ubuntu下更改IP,主机名,DNS
Ubuntu配置和修改IP地址

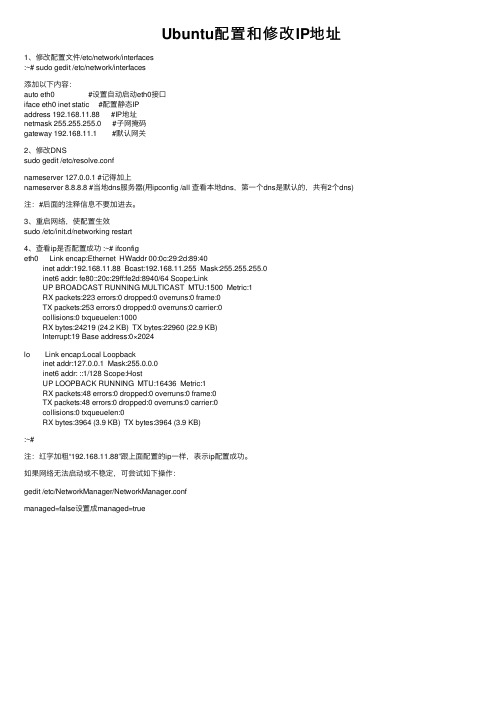
Ubuntu配置和修改IP地址1、修改配置⽂件/etc/network/interfaces:~# sudo gedit /etc/network/interfaces添加以下内容:auto eth0 #设置⾃动启动eth0接⼝iface eth0 inet static #配置静态IPaddress 192.168.11.88 #IP地址netmask 255.255.255.0 #⼦⽹掩码gateway 192.168.11.1 #默认⽹关2、修改DNSsudo gedit /etc/resolve.confnameserver 127.0.0.1 #记得加上nameserver 8.8.8.8 #当地dns服务器(⽤ipconfig /all 查看本地dns,第⼀个dns是默认的,共有2个dns)注:#后⾯的注释信息不要加进去。
3、重启⽹络,使配置⽣效sudo /etc/init.d/networking restart4、查看ip是否配置成功 :~# ifconfigeth0 Link encap:Ethernet HWaddr 00:0c:29:2d:89:40inet addr:192.168.11.88 Bcast:192.168.11.255 Mask:255.255.255.0inet6 addr: fe80::20c:29ff:fe2d:8940/64 Scope:LinkUP BROADCAST RUNNING MULTICAST MTU:1500 Metric:1RX packets:223 errors:0 dropped:0 overruns:0 frame:0TX packets:253 errors:0 dropped:0 overruns:0 carrier:0collisions:0 txqueuelen:1000RX bytes:24219 (24.2 KB) TX bytes:22960 (22.9 KB)Interrupt:19 Base address:0×2024lo Link encap:Local Loopbackinet addr:127.0.0.1 Mask:255.0.0.0inet6 addr: ::1/128 Scope:HostUP LOOPBACK RUNNING MTU:16436 Metric:1RX packets:48 errors:0 dropped:0 overruns:0 frame:0TX packets:48 errors:0 dropped:0 overruns:0 carrier:0collisions:0 txqueuelen:0RX bytes:3964 (3.9 KB) TX bytes:3964 (3.9 KB):~#注:红字加粗“192.168.11.88”跟上⾯配置的ip⼀样,表⽰ip配置成功。
Ubuntu系统性能优化简单教程

1、关闭最小化动画
[alt+f2]gconf-editor 进入gnome控制台程序。
app/metacity/general/reduced_resources 选上
desktop/genome/interface/accessibility 选上(如果不选这个移动窗口的时候会出现一些黑方格)
2、长期使用Ubuntu 后有一种感觉,那就是在GNOME 中启动应用程序时,速度越来越慢。
在Ubuntu 英文论坛那边看到一个技巧,可以对这个问题起到改善作用。
打开/etc/hosts 文件,可以看到类似下面的内容:
127.0.0.1 localhost
127.0.1.1 windstorm
现在,只需在第一行的末尾加上主机名即可
127.0.0.1 localhost windstorm
127.0.1.1 windstorm
保存后,重启系统,更改生效。
3、ipv6 dns 大多数的Linux Distro 也将IPv6 (Internet Protocol V ersion 6) 预设地开启,但有时实际上不需要IPv6 支援,如要关闭IPv6 可用以下方法:
Debian / Ubuntu
1. 开启/etc/modprobe.d/aliases
2. 里面有一行是"alias net-pf-10 ipv6"
3. 将以上一行用以下两行取代:
alias net-pf-10 off
alias ipv6 off
Red Hat
杭州计算机培训。
网络地址随意换——命令修改IP地址方法解析

网络地址随意换——命令修改IP地址方法解析在计算机网络中,IP地址是为每个连接到网络上的设备分配的唯一地址,以便在网络中进行通信。
有时候,我们可能需要修改设备的IP地址,以便满足特定的网络需求或解决网络问题。
下面将介绍几种常见的命令方法来修改IP地址。
1. 使用ifconfig命令(Linux/Unix系统)ifconfig是一个用来配置和显示系统网络接口的命令。
要修改IP地址,我们需要指定网络接口和新的IP地址。
首先,通过以下命令查看当前网络接口的详细信息:```ifconfig```确定要修改的网络接口名称,通常是以"eth"或"wlan"开头的项。
然后,通过以下命令修改IP地址:```sudo ifconfig <interface_name> <new_ip_address>```这里,<interface_name>是网络接口名称,<new_ip_address>是新的IP地址。
例如,要将eth0接口的IP地址修改为192.168.0.100,可以使用以下命令:```sudo ifconfig eth0 192.168.0.100```最后,通过以下命令检查修改结果:```ifconfig```2. 使用ip命令(Linux/Unix系统)ip命令是一个更先进和功能更丰富的网络配置工具,可以使用它来修改IP地址、子网掩码和网关等。
首先,通过以下命令查看当前网络接口的详细信息:```ip addr show```确定要修改的网络接口名称,通常是以"eth"或"wlan"开头的项。
然后,通过以下命令修改IP地址:```sudo ip addr add <new_ip_address>/<subnet_mask> dev<interface_name>```这里,<new_ip_address>是新的IP地址,<subnet_mask>是子网掩码,<interface_name>是网络接口名称。
修改ip地址方法

修改ip地址方法
修改IP地址的方法有以下几种:
1. 手动修改:在操作系统中打开网络设置,找到当前使用的网络连接,点击进入详细设置。
在IPv4或IPv6配置中,选择手
动修改IP地址,并输入新的IP地址、子网掩码、默认网关和DNS服务器地址。
保存设置后,系统会重新分配新的IP地址。
2. 使用命令行工具:打开命令提示符或终端窗口,输入ipconfig(Windows系统)或ifconfig(Linux和macOS系统)
命令,查看当前网络连接的IP地址。
然后使用相应的命令进
行修改,如Windows系统中的netsh命令或Linux系统中的ifconfig和ip命令。
3. 修改路由器设置:通过登录路由器的管理界面,找到网络设置选项。
在LAN设置或DHCP服务器设置中,可以手动修改
IP地址。
保存设置后,所有连接到该路由器的设备都会获取
新的IP地址。
4. 使用专业工具:有许多第三方软件可用于修改IP地址。
这
些工具通常提供简单易用的界面,可以快速更改IP地址,并
提供其他网络设置选项。
无论使用哪种方法修改IP地址,务必确保新的IP地址与其他
设备在同一子网中,并且与网络规则兼容。
另外,修改IP地
址后,网络连接可能会中断一段时间,直到新的IP地址生效。
ubuntu IP设置

Ubuntu 11.04 下如何手动设置IP现在的计算机发展已经非常智能化了,我们很多时侯已经不用给计算机设置IP 地址而计算机在链接到网络的时侯会自动配置这些。
那么如果我们想在Ubuntu 11.04 下自己指定一个IP 地址该在哪里操作呢?下面我就来一步一步告诉大家在Ubuntu 11.04 下IP 地址在哪里设置:首先,在打开系统设置“Power –> System Settings” :然后选择“互联网和网络”中的网络链接“Internet and Network –> Network Connections” :打开对话框后,选择选择当前网络连接“Auto eth(X)” 然后点击编辑按钮“Edit”然后选择IPv4 设置选项卡"IPv4 Settings",并选择"Manual" 连接方法。
然后点击添加按钮“Add” :然后输入我们自己需要的IP 地址、子网掩码和网关。
在DNS 服务器框中,输入DNS 服务器地址,可以用逗号分隔多个DNS 地址:输入完成后,我们点击保存按钮“Save”。
这样我们自己指定的IP 地址就设定好了。
Ubuntu11.04网络配置与问题排除这几天用Ubuntu11.04,被网络配置问题搞得很心烦。
这个Ubuntu是装在笔记本上的,在宿舍有静态IP,在实验室用无线网,IP自动获取。
刚开始系统装好了,没有进行配置,开启无线网,就可以上网了。
于是以为Ubuntu的网络配置做的挺好的哈。
回到宿舍,配置好静态IP,和DNS,打开网页,也可以上网了。
挺不错的哈。
可第二天,悲剧就来了。
实验室无线网络没有什么问题,问题是回到宿舍后,不能上网了。
ping一下,unreachable。
看一下IP设置,是对的。
于是networking重启一起,ping一下,也可以了,但还是不能上网。
再看一下DNS。
嗯?空的?昨天设好的dns被清空呢?怎么会这样呢?文件中还有一行注释,generated by network manager。
Linux命令行修改IP、网关、DNS的方法

Linux命令行修改IP、网关、DNS的方法方式一:ifconfig eth0 192.168.1.18 netmask 255.255.255.0说明:该种方式可以使改变即时生效,重启后会恢复为原来的IP 方式二:vi /etc/sysconfig/network-scripts/ifcfg-eth0说明:该方式要重启后生效,且是永久的如果要立即更改且永久生效,就只能以上两种方式同时使用了。
以上是通过linux命令行修改IP的方法。
网卡eth0 IP修改为 102.168.0.1ifconfig eth0 102.168.0.1 netmask 255.255.255.0网关修改为 102.168.0.254route add default gw 102.168.0.254Linux命令行修改dnsecho "nameserver 202.202.202.20 ">> /etc/resolv.conf重启网络服务例子:由原来的DHCP改固定IPDEVICE=eth0HWADDR=00:0C:29:F7:EF:BFONBOOT=yesTYPE=EthernetNETMASK=255.255.255.0IPADDR=192.168.0.68GATEWAY=192.168.0.1加上红色即可重启网卡:/etc/init.d/network restartifconfig eth0 新ip然后编辑/etc/sysconfig/network-scripts/ifcfg-eth0,修改ip [aeolus@db1 network-scripts]$ vi ifcfg-eth0DEVICE=eth0ONBOOT=yesBOOTPROTO=staticIPADDR=219.136.241.211NETMASK=255.255.255.128GATEWAY=219.136.241.254[aeolus@db1 etc]$ vi resolv.confnameserver 202.96.128.68nameserver 219.136.241.206-----------------------Linux下修改网卡IP和网关建议通过终端字符方式下来修改一修改IP地址vi /etc/sysconfig/network-scripts/ifcfg-eth0 DEVICE=eth0BOOTPROTO=noneBROADCAST=192.168.1.255IPADDR=192.168.1.33NETMASK=255.255.255.0NETWORK=192.168.1.0ONBOOT=yesUSERCTL=noPEERDNS=noTYPE=Ethernet~vi /etc/sysconfig/network-scripts/ifcfg-eth1DEVICE=eth1ONBOOT=yesBOOTPROTO=noneIPADDR=192.168.2.34NETMASK=255.255.255.0USERCTL=noPEERDNS=noTYPE=EthernetNETWORK=192.168.2.0BROADCAST=192.168.2.255二修改网关vi /etc/sysconfig/networkNETWORKING=yesHOSTNAME=AaronGATEWAY=192.168.1.1三重新启动网络配置/etc/init.d/network restart-----------------------------------------------------------------------------------修改配置文件/etc/sysconfig/network-scripts/ 下有配置文件比如文件:ifcfg-eth0 代表是以太网实际网卡0的配置文件比如文件:ifcfg-eth0:1 代表是以太网实际网卡0的配置文件域名服务器配置文件:/etc/ resolv.conf修改ip地址即时生效:# ifconfig eth0 192.168.0.20 netmask 255.255.255.0启动生效:修改/etc/sysconfig/network-scripts/ifcfg-eth0修改default gateway即时生效:# route add default gw 192.168.0.254启动生效:修改/etc/sysconfig/network-scripts/ifcfg-eth0修改dns修改/etc/resolv.conf修改后可即时生效,启动同样有效修改host name即时生效:# hostname fc2启动生效:修改/etc/sysconfig/network# Realtek Semiconductor Co., Ltd. RTL-8139/8139C/8139C+ DEVICE=eth0 接口名称BOOTPROTO=none 静态配置,若该值为“dhcp”则为动态获得,另外 static也是表示静态ip地址BROADCAST=192.168.10.255 广播地址,通过IP地址和子网掩码自动计算得到HWADDR=00:13:D3:27:9F:80IPADDR=192.168.10.238IPV6INIT=yesIPV6_AUTOCONF=yesNETMASK=255.255.255.0NETWORK=192.168.10.0 指定网络,通过IP地址和子网掩码自动计算得到ONBOOT=yes 开机时自动加载GATEWAY=192.168.10.1TYPE=EthernetPEERDNS=yesUSERCTL=noifdown eth0 关闭网络ifconfig eth0 down 关闭网络ifup eth0 开启网络ifconfig eth0 up 开启网络设置dns/etc/resolv.confnameserver 61.144.56.101nameserver 202.96.128.166[yeger@yeger ~]$ cat /etc/resolv.conf# Generated by NetworkManagernameserver 202.96.128.86nameserver 202.96.128.166其他方面service network start //启动网络服务service network stop //停止网络服务service network restart //重启网络服务service network status //查看网络服务状态ifconfig eth0 192.168.10.222 netmask 255.255.255.0 //临时修改接口IP地址(无需重启接口)[yeger@yeger ~]$ sudo ifconfig wlan0 192.168.21.199 netmask 255.255.255.0[yeger@yeger ~]$ ifconfig wlan0wlan0 Link encap:Ethernet HWaddr 00:02:72:77:BB:D1inet addr:192.168.21.199 Bcast:192.168.21.255Mask:255.255.255.0inet6 addr: fe80::202:72ff:fe77:bbd1/64 Scope:LinkUP BROADCAST RUNNING MULTICAST MTU:1500 Metric:1RX packets:3246 errors:0 dropped:0 overruns:0 frame:0TX packets:1947 errors:0 dropped:0 overruns:0 carrier:0 collisions:0 txqueuelen:1000RX bytes:4514869 (4.3 MiB) TX bytes:177732 (173.5 KiB) wlan0 表示第一块无线以太网卡Link encap 表示该网卡位于OSI物理层(Physical Layer)的名称HWaddr 表示网卡的MAC地址(Hardware Address)inet addr 表示该网卡在TCP/IP网络中的IP地址Bcast 表示广播地址(Broad Address)Mask 表示子网掩码(Subnet Mask)MTU 表示最大传送单元,不同局域网 MTU值不一定相同,对以太网来说,MTU的默认设置是1500个字节Metric 表示度量值,通常用于计算路由成本RX 表示接收的数据包TX 表示发送的数据包collisions 表示数据包冲突的次数txqueuelen 表示传送列队(Transfer Queue)长度interrupt 表示该网卡的IRQ中断号Base address 表示I/O地址配置虚拟网卡IP地址:网卡需要拥有多个IP地址命令格式: ifconfig 网卡名:虚拟网卡ID IP地址 netmask 子网掩码[yeger@yeger ~]$ sudo ifconfig wlan0:1 192.168.21.188 netmask 255.255.255.0更改网卡MAC地址ifconfig 网卡名 hw ether MAC地址[yeger@yeger ~]$ ifconfig wlan0 hw ether 00:11:22:33:44:55SIOCSIFHWADDR: 不允许的操作[yeger@yeger ~]$ sudo ifconfig wlan0 hw ether00:11:22:33:44:55SIOCSIFHWADDR: 设备或资源忙[yeger@yeger ~]$ ifconfig wlan0 downSIOCSIFFLAGS: 权限不够[yeger@yeger ~]$ sudo ifconfig wlan0 down[yeger@yeger ~]$ sudo ifconfig wlan0 hw ether00:11:22:33:44:55更改成功[yeger@yeger ~]$ netstat -ant 查看端口信息 a 所有 n数字显示t tcp协议 u udp协议Active Internet connections (servers and established 已建立连接)Proto Recv-Q Send-Q Local Address Foreign Address State协议本地地址远程地址连接状态类型tcp 0 00.0.0.0:57798 0.0.0.0:* LI STEN listen表示监听状态tcp 0 00.0.0.0:111 0.0.0.0:* LI STENtcp 0 0192.168.122.1:53 0.0.0.0:* LI STENtcp 0 00.0.0.0:22 0.0.0.0:* LI STENtcp 0 0127.0.0.1:631 0.0.0.0:* LI STENtcp 0 0127.0.0.1:25 0.0.0.0:* LI STENtcp 0 0 :::111 :::* LISTENtcp 0 0 :::22 :::* LISTENtcp 0 0 ::1:631 :::* LISTEN[yeger@yeger ~]$ netstat -r 查看路由表Kernel IP routing tableDestination Gateway Genmask Flags MS S Window irtt Iface192.168.21.0 * 255.255.255.0 U 0 0 0 wlan0192.168.122.0 * 255.255.255.0 U0 0 0 virbr0default 192.168.21.1 0.0.0.0 UG 0 0 0 wlan0[yeger@yeger ~]$ netstat -i 查看网络接口状态Kernel Interface tableIface MTU Met RX-OK RX-ERR RX-DRP RX-OVR TX-OK TX-ERR TX-DRP TX-OVR Flgeth0 1500 0 0 0 0 0 0 0 0 0 BMUlo 16436 0 230 0 0 0 230 0 0 0 LRUvirbr0 1500 0 0 0 0 0 29 0 0 0 BMRUwlan0 1500 0 10546 0 0 0 7060 0 0 0 BMRUwmaster0 0 0 0 0 0 0 0 0 0 0 RU[yeger@yeger ~]$MTU字段:表示最大传输单元,即网络接口传输数据包的最大值。
Citrix发布Ubuntu16.04虚拟桌面

Ubuntu_16.04.2_linux_VDA 安装试验环境注:虚拟Linux虚拟桌面知识具备以上几个组件,否则虚拟桌面将无法发布。
本文档只介绍Ubuntu_linuxVDA 的安装,其他不做详细介绍。
安装前准备1、准备AD服务器及Desktop组件服务器。
虚拟桌面组件环境需提前准备。
(本文档不做介绍)2、安装Ubuntu16.04.2操作系统。
3、设置root用户密码,方便root用户切换,提升root权限;4、安装vim编辑器:apt-get install -y vim5、配置root用户可呗远程:apt-get install -y openssh-server注:apt-get 命令安装软件需要连接互联网。
修改配置文件vim /etc/ssh/sshd_config保存退出后,重启服务:sudo service ssh restart主机名配置1、修改Linux主机名:vim /etc/hostname将主机名修改为Ubuntu;2、修改自解析文件:vim /etc/hosts修改完成后,重启:reboot;3、验证:禁用mDNS1、配置IP地址及DNS地址。
使虚拟桌面与AD及组件服务器可以正常通信,并可以解析AD域名。
2、禁用mDNS,编辑配置文件:/etc/nsswitch.conf更改包含以下内容的行:hosts: files mdns_minimal [NOTFOUND=return] dns修为:hosts: files dns配置时间同步1、安装chrony:apt-get install -y chrony2、编辑配置文件:vim /etc/chrony/chrony.conf 指向AD的主机。
3、重启chrony服务:systemctl restart chrony安装LinuxVDA的依赖包在Ubuntu16.04上安装VDA依赖包:apt-get install -y default-jdk apt-get install -y postgresql apt-get install -y libpostgresql-jdbc-java apt-get install -y libxm4 apt-get install -y libsasl2-2 apt-get install -y cupsapt-get install -y libldap-2.4-2 apt-get install -y krb5-user apt-get install -y libsasl2-modules-gssapi-mitUbuntu 加域:安装软件包1、安装Linux加域软件包:apt-get install winbind samba libnss-winbind libpam-winbind krb5-config krb5-locales krb5-user2、启用winbind 守护程序:设置winbind服务自启:systemctl enable winbind 启动服务:systemctl start winbind 配置Kerberos以root用户修改krb5配置文件:vim /etc/krb5.conf配置winbind身份验证●打开配置文件:vim /etc/samba/smb.conf●重启服务:systemctl restart smbd配置nsswitch●编辑配置文件:vim /etc/nsswitch.conf 将winbind附加到以下行:●加域:net ads join –U administrator●重启winbind服务:systemctl restart winbind加域后的验证1、为winbind 配置PAM:sudo pam-auth-update2、验证域成员身份:net ads testjoin3、验证kerberos 配置:sudo klist -ke4、验证用户身份验证:wbinfo --krb5auth=\\user01ssh localhost –l \\user01安装并配置VDA:1、使用debian 软件包管理器安装LinuxVDA:sudo dpkg -i xendesktopvda_7.15.0.404-1.ubuntu16.04_amd64.deb软件包扎安装时出现错误需运行:apt-get install -f 解决2、手工执行配置脚本并进行配置VDA:/opt/Citrix/VDA/sbin/ctxsetup.sh创建计算机目录创建交付组使用客户端登录验证。
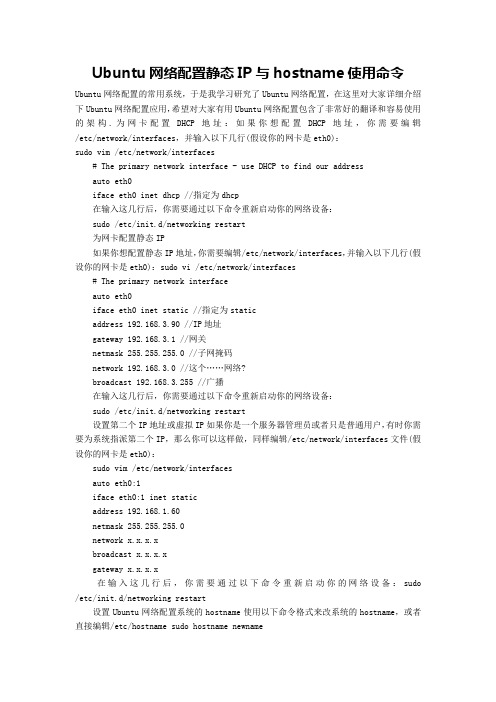
Ubuntu网络配置静态IP与hostname使用命令

Ubuntu网络配置静态IP与hostname使用命令Ubuntu网络配置的常用系统,于是我学习研究了Ubuntu网络配置,在这里对大家详细介绍下Ubuntu网络配置应用,希望对大家有用Ubuntu网络配置包含了非常好的翻译和容易使用的架构.为网卡配置DHCP地址:如果你想配置DHCP地址,你需要编辑/etc/network/interfaces,并输入以下几行(假设你的网卡是eth0):sudo vim /etc/network/interfaces# The primary network interface - use DHCP to find our addressauto eth0iface eth0 inet dhcp //指定为dhcp在输入这几行后,你需要通过以下命令重新启动你的网络设备:sudo /etc/init.d/networking restart为网卡配置静态IP如果你想配置静态IP地址,你需要编辑/etc/network/interfaces,并输入以下几行(假设你的网卡是eth0):sudo vi /etc/network/interfaces# The primary network interfaceauto eth0iface eth0 inet static //指定为staticaddress 192.168.3.90 //IP地址gateway 192.168.3.1 //网关netmask 255.255.255.0 //子网掩码network 192.168.3.0 //这个……网络?broadcast 192.168.3.255 //广播在输入这几行后,你需要通过以下命令重新启动你的网络设备:sudo /etc/init.d/networking restart设置第二个IP地址或虚拟IP如果你是一个服务器管理员或者只是普通用户,有时你需要为系统指派第二个IP,那么你可以这样做,同样编辑/etc/network/interfaces文件(假设你的网卡是eth0):sudo vim /etc/network/interfacesauto eth0:1iface eth0:1 inet staticaddress 192.168.1.60netmask 255.255.255.0network x.x.x.xbroadcast x.x.x.xgateway x.x.x.x在输入这几行后,你需要通过以下命令重新启动你的网络设备:sudo /etc/init.d/networking restart设置Ubuntu网络配置系统的hostname使用以下命令格式来改系统的hostname,或者直接编辑/etc/hostname sudo hostname newname设置DNSsudo vim /etc/resolv.confnameserver 202.96.134.133nameserver 202.96.128.68以上介绍Ubuntu网络配置。
Linux系列:Ubuntu虚拟机设置固定IP上网(配置IP、网关、DNS、防止resol。。。

Linux系列:Ubuntu虚拟机设置固定IP上⽹(配置IP、⽹关、DNS、防⽌resol。
虚拟机⾥设置上⽹⽅式为NAT最⽅便,因为⽆需⼿动设置即可上⽹,但是NAT的上⽹⽅式默认是DHCP动态分配IP的,这意味着你每次重启虚拟机都有不⼀样的IP地址,这对⼀般⽤户没任何问题。
但是如果你的机⼦有特殊⽤处,⽐如作为服务器,需要IP地址信息,亦或者像我⼀样,作为⼀个云计算的节点,其IP都是在配置⽂件⾥配置好的,如果每次重启系统都要跑过去修改下配置⽂件⾥的IP,那简直是不可取的做法,因此为虚拟机设置固定IP上⽹⾮常的有必要!设置固定IP的⽅法很多,⼤家都知道虚拟机上⽹有三种模式:bridged、host-only和NAT,其中NAT模式对应VMnet8虚拟⽹络,host-only模式对应VMnet1虚拟⽹络,bridged模式对应 VMnet0虚拟⽹络,都是由VMware虚拟机⾃动配置⽽⽣成的,不需要⽤户⾃⾏设置。
VMnet8和VMnet1提供DHCP服务,VMnet0虚拟⽹络则不提供。
三种⽅式具体的区别和介绍可看参考⽂献(1)。
由于NAT的⽅式最简单,因此下⾯是NAT设置的具体⽅法。
测试环境:虚拟机版本:VMware Workstation 10Ubuntu版本:Ubuntu 12.10/13.041. 设置虚拟机上⽹⽅式为NAT2. 配置VMnet8虚拟⽹络(Virtual Network Editor)因为NAT对应的是VMnet8虚拟⽹络,打开Vmware⾃带的虚拟⽹络编辑⼯具Virtual Network Editor,配置如下:其中⼦⽹IP根据⾃⼰情况设置,⽐如我想设置固定IP地址为192.168.1.151,那么这⾥的⼦⽹IP就填192.168.1.0,另外记得取消DHCP选项服务。
3. 进⼊到Ubuntu系统中配置⽹络主要配置下⾯三个⽅⾯的内容:(1)修改⽂件/etc/network/interfaces,这⾥是IP、⽹关、掩码等的⼀些配置;(2)修改⽂件/etc/resolv.conf,这个⽂件保存DNS的有关信息;(3)解决resolv.conf被重写问题;(4)重启虚拟机⽹络下⾯是具体配置⽅法:(1)修改⽂件/etc/network/interfaces命令:sudo vi /etc/network/interfaces sudo gedit /etc/network/interfaces我的配置如下:# interfaces(5) file used by ifup(8) and ifdown(8)auto loiface lo inet loopbackauto eth0iface eth0 inet staticaddress 192.168.1.151netmask 255.255.255.0gateway 192.168.1.2其中⽹关gateway要与Virtual Network Editor中“NAT Settings...”中的⼀致,⼀般好像都为192.168.xx.2。
UbuntuLinux上的网络设置

UbuntuLinux上的网络设置Ubuntu Linux是开源操作系统中最受欢迎的一个,其最新版本为Ubuntu 20.04 LTS,众多用户喜欢使用Ubuntu Linux的原因之一是它的简单易用性和对用户友好的界面设计。
在Ubuntu Linux 上设置网络连接也是一件相对容易的事情,但对于新手来说可能需要花费一定的时间和精力去完成。
本文将介绍如何在Ubuntu Linux操作系统上进行网络设置。
一、有线网络设置在Ubuntu Linux上,当插上有线网线时,大多数情况下系统会自动连接到网络,无需进行任何设置。
但在某些情况下,需要手动设置有线网络连接。
1.打开Ubuntu Linux电脑的“系统设置”界面(可在任务栏中找到),点击“网络”选项。
2.在“网络”界面中,选择“有线”选项卡,即可看到当前有线连接的状态。
如未连接,则需要手动输入有线网络的信息。
一般来说,只需输入“IP地址”、“子网掩码”、“网关”和“DNS服务器”即可。
3.在“有线”选项卡下,找到“IPv4设置”部分,选择“手动”模式,并填写网络信息。
4.在“IPv4设置”界面中,首先填写“IP地址”,一般格式为“192.168.x.x”,其中“x”代表数字,可以自由填写。
接着,在“子网掩码”中填写本地IP与网关的区分依据,通常填写“255.255.255.0”,填写后,自动计算局域网地址范围。
在“网关”中填写本地路由器的IP地址。
DNS服务器可以使用宽带提供商的默认服务器地址,也可以自己填写Google的公共DNS服务器8.8.8.8。
二、无线网络设置无线网络设置是在Ubuntu Linux中比较复杂的一项设置操作,具体步骤如下:1.打开Ubuntu Linux电脑的“系统设置”界面,选择“网络”选项,在下拉菜单中选择“Wi-Fi”。
2.在Wi-Fi界面中,点击“连接”按钮,即可搜索无线网络。
找到要连接的Wi-Fi网络,点击即可连接。
ubuntu网络设置方法大全

方式1:网卡通过DHCP自动获取IP地址$ sudo gedit /etc/network/interfaces# 修改文件/etc/network/interfaces如下文#-------------------------------------------------------------------------------# This file describes the network interfaces available on your system# and how to activate them. For more information, see interfaces(5).## The loopback network interface(配置环回口)auto lo # 开机自动激lo接口iface lo inet loopback # 配置lo接口为环回口# The primary network interface (配置主网络接口)auto eth0 #开机自动激活eth0接口iface eth0 inet dhcp #配置eth0接口为DHCP自动获取#-------------------------------------------------------------------------------$ sudo /etc/init.d/networking restart # 重启网络 方式2:网卡静态分配IP地址$ sudo gedit /etc/network/interfaces# 修改文件/etc/network/interfaces如下文#-------------------------------------------------------------------------------# This file describes the network interfaces available on your system# and how to activate them. For more information, see interfaces(5).## The loopback network interface(配置环回口)auto lo # 开机自动激lo接口iface lo inet loopback # 配置lo接口为环回口# The primary network interface (配置主网络接口)auto eth0 #开机自动激活eth0接口iface eth0 inet static #配置eth0接口为静态设置IP地址address 10.16.3.99netmask 255.255.255.0network 10.16.3.0broadcast 10.16.3.255gateway 10.16.3.1###################################################### dns-* options are implemented by the resolvconf package, if installed(DNS 设置)#dns-nameservers 61.153.177.196 61.153.177.197#dns-search #####################################################sudo gedit /etc/resolv.conf##设置DNS server(可以设置多个)#nameserver 192.168.1.1#####################################################-------------------------------------------------------------------------------$ sudo /etc/init.d/networking restart # 重启网络方式3:PPPoE宽带拨号配置首次拨号:应用程序–系统工具–终端 打开一终端,输入命令:sudo pppoeconf系统开始搜索所有网络接口上的adsl modem,一步步的yes过来。
Ubuntu20.04修改网卡名及其配置文件

Ubuntu20.04修改⽹卡名及其配置⽂件
修改Ubuntu的⽹卡名称基本和Centos ⼀样,⽐如要把ens 32 修改成更加熟悉的 eth 0,简单步骤如下:
编辑修改⽂件 /etc/default/grup
在 GRUB_CMDLINE_LINUX=" " 的双引号内加⼊ net.ifnames=0 ,保存退出。
重建GRUB配置⽂件 grub-mkconfig -o /boot/grub/grub.cfg >& /dev/null
注意:这个地⽅和CentOS不太⼀样,CentOS的重建GRUB配置⽂件:grub2-mkconfig -o /boot/grub2/grub.cfg
ubuntu已经是利⽤netplan来设置ip地址,不是network/interfaces来设置了,具体的 yaml⽂件不⼀样,我的显⽰的是 00-installer-config.yaml (yaml⽂件其实也是⼀种配置⽂件类型,相⽐较ini,conf配置⽂件来说,更加的简洁,操作也更加简单,同时可以存放不同类型的数据,不会改变原有数据类型,所有的数据类型在读取时都会原样输出,yaml⽂件依赖python的第三⽅库PyYaml模块)
⽹卡配置⽂件⾥的ens 32需要修改为eth 0 ,同理设置静态IP也是在该⽂件⾥修改编辑。
最后重启即可。
可以修改成功,可以看到 eth 0
另外附上简单的对⽐CentOS和Ubuntu的⼩总结。
在ubuntu操作系统中开启ssh服务和设置ip的步骤

在Ubuntu操作系统中开启SSH服务和设置IP的步骤SSH的英文全称是Secu reSHell。
通过使用SSH,你可以把所有传输的数据进行加密,这样\"中间人\"这种攻击方式就不可能实现了,而且也能够防止DNS和IP欺骗。
还有一个额外的好处就是传输的数据是经过压缩的,所以可以加快传输的速度。
下文介绍的是在Ubuntu操作系统中开启SSH服务和设置IP的步骤。
Ubuntu系统中开启SSH设置:1、默认ubuntu已经安装好了客户端2、如使用命令:ps-e|greps sh3、会打印出来:ssh-agen t4、下面安装服务端:sudoa pt-getinstallopenssh-server(sudoapt-getinstallssh)5、安装好后会自动启动服务,再使用命令ps-e|grepssh6、会打印出:ssh-agent和sshd7、现在可以在其它系统使用ssh工具连到这台电脑了。
8、在上面如果没有启动ssh命令则:s udo/etc/init.d/sshst art9、etc/ssh/sshd_config里面可修改ssh端口,默认为2210、重启ssh服务sudo/e tc/init.d/sshrestart11,安装vsftpd#sudo apt-getinstallvsftp设置/etc/vsftpd.conf,由于不需要对外开放FTP,只是内网访问,相关设置如下. #拒绝匿名用户,将其注释掉#anonymous_enabl e=YES#接受本地用户loca l_enable=YES#可以上传write_enable=YES#允许上传Ascii文件ascii_u pload_enable=YESascii_download_enabl e=YES启动vsftpd/et c/init.dvsftpdstar Ubuntu系统中IP设置:一、使用命令设置Ubuntu IP地址1.修改配置文件blacklist.conf禁用IPV6:sudovi/etc/mod probe.d/blacklist.co nf2.在文档最后添加blackli stipv6,然后查看修改结果:cat/etc/modprobe.d/black list.conf3.设置Ubunt uIP(设置网卡eth0的IP地址和子网掩码)sudoifconfigeth0192.168.2.1netmask255.255.255.04.Ubuntu IP设置网关sudorouteaddde faultgw192.168.2.2545.UbuntuIP设置DNS修改/etc/resolv.conf,在其中加入nameserverDNS的地址1和n ameserverDNS的地址2完成。
批处理根据MAC地址改计算机名、IP、掩码、网关、DNS

/blog/static/85941042009 9293145538/批处理根据MAC地址改计算机名、IP、掩码、网关、DNS复制内容到剪贴板代码:----------------------------------------------------------------------------------------------------------------------------------------------------------------@ECHO OFF@clsECHO ::::::::::::::::::::::::::::::::::::::::::::::::::::ECHO :: GHOST完成后根据网卡MAC自动设置机名和IP的批处理 ::ECHO ::::::::::::::::::::::::::::::::::::::::::::::::::::::::清空环境变量Set IPAddress=Set strMac=Set MacAddress=Set CName=Set scfile=Set sc=Set MacWMIC=Set ConnName=If not "%1"=="run" Goto setbootcd/d %temp%REM ::::请手动修改列表ECHO [ComputerName] [MacAddress] [IPAddress] >iplist.txtECHO LX001 00-04-01-02-09-90 192.168.1.1 >>iplist.txtECHO LX002 00-04-01-02-09-91 192.168.1.2 >>iplist.txtECHO LX003 00-04-01-02-09-92 192.168.1.3 >>iplist.txtECHO LX004 00-04-01-02-09-93 192.168.1.4 >>iplist.txtECHO LXASP 00-03-FF-93-39-9F 192.168.0.10 >>iplist.txtREM ::::请手动修改子网掩码Set mask=255.255.255.0REM ::::请手动修改默认网关Set gway=192.168.0.1ECHO :::: 开始查找网卡 ::::::::获取机器的TCP/IP 配置if exist ipconfig.txt del ipconfig.txtipconfig /all >ipconfig.txt::::分离出机器的物理地址,并保存到 ( phyaddr.txt) 文件中if exist phyaddr.txt del phyaddr.txtif exist phyaddr1.txt del phyaddr1.txtfind "Physical Address" ipconfig.txt >phyaddr.txtSet sc=1Set scfile=phyaddr.txtgoto scan::::多网卡时,扫描每个网卡MAC地址:rescan1Set sc=%sc%1Set scfile=phyaddr1.txtfind /v "%strMac%" phyaddr.txt >%scfile%Goto scan:rescan2Set sc=%sc%1Set scfile=phyaddr.txtfind /v "%strMac%" phyaddr1.txt >%scfile%Goto scan:scan::::从(c:\phyaddr.txt)文件中取得物理地址字符串,并赋给变量"MacAddress" for /f "skip=2 tokens=12" %%M in (%scfile%) do set strMac=%%M::::以变量"strMac"为关键字搜索(iplist.txt)中相同的字符串行,并保存到(PCCfg.txt)find "%strMac%" iplist.txt >PCCfg.txt::::找出机器名(从"PCCfg.txt"中分离出机器名字段,并赋给变量"CName") for /f "skip=2 tokens=1" %%N in (PCCfg.txt) do set CName=%%Nif not "%CName%"=="" Goto found::::支持最多扫描5个网卡If "%sc%"=="11111" Goto failedIf "%sc%"=="1" Goto rescan1if %scfile%==phyaddr.txt Goto rescan1if %scfile%==phyaddr1.txt Goto rescan2:foundECHO 本机 MAC: %strMac%ECHO 目标名称: %CName%::::显示IP地址. (从"PCCfg.txt"中分离出 IP地址字段,并赋给变量"IPAddress")for /f "skip=2 tokens=3" %%I in (PCCfg.txt) do set IPAddress=%%I ECHO 目标地址: %IPAddress%::::显示网卡MAC地址.(从"PCCfg.txt"中分离出 MAC地址字段,并赋给变量"MacAddress")for /f "skip=2 tokens=2" %%M in (PCCfg.txt) do set MacAddress=%%M ECHO 目标 MAC: %MacAddress%::::创建注册表文件::::用变量"%CName%"去替换实际的机器名ECHO Windows Registry Editor Version 5.00 >PCName.regECHO.>>PCName.regECHO[HKEY_LOCAL_MACHINE\SYSTEM\CurrentControlSet\Control\ComputerName\Com puterName] >>PCName.regECHO "ComputerName"="%CName%" >>PCName.regECHO.>>PCName.regECHO[HKEY_LOCAL_MACHINE\SYSTEM\CurrentControlSet\Services\Tcpip\Parameter s] >>PCName.regECHO "NV Hostname"="%CName%" >>PCName.regECHO "Hostname"="%CName%" >>PCName.regECHO :::: 正在更改设置 ::::REM ::::导入注册表文件。
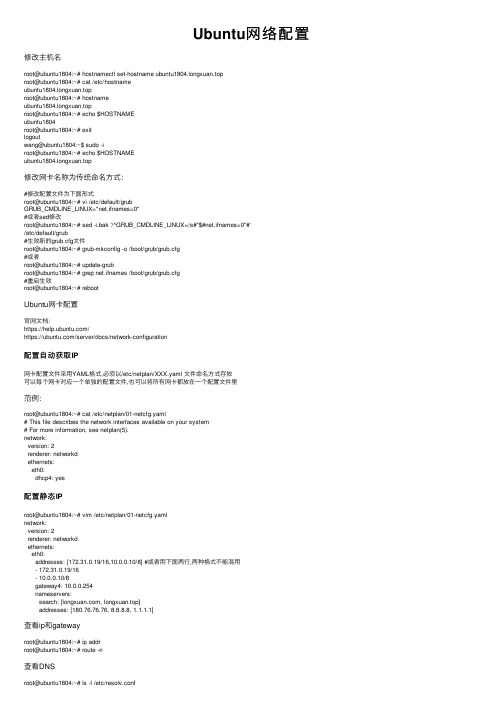
Ubuntu网络配置

Ubuntu⽹络配置修改主机名root@ubuntu1804:~# hostnamectl set-hostname ubuntu1804.longxuan.toproot@ubuntu1804:~# cat /etc/hostnameubuntu1804.longxuan.toproot@ubuntu1804:~# hostnameubuntu1804.longxuan.toproot@ubuntu1804:~# echo $HOSTNAMEubuntu1804root@ubuntu1804:~# exitlogoutwang@ubuntu1804:~$ sudo -iroot@ubuntu1804:~# echo $HOSTNAMEubuntu1804.longxuan.top修改⽹卡名称为传统命名⽅式:#修改配置⽂件为下⾯形式root@ubuntu1804:~# vi /etc/default/grubGRUB_CMDLINE_LINUX="net.ifnames=0"#或者sed修改root@ubuntu1804:~# sed -i.bak '/^GRUB_CMDLINE_LINUX=/s#"$#net.ifnames=0"#'/etc/default/grub#⽣效新的grub.cfg⽂件root@ubuntu1804:~# grub-mkconfig -o /boot/grub/grub.cfg#或者root@ubuntu1804:~# update-grubroot@ubuntu1804:~# grep net.ifnames /boot/grub/grub.cfg#重启⽣效root@ubuntu1804:~# rebootUbuntu⽹卡配置官⽹⽂档:https:///https:///server/docs/network-configuration配置⾃动获取IP⽹卡配置⽂件采⽤YAML格式,必须以/etc/netplan/XXX.yaml ⽂件命名⽅式存放可以每个⽹卡对应⼀个单独的配置⽂件,也可以将所有⽹卡都放在⼀个配置⽂件⾥范例:root@ubuntu1804:~# cat /etc/netplan/01-netcfg.yaml# This file describes the network interfaces available on your system# For more information, see netplan(5).network:version: 2renderer: networkdethernets:eth0:dhcp4: yes配置静态IProot@ubuntu1804:~# vim /etc/netplan/01-netcfg.yamlnetwork:version: 2renderer: networkdethernets:eth0:addresses: [172.31.0.19/16,10.0.0.10/8] #或者⽤下⾯两⾏,两种格式不能混⽤- 172.31.0.19/16- 10.0.0.10/8gateway4: 10.0.0.254nameservers:search: [, longxuan.top]addresses: [180.76.76.76, 8.8.8.8, 1.1.1.1]查看ip和gatewayroot@ubuntu1804:~# ip addrroot@ubuntu1804:~# route -n查看DNSroot@ubuntu1804:~# ls -l /etc/resolv.conflrwxrwxrwx 1 root root 39 Dec 12 11:36 /etc/resolv.conf ->../run/systemd/resolve/stub-resolv.confroot@ubuntu2004:~# resolvectl status #Ubuntu 20.04新命令root@ubuntu1804:~# systemd-resolve --statusGlobalDNSSEC NTA: 10.in-addr.arpa...MulticastDNS setting: noDNSSEC setting: noDNSSEC supported: noDNS Servers: 180.76.76.768.8.8.81.1.1.1DNS Domain: longxuan.top配置多⽹卡静态IP和静态路由root@ubuntu1804:~# vim /etc/netplan/01-netcfg.yaml# This file describes the network interfaces available on your system # For more information, see netplan(5).network:version: 2renderer: networkdethernets:eth0:dhcp4: nodhcp6: noaddresses: [172.31.0.19/16]gateway4: 172.31.0.254nameservers:addresses: [223.6.6.6]eth1:dhcp4: nodhcp6: noaddresses: [172.31.8.20/16]routes:- to: 172.31.0.0/16via: 172.31.0.1- to: 10.40.0.0/16via: 10.20.0.1- to: 10.50.0.0/16via: 10.20.0.1- to: 10.60.0.0/16via: 10.20.0.1root@ubuntu1804:~# netplan apply#或者每个⽹卡各⾃⼀个配置⽂件root@ubuntu1804:/etc/netplan# ls01-netcfg.yaml 02-eth1.yamlroot@ubuntu1804:/etc/netplan# cat 01-netcfg.yaml# This file describes the network interfaces available on your system # For more information, see netplan(5).network:version: 2renderer: networkdethernets:eth0:dhcp4: yesroot@ubuntu1804:/etc/netplan# cat 02-eth1.yamlnetwork:version: 2renderer: networkdethernets:eth1:addresses:- 172.31.0.19/16- 192.168.0.100/24gateway4: 172.31.0.254nameservers:search: [, longxuan.tcp]addresses: [180.76.76.76, 8.8.8.8, 1.1.1.1]routes:- to: 172.31.0.0/16via: 172.31.0.1- to: 10.40.0.0/16via: 10.20.0.1- to: 10.50.0.0/16via: 10.20.0.1- to: 10.60.0.0/16via: 10.20.0.1单⽹卡桥接root@ubuntu1804:~# apt install -y bridge-utilsroot@ubuntu1804:~# dpkg -L bridge-utils/sbin/brctl......#三个⽹卡配置使⽤⼀个配置⽂件root@ubuntu1804:~# cat /etc/netplan/50-cloud-init.yaml# This file describes the network interfaces available on your system # For more information, see netplan(5).network:version: 2renderer: networkdethernets:eth0:dhcp4: yeseth1:dhcp4: nodhcp6: noeth2:dhcp4: nobridges:br0:dhcp4: nodhcp6: noaddresses: [172.31.0.19/16]gateway4: 1072.31.0.254nameservers:addresses: [223.6.6.6]interfaces:- eth1- eth2#桥接配置单独⼀个⽂件[root@ubuntu1804 netplan]# vim /etc/netplan/br0.yamlnetwork:version: 2renderer: networkdethernets:eth1:dhcp4: nodhcp6: noeth2:dhcp4: nobridges:br0:dhcp4: nodhcp6: noaddresses: [172.31.0.10/16]gateway4: 172.31.0.254nameservers:addresses: [223.6.6.6]interfaces:- eth1- eth2root@ubuntu1804:~# netplan applyroot@ubuntu1804:~# ifconfig br0root@ubuntu1804:~# brctl showbridge name bridge id STP enabled interfacesbr0 8000.9ebe1d856601 no eth1eth2多⽹卡桥接#有多少个eth 就要有多少块⽹卡root@ubuntu1804:~# vim /etc/netplan/50-cloud-init.yaml# This file describes the network interfaces available on your system # For more information, see netplan(5).network:version: 2renderer: networkdethernets:eth0:dhcp4: nodhcp6: noeth1:dhcp4: nodhcp6: nobridges:addresses: [172.31.0.19/16]gateway4: 172.31.0.254nameservers:addresses: [223.6.6.6]interfaces:- eth0br1:dhcp4: nodhcp6: noaddresses: [172.31.0.19/16]routes:- to: 172.31.0.0/16via: 172.31.0.1- to: 10.30.0.0/16via: 10.10.0.1- to: 10.4.0.0/16via: 10.10.0.1- to: 10.50.0.0/16via: 10.10.0.1interfaces:- eth1root@ubuntu1804:~# netplan applyroot@ubuntu1804:~# brctl showbridge name bridge id STP enabled interfacesbr0 8000.96dbd15c1daf no eth0br1 8000.9e02ab0faeb0 no eth1root@ubuntu1804:~# ifconfig br0br0: flags=4163<UP,BROADCAST,RUNNING,MULTICAST> mtu 1500inet 172.31.0.18 netmask 255.255.0.0 broadcast 172.31.255.255root@ubuntu1804:~# ifconfig br1br1: flags=4163<UP,BROADCAST,RUNNING,MULTICAST> mtu 1500inet 172.31.0.18 netmask 255.255.0.0 broadcast 172.31.255.255双⽹卡绑定⽀持多⽹卡绑定七种模式第⼀种模式:mod=0,即:(balance-rr) Round-robin policy(平衡抡循环策略)特点:传输数据包顺序是依次传输(即:第1个包⾛eth0,下⼀个包就⾛eth1...⼀直循环下去,直到最后⼀个传输完毕),此模式提供负载平衡和容错能⼒。
Ubuntu配置DNS服务器--bind

Ubuntu配置DNS服务器--bind3. BIND9 的安装与配置3.1 bind简介BIND (Berkeley Internet Name Domain)是Domain Name System (DNS) 协议的一个实现,提供了DNS主要功能的开放实现,包括* 域名服务器(named)* DNS解析库函数* DNS服务器运行调试所用的工具是一款开放源码的DNS服务器软件,由美国加州大学Berkeley分校开发和维护的,按照ISC的调查报告,BIND是世界上使用最多最广泛的域名服务系统。
不论你的邮件服务器,WEB服务器或者其他的services如何的安全可靠,DNS的故障会给你带来用户根本无法访问这些服务。
BIND,也是我们常说的named,由于多数网络应用程序使用其功能,所以在很多BIND的弱点及时被发现。
主要分为三个版本:v41998年多数UNIX捆绑的是BIND4,已经被多数厂商抛弃了,除了OpenBSD还在使用。
OpenBSD核心人为BIND8过于复杂和不安全,所以继续使用BIND4。
这样一来BIND8/9的很多优点都不包括在v4中。
v8就是如今使用最多最广的版本,其详细内容可以参阅BIND 8+ 域名服务器安全增强v9最新版本的BIND,全部重新写过,免费(但是由商业公司资助),也添加了许多新的功能(但是安全上也可能有更多的问题)。
BIND9在2000年十月份推出,现在稳定版本是9.3.2。
3.2 软件的相关资源官方网站:/最新版本: 9.3.2 /sw/bind/bind9.3.php#download帮助文档:/sw/bind/配置文件样例:/bind.htmlFAQ: /getOpenSourceResource.php?id=6 3.3 配置环境环境:GNU/Linux Debian/testing Linux 2.6.8-2-386版本:bind9 9.3.2-2测试域名:测试ip: 192.168.102.47 主域名服务器192.168.102.48 纯缓存域名服务器192.168.102.49 辅助域名服务器192.168.102.49 测试客户机3.4 配置文件说明安装bind9的命令:~# aptitude update~# aptitude install bind9 bind9-host dnsutils配置文件族:# ls /etc/bind/ -ltotal 44-rw-r--r-- 1 root root 237 Jan 16 2006 db.0-rw-r--r-- 1 root root 271 Jan 16 2006 db.127-rw-r--r-- 1 root root 237 Jan 16 2006 db.255-rw-r--r-- 1 root root 353 Jan 16 2006 db.empty-rw-r--r-- 1 root root 256 Jan 16 2006 db.local-rw-r--r-- 1 root root 1507 Jan 16 2006 db.root-rw-r--r-- 1 root bind 1611 Jan 16 2006 named.conf-rw-r--r-- 1 root bind 165 Jan 16 2006 named.conf.local-rw-r--r-- 1 root bind 672 Jan 16 2006 named.conf.options-rw-r----- 1 bind bind 77 Aug 4 08:41 rndc.key-rw-r--r-- 1 root root 1317 Jan 16 2006 zones.rfc1918配置文件说明:named.conf设置一般的named参数,指向该服务器使用的域数据库的信息源named.conf.optionsdb.root根服务器指向文件,由Internet NIC创建和维护,无需修改,但是需要定期更新db.locallocalhost正向区文件,用于将名字localhost转换为本地回送IP地址(127.0.0.1) db.127localhost反向区文件,用于将本地回送IP地址(127.0.0.1)转换为名字localhost其中,主配置文件/etc/named.conf的配置语句命令用法acl 定义IP地址的访问控制清单control 定义ndc使用的控制通道include 把其他文件包含到配置文件中key 定义授权的安全密钥logging 定义日志写什么,写到哪opitons 定义全局配置选项和缺省值server 定义远程服务器的特征trunsted-keys 为服务器定义DNSSEC加密密钥zone 定义一个区默认情况下,内容如下:include "/etc/bind/named.conf.options";zone "." {type hint;file "/etc/bind/db.root";};zone "localhost" {type master;file "/etc/bind/db.local";};zone "127.in-addr.arpa" {type master;file "/etc/bind/db.127";};zone "0.in-addr.arpa" {file "/etc/bind/db.0";};zone "255.in-addr.arpa" {type master;file "/etc/bind/db.255";};include "/etc/bind/named.conf.local";其中type项的值:master:表示定义的是主域名服务器slave :表示定义的是辅助域名服务器hint:表示是互联网中根域名服务器在Debian环境中,options语句的配置内容,被移至named.conf.options文件中:options {directory "/var/cache/bind";// If there is a firewall between you and nameservers you want// to talk to, you might need to uncomment the query-source// directive below. Previous versions of BIND always asked// questions using port 53, but BIND 8.1 and later use an unprivileged// port by default.// query-source address * port 53;// If your ISP provided one or more IP addresses for stable// nameservers, you probably want to use them as forwarders.// Uncomment the following block, and insert the addresses replacing// the all-0's placeholder.//可以将下面的注释去掉添加原来的dns (可加多个)// forwarders {// 0.0.0.0;// };auth-nxdomain no; # conform to RFC1035};3.5 创建主域名服务器a. 首先, 在在192.168.102.47机器上安全bind9b. 使用编辑器,比如vi,编辑配置文件/etc/bind/named.conf注:在ubuntu中还有一个/etc/bind/named.conf.local (效果相同)加入如下内容zone "" {type master; //定义此区为主服务器file "/etc/bind/db.mydebian"; //指定区资源文件的位置};zone "102.168.192.in-addr.arpa" {type master; //定义此区为主服务器file "/etc/bind/db.192"; //指定区资源文件的位置};c. 创建区资源文件:创建区资源文件/etc/bind/db.mydebian内容如下;; BIND data file for local loopback interface;$TTL 604800$ORIGIN .@ IN SOA . . (2006080401 ; Serial604800 ; Refresh86400 ; Retry2419200 ; Expire604800 ) ; Negative Cache TTL;@ IN NS ns@ IN MX 0 .@ IN A 192.168.102.47ns IN A 192.168.102.47www IN A 192.168.102.47webserver IN CNAME wwwmail IN A 192.168.102.47ftp IN A 192.168.102.48ns2 IN A 192.168.102.48ns3 IN A 192.168.102.49第一行是TTL设定,生存时间记录字段。
如何在ubuntu下更改主机名/更改ubuntu电脑名

如何在ubuntu下更改主机名/更改ubuntu电脑名
展开全文
如何在ubuntu下更改主机名?
如何更改ubuntu的电脑名呢?
如果我们安装ubuntu时随便输入了一个主机名,安装完成后感觉不好又想修改,怎么办?
经过一番研究得到了修改的方法,其实很简单,只要打开/etc/hostname和/etc/network文件修改里面的老的主机名为你的新的主机名就可以了!
在Terminal下输入:
gedit /etc/hostname (Root权限环境下)
sudo gedit /etc/hostname (非Root权限环境下)
更改相应的Host名,保存退出!因为是在x-window下修改的,所以需要注销一下,重新登陆即生效!
如果是在字符界面用
vi /etc/hostname
然后在Terminal下执行hostname命令看看改动是否生效了!(当然文中所说的修改默认都是root权限之下)。
hostname命令不带任何参数默认是用来显示主机名的。
如果在该命令的后面加上一个字符串,那么这个字符串就是新设置的主机名,但是这样的主机名系统没有记录,在下次登陆时还是老的主机名。
- 1、下载文档前请自行甄别文档内容的完整性,平台不提供额外的编辑、内容补充、找答案等附加服务。
- 2、"仅部分预览"的文档,不可在线预览部分如存在完整性等问题,可反馈申请退款(可完整预览的文档不适用该条件!)。
- 3、如文档侵犯您的权益,请联系客服反馈,我们会尽快为您处理(人工客服工作时间:9:00-18:30)。
5. 配置DNS
首先,你可以在/etc/hosts中加入一些主机名称和这些主机名称对应的IP地址,这是简单使用本机的静态查询.
要访问DNS 服务器来进行查询,需要设置/etc/resolv.conf文件.
假设DNS服务器的IP地址是192.168.3.2, 那么/etc/resolv.conf文件的内容应为:
4. 设置主机名称(hostname)
使用下面的命令来查看当前主机的主机名称:
sudo /bin/hostname
使用下面的命令来设置当前主机的主机名称:
sudo /bin/hostname newname
系统启动时,它会从/etc/hostname来读取主机的名称.
关于设置主机名称的更多信息,请访问这里
address 192.168.1.60
netmask 255.255.255.0
network x.x.x.x
broadcast x.x.x.x
gateway x.x.x.x
根据你的情况填上所有诸如address,netmask,network,broadcast和gateways等信息.
auto eth0
iface eth0 inet dhcp
用下面的命令使网络设置生效:
sudo /etc/init.d/networking restart
也可以在命令行下直接输入下面的命令来获取地址
sudo dhclient eth0
2. 为网卡配置静态IP地址
编辑文件/etc/network/interfaces:
ubuntu下更改IP,主机名,DNS
ubuntu 主机名
使用下面的命令来查看当前主机的主机名称:
sudo /bin/hostname
或者:
hostname
使用下面的命令来设置当前主机的主机名称:
sudo /bin/hostname newname
要永久重设主机名则需手工修改/etc/hostname文件
假设DNS服务器的IP地址是192.168.3.2, 那么/etc/resolv.conf文件的内容应为:
search
nameserver 192.168.3.2
/etc/network/interfaces
打开后里面可设置DHCP或手动设置静态ip。前面auto eth0,让网卡开机自动挂载.
sudo vi /etc/network/interfaces
并用下面的行来替换有关eth0的行:# The primary network interface
auto eth0
iface eth0 inet static
address 192.168.3.90
gateway 192.168.3.1
查看dns
less /etc/resolv.conf
修改:
sudo gedit /etc/resolv.conf
ubuntu下配置静态IP地址,设置DNS和主机名
新装了ubuntu,虽然使用图形界面明明已经设置好了ip,网关等等,但是不能上网。
一个朋友提醒说,也许是设置的问题,试试命令行的设置。于是搜索了一下怎么设置,结果还真的成功了。
netmask 255.255.255.0
#network 192.168.3.0
#broadcast 192.168.3.255
将上面的ip地址等信息换成你自己就可以了.用下面的命令使网络设置生效:
sudo /etc/init.d/networking restart
3. 设定第二个IP地址(虚拟IP地址)
用下面的命令使网络设置生效:
sudo /etc/init.d/networking restart
4. 设置主机名称(hostname)
使用下面的命令来查看当前主机的主机名称:
sudo /bin/hostname
使用下面的命令来设置当前主机的主机名称:
sudo /bin/hostname newname
network x.x.x.x
broadcast x.x.x.x
gateway x.x.x.x
根据你的情况填上所有诸如address,netmask,network,broadcast和gateways等信息.
用下面的命令使网络设置生效:
sudo /etc/init.d/networking restart
编辑文件/etc/network/interfaces:
sudo vi /etc/network/interfaces
在该文件中添加如下的行:
auto eth0:1
iface eth0:1 inet static
address 192.168.1.60
netmask 255.255.255.0
sudo /etc/init.d/networking restart
3. 设定第二个IP地址(虚拟IP地址)
编辑文件/etc/network/interfaces:
sudo vi /etc/network/interfaces
在该文件中添加如下的行:
auto eth0:1
iface eth0:1 inet static
也可以在命令行下直接输入下面的命令来获取地址
sudo dhclient eth0
2. 为网卡配置静态IP地址
编辑文件/etc/network/interfaces:
sudo vi /etc/network/interfaces
并用下面的行来替换有关eth0的行:# The primary network interface
先备份:
sudo cp /etc/resolv.conf /etc/resolv.conf.bak
然后编辑
sudo gvim /etc/dhcp3/dhclient.conf
将以下行添加到末尾,就是DNS的2个服务器啦
prepend domain-name-servers 208.67.222.222,208.67.220.220;#这两个服务器根据自己的DNS填上。
并用下面的行来替换有关eth0的行:
# The primary network interface - use DHCP to find our address
auto eth0
iface eth0 inet dhcp
用下面的命令使网络设置生效:
sudo /etc/init.d/networking restart
auto eth0
iface eth0 inet static
address 192.168.3.90
gateway 192.168.3.1
netmask 255.255.255.0
#network 192.168.3.0
#broadcast 192.168.3.255
将上面的ip地址等信息换成你自己就可以了.用下面的命令使网络设置生效:
ubuntu命令行修改网络配置方法
/etc/network/interfaces
打开后里面可设置DHCP或手动设置静态ip。前面auto eth0,让网卡开机自动挂载.
1. 以DHCP方式配置网卡
编辑文件/etc/network/interfaces:
sudo vi /etc/network/interfaces
1. 以DHCP方式配置网卡
编辑文件/etc/network/interfaces:
sudo vi /etc/network/interfaces
并用下面的行来替换有关eth0的行:
# The primary network interface - use DHCP to find our address
3. 设置网关 sudo route add default gw 133.133.133.40
4. ping 网关就可以ping通了
5. 设置DNS 修改/etc/resolv.conf,在其中加入
nameserver DNS的地址1 Nhomakorabeanameserver DNS的地址2
完成。
这样设置之后,下次开机时候似乎IP又会发生变化。
一、使用命令设置ubuntu的ip地址
1. 设置IP
sudo ifconfig eth0 203.171.239.155 netmask 255.255.255.224
这样就算设置好了网卡eth0的IP地址和子网掩码
2. 设置网关 sudo route add default gw 203.171.239.129
具体如下:
1. 检验是否可以连通,就使用ping命令ping 网关
开始的时候总是现实unreachable
2. 设置IP
sudo ifconfig eth0 133.133.133.190 netmask 255.255.255.0
这样就算设置好了网卡eth0的IP地址和子网掩码
search
nameserver 192.168.3.2
解决ubuntu重启DNS重新设置的问题
作者: wynlchae 发布日期: 2008-4-09 查看数: 256 出自:
在Ubuntu下设置静态IP,“主菜单”,“系统”,“系统管理”,“网络”,在“DNS”里删掉原来的DNS,填上静态的DNS的服务器,不过这样重启后就恢复,下次开机开得重新设置一次。
3. 设置DNS 修改/etc/resolv.conf,在其中加入 nameserver DNS的地址1 nameserver DNS的地址2 完成。
