德劲DE535数码录音机使用说明书(下)
德劲 DE1102
1/2
ENTER
点按数字键 1或2
3. 快速点按一次输入键收音机进入步进选择模式,显示屏有 9-10 字样持续显示3秒钟,如上图。9表示中波步进为9K, 10表示 中波步进为10K。
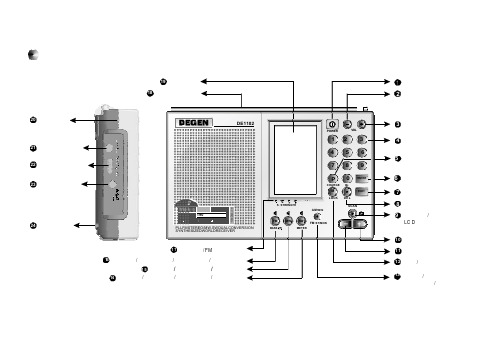
外观图及各部分名称
19 液晶显示屏 18 支撑架(背面)
20 手挽带位 21 外接天线插孔 22 远/近程选择推钮 23 外接电源插孔
24 电池仓位
DE1102
2 爱好者 号
智 能
智能充电
调幅宽/窄带 选择
单边带接收
蓝 色
电子音量
190个电台永久存储+动态+ATS
背 光
中
波短
波
二
次
变
频/调频立体声
超重低音
8
开、关收音机
本机具有状态记忆功能,无论采用哪种方式开机,开机后自 动进入关机前的波段频率。
电源键开、关机
点按一次电源 1 键收音机开机,开机后按本键收音机关机。
定时开/关机
本机在24小时内可设置三个定时开机,每一个的开机时间、 关机时间、开机频率、开机音量均可任意设定。预设开机时间 到,收音机自动开机,关机时间到将自动关机,(详见第29页)。 设定了定时开/关机后,定时开机符号恒定显示, 1 表示第一个 定时开机、2表示第二个定时开机、 3 表示第三个定时开机。
使用机内电池供电时,请将外接电源适配器插头脱离本机。
更换电池
1. 当电池电量即将耗尽时,收音机会自动关机,一般使用普通 干电池时,请更换新电池,此时若继续使用,电量指示会由 变为 ,瞬间显示后关机。 2. 取出电池,本机所有电台的储存信息永久保留,但实时时钟 会进入默认的12:00、定时闹醒时间取消,需要重新调整(调整 时钟详见第6页)。
shure mv88plus 立体声 usb 话筒 使用指南说明书
MV88plus Stereo USB MicrophoneShure MV88+ 立体声 USB 话筒The Shure digital USB microphone, MV88+ Stereo USB, user guide.Version: 1.0 (2021-J)Table of ContentsMV88plus Stereo USB Microphone Shure MV88+ 立体声USB 话筒3简要说明3产品特点 3快速设置3防风罩 4 MV88+ 话筒4麦克风方向 5 MV88+ 输出 5对准话筒5音频录制 6录音采访(桌面) 6手持式录制 7 Shure MOTIV 桌面应用程序7话筒设置 8预设模式 9定制预设 9指向性选择(立体声和单声道设置) 9监听混音合成11高级话筒设置 11限幅器11压缩器11高通滤波器11左右通道交换11均衡器11流媒体提示12控制音量 12使用锁定模式锁定您的声音 12监听声音 12故障排除12固件更新12在更新过程中保持设备连接 13系统要求13系统要求和兼容性:Mac 13系统要求和兼容性:Windows 13系统要求和兼容性:iOS 13系统要求和兼容性:Android 13规格 13认证15 Information to the user 15•••••••••••MV88plus Stereo USB Microphone Shure MV88+ 立体声 USB 话筒简要说明Shure MV88+ 是一款专业的高品质电容话筒,可通过 Lightning 或 USB-C 接头直接插入到移动设备中。
两个话筒炭精盒按中侧配置排列,提供可调节的立体声声像,适合捕获各种音源,包括音乐和语音。
ShurePlus MOTIV 应用允许您通过数字信号处理(DSP)、预设模式选择、增益调节、压缩和立体声宽度控制来自定义声音。
产品特点Mid-Side 立体声支持经典的 mid-side 立体声录制技术。
VR-56(I)数码录音笔 说明书

VR-56(I)数码录音笔使用说明书目 录一、面板说明 ... ... ... ... ... ... ... ... ... ... ... ... ... (1)二、操作说明... ... ... ... ... ... ... ... ... ... ... ... ... (1)三、其它功能... ... ... ... ... ... ... ... ... ... ... ... ... (10)四、使用须知... ... ... ... ... ... ... ... ... ... ... ... ... (12)五、主要性能指标... ... ... ... ... ... ...... ... ... ...... (13)一、 面板说明二、操作说明打开电池盖,按正确方向放入两节 7 号(AAA)碱性电池,合上电池盖。
● 开机装入电池后,系统自动进入日期/时钟状态,LCD显示默认系统时间,LCD 显示 如下:**如在日期/时钟状态下,按【REC/STOP】键或【PLAY/STOP】键进入待机状态; 如在待机状态下,按【MENU/PAUSE】键则进入日期/时钟状态;如 60 秒内无任何 操作,将进入日期/时钟状态。
**1● 录音及录音设置1.录音品质设置在停止状态下,长按【MENU/PAUSE】键进入 SET(设置)菜单,按【FF】 或【REV】键选择所需录音模式(HP、MP、LP),按【PLAY/STOP】键确认 退出。
(系统默认为 HP,HP 为高品质录音模式)。
2.录音1)录音.将 MIC(麦克风)对准声音来源;在停止状态下,按【REC/STOP】键 开始录音,录音状态指示灯点亮,LCD 显示如下:LCD 显示当前录音的条数,LCD 显示“REC”,2 秒后切换显示为已录时间:录音条数处显示的数字“08”表示第 08 条录音记录。
当完成一段录音后,按【REC/STOP】键即可停止录音,录音状态指示灯熄灭, 录音记录自动保存。
广东得胜电子有限公司专业电容麦克风SM-5B说明书
广东省电声工程技术研究中心广东得胜电子有限公司制造地址:广东省惠州市博罗县龙溪镇富康一路2号 电话:400 6828 333 传真:0752-******* 邮编:516121 邮箱:**************网址:技术参数连接线的安装与拆卸连接幻象电源使用说明专业电容麦克风SM -5B 内部采用全电子线路控制,并使用单面纯金镀膜极头,单指向拾音方式。
除了同样具有低噪声、高感度输出等特点,更具有很好的性价比。
麦克风本体为锌合金材质,网头为经过热处理的三层网,表面烤漆处理。
本体尾端连接使用标准XLR (母)连接器,可与各种音响设备相匹配。
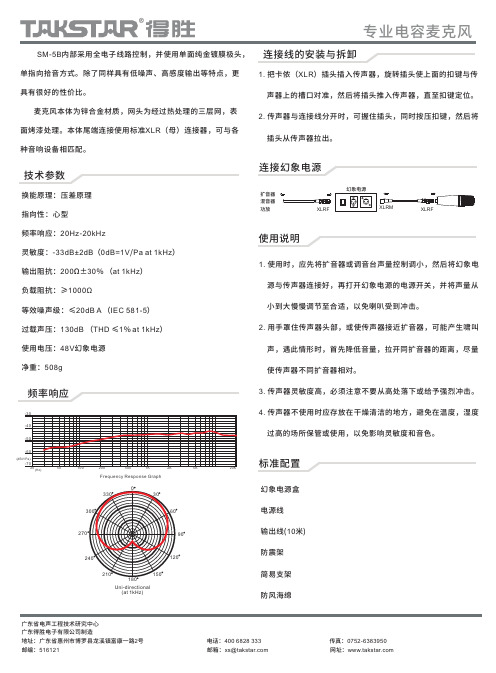
换能原理:压差原理指向性:心型频率响应:20Hz -20kHz灵敏度:-33dB±2dB (0dB =1V /Pa at 1kHz )等效噪声级:≤20dB A (IEC 581-5)过载声压:130dB (THD ≤1% )使用电压:V 幻象电源净重:508g输出阻抗:200Ω±30% (at 1kHz ) 负载阻抗:≥1000Ωat 1kHz 48Uni-directional (at 1kHz)306090120150330300270240210180-30-40-50-60-70(dBV/Pa)202K 20K501002005001K 5K (Hz)Frequency Response Graph频率响应1. 把卡侬(XLR )插头插入传声器,旋转插头使上面的扣键与传 声器上的槽口对准,然后将插头推入传声器,直至扣键定位。
2. 传声器与连接线分开时,可握住插头,同时按压扣键,然后将插头从传声器拉出。
1. 使用时,应先将扩音器或调音台声量控制调小,然幻象电 源与传声器连接好,再打开幻电源的电源并将声量从 小到大慢慢调节至合适,以免喇叭受到冲击。
2. 用手罩住传声器头部,或使传声器接近扩音器,可能产啸叫 声,遇此情形时,首先降低音量,拉开同扩音器离,尽量 使传声器不同扩音器相对。
德劲DE1125H收音机的使用报告
德劲DE1125H收音机的使用报告德劲DE1125H收音机的使用报告经过几天的测试,我不得不改写这份报告,对以前带给网友一些不确定的信息,在此表示歉意!终于收到DE1125H收音机了,怀着激动的心情,我迫不及待的迎出了德劲刚刚出阁的闺秀!【好奇】本机最大的亮点是采用新型宽频音响型喇叭,在收到1125H 前,我很好奇,这种“新型宽频音响型喇叭”有何特点?我很想知道。
于是好奇的我输入这个词条,百度一下,岂知跳出来的与其相匹配的结果是网友qqq2000的日志——题目是《新型宽屏音响型升级版DE1125H即将上市!(转帖)》,转的是德劲尧尧的文章。
似乎将我搜索的结果又回到了德劲。
难道这种新型宽频音响型喇叭还是德劲首用?为什么网上都搜索不到?如此看来,此种宽频音响型喇叭自然是“新型”无疑!【外观】收到的1125H收音机和原来DE1125(4G)版一般大小,只是喇叭没有圆圈的银色,取而代之的是深黑色外壳与同色凸起的喇叭形圆圈。
这种外观改版,感觉有四:1、深黑色的外壳使人肃然起敬,因为她显得端庄典雅,沉稳持重。
2、原来老版机都是用英文标识,H机型换成了汉字,意味着使用普及化,方便工农大众。
3、H机型与老版机型机面区别明显,有利于售后员容易识别取货,不容易出错。
尽管外观并未标明1125H,看到通黑色的外观即可辨认!4、老版机厚度15mm,H版厚度23.5mm。
适宜新型宽频音响型喇叭安装使用。
由于喇叭的凸显,给人的感觉有浑厚的感觉。
尽管只加了8.5mm,而声音的提升,却是来了一次飞跃!【音质】1125H的亮点应该是她的音质。
接到1125DH的下午我让1125H尽力开大音量,欣赏1125H的音质,随机有两首歌,一首是惠威试音碟“回家”;另一首是“伤不起”。
1125H共有音量31级。
我把“回家”开到31级,微有失真现象,其后降下两级,刚好,但声音很大,耳朵感觉受不了。
另一首是“伤不起”我开到31级音量,稍有失真感觉,25级,相当好听!在客厅里H版机型开20—23级音量即可。
SD5快速入门指南

用户手册-入门指南
结合 SD 系列软件阅读参考
用户手册 C 版本对应控台 2.0.680+
0-1
SD5 操作指南
Copyright © 2014 Digico UK Ltd
All rights reserved.
No part of this publication may be reproduced, transmitted, transcribed, stored in a retrieval system, or translated into any language in any form by any means without the written permission of Digico UK Ltd. Information in this manual is subject to change without notice, and does not represent a commitment on the part of the vendor. Digico UK Ltd shall not be liable for any loss or damage whatsoever arising from the use of information or any error contained in this manual. All repair and service of the SD5 product should be undertaken by Digico UK Ltd or its authorised agents. Digico UK Ltd cannot accept any liability whatsoever for any loss or damage caused by service, maintenance, or repair by unauthorised personnel.
得胜SM-18 PURE 专业录音麦克风使用说明书
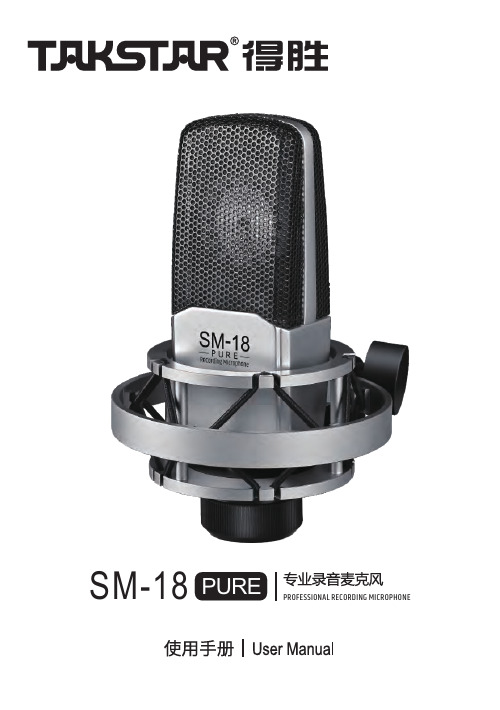
SM-18 PURE 专业录音麦克风
前言
尊敬的用户: 感谢您选购得胜SM-18 PURE专业录音麦克风,为了您能够更好的了解使用本产
品,建议您在使用前仔细阅读本说明书。 若存在有疑问或者您有宝贵的建议,可通过拨打得胜官方服务
plosives. • Dedicated, high-performance shock mount effectively removes vibration noise. • Supplied with a premium aluminum case for easy storing and carrying.
6. 使用时,应先将设备音量调小,再打开幻象电源开关,并将音量从小到大慢慢 调节至合适,以免声压过大对扬声器产生冲击;尽可能的拉开麦克风与扬声器的距 离,避免麦克风和扬声器相对,从而有效控制回馈啸叫;
7. 麦克风输出接口是三针XLRM接口,其极性如图所示:
针脚1(接地)
针脚2(正)
针脚3(负)
5
SM-18 PURE 专业录音麦克风
关于本说明书
本说明书中内容符合截止印刷之日的技术规格。由于得胜公司会不断改进产品, 本说明书可能不符合您的特定产品的技术规格。要获取最新版说明书,请访问得胜 官网,然后下载说明书文件。技术规格、设备或另售的附件在各个地区可能有所不 同,如有问题请与当地得胜经销商确认。 如需更多支持和深层产品信息,请浏览得 胜官方网站:https:///
11
SM-18 PURE PROFESSIONAL RECORDING MICROPHONE
Operation Instructions
旺德电通 WD-P23 手提式CD收录音机 说明书
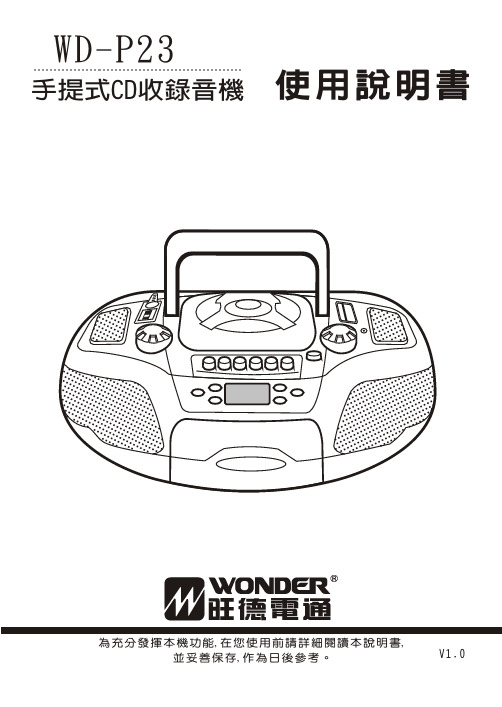
WD-P23使用說明書手提式CD收錄音機為充分發揮本機功能,在您使用前請詳細閱讀本說明書,並妥善保存,作為日後參考。
V1.0目錄(一)本機特點 (2)警告 (2)(二)外型及各部位名稱 (3)(三)安裝方法 (4)(四)基本操作 (5)接通電源 (5)音量調整 (5)3D虛擬環繞音效 (5)調諧電台 (5)CD唱片的使用 (6)CD唱片播放方法 (6)CD唱片搜尋特定樂曲 (6)重覆播放 (6)程序播放 (7)檢查程序記憶 (7)增加程序記憶 (7)變更程序記憶 (7)清除程序記憶 (7)卡帶操作 (8)播放卡帶 (8)錄音 (8)耳機 (8)(五)維護 (9)整個系統 (9)雷射唱盤 (9)錄放音卡座 (9)(六)碟片清潔 (10)(七)故障排除 (10)(八)緊急處理方法 (10)(九)規 格 (10)請詳細閱讀本說明書,讓您輕鬆操作!11.HI/FI立體聲。
2.可播放CD/TAPE/RADIO功能。
3.AM/FM立體聲收音。
4.具有耳機插孔。
5.LCD顯示幕。
6.輸出功率:1.5W(每聲道)。
7.多種CD編輯播放功能 Program(20首)/Repeat。
8.CD重複播放及單曲重複播放功能。
9.3D 虛擬環繞音效23(CD播放及暫停鍵)(CD順向選曲及跳曲鍵)15.卡帶門16.CD DISPLAY顯示幕17.REPEAT(CD重複鍵)19.PROG(CD程序編輯鍵)20.VOLUME(音量調整鈕)21.3D虛環繞開關22.PHONES(耳機插孔)3.F.FWD (卡帶快進按鍵)4.REW (卡帶倒帶按鍵)7.CD門8.DIAL POINTER(波段頻率指示)9.FM STEREO(FM 立體聲指示燈)10.11.OPEN CD 門開啟按鍵TUNING(調諧鈕)1.天線安裝方法(初次使用時,請務必詳閱)交流供電當插上交流電源插頭後本機已經接通電源,如若不想消耗,確保安全,電源請在不使用時拔掉電源插頭。
多功能打铃广播机使用说明书

多功能打铃广播机使用说明书多功能打铃器使用微电脑设计,即可输出音乐打铃、又可控制电铃打铃、还可程序控制外部音源或者扩音设备的供电;又可用来做广播机信号源,又可用于智能广播控制器;即可话筒输入广播,又可线路输入广播;即可使用内部固定乐曲和高保真录音音乐,又可自行录音用于信号源。
实现了一机在手,多种控制。
音乐打铃具有几十首曲目供打铃选择,电铃打铃有3种不同的打铃规律,不论是乐音打铃还是电铃打铃,均可使用不同的音乐声和电铃规律来区分预备铃、上课铃和下课铃。
内置专用时钟模块,交流停电时钟正常走时,交流停电情况下维持长时间正常走时,保证了走时精度和始终的连续性。
音乐打铃、电铃打铃、时间程序控制分别有128个定时时间设置,保证绝大多数的应用于任何场合。
是学校、部队以及企业等单位的首选产品。
一、基本功能:1、音乐打铃输出:有19段音乐供音乐打铃和广播使用。
2、音乐信息分为演奏乐曲和录音音乐两种,录音音乐电路为用户提供了灵活性的音乐内容。
3、内置录音电路,根据用户的需要,随时录制自己喜爱的不同的内容。
4、5个高亮度数码管显示当时小时和分钟和星期,在设置状态下、定时操作和手动操作状态下,显示各种直观操作内容,避免了误操作。
5、键盘按键提示音功能,提示按键有效和操作正误,使得操作更可靠。
6、状态指示灯辅助指示当前工作状态。
7、可控的秒点指示灯协助各种状态下的设置工作。
8、专用时钟芯片,走时准确,交流停电时钟可正常走时2-3年。
9、音乐打铃、电铃打铃、时间程控设置次数最大允许128个,完全可以满足学校、部队等部门的任何场合下的使用。
10、电铃打铃有3种电铃声音规律区分预备铃、上课铃和下课铃。
11、具有键盘锁功能,防止非工作人员的非法操作。
12、具有手动音乐铃和手动电铃打铃操作,用于特殊情况下的手动打铃,手动电铃打铃亦可选择不同的铃声规律。
13、具有广播功能,即可选择曲目,又可选择遍数,也可设置长时间的循环播放。
14、广播中广播遍数自动计数,广播状态一目了然。
HS-5_中文说明书
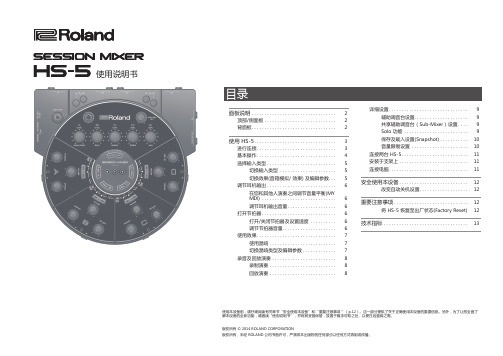
有关图示中的插头
立体声1/4英寸耳机类型 1/4英寸耳机类型 XLR 立体声迷你耳机类型
区域 A
* 为了防止设备发生故障,请在进行任何连接之前降低音量并关闭所有设备电源。 * 当所有设备连接后,请按照上述顺序打开设备电源。如果按照错误的顺序打开电源,有可能会导致设备产生故障。 * 开启/关闭电源前请将设备的音量调节至最低。即使您将音量调节至最低,开启设备时仍将听到低微的声响。这是正常现象并非故障。
[REVERB] 旋钮
&p. 8
$
4 调节耳机输出
&
在每个区域使用 [MY MIX] 旋钮调节您和其 人员演奏的平衡,使用 [PHONES] 旋钮调节耳机 音量。
* HS-5 音量输出可能会非常 高。请小心调节以避免损伤您 的听力。
[PHONES] 旋钮
&p. 7
[MY MIX] 旋钮
&p. 6
选择输入类型
详细设置. . . . . . . . . . . . . . . . . . . . . . . . . . . . . . . 9 辅助调音台设置.. . . . . . . . . . . . . . . . . . . . 9 共享辅助调音台(Sub-Mixer)设置. . . . 9 Solo 功能 . . . . . . . . . . . . . . . . . . . . . . . . . 9 保存及载入设置(Snapshot). . . . . . . . . . . 10 音量限制设置 . . . . . . . . . . . . . . . . . . . . . . 10
Soundstream Rubicon 5.2频道强力戴登扬声器实用指南说明书
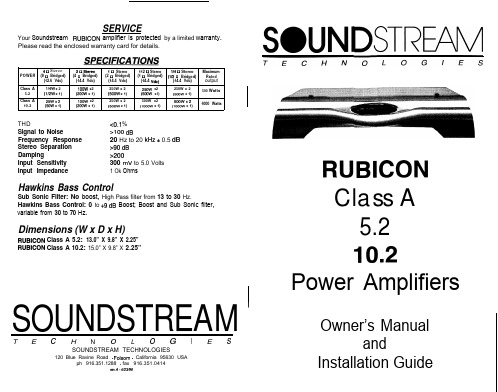
Class A
10.2
4 iI Stereo (8 R Bridged)
(12.6 Vdc)
ll4W x 2 (1/2W x 1)
25Wx2 (5OW x 1)
2RStereo (4 R Bridged)
(14.4 Vdc)
1oow x2 (2OOW x 1)
1oow x2 (2OOW x 1)
4 TridentTM Protection Topology provides three types of protection: 1. Output protection against short circuits or improper loads. 2. Ground fault detection: Shuts down the amplifier when a significant voltage (> Welts) fluctuation occurs between electrical (turn-on lead) and battery ground. 3. Thermal Protection: Puts the amplifier into thermal rollback or shuts the amplifier down in extreme thermal conditions.
ph 916.351.1288 l fax 916.351.0414
revA-4B3@8
RUBICON Class A
5.2 102 Power Amplifiers
Owner’s Manual and
Installation Guide
Conaratulations!
You now own a Soundstream RUBICON CLASS A amplifier, the product of an uncompromising design and engineering philosophy. Your Soundstream RUBICON CLASS A amplifier will outperform any other amplifier in the world.
BenQ DE350 DVD 錄放影機 快速使用指南

DE350DVD錄放影機快速使用指南歡迎使用2 包裝內容包裝內容請檢查您購買的DE350包裝內容。
若有任何物件遺漏或損壞,請立即與經銷商連絡。
電源線的類型會因銷售的國家地區而不同。
DE350 DVD 錄放影機 x 1A/V 連接線 x 1電源線 x 1DVD+RW 光碟 x 1使用手冊 x 1快速使用指南 x 1遙控器 x 1AA (UM3)電池 x 2天線連接線 x 1選擇適當安裝位置• 請將DVD錄放影機放置在堅固平坦的表面或桌上。
• 請在DVD錄放影機每一邊皆預留至少3公分的空間供錄放影機散熱。
• 請在DVD錄放影機前方預留至少15公分的空間供操作光碟托盤之用。
• 請勿在DVD錄放影機上放置任何物件。
• 請讓DVD錄放影機遠離受日光直射、有雨水、濕氣及熱源的地方。
連接DVD錄放影機連接至顯示裝置(電視或投影機)此DVD錄放影機必須連接至顯示裝置,您才能觀賞播放的DVD,以及使用此DVD錄放影機的螢幕顯示選單。
您可以使用下面其中一種方式將DVD錄放影機連接至顯示裝置:• 色差視訊連接線:請參見第4頁的「使用色差視訊連接線將DVD錄放影機連接至電視機」• S-Video連接線:請參見第5頁的「使用S-Video連接線將DVD錄放影機連接至電視機」。
• A/V連接線:請參見第6頁的「使用A/V連接線將DVD錄放影機連接至電視機」。
您只需使用上列其中一種方式將DVD錄放影機連接至您的顯示裝置即可,因為每種方式都會提供不同等級的影像品質。
基本上您選擇的方式皆必須視顯示裝置本身提供的連接端子而定。
關於連接方式與視訊畫質的完整說明,請參見使用手冊。
電視頻道錄影此DVD錄放影機也必須連接電視天線才能將電視訊號錄製到DVD光碟上。
連接電視天線可讓您在電視機上選擇及觀賞電視頻道,即使DVD錄放影機正在錄製另一個頻道或是在關機時,您也可以觀賞其它電視頻道。
請參見第7頁的「將DVD錄放影機連接至電視天線」。
連接至聲音系統您可以使用適當的音訊連接線將DVD錄放影機連接至數位或類比聲音裝置。
美得理 魔鲨电子鼓DD516用户说明书

注意事项请在操作使用前,首先仔细阅读以下内容 。
请将本用户说明书妥善保管,以便将来随时查阅。
电源请将指定的电源适配器插入符合规定电压的电源插座。
请使用指定的电源适配器,使用错误的电源适配器会导致鼓机过热或损坏。
当不使用本电子鼓或打雷时,请拔掉电源线。
连接在将本电子鼓连接到其他设备之前,请关闭所有设备的电源开关。
这将有效防止设备故障或防止损坏其他设备。
放置请勿将本电子鼓放置于以下环境中,以免设备发生变形、褪色或其他更严重的损坏:阳光直射处、暖气旁多尘土、高温、潮湿、可能产生强烈震动或冲击的位 置接近磁场处对其他设备的干扰将本电子鼓放置在电视机、收音机的周围可能引起干扰。
使用本电子鼓时,请与电视机和收音机保持适当的距离。
清洁保养清洁本鼓机时,请用干燥柔软的布擦拭。
请勿使用涂料稀释剂、溶剂、清洁液或浸了化学物质的抹布擦拭。
操作在操作按钮开关或插孔时,不要用力过快或过猛。
避免纸张、金属或其他杂物进入电子鼓内部。
如果发生此类情况,请拔掉墙上电源插座中的插头。
然后请具有资格的维修人员对设备进行检查。
在搬动本电子鼓之前,请断开所有的电源。
警告该产品的正常功能可能会遭受强电磁干扰。
如果出现这种情况,只需简单地按照用户说明书将产品恢复初始设置。
当产品的功能无法恢复时,请在其他地方使用本产品。
装箱单尊敬的用户,当您选购本乐器后,请检查以下物品是否齐全: 音源器:1 个 鼓盘:4个 镲片:3个 低音鼓组件:1套 Hi-hat 踏板:1个 支架组件:1 套 鼓盘线:1 套 鼓棒: 1副 电源适配器:1个使用说明书:1套(中英文) 安装说明书:1套(中英文) 鼓谱:1本售后保修证书面板控制和终端正面面板 (4)背面面板和侧面面板 (5)显示屏 (5)快速入门装配连接鼓盘和踏板 (6)接口扩音设备连接 (7)耳机连接 (7)MP3/CD播放器连接 (7)计算机连接 (7)MIDI键盘连接 (7)电源连接 (7)基本操作鼓组选择 (8)鼓盘敲击 (8)触发器灵敏度调节 (9)节拍器使用 (9)速度调节 (9)编辑并保存鼓组鼓组音量调节 (10)混响开关/均衡设置 (10)鼓盘音色选择 (10)鼓盘音量/相位/音高调节 (10)鼓盘启动音乐片段功能 (10)鼓组保存 (10)乐曲播放乐曲选择 (11)乐曲音量调节 (11)乐曲主打轨静音 (11)使用鼓盘启动乐曲片段 (11)录音功能快速录音 (12)录音回放 (12)录音菜单设置 (12)学习模式练习曲选择 (13)考试/评分 (13)考试录音回放 (13)实用指南创建用户鼓组关于鼓组 (14)鼓组选择 (14)鼓组整体参数设置 (14)鼓盘选择 (14)关于鼓盘音色 (15)音色选择 (15)快速入门实用指南附录其他参数设置 (15)用户鼓组保存 (15)触发器性能设置关于触发器性能参数设置 (16)触发器灵敏度调节 (17)触发器敲击门限设置 (17)触发器串扰抑制参数设置 (17)触发器力度曲线选择 (17)触发器边击灵敏度调节 (18)踩镲踏击灵敏度调节 (18)触发器性能设置保存 (18)节拍器设置关于节拍器 (19)节拍器开关 (19)节拍器速度调节 (19)节拍器拍号设置 (19)节拍器节拍间隔设置 (19)节拍器音量调节 (19)节拍器音色设定 (19)乐曲播放关于乐曲 (20)乐曲选择 (20)乐曲播放 (20)乐曲伴奏音量调节 (20)乐曲主打音量调节 (20)乐曲主打轨静音 (20)录音功能关于录音 (21)实时录音 (21)以乐曲作为伴奏录音 (21)录音回放 (21)录音菜单 (21)学习模式关于学习模式 (22)军鼓练习 (22)套鼓练习 (23)节奏练习 (23)考试评分 (24)回放考试录音 (24)MIDI设置关于MIDI (25)MIDI设置 (25)与外部音序设备连接 (26)作为音源使用 (26)附录提示信息 (27)故障排除 (27)规格 (28)鼓组表/音色表/GM鼓组表/GM旋律音色表 (29)乐曲表/练习曲表/参数列表 (36)MIDI应用表 (39)1. 主音量【VOLUME 】旋钮用于调节耳机及音频输出音量。
便携录播机 NLB-530P 使用手册说明书

便携录播机NLB-530P使用手册REV688南京纳加软件股份有限公司版权所有,不得翻印目录一、硬件规格 (1)1.1配件清单 (1)1.2设备参数 (1)1.3展示图 (1)1.4接口图 (2)二、安装调试 (3)三、授课机桌面采集客户端 (6)四、系统功能详细说明 (8)4.1纳加远程互动教育录播系统(VJES1.2) (8)4.1.1监视 (9)4.1.2通道 (10)4.1.3输出 (18)4.1.4调音台 (30)4.1.5导播规则 (31)4.1.6云教室 (35)4.1.7云台 (37)4.1.8字幕 (38)4.1.9角标 (40)4.1.10CG (40)4.1.11切换控制 (42)4.1.12切换特技 (43)4.1.13上传 (43)4.2授课机桌面采集客户端(VJT EACHER) (45)4.2.1运行 (45)4.2.2桌面采集 (45)4.2.3远程控制 (45)4.2.4手写板 (46)4.2.5音频设置 (47)4.2.6开始/停止课件录制 (48)4.2.7录播机开机/关机 (48)4.2.8课件信息设置 (49)4.2.9图像质量设置 (49)五、课件录制 (50)5.1课件格式 (50)5.2本地播放 (50)5.3网络在线播放 (51)5.4课件播放器 (51)5.4.1界面布局 (51)5.4.3PPT索引 (53)5.4.4笔记 (53)六、附录 (54)6.1录播内置操作台使用说明 (54)6.2片头、片尾的制作方式和关联使用说明 (55)6.3ONVIF测试工具及方法 (59)6.4还原出厂设置 (61)6.5常见问题 (62)一、硬件规格1.1配件清单1.2设备参数名称参数说明机箱便携机箱,内置1块15.6寸全高清显示屏,内置导播键盘、PC 键鼠材质镁铝合金外形尺寸387mm x 262mm x 89mm(长x 宽x 高)重量 4.6KG供电19V 电源,提供外置电源适配器运输箱纸箱包装运输工作温度0°C -45°C 贮存温度-20°C -70°C 工作湿度10~90%无凝露1.3展示图115.6寸全高清显示屏2PC 键盘/鼠标触摸板3专业导播键盘/云台摇杆4高强度提手名称/型号包装规格件数备注设备主体纸箱内包装NLB-530P 1电源线纸箱内包装国标1适配器纸箱内包装国标1使用手册纸箱内包装纳加定制1电子版保修卡合格证纸箱内包装纳加定制11.4接口图1、侧面接口11散热口2电源开关1、侧面接口21立体声喇叭开关248V 幻象电源开关3音频输出L 4音频输出R5音频输入1(MIC/LINE IN)6音频输入2(MIC/LINE IN)7音频输入1电平输入选择按钮8音频输入1电平衰减开关按钮9音频输入2电平输入选择按钮10音频输入2电平衰减开关按钮11直接监听输入信号开关12耳机监听增益旋钮13音频输入1增益旋钮14音频输入2增益旋钮15音频输出L/R 增益旋钮16耳机监听接口2、背面接口1SDI 输入42SDI 输入33SDI 输入24SDI 输入15HDMI 输入6DC 19V 接口7HDMI 输出8COM 口9USB 3.2接口10LAN 口11USB 3.2接口12Mic in 13Line out二、安装调试1.打开纸箱,从拉箱中取出主机和电源,将主机平放在平稳的台面上,2.双手同时轻轻上翻显示屏到一定显示角度,如下图所示:3.连接电源,如下图所示:4.连接输入的视音频信号(1)摄像机等现场信号通过SDI线接入SDI输入口,如下图所示:(2)电脑桌面通过HDMI线连接到HDMI输入口,如下图所示:5.声音通过卡侬/大三芯线连接到卡龙/大三芯两用混音输入口,如下图所示:6.连接录播主机投影到大屏或者分屏监视。
监听录音系统用户操作说明书

友迪录音监听系统用户使用手册广州市友迪资讯科技有限公司GUANGZHOU INFONEWTECH COMPANY LTD., 广东省广州市天河区五山路248号金山大厦1701-1703室二零零八年九月十六日目录1. 系统介绍 (1)1.1. 系统概述 (1)1.2. 技术指标 (1)2. 系统功能 (2)2.1. 安装操作 (2)2.2. 友迪录音监听服务端 (10)2.2.1.卡位设置 (11)2.2.2.系统设置 (15)2.2.3.录音服务 (18)2.2.4.服务器设置 (18)2.2.5.导入授权文件 (18)2.2.6.皮肤 (20)2.2.7.退出 (22)2.3. 友迪录音监听系统客户端 (22)2.3.1.录音查询 (33)2.3.2.服务器设置 (35)2.3.3.皮肤 (36)2.3.4.退出 (36)3. 监听通道的命令表 (37)1.系统介绍1.1.系统概述友迪录音监听系统根据监狱会见实际需求开发的、对罪犯会见过程与家属对话进行实时录音的软件,系统可对各个会见单元进行实时录音,录音文件格式为标准WAV文件,同时系统具有远程网络控制与放音功能,用户可通过远程联网计算机开放会见单元、中断会见、修改通道类型等操作,并可对录音内容进行远程网络回放。
录音系统支持电话录音(普通用见)、拾音器录音(亲情会见、帮教等)、集中监听(监控室监听)、分散监听(现场监听)。
电话录音通道至少支持100对电话(卡位),拾音器录音通道至少支持于100个拾音器,监听通道至少支持20门,并可根据用户实际需要,随意进行扩充或减少各类通道。
本系统的自动化程度好,录音时系统会自动触发录音通道,无需手工操作;录音后,系统自动生成录音文件,便于用户查询和检索;系统可进行语音提示,无需手工操作,只要系统调用已录制好的语音文件即可,做到操作简单、容易,实现系统的人性化、合理化。
存储的录音文件可设置成自动删除,可按时间来删除,也可按计算机的磁盘空间来删除文件。
发声器 DB5 和 DB51 安装和操作手册说明书
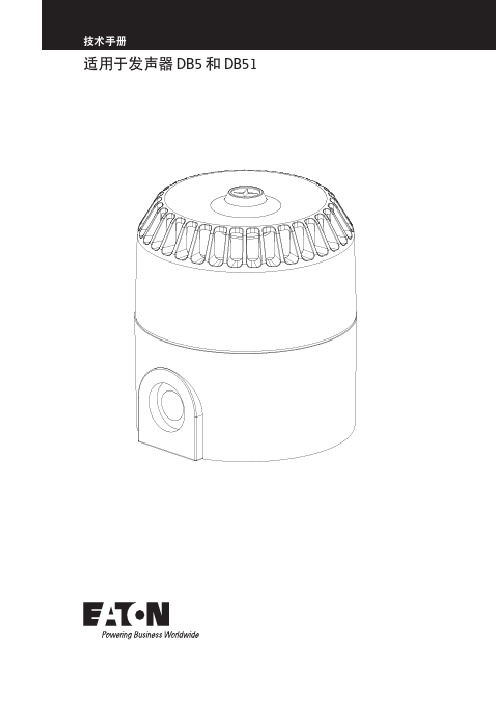
适用于发声器 DB5 和 DB51发声器 DB5 和 DB51简体中文请注意,我们已尽全力确保我们的技术手册的准确性。
但是,我们不对任何错误或遗漏造成的损坏、损失或费用承担责任。
我们保留根据技术进步和行业标准做出更改的权利。
ii适用于发声器 DB5 和 DB51TM385 第 1 期 August 2020 发声器 DB5 和 DB51简体中文目录1.0 简介 . . . . . . . . . . . . . . . . . . . . . . . . . . . . . . . . . . . . . . . . . . . . . . . . . . . . . . . . . . . . . . . . . . . . . . . . . . . . . . . .12.0 安装 . . . . . . . . . . . . . . . . . . . . . . . . . . . . . . . . . . . . . . . . . . . . . . . . . . . . . . . . . . . . . . . . . . . . . . . . . . . . . . . .12.1 拆卸/装回盖板: . . . . . . . . . . . . . . . . . . . . . . . . . . . . . . . . . . . . . . . . . . . . . . . . . . . . . . . . . . . . . . . . . . .12.2 电缆端接: . . . . . . . . . . . . . . . . . . . . . . . . . . . . . . . . . . . . . . . . . . . . . . . . . . . . . . . . . . . . . . . . . . . . . . .13.0 操作 . . . . . . . . . . . . . . . . . . . . . . . . . . . . . . . . . . . . . . . . . . . . . . . . . . . . . . . . . . . . . . . . . . . . . . . . . . . . . . . .14.0 维护 . . . . . . . . . . . . . . . . . . . . . . . . . . . . . . . . . . . . . . . . . . . . . . . . . . . . . . . . . . . . . . . . . . . . . . . . . . . . . . . .25.0 认证 . . . . . . . . . . . . . . . . . . . . . . . . . . . . . . . . . . . . . . . . . . . . . . . . . . . . . . . . . . . . . . . . . . . . . . . . . . . . . . . .2IECEX 装置 . . . . . . . . . . . . . . . . . . . . . . . . . . . . . . . . . . . . . . . . . . . . . . . . . . . . . . . . . . . . . . . . . . . . . . . . . .2 ATEX 装置 . . . . . . . . . . . . . . . . . . . . . . . . . . . . . . . . . . . . . . . . . . . . . . . . . . . . . . . . . . . . . . . . . . . . . . . . . . .2 6.0 安全使用特殊条件 . . . . . . . . . . . . . . . . . . . . . . . . . . . . . . . . . . . . . . . . . . . . . . . . . . . . . . . . . . . . . . . . . . . . .2iii适用于发声器 DB5 和 DB51TM385 Issue 1 August 2020 发声器 DB5 和 DB51简体中文iv适用于发声器 DB5 和 DB51TM385 Issue 1 August 2020 发声器 DB5 和 DB51简体中文1.0 简介该系列轻质本安型发声器设计具有高耐候等级,可应对 石油、天然气和石化行业中海上和陆上应用场合的恶劣环境 条件。
BD552i 使用说明书

DIGITAL PORTABLE RADIO数字手持终端BD552i OWNER’S MANUALBD552i使用说明书Welcome to the world of Hytera and thank you for purchasing this product.This manual includes a description of the functions and step-by-step procedures for use.It also includes a troubleshooting guide.To avoid bodily injury or property loss caused by incorrect operation,please carefully read the Safety Information Booklet before use.This manual is applicable to the following product:BD552i Digital Portable RadioCopyright InformationHytera is the trademark or registered trademark of Hytera Communications Corporation Limited(the Company)in the People's Republic of China(PRC) and/or other countries or areas.The Company retains the ownership of its trademarks and product names.All other trademarks and/or product names that may be used in this manual are properties of their respective owners. The product described in this manual may include the Company's computer programs stored in memory or other ws in PRC and/or other countries or areas protect the exclusive rights of the Company with respect to its computer programs.The purchase of this product shall not be deemed to grant,either directly or by implication,any rights to the purchaser regarding the Company's computer programs.The Company's computer programs may not be copied,modified,distributed,decompiled,or reverse-engineered in any manner without the prior written consent of the Company. DisclaimerThe Company endeavors to achieve the accuracy and completeness of this manual,but no warranty of accuracy or reliability is given.All the specifications and designs are subject to change without notice due to continuous technological development.No part of this manual may be copied,modified,translated,or distributed in any manner without the prior written consent of the Company.We do not guarantee,for any particular purpose,the accuracy,validity, timeliness,legitimacy or completeness of the third-party products and contents involved in this manual.If you have any suggestions or would like to receive more information, please visit our website at:.FCC StatementThis equipment has been tested and found to comply with the limits for a Class B digital device,pursuant to part15of FCC Rules.These limits are designed to provide reasonable protection against harmful interference in a residential installation.This equipment generates and can radiate radio frequency energy.If not installed and used in accordance with the instructions,it may cause harmful interference to radio communications. However,there is no guarantee that interference will not occur in a particular installation.Verification of harmful interference by this equipment to radio or television reception can be determined by turning it off and then on.The user is encouraged to try to correct the interference by one or more of the following measures:·Reorient or relocate the receiving antenna.Increase the separation between the equipment and receiver.·Connect the equipment into an outlet on a different circuit to that of the receiver's outlet.·Consult the dealer or an experienced radio/TV technician for help. Operation is subject to the following two conditions:·This device may not cause harmful interference.·This device must accept any interference received,including interference that may cause undesired operation.Note:Changes or modifications to this unit not expressly approved by the party responsible for compliance could void the user's authority to operate the equipment.Compliance with RF Exposure Standards Hytera's portable radio complies with the following RF energy exposure standards and guidelines:·United States Federal Communications Commission,Code of Federal Regulations;47CFR§1.1307,1.1310and2.1093.·American National Standards Institute(ANSI)/Institute of Electrical and Electronic Engineers(IEEE)C95.1:2005;Canada RSS102Issue5 March2015.·Institute of Electrical and Electronic Engineers(IEEE)C95.1:2005 EditionRF Exposure Compliance and Control Guidelines and Operating InstructionsTo control your exposure and ensure compliance with the occupational/controlled environmental exposure limits,always adhere to the following procedures.Guidelines:·Do not remove the RF Exposure Label from the device.·User awareness instructions should accompany device when transferred to other users.·Do not use this device if the operational requirements described herein are not met.Operating Instructions:·Transmit no more than the rated duty factor of50%of the time.To transmit(talk),push the Push-To-Talk(PTT)button.To receive calls, release the PTT button.Transmitting50%of the time,or less,isimportant because the radio generates measurable RF energy only when transmitting(in terms of measuring for standards compliance).·Keep the radio unit at least2.5cm away from the face.Keeping the radio at the proper distance is important as RF exposure decreases with distance from the antenna.The antenna should be kept away from the face and eyes.·When worn on the body,always place the radio in a Hytera-approved holder,holster,case,or body harness or by use of the correct clip for this e of non-approved accessories may result in exposure levels which exceed the FCC's occupational/controlled environmental RF exposure limits.·Use of non-approved antennas,batteries,and accessories causes the radio to exceed the FCC RF exposure guidelines.·Contact your local dealer for the product's optional accessories.IC StatementThe device has been tested and complies with SAR limits,users can obtain Canadian information on RF exposure and complianceAprès examen de ce matériel aux conformitéaux limites DAS et/ou aux limites d’intensitéde champ RF,les utilisateurs peuvent sur l’exposition aux radiofréquences et la conformitéand compliance d’acquérir les informations correspondantesThis device complies with Industry Canada license-exempt RSS standard(s). Operation is subject to the following two conditions:·This device may not cause harmful interference.·This device must accept any interference received,including interference that may cause undesired operation.Le présent appareil est conforme aux CNR d'Industrie Canada applicables aux appareils radio exempts de licence.L'exploitation est autorisée aux deux conditions suivantes:(1)l'appareil ne doit pas produire de brouillage, et(2)l'utilisateur de l'appareil doit accepter tout brouillage radioélectrique subi,même si le brouillage est susceptible d'en compromettre le fonctionnementEU Regulatory ConformanceAs certified by the qualified laboratory,the product is in compliance with the essential requirements and other relevant provisions of the following directives:1999/5/EC or2014/53/EU,2006/66/EC,2011/65/EU,and 2012/19/EU.Please note that the above information is applicable to EU countries only.ContentsPacking List 2Product Overview3ProductControls 3LCD Icons 4LED Indications 4Before Use4Attaching the Antenna 4Attaching the Battery 4Attaching the Belt Clip5Attaching the Audio Accessories 5Charging the Battery5Checking the Battery Power 5Basic Operations 6Call Services6Call on Digital Channel6Callon Analog Channel (Without Signaling)6Optional Features 7Troubleshooting 9Care and CleaningProductCare 11ProductCleaning 11Optional Accessories1111ContentsPlease unpack carefully and check that all items listed below are received.If any item is missing or damaged,please contact your dealer.Item Quantity(PCS)Item Quantity(PCS) Radio1Antenna1 Battery1Belt Clip1 Charger1Strap1 Power Adapter1Documentation Kit1Check whether the frequency band marked on the antenna label matches that on the radio label.If not,please contact your dealer.You can request your dealer to program your radio to use the SK as the shortcut to a radio featureProduct ControlsLCDIconsLED IndicationsLED Indicator Radio StatusFlashes green Being turned on.Glows green Receiving.Glows redTransmitting.Flashes orange slowlyScanning.Glows orangeCall hang time:No voice is being transmitted or received on the channel during a call.Within such a period,you can press and hold the PTT key and speak.Attaching the Antenna1.Place the antennain its receptacle.2.Rotate the antenna clockwise until hand tight.Do not hold the radio by the antenna,as it may reduce the radio performance and life span of the antenna.Attaching the Battery1.Insert the top of the battery into the top of the battery slot.2.Press the bottom of the battery until the latch snaps into place.To remove the battery,make sure the radio is turned off,and then slide the battery latch upwards to unlock the battery.Attaching the Belt Clipe a Phillips screwdriver to turn the screws counterclockwise on the back of the radio and remove them.2.Align the screw holes on the belt clip with those on the back of the radio.3.Put the screws back in place,and use the Phillips screwdriver to turn them clockwise until hand tight.Attaching the Audio Accessories1.Open the accessory connector cover.2.Plug the accessory into the accessory connector.3.Turn the screw on the accessory plug clockwise until hand tight.Charging the Battery·Use the charger specified by Hytera to charge the battery.·Read the Safety Information Booklet before charging.The battery delivered with the radio is uncharged.To ensure optimum performance,fully charge the battery before initial use.It is recommended that your radio remain powered off during charging.To charge the battery,do as follows:1.Insert the output connector of the power adapter into the port on the back of the charger.2.Plug the power adapter into a power outlet.3.Place the battery or the radio with battery attached into the charger,and then switch the power outlet on.To determine the charging status,check the light-emitting diode(LED) indicator on the charger according to the following table:LED Indicator Charging StatusGlows greenThe battery is fully charged or fails to make propercontact with the charger.Glows red The battery is charging.Glows orange The battery is charged to85%or above.If the LED indicator does not glow red after you place the battery or radio into the charger,take the battery or radio out of the charger,and thenreplace it into the charger while ensuring it makes proper contact with the charger.Checking the Battery PowerTo check the current battery power,press andhold the Battery Power Indicatorkey preprogrammed by your dealer.The following table lists battery powerindications.The icon indicates that the battery runs low. In this case,please recharge or replace the batteryLED Indicator Alert Tone Battery Power Glows green Three beepsGlows orange Two beepsGlows red One beepFlashes red Low battery toneIf you want to…Then...Turn on/off the radioRotate the On-Off/Volume Control knob clockwise/counterclockwise.Increase/Decrease the volume Rotate the On-Off/Volume Control knob clockwise/counterclockwise after turning on the radio.Select a channelRotate the Channel Selector knob.Call on Digital ChannelYou can initiate a call to or receive a call from theprivate or group contact preset fora digital channel.Initiating a Call1.Select the required channel.2.Hold the radio vertically 2.5to 5cm from your mouth.3.Press and hold the PTT key,and then speak into themicrophone.The radio displays for an outgoing group call andfor an outgoingprivate call.Receiving and Responding to a CallWhen receiving a call,you can listen to it without any operation.The radio displays for an incoming group call andfor an incoming privatecall.You can press and hold the PTT key and speak within the preset time period.Call on Analog Channel (Without Signaling)You can initial a call to or receive calls from all other users on an analogchannel.The operations are the same as those on a digital channel.The following features need to be programmed by your dealer.Please contact your dealer for detailed operations. Type Feature DescriptionGeneral Feature Zone Allows you to select a zone.The radio supports up to16zones,with a maximum of256channels per zone.Power Level Allows you to switch the transmit power level between high and low.Scan Allows the radio to scan all channels in the scan list preset for the current channel and stay on a channel with activities. Emergency Alarm Allows you to initiate an emergency alarm or call to ask for help in case of emergencies.Busy Channel Lockout Prevents the radio from transmitting on a busy channel.Time-out Timer(TOT)Terminates transmission when the preset time period expires.Keypad LockAllows the keypad to be locked automatically when the radio does not detect any activity or operation within the presetperiod.Battery SaveAllows the radio to automatically enter the battery save mode when it does not detect any activity or operation within thepreset period.Digital Feature All Call Allows you to initiate a call to all users on a digital channel.One Touch Call Allows you to press one key to call the predefined private or group contact. TDMA Direct Mode Allows the radio to operate on a channel with two time slots.Type Feature DescriptionAnalog Feature Squelch Off Allows the radio's speaker to always keep unmuted.Squelch Off Momentary Allows the radio's speaker to keep unmuted when you press and hold the preprogrammed key. Squelch Level Allows you to adjust the squelch threshold required for the radio to unmute.Monitor Allows the radio to monitor activities on the channel.Scrambler Allows you to encrypt the transmitted voice to prevent eavesdropping.CTCSS/CDCSS Allows you to prevent unwanted calls on the same frequency.Phenomena Analysis SolutionYou are unable to hear anyone because of too much noise and hiss.You may be too far away from other members.Move towards other members.You may be located in an unfavorable position.Forexample,your communication may be blocked by highbuildings or blocked in an underground area.Move to an open and flat area,and restart the radio and trycontacting again.It could be the result of external disturbance(such aselectromagnetic interference).Stay away from equipment that may cause interference.The OLED does notdisplay any information.The OLED may fail to function temporarily.Restart the radio.If the above solutions cannot fix your problems, or you may have some other queries, please contact us or your local dealer for more technical support.To guarantee optimal performance as well as a long service life of the product,please follow these tips.Product Care·Do not pierce or scrape the product.·Keep the product far away from substances that can corrode thecircuitry.·Do not hold the product by the antenna or earpiece cable.·Close the accessory connector cover when no accessory is in use.Product CleaningTurn off the product and remove the battery before cleaning.·Clean up the dust and fine particles on the products surface andcharging piece with a clean and dry lint-free cloth or a brush regularly ·Use neutral cleanser and a non-woven fabric to clean the keys,knobsand front case after long-time use.Do not use chemical preparations such as stain removers,alcohol,sprays or oil preparations,so as to avoid surface casedamage.·Make sure the product is completely dry before use.Use the accessories specified by Hytera only;otherwise,the Company will not be liable for any loss or damage arising out of the use of any unauthorised accessories.Contact your local dealer for the optional accessories used with the product.非常感谢您对我们产品的青睐!本手册旨在让您快速掌握终端的使用。
声宝 手提式收錄音機 使用說明書

2 本機特點3 各部名稱4 安全注意事項5 安裝方法6 功能操作6 功能選擇6 音量調整6 調諧電台7 卡帶操作7 播放卡帶7 錄音7 耳機的使用891保養方法故障排除1. 緊急處理方法1. 關於售後服務包裝清單: 手提式收錄音機1台 附件: 電源線1條 使用說明書1本 保證書1份1.PHONES(耳機孔)2. PLAY(播放鍵)3. REW(後退鍵)4. F.FWD(前進鍵)5. PAUSE(暫停鍵)6. STOP/EJECT(停止/開啟卡帶門)7. RECORD(暫停鍵)8.FUNCTION(功能選擇鍵)9.BAND(波段開關鍵)10.MIC(隱藏式麥克風)11.VOLUME(音量調整鈕)12.TUNING(選擇頻道)13.波段/頻道指示14.卡帶門15.天線16.電源線插孔17.電池蓋123456131415交流供電:當插上交流電源插頭後本機已經接通電源,如長期不使用或想降低電源消耗,請拔掉電源插頭。
電池供電:打開機背電池蓋,照指示依正負方向放入4顆2號電池。
在使用電池時,請將機後插上的交流電源線插頭拔出,如未拔除電源線插頭,電池將無法供電。
本機應安裝於陰涼、乾燥、通風、無腐蝕性氣體的地方。
盡量避免放在潮濕或高溫曝曬的地方。
更換電池時,請將交流電源插頭暫時拔出。
若長時間不使用電池,請將電池取出。
安裝步驟安裝場所注意事項本機請勿置於雨中、濕氣中或避免陽光直射及遠離其他會產生熱能的裝置。
本機放置位置,請勿太靠近電視、電腦、錄影機及手機,以免遭受干擾,產生誤動作。
00使用本機的工作溫度為5~35C。
長期不使用本機時,應將其電源線插頭從插座內拔出及將電池取出。
請勿將雜物或液體從機身開口處進入機身內部。
當本機出現下列情況時,應請合格的維修人員進行維修:A:故障或液體落入本機內。
B:雜物或液體落入本機內。
C:受到雨淋。
D:無法正常操作或性能出現明顯變化。
E:不慎跌落或外殼受損。
請勿擅自拆下任何蓋子、內部裝置或調校內部裝置,請交由本公司專業人員進行維修。
旺德电通 WD-7901P MP3数位录音机 说明书
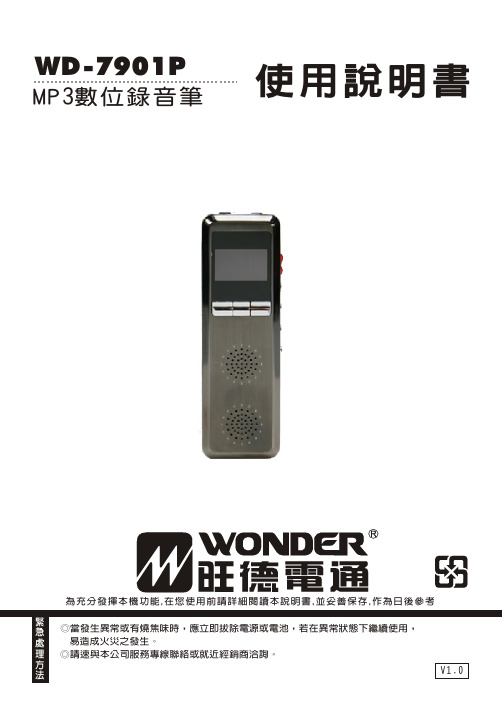
使用說明書WD-7901P為充分發揮本機功能,在您使用前請詳細閱讀本說明書,並妥善保存,作為日後參考MP3數位錄音筆目錄(一)本機特點.............2(二)免責聲明.............2(三)安全注意事項.........3(四)外型及各部位名稱.....4(五)基本操作.............5 充電................5 開機/關機............5 音量調整.............5 耳機的使用...........5 模式選擇.............5 錄音操作(錄音筆模式)..6 暫停錄音.............6 播放錄音.............6 刪除單筆錄音.........6 刪除全部錄音.........6 聲控錄音設定.........7 錄音監聽設定.........7 錄音類型設定.........7 播放目錄選擇.........8 錄音時間設定.........8 電話錄音.............9 無線接收錄音.........9 音樂模式.............9 播放/暫停............9 上下曲/快進退........9 重複播放模式.........9 音效模式............10 詞曲同步............10 復讀模式............10 取消復讀模式........10 復讀次數 (11)復讀間隔 (11)請詳細閱讀本說明書,讓您輕鬆操作,使用 EASY!1刪除音樂................11 收音機模式..............11 找尋電台................11 刪除全部電台............12 保存電台................12 電台錄音................12 停止/保存電台錄音........12 刪除電台................12 校園廣播................12 系統設置................13 背光時間................13 語言選擇................13 關機設定................13 對比調節................14 儲存狀況................14 韌體版本................14 退出系統設置............14(六)與電腦連結.............15 附屬程式................15 連結電腦................15 REC檔播放及轉為WAV檔.....16(七)疑難排解...............17(八)故障排除...............18(九)規格. (18)1.聲控錄音,定時錄音功能。
