Juniper+CLI基本配置(小结)
Juniper_JUNOS_CLI_介绍

输入以下命令,使用空格键将其补齐: sh<space>ow ro<space>ute sh<space>ow ch<space>assis h<space>ardware sh<space>ow conf<space>iguration cl<space>ear rip s<space>tastics res<space>tart ro<space>uting g<space>racefully
rollback只是将配置恢复到Candidat配置e
rollback 或者 rollback 0 恢复上次commit之前的配置
rollback 1 上两次commit之前的配置
总共可以恢复49份配置
rollback ? 可以显示每次commit的时间,确定恢复那份配置
run file show /config/juniper.conf.n.gz n为1-3,可以查看需要恢复配置的内容,对应于rollback 1-3 run file show /config/juniper.conf.gz对应rollback 0
run file show /var/db/config/juniper.conf.n.gz
n为4-49,可以查看需要恢复配置的内容,对应于rollback 4-
49
Copyright © 2009 Juniper Networks, Inc.
Juniper的基本配置

Juniper的基本配置:root# cli#相当于cisco的enroot@>cli> configure#相当于cisco的configure terminal[edit]root@# set system host-name router1#配置路由器的名字为router1root@# set system domain-name #配置路由器所在域为root@# set interfaces fxp0 unit 0 family inet address 192.168.15.1/24#配置fxp0 unit 0的接口地址,fxp0代表管理接口,unit 0代表子接口,inet代表是ipv4地址。
root@# set system backup-router 192.168.15.2#backup-router是本路由器的直连路由器,在路由器启动的时候,#JUNOS路由软件(routing protocol process, RPD)没有立即启动,#路由器将自动生成一条到back-up router的缺省路由,当路由器启动完成后再自动删除这条路由。
root@# set system name-server 192.168.15.3#DNS的地址root@# set system root-authentication plain-text-password#设置明文密码New password:Retype password:#输入并且确认密码,要求字母和数字。
root@# commit#确认配置,在没有确认配置的时候所有配置都是不生效的!root@router1# exitroot@router1>#保存配置用save命令[edit]aviva@router1# save configuration-march02Wrote 433 lines of configuration to configuration-march02#察看保存过的文件用run file list命令aviva@router1# run file list/var/home/aviva:.ssh/configuration-march02#用保存的文件载入配置用load replace命令。
juniper配置方法
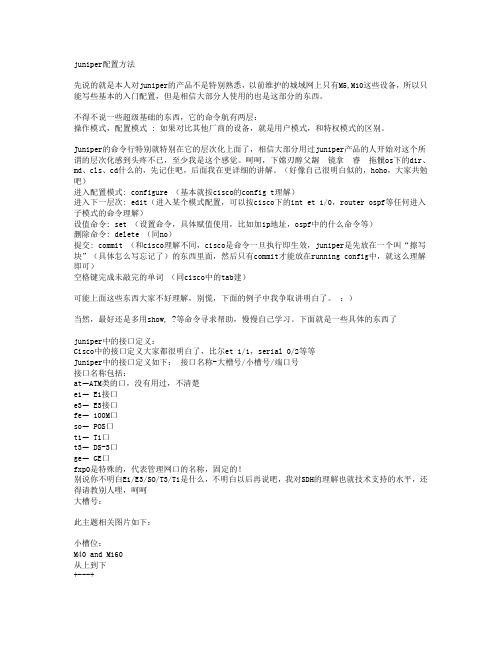
juniper配置方法先说的就是本人对juniper的产品不是特别熟悉,以前维护的城域网上只有M5,M10这些设备,所以只能写些基本的入门配置,但是相信大部分人使用的也是这部分的东西。
不得不说一些超级基础的东西,它的命令航有两层:操作模式,配置模式 : 如果对比其他厂商的设备,就是用户模式,和特权模式的区别。
Juniper的命令行特别就特别在它的层次化上面了,相信大部分用过juniper产品的人开始对这个所谓的层次化感到头疼不已,至少我是这个感觉。
呵呵,下嫦刃醇父龌 镜拿 睿 拖骴os下的dir、md、cls、cd什么的,先记住吧,后面我在更详细的讲解。
(好像自己很明白似的,hoho,大家共勉吧)进入配置模式: configure (基本就按cisco的config t理解)进入下一层次: edit(进入某个模式配置,可以按cisco下的int et 1/0,router ospf等任何进入子模式的命令理解)设值命令: set (设置命令,具体赋值使用,比如加ip地址,ospf中的什么命令等)删除命令: delete (同no)提交: commit (和cisco理解不同,cisco是命令一旦执行即生效,juniper是先放在一个叫“擦写块”(具体怎么写忘记了)的东西里面,然后只有commit才能放在running config中,就这么理解即可)空格键完成未敲完的单词(同cisco中的tab建)可能上面这些东西大家不好理解,别慌,下面的例子中我争取讲明白了。
:)当然,最好还是多用show, ?等命令寻求帮助,慢慢自己学习。
下面就是一些具体的东西了juniper中的接口定义:Cisco中的接口定义大家都很明白了,比尔et 1/1,serial 0/2等等Juniper中的接口定义如下:接口名称-大槽号/小槽号/端口号接口名称包括:at—ATM类的口,没有用过,不清楚e1— E1接口e3— E3接口fe— 100M口so— POS口t1— T1口t3— DS-3口ge— GE口fxp0是特殊的,代表管理网口的名称,固定的!别说你不明白E1/E3/SO/T3/T1是什么,不明白以后再说吧,我对SDH的理解也就技术支持的水平,还得请教别人哩,呵呵大槽号:此主题相关图片如下:小槽位:M40 and M160从上到下+---+| ||0 |+---+| ||1 |+---+| ||2 |+---+| ||3 |+---+其他的从右到左+----+----+----+----+| 3 | 2 | 1 | 0 |+----+----+----+----+端口号:M40/M160 从上到下,从右到左+---------+| | || 2 | 0 |+----+----+| | || 3 | 1 |+----+----+其他的从右到左,从下到上+---------+| | || 3 | 2 |+----+----+| | || 1 | 0 |+----+----+一个例子:Fe-5/2/3 〔端口名称-大槽号/小槽号/端口号〕看一个接口配置的基本例子:####节选###########interfaces {fe-1/0/3 {unit 0 {family inet {address 10.0.20.1/24;}family mpls}}}####节选结束#########看到上面的配置了吧,感觉和cisco或者其他的配置不同了吧,后面我会附一个完整配置,大家感觉一下,呵呵。
juniper ssg 5常用CLI指南
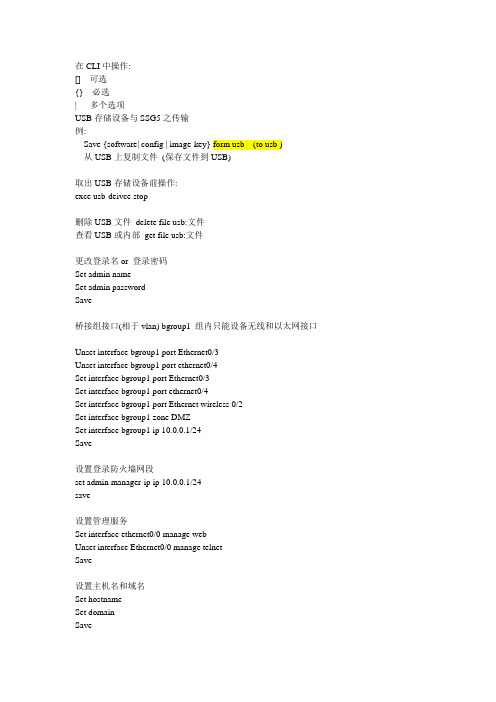
在CLI中操作:[] 可选{} 必选| 多个选项USB存储设备与SSG5之传输例:Save {software| config | image-key} form usb (to usb )从USB上复制文件(保存文件到USB)取出USB存储设备前操作:exce usb-deivce stop删除USB文件delete file usb:文件查看USB或内部get file usb:文件更改登录名or 登录密码Set admin nameSet admin passwordSave桥接组接口(相于vlan) bgroup1 组内只能设备无线和以太网接口Unset interface bgroup1 port Ethernet0/3Unset interface bgroup1 port ethernet0/4Set interface bgroup1 port Ethernet0/3Set interface bgroup1 port ethernet0/4Set interface bgroup1 port Ethernet wireless 0/2Set interface bgroup1 zone DMZSet interface bgroup1 ip 10.0.0.1/24Save设置登录防火墙网段set admin manager-ip ip 10.0.0.1/24save设置管理服务Set interface ethernet0/0 manage webUnset interface Ethernet0/0 manage telnetSave设置主机名和域名Set hostnameSet domainSave缺省路由Set route 0.0.0.0/0 interface Ethernet0/2 gateway ip 地址Save备份untrust 接口设置Set interface bgroup0 port ethernet0/4Set interface ethernet0/4 zone untrustSet interface Ethernet0/0 backup interface Ethernet0/4 type track-ip SaveISDN配置set interface bri0/0 dialer-enableset interface bri0/0 primary-number “123456”set interface bri0/0 encap pppset interface bri0/0 ppp profile isdnprofilesave。
Juniper CLI 基本操作
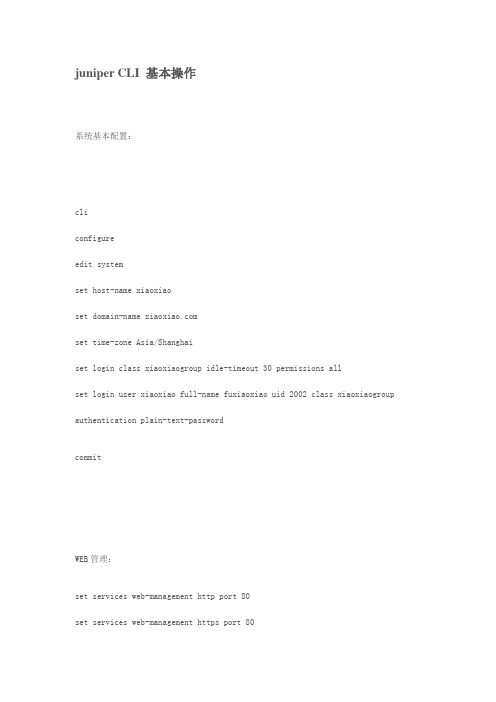
juniper CLI 基本操作系统基本配置:cliconfigureedit systemset host-name xiaoxiaoset domain-name set time-zone Asia/Shanghaiset login class xiaoxiaogroup idle-timeout 30 permissions allset login user xiaoxiao full-name fuxiaoxiaouid 2002 class xiaoxiaogroup authentication plain-text-passwordcommitWEB管理:set services web-management http port 80set services web-management https port 80set services web-management session idle-timeout 30 set services web-management session session-limit 30 Telnet配置:edit systemset services telnetset services telnet rate-limit 10set services telnet connection-limit 30日志管理:edit systemset syslog file messages any noticeset syslog archive size 1m files 20set syslog host 202.15.26.156.158 any anyset syslog console any noticeset syslog file messages archive size 2M files 20juniper os可以把syslog发送到console(控制台口)日志服务器,本地硬盘默认是存放到本地硬盘:/var/log 下set syslog console any notice 可以指定日志输出到控制台set syslog host 202.15.26.156.158 any any 可以指定日志输出到远程主机关闭日志从控制台输出delete syslog console any noticeSSH配置:edit systemset services sshset services ssh rate-limit 10set services ssh connection-limit 30SNMP配置:set snmp community key-string authorization read-only clients ipaddressset snmp community key-string authorization read-only clients default restrict set snmp community key-string authorization read-write clients ipaddressset snmp community key-string authorization read-only clients default restrict set snmp interface interfacelistset snmp trap-group groupname version [v1|v2|all] destination-port portnumber targets ipaddressset snmp trap-options source-address lo0例子:setsnmp community xiao3 authorization read-writeset snmp community xiao3 authorization read-write clients 192.168.1.200set snmp trap-group xiao5 version allset snmp trap-group xiao5 targets 192.168.1.200FTP:edit systemset services ftpset services ftp rate-limit 10set services ftp connection-limit 30 set name-server 192.168.1.1。
Juniper基础配置命令
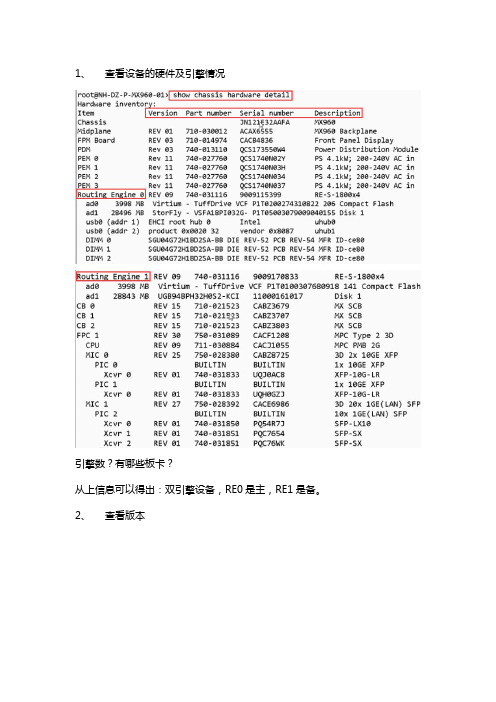
1、查看设备的硬件及引擎情况引擎数?有哪些板卡?从上信息可以得出:双引擎设备,RE0是主,RE1是备。
2、查看版本从上可看出:re0的版本是【12.3R4.6】re1的版本是【12.3R4.6】3、引擎切换4、查看当前引擎运行状态设备配置管理Juniper的配置存在2个地方:第一个:其中,juniper.conf.gz是当前的配置第二个:可以查看文件的实际配置内容:查看全局配置:或查看接口查看接口匹配信息查看路由协议信息或查看系统方面的信息查看之前的历史配置信息查看运行的文件回滚载入之前的某一个配置文件批量导入配置命令:带外管理口配置:set groups re0 interfaces fxp0 unit 0 family inet address 172.18.18.30/24set system time-zone Asia/Shanghaiset system root-authentication encrypted-password "$5$hmy2W7ar$TR/KP7qIckZ37QbfzSKJWpFW1QS70m1zAPQCsK4jth0" set system login user lab uid 2000set system login user lab class super-userset system login user lab authentication encrypted-password "$5$.Us1Dtb0$dIi5e/6/xp3IAUS/EXkntfTk3fDqESpZBNBLxrWVLHB"set system services ftpset system services sshset system services telnetset system syslog user * any emergencyset system syslog file messages any noticeset system syslog file messages authorization infoset system syslog file interactive-commands interactive-commands anyset logical-systems vr101set logical-systems vr102set interfaces ge-2/0/0 description link_to_Serv1set interfaces ge-2/0/0 unit 0 family inet address 11.1.1.1/24 deactivate interfaces ge-2/0/0 unit 0set interfaces ge-2/0/1 description link_to_Serv2set interfaces ge-2/0/1 unit 0 family inet address 11.1.2.1/24 deactivate interfaces ge-2/0/1 unit 0set routing-options static route 172.0.0.0/8 next-hop 172.18.18.254set routing-options static route 10.0.0.0/8 next-hop 172.18.18.254show configuration | display set |match traceoptionshow bgp summaryshow configuration | display set | match 100.125.154.9set protocols bgp group HZ-OOB2IN75 neighbor 100.125.154.9 export rpFW-ADCN2FW-POPshow bgp neighborshow route forwarding-tableshow configuration interfacesshow configuration policy-optionsshow configuration interfaces gr-0/0/0show configuration protocols bgpping 100.125.154.126 count 100ping 14.143.27.242 rapid count 300show configuration | display set | compare rollback 5 show version detail no-forwardingshow system core-dumps no-forwardingshow chassis alarms no-forwardingshow chassis hardware detail no-forwarding show system processes extensive no-forwarding show pfe statistics errorshow pfe statistics trafficshow chassis routing-engine no-forwarding show chassis environment no-forwarding show chassis firmware no-forwardingshow chassis fpc detailshow system boot-messages no-forwarding show system storage no-forwardingshow system virtual-memory no-forwardingshow system buffer no-forwardingshow system queues no-forwardingshow system statistics no-forwardingshow configuration | except SECRET-DATA | display omit show interfaces extensive no-forwardingshow network-access aaa statistics accountingshow route forwarding-table summaryshow ppp statistics extensiveshow accounting server statisticsshow system resource-monitor summaryshow shm-ipc statisticsshow interfaces diagnostics optics et-0/1/1。
Juniper路由器配置命令介绍

Juniper路由器配置命令介绍Juniper路由器配置命令介绍目录1、简介2、配置基础命令2.1 进入操作模式2.2 配置系统参数2.3 设置管理接口2.4 配置路由表3、高级配置命令3.1 OSPF配置3.2 BGP配置3.3 VRF配置3.4 MPLS配置4、安全配置命令4.1 配置防火墙4.2 配置安全策略4.3 配置VPN4.4 配置ACL5、故障排查命令5.1 显示命令5.2 路由故障排查5.3 硬件故障排查5.4 访问控制故障排查6、性能优化命令6.1 接口配置6.2 QoS配置6.3 缓存配置6.4 动态路由配置1、简介Juniper路由器是一种支持多种网络协议的高性能路由器。
本文档介绍了Juniper路由器的配置命令,并根据功能分类进行了细化。
2、配置基础命令2.1 进入操作模式- login:登录路由器- cli:进入命令行操作模式- configure:进入配置操作模式2.2 配置系统参数- set system hostname <hostname>:设置路由器主机名- set system domn-name <domn-name>:设置路由器域名- set system time-zone <time-zone>:设置时区- set system name-server <ip-address>:设置DNS服务器2.3 设置管理接口- set interfaces <interface> unit <unit> family inet address <ip-address/mask>:配置管理接口的IP地质- set interfaces <interface> unit <unit> family inet address dhcp:使用DHCP分配管理接口的IP地质2.4 配置路由表- set routing-options static route <destination> next-hop <next-hop>:配置静态路由- set routing-options router-id <id>:配置路由器ID- set protocols ospf area <area> interface <interface>:配置接口与OSPF区域的关联3、高级配置命令3.1 OSPF配置- set protocols ospf area <area> interface <interface>:配置接口与OSPF区域的关联- show ospf neighbor:显示OSPF邻居信息- show ospf route:显示OSPF路由表3.2 BGP配置- set protocols bgp group <group-name> neighbor<neighbor-address>:配置BGP邻居- set protocols bgp group <group-name> family <family>:配置BGP邻居的地质族- show bgp neighbor:显示BGP邻居信息- show bgp summary:显示BGP邻居摘要信息3.3 VRF配置- set routing-instances <instance-name> interface<interface>:配置接口与VRF的关联- set routing-instances <instance-name> routing-options static route <destination> next-hop <next-hop>:配置静态路由3.4 MPLS配置- set protocols mpls interface <interface>:启用接口的MPLS功能- set protocols mpls label-switched-path <LSP-name> to <destination-address> : 配置LSP的路径4、安全配置命令4.1 配置防火墙- set security policies from-zone <from-zone> to-zone <to-zone> policy <policy-name> match <match-conditions> then permit/deny:配置安全策略4.2 配置安全策略- set security zones security-zone <zone-name> address-book address <address-name> <ip-address>:配置地质对象- set security zones security-zone <zone-name> host-inbound-traffic system-services <services>:配置允许进入防火墙的服务4.3 配置VPN- set security ike proposal <proposal-name> authentication-method <method>:配置IKE提议- set security ike gateway <gateway-name> ike-policy <policy-name>:配置IKE网关- set security ipsec vpn <vpn-name> bind-interface<interface>:绑定VPN到接口4.4 配置ACL- set firewall family inet filter <filter-name> term <term-name> from protocol <protocol>:配置ACL规则- set firewall family inet filter <filter-name> term <term-name> then accept/discard:配置ACL规则动作5、故障排查命令5.1 显示命令- show interfaces <interface> detl:显示接口详细信息- show route <destination> : 显示路由信息- show chassis hardware:显示硬件信息5.2 路由故障排查- show bgp summary:显示BGP邻居摘要信息- show ospf neighbor:显示OSPF邻居信息- show route protocol <protocol>:显示指定协议的路由5.3 硬件故障排查- show chassis hardware:显示硬件信息- show log messages:显示系统日志消息- request support information:收集支持信息文件5.4 访问控制故障排查- show security policies from-zone <from-zone> to-zone <to-zone> policy <policy-name>:显示安全策略信息- show security zones interfaces:显示接口与安全域的关联信息6、性能优化命令6.1 接口配置- set interfaces <interface> mtu <mtu-size>:设置接口MTU大小- set interfaces <interface> description <description>:设置接口描述6.2 QoS配置- set class-of-service interfaces <interface> unit<unit> scheduler-map <map-name>:为接口配置调度器映射- set class-of-service scheduler-maps <map-name> forwarding-class <forwarding-class> scheduler <scheduler-name>:配置调度器映射6.3 缓存配置- set forwarding-options cache hit-cache-size <size>:设置缓存大小- set forwarding-options cache timeout <timeout-value>:设置缓存超时时间6.4 动态路由配置- set protocols ospf area <area> interface <interface> passive:将接口设置为OSPF被动接口- set routing-instances <instance-name> interface <interface> passive:将接口设置为VRF被动接口附件:无法律名词及注释:无。
Juniper路由器配置详解
Juniper路由器配置详解第一章:Juniper路由器概述Juniper Networks是全球知名的网络设备供应商之一,其路由器产品以高性能和可靠性而闻名。
本章将介绍Juniper路由器的基本概念和架构。
首先将介绍Junos操作系统,然后探讨Juniper路由器的不同系列和型号。
第二章:Juniper路由器接口配置Juniper路由器的接口配置非常重要,它决定了如何连接路由器以及与其他设备进行通信。
本章将详细讨论接口类型、接口配置命令以及不同接口的特性和用途。
第三章:基本路由配置路由是网络中数据包传输的基础,对于Juniper路由器的配置来说非常重要。
本章将介绍如何配置静态路由和动态路由,包括OSPF和BGP等常用路由协议。
第四章:高级路由配置高级路由配置允许更复杂的路由策略和动态路由选择。
本章将讨论路由策略配置和路由过滤列表等高级路由功能,以及如何实现路由红istribution和路由聚合。
第五章:安全配置网络安全对于任何企业来说都是至关重要的。
本章将介绍如何配置Juniper路由器的安全功能,包括防火墙、虚拟私有网络(VPN)和安全策略等。
我们还将谈及如何使用Juniper安全套件提供的高级保护机制来保护网络。
第六章:QoS配置服务质量(QoS)是保证网络性能的重要因素之一。
本章将详细讨论如何使用Juniper路由器的QoS功能来管理带宽、优化流量和提供最佳用户体验。
第七章:管理配置管理配置是确保Juniper路由器正常运行的关键。
本章将讨论如何配置远程访问、系统日志和故障排除等管理功能。
我们还将介绍如何使用Junos Space网络管理平台来实现集中化管理和配置。
第八章:高可用性配置高可用性是企业网络的重要要求之一。
本章将介绍如何配置Juniper路由器的高可用性功能,包括冗余路由器、Virtual Chassis和Link Aggregation等。
我们还将讨论如何实现网络故障恢复和负载均衡。
Juniper配置
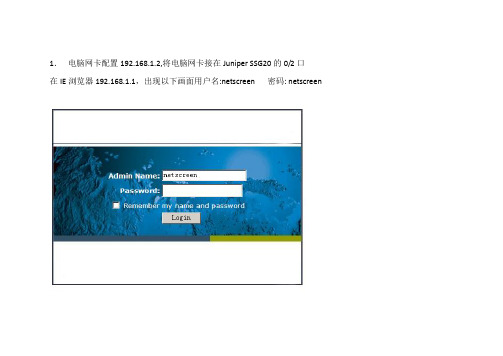
1.电脑网卡配置192.168.1.2,将电脑网卡接在Juniper SSG20的0/2口在IE浏览器192.168.1.1,出现以下画面用户名:netscreen 密码: netscreen2.出现下面画面,点击”Network”“Interfaces”“list”3.点击“ethnet0/0”对应的“edit”4.配置IP地址“192.168.0.2”子网掩码”255.255.255.0”点击“ok”5.点击“bgroup0”对应的“edit”6.配置IP地址“10.132.xx.xx”(根据川庆分配的IP), 子网掩码“255.255.255.240”,然后点击“ok”7.点击“DHCP”后,出现下图, 再点击“Addresses”8.点击“new”9.输入相应的DHCP 要分配IP 地址段,然后点击“ok”10.点击“Routing”“Destination”“New”11.添加默认路由0.0.0.0,掩码0; 选择“Gateway”, 然后选择“Ethernet0/0/”, 在IP地址栏输入”192.168.0.1”, 点击”ok”12.点击“Wizards”“Route-based VPN”13. 出现以下画面, 点击“Next”14.①如果以前建过基于路由的vpn,在此处会默认出现“tunnel.1”,此时选择红色框. ②如果是没有建过基于路由的vpn则选择“Make new tunnel interface”并选择”bgroup0(trust-vr)”绿色框15.选择“LAN-to-LAN”, 点击“ok”16. 选择“Local Dynamic IP <-> Remote Static IP”,并输入本地用户名,命名为专业化公司名字拼音的第一个字母加井队号,比如西钻50556队,XC-5055617.此处输入对端设备IP 如果是电信用户输入”125.69.69.107”;如果是联通用户输入”192.168.128.2”18.选择“Compatible(56-bit encryption strength”并输入密码”123456”,点击”Next”19.“Local Host Address”输入川庆分配给井队的28位掩码的IP地址段; “Romote Host Address”输入”10.0.0.0/8”, 点击”Next”20.“Service”处选择“ANY”, 点击“Next”21.点击“Next”21.点击“Next”22.点击“Next”23.点击“Next”24.点击“VPNs”“Autokey Advanced”“Gateway”,点击“Advanced”26.将下图2个选项打勾, “Keepalive Frequency”为“5”, 点击”Return”,屏幕跳转后点击”ok”27. 点击“VPNs”“Autokey IKE”“Edit”28.点击“Advanced”29.勾选“VPN Monitor”“return”,页面跳转后点击”ok”。
Juniper交换机配置手册
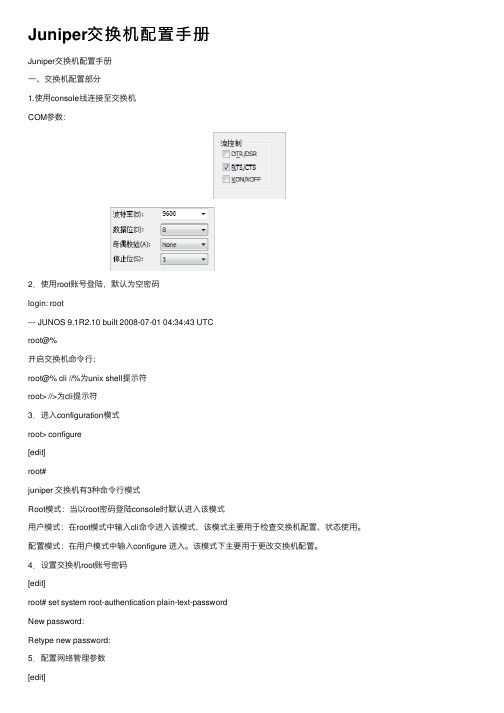
Juniper交换机配置⼿册Juniper交换机配置⼿册⼀、交换机配置部分1.使⽤console线连接⾄交换机COM参数:2.使⽤root账号登陆,默认为空密码login: root--- JUNOS 9.1R2.10 built 2008-07-01 04:34:43 UTCroot@%开启交换机命令⾏:root@% cli //%为unix shell提⽰符root> //>为cli提⽰符3.进⼊configuration模式root> configure[edit]root#juniper 交换机有3种命令⾏模式Root模式:当以root密码登陆console时默认进⼊该模式⽤户模式:在root模式中输⼊cli命令进⼊该模式,该模式主要⽤于检查交换机配置、状态使⽤。
配置模式:在⽤户模式中输⼊configure 进⼊。
该模式下主要⽤于更改交换机配置。
4.设置交换机root账号密码[edit]root# set system root-authentication plain-text-passwordNew password:Retype new password:5.配置⽹络管理参数[edit]root# edit system[edit system]root# set services telnet //配置使⽤telnet服务登陆交换机[edit system]root# set services ssh[edit system]root# set services web-management http[edit system]root# commit and-quitcommit completeExiting configuration moderoot@switch>6.配置其他管理员账号密码,以添加⼀个admin账号为例[edit]Set system login user admin class super-user authentication plain-text-passwordNew password:Retype new password:7.提交配置⽂件使配置⽣效[edit]commit8. 配置VLAN,三层VLAN虚拟地址及VLAN接⼝以配置valn10 为例,下⾯为配置命令:[edit]set vlans vlan_10vlan-id10set vlans vlan_10 l3-interface vlan.10set interface vlan unit10family inet address192.192.0.167/24将接⼝划⼊到VLAN中set interface ge-0/0/10 unit 0 family ethernet-switching vlan members vlan_10 将接⼝配置成trunk ⽅法Set interface ge-0/0/23 unit 0 family ethernet-switching port-mode trunk vlan members all //将ge-0/0/23接⼝配置成为VLAN,并允许所有VLAN数据通过9. 配置链路捆绑具体命令如下:set chassis aggregated-devices ethernet device-count 5 //配置链路聚合端⼝数⽬为5个(ae0-ae4)set interface ae0 aggregated-ether-options lacp active //配置ae0接⼝链路聚合的模式set interface ae0 unit 0 family ethernet-switching port mode trunk vlan members all //配置ae0 为trunk并允许所有VLAN通过delete interface ge-0/0/4 //删除ge-0/0/4的默认配置delete interface ge-1/0/4set interface ge-0/0/4 ether-options 802.3ad ae0 //将ge-0/0/4接⼝绑定⾄ae0 set interface ge-1/0/4 ether-option 802.3ad ae0对端⼆层交换机配置使⽤相同⽅法ae接⼝后链路捆绑即⽣效10.配置路由添加⼀条默认路由⾄JUNIPER ISG1000set routing-options static route 0.0.0.0/0 next-hop 100.1.1.1;在hillstone防⽕墙上VPN切换时将分⽀点⽹段路由指向hillstone 5020Set routing-options static route 192.150.1.0/24 next-hop 100.1.2.1 //这条路由必须在切换VPN时添加,在切换前添加会造成VPN⽆法访问。
Juniper的简单配置
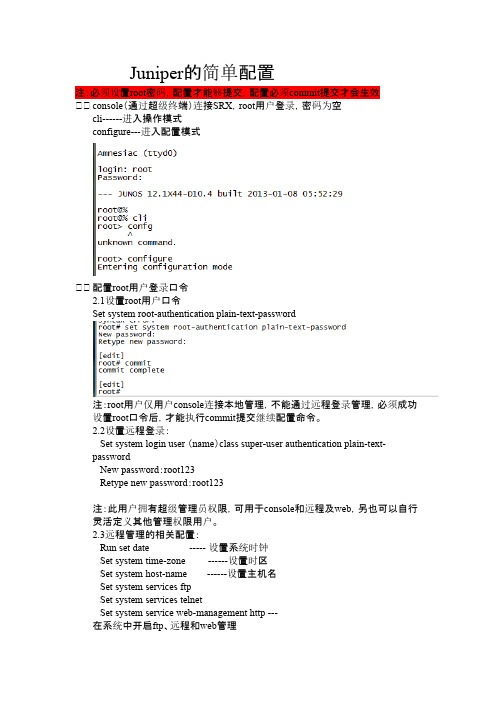
Juniper的简单配置注:必须设置root密码,配置才能够提交,配置必须commit提交才会生效、、console(通过超级终端)连接SRX,root用户登录,密码为空cli------进入操作模式configure---进入配置模式、、配置root用户登录口令2.1设置root用户口令Set system root-authentication plain-text-password注:root用户仅用户console连接本地管理,不能通过远程登录管理,必须成功设置root口令后,才能执行commit提交继续配置命令。
2.2设置远程登录:Set system login user (name)class super-user authentication plain-text-passwordNew password:root123Retype new password:root123注:此用户拥有超级管理员权限,可用于console和远程及web,另也可以自行灵活定义其他管理权限用户。
2.3远程管理的相关配置:Run set date ----- 设置系统时钟Set system time-zone ------设置时区Set system host-name ------设置主机名Set system services ftpSet system services telnetSet system service web-management http ---在系统中开启ftp、远程和web管理、、接口配置Ip地址必须配置在逻辑接口下,接口必须加入zone例如:Set security zones security-zone untrust host-inbound-traffic system-service ping Set security zones security-zone untrust host-inbound-traffic system-service http Set security zones security-zone untrust host-inbound-traffic system-service telnet 基于untrust zone打开允许 ping、远程和telnet、、NATNAT 共分为3中基于目的地址的NAT:包括目的地址及端口的转换基于源地址的NAT:包括源IP地址及端口的转换Static—静态地址转换这次是基于source 做的;源地址池转换公网地址Set secu nat sou pool pool-1 add 192.168.1.50 to 192.168.1.80Set sec nat sou rule-set from zone trusSet sec nat sou rule-set 1 to zone untSet sec nat sour rule-set 1 rule rule-1 match source-add 0.0.0.0/0 destination-add0.0.0.0/0Set sec nat sou rule-set 1 rule rule1 then source-nat pool pool-1Set sec nat proxy-arp inter ge-0/0/0 address 192.168.1.50 to 192.168.1.80策略方行—策略是写在zone中的Set sec poli from-zone trust to-zone untrust policy 1 match soures-add pc-1 Set sec poli from-zone trust to-zone untrust policy 1 match destination-add any Set sec poli from-zone trust to-zone untrust policy 1 match addplication anySet sec policies from-zone trust to-zone untrust poli 1 then permit。
JUNIPER路由器中常用命令总结
JUNIPER路由器中常⽤命令总结前些⽇⼦认真看了⼀下Juniper路由器的⼀些命令。
在这⾥总结⼀下。
⽅便以后使⽤Juniper路由器的命令主要分为两个部分,⼀个是operational,主要是复杂查看⽬前⽹络的配置情况(只能查看,不能修改。
感觉权限⽐较低);另⼀个是configuration,主要⽤来查看和修改配置(感觉权限⾼⼀些)。
刚进⼊到Juniper路由器时,默认进⼊的是operation,输⼊edit命令之后,就进⼊到了[edit]⽬录下,也就是进⼊了configuration。
基础配置命令(如未说明则在[edit]⽬录下)1、配置主机名字:set system host-name router12、配置域名: set system domain-name 3、配置fxp0接⼝(以太⽹中通过这个接⼝进⾏路由器的配置)。
Set interfaces fxp0 unit 0 family inet address 192.168.15.1/2 44、配置备份路由器:set system backup-router 192.168.15.25、配置DNS服务器:set system name-server 192.168.15.36、配置root⽤户的密码:set system root-authentication plain-text-password(密码中不可以全是⼤写、全是⼩写、全是数字)7、设置ntp服务器: set system ntp server 192.168.2.28、提交修改:commit9、查看提交是否合法: commit check10、在当天特定时间进⾏提交 commit at 22:4511、在特定⽇期的特定时间提交: commit at “2005-02-26 10:45”12、取消commit的操作 clear system commit13、为了避免提交带来意外的损害采⽤:commit confirmed,会在10分钟以后⾃动回滚14、与14相同,但在⼀分钟以后⾃动回滚:commit confirmed 115、提交信息,并同步到备份路由器上: commit synchronize配置服务:1、设置ssh服务:set system services ssh2、配置ftp服务: set system services ftp3、删除ftp服务: delete system services ftp权限设置:1、设置root⽤户ssh登录的密码:set system root-authentication ssh password2、禁⽌root⽤户使⽤ssh登录:[edit system ] set services ssh root-login deny3、设置密码要求:[edit system login] set password maximun-length 20 set password minimum-length 8 set password mi nimum-changes 24、设置密码加密算法:set system login password formate md55、查看⾃⼰的权限,以及可以设置的权限: show cli authorization进⼊与退出命令:1、Edit2、修改root的配置:configure3、避免多⼈修改导致设置丢失采⽤ configure exclusive4、查看⽬前修改区域有谁在线:[edit]status(只能看见⽐你先登录的⼈,后⾯登录的信息看不见)5、强制要求别⼈下线:request system logout user mike6、进⼊到根⽬录 top7、退出configuration 模块:quit8、退出configuration模块:exit configuration-mode9、提交并退出:commit and-quit10、退出当前⽬录:exit11、进⼊到某⽬录 edit ⽬录名字查看命令:1、查看当前⽬录地下的设置 [edit]show2、查看你设置的命令 show | display set3、查看你新增的命令 show | compare(+表⽰你增加的命令,-表⽰你删除的命令。
经典-Juniper路由器的日常基本配置
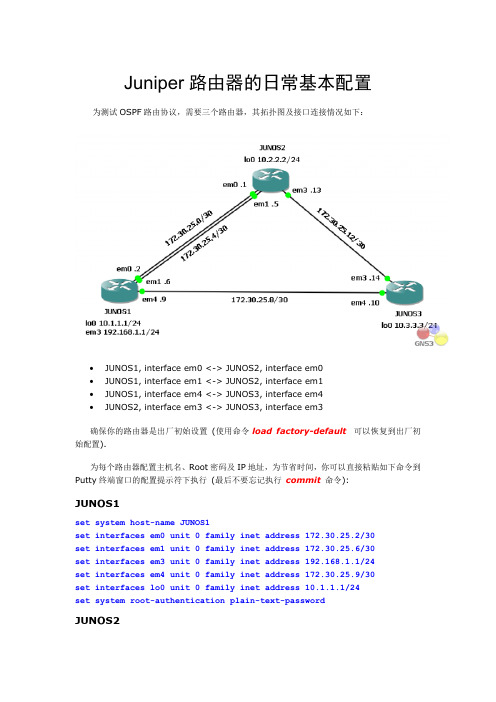
Juniper路由器的日常基本配置为测试OSPF路由协议,需要三个路由器,其拓扑图及接口连接情况如下:∙JUNOS1, interface em0 <-> JUNOS2, interface em0∙JUNOS1, interface em1 <-> JUNOS2, interface em1∙JUNOS1, interface em4 <-> JUNOS3, interface em4∙JUNOS2, interface em3 <-> JUNOS3, interface em3确保你的路由器是出厂初始设置(使用命令 load factory-default 可以恢复到出厂初始配置).为每个路由器配置主机名、Root密码及IP地址,为节省时间,你可以直接粘贴如下命令到Putty终端窗口的配置提示符下执行(最后不要忘记执行commit 命令):JUNOS1set system host-name JUNOS1set interfaces em0 unit 0 family inet address 172.30.25.2/30set interfaces em1 unit 0 family inet address 172.30.25.6/30set interfaces em3 unit 0 family inet address 192.168.1.1/24set interfaces em4 unit 0 family inet address 172.30.25.9/30set interfaces lo0 unit 0 family inet address 10.1.1.1/24set system root-authentication plain-text-passwordJUNOS2set system host-name JUNOS2set interfaces em0 unit 0 family inet address 172.30.25.1/30set interfaces em1 unit 0 family inet address 172.30.25.5/30set interfaces em3 unit 0 family inet address 172.30.25.13/30set interfaces lo0 unit 0 family inet address 10.2.2.2/24set system root-authentication plain-text-passwordJUNOS3set system host-name JUNOS3set interfaces lo0 unit 0 family inet address 10.3.3.3/24set interfaces em3 unit 0 family inet address 172.30.25.14/30set interfaces em4 unit 0 family inet address 172.30.25.10/30set system root-authentication plain-text-password实验1 –静态路由要求1:在JUNOS1上, 配置一个缺省静态路由(0.0.0.0/0) 到下一跳172.30.25.1.方法[edit]root@JUNOS1# set routing-options static route 0.0.0.0/0 next-hop 172.30.25.1要求2:用优先级为7添加第二条缺省静态路由到下一跳172.30.25.5 以便作为一个路由备份(浮动静态路由) 并commit.方法[edit]root@JUNOS1# set routing-options static route 0.0.0.0/0qualified-next-hop 172.30.25.5 preference 7[edit]root@JUNOS1# commitcommit complete检查一下设置的工作情况:root@JUNOS1# run show route 查看路由表inet.0: 5 destinations, 5 routes (5 active, 0 holddown, 0 hidden)+ = Active Route, - = Last Active, * = Both0.0.0.0/0 *[Static/5] 00:01:54> to 172.30.25.1 via em0.0[Static/7] 00:00:13> to 172.30.25.5 via em1.0...[edit]root@JUNOS1# run ping 10.2.2.2PING 10.2.2.2 (10.2.2.2): 56 data bytes64 bytes from 10.2.2.2: icmp_seq=0 ttl=64 time=1.650 ms64 bytes from 10.2.2.2: icmp_seq=1 ttl=64 time=1.272 msroot@JUNOS2# run monitor traffic interface em0...19:33:03.526742 172.30.25.2 > 10.2.2.2: ICMP echo request, id 16648, seq 0, length 64[edit]root@JUNOS1# deactivate interfaces em0 // 暂时关闭接口em0[edit]root@JUNOS1# commitcommit complete[edit]root@JUNOS1# run ping 10.2.2.2PING 10.2.2.2 (10.2.2.2): 56 data bytes64 bytes from 10.2.2.2: icmp_seq=0 ttl=64 time=3.247 ms64 bytes from 10.2.2.2: icmp_seq=1 ttl=64 time=0.658 ms[edit]root@JUNOS2# run monitor traffic interface em1...19:35:30.376370 172.30.25.6 > 10.2.2.2:ICMP echo request, id 14090, seq 7, length 64实验 2 – OSPF路由要求:对连接路由器的所有接口与环回接口配置OSPF路由,但对连接到子网172.30.25.0/30的接口(172.30.25.1 和172.30.25.2)不形成邻接关系.SolutionJUNOS1set protocols ospf area 0.0.0.0 interface em0.0 passiveset protocols ospf area 0.0.0.0 interface em1.0set protocols ospf area 0.0.0.0 interface lo0.0set protocols ospf area 0.0.0.0 interface em3.0set protocols ospf area 0.0.0.0 interface em4.0JUNOS2set protocols ospf area 0.0.0.0 interface em0.0 passiveset protocols ospf area 0.0.0.0 interface em1.0set protocols ospf area 0.0.0.0 interface lo0.0set protocols ospf area 0.0.0.0 interface em3.0JUNOS3set protocols ospf area 0.0.0.0 interface em3.0set protocols ospf area 0.0.0.0 interface em4.0set protocols ospf area 0.0.0.0 interface lo0.0检查一下配置情况:[edit]root@JUNOS1# run show ospf neighborAddress Interface State ID Pr i Dead172.30.25.5 em1.0 Full 10.2.2.2 12 8 34172.30.25.10 em4.0 Full 10.3.3.3 12 8 32[edit]root@JUNOS2# run show ospf neighborAddress Interface State ID Pr i Dead172.30.25.6 em1.0 Full 10.1.1.1 12 8 36172.30.25.14 em3.0 Full 10.3.3.3 12 8 38[edit]root@JUNOS3# run show ospf neighborAddress Interface State ID Pr i Dead172.30.25.13 em3.0 Full 10.2.2.2 12 8 36172.30.25.9 em4.0 Full 10.1.1.1 12 8 35root@JUNOS3# run show route protocol ospf...10.1.1.1/32 *[OSPF/10] 00:04:11, metric 1...10.2.2.2/32 *[OSPF/10] 00:04:11, metric 1...192.168.1.0/24 *[OSPF/10] 00:00:02, metric 2> to 172.30.25.9 via em4.0root@JUNOS3# run traceroute 192.168.1.1traceroute to 192.168.1.1 (192.168.1.1), 30 hops max, 40 byte packets 1 192.168.1.1 (192.168.1.1) 1.611 ms 0.588 ms 1.362 ms[edit]root@JUNOS3# deactivate interfaces em4[edit]root@JUNOS3# commitcommit complete[edit]root@JUNOS3# run traceroute 192.168.1.1traceroute to 192.168.1.1 (192.168.1.1), 30 hops max, 40 byte packets1 172.30.25.13 (172.30.25.13) 2.316 ms 1.479 ms 0.882 ms2 192.168.1.1 (192.168.1.1) 1.283 ms 1.300 ms 1.129 ms最后,不要忘记再激活接口em4 并commit:[edit]root@JUNOS3# activate interfaces em4[edit]root@JUNOS3# commitcommit complete。
Juniper CLI基本配置

'con' is ambiguous.
(命令不完整)
root@52network> set CLI
^
syntax error, expecting <command>
(语法错误)
10.控制cli输出信息:
设置cli屏幕长度和宽度
语法:
set CLI screen-length <length> Number of lines on screen (0..100000)
set CLI screen-width <width> Number of characters on a line (0..100000)
policy Show policy information
root@52network> show po<space>
root@52network> show policy
3.set CLI idle-timeout
设置CLI会话空闲时的最大时间
语法:
set CLI idle-timeout <timeout> (0-100000 minutes)
例子:
root@52network> set CLI idle-timeout 1
Idle timeout set to 1 minute
root@52network> Warning: session will be closed in 10 seconds if there is no activity
语法:
show configuration | display xml
Juniper交换机配置手册
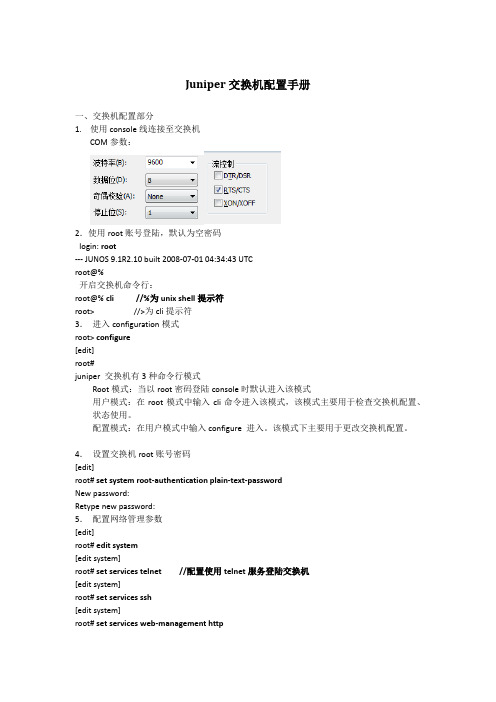
Juniper交换机配置手册一、交换机配置部分1.使用console线连接至交换机COM参数:2.使用root账号登陆,默认为空密码login: root--- JUNOS 9.1R2.10 built 2008-07-01 04:34:43 UTCroot@%开启交换机命令行:root@% cli //%为unix shell提示符root> //>为cli提示符3.进入configuration模式root> configure[edit]root#juniper 交换机有3种命令行模式Root模式:当以root密码登陆console时默认进入该模式用户模式:在root模式中输入cli命令进入该模式,该模式主要用于检查交换机配置、状态使用。
配置模式:在用户模式中输入configure 进入。
该模式下主要用于更改交换机配置。
4.设置交换机root账号密码[edit]root# set system root-authentication plain-text-passwordNew password:Retype new password:5.配置网络管理参数[edit]root# edit system[edit system]root# set services telnet //配置使用telnet服务登陆交换机[edit system]root# set services ssh[edit system]root# set services web-management http[edit system]root# commit and-quitcommit completeExiting configuration moderoot@switch>6.配置其他管理员账号密码,以添加一个admin账号为例[edit]Set system login user admin class super-user authentication plain-text-passwordNew password:Retype new password:7.提交配置文件使配置生效[edit]commit8. 配置VLAN,三层VLAN虚拟地址及VLAN接口以配置valn10 为例,下面为配置命令:[edit]set vlans vlan_10vlan-id10set vlans vlan_10 l3-interface vlan.10set interface vlan unit10family inet address192.192.0.167/24将接口划入到VLAN中set interface ge-0/0/10 unit 0 family ethernet-switching vlan members vlan_10 将接口配置成trunk 方法Set interface ge-0/0/23 unit 0 family ethernet-switching port-mode trunk vlan members all //将ge-0/0/23接口配置成为VLAN,并允许所有VLAN数据通过9. 配置链路捆绑具体命令如下:set chassis aggregated-devices ethernet device-count 5 //配置链路聚合端口数目为5个(ae0-ae4)set interface ae0 aggregated-ether-options lacp active //配置ae0接口链路聚合的模式set interface ae0 unit 0 family ethernet-switching port mode trunk vlan members all //配置ae0 为trunk并允许所有VLAN通过delete interface ge-0/0/4 //删除ge-0/0/4的默认配置delete interface ge-1/0/4set interface ge-0/0/4 ether-options 802.3ad ae0 //将ge-0/0/4接口绑定至ae0 set interface ge-1/0/4 ether-option 802.3ad ae0对端二层交换机配置使用相同方法ae接口后链路捆绑即生效10.配置路由添加一条默认路由至JUNIPER ISG1000set routing-options static route 0.0.0.0/0 next-hop 100.1.1.1;在hillstone防火墙上VPN切换时将分支点网段路由指向hillstone 5020Set routing-options static route 192.150.1.0/24 next-hop 100.1.2.1 //这条路由必须在切换VPN时添加,在切换前添加会造成VPN无法访问。
juniper交换机配置指南
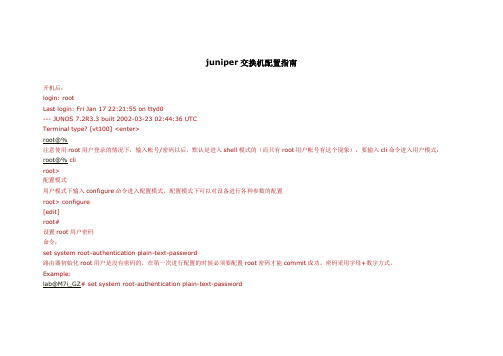
juniper交换机配置指南开机后:login: rootLast login: Fri Jan 17 22:21:55 on ttyd0--- JUNOS 7.2R3.3 built 2002-03-23 02:44:36 UTCTerminal type? [vt100] <enter>root@%注意使用root用户登录的情况下,输入帐号/密码以后,默认是进入shell模式的(而只有root用户帐号有这个现象),要输入cli命令进入用户模式:root@% cliroot>配置模式用户模式下输入configure命令进入配置模式,配置模式下可以对设备进行各种参数的配置root> configure[edit]root#设置root用户密码命令:set system root-authentication plain-text-password路由器初始化root用户是没有密码的,在第一次进行配置的时候必须要配置root密码才能commit成功。
密码采用字母+数字方式。
Example:lab@M7i_GZ# set system root-authentication plain-text-passwordNew password:Retype new password:添加系统用户命令:set system login user juniper uid 2000 <-设置用户名为juniper用户id为2000set system login user juniper class super-user <-设置juniper用户为超级用户set system login user juniper authentication plain-text-password <-设置juniper用户的密码设置主机名命令:set system host-name M7i_GZ <-设置主机名为M7i_GZ开启系统telnet服务命令:set system services telnet说明:系统默认是没有打开telnet功能的,只有打开telnet服务之后才能从网络上登陆到路由器。
juniper基本配置

作者:红盟过客CCIE理论RHCEQQ:369136929时间:2007年夏天地点:浙江杭州软件:Visio2003CorelDRAW12WPS2007SecureCRT5.1Juniper常用命令设置用用户名密码juniper->set admin user redhat password redhat设置防火墙名juniper->set host ccieccie->更改用户密码ccie->set admin password123456设置密码长度,必需自己也满足设置长度ccie->set admin password restrict length6重置设备到出厂缺省设置如果丢失了admin密码,可以使用下列步骤将NetScreen设备重置为其缺省设置。
此时将会丢失配置内容,但会恢复设备访问。
要执行此操作,需要建立控制台连接.1.出现登录提示时,键入设备的序列号。
2.出现密码提示时,再次键入该序列号。
将显示以下消息:!!!!Lost Password Reset!!!!You have initiated a command to reset the device to factory defaults,clearing allcurrent configuration,keys and settings.Would you like to continue?y/n3.按Y键。
将显示以下消息:!!Reconfirm Lost Password Reset!!If you continue,the entire configuration of the device will be erased.Inaddition,a permanent counter will be incremented to signify that this device has been reset.This is your lastchance to cancel this command.If you proceed,the device will return to factory default configuration,whichis:System IP:192.168.1.1;username:netscreen;password:netscreen.Would you like to continue?y/n4.按Y键重置设备。
Juniper路由器配置命令介绍

Juniper路由器配置命令介绍本文档是关于Juniper路由器配置命令的介绍,旨在帮助用户快速了解和使用Juniper路由器的各种命令。
以下是文档的详细内容。
第一章:登录和基本配置1.登录Juniper路由器- 进入路由器的命令行界面- 输入用户名和密码进行登录2.基本配置命令- 配置路由器的主机名- 配置管理接口的IP地质- 设置路由器的时钟- 保存配置更改第二章:接口配置1.配置物理接口- 激活和禁用接口- 配置接口IP地质- 配置接口子网掩码- 配置接口速率和双工模式- 配置接口上的ACL(访问控制列表)2.配置逻辑接口- 配置VLAN接口- 配置子接口- 配置隧道接口第三章:路由配置1.配置静态路由- 添加静态路由- 删除静态路由- 配置默认路由- 查看路由表2.配置动态路由- 配置OSPF(开放最短路径优先)协议 - 配置BGP(边界网关协议)协议- 配置RIP(路由信息协议)协议第四章:安全配置1.配置防火墙规则- 添加入站规则- 添加出站规则- 配置地质转换(NAT)2.配置VPN- 配置IPSec VPN- 配置SSL VPN第五章:监控和故障排除1.监控命令- 查看接口状态- 查看路由器 CPU 和内存使用情况 - 查看硬盘使用情况2.故障排除命令- 执行连通性测试- 查看日志信息- 跟踪路由本文档涉及附件:附件1:Juniper路由器配置示例文件(示例配置文件,供参考使用)本文所涉及的法律名词及注释:1.ACL(访问控制列表):用于控制网络流量的一种机制,可以限制特定源IP地质或目的IP地质的访问权限。
2.OSPF(开放最短路径优先):一种用于动态路由选择的内部网关协议,使用最短路径优先算法确定最佳路由。
3.BGP(边界网关协议):一种用于在互联网自治系统之间交换路由信息的外部网关协议。
4.RIP(路由信息协议):一种用于在小型网络中交换路由信息的距离矢量路由协议。
- 1、下载文档前请自行甄别文档内容的完整性,平台不提供额外的编辑、内容补充、找答案等附加服务。
- 2、"仅部分预览"的文档,不可在线预览部分如存在完整性等问题,可反馈申请退款(可完整预览的文档不适用该条件!)。
- 3、如文档侵犯您的权益,请联系客服反馈,我们会尽快为您处理(人工客服工作时间:9:00-18:30)。
CLI配置:操作模式进入和退出操作模式:下面的例子显示了使用用户名root登陆到路由器进入到操作模式login: rootPassword:Last login: Wed Nov 28 18:40:03 from 192.168.161.250--- JUNOS 5.0R2.4 built 2001-09-25 02:34:13 UTCroot@52network>Exit the operational mode by using the quit command:root@52network> quit52network (ttyd0)login:设置CLI:1. set cli命令:root@52network> set CLI ?Possible completions:complete-on-space Toggle word completion on spaceidle-timeout Set the CLI maximum idle timeprompt Set the CLI command prompt stringrestart-on-upgrade Set CLI to prompt for restart after a software upgrade screen-length Set number of lines on screenscreen-width Set number of characters on a lineterminal Set terminal type2.set CLI complete-on-space这个命令将允许自动完成命令,语法如下:set CLI complete-on-space <on|off>例子:root@52network> show p^'p' is ambiguous.Possible completions:pfe Show packet forwarding engine datapim Show information about PIMpolicy Show policy informationroot@52network> show po<space>root@52network> show policy3.set CLI idle-timeout设置CLI会话空闲时的最大时间语法:set CLI idle-timeout <timeout> (0-100000 minutes)例子:root@52network> set CLI idle-timeout 1Idle timeout set to 1 minuteroot@52network> Warning: session will be closed in 10 seconds if there is no activityIdle timeout exceeded: closing session4.set CLI prompt设置cli会话操作模式下的提示符语法:set cli prompt <cli-prompt>例子:root@52network>set cli prompt newpromptnewprompt>5.set CLI restart-on-upgrade设置当软件更新完成,将提示去重新启动路由器,默认打开语法:set CLI restart-on-upgrade <on|off>6.set CLI screen-length and screen-width设置cli屏幕长度和宽度语法:set CLI screen-length <length> Number of lines on screen (0..100000) set CLI screen-width <width> Number of characters on a line (0..100000) 例子:root@52network> set CLI screen-length 2Screen length set to 2root@52network> set CLI screen-width 5Screen width set to 57. set CLI terminal设置路由器的终端类型root@52network> set CLI terminal ?Possible completions:ansi ANSI-compatible terminalsmall-xterm Small (24 line) xterm windowvt100 VT100-compatible terminalxterm Large (65 line) xterm window7. set date设置时间语法:set date <time> New date and time (YYYYMMDDhhmm.ss)例子:root@52network> set date 200202171448.00Sun Feb 17 14:48:00 UTC 20028. 操作模式中的基本操作:Function Keyboard SequenceMove cursor back one character Ctrl-bMove cursor forward one character Ctrl-fMove cursor to beginning of line Ctrl-aMove cursor to end of line Ctrl-eDelete character before the cursor Ctrl-h, Delete, Backspace Delete character the cursor is on Ctrl-dDelete word before cursor Ctrl-w, Esc-Backspace, Alt-Backspace Insert most recently deleted text at the cursor Ctrl-yRedraw the current line Ctrl-lScroll backward through history Ctrl-pScroll forward through history Ctrl-nSearch CLI history in reverse order Ctrl-rMove cursor back one word Esc-b or Alt-bMove cursor forward one word Esc-f or Alt-fDelete the word after the cursor Esc-d, Alt-dSearch CLI history Esc-/Specify the number of times to execute a key-board sequence (number from one to nine)Esc-number sequence, Alt-number sequence9. cli注释信息:root@52network> show con^'con' is ambiguous.(命令不完整)root@52network> set CLI^syntax error, expecting <command>(语法错误)10.控制cli输出信息:1.显示输出:root@52network> show configurationversion 5.0R3.3;system {host-name 52network;login {user test {uid 2001;class superuser;authentication {encrypted-password "$Upc0"; # SECRET-DATA}}user root {uid 2000;class superuser;authentication {encrypted-password "0"; # SECRET-DATA---(more)---定制输出信息使用管道参数:这个参数可以帮助在一个大的文件中快速的找到制定的信息root@52network> show configuration | ?Possible completions:count Count occurrencesdisplay Display additional informationexcept Show only text that does not match a patternfind Search for the first occurrence of a patternhold Hold text without exiting the --More-- prompt match Show only text that matches a patternno-more Don't paginate outputresolve Resolve IP addressessave Save output text to a filetrim Trim specified number of columns from start of line 2.过滤输出信息1. count:显示文件或列表行数语法:show route protocol isis | count例子:root@52network> show configuration | countCount: 143 linesroot@52network> show route protocol isis | countCount: 59 lines2.display:display命令提供显示输出xml格式语法:show configuration | display xml例子:root@52network> show configuration | display xml | find interfaces <interfaces><interface><name junos:key="key">fxp0</name><speed>100m</speed><link-mode>full-duplex</link-mode><unit><name junos:key="key">0</name><encapsulation>802.3-llc</encapsulation><family><inet><address><name junos:key="key">192.168.161.16/24</name></address></inet></family></unit></interface></interfaces></configuration></rpc-reply>3.except:此参数设置显示输出信息不包含指定信息语法:show configuration | except <pattern> pattern to avoid例子:root@52network> show configurationversion 5.0R3.3;system {host-name 52network;login {user test {uid 2001;class superuser;authentication {encrypted-password "$1$A"; # SECRET-DATA }}user root {uid 2000;class superuser;authentication {encrypted-password "niG0"; # SECRET-DATAroot@52network> show configuration | except uidversion 5.0R3.3;system {host-name 52network;login {user test {class superuser;authentication {encrypted-password "$1$A"; # SECRET-DATA}}user root {class superuser;authentication {encrypted-password "niG0"; # SECRET-DATA4.find 和match命令find查找指定信息,并且显示所有相似信息match查找指定信息,并且只显示此指定信息语法:show route | find <pattern> pattern to search forshow route | match <pattern> pattern to match against例子:root@52network> show route | find 192.168.161.0192.168.161.0/24 *[Direct/0] 3d 02:05:58> via fxp0.0192.168.161.16/32 *[Local/0] 3d 02:05:58Localroot@52network> show route | match 192.168.161.0192.168.161.0/24 *[Direct/0] 3d 02:06:085.holdhold参数设置通过up和down翻动查看文件。
