SLAMWARE开发套件快速使用指南
Pixhawk 4 开发套件 使用说明书
The most advanced development kit for the PX4 autopilotIN THE BOXPixhawk 4 autopilotGPS modulewith safety switch and LED Power boardI2C splitter6 to 6 pin cable (power) x 3 4 to 4 pin cable (CAN) x 26 to 4 pin cable (Data)10 to 10 pin cable (PWM) x 28 to 8 pin cable (AUX)PPM/SBUS out cableXSR receiver cableDSMX receiver cableSBUS receiver cableUSB CableMOUNTUse the provided foam pads to mount Pixhawk 4 as close as possible to your vehicle’s center of gravity. Make sure to orient the board with the arrow pointing forward.CONNECTConnect the PMB to the POWER port using the 6-wire cable to direct power from your lithium polymer (LiPo) battery to the autopilot.(Optional) Connect a Telemetry Radio to the TELEM port to receive data in Ground Control Station and communicate with the autopilot in flight.Connect I/O PWM-IN port of the PMB to the I/O PWM OUT of Pixhawk 4 using the 10 wire cable to send PWM signals to the motors.Connect PPM, DSM or SBUS Radio Control receiver to provide the autopilot with RC inputin manual and assisted flights modes.Connect the GPS module to provide the autopilot with positioning data during flight.For more details on how to connect Power Management Board(PMB) with Pixhawk 4 and the motors, refer to PX4 User Guide:https://docs.px4.io/en/assembly/quick_start_pixhawk4.htmlSET UPThe PX4 firmware is the brains of your autopilot operation and Version 1.7 is already loaded on your Pixhawk 4.To configure your vehicle as well as do mission planning and flight monitoring, you can use the free QGroundControl application (Windows, Mac, Linux), which you can download from /Once you have installed and successfully run QGroundControl, plug in Pixhawk 4 with the supplied USB cable, it should be automatically recognized. Click on and follow theon-screen instructions to finish the setup steps.As part of a first time setup, you’ll need to configure some of the required hardware compo-nents, such as:● Frame type configuration● Compass calibration● Radio control calibration● Accelerometer calibration● RC transmitter mode setup● ESC calibrationIn addition to mandatory calibrations, you may also choose to configure optional hardware including battery monitor, sonar, airspeed sensor, optical flow, OSD, camera gimbal, antenna tracker etc.ADDITIONAL INFORMATIONRefer to for detailed pin-outs of Pixhawk 4 connectors.Visit PX4 user guide at px4.io for detailed instructions including tutorials on how to change firmware and do advanced configurations with QGroundControl.Join PX4 Slack (http://slack.px4.io/) to receive support from the community and the PX4 team.。
SLAM+语音机器人DIY系列:(二)ROS入门——9.熟练使用rviz
SLAM+语⾳机器⼈DIY系列:(⼆)ROS⼊门——9.熟练使⽤rviz 温馨提⽰本篇⽂章已经收录在我最新出版的书籍《机器⼈SLAM导航核⼼技术与实战》,感兴趣的读者可以购买纸质书籍来进⾏更加深⼊和系统性的学习,购买链接如下:摘要ROS机器⼈操作系统在机器⼈应⽤领域很流⾏,依托代码开源和模块间协作等特性,给机器⼈开发者带来了很⼤的⽅便。
我们的机器⼈“miiboo”中的⼤部分程序也采⽤ROS进⾏开发,所以本⽂就重点对ROS基础知识进⾏详细的讲解,给不熟悉ROS的朋友起到⼀个抛砖引⽟的作⽤。
本章节主要内容:9.熟练使⽤rviz(1)rviz整体界⾯(图29)rviz整体界⾯rviz是ROS⾃带的图形化⼯具,可以很⽅便的让⽤户通过图形界⾯开发调试ROS。
操作界⾯也⼗分简洁,如图29,界⾯主要分为上侧菜单区、左侧显⽰内容设置区、中间显⽰区、右侧显⽰视⾓设置区、下侧ROS状态区。
(2)添加显⽰内容(图30)设置Global Options如图30,启动rviz界⾯后,⾸先要对Global Options进⾏设置,Global Options⾥⾯的参数是⼀些全局显⽰相关的参数。
其中的Fixed Frame参数是全局显⽰区域依托的坐标系,我们知道机器⼈中有很多坐标系,坐标系之间有各⾃的转换关系,有些是静态关系,有些是动态关系,不同的Fixed Frame参数有不同的显⽰效果,在导航机器⼈应⽤中,⼀般将Fixed Frame参数设置为map,也就是以map坐标系作为全局坐标系。
值得注意的是,在机器⼈的tf tree⾥⾯必须要有map坐标系,否则该选项栏会包error。
⾄于Global Options⾥⾯的其他参数可以不⽤管,默认就⾏了。
(图31)添加地图显⽰如图31,在机器⼈导航应⽤中,我们常常需要⽤rviz观察机器⼈建⽴的地图,在机器⼈发布了地图到主题的情况下,我们就可以通过rviz订阅地图相应主题(⼀般是/map主题)来显⽰地图。
深圳市越疆科技有限公司 Dobot 视觉套件安装指南说明书

Dobot视觉套件安装指南文档版本:V1.0发布日期:2018-09-12深圳市越疆科技有限公司版权所有©越疆科技有限公司2019。
保留一切权利。
非经本公司书面许可,任何单位和个人不得擅自摘抄、复制本文档内容的部分或全部,并不得以任何形式传播。
免责申明在法律允许的最大范围内,本手册所描述的产品(含其硬件、软件、固件等)均“按照现状”提供,可能存在瑕疵、错误或故障,越疆不提供任何形式的明示或默示保证,包括但不限于适销性、质量满意度、适合特定目的、不侵犯第三方权利等保证;亦不对使用本手册或使用本公司产品导致的任何特殊、附带、偶然或间接的损害进行赔偿。
在使用本产品前详细阅读本使用手册及网上发布的相关技术文档并了解相关信息,确保在充分了解机器人及其相关知识的前提下使用机械臂。
越疆建议您在专业人员的指导下使用本手册。
该手册所包含的所有安全方面的信息都不得视为Dobot的保证,即便遵循本手册及相关说明,使用过程中造成的危害或损失依然有可能发生。
本产品的使用者有责任确保遵循相关国家的切实可行的法律法规,确保在越疆机械臂的使用中不存在任何重大危险。
越疆科技有限公司地址:深圳市南山区留仙大道3370号南山智园崇文区2号楼9-10楼网址:/目的本手册介绍了Dobot视觉套件说明和安装指南,方便用户了解和使用。
读者对象本手册适用于:•客户工程师•销售工程师•安装调测工程师•技术支持工程师修订记录符号约定在本手册中可能出现下列标志,它们所代表的含义如下。
危险警告注意说明1. 视觉套件说明 (1)概述 (1)1.2视觉套件清单 (1)1.3相机参数说明 (1)1.4光源参数说明 (2)1.5相机镜头参数 (3)2. 安装指南 (4)安装相机 (4)安装Dobot Magician (13)安装Dobot M1 (13)1. 视觉套件说明概述图像处理系统通过设置图像(视觉套件获取)的色度(Hue)、饱和度(Saturation)、亮度(V alue)、特征大小来提取图像的特征,并把图像坐标转换成机械臂坐标传送给机械臂,利用机械臂完成智能分拣。
ETRX3DVK开发套件快速入门指南说明书
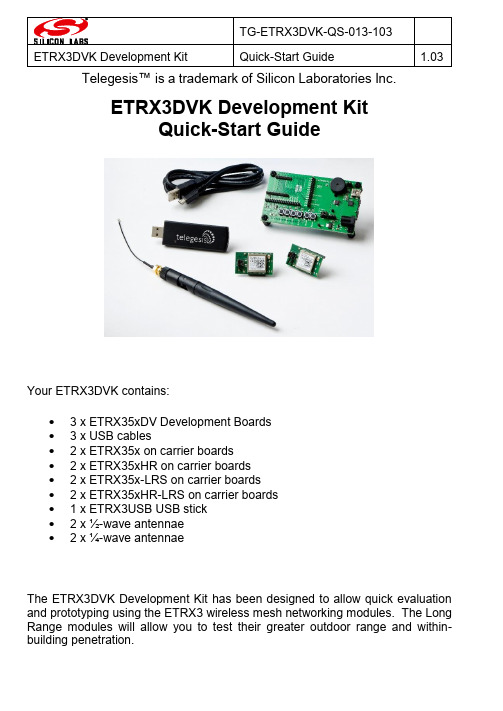
ETRX3DVK Development KitQuick-Start GuideYour ETRX3DVK contains:∙ 3 x ETRX35xDV Development Boards∙ 3 x USB cables∙ 2 x ETRX35x on carrier boards∙ 2 x ETRX35xHR on carrier boards∙ 2 x ETRX35x-LRS on carrier boards∙ 2 x ETRX35xHR-LRS on carrier boards∙ 1 x ETRX3USB USB stick∙ 2 x ½-wave antennae∙ 2 x ¼-wave antennaeThe ETRX3DVK Development Kit has been designed to allow quick evaluation and prototyping using the ETRX3 wireless mesh networking modules. The Long Range modules will allow you to test their greater outdoor range and within-building penetration.Telegesis™ is a trademark of Silicon Laboratories Inc.Before you start, go to our Support Software Download page at /telegesissoftware and download the ETRX3USB drivers and the Telegesis Terminal software (the ETRX357 Development Board uses the ETRX3USB drivers). Install them on your computer. Also, we recommend you to go to /telegesisdocuments and get the AT Command Manual, the ETRX357 Development Kit Manual and the ETRX3USB Product Manual.1 Connecting your Development Kit BoardAfter you have installed the USB drivers, connect a Development Kit Board to the computer and load the drivers as prompted, then repeat for the USB stick. Then right-click on “My Computer”, select “Manage” and “Device Manager”.Under “Ports” you will see your Telegesis USB device(s); note the COM port number that it is attached to (here, COM5). Now you can close the Device Manager. Each board that you plug in will appear as a different COM port.2 Application SoftwareIf you do not wish to use the Telegesis Terminal Application program, the command line of the ETRX357 can be accessed using any terminal software program such as HyperTerminal®or PuTTY. Simply set up HyperTerminal to connect to the appropriate com port at 19200bps, Data bits - 8, Parity - none, Stop bits - 1, Flow Control – none (ETRX357 factory default).However the Telegesis Terminal Application Software program allows enhanced functionality especially suited to the ETRX357 modules. The AT-Style commandscan be issued by clicking on c ustomisable ‘Command’ buttons and all of the 64-bit serial numbers which are reporting in are listed in a separate window. This means you will not need to input any of the 64-bit serial numbers.For instructions on how to use the AT Commands read the AT Command Manual- check y our firmware version with the “ATI” command and ensure you have the correct manual. There is also introductory material in the development kit manual. After installing the Telegesis Terminal Application program a single command button will appear. Use File -> Open Layout to select the correct set of buttons for firmware R2xx based on EmberZnet2.x or R3xx based on EmberZnet3.x. In order to use the Telegesis Terminal software, select the correct COM port and the connection parameters (ETRX357 default 19200, 8 bits, no parity, no flow control) and press the “C onnect” button. These settings are automatically retained each time the software is re-started.To get started quickly, power up one node connected to the PC and type AT followed by <enter>. If the communication to the module is working the module will prompt OK, if not check power and serial connections and make sure you have connected to the correct COM port.3 Network Set-up with Telegesis AT commandsTo start a PAN network issue the AT+EN command, or alternatively press the ‘Establish PAN’ button. The local unit will now scan all available 16 channels and establish a PAN with a random PAN ID on the quietest one. This may take up to 16 seconds and leads to the node becoming the network’s coordinator. When successful the module will prompt ‘JPAN:cc,PPPP’1, where cc is the channel number and PPPP is the PAN ID of the newly created PAN.If you get an error message instead it is likely that the module was already part of a PAN, so you need to issue the AT+DASSL command or press the ‘Disas Local’ button to leave the PAN before going back to starting a new one. In order to find the network status simply issue the AT+N command or press the ‘NWK Info’ button.Once the network is established remote nodes can be powered up ready to join in. If you have serial access to remote nodes simply issue the AT+JN command or press the ‘Join any PAN’ button to join the newly established PAN. If you don’t have serial access to the remote nodes (such as when Development Boards are battery-powered with no USB cable) you just need to wait for them to join the network automatically.By default all nodes (except coordinators) are set up to check once every minute whether any neighbours on the same PAN are present, or whether they areorphaned. If no neighbours have been found after a couple of minutes, the unit will leave the (deserted) PAN and try to join into a new one once every minute.This initial network setup can take a few minutes, especially with no serial access to remote nodes, but once the network is set up it will remain set even after power cycles.New nodes joining will cause a prompt ‘NEWNODE: <EUI64>’1 on the remote side, where <EUI64> is the unique 64-bit identifier of the device joining in, and display the JPAN message locally as described above.To learn more about setting up and maintaining a PAN please refer to the AT Command Dictionary.4 Configuring Buttons for your set-upAfter setting up the network, press the button labelled ‘Configure’ which will issue a command to scan the network causing all the nodes in the network to report in. You will see that on discovery of a remote device its serial number is added to the device list window. In addition to this, the configure functionality will build additional buttons to play a tune on a remote board (‘Ident Node x’).By looking at the actual commands behind these new buttons it is quite easy to understand how the AT-Command interface operates. Also you can easily discover the principle of mesh networking: simply move a Development Board out of range and then add a Development Board between the local node and the one which is out of range and you will find that the network has healed the broken link and all three nodes are accessible again.With a Development Board and a USB stick you can send messages between two PCs using the Broadcast or Unicast buttons and by experimenting with those buttons you will quickly get an understanding on how to integrate the ETRX357 into your application.The Telegesis Terminal Application also allows you to create custom command buttons for your individual application, just click on Commands / Add command b utton…1R3xx firmware will also report Extended Pan ID and module’s short address Silicon Laboratories Inc.400 West Cesar Chavez Austin, TX 78701USASmart.Connected.Energy-FriendlyProducts /products Quality /quality Support and Community Disclaimer Silicon Laboratories intends to provide customers with the latest, accurate, and in-depth documentation of all peripherals and modules available for system and software implementers using or intending to use the Silicon Laboratories products. Characterization data, available modules and peripherals, memory sizes and memory addresses refer to each specific device, and "Typical" parameters provided can and do vary in different applications. Application examples described herein are for illustrative purposes only. Silicon Laboratories reserves the right to make changes without further notice and limitation to product information, specifications, and descriptions herein, and does not give warranties as to the accuracy or completeness of the included information. Silicon Laboratories shall have no liability for the consequences of use of the information supplied herein. This document does not imply or express copyright licenses granted hereunder to design or fabricate any integrated circuits. The products are not designed or authorized to be used within any Life Support System without the specific written consent of Silicon Laboratories. A "Life Support System" is any product or system intended to support or sustain life and/or health, which, if it fails, can be reasonably expected to result in significant personal injury or death. Silicon Laboratories products are not designed or authorized for military applications. Silicon Laboratories products shall under no circumstances be used in weapons of mass destruction including (but not limited to) nuclear, biological or chemical weapons, or missiles capable of delivering such weapons.Trademark Information Silicon Laboratories Inc.® , Silicon Laboratories®, Silicon Labs®, SiLabs® and the Silicon Labs logo®, Bluegiga®, Bluegiga Logo®, Clockbuilder®, CMEMS®, DSPLL®, EFM®, EFM32®, EFR, Ember®, Energy Micro, Energy Micro logo and combinations thereof, "the world’s most energy friendly microcontrollers", Ember®, EZLink®, EZRadio®, EZRadioPRO®, Gecko®, ISOmodem®, Precision32®, ProSLIC®, Simplicity Studio®, SiPHY®, Telegesis, the Telegesis Logo®, USBXpress® and others are trademarks or registered trademarks of Silicon Laborato-ries Inc. ARM, CORTEX, Cortex-M3 and THUMB are trademarks or registered trademarks of ARM Holdings. Keil is a registered trademark of ARM Limited. All other products or brand names mentioned herein are trademarks of their respective holders.。
SLAMTEC MAPPER开发板快速使用指南说明书
SLAMTEC MAPPER DEVELOPMENT KIT QUICK STARTSTEP 1: Quick ConnectionSLAMTEC MAPPER Development Kit Components: SLAMTEC MAPPER and power cable.Please put the SLAMTEC MAPPER on a flat surface, and connect to 5V power source with the enclosed power cable.STEP 2: Start and Connect to the ComputerTurn the switch(SW1)to ON to start the device, the indicator light(D1) will light up. SLAMTEC MAPPER will start to spin in about 20 seconds, which indicates the device starts properly.After startup, you will find the SLAMWARE- XXXXXX WiFi Hot spot.Please connect to the above SLAMWARE- XXXXXX network (you can also connect SLAMTEC MAPPER to PC via Ethernet cable. Please set the network mode as DHCP client).STEP 3: download the RoboStudioPlease download the Robostudio from our official website:/en/RoboStudioAnd then start the RoboStudio application. Right click at the robots panel and select manual connect. Use 192.168.11.1 for IP address and 1445 for the port (default settings). With a successful connection, the discovered map and real-time laser scan will be shown in the main workspace of the Robostudio.STEP 4: More Reference1.For more details of RoboStudio, please refer to the documents in the RoboStudio documents2.For more usage of SLAMTEC MAPPER Kit, please refer to the SLAMTEC MAPPER User Manual3.For the electrical characteristics and specification of SLAMTEC MAPPER, please refer to theSLAMTEC MAPPER DatasheetYou can download all the above documents from /, more help please contact ******************* .。
蓝鲸智能机器人ORB_SLAM2包配置手册说明书

目录1.概述 (2)2.可执行节点nodes (2)2.1节点参数 (2)2.2bwMono节点 (6)2.2.1订阅的话题数据 (6)2.2.2发布的话题数据 (6)2.2.3 dynamic_reconfigure参数 (7)2.2.4 发布的tf变换关系 (7)2.3bwMulti节点 (8)2.3.1订阅的话题数据 (8)2.3.2发布的话题数据 (8)2.3.3 dynamic_reconfigure参数 (9)2.3.4 发布的tf变换关系 (9)3.配置教程 (10)3.1单目建图 (10)3.2单目摄像头安装矩阵的标定 (10)3.3单目加2d激光雷达建图 (12)3.4单目地图更新 (12)3.5单目导航定位 (12)3.6前后两摄像头即双目导航定位 (13)蓝鲸智能机器人ORB_SLAM2包配置手册1.概述ORB_SLAM2属于基于稀疏特征点的视觉slam算法,蓝鲸智能机器人在原始版本的基础上进行了改进和优化。
通过融合惯导里程计和激光雷达,提高了定位精度和定位鲁棒性,解决了单目尺度恢复和漂移问题,同时可以输出2d栅格地图。
增加了地图保存、加载功能,发布相关ROS话题数据,使ORB_SLAM2兼容ROS的navigation框架。
蓝鲸智能机器人ORB_SLAM2包会输出完全兼容gmapping和amcl的ros接口数据,因此可以直接替换gmapping用于建图,替换amcl用于定位。
2.可执行节点nodes共有bwMono、bwMulti两个ROS node,使用方法是一样的。
bwMono可用于建图、定位、更新地图。
bwMulti目前只支持定位。
两个节点都需要传入两个参数,分别是字典文件和配置参数文件。
字典文件相同,配置参数文件里面的参数选项是一样的,参数设置略有区别。
下文将先介绍配置参数文件里面各个参数的意义,然后介绍两个节点特有的参数设置和ros 话题信息。
对于节点的使用,蓝鲸机器人ORB_SLAM2包默认已经配置好了三个launch 文件,unch用于建图,unch用于定位,unch用于地图更新。
DriverStudio培训教程

驱动开发网之 DriverStudio教程(由北京朗维赞助) 由北京朗维计算机应用技术公司赞助编写的DriverStudio教程,此教程全面详细地讲述了以DriverStudio为开发工具编写设备驱动程序和核心层程序的技术与技巧。
包括完全的库参考手册与开发技巧的中文版本。
DriverStudio培训教程△前言△DriverStudio开发工具包介绍△DriverStudio套件包的安装与运行环境设置△使用Vtoolsd写我们的VXD驱动△VXD的调试技术△Vtoolsd运行库函数介绍△一个Vtoolsd开发的文件保护程序例子△一个Vtoolsd开发的硬件板卡驱动例子△VXD驱动程序的安装及应用层对它的调用△DriverWork介绍△DriverWork核心运行类库介绍△生成我们的第一个WDM驱动程序△WDM驱动程序的调试技术△开发一个硬件板卡的WDM驱动△开发一个过滤器驱动程序△10分种开发一个USB驱动(USB版版主倾情奉献)△inf文件的编制及WDM驱动程序的安装△应用层对WDM的调用△DriverNetWork介绍△与网络有关的运行库△开发一个可以实用的防火墙例子△其它实用工具介绍△DriverStudio附带例子程序介绍前言鉴于国内开发人员迫切需要学习驱动开发技术,而国内有关驱动开发工具DriverStudio的资料很少,大家在开发过程中遇到很多问题却没处问,没法问.而这些问题却是常见的,甚至是很基础的问题。
有感于此,本站联合北京朗维计算机应用公司编写了本教程。
本教程的目的是让一个有一些核心态程序编写经验或对系统有所了解的人学习编写驱动程序。
当然,本教程不是DDK中有关驱动方面内容的替换,而只是一个开发环境的介绍和指导。
学习本教程,你应该能熟练地使用本套工具编写基本的驱动程序。
当然如果你想能顺利地编写各种各样的驱动的话,你应该有相关的硬件知道和系统核心知识并且要经过必要的训练才能胜任。
如果真心说一句话,DriverStudio并没有对驱动程序开发有什么实质的改变,它和DDK的关系不过是SDK和MFC的关系,但很多人选择了MFC,原因不言自明,方便二字何以说得完呀?你再也不用去关注繁琐的框架实现代码,也不用去考虑让人可怕的实现细节。
思岚科技 雅典娜(Athena) 通用机器人平台专业版 用户手册说明书

w w w .slam t 上海思岚科技有限公司雅典娜(Athena)通用机器人平台专业版用户手册型号:N4M112020-08-18.rev.1.1目录 (2)产品介绍 (3)简介 (3)基本功能 (3)内部模块框图 (3)传感器配置 (4)接口配置 (4)指示灯状态说明 (5)充电座 (6)产品清单 (6)扩展说明 (7)简介 (7)接口定义 (7)A THENA参考设计 (9)部署及使用方法 (12)部署A THENA (12)连接至电脑 (17)调试工具 (17)充电与电池 (18)注意事项 (20)机械尺寸 (21)快速启动指南——开箱 (22)深度摄像头支架安装指导 (24)电池安装指导 (26)附录 (29)图表索引 (29)简介Athena 是一款由SLAMTEC 研发的小型可扩展、低成本机器人平台,可满足小型机器人应用开发的需求。
如智能巡检机器人,货柜运送机器人等。
其内置的高性能SLAMCUBE 自主导航定位系统套件使其具备路径规划与定位导航功能,从而能搭载不同应用在各种商用环境中工作。
Athena 采用多传感器融合技术,包含激光雷达、超声波传感器、跌落传感器、磁传感器、深度摄像头、碰撞传感器,能在复杂多变的商业环境中应变自如,成功完成自主建图,定位与导航。
基本功能自主建图定位与导航该平台具备自主建图定位与导航功能,工作过程中无需人为协助,能根据需要自动寻找路径并移动到指定的地点。
此外,它还支持多路线巡逻模式。
自动回充提供开放接口供上层应用调用,调用成功后可实现该平台在电量不足的情况下自动返回充电座充电。
第三方应用拓展该平台拥有完全开放的软硬件平台并提供外扩硬件支持,可通过SLAMWARE SDK 进行业务逻辑应用开发。
内部模块框图下图描述了Athena 和外部系统之间的通信、电源连接框图。
图表1-1 Athena 与外部系统连接示意图产品介绍User 外部系统Athena 主系统有线网络用户供电电源接口应急充电口急停开关刹车释放开关kaikaiguan 网络复位开关 Wi-Fi系统开关传感器配置图表 2-1 Athena传感器配置说明示意图接口配置图表 2-2 Athena接口配置说明示意图防跌落传感器深度摄像头传感器激光雷达传感器(层)超声波传感器碰撞传感器磁传感器应急充电Wi-Fi天线自动充电空气开关指示灯状态说明图表 2-3 Athena左右灯状态显示由于低电量的时候,同时存在health information、左转、右转等其他状态。
亚为机器视觉通用平台 EVPS3.0 使用说明说明书

亚为机器视觉通用平台EVPS3.0使用说明武汉亚为电子科技有限公司2020.08特别声明:本平台为我司技术员友情提供的一个开源自学平台,仅供个人学习和研究使用,未经允许,不得作为商业用途或者另行转卖。
我司提供的密码只保证购买者本人正常使用。
程序不提供修改服务,不对客户具体的项目应用负责。
如需其他功能或二次开发,需与我司以项目的形式进行或请用户自行研发。
如发现bug,敬请告知,公司会及时修改完善,并可能做不定期升级,但不对具体用户负责。
★★★如有任何疑问,可加亚为测控售后QQ:3075964420。
欢迎各位用户和业内外人士技术上的交流和探讨。
目录一、概述 (1)二、使用条件 (1)(一)适用对象 (1)(二)类型说明 (1)(三)相关下载 (2)三、系统简介 (5)(一)功能说明 (5)(二)使用方法 (5)(三)注意事项 (5)四、软件界面 (6)五、功能介绍 (7)(一)测距 (7)(二)放大 (8)(三)旋转 (9)(四)图像标注 (9)(五)图像裁剪 (10)(六)FFT变换 (10)(七)描边 (11)(八)直方图 (11)(九)边缘跟踪 (12)(十)对象素描 (12)(十一)颜色识别 (13)(十二)图片对比 (13)(十三)颜色增强 (14)(十四)字符识别 (14)(十五)几何匹配 (15)(十六)二维码识别 (16)(十七)条形码识别 (16)(十八)控制与采集 (17)(十九)目标跟踪 (17)(二十)目标计数 (18)六、异常处理 (2)(一)软件无法打开 (2)(二)界面错乱 (2)(三)软件无法运行 (2)亚为机器视觉通用平台EVPS3.0使用说明武汉亚为电子科技有限公司一、概述该平台基于LabVIEW2017开发,支持绝大部分国内外的相机。
国外的相机,基本上可以直接使用NI的IMAQdx驱动进行驱动,而国内的,很多都是提供DLL供LV调用。
EVPS机器视觉平台是利用机器代替人眼实现了自动测量和智能控制,目前已集成30大类自适应算法,并获得专利。
机器人自主导航中的SLAM技术教程

机器人自主导航中的SLAM技术教程在机器人领域,SLAM技术(Simultaneous Localization and Mapping,即同时定位与建图)是实现机器人自主导航的关键技术之一。
SLAM技术通过机器人同时进行自身定位和环境建图,实现在未知环境中的自主导航。
本文将介绍SLAM技术的原理、方法和应用,并结合实际案例进行详细讲解。
一、SLAM技术原理SLAM技术的核心原理是通过机器人在未知环境中的感知和运动控制,实现对机器人自身位姿和环境地图的同步估计。
具体而言,SLAM技术包含以下三个主要步骤:1. 数据获取:机器人通过搭载各种传感器,如激光雷达、摄像头、惯性测量单元等,获取环境的感知数据。
激光雷达可以提供准确的环境几何信息,摄像头可以获取环境的视觉信息,而惯性测量单元则可以测量机器人的加速度和角速度等运动信息。
2. 自身定位:机器人利用感知数据进行自身定位,即确定自己在环境中的位置和姿态。
常用的自身定位方法包括扩展卡尔曼滤波(EKF)、粒子滤波(PF)等。
这些方法通过将感知数据与机器人的运动模型相结合,实现对机器人位置的估计和更新。
3. 环境建图:机器人通过感知数据和自身定位结果,对环境进行三维建模或二维地图构建。
常用的环境建图方法包括栅格地图法、占据网格法等。
这些方法可以将感知数据转化为对环境的表示,为机器人的导航和路径规划提供基础。
二、SLAM技术方法SLAM技术有多种方法和算法,包括基于特征的方法、图优化方法、滤波方法等。
下面介绍其中两种常用且典型的方法:1. 基于特征的方法:在基于特征的SLAM方法中,机器人通过提取环境中的特征点,如角点、直线等,进行定位和建图。
常用的特征提取算法有Harris角点检测、SIFT、SURF等。
通过匹配特征点,可以实现机器人的定位和环境地图的生成。
这种方法适用于较为结构化的环境。
2. 图优化方法:图优化是一种基于图论的SLAM方法,通过构建一个图模型,将机器人的位姿和环境特征作为节点,感知数据的约束关系作为边。
视觉导航中的SLAM技术应用指南

视觉导航中的SLAM技术应用指南导语:视觉导航是近年来快速发展的技术,它结合了计算机视觉和导航领域的知识,旨在让机器能够通过识别和理解视觉输入来导航。
在视觉导航中,Simultaneous Localization and Mapping(SLAM)技术起着至关重要的作用。
本文将深入探讨SLAM技术在视觉导航中的应用指南。
1. SLAM技术简介SLAM技术是一种同时进行定位和地图构建的技术,通过将传感器的观测数据和机器人的位置信息融合,实现机器人在未知环境下的自主导航。
SLAM技术的核心是通过建立一个包含环境信息的地图,并根据机器人的移动轨迹实时更新地图。
视觉SLAM是指使用摄像头或其他视觉传感器进行建图和定位的SLAM技术。
2. 视觉导航中的SLAM技术应用2.1 增强现实(AR)导航SLAM技术可以在现实世界中的实时摄像头图像上叠加虚拟信息,提供更直观的导航体验。
通过SLAM技术,AR导航可以更准确地识别地标和建筑物,并将其与导航路线结合,实现更精准的导航和定位。
这种技术在旅游、导航和游戏等领域有着广泛的应用。
2.2 自动驾驶视觉导航在自动驾驶领域有着重要的应用。
SLAM技术可以利用车载摄像头和其他传感器的数据,实时构建道路地图并进行车辆定位。
通过实时地图更新和车辆定位的信息,自动驾驶车辆可以实时感知周围环境,规划最优路径,并进行自主导航。
2.3 室内导航室内环境通常缺乏GPS信号,因此室内导航面临着定位和地图构建的挑战。
SLAM技术可以通过结合视觉传感器和惯性传感器的数据,实时构建室内地图,并进行定位。
基于SLAM技术的室内导航系统可以在大型建筑物、购物中心和机场等场所提供精确的导航服务。
2.4 无人机导航随着无人机技术的快速发展,SLAM技术在无人机导航中的应用也越来越广泛。
无人机通过搭载摄像头或激光雷达等传感器,利用SLAM技术实现自主导航和定位。
无人机可以在未知环境中进行地图构建,并根据地图进行路径规划和障碍物避让,实现高效的自主导航。
SMeshStudio 快速入门指南

SMeshStudio 快速入门指南傅骞博士fuqian@ 1SMeshStudio简介当然物联网开发领域流行着三大可商用的开源软件平台,它们分别是Arduino, mBed 和Contiki,它们在各自的应用领域都有着自己的优势,简单来说,Arduino重在简单易用,可以方便地连接各类传感器;mBed重在支持广泛,应用开发通用性强;Contiki重在网络功能强大,应用开发互联方便。
但对于开发者来说,这三者都没有提供让开发者满意的本地化IDE开发环境,如Arduino的开发环境过于简单,mBed只提供在线开发环境,Contiki干脆全部用命令行操作,这在一定程度上降低了开发者的开发效率,同时也减缓了这三者的推广进度。
SMeshStudio就是在这样的背景下产生的,它基于Eclipse和Arduino Eclipse Plugin 开发(感谢他们做出的伟大产品),支持Arduino, mBed和Contiki应用的开发、编译和上载(不支持调试),可以大大加快开发者使用上述开源系统进行应用开发的过程,具体来说,SMeshStudio具有以下特点:●免安装,免配置,解压后就能直接使用。
SMeshStudio全部采用Java编写,并在内部集成了用户开发所需的编译器、上载工具和各类源代码库,所以只要用户计算机中已经有了java运行环境,下载后解压就能直接使用。
考虑到64位的逐步普及,SMeshStudio有32位和64位两个版本可以选择。
●多平台支持。
SMeshStudio可以支持多个平台的开发,在软件上包括contiki,Arduio和mbed,在硬件上可以支持各类采用gcc编译的微处理器平台,主要是AVR和ARM,系统会根据用户的选择自动载入相应的代码和编译器。
●向导式项目创建。
SMeshStudio提供了项目创建向导,用户只要根据向导完成项目类型、项目名称、开发板类型、程序上载端口的选择,SMeshStudio就会自动创建好相应项目的模板。
RoboStudio-Android 用户手册说明书
2023-06 rev.1.0www .s lam tec.c omSLAMWARE RoboStudio-A ndroid 用 上海思岚科技有限公司目录一、简介 (3)二、使用指南 (4)1. 连接机器人 (4)2. 断开与机器人之间的连接 (4)3. 地图显示调整 (6)4. 移动机器人 (7)4. 定位与建图 (9)A. 地图相关功能操作 (9)B. 地图橡皮擦 (9)C. 清空地图 (10)D. 同步地图 (10)5. 虚拟墙管理 (10)A. 添加虚拟墙 (10)B. 移动虚拟墙 (10)C. 删除虚拟墙 (11)D. 保存虚拟墙 (11)E. 注意事项 (11)6. 虚拟轨道 (11)A. 添加虚拟轨道 (12)B. 移动虚拟轨道 (12)C. 删除虚拟轨道 (12)D. 保存虚拟墙 (12)E. 虚拟轨道导航 (12)F. 注意事项 (12)7. 禁行区域 (12)A. 添加禁行区域 (13)B. 移动禁行区域 (13)C. 调整禁行区域大小 (13)D. 删除禁行区域 (13)E. 保存禁行区域 (13)F. 注意事项 (13)8. 危险区域 (14)A. 添加危险区域 (14)B. 移动危险区域 (14)C. 调整危险区域大小 (14)D. 删除危险区域 (14)E. 保存危险区域 (14)F. 设置危险区域内的行进速度 (14)G. 注意事项 (14)A. 添加运维区域 (15)B. 移动运维区域 (15)C. 调整运维区域大小 (15)D. 删除运维区域 (15)E. 保存运维区域 (15)F. 注意事项 (15)10. 星标管理(POI) (15)A. 打开星标列表 (15)B. 创建星标 (16)C. 编辑星标 (17)D. 前往星标 (18)E. 删除星标 (18)11. 本地地图管理 (18)A. 浏览本地地图 (18)B. 编辑本地地图 (19)C. 上传本地地图至机器人 (19)三、修订历史 (20)一、简介RoboStudio.Android 是一款用于便携部署机器人的 Android 应用程序。
赫尔墨斯 Hermes 通用机器人平台用户手册说明书
○ 中小型机器人开发○ 灵活适配 扩展性强 ○ 选配功能强大 进一步了解>>2021-09-18.rev.1.0 赫尔墨斯Hermes通用机器人平台用户手册使用前请仔细阅读用户手册上海思岚科技有限公司目录一、简介 (4)二、HERMES功能介绍 (5)2.1自主导航 (5)2.2协同作业 (5)2.3多楼层配送 (5)2.4智能避障 (5)2.5360°防护 (5)2.6自动回充 (5)三、HERMES结构图 (6)四、HERMES充电座 (7)五、HERMES参数 (8)六、硬件使用说明 (11)6.1线路说明 (11)6.2 RK3399开发板重要接口介绍 (13)6.3 硬件设计参考注意事项 (14)七、结构设计参考 (25)7.1上位机安装接口 (25)7.2负载限制说明 (26)7.3雷达净空区 (26)7.4深度摄像头净空区 (27)7.5搬运设计说明 (27)八、HERMES部署及使用方法 (29)8.1开箱指导 (29)8.2放置充电座 (29)8.3开机&关机 (30)8.4充电 (30)8.5急停&刹车和复位 (30)8.6建图并保存上传 (31)8.7上位机完成启动加载地图功能 (34)九、连接至电脑 (36)十、调试工具 (39)10.1 RoboStudio (39)10.2网页管理后台 (39)十一、开发者工具 (40)11.1 开始使用 (40)11.2 系统间调用框架 (40)11.3 各系统功能说明 (40)11.4 程序示例 (49)11.5 Robot API 详情列表 (51)十二、梯控简介及使用 (54)12.1产品简介 (54)12.2功能介绍 (54)十三、特别说明 (56)13.1充电桩部署 (56)13.2限制使用场景 (56)13.3底盘遇上暂时无法处理的故障 (57)13.4注意事项 (57)十四、维护保养 (59)十五、常见故障及排除故障 (60)十六、产品执行标准与合格证 (61)16.1产品执行标准 (61)16.2合格证 (61)一、简介Hermes是一款由SLAMTEC 研发的中小型可扩展、低成本机器人平台,可满足中小型机器人应用开发的需求。
SLAMTEC思岚科技Slamware SDP数据手册
Slamtec Slamware SDP数据手册2015-12-30Rev. 1.1目录1.简介 (2)2.功能概览 (3)3.接口 (4)4.机械尺寸 (5)5.固件 (6)6.订购信息 (7)7.联系我们 (8)8.版本历史 (9)1.简介Slamtec Slamware SDP是一个具备内置SLAM功能的通用用途的机器人开发平台。
Slamware SDP基于Slamtec RPLIDAR传感器和Slamware软件技术构建。
该平台可以让您的机器人利用自动建图和定位功能,而您无需关心SLAM算法及机器人定位技术的任何细节。
Slamware SDP对应用的开发者提供了一个非常友好的API。
您的应用程序可以获得当前已经探索过的所有地图、您的机器人在地图中的位置和方向(亦即姿态),并可以通过该API 向机器人下达运动指令,让他自动的移动到指定位置。
该模块具有如下功能:●同步定位与建图●高分辨率高频激光雷达传感器●2cm分辨力的高精度环境地图●每200ms更新一次地图●D*路径规划算法●可处理透明障碍物●用于查看机器人状态、设置机器人的彩色触摸屏●802.11n Wi-Fi连接能力,可同时支持AP和Station模式(您可以将Slamware SDP连接到您既有的无线网络以便开发)2. 功能概览Slamtec Slamware SDP 由以下几个部分组成: ● 动作机构包含了外部的物理框架、传感器、电动机、车轮等等… ● 电池 ● 动作控制器控制动作机构中的传感器和电动机。
● 导航核心 ● 计算核心 ● RPLIDAR ● 彩色TFT 触摸屏动作控制器触摸屏 导航核心 应用程序SDK动作机构 电池计算核心 RPLidar3.接口接口名称说明POWER_CON电源连接器24V 0.5A DCPOWER_SW电源开关TOUCH_SCREEN 2.8寸彩色TFT触摸屏BUMPER_L左碰撞传感器BUMPER_R右碰撞传感器CMP_CORE计算核心RPLIDAR RPLIDAR传感器T able 1 Interface Definition4.机械尺寸340mm150mmFigure 2 Slamtec Slamware SDP 机械尺寸5.固件在Slamtec Slamware SDP中有多个处理器。
altanium matrix5 用户指南说明书
Altanium Matrix5用户指南原始说明发行:v 1.0 — 2020 年 2 月本产品手册的目的是提供有关安全操作和/或维护的信息。
Husky 保留对产品进行更改的权利,以便不断改进产品功能和/或性能。
这些更改可能导致不同和/或额外的安全措施,在进行更改时,将通过公告向客户传达这些措施。
本文包含的信息是 Husky Injection Molding Systems Limited 的专有财产。
除合同明确授予的任何权利外,未经 Husky Injection Molding Systems Limited 事先书面许可,不得对本文全部或部分内容进行进一步发布或商业使用。
尽管有上述规定,但 Husky Injection Molding Systems Limited 仍允许其客户仅出于有限内部使用的目的而复制本文。
这些资料中引用的 Husky® 产品或服务名称或徽标是 Husky Injection Molding SystemsLimited 的商标,其某些附属公司可在许可下使用它们。
所有第三方商标均为各自第三方的财产,可能受适用版权、商标或其他知识产权法和条约的保护。
每个此类第三方均明确保留对此类知识产权的所有权利。
© 2019 Husky Injection Molding Systems。
保留所有权利。
iiiii一般信息电话支持号码有关现场服务,请联系最近的 Husky 地区服务和销售办事处。
有关非紧急问题,请向 Husky 发送电子邮件,电子邮件地址为 ********************。
Husky 地区服务和销售办事处有关最近位置,请访问 www.husky.co 。
产品升级可获得升级,升级可改善输出,缩短周期时间,以及为 Husky 设备增加功能。
要查看可获得哪些升级,请访问 www.husky.co ,或者致电最近的 Husky 地区服务和销售办事处。
Slamtec RPLIDAR A1 开发套件说明书
2021-05-20 rev.2.1CONTENTS (1)OVERVIEW (3)I TEMS IN THE D EVELOPMENT K IT (3)RPLIDAR A1 (4)USB A DAPTER (4)CONNECTION AND USAGE (5)C ONNECTION (5)I NSTALL D RIVER FOR THE USB A DAPTER (6)R UN D EMO A PPLICATION (7)T ROUBLESHOOTING (10)SDK INTRODUCTION AND USAGE (11)RPLIDAR A1P IN D EFINITION AND S PECIFICATION (11)P IN D EFINITION FOR THE USB A DAPTER (12)C ONFIGURE RPLIDAR A1S CAN F REQUENCY (13)SDK U SAGE (13)OPERATION RECOMMENDATION (13)P RE-H EATING FOR B EST P ERFORMANCE (14)A MBIENT T EMPERATURE (14)A MBIENT L IGHT (14)REVISION HISTORY (15)APPENDIX (16)I MAGE AND T ABLE I NDEX (16)RPLIDAR A1 development kit includes the matched tools used for evaluating RPLIDAR A1’s performance and initial development. After connecting the RPLIDAR A1 with PC via USB cable and adapter, Users can observe the cloud map of the environment scanning point collected by the RPLIDAR A1 and start development based on the SDK.Items in the Development KitRPLIDAR A1 Development Kit contains:o RPLIDAR A1(PWM motor driver embedded )o USB Adaptero RPLIDAR A1 communication cableNote: The Micro-USB cable needs to be prepared by users.Figure 1-1 Items in the RPLIDAR A1 Development KitUSB Adapter RPLIDAR ModuleRPLIDAR communication cableRPLIDAR A1Figure 1-2 The RPLIDAR A1The RPLIDAR A1 development kit contains standard RPLIDAR A1 unit (A1M8-R1). The RPLIDAR A1 is embedded with logic IO drivable(3.3v) motor controller which can be used to configure the scan frequency by tuning motor speed. Developers can also choose to turn off the motor for power saving purpose.RPLIDAR A1 usage and interface definition will be introduced in the coming sections.USB AdapterFigure 1-3 RPLIDAR A1 AdapterRPLIDAR A1 development kit contains a USB adapter to provide power supply for RPLIDAR A1 and convert RPLIDAR A1 internal UART serial interface to USB interface.Connection RPLIDAR A1 can be easily connected to PC according to the following steps.1) Connect RPLIDAR A1 with the USB adapter using provided communicationcable. The socket is in the bottom of RPLIDAR A1.Figure 2-1 Connect RPLIDAR A1 and USB Adapter2) Connect the USB adapter to your PC using the Micro-USB cable. Afterconnecting RPLIDAR A1 to your PC through the USB cable, the LED in the bottom of the RPLIDAR A1 will light up and RPLIDAR A1 start scanning.Figure 2-2 Connect the USB Adapter to PC via Micro-USB CableInstall Driver for the USB AdapterThe USB adapter converts UART to USB by using CP2102 chip. You need to install the device driver for the chip. The driver can be found in the provided SDK package or downloaded from Silicon Labs’ official website:/products/interface/usb-bridges/Pages/usb-bridges.aspxHere’s the installation steps in Windows:After connecting the RPLIDAR A1 with PC, please find the driver file “CP210x VCP Windows” and choose correct operating system version accordingly: x86 for 32-bit OS and x64 for 64-bit OS.Figure 2-3 Choose USB Adapter Driver for InstallationFigure 2-4 Start Page of USB Adapter Driver InstallationAfter Installing the driver according to the above installation steps, you will see corresponding serial port name in the [Control Panel] -> [Device and Printers]. Please refer to the below figure.Figure 2-5 Recognized Serial Port Name Matched with the USB AdapterRun Demo ApplicationSLAMTEC provides a Lidars plugin in RoboStudio for users in test and evaluation. You can view the scan result directly in the UI and save the scan result to files for further processing.This GUI demo can only run under Windows. For Linux and MacOS users, please refer to the other simple demo provided in the SDK.Please make sure you have connected RPLIDAR to PC by using USB adapter and installed the device driver correctly before running the demo application in RoboStudio. Launch RoboStudio and log in.Figure 2-6 RoboStudio Login PageIf the connection is ok, you shall see the user interface is shown as below.1. Click File->Lidars to open the lidar control panel in the left;2. Click Serial Ports to extend the lidar lists and you’ll find the RPLIDAR A1 previously connected to your PC;3. Click the RPLIDAR A1 icon to extend the tool buttons below the icon: the left one is to adjust the motor speed(RPLIDAR A1 is not adjustable by default.) while the right one is to open the tool bar in the major work area as shown in Figure 2-7.Figure 2-7 The Lidar Plugin in RoboStudioThe serial number, version and model of the RPLIDAR A1 will show next with its icon in the lidar control panel. The supported commands of RPLIDAR are showed in the tool bar. The descriptions are listed in the bellow table.Figure 2-8 The Supported Commands of RPLIDAR in RoboStudioPress the Start Scan button,the scan data will be displayed as below(by default, the motor rotating speed should be about 8Hz.):Figure 2-9 The Scan Outline by RPLIDAR in RoboStudioRight click in the major working area to choose a range so as to zoom in or out the view.The scan frequency is also showed in the above interface. TroubleshootingWhen the scan core or the laser power works abnormally, the scan core will enterprotection mode. This state can be retrieved via SDK API. If such scenariohappened, please send restart command to reset the scan core.RPLIDAR A1 Pin Definition and SpecificationIn the development kit, the bottom motor interface and core interface of the RPLIDAR A1 module use PH1.25-3P and PH1.25-4P vertical mounts respectively. Users can use a cable connection with 1.25mm-pitch 3pin and 1.25mm-pitch 4pin terminals. Please find the detail pin definition in the bellow table:Figure 3-1 RPLIDAR A1 Pin Definition and SpecificationExternal system must provide required VMOTO and V5.0 power to make scan motor and scan core work correctly. In most of scenarios, VMOTO and V5.0 can share the same power supply.MOTOCTL Pin used to control scan motor speed to adjust RPLIDAR A1’s scan frequency, PWM signal also can be applied. The equivalent circuit showed as bellow:Figure 3-2 RPLIDAR A1 MOTOCTL Equivalent Circuito Reference Design for RPLIDAR A1 developmentFigure 3-3 RPLIDAR A1 Pins Reference DesignPin Definition for the USB AdapterThe USB adapter uses a 1.25mm pitch 7pin socket and is connected to theRPLIDAR A1 module through a communication cable: VMOTO GND V5.0GNDTXRXMOTOCTL Power (4-9V DC) Power (5V DC) UART PWM GeneratorMCU/DSP RPLIDARFigure 3-4 RPLIDAR A1 USB Adapter Pin DefinitionConfigure RPLIDAR A1 Scan FrequencySince USB adapter’s control signal MOTOCTL is fixed to high level, RPLIDAR A1’s scan motor is always rotating at its highest speed which makes RPLIDAR A1 working on a relative high scan frequency. You can configure RPLIDAR A1’s scan frequency by controlling motor speed.By connecting MOTOCTL signal to the device has PWM output function such as MCU’s PWM output I/O port, RPLIDAR A1’s scan frequency can be locked in a proper value by adjust duty ratio of PWM using the scan frequency feedback provided by RPLIDAR A1 core.Please refer to RPLIDAR A1 protocol and application note for more information. SDK also contains the sample code.SDK UsageSLAMTEC provides RPLIDAR A1 SDK support on both Windows and Linux platform. And users can embe the SDK source code to other operational system orembedded system quickly. Please refer to the SDK document for more information.P1 P7 … 1.25mm-7pinPre-Heating for Best PerformanceThe scan core will be heating when start working. We recommend pre-heating RPLIDAR A1 (Start the scan mode and the scan motor is rotating) for more than 2 minutes to get the best measurement accuracy.Ambient TemperatureRPLIDAR A1’s measurement resolution is sensitive to the ambient temperature. Improper use may even damage the sensor. Please avoid using RPLIDAR A1 in extreme high temperature (>40 degree) and too low temperature (<-10 degree).Ambient LightAlthough RPLIDAR A1 is not sensitive to ambient light, improper use may still lead to errors. In indoor environment, please avoid lighting RPLIDAR A1 with strong light source such as high-power laser.In outdoor environment, please avoid facing RPLIDAR A1 directly to sun light. This may lead to permanent damage to the image sensor of RPLIDAR A1 and make the measurement invalidThe standard version of RPLIDAR A1 may have less measurement range in the environment with strong sunlight.Image and Table IndexF IGURE 1-1I TEMS IN THE RPLIDAR A1D EVELOPMENT K IT (3)F IGURE 1-2T HE RPLIDAR A1 (4)F IGURE 1-3RPLIDAR A1A DAPTER (4)F IGURE 2-1C ONNECT RPLIDAR A1 AND USB A DAPTER (5)F IGURE 2-2C ONNECT THE USB A DAPTER TO PC VIA M ICRO-USB C ABLE (5)F IGURE 2-3C HOOSE USB A DAPTER D RIVER FOR I NSTALLATION (6)F IGURE 2-4S TART P AGE OF USB A DAPTER D RIVER I NSTALLATION (6)F IGURE 2-5R ECOGNIZED S ERIAL P ORT N AME M ATCHED WITH THE USB A DAPTER (7)F IGURE 2-6R OBO S TUDIO L OGIN P AGE (8)F IGURE 2-7T HE L IDAR P LUGIN IN R OBO S TUDIO (9)F IGURE 2-8T HE S UPPORTED C OMMANDS OF RPLIDAR IN R OBO S TUDIO (9)F IGURE 2-9T HE S CAN O UTLINE BY RPLIDAR IN R OBO S TUDIO (10)F IGURE 3-1RPLIDAR A1P IN D EFINITION AND S PECIFICATION (11)F IGURE 3-2RPLIDAR A1MOTOCTL E QUIVALENT C IRCUIT (12)F IGURE 3-3RPLIDAR A1P INS R EFERENCE D ESIGN (12)F IGURE 3-4RPLIDAR A1USB A DAPTER P IN D EFINITION (13)。
autoware的使用手册
autoware的使用手册
Autoware是一个开源的自动驾驶软件平台,它提供了一系列的
功能和工具,用于开发自动驾驶系统。
Autoware的使用手册可以帮
助用户了解如何安装、配置和使用Autoware平台。
下面我将从多个
角度来回答你关于Autoware使用手册的问题。
首先,Autoware的使用手册通常包括以下内容:
1. 安装指南,这部分会介绍如何在不同的操作系统上安装Autoware,包括所需的依赖项和安装步骤。
2. 配置说明,使用手册会详细介绍Autoware的各项配置,包
括传感器配置、车辆模型、地图数据等。
3. 功能介绍,手册会详细介绍Autoware平台提供的各种功能,如定位、感知、规划、控制等,以及如何使用这些功能。
4. 示例和教程,手册通常会包含一些示例和教程,帮助用户快
速上手Autoware,比如如何进行简单的自动驾驶模拟或测试。
其次,Autoware的使用手册可能会针对不同的用户群体进行详细介绍。
比如针对开发人员,手册可能会包括更多的技术细节和API文档;而对于普通用户,手册可能会更加注重用户友好的操作指南和实际案例演示。
此外,Autoware的使用手册可能会随着软件版本的更新而不断完善和更新。
用户可以通过官方网站或者开发者社区获取最新的使用手册和文档。
总的来说,Autoware的使用手册是帮助用户全面了解和使用Autoware平台的重要指南,通过仔细阅读和实践,用户可以更好地掌握Autoware的各项功能和工具,从而更好地开发和应用自动驾驶系统。
希望这些信息能够帮助到你。
slam_toolbox解读 -回复
slam_toolbox解读-回复Slam Toolbox 解读近年来,随着机器人技术的快速发展,Simultaneous Localization and Mapping(同时定位与地图构建,简称SLAM)成为了一个备受关注的研究领域。
为了帮助机器人能够在未知环境中实现定位和地图构建,在SLAM研究中出现了许多工具和库,其中SLAM Toolbox 就是其中之一。
本文将详细解读SLAM Toolbox,介绍其功能和应用,并分析其优劣势。
首先,SLAM Toolbox 是一种基于开源软件的工具集,旨在为研究人员和开发者提供一个快速构建和实现SLAM算法的平台。
它主要包含了一系列常用的SLAM算法,如基于卡尔曼滤波器和粒子滤波器的SLAM、基于图优化的SLAM等等。
通过使用SLAM Toolbox,用户可以方便地调用这些算法,并进行参数优化和结果分析。
SLAM Toolbox 的核心功能是提供了一些用于数据处理和滤波的函数,以及用于地图构建和环境建模的算法。
对于数据处理和滤波,SLAM Toolbox 提供了一些常用的传感器数据处理函数,如数据融合、数据预处理和异常检测等功能。
它还提供了一些经典的滤波器算法,如扩展卡尔曼滤波器(EKF)和无迹卡尔曼滤波器(UKF),以及一些基于粒子滤波器的算法,如蒙特卡洛定位(MCL)和机器人自适应定位(RAL)等。
在地图构建和环境建模方面,SLAM Toolbox 提供了一些图优化算法,如最小二乘法(LS)、因子图优化(FGO)和置信度传播(CBP)等。
这些算法可以帮助用户通过传感器数据和机器人运动信息构建准确的地图,并对地图进行更新和优化。
此外,SLAM Toolbox 还支持多种传感器数据的输入,如激光雷达数据、视觉数据和惯性测量单元(IMU)数据等,支持多种机器人平台的使用,如移动机器人、飞行器和水下机器人等。
SLAM Toolbox 的优势之一是它的开源性和灵活性。
- 1、下载文档前请自行甄别文档内容的完整性,平台不提供额外的编辑、内容补充、找答案等附加服务。
- 2、"仅部分预览"的文档,不可在线预览部分如存在完整性等问题,可反馈申请退款(可完整预览的文档不适用该条件!)。
- 3、如文档侵犯您的权益,请联系客服反馈,我们会尽快为您处理(人工客服工作时间:9:00-18:30)。
SLAMWARE开发套件快速使用指南
第一步: 快速连接
SLAMWARE开发套件组成:SLAMWARE 核心模块, SLAMWARE Breakout, RPLIDAR A1及配套通讯排线或RPLIDAR A2(本文档以RPLIDAR A2 为例进行介绍)。
如下图。
请将套装中SLAMWARE BREAKOUT取出并放置于平整台面上,将SLAMWARE核心模块插入miniPCIE插槽(J10接口)并固定,将RPLIDAR A2连接至Breakout的A2接口,将电源适配器连接至Breakout的电源接口(J8接口)。
如下图
天线
DC 9V-24V
第二步: 启动并连接至电脑
将Breakout开关(SW1)拨至ON启动设备,指示灯(D1)亮红色,同时Breakout发出滴滴声,约30秒后雷达开始转动,此时设备正常启动。
第三步: 下载并使用SLAMWARE SDK
请至SLAMTEC官方网站下载最新SLAMWARE SDK
/cn/Slamware
当设备正常启动后,打开您的无线网络适配器,您将看到热点 SLAMWARE-XXXXXX “。
请使用无线网卡连接至“SLWAMWARE-XXXXXX”(您也可以使用有线网络连接SLAMWARE BREAKOUT至PC,此时PC端网络适配器需设置成DHCP模式),并使用SDK包中文件夹bin下uicommander.exe连接系统,默认IP为192.168.11.1,连接成功之后,uicommander界面将出现RPLIDAR扫描到的地图。
第四步: 更多参考内容
更多SDK相关内容请参考SDK包中相关文档;
如需了解更多SLAMWARE套件使用方法,请参考SLAMWARE套件用户手册;
如需了解SLAMWARE核心模块如何与外部系统通讯,请参考SLAMWARE Ctrl Bus 通讯协议文档;
如需了解SLAMWARE CORE的电气特性及具体规格信息,请参考SLAMWARE CORE数据手册;
上述文档均可在思岚科技官方网站/上下载,如需更多帮助,请联系support@。
