ProfometerPM-600说明书
菲利普600i系列空气净化器说明书

Philips 600i seriesAir purifierPurifies rooms up to 21.8 m2Operates at max. 12W170 m³/h clean air rate (CADR)Connected to the Air+ appAC0650/20Our most energy-efficient, compact air purifierCleans the air from allergens and pollutantsWith the push of a button, the air purifier removes allergens and pollutants whileconsuming minimal energy. Its compact, sleek design blends seamlessly into your home.Control the air purifier anytime, anywhere, with the Philips Air+ app.Filtration performance•Removes pollutants in under 17 mins(3)•Filters 99.97% particles as small as 0.003 microns (1)•Removes viruses and aerosols from the air (5)Seamless Operation•Energy-efficient design•Ultra-quiet and no light disturbance•Thoroughly tested for durability and quality you can trustEffortless Control•Control your air purifier with the Philips Air+ app•Compact size and sleek design•Filter lifetime Indicator•3 manual speeds: medium, turbo, sleep modeWhole-room purificationOur air purifier delivers clean air to every corner of the room at a CADR of 170 m3/h, thoroughly purifying rooms up to 21.8m2. Say goodbye to pollutants like PM2.5, bacteria, pollen, dust, pet dander and more in under 17 minutes (3).HEPA filtrationOur 2-layer filtration system featuringNanoProtect HEPA technology captures an impressive 99.97% of ultra-fine particles as small as 0.003 microns (1) NanoProtect HEPA technology not only traps pollutants, but also uses an electrostatic charge to attract them, cleaning up to 2x more air than traditional HEPA H13 filtration, with higher energy efficiency(2).Virus removalVirtually nothing escapes VitaShield expect purer, cleaner air. VitaShield tehcnologycaptures aerosols, germs and particles as smallas 0.003 microns, smaller than the smallest know virus. Tested independently by external lab to remove H1N1 virus from the air. Also tested to remove 99.99% of HCoV-E229 virus (5).Low energy consumptionAchieve cleaner air with minimal energyconsumption and save money on your energy bill. Operating at max. 12W, our purifier is 2x more energy-efficient than other leading air purifiers (7). In sleep mode, it consumes just 2W, 30x less energy than a traditional lightbulb.Ultra-quiet operationEnjoy undisturbed sleep with our innovative purifier. In sleep mode, it operates only at 19 dB (6), quieter than a whisper. Also, the digital display light is dimmed, minimizing any light disturbance. With this setting, the air in your home will be clean always, even at night time.Tested for qualityWhen choosing Philips, you choose Philips for a trusted brand with 80+ years of experience in air care and health tech. Our air purifiers undergo 170 strict inspection tests before release and are certified by the European Centre for Allergy Research Foundation..Connected to Philips Air+ appUse our app for extra convenience andcontrol. In the app, you can turn your purifier on and off, adjust speed settings, and monitor your filter status. Additionally, learn more about air purification through our collection of in-app articles and check outdoor air quality data, available to you anytime, anywhere.Compact size and designOur purifier's compact size and sleek design make it the perfect complement to any space, effortlessly enhancing both the air comfort and aesthetic of your home. At just 34 cm tall, it is perfect to be placed on a desk or shelf. Enjoy fresh and clean air with a touch of sophistication.Issue date 2023-09-28 Version: 7.7.1EAN: 87 20389 02523 5© 2023 Koninklijke Philips N.V.All Rights reserved.Specifications are subject to change without notice. Trademarks are the property of Koninklijke Philips N.V. or their respective owners.Energy efficiency•Max. power consumption: < 12 W•Stand-by power consumption: < 1 W •Voltage: 100-240 VMaintenance•Recommended filter change: 12 months (8)•Replacement filter: FY0611/30•Service: 2-year worldwide guarantee Connectivity•App, connects via Wi-Fi: Air+•Smartphone compatibility: iPhone and Android devicesWeight and dimensions •Dimensions of packaging (LxWxH):263x263x375 mm•Dimensions of product (LxWxH):243x237x341 mm•Product weight: 2.2 kg•Weight incl. packaging: 3.2 kg•Color(s): White, silk beigePerformance•CADR (Particle, GB/T): 170 m³/h•Room size (NRCC): Up to 44 ?•Filtration: HEPA, Pre-filter•Particle filtration: 99.97% at 0.003 microns (1)•Allergens filtration: 99.99% (4)•Virus & aerosol filtration: 99% (5)Usability•Cord length: 1.6 m•Sleep mode•Manual speed settings: 3 (sleep, medium, turbo)•Min. sound level (Sleep mode): 19 dB (6)•Max. sound level (Turbo mode): 49 dB (6)*(1) From the air that passes through the filter, tested with NaClaerosol by iUTA according to DIN71460-1.*(2) Philips air purifiers have higher Clean Air Delivery Rate andenergy efficiency with a NanoProtect HEPA filter than with a HEPAH13 filter, tested to GB/T 18801.*(3) It is a theoretical time for one-time cleaning calculated by dividingits CADR 170 m²/h by the room size of 48 m² (assuming the roomis 20 m² in floor area and 2.4 m in height.*(4) From the air that passes through the filter material, tested withbirch pollen dust on filter media according to SOP 350.003 of theAustrian OFI institute.*(5) Microbial reduction rate test at external lab, with appliancerunning in turbo mode for 1.5 h in a test chamber contaminated withHCoV-229E virus aerosols. While related to it, HCoV-229E isnot SARS-CoV-2, which causes Covid-19.*(6) The average noise level, tested to IEC 60704-1 - 2020, MOD.*(7) Declared CADR per Watt, at max. power, vs. top-20 selling airpurifiers on Amazon Germany, March 2023*(8) The recommended lifespan is calculated based on the averageusage time of the Philips users and the WHO data on the pollutionlevel in the city. Actual life is affected by usage environment andfrequency. Applicable only in countries where the Philips store isavailable.。
BCHP 高纯度氧气发生器 SPO-600 说明书
BCHP高纯度氧气发生器SPO-600使用说明书北京中惠普分析技术研究所敬告:1. 在使用仪器前请您认真阅读此说明书!2. 切勿在缺电解液的情况下运行!以免造成电解池无法修复的后果。
3. 运输前请务必将电解液倒净,盖好储液桶内盖!以免在运输途中腐蚀机箱及内部元件,造成仪器报废。
注意:1. 需要配合空气源一起使用。
2. 在加电解液时请缓慢将电解液到入储液桶内。
3. 要经常观察电解液水位线,达到下限须立即加入纯净水或二次蒸馏水。
4. 更换完过滤器中的填充物后,务必要将过滤器上盖拧紧以及过滤器和过滤器底座拧紧,以免造成漏气。
企业通过ISO9001:2008质量管理体系认证产品通过国家分析仪器质量监督检验中心检测产品通过国家标准物质检测中心检测产品荣获部级科技进步二等奖产品中国专利号:94222810.3产品在世界银行国际性招标《ITC-943026》项目中标产品被联合国开发计划署《ICEB-Q91211》项目采用目录一、公司介绍 (1)二、产品概述 (1)三、仪器各部位名称 (2)四、仪器的安装与使用 (2)五、主要技术参数 (4)六、仪器的成套性 (4)七、仪器的故障原因与排查方法 (5)八、制造商的保证 (5)九、附图1 气路连接示意图 (5)一、公司介绍北京中惠普分析技术研究所成立于1994年,是一所集科、工、贸于一体的高新技术企业,是国内规模最大的气相色谱仪气源发生器的配套厂家,产品涵盖高纯度氢气、高纯度氮气、低噪声空气源等各种流量单体机及各种相关组合机。
系列全,品种多。
最近又推出供科学研究用超纯氢提纯仪(氢气纯度可达99.99999%)和纯氧发生器、热解析仪等多种产品。
我所于国内首推的小型全自动氢气站更是解决了中心实验室安全集中供氢的难题。
我们坚持质量第一,用户至上的服务准则,产品遍及全国,并出口挪威、阿根廷、韩国、乌克兰等18个国家和地区。
二、产品概述SPO-600型高纯度氧气发生器是通过电解吸附法从空气中获得氧气,其中电解池是利用燃料电池的逆过程设计而成。
Fluke 600A AC DC Clamp Meter 说明书
BM037BM035BM033BM031Robust Enclosure;Premium Plating & Low Leakage PCBSuperior Immunity To Interference;Reliable Operations And Readings;Meets The Latest EN61326-1 EMC Features Non-Contact (NCV) & Single-Probe Voltage Detection For Identifying Live Lines;Added User Selectable Hi/Lo SensitivitiesDUAL SENSITIVITIES EF-DETECTION PATENTED AmpTip TM CAT III 600V & CAT IV 300V Up To 600V AC Measures Up To 600V DC AmpTip TM REGULAR CURRENT Features 600A Extra-slim Jaws ACA ModelsAnd Hall-effect Jaws ACA/DCA ModelsMAX CONDUCTOR SIZE 26mm, 600Amps Fast Captures In-rush +/- Peak SignalsAt Durations As Short As 5ms;Automatic APO Disable Feature CREST MaxMin IN-RUSH CURRENTS Records Max & Min Readings Over Time;Automatic APO Disable Feature REC MaxMin DISPLAY READINGS REL For Convenient Readings Comparison;DC_Zero For DCA Residue Offset (BM037 & 035)RELATIVE ZERO & DC_ZERO Freezes The DisplayingReading For Later View DATA HOLD Short-Beep Alert On Forward Voltages <0.85V;Beep & Backlight Effects For Shorted DiodesINNOVATIVE BeepLit TM DIODE TEST Best Resolution 0.1Ω At 600Ω Range;2 Auto-ranges Up To 6k Ω (BM035 & 031);5 Auto-ranges Up To 6000k Ω (BM037 & 033)RESISTANCE Quick Open-short Tests On Switches And Wires;Beep & Backlight Effects For Noisy EnvironmentsINNOVATIVE BeepLit TM CONTINUITY For HVAC Flame SensorsTesting Via Test Probes DCµA (BM037 & 033)2 Auto-ranges Up To 2500µFTo Measure Motor Capacitors CAPACITANCE (BM037 & 033)Selectable ºC And ºF Readings;Comes With Bkp60 Bead ProbeTYPE-K TEMPERATURE (BM037 & 033)Up To 6kV 1.2/50µs Lightning Surge;Fully Certified By Independent Test Lab;Years Of Credibility For Serious UsersTRANSIENT PROTECTION Compact AC/DC 600A! Cat-III 600V! AmpTip TM ! Precise Rotary Switch!Compact AC/DC 600A! Cat-III 600V! AmpTip TM ! Precise Rotary Switch!AmpTip TM To Fit, Accurate To Read, Compact To Carry, Safe To Trust, Reliable To Last Body width <50mm For Handy Operations, Overall Length <190mm For Easy CarryingELECTRICAL SPECIFICATIONS Accuracy is ±(% reading digits + number of digits) orotherwise specified, at 23°C ± 5°C.Maximum Crest Factor < 2 : 1 at full scale & < 4 : 1 athalf scale or otherwise specified, and with frequencyspectrum not exceeding the specified frequency bandwidth for non-sinusoidal waveforms.Indication: Bar-graph segments & audible beep tones proportional to the field strength Detection Frequency: 50/60Hz Detection Antenna: Inside the top side of the stationary jaw Probe-Contact EF-Detection: For more precise indication of live wires, such as distinguishing between live and ground connections, use one single probe to test via terminal COM for direct metal Probe-Contact EF-Detection to achieve the most distinctive indication.RANGE 600.0V 1.0% + 5dAccuracyDC VoltageInput Impedance: 10M Ω, 100 pF nominalRANGE AccuracyAC Voltage (with Low-Pass Filter)Open Circuit Voltage: < 3.5VDC typically Short Beep Alert Threshold: Drop across 0.850VBeepLit™ ON Threshold: < 0.100VAudible Indication: Beep soundVisible Indication: LCD Backlighttemperature of the ambient (isothermal stage) for a correct junction voltage compensation. Allow the meter and the type-K probe set to reach isothermal stage for a significant change of ambient temperature. It can take up to an hour for changes > 5°C. 2)Type-K thermocouple range & accuracy notincluded TM conductor: <0.01A/A for BM037 & BM035<0.06A/A for BM033 & BM031TM conductor: <0.01A/A 2)Specified with DC-Zero mode applied to offset the non-zero residual readings, if any 3)Add 5d to the specified accuracy @ < 4A 1.5% + 5d 600.0A conductor: <0.1A/A for BM037 & BM035 <0.6A/A for BM033 & BM031 2)For BM033 & BM031, specified accuracy is for measurements made at the jaw center. When the conductor is not positioned at the jaw center, add 2% to specified accuracy for position errors conductor: <0.1A/A 2)Specified with DC-Zero mode applied to offset the non-zero residual readings, if any 1)DC-bias, if any, not more than 50% of Sine RMS BeepLit™ Continuity Tester:Continuity Threshold: Between 30Ω and 480ΩContinuity ON Response Time: 15ms approx.Audible Indication: Beep soundVisible Indication: LCD BacklightCREST (Peak-Hold): Applicability: Voltage and Non-invasion Current functions Accuracy: Add +/- 250 digits to specified accuracy for changes > 5ms in duration。
Waters 600中文操作说明书

Waters 600高精度四元梯度泵中文操作说明书 Waters 600E 控制器前面板Waters 600E 泵液晶显示屏方向键亮度调整键电源开关相对屏幕功能键操作功能键数字键确认键梯度控制器画面一. 操作功能画面说明1.Set up --- 设定泵硬件系统配置选择A,B,C,D 溶剂瓶的氦气法脱气装置开关, 0=关,1=开设定色谱柱加热装置温度上限泵硬件系统配置键压力上下限控制键盘锁定键帮助键2. Direct --- 等度(Isocratic)操作设定FLOW RATE :流动相流速设定( 范围随着硬件规格而定)。
COMPOSITION :流动相设置比例(A+B+C+D=100%)。
CURRENT :当前状态流动相比例。
NEW :改变流动相比例。
SPARGE:氦气脱气装置流量(0~100)。
TEMPERATURE:设定柱温箱温度(室温~9 0℃)。
PRESSURE:显示系统压力值。
SWITCH:外接装置的控制开关。
STOP FLOW:停止泵流速。
3. Operate Method --- 执行梯度功能(GRADIENT)操作设定执行梯度方法代号(#1~15)4. Program Method --- 编辑梯度表(Gradient Table)显示或变更表号清除一行清除表格全部内容存储键5. Program Table --- 编辑事件表(Event Table)显示或变更表号清除一行清除表格全部内容存储键二. 基本操作说明(等度 ISOCRATIC)1. 打开氦气钢瓶,设定输出压力为50~90psi(使用在线脱气机者,请忽略此步骤)。
2. 将溶剂输送塑料管置入储液瓶内流动相中(请注意输送塑料管的代号),打开电源开关至ON(1)的位置,出现如下的开机画面:3. 按一下“Set Up” 功能键,即进入泵设定(Pump Setup )画面。
4. 移动光标设定欲使用的溶剂瓶A,B,C 或D 的氦气法脱气装置开关,使其为“ENABLE” (按“1”, Enter ⇒ ENABLE 打开;按“0”,Enter ⇒ DISABLE 关闭)5. 如果使用柱温箱,设定温度数值(温度上限应低于溶剂沸点)。
Omega HPP-600 胸部手泵说明书

HPP-600Pneumatic Hand PumpVolume ControlThe HPP-600pump is equipped with two knobs for fine adjustment of the system pressure.The vent knob can be used to slowly reduce the system pressure.The vent knob should be closed prior to pressurizing the system by turning the knob away from the pump housing.The Vernier knob can be used to increase or decrease the system at a more controlled rate.For fast relieve of the pressure,move the pressure/vacuum pin to the opposite direction.Pressure/Vacuum SelectorThe pump can be used to generate pressure or vacuum depending on the position of the pin located in the pressure/vacuum switch.Press the pin on the side of the pump housing according to labels for the desiredoperation.For High Pressure OperationPrior to pressurizing, back out the Vernier knob until the ring on the Vernier shaft is showing. Pump to pressurize. Turn the Vernier knob towards the pump housing and the pressure should easily be able to reach 600 psi.NOTE:The pump uses a Schrader valve instead of a needle valve.Thus,full open or closed is several turns from the end of the travel.Over-tightening does not increase the seal.FittingsThe pump is equipped with 1/8" and 1/4" BSP ports. In order to use NPT fittings, a NPT to BSP Parallel Thread Adapter is required. These adapters, which are included with the pump, have a bonded washer attached to the male end of the adapter.MAINTENANCENo routine maintenance is required.A periodic check of system calibration is recommended.The Pump is not field serviceable and should be returned to Omega Engineering if repair is needed (field repair should not be attempted and may void warranty).Be sure to include a brief description of the problem plus any relevant application notes.Contact customer service to receive a return goods authorization number before shipping.FOR WARRANTY RETURNS, please have the following information available BEFORE contacting OMEGA:1.Purchase Order number under which the product was PURCHASED,2.Model and serial number of the product under warranty, and 3.Repair instructions and/or specific problems relative to the product.FOR NON-WARRANTY REPAIRS, consult OMEGA for current repair charges. Have the following information available BEFORE contacting OMEGA:1. Purchase Order number to cover the COST of the repair,2.Model and serial number of the product, and 3.Repair instructions and/or specific problems relative to the product.OMEGA’s policy is to make running changes, not model changes, whenever an improvement is possible. This affords our customers the lat-est in technology and engineering.OMEGA is a registered trademark of OMEGA ENGINEERING, INC.© Copyright 2008 OMEGA ENGINEERING, INC. All rights reserved. This document may not be copied, photocopied, reproduced, translated, or reduced to any electronic medium or machine-readable form, in whole or in part, without the prior written consent of OMEGA ENGINEERING, INC.WARRANTY/DISCLAIMER OMEGA ENGINEERING, INC. warrants this unit to be free of defects in materials and workmanship for a period of 13 months from date of purchase. OMEGA’s WARRANTY adds an additional one (1) month grace period to the normal one (1) year product warranty to cover handling and shipping time. This ensures that OMEGA’s customers receive maximum coverage on each product.If the unit malfunctions, it must be returned to the factory for evaluation. OMEGA’s Customer Service Department will issue an Authorized Return (AR) number immediately upon phone or written request. Upon examination by OMEGA, if the unit is found to be defective, it will be repaired or replaced at no charge. OMEGA’s WARRANTY does not apply to defects resulting from any action of the purchaser, including but not limited to mishandling, improper interfacing, operation outside of design limits, improper repair, or unauthorized modification. This WARRANTY is VOID if the unit shows evidence of having been tampered with or shows evidence of having been damaged as a result of excessive corrosion; or current, heat, moisture or vibration; improper specification;misapplication; misuse or other operating conditions outside of OMEGA’s control. Components in which wear is not warranted,include but are not limited to contact points, fuses, and triacs.OMEGA is pleased to offer suggestions on the use of its various products. However, OMEGA neither assumes responsibility for any omissions or errors nor assumes liability for any damages that result from the use of its products in accordance with information provided by OMEGA, either verbal or written. OMEGA warrants only that the parts manufactured by the company will be as specified and free of defects. OMEGA MAKES NO OTHER WARRANTIES OR REPRESENTATIONS OF ANY KIND WHATSOEVER, EXPRESSED OR IMPLIED, EXCEPT THAT OF TITLE, AND ALL IMPLIED WARRANTIES INCLUDING ANY WARRANTY OF MERCHANTABILITY AND FITNESS FOR A PARTICULAR PURPOSE ARE HEREBY DISCLAIMED. LIMITATION OF LIABILITY: The remedies of purchaser set forth herein are exclusive, and the total liability of OMEGA with respect to this order, whether based on contract, warranty,negligence, indemnification, strict liability or otherwise, shall not exceed the purchase price of the component upon which liability is based. In no event shall OMEGA be liable for consequential, incidental or special damages.CONDITIONS: Equipment sold by OMEGA is not intended to be used, nor shall it be used: (1) as a “Basic Component” under 10 CFR 21 (NRC), used in or with any nuclear installation or activity; or (2) in medical applications or used on humans. Should any Product(s)be used in or with any nuclear installation or activity, medical application, used on humans, or misused in any way, OMEGA assumes no responsibility as set forth in our basic WARRANTY/DISCLAIMER language, and, additionally, purchaser will indemnify OMEGA and hold OMEGA harmless from any liability or damage whatsoever arising out of the use of the Product(s) in such a manner.RETURN REQUESTS /INQUIRIES Direct all warranty and rep air requests/inquiries to the OMEGA Customer Service Department. BEFORE RETURNING ANY PRODUCT(S) TO OMEGA, PURCHASER MUST OBTAIN AN AUTHORIZED RETURN (AR) NUMBER FROM OMEGA’S CUSTOMER SERVICE DEPARTMENT (IN ORDER TO AVOID PROCESSING DELAYS). The assigned AR number should then be marked on the outside of the return package and on any correspondence.The purchaser is responsible for shipping charges, freight, insurance and proper packaging to prevent breakage in transit. regulations that apply. OMEGA is constantly pursuing certification of its products to the European New Approach Directives. OMEGA will add the CE mark to every appropriate device upon certification.The information contained in this document is believed to be correct, but OMEGA Engineering,Inc. accepts no liability for any errors it contains, and reserves the right to alter specifications without notice. WARNING: These products are not designed for use in, and should not be used for, human applications.。
PM-630钢筋保护层测试仪
革命性 Profometer 触摸屏
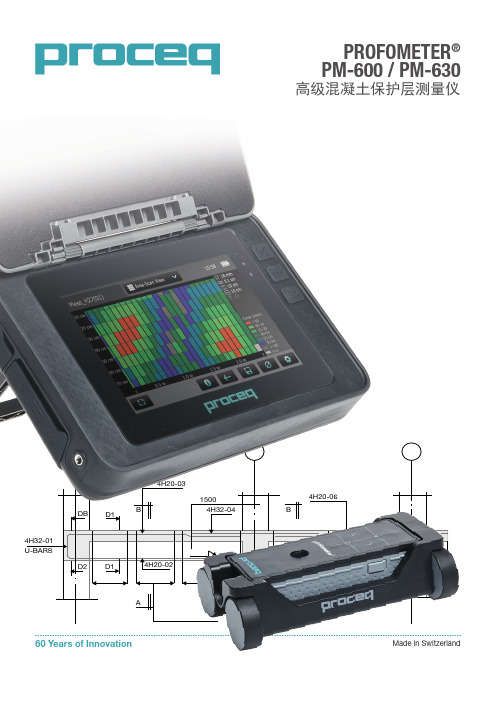
Profometer PM-600 和 Profometer PM-630 源于 Profometer 5+ S 和 Scanlog 型号,继承了 40 年的优良传统,代表第六 代 Profometer。
Profometer PM-600 和 PM-630 采用新一代经过设计保护的 触摸屏装置。两种仪器均提供了独特的现场测量和分析功能, 对测量程序进行实时控制。
Profometer PM-630 包括 Profometer 触摸屏、 带探头手推车的通用探头、1.5 米(5 英尺) 探头电缆、电池充电器、USB 电缆、粉笔、 带软件的 DVD、产品说明书、背带和手提箱
Profoscope 装置包括 Profoscope、 启动测试 套件、电池、帆布包、背带、粉笔和产品说明书
基本保护层测量仪 Profoscope Profoscope+
高级保护层测量仪
点检
扫描
Profometer PM-600
Profometer PM-630
专业钢筋成像 (未來)
Profometer PM-650
钢筋定位 保护层测量 直径预估 数据采集 统计信息 快照 单线扫描 多线扫描 面积扫描 2D 成像 锈蚀数据融合 升级可能性
高级混凝土保护层测量仪
Profometer PM-600 概述
定位模式
在定位模式中,您可精确探测钢筋 位置和方向以及测量保护层和钢筋 直径。
控制速度和信号强度 可视化
可在测量屏幕上直接访 问设置
点检探头专为稠密钢筋布 局区域设计
统计信息和快照视图
借助统计信息和快照视图,可直接在屏幕上全面 审核测量数据。
外壳经过特殊设计,可用于严苛的现场环境,包括背 带、集成支架和遮阳盖
ifm电子 PY-600-SE 压力传感器说明书
2 switching signal; analogue signal; (configurable)
PNP/NPN 2
normally open / normally closed; (parameterisable) 2
250 < 170
1 4...20; (scalable 1:4)
(Ub - 10 V) / 20 mA 0...10; (scalable 1:4)
[s]
Max. response time analogue output
[ms]
<3 0...4 0 - 0; 1 - 0; 5 - 2
3
Software / programming Parameter setting options
hysteresis / window; normally open / normally closed; switching logic; current/voltage output; Damping; adaptation of displayed values;
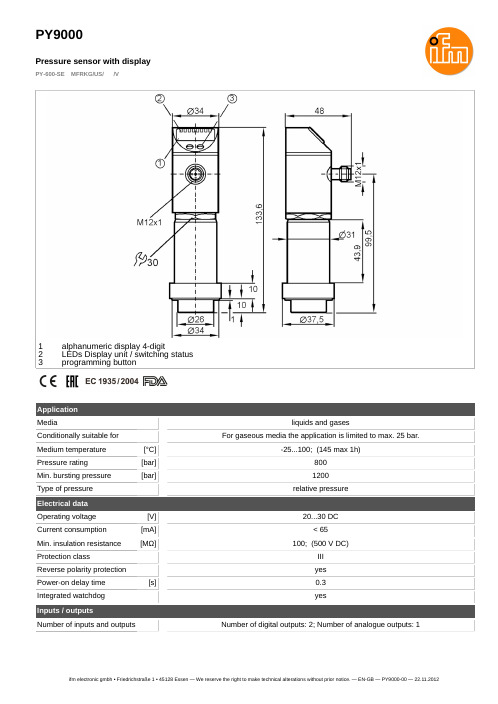
PY9000
Pressure sensor with display
PY-600-SE MFRKG/US/ /V
Connection
OUT1 OUT2
switching output switching output analogue output
ifm electronic gmbh • Friedrichstraße 1 • 45128 Essen — We reserve the right to make technical alterations without prior notice. — EN-GB — PY9000-00 — 22.11.2012
XPower 空气扇说明书

PROFESSIONAL AIR MOVEROWNER ’S MANUALXPOWER MANUFACTURE, INC. 220 Clary AvenueSan Gabriel, CA 91776, USATel: 626-285-3301, Fax: 626-285-3302 www.xpower.wsPLEASE READ AND SAVE THESE INSTRUCTIONSX-600/ X-600A/ X-630 P-600/ P-630 (115V/230V)X-600 / X-600A / X-630P-600 / P-630IndexIntroduction (2)Operation / Instructions (3)Safety Instructions (4)Maintenance Instructions / Troubleshooting (5)Specifications (6)Warranty / Service (7)Parts List (8)Daisy Chain Specifications / Accessories (9)Warranty Registration Form (10)IntroductionXPOWER Air Movers are ETL/CETL/CE/GS certified and multifunctional Air Mover with the most efficient engineering design. All XPOWER AirFeatures:•Low power draw with a velocity over 2400 CFM when switch on High.•Super quiet and super light weight.•Optional Easy clean filter system.•Easy carrying and storage stackable.•Easily disassembled for thorough cleaning and service.•“Power cord” lengths are 20’/25’ in US and 10’ for Canada•Easy cord wrap on handle•Safety screens on open vents.• 3 speed switch.• 4 air flow positions (0°, 20°, 45°, 90°).0° 20° 45° 90°• Durable and rugged housing with 5 Years Warranty.Operation / InstructionsXPOWER Air Movers are intended to move air and to dry floors, walls, furniture, etc. Durable and easy to operate withan effective balance of static pressure and airflow, the units are suitable for a variety of applications.1. XPOWER Air Movers are shipped ready to be put into service.Prior to plugging the unit into the power source,inspect completely for any shipping damage.2. Plug the electrical cord into the power outlet.3. Carefully place the Air Mover unit on a stable, flat dry surface.4. The unit has four air flow positions, capable to aim airflowacross flat surfaces or angled upward.5. Turn the switch to desired speed and make sure it isoperating correctly.6. All Air Movers in operation must be supervised at all times.AIR MOVER STORAGE:Air Movers can be stacked (up to 4) on their sides for storage.NOTICE:1.Stacking feature is not secure for transportation.2.Remove the filters before stacking.Safety Instructions1. To prevent electric shock, do not operate the unit in standing water. Never plug in or unplugthe unit with wet hands or while standing in water.2. To avoid risk of injury, do not direct air flow at face or body.3. To reduce the risk of fire or electric shock, do not use the Air Mover with any solid-state speedcontrol device.4. Use only with GFCI protected receptacles. Please contact a qualified electrician for verificationand / or installation of a GFCI receptacle if necessary.5. Do not operate any Air Mover with a damaged cord or plug. Discard the unit or return it to anauthorized service facility for examination and/or repair.6. Unplug the Air Mover from the power supply before servicing or cleaning.7. Do not run the power cord under carpeting. Do not cover the power cord with throw rugs,runners, or similar coverings. Place the power cord away from traffic area to prevent tripping.8. Do not allow children to play with or around an Air Mover at any time.9. Do not move or carry an Air Mover while unit is operating.10.All Air Movers in operation must be supervised at all times.Maintenance Instructions1. To keep the Air Mover clean, use a damp cloth to wipe the surface of the housing.2. Never clean the Air Mover with water.3.When not in use, unplug and store the Air Mover in a dry indoor place out of reach of children.4. Always disconnect the Air Mover from its power source before performing any maintenance or cleaning.5. Clean the filters (optional item) as often as necessary to avoid loss of airflow.TroubleshootingFor any problems not listed below, call your local distributor or contact our Service Department.SpecificationsXPOWER LIMITED WARRANTYXPOWER Warranty covers the unit from defects in materials and craftsmanship. The Warranty covers normal use for a term of one year from the original date of purchase including parts, labor and one way shipping. The XPOWER Air Mover Housing is covered for a term of fiveyears from the date of original purchase.Important !Warranty does not cover signs of misuse including, but not limited to, a unit that has been dropped, subjected to water damage, tampered with, improper voltage use and unauthorized maintenance and repairs. The POWER CORD and FILTERS are not covered by the warranty.ServiceIn order to receive service or replacement parts under warranty, you must:A. Must Call for a Return Merchandise Authorization (RMA) number through Service Department andobtain ship back instructions.B. Must have original proof of purchase.C. Must use original none damaged packaging or Industrial certified packaging method.The end user will be responsible to ship the unit (with the RMA number showing on the shipping label) to the XPOWER Service Department. Upon inspection, we will advise you of the repairs needed and the cost (if applicable). XPOWER will provide repair or replacement parts depending on warranty.- 7 -600 Series Parts List- 8 -Daisy Chain Specifications (applicable for model X-600A)XPOWER Air Mover Model X-600A is daisy chainable with a low 3.8 amp draw. The 12-amp on-board circuit breaker will allow two (2) additional X-600A units to run on one circuit at the same time.Filters (optional)Note:Air Mover has an on-board circuit breaker. If the auxiliary outlet overloads, the circuit breaker will trip. If the breaker trips, unplug the units and press the circuit breaker reset button.Plug the units back into the power source and turn on the switch.AccessoriesA set of filters is available for the XPOWER Air Mover which will help prevent small debris and dust from entering the Air Mover. To clean the filters: remove filters from the unit and wash with warm soapy water, rinse with clean water and let dry thoroughly before reinstalling.the blower.- 9 -WARRANTY REGISTRA TIONPlease complete and mail or fax for your product warranty. F or a multiple units, please list serial numbers on a separate sheet of paper. Address: XPOWER MANUFACTURE, INC. 220 Clary Avenue San Gabriel, CA 91776, USATel: (626) 285-3301; Fax: (626) 285-3302From:TO:XPOWER MANUFACTURE, INC.220 Clary AvenueSan Gabriel, CA 91776, USATel: (626) 285-3301; Fax: (626) 285-3302。
PM8000 快速参考键 - 概述说明书

PM8000 Quick ReferenceKeys -OverviewDevice ON/OFF Long push (2s)Power ON Very Long push (5s)Power OFFMenu Short pushReturn to previous menu level or to measurement screen Home, Measurement Screen Short pushEnter Menu+Home, Measurement ScreenShort push Measure Rebar Diameter Long push (2s)Calibrate MenuShort pushMenu Navigation: rightLeft Side KeyRight Side KeyRight Function KeyLeft Function KeyHome, Measurement Screen Long push (2s)Show pre-set screen(auto-disappear after 2s)Short push Save cover and rebar diametersvalues in spot scan manual modeMenuShort push Menu Navigation: leftHome, Measurement Screen Short push Toggle between 2 statistic views Long push (2s)Start new series with same parameters MenuShort pushConfirm the indicated function and return after 1s to previous menu levelMeasurement screenMeasuring rangeConcrete cover alertNeighboring rebar correctionNumber of measurements takenReference rebar diameter*Measured bar diameter*Measured concrete cover*Calibration alertBluetooth active Battery indicatorMemory fullFurther InformationMetric Units mmASTM Units # units of 1/8 inch Japanese Unitsmm(*) Depending on the unit setting,Start-up and operationDevice needs to be in free space for the complete calibration process(no metal within a 200 mm / 8” sphere)Measurement screen(when no rebar or metal object is detected)Startup ScreenLong push2 secStart DeviceCalibrate DeviceLong pushCalibrateMeasureMeasurement ProcessFind RebarRebar PositionDiameter & CoverShort pushMeasureRebar locatedMove as indicatedNoteRemove all metallic objects such as rings and watches before you start measuring .Main Menu –Overview and NavigationRight Side KeyNavigate RightLeft Side KeyNavigate LeftRight Function KeyChoose indicated functionLeft Function KeyReturn to previous menu level +Home/Measurement ScreenMain Menu ScreenEnter MenuNavigationReference Rebar Diameter Settings Operation Mode SettingsConcrete Cover Alert SettingsNeighboring Rebar Correction SettingsMeasuring Range Audio Settings Units Main Menu –Menu ItemsConfiguration of the operation modeLocate or Spot Scan (data collection)Configuration of the diameter of the reference rebar Configuration of Cover Alert valueConfiguration of spacing between rebars for neighboring rebar correction Configuration of measuring range depending on metal object depthStandard, Deep or AutoConfiguration of all audio signallingRebar centered, Min cover alert or Key pressedConfiguration of measurement unitsIn Metric, ASTM or Japanese UnitsMemory InformationMemory used information / clear Show Device InformationMenu Navigation –Reference rebardiameterMetric unitsASTM unitsJapaneseRight Side ButtonNavigate RightLeft Side ButtonNavigate LeftMain Menu Screen++Further InformationMetric Units mmASTM Units# units of 1/8 inchJapanese Units mmUnitsBefore measuring be sure you set the right units system for your inspectionMenu Navigation –Operation modeFurther InformationLOCATE Rebar location or Metal detection without data storageSPOT SCAN AUTO Automatic data collection of concrete cover when a rebar is detectedSPOT SCAN MANUAL Manual data collection of concrete cover and/or rebar diameter values with Left Side Key buttonRight Side ButtonNavigate RightLeft Side ButtonNavigate LeftMain Menu Screen++Menu Navigation –Minimumcover alertMetric & Japanese unitsASTM unitsRight Side ButtonNavigate RightLeft Side ButtonNavigate LeftMain Menu Screen++If a minimum cover alert is selected,the LED is lit when the cover is below this limit.If audio is on,an audio signal is given.The minimum cover setting is possible with a cover up to 180mm /7.08”.Further InformationMenu Navigation –Neighbouring rebar correctionMetric & Japanese unitsASTM units Right Side Button Navigate Right Left Side Button Navigate LeftMain Menu Screen++It compensates the influence of 1st and 2nd layer neighbor rebars (AI) or 1st layer neighbor rebars only (NRC) on cover measurement of 1st layer rebars. If both a1 and a2 spacings are entered, Φ1 ≤ Φ2 and Standard Range is set, then the Artificial Intelligence is automatically applied. If only a1 spacing is entered or Φ1 > Φ2 or Large/Spot Range is set, then the Neighboring Rebar Correction (only taking into account 1st layer) is automatically applied. The user can enter the spacing value manually or choose the Auto function, which redirects to a Single-Line scan where the spacing is automatically measured and averaged. The rebar size measurement is anyway only corrected with NRC.Further InformationNOTE! This effect can be reduced by the neighboring bar correctionAny ferromagnetic material within the sphere may have an influence on the signal value (e.g. during a reset)Menu Navigation –Measuring rangeFurther InformationSelect between:Mode Rebar or metal object depth Standard < 80mm (Default)Deep from 80mm to 180mm Auto Switches automatically from Standard to Deep Metric & Japanese unitsRight Side Button Navigate RightLeft Side Button Navigate Left Main Menu Screen++The pulse induction principle used by PM8000 has defined operating ranges and accuracies. The measuring range is dependent on the bar size. The expected accuracy of the cover measurement is indicated in the graphic below. (Complies with BS1881 part 204, for a single rebar with sufficient spacing and known diameter).StandardDeepRight Side ButtonNavigate RightLeft Side ButtonNavigate LeftMain Menu Screen++Further InformationSelect/Deselect the sound settings for the following alerts (Default: all off)§Rebar center detected§Minimum Cover alert§Key pressedRight Side Button Navigate RightLeft Side Button Navigate LeftMain Menu Screen++Menu Navigation –MemoryRight Side Button Navigate RightLeft Side Button Navigate LeftMain Menu Screen++Menu Navigation –InfoRight Side Button Navigate RightLeft Side Button Navigate LeftMain Menu Screen+Measurement -AccuracyMeasuring RangeThe pulse induction principle used by PM8000has defined operating ranges andaccuracies.The measuring range is dependent on the bar size.The expectedaccuracy of the cover measurement is indicated in the graphic below.(Complieswith BS1881part204,for a single rebar with sufficient spacing and knowndiameter).DeepStandardStandardDeepMethod 1Map out a rebar grid on a test surface and then select one rebar from the grid that has sufficient spacing from other rebars.Step 1Create a rebar grid by locating rebars.Step 2Select one rebar that has the largestspacing from neighboring rebars.Step 3Use a ruler and confirm that the spacing is larger than the limits of the circle defined above.If not,redo Steps 1and 2until a rebar is located with the required spacing to a neighbor rebar.Step 4Place the center of point of the device of the PM8000over the rebar at themidpoint line of the rebars running crosswise to the rebar under test and click the right side key (short push)for measuring rebar diameter.Midpoint line Measurement –Rebar DiameterFactors Affecting Diameter DeterminationTwo factors affect the determination of the rebar diameter:1.Cover depth.Diameter can be determined for rebars with cover not exceeding 80%of the Standard range.64mm /2.5”.2.Spacing between neighboring bars.For accurate determination of the diameter,the spacing between the rebars must be greater than the limits shown in the drawing below withreference to the center point of the device.Method 2Neighboring rebars that are within the sphere of influence will be detected by the PM8000and will affect cover depth and diameter estimation results.An insufficient spacing is smaller as the minimum spacing defined in Menu Navigation –Neighboring Rebar Correction .The effects of neighboring rebars can be mitigated by keying-in a correction value.NOTE!This works only for rebars of the same layer running in parallel to the rebar under test.Step 1Create a rebar as grid by locating rebars.Step 2Select one rebar that has the largest spacing from neighboring rebars.Step 3Use a ruler to measure the spacing.In case the spacing from the rebar under test to a neighboring rebar is equal or less than 130mm /5.2”go to the main menu,select the icon and input the measured spacing.Verify that neighboring rebar correction symbol is active in the status line at the top of the display as shown in Menu Navigation –Neighboring Rebar Correction .Step 4Place the center of the PM8000over the rebar at the midpoint line of the rebars running crosswise to the rebar under test and click the right side key (short push)for measuring rebar diameter.Diameter Measurement on Areas with sufficient Spacing of the Rebars Diameter Measurement on Areas with insufficient Spacing of the Rebars (Neighboring Rebar Correction)Diameter Measurements on Welded or bound (wires) reinforcement Meshes In most cases a diameter can be measured but the displayed value is far too high and cannot be used.The only way to determine the diameter is by an inspectionhole.For more information on the product use of the product & firmware update with PqUpgrade software please refer to the Product Name PM8000 documentationIt is available for download on For safety and liability information, please download at https:///en/about-us/gtc-and-certificates Subject to change. Copyright © 2022 by Proceq SA, Schwerzenbach. All rights reserved./en/products/profometer-pm8000ASIA-PACIFICProceq Asia Pte Ltd.1 Fusionopolis WayConnexis South Tower #20-02 Singapore 138632T +656382 3966CHINAProceq Trading Shanghai Co., Limited Room 701, 7th Floor, Golden Block 407-1 Yishan Road, Xuhui District 200032 Shanghai | ChinaT +86 21 6317 7479EUROPEProceq AGRingstrasse 28603 SchwerzenbachZurich| SwitzerlandT +41 43 355 38 00UKScreening Eagle UK LimitedBedford i-lab, Stannard WayPriory Business ParkMK44 3RZ BedfordLondon | United KingdomT +44 12 3483 4645MIDDLE EAST AND AFRICAProceq Middle East and AfricaSharjah Airport InternationalFree Zone | P.O.Box: 8365United Arab EmiratesT +971 6 5578505USA, CANADA & CENTRAL AMERICAScreening Eagle USA Inc.14205 N Mopac Expressway Suite 533Austin,TX 78728 | United StatesScreening Eagle USA Inc.117 Corporation DriveAliquippa, PA 15001 | United StatesT +1 724 512 0330SOUTH AMERICAProceq SAO Equipamentosde Mediçao Ltda.Rua Paes Leme136Pinheiros, Sao PauloSP 05424-010 | BrasilT +55 11 3083 3889Version 0.9。
Get清风ABBPCM600软件使用方法详解

ABBPCM600软件使用方法详解ABB保护逻辑编写和PCM600软件使用方法详解一、概述1、ABB保护逻辑的编写﹡ABB保护逻辑的编写是在电学理论的根底上,通过PCM600调试软件内的逻辑模块的整合,再通过试验验证后,得出的。
﹡PCM600调试软件内的常用逻辑模块列举如下表:功能IEC 61850IEC60617IEC-ANSI 保护三相过电流保护,低定值段PHLPTOC1 PHLPTOC2三相过电流保护,高定值段PHHPTOC1 PHHPTOC2三相过电流保护,瞬时段PHIPTOC1 PHIPTOC2三相方向过电流保护,低定值段DPHLPDOC1 DPHLPDOC2三相方向过电流保护,高定值段DPHHPDOC1接地保护,低定值段EFLPTOC1 EFLPTOC2接地保护,高定值段EFHPTOC1 EFHPTOC2接地保护,瞬时段EFIPTOC1方向接地保护,低定值段〔下一页续表〕DEFLPDEF1方向接地保护,高定值段DEFHPDEF1间歇性接地保段INTRPTEF1接地保护〔越野式双相同时接地故障〕,使用计算的I0EFHPTOC1断相保护PDNSPTOC1负序电流保护NSPTOC1 NSPTOC2 NSPTOC3 NSPTOC4正序欠电压保护PSPTUV1三相欠电压保护PHPTUV1 PHPTUV2 PHPTUV3三相过电压保护PHPTOV1 PHPTOV2 PHPTOV3零序电压保护ROVPTOV1 ROVPTOV2 ROVPTOV3负序过电压保护NSPTOV1手合加速CBRSOF1馈线、电缆和变压器热过负荷保护T1PTTR1便要器的热过负荷保护,两个时间常数T2PTTR1电机的负序电流保护MNSPTOC1 MNSPTOC2负载损失监视LOFLPTUC1电机负荷堵塞保护JAMPTOC1STTPMSU1电机启动监视反相保护PREVPTOCMPTTR1电机的热过负荷保护BSTGGIO1开关量信号传递TR2PTDF1 2W变压器的稳态和瞬动差动保护LNPLDF1线路差动保护和相关的测量,稳态段和瞬动段LREFPNDF1数值稳态低阻抗限制的接地保护高阻抗限制的接地保护HREFPDIF1断路器失灵保护CCBRBRF1涌流检测INRPHAR1主跳闸TRPPTRC1TRPPTRC2弧光保护ARCSARC1ARCSARC2ARCSARC2 控制断路器控制CBXCBR1隔离开关位置指示DCSXSWI1 DCSXSWI2 DCSXSWI3接地开关指示ESSXSWI1紧急启动ESMGAPC1自动重合闸DARREC1分接开关位置指示TPOSSLTC1状态监视断路器状态监视SSCBR1跳闸回路监视TCSSCBR1 TCSSCBR2CT 断线监视CCRDIF1PT 断线监视SEQRFUF1保护信道监视PCSRTPC1电机运行计数器MDSOPT1测量故障录波RDRE1三相电流测量CMMXU1 CMMXU2相序电流测量CSMSQI1 CSMSQI2零序电流测量RESCMMXU1 RESCMMXU2三相电压测量VMMXU1零序电压测量RESVMMXU1相序电压测量VSMSQI1三相功率和电能测量PEMMXU1/MP EMMXU1频率测量FMMXU1逻辑模块的详细解读,请参照ABB技术说明书。
ProfometerPM-600说明书

图 2: 测量范围和精度
© 2014 Proceq SA
7
2.4 分辨率
对钢筋的最小间距有所限制,具体取决于保护层深度和钢筋直径。超过
这些限制的钢筋无法区分。
C [英寸][毫米]
8 200
7 180
160 6
140 5
120
4 100
3 80
C S
点检探头范围
大范围
Ø 40 mm Ø 26 mm
Ø 16 mm Ø 12 mm Ø 8 mm
1.1 通用信息........................................... 6 1.2 责任............................................... 6 1.3 安全说明........................................... 6 1.4 正确使用........................................... 6
lovibond 水质检测 tintometer 泳池管理器 pm 600 使用说明书

Lovibond ® Water TestingTintometer ®GroupPM 600泳池管理器。
所有泳池参数都在一台仪器中大型存储器PM 6xx 系列的设备最多可存储 1000 个数据组。
先进技术红外线 (PM 600 / PM 620) 或 Bluetooth ® (PM 630) 可用于数据传输。
PM 600 和 PM 620 设备可通过模块连接 PC,PM 630 可通过Bluetooth ® 连接至 AquaLX ® App。
所有重要参数从 A(碱度 M)到 W(过氧化氢),测量最重要的泳池参数。
可选择提供 10 个 (PM 600) 或 34 个参数 (PM 620 / PM 630)。
发光显示屏即使在黑暗的光线条件下,也可以随时测量:所有设备都配备发光显示屏,为您提供更大的灵活性。
灵活性从不同的剂型中选择 - 片剂、液体指示剂或粉末试剂:通过 PM 6xx 系列,您可以使用所有类型的试剂。
行业公共泳池 | 泳池服务应用冷却水 | 原水处理 | 污水处理 | 泳池水处理 | 泳池水质控制 | 消毒控制 |电镀 | 锅炉水 | 饮用水处理PM 600使用光度计 PM 600 和 PM 620,随时满足泳池运营方的严格要求。
这些设备配备多达 34 种检测方法和一个最多可存储 1000 个数据组的存储器。
PM 630 提供一个 Bluetooth ® 接口,不采用红外数据传输。
直观的操作和发光显示,使该系列具备极高的用户友好性。
测量范围Test Name测量范围化学方法2T 钙硬度20 - 500 mg/L CaCO3紫脲酸铵HR T 氯0.1 - 10 mg/L Cl2a)DPDHR T 碱度-m 5 - 500 mg/L CaCO3酸性 /指示剂LR T 磷酸盐0.05 - 4 mg/L PO4磷钼蓝T pH 值 6.5 - 8.4 pH苯酚红T 次氯酸盐0.2 - 16 % NaOCl碘化钾T 氯0.01 - 6.0 mg/L Cl2a)DPDT 氰10 - 160 mg/L CyA三聚氰胺T 溴0.05 - 13 mg/L Br2DPDT 碱度-m 5 - 200 mg/L CaCO3酸性 /指示剂T 臭氧0.02 - 2 mg/L O3DPD / 甘氨酸T 铁0.02 - 1 mg/L Fe Ferrozine/巯乙酸盐T 铜0.05 - 5 mg/L Cu a)双喹啉Technical Data光学性质发光二极管 - 光电传感器 - 在带有干扰滤光片的透明测量井内配对波长精度± 1 nm光度精度 2 % FS (T = 20 °C – 25 °C)适用比色皿比色管 24 mm显示图形显示器数据接口紅外線操作耐酸且耐溶剂的触感薄膜键盘,通过内置蜂鸣器提供声音反馈Auto – OFF是更新通过互联网更新软件内置存储器约 1,000 个数据组电源4个电池 (Mignon AA/LR6)电池寿命约 26 小时蜂鸣器可用便携性台式环境条件5-40 °C,对应 相对湿度 30-90 %(非冷凝)保护等级IP 68一致性CE多语言操作界面德文, 英文, 法文, 意大利, 西班牙, 葡萄牙, 波兰, 印尼尺寸95 x 45 x 210 mm重量450 g辅料标题货号样本收集器,500 ml 瓶和盖,AF 631170500电池 (AA),4 件套1950025组合比色杯 3, 12 件套197605带盖的圆形比色杯 Ø24mm,高 48 mm,10 ml,12 件套197620用于 24 mm 圆形比色杯的比色杯密封圈,12 件套197626圆形比色杯,盖子直径 Ø 24 mm,高 48 mm,10 ml,5 件套197629清洁布197635圆形比色杯,盖子直径 Ø 16 mm,高 90 mm,10 ml,10 件套197665圆形比色杯 16 mm 适配器19802190 Fixed price service package for PM600/PM620/PM63019802704 Service plan - 3 years for PM600/PM620/PM63019802804更新电缆用于连接 PC214030红外数据传输模块 IRiM214050氯参考标准套件 0.2 和 1.0 mg/l (MD/PM 600 series)215630氯参考标准套件 0.5 和 2.0 mg/l (MD/PM 600 series)215635氯参考标准套件 1.0 和 4.0 mg/l (MD/PM 600 series)215636 pH 参考标准套件 7.45 pH (MD/PM 600 series)215665验证标准套件 PM 光度计215680塑料搅拌棒,长 13 cm364100塑料搅拌棒,长 10 cm364109塑料搅拌棒,长 13 cm,10 件套364120塑料搅拌棒,长 10 cm,10 件套364130塑料注射器,5 ml366120 500 ml 瓶子,AF 631375069量杯,100 ml384801试样瓶支架,用于 6 个Ø 24 mm 圆形试样瓶418951带把手的塑料漏斗471007 ValidCheck 氯 1.5 mg/l48105510 Factory calibration certificate ISO 9001 for PM600/PM620/PM630999751Tintometer GmbH Lovibond® Water Testing Schleefstraße 8-12 44287 Dortmund Tel.: +49 (0)231/94510-0 ****************** 德国The Tintometer LimitedLovibond HouseSun Rise WayAmesbury, SP4 7GRTel.: +44 (0)1980 664800Fax: +44 (0)1980 625412*****************英国Tintometer ChinaRoom 1001, China Life Tower16 Chaoyangmenwai Avenue,Beijing, 100020Customer Care China Tel.: 4009021628Tel.: +86 10 85251111 App. 330Fax: +86 10 85251001**************************中国Tintometer South East AsiaUnit B-3-12, BBT One Boulevard,Lebuh Nilam 2, Bandar Bukit Tinggi,Klang, 41200, Selangor D.ETel.: +60 (0)3 3325 2285/6Fax: +60 (0)3 3325 2287****************************马来西亚Tintometer Brazil Caixa Postal: 271 CEP: 13201-970 Jundiaí – SPTel.: +55 (11) 3230-6410 ***************** .br巴西Tintometer Inc.6456 Parkland DriveSarasota, FL 34243Tel: 941.756.6410Fax: 941.727.9654*****************美国Tintometer India Pvt. Ltd.Door No: 7-2-C-14, 2nd, 3rd & 4th FloorSanathnagar Industrial Estate,Hyderabad, 500018TelanganaTel: +91 (0) 40 23883300TollFree:180****3891/3892***********************www.lovibondwater.in印度Tintometer SpainPostbox: 2404708080 BarcelonaTel.: +34 661 606 770*******************西班牙Technical changes without noticePrinted in GermanyLovibond® and Tintometer® are Trademarks of the Tintometer Group of Companies。
Sysmex CA-600系统产品介绍说明书

Resetting the standard, again.Introducing the Sysmex CA-600 Systems:Reliability and convenience come standard./diagnostics2Built on one standard,to deliver the nextAdvance your hemostasis lab with confidence with the Sysmex CA-600 SystemsThe Sysmex CA-600 Systems share a proven design that drives proven performanceProven reliability for uninterrupted testingWith nearly a year between unscheduled service visits on the Sysmex CA-500 Systems,1 Sysmex CA-series systems offer a history of providing consistently efficient workflow and uninterrupted test results for your physicians.Proven history of #1-ranked serviceWhen you do have an unscheduled service visit, you can be confident that Siemens Healthineers will service your system quickly and efficiently. That’s why, year after year, IMV ServiceTrak rates Siemens Healthineers with the “highest overall service performance,” based on 46 individual service criteria.2Proven economy with two model configurations Some labs need routine testing. Others need routine and specialty testing. With models custom-tailored to the needs of each, labs get the ideal solution. The Sysmex CA-620 System offers clotting testing methodology for laboratories that primarily perform routine tests; the Sysmex CA-660 System offers clotting, chromogenic,* and immunologic* testing for laboratories that require a broader test menu and perform specialty testing. Proven technology for accuracy and confidenceWith more than 5,000 active Sysmex CA-500 Systems installed worldwide,† you can be confident that thedetection principles found in the Sysmex CA-600 Systems represent proven testing accuracy and confidence.The Sysmex® CA-600 Systems build upon the proven technology and reliability of the Sysmex CA-500 Series Systems, offering peace of mind and easy integration into your laboratory. And, as is standard with thesolutions offered by Siemens Healthineers, you can be sure that we will offer various instruments to meet individual needs. That’s why the Sysmex CA-600 Systems are available in two models.1A ccording to internal data.2B ased on ServiceTrak study data from IMV from service years 2007–2011. IMV provides database and market information for products and services for managers in the analytical, clinical diagnostics, biotechnology, life sciences, and medical imaging industries. ServiceTrak is a telephone survey among section supervisors, laboratory managers, and technologists from hospitals across the United States.* Offered on Sysmex CA-660 System only.†As of April 2012, the Siemens Healthineers active installed base exceeded 5400 systems.3BFT™ II SystemSemiautomated dual-channel coagulometer with turbodensito-metric detection, ideal for low-volume labs performing routine coagulation tests.The standard for savingyour time and moneyThe Siemens Healthineers family of solutions offers a systematic, end-to-end approach specially designed to meet your individualized testing needsAs your testing needs grow, we have you covered. Our family of scalable hemostasis instruments represents our commitment to offer solutions that meet the needs of any-sized lab.• W hether your lab requires low-volume routine testing, high-volume specialty testing, or multiple instruments at several locations, we have the solution for you.• O ur cross-platform reagents and consumables,comparable reference ranges, and test cutoff values on all BCS® XP and Sysmex CA and CS systems enable your lab to realize significant improvements in labor efficiency and cost savings.Just some of the standard benefits • C ross-platform use of reagents, controls, and calibrators improves convenience, offers cost savings, and reduces waste for more efficient labor utilization.• T he systems provide consistent monitoring of patients from lab to lab, with one D-dimer cutoff value and results that correlate with the entire Siemens Healthineers family of hemostasis systems.• A single point of contact for all your hemostasis needs supports convenient ordering and service coordination.The Siemens Healthineers portfolio of hemostasis systemsSysmex CA-600 Systems Compact, fully automatedcoagulation analyzers that offer a variety of configurations for clotting, chromogenic,* andimmunologic* methods. Sysmex CS-2500 SystemUnique, mid-volume solution featuring Preanalytical Sample Integrity (PSI™) technology and an advanced third-generationcap-piercing option.Sysmex CS-5100 SystemHigh-volume, fully automated solution featuring PSI technology and full automation connectivityoptions.BCS® XP SystemAuto-start, random-access analyzer offering clotting, chromogenic,immunologic, and aggregation-based assays for both routine and specialty testing in an economical footprint.4Big performance from thesmallest instrument in its class 3123123Automated daily maintenance and sample probe rinsing • R equires minimal daily maintenance and no monthly maintenance downtime •R educes hands-on time through minimal maintenance proceduresRemovable reagent trays • R educes hands-on time with convenient and easily removable reagent trays• E nables hands-off reagent handlingThree different detection principles • R epresents the current state-of-the-art testing methodology by offering clotting, chromogenic,* and immunologic* detection principles in true random access•I mproves workflow by consolidating testing Routine and STAT sample processing • O ffers PT test results in 7 minutes and D-dimer results in 9 minutes • E xpedites STAT sample testing5456456User-friendly display with color LCD • O ffers easy-to-use system handling through intuitive menu structure and tilted color touchscreen• F acilitates easier viewing of reaction curves • I mproves querying of patient resultsHandheld two-dimensional bar-code reader • S aves time and supports accuracy by automating the data-entry process for calibrator and control values • S implifies patient result trackingSample bar-code reader • E nsures the quality and integrity of patient records with an automated, positive sample ID process • L everages the convenience of your LIS by facilitating secure and accurate result transfersBroad testing menu • S upports your most frequently used specialty tests with innovative reagents, including INNOVANCE® Antithrombin,* INNOVANCE D-Dimer* Diagnostic confidence • P rovides uniform D-dimer* results with a single cutoff value of 0.50 mg/L FEU for the exclusion of PE/DVT on all Siemens Healthineers hemostasis systems3Based on a comparison of low-volume instrument dimensions (Height × Weight × Depth) as listed in CAP Today, January 2017.* Offered on Sysmex CA-660 System only.6Four reasons to upgradeto the Sysmex CA-600 Systems—today* Offered on Sysmex CA-660 System only.†† D-dimer throughput is 40% faster when compared to the CA-500 Systems.‡‡Compared to Sysmex CA-500 Systems.Economical operation Save time and money:• T he most economical testing solution is usually the one best tailored to your needs. With the Sysmex CA-620System for routine testing and the Sysmex CA-660 System adding specialty testing, labs get exactly what they need.• T he systems are so easy to learn and use that costly classroom training is not required, maximizing staff availability and ensuring efficient workflow.• T he Siemens Healthineers commitment to cross-platform reagents, quality control, and consumables reduces waste and saves time through streamlined ordering and maintenance.• W ith nearly a year between service visits, you can be confident that the system will deliver consistent uptime.Efficient workflowReduce hands-on time and increase walkaway ability:• A utomated probe rinse eliminates manual steps.• S imultaneous analysis of results frees up time.• I ncreased D-dimer throughput enables physicians to quickly assess a patient’s risk of DVT/PE ††.• H andheld two-dimensional bar-code reader simplifies the data entry process for ISI, control and calibrator values, lot numbers, and expiry information. • S ample bar-code reader provides simplified sample ID processing and enables security and integrity of patient records.Ecological impactMake a big impact with the smallest footprint: • 25% less power consumption.‡‡• M inimal consumables needed—only CA Clean I, CA Clean II, and reaction tubes.• O nly one reaction tube used per test.Excellent correlationConsistently monitor your patients, from lab to lab:• R esults correlate with the entire line of Siemens Healthineers hemostasis systems.• Consistent result provide confidence.A partner as committed to your success as you areThe world leader in hemostasis testingSiemens Healthineers is one of the world’s largest provider ofhemostasis solutions. Our partnership with Sysmex Corporationgives us the combined expertise to anticipate the needs of ourcustomers and deliver the complete and integrated portfolio ofadvanced solutions that customers need.Siemens Customer CareOur Customer Care program truly expands thetraditional definition of “service.” From pre-purchaseand throughout the lifecycle of your instrument,Siemens Customer Care acts as a seamless extension ofyour lab with a comprehensive portfolio of personalizedsolutions, proactive services, and proven expertise toanticipate your challenges and meet your needs.From highly skilled field engineers and workflow expertsto experienced education and customer servicespecialists, we are focused on delivering solutions tohelp you reach the next level of operational efficiency.INNOVANCE ReagentsReagent quality is a critical factor in establishing trust and confidence in any hemostasis testing system. That’s why our comprehensive portfolio of INNOVANCE reagents provides the quality you need to support physicians in making sound diagnostic and therapeutic decisions.Personalized Education Plan (PEPconnect)Available exclusively from Siemens Healthineers as part of the Customer Care program, PEPconnect is the only virtual competency-based education solution in the industry that can be tailored to meet the individual needs of your employees. Our innovative approach to personalized education for the Sysmex CA-600 Systems does not require disruptive, off-site training or traveling, allowing employees to train on their own instruments as their schedule allows.7BCS, BFT, Dade, INNOVANCE, Innovin, and all associated marks aretrademarks of Siemens Healthcare Diagnostics Inc. Sysmex is a trademark of Sysmex Corporation. All other trademarks and brands are the property of their respective owners.On account of certain regional limitations of sales rights and service availability, we cannot guarantee that all products included in thisbrochure are available through the Siemens sales organization worldwide. Availability and packaging may vary by country and is subject to change without prior notice. Some/All of the features and products described herein may not be available in the United States.The information in this document contains general technical descriptions of specifications and options as well as standard and optional features, which do not always have to be present in individual cases.Siemens reserves the right to modify the design, packaging, specifications, and options described herein without prior notice. For the most current information, please contact your local sales representative from Siemens.Note: Any technical data contained in this document may vary within defined tolerances. Original images always lose a certain amount of detail when reproduced.Product availability may vary from country to country and is subject to varying regulatory requirements. Please contact your local representative for availability.Order No. A91LD-HHS-17967-P1-4A00 | Printed in USA 06-2017 | © Siemens Healthcare Diagnostics Inc., 2017Siemens Healthineers H eadquarters Siemens Healthcare GmbH Henkestr. 127 91052 Erlangen GermanyPhone: +49 9131 84-0/healthineersLocal Contact InformationSiemens Healthcare Diagnostics Inc. Laboratory Diagnostics 511 Benedict AvenueTarrytown, NY 10591-5005USAPhone: +1-888-826-9702/diagnostics。
PM-630中文说明书

6. 技术规格................................ 24
7. 保养和支持.............................. 25
7.1 保养.............................................. 25 7.2 支持理念.......................................... 25 7.3 标准保修和延期保修................................ 25 7.4 废物处置.......................................... 25
2.3 测量范围
测量范围取决于钢筋尺寸。下图指明了预期的保护层测量精度。它符合 BS1881 第 204 部分,适合有足够间距的单条钢筋。
混凝土
磁场
钢筋
图 1: 测量原则
Profometer PM-600/630 采用不同的线圈布局,以生成多个磁场。高级信 号处理可查找钢筋,并测量保护层和钢筋直径。 此方法不受所有非导电材料影响,比如,混凝土、木头、塑料和砖块等。 然而,磁场内任何类型的导电材料(半径大约为 200 mm / 8” 的圆周范 围)均可能影响测量结果。
电,或在仪器外部给电池充电。在这种情况下充满需要耗时 < 4h。) 将通用探头 (C) 连接至 Profometer 触摸屏装 置 (A) 上侧的其中一个接口。
3. 使用..................................... 8
3.1 入门指南........................................... 8 3.2 主菜单............................................. 9 3.3 设置............................................... 9 3.4 测量屏幕.......................................... 10 3.5 测量模式.......................................... 11 3.6 数据处理.......................................... 16 3.7 实用提示.......................................... 20
Philips 空气净化器说明书

Philips Series 8000i空气净化器去除 99.9% 的小至 3 纳米的颗粒物PM2.5、过敏原和气体显示覆盖范围高达 108 平方米自动、睡眠模式和应用程序AC8686/00长久保护,持久健康呼吸并“见证” 99.9%* 无污染的空气飞利浦旗舰级净化器系列 8000i 将以您看得见的方式,确保您始终呼吸到 99.9%无污染的空气,免受降低室内空气质量的三大威胁(PM2.5、甲醛和过敏原)的影响。
随时随地检测和掌控空气质量•简单的 4 色显示环,易于监测•通过您的智能手机应用程序追踪、监测和控制•实时指数显示屏,显示室内空气 3 大威胁的指数为您度身定做•性能出色,噪音至低•高效的过滤网,提供出众、持久的性能•符合严格的美国标准的出色空气质量•节能又经济,每天用电量低于 1 千瓦时更出色的性能,可净化大至 109 平方米的房间•去除空气中 99.9% 小至 0.003 微米的颗粒物•3 种优化自动模式:去污染原模式、去甲醛模式和去过敏原模式•经欧洲研究中心认证,防过敏•去除甲醛并将其始终保持在安全水平•12 分钟内将 PM2.5 从 200 降至 1099.9%无污染的空气*采用前沿 VitaShield Plus 净化技术,此产品经验证可去除 99.9% 小至0.003 微米(比PM2.5 小800 倍)的细小颗粒;包括PM2.5、病毒、细菌、花粉、灰尘和动物皮屑。
它提供出众的颗粒洁净空气量(CADR),达910 立方米/小时。
在 20 平方米的房间内,它可在不到 3.2 分钟*时间内净化空气,因此每小时净化空气可达 18 次。
出众的 PM2.5 去除效果得益于双重过滤系统,该净化器可在 12 分钟内将室内 PM2.5 从 200 降至 10 并将其保持在 10* 以下,即使在严重污染期间也是如此。
根据世界卫生组织的标准和报告,这意味着您呼吸的是只有全球 10% 的人口才能呼吸到的优质空气。
Milwaukee MW600 Smart DO Meter 用户手册说明书
USER MANUALPORTABLEDISSOLVED OXYGEN METERMODEL: MW600Smart DO MeterThe meter is supplied with a 9V battery. Slide off the battery compartment cover on the back of the meter. Install the battery into the battery clip connector while observing polarity.D.O. probes are shipped dry. Assemble the probe and prepare it for use, connect it to the meter and proceed as follows.1.Remove the red and black plastic cap.This cap is used for shipping purposesonly and can be thrown away.2.Wet the sensor by soaking the bottom2½ cm of the probe in electrolyte(MA9071) for 5 minutes.3.Rinse the membrane (supplied with themeter) with electrolyte while shaking itgently. Refill with clean electrolyte.4.Gently tap the sides of the membranewith a pencil or a rod to disengageair bubbles. To avoid damaging themembrane, do not tap the membranedirectly on the bottom.5.Install O-Ring properly inside themembrane cap.6.With the sensor facing down, screwthe cap clockwise. Some electrolyte willoverflow.7.Examine membrane to verify air is nottrapped between the membrane andelectrode tip.When probe is not in use and duringpolarization, place the protective capsupplied over the electrode tip.1• A dissolved oxygen probe must be polarized to function properly.•To polarize the probe, the fully assambled probe must be connected to the meter and the meter must be on.•During polarization (and during measurement), approximately 800 mV is applied to the cathode and anode inside the membrane and a chemical reaction occurs. During the polarization period excess oxygen in the electrolyte is consumed. During this phase, probe movement that “moves”the electrolyte will yield jumpy measurements. When a probe is totally polarized moving the probe will not effect the measurement.•When the meter is turned off, the probe will revert to it’s prepolarized state. Before using again, the probe will have to be repolarized.CALIBRATION PROCEDURE:The calibration is very simple and fast.•Make sure the probe is ready for measurements(see Probe Preparation), i.e. the membrane isfilled with electrolyte and the probe is connectedto the meter.•Switch the meter on by pressing the ON/OFFkey.•For an accurate calibration, it is recommendedto wait at least 15 minutes to ensure polarizationof the probe.•Remove the protective cap from the D.O. probe.2Zero Calibration:•Dip the probe into MA9070•stable reading.•"0.0".Slope Calibration:It is suggested to perform the slope calibration in water saturated air.•Rinse the probe with a large amount of clean water to remove any residual zero oxygen solution.•Dry the probe tip and allow a few minutes for the D.O. probe to stabilize while suspending over a container of water in the air.•Press and hold the CAL key.•Adjust the slope trimmer on thefront panel of the meter to read"100%" on the LCD (while stillholding the CAL button).•Release the CAL key and theLCD will display a value in ppmof oxygen.The zero calibration of the MW600 is very stable, therefore this procedure needs only to be performed whenever the probe is replaced. However, if most of the measurements are closer to zero, more frequent zero calibration is advised.Slope calibration can be easily performed on a weekly basis.3TAKING MEASUREMENTS:Verify the probe is polarized and the probe andmeter have been calibrated. Remove the protectivecap from probe. Immerse the tip of the probe inthe sample to be tested.For accurate dissolved oxygen measurements aminimum water movement of 0.3 m/sec is required.This is to ensure that the oxygen-depletedmembrane surface is constantly replenished. Amoving stream will provide adequate circulation. To quickly check if the water speed is sufficient, wait for the reading to stabilize and then move the D.O. probe. If the reading is still stable, the measurement conditions are right, while if the reading increases, the water movement is not adequate.During field measurements, this condition may be met by manually agitating the probe. Accurate readings are not possible while the liquid is at rest.During laboratory measurements, the use of a magnetic stirrer to ensure a certain velocity in the fluid is recommended. In this way, errors due to the diffusion of the oxygen present in the air into the solution are reduced to a minimum.Always wait for thermal equilibrium to occur between the probe and the sample before recording a measurement (a few minutes for temperature difference of several degrees).ALTITUDE & SALINITY COMPENSATION:If the sample contains salts or if you are performing the measurements at a higher altitude, the displayed reading must be corrected to account for the lower degree of oxygen solubility.4°C 0 2 4 6 8 10 12 14 16 18 20 22 24 26 28 30 32 34 36 38 400 m14.613.813.112.411.811.310.810.39.99.59.18.78.48.17.87.57.37.16.86.66.4300 m14.113.312.712.011.410.910.49.99.79.28.88.48.17.87.57.27.16.96.66.46.2600 m13.612.912.211.611.010.510.19.69.28.78.58.17.87.57.37.06.86.66.36.26.01200 m12.712.011.410.810.39.89.49.08.68.37.97.77.37.06.86.56.46.25.95.75.61500 m12.311.611.010.49.99.59.18.78.38.07.77.37.16.86.66.36.16.05.75.65.41800 m11.811.210.610.19.69.28.88.38.07.77.47.16.86.66.36.15.95.85.55.45.2900 m13.212.411.911.210.610.29.79.38.98.68.27.87.57.37.06.86.66.46.15.95.8Altitude, Meters above Sea Level°F32.035.639.242.846.450.053.657.260.864.468.071.675.278.882.486.089.693.296.8100.4104.0The displayed measurements are referenced to sea level pressures. At higher elevations, oxygen solubility decreases (thus at higher elevations actual oxygen concentrations are really lower than the displayed value).The table below illustrates the changes in the solubility of oxygen in air saturated fresh water as a result of changes in elevation. The table can also be used to correct the displayed measurement. If the meter was calibrated at an elevation above sea level, you multiply your reading by the ratio of:(ppm at the elevation) / (the ppm at sea level)For example: You are at 600 m above sea level and the meter displays 3.2 ppm. The temperature is 14 °C.To correct your measurement multiply the displayed measurement by the ratio of (ppm reading at 600 m) / (ppm reading at 0 m) = 3.2 ppm X (9.6 ppm/10.3 ppm) = 2.98 ppm (or 3.0 ppm altitude corrected).56The table below illustrates the change in the solubility of oxygen in air saturated water as a result of chloride concentration or salinity.The table can also be used to correct the displayed measurement.If you are making measurements in salt water and know the chloride concentration (or salinity), you can multiply your reading by the ratio of (ppm at the chloride concentration) / (the ppm at 0 g/L chloride) at the temperature of measurement to compensate for the salt effect.l e v e l a e S =r r o T 067e r u s s e r P yt i n i l a S d n a e d i r o l h C n o e c n a d n e p e d y t i l i b u l o S n e g y x O e d i r o l h C L /g 0L /g 2L /g 4L /g 6L /g 8L /g 01L /g 21L /g 41L /g 61L /g 81L /g 02e d i r o l h C y t i n i l a S L/g 0L/g 6.3L/g 3.7L/g 9.01L/g 5.41L/g 1.81L/g 7.12L/g 3.52L/g 9.82L/g 5.23L/g 1.63y t i n i l a S C °F°06.412.419.316.313.319.216.213.219.116.113.110.2328.315.312.319.216.213.210.216.113.110.117.016.5341.318.215.212.219.116.114.111.118.015.012.012.9364.212.219.116.113.111.118.015.013.010.017.98.2488.116.113.111.118.016.013.011.018.96.93.94.64013.110.118.016.013.011.018.96.94.91.99.80.05217.015.013.011.019.96.94.92.90.98.85.86.35413.011.019.97.94.92.90.98.86.84.82.82.75618.96.94.93.91.99.87.85.83.81.89.78.06814.93.91.99.87.85.83.82.80.88.76.74.46021.99.87.85.84.82.80.88.77.75.73.70.86227.86.84.82.81.89.77.76.74.72.71.76.17424.82.81.89.78.76.74.73.71.70.78.62.57522.81.89.78.76.75.73.71.70.78.67.60.77621.89.78.76.75.73.72.70.79.67.66.68.87828.77.75.74.72.71.79.68.66.65.63.64.28036.74.73.71.70.78.66.65.63.62.60.60.68For example, if the measurement displayed at 10°C is 5 ppm, but the sample has 20 g/L of chloride, to correct your measurement multiply the displayed measurement by the ratio of (ppm reading at 20 g/L) / (ppm reading at 0 g/L) = 5.0 ppm X (8.9 ppm/11.3 ppm) = 3.93 ppm (or 3.9 ppm Chloride or Salinity corrected). PROBE & MEMBRANE MAINTENANCE:The D.O. probe body is made of reinforced plastic for maximum durability.A thermistor temperature sensor provides temperature measurements of the tested sample. It is always recommended to keep the protective cap on the probe when not in use, to protect the membrane against damage and dirt.To replace the membrane or refill it with electrolyte, see page 1.7The Platinum cathodeshould always be brightand untarnished. If it istarnished or stained, dueto contact with certaingases or a damagedmembrane cap, the cathodeshould be cleaned. Youcan use a clean lint-freecardboard or cloth. Rubthe cathode very gentlyside to side 4-5 times. Thiswill be enough to polishand remove any stainswithout damaging theplatinum tip.Rinse the probe with deionized or distilled water and install a new membrane cap using fresh electrolyte (see page 1). Recalibrate the instrument/probe.Note:In order to obtain accurate and stable measurements, it is important that the surface of the membrane be inperfect condition. This gas-permeable membrane isolatesthe sensor elements from the environment, but allowsoxygen to enter. If any dirt is observed on the membrane,rinse it carefully with distilled or deionized water. If anyimperfections still exist, or any damage is evident (suchas wrinkles or tears-holes), the membrane cap shouldbe replaced. Make sure that the O-Ring is properly seatedin the membrane cap.8BATTERY REPLACEMENT:When the battery becomes weak the meter will display the low battery indicator "".When this appears, only a few hours of battery life remain. A low battery will result in unreliable measurements.Prompt battery replacement is required.Battery replacement must take place in a non-hazardous area using an alkaline 9V battery.Turn the meter off, slide the battery compartment cover located at the rear of the meter off and replace the 9V battery with a new one. Make sure the battery contacts are fully engaged in the connector, seat the battery in its compartment and replace the cover.9OPTIONAL ACCESSORIES:MA9070Zero Oxygen calibration solution, 220 mL MA9071Refilling Electrolyte solution, 220 mL MA841Spare membrane, 5 pcs MA840D.O. probeSPECIFICATIONS:MW600RANGE0.0 to 19.9 mg/L RESOLUTION0.1 mg/LACCURACY (@25°C)±1.5% Full Scale TEMPERATURE Automatic from 0 to 30°C COMPENSATIONCALIBRATION Manual on 2 points(zero and slope)LCD3½ digits with symbolsPROBE MA840 (included) ENVIRONMENT0 to 50°C, 95% RH max. BATTERY TYPE9V alkaline (included) BATTERY LIFE approximately 70 hours of use DIMENSIONS 143 x 80 x 32 mmWEIGHT220 g (with battery) meter onlyWARRANTY:This instrument is warranted from all defects in materials and manufacturing for a period of two years from the date of purchase. The probe is warranted for a period of 6 months.If during this period, the repair or replacement of parts is required, where the damage is not due to negligence or erroneous operation by the user, please return the parts to either dealer or our office and the repair will be effected free of charge. Note:We reserve the right to modify the design, construction and appearance of our products without advance notice.10Authorized Dealer:ISTMW600 01/10。
PMH600多功能配电仪表使用说明书

多功能配电仪表使用说明书V1.14型号:PMH6001序 (1)1.1选型表 (1)1.2使用要点 (1)1.3安全守则 (1)1.4使用条件 (1)2多功能配电仪表 (2)2.1多功能配电仪表简介 (2)2.2PMH600 系列多功能配电仪表的特点 (2)2.3应用领域 (2)3功能简述 (3)4技术规格参数 (3)4.1输入信号 (3)4.2测量精度 (3)4.3通讯 (4)4.4适用环境 (4)4.5安全性 (4)4.6外形尺寸和重量 (4)4.7电源 (4)5包装 (4)6安装和接线方法 (5)6.1盘面固定方法 (5)6.2安装尺寸 (5)6.3安装 (5)6.4拆卸 (6)6.5接线方法 (7)7工程施工注意事项 (9)7.1辅助电源输入 (9)7.2电压输入 (9)7.3电流输入 (9)7.4安装CT (9)7.5通讯接线 (9)8用户操作方法 (10)8.1定义及说明 (10)8.2系统上电 (11)8.3察看U/I (11)8.4察看其他电参数 (12)8.5DI状态指示 (12)8.6DO状态指示 (12)8.7通讯指示 (12)9系统编程模式 (13)9.1进入/退出系统编程模式 (13)9.2系统编程模式下的操作 (13)9.3DO状态设置和察看 (13)9.4通讯地址设置 (14)9.5通讯波特率设置 (14)9.6接线方式设置 (15)9.7PT设置 (15)9.8CT设置 (16)9.9越限报警设置 (17)9.10DO模式设置 (20)9.11电度脉冲工作方式设置 (20)9.12继电器工作方式设置 (22)9.134-20mA 模拟量AO设置 (24)9.14自动循环显示方式设置 (27)9.15密码设置 (27)9.16电度清零 (28)9.17分时电度设置 (28)9.18实时时钟RTC设置 (29)9.19显示版本号及产品序列号 (30)10通讯及组态操作说明 (31)10.1MODBUS-RTU通讯简介 (31)10.2PMH600 系列的应用细节及参量地址表 (38)10.3越限报警功能 (48)10.4漏电保护 (48)1序●本说明书旨在帮助您快速安装、操作和系统集成PMH600 系列智能电力仪表。
诺贝瓦尔 PME600 610 型面板仪表 用户指南说明书
Nokeval No 100211 v1.2User GuidePanel metermodels PME600 & PME610OverviewPanelmeter PME600/PME610 is easy to use. Operatin voltage is 21..265 VAC/DC. Meter supports common temperature sensors thermocouple K, Pt100 and process signals 0..20 mA, 4..20 mA and 0..10 V. Meters settings menu structure is simple, so its easy to setup.Model PME610 contains analog output 4..20 mA. Model PME600 contains 12V output for 2-wire transmitter.Technical informationSensor break in tcK or Pt100, appears hyphens (---) in the display and high alarm closing and low alarm opening.Prosess inputs:0..20 mA, 4..20 mA and 0..10 V Display scaling:-999...9999Resistance 4..20 mA:70 Ωshunt resistor is active only when power is on and device is set to mA input Resistance 0..10 V:110 k ΩRTD:Pt100Range:-200....+700°C Current:0,3 mA Thermocouple:KRange:-150.... 1350°C mV-input:-70...70 mVAnalog output (PME610):4..20 mAmax. load:650 ΩScale:Adjustable.Galvanic isolation from inputs:No Output for 2-wire transmitter (PME600):12 V, 23 mAAlarms:High and Low alarm.Alarm reset:Automatic or manual via front panel keyHysteresis:Adjustable. Shared with high and low alarm.Relays:2. One for high alarm, one for low alarm.Closing contact Relays direction:Normal openContact Rating: 3 A, 250 VAC / 30 VDC (res. Load)Indication lights:In front panelGeneral features Input filter:Three samples continues averageSpeed:mV, V & mA:~ 8,3 samples / sec Pt100 & TcK:~ 3,4 samples / sec AD-converter:24 bitsIndication lights:Alarms, setup mode Display:4-digits bright red LED digit height 14,5 mm Operating voltage:21-265 VAC/DC IP Protection class for front panel:IP65 with gasget Weight:146 gINSTALLINGThis chapter guide to install 1/8 DIN-size panelmeter PME600/PME610.Panel installationPanelmeter should be mount to panel cutoff according to below picture. Attach the meter with two holders supplied.DimensionsWiringsMeter has three or four (depending the model) removable screw connector. One green 6-pin connector for input and one green 2-pin connector for mA output (PME610). One grey 4-pin connector for relays and one grey 3-pin connector for power supply. Green connector may used only with safety extra-low voltage. Analog output is not galvanic isolated from input. Shunt resistor for current input is internally connected only when power is on and input sersor is set to 0-20 mA or 4-20 mA.Operating voltageConnect power supply to pins D1 and D3. No polarity. No ground needed. The meter has internal pre-fuse. If an external is used, it should be at least 500mAT.PowerCutoff43,7 (H) x 90,7 (W) mm ±0,7 mmUSER INTERFACEFront panelThere is two modes:•Normal mode – Shows reading.•Setting mode – For changing the settings.After switching the power on, the userinterface is in normal state, indicating readings.Indicator LEDs A1 (low alarm) and A2 (high alarm)indicate the state of alarms. Conf LED is lighting when user interface is in setting mode.Manual reset with front panel v -key can be selected by choosing wider hysteresis than full span.Setting modeEnteringIn the normal mode press *- and ^-buttons simultaneously until conf LED start lighting.NavigatingWithin menu you can navigate up and down using the ^v -buttons.EditingPressing the >-button shows the value of the settings and allows editing it.Most data types are edited simply with ^v -buttons and exited with *-button.Floating point numbers are edited using the^v>-buttons. Select the digit to be edited or the decimal point with >-button and edit it with^v -buttons. The first digit can be edited to a minus sign.ExitingWhen all done, exit from setting mode with*-button. Select ^v Save (keep the changes) or Undo (discard the changes) and press >.KeylockIt is possible to prevent access to the setting mode by setting a jumper as shown :Key lock off (default)Key lock onFlow diagramOutput settings OUTL and OUTH are visible only in model PME610.Auto reset is a standard function. Manual reset with front panel v -key can be selected by choosing wider hysteresis than full span (Hi -Lo). For example: Input scaling is 0..100,0 i.e.full span is 100. Select hysteresis larger than 100 (9999) and you will have manual reset.Yrittäjäkatu 1237100 NOKIAPuh. 03-342 4800Fax.03-342 2066email *******************Display scaling for V- and mA-inputs:Reading when input is in min. level.High alarm level Nokeval OyInput selection 4-20 = 4...20 mA 0-20 = 0...20 mA Pt 3 = Pt100 3-wire Pt 4 = Pt100 4-wire Tc = Thermocouple K mV = Millivolts 0-10 = 0...10 VOutput scaling: Display reading corresponding 20 mA output.Hysteresis levelOutput scaling: Display reading corresponding 4 mA output.Low alarm level Display scaling for V- and mA-inputs:Reading when input is in max. level.Display brightnessPositive value: decimals.Negative value: rounding to zero。
PM 中文说明书
PROFOMETER®PM-600 / PM-630操作说明A Profometer 触摸屏装置B电池组C带小车的通用探头D Profometer PM-6 探头电缆 1.5 米E电源,含电缆(美国、英国或欧盟)F USB 线 1.8 米(6 英尺)G DVD 光盘(含软件)H文档I背带AEIFBGH物品清单CD概述1234567891011按下即可开启电源。
要关闭电源,再次按下,并轻触屏幕上的“X 关闭”。
软键 - 切换全屏显示。
后退按钮 – 返回上一个屏幕。
USB 接口,连接鼠标、 打印机、USB 内存卡等USB 接口,连接应用特定 探头和 PC。
网络接口,连接 Internet, 用于固件升级。
电源外部电源连接。
116 中线 (CL)*当箭头 LED 灯亮起时,沿着钢筋轴移动探头,直至 MC LED 14 或 15 指示灯亮起。
然后,MC 刚好位于钢筋轴上方。
同时按12 和 13,光标就会跳至下一条线(仅在多线和面积扫描模式中)13 短按:测量直径长按:归零15设置完点检范围时的测量中心 (MC Sp)设置完标准范围、大范围或自动范围时的测量中心 (MC SLA)短按:开始/停止长按:设定标记121417 箭头 LED 灯指示钢筋的邻近度*箭头 LED 灯指示钢筋的邻近度*17目录1. 安全和责任 (6)1.1 通用信息 (6)1.2 责任 (6)1.3 安全说明 (6)1.4 正确使用 (6)2. 测量原则 (7)2.1 测量原则 (7)2.2 通过 Profometer PM-600/630 校准的测量 (7)2.3 测量范围 (7)2.4 分辨率 (8)2.5 铁磁材料的影响范围 (8)3. 使用 (8)3.1 入门指南 (8)3.2 主菜单 (9)3.3 设置 (9)3.4 测量屏幕 (10)3.5 测量模式 (11)3.6 数据处理 (16)3.7 实用提示 (20)4. 资源管理器 (23)5. 订购信息 (23)5.1 整机配置 (23)5.2 升级 (23)5.3 零件和配件 .......................................246. 技术规格 . (24)7. 保养和支持 (25)7.1 保养 (25)7.2 支持理念 (25)7.3 标准保修和延期保修 (25)7.4 废物处置 (25)8. PM-Link 软件 (25)8.1 启动 PM-Link (25)8.2 查看数据 (26)8.3 调整设置 (27)8.4 导出数据 (28)8.5 删除数据 (29)8.6 更多功能 (29)9. 附录 (30)9.1 附录 A1 钢筋直径 (30)9.2 附录 A2 邻近钢筋修正 (30)9.3 附录 A3 最小保护层 (30)1. 安全和责任1.1 通用信息本手册包含了 Profometer触摸屏的安全、使用和保养等方面的重要信息。
- 1、下载文档前请自行甄别文档内容的完整性,平台不提供额外的编辑、内容补充、找答案等附加服务。
- 2、"仅部分预览"的文档,不可在线预览部分如存在完整性等问题,可反馈申请退款(可完整预览的文档不适用该条件!)。
- 3、如文档侵犯您的权益,请联系客服反馈,我们会尽快为您处理(人工客服工作时间:9:00-18:30)。
6. 技术规格...........ቤተ መጻሕፍቲ ባይዱ.................... 24
7. 保养和支持.............................. 25
7.1 保养.............................................. 25 7.2 支持理念.......................................... 25 7.3 标准保修和延期保修................................ 25 7.4 废物处置.......................................... 25
然后,MC 刚好位于钢筋轴上方。
© 2014 Proceq SA
16 中线 (CL)
15 设置完点检范围时的测量中
心 (MC Sp)
13 短按:测量直径
长按:归零
17 箭头 LED 灯指示钢筋的邻近度*
同时按 12 和 13 ,光标就会跳至下
一条线(仅在多线和面积扫描模式中)
4
目录
1. 安全和责任............................... 6
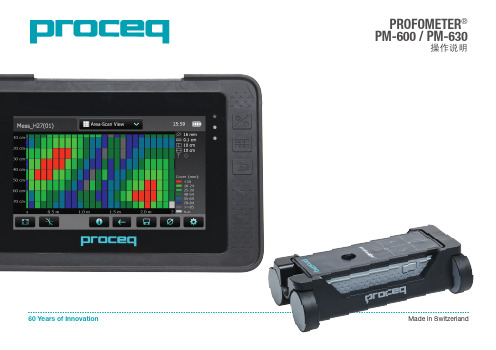
60 Years of Innovation
PROFOMETER® PM-600 / PM-630
操作说明
Made in Switzerland
物品清单
A B
C
D
E
G
H
F
© 2014 Proceq SA
A Profometer 触摸屏装置 B 电池组 C 带小车的通用探头 D Profometer PM-6 探头电缆 1.5 米 E 电源,含电缆(美国、英国或欧盟) F USB 线 1.8 米(6 英尺) G DVD 光盘(含软件) H 文档 I 背带
I
2
概述
USB 接口,连接鼠标、 打印机、USB 内存卡等
USB 接口,连接应用特定 探头和 PC。
网络接口,连接 Internet, 用于固件升级。
电源 外部电源连接。
1
1
2
3
4
11 10
98 76 5
按下即可开启电源。要关闭电 源,再次按下,并轻触屏幕上 的“X 关闭”。
软键 - 切换全屏显示。
后退按钮 – 返回上一个屏幕。
3
© 2014 Proceq SA
短按:开始/停止
长按:设定标记 12 箭头 LED 灯指示钢筋的邻近度* 17
设置完标准范围、大范围或自动范围时
的测量中心 (MC SLA) 14
*当箭头 LED 灯亮起时,沿着钢筋轴移动探
头,直至 MC LED 14 或 15 指示灯亮起。
9. 附录.................................... 30
9.1 附录 A1 钢筋直径.................................. 30 9.2 附录 A2 邻近钢筋修正.............................. 30 9.3 附录 A3 最小保护层................................ 30
2. 测量原则................................. 7
2.1 测量原则........................................... 7 2.2 通过 Profometer PM-600/630 校准的测量.............. 7 2.3 测量范围.........................................7 2.4 分辨率............................................. 8 2.5 铁磁材料的影响范围................................. 8
8. PM-Link 软件............................ 25
8.1 启动 PM-Link...................................... 25 8.2 查看数据.......................................... 26 8.3 调整设置.......................................... 27 8.4 导出数据.......................................... 28 8.5 删除数据.......................................... 29 8.6 更多功能.......................................... 29
3. 使用..................................... 8
3.1 入门指南........................................... 8 3.2 主菜单............................................. 9 3.3 设置............................................... 9 3.4 测量屏幕.......................................... 10 3.5 测量模式.......................................... 11 3.6 数据处理.......................................... 16 3.7 实用提示.......................................... 20
1.1 通用信息........................................... 6 1.2 责任............................................... 6 1.3 安全说明........................................... 6 1.4 正确使用........................................... 6