HHR6800嵌入式录音系统操作说明书
音频系统使用指南说明书

If you are playing a CD ,use the CHbutton to skip to the beginning of the next track.You will see the CD and track number in the display.Three controls for the audio system are mounted in the steering wheel hub.These let you control basic functions without removing your hand from the wheel.The middle button adjusts the volume.Press the top or bottom of the button and hold it until the desired volume is reached,then release it.The CH button has three functions,depending on whether you arelistening to the radio,playing a tape,or CD.The MODE button changes theaudio mode between FM1,FM2,AM,CD,and DVD/AUX (if a disc is inserted).Remote Audio Controls122If your vehicle’s battery is discon-nected or goes dead,the audio system will disable itself.If thishappens,you will see ‘‘CODE’’in the frequency display the next time you turn on the e the preset buttons to enter the five-digit code.The code is on the radio code card included in your Owner’s Manual kit.When it is entered correctly,the radio will start playing.If you make a mistake entering the code,do not start over;complete the five-digit sequence,then enter the correct code.You have ten tries to enter the correct code.If you are unsuccessful in ten attempts,you must then leave the system on for 1hour before trying again.If the code card is lost,a dealer can access your code with the your radio’s serial number.To access the serial number,turn the radio on.It must display ‘‘CODE’’,then turn the radio off.Push the preset 1,preset 6,and power buttons at the same time,then quickly release.If you lose the card,you must obtain the code number from a dealer.To do this,you will need the system’s serial number.You will have to store your favorite stations in the preset buttons after the system begins working.Your original settings were lost when the power was disconnected.Your vehicle’s audio system will disable itself if it is disconnected from electrical power for any reason.To make it work again,you must enter a specific five-digit code in the preset buttons.Because there are hundreds of number combinations possible from five-digits,making the system work without knowing the exact code is nearly impossible.You should have received a card that lists your audio system code number and serial number.It is best to store this card in a safe place at home.In addition,you should write the audio system’s serial number in this owner’s manual.Radio Theft ProtectionFeatures123On EX,and EX-LmodelsPress and hold the CLOCK (SCAN/RPT)button.Change the hours by pressing the H (preset 4)button until the numbers advance to the desired time.Change the minutes by pressing the M (preset 5)button until the numbers advance to the desired time.When you are finished,release the CLOCK button.If your vehicle’s battery isdisconnected or goes dead,you will need to set the clock.You can quickly set the time to the nearest hour.If the displayed time is before the half hour,pressing and holding the clock button,then pressing the RESET (preset 6)button sets the clock back to the previous hour.If the displayed time is after the half hour,the clock sets forward to the beginning of the next hour.For example:1:06will reset to 1:001:52will reset to 2:00The right display shows the time when the ignition is in theACCESSORY (I)or ON (II)position.Press and hold the SET (TUNE)button until the numbers flash.Change the hours by pressing the H ()button until the numbers advance to the desired time.Change the minutes by pressing the M ()button until the numbers advance to the desired time.When you arefinished,press the SET button again.LX modelSetting the Clock124EX,and EX-Lmodels。
HY-6800说明书

机内充电:
如果蓄电池装在仪器内,您只要接上充电器,充电过程即自动开始。您也可以在进行超声波检验的同时对蓄电池进行充电。若同时进行超声波检验,充电时间为12小时。若仪器关机状态下,充电时间则为10小时。
此充电时间适用于25~30摄氏度的环境温度。在更高的温度下,蓄电池可能充不到满电量。
如果对您的检验设备的使用有任何疑问,请与一恒公司联络。
1.4关于超声波检验的重要提示:
请在使用HY-6800之前阅读以下说明,为避免因使用不当而导致错误的检验结果,理解和遵从这些信息是很重要的。检验错误很可能造成人身伤亡和财产损失。
用超声波检验设备进行测量的前提
您在使用本使用说明书中获得有关使用本检验设备的基本资料,此外还有若干因素会影响测量结果,对这些因素的说明已超出本说明书的范围。因此下面仅列举出三项最重要的、为达到安全可靠的超声波检验所必须的条件:
检验工件内部的分解面能够完全的反射声波束,使得更深处的缺陷检测不到而产生漏检,因此确保声波束能够到达检测工件中所有的待检测区域是非常重要的。
缺陷的超声波评估
在目前的超声波探伤方法中,有两种不同的缺陷评估方法:
如果声束直径小于缺陷的尺寸,可以用声束探测缺陷的边界来确定缺陷的面积。
如果声束直径大于缺陷的尺寸,就必需制造一个专门用于对比的人工缺陷,再将待测缺陷的最大回波波幅与人工缺陷的最大回波波幅进行比较来确定缺陷的面积。
3、英文方式,用于英文输入时,为A~Z。
3.2.1+(增量调节键)
该键和其它功能键配合使用完成增量调节。【+】键在不同的情况下有不同的用法,
主要起调节作用:
1、被激活的参量值增加2、移动光标3、对仪器提问回答“是”。
嵌入式点歌机说明书

嵌入式硬盘点歌机(4.0)0 / 17使用说明书安全注意事项警告:这标志提醒用户产品带有危险电压。
警告:为防止起火或触电事故,请不要让机器暴露在雨中或潮湿环境里。
机内有危险的高压配件,因而不要擅自打开机盖。
维修时必须委托合格的维修人员进行。
注意:为防止触电,请使用宽槽插座相配,并使接插牢靠。
注意:在使用完点歌机后,请关闭电源、;点歌机不适用6岁以下儿童操作;务必通读本使用说明书,以便您掌握如何正确使用此点歌机。
当您读完本说明书后,请将它妥善保存,以备日后参考,如果需要维修,请与经销商或本公司技术服务中心联系。
警告:未经授权单位的明确认可,任何对于本机的变动或改装都有可能对用户的使用带来诸多的不便。
1 / 17目录第一部分:使用前须知一、安全注意事项 (3)二、放置地点选择 (3)三、附件检查 (3)四、遥控器的使用 (3)第二部分:功能介绍和说明五、系统安装介绍 (4)六、遥控器功能简介 (4)七、点歌界面简介 (5)八、功能按钮介绍 (7)九、后台功能介绍 (7)第三部分:附录附录1 U盘加歌说明 (9)附录2 修改广告信息 (11)附录3 常见问题及解决 (11)附录4 错误代码对照表 (12)2 / 17使用前须知安全注意事项※使用本机前,请检查当地电压,应与本机工作电压相符。
※在插上或拔出交流电源源时,应抓牢电源插头部分,不可拉扯电源线。
※若本机插头与电网插座相连,即使关闭电源,本机仍与交流电相通。
长时间不使用本机,请拔下电源插头。
※如果有液体或异物落入机内,请立即拔下电源插头,经检查后方可再行使用。
※切勿擅自拆卸机壳,任何维修都必须由专业技术人员进行。
放置地点选择※请将本机放置在通风良好之处,以防机内过热。
※请勿将本机放置于直射阳光下或靠近热源的地方。
※请将本机置于水平位置,不要将任何重物放在本机上。
※请勿将本机放置于尘埃度极高之处,以防灰尘对本机内部元件造成损坏,影响本机的正常工作,缩短本机的使用寿命。
录音系统使用说明书

二、技术参数
接口方式:模拟中继 录音输入阻抗 直流>= 470K 欧姆 交流(1000HZ 时)>=10K 欧姆 隔离阻抗脚直流均:>= 470K 欧姆 录音模块直流阻抗: >1M 隔离耐压:>=500VDC 录音格式:LAW、ADPCM,GSM 格式的 WINDOWS WAV 文件 数据速率:64 KBPS /32 KBPS /13.6 KBPS 全通道信噪比:>= 42 dB 频响:300~3400HZ 放音输出功率 >= 0.5 W 全通道失真:< 5% 音量调整:-20db ~ +20db 硬盘容量 (20 G 最多可存放 3500 小时)
10. 所有谈话内容录为 wav 格式,可以在任意 WINDOWS 电脑中播放。 11. 可以设置任意多个盘(可以是硬盘、分区或网络映射盘)自动循环录音。 12. 录音启动方式灵活,具有压控、键控、声控三种启动方式。 13. 录音起始时间可以灵活设置,可以是一段时间内录音,也可以是每天 24 小时录 音。 14. 提供不同的压缩率,满足不同用户的需要,20G 的硬盘最多可以保存 3500 多个 小时。 15. 线路适用于电话外线、分机内线、无线对讲机的音频输出线等。 16. 当系统的硬盘将满时,系统将自动清除最先录音的资料,以保证系统可以常年 不间断运行。 17. 方向判别。可以判别出呼叫方向,如呼入还是呼出。 18. 系统具有强大的操作员权限管理功能,除设定每个操作员的权限外,还可以设 置每个操作员可操作的通道。 19. 内置有区号表,可以记录每一次通话的地区。
电话录音系统
操作手册
电话录音系统 . 操作手册
目
录
系统简介 .....................................................................................2 一、基本功能 ..............................................................................2 二、技术参数 ..............................................................................3 系统安装 .....................................................................................4 一、硬件安装 ..............................................................................4 1、1 微机 ..............................................................................4 1、2 PCI 接口录音卡安装 .............................................................4 二、软件安装 ..............................................................................6 2、1 板卡驱动安装 ....................................................................6 2、2 录音系统软件的安装 ............................................................7 软件操作 .....................................................................................8 一、 系统登陆 ............................................................................8 1、1 登陆 ..............................................................................8 1、2 主窗口说明 ......................................................................9 二、 功能操作 .......................................................................... 10 2、1 管理 ............................................................................ 11 1) 查听 ............................................................ 11 2)操作员(权限设置) .............................................. 13 3)日志管理 ........................................................ 14 4)号码薄 .......................................... 错误!未定义书签。 5)区号表 .......................................................... 15 2.2 设 置 ........................................................................... 15 1) 系统设置 ........................................................ 15 2) 通道参数 ........................................................ 16 3) 免录音号码 ...................................................... 18 4) 硬件设置 ........................................................ 19 5) 录音目录 ........................................................ 20 6) 清除策略 ........................................................ 20 7) 备份策略 ........................................................ 21 8) 留言参数 ........................................................ 21 2、3 查 看 ........................................................................... 22 2、4 操作员 ......................................................................... 23 2、5 工 具 ........................................................................... 23 1) 数据备份 ........................................................ 23 2、6 帮 助 ........................................................................... 24
嵌入式DVR控制键盘使用手册
嵌入式DVR控制键盘使用手册嵌入式DVR操纵键盘使用手册在连接与使用本设备前,请认真阅读本使用手册并妥善储存以备日后参考。
设备配备清单名称数量单位备注DC-12V电源 1 个输入:AC100-240V5PIN插头 2 个水晶头连接线 1 条用户使用手册 1 本目录第一章功能简介 (1)第二章键盘设置与查询 (4)第三章典型接线图示 (5)第四章技术参数 (6)第一章功能简介功能简介嵌入式DVR操纵键盘全面兼容本公司所有系列的嵌入式硬盘录像机。
除了具备集中操纵嵌入式硬盘录像机的功能外,操纵键盘还能够直接操纵快球及解码器,当然也能够通过操纵嵌入式硬盘录像机来遥控快球或者解码器。
操纵* 完全取代嵌入式硬盘录像机前面板的所有功能操作按键;* 所有的操作在液晶显示屏上均有显示说明;* 一台设备能够同时操纵31台嵌入式硬盘录像机;* 操纵快球及解码器:快球、解码器地址范围从0~254,同时可操纵128台。
操纵协议* 备有9种快球、解码器协议,遇到没有集成的协议时,能够按照用户提供的协议做添加,在不更换硬件的情况下,把修改好的程序文件发给客户,让客户通过RS485口在线刷新程序。
主副分控功能* 操纵嵌入式硬盘录像机支持副控级联操纵功能,可级联15 个副控键盘,键盘ID:0~15;* 操纵快球、解码器支持副控级联操纵功能,可级联15个副控键盘,键盘。
特色功能* RS485总线并联的任何设备能够单独设置不一样的协议、波特率,巧妙的增强了系统的灵活性;*设置均在液晶屏上完成操作,免除了要找说明书再更换协议的烦恼。
1.1后面板接口说明序号物理接口连接说明1 操纵快球输出(PTZ-CON)连接快球或者解码器的 RS485总线: 10(Ta)接 RS485+,9(Tb)接 RS4852 操纵快球副控键盘输入(PTZ-AUX) 连接操纵快球的副控键盘的快球操纵输出: 8(Ra)接副控键盘 10(Ta),7(Rb)接副控键盘 9(Tb)3 操纵线接地端(Ground)操纵信号线接地端4 操纵 DVR副控键盘输入(DVR-AUX) 连接操纵硬盘录像机的副控键盘的硬盘录像机操纵输出口: 4(Ra)接副控键盘 2(Ta), 3(Rb)接副控键盘 1(Tb)5 DVR操纵输出( DVR-CON)连接硬盘录像机 KB口的 D+、D-:2(Ta)接 D+,1(Tb)接 D6 PTZ操纵指示灯在PTZ操纵模式下,按键时显示,状态为闪烁、绿色7 DVR操纵指示灯在DVR操纵模式下,按键时显示,状态为闪烁、绿色8 电源指示灯 (PW) 操纵键盘在工作状态为常亮,红色9 电源输入 (DC-12V) 直流12V电源输入1.2前面板说明名称功能说明地址选择快球地址或者者DVR地址。
嵌入式智能录播系统方案说明书

嵌入式智能录播系统方案说明书中教新纪嵌入式录播系统方案嵌入式智能录播系统方案说明书1中教新纪嵌入式录播系统方案目录一、方案介绍 ............................................................. 4 1、1 需求背景 . (4)1、2 需求概述 ..........................................................5 1、3 方案目标 .......................................................... 5 1、4 建设原则 . (6)二、系统组成 (8)1、视频采集部分 ........................................................8 2、多媒体信号采集部分 .................................................. 8 3、声音采集部分 ........................................................ 8 4、无人值守录制功能 .................................................... 8 5、主控部分 (8)6、集中式的管理方式 ....................................................9 7、图像识别智能跟踪系统 ...............................................10三、方案详细说明 ............................................................ 11 3、1系统概述 (11)3.2 录播室布线示意图 ..................................................13 3.3 设备连接示意图 .................................................... 14 3.3.2 教室效果图 ...................................................... 15 3.4多媒体控制系统 ..................................................... 16 3、5 图像识别跟踪系统 . (17)3、5、1 简介 .....................................................173、5、2特点 (18)3、5、3结构图 (19)3、5、4教师识别跟踪 ..............................................203、5、5学生识别跟踪 ..............................................213、5、6 平面图 ...................................................22 3.6方案功能 (22)3.6.1同步录制 (22)3.6.2实时直播与点播 ..............................................223.6.3课件点评 (26)3.6.4用户及权限管理 ..............................................263.6.5课件管理 (27)3.7方案总结 ...........................................................28 4、平台特色 ........................................................... 29 5、嵌入式与工控机技术优势比对表 (36)2中教新纪嵌入式录播系统方案四、核心产品介绍 (37)4、1 高清录播主机 (37)4、2录播管理软件 (39)4、3高清宽动态摄像机 (43)4、4 图像跟踪主机 (44)4.5单/双高清编码器(可选) ............................................45 五、部分案例赏晰 (48)3中教新纪嵌入式录播系统方案一、方案介绍1、1 需求背景随着计算机多媒体技术、网络技术、信息高速公路等为代表的新技术的不断更新,推动了教学手段现代化进程。
环格录音笔H-R600_产品使用手册_中英文

智能数字录音笔用户手册User Manual Intelligent Digital Voice Recorder使用前请仔细阅读此手册以保证产品功能得到正确使用,并请保留此手册以备将来查阅!Please read this manual carefully before using , to ensure that product function is used correctly, and please keep this manual for future reference!前言 Preface感谢您选择本公司的智能数字录音笔。
Thank you for choosing our intelligent digital voice recorder.为了使您能尽快熟悉操作本产品,我们随机配备了用户手册,从中您可以获取有关产品的介绍,使用方法,产品设置以及使用本产品的注意事项等内容,在您使用本产品前,请务必仔细阅读本手册及所有资料,这有助于您更好的使用本产品。
In order to enable you are familiar with the operation of this product,we provide the user manual. You can learn about each of the products, using method, product set as well as mattersneeding attention, etc.Before using you use this product, please read this manual carefully, this will help you better use this product.警告Caution本产品内置有聚合物锂电池,切勿把本产品丢入火中,因为锂电池可能发生爆炸;请勿把本产品浸入水中或者其他液体中,电池短路受损坏时也可能发生爆炸;请勿将产品长期置于阳光,火源等极热的地方。
嵌入式单机版点播系统使用说明书模板

嵌入式单机版点播系统使用说明书目录…………………………………………………………… (1)一、包房安装使用说明……………………………………………………………2二、文件说明…………………………………………………………… (3)2.1 歌曲文件存放规则 (3)2.2 系统文件说明 (3)三、使用说明..........................................‥ (4)3.1 添加歌曲…………………………………………………………… (4)3.2 删除歌曲……………………………………………………………3.3 修改密码…………………………………………………………… (6)3.4 添加歌星…………………………………………………………… (7)3.5 公播歌曲设置………………………………………………………………73.6 数码像框…………………………………………………………… (8)3.7 流媒体播放器………………………………………………………………83.8 软件升级…………………………………………………………… (9)GS-V6100家庭版…………………………………………………………… (9)遥控器说明图…………………………………………………………… (11)四、简易故障排除…………………………………………………………… (12)附录..............................‥ (12)初始密码:888888一、包房安装使用说明1.按下图连接好各个接口后插上电源(图1.2),前面板的待机电源指示灯亮(图1.1)。
电源开关遥控接收头电源指示灯图 1.1后面板接口示意图:1 2 3 4 5 6 7 8 9 10 11 12 13图 1.21.110-220V电源 B TypeA2.AV视频输出1 B TypeB3.AV视频输出2 10.显示器输出口4.AV左音频输出 11.键盘接口5.AV右音频输出 12.鼠标接口6.单双屏开关 13.散热风扇7. 外置遥控接收头2.注意:✧将本机安放在遥控器可操作范围(5米距离以内最佳,前面板前无遮挡)。
HC6800-EM3 说明书

检查下是否有概叹号和问号出现
此 时,重 新 启动计算机,再次打开设 备管理器,点击右键选择"更新驱 动 程 序"
普中科技 选择“自动安装软件(推荐)”
第二章 软件安装及使用
出 现 此 对 话 框,正在搜索,匹配的 驱动程序
普中科技
第二章
22.多 达7个通信接 口 a.多 达2个I2C接口(SMBus/PMBus) b.多 达3个USART接口,支持ISO7816,LIN,IrDA接口和调制解调控制 c.多 达2个SPI同步串行 接口(18兆位/秒)
23. 1个1 2位模数转换器 ,1us转换时间(16通道)
整板资源介绍
知识改变命运
热敏电阻和光敏电阻 接口
普中科技
第二章 软件安装及使用 USB驱动 程序安 装
在 光 盘 中 找 到"安装USB驱动程序"的文件夹,在文件夹中,有XP和WIN7两种驱动程序 。
XP安 装演示:
双 击U S B驱动程序 的安装程序
弹出此对话框,说明 你 电 脑里已经安装了此类驱 动程序,此时强烈建议 选 择"移除该驱动程序" ,根 据提示重启计算机。
卸 载 成 功 后,重新安装 我们光 盘中的驱动程序,我们提供驱动程序 是兼容性 最好的版本
点“下 一 步”即将 开始安装,完成后,按照提示重启计算机
普中科技
第二章 软件安装及使用
安装不成功解决办法
安 装 完 驱 动程序 后,发现不能正常烧录程序 时,此时打开设备管理器
件或设备的供电,为做不同电压实验提供了更多方便,还增加了一些锁存器的
功 能 。 从51过渡到ARM嵌入式 系统,HC600-EM3是您明智的选择
系列嵌入式操作手册
嵌入式硬盘录像机操作手册非常感谢您购买我公司的产品,如果您有什么疑问或需要请随时联系我们。
本手册适用于S系列硬盘录像机。
本手册可能包含技术上不准确的地方、或与产品功能及操作不相符的地方、或印刷错误。
本手册的内容将根据产品功能的增强而更新,并将定期改进或更新本手册中描述的产品或程序,更新的内容将会在本手册的新版本中加入,恕不另行通知。
安全使用注意事项使用本产品时请务必遵守以下事项:⏹硬盘录像机上不能放置盛有液体的容器(例如水杯)。
⏹将硬盘录像机放置在通风良好的位置。
⏹使硬盘录像机工作在允许的温度及湿度范围内。
⏹硬盘录像机内电路板上的灰尘在受潮后会引起短路,请定期用软毛刷对电路板、接插件、机箱及机箱风扇进行除尘。
产品提供的功能特别说明⏹SH、SD、SL、SV系列最多支持8个SATA硬盘,S系列经济型最多支持2个SATA硬盘。
⏹S、SH、SD系列支持复合流和视频流编码,复合流编码时音频和视频同步。
⏹SL、SV系列仅支持视频流,同时支持环通。
压缩处理功能·采用H.264视频压缩技术。
·支持PAL/NTSC制式视频信号,每路皆可实时每秒25帧的独立硬件压缩,视频压缩采用H.264压缩技术,不仅支持变码率,而且支持变帧率。
可设定视频图像质量,也可设定视频图像的压缩码流。
·S、SH、SD系列支持音频信号,每路音频信号独立实时压缩,音频压缩标准采用ADPCM、G.711等多种编码方式,压缩码率为16Kbps~40Kbps。
·视频和音频信号压缩后生成复合的H.264码流,码流回放时视频和音频保持同步。
也可设置不用音频。
·支持参数动态设置。
·支持双码流。
·支持多区域移动侦测。
·支持OSD,日期和时间的位置可以设置,日期和时间更新。
本地监控·VGA显示,最高分辨率达1280*1024,4路、8路经济型S最高支持1024*768·预览时显示模式多路切换。
美电贝尔嵌入式硬盘录像机使用手册Ver3.4

开机与关机操作 插上电源线,按下前面板电源开关,电源指示灯亮,录像机开机。如图 图 1。此时可进入系统菜单对硬盘录像机进行配置和操作,请参考《进入系 统菜单》和后续介绍。 若开机启动时间在录像设定时间内,系统将自动启动定时录像功能。
注意:请使用与硬盘录像机配套提供的电源,不得使用其他类型 或品牌电源代替原配电源。
7
接线端子
包括报警输入,报警输出,RS-485 接口
8
1080P 接口
1080P 视频信号输出接口
将输入的视频信号再接出来给其他的需要视频信号的
9
环通接口
设备
10
对讲输入
对讲音频输入
注意:所有的后面板都以该系列 16 路 DVR 为例。 NVR 的后面板没有视频输入和音频输入。
第 11 页
接线接口描述 后面板 I/O 接口示意图如下:
1 23 4
嵌入式硬盘录像机使用手册
NO C A B
1
23
4
图 9 4 路 DVR I/O 接口示意图
1
3
24
1
2
24 6 8
2
13 5 7
1
4
10 12 14 16
3
B A 9 11 13 15
UP DOWN
图 10 8 路、16 路 DVR I/O 接口示意图一
第 12 页
嵌入式硬盘录像机使用手册
异常状态屏幕提示功能。
压缩处理功能
采用 H.264 视频压缩技术和 G.711 音频压缩技术。
录像功能
第3页
嵌入式硬盘录像机使用手册
支持定时录像、手动录像、报警联动、动态检测等多种录像模式;支持
电话商务录音系统使用说明书
第一章简介本公司将先进语音技术同大容量磁盘存储技术相结合推出性能优异的新一代多路电话商务录音管理系统是对电话双方通话过程进行实行自动录音和实时监听功能的软硬件集成系统。
能对多路电话同时进行超长时间录音显示记录主叫号码、被叫号码及通话时长等通话信息并保存于电脑系统管理人员可以对任意正在通话的通道进行实时监听而通话不受任何影响。
录音采用国际通用语音处理及压缩技术符合CCITT标准将话音信号经取样数字化压缩后存储在计算机磁盘中。
放音则是通过对磁盘上的语音数据进行解压后通过外接音箱(耳机)播放。
是生产调度、服务热、110、火警、防讯报警、银行委托、证卷行业等领域不可缺少的工具。
产品已布及国家和地区:美国、港澳台地区新加坡马来西亚印度尼西亚等东南亚国家南美诸国中东地区以及西亚地区出口品质值得信赖。
产品通过CE/FCC认证.系统基本功能:●支持Windows 98/NT/2000/XP/2003操作环境。
●提供USB接口2路PCI接口单卡4路8路16路数字30B+D(30路)。
●可实时监听每一条线路的通话内容。
●支持三种录音模式自动录音(压控)声控可手动录音(键控)。
●可以对所有的拨入、拨出未接电话进行清单列表、打印、支持条件查询及添加通话备注。
●支持直线交换机的内线分机接入同时录音。
●系统支持自动备份可将语音文件自动备刻录到DVD支持自动循环录音。
●系统附带来电客户信息管理系统可识别来电身份及自定义来电座席弹屏。
●录音起始时间可以灵活设置可以是一段时间内录音也可以是每天24小时录音。
●用户可在特殊号码表里自定义不录音的电话号码如拨打95555,163上网录音系统不启动录音)。
●系统具有完整的操作日志可以记录对系统的所有操作。
●支持每个用户对某些线路拥有操作的权限可设定不同等级的密码保护除了系统管理员使用最高级的密码外还有用户密码、录音文档查询密码等多种保护措施。
●线路适用于普通电话外线、分机内线、ISDN引出的模拟线、无线对讲机的音频输出线等。
洪达音频系统用户手册说明书

Audio SystemAM/FM/Cassette Stereo Audio SystemU.S. EX and Canada Si Models Your Honda audio system is easy to use and will give clear AM/FM reception. The preset buttons allow you to select six stations on AM and 12 stations on FM.The anti-theft feature disables the system if it is disconnected from the car's battery. To get the system working again, you must enter a code number. See page 71.The cassette system usesDolby B* noise reduction to give excellent sound reproduction.The system also senses when a metal or a chromium dioxide (CrO 2) tape is being played and adjusts accordingly.*Dolby noise reduction manufac-tured under license from Dolby Laboratories Licensing Corpora-tion. "Dolby" and the symbol are trademarks of Dolby Labora-tories Licensing Corporation.Operating the RadioThe ignition switch must be in ACCESSORY (I) or ON (II) tooperate the audio system. Turn the system on by turning the ON/OFF/VOL knob clockwise.The radio comes on anddisplays the frequency of the station it was last tuned to.Adjust the volume by turning the ON/OFF/VOL knob.Comfort and Convenience FeaturesON/OFF/VOL KNOBAM BUTTONSTEREO INDICATORTUNE/SEEK BARPRESET BUTTONSFM 1-2 BUTTONAudio SystemSelect the band you want to listen to by pressing the AM or FM 1-2 button. You will see the selected band and the frequency in the display.ST will be displayed next to the frequency if the station isbroadcasting in FM stereo. The AM stereo feature is not available.You can use any of threemethods to find radio stations on the selected band: TUNE, SEEK,or the Preset buttons.The TUNE function lets you find a desired frequency. Push the right side of the TUNE/SEEK bar to change to a higherfrequency, and push the left sideof the bar to change to a lower frequency.To change the frequency up or down a single increment, push and release the TUNE/SEEK bar.The SEEK function searches the band for a station with a strong signal. Depending on which way you push the TUNE/SEEK bar,the system searches up or down from the current frequency. Push the bar until you hear a beep,then release it. The system searches until it finds a station with a strong signal, then stops.Presetting Radio StationsThe preset buttons allow you to store radio frequencies for later selection. Each button will store one frequency on the AM band and two on the FM band. To store a frequency do this:1. Select the desired band, AMor FM. FM 1-2 allows you tostore two frequencies with each Preset button.2. Use the TUNE or SEEKfunction to tune the radio to a desired station.3. Pick the Preset button youwant for that station. Press the button and hold it until you hear a beep. The light in the indicator will come on and the station selected will show in the display.4. Repeat steps 1 through 3 tostore a total of six stations on AM and 12 on FM.Once a station's frequency is stored, simply press and release the proper Preset button to tune to it. If you want to change any Preset button's selection, store another frequency as described.The frequencies you preset will be lost if your car's battery goes dead or is disconnected.Comfort and Convenience FeaturesAudio SystemAdjusting the SoundUse the Balance and Fader controls to adjust the sound "direction." The Balance control moves sound left to right. The Fader control moves it front to back.To use either control, push on the knob to get it to pop out.Adjust the front-to-back sound to your liking with the outer ring.Adjust the side-to-side sound balance with the knob. Push the knob back in when you are done.The illumination for the radio controls comes on with the instrument panel lights, even ifthe radio is off. You can use the Balance control to turn off the radio panel illumination even with the radio on. Push the control knob so it pops out, then pull it out slightly farther. Check this control if the control panel lights do not come on with the instrument panel lights.Use the Bass and Treble controls to adjust the tone quality to your liking. Push on the knob to get the controls to pop out. Adjust the bass level with the outer ring and the treble level with the knob. When finished, push the knob back in to prevent accidentally changing your settings.Comfort and Convenience FeaturesON/OFF/VOL KNOBAM BUTTONSTEREO INDICATORTUNE/SEEK BARPRESET BUTTONS FM 1-2BASS/TREBLE BALANCER/FADERAudio SystemRadio FrequenciesYour Honda's radio can tune in all frequencies in both the AM and FM bands. Those bands cover these frequencies:AM band530 to 1710 kilohertz FM band87.7 to 107.9 megahertz Radio stations on the AM band are assigned frequencies at least 10 kilohertz apart (530, 540, 550).Those on the FM band areassigned frequencies at least 0.2megahertz apart (87.9, 88.1,88.3).Stations must use these exact frequencies. It is fairly common for stations to round-off the frequency in their advertising,so your radio will show afrequency of 100.9 even though the announcer may call the station "FM101."Operating the Cassette PlayerTurn the system ON. Insert the cassette into the slot with the tape opening to the right. Push the cassette in most of the way.The drive pulls it in the rest of the way and begins to play.The or lights to show you which side of the cassette is playing. The indicates the side you inserted facing upward is now playing. To play the other side of the tape, press the PROG button.The system also has an auto-reverse feature. It automaticallyComfort and Convenience FeaturesEJECT BUTTON REWIND BUTTON CASSETTE SLOT FAST FORWARD BUTTONTAPEDIRECTION INDICATORPROGRAM BUTTONPLAY BUTTONTMSBUTTON DOLBYBUTTONAudio Systemreverses direction when itreaches the end of the cassette.If the tape was recorded with Dolby "B" noise reduction, turn it on by pressing the button.To remove the cassette from the drive, press the EJECT knob. The system automatically ejects the cassette whenever you turn off the system or the ignition switch.Cassette Search FunctionsOnce a cassette is playing, you can use the REW, FF, or TMS function to look for desired songs or passages.Press the REW button to rewind the cassette. Press the FF button to fast forward. The cassette will stop playing and will rewind or fast forward. To stop rewind orfast forward, press the PLAYbutton. If the system reaches the end of the cassette while in fast forward or rewind, it auto-matically stops that function,reverses direction, and begins to play.The TMS function lets you skip to the beginning of a song or other passage.Press the TMS button and then the FF button or REW button.The tape will automaticallyadvance to the beginning of the next song or return to the beginning of the song justplayed. When the system senses a silent period on the tape, it goes back to PLAY mode.The TMS function uses silent periods on the tape to find the end of a selection. This feature may not work satisfactorily ontapes that have almost no gap between songs, a high noise level between songs, or silent periods in the middle of songs.Caring for CassettesDamaged cassettes can jam inside the drive or cause other problems. See page 67 forinformation on cassette care and protection.Caring for the Cassette PlayerThe cassette drive picks up dirt and oxides whenever you play a tape. This builds up over time and causes the sound quality to degrade. To prevent this, you should clean the cassette drive after every 30 hours of use. Your Honda dealer has a cleaning kit available for this purpose.After 30 hours of tape use, you will see CLEAN flashing for fiveComfort and Convenience FeaturesAudio Systemseconds in the display when you insert a tape into the tape slot. If you are already regularly cleaning the tape drive at least every 30 hours, reset theindicator by pressing the FM1button while the system is in the tape operation mode. Hold the button until you hear a beep and the CLEAN indicator goes out.If you do not clean the cassette drive regularly, it may eventually become impossible to remove the deposits with a normal cleaning kit.The cassette playerautomatically ejects cassettes that do not play normally. If it ejects a cassette before it begins to play, it is probably defective and should not be inserted again. You may have a cassettesuddenly stop playing, reverse directions once or twice and then eject. This is normally an indication the tape is woundunevenly. It should play normally after being manually e 100-minute or shortercassettes. Cassettes longer than 100 minutes use thinner tape that may break or jam the drive.Look at a cassette before you insert it. If the tape is loose,tighten it by turning one of the hubs with a pencil or your finger.If the label is peeling off, do not put it in the player. It may cause the cassette to jam in the drive mechanism when you try to eject it.Do not leave cassettes sitting where they are exposed to highheat or humidity, such as on top of the dashboard or in theplayer. If a cassette is exposed to extreme heat or cold, let it reach a moderate temperature before putting it in the player.Operating the CD Player/Changer (Optional)Your dealer has an in-dashHonda Compact Disc player or a trunk-mounted changer available for your car. The changer holds up to six discs, providing several hours of continuous program-ming. You operate the CD player and the changer with the same controls used for the radio.Loading the CD Changer Load the CDs in the magazine and load the magazine into the changer according to theinstructions that came with the changer unit.Comfort and Convenience FeaturesAudio SystemTo operate the CD player or changer, the ignition key must be in the ACCESSORY (I) or ON (II). If you were listening to a cassette tape, eject it before listening to a CD.CD PlayerInsert the disc in the player.Push the CD button on the player, "CD" will show in the display and the disc will start to play.CD ChangerPush the CD button on the radio,the display will show "CD" and the track last listened to will play. When that disc ends, the next disc in the magazine is loaded and played.After disc 6 has completed, the system will return to disc 1. To make your own disc selection,push one of the corresponding Preset buttons. Your selection will appear in the display andstart playing.If you try to select an empty slot in the magazine, thesystem will select and play the first track of the next disc in the magazine.You can use the TUNE/SEEK bar while a disc is playing to select passages and change tracks. To move rapidly forward within a track, press and hold the side of the TUNE/SEEK bar. Press and hold the side to move rapidly backward within a track. You will hear a beep a half second after you press either side of the bar.Comfort and Convenience FeaturesTUNE/SEEK BARCD BUTTONAudio SystemKeep pressing the bar until you think the track has advanced or returned to the desired position.The disc will start playing when you release the bar.If you press the side andrelease it before you hear a beep,the system will skip forward to the beginning of the next track on the CD. It will skip backward to the beginning of the current track if you press the side andrelease it.If you change modes to radio or tape while a CD is playing,then change back to CD mode,the same disc and track willplay.If you turn off the system while a CD is playing, either with the ON/OFF/VOL knob or by turning off the ignition, the system will begin playing thesame disc and track when you turn it back on.To return to the radio function,press the AM/FM button.Comfort and Convenience FeaturesAudio SystemCD Error IndicationsIf you see an error indication onthe display, find the cause in thechart to the right. If you cannotclear the error indication, takethe car to your Honda dealer.Comfort and Convenience FeaturesAudio SystemOn U.S. EX and Canada Si models Your car's audio system willdisable itself if it is disconnected from electrical power for any reason. To make it work again,the user must enter a specific five-digit code in the Preset buttons. Because there are hundreds of numbercombinations possible from five digits, making the system work without knowing the exact code is nearly impossible.You should have received a card that lists your audio system's code number and serial number.Store the card in a safe place at home. In addition, you should write the audio system's serial number in this Owner's Manual.If you should happen to lose the card, you must obtain the code number by having your Honda dealer contact American Honda.To do this, he will need the system's serial number.If your car's battery isdisconnected or goes dead, the audio system will disable itself. If this happens, you will see "Code"in the frequency display the next time you turn on the system. Use the Preset buttons to enter the five-digit code. If it is entered correctly, the radio will start playing.If you make a mistake entering the code, do not start over or try to correct your mistake.Complete the five-digit sequence,then enter the correct code. You have three tries to enter the correct code. If you areunsuccessful in three attempts,you must then leave the system on for one hour before trying again.You will have to store your favorite stations in the Preset buttons after the system begins working. Your original settings were lost when power was disconnected.Comfort and Convenience Features。
海康嵌入式网络硬盘录像机简单操作指南

(4)暂停/继续播放 )暂停/
按【end】键可以进行暂停/继续播放控制; end】键可以进行暂停/ 单帧模式时,每按一次【 单帧模式时,每按一次【左】键 向前播放一帧。
5)对指定条件的录像文件进行备份
备份指定某一通道、指定某一时间段内的 录像资料。按以下步骤进行: 第一步:搜索指定的录像文件。 第一步:搜索指定的录像文件。 在回放操作界面中选择通道号及文件类型, 然后输入起止时间,将活动框定位在“ 然后输入起止时间,将活动框定位在“搜 索文件”按钮处,按前面板的【end】 索文件”按钮处,按前面板的【end】键。 若存在符合条件的录像文件,则显示在 “录 像文件列表窗口” 像文件列表窗口”中。
9如果一旦发生报警,应该如何消除警报 先找到报警键盘,然后按下1234#警报就 先找到报警键盘,然后按下1234#警报就 消了,然后按下*1#消除对联社报警。详 消了,然后按下*1#消除对联社报警。详 见“报警简要操作说明书”。 报警简要操作说明书” 10请勿擅自移动摄像机位置,摄像机都是 10请勿擅自移动摄像机位置,摄像机都是 按要求位置固定好的,如果在摄像机正常 工作情况下擅自移动会造成画面位置上的 偏差,甚至会造成掉落,人为损坏。后果 很严重
五、日常使用维护及小故障的排除
日常维护 1、录像回放时,出现系统假死现像 可能是在搜索的内容过多,系统反应迟钝,请勿 此时乱按其它键,静静等待两至三分钟就可。 2、显示器上出现色差太大,画面不清晰。 这种情况是显示器长时间开起,磁场干扰造成的, 这种情况只需要消磁就可以了。 3、突然断电后,再开机发现显示器显示画面有长 条磁状画面,这种属于静电。 这种情况解决方法是将机子关了,把主机后面的 电源掉掉,过一分钟再插上,开机就可以了。
第三步:选择存储设备。 第三步:选择存储设备。 检查一下与硬盘录像机连接的备份设备类 型(必需是fat32文件类型),是 型(必需是fat32文件类型),是 U 盘或 移动硬盘然后在“存储设备” 移动硬盘然后在“存储设备”选项中选择 同样类型的备份设备
D8嵌入式固态录音机硬件手册V1.2_1031
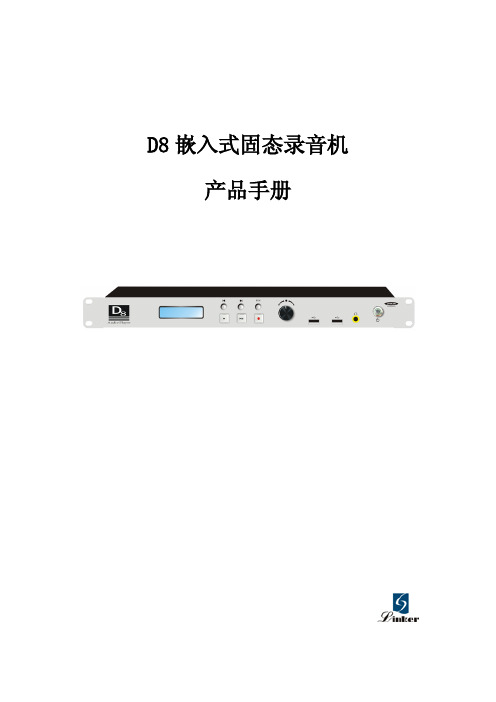
D8 嵌入式固态录音机产品手册
安全说明
感谢您使用 D8 嵌入式固态录音机产品! 融合了人性化高科技的技术精华,D8 嵌入式固态录音机将给您一个全新的应用体验。 请遵循以下安全原则, 以保护您的产品和工作环境避免潜在的损坏危险, 并可确保您的人身 安全。
在使用本产品或系统时
3
D8 嵌入式固态录音机产品手册
目
录
安全说明 .................................................................................................................................................. 2 在使用本产品或系统时 .................................................................................................................. 2 寻求技术支援 .................................................................................................................................. 3 本手册声明 ...................................................................................................................................... 3 第一章 D8 嵌入式固态录音机介绍 ...................................................................................................... 5 1. 产品特点 ..................................................................................................................................... 5 2. 前面板 ......................................................................................................................................... 6 3. 后面板 ......................................................................................................................................... 7 第二章 技术规格 .................................................................................................................................... 8 1. 音频指标 ..................................................................................................................................... 8 2. 接口规格 ..................................................................................................................................... 8 3. 其他规格 ..................................................................................................................................... 8 第三章 系统连接和按键操作 ................................................................................................................ 9 1. 系统连接 ..................................................................................................................................... 9 2. 按键操作 ................................................................................................................................... 10 2.1 播放选择界面 ................................................................................................................... 10
- 1、下载文档前请自行甄别文档内容的完整性,平台不提供额外的编辑、内容补充、找答案等附加服务。
- 2、"仅部分预览"的文档,不可在线预览部分如存在完整性等问题,可反馈申请退款(可完整预览的文档不适用该条件!)。
- 3、如文档侵犯您的权益,请联系客服反馈,我们会尽快为您处理(人工客服工作时间:9:00-18:30)。
HHR6800系列嵌入式录音系统操作说明书所有权声明本文档的内容将做定期性的变动,且不另行通知。
更改的内容将会补充到本手册中。
除特别声明外,此文档所用的公司名称、个人姓名及数据均属为说明的目的而模拟。
文档的版权属福州华亨通讯信息有限公司所有,受中华人民共和国法律的保护。
本文档所含的任何构思、设计、工艺及其他技术信息均属本公司所有,受中华人民共和国法律的保护。
未经本公司书面同意,任何单位和个人不得擅自摘抄、全部或部分复制本书内容,或者以其他任何方式使第三方知悉。
目录第一章系统简介 (5)1.1产品功能 (5)1.2产品特点 (6)第二章软硬件环境要求 (7)第三章主界面介绍 (8)3.1登入界面 (8)3.2密码修改 (9)3.3界面介绍图 (9)3.3.1导航菜单栏 (11)3.3.2 快捷菜单栏 (12)3.3.3运行状态信息 (13)第四章录音查询 (14)4.1 录音界面介绍 (14)4.1.1录音条件设置区域 (14)4.1.2录音文件播放区域 (15)4.1.3录音记录的删除、导出和录音文件下载操作 (15)4.1.4录音记录显示栏目介绍 (16)第五章通道设置 (18)5.1通道列表 (18)5.2通道基本信息 (18)5.3录音启动方式 (19)5.4录音记录处理 (20)5.5 通道监控 (20)第六章系统设置 (21)6.1全局参数 (21)6.2 录音过滤 (21)6.3 设置IP (22)6.4 设置时间 (22)6.5 重启系统 (23)6.6 恢复出厂 (23)6.7 系统升级 (23)6.8高级设置 (24)第七章号码管理 (25)7.1免录号码管理 (25)7.2白名单 (27)第八章日志管理 (29)8.1操作日志 (29)8.2录音查听日志 (31)8.3设备启动日志 (32)8.4系统运行日志文件 (33)第九章话务统计 (34)9.1 图表统计 (34)9.2 列表统计 (37)第十章菜单 (38)10.1 菜单操作 (38)第十一章分布式管理 (39)第一步设置主设备 (40)第二步设置子设备 (40)第一章系统简介华亨通讯HHR6800系列嵌入式录音设备,安装使用方便,直接接入网线,用户通过局域网或互联网,对坐席实现电话录音管理。
HHR6800采用工业级机箱结构设计,采用工业标准的19英吋上架机箱,结构坚固紧凑,外形简约美观。
采用低功耗的芯片组,无需风扇散热,系统稳定可靠。
内置嵌入式操作系统,可独立运行操作,具有良好的防病毒、抗干扰能力。
HHR6800采用了基于Linux 2.6内核嵌入式操作系统、Power PC架构CPU和DSP处理芯片等目前业内较为先进的技术和硬件,实现录音数据的采样、量化处理,可实现达64路通道的处理能力。
HHR6800配置了320G SATA接口的录音硬盘,可实现长达16000~22400小时的超大录音容量。
突破“传统PC级录音系统在线路较多情况下,录音或PC不稳定”的缺点,HHR6800实现了0~64路等不同路数的电话录音功能。
1.1产品功能1、独立系统:采用Linux 2.6内核嵌入式操作系统,无需电脑即可实现7*24小时录音。
2、支持线路:普通模拟电话线路;数字中继线路(SS7\ISDN\SS1\LINESIDE\CAS分机),同时支持E1\T1;VOIP线路;3、语音通道:支持8、16、32、64路普通模拟电话线路同时录音支持30、60、120路数字中继线路同时录音支持8、16、32、64路VOIP线路同时录音4、语音编码:CCITT A/u law 64KbpsIMA ADPCM 32Kbps5、录音启动:录音启动方式灵活,具有压控、键控、声控三种启动方式。
6、录音设置:录音起始时间可以灵活设置,可以是一段时间内录音,也可以是7*24小时录音。
7、自动录音:无需人工操作,系统会24小时自动开启录音、结束录音。
8、录音保护:嵌入式系统,独立运行操作,实现了较高的防病毒、抗干扰能力,对存储录音文件具有高效的保护作用。
9、自动增益:系统具有自动增益功能,可以自动调节通话双方的音量,而不至于声音太小。
10、自动清除:当系统的硬盘将满时,系统将自动清除最先录音的资料,以保证系统可以常年不间断运行。
11、电话查询:可以查询相关来电号码、去电号码、未接来电、录音时间、录音时长、录音通道号等各种信息。
12、话务分析:可以根据通话各种信息分类,并进行分析处理。
1.2产品特点1、工业级机箱设计:采用工业标准的19英寸上架机箱,结构坚固而紧凑,质量轻巧,移动、安装简洁方便。
2、嵌入式操作系统:采用Linux 2.6内核嵌入式操作系统,提供了最优化的任务处理、最安全的文件系统、最可靠的系统稳定性。
3、专业级的嵌入式硬件:采用低功耗嵌入式PowerPC 架构CPU,最高主频可高达667MHz。
4、DSP技术:采用基于TMS320C64x+内核的专业的语音处理DSP,处理能力达5.6G MIPS。
5、低功耗:由于采用低功耗嵌入式设计,整机功能低于15W,可在无需外部散热的条件下,保证系统持续稳定运行。
6、录音容量:配置320G SATA接口录音硬盘,可实现长达16000~22400小时的超大录音容量。
7、操作系统固化设计:操作系统及主要功能模块均固化于FLASH中。
8、监控系统:内置看门狗电路对系统运行进行守护和监控,系统异常时可自动复位。
第二章软硬件环境要求HHR6800嵌入式录音设备(以下简称为本设备或本系统)采用B/S架构设计,用户通过IE浏览器就可以实现对本设备的所有管理、设置、查询操作。
HHR6800嵌入式录音设备可独立运行,平时无需外部设备协作。
只要用户需要访问本设备数据时,只要打开任何一个与本设备在同一个网内的PC机上的web浏览器,就可以访问本设备。
HHR6800嵌入式录音设备支持名种主流浏览器来访问来设备数据,如:Microsoft IE 7.0及以上版本、360安全浏览器、Google Chrome浏览器、世界之窗、遨游浏览器等。
但为获得更好的用户体验和更稳定的运行效果,我们强烈推荐您使用Microsoft IE 7.0以上版本浏览器来访问本设备,并且屏幕分辨率不要低于1024*768。
为了播放录音文件,访问本设备的PC机必须装有声卡和Windows Media Player 10.0。
第三章主界面介绍3.1登入界面为了保证数据安全性,录音系统采用严格的权限管理。
在未通过系统认证前任何数据将不会被访问。
打开PC机上的浏览器,在地址输入Http://xxx.xxx.xxx.xxx(xxx.xxx.xxx.xxx 为你为本设备分配的IP地址),按[回车]进入系统登录界面。
进入登录界面,系统要求你输入用户名和密码。
系统用户名:admin密码:123456错误提示:3.2密码修改登录成功后,在左边导航栏中点击[用户管理] [修改密码],可修改当前登录用户的密码。
3.3界面介绍图主界面主要分为三个部分,左边为导航菜单栏,中间快捷菜单栏,右边运行状态信息。
图导航菜单栏图快捷菜单栏图设备信息3.3.1导航菜单栏导航菜单栏将引导你进行各种操作。
1、系统设置(设置全局参数、录音过滤、设置时间、设置IP、重启系统、恢复出厂、系统升级、高级设置)图系统设置2、号码管理(免录/白名单管理)图号码管理3、用户管理(管理用户、权限,修改密码)图用户管理4、日志管理(查看操作日志、运行日志)图日志管理5、话务统计(查看话务统计:列表、图表)图话务统计3.3.2 快捷菜单栏主要方便用户快速操作系统,包括录音查听,通道设置,通道监控等功能:图快捷菜单栏3.3.3运行状态信息用于显示设备信息和版本信息:图设备信息第四章录音查询4.1 录音界面介绍录音查询是本系统较为常用的模块,在此模块中可以对录音记录进行查询、收听、记录Excel导出、录音文件下载、录音删除等操作。
录音查询界面介绍录音查询界面从上到下主要分为四个功能区域:4.1.1录音条件设置区域允许用户输入常用的查询条件进行记录筛选。
系统默认显示当前时间向前一周的录音文件。
如果你想进行更复杂的查询,点击[]将弹出以下界面,对于内部提到各项设置,将在下面介绍[录音记录显示区]时进行详细说明4.1.2录音文件播放区域此处本系统加载了IE所在PC机的Windows Media Player 10.0控件,若此处显示为空白,则表明此PC机安装Windows Media Player 10.0控件,将下载和安装此控件。
用户想播放录音记录时,只要点击相应录音记录后面的按钮,播放控件将自动开始播放。
由于PC系统和设置的不同,可能会出点击按钮并未开始播放,播放控件的开始播放按钮由变为,此时需要你点一下控件的按钮就可以听到录音文件了。
录音记录显示及操作区域本区域将详细显示每条录音记录的所有信息。
4.1.3录音记录的删除、导出和录音文件下载操作在进行删除录音、导出Excel、录音文件下载操作前,用户在必须先选中相应的记录,只要将相应记录音。
删除录音操作此操作在删除对应的数据记录及录音文件,并且无法恢复。
1导出Excel将选中的录音记录与Excel文件方式下载。
录音文件下载1由于采用B/S架构,录音文件的删除不会立即执行,可能会有5秒延迟。
若在此5秒内设备重启或断电,可能会导致删除录音文件失败。
将选中的录音压缩成一个RAR文件下载。
由于需要在后台进行文件压缩,根据下载文件的多少,可能会一定延迟,请耐心等候。
4.1.4录音记录显示栏目介绍通道:表明此录音记录是从设备上的哪一个物理端口上被记录的。
本地号码:本地号码用来标识被录音电话的电话号码,方便在录音查询进行查找。
对方号码:对方号码用于显示正在被录音那通电话的对方号码。
时间:此时间是用户完成通话挂机时的时间,取自设备内部的系统时间,用户在[系统设置]中调整设备的系统时间。
方向:通话方向栏用于显示正在被录音的那通电话的呼叫方向,打入或打出。
录音时长:对于[压控]模式产生的录音,录音时长表示被录音话机的摘机到挂机的时间长度。
对于[键控]模式产生的录音,录音时长表示用户按完最后一个[录音启动键]到按完最后一个[录音停止键]这段时间时长。
对于[声控]模式产生的录音,录音时长表示系统检测有声开始录音到无声停止录音的这段时间时长。
对于未摘机的录音记录(主要是来电未接电话),此处会显示0:0:0。
振铃次数:记录呼入时电话开始第一声响铃到用户摘机这段时间中,电话机响铃次数。
对呼出的电话,此处一直为0。
用户:同主界面中的[用户]。
部门及上级部门22用户、部门、上级部门在系统中并没有逻辑关系,仅仅是一个为了方便管理的标识而已。
部门、上级部门是用来标识被录音电话的使用者所在部门。