系统技术说明操作手册 之 音频系统
音响系统设置手册
音响系统设置手册第一章、引言音响系统是现代生活中不可或缺的一部分,它能为我们带来高品质的音频体验。
本手册旨在向您介绍如何正确设置音响系统,以确保您获得最佳的音频效果。
在使用本手册前,请确保已仔细阅读您所购买的音响设备的使用说明书。
第二章、选址与环境要求2.1 选址要求为了保证音响系统的正常运作,请确保将其放置在水平稳定的位置上,远离磁场、静电和灰尘等干扰源。
2.2 环境要求音响系统应放置在通风良好的环境中,远离阳光直射和潮湿环境,避免与火源或液体接触。
第三章、连接设备3.1 连接音源将音源设备(如电视、CD播放器等)通过音频线缆连接到音响系统的音频输入接口上,确保插头与接口相匹配,并牢固连接。
3.2 连接扩音器根据您的音响系统类型,将扩音器通过扩音器线缆连接到音响系统的扩音器接口上。
请注意区分左声道和右声道,并确保连接稳固。
第四章、音调调节4.1 音量调节通过操作音响系统的音量旋钮或遥控器上的音量按钮,调节音响系统的音量大小。
首次使用时,请将音量调至较低的水平,逐渐提升至适宜的音量。
4.2 音效模式选择根据个人喜好,在音响系统的控制面板或遥控器上选择适合的音效模式,如普通、摇滚、爵士等。
试听不同模式,并选择最符合您品味的模式。
第五章、扩音器设置5.1 声场调节根据您的音响系统类型以及空间特点,调整音响系统的声场效果。
可以尝试不同角度和位置,以获得最佳的音频效果。
5.2 低音调节根据个人喜好,调节音响系统的低音效果。
请注意,过度增强低音可能会影响音频的平衡与清晰度,因此请谨慎调整。
第六章、其他设置6.1 平衡调节根据您的喜好,调节音响系统的平衡效果,确保左、右声道音量均匀分配。
6.2 重播与暂停通过遥控器上的相应按钮或音响系统的控制面板上的功能键,实现音频的重播与暂停操作。
第七章、维护与保养7.1 清洁音响系统定期使用柔软的干布清洁音响系统的外壳,避免使用含有液体的清洁剂,以防止对音响系统造成损害。
DAAS音频测试系统品管功能手册
前言[数位音响分析系统](Digital Audio Analyser System, DAAS 3L+)是德国admengineering 公司(位于Nordhorn)所发展与制作的.合法使用者可以无限次使用DAAS 3L+所附的软体,并且容许自行拷贝一份当作[备份]软体,仅限自己使用. 除此之外,此软体、使用手册、与硬体等之其它拷贝或以任何形式复制,均属违法,将依法追诉. 使用手册或内含之资讯必须获得adm engineering公司或RCM Akustik 公司之书面许可,才能转载或复印.adm engineering公司与RCM Akustik公司并不保证本使用手册或所附之软体毫无瑕疵. 欢迎使用者提供修正意见,若有任何缺失,本公司将尽快修正.使用手册里所提及之公司名称与商标品牌等均受国际法保护,即使未特别声明.MS-DOS and WINDOWS © Microsoft CorporationDR-DOS © Digital Research IBM PC、XT、AT、PC-DOS © IBM(Inter National Business Machines)1 概述1-1.前言DAAS(数位音讯分析系统Digital Audio Analyser System)之发展目的在于制造一个能够利用个人电脑功能又售价合理的频率响应度测试仪器, 从取样、类比/树位转换、到计算评估技术等, 此系统逐渐发展成目前的多功能形式DAAS 3L.尽管讯号取样有很多种分析方法, 然而对于使用者而言, 测试值比讯号本身更加重要. 换言之, 扬声器或扩大机的设计师并不需要了解数字讯号评估技术, 因为每一项测试均可依照指定的程序而获得测试结果. 每一测试的所有重要参数均已经有最佳化之设定. 凡是想进一步利用此系统者, 可以更改系统参数, 尝试其它领域之运用,例如频谱分析与示波器功能等.新的DAAS 3L包含许多重要而实用的功能:●利用[数位/类比转换器]与[类比/数位转换器]产生讯号与执行测试。
dass操作手册
DAAD 3L+
图 44
图 45
28
DAAD 3L+
图 46
图 47
29
DAAD 3L+
六.示波器
图 48
图 49 1) 进入主菜单选择 F7 Scope (图 49)
30
2) 在图 50 界面中
DAAD 3L+
图 50 F4 Time+, F9 Time-:调整测试时间宽度 F5 Test signal:选择测试讯号 F10 Sample rate :选择测试频宽
3) 例如测试 100HZ—800HZ 失真,选择 F2 进入测试界面(图 36)
图 36 F1 Start:开始执行失真测试 F2 Input selet :选择输入端及量程,测试扬声器一般选择 F2 8Pa,而测试放 大器时一般选择 F5 Line 20V(图 37)
23
DAAD 3L+
图 37 F4 Test treq:选择测试频率范围 4) 选择 F1 Start 开始失真测试
图 22
15
DAAD 3L+
图 23
图 24 三.扬声器低频参数测试
1) 在主菜单中选择 F3 Thiele small(图 23)
16
2) 在图 24 所示的界面中选择 F1 Start 开始基准测试 3) 在图 25 所示的界面中选择 F1 OK,基准测试完毕
DAAD 3L+
图 25
图 26
图 12 F1 Setup frequeney axis 调整水平显示范围 F2 Setup magni tude axis 调整整纵向分辨率 5) 点击 F10 Functions,进入其它功能设定(图 13) F1 Export curve:储存当前测试曲线 F2 Correct distance loudspeaker—mic:手动修正扬声器与麦克风之距离 F3 Mask load/save/import/new:品管功能键见操作手册之品管功能说明 F4 Smoofh:平滑键 F5 Measure Impedance curve:在频响菜单中,测试阻抗曲线 F6 Compine with near field meas :低频测试时曲线结合功能
LG FX166 3D Blu-ray微型高保真音响系统 使用说明书

yy 根据美国和其他国家的版权法,未经授权对 电视节目、录影带、BD-ROM 光碟、DVD、CD 和其他材料进行录制、使用、播放、分发或 修改,将承担民事和/或刑事责任。
6 目录
目录
1 开始
3 安全信息 8 介绍 8 – 可播放的光碟和本手册中使用的符号 9 – 关于“7”符号显示 10 – 文件要求 11 – AVCHD(Advanced Video Codec High
3 系统设置
27 设置 27 – 调整设置 27 – [显示] 菜单
29 – [语言] 菜单 29 – [音频] 菜单 30 – [锁定] 菜单 31 – [网络] 菜单 31 – [其它] 菜单 32 音效
4 操作
33 基本播放 33 – 使用 [主菜单] 菜单 33 – 播放光碟 33 – 播放光碟/USB 设备上的文件 34 – 播放蓝光 3D 光碟 34 – Enjoying BD-LiveTM 35 – 播放网络服务器中的文件 36 – 视频和音频内容基本操作 36 – 图片内容的基本操作 36 – 使用光碟菜单 36 – 恢复播放 37 高级播放 37 – 重复播放 37 – 重复指定区段 38 – 标记搜索 38 – 使用搜索菜单 39 – 更改内容列表视图 39 – 查看内容信息 39 – 选择字幕文件 40 – 最后场景记忆 40 – 观看图片时的选项 41 – 幻灯片放映期间欣赏音乐 41 屏幕菜单显示 41 – 在屏幕上显示内容信息 42 – 从选择的时间播放 42 – 收听不同的音频 42 – 选择字幕语言 43 – 从不同的角度观看 43 – 更改电视机宽高比 43 – 更改图像模式 44 – 更改字幕代码页 44 音频 CD 录制 45 显示 MP3 音乐信息 (ID3 Tag) 46 电台操作 46 – 收听电台 46 – 预设电台 46 – 清除所有存储的电台 46 – 删除储存的电台
系统使用手册
****高技术产业园多媒体系统操作手册一、多功能厅系统操作手册1.统概述多功能厅会议系统是一套集中央控制器、无线触摸屏、RGB矩阵、A V矩阵、电源时序控制器、等离子显示屏、大屏幕投影系统、图形拼接系统、监控系统、网络系统、视频会议系统、音响系统于一体的多功能综合系统。
本系统采用先进的中央集成控制设备——CREA TOR PGMⅡ,它采用无线触摸屏作为控制平台,系统高度集成化,对矩阵、投影机、摄象机及音响设备可以实现精确控制,各种信号在不同的设备之间可以由触摸屏实现自由切换,系统稳定性强,操作简单,便于掌握。
2.设备操作整个系统除音响系统用电源时序器控制,其他的设备电源开关、信号切换、音量控制、都可以由触摸屏实现自由切换,系统稳定性强,操作简单,便于掌握。
(一)、正常操作程序1、开机程序点击触摸屏开机界面,触摸屏界面进入主页菜单,点击系统电源,点击相应按扭开启设备电源。
根据需求依次进入大屏控制、视频信1号、音频信号、RGB信号、DVD、录音卡座等子菜单,根据需要进行投影机和摄象机的开机和各种信号切换等工作。
音响系统设备请手动打开电源时序器的电源开关,音响系统才能加电。
2、关机程序:退出系统前,请先在触摸屏上关闭投影机和手动关闭电源时序器电源,然后再退出系统,系统会自动延时关闭设备机柜,摄象机,投影机电源。
(二)、非正常情况下操作程序整个系统在正常情况下由中控系统控制,所有设备均可手动开关机和进行各种信号切换。
1、开机程序(3)、投影机操作用遥控器对投影机进行开机、VIDEO、RGB1(PC1-PC12)、RGB2(拼图模式)切换。
(4)、RGB信号切换1)切换指令:“功能键”+“输出通道”+“输入通道”+“enter",其中:“功能键”包括:av或in/out:表示音视频信号同时切换(8/32系列用in/out) video:表示只切换视频信号或vga信号audio:表示只切换音频信号2“输出通道”要切换的信号源当前所连接的通道,面板上的“0-9”“10+”“20+”“30+”号数字键。
教室音频系统安装及操作手册说明书
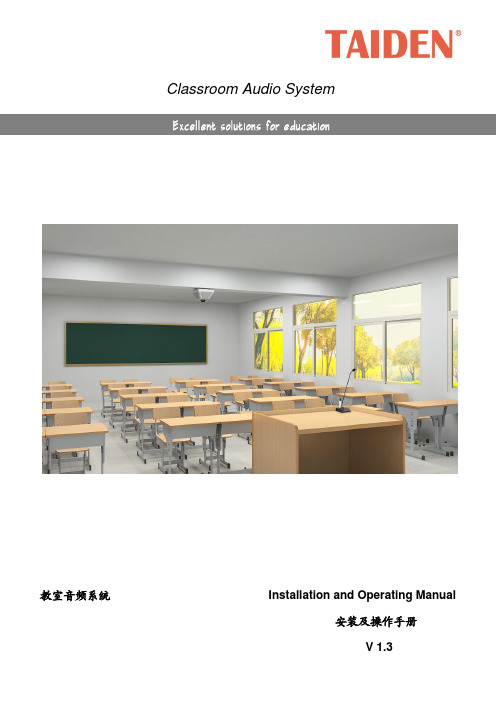
Classroom Audio System教室音频系统 Installation and Operating Manual安装及操作手册V 1.3重要的安全说明重要的安全说明1. 在安装和使用设备前请先仔细阅读本安全操作规程。
2. 请保存好您的安全操作指南便于以后作参考用。
3. 请遵守所有设备操作指南中的“警告”事项。
4. 须遵守各项操作指南中的规章原则。
5. 清洁设备:清洁设备之前,请先关掉电源,从插座中拔出设备插头,将各连接的系统单元拆卸出来,清洁时请用干燥的软布擦拭。
6. 未经生产厂家同意,不要使用任何不匹配的附件配置,这都有可能引起危险事故。
7. 勿将设备置于潮湿或靠近热源的地方,以免发生危险。
8. 设备不应遭受水滴或水溅,不应放置诸如花瓶一类装满液体的物品。
9. 电源插头作为断接装置,应便于操作。
10. 设备应可靠连接到带保护接地的电网电源输出插座上。
11. 勿将设备放置在不稳固的台面上;在运输过程中避免设备遭受强烈振动而引起损坏,建议在运输前选用合适的包装或使用原包装。
12. 请勿阻塞设备上的通风开口,并保持室内的空气通畅,便于设备的维护。
13. 供电电压:AC 100 V-240 V 50 Hz/ 60 Hz14. 设备连接所需要的延长电缆线请绕道穿行,勿有重物挤压,这样能有效维护系统的正常工作。
15. 每套系统中所连接的接收器不得超过规定数量,否则可能会导致整个系统中设备的异常工作,如有特殊要求请与距离您最近的深圳台电售后服务中心取得联系。
16. 确保设备不被任意拆开机壳,也不允许任何硬质导体或液态物质残留在机壳内。
17. 设备有需要维护时,不要自行拆卸,请及时与距离您最近的深圳台电售后服务中心取得联系。
18. 所有TAIDEN产品将提供一定期限(详见保修卡)免费保修,但人为损坏除外,例如:A. 设备因人为作用被摔坏;B. 因操作员操作不当而导致设备受损;C. 自行拆卸后而导致部分设备零件受损或丢失。
DAAS音频测试系统操作手册
DAAS3L+ 音频测试系统
操 作 手 册
© Copyright 2013
1
一、主菜单功能:(图 1)
淘宝 ATS 音频 技术支持 18938097631
图1
F1:频率响应测试 F2:阻抗特性测试 F3:扬声器低频参数测试 F4:失真测试 F5:RT60 测试 F6:声压及电平测试 F7:音频示波器 F8:扫频仪 F9:信号发生器 F 10:系统设定
图 17 4) 联接好待测扬声器,选择 F1 0.2V(图 17)
12
淘宝 ATS 音频 技术支持 18938097631 5) 选择 F 1 OK 即可得到阻抗曲线(图 18)
图 18
图 19 6) 在阻抗曲线界面内(图 19)
13
淘宝 ATS 音频 技术支持 18938097631 F2 Mask :绘制阻抗品管曲线功能键,点击 F2 Mask,得到图 20 界面
Qts 值(图 29)
图 29
图 30
19
淘宝 ATS 音频 技术支持 18938097631 7) 若要继续测得 VAS 值,在图 29 中点按 F2 VAS 键 8) 选择 F1 0.2V 开始测试 VAS 值(图 30)
图 31
图 32
20
淘宝 ATS 音频 技术支持 18938097631
9) 选择 F 1 OK(图 31)后,在中央询问菜单中依次填入扬声器有效的振动直径 及附重的重量后按回车键确定(图 32)
图 33
10)
即得到扬声器 ThieleSmall 参数(图 33) F3 Fit 显示加附重后的谐振峰幅度。
21
淘宝 ATS 音频 技术支持 18938097631
RME MADIface XT音频接口用户手册说明书
用户手册MADIface XT全球首款USB3音频接口!USB 3 / USB 2.0 / PCI Express数字输入/输出系统24 Bit / 192 kHz数字音频192通道3个MADI接口AES/EBU输入/输出2 + 4通道模拟输入/输出196 x 198矩阵路由器1 x MIDI输入/输出3 x 嵌入MADI的MIDI重要的安全说明 (6)概述 (7)1. 简介 (8)2. 包装清单 (8)3. 系统要求 (8)4. 简介及主要特点 (8)5. 首次使用——快速上手 (9)5.1 接口、控制与显示 (9)5.2 快速上手 (10)安装与操作——Windows (11)6. 硬件、驱动和固件安装 (12)6.1 驱动安装 (12)6.2 驱动卸载 (12)6.3 固件升级 (12)7. 设置MADIface XT (13)7.1 Settings(设置)对话框—主标签 (13)7.2 WDM Devices(WDM设备)选项 (16)7.3 Global选项卡(PCI Express模式) (18)7.4 Pitch(仅E-PCIe支持) (19)7.5 时钟模式–同步 (20)8. 操作和使用 (21)8.1 播放 (21)8.2 播放DVD (AC-3/DTS) (22)8.3 多客户端操作 (23)8.4 数字录音 (23)8.5 模拟录音 (23)9. ASIO下的操作 (24)9.1 概述 (24)9.2 已知问题 (24)10. 使用多个MADIface XT (25)11. DIGICheck Windows (26)12. 热线–故障处理 (27)安装与操作——Mac OS X (28)13.驱动和Flash更新 (29)13.1 驱动安装 (29)13.2 驱动卸载 (29)13.3 固件升级 (30)14. 设置MADIface XT (31)14.1 Settings(设置)对话框 (31)14.2 时钟模式–同步 (33)15. Mac OS X FAQ (34)15.1 MIDI不工作 (34)15.2 修复磁盘权限 (34)15.3 支持的采样率 (34)15.4 各种信息 (34)16. 使用多个MADIface XT (35)17. DIGICheck Mac (35)18. 热线–故障处理 (36)19. 前面板操作 (38)19.1 概述 (38)19.2 Encoders(旋钮) (38)19.3 Menu(菜单)键— MIC/GAIN(话筒/增益)和METERS(电平表) (39)19.4 Channel(通道)菜单 (39)19.5 Setup(设置)菜单 (41)19.5.1 Options(选项)菜单 (41)19.5.2 Setups(设置)菜单 (42)19.6 Clock(时钟) (43)输入和输出 (44)20. 模拟输入/输出 (45)20.1 Mic / Line In (话筒/线路输入,XLR/TRS) (45)20.2 幻象供电 (45)20.3 AutoSet(自动设置) (45)20.4 Balanced Line Outputs(平衡线路输出) (46)20.5 Line – Headphones(线路-耳机) (46)21. 数字输入和输出 (47)21.1 MADI输入/输出 (47)21.2 AES/EBU (47)21.3 MIDI (47)21.4 D-sub针脚 (48)22. 字时钟 (49)22.1 字时钟输入和输出 (49)22.2 技术描述和使用 (50)22.3 布线和终止 (51)独立工作模式 (52)23. 操作和使用 (53)23.1 概述 (53)23.2 在设备上设置 (53)24. 实例 (54)24.1 2/4通道AD/DA转换器 (54)24.2 2通道话筒放大器 (54)24.3 194通道监听混音器 (54)24.4 模拟和数字插入器 (54)24.5 带有监听的3端口MADI路由器 (54)TotalMix FX (55)25. TotalMix:路由和监听 (56)25.1 概述 (56)25.2 用户界面 (58)25.3 通道 (59)25.3.1 设置 (61)25.3.2 均衡器 (62)25.3.3 动态 (64)25.4 控制室栏 (65)25.5 控制条 (66)25.5.1 视图选项 (67)25.5.2 快照-组 (68)25.5.3 通道布局-布局预设 (68)25.5.4 滚动位置标记 (70)25.7 首选项 (74)25.7.1 为当前所有用户保存(Windows) (75)25.8 设置 (76)25.8.1 混音器页面 (76)25.8.2 MIDI 页面 (77)25.8.3 OSC页面 (78)25.8.4 辅助设备 (79)25.9 热键与使用 (80)25.10 菜单选项 (80)25.11 菜单窗口 (82)26. 矩阵 (82)26.1 概述 (82)26.2 矩阵视图元素 (82)26.3 操作 (82)27. 操作技巧 (83)27.1 ASIO直接监听(Windows) (83)27.2 复制子混音 (83)27.3 复制一个输出信号(镜像) (83)27.4 删除子混音 (83)27.5 任意复制和粘贴 (84)27.6 录制子混音–回路 (84)27.7 MS 处理 (85)28. MIDI 远程控制 (86)28.1 概述 (86)28.2 规划 (86)28.3 设置 (87)28.4 操作 (87)28.5 MIDI控制 (88)28.6 回路检测 (89)28.7 OSC (89)技术参考资料 (90)29. 技术指标 (91)29.1 模拟 (91)29.2 数字输入 (92)29.3 数字输出 (92)29.4 数字 (93)29.5 MIDI (93)29.6 通用 (93)30. 技术背景 (94)30.1 MADI基础 (94)30.2 锁定(Lock)与SyncCheck(同步检查) (95)30.3 延时(Latency)与监听(Monitoring) (95)30.4 USB音频 (97)30.5 External PCI Express (98)30.6 DS –双倍速 (99)30.7 QS –四倍速 (99)30.8 SteadyClock(稳定时钟) (100)30.9 WDM的注意事项 (101)30.10 术语 (102)其他 (103)31. 配件 (104)32. 产品保证 (104)33. 附录 (105)34. 符合性声明 (105)重要的安全说明注意! 不要打开底盘,以防触电。
DAAS 4 Pro音频测试系统操作手册说明书
深圳阳光丽声仪器设备有限公司深圳市音之侣机电有限公司www sunvoice cn com email 138****6201163com 138****6201075529593393075589472581808.-. :@.手机: 电话:- 传真:--******************************************郑重申明:DAAS公司只提供英文版光盘使用操作手册,没有提供中文版本手册及印刷品. 此中文说明书为本公司翻译,版权为其所有,任何其他公司不得抄袭翻印.公 司 简 介本公司是专业电声测量领域的先导者。
本公司代理国内外各类电声测量仪器及音响、分频器开发设计软件,产品种类齐全;公司成立多年来,包括港、台商在内的众多客户(如松下、TCL王牌、惠阳东亚集团、东莞美隆、深圳隆光等),对我们公司的产品及售后服务给予了很高的评价。
我们已获准成为美国LMS,MLSSA,德国DAAS,ATB,Loudsoft,台湾阳光,意大利CLIO等公司的大陆代理商。
因为有我们美国分部的全力支持,故我们在价格及技术支持方面具有绝对优势。
******************************************DAAS4Pro 硬件安装图示:红白黄接线头按照位置顺序连接,请勿插错************************************************************************************ DAAS4Pro QC简易操作说明一:首先将DAAS卡插入电脑主机,然后安装驱动程序和测试软件.安装完毕后请接好电脑主机与DAAS专用功放之间的所有连接线缆并打开功放电源.(请注意,在以后进行测试操作时一定要先打开功放电源再打开测试软件,此点十分重要).当你装完DAAS卡的驱动后在你的电脑屏幕右下角会出现一个这样的图标,请双击它会出现下图:备注:此项设置是首次安装完驱动软件后必须要进行的,此设置只需进行一次.二:进入测试界面,首先双击桌面DAAS快捷图标,第一次会出现如下图所示的提示: 2:点击此处 ******************************************点击OK 进入下一画面,请按照图上的步骤操作:会出现下图:1:首先点击此处 ******************************************然后点击再按Esc 退出测试程序之后再重新进入测试程序,就会听到功放中的继电器切换几次,这是系统在检测电脑与功放之间的连接是否正常.如果一切正常就可进入下一步的操作.三:重新双击桌面上的DAAS 快捷图标会进入测试界面,我们首先调节测试电压,如下图所示:当选择好合适的电压后,我们开始进行下一步操作. ******************************************首先选择测试项目,我们先测试频响,如下图:接着点击F1会出现如下界面:选择F1******************************************还是选择F1开始接着选择F1点击OK******************************************选择F1点击F1出现下图所示的测试曲线,然后点击F5 ******************************************选择想要保存的路径和文件名称(路径和文件名称请按需要自己设定).保存完毕后请点击F7出现如下画面,再选择F9点击此处保存曲线******************************************出现如下图后请按照需要进行选择我们选择F1手绘上下限文件,会出现下图点击此处F1手绘上下限F2载入上下限F3存储上下限F4删除上下限******************************************点击此处用鼠标左键首先选择上限的起始位置,之后延样品曲线走势连续点击即可绘出上限(此处注意,选择F1手绘上下限文件时一定要先绘上限),之后点击鼠标右键会出现如下画面:继续选择此处 ******************************************用相同方法绘出下限,如下图:点F7,再F9,得出下图:出现如下图所示后选择路径,保存文件.(注意保存路径一定要和样品曲线的路径一致,即要在同一文件夹)选择F3保存上下限文件******************************************2.再点击OK ******************************************出现下图后先选择Quality Control(QC 品管控制)然后点击F1或者踩脚踏开关则开始QC测试,如下为测试结果图 ******************************************出现如下图所示画面后此时就会出现你所要的结果曲线,现在请点F5保存曲线,如下图,选择自己想要保存的文件名称和路径保存 ******************************************方法与频响上下限绘制方法一样再选择F1绘制上下限公差 ******************************************绘制完毕后出现如下图所示画面:如下图所示先选择F9,再选择F3保存上下限公差文件出现如下图所示后选择路径,保存文件.(注意保存路径一定要和样品曲线的路径一致,即要在同一文件夹)2,再选择F3******************************************然后进行QC测试,方法与频响QC测试一致.下图为频响,阻抗QC测试完毕后的画面: ******************************************(1)更改显示频率范围:如下框中先输入起始频率后点击ok ,再输入截至频率:.(2)要在同一画面显示多条频响曲线或者频响和阻抗曲线同时显示在同一1.在测试出结果后点击这里的F7 ******************************************画面,可以先将测试的曲线保存,然后测试另外一个频响曲线后在画面上点击File-Load Curve(载入曲线),选择刚才保存的文件名则可将刚才保存的曲线调入同一画面. ******************************************手动设置DAAS4系统功放输出电压/电平(1) 若被测试扬声器的阻抗为8欧姆,则在1M1W 的测试距离功放输出应该为8开根号=2.83V 来测试,麦克风和被测试扬声器的距离为1M(2) DAAS4输出电压/电平单位只有dB 没有V ,因此要经过换算,2V=22dB, 2.83V =19dB,179mV=43dB下图:出现如下画面,(3) 回到测试软件界面,测试频响曲线,麦克风和被测试扬声备注:若不用手动设置方法,可点选此软件自动换算设置,让软件自动换算成1M1W 测试结果,只更改这里被测试喇叭阻抗数值即可。
会议室会议系统操作手册(30页)
云南双豪会议室会议系统操作手册中国建筑股份有限责任公司2012年6月目录1系统组成:................................................................ 错误!未指定书签。
1.1系统..................................................................... 错误!未指定书签。
1.2调音台.............................................................. 错误!未指定书签。
1.3音源系统.......................................................... 错误!未指定书签。
1.4周边设备.......................................................... 错误!未指定书签。
1.5系统电源管理系统.......................................... 错误!未指定书签。
1.6系统开关机...................................................... 错误!未指定书签。
2主要设备功能介绍.................................................... 错误!未指定书签。
2.1调音台.............................................................. 错误!未指定书签。
2.2功率放大器...................................................... 错误!未指定书签。
2.3无线智能会议主机.......................................... 错误!未指定书签。
音频参数设置指导手册_MTK

[免提通话接收 ]
[按键音 ](Key Tone)、[开机铃音 ](Melody )、[FM 外放到喇叭 ] (FM Radio)不用设置
说明: 相关操作类同于正常模式下的参数设置。参数设置参考表 2。
图 4:正常模式音频参数设置项
图 5:正常模式下 [ 正常通话接收 ] ( Speech)各级音量设置
图 6:音频参数设置
图 7:音乐播放器的音频参数设置
图 8:保存更新参数
表 1:正常模式参数设置参考
正常模式( Normal Mode)
备注说明
Speech:
音量 6 250
音量 5 230
音量 4 200
音量 6 音量 5 音量 4 音量 3 音量 2 音量 1 音量 0
255
240
200
160
120
80
40
FM 外放到喇叭
Key Tone :
音量 6 音量 5 音量 4 音量 3 音量 2 音量 1 音量 0
188
168
148
128
108
88
68
按键音到听筒或者喇叭, 取决于正常通话还是免提模式
Melody :
Microphone :
免提通话发送
212
196
180
180
180
180
180
FM Radio :
音量 6 音量 5 音量 4 音量 3 音量 2 音量 1 音量 0
255
255
255
255
255
255
255
音频系统基本操作指南说明书
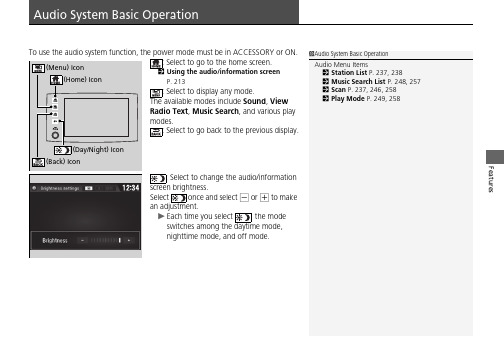
FeaturesUsing the audio/information screen P.213: Select to display any mode.The available modes include Sound , View Radio Text , Music Search , and various play modes.: Select to go back to the previous display.: Select to change the audio/information screen brightness.Select once and select - or + to make an adjustment.u Each time you select , the mode switches among the daytime mode, nighttime mode, and off mode.1Audio System Basic OperationAudio Menu Items2Station List P.237, 2382Music Search List P.248, 2572Scan P.237, 246, 2582Play Mode P.249, 258uu Audio System Basic Operation u Audio/Information ScreenFeatures Audio/Information ScreenDisplays the audio status and wallpaper. From this display, you can go to various setup options.■Using the buttonPress the (display) button to change the display.■Switching the DisplayContinueduu Audio System Basic Operation u Audio/Information ScreenFeatures■Using the audio/information screen■PhoneDisplays the HFL information.2Bluetooth ® HandsFreeLink ® P.3301Using the audio/information screenTouchscreen Operation•Use simple gestures - including touching, swiping,and scrolling - to operate certain audio functions.•Some items may be grayed out during driving to reduce the potential for distraction.•You can select them when the vehicle is stopped or use voice commands.•Wearing gloves may limit or prevent touchscreen response.•You can use the microfiber cleaning cloth included in your owner’s kit to remove dust or fingerprints from the touchscreen.You can change the touchscreen sensitivity setting.2Customized Features P.299uu Audio System Basic Operation u Audio/Information ScreenFeatures ■InfoDisplays Trip Computer, Voice Info, Clock/Wallpaper and System/DeviceInformation.Trip Computer:•Current Drive tab: Displays the current trip information.•History of Trip A tab: Displays information for the three previous drives. Theinformation is stored every time you reset Trip A.To delete the history manually, select Delete History on the History of Trip Atab. The confirmation message appears on the screen, then select Yes.Voice Info: Displays the all commands list.Clock/Wallpaper: Displays the clock and wallpaper.System/Device Information:•System Info: Displays the software version of the audio system.•USB Info: Displays the memory usage of the USB device.■AudioDisplays the current audio information.■SettingsEnters the customizing menu screen.2Customized Features P.299■Navigation*Displays the navigation screen.2Refer to the Navigation System Manual1InfoWhen you select Info Top from the customizesettings, displays Trip Computer or Clock/Wallpaper.2Customized Features P.299*Not available on all modelsuu Audio System Basic Operation u Audio/Information ScreenContinued Features■HondaLinkDisplays the HondaLink® screen.2HondaLink® P.261■Apple CarPlay/Android AutoDisplays the Apple CarPlay or Android Auto screen.2Apple CarPlay P.2692Android Auto TM P.273■Truck Bed Audio*Displays the Truck Bed Audio System screen.2Truck Bed Audio System* P.277*Not available on all modelsuu Audio System Basic Operation u Audio/Information ScreenFeatures1.2.u The screen switches to the customizationscreen.3.Drag and drop the icon to where you wantit to be.4.Select OK.u The screen will return to the homescreen.■Changing the Home Screen Icon Layout1Changing the Home Screen Icon LayoutIt is not possible to change the position of theicon.Continueduu Audio System Basic Operation u Audio/Information ScreenFeaturesYou can change, store, and delete the wallpaper on the audio/information screen.■Import wallpaperYou can import up to five images for wallpaper from a USB flash drive.1.Connect the USB flash drive to the USB port.2USB Ports P.2052.Select Settings .3.Select Clock/Info .4.Select Clock/Wallpaper Type , then open the Wallpaper tab.5.Select Add New .u The picture name is displayed on the list.6.Select a desired picture.u The preview is displayed on the left side on the screen.7.Select Start Import to save the data.u The display will return to the wallpaper list.■Wallpaper Setup1Wallpaper SetupThe wallpaper you set up on Clock/Wallpaper Type cannot be displayed on the multi-information display.•When importing wallpaper files, the image must be in the USB flash drive’s root directory.Images in a folder cannot be imported.•The file name must be fewer than 255 characters.•The file format of the image that can be imported is BMP (bmp) or JPEG (jpg).•The individual file size limit is 5 MB.•The maximum image size is 4,096 × 4,096 pixels. If the image size is less than 800 × 480 pixels, the image is displayed in the middle of the screen with the extra area appearing in black.•If the USB flash drive does not have any pictures,the No files detectedmessage appears.uu Audio System Basic Operation u Audio/Information ScreenFeatures ■Select wallpaper1.Select Settings.2.Select Clock/Info.3.Select Clock/Wallpaper Type, then open the Wallpaper tab.u The screen changes to the wallpaper list.4.Select a desired wallpaper.u The preview is displayed on the left side on the screen.u The pop-up menu appears on the screen.5.Select Set.u The display will return to the wallpaper list.■1.2..3.Select .4.Select Clock/Wallpaper.■Delete wallpaper1.Select Settings.2.Select Clock/Info.3.Select Clock/Wallpaper Type, then open the Wallpaper tab.u The screen changes to the wallpaper list.4.Select a wallpaper that you want to delete.u The preview is displayed on the left side on the screen.u The pop-up menu appears on the screen.5.Select Delete.u A confirmation message appears on the screen.6.Select Yes to delete completely.u The display will return to the wallpaper list.1Wallpaper SetupFrom the pop-up menu, select Preview to see apreview at full-size screen.To go back to the previous screen, select OK, orselect .When the file size is large, it takes a while to bepreviewed.To delete all wallpapers you add, select Delete All,then Yes.Continueduu Audio System Basic Operation u Audio/Information ScreenFeatures■To move to the next screenSelecting or , or swiping the screen left or right changes to the next screen.■Home Screen1Home ScreenThe home screen has 5 pages (fixed). You cannot add any more pages.Swipeuu Audio System Basic Operation u Audio/Information ScreenFeatures ■To use apps or widgets1.2.u screen appears.3.Select the app or widget you want to use.Preinstalled app list:•Browser: Displays the web browser utilizedby smartphone and Wi-Fi connection.•Calculator: Displays Calculator.•Downloads: Displays the data downloadedfrom the web browser and so on.•Install USB: Check with a Honda dealer forapps that are available for installation.•Search: Displays various retrieval screens.•Settings: Displays the Android settingscreen.1To use apps or widgetsSelect and hold a selected app or widget to add thatapp’s or widget’s shortcut on the home screen.Pre-installed apps may not start up normally. If thisoccurs, you need to reset the system.2Defaulting All the Settings P.323If you perform Factory Data Reset, it may reset allthe settings to their factory default.2Defaulting All the Settings P.323In case those apps still do not startup normally evenafter Factory Data Reset, contact an authorizedHonda dealer.There is a possibility that a browser is shut down inthe situation of the use. In that situation, the screenwill return to before the browser startup.Do not install apps other than those confirmed by aHonda dealer. Installation of unauthorized apps mayintroduce data corruption risks to your vehicle’sinformation and your privacy.You can delete user installed apps by the followingprocedure.1.Select .2.Select Settings.3.Select System.4.Select the Others tab.5.Select Detail Information.6.Select an app that you want to delete.7.Select Delete.Pre-installed apps cannot be deleted.uu Audio System Basic Operation u Audio/Information ScreenContinued Features■To add app or widget icons on the home screen1.2.3.screen.u The pop-up menu appears on the screen.4.Select Add App or Add Widget.u The Apps/Widgets screen appears.Select and hold.uu Audio System Basic Operation u Audio/Information ScreenFeatures5.Select and hold an app or widget icon youwant to add.u The screen switches to the customizationscreen.6.Drag and drop the icon to where you wantit to be.7.Select OK.u The screen will return to the homescreen.Select and hold.Drag and drop.uu Audio System Basic Operation u Audio/Information ScreenContinued Features■To move icons on the home screenYou can change location on the home screen.1.Select and hold an icon.u The screen switches to the customizationscreen.2.Drag and drop the icon to where you wantit to be.3.Select OK.u The screen will return to the homescreen.Select and hold.Drag and drop.uu Audio System Basic Operation u Audio/Information ScreenFeatures ■To remove icons on the home screenYou can delete the icons on the home screen.1.Select and hold an icon.u The screen switches to the customizationscreen.2.Drag and drop the icon you want to removeto the trash icon.u The icon is removed from the homescreen.3.Select OK.u The screen will return to the homescreen.1To remove icons on the home screenYou cannot delete the Phone, Info, Audio,Settings, Navigation*, HondaLink, SmartphoneConnection, and Truck Bed Audio* icons.Apps or widgets will not be deleted by deleting theicon on the home screen.Select and hold.Drag and drop totrash icon.*Not available on all modelsuu Audio System Basic Operation u Audio/Information ScreenContinuedFeatures1.Swipe down from the top of the screen.u The status area appears.2.Select an item to see the details.3.Select or swipe up from the bottom of the screen to close the area.■Status AreaSwipeuu Audio System Basic Operation u Audio/Information ScreenFeatures1.2.3.Select Stop.u The display will return to the app list.■Closing Apps1Closing AppsIf you leave the apps used open in the background,some apps may stop operating properly next timeusing them.If this happens close unused apps.To close all apps on the system, select Stop All, thenYes.You cannot close the HondaLink® and Garmin* apps. *Not available on all modelsContinueduu Audio System Basic Operation u Audio/Information ScreenFeaturesSome of the audio system’s apps can be updated wirelessly when connected via Wi-Fi, or Bluetooth ® in conjunction with the HondaLink ® app installed on a compatible iOS or Android device. If an update is available, the audio system beeps and a notification is displayed at the top of the screen with the respective app’s update icon.■To update an app:1.From the top of the screen, swipe down to see the messages.2.Select the software update notification from the list.■Updating Apps1Updating AppsThe wireless updates are for the apps on the audio system only.To update compatible apps on your iPhone orAndroid phone, please visit the App Store or GooglePlay Store, respectively.uu Audio System Basic Operation u Audio/Information ScreenFeatures 3.Select Download.4.Select OK.uu Audio System Basic Operation u Adjusting the SoundFeaturesAdjusting the Sound1.2..3.Select .4.Select Sound .Select a tab from the following choices:•BAS-TRE : Bass, Treble •FAD-BAL : Fader, Balance•SUBW */CTR-SUBW *: Center *, Subwoofer •SVC (Speed Volume Compensation):Sets the amount of volume increase.1Adjusting the SoundThe Speed Volume Compensation (SVC) has four modes: Off , Low , Mid , and High .SVC adjusts the volume level based on the vehicle speed. As you go faster, audio volume increases. As you slow down, audio volume decreases.You can also adjust the sound by the following procedure.1.Select .2..3.Select Audio .4.Select Sound .When the Truck Bed Audio system is on, only the BAS-TRE tab is selectable.Models with Truck Bed Audio System*Not available on all modelsuu Audio System Basic Operation u Display SetupFeatures Display SetupYou can change the brightness or color theme of the audio/information screen.1.2..3.SelectSystem.4.Select the Display tab.5.Select Display Settings.6.Select the setting you want.7.Select OK.1.2..3.Select System.4.Select the Display tab.5.Select Background Color.6.Select the setting you want.7.Select OK.■Changing the Screen Brightness1Changing the Screen BrightnessYou can change the Contrast and Black Levelsettings in the same manner.■Changing the Screen’s Color Themeuu Audio System Basic Operation u Display Setup Features Select the current source icon, then select an icon on the source list to switch the audio source.Certain manual functions are disabled or inoperable while the vehicle is in motion.You cannot select a grayed-out option until the vehicle is stopped.■Selecting an Audio Source■Limitations for Manual Operation Source List Icons。
BOSE link AL8无线音频连接系统 说明书
Bose® link AL8无线音频连接系统请阅读本用户手册请务必认真遵守本用户手册中的指示。
它可以帮助您正确安装和操作本系统,享受其全部的高级功能特性。
请保存本用户手册以备日后参考。
警告:为了防止火灾或触电请不要将本产品暴露在雨中或潮气中。
警告:本设备不能受到液体的滴溅或泼洒,不能接触例如花瓶等充满液体的物体,也不要将设备放 置于其他器材之上。
正如任何电子产品,不要将液体洒入本系统的任何一部分以免引起故障或者火 灾。
警告:不要将明火源,例如点着的蜡烛放在器材上面。
对称三角形中的箭头指示灯,在系统的罩壳带有未绝缘的危险电压时会闪亮,告诫用户可能有足够的电流量形成电击。
对称三角形中的感叹号,系统中标有此标号的地方告诫用户参照本指南中较为重要的操作指示和保养要求。
注意:产品标志位于本产品的底部。
本产品只能使用所提供的电源。
如果电源插头起切断设备电路的作用,那么该设备应保持随时可工作状态。
必须在室内使用本产品。
在室外、旅游汽车或者船舶上使用本产品不符合本产品的设计和测试初衷。
重要的安全指示1. 使用本产品前请先阅读每个元件的使用说明。
2. 保留这些说明以供日后参照。
3. 注意产品上和用户手册中的警告。
4. 遵守每个指示。
5. 不要在靠近水边或潮气处使用本产品。
不要在浴缸、洗脸盆、厨房水槽、洗衣槽附近以及潮湿的 地下室中,游泳池边或任何其他有水和潮气存在的地方使用该产品。
6. 只能按照Bose公司的规定使用干布擦拭该产品。
在擦拭前请先从墙上拔掉电源插头。
7. 按照制造商的指示安装,不要堵塞通风口。
为了确保产品安全运行,防止过热,请选择合适的方 位和位置放置产品以保证其正常通风。
例如,不要将产品放置在阻碍通风的床、沙发或类似表面 上。
为确保空气流出通风口,请不要将产品放置在内置的书柜或橱柜中。
8. 不要将产品放置在靠近热源处,例如暖气管、加热器、火炉或其他能产生热量的装置(包括放大器)。
9. 只能使用制造商制定的附件/零件。
音视频系统快速操作手册
iVMS-4200快速操作手册V1.02杭州海康威视数字技术股份有限公司技术热线:400-700-5998非常感谢您购买我公司的产品,如果您有什么疑问或需要请随时联系我们。
本手册适用于网络视频监控软件iVMS-4200。
本手册可能包含技术上不准确的地方、或与产品功能及操作不相符的地方、或印刷错误。
我司将根据产品功能的增强而更新本手册的内容,并将定期改进或更新本手册中描述的产品或程序。
更新的内容将会在本手册的新版本中加入,恕不另行通知。
目录目录 (2)1简介 (3)2安装和卸载 (4)2.1程序安装 (4)2.2修改、修复或者删除程序 (6)3快速操作 (8)3.1登录 (8)3.2控制面板 (8)3.3设备管理 (9)3.4预览 (12)3.5录像 (14)3.6回放 (17)3.7退出 (20)1简介本手册介绍软件软件的安装卸载,以及一些基本操作,如实时预览、录像和回放。
详细操作说明请参考iVMS-4200用户手册。
iVMS-4200拥有5个组件,分别为:●客户端:管理设备和其他模块的核心模块,包括设备管理、回放、预览、电视墙、电子地图等功能。
●流媒体服务器:通过服务器的并发处理,转发实时的音视频流,合理有效的减轻前端编码设备的带宽压力。
●存储服务器:录像服务器,用于存储和备份录像。
●解码卡服务器:管理解码卡,提供相应的解码功能。
●编码卡服务器:管理编码卡,提供视音频的网络传输和存储功能。
运行环境操作系统:Microsoft Windows 7/Windows 2008(支持32/64位系统),Windows 2003/Windows XP(均只支持32位系统)CPU:Intel Pentium IV 3.0 GHz或以上内存:1G或更高显示:支持1024×768或更高分辨率注意:(1)同时预览多路视频或较高分辨率的视频,需要更高的硬件配置。
(2)软件不支持纯64位系统,以上提及64位系统指支持32位软件的64位系统。
Acura 车载音频系统操作手册说明书
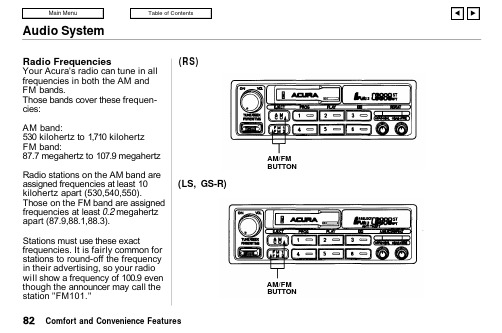
Audio SystemRadio FrequenciesYour Acura's radio can tune in all frequencies in both the AM and FM bands.Those bands cover these frequen-cies:AM band:530 kilohertz to 1,710 kilohertz FM band:87.7 megahertz to 107.9 megahertz Radio stations on the AM band are assigned frequencies at least 10kilohertz apart (530,540,550).Those on the FM band are assigned frequencies at least 0.2 megahertz apart (87.9,88.1,88.3).Stations must use these exactfrequencies. It is fairly common for stations to round-off the frequency in their advertising, so your radio will show a frequency of 100.9 even though the announcer may call the station "FM101."(RS)(LS, GS-R)Comfort and Convenience FeaturesAM/FM BUTTONAM/FMBUTTONAudio SystemOperating the Cassette Player Turn the system ON. Insert the cassette into the slot with the tape opening to the right. Push the cassette in most of the way. The drive will pull it in the rest of the way and begin to play.The or will light to show you which side of the cassette is playing.The indicates the side you inserted facing upward is now playing. To play the other side of the tape, press the PROG button.The system also has an Auto-reverse feature. It will automati-cally reverse direction when it reaches the end of the cassette.(RS)CONTINUEDComfort and Convenience FeaturesON/OFF/VOL KNOBCASSETTE SLOT TAPE DIRECTION INDICATOREJECT BUTTON PROG BUTTON PLAY BUTTON DOLBY BUTTON(LS, GS-R)ON/OFF/VOL KNOBCASSETTE SLOTTAPE DIRECTION INDICATOREJECT BUTTON PROG BUTTON PLAY BUTTON DOLBYBUTTONAudio SystemDolby ® noise reduction turns on when you insert a cassette. If the tape was not recorded with Dolby "B " noise reduction, turn it off by pressing the button.To remove the cassette from the drive, press the EJECT button. The system automatically ejects the cassette whenever you turn off the system or the ignition switch.(RS)(LS, GS-R)Comfort and Convenience FeaturesFF/REW/TMS SWITCH EJECT BUTTON PROG BUTTON PLAY BUTTON DOLBY BUTTON REPEAT BUTTONFF/REW/TMS SWITCH EJECT BUTTON PROG BUTTON PLAY BUTTON DOLBY BUTTON REPEATBUTTONAudio SystemCassette Search Functions Once a cassette is playing, you can use the FF, REW, TMS, or REPEAT function to look for desired songs or passages.To rewind the tape, push the FF/REW/TMS switch down thenrelease it. You will see REW in the display. To fast forward the tape,push the switch up then release it.You will see FF displayed. To stop rewind or fast forward, press the PLAY button. If the system reaches the end of the cassette while in fast forward or rewind, it automatically stops that function,reverses direction, and begins to play.Press the REPEAT button to replay the current passage. You will see RPT displayed. When the system reaches the end of the song or passage that is being played, it automatically goes into rewind.When it senses the beginning of that passage, it goes back to play.The system will continue repeating this passage until you turn off REPEAT by pressing the button again.The TMS function lets you skip to the beginning of a song or other passage. The tape skips forward or backward, depending on which direction you push the FF/REW/TMS switch.Activate TMS by pushing the FF/REW/TMS switch and holding it until you hear a beep. If you push the switch down, you will see REW blinking in the display as the tape rewinds. If you push the switch up,you will see FF blinking in the display as the tape fast forwards.When the system senses a silent period on the tape, it goes back to PLAY mode.The REPEAT and TMS functions use silent periods on the tape to find the end of a selection. These features may not work satisfacto-rily on tapes that have almost no gap between songs, a high noise level between songs, or silent peri-ods in the middle of songs.Caring For CassettesDamaged cassettes can jam inside the drive or cause other problems.See page 90 for information on cassette care and protection.Comfort and Convenience FeaturesAudio SystemOperating the CD Changer or Player (Optional)A Compact Disc changer isavailable for your car. It holds up to six discs, providing several hours of continuous programming. You operate the CD changer with the same controls used for the radio and cassette player.Load the desired CD's in themagazine and load the magazine in the changer according to the instructions that came with the unit.Your dealer has Genuine Acura accessory in-dash CD players available that are operated by the radio controls. If you have one of these units, use the directions in this section (except for multi-disc selection) to operate it.To operate the CD changer, the ignition key must be inACCESSORY (I) or ON (II). If you are listening to a cassette tape,eject it before playing a CD.Press the CD button until "CD"appears on the display. Once in the CD mode, the system will start to play the first track of the first disc in the magazine.When that disc ends, the next disc in the magazine is loaded and played.After disc 6 has completed, the system will return to disc 1. To make your own disc selection, push one of the six preset buttons. Your selection will appear in the display and start playing.You can use the TUNE/SEEK switch while a disc is playing to select passages and change tracks.To move rapidly forward within a track, push up and hold the TUNE/SEEK switch. Push down and hold the switch to move rapidly back-ward within a track. You will hear a beep a half second after you push the switch up or down. Keeppushing the switch until you think the track has advanced or returned to the desired position. The disc will start playing when you release the switch.If you push the TUNE/SEEKswitch up and release it before you hear a beep, the system will skip forward to the beginning of the next track on that CD.If will skip backward to the begin-ning of the current track if youpush the switch down and release it.Comfort and Convenience FeaturesAudio System(RS)CONTINUEDComfort and Convenience FeaturesON/OFF/VOL KNOBRPT INDICATORTUNE/SEEK SWITCHCD BUTTONREPEAT BUTTON(LS, GS-R)ON/OFF/VOL KNOBA. SELECT INDICATORRPT INDICATORTUNE/SEEK SWITCHCD BUTTONA. SELECT/REPEAT BUTTONAudio SystemIf you push the REPEAT button on the RS model or the A. SELECT/REPEAT button on the LS and GSR models, the system willcontinuously play the track you are listening to. You will see RPT in the display.Push the switch again to turn off REPEAT mode.On LS and GS-R modelsYou can get the CD player torandomly select tracks by pressing A. SELECT/REPEAT until you see A. SELECT in the display.With this active, the system selects and plays the tracks randomly,rather than sequentially, on each disc. When the system has played all the tracks on that disc, it loads the next disc and starts to playrandomly. The system continues to select and play tracks randomly on each of the six discs until you press the A. SELECT/REPEAT button again.To turn on random play mode while the system is in the REPEAT mode,turn off REPEAT mode first by pressing the A. SELECT/REPEAT button. Then, press the buttonagain as explained above.If you change modes to radio or tape while a CD is playing, then change back to CD mode, thesame disc and track will play.If you turn off the system while a CD is playing, either with the ON-OFF/VOL knob or by turning off the ignition, the system will begin at the same disc and track when you turn itback on.If you try to select an empty slot in the magazine, the system will select and play the first track of the next disc in the magazine.To return to the radio function,press the AM/FM button.Comfort and Convenience FeaturesAudio SystemCD Error IndicationsIf you see an error indication on thedisplay, find the cause in the chartto the right. If you cannot clear theerror indication, take the car toyour Acura dealer.Comfort and Convenience FeaturesCaring for the Cassette PlayerThe cassette drive picks up dirt and oxides whenever you play a tape. This builds up over time and causes the sound quality to degrade.To prevent this, you should clean the cassette drive after every 30hours of use. Your dealer has a cleaning kit available for this purpose.After 30 hours of tape use, you will see CLEAN flashing for 5 seconds in the display when you insert atape into the tape slot. If you are already regularly cleaning the tape drive at least every 30 hours, reset the indicator by pressing the Preset 6 button while the system is in the tape operation mode. Hold the button until you hear a beep and the CLEAN indicator goes out.If you do not clean the cassette drive regularly, it may eventually become impossible to remove the deposits with a normal cleaning kit.The cassette player automatically ejects cassettes that do not play normally. If it ejects a cassette before it begins to play, it isprobably defective and should not be inserted again. You may have a cassette suddenly stop playing,reverse directions once or twice and then eject. This is normally an indication the tape is woundunevenly. It should play normally after being manually rewound.Use 100-minute or shorter cas-settes. Cassettes longer than 100minutes use thinner tape that may break or jam the drive.Look at a cassette before you insert it. If the tape is loose, tighten it by turning one of the hubs with a pencil or your finger.If the label is peeling off, do not put it in the player. It may cause the cassette to jam in the drive mecha-nism when you try to eject it.Do not leave cassettes sitting where they are exposed to high heat or humidity, such as on top of the dashboard or in the player. If a cassette is exposed to extreme heat or cold, let it reach a moderatetemperature before putting it in the player.Comfort and Convenience FeaturesCLEAN INDICATORTheft ProtectionOn LS and GS-R modelsYour car's audio system will disable itself if it is disconnected from electrical power for anyreason. To make it work again, the user must enter a specific five-digit code in the Preset buttons. Because there are hundreds of number combinations possible from five digits, making the system work without knowing the exact code is nearly impossible.You should have received two copies of a card that lists your audio system's code number and serial number. It is best to store one of these cards in a safe place at home, and to keep the other in your wallet or purse. In addition, you should write the audio system's serial number in this Owner's Manual. If you should happen to lose both cards, you must obtain the code number from your Acura dealer. To do this, you will need thesystem's serial number.If your car's battery is discon-nected or goes dead, the audio system will disable itself. If this happens, you will see "Code" in the frequency display the next time you turn on the system. Use the Preset buttons to enter the five-digit code. If it is entered correctly,the radio will start playing.If you make a mistake entering the code, do not start over or try to correct your mistake. Complete the five-digit sequence, then enter the correct code. You have three tries to enter the correct code. If you are unsuccessful in three attempts, you must then leave the system on for one hour before trying again.You will have to store your favorite stations in the Preset buttons after the system begins working. Your original settings were lost when power was disconnected.Comfort and Convenience Features。
太平洋保险会议扩声系统说明操作手册
太平洋保险会议室、培训室扩声及视频显示系统系统操作说明手册上海致达信息产业股份有限公司目录一、概述 ............................................................. - 3 -二、音频扩声系统 ..................................................... - 4 -1、系统简介 ......................................................... - 4 -2、操作说明 ......................................................... - 4 -2.1系统开关机顺序................................................ - 4 -2.2系统信号流程.................................................. - 5 -2.3系统设备使用.................................................. - 5 -3、注意事项 ......................................................... - 6 -4、系统维护 ......................................................... - 7 -三、视频显示系统 ..................................................... - 9 -1、系统简介 ......................................................... - 9 -1.1信号源........................................................ - 9 -1.2信号切换调度.................................................. - 9 -1.3信号显示..................................................... - 10 -2、操作说明 ........................................................ - 10 -2.1系统视频信号的类型和接线..................................... - 10 -2.2系统信号流程................................................. - 11 -2.3系统设备使用................................................. - 12 -2.3.1 VGA/AV矩阵............................................ - 12 -2.3.4 投影机 ................................................ - 15 -3、注意事项 ........................................................ - 16 -4、系统维护 ........................................................ - 17 -四、附录 ................................................错误!未定义书签。
高级音响系统操作手册
高级音响系统操作手册欢迎使用高级音响系统!本手册将为您提供详细的操作指南,使您能够充分利用系统的功能和特点。
在开始使用之前,请务必仔细阅读本手册,以确保正确操作和优质的音频体验。
第一部分:系统概述高级音响系统是一款功能强大的音频设备,具有多种播放源和音效调节选项,为用户提供高品质的音频体验。
系统主要由以下几个部分组成:1. 音频播放源:高级音响系统支持多种音频播放源,包括CD、USB、蓝牙和调频收音机等。
您可以选择所需的播放源,并通过系统面板或遥控器来操控。
2. 音效调节:系统提供了丰富的音效调节选项,包括均衡器、环绕音效和声场调节等。
您可以根据自己的喜好和环境需求,进行精细的音效调节,以获得最佳的音频效果。
3. 外部设备连接:除了内置播放源外,系统还支持外部设备的连接,如电视、手机和平板电脑等。
您可以通过HDMI或音频输入接口,将外部设备与音响系统连接,以实现更广泛的音频体验。
第二部分:系统操作指南1. 播放源切换:通过面板或遥控器上的播放源按钮,您可以切换不同的音频播放源。
每个按钮都有相应的图标和标识,使您能够轻松选择所需的播放源。
2. 音量控制:系统的音量控制按钮位于面板或遥控器上,您可以通过调节音量按钮来增加或减小音量。
相应的音量指示灯也会显示当前音量的级别。
3. 音效调节:系统的音效调节功能位于面板或遥控器上的相应按钮菜单中。
您可以通过选择不同的音效模式、调节均衡器或应用特定的声场调节,来调整音频效果。
4. 播放控制:在播放音频时,您可以使用面板或遥控器上的相应按钮进行播放、暂停、前进和后退等控制操作。
此外,系统还提供了随机播放和重复播放等功能,以满足不同的播放需求。
5. 外部设备连接:如果您需要将外部设备连接到音响系统进行音频播放,可以通过HDMI接口或音频输入接口来实现。
需要注意的是,在连接外部设备之前,请确保音响系统和外部设备均处于关闭状态。
6. 蓝牙连接:高级音响系统支持蓝牙连接,使您能够通过蓝牙无线技术,从手机或平板电脑等设备上进行音频播放。
系统技术说明操作手册 之 音频系统
音频系统(一)音系统操作指南1、音响设备开、关机顺序应按由前到后顺序开机,即由音源设备,音频处理设备,信号切换设备(高清播放机,机顶盒,DVD,调音台等)到音频功率放大器。
关机时顺序相反,应先关功放。
这样操作可以防止开、关机对设备的冲击,防止烧毁功放和扬声器。
2、常用音响设备介绍(1)调音台基本结构均可分为以下三个部分:1)输入部分(由话筒及录音设备线路输入到调音台);2)输出部分(由调音台输出到录音设备);3)监测部分(用表头、音箱、耳机监听所有信号);从话筒卡农插座到推子,称之为一“路”或一个“通道”。
所有的信号经分路输入,然后被增益、均衡、音量推予、声像和辅助部分控制,最后从右边输出。
在每一路背面都可找到Input(输入)口,模拟输入一般分为卡农XLR和大二芯TRS两种,话筒插口一般都有幻象供电,在台子上可以找到幻象电源标志为+48V。
每一个通道都有一种或几种规格的信号输入口,用于连接系统中的录音机、音源、合成器等的音频输出口,或者插上动圈、电容、无线话筒等。
信号输入插口分为低阻平衡输入(LO—Z卡侬)及高阻不平衡输入(HI—Z二芯)。
一般的音响设备的接法采用不平衡式,信号“+”、“-”的其中一端和信号线的屏蔽层公用。
例如:一芯屏蔽线,芯线是信号“+”,屏蔽线是信号“-”和地线。
这比没有屏蔽的平行线的感应噪声要少,属于筒易型不完全屏蔽。
专业音响设备的输入输出都采用平衡式两芯信号线,芯线信号分“+”、“-”传输,另外再接屏蔽线,“+”、“-”使用独立的地线,插头使用卡侬XLR插头。
和这些输入口紧连的通常是一个调节旋钮,称之为增益钮(gain),是用来调整信号输入量的,即当信号太强时对其削减,太弱时则对其提升,根据不同的接插形式增益自动识别调整响应电平范围,增益旋钮是作为声音输入调音台的第一个关口,调整适当,即可保证调音台下一级的处理电路能接收到充分且“干净”的信号。
增益下面有一个80HZ以下切除按钮,用于降低低频噪声和人声应用中阻断80HZ以下无用频率。
DAAS音频测试系统操作手册

图 15 2) 选择 F1 Start 做基准测试(图 15)阻抗线不联扬声器 。F9 Ser resist:设定取
样电阻值,校正测试结果。
11
淘宝 ATS 音频 技术支持 18938097631
图 16 3) 基准测试完毕,选择 F1 OK(图 16)
图 36 F1 Start:开始执行失真测试 F2 Input selet :选择输入端及量程,测试扬声器一般选择 F2 8Pa,而测试放 大器时一般选择 F5 Line 20V(图 37)
23
淘宝 ATS 音频 技术支持 18938097631
图 37 F4 Test treq:选择测试频率范围 4) 选择 F1 Start 开始失真测试
图 25
图 26
17
淘宝 ATS 音频 技术支持 18938097631 4) 联好待测扬声器,选择 F1 0.2 开始测试(图 26)
5) 选择 F1 OK(图 27)
图 27
图 28
18
淘宝 ATS 音频 技术支持 18938097631 6) 在中央询问框输入扬声器为直流电阻(图 28)后确定即得到扬声器 Fms 值及
1) 进入主菜单选择 F4 Harm dist (图 34)
图 35
22
淘宝 ATS 音频 技术支持 18938097631 2) 在图 35 界面中:
F1 Harm dist single measuring (spel trum):单点谐波失真测试。 F2 Distortion curve vs frequency:100—8000hz 频率失真测试。 F3 Distortion curve vs frequency,external:20—14000hz 失真测试(3L+版软 件仅支持 PⅡ芯片组) F4 Inter modulation distortion:互调失真测试 3) 例如测试 100HZ—800HZ 失真,选择 F2 进入测试界面(图 36)
- 1、下载文档前请自行甄别文档内容的完整性,平台不提供额外的编辑、内容补充、找答案等附加服务。
- 2、"仅部分预览"的文档,不可在线预览部分如存在完整性等问题,可反馈申请退款(可完整预览的文档不适用该条件!)。
- 3、如文档侵犯您的权益,请联系客服反馈,我们会尽快为您处理(人工客服工作时间:9:00-18:30)。
音频系统(一)音系统操作指南1、音响设备开、关机顺序应按由前到后顺序开机,即由音源设备,音频处理设备,信号切换设备(高清播放机,机顶盒,DVD,调音台等)到音频功率放大器。
关机时顺序相反,应先关功放。
这样操作可以防止开、关机对设备的冲击,防止烧毁功放和扬声器。
2、常用音响设备介绍(1)调音台基本结构均可分为以下三个部分:1)输入部分(由话筒及录音设备线路输入到调音台);2)输出部分(由调音台输出到录音设备);3)监测部分(用表头、音箱、耳机监听所有信号);从话筒卡农插座到推子,称之为一“路”或一个“通道”。
所有的信号经分路输入,然后被增益、均衡、音量推予、声像和辅助部分控制,最后从右边输出。
在每一路背面都可找到Input(输入)口,模拟输入一般分为卡农XLR和大二芯TRS两种,话筒插口一般都有幻象供电,在台子上可以找到幻象电源标志为+48V。
每一个通道都有一种或几种规格的信号输入口,用于连接系统中的录音机、音源、合成器等的音频输出口,或者插上动圈、电容、无线话筒等。
信号输入插口分为低阻平衡输入(LO—Z卡侬)及高阻不平衡输入(HI—Z二芯)。
一般的音响设备的接法采用不平衡式,信号“+”、“-”的其中一端和信号线的屏蔽层公用。
例如:一芯屏蔽线,芯线是信号“+”,屏蔽线是信号“-”和地线。
这比没有屏蔽的平行线的感应噪声要少,属于筒易型不完全屏蔽。
专业音响设备的输入输出都采用平衡式两芯信号线,芯线信号分“+”、“-”传输,另外再接屏蔽线,“+”、“-”使用独立的地线,插头使用卡侬XLR插头。
和这些输入口紧连的通常是一个调节旋钮,称之为增益钮(gain),是用来调整信号输入量的,即当信号太强时对其削减,太弱时则对其提升,根据不同的接插形式增益自动识别调整响应电平范围,增益旋钮是作为声音输入调音台的第一个关口,调整适当,即可保证调音台下一级的处理电路能接收到充分且“干净”的信号。
增益下面有一个80HZ以下切除按钮,用于降低低频噪声和人声应用中阻断80HZ以下无用频率。
当增益旋钮设置好以后,就可以使用通道的音量推子(通常位于调音台面板的最下端)来确定该通道信号发送给总线的音量大小。
音量推子实际上是一个衰减器,用于对该通道的输出信号进行衰减。
当推子位于最下端(或音量旋钮位于最左端)时,信号被无穷衰减,这时,该通道没有信号输出。
推子学名“推拉衰减器”,俗称“推子”。
正确的使用应是推子放在0刻度,用增益钮调好输入电平,当信号出现波动需要调整时,再使用推子。
推子旁边的,是输出总线选择开关。
每一路信号进行适当处理之后,可按下总线选择开关,把信号接往一路或多路输出,当然也可以把多路输入信号组成一路输出。
我们用的调音台是四编组两总线型的,我们可以把信号分配到6路输出。
选择按钮有:1-2、3-4 group (组输出)和mas(总输出)。
在音量推子的上方,有一个声像(pan)旋钮,声相旋钮用于调整信号的左、右平衡,位置处于通道电位器电平调整之后。
并且各个输入通道信号在第1—2组和第3—4组间声相位置定位也是由这个旋钮决定的。
如果旋钮位置在中间,声相位置也在中间。
旋钮调向左边,定位就在1或3组。
旋刍调向右边,定位就在2或4组。
还有峰值(pk)过载指示是用于警告输入信号瞬间过载,指示灯将在峰值(信号过大发生失真的电平)电平下面3dB时发光,便于帮助设置增益开关的位置。
台子在音量推子和声像旋钮之间还设计了两个按钮:静音(mute)和监听(solo)按钮。
静音按钮可以不用动音量推子就可将混音总线中该通道的信号关闭。
当该通道的输出音量已经被精确调整好而不想再去碰它时,这个功能是很有用的。
当监听按钮被按下时,则其他的通道声音无法发送到监听音箱内。
调音台都提供了一套的通道均衡。
四段均衡分为treble(高音)、hi mid(中高音)、lo mid(中低音)、bass(低音)进行提升或衰减的旋钮。
另外还增加了两个选择hi mid/lo mid中频点的旋钮freq HZ (频率),我们称之为全参数中频均衡。
其功能不但能选定中央频点,而且还能选择一段频率范围来实施提升或衰减。
四段均衡最末端设有一个eq on的按键,其作用是控制信号是否需要通过均衡器处理。
一般调音台每个通道都设计了6个辅助发送通道(fx/mon/aux), 也可称效果发送钮。
这些旋钮可以控制该通道信号发送给各辅助输出口(fx/mon/auxSEND)的信号量,几个通道的信号可以通过辅助旋钮同时辅出到一个辅助口。
当辅助输出口连接了周遍音频处理设备后,则由辅助口输出的信号通过效果器处理后,由音频处理设备的输出口返回至调音台的辅助返回输入口(fx/mon/aux RETURN),然后同总线信号进行混合。
最终,由各通道输出的信号混合在一起,然后进入立体声总线。
总线控制部分有一个主音量推子(masters)、编组(group)1-4号辅助输出推子。
调音台有两个VU(Volume Unit 的缩写,意思为音量指示)指示器。
这里指LED(发光二极管)方式的电平表。
用以监控总输出量、mon1,2输出量,监听信号电平等各项指标。
还有其他如:pre(前级)、post(后级)、bal(平衡)等功能,调试完成后均无须作改动。
总结以上,调音台的作用是:1)拾取信号,进行放大;2)按需要进行高、中、低音的音调均衡;3)将信号按需要送入母线或进行编组控制;4)对送入辅助母线的信号进行艺术处理;5)按要求进行输出控制。
(2)专业功率放大器专业放大器在使用中需要连续长时间高负载工作,专业放大器与一般音响用的放大器相比,在设计上更重视长时间使用的耐久性和构造上的可靠性。
放大器对扩声的音质有着重要的影响,在全套音响设备中所占比例约30%。
因此为了充分发挥音响设备的性能及作用就要重视放大器的设置。
不然,高质量的扩声系统是不能发挥作用的。
单体式放大器属于一个独立的组件,可以根据自己的计划自行组合音响系统,一般一台功放由两个通道组成。
原理上功率放大器的额定输出功率应当等于音箱的额定功率,但由于功放管在过载后将出现严重的非线性失真,所以通常有意提高放大器的额定输出功率,使之大于扬声器的额定功率。
通常情况下功放的输出功率比音箱的标称功率大30%。
若是音箱的功率比功放的功率小得太多,在使用功放时应格外小心,音量应由小至大逐渐调节,且不可过大,否则会损坏音箱。
在实际工作中,功放输出功率比较大,对提高音质有利。
另外,音源的动态范围很大,要十分注意功放的瞬间过载引起音箱的损坏。
平均输出功率是指长时间连续工作的功率;峰值功率是指在短时间内承受的最大的功率,它要比额定功率大很多。
功放输出电平显示器:显示器为彩色发光二极管,用于即时显示功放的电平高度。
正常的电平处于绿色;当功放要求传送高音的持续性的信号时,电平信号处于黄色;在演出的音频信号高峰时,红色发光二极管闪亮(时而闪亮),以上均为正常现象。
如果红色发光二极管一直亮着,这说明功放可能过载。
在一路功放驱动多路扬声器时,这种情况经常发生,这时应减小起前端设备(如调音台)的输出量,以消除这种过载现象。
(二)音响器材日常保养与维护1、音响器材正常的工作温度应该为18℃~45℃。
温度太低会降低某些机器(如电子管机)的灵敏度;太高则容易烧坏元器件,或使元器件提早老化。
2、音响器材切忌阳光直射,也要避免靠近热源,如取暖器。
3、音响器材用完后,各功能键要复位。
如果功能键长期不复位,其牵拉钮簧长时期处于受力状态,就容易造成功能失常。
4、开关音响电源之前,把功放和调音台的音量电位器旋至最小,这是对功放和音箱的一项最有效的保护手段。
这时候功放的功率放大几乎为零,至少在误操作时也不至于对音箱造成危害。
5、机器要常用。
常用反而能延长机器寿命,如一些带电机的部体(录音座、激光唱机、激光视盘机等)。
如果长期不转动,部分机件还会变形。
6、要定期通电。
在长期不使用的情况下尤其在潮湿、高温季节,最好每天通电半小时。
这样可利用机内元器件工作时产生的热量来驱除潮气,避免内部线圈、扬声器音圈、变压器等受潮霉断。
7、每隔一段时间要用干净潮湿的软棉布擦拭机器表面;不用时,应用防尘罩或盖布把机器盖上,防止灰尘入内。
8、从电子学的原理来说,任何电子设备在带电工作状态都不应该连接或断开其它设备,带电插拨有源设备是十分危险的。
(三)常见故障解决1、系统安全注意事项设备在日常使用中要注意保持清洁和防尘,而且切忌勤开勤关。
比如:在开启系统后不要马上就关闭系统,这样会较容易损伤设备,虽然在系统控制编写程序时已注意到该事项,作了一定的保护功能。
遵循以下安全原则有助于确保您的人身安全,并防止器材或整个系统受到潜在的损害:(1)请勿尝试自行维修组成系统的所有器材,请始终严格按照操作手册进行系统的使用和维护。
(2)请保持所有器材的通风畅顺,否则可能会导致器材内部组件短路而引起火灾或触电事件,甚至可能会因此造成整个系统的崩溃。
(3)为了避免可能发生的电击事件,不要尝试对系统的器材进行带电维修和安装。
(4)本系统的大部分器材都经过了严格的电磁辐射(EMC)或类似的安全验证,一般情况不会对其它电子产品产生干扰,但在系统需要增加电子器材设备时,请注意您选择的产品有无通过类似的测试验证,以免对现有的系统产生干扰。
(5)断开所有电缆连接时,请针对不同的电缆连接头方式,捂紧连接器进行拔插,请勿使用蛮力强拉电缆。
连接电缆之前,请确认两个连接头的朝向正确并对齐。
(6)保持电子系统运行的基本清洁环境,做到无烟雾、无灰尘,因为烟雾和灰尘对投影机以及所有电子器材的损害较大。
(7)其它安全说明或详细的注意事项请参考附件的产品说明书。
2、整个系统不能启动原因及处理办法(1)电源时序器有故,无法接收中控系统的指令,可以采取手工启动的方式应急处理。
(四)音频故障原因及处理办法1、定义举例与多媒体播放、制作有关的软硬件故障。
2、可能的故障现象(1)播放CD、VCD或DVD等报错、死机;(2)播放多媒体软件时,有图像无声或无图像有声音;(3)播放声音时有杂音,声音异常、无声;(4)声音过小或过大,且不能调节;(5)不能录音、播放的录音杂音很大或声音较小;(6)设备安装异常。
3、可能涉及的部件音频板卡或设备、主板、内存、光驱、磁盘介质、机箱等。
4、判断要点/顺序(1)维修前的准备A.除必备的维修工具外,应准备最新的设备驱动、补丁程序、主板BIOS、最新的DirectX,标准格式的音频文件(CD、WAV文件)、视频文件(VCD、DVD);B.熟悉多媒体应用软件的各项设置,如WINDOWS下声音属性的设置、声卡/显卡附带应用软件的设置、视频盒/卡应用软件的设置等;C.有针对性的了解用户的信息,主要了解:出现故障前是否安装过新硬件、软件、重装过系统(包括一键恢复)。
