informatica powercenter9.5.1安装文档
Informatica服务器在liunx安装及部署文档

PowerCenter 9.6.1 HF3 for Linux安装和配置手册一、安装PowerCenter 9.6.1 HF3 for Linux1.在oracle用户下创建两个infa用户输入命令sqlplus / as sysdbaalter system set open_cursors=2000;create user hxrz_domain identified by infa;grant connect,resource,create any view to hxrz_domain;create user hxrz_rep identified by infa;grant connect,resource,create any view to hxrz_rep;退出按exit2.在root下创建infa用户mkdir /home/infauseradd –d /home/infa infapasswd infachown infa:oinstall /home/infa删除用户# /usr/sbin/groupadd dba3.修改infa用户的环境变量在infa用户下,输入命令vi .bash_profile添加下列变量:/_________________ORACLE_BASE=/home/opt/u01export ORACLE_BASEORACLE_HOME=$ORACLE_BASE/oracleexport ORACLE_HOMENLS_LANG=AMERICAN_AMERICA.ZHS16GBKexport NLS_LANGLD_LIBRARY_PATH=$ORACLE_HOME/lib:$LD_LIBRARY_PATH:/home/infa/Informatica/9.6.1/server/bin export LD_LIBRARY_PATHTNS_ADMIN=$ORACLE_HOME/network/adminexport TNS_ADMINPATH=$ORACLE_HOME/bin:$PATH:$HOME/binexport PATHexport ORACLE_SID= orcl############# INFORMATICA #####################LANG=C; export LANGPM_CODEPAGENAME="MS936"; export PM_CODEPAGENAME#INFA_HOME=/home/infa/Informatica/9.6.1#LD_LIBRARY_PATH=$INFA_HOME/server/bin:$LD_LIBRARY_PATH#PATH=$INFA_HOME/tomcat/bin:$PATH______________________/若不记得oracle安装路径执行以下操作:在oracle用户下执行命令:cat .bash_profile将informatica安装包上传到虚拟机/home/infa下由于权限问题,先上传到/home/wangli下将文件移动到/home/infa下查看/home/infa下是否存在该文件修改文件用户权限命令chown 必须在root 用户下进行解压压缩包文件解压tar压缩包命令tar xf 文件名解压zip压缩包命令unzip 文件名Ctrl+c为撤销put文件4.安装安装PowerCenter 9.6.1 HF3 for Linux运行./install.sh命令问题:home磁盘空间已满查看磁盘空间dfKeyword:Informatinca1注:服务器重启时,要关闭防火墙,否则服务器将无法重启二、配置PowerCenter 9.6.1 HF3 for Linux查看端口是否启用:登录用户名:Administrator 密码:Informatinca1创建存储库服务创建集成服务相关命令:。
Informatica 9.1.0 upgrade for PowerCenter 8.5.x and 8.6.x

目录1.Install PowerCenter8.6.1 (1)1.1.Domain and Repository User information (1)1.2.PowerCenter8.6.1Environment Variables (2)1.3.Install PowerCenter8.6.1 (2)1.4.Create Repository Service and Integration Service (11)rmatica9.1.0upgrade (12)2.1.Stop PowerCenter8.6.1service (12)2.2.Modify Environment Variables (12)2.3./etc/security/limits.conf (13)2.4.alter paramter open_cursors1000 (14)2.5.FTP Informatica9.1.0software and解压tar包 (15)2.6.Install Informatica9.1.0 (16)2.7.Shutdown informatica9.1.0service (22)2.8.Modify Environment Variables (22)2.9.Startup informatica9.1.0service (23)2.10.Upgrade Repository (23)Informatica9.1.0upgrade for PowerCenter8.5.x and8.6.x 1.Install PowerCenter8.6.11.1.Domain and Repository User information-------------------------------Create Domain and Repository User----------------------------------SQL>SQL>create user infa_domain identified by infa_domain;User created.SQL>create user infa_rep identified by infa_rep;User created.SQL>grant connect,resource,create any view to infa_domain,infa_rep;Grant succeeded.SQL>1.2.PowerCenter8.6.1Environment Variables[root@ORA_1024~]#[root@ORA_1024~]#su-infa[infa@ORA_1024~]$more.bash_profile#.bash_profile#Get the aliases and functionsif[-f~/.bashrc];then.~/.bashrcfi#User specific environment and startup programsPATH=$PATH:$HOME/binexport PATHunset USERNAME######################ORACLE###################################export ORACLE_BASE=/u01/app/oracleexport ORACLE_HOME=$ORACLE_BASE/product/10.2.0/db_1export PATH=$PATH:$HOME/bin:$ORACLE_HOME/binexport LD_LIBRARY_PATH=$ORACLE_HOME/lib:/usr/libexport NLS_LANG=AMERICAN_AMERICA.ZHS16GBK######################PowerCenter##################################export INFA_HOME=/infa/Informatica/PowerCenter8.6.1export PATH=$PATH:$ORACLE_HOME/binexport LANG=Cexport INFA_CODEPAGENAME="MS936"export LD_LIBRARY_PATH=$ORACLE_HOME/lib:/home/oracle:$INFA_HOME/server/bin:$LD_LIBRARY_PATH export PATH=$PATH:/home/oracle:$INFA_HOME/server/bin:$INFA_HOMEexport LC_ALL=C[infa@ORA_1024~]$[infa@ORA_1024~]$1.3.Install PowerCenter8.6.1-----------------------------Install PowerCenter8.6.1-----------------------------------------[infa@XKZENON VM]$[infa@XKZENON VM]$pwd/installSoft/Server/Linux/Disk1/InstData/VM[infa@XKZENON VM]$ls-ltotal136968-rwxrwxr-x1infa oinstall140105036Dec192008install.bin[infa@XKZENON VM]$./install.bin-i consolePreparing to install...Extracting the JRE from the installer archive...Unpacking the JRE...Extracting the installation resources from the installer archive...Configuring the installer for this system's environment...Launching installer...Preparing CONSOLE Mode Installation...=============================================================================== Choose Locale...----------------->1-EnglishCHOOSE LOCALE BY NUMBER:1=============================================================================== PowerCenter8.6.1(created with InstallAnywhere by Macrovision)-------------------------------------------------------------------------------=============================================================================== Welcome-------Welcome to Informatica PowerCenter8.6.1.Use this wizard to install Informatica PowerCenter8.6.1.Copyright1998-2008Informatica Corporation.All rights reserved.This Software is protected by U.S.Patent Numbers6,208,990;6,044,374;6,014,670;6,032,158;5,794,246;6,339,775;6,850,947;6,895,471;7,254,590andother U.S.Patents Pending.PRESS<ENTER>TO CONTINUE:=============================================================================== Configure Environment Variables-------------------------------Required UNIX Environment VariablesYou must set the following environment variables to continue with theinstallation on UNIX machines:DISPLAY variable:Configure the DISPLAY variable to run the GUI-basedinstallation program using X Windows on Solaris,AIX,HP-UX,and Linux.Locale variables:Configure the LANG,LANG_C,LC_TYPE,and LC_ALL variables togenerate appropriate code pages and create and connect to repositories andRepository Services.If any of the required variables are not configured,quit the installationprogram,configure the variables,and restart the installation program.If you are not sure that the environment is correctly configured,quit theinstallation and verify environment settings.For more information about configuring environment variables and testingdatabase connections,see the PowerCenter Installation Guide.PRESS<ENTER>TO CONTINUE:=============================================================================== Choose Installation Type------------------------Please choose the Install Set to be installed by this installer.->1-Install PowerCenter8.6.12-Upgrade to PowerCenter8.6.1ENTER THE NUMBER FOR THE INSTALL SET,OR PRESS<ENTER>TO ACCEPT THE DEFAULT :1=============================================================================== PowerCenter License Key-----------------------<Type'back'for the previous panel or'quit'to exit the installer.>License key fileSelect the license key file:(DEFAULT:/home/infa/license.key):/installSoft/v861.key=============================================================================== Installation Prerequisites--------------------------Verify the installation prerequisites and complete the pre-installation tasksbefore continuing with the installation.PrerequisitesDomain Configuration Database-Oracle,Microsoft SQL Server,Sybase ASE,or IBM DB2-At least one database user account is required to complete the installation.Disk Space Requirements-2GBPre-installation TasksCreate a system user account and configure the web browser for the PowerCenterAdministration Console,Metadata Manager&Business Glossary,and Data Analyzerapplications.Determine the port numbers to use for nodes in the domain.Optionally,configure environment variables and set up a keystore file forHTTPS support.For more information,see the PowerCenter Installation Guide.PRESS<ENTER>TO CONTINUE:=============================================================================== Installation Directory----------------------<Type'back'for previous screen and'quit'to exit installer>Choose the installation directory:Default Install Folder:/home/infa/Informatica/PowerCenter8.6.1ENTER AN ABSOLUTE PATH,OR PRESS<ENTER>TO ACCEPT THE DEFAULT:/infa/Informatica/PowerCenter8.6.1INSTALL FOLDER IS:/infa/Informatica/PowerCenter8.6.1IS THIS CORRECT?(Y/N):Y=============================================================================== PowerCenter HTTPS Configuration-------------------------------1-Do not enable https->2-Use a keystore generated by the installer3-Use existing keystore fileENTER THE NUMBER FOR YOUR CHOICE,OR PRESS<ENTER>TO ACCEPT THE DEFAULT: :1=============================================================================== Pre-Installation Summary------------------------Review the following information before continuing.Enter'Back'to go back andchange settings.Product Name:PowerCenter8.6.1Install Folder:/infa/Informatica/PowerCenter8.6.1Disk Space RequirementsRequired Space:1,400MBAvailable Space:4,196MBHTTPS statusHTTPS disabledPRESS<ENTER>TO CONTINUE:=============================================================================== Installing...-------------[==================|==================|==================|==================][------------------|------------------|------------------|------------------]=============================================================================== Create or Join Domain---------------------<Type'back'for the previous panel or'quit'to exit the installer.>For more information about creating or joining a domain,see the PowerCenterInstallation Guide.Note:PowerCenter is licensed on a CPU basis.Consult your licensing agreementfor details about your licensed configuration.->1-Create New Domain(If you are installing PowerCenter for the first time or you want to create a new domain.)2-Join Existing Domain(If you are installing PowerCenter on multiple machines and you already created a domain on another machine.)Enter an option::<Default:1>:1===============================================================================Configure Domain Database-------------------------<Type'back'for the previous panel or'quit'to exit the installer.>Enter the account information for the database to store PowerCenter domainconfiguration metadata.Each PowerCenter domain must store configurationmetadata in a separate database account.->1-Oracle2-DB23-SQLServer4-SybaseDatabase type::<Default:1>:1->1-Default2-Custom stringDatabase URL type::<Default:1>:1Database URL:(DEFAULT:host_name:port_no):XKZENON:1521Database user ID::infa_domainDatabase user password::infa_domainDatabase service name:(DEFAULT:servicename):ora1024=============================================================================== Configure Domain----------------<Type'back'for the previous panel or'quit'to exit the installer.>Enter the information for the PowerCenter domain to create.Domain name:(DEFAULT:Domain_XKZENON):Domain host name:(DEFAULT:XKZENON):Node name:(DEFAULT:node01_XKZENON):Domain port no:(DEFAULT:6001):Domain user name:(DEFAULT:admin):Domain password::adminConfirm password::adminConfigure minimum and maximum port numbers?(Y/N)(DEFAULT:N):N=============================================================================== Post-Installation Summary-------------------------Installation Status:SUCCESSThe PowerCenter8.6.1installation completed successfully.The informationbelow summarizes the location of the installed products.For more information,see the debug log file at/infa/Informatica/PowerCenter8.6.1/Informatica_Installation_Server_Debug.logProduct Name:------------------------PowerCenter8.6.1Components:------------------------PowerCenter ServicesPowerCenter Data AnalyzerPowerCenter Metadata Manager Business GlossaryInstallation Directory:------------------------/infa/Informatica/PowerCenter8.6.1PowerCenter Services ConfigurationPRESS<ENTER>TO CONTINUE:--------------------------------------------Administration Console URL:http://XKZENON:6001/adminconsoleDomain Name:Domain_XKZENONGateway Host Name:XKZENONAdministrator User Name:adminNode Name:node01_XKZENONNode Port Number:6001If you purchased PowerCenter Real Time Edition,you must configure the Informatica Orchestration and Human Workflow server after you install.To configure the Informatica Orchestration and Human Workflow server,run the script at/infa/Informatica/PowerCenter8.6.1/OrchestrationServer/extras.IMPORTANT INFORMATION COMPLETE.PRESS<ENTER>TO CONTINUE: [infa@XKZENON VM]$[infa@XKZENON VM]$1.4.Create Repository Service and Integration Servicermatica9.1.0upgrade 2.1.Stop PowerCenter8.6.1service#su-infa$$INFA_HOME/server/tomcat/bin/infaservice.sh shutdown2.2.Modify Environment Variables-------------------------------Modify Environment Variables-------------------[infa@XKZENON~]$vi.bash_profile#.bash_profile#Get the aliases and functionsif[-f~/.bashrc];then.~/.bashrcfi#User specific environment and startup programsPATH=$PATH:$HOME/binexport PATHunset USERNAME######################ORACLE################################### export ORACLE_BASE=/u01/app/oracleexport ORACLE_HOME=$ORACLE_BASE/product/10.2.0/db_1export PATH=$PATH:$HOME/bin:$ORACLE_HOME/binexport LD_LIBRARY_PATH=$ORACLE_HOME/lib:/usr/libexport NLS_LANG=AMERICAN_AMERICA.ZHS16GBK######################PowerCenter################################## export LANG=Cexport LC_ALL=C~2.3./etc/security/limits.conf[root@XKZENON/]#more/etc/security/limits.conf#/etc/security/limits.conf##Each line describes a limit for a user in the form:##<domain><type><item><value>##Where:#<domain>can be:#-an user name#-a group name,with@group syntax#-the wildcard*,for default entry#-the wildcard%,can be also used with%group syntax,#for maxlogin limit##<type>can have the two values:#-"soft"for enforcing the soft limits#-"hard"for enforcing hard limits##<item>can be one of the following:#-core-limits the core file size(KB)#-data-max data size(KB)#-fsize-maximum filesize(KB)#-memlock-max locked-in-memory address space(KB)#-nofile-max number of open files#-rss-max resident set size(KB)#-stack-max stack size(KB)#-cpu-max CPU time(MIN)#-nproc-max number of processes#-as-address space limit#-maxlogins-max number of logins for this user#-maxsyslogins-max number of logins on the system#-priority-the priority to run user process with#-locks-max number of file locks the user can hold#-sigpending-max number of pending signals#-msgqueue-max memory used by POSIX message queues(bytes) ##<domain><type><item><value>#*soft nproc2047*hard nproc16384*soft nofile1024*hard nofile65536#*soft core0#*hard rss10000#@student hard nproc20#@faculty soft nproc20#@faculty hard nproc50#ftp hard nproc0#@student-maxlogins4infa soft nofile8192infa hard nofile65536#End of file[root@XKZENON/]#2.4.alter paramter open_cursors1000[oracle@XKZENON~]$[oracle@XKZENON~]$sqlplus/nologSQL*Plus:Release10.2.0.4.0-Production on Thu Apr1211:17:412012Copyright(c)1982,2007,Oracle.All Rights Reserved.SQL>conn/as sysdbaConnected.SQL>SQL>SQL>show parameter open_cursorsNAME TYPE----------------------------------------------------------VALUE------------------------------open_cursors integer300SQL>SQL>SQL>alter system set open_cursors=1000scope=both;System altered.SQL>SQL>show parameter open_cursorsNAME TYPE----------------------------------------------------------VALUE------------------------------open_cursors integer1000SQL>2.5.FTP Informatica9.1.0software and解压tar包[infa@XKZENON infa910]$cd soft/[infa@XKZENON soft]$ls-ltotal3977664-rw-r--r--1infa oinstall4069140480Dec2315:46910HF3_Server_Installer_linux32-x86.tar[infa@XKZENON soft]$chmod-R775910HF3_Server_Installer_linux32-x86.tar[infa@XKZENON soft]$ls-ltotal3977664-rwxrwxr-x1infa oinstall4069140480Dec2315:46910HF3_Server_Installer_linux32-x86.tar[infa@XKZENON soft]$tar xvf910HF3_Server_Installer_linux32-x86.tar[infa@XKZENON soft]$chmod-R775*[infa@XKZENON soft]$ls-ltotal3977856-rwxrwxr-x1infa oinstall4069140480Dec2315:46910HF3_Server_Installer_linux32-x86.tardrwxrwxr-x2infa oinstall4096Nov2917:26Messagesdrwxrwxr-x4infa oinstall4096Nov2917:26Server-rwxrwxr-x1infa oinstall5650Sep92011SilentInput.properties-rwxrwxr-x1infa oinstall866Sep162011SilentInput_DT.properties-rwxrwxr-x1infa oinstall976Sep162011SilentInput_hotFix.properties-rwxrwxr-x1infa oinstall2307Sep92011SilentInput_upgrade.properties-rwxrwxr-x1infa oinstall5093Sep92011SilentInput_upgrade_NewConfig.propertiesdrwxrwxr-x5infa oinstall4096Nov2917:19i9Pi-rwxrwxr-x1infa oinstall13242Nov1719:23install.shdrwxrwxr-x2infa oinstall4096Nov2917:26propertiesdrwxrwxr-x4infa oinstall4096Nov2917:26sapsolutionsdrwxrwxr-x4infa oinstall4096Nov2917:27saptrans-rwxrwxr-x1infa oinstall10683Nov1719:23silentinstall.sh-rwxrwxr-x1infa oinstall10723Nov1719:23silentinstallDT.sh-rwxrwxr-x1infa oinstall10674Sep162011silentinstallHotFix.shdrwxrwxr-x3infa oinstall4096Nov2917:36source-rwxrwxr-x1infa oinstall4848Nov1719:23unjar_esd.sh drwxrwxr-x3infa oinstall4096Nov2917:26upgrade_utils [infa@XKZENON soft]$2.6.Install Informatica9.1.0 $./install.sh--解压jar包$./install.bin-i console--开始安装Informatica9.1.0 2->Upgrade to Informatica9.1.0with Hotfix3./infa/Informatica/PowerCenter8.6.1:PowerCenter8.6.1或者Informatica9.0.1的安装目录/infa910/Informatica/9.1.0:Informatica9.1.0的安装目录注意:Allow changes to the node host name and port numbers:如果upgrade到一个新的主机上,可以改变node的配置来匹配新主机。
Informatica_PowerCenter安装指南 (2)

Informatica PowerCenter安装指南(2)目录简介: (2)目标程序: (2)安装环境: (3)假设: (3)前置任务: (3)数据库需求: (3)PowerCenter域配置存储库 (3)PowerCenter 存储库 (4)安装JRE: (4)环境变量设置: (4)安装服务器端: (5)配置服务器端: (6)创建PowerCenter存储库服务: (7)创建PowerCenter集成服务: (9)简介:PowerCenter是Informatica出品的数据中心管理工具集中的一个产品,主要用于设计和完成ETL过程,其中又包含多个子产品,如Data Profiling和Data Analyzer,其服务器端的架构如下:如上图所示,PowerCenter服务器端由被配置在同一域(PowerCenter domain)中的一组计算机组成。
此组计算机可以master-slaves的方式协作,也可以网格方式进行分布式运算?(待求证)。
一个PowerCenter domain中可以配有多个gateway nodes,但只有一个能被设为master,所有对该域的访问均由该结点路由;其余gateway可作为备份。
该服务器段采用面向服务架构,除Service Manager和PowerCenter Administrator这两个服务必须运行在master gateway机器上以外,其他服务均可部署在同一域中的其他结点上,由master gateway提供统一的访问。
对于ETL流程而言,PowerCenter Repository Service和PowerCenter Integration Service为核心服务。
只要安装和部署成功这两个服务,即可执行ETL流程,其他服务为可选服务,当购买了其他产品后才(如Analyst Service为PowerCenter Analyzer的依赖服务)需要。
(整理)Informatica Powercenter安装与配置参考文档
—Informatica Powercenter安装、配置及简单使用文档文档控制变更记录3日期作者版本变更参考目录1概述 (1)1.1读者对象 (1)1.2参考文档 (1)2软件简介 (2)2.1概念 (2)2.2作用 (2)3安装准备 (4)3.1系统要求 (4)3.2数据库账户 (5)3.3注意事项 (5)4POWERCENTER安装 (6)4.1服务器端安装 (6)4.1.1运行安装向导 (6)4.1.2选择安装类型 (7)4.1.3选择License Key (8)4.1.4选择安装路径 (10)4.1.5设置https协议 (10)4.1.6域选择与配置 (13)4.1.7配置节点 (15)4.1.8选择System账户 (16)4.1.9安装成功 (16)4.2客户端安装 (18)4.2.1运行安装向导 (18)4.2.2选择安装类型 (19)4.2.3选择安装路径 (20)4.2.4安装成功 (22)4.3官方文档安装 .......................................................................................................... 错误!未定义书签。
4.3.1运行安装向导................................................................................................. 错误!未定义书签。
4.3.2选择安装路径................................................................................................. 错误!未定义书签。
4.3.3安装成功......................................................................................................... 错误!未定义书签。
Informatica安装手册

Informatica安装配置手册David Jiang1. 准备工作 (2)1.1. 安装环境 (2)1.2. 数据库准备 (2)2. Window下安装配置手册 (3)2.1. 安装Informatica 的相关组件: (3)2.2. 创建知识库(Repository) (8)2.3. 创建目录(Folder) (11)2.4. Repository Server Administrator密码 (12)2.5. Informatica Server 配置步骤 (13)3. Informatica客户端工具简介 (16)3.1. Designer (17)3.2. Reposiotry Manager (17)3.3. Repository Server Administration Console (18)3.4. Workflow Manager (19)3.5. Workflow Monitor (19)1.准备工作1.1. 安装环境工作站IBM PC及兼容机处理器-Intel Pentium®显示器-SVGA以上内存-建议128MB磁盘空间-70MBWindows 95/98,Windows 2000,Windows XP或者Windows NT 4.0。
服务器Informatica ServerUNIX(HP-UX™,AIX™,Solaris ™,Linux)Windows 2000,Windows XP,Windows 2003或Windows NT 4.0。
内存-256 MB磁盘空间-40 MBRepository ServerUNIX(HP-UX™,AIX™,Solaris ™,Linux)Windows 2000,Windows XP,Windows 2003或Windows NT 4.0。
内存-16 MB,并且每管理一个知识库增加16M。
磁盘空间-40 MB知识库所在数据库Database: Oracle,DB2,Sybase,MS SQL Server,Informix,Teradata磁盘空间-数据库100 MB(推荐150 MB)1.2. 数据库准备1.在要安装Informatica服务的主机上,要提供连接到关系型数据库的Native Driver。
Informatic_安装手册

Informatica 安装手册版本:V1.0All rights reserved版权所有侵权必究文档修订记录目录1简介 (4)1.1编写目的 (4)1.2范围 (4)2运行环境 (4)2.1硬件平台 (4)2.2软件平台 (4)3使用者 (4)4BUILD版本须知 (6)5数据库搭建 (6)5.1创建数据库实例 (6)5.2创建数据库表空间、用户和角色 (6)5.2.1创建表空间 (6)5.2.2创建用户 (6)6INFORMATICA POWERCENTER8.5.1 安装 (9)6.1准备工作 (9)6.2开始安装 (10)6.2.1上传Informatica安装介质和license.key到服务器上 (10)6.2.2Informatica安装过程 (10)6.3环境变量配置 (16)6.4启停服务 (17)7INFORMATICA配置 (18)7.1.1登陆PowerCenter Administrator Console (18)7.1.2创建Repository Service (19)7.1.3创建Integration Service (20)7.1.4客户端连接配置 (22)7.1.5建立Folder (24)7.1.6创建连接串 (26)7.1.7导入ETL开发程序 (28)7.1.8Assign Integration Service (33)7.2修改I NFORMA TICA知识库配置文件 (34)1 简介1.1 编写目的本文档详细说明了Informatica的安装步骤。
通过该文档,Informatica的最终使用者将能够顺利的搭建Informatica的运行环境。
1.2 范围该文档适用环境的相关部署人员,文档使用者需要对UNIX、Linux、Aix、Weblogic和ORACLE比较熟悉,如有必要请参考相关文档。
2 运行环境2.1 硬件平台无。
2.2 软件平台服务器⏹IBM AIX,Linux,Windows,HP-UX。
INFORMATICA(LINUX)安装配置文档

广州市连线科技有限公司 -2-
INFA 测试服务器安装配置文档
QuotedId=No [AIS_S001_080420] Driver=/home/infa/Informatica/PowerCenter8.1.1/ODBC5.1/lib/DWmsss21.so Description=DataDirect 5.1 SQL Server Wire Protocol Address=10.33.1.94, 1433 AlternateServers= AnsiNPW=Yes ConnectionRetryCount=0 ConnectionRetryDelay=3 Database=AIS_S001_080420 LoadBalancing=0 LogonID=programmer Password=programmer QuotedId=No IANAAppCodePage=113 ReportCodePageConversionErrors=0
Informatica+PowerCenter开发配置手册
Informatica PowerCenter Developer Platform开发配置手册编写: 冷鹏版本: 1.1状态:初稿日期:2008年5月29日该文档是基于Informatica PowerCenter Developer Platform SP3 for Win32的环境写的,主要介绍开发平台的安装配置步骤,针对开发调试中出现的错误信息提出解决办法。
版权信息:© Copyright DigitalChina 2008.本文档未经许可,任何单位及个人不得传播、涉露本文档信息,违者必究编写历史目录1介绍 (4)1.1背景 (4)2开发平台安装 (5)2.1安装准备 (5)2.2安装步骤 (5)2.3配置说明 (7)2.3.1 环境变量 (7)2.3.2 相关文件拷贝 (8)2.3.3 端口号配置 (8)2.3.4 样本脚本修改 (9)3样例介绍 (10)3.1JAVA应用程序样例 (11)3.2Web JSP应用样例 (14)4参考 (19)4.1示例参考 (19)4.2示例参考 (19)1 介绍1.1 背景由于有越来越多的神州数码用户需要将Informatica开发的应用部署到企业系统中,如将Informatica Client中的ETL任务调度、监控功能嵌入到企业系统应用平台中。
而目前向Informatica Service发送任务请求的途径有3种方式,一种是常用的Informatica Client方式,如PowerCenter Workflow Manager执行任务调度;一种是命令行方式,如通过PMCMD方式执行StartWorkflow;还有一种就是通过Developer Platform API接口方式来执行任务调用,可开发Java或C/C++接口内嵌到应用程序或Web平台上进行使用,这样可将ETL功能与企业原应用系统整合起来。
因此该文档是基于第3种方式,力求给这些用户在安装配置InformaticaPowerCenter Developer Platform时一些帮助,文档是基于Informatica PowerCenter DeveloperPlatform SP3 for Win32的环境写的,主要介绍开发平台的安装配置步骤、Load Manager Java API样例介绍,针对开发调试中出现的错误信息提出析疑。
Informatica客户端安装及配置文档
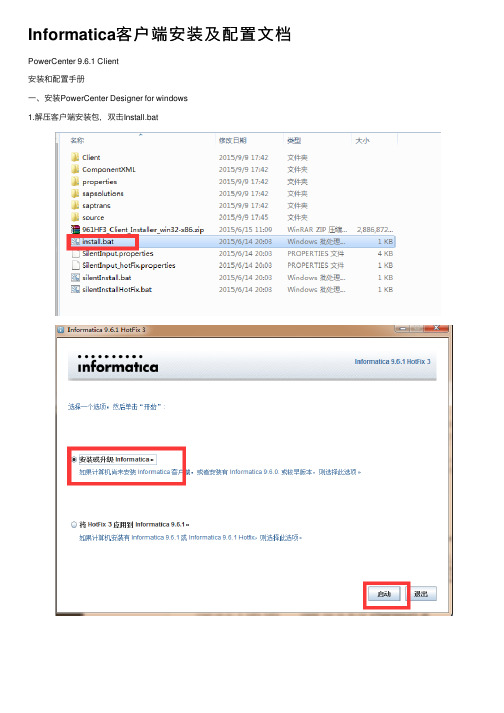
点击下一步, 默认目录是C:\Informatica\9.6.1,当然也可以根据自己的需要来自行设定,推荐设为D:\Informatica\9.6.1,然后点击下一步
点击下一步,最后点击安装。 二、配置 1.配置存储库
存储库的密码:Infomatinca1 在客户端的hosts的文件夹中加入服务器端和IP的对应关系
文档之家的所有文档均为用户上传分享文档之家仅负责分类整理如有任何问题可通过上方投诉通道反馈
Informatica客 户 端 安 装 及 配 置 文 档
PowerCenter 9.6.1 Client 安装和配置手册 一、安装PowerCenter Designer for windows 1.解压客户端安装包,双击Install.bat
2.配置域
3.配置成功后,建立项目文件夹Folder
界面切换到PowerCenter Designer,连接存储库就可以看到创建的项目文件夹
Informatica PowerExchange 9.5.1 for DB2 UDB 安装和使用手册

Informatica PowerExchange 9.5.1 for DB2安装和使用手册2014-01-23杨晓东QQ: 734471791目录致读者 (4)本手册涉及的软件和配置说明 (5)DB2 Server安装和配置 (6)DB2环境要求 (6)检测是DB2是否已经打开归档 (6)未打开的状态 (7)打开的状态 (8)设置DB2为归档模式(2种方式) (8)命令行 (8)图形化 (9)创建Capture Catalog表 (18)初始化Capture Catalog表 (19)创建CDCDEMO源表 (19)启动CDCDEMO源表的CDC Change(2种方式) (20)命令行 (20)图形化 (20)PWX Server安装配置 (21)安装PWX Listener (21)配置dbmover.cfg文件 (21)启动PWX Listener (22)测试PWX连通性 (22)PWX Client端安装配置 (23)安装PWX Client 和配置Dbmover.cfg文件 (23)配置Dbmover.cfg (23)测试PWX连通性 (23)PWX Navigator中注册CDC表 (24)PWX/PWC CDC RT模式任务设置 (29)导入源表结构 (29)创建Mapping (30)创建PWX DB2LUW CDC Real Time类型的Application 连接 (31)创建Workflow,并配置Session属性 (32)执行Workflow,并验证CDC数据的同步结果 (33)PWX/PWC CDC Continuous RT模式任务设置 (34)Mapping设计 (34)配置dbmover.cfg 文件 (34)配置pwxccl.cfg 文件 (34)启动PWX Logger程序 (35)创建PWX DB2LUW CDC Real Time类型的Application 连接 (35)创建Workflow,并配置Session属性 (37)执行Workflow,并验证CDC数据的同步结果 (38)PWX/PWC Batch模式任务设置 (39)Mapping设计 (39)配置dbmover.cfg 和pwxccl.cfg (39)启动PWX Logger程序 (39)创建PWX DB2LUW CDC Change类型的Application 连接 (39)创建Workflow,并配置Session属性 (40)执行Workflow,并验证CDC数据的同步结果 (41)常用命令 (42)启动PWX Listener (42)停止PWX Listener (42)测试PWX连通性 (42)启动PWX Logger程序 (42)停止PWX Logger程序 (43)停止PWX RT程序 (43)致读者子曰:“三人行,必有我师焉。
INFROMATICA安装文档
Informatica的安装首先在该服务器上需要安装Oracle数据库及Oracle客户端,针对Informatica PowerCenter 服务需要创建相关的表空间INFA,表空间的出示大小设定为16GB,建议分为4个数据文件。
此外,需要创建以下用户:1.数据库用户infa:密码设定为infa,需要1GB的表空间,该用户需具备create view、connect、resource、unlimited tablespace数据库权限,用于存放PowerCenter域元数据。
2.数据库用户infarep:密码设定为infarep,需要10GB的表空间,该用户需具备create view、connect、resource、unlimited tablespace数据库权限,用于存放PowerCenter资料库数据。
数据库对应域用户及资料库用户创建在数据库中创建域用户INFA在数据库中创建资料库用户INFAREPInformatica server安装选择informatica安装介质选择中文简体后点击ok单击下一步选择安装PowerCenter8.6.1选择许可证密钥文件,找到相应的key检查安装必备条件选择安装目录不勾选启用HTTPS单击下一步查看安装信息并单击安装在域配置中选择”建域,单击下一步输入数据库中创建的域用户信息,并测试连接测试连接通过后点击确定输入要创建的域名、节点名、域用户名和域密码等信息后单击下一步密码为admin在浏览器中输入地址进入PowerCenter管理控制台地址:http://192.168.1.100:6001http://localhost:6001单击Create选择”Repository Service”,创建资料库服务输入选择要创建的Repository Service名、选择节点、数据库类型、CodePage、连接字符串、在数据库中创建的资料库用户名、密码、Creation Mode信息后创建资料库服务!!!!注意ConnectString:ORCL是指的本机数据库的tnsname设置OperatingMode为Normal单击Create创建Integration Service输入要创建的Integration Service名称、选择节点、Repository Service并输入用户名和密码后单击创建安装完成后查看目录Informatica客户端安装双击install.bat安装客户端单击下一步选择”安装PowerCenter Client8.6.1并单击”下一步选择安装目录单击安装安装成功点击完成后完成安装查看安装目录配置客户端在客户机hosts文件中添加informatica服务器相应的计算机名和IP选择PowerCenter Repository Manager配置资料库添加域配置相应的计算机名和端口配置成功就会在右边看到相应的资料库服务打开资料库管理双击资料库填写资料库用户名和密码新建Folder新建Folder成功打开PowerCenter Designer右击打开folder。
informatica9_install

Informatica 9安装手册项目号xxxx文档编号xxxx版本号 1.0保密级别一般内部公开秘密机密修订记录日期作者版本修订原因主要修订内容目录一、文档说明 (4)二、安装前系统环境准备 (4)1.确认系统需求 (4)2.检查Informatica环境变量 (5)3.确定端口 (5)4.创建Informatica用户 (5)三、安装介质准备 (6)四、安装Informatica 服务端 (6)1.创建informatica安装用户并设置安装目录 (6)2.准备安装介质 (6)3.运行install.sh,开始安装 (7)4.择图形化方式进行全新安装 (8)5.选择安装类型 (8)6.系统环境检查 (9)7.指定license,设定安装目录 (9)8.安装概要 (10)9.安装过程 (10)10.创建Domain并启用HTTPS安全管理 (11)11.设置配置Domain的数据库连接信息 (11)12.配置Domain和Node信息 (12)13.安装结束 (12)五、安装informaitca客户端 (13)六、安装之后的设置 (18)1.配置环境变量 (18)2.安装/配置数据库客户端 (19)七、创建服务 (20)八、验证安装结果 (22)一、文档说明二、安装前系统环境准备1.确认系统需求Domain和应用服务的系统需求可以在同一机器配置Informatica Domain和一个node,所有application服务运行在同一node。
如果创建包括多个node的domain,可以将application服务运行不同的node上。
Informatica node支持以下Unix或Linux安装平台:✓Sun Solaris✓HP-UX✓IBM AIX✓Red Hat Linux✓SUSE Linux下表中列出了Informatica Domain包括不同node配置的最小系统需求:安装组件处理器需求内存需求磁盘需求4 CPU 8GB 20GB Domain with all Data Quality,Data Services andPowerCenter services running on one node2 CPU 4GB 4GB Domain with all PowerCenter services running onone node1CPU 2GB 3GB Domain with all PownerCenter services running onone node except Metadata Manager Service andReporting Service2CPU 2GB 3GB Metadata Manager Service running on a separatenodeReporting Sevice running on a separate node 1CPU 512MB 3GB Orchestration Server running on a separate node 1CPU 512MB 3GB安装过程中临时磁盘空间需求在安装过程中会产生大量的临时文件,确保有足够的可用临时空间。
Informatica PowerExchange961 Windows + Linux版本安装使用手册

Informatica PowerExchange961 安装配置使用手册(保密资料,请勿外传)芦振明神州数码系统集成服务有限公司2016目录1、安装前准备 (3)2、安装前操作 (4)3.Linux版本安装 (5)4、windows版本安装 (8)5、Server端配置 (13)6、Client配置 (17)7、被监听数据库配置 (13)8、PowerExchange快速配置开发 (17)9、各服务器配置参考............................................. 错误!未定义书签。
1、安装前确认操作系统、资料库是Informatica PowerExchange961版本所支持的。
注:1)S表示只支持物理机,NS表示不支持,NA表示不适用,SV 表示支持物理机与虚拟机。
2)CDC列是PowerExchange for oracle CDC的支持性。
2、根据操作系统类型、位数,获取PowerExchange的安装介质,本次安装文件为:PExchange961HF3.zip。
说明:PowerExchange安装区分操作系统类型,不区分客户端与服务端。
3、获取Informatica PowerCenter的key文件,例如:8C5B-EAB0-1901-00E2-AF81-533D-B703-1262-F470-E9ED-9E0C-83E6 -FB5B。
1、安装用户选择:1)windows安装,则直接安装即可,不需选择特殊用户。
2)如果linux安装,且安装在PowerCenter Server上,那么建议使用安装PowerCenter的用户来安装。
3)如果linux安装,且是安装在oracle数据库端,那么可以新建一个PowerExchange的安装用户,也可以采用安装oracle的用户进行安装。
2、上传安装介质解压安装文件。
解压PExchange961HF3.zip后,获取到pwx961_03_linux_em64t.tar Linux版解压后,显示如下:Windows版解压后,显示如下:3、PowerExchange不管是作为客户端使用,还是服务器使用,都要先安装PowerCenter然后安装PowerExchange。
Informatica PowerCenter 9 for Linux64 安装配置

Informatica PowerCenter 9 for Linux64 安装配置informaticapowercenter9forlinux64安装配置informaticapowercenter9.0.1安装与配置本文档就如何在linux64系统上加装布局informaticapowercenter9.0.1作直观的操作方式表明。
1环境准备1.1操作系统市场需求informatica测试机ip:172.16.99.27在加装informatica之前,恳请先加装oracle数据库的客户端。
?为informatica创建一个操作系统用户user:infagroup:dbapwd:infa?为infa用户留出8g内盘空间,系统tmp区留出2g空间?布局infa用户环境变量,保证可以相连中所有牵涉的数据源和目标?保证infa用户可以采用sqlplus命令出访oracle数据库或oracle目录请保证端口6005不被占用,与数据库连接端口6006-6105(可更换端口,最少5个)?infa用户下的ulimitca的memory、file、data、nofiles请尽量放大(unlimited)root用户:#ulimitcmunlimited#ulimitcsunlimited#ulimitchatime(seconds)unlimitedfile(blocks)unlimiteddata(kbytes)unlimitedstack(kbytes)u nlimitedmemory(kbytes)unlimitedcoredump(blocks)unlimitednofiles(descriptors)un limited1.2数据库市场需求informatica需要一个数据库(oracle、ibmdb2、mssqlserver或sybasease)作为保存其元数据的知识库,创建一个informatica专用的表中空间(db2建议缓冲器池页大小至少32k),建议至少500m。
Informatic_安装手册

Informatica 安装手册版本:V1.0All rights reserved版权所有侵权必究文档修订记录目录1简介 (4)1.1编写目的 (4)1.2范围 (4)2运行环境 (4)2.1硬件平台 (4)2.2软件平台 (4)3使用者 (4)4BUILD版本须知 (6)5数据库搭建 (6)5.1创建数据库实例 (6)5.2创建数据库表空间、用户和角色 (6)5.2.1创建表空间 (6)5.2.2创建用户 (6)6INFORMATICA POWERCENTER8.5.1 安装 (9)6.1准备工作 (9)6.2开始安装 (10)6.2.1上传Informatica安装介质和license.key到服务器上 (10)6.2.2Informatica安装过程 (10)6.3环境变量配置 (16)6.4启停服务 (17)7INFORMATICA配置 (18)7.1.1登陆PowerCenter Administrator Console (18)7.1.2创建Repository Service (19)7.1.3创建Integration Service (20)7.1.4客户端连接配置 (22)7.1.5建立Folder (24)7.1.6创建连接串 (26)7.1.7导入ETL开发程序 (28)7.1.8Assign Integration Service (33)7.2修改I NFORMA TICA知识库配置文件 (34)1 简介1.1 编写目的本文档详细说明了Informatica的安装步骤。
通过该文档,Informatica的最终使用者将能够顺利的搭建Informatica的运行环境。
1.2 范围该文档适用环境的相关部署人员,文档使用者需要对UNIX、Linux、Aix、Weblogic和ORACLE比较熟悉,如有必要请参考相关文档。
2 运行环境2.1 硬件平台无。
2.2 软件平台服务器⏹IBM AIX,Linux,Windows,HP-UX。
Infomatica_OBIEE安装文档

目录1.安装Infomatica (3)1.1.配置要求 (3)1.2.安装说明 (3)1.3.安装Infomatica Server (3)1.4.配置Server端Oracle连接 (7)1.5.配置Client端连接 (19)1.6.配置“操作系统配置文件” (9)1.7.设置CodePage (11)1.8.启动Informatica服务 (21)2.安装Oracle RCU 及oracle BIEE (21)2.1.配置要求 (21)2.2.安装说明 (21)2.3.安装Oracle Repository Creation Utility (22)2.4.安装Oracle BIEE 11G (27)3.安装Oracle BI Apps (39)3.1.配置要求 (39)3.2.安装说明 (39)3.3.安装BI Apps (40)3.4.安装Oracle BI Administration Client (43)3.5.部署RPD和Catalog (46)3.6.配置联机打开RPD文件 (51)4.启停Oracle BIEE (53)4.1.概况 (53)4.2.启动WebLogic (53)4.3.启动NodeManager (53)4.4.启动ManagedWebLogic (54)4.5.启动BIEE各项应用 (54)4.6.停止BIEE各项应用 (55)4.7.停止ManagedWebLogic (55)4.8.停止WebLogic (55)4.9.停止NodeManager (55)变更记录序号修改内容修改人修改日期1 新建乔华2012-2-81.安装Infomatica1.1.配置要求安装版本为Informatica 9.0.1 HotFix21.2.安装说明无特殊要求1.3.安装Infomatica Server 在安装目录运行install.sh 启动安装向导选择安装选项,点击下一步确认相关安装硬件要求,点击下一步指定License Key文件目录以及Infomatica Server的安装目录,点击下一步;确认安装的相关信息,点击下一步;创建域,启动HTTPS并指定相应的端口,默认为8443;指定数据库类型,数据库JDBC的URL及相应的用户名和密码,单击下一步;配置域信息,节点信息,及域的管理员相对应的信息,点击下一步完成安装。
Informatica PowerCenter for AIX安装配置手册
目录1 使用 32 位和 64 位平台 (1)2 最低系统要求 (1)3 数据库环境 (3)4 从UNIX连接至数据库 (3)4.1概述 (3)4.2连接至ORACLE数据库 (4)4.3配置本地连接 (5)5 POWERCENTER SERVER在 AIX下的安装 (7)5.1配置环境变量 (7)5.2开始安装 (9)6 创建REPOSITORY SERVICE 以及 INTEGRATION SERVICE (21)7 启动/停止NODE上的INFORMATICA SERVICES (24)7.1 UNIX下停止NODE服务 (24)7.2使用ADMINISTRATION CONSOLE停止INFORMATICA服务 (24)7.3停止DOMAIN (25)8 卸载INFORMATICA POWERCENTER ............................ 错误!未定义书签。
1使用 32 位和 64 位平台PowerCenter 支持以下 64 位平台:✧AIX✧Itanium 上的 HP-UX运行在使用 32 位和 64 位平台时请遵照以下准则:✧库。
依据以下准则链接库:◆将 32 位应用程序链接至 32 位库,而将 64 位应用程序链接至64 位库。
◆将 32 位 PowerCenter Server 链接至 32 位数据库客户端,而将64 位 PowerCenter Server 链接至 64 位数据库客户端。
✧数据库客户端。
将 32 位 Repository Server 链接至 32 位数据库客户端,而将 64 位 Repository Server 链接至 64 位数据库客户端。
✧PowerCenter Server 和 Repository Server。
32 位和 64 位PowerCenter Server 以及 Repository Server 相互兼容。
✧高速缓存。
Informatica9.1安装部署
Informatica安装部署1PWC服务器端部署说明本次部署欲在22.50上部署PWX;1.1创建informatica系统用户1.1.1使用root用户登录,输入如下:# groupadd informatic# useradd -g informatic -d /home/informatic -m informatic# passwd informatics1.1.2创建安装目录# mkdir -p /usr/app/informatica/product/PowerCenter8.6.1# chown -R informatic:informatic /usr/app/informatica --给权限# chmod -R 775 /usr/app/informatica //如果后面映射到其他驱动器,还要给该驱动器上的目录赋相同的权限1.2配置环境变量变量说明如下:IATEMPDIR:安装过程需要1GB的临时磁盘空间,如果不使用/tmp目录,就为该变量指定新的目录。
设置ORACLE_BASE,22.50的ORACLE_BASE 为/db/oracle/oracle,再设置INFA_HOME为For Red Hat Linux:用informatica安装用户登录系统,修改.bash_profile$ vi .bash_profile1.2.1追加录入下列内容#for OracleORACLE_BASE=/usr/app/oracle; export ORACLE_BASEORACLE_HOME=$ORACLE_BASE/product/10.1.0/db_1; export ORACLE_HOME#ORACLE_SID=orcl; export ORACLE_SID#ORACLE_TERM=xterm; export ORACLE_TERMPATH=/usr/sbin:$PATH; export PATHPATH=$ORACLE/bin:$PATH; export PATHLD_LIBRARY_PATH=$ORACLEHOME/lib:/lib:/usr/lib; export LD_LIBRARY_PATH#CLASSPATH=$ORACLE_HOME/JRE:$ORACLE_HOME/jlib:$ORACLE_HOME/rdbms/jlib; export CLASSPATH#DISPLAY=“localhost:0.0”; export DISPLAY //必要时使用LANG=C; export LANGPM_CODEPAGENAME=”MS936”; export PM_CODEPAGENAME //参数值详见附录错误!未找到引用源。
Informatica安装手册

Informatica8.1安装与部署说明书2008年01月22日版本:Version 0.x修改历史审批签名(Signature) 日期(Date)签名(Signature) 日期(Date)文档说明参考文档Informatica8.1.1安装说明哪些人员需要参考本文综合业务平台项目组人员本说明书的相关文档列出与本说明书相关的文档列表缩略语和术语对英文大写联拼信息或专业术语进行解释说明Informatica8.1安装与部署说明书 (1)1 安装前准备工作 (5)1.1系统配置清单 (5)1.2安装JDK (6)1.3在数据库上的准备 (6)2 Informatica8.1.1Server的安装 (7)2.1Informatica8.1.1Server端安装 (7)2.2指定DA和MM的license key (11)2.3指定PowerCenter的安装根路径 (12)2.4指定DA和MM的Application Server(选择应用服务器) (13)2.5指定Application Server根路径 (13)2.6阅读安装信息后点击Install继续 (14)2.7安装进程中 (14)2.8选择创建新Domain (15)2.9设定Domain的Metadata库 (15)2.10配置新Domain的信息 (16)2.11Domain和第一个Node的创建中... (17)2.12配置启动PowerCenter Services的系统用户,本例中不选择直接点击next下一步182.13PowerCenter Services的配置中... . (19)2.14为Metadata Manager配置PowerCenter repository (19)2.15Metadata Manager的Repository Service创建中... . (20)2.16Metadata Manager的PowerCenter Service配置(不选择Create integration Service,character选Unicode) (21)2.17PowerCenter Service的创建中... . (22)2.18为Data Analyzer配置Repository (22)2.19Repository的创建中... .. (23)2.20PowerCenter Services安装成功 (23)3 PowerCenter Client的安装 (24)3.1选定“Client”安装选项 (24)3.2欢迎界面 (25)3.3选择自定义安装 (25)3.4选择要安装的组件 (26)3.5指定PowerCenter的安装根路径 (26)3.6指定Metadata Manger要管理的PowerCenter Repository (27)3.7阅读配置信息后点击Install (28)3.8安装进程中 (28)3.9安装成功 (29)3.10安装成功后可启动指定客户端程序 (29)4 PowerCenter Reports 的安装 (30)4.1选定“Reports”安装选项 (30)4.2欢迎界面 (31)4.3点击next继续 (31)4.4选择自定义安装 (32)4.5选择PowerCenter Reports的Server URL (32)4.6阅读配置信息后点击Install (33)4.7安装进程中 (33)4.8安装成功 (34)5 Informatica配置 (34)5.1client端资料库配置与连接(Informatica客户端的Repository Manager) (34)5.2创建一个文件夹并分配权限 (39)6备份PowerCenter资料库内容 (39)6.1选定资料库,执行Actions->Back Up Contents菜单命令 (39)6.2配置备份资料库的相关信息 (40)6.3资料库内容备份成功 (41)7 删除PowerCenter资料库内容 (43)7.1选定资料库,配置Properties->General Properties->OperatingMode为Exclusive (43)7.2选定资料库,执行Actions->Delete Contents菜单命令 (44)7.3配置有删除权限的用户名/密码 (45)7.4资料库内容删除成功 (46)8恢复PowerCenter资料库内容 (47)8.1选定资料库,执行Actions->Restore Contents菜单命令 (47)8.2选定要恢复的资料库备份文件 (48)8.3资料库内容恢复成功 (49)9 ETL目录结构部署 (49)10元数据目录结构: (51)11 ETL部署 (52)1、开发期 (52)2、运行期 (53)1安装前准备工作1.1 系统配置清单1.2 安装JDKInformatica PowerCenter 8.1的主安装界面是基于JA V A平台建立的,所以在安装前安装JDK(推荐)。
- 1、下载文档前请自行甄别文档内容的完整性,平台不提供额外的编辑、内容补充、找答案等附加服务。
- 2、"仅部分预览"的文档,不可在线预览部分如存在完整性等问题,可反馈申请退款(可完整预览的文档不适用该条件!)。
- 3、如文档侵犯您的权益,请联系客服反馈,我们会尽快为您处理(人工客服工作时间:9:00-18:30)。
1.PowerCenter安装1.1 服务器端安装
密码:ADMIN
1.2 服务器端配置
1.2.1 问题http://bodev04:6008/端口访问不了
原因定位:域及节点安装失败,相关服务无法启动解决办法:重新安装域节点
1.2.2 问题powercenter存储库服务不可用
原因:环境变量设置有问题
解决办法:pmora8.dll文件所在路径C:\informatica\9.5.1\server\bin加入到环境变量path 里面,重启电脑(重启很重要),正常
1.2.3 问题powercenter集成服务不可用
原因:存储库服务以独占方式启动,集成服务无法再连接
解决办法:调整存储库以普通方式启动,再重新启动集成服务,正常1.3 客户端安装
1.4 客户端配置
配置本地电脑hosts文件:
用文本编辑器打开本地电脑C:\windows\system32\drivers\etc目录中的hosts文件,然后在最后一行加入:172.31.68.65 BODev04(这是PowerCenter服务器的机器IP和名称,需要按实际情况填写),然后保存关闭hosts文件
配置PowerCenter客户端资料库
1)点击开始菜单里的PowerCenter Repository Manager
2)点击添加到存储库
3)输入存储库名:RESP_01和用户名:Administrator后点击确定(注意:
Administrator第一个字母一定要大写)
4)对着RESP_01点右键,然后选择配置域, 点击添加域按钮,然后在添加域里
输入域名:Domain_BODev01,网关主机:172.31.68.65,网关端口:6005,最后点击确定
5)此时右边就会出现一个RESP_01存储库图标,再次点击确定
6)然后对RESP_01点击右键选择连接,输入用户名:Administrator 密码:
ADMIN,然后点击连接
7)客户端配置结束。
