万润股份:关于持股5%以上的股东减持公司股份预披露公告
奥迪 A5 S5 使用说明书
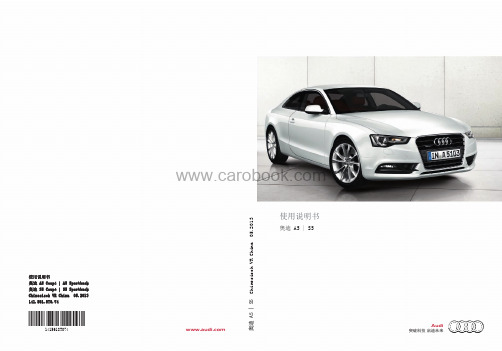
使用说明书奥迪 A5 | S5Audi突破科技启迪未来奥迪 A 5 | S 5 C h i n e s i s c h V R C h i n a 05.2013使用说明书奥迪 A5 Coupé | A5 Sportback 奥迪 S5 Coupé | S5 Sportback Chinesisch VR China 05.2013141.561.8T0.741415618T074©2013 年奥迪股份公司版权所有奥迪股份公司对所有车型都在不断进行后续开发。
公司可能随时改进产品的外形、装备和技术,因此请您谅解。
本操作手册的数据、附图和说明不能作为提出任何要求的依据。
未经奥迪股份公司书面许可,不得全部或部分翻印、复制或翻译本说明书。
奥迪股份公司拥有著作权法所规定的一切权利。
保留修改的权利。
德国印刷。
定稿日期:2013 年 3 月 15 日环境保护提示本说明书用纸系以无氯漂白纸浆制成。
奥迪 A5 Coupé | A5 Sportback奥迪 S5 Coupé | S5 Sportback前言您选择奥迪车作为座驾 - 非常感谢您的信任。
因为拥有新的奥迪,所以您就可以体验领先的技术和高品质的设备带来的享受。
建议您仔细阅读本使用说明书,以便掌握本车性能并能够在日常驾驶中使用全部功能。
除操控信息外,在本使用说明书中还有使用和保养指南用于保证安全和车辆的保值。
此外,我们还向您提供经济和环保驾驶的宝贵信息。
随车资料还包括简要说明书、信息娱乐系统的操作说明书以及保养手册。
祝您的奥迪给您带来无限愉悦,祝您一路顺风。
奥迪股份公司(AUDI AG)1415618T0742目录关于本使用说明书 . . . . . . . . . .4操作 . . . . . . . . . . . . . . . .6驾驶舱 . . . . . . . . . . . . . . .6一览图 . . . . . . . . . . . . . .6仪表和指示灯 . . . . . . . . . . . .8仪表 . . . . . . . . . . . . . . .8指示灯 . . . . . . . . . . . . . .10驾驶员信息系统 . . . . . . . . . . .18引言 . . . . . . . . . . . . . . .18车载计算机 . . . . . . . . . . . .18换档显示 . . . . . . . . . . . . .20功效节能程序 . . . . . . . . . . .21驾驶员疲劳提示 . . . . . . . . . .22保养周期显示 . . . . . . . . . . .23打开和关闭 . . . . . . . . . . . . .25中央门锁 . . . . . . . . . . . . .25行李箱盖 . . . . . . . . . . . . .31儿童保险功能 . . . . . . . . . . .32电动车窗升降器 . . . . . . . . . .32移动-外翻式天窗 . . . . . . . . .33全景-外翻天窗 . . . . . . . . . .34代客泊车功能 . . . . . . . . . . .34车灯和视野 . . . . . . . . . . . . .36外部照明 . . . . . . . . . . . . .36内部照明 . . . . . . . . . . . . .39视野 . . . . . . . . . . . . . . .39车窗雨刮器 . . . . . . . . . . . .41座椅和摆放 . . . . . . . . . . . . .44一般说明 . . . . . . . . . . . . .44前座椅 . . . . . . . . . . . . . .44头枕 . . . . . . . . . . . . . . .46记忆功能 . . . . . . . . . . . . .47烟灰缸 . . . . . . . . . . . . . .48点烟器 . . . . . . . . . . . . . .48 12 伏插座 . . . . . . . . . . . .49 230 伏欧洲制式插座 . . . . . . . .49摆放 . . . . . . . . . . . . . . .50行李箱 . . . . . . . . . . . . . .52采暖和制冷 . . . . . . . . . . . . .56空调装置 . . . . . . . . . . . . .56驻车暖风及通风 . . . . . . . . . .59驾驶 . . . . . . . . . . . . . . . .61转向系统 . . . . . . . . . . . . .61点火开关 . . . . . . . . . . . . .61便捷式智能钥匙 . . . . . . . . . .63驾驶指南 . . . . . . . . . . . . .64强制降档 . . . . . . . . . . . . .65电控机械式驻车制动器 . . . . . . .65智能启动/停止系统 . . . . . . . .67限速警告装置 . . . . . . . . . . .70定速巡航装置 . . . . . . . . . . .71自动变速箱 . . . . . . . . . . . . .73 multitronic、S tronic,、tiptronic 变速箱 . . . . . . . . . . . . . . .73奥迪自适应巡航控制系统和制动扩展辅助装置 . . . . . . . . . . . . . . . .79引言 . . . . . . . . . . . . . . .79一般说明 . . . . . . . . . . . . .79奥迪自适应巡航控制系统 . . . . . .80奥迪制动扩展辅助装置 . . . . . . .84驾驶指南 . . . . . . . . . . . . .85奥迪主动式车道辅助 . . . . . . . . .87车道保持辅助系统 . . . . . . . . .87奥迪侧向辅助系统 . . . . . . . . . .90行驶换道辅助系统 . . . . . . . . .90奥迪驾驶模式选择系统 . . . . . . . .93驾驶设置 . . . . . . . . . . . . .93驻车辅助系统 . . . . . . . . . . . .96概述 . . . . . . . . . . . . . . .96后部驻车辅助系统 . . . . . . . . .96升级版驻车辅助系统 . . . . . . . .96带倒车摄像头的升级版驻车辅助系统 .97调节显示和信号音 . . . . . . . . .100拖车牵引装置 . . . . . . . . . . .101故障报告 . . . . . . . . . . . . .101HomeLink . . . . . . . . . . . . . .102通用遥控器 . . . . . . . . . . . .102安全 . . . . . . . . . . . . . . . .105安全驾驶 . . . . . . . . . . . . . .105基本原则 . . . . . . . . . . . . .105乘员的正确坐姿 . . . . . . . . . .1063目录儿童座椅 . . . . . . . . . . . . .108固定儿童座椅 . . . . . . . . . . .110踏板部位 . . . . . . . . . . . . .112正确安放行李件 . . . . . . . . . .112安全带 . . . . . . . . . . . . . . .114为什么要系带安全带? . . . . . . .114交通事故的基本原理 . . . . . . . .115如何正确系好安全带? . . . . . . .116安全带拉紧器 . . . . . . . . . . .117安全气囊系统 . . . . . . . . . . . .118安全气囊系统说明 . . . . . . . . .118前部安全气囊 . . . . . . . . . . .119侧面安全气囊 . . . . . . . . . . .121头部安全气囊 . . . . . . . . . . .122关闭副驾驶员安全气囊 . . . . . . .123驾驶指南 . . . . . . . . . . . . . .124智能技术 . . . . . . . . . . . . . .124电控行车稳定系统(ESC) . . . . .124制动器 . . . . . . . . . . . . . .125电控机械式转向系、动态转向系统 . .126四轮驱动 (quattro) . . . . . . . .127电源管理系统 . . . . . . . . . . .127控制器中储存的信息 . . . . . . . .128行车和环境 . . . . . . . . . . . . .130磨合 . . . . . . . . . . . . . . .130在街道上涉水行驶 . . . . . . . . .130废气净化装置 . . . . . . . . . . .130长时间停车 . . . . . . . . . . . .130经济节约和有环保意识地行车 . . . .130符合环境保护要求 . . . . . . . . .131带拖车行驶 . . . . . . . . . . . . .133带拖车行驶 . . . . . . . . . . . .133可拆卸的拖车牵引装置 . . . . . . .135维护指南 . . . . . . . . . . . . . .140养护和清洁 . . . . . . . . . . . . .140概述 . . . . . . . . . . . . . . .140洗车 . . . . . . . . . . . . . . .140清洁及养护指南 . . . . . . . . . .141检查和添加 . . . . . . . . . . . . .144燃油 . . . . . . . . . . . . . . .144加油 . . . . . . . . . . . . . . .145选择性催化净化还原 . . . . . . . .146发动机舱 . . . . . . . . . . . . .148发动机机油 . . . . . . . . . . . .150冷却系统 . . . . . . . . . . . . .152制动液 . . . . . . . . . . . . . .153蓄电池 . . . . . . . . . . . . . .153车窗玻璃清洗装置 . . . . . . . . .155车轮和轮胎 . . . . . . . . . . . . .156车轮 . . . . . . . . . . . . . . .156轮胎压力监控显示 . . . . . . . . .160应急轮胎 . . . . . . . . . . . . .161附件和技术改装 . . . . . . . . . . .163附件和配件 . . . . . . . . . . . .163技术更改 . . . . . . . . . . . . .163无线发射器和商务设备 . . . . . . .163自助 . . . . . . . . . . . . . . . .165抛锚救助 . . . . . . . . . . . . . .165概述 . . . . . . . . . . . . . . .165装备 . . . . . . . . . . . . . . .165轮胎修理包 . . . . . . . . . . . .166车轮更换 . . . . . . . . . . . . .168备用车轮 . . . . . . . . . . . . .171辅助启动 . . . . . . . . . . . . .171牵引启动和拖车 . . . . . . . . . .172保险丝和灯泡 . . . . . . . . . . . .175保险丝 . . . . . . . . . . . . . .175灯泡 . . . . . . . . . . . . . . .178更换主大灯的灯泡 . . . . . . . . .180更换前雾灯灯泡 . . . . . . . . . .183更换尾灯的灯泡 . . . . . . . . . .183侧面车身件中的尾灯 . . . . . . . .184在 Coupé 车上:行李箱盖中的尾灯 .185在 Sportback 车上:行李箱盖中的尾灯185技术数据 . . . . . . . . . . . . . .187技术数据 . . . . . . . . . . . . . .187汽车特性数据 . . . . . . . . . . .187尺寸 . . . . . . . . . . . . . . .187充填量 . . . . . . . . . . . . . .188技术数据说明 . . . . . . . . . . .188汽油发动机 . . . . . . . . . . . .189柴油发动机 . . . . . . . . . . . .1934关于本使用说明书本使用说明书的内容包含关于使用本车的重要信息、提示、建议和警告。
5 S 概 念
■5 S 概念整理:将工作场所中的任何物品区分为必要的与不必要的,必要的留下来,不必要的物品彻底清除。
整顿:必要的东西分门别类依规定的位置放置,摆放整齐,明确数量,加一标示。
清扫:清除工作场所内的脏污,并防止脏污的发生,保持工作场所干净亮丽。
清洁:将上面的3S制度化、规范化,并贯彻执行及维持提升。
素养:人人养成好习惯,依规定行事,培养积极进取的精神。
“5S”是整理(Seiri)、整顿(Seiton)、清扫(Seiso)、清洁(Seikeetsu)和素养(Shit- suke)这5个词的缩写。
因为这5个词日语中罗马拼音的第一个字母都是“S”,所以简称为“5S'’,开展以整理、整顿、清扫、清洁和素养为内容的活动,称为“5S”活动。
“5S ”活动起源于日本,并在日本企业中广泛推行,它相当于我国企业开展的文明生产活动。
“5S ”活动的对象是现场的“环境”,它对生产现场环境全局进行综合考虑,并制订切实可行的计划与措施,从而达到规范化管理。
近年来,随着越来越多的日资、港资及台资企业的进入,"5S 管理" 逐渐被国人所了解,并在国内部分企业中开花结果。
现代管理引入安全(safety)和速度/节约(speed/saving)的概念,成为新的7S,可参见“7S”词条。
实施5S的目的在改善生产现场环境、提升生产效率、保障产品品质、营造企业管理氛围以及创建良好的企业文化等方面取得显著效果:提升企业形象整齐清洁的工作环境,使顾客有信心;由于口碑相传,会成为学习的对象提升员工归属感人人变得有素养;员工从身边小事的变化上获得成就感;对自己的工作易付出爱心与耐心提升效率物品摆放有序,不用花时间寻找;好的工作情绪。
保障品质员工上下形成做事讲究的风气,品质自然有保障;机器设备的故障减少。
减少浪费场所的浪费减少,节约空间和时间。
咨询项目目标使企业员工掌握5S 的知识及实施要求;指导企业在相关环节实施5S ,并达到预期效果;指导企业完成5S 相关制度的建设,使企业具有自我开展5S 的能力。
五S的定义
五S的定义第一章5S是什么?5S是指整理、整顿、清扫、清洁、习惯〔纪律〕等五个单词组成,其日文的罗马拼音均为S,因此简称“5S”。
5S定义整理:SEIRI 要/不要整顿:SEITON 定位清扫:SEISO 没有垃圾和脏乱清洁:SEIKETSU 保持光亮和卫生习惯:SHITSUKE 养成纪律的习惯根据日本劳动安全协会在1950年推行的口号是:安全始于整理、整顿,而终于整理、整顿。
可见日本早期只推行5S中的整理、整顿,目的在于确保安全的作业空间,后因生产管理需求和水准的提高,另增清扫、清洁、习惯,而成为现在的5S,着眼点不限于安全,扩大到环境卫生、效率、品质、成本等方面。
日本企业成功的秘诀和人民生活高水平的真谛,在于持续不断地、有系统的全面推行生产和经营管理5S运动。
所以推行5S的时候,不可操之过急,也不要期望一次见效;它不可能在短期内获利,而是长期投资;没有捷径,只有脚踏实地去做。
现代化企业成功的经营告诉我们:一个组织要发展,设备一定要精密、产品要优良,而5S就更加重要。
因为脏乱的工作场所,非但时间成本太高,人员安全没保障、士气低落,更重要的是不能制造出优良的产品,尤其是客户下大笔订单前,一定要求到生产现场参观。
如果未彻底推行5S,则经常临时抱佛脚来整理,即费时又耗人力。
反之实施5S的组织或办公室,则一定到处窗明几亮,物品放置井然有序,标识、看板、通道畅通无阻,因此可以提高组织的形象,获得客户的信赖,成为组织无形的珍贵资财。
现今人们生活水平提高,教育水准层次高,追求美好的生活品质观念,充满新的价值观。
组织环境品质的好坏也成为新一代年轻人选择工作的条件之一。
因此,塑造组织明朗的工作场所,成为追求人力资源成功的对策之一。
第二章为什么要推行5S?根据日本企业经济成长的经验,大多数的组织近年来深深体会到组织升级的必要性。
于是经常举办产业研讨会、产业考察团或建立品质活动月、品质激励奖等等,不外乎也是期望本组织能朝着高品质的目标推进。
门店五S管理规定
门店5S管理规定第一章门店销售旳5S原则所谓店员导购旳5S,就是微笑(Smile)、迅速(Speed)、诚恳(Sincerity)、机灵(Smart)、研究(Study)。
5S旳详细做法 一、微笑(Smile) 微笑是指适度旳笑容,微笑可体现感谢旳心与心灵上旳宽容,体现开朗、健康和体贴,门店店员要对顾客有体贴旳心,才有也许发出出自内心旳真正旳微笑。
二、迅速(S peed) 迅速是指动作迅速,在此有两层含义:1、指物理上旳速度,工作时要做旳每件事都应尽量地快些,不要让顾客久等;2、“演出”上旳速度,门店店员诚意十足旳动作会引起顾客旳满足感,使他们对应地也不觉得等待旳时间过长。
不让顾客等待是服务好环旳重要衡量原则。
三、诚恳(Sincerity) 诚恳是以真诚、不虚伪旳态度努力地认真工作,这是门店店员旳基本原则。
门店店员假如心中怀有尽心竭力地为顾客服务旳诚意,顾客一定能体会得到。
四、机灵(Smart) 机灵是指“精明、整洁、利落”,以洁净利落旳方式来接待顾客,即是所谓机灵旳服务。
门店店员要做到以灵活、敏捷旳动作来包装商品,以优雅、巧妙旳工作态度来获得顾客旳信赖。
五、研究(Study) 研究是指平时努力认真地研究顾客旳购物心理、销售服务技巧,以及学习商品专业知识,不仅能有效地提高接待顾客旳能力,并且能卓有成效地提高销售业绩。
第二章店面旳5S规范一、什么是店面旳5S管理 5S管理就是整顿(SEIRI)、整顿(SEITON)、打扫(SEISO)、清洁(SETKETSU)、素养(SHITSUKE)五个项目,通过规范现场、现物,营造一目了然旳工作环境,培养员工良好旳工作习惯,其最终目旳是提高人旳品质,养成良好旳工作习惯: 1、革除马虎之心,凡事认真(认认真真地看待工作中旳每一件"小事" ) 2、遵守规定 3、自觉维护工作环境整洁明了4、文明礼貌二、5S管理旳定义、目旳、实行要领1、整顿(SEIRI) 定义: ①将工作场所任何东西辨别为有必要旳与不必要旳; ②把必要旳东西与不必要旳东西明确地、严格地辨别开来; ③不必要旳东西要尽快处理掉。
博朗Series 5官方中文说明书

()614s h 19EngliBraun GmbHFrankfurter Straße 145 61476 Kronberg/Germany 96620210/X-13China/Korea/UKSer ies 5S e ri e s 511b5090cc112EnglishOur products are designed to meet the highest standards of quality, functionality and design. Thank you for your trust in Braun’s quality and we hope you enjoy your new Braun shaver.Please read the use instructions carefully and completely before using the appliance.Keep them for future reference.WarningYour appliance is provided with a special cord set, which has an integrated Safety Extra Low Voltage power supply. Do not exchange or tamper with any part of it, otherwise there is risk of an electric shock.Only use the special cord set provided with your appliance.Do not shave with a damaged foil or cord.The shaver is suitable forcleaning under running tabwater. Detach the shaver fromthe power supply before clean-ing it in water.Model 5040s w&d only:This appliance is suitable forcleaning under running waterand use in a bath or shower. Forsafety reasons it can only beoperated cordlessly.This appliance can be used by children aged from 8 years and above and per-sons with reduced physical, sensory or mental capabilities or lack of experience and knowledge if they have been given supervision or instruction concerning the safe use of the appliance and under-stand the hazards involved.Children shall not play with the appliance. Cleaning and user maintenance shall not be made by children unless they are older than 8 years and supervised.Oil bottle(models 5040s w&d/5030s/5020s) Keep out of reach of children. Do not swallow. Do not apply to eyes. Dispose of properly when empty.Clean&Charge Station(models 5090cc/5070cc/5050cc) To prevent the cleaning fluid from leaking, ensure that the Clean&Charge Station is placed on a flat surface. When a cleaning cartridge is installed, do not tip, move suddenly or transport the station in any way as cleaning fluid might spill out of the cartridge. Do not place the station inside a mirror cabinet, nor place it on a polished or lacquered surface.The cleaning cartridge contains a highly flammable liquid so keep it away from sources of ignition. Do not expose to direct sunlight and cigarette smoking nor store it over a radiator.Do not refill the cartridge and use only original Braun refill cartridges.1 Foil & Cutter cassette2 Cassette release button3 MultiHeadL ock switch4 On/off switch5 Shaver display6 Long hair trimmer7 Shaver-to-station contacts8a Release button for long hair trimmer8b Model number of shaver9 Shaver power socket10 Special cord set11a Brush11b Hard travel case*11c Protection cap**not with all modelsPrior to first use remove the protection foil if any from the shaver display and connect the shaver to an electrical outlet using the special cord set (10). Charging and basic operating information• A full charge provides up to 45 minutes of cordlessshaving time. This may vary according to your beard growth and environmental temperature.• Recommended ambient temperature for charging is 5 °C to 35 °C. The battery may not charge properly or at all under extreme low or high temperatures. Recommended ambient temperature for shaving is 15 °C to 35 °C.• Do not expose the appliance to temperatures higher than 50 °C for extended periods of time.• When the shaver will be connected to an electrical outlet, it may take some minutes until the display illuminates.Charge statusThe shaver display (5) shows the charge status of the battery.During charging: The battery symbol will blink. (5090cc: The respective battery segment will blink.) Fully charged (shaver is connected to an electrical outlet): The battery symbol will light up for a few seconds. (5090cc: All battery symbols will light up for a few seconds.)Low chargeThe low-charge light flashes red when the battery is running low. You should be able to finish your shave. With switching off the shaver a beep sound reminds of the low charge status.Cleaning status(models 5090cc/5070cc/5050cc only)Travel lockThe lock symbol lights up when the shaver has been locked to avoid unintended starting of the motor (e.g. for storing it in a suitcase).Press the on/off switch (4) to operate the shaver. Tips for a perfect dry shaveFor best results, Braun recommends you to follow 3 simple steps:1. Always shave before washing your face.2. At all times, hold the shaver at the right angle(90°) to your skin.3. Stretch your skin and shave against the directionof your beard growth.MultiHeadLock switch (head lock)To shave hard-to-reach areas (e.g. under the nose) slide the MultiHeadLock switch (3) down to lock the shaver head. The shaver head can be locked in five positions. To change position, move the shaver head with your thumb and forefinger back or forth. It will automatically click into the next position.To set it back into the pivoting position the MultiHeadLock switch needs to be slid up again. Models 5090cc/5070cc/5050cc: For automatic cleaning in the Clean&Charge Station the head lock should be released.Long hair trimmerTo trim sideburns, moustache or beard press the release button (8a) and slide the long hair trimmer (6) upwards.Shaving with the cord (models 5090cc/5070cc/ 5050cc/5030s/5020s only)If the shaver has run out of power (discharged), you may also shave with the shaver connected to an electrical outlet via the special cord set.Travel lock• A ctivation: By pressing the on/off switch (4) for3 seconds the shaver is locked. This is confirmed by a beep sound and the lock symbol in the display. Afterwards the display turns off.• D eactivation: By pressing the on/off switch for3 seconds the shaver is unlocked again.• S witch the shaver on (cordless) and rinse the shaver head under hot running water until all residues have been removed. You may use liquid soap without abrasive substances. Rinse off all foam and let the shaver run for a few more seconds.• N ext, switch off the shaver, press the release button (2) to remove the Foil & Cutter cassette (1) and let it dry.• I f you regularly clean the shaver under water, then once a week apply a drop of light machine oil on top of the Foil & Cutter cassette.Alternatively, you may clean the shaver with a brush:• S witch off the shaver. Remove the Foil & Cutter cassette (1) and tap it out on a flat surface. Using the brush, clean the inner area of the pivoting head. Do not clean the cassette with the brush as this may damage it!Model 5040s only:The shaver should be cleaned after each foam usage.The Clean&Charge Station has been developed for cleaning, charging, lubricating, disinfecting and storing your Braun shaver.12 Station power socket13 Lift button for cartridge exchange14 Station-to-shaver contacts15 Clean&Charge Station display15a Status light16 Start button17 Cleaning cartridgeInstalling the Clean&Charge Station (see fig. D)• Remove the protection foil from the Clean&Charge Station display.• Using the special cord set (10), connect the station power socket (12) to an electrical outlet. • Press the lift button (13) at the rear side of the Clean&Charge Station to lift up the housing.• Hold the cleaning cartridge (17) down on a flat, stable surface (e.g. table).• Carefully remove the lid from the cartridge.• Slide the cartridge from the rear side into the base of the station until it snaps into place.• Slowly close the housing by pushing it down until it locks.Charging the shaver in the Clean&Charge Station (see fig. D)Insert the shaver head down into the cleaning station. Important: The shaver needs to be dry and free from any foam or soap residue!The contacts (7) on the back of the shaver need to align with the contacts (14) in the station. Push the shaver in the correct position.A beep sound confirms that the shaver sits properly in the station. Charging will start automatically. Model 5090cc: The Clean&Charge Station analyzes«Cleaning programs» below.Cleaning the shaver(see fig. D)Station, upside down and with the front showing (with released head lock/contact alignment/beep sound). Cleaning programs5090cc: The hygiene status will be analyzed and oneshort economical cleaningnormal level of cleaninghigh intensive cleaning5070cc/5050cc: One standard cleaning program included.Start automatic cleaningStart the cleaning process by pressing the start button (16). If status light (15a) does not shine (Clean&Charge Station switches to stand-by after ca. 10 minutes), press start button twice. Otherwise cleaning will not start. For best shaving results, we recommend cleaning after each shave.Each cleaning program consists of several cycles, where cleaning fluid is flushed through the shaver head. Depending on your Clean&Charge Station model and/or program selected, the cleaning time takes up to 3 minutes. During this time the status light blinks. Leave the shaver in the station for drying.It takes several hours until remaining moisture evaporates depending on the climatic conditions. Afterwards the shaver is ready for use.After completing the cleaning and charging proce-dure, all indicators turn off.Removing the shaver from the Clean&Charge Station (see fig. E)Hold the Clean&Charge Station with one hand and tilt the shaver slightly to the front to release it. Cleaning Cartridge / Replacement (see fig. F) When the level indicator lights up permanently red, the remaining fluid in the cartridge is sufficient for about 3 more cycles. When the level indicator blinks red, the cartridge needs to be replaced - (about every 4 weeks when used daily.)After having pressed the lift button (13) to open the housing, wait for a few seconds before removingthe used cartridge to avoid any dripping. Before discarding the used cartridge, make sure to close the openings using the lid of the new cartridge, since the used cartridge will contain contaminated cleaning solution.The hygienic cleaning cartridge contains ethanol, which once opened will naturally evaporate slowly into the surrounding air. Each cartridge, if not used daily, should be replaced after approximately8 weeks to ensure optimal disinfection.The cleaning cartridge also contains lubricants for the shaving system, which may leave residual marks on the outer foil frame and the cleaning chamberof the Clean&Charge Station. These marks can be removed easily by wiping gently with a damp cloth. Braun recommends changing your shaver’sFoil & Cutter cassette every 18 months to maintain your shaver’s maximum performance.Available at your dealer or Braun Service Centres:• Foil & Cutter cassette: 52S/52B• Cleaning cartridge Clean&Charge Station: CCR •Braun Shaver cleaner spray21This product contains rechargeable batteries.In the interest of protecting the environment, please do not dispose of the product in the household waste at the end of its useful life. Disposal can take place at a Braun Service Centre or at appropriate collection points provided in your country.The cleaning cartridge can be disposed of with regular household waste.Subject to change without notice.For electric specifications, see printing on thespecial cord set.22。
三菱電機可程式控制器 MELSEC iQ-F系列 FX5S-30M□ □, FX5S-40M□ □,

©Mitsubishi ElectricCorporation三菱電機可程式控制器MELSEC iQ-F系列FX5S-30M□/□, FX5S-40M□/□,FX5S-60M□/□©Mitsubishi ElectricCorporation2目次目次1.特點………………………P32.實現IoT………………………P73.國際標準………………………P144.規格………………………P155.產品陣容………………………P21©Mitsubishi Electric Corporation3輕鬆上手,簡單易用紧凑型CPU模組,內藏Ethernet端口。
具有高性價比的MELSEC iQ-F系列不僅簡單易用,基本性能強大,而且機型選擇更簡單、利用更輕鬆。
產品陣容CPU模組繼電器輸出R 電晶體輸出(NPN型)T1電晶體輸出(PNP型)T21.特點FX5-SDCD擴充版SD記憶卡模組(FX5S專用)FX5S-30MT/ESS AC DC T2FX5S-30MT/ES AC DC T1FX5S-30MR/ES AC DC R AC電源AC DC輸入(NPN型/PNP型)DCFX5S-60MT/ESS AC DC T2FX5S-60MT/ES AC DC T1FX5S-60MR/ES AC DC R FX5S-40MT/ESS AC DC T2FX5S-40MT/ES AC DC T1FX5S-40MR/ES AC DC R©Mitsubishi Electric Corporation4便捷功能!指令處理時間(LD、MOV指令)84ns48k步無需電池I/O點數最大80點定位4軸(100kHz)高速計數器8ch 內藏Ethernet,支持CC-Link IE現場網路Basic,強化了與三菱電機FA設備和各合作廠商產品的聯動。
此外,還內藏了可用於編程的USB(Mini-B)連接器。
AELTA ASD-A2系列 高机能通讯型伺服器简易说明书

第三章
3.1
配线
周边装置与主电源回路连接 ............................................................................. 3-1
3.1.1 周边装置接线图 ...................................................................................... 3-1 3.1.2 驱动器的连接器与端子 ........................................................................... 3-3 3.1.3 电源接线法 ............................................................................................ 3-5
Revision April, 2010
目录|ASDA-A2 系列
3.1.4 电机 U、V、W 引出线的连接头规格 ...................................................... 3-7 3.1.5 编码器引出线的连接头规格 .................................................................... 3-8 3.1.6 线材的选择.............................................................................................. 3-9 3.2 伺服系统基本方块图 ........................................................................................ 3-11 3.2.1 400W(含)以下机种(无内建回生电阻) ............................................ 3-11 3.2.2 750W ~ 4.5kW 机种(内建回生电阻和风扇) ........................................ 3-12 3.2.3 5.5kW 机种(内建风扇,无回生电阻) .................................................. 3-13 3.3 CN1 I/O 信号接线 ............................................................................................ 3-14 3.3.1 CN1 I/O 连接器端子 Layout.................................................................... 3-14 3.3.2 CN1 I/O 连接器信号说明 ........................................................................ 3-16 3.3.3 界面接线图(CN1) ............................................................................... 3-27 3.3.4 使用者指定 DI 与 DO 信号 ...................................................................... 3-36 3.4 3.5 CN2 编码器信号接线 ....................................................................................... 3-37 CN3 通讯口信号接线 ....................................................................................... 3-39 3.5.1 CN3 通讯口端子 Layout.......................................................................... 3-39 3.5.2 CN3 通讯口与个人电脑的连接方式 ........................................................ 3-40 3.6 3.7 3.8 3.9 3.10 CN4 串列通讯口(USB) ................................................................................ 3-41 CN5 位置反馈信号接头(全闭回路) .............................................................. 3-42 CN6 通讯连接口(CANopen) ....................................................................... 3-43 CN7 扩展 DI ..................................................................................................... 3-45 标准接线方式 ................................................................................................... 3-46 3.10.1 位置(Pt)模式标准接线 ...................................................................... 3-46 3.10.2 位置(Pr)模式标准接线 ...................................................................... 3-47
AZ5中文资料

GENERAL DATALife ExpectancyMinimum operations Mechanical 10 million operationsElectricalStandard Duty:5 x 10⁵at 1 A, 30 VDC Res.4 x 105at 0.5 A, 120 VAC Res.Heavy Duty:2 x 10⁵at 2 A, 30 VDC Res.2 x 105at 1 A, 120 VAC Res.Operate Time (typical)Standard: 3 ms at nominal coil voltage Sensitive: 5 ms at nominal coil voltage Release Time (typical) 1 ms at nominal coil voltage (with no coil suppression)Capacitance Coil to contact: 3.0 pF Contact to contact: 3.0 pF Bounce (typical)At 10 mA contact current 2 ms at operate 8 ms at releaseDielectric Strength 1250 Vrms coil to contact(at sea level for 1 min.)500 Vrms between open contactsMeets FCC Part 68.3021500V lightning surge Meets FCC Part 68.304 1000 V dielectric Insulation 100 megohms min. at 20°C, 500 VDC,Resistance 50% RHDropoutGreater than 10% of nominal coil voltage Ambient TemperatureAt nominal coil voltageOperatingStandard: -25°C (-13°F) to 60°C (140°F)Sensitive: -25°C (-13°F) to 75°C (167°F)StorageBoth: -25°C (-13°F) to 105°C (221°F)Vibration 0.062" DA at 10–55 Hz Shock Standard: 10 g Sensitive: 6 g Enclosure P.B.T. polyester TerminalsTinned copper alloy Max. Solder Temp.270°C (518°F)Max. Solder Time 5 seconds Max. Immersion Time 30 seconds Weight3.5 gramsSUBMINIATURE PC BOARD RELAYFEATURES •Subminiature size for high density packaging •Coil sensitivity to 100 mW •Extremely low cost •Coils to 24 VDC•Epoxy sealed for automatic wave soldering •1 Amp and 2 Amp contacts•Life expectancy to 10 million operations•Meets FCC Part 68.302 1500 V lightning surge •Meets FCC Part 68.304 1000 V dielectric •UL file E43203; CSA file 74120CONTACTSArrangement SPDT (1 Form C)Welded crossbar constructionRatingsResistive load:Light DutyMax. switched power: 30 W or 60 VA Max. switched current: 1 AMax. switched voltage:150 VDC or 300 VAC UL Rating:1 A at 30 VDC0.5 A at 120 VAC Heavy DutyMax. switched power: 60 W or 120 VA Max. switched current: 2 AMax. switched voltage:150 VDC or 300 VAC UL Rating: 2 A at 30 VDC1 A at 120 VAC MaterialLight Duty Silver palladium, gold clad Heavy Duty Silver nickelResistance< 50 milliohms initiallyCOILPowerAt Pickup Voltage Standard coil: 220 mW (typical)Sensitive coil: 100 mW Max. Continuous 1.1 W at 20°C (68°F) ambient Dissipation .8 W at 40°C (104°F) ambientTemperature RiseStandard: 40°C (72°F) at nominal coil voltageSensitive: 22°C (40°F) at nominal voltage TemperatureMax. 105°C (221°F)NOTES1.All values at 20°C (68°F).2.Relay may pull in with less than “Must Operate” value.3.Other coil resistances and sensitivities available upon request.4.Specifications subject to change without notice.Dimensions in inches with metric equivalents in parentheses. Tolerance: ± .010"Coil Temperature RiseMaximum Switching CapacitySTANDARD RELAYS: Light Duty TypeCOIL SPECIFICATIONSORDER NUMBERNominal Max.CoilMust Coil Continuous Resistance Operate AZ5X Footprint AZ5Y Footprint VDC VDC ±10%VDC 5 6.8563.5AZ5X –1C –5DEAZ5Y –1C –5DE 68.180 4.2AZ5X –1C –6DE AZ5Y –1C –6DE 912.2180 6.3AZ5X –1C –9DE AZ5Y –1C –9DE 1216.23208.4AZ5X –1C –12DE AZ5Y –1C –12DE 2432.41,28016.8AZ5X –1C –24DEAZ5Y –1C –24DESENSITIVE RELAYS: Light Duty TypeCOIL SPECIFICATIONSORDER NUMBERNominal Max.CoilMust Coil Continuous Resistance Operate AZ5X Footprint AZ5Y Footprint VDC VDC ±10%VDC 510.01203.5AZ5X –1C –5DSEAZ5Y –1C –5DSE612.0180 4.2AZ5X –1C –6DSE AZ5Y –1C –6DSE 918.0405 6.3AZ5X –1C –9DSEAZ5Y –1C –9DSE1224.07008.4AZ5X –1C –12DSE AZ5Y –1C –12DSE 2448.02,80016.8AZ5X –1C –24DSE AZ5Y –1C –24DSESTANDARD RELAYS: Heavy Duty TypeCOIL SPECIFICATIONSORDER NUMBERNominal Max.CoilMust Coil Continuous Resistance Operate AZ5X Footprint AZ5Y Footprint VDC VDC ±10%VDC 5 6.8563.5AZ5X –1CH –5DEAZ5Y –1CH –5DE 68.180 4.2AZ5X –1CH –6DE AZ5Y –1CH –6DE 912.2180 6.3AZ5X –1CH –9DEAZ5Y –1CH –9DE1216.23208.4AZ5X –1CH –12DE AZ5Y –1CH –12DE 2432.41,28016.8AZ5X –1CH –24DE AZ5Y –1CH –24DE。
芯片预处理争霸,RMA与MAS5

芯片预处理争霸,RMA与MAS5展开全文在数据分析和信息挖掘这个行当,流传着这样的说法,数据狗们80%的精力在倒腾数据,20%在研究算法。
多年的分析经验和积累之下,吉凯基因如是说:数据质量是关键,预处理是命门!芯片数据的完整性、准确性和一致性,是后续高效、准确地分析和挖掘疾病发生或发展的分子机制和临床应用价值的基础;选择适当的方法和流程对芯片数据进行预处理,消除由于实验技术引入的系统偏差,从而使我们可以得到具有生物学意义的基因表达量的变化,是获得高质量数据的关键。
RMA和MAS5,这两种目前最常用的芯片数据预处理方法,自从它们的出现,二者孰优孰劣的争议和对芯片数据处理领地的争夺就从未休止过。
MAS5算法是由Affymetrix公司设计开发的,其对于芯片背景噪音的校正采用了比较直接的策略,即通过计算PM[i]-MM[ii]或PM/MM实现信噪分离。
理论上讲,MM探针只有非特异杂交信号,不会有特异性杂交,因此MM探针的信号值应始终小于其对应的PM探针信号值。
但是,在实际分析过程中,经常发现甚至多达三分之一的MM探针信号值高于对应PM探针信号值。
RMA算法并不直接利用MM的信号去除背景噪音,而是基于20组探针的信号分布采用随机模型来评估表达值,对于低噪号的实验有更好的适用性。
对比MAS5与RMA两种算法的分析结果发现,MAS5会在低丰度区域产生大量差异基因(如Figure 1所示)。
但是,根据文献报道,这些差异多为假阳性。
吉凯基因基于过去多年积累的大量项目数据,比较分析了两种算法的分析结果并进行了实验验证,结论也与这一观点一致。
大量的假阳性会对下游的数据分析和挖掘工作造成很大的困扰,也给后续的验证工作增加很多无谓的工作量。
但是,根据文献报道和我们的对比分析发现,当MAS5算法结合探针的detection calls (P/M/A)[iii]过滤,可以得到更为稳定且准确的分析结果,且与RMA 算法的结果有很高的吻合度。
新奥迪A5 S5产品介绍

新奥迪A5/S5 Coupe/Cabriolet /Sportback产品概览奥迪销售事业部产品营销部目录►市场与用户►竞争对手►产品简介1. 市场与用户2. 竞争对手3. 产品简介设计►产品的改脸主要体现在更加清晰的车身线条、显著变化的车灯以及更多的车轮和内饰细节。
全新的奥迪标识(更大)驻车传感器与牌照架相邻车身& 车轮:►新的车身颜色s(基本装备)*A5 PI 产品信息 尾部设计►排气管设计1.8 TFSI 2.0 TFSI 2.0 TDI 3.0 TDI Clean Diesel (EU 6) All A5 derivatives A5 Coupé, A5 Sportback (A5 Cabriolet not offered) A5 Sportback, A5 Cabriolet All A5 derivatives All A5 derivatives A5 Coupé左侧双排气管两侧单排气管1.8 TFSI 2.0 TFSI 3.0 TFSI 200 kW 3.0 TDI31FAW-VW, ASDA5 PI 产品信息产品信息 内容-EPS: 电子机械助力转向 -优化的悬架 -quattro 运动差速锁驾驶体验-响应快 -精准 -舒适quattro 运动差速锁EPS: 电子机械助力转向1. 2. 有效的降低燃油消耗: 0.3L/100km 实现奥迪车道辅助系统选装:32FAW-VW, ASDA5 PI 产品信息 quattro可选的运动差速锁quattro 运动型差速锁扭矩分配用户利益: ► 由于实时动态的扭矩分配,实 现了车辆的高度灵活性及稳定 性在各种驾驶环境下,通过电控单元实现扭矩 在前后轴及各车轮的实时动态分配电子扭矩分配非对称扭矩分配 传感器判断驾驶员的操作意向 电控单元实现各车轮的实时扭矩分配用户利益: ► 精准的驾驶风格 ► 易于控制Quattro全时四轮驱动系统基础的机械装置自锁式冠形齿轮差速器 机械自锁功能将扭矩任意的分配到前 轴和后轴 实现非对称力矩分配USP用户利益: ► 保证了全时四轮驱动的可能性 ► 出色的牵引力 ► 绝佳的稳定性33FAW-VW, ASDA5 PI 产品信息 方向盘3幅设计,真皮运动方向盘- 多功能方向盘,带换挡拨片 (PR No.: 1XX)基本装备New多功能真皮运动方向盘,3幅设计,底部扁平 运动设计选装装备- 带有换挡拨片 (PR No.: 2PK)全新设计的方向盘以及更运动设计的选装装备34FAW-VW, ASDA5 PI 产品信息 方向盘细节设计全新高光设计Steering wheel trim带有高光设计的真皮运动方向盘35FAW-VW, ASDA5 PI 产品信息产品信息 内容-奥迪驾驶模式选项带有高效模式 -带能量回收的启停装置效率-高效率的发动机 -能量回收系统带有高效模式的奥迪驾驶模式选项带有能量回收的启停装置1. 2. 有效降低燃油消耗: 0.2L/100km 城市交通拥堵情况下,有效降低燃油消耗 达到:1.5L/100kmEfficiency36FAW-VW, ASDA5 PI 产品信息 带有高效模式的奥迪驾驶模式选项PR No. 2H1For:A5 CoupéA5 SportbackA5 CabrioletS5 modelsS line选装装备 “奥迪驾驶模式选项"动态转向 (1N8) – 可变传动比 Quattro运动差速锁 (GH2) – 可变扭矩传递 电磁减震 (1BL) – 可变阻尼Source: Mr Ullmann, I/EF-25 奥迪驾驶模式选项 (2H1) 带有高效模式 (必须带有启停装置)助力转向系统发动机 – 可变的油门踏板曲线 (高效模式)变速箱 – 可变传动比空调出风口 – 优化的温度控制 (高效模式)37FAW-VW, ASDA5 PI 产品信息产品信息 内容-全新的MMI 3G导航系统 -带有Google earth图像的导航系统 -数字信号接收娱乐系统-清晰的显示 -符合人机工程学设计 -操作简易-全新设计的MMI 3G导航系统 以前的操作逻辑 新的操作逻辑38FAW-VW, ASDA5 PI 产品信息产品信息 内容-奥迪车道辅助系统 -ACC: 主动巡航系统 -驾驶员信息系统带有休息提示辅助系统-引领豪华B级车 -舒适、安全带有休息提示的驾驶员信息系统奥迪车道辅助系统Pausen empfehlung2696 Km 125.9 D4 ※ -2.5℃奥迪主动巡航系统 30-200km/h39FAW-VW, ASDA5 PI 产品信息 装备► 电子机械助力转向 (EPS) ( 基本装备 ) 电子机械助力转向更加精准和舒适,同 时有效的降低油耗► 动态转向 ( 选装装备 ) 配有奥迪驾驶模式选项下,转向扭矩及 传动比的调整随时针对路况及车辆行驶 速度来变化►高速情况下,转向更加精准 ►转向更加舒适 ►响应更加迅速 ►精准的转向传动比►低速情况下,更加直接转向传动比 ►高速情况下,更少的转向助力及间接 的传动比 ►路况复杂情况下,根据车辆情况主动 干涉转向系统USP40FAW-VW, ASDEfficiencyUSP USP►除此之外,音量调整也集成在了浏览功能之下铂金灰扩散器S line 标示侧进气格栅和车身颜色一致的装饰条中间的铂金灰辅助进气排气管(4缸)运动的,凸显个性的后保险杠设计A5 PI 产品信息装备奥迪专享风尚包(PR No.: WQK)►前排运动座椅►前排座椅电动腰部支撑►Fine Nappa真皮双色座椅带线缝(座椅周围部分为黑色/ 座椅中间部分及线缝颜色可以选择:白兰地酒色、雪花石膏白色、深灰色——Coupe & Sportback) (座椅周围部分为黑色/ 座椅中间部分及线缝颜色可以选择:白兰地酒色、雪花石膏白色、深红色——Cabriolet)►门护板与座椅中间部分同色,门护板扶手为黑色带有彩色线缝(与座椅中间部分一致)►3辐真皮多功能运动方向盘带有彩色线缝(与座椅中间部分颜色一致)►马特拉丝铝饰条►黑色内饰(顶棚为黑色)►脚垫为彩色线缝(与座椅中间部分颜色一致)►奥迪专享门槛条。
澳焊标第5部分AS NZS 1554.5 2004
AS/NZS 1554.5:2004澳大利亚/新西兰标准结构钢焊接第五部分:经受高度疲劳负荷的钢结构之焊接第五部分:经受高度疲劳负荷的钢结构之焊接 ------------------------------------------------------------ 1 1范围和总则------------------------------------------------------------------------------------------------------- 4 1.1范围-------------------------------------------------------------------------------------------------------------- 4 1.2不包括在内的焊接方法------------------------------------------------------------------------------------- 5 1.3创新-------------------------------------------------------------------------------------------------------------- 5 1.4参考文件-------------------------------------------------------------------------------------------------------- 5 1.5定义-------------------------------------------------------------------------------------------------------------- 5 1.6焊接基本要求 ------------------------------------------------------------------------------------------------- 6 1.7安全-------------------------------------------------------------------------------------------------------------- 7 2施工材料---------------------------------------------------------------------------------------------------------- 7 2.1母材-------------------------------------------------------------------------------------------------------------- 7 2.2(焊接)垫板材料 ------------------------------------------------------------------------------------------------ 8 2.3焊接消耗材料 ------------------------------------------------------------------------------------------------- 8 3焊接连接的细述------------------------------------------------------------------------------------------------- 9 3.1总则-------------------------------------------------------------------------------------------------------------- 9 3.2对接焊缝------------------------------------------------------------------------------------------------------- 10 3.3角焊缝---------------------------------------------------------------------------------------------------------- 123.4复合焊缝------------------------------------------------------------------------------------------------------- 154.工艺评定--------------------------------------------------------------------------------------------------------- 16 4.1焊接工艺评定 ------------------------------------------------------------------------------------------------ 16 4.2焊接工艺评定的方法--------------------------------------------------------------------------------------- 18 4.3经预评定的焊接工艺--------------------------------------------------------------------------------------- 19 4.4评定通过的焊接工艺之可借用性 ----------------------------------------------------------------------- 19 4.5经预评定的接头制备--------------------------------------------------------------------------------------- 19 4.6焊材评定------------------------------------------------------------------------------------------------------- 20 4.7 用试验对焊接工艺进行评定----------------------------------------------------------------------------- 26 4.8评定范围的扩展 --------------------------------------------------------------------------------------------- 30 4.9 焊接方法的组合 -------------------------------------------------------------------------------------------- 31 4.10 试验记录 ---------------------------------------------------------------------------------------------------- 31 4.11 焊接工艺的重新评定------------------------------------------------------------------------------------- 314.12 焊接人员的资格评定------------------------------------------------------------------------------------- 355.技艺 --------------------------------------------------------------------------------------------------------------- 39 5.1焊接前钢板边缘准备工作--------------------------------------------------------------------------------- 39 5.2装配------------------------------------------------------------------------------------------------------------- 40 5.3预热温度和道间温度的控制------------------------------------------------------------------------------ 41 5.4在不利天气条件下的焊接--------------------------------------------------------------------------------- 44 5.5点(定位)焊缝 ------------------------------------------------------------------------------------------------- 44 5.6焊缝的深宽之比 --------------------------------------------------------------------------------------------- 44 5.7变形和殘余应力的控制------------------------------------------------------------------------------------ 44 5.8焊缝中缺陷的清除和修理--------------------------------------------------------------------------------- 50 5.9临时附件------------------------------------------------------------------------------------------------------- 51 5.10引弧 ----------------------------------------------------------------------------------------------------------- 52 5.11完工焊缝的清洁-------------------------------------------------------------------------------------------- 52 5.12对接焊缝的整修-------------------------------------------------------------------------------------------- 526.焊缝质量--------------------------------------------------------------------------------------------------------- 53 6.1检查方法和缺陷的允许级别------------------------------------------------------------------------------ 53 6.2射线拍片------------------------------------------------------------------------------------------------------- 54 6.3超声波检查 --------------------------------------------------------------------------------------------------- 55 6.4磁粉探伤------------------------------------------------------------------------------------------------------- 56 6.5焊缝缺陷------------------------------------------------------------------------------------------------------- 566.6报告------------------------------------------------------------------------------------------------------------- 567.检查 --------------------------------------------------------------------------------------------------------------- 62 7.1总则------------------------------------------------------------------------------------------------------------- 62 7.2检查员的资格评定 ------------------------------------------------------------------------------------------ 62 7.3焊接的外观检查 --------------------------------------------------------------------------------------------- 62 7.4除外观检查外的无损检查--------------------------------------------------------------------------------- 63 附录 ----------------------------------------------------------------------------------------------------------------- 65A.参考的文件 ----------------------------------------------------------------------------------------------------- 65B.脆性断裂 -------------------------------------------------------------------------------------------------------- 69C.焊接工艺用的典型表格-------------------------------------------------------------------------------------- 72D.讨论事宜检查表----------------------------------------------------------------------------------------------- 75E.焊接接头和焊接方法的识别-------------------------------------------------------------------------------- 761范围和总则1.1范围本标准规定了对那些由钢板、薄板或型钢(包括中空型钢和拼制型钢),或铸件和锻件组合而成的钢结构的焊接要求,焊接采用下列方法。
奥迪A5.S5
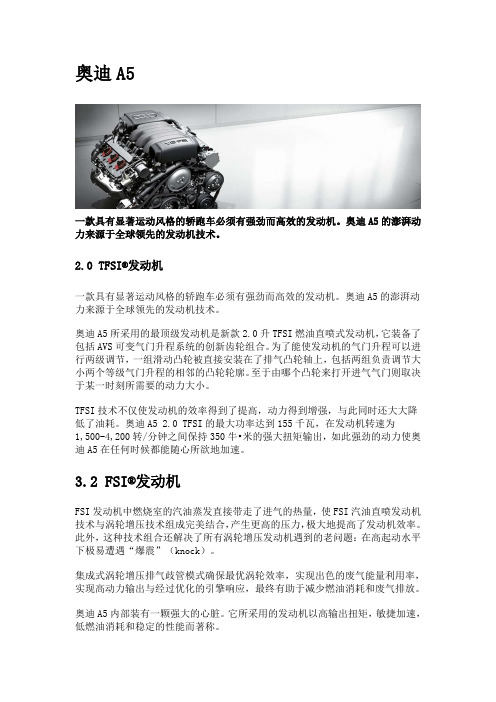
奥迪A5一款具有显著运动风格的轿跑车必须有强劲而高效的发动机。
奥迪A5的澎湃动力来源于全球领先的发动机技术。
2.0 TFSI®发动机一款具有显著运动风格的轿跑车必须有强劲而高效的发动机。
奥迪A5的澎湃动力来源于全球领先的发动机技术。
奥迪A5所采用的最顶级发动机是新款2.0升TFSI燃油直喷式发动机,它装备了包括AVS可变气门升程系统的创新齿轮组合。
为了能使发动机的气门升程可以进行两级调节,一组滑动凸轮被直接安装在了排气凸轮轴上,包括两组负责调节大小两个等级气门升程的相邻的凸轮轮廓。
至于由哪个凸轮来打开进气气门则取决于某一时刻所需要的动力大小。
TFSI技术不仅使发动机的效率得到了提高,动力得到增强,与此同时还大大降低了油耗。
奥迪A5 2.0 TFSI的最大功率达到155千瓦,在发动机转速为1,500-4,200转/分钟之间保持350牛•米的强大扭矩输出,如此强劲的动力使奥迪A5在任何时候都能随心所欲地加速。
3.2 FSI®发动机FSI发动机中燃烧室的汽油蒸发直接带走了进气的热量,使FSI汽油直喷发动机技术与涡轮增压技术组成完美结合,产生更高的压力,极大地提高了发动机效率。
此外,这种技术组合还解决了所有涡轮增压发动机遇到的老问题:在高起动水平下极易遭遇“爆震”(knock)。
集成式涡轮增压排气歧管模式确保最优涡轮效率,实现出色的废气能量利用率,实现高动力输出与经过优化的引擎响应,最终有助于减少燃油消耗和废气排放。
奥迪A5内部装有一颗强大的心脏。
它所采用的发动机以高输出扭矩,敏捷加速,低燃油消耗和稳定的性能而著称。
奥迪A5采用的3.2 FSI发动机装置也采用了这一技术。
V6发动机可输出195kW 功率和330牛米扭矩。
FSI技术的优势显而易见,燃油直接喷射技术让燃油燃烧的更快,更有效率。
而将其与奥迪降低发动机内部摩擦的奥迪两级可变正时控制系统VALVELIFE结合使用时,其效果会更为显著。
zamak5成分

zamak5成分
Zamak 5是一种锌合金,其成分主要包括:
1. 锌(Zn):约为92%左右,是主要的成分,提供了锌合金的基础性能。
2. 铝(Al):约为4%左右,用于提高合金的强度和硬度。
3. 镁(Mg):约为1%左右,有助于提高合金的强度和耐腐蚀性能。
4. 铜(Cu):约为0.1%左右,可提高合金的耐腐蚀性能。
5. 铅(Pb):约为0.1%左右,用于改善液态流动性和减少气孔。
6. 镍(Ni):约为0.02%左右,可以提高合金的耐腐蚀性能。
7. 锡(Sn):约为0.02%左右,可提高合金的液态流动性和减少气孔。
总的来说,Zamak 5是一种以锌为基础的合金,添加了铝、镁、铜、铅和少量的镍、锡等元素,以提供合金所需的特定性能。
例如,铝和镁的添加可以提高合金的强度和硬度,铜和镍的添加可以提高耐腐蚀性能。
五年级下册英语人教PEP版Unit5测试卷(含答案)
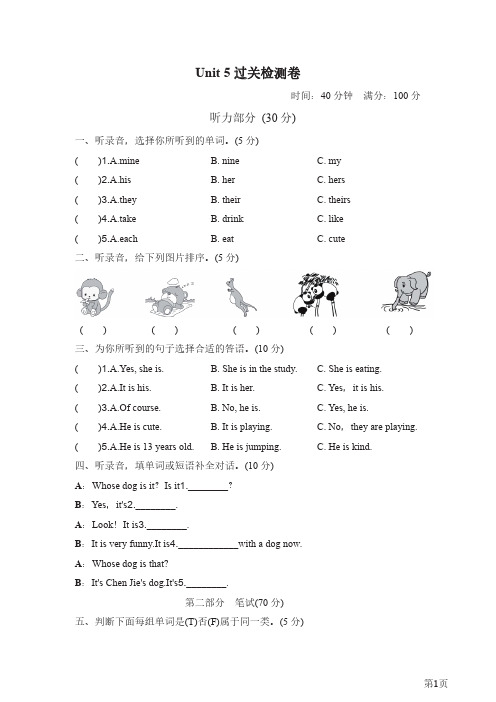
Unit5过关检测卷时间:40分钟满分:100分听力部分(30分)一、听录音,选择你所听到的单词。
(5分)()1.A.mine B.nine C.my()2.A.his B.her C.hers()3.A.they B.their C.theirs()4.A.take B.drink C.like()5.A.each B.eat C.cute二、听录音,给下列图片排序。
(5分)()()()()()三、为你所听到的句子选择合适的答语。
(10分)()1.A.Yes,she is. B.She is in the study. C.She is eating.()2.A.It is his. B.It is her. C.Yes,it is his.()3.A.Of course. B.No,he is. C.Yes,he is.()4.A.He is cute. B.It is playing. C.No,they are playing. ()5.A.He is13years old. B.He is jumping. C.He is kind.四、听录音,填单词或短语补全对话。
(10分)A:Whose dog is it?Is it1.________?B:Yes,it's2.________.A:Look!It is3.________.B:It is very funny.It is4.____________with a dog now.A:Whose dog is that?B:It's Chen Jie's dog.It's5.________.第二部分笔试(70分)五、判断下面每组单词是(T)否(F)属于同一类。
(5分)()1.A.ours B.her C.mine()2.A.theirs B.our C.your()3.A.take e C.play()4.A.drinking B.sing C.eating()5.A.which B.whose C.what六、单项选择。
ISA_S5.2中文版(很好)

A 分析5 17 报警B 烧嘴、火焰供选用1 供选用1 供选用1C 电导率控制12D 密度差4E 电压(电动势)检测元件F 流量比(分数)4G 供选用1 视镜;观察9H 手动高14 15I 电流指示10J 功率扫描K 时间、时间程序变化速率4 19 操作器20L 物位灯11 低14 15M 水分或湿度瞬动4 中、中间14N 供选用1 供选用1 供选用1 供选用1O 供选用1 节流孔P 压力、真空连接点、测试点Q 数量积算、累计4R 核辐射记录16S 速度、频率安全开关12、联锁T 温度传送U 多变量6 多功能7 多功能7 多功能7V 振动、机械监视17 阀、风门、百叶窗12W 重量、力套管X 未分类2 X轴未分类2 未分类2 未分类2Y 事件、状态18 Y轴继动器、计算器、转换器12 13Z 位置、尺寸Z轴驱动器、执行机构未分类的最终执行元件目录CONTENTS1 简介23 符号表示4 开/关逻辑输入符号5 模拟输入符号5.1 变送器5.2 温度测量6 逻辑数据处理模块6.1 ET逻辑数据模块6.2 OU逻辑数据模块6.3 XOR 逻辑数据模块6.4 延时DI6.5 延时DT6.6 PO脉冲输出6.7 寄存器6.8 计时器7 数字数据处理模块7.1 计算模块7.2 控制模块7.3 临界点模块7.4 复位模块7.5 选择模块7.6 变量速度限制模块8 显示模块8.1 变量显示模块8.2 逻辑变量显示模块8.3 报警显示模块8.4 变量记录模块9 操作人员控制模块9.1 HS控制模块9.2 HIC控制模块10 直联和/ 或互联符号11 开-关逻辑输出符号12 模拟输出符号1 简介这个符号表示方法是用来明确表示数字控制系统的所有处理过程。
为了此目的,DCS所有的处理过程被分成多个基本功能,一套DCS执行的基本操作将完成一个基本功能,再组成一个统一单元,例如:−流程参数的获取,监视和核对−在工厂的一个给定点上,流体特性的获取,监视和核对−工厂中设备的任何一种部机的停车,监视和启动顺序−设备各种部机组装的顺序处理基本回路一个识别数码被分配到每个基本功能上,第一个数字允许标识与流程的特殊部分有关的所有处理过程,作为顺序数码的后两个数字没有排除。
ISA 5.1

1 PurposeThe purpose of this standard is to establish a uniform means of designating instruments and instrumentation systems used for measurement and control. To this end, a designation system that includes symbols and an identification code is presented.2 Scope2.1 General2.1.1 The procedural needs of various users are different. The standard recognizes these needs, when they are consistent with the objectives of the standard, by providing alternative symbolism methods. A number of examples are provided for adding information or simplifying the symbolism, as desired.2.1.2 Process equipment symbols are not part of this standard, but are included only to illustrate applications of instrumentation symbols.2.2 Application to industries2.2.1 The standard is suitable for use in the chemical, petroleum, power generation, air condition-ing, metal refining, and numerous other, process industries.2.2.2 Certain fields, such as astronomy, navigation, and medicine, use very specialized instruments that are different from the conventional industrial process instruments. No specific effort was made to have the standard meet the requirements of those fields. However, it is expected that the standard will be flexible enough to meet many of the needs of special fields.2.3 Application to work activities2.3.1 The standard is suitable for use whenever any reference to an instrument or to a control system function is required for the purposes of symbolization and identification. Such references may be required for the following uses, as well as others:•Design sketches•Teaching examples•Technical papers, literature, and discussions•Instrumentation system diagrams, loop diagrams, logic diagrams•Functional descriptions•Flow diagrams: Process, Mechanical, Engineering, Systems, Piping (Process) andInstrumentation•Construction drawings•Specifications, purchase orders, manifests, and other lists•Identification (tagging) of instruments and control functions•Installation, operating and maintenance instructions, drawings, and records2.3.2 The standard is intended to provide sufficient information to enable anyone reviewing any document depicting process measurement and control (who has a reasonable amount of process knowledge) to understand the means of measurement and control of the process. The detailed knowledge of a specialist in instrumentation is not a prerequisite to this understanding.2.4 Application to classes of instrumentation and to instrument functionsThe symbolism and identification methods provided in this standard are applicable to all classes of process measurement and control instrumentation. They can be used not only to describe discrete instruments and their functions, but also to describe the analogous functions of systems which are variously termed "shared display," "shared control," "distributed control," and "computer control."2.5 Extent of functional identificationThe standard provides for the identification and symbolization of the key functions of an instrument. Additional details of the instrument are better described in a suitable specification, data sheet, or other document intended for those requiring such details.2.6 Extent of loop identificationThe standard covers the identification of an instrument and all other instruments or control functions associated with it in a loop. The user is free to apply additional identification — by serial number, unit number, area number, plant number, or by other means.3 DefinitionsFor the purpose of understanding this standard, the following definitions apply. For a more complete treatment, see ISA-51.1 and the ISA-75 series of standards. Terms italicized in a definition are also defined in this section.Accessible: A term applied to a device or function that can be used or be seen by an operator for the purpose of performing control actions, e.g., set point changes, auto-manual transfer, or on-off actions.Alarm: A device or function that signals the existence of an abnormal condition by means of an audible or visible discrete change, or both, intended to attract attention.It is not recommended that the term alarm switch or alarm be used to designate a device whose operation is simply to close or open a circuit that may or may not be used for normal or abnormal interlock, start-up, shutdown, actuation of a pilot light or an alarm device, or the like. The first device is properly designated as a level switch, a flow switch, etc., because "switching" is what the device does. The device may be designated as an alarm only if the device itself contains the alarm function. [See also Table 1, note (13).]Assignable: A term applied to a feature permitting the channeling (or directing) of a signal from one device to another without the need for switching, patching, or changes in wiring.Auto-manual station: Synonym for control station.。
SIA 的基本操作攻略
SIA 的基本操作攻略进几年,在现场的SR 作业里,总是会携带一些各人的装备,如手提电脑或者是一些处理器啦,或是一些你善用的效果器。
早期,一般条件好些的硬件系统在架设完后,都会有一些校准的动作,当然会使用到一些仪测的设备,通常有的就是Gold Line,或是audio control 这类的频谱分析仪,这些工具虽然只是简单的LED 灯光排列显示信息,不过却能给人信赖与放心。
最近看了一些朋友同行们,出门携带设备在旁的,几乎是场场必见手提电脑,也大致上看了大家在使用的平台是什幺,不管大家用什么东东出现在计算机里,最重要的是它要能工作!而且是准确的,不是打开在那儿突显自己控场子有用计算机哦!水准哦!好啦。
频谱分析工具,它们的单位离不开分贝dB、音压值SPL、等响加权,为何要介绍它呢?使用的环境国际化嘛,支持的厂商多嘛,还有它的前身就是JBL 那一套软件,然后老板们买得起。
SmaartLive 5 是一套双信道,采用FFT 数学运算转换为基础的量测软件,它可以实时分析音场频谱设备,或是声音档案的相位、时间等工具,也可遥控调整有支持软件的喇叭处理器,算是在数字软件仪表里,属于便宜又准确的东东。
批注:FFT ( Fast Fourier Transform 快速傅立叶转换or 傅氏转换),法国数学、物理学家。
1768年3月21日生于欧塞尔,1830年5月16日卒于巴黎。
9岁父母双亡,被当地教堂收养,12岁由一主教送入地方军事学校读书。
17岁(1785 ) 回乡教数学,1794到巴黎,成为高等师范学校的首批学员,次年到巴黎综合工科学校执教。
1798年随拿破仑远征埃及时任军中文书和埃及研究院秘书,1801年回国后任伊泽尔省地方长官。
1817年当选为科学院院士,1822年任该院终身秘书,又任法兰西学院终身秘书和理工科大学校务委员会主席。
主要贡献是在研究热的传播时创立了一套数学理论。
1807年向巴黎科学院呈交《热的传播》论文,推导出著名的热传导方程,并在求解该方程时发现解函数可以由三角函数构成的级数形式表示,从而提出任一函数都可以展成三角函数的无穷级数。
- 1、下载文档前请自行甄别文档内容的完整性,平台不提供额外的编辑、内容补充、找答案等附加服务。
- 2、"仅部分预览"的文档,不可在线预览部分如存在完整性等问题,可反馈申请退款(可完整预览的文档不适用该条件!)。
- 3、如文档侵犯您的权益,请联系客服反馈,我们会尽快为您处理(人工客服工作时间:9:00-18:30)。
证券代码:002643 证券简称:万润股份公告编号:2020-025
中节能万润股份有限公司
关于持股5%以上的股东减持公司股份预披露公告
特别提示:
持有中节能万润股份有限公司(以下简称“公司”、“本公司”、“万润股份”)股份7,519.775万股(占本公司总股本比例8.27%)的股东鲁银投资集团股份有限公司(以下简称“鲁银投资”)计划在本公告披露日起15个交易日后的六个月内以集中竞价方式减持本公司股份不超过1,800万股(即不超过本公司总股本比例1.98%)。
一、股东的基本情况
1、股东名称:鲁银投资集团股份有限公司。
2、持股情况:截止本公告日,鲁银投资持有公司股份7,519.775万股,占本公司总股本比例8.27%;鲁银投资的控股子公司山东鲁银科技投资有限公司持有公司股份3,536万股,占公司总股本比例3.89%。
二、本次减持计划的主要内容
1、本次拟减持的原因:鲁银投资生产经营需要。
2、拟减持股份来源:万润股份首次公开发行股票上市前的股份。
3、拟减持股份的数量和比例:鲁银投资持有的不超过1,800万股(含本数,若万润股份有送股、资本公积金转增股本等除权事项,应对该出售股份数量进行除权处理)万润股份股票,占万润股份总股本的1.98%。
4、减持期间:本公告披露日起15个交易日后的六个月内。
5、价格区间:根据二级市场价格择机出售。
6、拟减持方式:通过深圳证券交易所集中竞价交易系统。
三、承诺履行情况
鲁银投资在首次公开发行时承诺:自万润股份A股股票上市之日起十二个月内,不转让或者委托他人管理本公司或本人直接或间接持有的万润股份公开发行股票前已发行的股份,也不由万润股份回购本公司或本人直接或间接持有的万润股份公开发行股票前已发行的股份。
承诺已于2012年12月20日履行完毕,该承诺履行期间,未出现不遵守承诺的情况。
本次鲁银投资拟减持事项不存在违反鲁银投资已披露的意向、承诺的情况。
四、相关风险提示
截至本公告披露日,鲁银投资共持有本公司7,519.775万股股份,其中质押其持有的公司股份为7,200万股,占其持有公司股份总数的95.75%;鲁银投资控股子公司山东鲁银科技投资有限公司共持有本公司3,536万股股份,其中质押其持有的公司股份为3,536万股,占其持有公司股份总数100.00%,鲁银投资按照本次计划减持不超过1800万股,需要根据减持情况提前办理解除质押手续。
除上述情况外,鲁银投资所持有的本公司股份权属清晰,不涉及诉讼、仲裁事项或查封、冻结等司法措施,不存在妨碍权属转移的其他情况。
敬请广大投资者理性投资,注意投资风险。
五、其他事项
1、鲁银投资不属于公司的控股股东和实际控制人。
上述减持计划实施后不会导致公司控制权发生变更。
2、鲁银投资承诺减持所持万润股份股票时,将严格遵守中国证监会和深圳证券交易所的相关规定。
3、本次鲁银投资减持万润股份股票的计划不会对公司治理结构及持续经营产生影响,公司基本面未发生重大变化。
六、备查文件
1、股东关于减持计划的书面文件。
特此公告。
中节能万润股份有限公司
董事会
2020年05月21日。
