MiniLyrics(迷你歌词) V7.4.10 激活方法
StroboStomp Mini
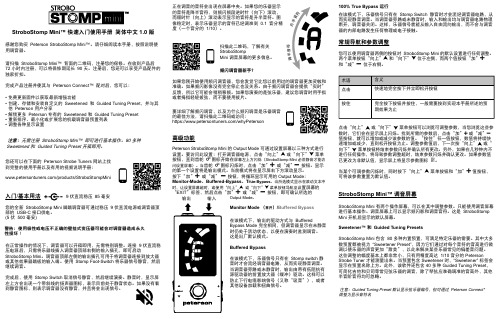
含义快速地完全按下并立即松开按钮完全按下按钮并按住,一般需要按到实现本手册所述的预期效果为止术语点击按住点击“向上”u 或“向下”d 菜单按钮可以浏览可调整参数,当您浏览这些参数时,它们会在显示屏上闪烁。
找到所需的参数后,点击“加”a 或“减”b 值按钮,就可以增加或减少该参数的值。
“按住”任一值按钮,数值将持续快速增加或减少,直到松开按钮为止。
调整参数值后,下一次按“向上”u 或“向下”d 菜单按钮将结束参数闪烁并确认所有更改。
另外,如果在几秒钟内不进行任何操作,将导致参数调整超时,结束参数闪烁并确认更改。
如果参数值已更改为非默认值,显示屏上将显示参数图标 P 。
当某个可调参数闪烁时,同时按下“向上”u 菜单按钮和“加”a 值按钮,可将该参数重置为默认值。
StroboStomp Mini™ 调音屏幕StroboStomp Mini 有两个操作屏幕,可以在其中调整参数。
只能使用调音屏幕进行基本操作。
调音屏幕上可以显示频闪影和调音音符。
这是 StroboStomp Mini 开机后显示的默认屏幕。
Sweetener™ 和 Guided Tuning PresetsStroboStomp Mini 包含 80 多种内置预置,可满足特定乐器的需要。
其中大多数预置都被视为 “Sweetener Preset”,因为它们通过对每个音符的音高进行微调以使乐器的声音更加“甜美”,以此来解决某些乐器常见的偏差音问题。
这些调整的幅度基本上都非常小,只有用精度高达 1/10 音分的 Peterson Strobe Tuner 才能测量出来。
当预置包含 Sweetener 时,“Sweetener” 标签会显示在预置名称上方。
此外,该软件还包含 40 多种 Guided Tuning Preset ,可简化吉他和贝司等常见弦乐器的调音,除了琴弦应准确调准的音高外,其他半音阶音符均可忽略。
注意:Guided Tuning Preset 默认显示弦乐器编号,但可通过 Peterson Connect* 调整为显示音符名100% True Bypass 运行在该模式下,乐器信号只有在 Stomp Switch 静音时才会流经调音器电路,从而实现静音调音。
Akai MPK Mini Play编辑器用户指南说明书
Table of ContentsUser Guide (4)Introduction (4)Support (4)Installation (4)Windows (4)macOS (4)Setup (5)Features (6)Graphical Interface (6)Operation (8)Managing Your Favorites (8)Saving Favorites (8)Loading Favorites (8)Sending Favorites (9)Editing a Pad’s MIDI Note (10)Editing a Knob (10)Editing the X-Y Controller (Joystick) (11)2Editing the Keyboard and Arpeggiator (12)Keyboard (12)Arpeggiator (13)Editing the Sound (14)Appendix (15)Trademarks and Licenses (15)3The MPK Mini Play Editor software gives you intuitive ways to edit the many functions that your MPK Mini Play can perform.SupportFor the latest information about this product (system requirements, compatibility information, etc.) and product registration, visit .For additional product support, visit /support.Windows1.Double-click the .exe installer file you downloaded.2.Follow the on-screen instructions.macOS1.Double-click the .dmg installer file you downloaded.2.Follow the on-screen instructions.45To use the MPK Mini Play Editor: 1.Optional: Connect M PK M ini Play to your computer using a standard USB cable. (If you are connecting MPK Mini Play to a USB hub, make sure it is a powered hub). You can still use the Editor and create favorites without connecting an MPK M ini Play, but you will not be able to send/load favorites to/from it.2.Open the M PK M ini Play Editor on your computer. The window will show a visual representation of all your M PK M ini Play’s editable controls. See Features > Graphical Interfacefor an overview of each section.6Graphical InterfaceThe MPK Mini Play Editor has a straightforward user interface that can be broken down into seven sections for editing:1.Joystick: These settings control the parameters affected when moving the X-Y Controller alongits X axis (left/right) or Y axis (up/down). See Operation > Editing the X-Y Controller (Joystick) to learn more.2.Sound: These two fields determine the overall sound of the keyboard as well as the pads. SeeOperation > Editing the Sound to learn more.3.Pads: This section enables you to edit note assignments for the pads. 16 pads are pictured inthe Editor: 8 of them correspond to the pads on the MPK Mini Play when Bank A is active, and the other 8 correspond to the pads on the M PK M ini Play when Bank B is active. See Operation > Editing a Pad’s MIDI Note to learn more.4.Knobs: This section enables you to edit the function of the knobs. 8 knobs are pictured in theEditor: 4 of them correspond to the knobs on the MPK Mini Play when Bank A is active, and the other 4 correspond to the knobs on the MPK Mini Play when Bank B is active. See Operation > Editing a Knob to learn more.5.Favorites: These controls let you import a favorite from your computer or from your connectedMPK Mini Play. They also allow you to save the current settings as a favorite and export them to your computer or to your connected M PK M ini Play. See Operation > Managing Your Favorites to learn more.6.Channels: These two fields determine the channels through which the pads, knobs, X-YController, and keyboard send MIDI data. Specific instructions are provided in the chapters for each control: Operation > Editing a Pad’s MIDI Note, Editing a Knob, Editing the X-Y Controller (Joystick), Editing the Keyboard and Apeggiator > Keyboard.7.Keyboard and Arpeggiator: This is a visual representation of the 25-key keyboard as well asthe settings that control the timing, range, and general behavior of the arpeggiator. See Operation > Editing the Keyboard and Arpeggiator to learn more.78Managing Your FavoritesWith the Favorites feature, you can save all your current settings in the Editor to a single .mpkplay file that can be loaded onto your MPK Mini Play. MPK Mini Play holds a maximum of eight favorites, but you can store more favorites on your computer to load onto MPK Mini Play later with the Editor. This way, you can have countless different control configurations for different situations. For instance, you may use different favorites with different software. Or you may use some favorites for production and others for performance.Saving FavoritesAfter saving a favorite on your computer, you can send it to MPK Mini Play or edit it again later. All settings that you see in the Editor software will be saved in the favorite.To save a favorite: Go to File > Save Favorite . Alternatively, you can type Ctrl + S (Windows) or + S (Mac). Then select the destination folder on your computer, enter a file name, and click Save . The favorite will be saved as an .mpkplay file.Loading FavoritesTo load a favorite from a connected MPK Mini Play: Click the R (receive) icon corresponding to the number of the desired favorite on your MPK Mini Play (1-8). Note : Using the software to edit a favorite loaded from your MPK Mini Play will not automatically affect this favorite on your keyboard; you will have to send the edited favorite to the keyboard after modifying it. See Sending Favorites below to learn more.To load a favorite from your computer, go to File > Open Favorite.Alternatively, you can type Ctrl + O (Windows) or + O (Mac). Then locate the desired .mpkplay file and click Open .Sending FavoritesWhen you send from the Editor to a connected MPK Mini Play, all settings that you see in the Editor will be stored as a favorite on the MPK Mini Play’s internal memory. When playing your keyboard, the favorite will be available for you to activate whenever you like.corresponding to the number of the favorite you want to replace on your M PKMini Play (1-8). Doing so will overwrite the favorite currently stored in this numberslot on the MPK Mini Play.You can also send a favorite to M PK M ini Play's RAM, where it will be kepttemporarily and will not overrite any favorite stored on the device. This applies thesettings to the MPK Mini Play and lets you try them out without fully committingto them. If you then decide that you like the settings, you can save the favorite toyour computer (see Saving Favorites above) or overwrite one of the currentlystored favorites on your MPK Mini Play.To send a Program to the RAM of a connected MPK Mini Play, click the SEND TO RAM icon or go to File > Send Favorite > Ram.Note: To avoid losing the settings kept in the RAM, you will need to save them before modifyingthem with the Editor or exiting the Editor.910Editing a Pad’s MIDI NoteYou can set the MIDI note for any of the pads in Bank A or Bank B. You can also set the channel through which all the pads send their MIDI notes.To select a pad’s MIDI note: Click the Note field within the pad and then type the desired M IDI note number (0 – 127). The M IDI note value will change accordingly. The current MIDI note value (C-1 – G9) will be displayed on the pad.To select the MIDI channel for all the pads: Click the Pad MIDI Channel field at the bottom of the window. In the pop-up menu that appears, select the desired MIDI channel number (1 – 16).Editing a KnobYou can edit settings for each of the eight knobs, including CC message, minimum value, maximum value, and FX level. You can also set the channel through which all the knobs send MIDI data.To select the CC message a knob sends: Click the CC field under a knob and then type the desired CC number (0 – 127).To select a knob's minimum and maximum values: Click the Lo field (minimum) or Hi field (maximum) under a knob and then type the desired value (0 – 127).To assign the FX level : Click the effect name field and then type the desired value (0 – 127). Each knob in each bank has its own designated effect.To select the MIDI channel for all the knobs, open the Keybed / Controls MIDI Channel pop-up menu at the bottom of the window. Then select the desired MIDI channel number (1 – 16). This will affect the X-Y Controller and keyboard as well as the knobs.11Editing the X-Y Controller (Joystick)You can designate the function for each axis of the X-Y Controller (joystick), allowing you to use it to manipulate up to two different parameters simultaneously.To designate the function of the axis, click the X Axis or Y Axis field under the X-Y Controller and then select the desired function from the pop-up menu: • Pitchbend: M oving the X-Y controller along the axis will bend thekeyboard pitch.• Single CC: M oving the X-Y controller along this axis will send a CCmessage.• Dual CC: M oving the X-Y controller along this axis will send one CCmessage in the positive direction (up or right) and another CC message in the negative direction (down or left).To select the CC message the X-Y Controller sends (when set to Single CC or Dual CC), click the CC field(s) and then type the desired value (0 – 127).To select the MIDI channel for the X-Y Controller, open the K eybed / Controls MIDI Channel pop-up menu at the bottom of the window. Then select the desired MIDI channel number (1 – 16). This will affectthe knobs and keyboard as well as the X-Y Controller.Editing the Keyboard and ArpeggiatorKeyboardThe Editor allows you to set the keyboard's octave and transposition.To transpose the keyboard, click the Transpose field under the keyboard. When the pop-up menu appears, select the desired value (-12 to 12 semitones). A transposition of 0 means the keyboard is not transposed. For reference, the leftmost key will display its note value to indicate the current transposition.To change the keyboard's octave, click the Octave field under the keyboard. When the pop-up menu appears, select the desired value (-4 to 4 octaves). An octave of 0 means the keyboard is at its center/default octave.To select the MIDI channel for the Keyboard: open Array the Keybed / Controls MIDI Channel pop-up menuat the bottom of the window. Then select the desiredM IDI channel number (1 – 16). This will affect theknobs and X-Y Controller as well as the keyboard.12ArpeggiatorYou can edit various parameters for the arpeggiator.To activate or deactivate the arpeggiator: Click the On/Off icon. The icon’s outline will be red if the arpeggiator is on and gray if the arpeggiator is off.To set the arpeggiator's time division: Click the Time Div field. When the pop-up menu appears, select the desired setting (1/4 – 1/32T).To set the arpeggiator's mode: Click the Mode field. When the pop-up menu appears, select the desired setting from the pop-up menu.The mode determines how the arpeggiated notes are played back:•Up: Notes will sound from lowest to highest.•Down: Notes will sound from highest to lowest.•Exclusive: Notes will sound from lowest to highest and then back down. The lowest and highest notes will sound only once at the directional change.•Inclusive: Notes will sound from lowest to highest and then back down. The lowest and highest notes will sound twice at the directional change.•Order: Notes will sound in the order they were pressed.•Random: Notes will sound in random order.1314To activate or deactivate the Latch: Click the Latch field and then select Off or On from the pop-up menu. • Off: When the Latch is Off and you press keys, the Arpeggiator will cease after you release your fingers from the keyboard.•On: When the Latch is On and you press keys, the Arpeggiator will continue even after you release your fingers from the keyboard. While holding down the keys, you can add more notes to the arpeggio by pressing down additional keys. If you press the keys, release them, and then press a new combination of keys, the Arpeggiator will arpeggiate the new notes.To set the arpeggiator's octave range: Click the Octave field and select the desired value from the pop-up menu: 0, 1, 2, or 3 octaves.To set the arpeggiator's swing, click the Swing field and select the desired setting from the pop-up menu: 50% (no swing), 55%, 57%, 59%, 61%, or 64%.To set the minimum number of taps required for MPK Mini Play’s Tap Tempo button to detect a new arpeggiator tempo: Click the Tempo Taps field and select the desired number from the pop-up menu: 2, 3, or 4 taps.Note: M PK M ini Play's Tap Tempo button is disabled if the Arpeggiator is synced to an external clock.Editing the SoundThe Editor allows you to select the default keyboard sound and pad sound for a favorite.To select the keyboard sound : Click the Keyboard Sound field at the top of the window. When the pop-up menu appears, select one of the 130 available sounds.To select the pad sound : Click the Pad Sound field at the top of the window. When the pop-up menu appears, select one of the 10 available sounds.Akai Professional is a trademark of inMusic Brands, Inc., registered in the U.S. and other countries. macOS is a trademark of Apple Inc., registered in the U.S. and other countries.Windows is a registered trademark of M icrosoft Corporation in the United States and other countries.All other product or company names are trademarks or registered trademarks of their respective owners.15。
迷你KMS mini-KMS_Activator_v1.3_Office2010_VL_ENG使用
“迷你KMS”——“”体态轻盈仅只1MB。
但却一身承担两大职能:KMS服务器和客户激活端。
“迷你KMS”可激活Microsoft Office 2010系列三大版本,以及Windows 7企业、专业版;Windows Vista企业、商务版;Windows Server 2008和Windows Server 2008 R2有关版本。
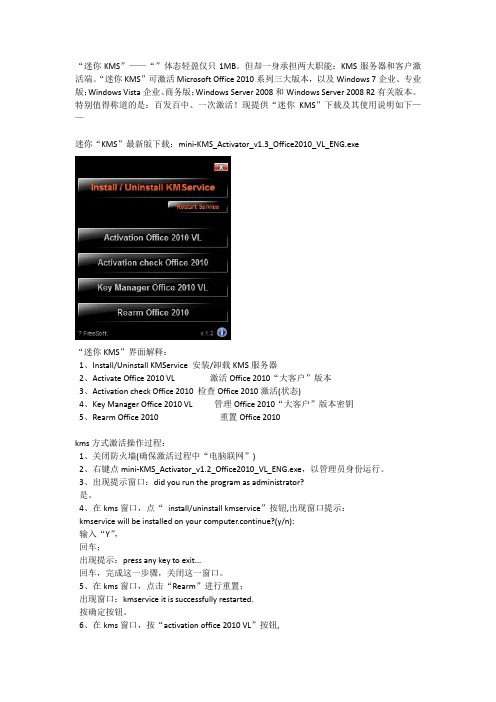
特别值得称道的是:百发百中、一次激活!现提供“迷你KMS”下载及其使用说明如下——迷你“KMS”最新版下载:mini-KMS_Activator_v1.3_Office2010_VL_ENG.exe“迷你KMS”界面解释:1、Install/Uninstall KMService 安装/卸载KMS服务器2、Activate Office 2010 VL 激活Office 2010“大客户”版本3、Activation check Office 2010 检查Office 2010激活(状态)4、Key Manager Office 2010 VL 管理Office 2010“大客户”版本密钥5、Rearm Office 2010 重置Office 2010kms方式激活操作过程:1、关闭防火墙(确保激活过程中“电脑联网”)2、右键点mini-KMS_Activator_v1.2_Office2010_VL_ENG.exe,以管理员身份运行。
3、出现提示窗口:did you run the program as administrator?是。
4、在kms窗口,点“install/uninstall kmservice”按钮,出现窗口提示:kmservice will be installed on your computer.continue?(y/n):输入“Y”,回车;出现提示:press any key to exit...回车,完成这一步骤,关闭这一窗口。
5、在kms窗口,点击“Rearm”进行重置;出现窗口:kmservice it is successfully restarted.按确定按钮。
小灰熊字幕软件的使用方法
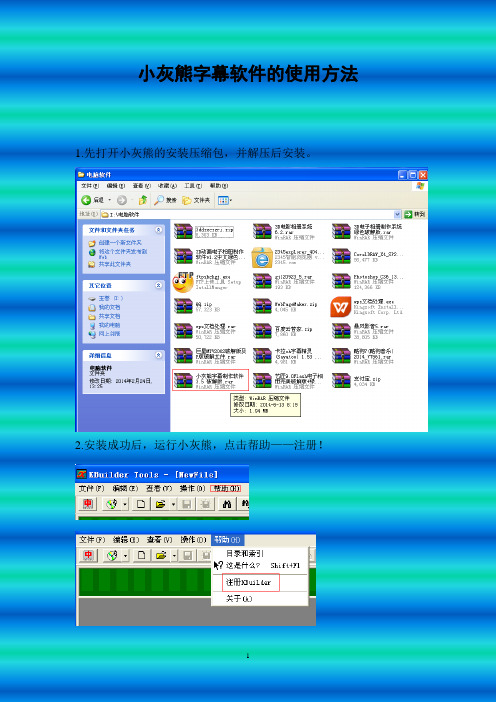
小灰熊字幕软件的使用方法1.先打开小灰熊的安装压缩包,并解压后安装。
2.安装成功后,运行小灰熊,点击帮助——注册!3.点击后,打开注册文件,接着再打开解压后得到的注册说明文本,复制注册码,粘贴到小灰熊注册文件中。
4.注册成功后,剩下的我们就要开始制作歌词了。
我们先导入一首你想要制作歌词的歌曲,点击文件菜单下的打开多媒体文件。
你也可以点击菜单栏下的第二个按钮,进行歌曲导入。
6.选择一首你想要制作歌词的歌曲,我在这里选择的是《两个傻瓜》。
如果你导入歌曲后,想要验证一下到底是不是你想要的歌曲,你可以点击查看菜单下的多媒体播放器,点击播放按钮进行试听。
7.歌曲成功导入后,我们就该导入歌词了(TXT或KRC),当然你也可以手动输入(就跟打字一样)。
点击菜单栏下的打开按钮或点击菜单栏下第四个按钮。
我在这里用《两个傻瓜》进行演示:打开歌词成功后,我们将看到,歌词会在小灰熊界面显示,而此时的操作界面为灰色,这说明当前为歌词制作模式(不可以修改字符)。
然而如果发现有错的字符,或有缺漏,我们该如何修改呢?难不成在记事本里改好了再导入进来吗?这倒也是个办法,但我们现在讲的是小灰熊的使用,那我们就得知道如何用小灰熊来改。
我们只需点击小灰熊菜单栏下倒数第五个按钮,将歌词制作模式改为歌词字符修改模式即可;点击后我们也可以明显看出界面变为了白色,这就说明可以对歌词进行修改了。
(注:歌词界面上方的字母请改动,并且与正文至少保持两排空格)8.接下来就开始制作KTV歌词了;点击查看菜单下的多媒体播放器,点击播放按钮。
用鼠标左键点击歌词录入界面(唱一个字,点击鼠标一下),或者点击键盘上的空格键(唱一个字按一下空格)。
这时我们会看到界面上的歌词会多出一些程序码,这个我们不必太在意。
9.制作完成后,我们往往都需要看看制作效果。
我们可以点击操作菜单下的卡拉ok预览,或直接点击菜单栏下倒数第三个按钮。
这时我们便可以看到自己做的KTv歌词了:10.做好后,我可以对其参数再进行设置,打开文件菜单下的选项设置,打开后对其参数进行设置即可。
歌词用英文怎么说
歌词用英文怎么说歌词是诗歌的一种,入乐的叫歌,不入乐的叫诗(或词)。
入乐的歌在感情抒发、形象塑造上和诗没有任何区别,但在结构上、节奏上要受音乐的制约,在韵律上要照顾演唱的方便,在遣词炼字上要考虑听觉艺术的特点,因为它要入乐歌唱。
那么你知道歌词用英语怎么说吗?下面来学习一下吧。
歌词的英语说法1:lyric歌词的英语说法2:words of a song歌词的相关短语:迷你歌词 MiniLyrics歌词窗口 Lyrics View音乐歌词 MapleTunes流行歌词 Popular lyrics ; Pop Phrases歌词传奇 Lyric Legend歌词的英语例句:1. His lyrics are highly literate. He even quotes Voltaire.他的歌词体现了高度的文化修养。
他甚至还引用了伏尔泰。
2. His face contorts as he screams out the lyrics.当他吼出这些歌词的时候,脸都扭曲了。
3. Lyrics are written almost conversationally, yet sung with passion.歌词写得几乎就像对话一样,但是唱得很有激情。
4. Gershwin's lyrics would today probably be deemed politically incorrect.格什温的歌词在今天很可能被视为政治上不正确。
5. It's widely assumed that his lyrics were coded references to homosexuality.大家普遍认为他的歌词是在影射同性恋。
6. The texts were sung in the original Italian.这些歌词是用原来的意大利语演唱的。
7. The lyrics of the song are embarrassingly banal. 那首歌的歌词非常老套,令人难堪。
MV7_guide_zh-CN说明书

MV7播客话筒The Shure MV7 USB cardioid microphone online user guide. Includes specifications and how to set up, update, and troubleshoot the mic. Version: 3.0 (2023-A)Table of ContentsMV7 播客话筒3简要说明3产品特点 3连接 MV7 3快速设置 4触控面板界面4控制部件 5 LED 指示灯运行状态 5 MV7 话筒5 MV7 输出 5安装说明5防风罩 6自动电平模式6近 7远 7其他技巧 7 Shure MOTIV 桌面应用程序7话筒设置:自动电平 8话筒设置:手动模式 9监听混音合成 9 EQ 模式 10高级话筒设置 10关于 MV7 的提示10 Control your Levels 11使用锁定模式锁定您的声音11监听声音11 MV7 播客话筒的三种使用方式11录音时如何避免爆破声11使用 MV7 进行视频通话11如何在 iOS DAW 中将 MV7 设置为聚合设备11故障排除 11 Firmware Update12在更新过程中保持设备连接 12系统要求12系统要求和兼容性:Mac 12系统要求和兼容性:Windows 12系统要求和兼容性:iOS 12系统要求和兼容性:Android 13规格13 MV7 轭架组装 15附件16提供的附件 16可替换配件 17可选配附件 17认证17用户信息 17••••••1.2.3.MV7 播客话筒简要说明Shure MV7 是一款具有专业品质的 USB 动圈话筒,非常适合要求声音清晰且音色均衡的近距离话筒应用场景。
美观耐用的全金属设计,具有可调节的轭架,可安装在各种话筒支架上,从而实现灵活放置。
触控面板用户界面可控制话筒增益、耳机电平、监听混音合成和静音。
产品特点便捷的即插即用操作兼容 Windows 和 Mac 计算机。
MIDIPLUS Xmini 迷你键MIDI键盘中文说明书
3
N.B. See the Appendix 2 for CTRL CC functions When CTRL CHL is set to 0, the controller is set to be full channel. The controller channel will follow the keyboard channel.
6. Avoid keeping the unit powered on for a long time. 7. Children should not use the unit without adult’s guidance. 8. Avoid using the unit close to radio sets, speakers, TV sets and other EMI sensitive devices. 9. To clean the unit, use a lightly soaked cloth and keep the unit unplugged. Never use
cd密钥的激活方法
cd密钥的激活方法
1. 在线激活:许多软件或游戏提供在线激活选项,你可以在安装过程中或软件/游戏启动时输入 CD 密钥,然后通过互联网与服务器进行验证和激活。
2. 手动输入:在某些情况下,你需要手动输入 CD 密钥来激活软件或游戏。
通常,在软件/游戏的安装过程中或启动时会提示你输入密钥。
3. 电子邮件:有些软件或游戏会将 CD 密钥通过电子邮件发送给你。
你需要查找购买软件或游戏时收到的电子邮件,其中可能包含密钥信息。
4. 包装盒或手册:CD 密钥也可能印在软件或游戏的包装盒上或随附的手册中。
你可以查找包装盒或手册上的密钥信息。
无论使用哪种激活方法,请确保你输入的 CD 密钥是正确的,并且与你购买的软件或游戏相匹配。
如果你遇到任何问题或困难,可以参考软件或游戏的官方支持文档或联系相关的客户支持部门。
请注意,CD 密钥的激活方法可能因软件或游戏的不同而有所差异。
如果你提供具体的软件或游戏名称,我可以为你提供更具体的激活方法。
Anchor Audio A-Mini MiniV Lite 声音系统用户手册说明书

1. Position the AN-Mini with the front/speaker facing toward your audience
one of the MIC jacks (1/4” MIC jack or 3.5 mm PWR MIC mini jack)
100-0174-000/A - 02/11
1
For System Setup & Operation Videos Visit Our Website:
AN-Mini/MiniVox Lite Owners Manual
MADE IN USA
BASIC SYSTEM OPERATION
Janet Jacobs, President on behalf of all Anchor employees
CONTENTS
MiniVox Lite
(contains AN-Mini speaker monitor, wired microphone, and SOFT-30 soft case)
AN-Mini/MiniVox Lite Owners Manual
MADE IN USA
AN-Mini
A Message from the President
SIX YEAR WARRANTY
Congratulations on purchasing an Anchor Audio sound system, the choice of thousands of satisfied customers including the White House, prestigious universities, school districts nationwide, police and fire departments, and all branches of the U.S. military. Our products are made of the finest materials and built with pride in the U.S.
2005版瑞星杀毒软件序列号
>: 虛擬還原3.03個人版 S/N:N6X480850010019
>: 木马克星: Name:icech Serial:289808514 name: serial:1286585824
>: 解霸3000英雄版: Name:crsky
Code:3319-13ns-173t-x5u1江民2004:SN:KV000-14548-BWFMB-G6ZHY-2FC4H 超级兔子魔法设置625
用户名:HLMSP5842 序列号:MSCNC-DDJOG-OGQXF-BQSTE-LUVJC用户名:HLMSP5842
Tweak-XP Pro v4.0注册版 Name: Ann Heywood ID: E100104475048Turbo Searcher v2.40
Name:tjvnet Code:0454F56980223902绿鹰PC万能精灵 3.0 用户名:eghostuser00002050
Folder Protector v1.83 Name:wswdddy Code:9373760936742700Dr.eye 译典通 2003
RRRZZ-OKPUR-QDROR RRSGA-CGTVW-SCROR全能格式转换大师!First name :Thomas H. Last name
注册码Name: Serial: 4632B9AA00QGMP1FXP变脸王:XSHLS5903405 注册码(密码):
C4E85-190D2-A66D7-5D9EC-0D69A6.0版:序列号XSHLS5801205
各种解码器和输出使用说明参考-打造自己的顶级播放音质资料
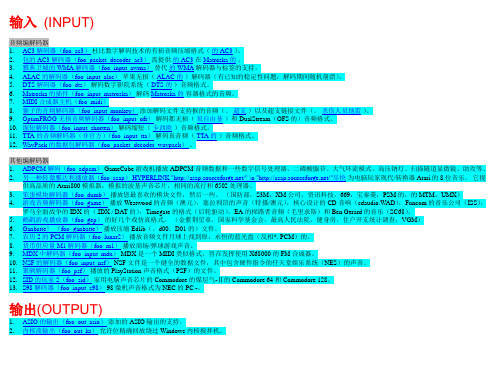
输入(INPUT)输出(OUTPUT)列的UI作为一项临时措施,这种全面的组件清单已采取从Foobar的维基页面牌照根据GNU免费文件。
列界面(foo_ui_columns)很受欢迎foobar2000记录备用接口布局的基础上柱和面板。
列有它自己的UI插件系统,这些插件扩展用户界面:1. 专辑封面面板(foo_uie_albumart)面板显示专辑封面。
2. 专辑封面面板的Matroska(foo_uie_albumart_mka) Albumart国防部阅读Matroska的封面。
3. 相册列表面板(foo_uie_albumlist)一个TreeView显示数据库中使用可自定义排序方式(按流派,艺术家,目录等)4. 书签(foo_uie_bookmarks)帮你记住歌曲的位置英寸5. 控制台(foo_uie_console)面板控制台版本。
显示诊断消息。
0.1.3用户界面需要列Beta 1或更新版本。
6. 可停靠的面板(foo_dockable_panels),它允许你创建窗口,每个窗口或其他主机的用户界面主要foobar2000记录列小组为浮动的窗口,可以附着在侧。
7. Explorer面板(foo_uie_explorer)显示所选文件夹树视图磁盘/。
8. 歌词面板(foo_uie_lyrics_panel)显示歌词存储在文件标签。
9. 音乐浏览器(foo_browser)面板浏览图书馆,类似于iTunes。
10. 播放列表下拉(foo_uie_playlists_dropdown)显示在一个下拉菜单列表。
11. 播放列表树(foo_playlist_tree)树的媒体库中有许多可供自定义。
12. ProjectM可视化委员会(foo_uie_vis_projectM)的基础上ProjectM项目,这是一个重新实现的Milkdrop下的OpenGL。
13. 队列管理器(foo_uie_queuemanager),它提供了一个窗口,显示队列的内容,并允许你删除其中某些部分或清除整个队列。
SongGenie音乐软件使用说明书
SongGenie Fills in Missing ITunes Info
Scott McNulty , Jan 10, 2009 12:40 am
RSS
Digg
1 Comment
Office 2007 Demo
A Guide to Business IT
Recommend this story?
0Yes 0No
RSS
Digg
Comment
/article/156844/songgenie_fills_in_missing_itunes_info.html
Page 1 sur 3
SongGenie Fills in Missing ITunes Info - PC World
SongGenie costs US$29.95 and requires Leopard (OS X 10.5).
Personal Productivity
Want to make the most of your limited time? Click here for more info...
lordmorgul says: Sat Jan 10 02:07:55 PST 2009
Re: SongGenie Fills in Missing ITunes Info
This sounds pretty cool, and having just manually gone through my library adding information for hours... and not finishing... its tempting. However, that pricetag is just simply too high for this product to really do well. Yes, it would save me some time, but its time I should only spend once and I'll probably be listening to music while I do it (and otherwise most likely browsing random stories such as this).
FLkey用户指南说明书
请阅读:感谢您下载此 F Lkey 用户指南。
我们使用机器翻译来确保您尽快获得使用您的语言的用户指南,对于任何错误,我们深表歉意。
我们的语言学家提供的翻译即将推出。
如果您希望查看本用户指南的英文版本,可以在我们的下载页面上找到:内容介绍 ................................................. ..................................................... (4)主要特征................................................ ..................................................... .. (5)包装盒内容 .................................................. ..................................................... . (5)入门................................................ ..................................................... ......................6将 F Lkey 与电脑连接...................... ..................................................... ......................6 轻松启动...................................... ..................................................... ..................................................... ......................6 更新您的 FLkey ...................... ..................................................... . (7)支持 ................................................. ..................................................... (7)硬件概述.................................................................. ..................................................... (8)使用 F L S tudio................................................................. ..................................................... . (10)安装 ................................................. ..................................................... . (10)手动安装 ................................................... ..................................................... (10)运输控制.................................................. ..................................................... . (11)预设导航 .................................................... ..................................................... . (12)外部连接.................................................................. ..................................................... . (12)带有外部 M IDI 乐器的 M IDI 输出 ................................................... (12)延音输入.................................................................. ..................................................... (12)打击垫模式.................................................. ..................................................... .. (13)通道架.................................................................. ..................................................... (14)仪表板模式 .................................................... ..................................................... . (15)FPC.................................................. ..................................................... (16)切片 .................................................. ..................................................... .. (16)水果切片机.................................................. ..................................................... ................................16 默认仪器.......................... ..................................................... ..................................................... (16)音序器 .................................................. ..................................................... . (17)通道机架图编辑器................................................................ ..................................................... . (18)自定义打击垫模式 .................................................... ..................................................... . (18)锅模式.................................................. ..................................................... .. (19)插入................................................. ..................................................... .. (20)混音器音量.................................................. ..................................................... . (20)搅拌盘.................................................. ..................................................... .. (21)银行业务.................................................. ..................................................... .. (21)风俗................................................. ..................................................... (22)查看通道机架选择 ................................................... (23)循环记录(第一次启动时).......................... ..................................................... . (23)聚焦 F L S tudio 的 W indows .................................................... (24)注意重复.......................... ..................................................... ................................25使用音符重复.......................... ..................................................... ................................................25 更改比率 ................................................ ..................................................... ................................25 设置速度.......................... ..................................................... ..................................................... ....26 更改音符/鼓点的力度 ................................... (26)独立功能 ................................................... ..................................................... . (27)转置.................................................. ..................................................... (27)八度按钮 ................................... ..................................................... .. (28)缩放模式.................................................. ..................................................... . (29)换档按钮.................................................. ..................................................... .. (31)锁存页 ................................................... ..................................................... (32)控制页面 .................................................... ..................................................... (32)移调控制 .................................................... ..................................................... (32)换档控制 ................................... ..................................................... (32)自定义模式和组件.................................................................. (33)自定义模式.................................................. ..................................................... .. (33)锅⋯⋯⋯⋯⋯⋯⋯⋯⋯⋯⋯⋯⋯⋯⋯⋯⋯⋯⋯⋯⋯⋯⋯⋯⋯⋯⋯⋯⋯⋯⋯⋯⋯⋯⋯⋯⋯⋯⋯⋯⋯⋯⋯⋯⋯⋯⋯⋯ ..................................................... (33)垫.................................................. ..................................................... (33)设置 .................................... ..................................................... (34)打击垫速度 .................................................. ..................................................... ................................................34 M IDI 时钟输出.......................... ..................................................... ..................................................... ..§34 维加斯模式 .................................................. ..................................................... (34)轻松启动.................................................. ..................................................... .. (35)重量和尺寸 .................................................... ..................................................... . (35)故障排除................................................. ..................................................... . (35)介绍FLkey 是 N ovation 的 M IDI 键盘系列,用于在 F L S tudio 中制作音乐。
instaxminiLiPlay使用说明书(完整版)

BODM1P303-101使用说明书(完整版)数模一次成像相机(具有打印功能)INSTAX MINI HM1使用之前 (3)相机废弃处理的注意事项 (3)关于本相机 (3)功能特点 (3)可与智能手机专属的应用程序 instax mini LiPlay 配合使用的功能 (3)部件名称 (4)LCD 显示器 (5)使用十字按键引导 (6)安装相机绳 (6)为电池充电 (7)充电状态指示 (7)开启/关闭电源 (7)确认电池电量 (7)初始设定 (8)安装/取出一次成像相纸 instax mini 的相纸盒 (9)安装一次成像相纸 instax mini 的相纸盒 (9)取出用完的一次成像相纸 instax mini 的相纸盒 (10)基本拍摄和回放 (10)拍摄 (10)回放拍摄的图像 (11)更改回放画面的显示 (11)打印 (12)相纸剩余张数显示 (12)选择模板和滤镜 (13)选择模板 (13)选择滤镜 (13)在图像中添加声音 (14)拍摄照片添加声音 (14)回放照片添加声音........................................................14各种拍摄方式 . (15)使用自拍定时器拍摄 (15)使用闪光灯拍摄 (15)自拍 (15)使用 AF/AE 锁定拍摄 (16)从打印历史记录打印 (16)使用存储卡 (17)插入存储卡 (17)使用拍摄菜单 (18)使用回放菜单 (18)使用设定菜单 (19)可与智能手机专属的应用程序 instax mini LiPlay 配合使用的功能 (20)声音功能 (20)遥控拍摄功能 (20)快捷功能 (20)直接打印功能 (20)规格 (20)常见问题 (21)安全使用须知 (22)相机维护和使用注意事项 (22)蓝牙™ 设备的注意事项 (23)2使用相机之前,请检查以下内容。
请注意,USB 电源适配器不包含在内,但是通常随智能手机提供。
AKAI MPK mini 用户指南说明书
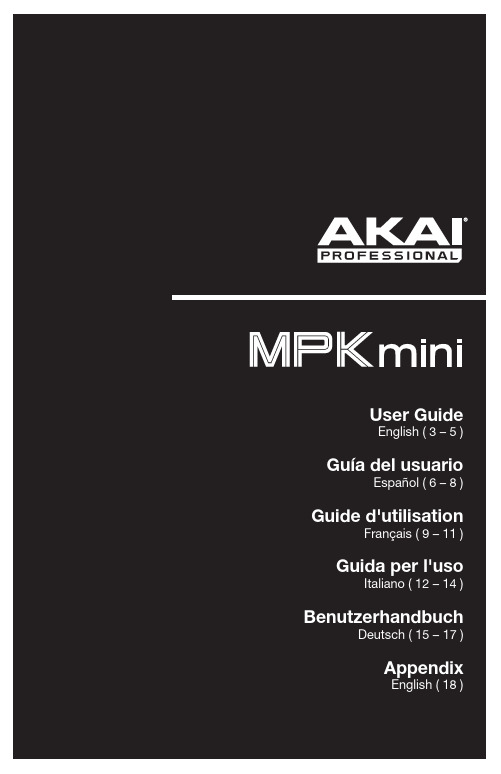
Box ContentsMPK miniUSB CableMPK mini Editor (download)Software Download CardUser GuideSafety & Warranty ManualSupportFor the latest information about this product (system requirements, compatibility information, etc.) and product registration, visit /mpkmini.For additional product support, visit /support.Device Setup in SoftwareTo select MPK mini as a controller for your digital audio workstation (DAW):1.Connect MPK mini to your computer using a standard USB cable. (If you are connectingMPK mini to a USB hub, make sure it is a powered hub.)2.Open your DAW.3.Open your DAW's Preferences, Options, or Device Setup, select MPK mini as yourhardware controller, and then close that window.Your MPK mini is now able to communicate with your software.MPK mini Editor InstallationWe recommend visiting /mpkmini and downloading the MPK mini Editor, which gives you a visual and intuitive way to edit the various MIDI messages that MPK mini's controls (pads, knobs, and X-Y controller) send to your computer.Learn more about the MPK mini Editor in the User Guide included with the download package.3Top PanelB Port: Use a standard USB cable to connect this USB port to a USB port on yourcomputer. The computer's USB port will provide power to MPK mini. This connection is also used to send and receive MIDI data to and from your computer.2.Sustain Pedal Input: Connect an optional 1/4" TS sustain pedal to this input.3.Keyboard: This 25-note keyboard is velocity-sensitive and, in conjunction with theOctave Down / Up buttons, can control a ten-octave range. You can use the keys to access certain additional commands, as well.4.Octave Down / Up: Use these buttons to shift the keyboard's range up or down (up tofour octaves in either direction). When you are higher or lower than the center octave, the corresponding Octave button will light. Press both Octave buttons simultaneously to reset the keyboard to the default center octave.5.Arpeggiator On/Off: Press this button to turn the Arpeggiator on or off. Pressing itduring a latched arpeggio will stop the arpeggio.Hold down Arpeggiator On/Off and press a key on MPK mini's keyboard to enter new settings for the Arpeggiator:•Time Division:1/4 note, 1/4 note triplet (1/4T), 1/8 note, 1/8 note triplet (1/8T), 1/16 note, 1/16 note triplet (1/16T), 1/32 note, or 1/32 note triplet (1/32T).•Mode: The mode determines how the arpeggiated notes are played back.o Up: Notes will sound from the lowest to the highest.o Down: Notes will sound from the highest to lowest.o Incl (Inclusive): Notes will sound from the lowest to the highest, and then back down. The lowest and highest notes will sound twice at the directional change.o Excl (Exclusive): Notes will sound from the lowest to the highest, and then back down. The lowest and highest notes will sound only once at the directionalchange.o Order: Notes will sound in the order they were pressed.4o Rand (Random): Notes will sound in random order.o Latch: The Arpeggiator will continue to arpeggiate the notes even after you lift your fingers. While holding down the keys, you can add more notes to thearpeggiated chord by pressing down additional keys. If you press the keys,release them, and then press down a new combination of notes, theArpeggiator will memorize and arpeggiate the new notes.•Octave: Arpeggio octave range (Arp Oct) of 0, 1, 2, or 3 octaves.•Swing:50% (no swing), 55%, 57%, 59%, 61%, or 64%.6.Tap Tempo: Tap this button at the desired rate to determine the tempo of theArpeggiator. The minimum number of taps required is programmable in the MPK mini Editor.Note: This button is disabled if the Arpeggiator is synced to an external clock.7.X-Y Controller: Use this 4-axis thumbstick to send MIDI pitch bend messages or sendMIDI CC messages. You can use the free, downloadable MPK mini Editor to assign how this X-Y Controller functions.8.Pads: The pads can be used to trigger drum hits or other samples in your software. Thepads are velocity-sensitive, which makes them very responsive and intuitive to play. You can use the free, downloadable MPK mini Editor to assign what MIDI message each pad (in each pad bank) sends.9.Bank A/B: Press this button to switch MPK mini's pads between Pad Bank A or PadBank B. You can use the free, downloadable MPK mini Editor to assign what MIDI message each pad (in each pad bank) sends.: When this button is active, MPK mini's pads will send MIDI CC messages instead ofMIDI Note On messages. You can use the free, downloadable MPK mini Editor to assign what CC message each pad sends.11.Prog Change: When this button is active, MPK mini's pads will send MIDI ProgramChange messages instead of MIDI Note On messages. You can use the free, downloadable MPK mini Editor to assign what Program Change message each pad sends.12.Full Level: Press this button to activate or deactivate Full Level Mode in which the padsalways play at a maximum velocity (127), no matter how hard or soft you hit them.13.N ote Repeat: Press and hold this button while striking a pad to cause the pad toretrigger at a rate based on the current Tempo and Time Division settings.14.Assignable Knobs: Each 270º knob sends a MIDI CC message. You can use the free,downloadable MPK mini Editor to assign what CC message each knob sends.15.Prog Select: Hold down this button and press Pad 5, Pad 6, Pad 7, or Pad 8 to selectthe Program whose number is printed above that pad (Prog 1, Prog 2, Prog 3, or Prog4).5。
常用软件注册码全集
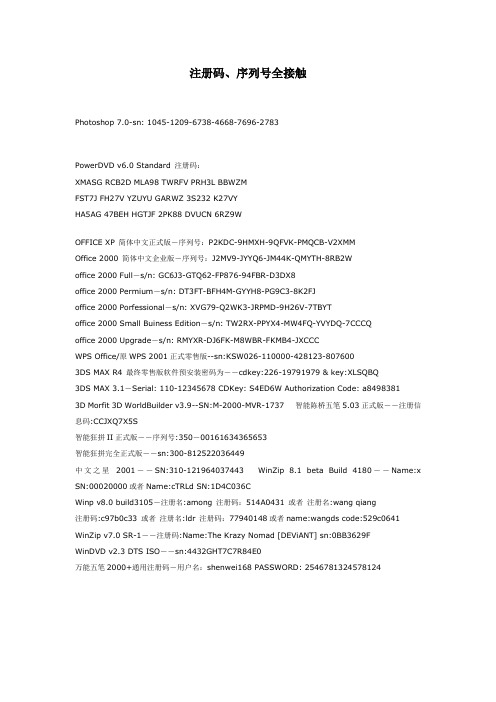
注册码、序列号全接触Photoshop 7.0-sn: 1045-1209-6738-4668-7696-2783PowerDVD v6.0 Standard 注册码:XMASG RCB2D MLA98 TWRFV PRH3L BBWZMFST7J FH27V YZUYU GARWZ 3S232 K27VYHA5AG 47BEH HGTJF 2PK88 DVUCN 6RZ9WOFFICE XP 简体中文正式版-序列号:P2KDC-9HMXH-9QFVK-PMQCB-V2XMMOffice 2000 简体中文企业版-序列号:J2MV9-JYYQ6-JM44K-QMYTH-8RB2Woffice 2000 Full-s/n: GC6J3-GTQ62-FP876-94FBR-D3DX8office 2000 Permium-s/n: DT3FT-BFH4M-GYYH8-PG9C3-8K2FJoffice 2000 Porfessional-s/n: XVG79-Q2WK3-JRPMD-9H26V-7TBYToffice 2000 Small Buiness Edition-s/n: TW2RX-PPYX4-MW4FQ-YVYDQ-7CCCQoffice 2000 Upgrade-s/n: RMYXR-DJ6FK-M8WBR-FKMB4-JXCCCWPS Office/原WPS 2001正式零售版--sn:KSW026-110000-428123-8076003DS MAX R4 最终零售版软件预安装密码为--cdkey:226-19791979 & key:XLSQBQ3DS MAX 3.1-Serial: 110-12345678 CDKey: S4ED6W Authorization Code: a84983813D Morfit 3D WorldBuilder v3.9--SN:M-2000-MVR-1737 智能陈桥五笔5.03正式版--注册信息码:CCJXQ7X5S智能狂拼II正式版--序列号:350-00161634365653智能狂拼完全正式版--sn:300-812522036449中文之星2001--SN:310-121964037443 WinZip 8.1 beta Build 4180--Name:x SN:00020000或者Name:cTRLd SN:1D4C036CWinp v8.0 build3105-注册名:among 注册码:514A0431 或者注册名:wang qiang注册码:c97b0c33 或者注册名:ldr 注册码:77940148或者name:wangds code:529c0641 WinZip v7.0 SR-1--注册码:Name:The Krazy Nomad [DEViANT] sn:0BB3629FWinDVD v2.3 DTS ISO--sn:4432GHT7C7R84E0万能五笔2000+通用注册码-用户名:shenwei168 PASSWORD: 2546781324578124RealProducer V10.0 Plus注册码:212-09000-8066212-09331-3866212-09934-9366212-09042-0266212-09084-9766212-09028-0866PowerDVD v6.0 注册码大全:PowerDVD v6.0 Standard 注册码:XMASG RCB2D MLA98 TWRFV PRH3L BBWZM FST7J FH27V YZUYU GARWZ 3S232 K27VY HA5AG 47BEH HGTJF 2PK88 DVUCN 6RZ9WPowerDVD v6.0 Deluxe 注册码:RS3VG JSZMT TBY2D 7QTCM 3JQUL ZNRD3 HD5LG HJA9U CLS76 HBDM2 ED5JB AE7PR XNYNT 2XZ42 EVQRF HC6ML 4HKR5 9MJBNPowerDVD v6.0 Express 注册码:G726L ZW6FF CRN3E PY5UR JXETB ER32H8ZZWS QC2PJ KLB9P Y8LCR DPYEE 5KDFM 87G8Z VBYZ4 8S2VK T5CCP HFGRR CLPYHPowerDVD v6.0 CLJ Deluxe 注册码:HSU2T WN9KH MD4MS LV6DR 6BFMB K35A7 H5E3J 4UYKG CA46S Z4M7P 53PXB ...ZG2 NW78K 73HYG J2T7N YTA5X PC3YG V46Q3PowerDVD v6.0 CLJ Express 注册码:ER6WB 68H4Y 5CJDZ EFEMG GVAJ8 RYV7E YMB2A NR3YS H85ZH 2DKQJ 78RLG 94MH4 VKR6V 6KFMK RY5Q6 QTNWU VDZM6 DTLQYDTS 96/24 Pack 注册码:YR6JR LA3EL 42V2W EBWW8 JF73G VHVLT V2NZP AE45Q 68L6M GBSAY ZP9E3 2WJ83C5LWJ TLVNJ 8SZHB 9FAB3 89UHF NXBSG37UF7 NKYRD 27EFM 2WEHE EYDE6 3J3PHU4PXV SZDJ4 HY2GT BX4P4 VSQTZ S56MA迷你歌词(MiniLyrics) V3.0注册码如果你以前安装过迷你歌词并已经注册,用覆盖安装迷你歌词(MiniLyrics) V3.0.1072 即可注册!Name: Serial: 5651A81E01QOC1OFName: Serial: 5752134E01QQQSQFName: Serial: 4614C4A1001GNGCFSerial: 46420A6B01S0HQXFSerial: 464236D101QGMP1FName: Serial: 57156AF600WWWPWFSerial: 5741134E01QQQSQFSerial: 5741A46F01QQQHQFSerial: 5741C2F301WWWPWFSerial: 5741E6A001PPPMPFName: Serial: 5615C065000U1QUFName: Serial: 51162B9F000QSQDFName: free userSerial: 421680AA001G11SFName: minilyricsSerial: 4F16DB9E00Q101QFFrontPage 2003 简体中文正式版注册码Use this serial for OFFICE11:GWH28-DGCMP-P6RC4-6J4MT-3HFDYUse this serial for REST:WFDWY-XQXJF-RHRYG-BG7RQ-BBDHM中华压缩(ChinaZip) V10.7注册码注册名:warshon注册码:37C48A2B2859WinRAR V3.41 简体中文版+注册使用说明:将蓝色文字内容copy到记事本中,保存成rarreg.key文件,并copy到winrar 3.41安装目录下即可完成注册。
AIMP4 如何使用MiniLyrics迷你歌词
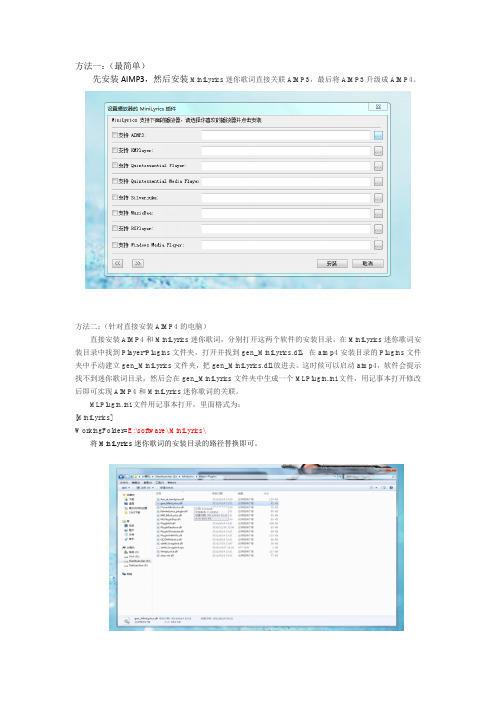
方法一:(最简单)
先安装AIMP3,然后安装MiniLyrics迷你歌词直接关联AIMP3,最后将AIMP3升级成AIMP4。
方法二:(针对直接安装AIMP4的电脑)
直接安装AIMP4和MiniLyrics迷你歌词,分别打开这两个软件的安装目录。
在MiniLyrics迷你歌词安装目录中找到Player-Plugins文件夹,打开并找到gen_MiniLyrics.dll,在aimp4安装目录的Plugins文件夹中手动建立gen_MiniLyrics文件夹,把gen_MiniLyrics.dll放进去。
这时候可以启动aimp4,软件会提示找不到迷你歌词目录,然后会在gen_MiniLyrics文件夹中生成一个MLPlugin.ini文件,用记事本打开修改后即可实现AIMP4和MiniLyrics迷你歌词的关联。
MLPlugin.ini文件用记事本打开,里面格式为:
[MiniLyrics]
WorkingFolder=E:\software\ MiniLyrics\
将MiniLyrics迷你歌词的安装目录的路径替换即可。
让音乐看得见——MiniLyrics使用技巧
让音乐看得见——MiniLyrics使用技巧
dream
【期刊名称】《电脑迷》
【年(卷),期】2004(0)5
【摘要】MiniLyrics即“迷你歌词”是笔者最喜爱的Winamp插件之一,它能够非常直观地显示正在播放的歌曲的歌词, 并且支持自动在互联网上搜索歌词,不用自己满世界找歌词文件了。
在使用MiniLyrics的过程,笔者发现了一些小技巧,写出来与大家共享。
【总页数】1页(P55-55)
【关键词】使用技巧;互联网;插件;播放器;目录;音乐;按钮;参数设置;搜索;自动下载【作者】dream
【作者单位】
【正文语种】中文
【中图分类】TP317
【相关文献】
1.轻松听音乐悠闲看歌词:迷你歌词(MiniLyrics) [J], 王向辉
2.中国共享软件:听音乐,看歌词——迷你歌词(Minilyrics) [J],
3."看得见"的音乐——图谱在小学音乐欣赏课中的实践 [J], 顾燕
4."看得见"的音乐——小学低年级音乐教学中图谱的有效运用策略 [J], 曾佳妮
5.看得见的音乐——图谱在小学音乐欣赏课中的应用 [J], 王惠
因版权原因,仅展示原文概要,查看原文内容请购买。
