DYSON V6 DC59使用说明书
博朗 590cc-4 使用说明书

B
123 1
2
3
e
+
-
sitiv
sensitiv
90°
3
on • off
4
on • off
sensitive
sensitive
sensitive
full
lollowoww cclelcaelnaeann
sensitive
sensitive
••• ••• s
C
a b c
D
full
lollowoww cclelcaelnaeann
Installing the Clean&Renew station • Using the special cord set (18), connect
the station power socket (5) to an electrical outlet. • Press the lift button (2) to open the housing. • Hold the cleaning cartridge (6) down on a flat, stable surface (e.g. table). • Carefully remove the lid from the cartridge. • Slide the cartridge into the base of the station as far as it will go. • Slowly close the housing by pushing it down until it locks.
V6+说明书
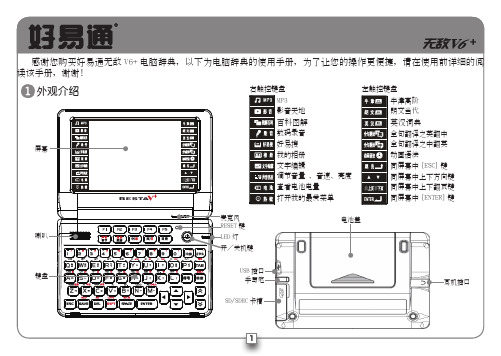
主機提供可拆卸充電鋰電池。
置入:沿電池蓋上箭頭方向,推動並 打開電池蓋,再按右圖中的箭 主機附帶5V /500mA 插入電源插座,另一端插入主機 用整流器對電池進行充電時,電池充飽時間約為 請將本機專用USB 線一端與 另一端插入本機 當使用USB 線對電池進行充電時,電 池充飽時間約為配備件選配件耳機電池適配器USB 線電腦詞典主機鍵關閉主機。
主機未關機前請勿隨意插拔卡片或做其他違法操作,以免引起主機異常或資料丟失。
屏幕操作主機提供可觸控屏幕,支持各種觸控操作。
請使用主機專用手寫筆實現這些操作。
標示直接按部分功能按鍵,即可實現 按鍵上標識的功能:鍵搭配使用,搭配按鍵的操作步驟為:先按再按功能鍵。
以上描述的兩種功能鍵操作方法,請對應參考使用。
˙ 菜單瀏覽 按翻頁鍵翻頁瀏覽菜單中的各功能選項。
當菜單有翻頁標識(箭頭類標識)時,可點擊翻頁標識瀏覽菜單。
˙ 選擇選項按主機上下鍵逐行滾動瀏覽資料。
按主機翻頁鍵翻頁瀏覽主機資料。
當屏幕中出現滾動條時,可用筆拖動滾動條進行資料瀏覽。
輸入區 主機默認光標閃爍處為資料輸入區,可按方向鍵和 或直接點選移動光標選擇輸入區。
輸入法 主機提供多種方式的多國語輸入法,先按 [SPACE]鍵,或點選標識打開菜單選擇輸入法。
菜單操作資料瀏覽資料輸入˙ 點圖示,開啟部分語言手寫輸入法。
˙ 點/// ,可切換中文/英文/日文/韓文手寫輸入。
˙ 點,切換為各輸入法對應之軟鍵盤。
˙ 點,開啟符號軟鍵盤。
˙ 點,關閉手寫窗口,返回鍵盤輸入狀態。
˙ 點//,切換單框手寫/多框手寫/全屏幕手寫功能。
˙ 全屏幕和單框手寫時,點/進行手寫輸入單字辨識/多字辨識設定。
其他功能鍵簡介輸出符號輸出數字例與配,實現按鍵上紅字部份功能現部選字區聯想區選字區聯想區符號軟鍵盤對不易掌握或重要的詞彙、句子和會話,可按“複習測驗”、“背單詞”及翻譯記錄使用。
˙ 詞典/會話/多媒體搜索 可在詞典、會話和多媒体功能畫面輸入詞彙或標示詞彙進行查詢。
威克森模型DE3、DE4和DE5无热风干式空气干燥器操作指南说明书

INSTRUCTION MANUAL FORW ILKERSON M ODELS DE3,DE4 AND DE5C OMPACT H EATLESS A IRD RYERSDE3 - DE5®OPERATIONSWilkerson Compact Heatless Air DryersGENERALThis instruction manual covers the installation, operation, maintenance and troubleshooting guide for the Wilkerson compact heatless air dryers, models DE3, DE4 and DE5. These dryers are designed to be installed into a compressed air system, providing ultra-dry compressed air to moisture sensitive applications.Instruction Manual / DE3, DE4 and DE5Wilkerson Compact Heatless Air DryersINSTALLATION AND OPERATIONNOTE:Wilkerson DE series compact heatless dryers have beenthoroughly inspected and tested at the factory and are inproper working condition.A.Initial Inspection– Remove the air dryer from the shipping carton. Inspect the exterior andremove the electrical cover and inspect the interior components for any shipping damage.NOTE:Any damage noticed at this time must be brought to theimmediate attention of the carrier and a freight claim mustbe filed.B.Warranty – Please read this instruction manual carefully before installing the air dryer.Failure to follow proper instructions could result in damage to the equipment and may voidthe product warranty.EXCEPT as otherwise specified by the manufacturer, this productis specifically designed for compressed air service and use withany other gas or liquid is a misapplication. Use with or injectionof certain hazardous liquids or gases in the system (i.e., alcoholor liquid petroleum gas) could be harmful to the unit and result ina combustible condition or cause hazardous external leakage.Manufacturers' warranties are void in the event of a misapplicationand manufacturer assumes NO RESPONSIBILITY for anyresulting loss. Before using equipment with fluids or gases otherthan air, or for non-industrial applications, consult WilkersonCorporation for written approval.C.Installation/Mounting– Four mounting holes are provided for wall mounting of Models DE3,DE4 and DE5. All dryers require a clean ambient environment for proper operation. Normally,most locations where ambient temperatures range between 40˚F and 125˚F are suitable forinstallation since drying efficiency is more dependent on the temperature of the compressed air flowing through the unit. Operating a unit at temperatures which could result in freezing maycause damage to the dryer. Do not operate at temperatures so low that freezing is a possibility.1.Install dryer where ambient temperatures are between 40°F (4.4°C) and 125°F (52°C).2.Mount dryer in a vertical position.3.Piping connections: For maximum flow, INLET and OUTLET piping should be schedule 40pipe or equivalent I.D. tubing. DE3, DE4 and DE5 inlet and outlet ports are 1/2" female,NPT, purge porting is 1/2" female, NPT.Instruction Manual / DE3, DE4 and DE5Wilkerson Compact Heatless Air DryersF.Solid State Timers– The solid state timer used in the DE3, DE4 and DE5 dryers control theswitching of the solenoid valves during a two minute total time cycle. The timers are equipped with a one hour memory capability. If power is interrupted, the dryer will resume operation atthe same point in the cycle when power is restored.Wiring DiagramFigure 4Instruction Manual / DE3, DE4 and DE5Wilkerson Compact Heatless Air DryersDE3,DE4 and DE5 Parts IdentificationParts IdentificationFigure 5Instruction Manual / DE3, DE4 and DE5Instruction Manual / DE3, DE4 and DE5Instruction Manual / DE3, DE4 and DE5Instruction Manual / DE3, DE4 and DE583-919-000-FL 6/98。
戴森吸尘器说明书
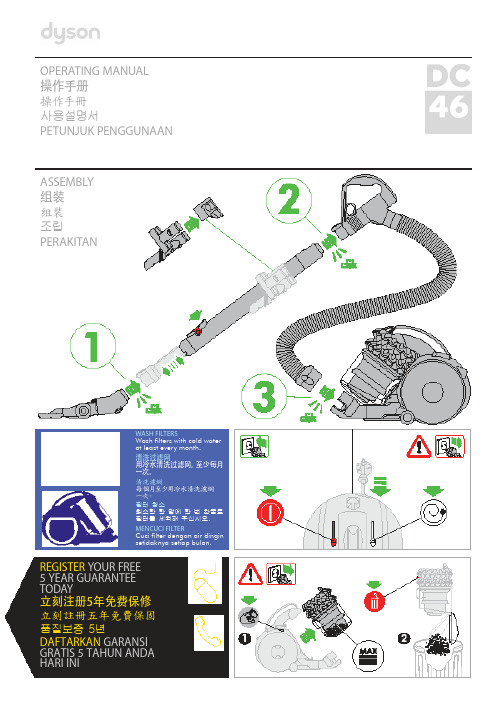
OPERATING MANUAL操作手册操作手冊사용설명서PETUNJUK PENGGUNAANASSEMBLY组装組裝조립PERAKITANWASH FILTERS清洗过滤网清洗濾網필터 청소MENCUCI FILTERREGISTER YOUR FREE5 YEAR GUARANTEE TODAY立刻注册5年免费保修立刻註冊五年免費保固품질보증 5년DAFTARKAN GARANSI GRATIS 5 TAHUN ANDA HARI INIDYSON CUSTOMER CARETHANK YOU FOR CHOOSING TO BUY A DYSON APPLIANCEAfter registering your free 5 year guarantee, your Dyson appliance will be covered for parts and labour for5 years from the date of purchase, subject to the terms of the guarantee.If you have any questions about your Dyson appliance, call the Dyson Helpline with your serial number and details of where/when you bought the appliance.Most questions can be solved over the phone by one of our trained Dyson Helpline staff.Alternatively visit for online help, general tips and useful information about Dyson.戴森客户服务感谢您选择购买戴森产品登记获取 5 年免费保修后,您的戴森产品自购买之日起,将享受 5 年的零件和人工保修服务,但须符合保修条款的规定。
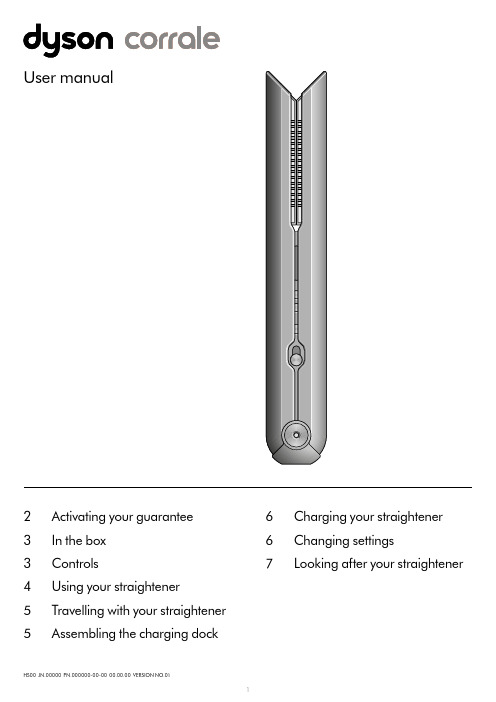
Dyson Corrale 直发器使用说明书
Target temp
210 185 165
Current temp
Adjusting the temperature Press the Temperature (+/-) control buttons to select the temperature that suits your hair type and styling preference.
Reactivating your straightener Insert the Flight-ready tag back into your straightener.
Assembling the charging dock
Your dock can be used as a charging dock or a stand to store your Dyson Corrale™ straightener.
To achieve enhanced styling with less reliance on heat, Dyson engineers developed flexing plates. Made from materials selected for their flexibility, strength and thermal conduction, they shape to gather and control hair.
Charging when travelling Just check if you need a travel adaptor. The Magnetic 360° charging cable is suitable for use with all mains electricity supplies.
dyson pure hot+cool 说明书

dyson pure hot+cool 说明书一、外观展示:延续经典,科技感十足戴森的产品一直有着自己的设计风格,当然这款戴森HP05也不例外,它在外观设计方面依然十分出色,可以说是颜值很高的一款产品。
首先就是外包装设计的十分简约,大大的外包装上面有一个本款产品的渲染图和一排Pure Hot+Cool字样,从这里就可以很清晰的了解到它的外观和主要功能。
戴森HP05的外观设计采用了戴森经典的无叶风扇的设计,上半部分是椭圆形的环状出风口,而下部分则是滤芯的所在,这种设计我感觉除了可以提高颜值颜值之外,更重要的是可以避免发生触碰扇叶的危险情况,在安全方面更有保障。
机身上半部分的出风口是一个细小的环状开槽,日常使用时冷暖风正是从此处喷射而出,单从外观来看倒像是一个环形的装饰条,其实这也是戴森产品的优点所在,既保证了产品的良好性能又兼顾了颜值,做的真的挺不错的。
因为这款机器具备了两种气流模式,所以除了在机身前方有一个环状出风口之外,在机身的侧面同样的预留了一个出风口,不过这个出风口主要是在无需凉风时才会使用到。
机身上惟一的一个实体按钮,通过它可以实现机器的开关机操作,而调节风速、温度、净化模式等操作则需要使用遥控器来实现。
动图封面在开机按钮的下方是一个液晶显示屏,通过这里可以实时的了解到房间内的空气质量指数、PM2.5、PM10、室内温度、室内湿度等各项数据,用户可以随时的掌握家中的空气质量,非常实用。
因为戴森HP05这款机器具备了空气净化器的功能,机身的底部其实可以看做是空气净化器的主体部分,它的滤芯就放置在这一部分机体内,所以外部的金属护罩外壳采用了密集的波点设计,相当于净化器的进风口。
值得一提的是这款机器的机身支持左右倾斜控制,所以在运行时就可以使送风的范围更加的宽广,能够更快的将凉风、暖风送达至房间的各个角落,这也是它的一个优势所在。
机身的护罩外壳是通过卡扣式的方式与机身组装到一起的,在更换滤芯或者进行清洁时只需用手按住这个卡扣并向下滑动就可以将它打开,操作非常的简单。
干式热泵机组使用说明书
感谢您选用本公司的产品!本设备专为冷冻空调系统的应用而开发的。
出厂前,已通过出厂检验。
本说明书涵盖了设备的安装、调试、运行、操作及故障排除等相关内容。
为确保您使用的权益,并避免无谓的损失,请您在使用前务必详读,并按各项操作要求作业。
如按本使用说明书规范地安装、操作和维护,本设备将为您提供多年满意的服务。
若有问题,请立即与本公司联络,公司将派专人为您提供最完善的售后服务。
产品保证!保证是基于本设备按产品使用说明书正常使用的情况。
未经授权的改造或超出使用限制、不正确的操作、缺少保养等,将影响欧森纳公司对您的保证。
交货确认!用户自提,用户应对本设备的正确性、完整性、完好性进行确认,并在交货单上签字。
由本公司安排发运,在承运者代表与用户在场的情况下,对本设备的正确性、完整性、完好性进行确认,并在交货单上签字。
安装前存放!机组应存放在温暖干燥的环境中并覆盖。
机组的电控、电气系统应保持通风、防潮。
目录1.介绍 (1)1.1使用须知 (1)1.2安装安全要求 (1)1.3操作维护安全要求 (1)1.4机组的维护和保养 (2)1.5运行管理和停机注意事项 (3)2. 进场预检 (4)2.1设备进场检验 (4)2.2吊装和搬运指导 (4)2.3安装场地要求 (5)3. 系统安装 (7)3.1空调系统安装注意事项 (7)3.2电气安装注意事项 (9)4. 技术规格 (10)4.1SNHPUK-270G机组技术参数 (10)4.2机组主要组件 (11)5. 控制系统的操作 (13)5.1安全要求 (13)5.2控制器性能介绍 (13)5.3控制界面介绍 (14)5.4用户设置 (17)5.5控制逻辑 (19)5.6故障诊断 (22)6. 运行 (24)6.1季节性关机步骤 (24)6.2季节性开机步骤 (24)6.3结冰保护 (24)7. 维护 (25)7.1概述 (25)7.2定期检查 (25)7.3每月的检查 (25)7.4冷凝器、蒸发器的维护 (25)7.5制冷剂的充注 (26)7.6添加润滑油 (26)附录 (27)附录一水流开关的安装及使用方法 (27)附录二电气原理图 (29)1. 介绍该机组是公司设计生产的SNHPUK-G系列干式水源热泵机组。
戴森 吸尘器 用户手册说明书

User manualIn the boxGetting startedCharging your machine Caring for your floors Emptying your bin Cleaning your bin Washing your filterWashing your brush barS V 12 J N .00000 P N .000000-00-00 00.00.00 V E R S I O N N O .01Cleaning your tools Clearing blockagesLooking after your machineThe Dyson cordless vacuum cleaner in an upright position with the wand and cleaner head attached.Dyson micro one point five kilogramsIn the boxWand clipClips to your vacuum's wand to hold tools.A plastic clip that attaches to the wandGetting startedCharging your machineFor the best experience, we recommend fully charging your machine, and any additional batteries, as soon as you open the box and after every clean.The LED light on the end of the handle will flash when the power is running low and you need to put your battery on to charge.Connect the charger directly to the charging point on the base of the handle of your machine. You can also connect to your dock as shown in the installation instructions supplied with your dock.The LED light on the end of the handle will pulse with a blue LED light when charging, and the light will go out when fully charged.It can take up to four hours to fully charge your battery. Your battery has been designed to be left on charge.Your machine won’t operate or charge if the ambient temperature is below 5°C (41°F). This is designed to protect both the motor and battery.You can help prolong the battery life by leaving your machine to cool downbefore recharging.Caring for your floorsCheck that the underside of the cleaner head or tool is clean and free from any objects that may cause damage.Before vacuuming your flooring, rugs, and carpets, check the manufacturer’s recommended cleaning instructions.This machine is designed for use on hard floors. The brush bar on your machine can damage certain flooring. Some rug materials may fuzz if a rotating brush bar is used when vacuuming. If this happens, we recommend vacuuming without the motorised floor tool and consulting with your flooring manufacturer.Washing your filterWash your filter at least once a month to maintain the best performance. Make sure the filter is completely dry before refitting.Twist off your filterDon’t put any part of your machine in a dishwasher or use detergents, polishes or air fresheners.Turn your filter anti-clockwise and pull it away from your machine.Before washing your filter, tap it gently over a bin to remove any loose dust and debris.Wash your filterWash the outside of the filter, rubbing with your fingers to remove the dirt. Carefully rinse the inside filter, without allowing water to fill the filter. Repeat these steps until the water runs clear.Shake and dryEmpty the filter and shake firmly to remove excess water.Keep shaking until there’s no water coming from the filter.Place your filter end up, as shown.Leave your filter to dry for at least 24 hours in a well-ventilated, warm place. Don’t dry your filter in a tumble dryer, microwave or near a naked flame. Important: your filter must be completely dry before you put it back into the machine. Your machine could be damaged if used with a damp filter.Refit your filterTo refit your filter, slide it onto the handle and turn it clockwise until it clicks into place.Your filter may need more frequent washing if you vacuum fine dust,use Max mode frequently or use with the bin full.A hand holding the filter with thenarrow end pointing downwards withdroplets of water being shaken from thefilter and again, with the end pointingdownwards shaking water out.The filter is left to drywith the pleated filterend facing upwards.Filter with hand overthe open end witharrows showing ashaking motion.Filter held in uprightposition, with the widerend in the palm of ahand. Water runningfrom a tap into thenarrower end.The filter is located at therear of your machine.Holding the filterby the hard, plasticend, tap the otherend over the bin.Washing your brush barRemove brush barDon’t put any part of your machine in a dishwasher or use detergents, polishes or air fresheners.Press the cleaner head release button to remove it from the wand.Pull the brush bar off the end cap and put the end cap to one side, don’t wash it.Wash and dry brush baror dirt. Keep washing until the water runs clear.Stand the brush bar upright and leave for at least 24 hours to dry.Replace your brush barsMake sure your brush bar is completely dry before refitting.Rotate the end cap until it clips securely back into position.The cleaner head housing is not washable and should only be wiped over with a damp lint-free cloth.Cleaning your toolspolishes or air fresheners.Light pipe crevice tool Mini motorised toolClearing blockagesIf your machine detects a blockage, the motor will pulse six times. You won’t be able to use your machine until the blockage has been cleared.If you try to use your machine when the motor is pulsing, it will automatically cut out.Leave your machine to cool down before looking for blockages and, for yoursafety, take care not to touch the power button.Disconnect your machine from the charger before looking for blockages. Be careful not to touch the trigger and be aware of sharp objects.Leave your machine to cool down before looking for blockages.Don't use your machine when looking for blockages as this could cause injury.With the wand removed from the machine, check for blockages at both ends of the wand.With the bin removed, check for blockages, paying particular attention to the air inlet, located at on the right–hand side of the machine just below the point where the bin joins the main body of the machine.Turn the cleaner head over to check for obstructions on the brush bar and air inlet.runner.Remove any obstructions from the brush bar.Looking after your machineTo always get the best performance from your machine, it’s important to clean it regularly and check for blockages.Look after your machineIf your machine is dusty, wipe with a damp lint-free cloth.Check for blockages in the cleaner head, tools and main body of your machine. Wash your filter regularly and leave to dry completely.Don’t use detergents or polishes to clean your machine.Look after your batteryTo get the best performance and life from your battery, use Eco mode.Your machine won’t operate or charge if the ambient temperature is below 5°C(41°F). This is designed to protect both the motor and battery.Your serial numbersYou can register your machine using the serial number found on the bottomof your machine.You can find your serial numbers on your machine, battery and charger.Use your serial number to register.。
瓦尔夫得西cussion 系列B5 SoundBar 使用手冊说明书
連接電視或類比裝置的類比音訊輸出。
c DIGITAL IN-COAXIAL
連接電視或數位裝置的同軸音訊輸出。
d (SERVICE) 連接 USB 隨身碟,升級本產品的軟體
(不適用於媒體播放)。
e DIGITAL IN-OPTICAL
連接電視或數位裝置的光纖音訊輸出。
f HDMI IN1 / HDMI IN2 連接至數位裝置上的 HDMI 輸出。
g TO TV-HDMI OUT (ARC) 連接至電視上的 HDMI (ARC) 輸入。
h AC 電源~
連接電源。
3 連接和設定
本章節協助您將 SoundBar 連接到電視和
其他裝置,然後加以設定。
如需有關 SoundBar 和配件的基本連線資
11
調節音量
11
選擇您的音效
11
MP3 播放機
12
透過藍牙播放音樂
13
透過 NFC 連接藍牙
14
自動待機
14
設定顯示亮度
14
套用原廠設定
14
6 更新軟體
15
檢查軟體版本
15
透過 USB 更新軟體
15
ZH-TW 1
1 重要事項
在您開始使用產品之前,請先閱讀並了解 所有指示。未遵守指示而造成的損壞,恕 不在保固責任範圍內。
• 當可攜式揚聲器切換為
SURROUND ON DEMAND 模 式時,LED 隨即亮起白燈。 e 按鈕/LED
• 按下以將可攜式揚聲器切換至藍牙 模式。
• 當您將可攜式揚聲器切換至藍牙模 式,且未連接任何藍牙裝置時,
LED 會閃爍。
• 當您將可攜式揚聲器切換至藍牙模
戴森超音速吹风机用户手册说明书
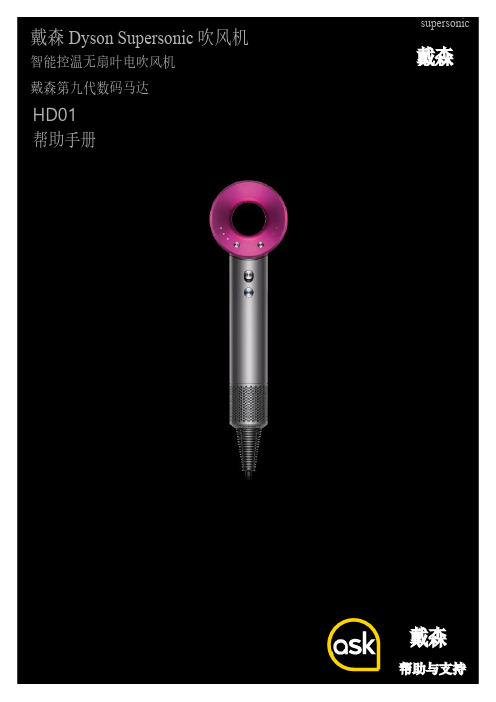
目录页数特性和优势3零配件组装6使用和操作7 LED显示灯的故障诊断7滤网清洁8零配件指导9部件识别图(分解图)10热线诊断12安全警告20戴森两年保修期21高压高速的气流高速喷射而出,实现可控的吹干和造型。
周围的空气被吸入并产生形成3倍的气流。
戴森第九代数码马达其转速相比其他吹风机马达快8倍,而重量却减半。
在手持处的气流倍增技术每秒推动13公升的空气。
全面稳定的气流快速吹干不只是需要高速的气流,对双组加热元件进行智能调整。
因为戴森独有设计的减震系统。
戴森第九代数码马达每分钟旋转高达110,000次,产生一种人耳听不到的频率。
没有格栅的出风口设计,带给客户更好的体验效果负离子技术避免静电产生。
内置强劲数码马达戴森第九代数码马达叶片增加至13片,每分钟旋转高达110,000次。
马达旋转时产生3.5kPa的压力。
转速相较于其他吹风机一部分马达高8倍,而重量却减少了一半。
简易的过滤器清洁方法只需转动一下,松开即可清洁过滤器。
4 supersonic环形元件构造未产生加热情况下的环形加热双栈元件磁性连接设计唯一一款配有磁性连接设计的机器, 可以快速方便地更换或转动风嘴减震支架橡胶安装架可帮助防止马达接触 手柄时的震动,从而降低马达和 壳之间的噪音传递只需转动一下,松开 即可清洁过滤器特性和优势脉宽调制精确控制加热元件LED 显示灯清晰地显示选项设置4档精确温度设置 • 快速吹干和造型 • 常规吹干• 轻柔吹干(头皮模式) • 恒冷风 3档风速设置: • 快速 • 常规 • 造型 Cool shot 按钮 自定义设计发型.消音技术同时降低了机器内部和外部的噪音,但是 并没有牺牲其干发的速度。
简易的存储方式为了快速,方便的存储,可以 使用挂绳和防滑垫磁性连接设计独一无二的吹风机体验,磁性连接设计,可以快速方便地更换或转动风嘴。
隔热可触碰技术通过Heat Shield 隔热技术,风嘴表面可保持低温, 即便长时间使用也可随时触碰风嘴。
Dyson Zone 空气净化耳机 用户手册说明书
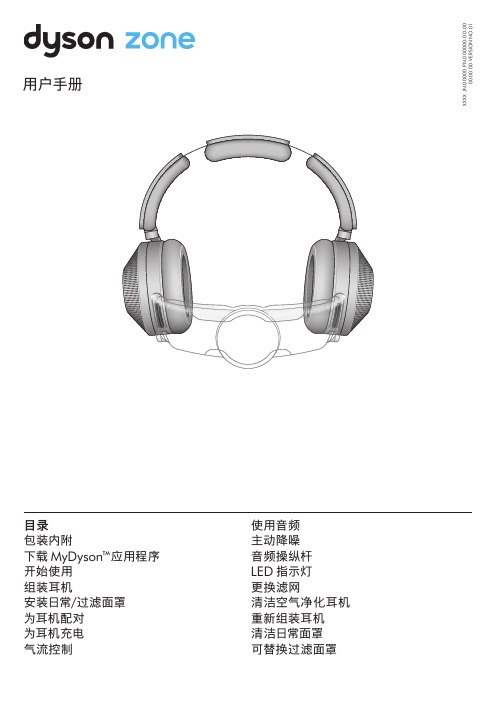
X X X X J N .00000 P N .000000-00-00 00.00.00 V E R S I O N N O .01目录包装内附下载 MyDyson™应用程序开始使用组装耳机安装日常/过滤面罩为耳机配对为耳机充电气流控制使用音频主动降噪音频操纵杆LED 指示灯更换滤网清洁空气净化耳机重新组装耳机清洁日常面罩可替换过滤面罩部分配件可能未包含在内。
您可前往戴森官方渠道购买。
USB-C 充电线飞行音频转接组件1无接触式面罩清洁刷Dyson Zone™空气净化耳机下载 MyDyson™ 应用程序作为使用体验的重要组成部分,MyDyson™应用程序让您可以随时随地控制您的 Dyson Zone™ 空气净化耳机。
现在就下载该应用程序,获取更多功能和最新信息。
从 App Store 或安卓(Andriod)应用商店下载MyDyson™应用程序。
打开应用程序,按照屏幕 上的说明创建新账号。
Apple 和 Apple 标志是 Apple Inc.在美国和其他国家的注册商标。
App Store 是 Apple Inc.在美国和其他国家的注册服务商标。
Android 和 Android 徽标是 Google Inc.的商标。
1. 鎏光金及普鲁士蓝旗舰版专属。
组装耳机插入滤网拧下两个耳罩盖。
握住滤网的边缘,将其放入耳罩中。
重新装上盖子,旋转并卡入原位。
调节耳机戴上耳机。
滑动两侧头带来调节,直至佩戴舒适。
安装无接触式面罩调节无接触式面罩调整面罩,直至佩戴舒适状态。
靠近但不接触您的面部。
气流将自动开始输送。
取下面罩外的包装,将面罩完全展开。
将面罩置于面部下方,通过磁性连接组件安装到耳罩两侧。
抬起面罩,遮盖口鼻。
x2安装日常/过滤面罩安装日常/过滤面罩将日常面罩或过滤面罩推入无接触式面罩中,确保顶部与底部安装位置均连接到位。
可重复使用的日常面罩。
可替换的过滤面罩。
这些配件可以通过戴森官方渠道再次购买。
安装无接触式面罩将无接触式面罩置于面部下方,通过磁性连接组件安装到耳罩两侧。
Dyson Pure Hot+Cool 用户手册说明书

S V 12 J N .00000 P N .000000-00-00 00.00.00 V E R S I O N N O .01ContentsAssembling your machine Getting startedConnecting to the Dyson Link app Connecting to your smart home Power and continuous monitoring Information menu Auto modeAirflow speed and direction Oscillation Night modeSleep timerHeating and Cooling modesChanging your HEPA+Carbon filter Resetting your HEPA+Carbon filter life Changing your HEPA and carbon filters Resetting your HEPA and carbon filter life Changing your HEPA+Carbon filters with a catalytic filterResetting your HEPA+Carbon filter life Looking after your machineAssembling your machineUse both hands to lift your machine out of the box, by its base.Do not lift out by the loop amplifier.Assemble your machine with the filters that are supplied.Dyson Purifier Hot+CoolSupplied with a HEPA+Carbon filter.Push your HEPA+Carbon filter into the outer cover and position onto thebase. Push firmly until both outer covers click securely into place.ClikDyson Purifier Hot+CoolSupplied with separate HEPA and carbon filters.Push the carbon filters into place on the machine.Push the HEPA filter into the outer cover. Put the outer covers into positionon the base and push firmly until they both click securely into place.Dyson Purifier Hot+Cool FormaldehydeYour machine comes with a permanent catalytic filter and a HEPA+Carbonfilter.Push the catalytic filter into position on the machine.Push the HEPA+Carbon filter into the outer cover and position on the base.Push firmly until both outer covers click into place.Clik Getting startedPlace the remote control on topof the machine with the buttons facing down.Plug in and switch on.Standby on/off Information menuAirflow speedAuto modeOscillation on/off Airflow directionNight modeRemote controlStandby on/offSleep timerCooling modeHeating controlThe air purifier fan heaterwith the filter coversopen showing a HEPAfilter located in the filtercovers and a carbon filter.Arrows demonstrate thatthe carbon filter is fitteddirectly to the base of themachine and the filtercovers will need to beassembled onto the baseof the machine.The air purifier fan heaterwith the filter covers openshowing a HEPA pluscarbon filter located in thefilter covers and a catalyticfilter. Arrows demonstratethat the catalytic filter isfitted directly to the baseof the machine and thefilter covers will need to beassembled onto the baseof the machine.An image of the air purifier fan heater with the remote placed on the top of the loop amplifier and the location of the standby on/off button on the top of the base of the machine.The layout of the remote control with the standby button on the top left, the airflow speed toggle button in the middle left with the Auto mode button below, then the Oscillation button and then at the bottom is the Sleep timer button. On the top right-hand side is the Information menu button, then go-ing downwards is the Heating control button, Cooling mode button, Airflow direction and then Night mode button at the bottom.The air purifier fan heaterwith the filter covers openshowing a HEPA pluscarbon filter located inthe filter covers. Arrowsdemonstrate that the filtercovers will need to beassembled onto the baseof the machine.Connecting to the Dyson Link appTake full control with the Dyson Link app and access step-by-step setup and support, control how and when your Dyson purifying fan heater operates, monitor air quality with visual updates and automatically keep up to datewith the latest software updates.Download the Dyson Link app from the App Store or Google Play.Open the app and follow the on-screen instructions to create a new account.Apple and the Apple logo are trademarks of Apple Inc., registered in the U.S. and other countries.App Store is a service mark of Apple Inc., registered in the U.S. and other countries.Google Play and the Google Play logo are trademarks of Google Inc.The Android robot is reproduced or modified from work created and shared by Google and used according to terms described in the Creative Commons 3.0 Attribution License.Connecting to your smart homeUsing Amazon AlexaAsk Alexa to enable the Dyson skill, to control your Dyson purifier or purifier humidifier. And set a routine that automates how your machine works with other devices in your home.Using Google AssistantControl all of your connected purifiers with Google or set a routine to automate how your machine works with other devices in your home. Just say “Hey Google” to get started.Using SiriConnect your Dyson machines to Siri Shortcuts and you’ll be ableto control them with your voice, on your Apple device.Power and continuous monitoringStandby on/offPress the Standby on/off button on your Dyson purifying fan heater or remote control to stop your machine. It will continue to monitor the air quality. Continuous monitoringContinuous monitoring is turned off by default. Once turned on, it will alwaysbe active until you turn it off again.With continuous monitoring turned on, your Dyson purifying fan heater will gather air quality, temperature and humidity information, which is displayedon the LCD screen and in the Dyson Link app.Continuous monitoringPress and hold the Auto mode button on the remote control for 5 secondsto turn it on. The LCD screen will indicate when continuous monitoring ison or off.Wi-Fi ConnectivityWi-Fi is on by default. To turn the Wi-Fi on or off, press and hold the Standbyon/off button on your machine for 5 seconds.Formaldehyde (HCHO)A common indoor pollutant. It can be released for many years from furnishings, floorings and glue.The current status of connection toSleep timerYour Dyson purifying fan heater will turn off automatically after the selected amount of time.To set the time: press the button to scroll through the time options. Once activated, press the Sleep timer button once to see the time selected.To cancel the Sleep timer: press the Sleep timer button twice.cooling mode.Resetting your HEPA+Carbon filter lifePress and hold the Night mode button on your remote control. be reset and your machine is ready to use.Resetting your HEPA filter lifebe reset and your machine is ready to use. Resetting your carbon filter lifereset and your machine is ready to use.above the sleep timerbutton, for 5 seconds. remote control for 5seconds.Resetting your HEPA+Carbon filter lifeResetting your HEPA+Carbon filter lifePress and hold the Night mode button on your remote control.be reset and your machine is ready to use.directly to the base of the machine and the filter covers will need to be assembled onto the base of the machine.Looking after your machineTo always get the best performance from your Dyson purifying fan heater, it’s important to regularly clean it and check for blockages.Cleaning your machineIf your machine is dusty, wipe with a damp lint-free cloth.Look for blockages in the air inlet holes on the filter and the small aperture inside the loop amplifier.Use a soft brush to remove dust and debris.Don’t use detergents or polishes to clean your machine.Error codesIf your machine shows an error code, try turning it off and then on again. If this doesn’t clear the error code contact Dyson Customer Care.For more information and support for your machine go to the Dyson Link app or online: /support。
干式热泵机组使用说明书

感谢您选用本公司的产品!本设备专为冷冻空调系统的应用而开发的。
出厂前,已通过出厂检验。
本说明书涵盖了设备的安装、调试、运行、操作及故障排除等相关内容。
为确保您使用的权益,并避免无谓的损失,请您在使用前务必详读,并按各项操作要求作业。
如按本使用说明书规范地安装、操作和维护,本设备将为您提供多年满意的服务。
若有问题,请立即与本公司联络,公司将派专人为您提供最完善的售后服务。
产品保证!保证是基于本设备按产品使用说明书正常使用的情况。
未经授权的改造或超出使用限制、不正确的操作、缺少保养等,将影响欧森纳公司对您的保证。
交货确认!用户自提,用户应对本设备的正确性、完整性、完好性进行确认,并在交货单上签字。
由本公司安排发运,在承运者代表与用户在场的情况下,对本设备的正确性、完整性、完好性进行确认,并在交货单上签字。
安装前存放!机组应存放在温暖干燥的环境中并覆盖。
机组的电控、电气系统应保持通风、防潮。
目录1. 介绍 (1)1.1使用须知 (1)1.2安装安全要求 (1)1.3操作维护安全要求 (1)1.4机组的维护和保养 (2)1.5运行管理和停机注意事项 (3)2. 进场预检 (4)2.1设备进场检验 (4)2.2吊装和搬运指导 (4)2.3安装场地要求 (5)3. 系统安装 (7)3.1空调系统安装注意事项 (7)3.2电气安装注意事项 (9)4. 技术规格 (10)4.1SNHPUK-270G机组技术参数 (10)4.2机组主要组件 (11)5. 控制系统的操作 (13)5.1安全要求 (13)5.2控制器性能介绍 (13)5.3控制界面介绍 (14)5.4用户设置 (17)5.5控制逻辑 (19)5.6故障诊断 (22)6. 运行 (24)6.1季节性关机步骤 (24)6.2季节性开机步骤 (24)6.3结冰保护 (24)7. 维护 (25)7.1概述 (25)7.2定期检查 (25)7.3每月的检查 (25)7.4冷凝器、蒸发器的维护 (25)7.5制冷剂的充注 (26)7.6添加润滑油 (26)附录 (27)附录一水流开关的安装及使用方法 (27)附录二电气原理图 (29)1. 介绍该机组是公司设计生产的SNHPUK-G系列干式水源热泵机组。
戴森手持式吸尘器说明书
TO REDUCE THE RISK OF FIRE, ELECTRIC SHOCK, OR INJURY: 1. Do not charge the Dyson handheld vacuum outdoors, in a bathroom or within 10 feet of a pool. 2. Do not use outdoors or on wet surfaces. 3. Do not allow to be used as a toy. Close attention is necessary when used by or near children. 4. Use only as described in this manual. Use only Dyson recommended accessories and replacement parts. 5. Do not use with damaged cable or charger. If the Dyson handheld vacuum is not working as it should, has been
OPERATING MANUAL 사용설명서 操作手册 操作手冊
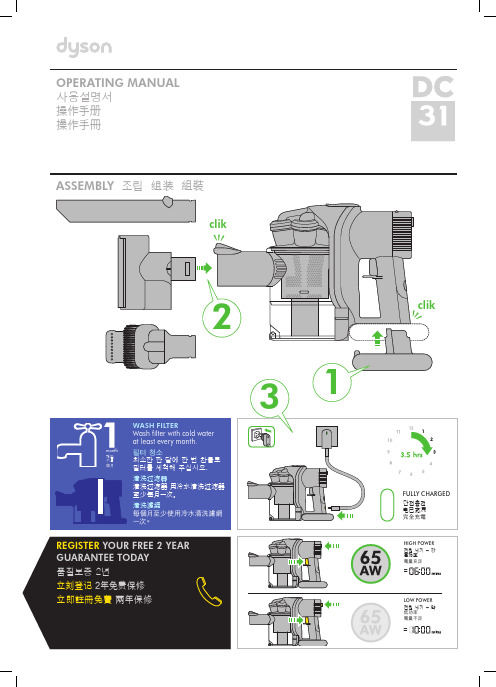
ASSEMBLY 조립 组装 組裝
clik
2
WASH FILTER Wash filter with cold water at least every month.
month
개월 个月
필터 청소 최소한 한 달에 한 번 찬물로
個月
필터를 세척해 주십시오.
SAVE THESE INSTRUCTIONS
THIS HБайду номын сангаасNDHELD VACUUM IS INTENDED FOR DOMESTIC HOUSEHOLD AND CAR USE ONLY.
戴森HEPA Big+Quiet Formaldehyde空气净化器使用说明书

User guideS V 12 J N .00000 P N .000000-00-00 00.00.00 V E R S I O N N O .01ContentsGetting startedAssembling your machine Positioning your machine Using your machineCO 2 monitoringChanging your HEPA filter Changing your carbon filter Looking after your machineDyson HEPA Big+Quiet Formaldehyde logo.Big+Quietand CO 2side.Getting startedReal-time LCD screenair quality in real time. sensor2 levels Ergonomic wheelsEasy to manoeuvre across a room – designed for hard surfaces and carpets.360º HEPA H13 filter K-carbon filtersensor positioned screen reports indoor air quality.Image of the 360° HEPA H13 filter in the Formaldehyde.The selective catalytic oxidisation filter, that willAssembling your machineUse both hands to lift your machine out of the box, by its base. Your machine comes with a HEPA filter, carbon filter and permanent catalytic filter. These are already installed in your machine.Lift the conic amplifier out of the box and place it on the top of your machine.Rotate the conic amplifier until it clicks securely into place. Plug in and press the power button.Positioning your machineYour machine is fitted with wheels to make it easier to move. Position your machine on a level floor.For the most effective purification, position your machine on the edge of the room with the conic amplifier pointing to the furthest point, along the wall.You can also position your machine facing diagonally acrossthe room.The purifier positioned on the edge of a room. A blue arrow shows theconic amplifier direction, pointing to furthest point, along the wall.The purifier positioned on the edge of a room. A blue arrow showsthe conic amplifier direction, pointing diagonally across the room.Using your machinePower and Airflow speedPress the Power button on the screen to switch on your machine.Press the Power button again for Airflow speed 1.Press the Power button a second time for Airflow speed 2.Press and hold the Power button to switch off your machine.CO 2 monitoringThe LCD screen displays the power mode setting and the CO 2 level in the room – reporting it in real time.Low CO 2CO 2 is at a safe level.Medium CO 2CO 2 has built up. It’s advisable to take action, like opening a door or window.High CO 2CO 2 has built up to a level of concern. It’s advisable to take action, like openinga door or window.LCD screen display showing that CO 2 is at a safe level. This is indicated by green-coloured numbers.LCD screen display showing that CO 2 is building up. This is indicated by yellow-coloured numbers.LCD screen display showing that CO 2 is at a concerning level. This is indicated by red-coloured numbers.Slide the Release button on the back of the conic amplifier to unlock. Lift the conic amplifier off your machine.Lift the outer cover off the base of your machine.Remove the filterThe HEPA filter is located in the outer cover. Press the filter release buttons located on the inner rim and lift the outer cover off the filter.Dispose of the filter.Install a new filterRemove your replacement filter from any packaging.Place the filter on the base of your machine.Place the outer cover over the filter and press down until it clicks securely into position.Place the conic amplifier on your machine and rotate until it clicks securely in position.Plug in and press the power button.Slide the Release button on the back of the conic amplifier to unlock. Lift the conic amplifier off your machine.Lift the outer cover off the base of your machine.Remove the filterThe carbon filter is wrapped around the central body of your machine. Pull each of the four clips towards you to release the filter.Dispose of the filter.Install a new filterRemove your replacement filter from any packaging. Place the filter on the base of your machine.Wrap the filter around the central body of your machine, fit the clips into position and push each one to secure the filter.Place the outer cover back in position on the base of your machine.Place the conic amplifier on your machine and twist until it clicks securely in position.Plug in and press the power button.Green arrows indicate that a user should pull each of the four clips towards them. This releases the filter from the body of the purifier.Position down the outer cover over the carbon filter, so it sits securely on the base of machine.Looking after your machineTo always get the best performance from your Dyson air purifier, it’s important to regularly clean it and check for blockages.Cleaning your machineIf your machine is dusty, wipe with a damp, lint-free cloth.Check the sensor inlets on the left hand side of the conic amplifier for dust and debris.Look for dust and debris in the outer cover and in the conic e a soft brush to remove dust and debris.Don’t use detergents or polishes to clean your machine.Eye icons identify where a user should regularly check for dust。
- 1、下载文档前请自行甄别文档内容的完整性,平台不提供额外的编辑、内容补充、找答案等附加服务。
- 2、"仅部分预览"的文档,不可在线预览部分如存在完整性等问题,可反馈申请退款(可完整预览的文档不适用该条件!)。
- 3、如文档侵犯您的权益,请联系客服反馈,我们会尽快为您处理(人工客服工作时间:9:00-18:30)。
DYSON V6 DC59无绳吸尘器日常保养及注意事项
1主机部分:a.不能进水,不然会烧坏马达。
b.机器有高低2个档位,高档持续使用时间不宜太长,以免马达持续高温,
影响使用寿命。
2电动吸头:a.V6的碳纤维绒面涡轮吸头、碳纤维涡轮吸头、涡轮毛发除螨吸头都是电流驱动,所以吸头不能进水,中间的滚刷可以定期拆卸清理。
(具体参考视频连接:/programs/view/Zr8M0gI5Ruw/?qq-pf-to=pcqq.c2c)
b.第一次拆卸很关键,建议用一块钱的硬币,沿着开锁方向用大力旋转,盖
子就可以取下来,滚刷就可以抽出来了。
3清洁事项:a.透明的垃圾壶外罩可以拆下来,拿湿布擦干净可以了。
b.主机的集尘器可以用分离气旋拆卸工具拆卸下来清理水洗,记得清洗后务
必晾干哦。
(操作方法视频:/player.php/sid/XMTM5Mzg4ODAxNg==/v.swf)
d.机器上面的过滤网可以抽出来,可以水洗,但是不用洗的太频繁,灰尘拍
拍就干净了。
一般一个月洗一次就可以了,用水冲洗,不要搓洗,晒干就
可以了。
c.透明垃圾壶的拆卸方法:按下垃圾壶舱门的按键,舱门打开后,再次按下舱
门的按键,同时用另外一只手握住垃圾壶的吸头接口向上掰一下,就可以
取下透明的垃圾壶了。
4电池保养:a.电池是锂电池,没有记忆,充电只需要大概3.5小时。
充电指示灯在电池上面,蓝灯长亮表示正在充电,熄灭表示充电完成了。
b.电池用完电后,不要立刻充电,要让电池冷却10-20分钟后在充电,这点
很重要,特别是使用MAX模式的时候,电池发热的情况下。
5关于指示灯:a.充电指示灯在电池上面,蓝灯长亮表示正在充电,蓝色灯熄灭表示充电完成了。
b.电池部位的灯出现蓝色闪烁表示电力不足,出现黄色表示电池温度过低
或者过高,出现红色闪烁表示电池故障。
C.主机后面有个MAX按键,是高低挡切换开关,只有机器运行的时候按
下此键才能进行切换,
MAX键蓝色灯亮起,表示正在使用加强模式(使用6分钟左右);MAX
键没有亮灯表示正在使用普通模式(使用20分钟左右),一般使用普通模
式就可以了。
DYSON如何退出MAX模式?
吸尘器启动的状态下,再按一下MAX键,恢复到普通状态,MAX灯会
灭,声音也由大变小(吸的时候按一下MAX键开和关都是要在机器吸的
时候按的)。