美国赛洛捷克数显(加热)型磁力搅拌器MS-H-Pro MS-Pro
美国赛洛捷克LCD数显(加热)型7寸方盘磁力搅拌器MS7-H550-Pro
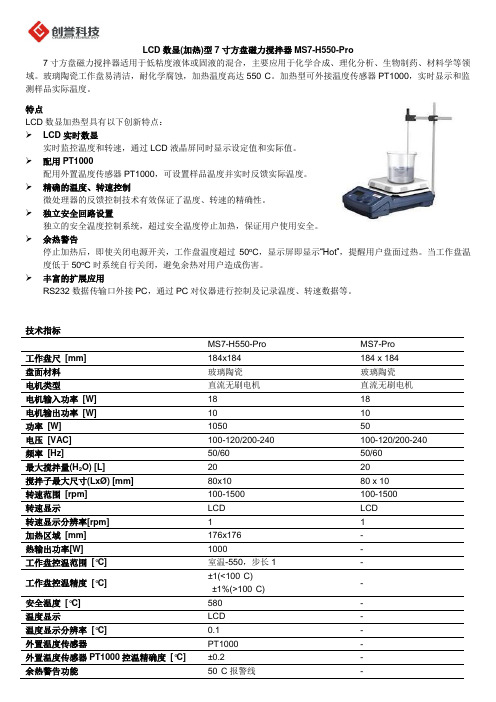
LCD数显(加热)型7寸方盘磁力搅拌器MS7-H550-Pro7寸方盘磁力搅拌器适用于低粘度液体或固液的混合,主要应用于化学合成、理化分析、生物制药、材料学等领域。
玻璃陶瓷工作盘易清洁,耐化学腐蚀,加热温度高达550°C。
加热型可外接温度传感器PT1000,实时显示和监测样品实际温度。
特点LCD数显加热型具有以下创新特点:LCD实时数显实时监控温度和转速,通过LCD液晶屏同时显示设定值和实际值。
配用PT1000配用外置温度传感器PT1000,可设置样品温度并实时反馈实际温度。
精确的温度、转速控制微处理器的反馈控制技术有效保证了温度、转速的精确性。
独立安全回路设置独立的安全温度控制系统,超过安全温度停止加热,保证用户使用安全。
余热警告停止加热后,即使关闭电源开关,工作盘温度超过50o C,显示屏即显示“H ot”,提醒用户盘面过热。
当工作盘温度低于50o C时系统自行关闭,避免余热对用户造成伤害。
丰富的扩展应用RS232数据传输口外接PC,通过PC对仪器进行控制及记录温度、转速数据等。
技术指标MS7-H550-Pro MS7-Pro工作盘尺[mm] 184x184 184 x 184盘面材料玻璃陶瓷玻璃陶瓷电机类型直流无刷电机直流无刷电机电机输入功率[W] 18 18电机输出功率[W] 10 10功率[W] 1050 50电压[VAC] 100-120/200-240 100-120/200-240频率[Hz] 50/60 50/60最大搅拌量(H2O) [L] 20 20搅拌子最大尺寸(LxØ) [mm] 80x10 80 x 10转速范围[rpm] 100-1500 100-1500转速显示LCD LCD转速显示分辨率[rpm] 1 1加热区域[mm] 176x176 -热输出功率[W] 1000 -工作盘控温范围[°C] 室温-550,步长1 -工作盘控温精度[°C] ±1(<100°C)±1%(>100°C)-安全温度[°C] 580 - 温度显示LCD - 温度显示分辨率[°C] 0.1 - 外置温度传感器PT1000 - 外置温度传感器PT1000控温精确度[°C] ±0.2 - 余热警告功能50°C报警线-远程控制(RS232接口) 有 有 保护级别 (DIN EN 60529) IP21IP21外形尺寸(WxDxH) [mm] 215 x 360 x 112 215 x 360 x 112 重量 [kg] 4.3 3.6 环境温度 [°C] 5-40 5-40 相对湿度 [%] 8080订货信息 型号产品描述MS7-H550-Pro LCD 数显加热型7寸方盘磁力搅拌器,玻璃陶瓷盘面,国标插头,220V/50Hz/60Hz MS7-Pro LCD 数显型7寸方盘磁力搅拌器,玻璃陶瓷盘面,国标插头,220V/50Hz/60Hz附件 型号 产品描述 PT1000 数显加热型磁力搅拌器专用外置温度探头,长度230mm PT1000 数显加热型磁力搅拌器专用外置温度探头,长度100mm MSPS01 温度探头支撑组件,适用于PT1000MS135.2 红色1/4圆,适用4ml 反应管,11孔,孔径:Ø15.2mm ,孔深:20mm MS135.3 紫色1/4圆,适用20ml 反应管,4孔,孔径:Ø28mm ,孔深:24mm MS135.4 蓝色1/4圆,适用30ml 反应管,4孔,孔径:Ø28mm ,孔深:30mm MS135.5 黑色1/4圆,适用40ml 反应管,4孔,孔径:Ø28mm ,孔深:43mm MS135.6 绿色1/4圆,适用8ml 反应管,6孔,孔径:Ø17.8mm ,孔深:26mm MS135.7金色1/4圆,适用16ml 反应管,4孔,孔径:Ø21.6mm ,孔深:31.7mm附件7寸方盘磁力搅拌器可配用1/4圆铝合金加热块,用于多种样品的平行反应,适用4-16ml 试管。
MS-PRO 三轴手持稳定器说明书

V1.0 2016.12 3-axis Handheld Stabilizer GimbalBeholder M S-‐PROInstruction ManualTable o f C ontents•About t he M S-‐PRO 3•What’s I ncluded 4•Charging t he B atteries 5•Installing t he B attery H older 7•Camera I nstallation a nd B alance 8•Powering O n 12•Modes o f O peration (Profiles) 13•OLED D isplay 14•Extensions a nd E xtra F eatures 14•List o f S upported C ameras 15•Operable C amera A ngles 15•Precautions 15•Safety 16•Copyright/Trademark S tatement 17•Technical S pecifications 18•FAQ 19The Beholder MS-‐PRO is the newest upgradeto the popular Beholder MS1 gimbal. It is a three-‐axis gyro-‐stabilizer with an encoder motor and a 32-‐bit control board. The MS-‐PRO is compatible with most mirrorless cameras w eighing l ess t han 900 g rams, i ncluding o ther s mall c ameras, c ell p hones,a nd G oPro c ameras.Whether f ilming f ast-‐paced a ctions o r a iming f or h igh o r l ow-‐angle s hots, t his d evice w ill h elp y ou c orrect s hakes or s waying a nd w ill b alance a nd s mooth t he p icture i n o rder t o a chieve p rofessional g rade i mage s tabilization.The MS-‐PRO uses a 32-‐bit system, which has a variety of shooting modes through the mode selection button. The 32-‐bit encoder system allows the MS-‐PRO to respond more quickly. By having an encoder with the motor, the gimbal i s m ore s table, a nd m ore a ccurate t han e ver b efore.The Gimbal can be turned on with a camera at any angle. By manually holding the camera at a certain position, the g imbal w ill h old t he c amera a t t he h eld p osition a nd s upport a ngled s hots. T he g imbal s upports t he c amera i n a ll 360 degrees while maintaining great stability, supports flip screen cameras, and has provisions for an external remote c ontrol (wired o r w ireless r emote c ontrol).By a ttaching a m onopod t o t he g imbal, y ou c an s imulate a d rone s hot, l ow a nd h igh f ollow s hots, d olly s hot, a nd many other different angles. It reduces any types of jitter from the footage. The Beholder MS-‐PRO includes a USB port t o a llow f or e asy f irmware a nd s oftware u pgrades.The M S-‐PRO h as 20 h ours o f s tandby t ime, w ith a n O LED d isplay t hat s hows t he c urrent b attery l evel. U sers c an better understand the battery level, charge the battery on time, and eliminate sudden low battery situations. The OLED screen can also display the current switch mode in real time so that users can know the current shooting mode.About t he M S-‐PRO▲To r educe f ire o r s hock h azard, d o n ot e xpose t he u nit t o r ain o r m oisture .What’s I ncluded ▲After y ou’ve r eceived t he p roduct a nd b efore y ou u se i t, p lease c heck w hether t he p ackage c ontains a ll t he items in the following inventory. If any item is missing, please get in touch with the dealer to resolve the situation.1. M S-‐PRO B ody2. T he B attery H older3. 3 x 18650 B attery4. C amera Q uick R elease P late5. ¼” S crew6. P ower A dapter o r U SB C able (dependent o n t he c ountry’s s pecifications)Battery c harging a nd i nsertingFor b est p erformance, p lease u se i kan I B-‐18650-‐26 b atteries. T he L ED i ndicator w ill t urn r ed w hilecharging a nd g reen i f t he b atteries a re f ully c harged.Connect the battery holder (Fig. 1) to the USB power supply before the batteries are installed inthe holder. T he LED will turn green to indicate the USB power can be used. Disconnect the battery holder and i nsert t he t hree b atteries. C onnect t he b attery h older t o t he c harger a gain. T he L ED i ndicator will t urn red to indicate the batteries have started to charge. If less than three batteries are placed in the battery holder, t he indicator light displays green to indicate that charging has not started. The battery holder can only c harge a ll t hree b atteries a t once.Note: The battery holder can only be used as a charger stand temporarily. When the battery LED indicator t urns g reen t o i ndicate t he c ompletion o f c harging, t he b atteries a re o nly c harged t o 80% of t he battery capacity. For 100% charge, please buy a professional charge adapter or use ikan’s ICH-‐ SC4 smart charger.The b attery h older c harge t ime i s 3-‐4 h ours.Charging t he B atteries▲Charging t he B atteries ▲Instructionst o u se t he b attery h olderMount t he 18650 b atteries w ith t he n egative e lectrode o f t he b attery (-‐) t owards t he s pring (Fig. 2). P ush t he t hree 18650 b atteries i nward.Fig. 2. I nserting b atteries i nto t he b attery h olderInstall the battery holder into the battery compartment with the two electrical terminals toward the direction of insertion (Fig. 3)Fig. 3. I nserting t he b attery h older i nto g imbal h andleInstalling t he B attery H older ▲STEP 1Mount t he c amera q uick r elease• Remove t he q uick r elease p late f rom t he g imbal.• Attach t he q uick r elease p late t o t he c amera (Fig. 4). B e c areful n ot t o t wist i t t oo t ight a t t his p oint. • Make s ure t he q uick r elease p late d irection i s f acing f orward t oward t he l ens.Fig. 4. T he c amera i s a ttached t o t he q uick r elease p lateCamera I nstallation a nd B alance▲Install t he c amera o n g imbal b ase• Install t he c amera w ith q uick r elease m ounted i nto t he B eholder M S-‐PRO b ottom m ount b ase (Fig.5).• Slightly a djust t he p osition o f t he c amera i nto t he b ase u ntil y ou f ind a h orizontal b alance.• Shift t he c amera a s c lose t o t he p itch m otor a s p ossible. U se t he b ase p late p ositioning i f n eeded.• Tighten t he t humb s crews.• Use a s crewdriver t o t ighten t he 1/4 q uick r elease s crew.STEP 3Adjust t he g imbal r oll – l eft a nd r ight b alance• Release t he r oll t humb M4 s crew a nd m ake t he a rm t o b e t he s hortest t hen t ighten t he M4 s crew.• Slide t he r oll a rm l eft o r r ight u ntil t he c amera f inds a b alance p osition a nd d oesn’t l ean l eft o r r ight.• Tighten t he t humb s crews.Adjust t he g imbal p itch -‐ u p a nd d own b alance• Loosen t he c amera p late M4 t humb s crew t o a djust t he p itch l evel (M4 t humb s crew – i n F ig. 7)• Move t he c amera p late a rm u p a nd d own, u ntil t he c amera s tays i n p lace a t a ny l ens a ngle.• Tighten t he t humb s crews.STEP 5Adjust t he g imbal p an– f orward a nd b ackward b alance• Loosen t he p an m otor l eft t humb s crew• Tilt t he g imbal h andle 45 d egrees f orward.• Move t he p an a rm t o t he l eft s ide o r t o t he r ight s ide a t 90 d egrees a nd o bserve t he d irection i t t ends t o m ove when r eleased.• If t he p an a rm t ends t o g o u p/backward, t hen t he g imbal i s f ront h eavy: m ove t he p an a rm b ack s lightly a nd repeat t he s ide t est.• If t he p an a rm t ends t o m ove d own/forward, i t m eans t he g imbal i s b ack h eavy: m ove t he p an a rm s lightly forward a nd r epeat t he s ide t est.• When i n b alance, t he p an a rm s hould s tay a t a ny p osition a round t he h andle w hen t he h andle i s t ilted f orward.• Tighten t he t humb s crewsPower O N ▲Starting t he g imbal i n d efault p rofile• Press t he p ower b utton f or t wo s olid s econd t o p ower t he g imbal o n.• The g imbal s tart i n P an f ollow m ode.(Profile 2)• Use t he f ive-‐way j oystick (Fig. 9 [1]) t o c ontrol t he c amera t ilt a nd p an d irection.Push t he j oystick u p o r d own f or t ilt u p a nd d own.Push t he j oystick t o l eft o r t o r ight t o p an c amera t o l eft o r r ight.The O LED s hows t he c urrent c onditionSwitching t he g imbal t o d ifferent m odes o f o peration (profiles)• Press t he m ode b utton o ne t ime, w hich i s l ocated u nder t he O LED s creen t o e nter L ock M ode (Profile 1):camera w ill h old t he d irection a nd n ot f ollow, p an, o r t ilt. • Press t he m ode b utton t wice t o e nter P an-‐Follow M ode (Profile 2): T he g imbal f ollows p an a nd h olds t hetilt p osition. • Press t he m ode b utton t hree t imes t o e nter F ollow M ode (Profile 3): T he c amera f ollows t he t ilt a nd p andirections. • Press t he m ode b utton f our t imes t o e nter F ull F ollow M ode (Profile 4): T he g imbal w ill f ollow r oll, p itch,and p an. • Press t he m ode b utton f ive t imes t o e nter P rofile 5: T his w ill l evel r oll a nd b ring t he p itch t o t he h orizon. • Press t he m ode b utton a nd h old f or s ix s econds t o c alibrate t he g yroscope.Modes o f O peration (Profiles)▲Boot i nterface w ith c ompany l ogoprofile1: P ress m ode b utton o nce: L ock m odeprofile2: P ress m ode b utton t wice: P an F ollow m odeprofile3: P ress m ode b utton t hree t imes: F ollow m odeprofile4: P ress m ode b utton f our t imes: 3-‐Axis F ollow m odeprofile5: P ress m ode b utton f ive t imes: R eturn t o t he H ome p ositionNote:Press a nd h old t he m ode b utton f or 6 s econds t o s tart g yro c alibration D o n ot m ove t hegimbal w hile c allibration i s i n t he p rocess. I n c ase g imbal i s m oved, p lease r edo t hecalibration. Usually t he c alibration t akes a bout 5 s econds d uring t his t ime t he g imbalshut o ff a nd r estart t he m otors.Extensions a nd e xtra f eatures• 3/8 s tandard s crew h oles, c onnecting r ods 1/4 o r 3/8 t urn s crews s old s eparately.• Mini U SB f or c ontrolling t he g imbal v ia w ired j oystick• Handle s crew f or a n e xternal m onitor a nd m icrophone, l ights, e tc.• Genuine u niversal q uick r elease p late M anfrotto 577 s eries, s uch a s 501PL, 701,etc. 50mm w idth Q uick E dition OLED D isplay ▲ Extra F eatures ▲Compatible c amera m odels• The B eholder M SPRO s upports l ighter t han 200-‐900gram m irrorless c ameras, G opro c ameras, a nd smartphones.• List o f s upported c ameras:• Mirrorless: A 6300, A 7R2, A 7S + 24-‐ 70 / 16-‐ 35, G H4 + 12-‐ 35, G H3 + 14-‐ 140 a nd s o o n. • Compact c ameras: R X100, L X100Handheld c amera a ngle r angeThings t o c onsider b efore u seThe B eholder M S-‐PRO i s s hipped f rom t he f actory w ith p erfect c alibration. H owever, a fter a l ong p eriod o f u nuse or i f t he t emperature d ifference i s t oo l arge, i t m ay c ause t he g yroscope t o d rift a utomatically o r t o t ilt d uring u se.Gyro C orrection:Place t he B eholder M S-‐PRO h orizontally o n t he t able, p ower o n t he g imbal a nd p ress a nd h old t he m enu b utton f or 6 seconds. T he s ystem a utomatically e nters t he g yroscope c alibration m ode. T he m otors l ose p ower f or 5 s econds. A fter that, t he a utomatic s ystem c alibration i s c omplete a nd t he s tabilizer c an r esume n ormal u se.Note :1. During t he c alibration p rocess, h old t he g imbal h andle o n t he t able a s s table a s p ossible.2. The m ini U SB p ort i s d esigned o nly f or a w ired j oystick a nd c an't b e u sed f or c harging.3. In o rder t o o btaina b etter s hooting e xperience i n t he u se o f M SPRO w hen s hooting, a void a ny c ollision and d o n ot u se e xcessive f orce.Compatible C ameras▲Gimbal W orking A ngles▲Precautions▲Safety ▲Important s afety i nstructions1.Do n ot g et t oo c lose t o a m agnetic f ield o r t he s ource o f e xtreme h eat a nd f ire.ing a nd s toring t his p roduct u nder h igh t emperature a nd h umidity, w ater, o r h ighly c orrosive e nvironmentcan c ause t he d evice a n i nternal f ault.3.Protect t he p ower c ord t o a void t rampling o r b acklog, p articularly a t p lugs, s ockets a nd o ther p arts.4.Do n ot u se i ncompatible p ower s upply, c harger o r b atteries t hat m ay c ause a f ire, e xplosion o r o ther h azard.Use o nly m anufacturer a pproved e quipment a nd m atching a ccessories t o m eet s afety s tandards. O ther t ypes o f accessories m ay c ause p roblems w ith t he p roduct o r a s ecurity i ncident.5.For a l ong-‐term o ut o f u se o f t his p roduct, p lease r emove t he b attery, w rap i t i n a d ust-‐proof p ackaging a ndplace i t i n a d ry e nvironment.6.Do n ot u se t he d evice d uring a t hunderstorm o r i t m ay r esult i n e quipment m alfunction o r a r isk o f l ightningstrike.7.Do n ot e xpose t he b attery t o e xcessive h eat i n t he e nvironment, s uch a s s unlight, f ire o r s imilar f actors.8.Do n ot e xpose t his a ppliance t o d ripping o r s plashing l iquids.9.Do n ot p lace c onductive o bjects a t t he b attery h older e lectrical t erminal, o r c ontact t he b attery e nds, i n o rdernot t o c ause t he b attery t o s hort-‐circuit o r c ause b urns a nd o ther p hysical i njuries d ue t o t he b attery o verheat.10.Do n ot e xpose t he b attery n ear a ny h eat s ources s uch a s s unlight, h eaters, m icrowave, o ven, s tove, r adiator, o rother i nstruments t hat p roduce h eat (including a mplifiers).11.If t he b attery i s u sed i mproperly, t here m ay b e a n e xplosion h azard. I n o rder t o r educe t he r isk o f f ire o r b urns,do n ot d isassemble, c rush, p uncture, s hort e xternal c onnections, e xpose t o h eat o r t hrow i n f ire.12.If t he b atteries l eak, d o n ot a llow t he l iquid c ontact t he s kin o r e yes. I f y ou c ome i n c ontact w ith t he s kin o reyes, w ash w ith w ater i mmediately a nd g o t o h ospital f or m edical t reatment.13.If b attery d iscoloration, d eformation, a bnormal h eat a nd o ther p henomena o ccurs, p lease s top u sing a ndreplace t he b attery.14.This p roduct m ay c ontain s mall e quipment a nd p arts, k eep t he d evice a nd i ts a ccessories o ut o f r each o fchildren, c hildren m ay d amage t he d evice o r s wallow s mall p arts, b eware o f c hoking h azard.15.Dispose o f u sed b atteries i n a ccordance w ith l ocal r egulations.Copyright/Trademark S tatement ▲ Copyright/Trademark S tatementBeholder® a nd i kan® a re c ertified t rademarks, w hich c annot b e u sed w ithout o ur p ermission f or a ny other purposes. The product has a number of patents so if copies of the product are found, the perpetrator will h old t he r elevant l egal r esponsibility.A r egular d ealer m ust o btain m arketing a uthorization d ocuments. P lease v isit a n a uthorizeddealer t o p urchase.A l ist o f d istributors c an b e f ound o n t he w ebsite. I n c ase t he p roduct i s p urchased o n a n on-‐authorized c hannel, w e w ill n ot p rovide a fter-‐sales s ervice f or t he p roduct.Product f eatures, a ppearance o r o ther f unctions m ay c hange o ver t ime. T he c ompany i s f ree t o implement a nd r elease a ny c hanges a s d esired.Learn M ore:More d ynamic i nformation a t o fficial w ebsite: w Support:Contact e mail: s*******************Product S pecifications ▲Beholder M S-‐PRO t echnical s pecificationsModel: MS-‐PRO 3-‐axis s ingle h andheld g imbal s tabilizerLoad C apacity: 900gBattery: 3x 18650 3.7vBattery O perating T ime: Approx. 8-‐10 h oursBattery C harging t ime: Approx. 3-‐4 h oursWorking t emperature: -‐10 t o 70 d egrees C elsiusWorking a ngles:Pan: 360°Roll: 355°+-‐180°(effective o perating r ange)Pitch: 355°+-‐180°(effective o perating r ange) Tripod M ounting T hread 3/8"Accessory M ounting T hreads 1 x ¼-‐20"Length 17cmDimensions Width 13.4cmHeight 31.4cmWeight 1.94 l b ( 0.8kg)Canon: 5D / 6D / 7D + 16-‐35f4.0 / f2.8,24-‐105f4.0,24-‐70Camera S upport: Mirrorless, 5D/6D/7D+16-‐35 f4.0/f2.8,24-‐105 f4.0,24-‐70 , A6300, A7+24-‐70/16-‐35、GH4+12-‐35/14-‐40/7-‐14,RX100、LX100.Frequently a sked q uestions a nd a nswers1.How d o y ou c harge t he g imbal?The B eholder M S-‐PRO c an b e c harged i n t wo w ays: u sing t he b uilt-‐in b attery h older m icro U SB o r u sing a s eparate authorized d edicated c harger (recommended) s uch a s t he i kan I CH-‐SC4.Charging u sing t he b attery h older:-‐ R emove t he b attery c ap c over o n t he b ottom o f t he h andle.-‐ T ake t he b attery h older o ut.-‐ C onnect t he p ower c able t o t he M icro U SB.-‐ C onnect t he o ther c able e nd t o p ower s upply.Charging u sing a d edicated c harger:-‐ B uy a n a uthorized s mart c harger-‐ R elease t he b attery h older.-‐ T ake o ut t he b atteries a nd c harge w ith f ast c harger.2.After m ounting t he q uick r elease p late, s liding i t i nto t he s tabilizer s eems d ifficult. H ow d o y ou f ix t his? Release t he 1/4 s crew a bout t wo t urns a nd t hen i nsert t o t he g imbal Q R b ase.3.After b alancing t he c amera, a djusting t he c amera’s c enter o f g ravity, a nd t ightening t he s crews, t he c amera i sstill w obbly a nd u nstable. W hy?You n eed t o p ut t he r ubber s tickers o nto t he q uick r elease p late a nd t hen p ut t he c amera b ack o n.4.Why i s m y b attery h older n ot c harging?When u sing t he b attery h older a s a c harger, t he U SB p ower s upply m ust m eet t he m inimum r equirements. T he common U SB p ort m ay n ot s upply e nough p ower t o c harge t he b atteries. A U SB a dapter r ated a t a m inimum o f2.5A/12.5W o r m ore m ay b e n eeded. Y ou c an a lso p urchase t he B eholder m ulti-‐function i ntelligent c harger.5.When I s tart u p t he s tabilizer(the c amera’s c enter o f g ravity h as b een a djusted), w hy i s i t a lways t wisted t oone s ide?This m ay b e f rom g yro m agnetic f ields t hat a re a ffecting t he s urrounding e nvironment, l eading t o a n i ncorrect g yro direction. S olution: P ress a nd h old t he m ode b utton f or a bout 6 s econds t o e nter t he c alibration m ode. I t c an b e u sed normally a fter c alibration i s c omplete.。
美国SCILOGEX(赛洛捷克)实验室常用设备 MS-H280-Pro LED数显加热型磁力搅拌器

SCILOGEX仪器始终与国际第三方认证机构TÜV德国莱茵公司合作,其全系列产品都经过该公司全面严格的安全检测,获得由该公司颁发的CE、cTUVus、FCC国际通行的安全标准证书。
TÜV德国莱茵公司系最具公信力的欧盟官方指定认证机构(欧盟官方公告号019) 。
MS-H280-ProBlueSpin LED数显加热型磁力搅拌器1.国际安全品质国际安全认证:获得极具公信力的TUV德国莱茵公司颁发的CE, cTUVus和FCC产品安全认证过温保护:独立的安全回路设计,任何时候当盘面温度超过320度自动停止加热,保证实验室安全余热警告保护操作者:停止加热后当盘面温度超过50℃时(即便关机,不拔电源),也会出现盘面温度过热提醒,保护操作者安全阻燃塑料外壳,符合国际通行的安全防护DIN/EN 60529标准,高保护等级IP212.精确控温加热温度范围室温-280℃,加热温度控制精度±1°C可接外置温度传感器PT1000,控温精度±0.5°C,实时监测和控制样品温度3.双LED显示转速和温度LED显示屏显示温度设置值和实际值;显示目标转速加热型磁力搅拌器常用盘面材料的特性加热盘最高加热温度(℃)耐腐蚀加热均一性抗冲击性颜色易清洁玻璃陶瓷550 出色有限有限白色出色陶瓷550 好有限有限白色好铝合金340 有限出色有限银色有限不锈钢370 出色好好银色好磁力搅拌芯的适用型号(加热型)磁力搅拌芯和磁力搅拌芯取出器,150℃下永磁适用型号MS7-Pro MS-H-Pro+ MS-H-S MS-S MS-H280-ProMS-PAMS-PBMS-H-S10MS-M-S10货号磁力搅拌芯规格[mm]适用最长搅拌芯80mm适用最长搅拌芯50mm适用最长搅拌芯40mm18900006 10mm x 6mm ●●●18900007 15mm x 8mm ●●●18900008 20mm x 8mm ●●●18900009 25mm x 8mm ●●●12500005 30mm x 6m ●●●18900011 40mm x 8mm ●●●12500004 51mm x 8mm ●●18900013 65mm x 8mm ●18900014 80mm x 13mm ●18900015 搅拌芯取出器,长度20cm●●●备注:大龙公司配置150℃下永磁搅拌芯(PTFE,普通搅拌芯),在高温条件下应用可能会发生逐渐消磁现象,另外磁场干扰、重击和时间因素都可能引发退磁现象。
美国SCILOGEX(赛洛捷克)实验室常用设备 SK-O180-PRO数字轨道摇床
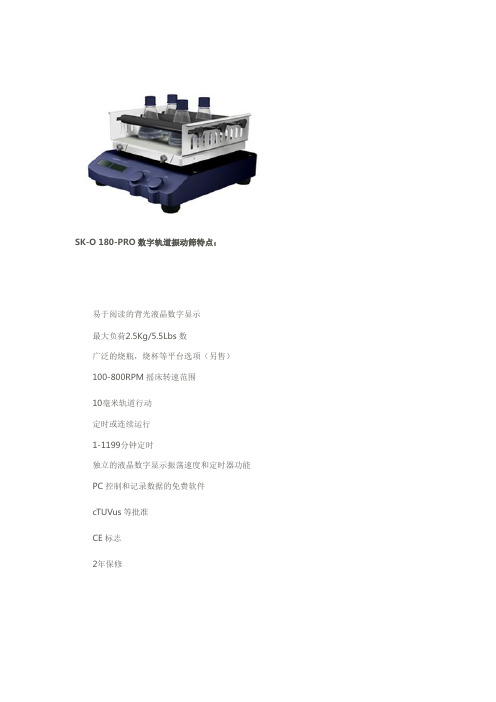
SK-O 180-PRO数字轨道振动筛特点:易于阅读的背光液晶数字显示最大负荷2.5Kg/5.5Lbs数广泛的烧瓶,烧杯等平台选项(另售)100-800RPM摇床转速范围10毫米轨道行动定时或连续运行1-1199分钟定时独立的液晶数字显示振荡速度和定时器功能PC控制和记录数据的免费软件cTUVus等批准CE标志2年保修SK-O 180-PRO数字轨道摇床规格::轨道Shaking action行动::Speed range速度范围100-500转:Timer定时器::1 - 1199分钟Orbit diameter轨道直径::4.5毫米Maximum load最大负荷::2.5/Kg/5.5LbsOperating temperature range工作温度范围::+4 - 40℃Maximum humidity最大湿度::80%Plate dimensions板尺寸::9×9英寸Overall dimensions外形尺寸::17W x 12D x 5H英寸Weight重量::19LbsElectrical supply电力供应::110V,60HZ,30WSK-O 180-PRO数字轨道摇床订购信息:产品编号::模型83201005::SK-O180-Pro 数字轨道摇床2.5 Kg/5.5Lbs容量,110V 60HZSK-Ø180-PRO 数字轨道摇床附件:Catalog No. 产品编号:: Accessories 饰品18900025::3可调夹紧酒吧与各种瓶/船只使用的通用平台18900039 ::(NEW!)组织培养瓶中的平台,培养瓶等表面防滑(新)18900026 ::固定剪辑平台等各种瓶/瓶(订单固定夹下面分别)18900029 ::振动筛为圆瓶25卷毫升的固定扣18900030 ::S 振动筛为圆烧瓶体积50毫升的固定扣18900031 ::振动筛为圆瓶量100毫升的固定扣18900032 ::振动筛为圆烧瓶容积200/250毫升的固定扣:18900033振动筛为圆瓶500毫升的固定扣:New!新!Free PC-Software for control & data logging via RS232.免费的PC软件通过RS232控制和数据记录。
MS-PA BlueSpin LED 数显磁力搅拌器和数显磁力搅拌器价格
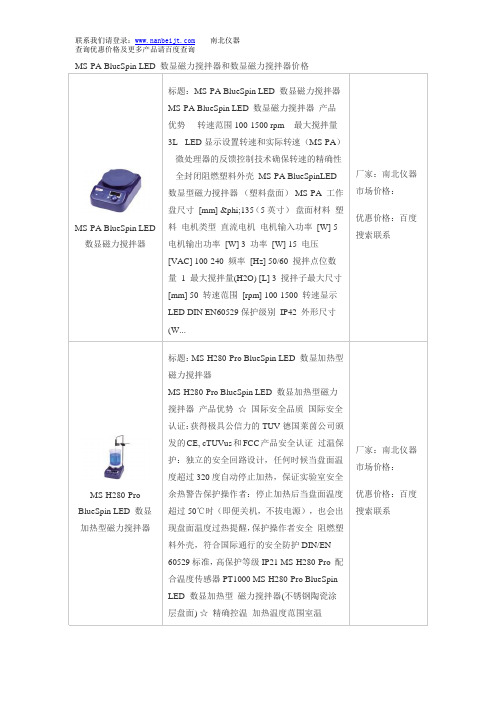
标题:MS-H-S BlueSpin标准加热型磁力搅拌器
MS-H-S BlueSpin标准加热型磁力搅拌器产品优势-最高加热温度340°C -不锈钢陶瓷涂层工作盘耐高温耐腐蚀-独立安全回路,超过安全温度自动停止加热-直流无刷电机免维护,转速稳定并精确可控-强磁性磁铁,有效防止搅拌子逃脱-全封闭外壳,保护等级IP42,确保使用寿命和安全MS-H-S BlueSpin标准加热型磁力搅拌器(不锈钢陶瓷涂层盘) MS-H-S电压[VAC] 220频率[Hz] 50/60功率[W] 530搅拌点位数量1最大搅拌量(H2O)[L] 20搅拌子最大长度[mm] 80电机类型无刷直流电机电机输入功率[W] 18电机输出功率[W] 10速度范围[rpm] 0-1500转速显示刻度工作盘材...
厂家:南北BlueSpin LED数显加热型磁力搅拌器
标题:MS-H280-Pro BlueSpin LED数显加热型磁力搅拌器
MS-H280-Pro BlueSpin LED数显加热型磁力搅拌器产品优势☆国际安全品质国际安全认证:获得极具公信力的TUV德国莱茵公司颁发的CE, cTUVus和FCC产品安全认证过温保护:独立的安全回路设计,任何时候当盘面温度超过320度自动停止加热,保证实验室安全余热警告保护操作者:停止加热后当盘面温度超过50℃时(即便关机,不拔电源),也会出现盘面温度过热提醒,保护操作者安全阻燃塑料外壳,符合国际通行的安全防护DIN/EN 60529标准,高保护等级IP21 MS-H280-Pro配合温度传感器PT1000 MS-H280-Pro BlueSpin LED数显加热型磁力搅拌器(不锈钢陶瓷涂层盘面)☆精确控温加热温度范围室温-280℃,加热温度控制精度±1°C可接外置...
AMSCO V-PRO MAX 低温 sterilization 系统(仅适用于非美国地区)说明书

AMSCO ® V-PRO ® MAX LOW TEMPERATURESTERILIZATION SYSTEM (For Use Outside U.S.A. Only)Item ________________________Location(s)_______________________________________________The Selections Checked Below Apply To This EquipmentUNIT POWER SUPPLY ❑North America:200-208/230 Vac, 3 phase, 50/60 Hz, 16 Amp ❑Europe/Asia:400 Vac, 3 phase, 50 Hz, 10 Amp ❑Japan:200 Vac, 3 phase, 50/60 Hz, 16 AmpLABELS AND MANUALS ❑French ❑Finnish ❑ Danish ❑Italian ❑Russian ❑ Portuguese ❑German ❑Polish ❑ Hungarian❑Spanish ❑ JapaneseMOUNTING❑Single Door, Cabinet ❑Single Door, Recessed ❑Double Door, CabinetAPPLICATIONThe Amsco V-PRO maX Low Temperature Sterilization System is intended for use in the terminal sterilization of properly prepared (cleaned, rinsed and dried) reusable metal and nonmetal medical devices used in Healthcare Facilities. The STERIS developed low pressure and low temperature Sterilization Cycles are suitable for sterilizing medical devices sensitive to heat and moisture.The Amsco V-PRO maX Low Temperature Sterilization System performs three pre-programmed Sterilization Cycles: the Lumen Cycle (approximately 55 minutes to complete), the Non Lumen Cycle (approximately 28minutes to complete) and the Flexible Cycle (approximately 35 minutes to complete).This sterilization system using the Lumen Cycle can sterilize* the following:1.Lumened and non-lumened instruments with diffusion-restricted spaces such as the hinged portion of forceps and scissors.2.Medical devices (including single, dual and triplechanneled rigid and semi-rigid endoscopes) with the following configurations:1•Single channeled devices with a stainless lumen thatis ≥0.77mm (~1/32") internal diameter (D) and ≤500mm (19-11/16") in length•Dual channeled devices with stainless lumens thatare ≥0.77mm (~1/32") ID and ≤ 527 mm (20-3/4") in length•Triple channeled devices with stainless lumens thatare either:»≥ 1.2 mm (~3/64") ID and ≤ 275 mm (~10-55/64")in length»≥ 1.8 mm (~5/64") ID and ≤ 310 mm (~12-13/64")in length»≥ 2.8 mm (~7/64") ID and ≤ 317 mm (12-31/64") in length1Validation testing for all channel/lumen sizes was conducted using a ma ximum of 20 lumens per loa d. Hospita l loa ds should not exceed this validated number of lumens. Validation studies were performed using a va lida tion loa d consisting of two instrument trays and two pouches for a total weight of 8.91kg (19.65 lb).This sterilization system using the Non Lumen Cycle can sterilize 2 non-lumened instruments including non-lumened rigid, semi-rigid and flexible endoscopes and non-lumened instruments with stainless-steel diffusion-restricted areas such as the hinged portion of forceps or scissors.2Validation studies conducted using validation load of two instrument trays and two pouches for a total weight of 8.91kg (19.65 lb).This sterilization system using the Flexible Cycle can sterilize single or dual lumen surgical flexible endoscopes (such as those used in ENT, Urology and Surgical Care) and bronchoscopes in either of two configurations:1.Two flexible endoscopes with a light cord (if not integral to endoscope) and mat with no additional load.3 The flexible endoscopes may contain either:» A single lumen with an inside diameter of ≥ 1 mm (~3/64") and a length of ≤ 1050 mm (41")»Or two lumens with:•One lumen with an inside diameter of ≥ 1 mm (~3/64") and a length of ≤ 998 mm (39")•And the other lumen with an inside diameter of ≥ 1mm (~3/64") and a length of ≤ 850 mm (33")3The valida tion studies were conducted with two flexible endoscopes, ea ch pa cka ged into a tra y with silicone ma t a nd light cord (if not integra l to endoscope).(Typical - details may vary.)2.One flexible endoscope with a light cord (if not integral toendoscope) and mat and additional non-lumenedinstruments including instruments with diffusion-restricted areas such as the hinged portion of forcepsand scissors.4The flexible endoscope may containeither:» A single lumen with an inside diameter of ≥ 1 mm (~3/64") and a length of ≤ 1050 mm (41")»Or two lumens with:•One lumen with an inside diameter of ≥ 1 mm(~3/64") and a length of ≤ 998 mm (39")•And the other lumen with an inside diameter of≥ 1mm (~3/64") and a length of ≤ 850 mm (33")4The validation studies were conducted with a flexible endoscope in a tray with silicone mat and light cord (if not integral to endoscope). Also included in the load were an additional instrument tray and one pouch for a total weight of 11kg (24lb).DESCRIPTIONThe Amsco V-PRO maX Low Temperature Sterilization System is specifically designed to only process goods using vaporized hydrogen peroxide under vacuum conditions. The process is fully automated, is compatible with a broad range of materials and has rapid Sterilization Cycle times. There are no toxic by-products created by the Sterilization Cycle – only water vapor and oxygen are produced.The Amsco V-PRO maX Low Temperature Sterilization System is NOT intended to process liquids, linens, powders or cellulose materials.The system utilizes specially designed, disposable, multi-use Cartridges (available separately) containing VAPROX® HC Sterilant and is available in either a single door (freestanding or recessed) or double door configuration.Articles to be sterilized are placed on a racking system within the aluminum chamber. An automated control enables the cycle to be started and monitored by the operator. The touch screen is user friendly and easy to operate.System installation requires no plumbing, ventilation or air supply – only a dedicated electrical connection is needed. A power cord is supplied for this connection.STANDARDSThis Amsco V-PRO maX Low Temperature Sterilization System meets the applicable requirements of the following standards, as certified by INTERTEK Testing Services:•Underwriters Laboratories (UL) Standard UL 61010-1, Second Edition•Canadian Standards Association (CSA) CAN/CSA 22.2 No. 61010-1, Second EditionGoverning Directive for the affixing of the CE mark: •Medical Device Directive (MDD) 2007/47/ECStandards applied to demonstrate conformity to the directives:•EN 61010-1•EN 60601-1-2•EN 14937•IEC 61010-2-040Each sterilization system is designed, fabricated, assembled and tested in accordance with all applicable sections of UL and CSA.SIZE (W X H X L)Overall Dimensions:•838 x 1908 x 973 mm (33 x 75-1/8 x 38-5/16")Chamber Size:•432 x 381 x 826 mm (17 x 15 x 32-1/2")Chamber Volume:•136 L (4.8 cubic feet)FEATURESThe chamber and door assembly are aluminum equipped with a silicone rubber gasket for each door and a welded backhead on single door units.Insulation fitted on the chamber wall exterior, door and backhead is 25mm (1") thick (nominal). Insulation is held in place with hook-and-loop closures.Insulation is constructed of asbestos- and chloride-free, oil and water resistant (silicone impregnated) fiberglass.Automatic door locking mechanism keeps the sterilization system door locked during the entire Sterilization Cycle. After cycle completion, air pressure is used to unlock the door. The sterilizer door cannot be opened if either electrical power or air pressure is lost during sterilizer operation. When sterilization system is in Standby mode, there are no door opening restrictions. Chamber heating is achieved through electric strip heaters attached to the chamber sides, bottom wall, door and backhead. Operating temperature is approximately 50°C (122°F)Sterilant cartridge interface only accepts VAPROX HC Sterilant Cartridges (Cups). The system control automatically tracks the amount of VAPROX HC Sterilant used and the Sterilant expiration date. The control prompts the user on the control display when a new Cup is needed.The proprietary Cartridge is equipped with a data matrix code to ensure the correct Cup is used in the sterilization unit and that the Cup contents are not expired; no Cup code (or other information) needs to be entered by the user.Catalytic converter receives outflow from chamber during all cycle phases. Catalytic converter converts hydrogen peroxideinto water vapor and oxygen.CartridgeInterfaceHMI Display PrinterOther Components:The following are furnished to obtain a complete working unit, ready for (but not including) connection to the facility service lines:•Resistive Thermal Detectors (RTDs) are installed for sensing and displaying temperature control of vaporizer and chamber. Signals from all system RTDs, converted into electrical impulses, provide accurate control inputs and readouts throughout the entire cycle.•Pressure Transducers are installed for sensing and displaying chamber pressure control. Signals from allsystem pressure transducers, converted into electricalimpulses, provide accurate control inputs and readouts throughout the entire cycle.•Pneumatic and Solenoid Valves and Switches are used in the sterilization system design to simplify piping andincrease serviceability.•Air Supply and Vacuum Filters are supplied to ensure air entering chamber is HEPA (High Efficiency Particulate Air) filtered (prevent chamber recontamination) and airexhausted from vacuum pump is free of entrapped oil and odor.•Sterilization System Panels are constructed of plastic and stainless steel.•Sterilization System Frame and support system is constructed of welded carbon steel with protective paint.•High Power Vacuum Pump is supplied to produce cycle vacuum pulses that remove air and moisture from thechamber. The direct drive rotary vane pump is quiet(<60dB) with low vibration. A powerful 2.2 kW (3 HP)motor produces a displacement of 90 m3/hr (53 CFM) and helps alleviate moisture sensitivity in the sterilization unit.The Sterilizer operating pressure is from atmosphericpressure down to less than 1 Torr.CONTROL DESCRIPTIONThe Amsco V-PRO maX Low Temperature Sterilization System is equipped with an Allen-Bradley Compact Logix™ (Panel View Plus™ 6 1000 Display1) control system and an impact printer.•Control Display Panel is located on the front of the sterilization unit in the center while facing the unit. Thiscolor touch panel provides user information and allows user inputs. The display is a 640 x 480 pixel resolution,10.4" screen. Use of this panel and associated screens isnormally self-explanatory. The screens are color coded for operator convenience as follows:»Control Screens -»Condition Phase - Green»Sterilize Phase - Blue»Aeration Phase - Violet»Service Screens - Light Blue»Option Screens - Purple»Alarm Screens - RedNOTE: This Sterilization System permits no manual control of the Sterilization Cycles.The Ready, Status, Standby and Cup Empty screensinclude a cup level indicator (similar to a cell phone battery indicator) in the lower right corner (see Typical Operator Screens). For normal operation, each bar representsapproximately four cycles remaining (e.g., four bars means cup contains enough sterilant for 13-16 cycles).•Printer is located on the front of the sterilization unit on the right side while facing the unit. This alphanumeric impact printer provides an easy to read permanent record of the Sterilization Cycle. Printer provides a 5.7cm (2-1/4"), 24-character wide cycle tape and paper take-up.1CompactLogix™ and PanelView™ Plus 6 1000 are trademarks ofAllen-Bradley, a Rockwell Automation Company.p yTypical Operator ScreensCYCLE DESCRIPTIONThe Amsco V-PRO maX Low Temperature Sterilization System is equipped with three pre-programmed Sterilization Cycles: Lumen Cycle (approximately 55 minutes to complete),Non Lumen Cycle (approximately 28 minutes to complete) and Flexible Cycle (approximately 35 minutes to complete). Each Sterilization Cycle proceeds through three phases: CONDITION, STERILIZE and AERATION.•CONDITION – Lumen Cycle: This cycle phase is a set time vacuum pulse to remove air and moisture from thechamber. When setpoint is reached, load is tested foracceptable moisture content. If content is acceptable,cycle proceeds. If not, Condition pulse repeats.Non Lumen Cycle: This cycle phase is a vacuum pulse to remove air and moisture from the chamber. When setpoint is reached, load is tested for acceptable moisture content. If content is acceptable, cycle proceeds. If not, Condition pulse as identified for Lumen Cycle is initiated.Flexible Cycle: This cycle phase is a vacuum pulse toremove air and moisture from the chamber. When setpoint is reached, load is tested for acceptable moisture content. If content is acceptable, cycle proceeds. If not, Condition pulse as identified for Lumen Cycle is initiated.NOTE: If Condition phase fails the second moisture check, the cycle Aborts.•STERILIZE – This cycle phase is a series of four pulses.Each pulse consists of: vacuum pulled to setpoint;VAPROX HC Sterilant vapor drawn into chamber; hold for programmed time; filtered air is introduced to setpoint; hold for programmed time; deep vacuum pulled to setpoint.•AERATION – This cycle phase pulls a vacuum to setpoint and continues to evacuate for programmed time to reduce chamber vapor concentration. Once Aeration phase iscomplete, chamber pressure returns to atmospheric and chamber door is unlocked.PREVENTIVE MAINTENANCECustomers are encouraged to contact STERIS concerning annual maintenance programs. Preventive maintenance, adjustments and replacement of worn parts are provided on a scheduled basis to help ensure optimal equipment performance and help minimize untimely and costly interruptions. STERIS maintains a worldwide staff of well-equipped, factory-trained technicians to provide these services, as well as on-site installation, training, and expert repair services. Contact STERIS for details.CUSTOMER IS RESPONSIBLE FOR COMPLIANCE WITH APPLICABLE LOCAL AND NATIONAL CODES AND REGULATIONS.NOTES1.For general installation information, refer to STERIS GeneralNotes for Sterilizers (drawing 062941-091). This drawing should always accompany the equipment drawing.2.Refer to equipment drawing showing all utility and spacerequirements for actual installation specifications.Clearances shown are minimum required for servicingequipment. Floor surface must be hard and level.3.STERIS recommends maintaining and operatingsterilization system in area where temperature does not exceed 40°C (104°F) and has ventilation systemexchanging area air at least 10 times per hour.4.STERIS recommends a dedicated, grounded electricalcircuit be provided for each unit. Use of an extension cord is not recommended.5.Consult MSDS regarding storage and handling ofVAPROX HC Sterilant Cartridges (Cups).6.Unit weight: Single Door – 386 kg (850 lb) recessed and463kg (1020 lb) free-standing; Double Door – 562kg(1240lb) recessed one wall.7.Heat loss at 21°C (70°F) – Peak=1,046 BTU/hr;Avg.=942BTU/hr.8.Electrical Consumption, per cycle=2.2 kW-hr average;out of cycle=0.7 kW-hr average.9.STERIS assumes no responsibility for changes to theSterilization Unit made necessary through failure to observe the supplied necessary specifications (e.g., incorrect facility power supply). Specifications are subject to change without notice.EQUIPMENT DRAWINGS (REQUIRED FOR INSTALLATION)Equipment DrawingPart NumberEquipment Drawing Title129385-449Single Door, Recessed 129385-450Single Door, Cabinet 129385-451Double Door, CabinetSINGLE DOOR, CABINET MODEL SHOWNDimensions are in inches [mm]Not Fo rI n s t a l l at i o n SIDE VIEW PLAN VIEWFRONT VIEWDrawing is not to scale.Dimensions are typical.30 1/2[775]DOOR SWINGFor Further Information, contact:STERIS Corporation5960 Heisley RoadMentor, OH 44060-1834 • USA440-354-2600 • 800-548-4873This document is intended for the exclusive use of STERIS Customers, includingarchitects or designers. Reproduction in whole or in part by any party other than。
joanlab磁力搅拌器操作说明msc

joanlab磁力搅拌器操作说明msc 磁力搅拌器也是磁力搅拌器的一种类型。
是用于液体混合搅拌加热的一种实验室仪器,主要用于同时加热搅拌低黏稠度的液体或固液混合物。
其基本原理是利用磁场的同性相斥、异性相吸的原理,使用磁场推动放置在容器中带磁性的搅拌子进行圆周运转,从而达到搅拌液体的目的。
采用优质直电机,噪音小,调速平稳,全封闭式加热盘可作辅助加热之用。
恒温磁力搅拌器可设定温度及温度显示,可长期加热使用,数显直观准确。
由聚四氟乙烯和优质磁钢精制成的搅拌子,耐温、耐磨、耐化学腐蚀、磁性强。
可在密闭的容器中行调混工作,使用方便。
磁力搅拌器使用方法
当使用本仪器时,请检查随整机配件是否齐全,然后按顺序装好夹具,把所需搅拌的烧杯放在镀铬盘(或不锈钢盘)正中,加入溶液把搅拌子放在烧杯溶液中,是恒温型的将控温探头固定在橡胶夹头上,使金属棒存放到烧杯中,注意不能太下影响搅拌子,然后插上仪器接插的电源插头,再接通电源打开电源调速开关,指标灯亮,即开始工作,调速是由低速逐步调至速,不允许速档直接起动,以免搅拌子不同步,引起跳动。
加热型的有开关控制,打开加热源开关,选择所需的温度,绿灯亮表明加热盘工作,红灯亮表明停止加热盘工作,此时入恒温状态,不工作时应切断电源,为确保安全,使用时请接上地线.仪器应保持清洁干燥,严禁溶液入机
内,以免损坏机件防止剧烈震动.
注意事项
1.搅拌时发现搅拌子跳动或不搅拌时,请切断电源检查烧杯底是否平整,位置是否正确,同时请您检测下,现用的电压是否在220V之间。
2.加热时间不宜过长,间歇使用寿命延长。
3.中速运转可连续工作8小时,速运转可连续工作4小时。
Thermo Scientific 精密小型重力炉辅助热风炉产品说明书

Precision Compact GravityConvection OvensModel No.PR305215G,PR305210G,PR305210GCNPR305225G,PR305220G,PR305220GCNLTM1879X1•8/4/09T able of Contents Introduction (3)Product Overview (3)Safety Information (4)Alert Signals (4)Specifications (5)Power Requirements (5)Overall Dimensions (5)Chamber Dimensions (5)Volume (5)Shipping Weight (5)Performance Characteristics (5)Environmental Operating Conditions (5)Unpacking and Installation (6)Shipping Carton (6)Location (6)Electrical Requirements (6)Installation (7)Operation (8)Start-Up (8)Maintenance (9)Replacement Parts (10)Wiring Diagrams (11)Ordering Procedures (14)Warranty (16)2Introduction4These instructions contain important operating and safety information.The user must carefully read and understand these instructions before using the oven.Y our unit has been designed to optimize function,reliability,safety and ease of use.It is the user’s responsibility to install the oven in conformance with local electrical codes.SafetyInformationWarningWarnings alert you to a possibility of personal injury.CautionCautions alert you to a possibility of damage to the equipment.NoteNotes alert you to pertinent facts and conditions.Hot SurfaceHot surfaces alert you to a possibility of personal injury if you come in contact with a surface during use or for a period of time after use.Alert SignalsSpecificationsUnpacking and InstallationNoteLeave unit disconnected when not in use.6U NPACKING AND I NSTALLATION7NoteIf the equipment is used in specified by the tion provided by the impared.OperationWarningDo not use in the mable or combustible materials or explosive gases.Do not use in the presence of pressurized or sealed containers –fire or explosion may result,causing death or severe injury.WarningDo not heat any substance above a temperature that will cause it to emit toxic fumes;death or severe injury may result.CautionIt is the user’s responsibility to mon-itor oven action when setting and maintaining operating temperature;oven failure may occur with possi-ble property damage and/or injury to personnel.Status LampCon t rol P o w er S wi t c hControl PanelWarningT o avoid electrical short or shock,do not allow any metal object to pro-trude into the space beneath the shelf that serves as the heater shield inside the oven.In addition,do not operate oven with the shield removed.Hot SurfaceAt the higher temperatures,the exte-rior of the oven and particularly the thermometer vent ring on the top become uncomfortably warm to the touch.To avoid burns,do not touch these surfaces.8MaintenanceBecause of their rugged,simple construction,these ovens require very little maintenance.Ordinary cleaning will suf-fice.The bottom shelf that covers the heater can be removed for easy access to the heater area.Clean up any spills as soon as possible to prevent materi-als being baked on surfaces.When the oven is cool,use a mild soap and water to clean surfaces.Rinse thorough-ly and dry.It is best to avoid highly abrasive cleaners that can damage the finish of the interior surfaces and shelves.If the oven fails to heat,there may be several possible causes:•Oven is not receiving electrical power.•Heater is burned out.•Thermostat is malfunctioning.Have a qualified electrical technician determine the cause of the problem and make the necessary repairs.Y our local Thermo Scientific products dealer can provide the service and replacement partsneeded.WarningDisconnect from the power supply prior to maintenance and servicing.NoteMake no attempt to service or repair a Thermo Scientific product under warranty before consulting your Thermo Scientific dealer.After the warranty period,such consultation is still advised,especially when the repair may be technically sophisticat-ed or difficult.If assistance is needed beyond what the distributor can pro-vide,please call Customer Service at 800-553-0039.No merchandiseshould be returned directly to the fac-tory without obtaining a ReturnMaterials Authorization (RMA)num-ber from CustomerService.9Replacement Parts DESCRIPTION PART NUMBER Tension Catch:600-124-00 Handle:560-248-00 Feet:790-225-00 Status Lamp Base:360-233-01 Status Lamp Lens(amber):360-235-00 Power Switch(120V):SWX143 Power Switch(240V):440-292-00 Thermometer Grommet:790-247-00 Thermometer Holder:910-039-00 Control Thermostat:920-412-00 Thermostat Knob:560-265-00Hi-Limit Thermostat:920-413-00 Heaters:PR305215G:340-212-00PR305225G:340-213-00PR305210G,PR305210GCN:340-214-00PR305220G,PR305220GCN:340-215-00 Shelves Kit:PR305215G,PR305210G,PR305210GCN:3510-8QPR305225G,PR305220G,PR305220GCN:3511-8Q10Wiring DiagramsOrdering ProceduresPlease refer to the Specification Plate for the completemodel number,serial number,and series number whenrequesting service,replacement parts or in any corre-spondence concerning this unit.All parts listed herein may be ordered from the ThermoScientific dealer from whom you purchased this unit orcan be obtained promptly from the factory.When serviceor replacement parts are needed we ask that you checkfirst with your dealer.If the dealer cannot handle yourrequest,then contact our Customer Service Departmentat563-556-2241or800-553-0039.Prior to returning any materials,please contact ourCustomer Service Department for a“Return MaterialsAuthorization”number(RMA).Material returned withoutan RMA number will be refused.12One Y ear Limited Warranty This Thermo Scientific product is warranted to be free of defects in materials and workmanship for one(1) year from the first to occur of(i)the date the product is sold by the manufacturer or(ii)the date the product is purchased by the original retail customer(the“Commencement Date”).Except as expressly stated above,the MANUFACTURER MAKES NO OTHER WARRANTY,EXPRESSED OR IMPLIED,WITH RESPECT TO THE PRODUCTS AND EXPRESSL Y DISCLAIMS ANY AND ALL WARRANTIES,INCLUDING BUT NOT LIMITED TO,WARRANTIES OF DESIGN,MERCHANT ABILITY AND FITNESS FOR A PARTICULAR PURPOSE.An authorized representative of the manufacturer must perform all warranty inspections.In the event of a defect covered by the warranty,we shall,as our sole obligation and exclusive remedy,provide free replace-ment parts to remedy the defective product.In addition,for products sold within the continental United States or Canada,the manufacturer shall provide free labor to repair the products with the replacement parts,but only for a period of ninety(90)days from the Commencement Date.The warranty provided hereunder shall be null and void and without further force or effect if there is any(i) repair made to the product by a party other than the manufacturer or its duly authorized service representa-tive,(ii)misuse(including use inconsistent with written operating instructions for the product),mishandling, contamination,overheating,modification or alteration of the product by any customer or third party or(iii)use of replacement parts that are obtained from a party who is not an authorized dealer of Thermo Scientific prod-ucts.Heating elements,because of their susceptibility to overheating and contamination,must be returned to the factory and if,upon inspection,it is concluded that failure is due to factors other than excessive high tempera-ture or contamination,the manufacturer will provide warranty replacement.As a condition to the return of any product,or any constituent part thereof,to the factory,it shall be sent prepaid and a prior written authorization from the manufacturer assigning a Return Materials Number to the product or part shall be obtained.IN NO EVENT SHALL THE MANUFACTURER BE LIABLE TO ANY P ARTY FOR ANY DIRECT,INDIRECT, SPECIAL,INCIDENTAL,OR CONSEQUENTIAL DAMAGES,OR FOR ANY DAMAGES RESULTING FROM LOSS OF USE OR PROFITS,ANTICIPATED OR OTHERWISE,ARISING OUT OF OR IN CONNECTION WITH THE SALE,USE OR PERFORMANCE OF ANY PRODUCTS,WHETHER SUCH CLAIM IS BASED ON CONTRACT,TORT(INCLUDING NEGLIGENCE),ANY THEORY OF STRICT LIABILITY OR REGULATORY ACTION.For the name of the authorized Thermo Scientific product dealer nearest you or any additional information,contact us:2555Kerper Blvd.,Dubuque,Iowa,52004-0797Phone:563-556-2241or1-800-553-0039Fax:563-589-0516Web:13。
高山韭挥发性成分HS-SPME-GC-MS分析及香料搭配应用
动植物研究《西藏科技》2020年12期(总第333期)咼山韭挥发性成分HS-SPME-GC-MS 分析及香料搭配应用**基金项目:西藏自治区科技计划项目"西藏高原优势及濒危动植物种质资源DNA 信息采集”(XZ 201801-GA-07);中央引导地方科技发展资金项目"西藏战略资源植物种质采集与保存1期”(XZ202001YD0008C )**通讯作者白玛央宗普布多吉马超**(西藏自治区高原生物研究所,西藏 拉萨 850008)摘 要:以西藏康马县野生高山韭为材料,对其进行形态和分子生物学鉴定,采用固相微萃取气相-质谱联用分 析和面积归一法测定各组分含量,通过高山韭在辣椒粉和孜然粉中按照不同比例复配并在烧肉中应用。
结果显示,该材料为高山韭,其主要芳香成分为右旋-柠檬烯(7.82%),右旋香芹酮(27.56%),乙酸芳樟酯(11.23%),同时 含有丰富的含硫芳香物质异丙基二硫(2.25%),丙基丙烯基二硫(2.23%),二丙基三硫醚(4.59%)。
复配高山韭含量为&80~16:80的辣椒粉和孜然粉中葱韭香味明显,口感适合,为康马县高山韭资源开发提供理论依据,助力地区产业扶贫开发。
关键词:高山韭 SPME GC-MS 挥发性成分 香料高山韭(Allium sikkimense )是百合科葱属的多年生草本宿根植物。
西藏及周边地区广泛分布,生于海拔2400m - 5000m 的山坡草地、林下和林缘[1]0葱属 作物具有较高的营养价值,是重要的世界性蔬菜和调味品,研究其遗传多样性具有重要的理论和实践意 义叭葱属植物含有含硫化合物、甾体皂苷、黄酮类化合物和多糖等活性物质,具有多种生理功能,如抗真 菌、抑菌消炎、解痉、抗血小板聚集、抗氧化、降低胆固 醇、抗肿瘤和缓解糖尿病等作用,亠5〕是开发防治心血 管疾病和抗肿瘤药物的重要依据。
研究上仅有研究侧重在不同居群间核型比较同,与近缘种不同居群黄 酮类化合物比较利用同工酶⑷和随机扩增多态DNA 技术⑼分析其种内分化等方面,高山韭作为香料植物,添加在食品中能产生独特的香味;段双全将高 山韭作为食品添加剂与辣椒粉进行了搭配评价了其香味和口味冏。
美国SCILOGEX(赛洛捷克)实验室常用设备 旋转混匀仪MX-RL-Pro MX-RD-Pro
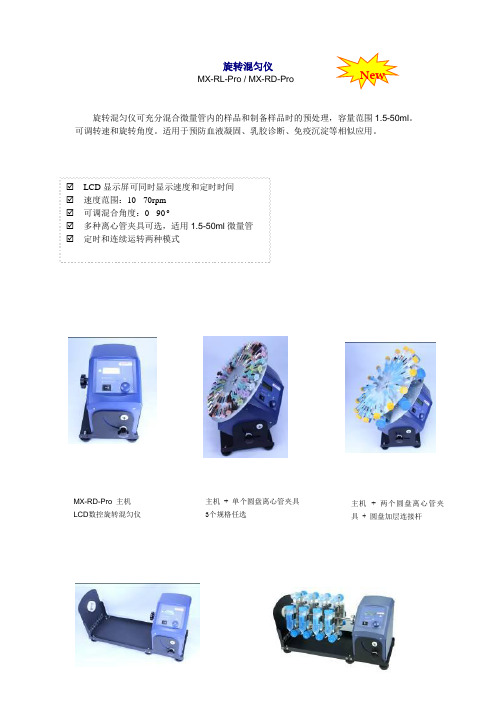
旋转混匀仪MX-RL-Pro / MX-RD-Pro旋转混匀仪可充分混合微量管内的样品和制备样品时的预处理,容量范围1.5-50ml 。
可调转速和旋转角度。
适用于预防血液凝固、乳胶诊断、免疫沉淀等相似应用。
NewLCD显示屏可同时显示速度和定时时间☑ 速度范围:10 - 70rpm ☑ 可调混合角度:0 - 90o ☑ 多种离心管夹具可选,适用1.5-50ml 微量管 ☑ 定时和连续运转两种模式 MX-RD-Pro 主机 LCD 数控旋转混匀仪 主机 + 单个圆盘离心管夹具 3个规格任选 主机 + 两个圆盘离心管夹具 + 圆盘加层连接杆技术指标MX-RD-Pro / MX-RL-Pro 电压 [VAC] 100-240 频率 [Hz] 50/60 功率 [W] 40 电机 直流电机 角度 [o ] 0-90 速度范围 [rpm] 10-70 速度显示 LCD 定时 Yes 时间显示LCD 时间设置范围 [min] 1-1199 运行方式定时/连续运转 尺寸 [D×W×H mm] 510×190×260 重量 [kg]8 允许环境温度范围 [℃] 5-40 允许相对湿度80% DIN EN60529保护方式IP21MX-RL-Pro 主机 LCD 数控旋转混匀仪 主机 + 长轴离心管夹具 6个规格任选附件货号:18900137 适用于MX-RD-Pro 圆盘离心管夹具,1.5ml x 60 离心管 货号:18900138 适用于MX-RD-Pro 圆盘离心管夹具,15ml x 16 离心管货号:18900139 适用于MX-RD-Pro 圆盘离心管夹具,50ml x 8 离心管货号:18900140 适用于MX-RD-Pro圆盘加层连接杆,4根货号:18900142 适用于MX-RL-Pro 长轴离心管夹具,可水平安装1.5ml x 48 离心管 货号:18900143 适用于MX-RL-Pro 长轴离心管夹具,可水平安装15ml x 24 离心管货号:18900144 适用于MX-RL-Pro 长轴离心管夹具,可水平安装50ml x 24 离心管 货号:18900145 适用于MX-RL-Pro 长轴离心管夹具,可竖直安装1.5ml x 32 离心管货号:18900146适用于MX-RL-Pro长轴离心管夹具,可竖直安装15ml x 16 离心管货号:18900147 适用于MX-RL-Pro 长轴离心管夹具,可竖直安装50ml x 16 离心管订货信息主机订货号型号描述824232110000 MX-RD-Pro LCD数控旋转混匀仪(不含离心管夹具), 可调速,110V-240V/50HZ/60HZ,国标插头824222110000 MX-RL-Pro LCD数控旋转混匀仪(不含离心管夹具), 可调速,110V-240V/50HZ/60HZ,国标插头。
美国SCILOGEX(赛洛捷克)SK-L180-Pro线性数显型摇床
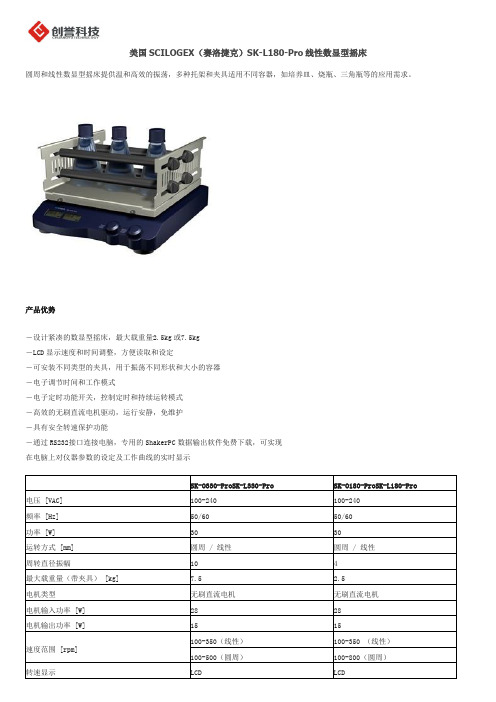
美国SCILOGEX(赛洛捷克)SK-L180-Pro线性数显型摇床
圆周和线性数显型摇床提供温和高效的振荡,多种托架和夹具适用不同容器,如培养皿、烧瓶、三角瓶等的应用需求。
产品优势
-设计紧凑的数显型摇床,最大载重量2.5kg或7.5kg
-LCD显示速度和时间调整,方便读取和设定
-可安装不同类型的夹具,用于振荡不同形状和大小的容器
-电子调节时间和工作模式
-电子定时功能开关,控制定时和持续运转模式
-高效的无刷直流电机驱动,运行安静,免维护
-具有安全转速保护功能
-通过RS232接口连接电脑,专用的ShakerPC数据输出软件免费下载,可实现
在电脑上对仪器参数的设定及工作曲线的实时显示。
MS400加热型磁力搅拌器和加热型磁力搅拌器价格

MS400加热型磁力搅拌器
标题:MS400加热型磁力搅拌器
可设定多项运行参数: MS300/400可设定多个工作参数,例如:加热温度,恒温温度,搅拌时间等,仪器最大工作时间达15小时。按键调速控制:仪器采用按键方式控制电机转速,开启搅拌功能后,内置的电机将由慢ห้องสมุดไป่ตู้快逐渐增速。智能化的加速设计防止电机突然快速运转而引起的搅拌棒失速现象。.自动恒温控制:仪器采用铂电阻作为温度传感器,使用时您只需将温度探棒浸入目标液体,仪器即能显示该液体的温度值并按您设定的恒温温度自动加热或恒温。.简洁的图标显示:仪器的液晶显示屏具有动画图标显示,它能清晰指示仪器目前的工作状态,您可以通过这些图标了解仪器的搅拌速度,加热或恒温状况等信息。.仪器配置:搅拌棒,温度探棒,电源保险丝...
厂家:南北仪器市场价格:优惠价格:搜索联系MS200磁力搅拌器
标题:MS200磁力搅拌器
MS200型磁力搅拌器采用数字电路及高性能集成芯片设计,定时范围可达999分钟。按键调速控制:仪器采用按键方式控制电机转速,开启搅拌功能后,内置的电机将由慢至快逐渐增速,智能化的加速设计防止电机突然快速运转而引起的搅拌棒失速现象。.简洁的图标显示:仪器的液晶显示屏具有动画图标显示,它能清晰指示仪器当前的工作状况,您可以通过这些图标了解仪器的搅拌速度,工作时间等信息。.仪器配置:搅拌棒,电源保险丝ModelMS200搅拌容量0~2000mL搅拌速度0~1250rpm工作面板尺寸135×135mm工作面板材质...
厂家:南北
MS7系列加热磁力搅拌器说明书

7User ManualMS7-H550-Pro LCD Digital 7”Square Hotplate Magnetic Stirrer MS7-H550-S LED Digital 7”Square Hotplate Magnetic Stirrer MS7-Pro LCD Digital 7”Square Plate Magnetic StirrerMS7-SClassic 7”Square Plate Magnetic StirrerPlease read the User Manual carefully before use, and follow all operating and safety instructions!Technical specifications and outline are subject to change without prior notice.13. Ordering information (15)ContentsPreface (1)Service (1)Warranty (1)1. Safety Instructions (2)2. Proper use (3)3. Inspection (4)3.1 Receiving Inspection (4)3.2 Listing of Items (4)4. Control (5)4.1 Control elements (5)4.2 Display (7)5. Trial run (8)6. Working with external temperature sensor (HotplateModel) (9)6.1 LCD digital hotplate model (9)6.2 LED digital hotplate model (9)7. Residual heat warning(HOT) (10)8. Remote Control (LCD Digital model) (10)9. Faults (11)10. Maintenance and Cleaning (11)11. Associated standards and regulations (12)12. Specifications (13)7” Square Hotplate Magnetic StirrerPrefaceWelcome to the “7”Square Hotplate Magnetic Stirrer”. Users should read this Manual carefully, follow the instructions and procedures, and be aware of all the cautions when using this instrument.ServiceWhen help needed, you can always contact the Service Department of manufacturer for technical support. Dragon Laboratory Instruments LimitedNo.31, Yu An Road, Zone B of TianZhu Airport Industrial Park, Shunyi District, Beijing, 101318 P. R. ChinaTel: 86-10-85653451/52/53Fax:86-10-85653383E-mail:*******************Service Hotline: 400-1100-556 Please provide the customer care representative with the following information:• Serial number(on the rear panel)• Certification• Description of problem (i.e., hardware or software)• Methods and procedures adopted to resolve the problems • Your contact informationWarrantyThis instrument is warranted to be free from defects in materials and workmanship under normal use and service, for a period of 24 months from the date of invoice. The warranty is extended only to the original purchaser. It shall not apply to any product or parts which have been damaged on account of improper installation, improper connections, misuse, accident or abnormal conditions of operation.For claims under the warranty please contact your local supplier. You may also send the instrument directly to manufacturer, enclosing the invoice copy and by giving reasons for the claim.7” Square Hotplate Magnetic Stirrer1.Safety Instructions• When workrisk from:- Splashing and evaporation of liquids- Release of toxic or combustible gases• Set up the instrument in a spacious are on a stable, clean, non-slip, dry and fireproof surface. Do not operate the instrument in explosive atmospheres, with hazardous substances or under water.• Gradually increase the speed, reduce the speed if:- Stirring bar breaks away due to high speed- The instrument is not running smoothly, or container moves on the base plate• Temperature must always be set to at least 50℃lower than the fire point of the media used.• Be aware of hazards due to:- Flammable materials or media with a low boiling temperature- Overfilling of media- Unsafe container• Process pathogenic materials only in closed vessels.• Check the instrume nt and accessories prior to each use. Do not use damaged components. Safe operation is only guaranteed with the accessories described in the “Accessories” chapter. Accessories must be securely attached to the device and can not come off by themselves. Always disconnect the plug before fitting accessories. • When the external temperature sensor needed, the tip of the measuring sensor must be at least 5-10mm from vessel bottom and wall.7” Square Hotplate Magnetic Stirrer• The instrument can only be disconnected from the main power supply by pulling out the main or the connector plug.• The voltage stated on the label must correspond to the main power supply.• Ensure that the main power supply cable does not touch the hotplate. Do not cover the device.• Forbid to put pressure and over heat media on the surface of glass ceramic that can be caused surface broken.• The instrument may only be opened by experts.• Keep away from high magnetic field.2.Proper useThe instrument is designed for mixing and/or heating liquids in schools, laboratories or factories.•Observe the minimum distances between the devices, between the device and the wall and above the assembly (min. 100 mm)>100mm>100mmFigure 1This device is not suitable for using in residential areas or other constraints mentioned in Chapter 1.7” Square Hotplate Magnetic Stirrer3.Inspection3.1 Receiving InspectionUnpack the equipment carefully and check for any damages which may have arisen during transport. Please contact manufacturer/supplier for technical support.3.2 Listing of Items7” Square Hotplate Magnetic Stirrer4. Control4.1 Control elementsTemperature Control Knob(Hotplate model)Speed Control KnobLED Heat (Hotplate model)LED StirFigure 2 LCD digital modelTemperature Control Knob(Hotplate model)Speed Control KnobLED Display (Hotplate model)LED Heat (Hotplate model)LED StirFigure 3 LED digital modelFigure 47” Square Hotplate Magnetic StirrerTable 27” Square Hotplate Magnetic Stirrer4.2 DisplayTemp Stir℃Remote Probe HotErrReal valueRated valueTemperature( Hotplate model)StirError(Hotplate model)( Hotplate model )Figure 5 LCD digital model7” Square Hotplate Magnetic StirrerDisplay area Figure 6 LED digital hotplate model5.Trial run• Make sure the required operating voltage and power supply voltage match.• Ensure the socket must be properly grounded.• Plug in the power cable,ensure the power is on and begin initializing.• Add the medium into the vessel with an appropriate stirring bar.• P lace vessel on the work plate.• Set the target stirring speed and begin.• Set thetarget temperature and start heating (hotplate model).• Stop the heating and stirring functions.If these operations above are normal, the device is ready to operate. If these operations are not normal, the device may be damaged during transportation, please contact manufacturer/supplier for technical support.7” Square Hotplate Magnetic Stirrer6. Working with externaltemperature sensor (Hotplate Model)Figure 76.1 LCD digital hotplate modelThe external temperature sensor PT1000 is manufacture ’s standard accessory. If the sensor is plugged in, “Probe” will be shown on the LCD digital display to indicate the sensor is operating. The setting value of external temperature sensor and actual temperature are displayed. Safe circuitcontrols hotplate temperature. Comparing with the temperature control of the hotplate, the external temperature sensor can control the medium’s temperature more precise. The heating function will be stopped automatically under abnormal conditions. Please operate follow the instructions below:• Switch OFF the instrument.• Ensure the external temperature sensor is inserted in the media heated.•Switch ON the instrument and run heating function. If the heating function does not work, please contact manufacturer/supplier for technical support.6.2 LED digital hotplate modelThe external temperature sensor PT1000 is the manufacture ’s standard accessory. If the sensor is plugged in and rotate the heating knob, LED displays the temperature setting value and shifts to real value in 5 seconds. Safe circuit controls hotplate temperature. Comparing with the temperature control of the hotplate, the external temperature sensor can control the medium ’s temperature more precise. The heating function will be stopped automatically under abnormal conditions. Please7” Square Hotplate Magnetic Stirreroperate follow the instructions below:•Switch OFF the instrument.•Ensure the external temperature sensor is inserted in the media heated.•Switch ON the instrument and run heating function.If the heating function does not work, please contact manufacturer/supplier for technical support.7.Residual heat warning(HOT)In order to prevent the risk of burns from the hotplate, digital hotplate model has a residual heat warning function. When the heating function is switched off and the heating plate temperature is still above 50°C, “Hot” will fla sh to warn that there is a hazard of burns from the hotplate. When the hotplate temperature drops to below 50°C, the unit will automatically switch off. If users want to turn off the LCD or LED screen immediately, just pull out the plug directly. When the power OFF, the residual heat warning function cannot be run.8.Remote Control (LCD Digitalmodel)Figure 8The unit can be controlled from an external PC (using the dedicated software) via the RS232C serial interface fitted to the unit. Data communication from laboratory instrument to computer is only possible on demand of the computer. •The functions of the interface lines between laboratory instrument and automation system are selected from the specified signals of the EIA-standard RS232C, corresponding with DIN66020 Part 1. The allotment of the bushing can be taken from Figure 8. •Transmission method: Asynchronous signal7” Square Hotplate Magnetic Stirrertransmission in start-stop-operation.•Mode of transmission: Fully Duplex. 1 start bit; 7 character bits; 1 parity bit [straight (even]); 1 stop bit. •Transmission speed: 9600 bit/s9.Faults•Instruments can’t be power ON-Check whether the power line is unplugged-Check whether the fuse is broken or loose•Fault in power ON self test-Switch OFF the unit, then switch ON and reset the instruments to factory default setting.•Stir speed cannot reach set point-Excessive medium viscosity may cause abnormal speed reduction of the motor•Unit cannot be powered OFF when switched OFF.-Check if the residual heat warning function is still ON and hotplate temperature is above 50℃(the LCD/LED screen still work and “Hot” flash).If these faults are not resolved, please contact manufacturer/supplier.10.M aintenance and Cleaning•Proper maintenance can keep instruments working properly and lengthen its lifetime.•Do not spray cleanser into the instrument when cleaning.•Unplug the power line when cleaning.••Wear the proper protective gloves during cleaning of the instrument.•Before using other method for cleaning or decontamination, the user must ascertain with the manufacturer that this method will not harm the instrument.7” Square Hotplate Magnetic Stirrer•Send in the case of service the instrument back in the packaging carton. Storage packing is not sufficient for the back dispatch. Use additionally a suitable transportation packing.•The enamel makes the hotplate easier to care for and more resistant to acids and bases. Because of it, however, the hotplate is also more susceptible to extreme fluctuations in temperature and the force of impact. This can result in cracks forming or the11. A ssociated standards andregulationsConstruction in accordance with the following safety standards:EN 61010-1 UL 3101-1CAN/CSA C22.2(1010-1)Instrument guidelines: 73/023/EWGChanges or modifications not expressly approved by the party responsible for compliance could void the user's authority to operate the equipment.NOTE: This equipment has been tested and found to comply with the limits for a Class A digital device, pursuant to Part 15 of the FCC Rules. These limits are designed to provide reasonable protection against harmful interference when the equipment is operated in a commercial environment. This equipment generates, uses, and can radiate radio frequency energy and, if not installed and used in accordance with the instruction manual, may cause harmful interference to radio communications. Operation of this equipment in a residential area is likely to cause harmful interference in which case the user will be required to correct the interference at his own expense.7” Square Hotplate Magnetic Stirrer 12.S pecifications7” Square Hotplate Magnetic StirrerTable 37” Square Hotplate Magnetic Stirrer7” Square Hotplate Magnetic StirrerTable 4Dragon Laboratory Instruments LimitedNo.31, Yu An Road, Zone B of TianZhu Airport Industrial Park, Shunyi District, Beijing, 101318 P. R. ChinaTel: 86-10-85653451/52/53Fax:86-10-85653383E-mail:*******************Service Hotline: 400-1100-556。
08—3G恒温磁力搅拌器使用方法介绍 恒温磁力搅拌器操作规程

08—3G恒温磁力搅拌器使用方法介绍恒温磁力搅拌器操作规程08—3G恒温磁力搅拌器使用方法介绍指示灯:SPEED转速,TIMER时间,STATE升温状态,TEMP.S温度,TEMP.P温差按键:SET设置,上升,下降,MOT运行搅拌,TEMP加热1.将搅拌器放置在水平稳定的桌面上,将温度传感器接在机后两接线柱上,将盛有待搅拌液体的烧杯放在加热盘正中,并放入搅拌子一个,温度传感器插入液体中,插上电源,开启电源开关,转速指示灯和温度指示灯亮,左数字显示原设定转速,右数字显示原设定温度;2.转速设定:按一下设置键,左数字闪亮,用上升或下降键设定所需转速;3.时间设定:按一下设置键,时间指示灯亮,用上升或下降键设定所需时间,假如不需要定时,将时间设为“0”;4.温度设定:按一下设置键,温度指示灯亮,用上升或下降键设定液体温度;5.温差设定:按一下设置键,温差指示灯亮,用上升或下降键设定所需温差值,温差值的大小直接关系到加热盘的高温度,加热盘高温度=液体设定温+温差值+(液体设定温度—液体实测温度)2,在搅拌加热的工作状态下,按设置键至温差指示灯亮时,数码显示是加热盘温度。
设定温差值,要依据搅拌量的多少,液体设定温度的高处与低处,容器底与加热盘直接接触面积大小等不同因素而定;6.按二下设置键,转速指示灯亮,左数字显示已设定转速,温度指示灯亮,右数字显示已设定的温度,设定完成;7.按一下搅拌键,搅拌指示灯亮,搅拌器就从慢到快运转,到达设定转速;8.按一下加热键,加热指示灯亮,加热开始,红色升温指示灯亮,表示加热盘通电发热;9.本机在搅拌的情况下才可加热,加热指示灯亮时,再按加热键,加热停止,如再按一下搅拌键,搅拌和加热都停止;10.显示当时情形:按动设置键,当转速、时间、温度指示灯亮时,则分别显示当时的转速、剩余时间、液体温度等(当加热指示灯不亮时,显示设定温度)。
搅拌器在加热状态下,按设置键至温差指示灯亮时,显示加热盘表面温度;11.当停止搅拌,重新按搅拌键,搅拌器依照上一次设定的数据运行;(定时计时重新开始)12.本机在工作状态下,按上升或下降键可调整搅拌转速,按键时数码显示的是调整需要的转速,按键松开后,即恢复原来的显示状态,工作状态下调整的搅拌转速,本机不能储存,下次开机时,按原搅拌设定转速工作;13.上海五相仪器08—3G恒温磁力搅拌器本机除搅拌转速在工作状态下可调整外,其他的数据需要新设定时,必需先关掉搅拌键,按设置键到需要重新设定的一项指示灯时可重新设定该数据;恒温磁力搅拌器的临时情形处理方法恒温磁力搅拌器具有结构简单,使用便利,噪声小等优点,由于磁钢由电机轴直接带动故机械故障少,调速平稳。
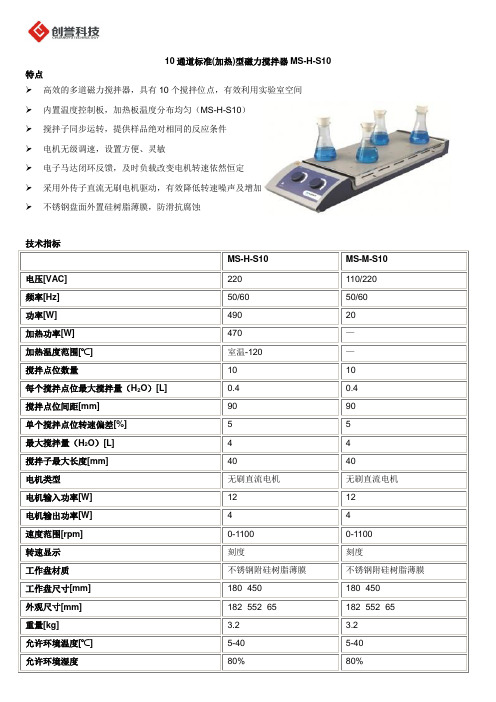
美国赛洛捷克MS-H-S10 10通道磁力搅拌器
磁力搅拌芯(30mm x 6mm),1个
MSBAR40
磁力搅拌芯(40mm x 8mm),1个
MARRM
磁力搅拌芯取出器,20cm,1个
90
90
单个搅拌点位转速偏差[%]
5
5
最大搅拌量(H2O)[L]
4
4
搅拌子最大长度[mm]
40
40
电机类型
无刷直流电机
无刷直流电机
电机输入功率[W]
12
12
电机输出功率[W]
4
4
速度范围[rpm]
0-1100
0-1100
转速显示
刻度
刻度
工作盘附硅树脂薄膜
工作盘尺寸[mm]
10通道标准(加热)型磁力搅拌器MS-H-S10
特点
高效的多道磁力搅拌器,具有10个搅拌位点,有效利用实验室空间
内置温度控制板,加热板温度分布均匀(MS-H-S10)
搅拌子同步运转,提供样品绝对相同的反应条件
电机无级调速,设置方便、灵敏
电子马达闭环反馈,及时负载改变电机转速依然恒定
采用外传子直流无刷电机驱动,有效降低转速噪声及增加电机运转寿命
MS-H-S10
10通道标准加热型磁力搅拌器,国标插头,220V/50Hz/60Hz
配件
型号
描述
MSBAR10
磁力搅拌芯(10mm x 6mm),1个
MSBAR15
磁力搅拌芯(15mm x 8mm),1个
MSBAR20
磁力搅拌芯(20mm x 8mm),1个
MSBAR25
磁力搅拌芯(25mm x 8mm),1个
180×450
180×450
外观尺寸[mm]
博世 ErgoMixx MSM6 手持式搅拌机使用说明书
https://?mat-no=8001217375[en]Scan the QR code or visit the website to open the Further Notices for Use. You can find additional informa-tion about your appliance or accessory here.[ms]Imbas kod QR atau lawati laman web untuk membuka arahan penggunaan lanjut. Anda boleh mendapatkan maklumat tambahan mengenai peranti anda atau aksesori di situ.[zh-tw]掃描 QR-Code 或訪問網站,以開啟更詳細的使用說明。
您可於此處找到有關電器或配件的更多資訊。
[zh]要打开更多与使用相关的提示,请扫描二维码或访问网站。
您可以在那里查阅关于机器或附件的更多详细信息。
[ar]حسمازمرةباجتسلااةعيرسلاايئوضوألَّضفتةرايزبعقوملاينورتكللإاحتفلتاداشرلإاةعسوملالوحمادختسلاا.دجتكانهتامولعمةيفاضإلوحكزاهجوأتاقحلملا.Safety enSafety¡Keep the instruction manual and the product information safe for future reference or for the next owner.Only use this appliance:¡With genuine parts and accessories.¡For cutting up, chopping, mixing, puréeing and emulsifying liquid or semi-solid food.¡In private households and in enclosed spaces in a domestic en-vironment at room temperature.¡for normal processing quantities and for normal processing times for domestic use.¡Up to an altitude of max. 2000 m above sea level.After each use, whenever the appliance is unsupervised, prior to assembly, disassembly or cleaning and in the event of an error, it must always be disconnected from the mains.This appliance can be used by persons with reduced physical, sensory or mental capabilities or a lack of experience and/or knowledge if they have been given supervision or instruction con-cerning use of the appliance in a safe way and if they understand the hazards involved.Do not let children play with the appliance.Cleaning and user maintenance must not be performed by chil-dren.The appliance must not be used by children. Keep children away from the appliance and power cable.▶Connect and operate the appliance only in accordance with the specifications on the rating plate.▶If the power cord of this appliance is damaged, it must be re-placed by the manufacturer, the manufacturer's Customer Ser-vice or a similarly qualified person in order to prevent any risk.▶Never immerse the appliance or the power cord in water or clean in the dishwasher.▶Never immerse the base unit in the food to be blended, only the blender foot.▶Never operate a damaged appliance.en Avoiding material damage▶Never let the power cord come into contact with hot parts or be dragged over sharp edges.▶Never place the appliance on or near hot surfaces.▶After switching off, wait until the drive has come to a complete standstill.▶Keep hands, hair, clothing and utensils away from rotating parts.▶Never touch the edges of the blades with bare hands.▶Care should be taken when handling sharp blades, emptying the container and during cleaning.▶Be careful when processing hot food.▶Leave boiling food to cool down to at least 70 °C before pro-cessing.▶Follow the cleaning instructions.▶Clean surfaces which come in contact with food before each use.Avoiding material damage▶Do not operate the appliance at no-load.▶Never use the blender jug in the mi-crowave or oven.▶Place the base unit fully on the blender foot or accessory and lock into position with a click.Overview→ Fig. 12separate operating instructions2separate operating instructionsNote: If an accessory is not included in the scope of supply, it can be ordered from customer service.ControlsSpeed settingFor continuous speed adjustment. Set the rotary selector between ● (lowest speed)and 12 (highest speed).On buttonTo use the appliance at the preselected speed.Turbo buttonTo use the appliance at maximum speed.Note: The appliance remains switched on as long as one of the buttons is pressed.Overload protectionOnly CNHR26 and CNHR26CIf the appliance switches itself off during use, the overload protection device has been activated.Blender feet enRemove the mains plug and leave the appli-ance to cool down for approx. 1 hour to de-activate the overload protection device. Note: If the fault cannot be eliminated, please contact customer service. Blender feetNote: The blender feet are not suitable for preparing purées consisting only of pota-toes or foods with a similar consistency. Plastic or stainless-steel blender foot The blender feet are suitable for the following purposes:¡Mixing drinks¡Making pancake batter, mayonnaise, sauces and baby food¡Puréeing cooked food, e.g. fruit, veget-ables, soupProcessing food with the blender foot Notes¡Solid foods should always be cut up and cooked until soft before processing, e.g.apples, potatoes or meat.¡Use the universal cutter for cutting up raw food without adding liquid, e.g.onions, garlic or herbs.¡Before processing the food in a pan, take the pan off the heat.→ Fig. 2 - 10Sample recipe Mayonnaise¡ 1 egg (egg yolk and egg white)¡ 1 tbsp mustard¡ 1 tbsp lemon juice or vinegar¡200-250 ml oil¡Salt and pepper to tasteMaking mayonnaiseNotes¡When using the blender foot, mayon-naise can only be made with whole eggs (egg white and egg yolk).¡When making mayonnaise, air under-neath the blender foot prevents the in-gredients blending together well. For op-timum results, let the air escape beforemixing.→ Fig. 11 - 15Application examplesAlways observe the maximum quantities and processing times in the table.After each operating cycle let the appliance cool down to room temperature.→ Fig. 16Overview of cleaningClean the individual parts as indicated in the table.→ Fig. 17Note: Appliances with a spiral cord: Never wind the cord around the appliance! Disposing of old appliance▶Dispose of the appliance in an environ-mentally friendly manner.Information about current disposal meth-ods are available from your specialistdealer or local authority.electrical and electronicequipment - WEEE).The guideline determinesthe framework for the returnand recycling of used appli-ances as applicablethroughout the EU. Customer ServiceDetailed information on the warranty period and terms of warranty in your country is available from our after-sales service, your retailer or on our website.The contact details for Customer Service can be found in the enclosed Customer Service directory or on our website.ms KeselamatanKeselamatan¡Simpan panduan dan juga maklumat produk untuk penggunaan atau pengguna seterusnya.Gunakan peranti hanya:¡dengan alat ganti dan aksesori tulen.¡untuk menghancurkan, mencincang, mencampurkan, membersihkan dan mengemulsikan makanan cair atau separa pepejal.¡dalam rumah persendirian dan dalam kawasan persekitaran rumah yang tertutup dengan suhu bilik.¡untuk kuantiti dan masa pemprosesan di rumah yang biasa.¡sehingga ketinggian 2000 m dari paras laut.Peranti mesti diputuskan daripada bekalan kuasa selepas setiap penggunaan, apabila pengawasan tidak tersedia, sebelum pemasangan, penanggalan atau pembersihan dan sekiranya terdapat kegagalan.Peranti ini boleh digunakan oleh orang yang mempunyai kekurangan keupayaan fizikal, deria atau mental atau kurangnya pengalaman dan/atau pengetahuan jika mereka telah diselia atau dilatih mengikut keselamatan peranti ini dan memahami kesan bahayanya.Kanak-kanak tidak dibenarkan bermain dengan peranti ini. Pembersihan dan penyelenggaraan pengguna tidak boleh dilakukan oleh kanak-kanak.Kanak-kanak tidak dibenarkan untuk menggunakan peranti ini. Jauhkan kanak-kanak daripada peranti dan kabel penyambungan.▶Sambungkan dan kendalikan peranti hanya mengikut spesifikasi pada label.▶Untuk mengelakkan kecederaan, kabel kuasa peranti rosak mestilah digantikan oleh pengeluar atau khidmat pelanggannya atau orang yang sama kelayakannya.▶Jangan sesekali mencelup peranti atau kabel kuasa ke dalam air atau memasukkannya ke dalam mesin pencuci pinggan.▶Jangan sesekali merendam unit asas, sebaliknya hanya celupkan kaki pengadun ke dalam makanan yang hendak dicampurkan.Elakkan kerosakan harta benda ms ▶Jangan sesekali kendalikan peranti yang rosak.▶Jangan sesekali dekatkan kabel kuasa dengan komponen panas atau pada sudut tajam.▶Jangan sesekali meletakkan peranti di atas atau berhampiran permukaan panas.▶Setelah dimatikan, tunggu pemacu berhenti sepenuhnya.▶Jauhkan tangan, rambut, pakaian dan perkakas lain daripada kompoenn yang berputar.▶Jangan sesekali menyentuh bilah dengan tangan.▶Berhati-hati semasa mengendalikan bilah pemotong yang tajam dan juga semasa mengosongkan bekas dan semasa pembersihan.▶Berhati-hati semasa memproses makanan panas.▶Biarkan makanan yang telah masak menyejuk sehingga suhu70 C atau lebih rendah sebelum diproses.▶Patuhi arahan pembersihan.▶Bersihkan permukaan yang bersentuhan dengan makanan sebelum setiap penggunaan.Elakkan kerosakan harta benda ▶Jangan mengendalikan peranti dalam keadaan tanpa beban.▶Jangan sesekali menggunakan bekas pengadun di dalam ketuhar gelombang mikro atau ketuhar.▶Kunci unit asas sehingga boleh didengar dan sepenuhnya pada tapak pengadun atau pada aksesori.Gambaran keseluruhan→ Raj. 12Arahan penggunaan yang berasinganBergantung kepada model2Arahan penggunaan yang berasinganNota: Sekiranya aksesori tidak disertakan dalam skop penghantaran, anda boleh memesan melalui khidmat pelanggan.Elemen kawalanTetapan kelajuanUntuk tetapan putaran berterusan. Tetapkan pemilih putaran antara ● (putaran minimum) dan 12 (putaran maksimum). Butang menghidupkanUntuk penggunaan perkakas dengan putaran yang telah ditetapkan sebelumnya.ms Pelindung beban berlebihanButang TurboUntuk penggunaan perkakas dengan putaran maksimum.Nota: Perkakas akan kekal hidup selagi salah satu butang ditekan.Pelindung beban berlebihan Hanya CNHR26 dan CNHR26CSekiranya perkakas tertutup sendiri semasa digunakan, pemutus litar telah diaktifkan.Tarik palam kuasa dan biarkan perkakas sejuk selama 1 jam untuk menyahaktifkan pemutus litar.Nota: Sekiranya gangguan tidak dapat diselesaikan, sila hubungi khidmat pelanggan kami.Tapak pengadunNota: Tapak pengadun tidak sesuai untuk penyedian puri, yang terdiri hanya daripada kentang atau bahan makanan yang mempunyai kepekatan yang sama.Tapak pengadun plastik atau keluli tahan karatTapak pengadun sesuai untuk kegunaan berikut:¡Mencampurkan minuman¡Menyediakan adunan penkek, mayones, sos dan makanan bayi¡Membuat puri daripada makanan yang telah dimasak, cth. buah-buahan, sayur-sayuran, supProses bahan makanan dengan tapak pengadunNota¡Potong kecil dan masak bahan makanan keras seperti epal, ubi kentang ataudaging.¡Gunakan pemotong kecil universal untuk memotong kecil bahan makanan mentah tanpa memasukkan cecair, cth. bawang besar, bawang putih atau herba.¡Sebelum anda memproses bahan makanan di dalam periuk, angkat periuk dari tempat memasak.→ Raj. 2 - 10Contoh resipi mayones¡ 1 Telur (Telur kuning dan telur putih)¡ 1 sudu besar biji sawi¡ 1 sudu besar jus lemon atau cuka¡200-250 ml minyak¡Garam dan lada secukup rasa Sediakan mayonisNota¡Mayonis boleh disediakan hanya dengan tapak pengadun daripada seluruh telur(putih telur dan kuning telur).¡Semasa menyediakan mayonis, udara yang terperangkap di bawah tapakpengadun menghalang adunan untuksekata. Untuk mendapatkan hasil yangoptimal, hilangkan gelembung udarasebelum anda menyampur.→ Raj. 11 - 15Contoh penggunaanPerhatikan kuantiti maksimum dan masa pemprosesan dalam jadual.Biarkan perkakas sejuk pada suhu bilik setiap kali selepas penggunaan.→ Raj. 16Gambaran keseluruhan pembersihanBersihkan bahagian-bahagian tunggal seperti yang ditunjukkan dalam jadual.→ Raj. 17Nota: Jangan sesekali menggulung kabel dikeliling perkasas untuk perkakas dengan kabel lingkar!Lupuskan peranti lama▶Lupuskan peranti secara mesra alam.Maklumat mengenai kaedah pelupusan terkini boleh didapati daripada pengedar anda dan juga pentadbir perbandaranatau bandar anda.Khidmat pelanggan msand electronic equipment -WEEE).Garis panduan tersebutmemberi rangka rujukanyang berlaku di seluruhEropa untuk penerimaanbalik dan penggunaan alat-alat tua.Khidmat pelangganMaklumat terperinci mengenai masajaminan dan syarat jaminan di negara andaboleh didapati melalui khidmat pelanggankami, pengedar anda atau di laman webkami.Maklumat hubungan khidmat pelangganboleh didapati dalam mana-mana panduankhidmat pelanggan atau pada lamansesawang kami.zh-tw 安全性安全性¡請妥善保管本說明書和產品資訊,以備日後查閱或提供給下一位使用者。
磁力搅拌器(MS300)使用说明
磁力搅拌器(MS300)使用说明操作步骤:1.为了您的安全,请在接通电源前,确认搅拌器的电源开关处于关闭状态。
2.将电源插头插入外部电源座,在容器中置入搅拌棒,打开搅拌器电源开关。
3.根据容器内液体的体积及粘稠度,按“△”或减键“▽”设定搅拌速度。
4.如果您需要停止搅拌,请按“▽”键使Motor Speed的指示条完全熄灭。
5.定时设置:按TIME键,仪器进入定时设置模式。
按“△”或减键“▽”设定时间。
按ENTER键确认。
仪器右显示区显示定时时间并自动倒计时。
当显示值到达0时,仪器自动停止工作。
如需取消定时,按TIME键进入定时设置模式,按EXIT键取消定时设置,仪器返回默认模式。
6.加热及恒温:将温度探棒的插头插入搅拌器对应的按口,屏幕Temperature栏显示实测温度值。
按℃键进入加温/恒温设定模式。
按“△”或减键“▽”设定目标温度。
按ENTER 键确认,加热盘启动加热。
如需取消加热,按℃键进入加温/恒温设定模式后,按EXIT 键取消温度设定,仪器自动返回默认模式。
注意事项:1.搅拌所使用的容器底部必须平整,无任何可能阻碍搅拌棒运行的突起物。
2.如果您需要同时启用加热功能,请务必使用玻璃容器。
3.当液体体积较少且粘稠度不高时请勿设定较快的搅拌速度,否则搅拌棒将脱离磁场而停止转动。
4.启动加热功能后,温度探棒必须插入仪器温度接口,否则仪器将不进行回热。
5.启动加热功能后,温度探棒必须浸入目标液体,否则仪器将持续加热并导致加热盘损坏。
6.及时取走自己的物品,注意用电安全,保持实验室清洁,不浪费。
仪器不正常时,及时上报,不得自行处理。
美国实验室SCILOGEX(赛洛捷克)实验室常用设备 价格表
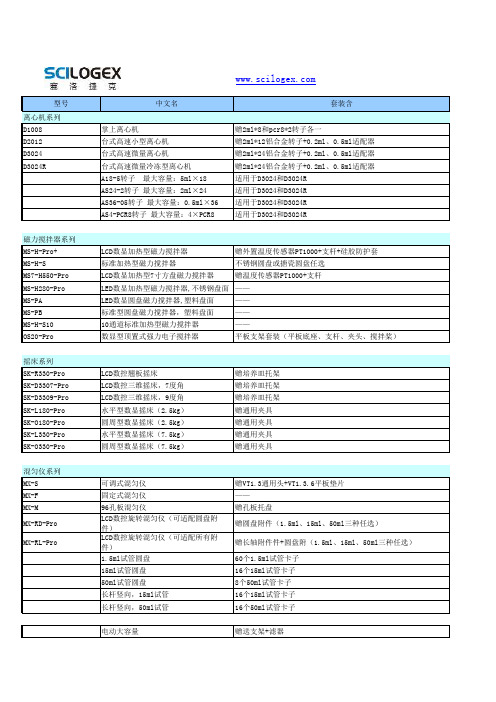
型号中文名套装含离心机系列D1008掌上离心机赠2ml*8和pcr8*2转子各一D2012台式高速小型离心机赠2ml*12铝合金转子+0.2ml、0.5ml适配器D3024台式高速微量离心机赠2ml*24铝合金转子+0.2ml、0.5ml适配器D3024R台式高速微量冷冻型离心机赠2ml*24铝合金转子+0.2ml、0.5ml适配器A18-5转子 最大容量:5ml×18适用于D3024和D3024RAS24-2转子 最大容量:2ml×24适用于D3024和D3024RAS36-05转子 最大容量:0.5ml×36适用于D3024和D3024RAS4-PCR8转子 最大容量:4×PCR8适用于D3024和D3024R磁力搅拌器系列MS-H-Pro+LCD数显加热型磁力搅拌器赠外置温度传感器PT1000+支杆+硅胶防护套MS-H-S标准加热型磁力搅拌器不锈钢圆盘或搪瓷圆盘任选MS7-H550-Pro LCD数显加热型7寸方盘磁力搅拌器赠温度传感器PT1000+支杆MS-H280-Pro LED数显加热型磁力搅拌器,不锈钢盘面——MS-PA LED数显圆盘磁力搅拌器,塑料盘面——MS-PB标准型圆盘磁力搅拌器,塑料盘面——MS-H-S1010通道标准加热型磁力搅拌器——OS20-Pro数显型顶置式强力电子搅拌器平板支架套装(平板底座、支杆、夹头、搅拌桨)摇床系列SK-R330-Pro LCD数控翘板摇床赠培养皿托架SK-D3307-Pro LCD数控三维摇床,7度角赠培养皿托架SK-D3309-Pro LCD数控三维摇床,9度角赠培养皿托架SK-L180-Pro水平型数显摇床(2.5kg)赠通用夹具SK-O180-Pro圆周型数显摇床(2.5kg)赠通用夹具SK-L330-Pro水平型数显摇床(7.5kg)赠通用夹具SK-O330-Pro圆周型数显摇床(7.5kg)赠通用夹具混匀仪系列MX-S可调式混匀仪赠VT1.3通用头+VT1.3.6平板垫片MX-F固定式混匀仪——MX-M96孔板混匀仪赠孔板托盘MX-RD-Pro LCD数控旋转混匀仪(可适配圆盘附件)赠圆盘附件(1.5ml、15ml、50ml三种任选)MX-RL-Pro LCD数控旋转混匀仪(可适配所有附件)赠长轴附件件+圆盘附(1.5ml、15ml、50ml三种任选)1.5ml试管圆盘60个1.5ml试管卡子15ml试管圆盘16个15ml试管卡子50ml试管圆盘8个50ml试管卡子长杆竖向,15ml试管16个15ml试管卡子长杆竖向,50ml试管16个50ml试管卡子电动大容量赠送支架+滤器北京科博赛尔生物科技有限公司。
磁力搅拌器
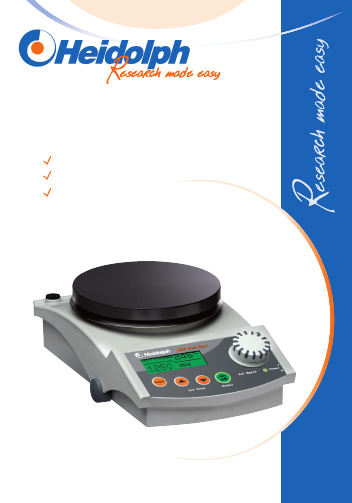
Heidolph-磁力搅拌器
首选Heidolph的磁力搅拌器,归因于其能够流畅地强烈混合低粘度溶液。
•
可根据需要选择不同形状和大小的搅拌盘
•操作方便,数字显示,带背景灯
•800W的加热能力,快速加热
•转速最大可达到1,400 rpm
•强大磁力,轻松驱动搅拌子
•最多可搅拌20L水
•免维护的发动机,启动顺畅
•
•
•包裹防腐蚀材料的硅铝合金机身,机身持久耐用
Heidolph 磁力搅拌器的优点
Heidolph磁力搅拌器-应用范围
附件
Page 9
Page 16-17
MR Hei-End
MR Hei-Tec
P/N 505-30000-00MR Hei-Standard P/N 505-20000-00
M a g n e t i c S t i r r e r s
MR Hei-Mix S P/N 503-02000-00
MR Hei-Mix D
P/N 505-01000-00
MR Hei-Mix L (not shown)P/N 505-00000-00
EKT Hei-Con G
玻璃包裹的温度探头,防强化学腐蚀P/N 509-88100-00
and feedback
Heat-On 10 ml 适配器
Heat-On 10 ml Insert
H e i d o l p h I n s t r u m e n t s , S c h w a b a c h , 10/2008。
- 1、下载文档前请自行甄别文档内容的完整性,平台不提供额外的编辑、内容补充、找答案等附加服务。
- 2、"仅部分预览"的文档,不可在线预览部分如存在完整性等问题,可反馈申请退款(可完整预览的文档不适用该条件!)。
- 3、如文档侵犯您的权益,请联系客服反馈,我们会尽快为您处理(人工客服工作时间:9:00-18:30)。
数显(加热)型磁力搅拌器MS-H-Pro/ MS-Pro
数显型磁力搅拌器特点
新型的搅拌器具备最新搅拌技术,适合无人操作
可自动判别搅拌子逃脱,并自动重新捕获
不锈钢和搪瓷工作盘面分别可选
带背光的LCD液晶显示,方便读数
采用模糊逻辑控制及微处理技术,确保控制精度
通过RS232接口和PC连接,专用的StirPC软件,可实现在PC机上对仪器参数的设定及工作曲线的实时显示,StirPC免费数据输出软件见我公司网站
数显加热型还具有以下创新特点
新型加热搅拌器具备最新的快速加热和搅拌技术以及精确控温技术,适合无人操作
加热型磁力搅拌器带安全温度控制,可实现无人操作
两个独立的安全回路
独立的温度传感器检测,保护温度可设置
可使用外置PT1000温度传感器
实验结束后热警示屏显示加热盘残留温度
A,B,C多种操作模式自动切换,确保搅拌和加热功能不因外界因素改变
技术指标
订货信息
附件
7寸方盘磁力搅拌器可配用1/4圆铝合金加热块,用于多种样品的平行反应,适用4-16ml试管。
也可配用圆底烧瓶铝合金加热块,适用50-500ml圆底烧瓶。
加热块耐高温和化学腐蚀;加热均匀一致,升温快;保持环境清洁、安全,不用担心油泄露、飞溅、油烟和火灾风险;一次采购终身使用,不需定期换油。
MS-H-Pro 配合PT1000和1/4圆
MS-H-Pro 配合PT1000和1/4圆
18900002 红色1/4圆
18900003 紫色1/4圆
18900004 蓝色1/4圆
18900005 黑色1/4圆
18900048 绿色1/4圆
18900049 金色1/4圆
18900065 扩大载物圈
18900001 扩大载物盘
18900083
500ml 圆底烧瓶加热块 18900082 250ml 圆底烧瓶加热块
18900016 PT1000
18900017 MSPS01。
