夏普KI-BX70、KI-BX80中文使用说明书
LG DLP投影机 BX401C 使用说明书

电源插头应当完全插入电源插座 中,以免发生火灾。
可能导致火灾或损坏本机。
请勿将重物放置在电源线上。 可能导致火灾或触电!
4
安全说明
电源
警告
请勿使用湿手接触电源插头。 有触电的危险!
不要在一个电源插座上插入过多插 不要让灰尘吸附到电源插头或插座
头。
上。
可能因插座过热而导致火灾。
可能引起火灾!
电源
注意
可能导致火灾、触电或产品损坏(变形、腐蚀或破损)。
可能造成机械故障或人身伤害!
可能导致火灾、触电或损坏本机!
清洁
警告
不要用水清洁投影机。 可能导致损坏本机或触电!
万一投影机冒烟或发出异味,关闭 使用喷气器具或用中性清洁剂和水 投影机并从墙上插座中拔出插头, 沾湿的软布清除投影镜头上的灰尘 然后联系您的经销商或服务中心。 或污渍。
可能导致火灾、触电或损坏本机!
用户手册
DLP 投影机
在使用本机前,请仔细阅读此用户手册。 请妥善保存此手册以备后用。
BX401C
P/NO : MFL62881110 (1107-REV00)
DLP 投影机
警告 本产品为 A 类产品。 在住宅环境下使用本产品时,它可能会产生电磁干扰,在源附近。
不要在投影机旁边放置易燃材料。 不要让儿童吊在安装的投影机上。
可能引起火灾!
可能导致投影机掉落,造成受伤或死亡。
可能引起火灾!
不要以任何方式堵住通风口或限制 气流。
可能造成内部温度过度升高,导致火灾 或损坏本机!
不要让投影机靠近加湿器等产生蒸 不要将投影机暴露在灰尘之中。
气或油雾的器具。
HDMI,HDMI标识和高清晰多媒体端口是HDMI许可LLC 注册商标。
bX中文说明书

bX中文说明书该配料控制器是世界上最小的配料控制器.使用21世纪最新之Delta-Sigma芯片以达至高精度及快速转换效果. 使用RS485标准接口进行多点或远距离通讯, 除原有CB920之软件功能外另新增多项软件功能, 适合不同的配料或包装系统使用.有关术语自重:能使称重传感器产生输出电压的承载器本身的重量.分度间距:指显示间距与倍数的比例. 分度间距数值只能选择数值1、2、5中的某一个.激励电压:指由显示器提供用以驱动称重传感器的电压.目标配料份量:指待配物料的目标重量.过冲控制:当CB920X的读数大于或等于目标配料份量减去过冲量时, 慢速配料继电器则自动断电.过冲量:当快速和慢速继电器断电后, 有些物料由于已离开供料槽, 尚在半空中, 这些物料会继续自由下落至秤的承载器上, 这些自由下落的物料导致称重显示器读数的平均增量, 就是过冲量.测力与称重传感器:测力与称重传感器是一种将所受力或重量转换成电压的部件.一个测力与称重传感器包括两个部分:第一部分是能根据所受力大小而线性变形的金属部件;第二部分是可根据金属部件的变形大小而改变其电阻的应变片.传感器输出灵敏度:指从传感器输出的电压与激励电压的比率.最大量程:指为称重显示器设计(略去小数点后)可显示的最大数值.倍数:用来确定小数点位置或加在读数后零的个数.例如:如果读数为234, 则倍数显示器显示10 23401234.1.01.001 .234.0001 .0234快速配料份量:当CB920X的读数大于或等于精计量而小于快速配料份量时, 则粗计量继电器自动断电.分辨率:指最大量程与显示分度间距之比例.秤量间距:指重量显示器对秤的承载器上单位标准重量变化所显示的数值.过冲量自动修正:过冲量自动修正公式为:过冲量(新值) = 过冲量(旧值) - [ (目标配料份量 - 最终物料净重) /2 ]该修正在每次配料完后进行, 即存储器中的过冲量在所有物料配料完成后再进行修正, 且修正后的过冲量将用于下一次的配料, 如果过冲量为负值, 则不进行修正, 如果新过冲量大于或等于所需物料粗重量的粗计量, 则将新过冲量设定为所需物料重量之粗计量减1, 如果新过冲量大于999, 则将新过冲量设为999.TDC:卸料控制延迟时间. 当卸料时, 毛重量小于零位范围后的至秒延迟后才关闭卸料控制. 可设定的范围为01到99 (即至秒).TTC:允差检测延迟时间. 在配料时, 慢速配料控制关闭后的至秒延迟后才检测误差, 可设定的范围为01至99 (即至秒).特点双显示器同时显示毛重和净重.是最小型的配料控制器, 其面板尺寸仅为96mm × 48mm.集重量显示器与配料控制器为一体.提供完整的物料配料控制功能.最多可控制四种不同种类的物料.所有配料份量数据皆通过面板按键输入, 并存储于存储器内.所有预置配料份量都具有断电保护功能.自动零位跟踪.按键后自动去皮重.所有物料具有各自的粗计量, 精计量和过冲量补偿.使用软件全数字式调校功能.可选RS485为标准串行输出输入口.通过RS485装置可实现多点通讯.通过RS232/RS485输出口输出配料资料.转换速率达200次/秒.显示精度最高达1/15000.RS232/RS485输入可用来预设置配料份量资料和系统功能资料.超出允差范围之检验.提供卸料控制功能.配料启动条件可通过菜单设定.配料自动除皮条件可通过菜单设定.可设定通电时自动归零.配料净重量显示保持功能可透过菜单设定.可设定过冲量最高范围以确保自动补偿功能不因机械故障而造成错误.慢速控制可设定延迟时间.控制比较次数设定, 可确保自动控制不因称体受冲击而造成错误控制.可设置启动除皮延迟时间.可设置除皮检测次数, 以免称体在不稳定的情形下造成除皮错误.快速及慢速之禁止比较时间可独立设置.温度系数少于(读数之±%+数字)/℃.备有双重数字滤波.配量低于宽容度时, 可作添量配料.模拟输出选配件.BCD输出选配件.串行打印机选配件.CB920X软件选配件, 它可提供配料过程可作三级控制的物料配料控制.使用易拆式插座.一般规格2. 技术规格1. 电源: 交流110V, 220V±10%,50/60赫兹(出厂前指定)2. 消耗功率: 9瓦3. 工作温度: -10℃至50℃(14℉至122℉)4. 相对湿度: 90%相对湿度(无凝结水)5. 电源滤波器: 内置数字部份1. 重量显示: 7段发光二极管2 LED显示: 采用毛重和净重双显示方式3. 指示灯亮的含意: M1, M2, M3, M4, 置零和重量变动4. 负数显示: 在最左边数字显示 " " 号5. 超载显示: 显示 " "6. 显示量程范围: 由500至7. 显示分度间距: 1, 2, 5, 10, 20或508. 小数点位置: 可选择4个不同位置9. 输出容量: 开集极输出, 最高80V,模拟部份1. 适用的传感器类型: 适用于所有电阻应变式测力与称重传感器2. 传感器输入电压: 直流电10 V±5 % , 最大可供150毫安3. 输入灵敏度: μV/格至200μV/格4. 输入阻抗 : 10兆欧姆5. 零位电压可调范围: 毫伏至15毫伏6. 温度系数: 小于(读数的%+数字) /℃7. 非线性误差: 不大于满刻度的%8. 采样方法: Delta-Sigma方法9. 采样速度: 约每秒200次10.内部分辨率 : 1,000,00011.显示分度数: 300至15000分度串行RS232/RS485资料输出接口标准: 输出采用串行EIA-RS232/RS485标准RS232/RS485的选择: 通过跳接线和开关进行选择选择RS232, 则主板上ST61的跳接线插在“232C” 位置, SW61的开关拨到“232C” 位置, ST62的跳接线插在“OFF” 位置;选择RS485, 则主板上ST61的跳接线插在“485” 位置, SW61的开关拨到“485” 位置, ST62的跳接线插在“OFF” 位置;多机并联时, 最后一台仪表主板上的ST62应置于“ON” 位置, 实质为给通讯口并上一个200欧姆的电阻.讯号形式:数据位 = 7奇偶校验位 = 1(偶数)终止位 = 1编码标准 = 美国ASCII编码标准波特速率 = 2400, 4800, 9600, 19200波特结束码 = CR/LFRS232/RS485操作指令当RS232/RS485输入端RXD收到指令后, 显示器才会采取相关操作.这些指令适用于所有操作模式.CB920X对指令之应答说明1. T=0 零位跟踪时间设定为零2. T=1 零位跟踪时间设定为1秒3. D=1 零位跟踪范围设定为1个显示分度间距4. D=2 零位跟踪范围设定为2个显示分度间距5. D=4 零位跟踪范围设定为4个显示分度间距6. MOTION 1D/S 重量变动检测设定为每秒1个显示分度间距7. MOTION 3D/S 重量变动检测设定为每秒3个显示分度间距8. D . P 4 倍数设定为9. D . P 3 倍数设定为10. D . P 2 倍数设定为11. D . P 1 倍数设定为12. D . P 0 倍数设定为113. d 1 分度间距设定为114. d 2 分度间距设定为215. d 5 分度间距设定为516. 500 最大量程设定为50017. xxxxx 最大量程设定为xxxxx,可选之范围为500-100,00018. 100,000 最大量程设定为100,00019. BAUD 2400 波特速率设定为 2400波特20. BAUD 4800 波特速率设定为 4800波特21. BAUD 9600 波特速率设定为 9600波特22. BAUD 19200 波特速率设定为19200波特23. x 零位范围设定为x%. x 之范围是1至1024. UNIT kg 重量单位设定为公斤25. UNIT t 重量单位设定为吨26. UNIT OFF 重量单位取消27. CAL ZERO 执行零位调校28. CAL SPAN 执行秤量间距调校29. M1 FINAL xxxxx 物料1的目标配料份量设置为 xxxxx30. M2 FINAL xxxxx 物料2的目标配料份量设置为 xxxxx31. M3 FINAL xxxxx 物料3的目标配料份量设置为 xxxxx32. M4 FINAL xxxxx 物料4的目标配料份量设置为 xxxxx33. M1 COARSE xxxx 物料1的快速配料份量设置为 xxxx34. M2 COARSE xxxx 物料2的快速配料份量设置为 xxxx35. M3 COARSE xxxx 物料3的快速配料份量设置为 xxxx36. M4 COARSE xxxx 物料4的快速配料份量设置为 xxxx37. M1 FINE xxx 物料1的慢速配料份量设置为 xxx38. M2 FINE xxx 物料2的慢速配料份量设置为 xxx39. M3 FINE xxx 物料3的慢速配料份量设置为 xxx40. M4 FINE xxx 物料4的慢速配料份量设置为 xxx41. YES 无错误发生或确认为对42. NO 接到不正确的指令或确认为错43. ERROR x 在调校过程中发生了编号为x的错误44. TARE xxxx 输出皮重值(XXXX是当前皮重,YYYY是参考皮重) YYYY45. ZERO xxxxxx 输出零位漂移46. OL, NT, + CRLF 回答READ提问OL = 超载ST = 稳定US = 不稳定NT = 净重GS = 毛重CRLF = 打印机换行47. RLY 1 物料输出口被RLY指令启动48. RLY D 卸料输出口被RLY指令启动49. TOL 3 允差被设为%50. ZERO x 可按ZERO键回零范围51. TOL xx 允差是多少52. TDC xx 卸料控制延迟时间是多少53. TTC xx 允差检测延迟时间是多少54. BCD xx BCD输出次数55. CIT xx 禁止比较56. FILTER xx 数字滤波57. SDT xx 起动时间延迟58. EFF xx 有效补偿功能59. ETC xx 有效检查超差功能60. ATE xx 自动除皮CB920X的输入指令:指令说明1.FUNC 将CB920X 设定到功能设定方式2.CAL 将CB920X 设定到调校方式3.SET 将CB920X 设定到配料份量设定方式4.READ 要求读数5.TARE 皮重是多少6.TARE ON 设定皮重7.TARE OFF 取消设定皮重8.ZERO 零位漂移是多少9.ZERO ON 设置零位漂移10.ZERO OFF 重新设定零位漂移11.PROG RS232/RS485的操作方式置为指令式12.AUTO RS232/RS485的操作方式置为自动式13.CONT RS232/RS485的操作方式置为连续式14.RLY 询问哪一个输出被RLY指令启动15.RLY 1 启动某一个输出, 只有在正常称重方式下方可启动, 1~ 4为各物料相对之输出, C为快速, F为慢速, D为卸料, T为超差.16.RLY OFF 关闭被RLY指令开启的输出17.ABO 放弃生产18.ST 启动生产19.KEY ON 使按键控制功能无效20.KEY OFF 使按键控制功能有效21.DSEL AUTO 选择使用自动RS232/RS485输出方式22.DSEL GROSS 选择使用毛重RS232/RS485输出方式23.DSEL NET 选择使用净重RS232/RS485输出方式注意: 输入的指令必须以确认, 例如“READ” 指令的ASCII输入为“52, 45, 41, 44, 0D, 0A” .CB920X 发出的配料资料:注意1: 每一种物料所配份量储存于CB920X 中, 当所有物料都配完后, 一次性输出来.NO. 1 2 3 4 5 6 7 8 9 10 11 12 13 14 15 16 17 18注意2: 当目标重量为零后, 将没有该物料资料的输出.RS232/RS485的操作方式: A) 指令方式(PRO) CB920X 完成配料后, 在RS232/RS485输出端送出一个“”, 若在 RXD 输入口收到“”, 则资料可输出, 次数不限. 在下一次生产启动时, 未收到“” 的指令, 则该次之配料数据将被取消. 重量数据亦需输入指令“READ” 才输出. 数据输出次数不限, 下次启动生产时方清洗报表.B) 连续方式(CONT)在这种方式下, 重量资料会自动不断输出而不需输入指令. 配料数据亦在生产完成时自行输出.C) 自动方式(AUTO)在这种方式下, 重量资料需有指令“READ”输入才送到输出. 当生产完成后, 配料数据则不须指令便会自动输出.状态1:M1物料1 M2物料2 M3物料3 M4物料4 状态2:NT= 净重 GS= 毛重 AB= 生产被终断数字重量资料:数字重量资料共包括8位字符, 数字从0到9,符号有: 负号“-”, 正号“+”, 空位“ ”和小数点.单位: kg = 公斤t = 吨输出接口电路图M M M M 1 2 4 3 , , , , N N N N T T T T , , , , + + + + 1 2 1 1 9 0 5 0 . . . . 9 0 0 0 9 0 0 0 k k k k g g g g L F L FL F L FCR CR CR CR9600 波特19200波特操作方式连续方式指令方式自动方式接线引脚端子说明 RS232插座PHOTO OUTPUT RS232 引脚端子名称讯号含义 RXD 指令数据(RXD)输入 TXD 资料(TXD)输出 COM 地电位 B 920X 安装在阳光直晒处,并须避免突然之温度变化、振如果当地交流电有可能超过±10 %的波动, 则必须使用电源稳压器稳定电源.称重显示器输入灵敏度称重显示器输入灵敏度(A)可通过以下方程式计算出来:对于CB920X 而言, A 必须大于或等于μV/格.传感器与显示器的连接法传感器的模拟输出及RS232板之输入或输出讯号对电子噪声很敏感, 故不要将这些电线结扎在一起,传感器在满载荷时的输出电压–传感器在自重时的输出电压A=× 秤量间距最大量程 O P T I O N A N A L O G O U TSIG+ SIG- EXC+ EXC- SHD5123467 8 9 10 1. M1指示灯 : 亮时显示在配物料 1. 2. M2指示灯 : 亮时显示在配物料 2. 3. M3指示灯 : 亮时显示在配物料 3. 4. M4指示灯: 亮时显示在配物料4. 5. ZERO 指示灯: 亮时显示零. 6. MOTION指示灯 : 亮时显示重量变动检测. 7. ENTER按键 : 接受输入数据.8. MODE 按键 : 选择功能设定方式. 9. TARE 按键: 如果没有重量变动, 且卸料继电器处于关闭状态, 皮重将储存于存贮器, 显示器则显示零. 该按键可将方式改为NET 方式. 10. ZERO 按键 : 如果初始调校之零位漂移不大于满量程百分之一至百分之十(参考功能设定) , 而又没有检测到重量变动, 则可按ZERO 按键令显示器显示零.后面板说明后面板外观CB920XCB920XA控制输出插座插座编号讯号含义 M1物料1输出口 M2 物料2输出口 SIG+CB920X ENTER MODE TARE ZERO MOTION ZERO M1 M2 M3 M4 M 1 M 2 M 3 M 4 C O A R S E F I N E D I S C H A R G E T O L E R A N C E E M T R C O M T X D (+) R X D (-) C O M + C O MS I G + S I G - E X C + E X C - S H I E L D S T A R T C O M E A R T H A C A C M 1 M 2 M 3 M E D I U M C O A R S E F I N E D I S C H A R G E T O L E R A N C E E M T R C O M T X D (+) R X D (-) C O M + C O M S I G + S I G - E X C + E X C - S H I E L D S T A R T C O M E A R T H A C A CM3 物料3输出口M4 (MEDIUM) 物料4输出口(中速配料输出口)COARSE 快速配料输出口FINE 慢速配料输出口DISCHARGE 卸料输出口TOLERANGE 误差输出口EMTR COM 输出口共通点TXD 资料(TXD)输出RXD 指令数据(RXD)输入COM 地电位+ 模拟输出(选配件)COM 地电位SIG+ 讯号输入+SIG- 讯号输入-EXC+ 激励电压输出+EXC- 激励电压输出-SHIELD 屏蔽START 生产启动COM 地电位EARTH 地线AC 交流电源AC 交流电源输出口可连接5伏至24伏直流电压, 最大驱动电流为. 为了将CB920X同外接控制设备隔离开以减少干扰, 应采用直流供电的缓冲继电器. 为了抑制由于接触连接造成的任何瞬间放电的噪音, 应将二极管同直流供电的缓冲继电器线圈并联.外接缓冲继电器地电位注: 为使CB920X 启动抗干扰能达到设计的效果, 可更换以下的方法连接起动线.按键, 按此键退出功能设置. 启动功能设置之步骤先按下, 不要放开, 然后按下 , 显示器显示“ ” 后,如果倍数, 如果最大量程. 详情可参阅.零位跟踪功能. 如果在大于.零位跟踪时间当显示“off”.~ = 至秒的延迟时间off = 无零位跟踪按“”.按按“10”. 1 = 指示灯会发亮.2 = 指示灯会发亮.5 = 每单位时间变动五个显示分度间距即只要读数在一/二秒内改变五个显示分度间距, MOTION 指示灯会发亮.10 = 每单位时间变动十个显示分度间距即只要读数在一/二秒内改变十个显示分度间距, MOTION 指示灯会发亮.按按分度间距当显示按最大量程当显示按分辨率. 这种情况分辨率 = 显示分度间距 / 最大量程波特率及19200波特.注: , 方可更改波特率.按零位范围10, 1至100表示零位范100kg , 当零位范围选择1%时, 称按操作方式当显示. , 将自动输出报表.正确指令(即READ)输入后, 才可有重量数据或数据输出, 生产完成后, 输出“” (ASCII 码为“05, 0D, 0A”). 当“” 输入后, 生产报表方可输出,次数不限. 但当生产启动时, 仍未有“” 输入, 则生产报表将被取消. ( “” 在ASCII 码上为“06” )数据输出次数不限, 下次启动生产时方清洗报表. “ ” : 自动方式正确指令(READ)输入后, 才可有重量数据或单位.吨不设定重量单位按按归零范围 1%至.按允差范围%至%按至是设定延迟卸料控制时间.按检当显示 , 可选择至范围.至是设定延迟检查超差时间, 还需要配合检查超差(ETC)使用.按, 由于物料的冲击和骤停,, 尤其是称料斗设计轻型, 当物料初始冲入称料斗时, 由于重力加速度的作用, 称料斗接受的重量信号会大于物料的实际重量, 因此在这段时间内, 可采取停止采样的禁止比较时间的方法, 提高显示值的准确性和稳定性.按“TARE” 键, 选择 ~ 范围.~是粗计量的禁止比较时间.按按 ~按数字滤波当显示“8”, 或时, 按第二阶段数字滤波按 0 = 1 = 有效按按 , 如超出设定的范围, 则此滤注: , 否则跳过此项功能设置, 而进入下一步功能设置状态.当卸料门关闭时, 由于机械的作用, 会使称料斗抖动, 从而使显示值在零位附近变动, 可以采用延迟启动的时间, 以保证有充分的时间使卸料门关紧, 提高零位的稳定性.检查重量按1 = 允许, 在上电时, 承重器之负载在归零范围内, 即以该负载为当时之零点,并显示为零(此按如STO=0及ATE=0, 即皮重等于零及不作任何除皮, 亦即为毛重配料.“ 3 ” 之条件下方可启动生产.3 = 毛重在归零范围之内且无生产按.按按 0.0~ = 去皮延迟时间设为~秒注: 在ATE 生效时, 先加入此去皮延迟时间, 以确保称体稳定才作去皮动作, 如该次配料无须去皮动作, 则去皮延迟时间TDT 亦无效.按按 ) 2~99次之读取皮重量及取其平均值,在去皮生产时, 皮重值为平均皮重值.在按下 , 皮重值将不会被进行平均.按按 0 100 = 当粗计量输出关闭后, 精计量输出打开注: 在添量配料时, 此参数无效.按按 (1) (即(2) 精计量延迟控制在粗计量完成后才完成(FCD=100).i) 如无点动配料, 则精计量延迟时间仍有效.ii) 如点动配料生效, 则精计量延迟时间将假设为零.有效无效快速慢速 (无点动配料) 慢速(有点动配料)。
夏普 ES-HK800G 全自動洗衣機 使用說明書说明书

ES-HK800G全 自 動 洗 衣 機使 用 說 明 書本使用說明書需要與設備一同保管,以備將來作參考。
如果設備被出售或轉移給另一個所有者,或者您搬家並離開設備,請始終確保該說明書隨設備一起提供,以便新的所有者可以了解設備的功能和相關警告。
這些警告是出於安全考慮而提供的。
在安裝或使用設備之前,您必須仔細閱讀它們。
目錄使用前各部件說明 (1)注意事項 (2)安裝與調整 (4)排水管的使用 (5)安裝進水管 (6)使用過程洗前準備 (7)投放洗滌物 (8)投放洗滌劑 (9)控製版面操作 (10)操作步驟 (12)附加功能 (15)其他保養方法 (16)異常現象 (17)規格表 (20)各部件名稱附 件與洗衣機連接端與進水管接頭連接端符號含義說明不要使用50℃以上的熱水。
洗衣機安裝在有地毯的地面上時,地毯不得堵塞通風孔。
柔軟的物體洗衣機底部通風孔不要洗滌雨衣、自行車罩、羽絨製品等防水性衣物,以免脫水時異常振動或因防水性衣物膨脹而引起劃破等損傷。
注意童攀爬洗衣機。
不要將任何熱的、重的物品(如盛有熱水的壺)放在洗衣機上。
清洗前,請確保水龍頭已打開,進水管已安裝好。
本機器不建議由這些人(包括兒童)來使用:身體上、感覺上或精神上有缺陷者,或缺乏經驗和知識者。
除非他們得到了在對其安全負責的人關於該項目產品使用的監護或指導。
兒童應當受到監督以確保其不會玩耍機器。
不要洗滌染有揮發性物質(烯料、汽油等)的衣物。
汽油稀釋劑苯避免陽光直接照射洗衣機,不要靠近暖氣等熱源。
洗滌時,為防止桶內線屑堵住瀑布口,影響瀑布效果,毛絨吸收器一定要完好,安裝到位,並及時清理。
拆下裝上任何物體,如硬幣、安全別針、釘子、螺絲釘、石頭或任何其他堅硬、鋒利的材料都可能造成嚴重損壞,不得放入機器中。
建議使用低泡沫洗衣粉。
拆除包裝°安裝與調整為了您正確、安全的使用洗衣機,請按說明書的要求安裝與調整洗衣機。
安裝底蓋鬆弛緊固高低調整螺母調整腳排水管的使用1.排水管在使用時必須掛起,但高度不能超過1.2m,以免造成漏水或排水不暢,排水時間過長,洗衣機會中途停止運行。
夏普笔记本使用说明
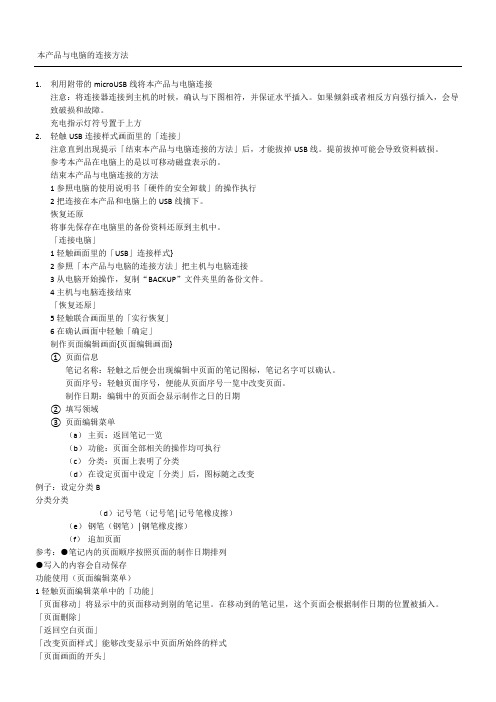
文件种类:16色位图(后缀:bmp)
存入的图像将转换成16谐调的单色图像显示。于此同时根据图像的不同可能会出现无法显示的情况。
将图像存入电脑
〈连接电脑〉
1轻触连接画面中的[USB连接样式]
2请参照里面的「本产品与电脑连接的方法」将本机与电脑连接
3从电脑开始操作,在“IMPORT”文件夹里复制图像文件
3从电脑开始操作,复制“BACKUP”文件夹里的备份文件。
4主机与电脑连接结束
「恢复还原」
5轻触联合画面里的「实行恢复」
6在确认画面中轻触「确定」
制作页面编辑画面{页面编辑画面}
1页面信息
笔记名称:轻触之后便会出现编辑中页面的笔记图标,笔记名字可以确认。
页面序号:轻触页面序号,便能从页面序号一览中改变页面。
参考本产品在电脑上的是以可移动磁盘表示的。
结束本产品与电脑连接的方法
1参照电脑的使用说明书「硬件的安全卸载」的操作执行
2把连接在本产品和电脑上的USB线摘下。
恢复还原
将事先保存在电脑里的备份资料还原到主机中。
「连接电脑」
1轻触画面里的「USB」连接样式}
2参照「本产品与电脑的连接方法」把主机与电脑连接
本机初始化
将本机初始化后就会回复购入之后的状态,写入的笔记资料会全部被消除。
注意执行「初始化」后,没有办法还原。
1卸下本机的外壳
2用附属的记录笔尖按重新设置的按钮,同时使电源的开关滑动。
3充电的指示灯一亮,按照「电源开关」「重新设置开关」的顺序离手。
4初始化确认画面显示的话,轻触确定内容的「确定」。
(e)改变笔记名称
(f)删除笔记
6设置
制作笔记(主页菜单1)
夏普KI-DX70、KI-DX85使用说明
夏普KI-DX70、KI-DX80使用说明书本空气净化器有4个过滤网,分别为HEPA除尘过滤网、脱臭过滤网、加湿过滤网、抗菌过滤网。
风路又分前端风路和后端风路2种,为保证高浓度负离子发生装置的有效工作,每运行17500小时需要更换一次负离子发生装置。
如果不更换,前端风路将在运行至19000小时后自动关闭。
Q:看不见有蒸汽出来,是否有效加湿?是否过度加湿?A:本净化器采用气化方式加湿,没有蒸汽出现。
并且会更具周围环境自动调整加湿量,不会出现过度加湿的情况。
Q:使用加湿功能下,水槽里的水位没有明显变化?A:电脑自动控制加湿,在湿度事宜的情况下,自动停止加湿。
Q:加湿中为何周围湿度未发生变化?A:有可能水槽里没有水、或者加湿滤网里附着过量垃圾。
请确认滤网及水槽水量。
Q:出风口有点冷?A:本净化器为了保证高浓度负离子的有效释放,出风口的前后会感到寒冷,属正常情况。
Q:只能使用自来水?A:自来水一般会有细菌抑制处理,所以推荐使用自来水。
如果用井水、净水器过滤的水、矿水的话,容易产生细菌。
Q:出风口有异味怎么办?A:经常抽烟或者吃烧烤、或者长时间未清洗水槽的话,会有异味产生。
遇此情况,请将本机清洗一遍。
Q:出风口的风量越来越弱怎么办?A:遇此情况,请将本机清洗一遍。
Q:高浓度负离子发生装置一定要定期更换么?A:是的,2年更换一次为好。
Q:出风口有[滋滋]的声响怎么办?A:属于正常情况,负离子发射器工作时会发出声响。
Q:突然间机器说起话来?A:机器在使用中,的确会说话,不懂不影响使用,如果觉得吵,可以反复按此按钮,将声音去除关于安置:为了得到最有效的除尘效果,请将机器背面放置于离墙壁30cm意外的位置。
1.室温最好控制在0-35度。
2.选择不被太阳直接照射的位置。
3.远离空调出风口。
4.远离电视机、调频收音机,调频时钟。
关于使用面表:1.按此键,机器会说日文,说的大多是一般提示之类的话语,只能说日文,不懂不影响操作,因为这些提示在面板上都会有显示。
夏普KI-BX70、KI-BX80中文使用说明书
夏普KI-BX70、KI-BX80使用说明书本空气净化器有4个过滤网,分别为HEPA除尘过滤网、脱臭过滤网、加湿过滤网、抗菌过滤网。
风路又分前端风路和后端风路2种,为保证高浓度负离子发生装置的有效工作,每运行17500小时需要更换一次负离子发生装置。
如果不更换,前端风路将在运行至19000小时后自动关闭。
Q:看不见有蒸汽出来,是否有效加湿?是否过度加湿?A:本净化器采用气化方式加湿,没有蒸汽出现。
并且会更具周围环境自动调整加湿量,不会出现过度加湿的情况。
Q:加湿中为何周围湿度未发生变化?A:有可能水槽里没有水、或者加湿滤网里附着过量垃圾。
请确认滤网及水槽水量。
Q:出风口有点冷?A:本净化器为了保证高浓度负离子的有效释放,出风口的前后会感到寒冷,属正常情况。
Q:只能使用自来水?A:自来水一般会有细菌抑制处理,所以推荐使用自来水。
如果用井水、净水器过滤的水、矿水的话,容易产生细菌。
Q:出风口有异味怎么办?A:经常抽烟或者吃烧烤、或者长时间未清洗水槽的话,会有异味产生。
遇此情况,请将本机清洗一遍。
Q:出风口的风量越来越弱怎么办?A:遇此情况,请将本机清洗一遍。
Q:高浓度负离子发生装置一定要定期更换么?A:是的,2年更换一次为好。
关于安置:为了得到最有效的除尘效果,请将机器背面放置于离墙壁30cm意外的位置。
1.室温最好控制在0-35度。
2.选择不被太阳直接照射的位置。
3.远离空调出风口。
4.远离电视机、调频收音机,调频时钟。
关于使用面表:1.切タイマー:此键为定时装置,从1小时--2小时--4小时--8小时--解除的设定流程来设定时间。
3秒后自动确认设定。
2.ファイルターお手入れ:此黄灯亮起时,表示需要对净化器做一次清洁。
清洁的流程为:1、关闭电源。
2、将水槽清洗一遍。
3、将托槽稍微向上抬起,取出加湿滤网并清洗。
(装回是切记不要将加湿滤网装反)4、将托槽也一起清洗一遍。
5、将机器外部用布料擦洗。
6、全部清洗一次后,将加湿滤网、托槽等一并装回后,插上电源,按切タイマー键3秒以上后,黄灯自动关闭。
Sharp LC-70X500T 智能电视操作手册说明书
>><目錄1. 零件名稱1-1. 顯示器零件名稱1-7. 遙控器按鈕名稱2. 基本操作2-1. 初始安裝2-3. 基本操作2-4. 使用計時器2-6. 用耳機收聽顯示器3. 目錄操作3-1. 如何使用目錄3-2. 如何使用設定目錄3-3. 設定目錄項目清單3-44. 如何使用工具目錄3-45. 輸入字母(軟體鍵盤)4. USB 媒體4-1. 使用 USB 媒體之前4-7. 欣賞照片4-22. 欣賞音樂4-25. 欣賞視訊5. AQUOS LINK 和其他裝置5-1. 連接 8K 輸出相容裝置5-5. 連接 4K 輸出相容裝置5-7. 觀看 HDR 視訊(輸入 1、輸入 7)5-9. 搭配使用 AQUOS LINK5-16. 連接錄製器、播放機等5-26. 連接錄製器、播放機或遊戲機5-27. 連接音訊裝置5-28. 連接 PC5-35. 連接顯示器和 PC5-36. 操作顯示器的設定5-37. 命令清單6. 疑難排解6-1. 若有任何疑問6-9. 若出現錯誤訊息6-12. 假設情況6-13. 主要規格6-14. PC 支援的訊號計時6-15. AV 支援的訊號計時6-16. PC/AV HDMI 輸入端子插角設定6-17. PC/AV D-sub 輸入端子插角設定7. 規格等7-1. 尺寸圖7-2. 軟體授權7-4. 用於顯示器的專利2. 基本操作3. ⽬錄操作4. USB 媒體5. AQUOS LINK 和其他裝置6. 疑難排解7. 規格等正面名稱頁面①電源指示燈綠色亮起︰運作狀態紅色亮起︰待機狀態未亮起︰電源關閉狀態2-1②遙控器指示燈接收部分遙控器指向此部分。
―1-12. 基本操作3. ⽬錄操作4. USB 媒體5. AQUOS LINK 和其他裝置6. 疑難排解7. 規格等背面名稱頁面①耳機輸出端子(φ3.5,立體聲微型插孔)即使連接耳機之後,亦能從揚聲器傳出聲音。
2-6②USB1 端子連接 USB 記憶體。
Seiko Epson 产品说明书
User’s ManualAll rights reserved. No part of this publication may be reproduced, stored in a retrieval system, or transmitted in any form or by any means, electronic, mechanical, photocopying, recording, or otherwise, without the prior written permission of Seiko Epson Corporation. No patent liability is assumed with respect to the use of the information contained herein. While every precaution has been taken in the preparation of this book, Seiko Epson Corporation assumes no responsibility for errors or omissions. Neither is any liability assumed for damages resulting from the use of the information contained herein.Neither Seiko Epson Corporation nor its affiliates shall be liable to the purchaser of this product or third parties for damages, losses, costs, or expenses incurred by purchaser or third parties as a result of: accident, misuse, or abuse of this product or unauthorized modifications, repairs, or alterations to this product, or (excluding the U.S.) failure to strictly comply with Seiko Epson Corporation’s operating and maintenance instructions.Seiko Epson Corporation shall not be liable against any damages or problems arising from the use of any options or any consumable products other than those designated as Original Epson Products or Epson Approved Products by Seiko Epson Corporation.EPSON is a registered trademark of Seiko Epson Corporation in Japan and other countries/regions. NOTICE: The contents of this manual are subject to change without notice.Standards and ApprovalsThe following standard is applied only to the printers that are so labeled. (EMC is tested using the Epson power supplies.)North America:FCC/ICES-003 Class AWARNINGThe connection of a non-shielded printer interface cable to this printer will invalidate the EMC standards of this device. You are cautioned that changes or modifications not expressly approved by Seiko Epson Corporation could void your authority to operate the equipment.FCC Compliance Statement For American UsersThis equipment has been tested and found to comply with the limits for a Class A digital device, pursuant to Part 15 of the FCC Rules. These limits are designed to provide reasonable protection against harmful interference when the equipment is operated in a commercial environment.This equipment generates, uses, and can radiate radio frequency energy and, if not installed and used in accordance with the instruction manual, may cause harmful interference to radio communications. Operation of this equipment in a residential area is likely to cause harmful interference, in which case the user will be required to correct the interference at his own expense.For Canadian UsersThis Class A digital apparatus complies with Canadian ICES-003.À l’intention des utilisateurs canadiensCet appareil numérique de la classe A est conforme à la norme NMB-003 du Canada.Default Delay Times for Power Management for Epson ProductsThis product will enter low power (sleep) mode after a period of nonuse. The time interval has been set at the factory to ensure that the product meets Energy Star standards of energy efficiency and cannot be modified by the consumer.The power consumption in the sleep mode and power off mode when using the AC adapter PS-180 is described below.Serial model Parallel model USB model Ethernet modelAC 115V 60 Hz Sleep mode 1.2 W 1.4 W 1.1 W 2.9 W Power off mode0.3 W0.3 W0.3 W0.3 W© 2008 Seiko Epson CorporationPrinted in ChinaPrecautions When Installing the Power Supply BoxA description of EMI standards is on the bottom of the printer. When the optionalpower supply box (OT-BX88) is installed, it is hard to check it. In such case,uninstall the power supply box if necessary.Safety PrecautionsThis section presents important information intended to ensure safe and effective use of this product. Please read this section carefully and store it in an accessible location.WARNING:Shut down your equipment immediately if it produces smoke, a strange odor, or unusual noise. Continued use may lead to fire. Immediately unplug theequipment and contact your dealer or a Seiko Epson service center for advice.Never attempt to repair this product yourself. Improper repair work can be dangerous.Never disassemble or modify this product. Tampering with this product may result in injury or fire.Be sure to use the specified power source. Connection to an improper power source may cause fire.Do not allow foreign matter to fall into the equipment. Penetration by foreign objects may lead to fire.If water or other liquid spills into this equipment, unplug the power cordimmediately, and then contact your dealer or a Seiko Epson service center for advice. Continued usage may lead to fire.If you open the DIP switch cover, be sure to close the cover and tighten the screw after adjusting the DIP switch. Using this product with the cover open may cause fire or electric shock.Do not use aerosol sprayers containing flammable gas inside or around this product. Doing so may cause fire.CAUTION:Do not connect cables in ways other than those mentioned in this manual.Different connections may cause equipment damage and burning.Be sure to set this equipment on a firm, stable, horizontal surface. The product may break or cause injury if it falls.Do not use in locations subject to high humidity or dust levels. Excessivehumidity and dust may cause equipment damage or fire.Do not place heavy objects on top of this product. Never stand or lean on this product. Equipment may fall or collapse, causing breakage and possible injury.Take care not to injure your fingers on the manual cutter•When you remove printed paper•When you perform other operations such as loading/replacing roll paper To ensure safety, unplug this product before leaving it unused for an extended period. Restriction of UseWhen this product is used for applications requiring high reliability/safety, such as transportation devices related to aviation, rail, marine, automotive, etc.;disaster prevention devices; various safety devices, etc.; or functional/precision devices, etc.; you should use this product only after giving consideration toincluding fail-safes and redundancies into your design to maintain safety and total system reliability. Because this product was not intended for use inapplications requiring extremely high reliability/safety, such as aerospaceequipment, main communication equipment, nuclear power control equipment, or medical equipment related to direct medical care, etc., please make your own judgment on this product’s suitability after a full evaluation.Precautions on Use of Recommended Liner-free Label ❏When using the recommended liner-free label, the printer power must always be on to maintain a good print quality❏Before using thermal roll paper after using the recommended liner-free label, clean up any glue from the recommended liner-free label that is on thethermal head, paper holder, or paper path. This glue may cause paper jams.UnpackingThe following items are included with the standard specification printer. If any item is damaged, contact your dealer.❏Printer❑Roll Paper❏Power switch cover❑Connector cover❏AC adapterInstalling the Printer Horizontally or VerticallyYou can install the printer horizontally on a flat surface (with the paper exit on top) or vertically (with the paper exit at the front) by hanging it on a wall, using the optional WH-10 hanging bracket set.WARNING:When hanging the printer on the wall with the hanging bracket set, be sure to attach a connector cover to the printer.Important Installation Notes❏For a serial interface, use a null modem cable.❏For a parallel interface, use an IEEE 1284 cable.❏For a USB interface, install the driver before connecting the printer.Downloading Drivers, Utilities, and ManualsDrivers, utilities, and manuals can be downloaded from the following URL./Part NamesControl PanelFEED buttonThis button feeds paper.(Power) LEDThis LED is on when the printer is on.ERROR LEDThis indicates an error.PAPER OUT LEDOn indicates a paper out, and when you select to use thermal roll paper by DIP Switches, also indicates a paper near end. (For DIP Switch settings, See Table B on page 7.)Using the Power Switch CoverAttaching and Removing the Connector CoverThese instructions apply if a connector cover is packed with your printer to protect your cables. To attach it, follow the steps below:WARNING:If an accident occurs with the powerswitch cover attached, unplug the power cord immediately. Continued use may cause fire or shock.The enclosed power switch cover ensures that the power switch is not pressedaccidentally. To use this cover, install it as shown in the illustration on the right.1.connector cover has threeleft, and back.2.Position the two hooks on theconnector cover so that they in the illustration on the right.3.to click onto the printer casethe printer over, and push the connector cover down whilecover inward to detach the hooks from the printer case.Installing Roll Paper1.Press the cover open button to open the printer cover.2.Be sure that the paper comes off the roll in the correct direction.3.The paper will be automatically fed and cut.Removing Jammed Paper1.Turn the printer off and press the cover open button to open the printer cover.2.Remove the jammed paper, reinstall the roll, and close the printer cover.3.If paper is caught in the cutter and you cannot open the printer cover, openthe cutter cover.4.to the normal position. There is a label near the cutter to assist you.5.6.Open the printer cover and remove the jammed paper.Cleaning the Thermal HeadIf you use thermal paper, follow the steps below to clean the thermal head.to let it cool before you clean it. Do not damage the thermal head bytouching it with your fingers or any hard object.Turn off the printer, open the printer cover, and clean the thermal elements of the thermal head with a cotton swab moistened with an alcohol solvent (ethanol or IPA).Epson recommends cleaning the thermal head periodically (generally every3months) to maintain receipt print quality.TroubleshootingNo lights on the control panelCheck the power supply cable connections and the power outlet.ERROR LED on (not flashing) with no printingIf PAPER OUT is on , the roll paper is not installed or is near the end.If PAPER OUT is off , the printer cover is not closed properly.ERROR LED flashing with no printing (and no paper jam)Printing stops if the head overheats and resumes automatically when it cools.If overheating is not the cause, turn the printer off, and after 10 seconds, back on.DIP Switch Tables*Only when DIP Switches 1-7 and 1-8 are on, thetransmission speed can be selected from one of seven speeds: 2400, 4800, 9600, 19200, 38400, 57600, and 115200 bps by conrol commands. The default is 38400.*1: For USB I/F, DIP Switches 1-3 and 1-4 are Undefined.*2: For Parallel I/F, DIP Switch 1-8 is Undefined.DIP switch 1 (Serial Interface)SW FunctionON OFF 1-1Data receive error Ignored Prints “?”1-2Receive buffer capacity 45 bytes 4K bytes 1-3Handshaking XON/XOFF DTR/DSR 1-4Data word length 7 bits 8 bits 1-5Parity check Enabled Disabled 1-6Parity selectionEvenOdd1-71-8Transmission speed (See table A.)Table ATransmission speed (bps)-bits per second 1-71-8Adjustable by control commands*ON ON 4800OFF ON 9600ON OFF 19200OFFOFFDIP switch 1 (Parallel/USB Interface)SW Function ON OFF 1-1Auto line feed Always enabled Always disabled 1-2Receive buffer capacity45 bytes4KB1-3*1Select paper sensors to output paper-end signals (default value of a command) from parallel I/F.DisabledRoll Paper end sensor enabled, Roll Paper near-end sensor enabled 1-4*1Error signal outputfrom parallel I/F Disabled Enabled1-5~1-7Undefined 1-8*2Power savingfunction for USBDisabledEnabledDIP switch 2 (Serial/Parallel/USB Interface)SW Function ONOFF2-1Handshaking (BUSY condition)Receive buffer fullOffline orReceive buffer full2-2Do not change settings Fixed to OFF 2-32-4Print density/Liner-free label See Table B2-5Release condition of receive buffer BUSY (If receive buffer capacity set to 4 KB.)Releases BUSY when remaining receive buffer capacity reaches 138bytes.Releases BUSY when remaining receive buffer capacity reaches 256bytes.2-6Do not change settings.Fixed to OFFDIP switch 2-7, 2-8 (Serial Interface)SW Function ON OFF 2-7I/F pin 6 reset Enabled Disabled 2-8I/F pin 25 resetEnabledDisabledDIP switch 2-7, 2-8 (Parallel/USB Interface)SW Function ONOFF2-7Do not change Fixed to OFF 2-8Do not changeFixed to ONTable BPaperPrint density 2-32-4Recommended liner-free labelFixed ON ON Thermal roll paperNormal OFF OFF Medium ON OFF DarkOFFONSpecificationsdpi: dots per 25.4 mm (dots per inch)*1:Set DIP Switches 2-3 and 2-4 for each paper type. (See Table B on page 7.)Font Specification* Memory switches can be set with the memory switch setting utility.58mm paper width model80mm paper width modelPrinting method Thermal line printingDot density 203 dpi × 203 dpi [dots per 25.4 mm {1"}]Printing direction Unidirectional with friction feed Printing width52.5 mm {2.07"}, 420 dot positions72 mm {2.83"}, 576 dot positionsNumber of characters Alphanumeric characters: 95; International characters: 48Extended graphics: 128 × 11 pages (including user-defined page)Printing speed *1Recommended liner-free label: 150 mm/s {5.9"/s} (default)Thermal roll paper: 177 mm/s {7.0"/s} max.Ladder bar code and 2D code: 88 mm/s {3.46"/s}The above speed values are approximate.Paper feed speed Approx. 150 mm/s {approx. 5.9"/s} continuous paper feedLine spacing (default) 3.75 mm {1/6.7"}Roll paper (single-ply)Width 57.5 mm ± 0.5 mm {2.26" ± 0.02"}79.5 mm ± 0.5 mm {3.13" ± 0.02"}Diameter Maximum outside diameter:83 mm {3.27"}SpoolRoll Paper spool diameter:Inside: 12 mm {0.47"}; Outside: 18 mm {0.71"}Specified thermal roll paper typeNTP058-80NTP080-80Recommended liner-free label type MS214150MS318150Interface(compatible)Serial (RS232/RS485)/Parallel (IEEE1284)/Ethernet (10/100Base-T)/USB (Full speed)Receive buffer 4KB/45 bytes Cash drawer function 2 drivesSupply voltage DC + 24 V ± 7%Temperature Operating: 5 to 45°C {41 to 113°F}Storage:–10 to 50°C {14 to 122°F}, except for paper HumidityOperating:Recommended liner-free label:10 to 80% RH Thermal roll paper:10 to 90% RH Storage:10 to 90% RH, except for paperOverall dimensions 148 × 145 × 195 mm {5.83 × 5.71 × 7.68"} (H × W × D)Weight (mass)Approx. 1.8 kg {3.96 lb}Memory switch settingFont58mm paper width model 80mm paper width model Font structureColumnFont structureColumnMemory switch 5-2 ON (default)Font A (default)10 × 244213 × 2444Font B9 × 174610 × 1757Font C12 × 243510 × 2457Memory switch 5-2 OFF Font A (default)12 × 243512 × 2448Font B 9 × 17469 × 1764Font C10 × 244210 × 2457。
LG BX580 3D蓝光DVD播放机 用户手册说明书
• 很多 BD-ROM/DVD 光碟均在编码时加入了复制 保护。因此,您只能将此播放器直接连接到 TV,不可连接到 VCR。如果连接到 VCR,会导 致带复制保护的光碟图像失真。
• 本产品包含版权保护技术,此技术受美国专利 权法以及其它知识产权法的保护。使用此版权 保护技术必须得到 Macrovision 公司的授权 。如果没有 Macrovision 公司的授权许可, 您只能将其用于家庭观看或其它受限的观看。 严禁进行反向设计和分解。
• 本机支持 H.264/MPEG-4 AVC profile Main 、High at Level 4.1。对于级别更高的文 件,屏幕上将显示警告信息。
• 可用的文件扩展名因 DLNA 服务器而 异。
• 本播放器不支持以 GMC*1 或 Qpel*2 录制的
2
文件。这些是采用 MPEG4 标准的视频编码
三角形内的闪电箭头符号警示用 户,产品外壳存在未绝缘的危险 电压,会产生对人身造成电击的危 险。
三角形内的惊叹号提醒用户,随设 备一起提供的印刷品中包含重要的 操作和维护(维修)指南。
注意和警告
警告:为了减少火灾或电击的危险,请勿使此产 品淋雨或暴露在潮湿的空气中。 警告:不要将此设备安装在狭窄的空间中,例如 书柜或类似的空间。 小心:不要挡住任何通风孔。 按照制造商的使用说明进行安装。 机壳上的槽和开孔供通风之用,以确保产品能够 可靠工作并防止内部过热。请不要将此产品放置 在床上、沙发上、地毯或其它类似物品上,以免 堵住通风孔。此产品不能采用内置式安装,如安 装在书架或其它架子上,除非能够充分通风或者 制造商的说明书中允许这样安装。
诸如影片之类可购买或租借的
光碟。
DVD±R(8 cm / 12 cm 光碟) - 仅视频模式和封盘光碟 - 同时支持双层光碟 - 封盘的 AVCHD 格式 - 包含电影、音乐或图片文件
LG DLP投影机 BX403B 使用说明书

可能导致火灾或损坏本机!
可能导致火灾或触电。
不要在潮湿的地方使用投影机,如 不要将投影机直接放在地毯、软垫 确保投影机周围通风良好。投影机
浴室等可能弄湿的地方。
上或通风不畅的地方。
和墙之间的距离应大于 30 厘米。
可能导致火灾或触电!
可能造成内部温度过度升高,导致火灾 投影机内部温度过度上升可能导致火灾或
零件名稱 主體................................................ 7 控制面板............................................ 7 連接零件............................................ 8 遙控器 .............................................9 安裝電池............................................ 9 投影機狀態指示燈................................... 10 配件............................................... 11 選購配件 ..........................................11
連接 連接到桌上型電腦................................... 17 連接到筆記型電腦................................... 17 連接到視訊來源..................................... 17 連接到 DVD.........................................18 連接到 D-TV 機上盒.................................18
夏普KI-DX70中文说明书
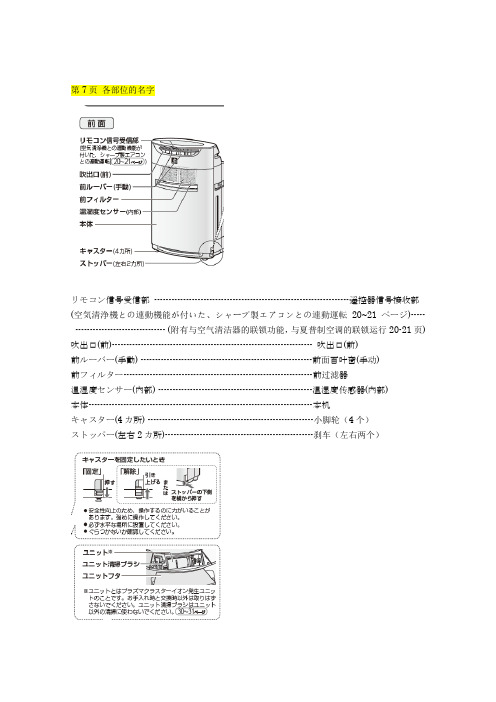
第7页各部位的名字リモコン信号受信部-------------------------------------------------------------------遥控器信号接收部(空気清浄機との連動機能が付いた、シャープ製エアコンとの連動運転20~21ページ)----- ------------------------------- (附有与空气清洁器的联锁功能,与夏普制空调的联锁运行20-21页) 吹出口(前)--------------------------------------------------------------------- 吹出口(前)前ルーバー(手動) -----------------------------------------------------------前面百叶窗(手动)前フィルター-----------------------------------------------------------------前过滤器温湿度センサー(内部) -----------------------------------------------------温湿度传感器(内部)本体-----------------------------------------------------------------------------本机キャスター(4カ所) ---------------------------------------------------------小脚轮(4个)ストッパー(左右2カ所)---------------------------------------------------刹车(左右两个)想固定小脚轮时固定----------------向下按解除----------------向上拉或者横向推刹车下侧●在安全性上,操纵需要用力。
SHARP UX-P710CN UX-A760CN 传真机 说明书
UX-P710CN UX-A760CN 传真机使用手册Datalight is a registered trademark of Datalight, Inc. FlashFX TM is a trademark of Datalight, Inc.Copyright 1993 - 2004 Datalight, Inc. All Rights Reserved. U.S. Patent Office 5.860.082/6.260.156引言2操作面板概览5 1. 安装8开箱核对清单 . . . . . . . . . . . . . . . . . . . 8设定 . . . . . . . . . . . . . . . . . . . . . . . . . . 8图象胶片. . . . . . . . . . . . . . . . . . . . . . . 9装入打印纸. . . . . . . . . . . . . . . . . . . . 12初始设定. . . . . . . . . . . . . . . . . . . . . . 13设定接收模式 . . . . . . . . . . . . . . . . . . 14音量调节. . . . . . . . . . . . . . . . . . . . . . 15 2.发送传真16可传送的文件 . . . . . . . . . . . . . . . . . . 16装入文件. . . . . . . . . . . . . . . . . . . . . . 16解晰度和对比度 . . . . . . . . . . . . . . . . 17发送传真:正常拨号. . . . . . . . . . . . . 18保存号码. . . . . . . . . . . . . . . . . . . . . . 19发送传真:自动拨号. . . . . . . . . . . . . 21拨打电话. . . . . . . . . . . . . . . . . . . . . . 24 3.接收传真25使用自动识别模式 . . . . . . . . . . . . . . 25使用传真模式 . . . . . . . . . . . . . . . . . . 26使用电话模式 . . . . . . . . . . . . . . . . . . 26使用答录模式 (UX-A760CN) . . . . . . 28接收至存储器 . . . . . . . . . . . . . . . . . . 284. 应答系统(仅限于 UX-A760CN)30录制外出留言 . . . . . . . . . . . . . . . . . . 30使用应答系统 . . . . . . . . . . . . . . . . . . 30应答系统设定 . . . . . . . . . . . . . . . . . . 33截接振铃. . . . . . . . . . . . . . . . . . . . . . 34远程操作. . . . . . . . . . . . . . . . . . . . . . 355.复印386.来电显示(需要服务)39开启来电显示 . . . . . . . . . . . . . . . . . . 39来电显示一览表. . . . . . . . . . . . . . . . . 39阻止呼叫. . . . . . . . . . . . . . . . . . . . . . 417.键锁功能438. 保养45清洁传真机 . . . . . . . . . . . . . . . . . . . . 45清洁打印头和辊筒. . . . . . . . . . . . . . . 46 9. 故障检修49故障与解决方法. . . . . . . . . . . . . . . . . 49信息与信号 . . . . . . . . . . . . . . . . . . . . 53清除夹纸. . . . . . . . . . . . . . . . . . . . . . 56快速参考指南59索引601规格图象胶片原装样本卷筒(传真机附带):大约可打印 20 张 A4 纸更换胶卷(不附带):UX-71CR(30 米 x 1 卷)UX-72CR(30 米 x 2 卷)(每卷大约可打印 90 张 A4 纸)纸盘容量约 10 张 A4 纸(80 克/米2)(室温)记录系统热转移记录有效打印宽度最大 205 毫米存储器容量UX-P710CN:平均约 40 页UX-A760CN:平均约 50 页(未录制语音留言),或 15分钟语音留言(包括 OGM)且存储器中无文件(最多 30 条语音留言)。
夏普打印机使用说明书
用户程序 .......................................................................................................... 62 在用户程序中选择一个设置 ............................................................................. 67
4 便捷的复印功能
自动双面复印 ................................................................................................... 26 整理复印 .......................................................................................................... 29 在一页纸上复印几页原稿(二合一复印)........................................................ 31 复印时建立边位(边位移动)...................................................................................................................................................................... 14 加载纸盒 .......................................................................................................... 15 手送(包括特殊纸张)..................................................................................... 17 更改纸盒的纸张尺寸设置 ................................................................................. 19
Philips OLED708 Series 用户指南说明书

使用手冊55OLED70865OLED708Register your product and get support at /TVsupport目錄1 OLED 螢幕照護 42 首頁畫面 5 2.1 簡介 5 2.2 儀表板與設定 5 2.3 Google TV 和基本模式 52.4 開啟首頁畫面 63 安裝 7 3.1 請閱讀安全指示 7 3.2 電視底座和壁面架設 7 3.3 擺放位置提示 7 3.4 電源線 73.5 天線電纜 74 遙控器 9 4.1 按鍵瀏覽 9 4.2 將遙控器與電視配對 10 4.3 語音搜尋 10 4.4 IR 感應器 104.5 電池與清潔 105 開啟和關閉 12 5.1 開啟或待機 125.2 電視上的按鍵 126 安裝頻道 13 6.1 安裝天線頻道 136.2 複製頻道清單 147 頻道 16 7.1 安裝頻道 16 7.2 頻道清單 16 7.3 頻道清單排序 16 7.4 觀賞頻道 16 7.5 設定為喜愛的頻道 19 7.6 圖文 / 圖文電視 207.7 互動式電視 218 電視指南 22 8.1 電視指南數據 228.2 使用電視指南 229 連接裝置 23 9.1 關於各種連接 23 9.2 家庭劇院 - HTS 24 9.3 數位音訊輸出 - 光纖 25 9.4 智慧型手機和平板電腦 25 9.5 藍光光碟播放器 25 9.6 耳機 25 9.7 遊戲機 25 9.8 USB 鍵盤 26 9.9 USB 儲存裝置 26 9.10 相機 269.11 攝影機 279.12 電腦 2710 連接您的電視 28 10.1 網路和網際網路 2810.2 Google 帳戶 2911 網際網路 3011.1 啟動網際網路 3012 輸入源 3112.1 切換至裝置 3113 快速選單和常用設定 3214 顯示和音效 33 14.1 畫面 33 14.2 螢幕 36 14.3 聲音 37 14.4 音頻輸出 4014.5 Ambilight (流光溢彩) 4015 應用程式 45 15.1 關於應用程式 45 15.2 Google Play 45 15.3 開始或停止應用程式 4615.4 管理應用程式 4616 系統 47 16.1 輔助功能 47 16.2 關於 47 16.3 日期和時間 48 16.4 語言 49 16.5 USB 鍵盤設定 49 16.6 儲存 49 16.7 環境模式 49 16.8 電源和能源 49 16.9 投放 49 16.10 系統聲音 50 16.11 兒童限制觀看設定 50 16.12 零售模式設定 5016.13 重新啟動 5117 遙控器與配件 52 17.1 開啟或關閉 Bluetooth® 5217.2 遙控器 5218 影片、相片和音樂 53 18.1 來自電腦或 NAS 53 18.2 喜愛頻道選單 53 18.3 最受歡迎選單與上次播放選單 53 18.4 來自 USB 連接裝置 53 18.5 播放您的影片/視訊 53 18.6 觀看您的相片 54 18.7 播放您的音樂 5519 智慧型手機和平板電腦 5719.1 Philips TV Remote App 5720 遊戲 58 20.1 必要準備 58 20.2 遊戲控制器 58 20.3 從遊戲機或電腦玩遊戲 5820.4 遊戲控制項列 5821 Freeview (澳洲) 59 21.1 關於 Freeview 5921.2 啟動 Freeview 5922 Netflix 6023 Alexa 61 23.1 關於 Alexa 6123.2 使用 Alexa 6124 規格 62 24.1 電源 62 24.2 作業系統 62 24.3 接收 62 24.4 顯示器類型 62 24.5 顯示器輸入解析度 62 24.6 連接 62 24.7 聲音 6224.8 多媒體 6325 協助說明與支援 64 25.1 註冊您的電視 64 25.2 使用協助說明 64 25.3 電視診斷與自我診斷 64 25.4 疑難排解 64 25.5 線上協助說明 6625.6 支援及維修 6626 安全與照護 68 26.1 安全性 6826.2 螢幕照護 6927 使用條款 70 27.1 使用條款 - 電視 7027.2 使用條款 - Smart TV 7028 版權 71 28.1 Google TV 71 28.2 HDMI 71 28.3 HEVC 先進技術 71 28.4 NVIDIA G-SYNC 71 28.5 AMD FreeSync Premium 71 28.6 杜比視界及 Dolby Atmos 71 28.7 DTS:X 71 28.8 DTS Play-Fi 71 28.9 Wi-Fi Alliance 72 28.10 Kensington 72 28.11 其他商標 7229針對第三方所提供服務及/或軟體的免責聲明 73索引 741OLED 螢幕照護OLED 顯示器採用尖端科技,並且結合我們屢屢獲獎肯定的畫質引擎。
KI-BX70中文说明书

常见问题1、没有看见蒸汽,是否在加湿呢?是否会加湿过度?本机器的加湿功能并不是像水沸腾的时候释放蒸汽那样,而是依靠风吹过加湿滤网时,将湿空气(气化方式)送出,所以蒸汽式肉眼看不见的。
机器没有使用加热器,所以比较省电。
湿度变大的时候机器会自动抑制加湿量,所以不会导致空气湿度过大。
您也可以通过加湿时的指示灯进行湿度确认。
2、正在加湿,可是空气湿度并没有加大是为什么?水箱内没有水或者水过少;加湿滤网上附着了水垢或者垃圾脏污;都有可能导致湿度无法达到正常水平。
这种情况下请清洗加湿滤网和托盘。
另外,室内空间的大小也可能会导致无法达到正常的湿度水平。
这种情况下请将风量调到中档或者高档。
3、吹出来的风是不是冷风,会不会让人感觉很冷?为了确保高浓度的等离子粒团能更快更好的散播到整个屋子,机身背面和正面同时有风吹出。
所以根据机器摆放的位子,有时候可能会感觉比较冷。
这种情况下,可以将机身的摆放的位子调整一下,或者直接将机器的风量调到节能模式。
4、可不可以不使用自来水?自来水经过了消毒处理,细菌比较难以繁殖,所以建议使用自来水。
使用其他未经过消毒的水的话,细菌容易繁殖。
注意:本产品电压是100V,在中国境内使用需要配备变压器。
关于机器的摆设注意:不要将入气口或者出气口对着窗帘,家具等摆设。
1、机器上方离天花板60cm以上,背部离墙壁3cm 以上,左右两边也尽量与家具等摆设隔开一点距离。
2、建议在0~35度的室内使用。
3、请避开日光直射。
4、不要对着空调风口或者电热器等发热装置的风口。
5、放在坚硬的水平面。
6、在同一个场所摆放时间比较长的话,要定期清理一下机身底部和四周。
7、会受电视和收音机的干扰,所以尽量离电视和收音机等装置远一点。
各部位名称前面吹出口(前):前出风口前ルーバー:前百叶窗(手动)前フィルター:前置滤网フィルターお手入れセンサー:滤网清洁传感器本体:机身キャスター:轮子想要固定底部的轮子时,将前面右下角的按钮按下去,解除固定时,将按钮的提上来。
夏普 手机 说明书
在範例 2 中,進入“電話簿”的步驟皆已簡化,如上所 示(步驟 1)。
B、a、b、c、d 與 C [ 選項 ] 表示本手 冊中的操作按鍵。有關按鍵與手機操作的詳細資 訊,請參閱第 4-22 頁上的“組件與控制鍵”。
符號表
這表示操作手機時的實用額外資訊。
Powered by Mascot Capsule®/Micro3D Edition™ Mascot Capsule® is a registered trademark of HI Corporation ©2002-2005 HI Corporation. All Rights Reserved.
Licensed by Inter Digital Technology Corporation under one or more of the following United States Patents and/or their domestic or foreign counterparts and other patents pending, including U.S. Patents: 4,675,863: 4,779,262: 4,785,450 & 4,811,420.
2 按下 a、 b、 c 或 d 以反白顯示“電話管 理”,並按 B。
3 按下 a 或 b 以反白顯示“電話簿”,並按 B。 此時會顯示“電話簿”的索引檢視。
在範例 1 中,會顯示進入“電話簿”的每一個步驟。 範例 2: (摘錄自第 9-59 頁上的“選擇要儲存項目的記憶體”)
1 請在主目錄下,依下列順序選擇: “電話管理”→“電話簿”。
依照版權法之規定,受版權(音樂、圖片等)保護的資料 的複製、變更和使用僅限於個人或私人用途。若用戶未擁 有更大範圍的版權或者未得到版權擁有者的明確同意而擅 自複製、變更或使用以此方式製作或修訂的複本,則視為 違反版權法,版權擁有者有權索賠其損失。因此,請勿非 法使用受版權保護的資料。
日立 XQB80-BJV XQB75-BJN XQB70-BJV洗衣机 说明书
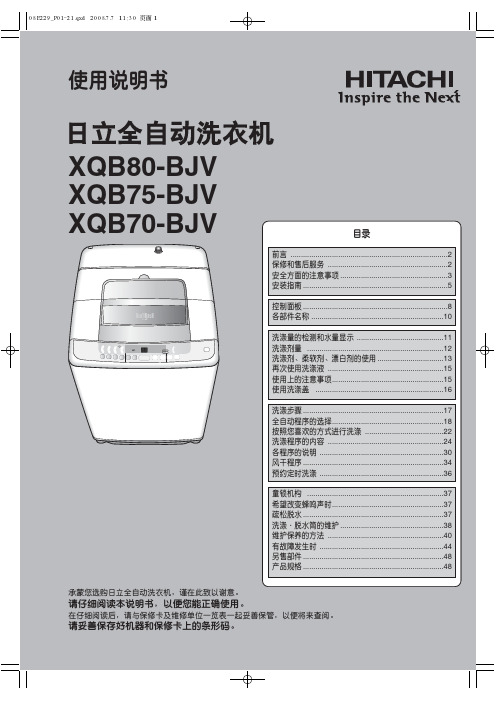
2前言风干¡可风干不耐热的泳衣或含隔热材料的内衣。
¡由于温度不上升,房间不会闷热。
¡干燥量:化纤混纺衣物为3kg以下、化纤为4kg以下。
(可以达到和室内晾干同等的风干效果)后面的数字表示说明事项所在的页码。
节水型循环水流纳米钛除臭防过敏净化网¡用定时器式干燥方式,结束时间与干燥程度无关。
干燥程度不足时,请再运行一次风干。
¡请仔细阅读“使用说明书”,以便您能正确使用。
不使用加热器,通过吸入清洁的空气,用强风和高速脱水功能甩掉衣物中的水分,达到干燥的目的。
3严禁让儿童探看洗涤·脱水筒。
也请勿在洗衣机旁放置台架等物品。
儿童可能因掉入洗涤 • 脱水筒中造成人身伤害。
严禁使用已损伤的电源线、插头或松否则可能导致触电、短路或起火现象。
可能因异常发热而导致火灾事故。
严禁使用湿手插拔电源4连接螺母)拔电源插头时,切勿拉拔电源线,务必拿住插头本体向外拉。
避免触电或因短路导致火灾事故。
可能因塑料部件的变形受损而导致触电或漏电事故。
请勿连接至热水管,并且用温水进行洗涤时,水温严禁超过50℃。
可能因绝缘老化而引发触电、漏电或火灾事故。
不使用洗衣机时,请务必将电源插头拔可能导致漏水。
长期使用后,可能会因连接螺母松动造成漏水而遭受不必可能在脱水时产生异常振动而引起人身伤害,或者导致洗衣机、墙壁、地板以及衣物的损坏。
进水管连接机体的螺母必须拧紧。
请勿洗涤防水性的苫布或衣物。
可能会因水滴飞溅或洗涤盖弹飞出造成洗衣机受损或严禁倾斜安装洗涤盖,并绝对禁止在『毛绒』、『大物』程序以外使用洗涤盖。
睡袋、雨衣、滑雪用具以及自行车、轿避免因机构损坏而招致意想不严禁用螺丝刀插入洗衣机的童锁机构部位的孔若电源线遭受损伤,可能导致触电或火灾事故。
源线。
此外,亦请勿将重物压在其上,或夹于其中。
5678¡开启电源后,发出“哔哔”的接收音,约1秒钟后指示灯点亮。
¡选择水量的「63L 」、洗涤的「15分」、漂洗的「储水2次」、脱水的「7分」、脱水转速的「800转/分」、预约的「3小时后」、风干「30分」、洗涤程序的「标准」,「浸泡」30分、「除垢」(筒清洗)3h选项时洗衣机都会连续发出两次接收音。
Sharp DW-J27FA 空氣淨化抽濕機 使用說明書说明书
Device of this mark is a trademark of Sharp Corporation.“Plasmacluster” and “Device of a cluster of grapes” are trademarks of Sharp Corporation.DW-J27FA DW-J20FAAIR PURIFYING DEHUMIDIFIER OPERATION MANUAL空氣淨化抽濕機使用說明書* The number in this technology mark indicates anapproximate number of ions supplied into air of 1 cm 3, which is measured around the center of a room with the “high-density plasmacluster 7000” applicable fl oor area (at 1.2 m height above the fl oor) when the product is placed close to a wall at the LAUNDRY Operation “DEODORIZE modesetting.Thank you for purchasing this SHARP Air Purifying Dehumidifi er.Please read this manual carefully before using the product.This manual should be kept in a safe place for handy reference. CONTENTSIMPORTANT SAFETY INSTRUCTIONS (2)PART NAMES (4)PREPARATION (6)OPERATIONSTART/STOP (6)DEHUMIDIFY OPERATION (7)HUMIDITY SELECT (7)LAUNDRY OPERATION (7)AIR PURIFY OPERATION (7)MOLD CONTROL OPERATION (8)TIMER OPERATION (8)SWING LOUVER (9)INTERNAL DRY OPERATION (9)CHILD LOCK (9)SELECTING DISPLAY (9)HOW TO CHANGE VARIOUS SETTING (10)HOW TO DRAIN (11)CARE AND MAINTENANCE (12)TROUBLESHOOTING (15)SPECIFICATIONS (16)A powerful Dehumidi fi er with a High Concentration ofPlasmacluster Ions, a high performance HEPA fi lter, and a active carbon deodorizing fi lter for Room Air Purifying, Laundry Deodorizing, Quick Drying, and Dehumidifying.MOLD CONTROL OPERATIONIt prevents the propagation of the mold by releasing Plasmacluster and dehumidi fi ed air into the room.LAUNDRY DryingWide angle louver swings to both top and bottom / left and right wards and provides wide-area air fl ow.AIR PURIFYINGIt collects toxic substances such as dust, pollen, airborne mold, unpleasant odor and purify the air through SHARP’s triple fi lters (HEPA Filter, Active Carbon Deodorizing Filter and Pre-fi lter)PM2.5 MonitorIt shows the approximate amount of PM2.5 by changing the color on the indicator and numbers on the monitor.Large Tank 4.6LIt realizes continuous dehumidi fi cation.g123Circulate Room AirWith High Air VolumeDehumidi fi cationAir Puri fi cationAir Purify infewer than 50% of humidityDehumidify inmore than 60%Always follow basic safety precautions when using electrical appliances, including the following:WARNING– Always observe the following to reduce the risk of electrical shock, fi re, or injury:• Read all instructions before using the Main Unit.• Use only a 220-240 volt outlet.• This appliance is not intended for useby persons (including children) withreduced physical, sensory or mentalcapabilities, or lack of experience andknowledge, unless they have been given supervision or instruction concerninguse of the appliance by a personresponsible for their safety. Childrenshould be supervised to ensure they do not play with the appliance.• If the power cord is damaged, it must be replaced by the manufacturer, its service agent, a Sharp authorized ServiceCenter or similarly qualifi ed persons in order to avoid a hazard.• Be sure to remove the power plug when draining the water, before performingmaintenance, when removing andattaching and replacing the fi lter andwhen not using for a long time. Failureto do so can cause a short circuitresulting in electrical shock or fi re.• Do not use the Main Unit if the power cord or plug is damaged or if the connection tothe wall outlet is loose.• Periodically remove dust from the plug.• Do not insert fi ngers or foreign objects into the air intake or air outlet.• When removing the power plug, alwayshold the plug and never pull on the cord.Failure to do so can cause a short circuitresulting in electrical shock or fi re.• When removing the Main Unit, do notdamage the power cord with the casters.Failure to do so can cause electric shock,heat generation, or fi re.• Be careful not to damage the power cord,it may cause electric shock, excess heat or fi res.• Do not remove the plug when your handsare wet.• Do not place the Main Unit near gasappliances or fi replaces.• Only a Sharp Authorized ServiceCenter should service this air purifyingdehumidifi er. Contact the nearest ServiceCenter for any problems, adjustments, orrepairs.• Do not operate the Main Unit in roomswhere aerosol insecticides are present. Do not operate the Main Unit in rooms wherethere is oily residue, incense, sparks from lit cigarettes, or chemical fumes in the air.Do not operate the Main Unit in placeswhere it may get wet, such as a bathroom.• Be cautious when cleaning the Main Unit.Strong corrosive cleansers can damage the exterior.• When carrying the Main Unit, fi rst remove the Water Tank, and then hold the MainUnit by the handles on both sides.• Do not drink the water in the Water Tank.• Do not expose the Main Unit to water.Doing so can cause a short circuit orelectrical shock.• Clean the Water T ank regularly. When theMain Unit is not in use, dispose of the water in the Water Tank. Leaving water in theWater Tank can cause mold, bacteria, and bad odors. In rare cases, such bacteria can be a health hazard.• Check for bent hose/falling height whenyou want to drain continuous, and place the hose where it will securely drain.• Keep the temperature around the hoseabove freezing point when using the hose.Inner water may leak in the room anddampen the furniture or may cause electric shock/leakage, fi re.NOTE- What to do if the Main Unit interferes with radio or TV reception.If the Air Purifying Dehumidifi er interferes with radio or television reception, try one or more of the following measures:• Adjust or reposition the receiving antenna.• Increase the distance between the MainUnit and the radio or TV.• Connect the equipment into an outlet on a circuit different from that of the radio or TV receiver.• Consult the dealer or a qualifi ed radio orTV technician.CAUTIONS CONCERNING OPERATION• Do not block the air intake or air outlet.• Do not place the Main Unit near or onhot objects, such as stoves or heaters, orwhere it may come into contact with steam.• Always operate the Main Unit in an upright position.• When moving the Main Unit, use thehandles on both sides. Do not move theMain Unit when it is in operation.• If the Main Unit is on easily damagedfl ooring, an uneven surface, or thick-piledcarpet, lift it up when moving.• When moving the Main Unit by its casters, move it slowly and in a horizontal direction.• Turn the Main Unit off and remove theWater Tank before moving, take care not to catch your fi ngers.• Do not operate the Main Unit without thefi lters and the Water Tank properly installed.• Do not wash and reuse the HEPA fi lter and the Active Carbon Deodorizing Filter. Doing so will not improve fi lter performance andcan also cause electric shock or operating malfunctions.• Clean the exterior with a soft cloth only.Do not use volatile fl uids or detergents.The Main Unit surface may be damagedor cracked with Benzene paint thinner orpolishing powder. In addition, the sensorsmay malfunction as a result.• Keep the Main Unit away from water.• Be sure to wipe off any excess water on the outside of the Water Tank.• Do not shake the Water Tank with holding the carrying handle.• Avoid spilling water when removing orcleaning the Water Tank.• Do not remove the Float.• Do not use the detergents for maintenance of the Water Tank and Tank Cover. If cause deformation, tarnishing, cracking (waterleakage).• Do not scrub the Back Panel hard during its maintenance.INSTALLATION GUIDELINES• Avoid locations where the sensors areexposed to direct wind. Doing so can cause the Main Unit to malfunction.• Avoid locations where furniture, fabrics, or other objects can come in contact with the Main Unit and interfere with the intake and outtake of air.• Avoid locations where the Main Unitis exposed to condensation or drasticchanges in temperature. Appropriate room temperature is between 4 - 38°C.• Place the Main Unit on a level and stablesurface with suffi cient air circulation. When placed on heavy carpet, the Main Unit may vibrate slightly. Place the Main Unit on alevel surface to avoid water leakage fromthe Water Tank.• Avoid locations that generate grease oroily smoke. Doing so can cause the MainUnit exterior to crack and the sensors tomalfunction.• The dust collecting ability of the Main Unit is effective even when the Main Unit is asclose to 3 cm from the wall,the surrounding walls and fl oor may get dirty. Please place the Main Unit at a distance from the wall.The wall directly behind the air outlet may become dirty over time. When using theMain Unit for an extended period of timeat the same location, periodically clean the walls adjacent to it.FILTER GUIDELINES• Follow the instructions in this manual forproper fi lter care and maintenance.MAIN UNIT345151617202122242318191Operation Panel 13Water Level Window 2Air Outlet 14Tank Knob 3Vertical Louver 15HEPA Filter4Horizontal Louver 16Active Carbon Deodorizing Filter 5Main Unit17Back Panel (Pre-Filter)6Handle (2 Locations)18Air Inlet 7Front Display 19Odor Sensor8Water Tank 20Temperature/Humidity Sensor 9Drain Outlet 21Dust Sensitive Sensor, Sensor Filter 10Float 22Drainage Hole, Rubber Cap 11Tank Handle 23Caster (4 Locations)12Tank Cover24Power Cord, Plug(FRONT)(BACK)ENGLISH O PERATION PANELPress the button with " " to start.F ILTER INSTALLATIONS TART / STOPSTARTSTOP1. Remove the Back Panel.Back Panel2. Remove the plastic bag from theeach fi lter.3. Install the filters in the correct order as4.Install the Back Panel.E N G L I S HAUTO :The humidity and the fan speed are automatically controlled by the "temperature and humiditySELECT :You can select your favorite humidity. (See below)When you press the DEFUMIDIFY button to set SELECT mode, target humidity level can bechanged to cycle among 60%, 70%, 80%, 40% and 50%RH in seguence.* HUMIDITY SELECT can be works only when in SELECT mode.D EHUMIDIFY OPERATIONHUMIDITY SELECTAUTO :When you want to dry with less powerconsumption, the Main Unit will repeat theDehumidifying operation and the Air Flow mode to dry the laundry.DEODORIZE :When you want to deodorize your laundry, the Main Unit operates at "HIGH" fan speed.Make sure the air blowing out from air outlet is directed to your laundry.It operates automatically the Plasmacluster Ion “ON”.AUTO :The fan speed is automatically changed according to amount of impurities in the air.SLEEP :The Main Unit will operate very quietly, and the fan speed is automatically changed depending on amount of impurities in the air.The light of Front Monitor gets off automatically.L AUNDRY OPERATIONAIR PURIFY OPERATIONT IMER OPERATION The Main Unit automatically starts once theselected time passes.The Main Unit automatically stops once theselected time comes.ON TIMEROFF TIMER(with the Main Unit OFF)(with the Main Unit ON)Front DisplayFront DisplayMOLD CONTROL OPERATIONNOTE• When the air in the room is puri fi ed and the humiditybecomes low, the main unit operates with “Low” air fl ow. (Cleanliness Monitor : lighting in Blue)• If the humidity becomes high again, it will switch to the above operation under the condition of “in a high humidity”.This mode is used to suppress the mold through strong air fl ow with Plasmacluster Ion.When turned ON, it fi rstly starts ventilation for 10 minutes with maximum air fl ow, and then repeats following operation.(Cleanliness monitor shows actual operating mode. Purple: high air volume, Blue: low air volume.)It operates automatically the Plasmacluster Ion “ON”.After 8 seconds, the beep sounds.After 8 seconds, the beep sounds.ENGLICHILD LOCKS ELECTING DISPLAYS WING LOUVERI NTERNAL DRY OPERATIONWhen you set the Internal Dry operation, the MainUnit automatically operate the Air Flow mode it forapproximate 90 minutes after stopping.The operation of the operation panel will be locked.VERTICAL SWINGON CANCELLATIONCANCEL(OFF)After 8 seconds, the beep sounds.(with the Main Unit ON)H OW TO CHANGE VARIOUS SETTINGYou can change the functions in the table "Type of setting".1. Turn off the Main Unit power.2.3. Select "Function number".Forward Reverse4. Select "Setting number".Forward Reverseor5. Press Power ON/OFF Button tofi nish the setting mode.Turn offE N G L I S HE N G L I S HHEPA FILTER / Active Carbon Deodorizing Filter(About once a month)The FILTER RESET Indicator light will turn on afterapproximately 720 hours operating. (30 days × 24 hours =720 hours)This is a reminder to perform the maintenance described below. After performing maintenance, reset the FILTER RESET Indicator.F ILTER INDICATORRESETRemove the dust on the HEPA Filter andActive Carbon Deodorizing Filter.Do not wash the fi lters. Do not expose to sunlight.(Otherwise these fi lters may lose ef fi cacy.)HEPA FILTERClean only the taggedsurface. Do not clean up the opposite surface. The fi lter is fragile, so be careful not to give too much pressure.Active Carbon Deodorizing FilterBoth surfaces can be cleaned.The fi lter may be broken if being too much pressure is applied on it, so please handle it with care.Some odors absorbed by the fi lters will break down over time, causing additional odors. Depending on usage conditions, and especially if the Main Unit is used in environments signi fi cantly more severe than a normal household, these odors may become noticeable sooner than expected.Replace the fi lter in those cases or if dust is unable to be removed after maintenance.When storing for a long period (not in use)1. Operate the INTERNAL DRYOPERATION.Start operation.Select the InternalDry Operation.Stop Operation.*Start the Internal Dry Operation, andstop automatically after approximate 90 minutes.2. Dispose tank water and care the MainUnit.3.sunlight.ERROR DISPLAYBefore contact for service, check the following points to make sure that the problem is not a Main Unit malfunction.If error occurs repeatedly, contact the Sharp Service Center.The room becomes hot.• The Main Unit generates heat during LAUNDRY DRY operation and DEHUMIDIFY operation and the room temperature will rise. Warm air will be come out from the air outlet, but this is normal and does not indicate a problem with the Main Unit.The Main Unit does not dehumidify.• The performance of dehumidi fi cation level varies with the size, structure, temperature and humidity level of the room. When room temperature or humidity level is low, the performance will become low in general.• Check whether the Back Panel is clean.• Check whether the air outlet or air inlet is not blocked.Sounds• The Main Unit may make clicking or ticking sounds when it is generating ions.• The Main Unit may seem rather loud for the fi rst 2 to 3 minutes when the Main Unit is turned on. This is the sound of the compressor starting-up and is perfectly normal.• A soft, swishing noise can be heard immediately after the Main Unit is turned on or off, and also during operation. This is the sound of the refrigerant fl owing inside the Main Unit.The sound is too loud.• The Main Unit will sound loudly for the fi rst few seconds upon power-on when the room temperature is low. • Check whether the Main Unit is placed on a stable and level fl oor.• Check whether the Back Panel is not clogged.Odor and smoke persists.Air discharged from the Main Unit has an odor.• Check whether the fi lters are extremely dirty.• Clean or replace the fi lters.The Cleanliness Monitor light is not blue even when the air is clean.• Dirty or clogged dust(sensitive) sensor openings interfere with sensor operation. Gently clean the sensor fi lter or the back panel.• When the Main Unit is operating MOLD CONTROL operation, the light indicates the operation mode of the MOLD CONTROL operation.The Main Unit does not operate when cigarette smoke is in the air.• Make sure the Main Unit is installed in a location in which the sensors can detect cigarette smoke.• Check whether the dust(sensitive) sensor openings are blocked or clogged. If they are blocked or clogged, clean the sensor fi lter or the back panel.The FILTER RESET Indicator Light is on.• Whenever after performing maintenance or replacing the fi lters, connect the power cord to an outlet and then press the ON/OFF Timer Button. (page 13)There is a discrepancy between the Main Unit’s Humidity Monitor and another hygrometer in the room.• There is a difference in the humidity level within the same room.• The sensor have different measurement parameters.• If the monitor indicates temperature or PM2.5 level, switch the display by pressing the DISPLAY SELECT button. (page 9)The Main Unit PM2.5 monitor does not match weather report or other local PM2.5 data.• Ambient / Indoor air condition or home environment vary in each place. This may cause the discrepancy of each reported number. Please take note PM2.5 monitor shows reference numbers.The water leaks.• Check whether the main unit is placed horizontally. • When draining continuous, check whether the hose is inserted all the way seated.1 The amount of humidity that a dehumidifi er removes from the air in a day when room temperature and relative humidity arekept at 30°C/80%RH and 26.7°C/60%RH respectively.2 The consumption value when fan speed reaches the highest.3 When the Main Unit’s power plug is inserted in a wall outlet it consumes the standby power in order to operate electricalcircuits.4 Based on standards of JEMA.5 Recommended Room Size for High density Plasmacluster ion in which approximately 7000 ions per cubic centimeter canbe measured in the center of the room when the Main Unit is placed next to a wall, is running at LAUNDRY Operation "DEODORIZE" mode settings, and is at a height of approximately 1.2 meters from the fl oor.MEMO安全注意事項 ..................................................................................................2頁各部分名稱 ......................................................................................................4頁使用前 .............................................................................................................6頁操作方法運行開始/停止 ............................................................................................7頁 除濕模式 ......................................................................................................7頁 濕度設定 ......................................................................................................7頁 乾衣除濕模式 ..............................................................................................7頁 空氣淨化模式 ..............................................................................................7頁 抑菌防霉模式 ..............................................................................................8頁 定時開/關機 ...............................................................................................8頁 搖擺送風 ......................................................................................................9頁 內部除濕模式 ..............................................................................................9頁 兒童安全鎖 ..................................................................................................9頁 濕度/溫度/ PM 2.5濃度偵測指示燈顯示切換 ............................................9頁 各種功能的變更設定 ...................................................................................10頁排水方法 ........................................................................................................11頁保養與清潔 .....................................................................................................12頁故障時的檢查事項 ..........................................................................................15頁規格 ...............................................................................................................16頁目錄感謝您購買 SHARP 空氣淨化抽濕機。
SHARP 洗衣机ES-W80EW ES-W90EW 使用说明书
FORBIDDEN DISASSEMBLE
electric shock, getting hurt or
malfunctions of the machine.
Do not place the machine at
high-humidity places such as
bathroom, locations where wind
FORBIDDEN TO
WASH WITH WATER
Use plug socket above 13A separately. A loose plug socket or the action of sharing a plug socket with other apparatus may start a fire due to heat.
PLUG OR PULL THE PLUG
Clean the dust on the plug and plug socket to avoid fire.
MANDATORY
2
Specifications 产品规格
Model 型号
Power supply 电源
Standard washing/ spin drying capacity 标准清洗/脱水容量
MANDATORY
Do not approach any fire source
to a plastic component, which
has the risk of starting a fire.
FORBIDDEN
While cleaning the machine body, the plug should be pulled out first. Do not plug or pull the plug with wet hand or wet cloth, so as to avoid electric shock.
- 1、下载文档前请自行甄别文档内容的完整性,平台不提供额外的编辑、内容补充、找答案等附加服务。
- 2、"仅部分预览"的文档,不可在线预览部分如存在完整性等问题,可反馈申请退款(可完整预览的文档不适用该条件!)。
- 3、如文档侵犯您的权益,请联系客服反馈,我们会尽快为您处理(人工客服工作时间:9:00-18:30)。
夏普KI-BX70、KI-BX80使用说明书
本空气净化器有4个过滤网,分别为HEPA除尘过滤网、脱臭过滤网、加湿过滤网、抗菌过滤网。
风路又分前端风路和后端风路2种,为保证高浓度负离子发生装置的有效工作,每运行17500小时需要更换一次负离子发生装置。
如果不更换,前端风路将在运行至19000小时后自动关闭。
Q:看不见有蒸汽出来,是否有效加湿?是否过度加湿?
A:本净化器采用气化方式加湿,没有蒸汽出现。
并且会更具周围环境自动调整加湿量,不会出现过度加湿的情况。
Q:加湿中为何周围湿度未发生变化?
A:有可能水槽里没有水、或者加湿滤网里附着过量垃圾。
请确认滤网及水槽水量。
Q:出风口有点冷?
A:本净化器为了保证高浓度负离子的有效释放,出风口的前后会感到寒冷,属正常情况。
Q:只能使用自来水?
A:自来水一般会有细菌抑制处理,所以推荐使用自来水。
如果用井水、净水器过滤的水、矿水的话,容易产生细菌。
Q:出风口有异味怎么办?
A:经常抽烟或者吃烧烤、或者长时间未清洗水槽的话,会有异味产生。
遇此情况,请将本机清洗一遍。
Q:出风口的风量越来越弱怎么办?
A:遇此情况,请将本机清洗一遍。
Q:高浓度负离子发生装置一定要定期更换么?
A:是的,2年更换一次为好。
关于安置:
为了得到最有效的除尘效果,请将机器背面放置于离墙壁30cm意外的位置。
1.室温最好控制在0-35度。
2.选择不被太阳直接照射的位置。
3.远离空调出风口。
4.远离电视机、调频收音机,调频时钟。
关于使用面表:
1.切タイマー:此键为定时装置,从1小时--2小时--4小时--8小时--解除的设定流
程来设定时间。
3秒后自动确认设定。
2.ファイルターお手入れ:此黄灯亮起时,表示需要对净化器做一次清洁。
清洁的流程为:1、关闭电源。
2、将水槽清洗一遍。
3、将托槽稍微向上抬起,取出加湿滤网并清洗。
(装回是切记不要将加湿滤网装反)4、将托槽也一起清洗一遍。
5、将机器外部用布料擦洗。
6、全部清洗一次后,将加湿滤网、托槽等一并装回后,插上电源,按切タイマー键3秒以上后,黄灯自动关闭。
大约1个月左右需要清洗一次。
切记!吸尘滤网和脱臭滤网不能沾水,只能用吸尘器一点点将灰尘吸走。
也不能将其放在日光底下曝晒,这样会减弱滤网效果。
加湿滤网10年更换一次,1个月清洗一回。
除尘滤网10年更换一次,遇到有异味时清理一次,清理时绝对不能用水洗。
脱臭滤网10年更换一次,遇到有异味时清理一次,清理时绝对不能用水洗。
后端滤盖,无需更换,一个月清洗一回。
前端滤网,无需更换,一个月清洗一回。
银离子滤网,一年更换一次。
3.チャイルドロックボタン:为了避免小孩误操作,按此键3秒钟可以将面板上的
功能键全锁住。
再按3秒取消。
4.風量切換ボタン:此键设定风量大小,按照自动--节能--花粉--强--中--静音的设定
流程。
自动:通过周围环境的尘埃、异味、温湿度自动调整风量大小。
节能:通过周围环境的尘埃、异味、温湿度和消费电力的关系自动降低风量大小。
花粉:10分钟强风之后20分钟弱风。
强:连续的强风。
中:连续的中等风量。
静音:连续的最低风量。
5.プラズマクラスターイオンサイン:高
浓度负离子运行灯。
6.空気清浄ボタン:空气净化开关。
7.加湿空気清浄ボタン:加湿空气净化开关。
8.スピード吸じん入:快速除尘开关(用于需要在短时间内除尘)。
9.明/暗/切:面板亮灯明暗切换。
10.温度/湿度/電気代:温度,湿度和使用电费显示切换。
11.停止:停止运行。
12.乾燥低温みはり:根据当前温度和湿度自动调节最佳净化状态。
13.给水:需要加水的提示。
14.ユニット交換:负离子发射器更换提示。
(大约连续使用17500小时后就会有提示出
现)
各类指标显示面板
左边:指示灯显示绿色的话,说明空气质量好。
红色的话,说明空气质量差。
右下方:指示灯表示当前湿度,以60%左右为最佳。
这个自己没法调节,只是显示当前湿度。
左边:显示当前温度。
指示灯为橙色时,说明当前温度湿度下细菌容易繁殖。
加湿状态指示灯。
指示灯不亮,为加湿停止。
指示灯为白色,加湿中。
指示灯为红色,
需要加水。
