SDVC32智能数字振动送料控制器用户手册
SDVC 智能数字调压振动送料控制器产品说明书

为使本控制器具有更好的使用效果和更长的使用寿命,在安装时请注意以下 问题:
! 良好的通风散热环境。 ! 远离水滴、蒸气、灰尘、特别是油性灰尘。 ! 无腐蚀、易燃性的气体、液体。 ! 无漂浮性的尘埃及金属微粒。 ! 坚固无振动。 ! 远离电磁噪声干扰。 ! 使用环境温度为-10摄氏度到35摄氏度。
-34-
输入电压
输出电压
输出电流
振动频率
输出功率 输出波形 电压调整精度 延迟时间范围 延迟时间精度 缓启动时间 辅助电源电压 辅助电源电流 空载功耗 显示方式
控制方式
工作环境温度 工作环境湿度
数值
最小 最大
85
260
85
440
0
260
0
440
-
5
-
10
50/100
60/120
-
1100
-
3800
正弦相切
1
SDVC20、22 智能数字稳压振动送料控制器系列
输入电压范围:85V~420V 输出电压范围:35V~380V
输出电流:0~10A
输出功率:3800VA
电源频率范围:40~70Hz
·自动稳压 ·缓启动时间设置 ·双控制信号输入 ·料满停机 ·线控调速 ·过热保护功能
·缓启动 ·信号控制开关 ·输出电压预置功能 ·智能光电传感 ·控制输出 ·过流保护功能
SDVC40 压电数字调频振动送料控制器系列
特
点
·自动稳压
·缓启动
·缓启动时间设置 ·智能光电传感
·线控调速
·控制输出
·键盘锁定
·最大输出限定
·波形指数设置 ·恢复出厂设置
·过热保护功能 ·过流保护功能
维控全数控钢筋调直切断机控制器产品说明书
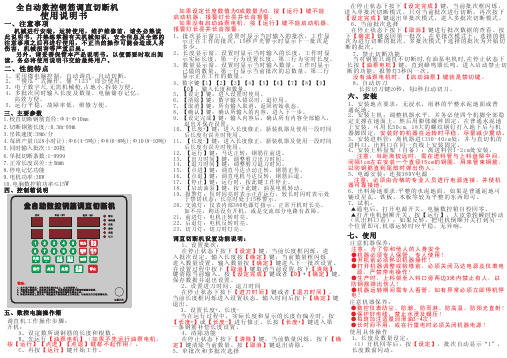
注意:必须由合格的专业人员进行电源连接,并使机 器可靠接地。 6、 出 料 场 地 要 求:平 整 的 水 泥 地 面 , 如 果 是 普 通 泥 地 可 铺设星瓦、铁板、木板等较为平整的东西即可。 7、 试 机 :
5、 自 动 停 机 , 警 示 功 能 : 每 一 批 完 成 后 , 机 器 自 动 停 机 并 声 光 报 警 ,1 5秒 后 自 动运行生产下一批产品,所有批次完成后自动停机。
6、 校 正 : 长 度 有 误 时 , 可 进 行 修 正 :
1、 调直 轮 压铁不 够 紧 不出铁,
调紧调直轮
3
八常见问题及排除八常见问题及排除编号常见问题原因排除方法1出铁不直1调直轮压不够直重调前后稍松中间稍紧2钢筋不在调直框的中心线上放松重调3新机调直轮未磨合磨合几天再试4钢筋太硬质量太差更换质量好的钢筋再调试5有个别调直轮不转调直轮轴承损坏更换轴承6调直轮严重磨损更换新轮300500吨需更换2入铁扭曲1进料管未装好入料不顺重装进料管2调直轮压铁太紧放松调直轮3有个别调直轮不转调直轮轴承损坏更换轴承4未装盘圆架放铁在盘架上再试3不出铁出铁速度不均匀时快时慢1调直轮压铁不够紧调紧调直轮2有个别调直轮不转调直轴承损坏更换轴承3进料管未装好入料不顺重装进料管4出铁时钢铁有划痕1新机调直轮未磨合磨合几天后故障自动消失2进料管未装好入料不顺重装进料管3有个别调直轮压铁太紧放松调直轮4有个别调直轮不转调直轮轴承损坏更换轴承5长度不准但出铁整齐1新装机长度未修正进行长度修正2测铁轮磨损重新进行长度修正6长度不准出铁长短相差很多1出铁速度不均匀时快时慢重装调直轮2进料管未装好入料不顺重装进料管3电子尺上的弹簧太松更换或截短一些再试4测长上轮或下轮转动不顺更换轴承5测长上轮磨损或有断齿更换测长上轮6钢筋不从电子尺中间过重调电子尺位置7编码器连接软管松动更换连接软管8编码器或电脑板损坏联系经销商或厂家更换7连切几厘米的短铁1离合打滑放松顶头调整螺丝正常时离合与顶头交合58mm2顶头转动不灵活是否没有加油
振动送料控制器

双路双控数字变频振动送料控制器(实现一拖二)PCK2-31A/B 型上海图子实业有限公司感谢您使用我公司出品的PCK 系列数字振动送料控制器本手册提供了本公司控制器安装调试、参数设定、故障排除、异常诊断及日常维护等相关注意事项。
请在装机前仔细阅读本手册,以期发挥最佳性能并维护安全。
本规格书适用于PCK2-31A/B 型系列双路双控数字变频振动送料控制器。
注意事项:1. 任何情况下都不可以在带电状态下拔插或试图触摸插座内各接点,以防触电和发生意外。
2. 请不要在室外、可能会进水、阳光暴晒场所工作,也不要在超越本手册规定温度范围之外工作。
3. 请勿将本控制器在超越设计极限状态下工作。
4. 本控制器不能连接到380V 交流电,这回造成本机严重损毁。
5. 请勿采用继电器等设备切断供电的方式来控制本控制器输出。
6. 请严格按照本操作手册使用,对于不按照本手册操作造成的任何设备或人身伤害,本公司不承担任何民事和刑事责任。
7. 通电中及切断电源5 分钟内请不要打开前盖。
8. 请务必确认接好接地线。
9. 如本机出现故障时别打开机壳先致电本公司或代理商,由相关技术人员指导故障排除。
如自行先打开本控制器,本公司不承担保修责任。
目录1. 技术格 (4)2. 控制面板图示 (5)3. 控制面板按键功能 (6)3.1. 基本功能 (6)3.2. 高级功能 (6)4. 控制面板显示功能 (7)4.1. 上电显示 (7)4.2. 运行显示 (7)4.3. 故障显示 (8)5. 外部扩展功能 (9)5.1. 外部开关传感器 (9)5.2. 速度预置 (9)5.3. 外部电位器控制 (9)5.4. 低电压信号输出 (10)5.5. 同步输入输出 (10)1. 技术规格名称双路双控数字变频振动送料控制器型号PCK2-31A/B用途用于控制自动化设备中的振动送料机输入电源AC 220V±20%,50/60Hz输出状态可同时控制输出到两个振动盘,每路参数独立配置输出电压AC 0 ~ 260V(均为用户独立可调)输出频率40 ~ 400Hz(均为用户独立可调)输出电流每路最大输出电流3A,A+B 共享最大输出电流4A 输出容量每路最大输出容量660VA,A+B 共享最大输出容量880VA 用户界面轻触键盘、数码显示、指示灯扩展功能可连接传感器、PLC 等实现外部控制功能环境温度-10 ~ 40℃相对湿度≤85%(25℃环境温度)保护方式过电流保护、过电压保护、欠电压保护等安全性能符合GB/T 3797-2005 标准要求2.控制面板图示2.1. 基本功能按键名称按键功能电压↑立即进入当前设备的输出电压(U)设置,并调整电压的设置值电压↓电压的设置值在调整完成后立刻生效频率↑立即进入当前设备的输出频率(F)设置,并调整频率的设置值频率↓频率的设置值在调整完成后立刻生效参数↑调整当前显示参数的设置值;显示的参数为输出电压(U)或输出频率(F)时:按“参数↑”键会快速进入开延时时间1(tA)的设置;按“参数↓”键会快速进入关延时时间1(tB)的设置。
cuh-SDVC40-用户手册
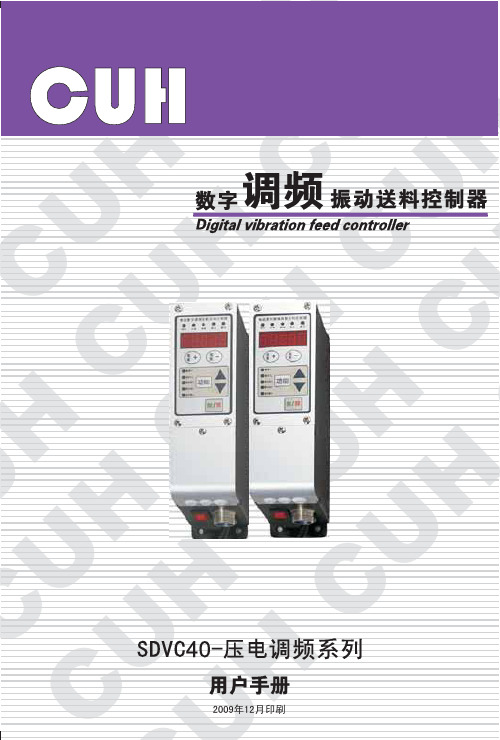
C8短 按 “ 功 能 ” 键 切 换 到 U “Γ2 ”状态,即料满停机逻 H H C 辑方向参数调整状态。 C 8使用“▲”和“▼”可以改变
逻辑方向。
停止灯表示当 前的工作状态
2-表示料满停
机逻辑方向
常通
UH CU UH H 常断
UH H C CU 逻辑方向设置为常通,则不连接任何控制信号,控制器处于运行状态。 C 逻辑方向设置为常闭,则不连接任何控制信号,控制器处于停止状态。
CU H21
SDVC31系列数字调频振动送料控制器
U H 5.7 控制信号逻辑关系设定 C (此需要在专业电气工程师的指导下使用) U 本控制器可以设定智能光电传感与料满停机同时作用时的逻辑关系。
H 8长按“功能”键2秒后不放开再 H C 按“▲”键进入高级功能的设
定状态。
U U 8短 按 “ 功 能 ” 键 切 换 到 “∏”状态,即控制信号逻 H C 辑关系参数调整状态。
U H 8使用“功能”键切换到关延时参数 H C 调整状态“L- ”,此时面板的
“关延时”指示灯点亮。
U 8使用“▲”和“▼”调整该参数。该 U参数的单位是秒,精度为0.1秒。
-表示料满停
机关延时
料满停机关延 时时间独立设 定为2秒
关延时出厂默认值是: ----
H C 将开关关延时时间调到小于0时,开关传感器独立延时时间将被关闭。
时,控制器才运行。
∏ -表示控制信
号逻辑关系
∏ -表示控制信
号逻辑关系
逻辑“或” 逻辑“异或”
C CUH H C 22
SDVC30数字调频振动送料控制器
CU H 5.5 PLC 控制振动送料控制器接线方法 U PLC控制连接方法 H C H 第 一步:打开控制器接线仓的仓门。
sdvc20调压系列说明
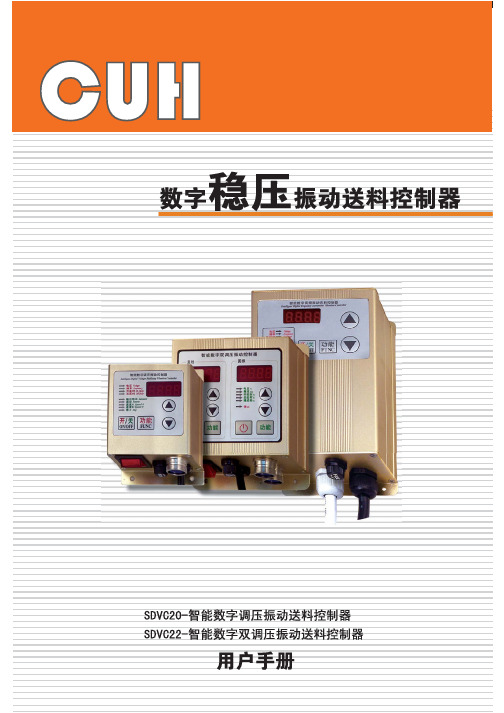
SDVC3100
智能数字稳压振动送料控制器
15
5
10
14
4
9
13
3
8
12
2
7
11
1
6
智能数字稳压振动送料控制器
智能数字稳压振动送料控制器
智能数字稳压振动送料控制器
智能数字稳压振动送料控制器
智能数字稳压振动送料控制器
PLC
PLC
智能数字稳压振动送料控制器
正弦相切
1
0
20
0.1
-
0
10.0
11
13
22
26
-
200
1.5
3
-
4
1-5
TTL 标准电平
4 键+LED
-10
10
单位
V(伏特) 交流有效值
V(特)
A(安培)
Hz (赫兹) Hz (赫兹) VA(伏安)
V(伏特) S(秒) S(秒) S(秒) V(伏特) V(伏特) mA(毫安) W(瓦特)
位 V(伏特)
45 85
说明
SDVC20-S 、SDVC22 SDVC20-L 小于电源电压
SDVC20-S 、SDVC22 SDVC20-L
交流电频率为 50 Hz 交流电频率为 60 Hz SDVC20-S 、SDVC22
SDVC20-L
SDVC20-S SDVC20-L、SDVC22
LED 数码管 线控电压 开关信号
轻触面板键盘 0C(摄氏度)
%相对湿度
项目
输入电压
输出电压
输出电流
振动频率
输出功率 输出波形 电压调整精度 延迟时间范围 延迟时间精度 缓启动时间 辅助电源电压 辅助电源电流 空载功耗 显示方式
振动喂料机说明书

操作保养使用说明书目录1.信息2.EU声明3.尺寸草图4.FC-4操作说明书5.振荡器说明书6.备件表7.电气文件1.信息客户宁国水泥厂生产厂家FLS A/S类型FCU080/0750M4CL型振动喂料机订货号02-051995-01商品号项目号341.120SKAKO类型FCU080/0750M4CL订货号31743商品号40001495收款号 12声明(省略)3尺寸草图交货时将附上此草图,涉及到大部分重要的备件,可以参看备件表。
当定备件时,我们需要设备的订货号和商品号、信息号等信息。
图(略)。
振动喂料机操作保养说明书目录(略)1概述1.1绪言这是SKAKO COMESSA振动喂料机的操作保养说明书,操作和维修人员必须详细阅读本书,此书将一直和装备在一起。
为了正确有效的使用使用SC振动喂料机,那么在操作保养前认真阅读,并且在操作过程中严格遵守说明书中的建议和各种注意事项,是十分重要的。
购买者有责任使操作员和清洁、维护人员详细阅读并理解本说明书,并且,和SC振动喂料机相关人员也要接受相关任务的训练。
操作人员和维护保养人员必须理解此操作说明书。
这本说明书包含了几种类型的装备,即一些信息和你厂装备不一定有关系,一些类型的设备可能有自己独立的说明书,操作人员必须认真阅读。
如果要了解SC振动喂料机更多的关于操作、清洁、润滑和保养方面的说明,请和SC A/S联系。
1.2铭牌当和SC A/S联系时,请说明铭牌上的信息,以避免产生误解,入下图1(略),此牌在振动斜槽的边上(参看图2),从上往下为:年、客户订货号、商品号、类型。
2.安全说明注:严格遵守我厂的《安全规章制度》即可。
3.描述在开放和封闭的标准设计中,振动喂料机包括进料口(机械术语:指单边支撑受力的装置)、悬挂的输送喂料斜槽和振摆装置。
FCE-3:开放设计-电磁振摆(图略);FCE-4:封闭设计-电磁振摆(图略);FCU-3:开放设计-电机振摆(图略);FCU-4:封闭设计-电机振摆(图略);FCE-1:振动斜槽-电磁振摆(图略);3.1进料口进料口是和扣牢在筒仓上的阀兰一起,有调节装置,可以通过调节料层的厚度来控制流量的大小。
三点法拨道系统调节说明(SDR-32-4-8)

SDR-32/4-8
三点法拨道系统调节说明
for PCB:EK-2160 for PCB:EK-2368
昆明中铁集团有限公司
昆明中铁大型养路机械集团有限公司 三点法拨道系统调节说明
总体说明
SDA-03/2-23 1
这个说明包括以下几个调节过程
零点平衡 概况 前后补偿传感器 拨道量传感器
切断点调节,右侧。 移动后弦支点至左侧,并利用电位计“P13”调整后弦支点,调整使后弦支点正好停在 气缸最大行程之前(接近最大行程位置)。 后补偿传感器零位校正,右侧 利用电位计“P16”,调整后弦支点移动,使拨道表指针回到零点。
6 SDR-32/4-8
三点法拨道系统调节说明
昆明中铁大型养路机械集团有限公司
调节 拨道量传感器 手动零点校正电位计 前后补偿 位移跟踪 弦长控制 最终零点校准 曲线修正
为了能够实现调节,必须有一个准确跟踪测量弦位移的传感器(正矢传感器)及相应的 弦长。
如果需要,可以通过测量标准轨道上小车的位置,测量出正矢传感器误差,并且通过适 当的措施(如在测量轮轴加调整垫圈)来校准。
一般来说,拨道调节可能发生在左侧轨也可能发生在右侧轨。下面的介绍以在左侧轨的 调节为例。
手动零位校正电位计 向左(红色)旋转零位直到其指示为“5”。将数字曲率电位计旋至“5”,并将位移方向 开关,利用电位计“P28”调节拨道指示在零位。 调完后,再把零位校准电位计重新调回到零。
昆明中铁大型养路机械集团有限公司 三点法拨道系统调节说明
SDA-03/2-23 5
后补偿传感器 切断点调节,左侧。 移动后弦支点至左侧,并利用电位计“P14”调整后弦支点,调整使后弦支点正好停在 气缸最大行程之前(接近最大行程位置)。 后补偿传感器零位校正,左侧 利用电位计“P15”,调整后弦支点移动,使拨道表指针回到零点。
SD32操作说明书-中文
1.1.2安全标牌...............................................................................................3
2.1操纵装置......................................................................................25
2.1.1操纵装置总体布局图............................................................................25
前言
SD32、SD32D、SD32W额定功率为为235kW(320马力)的液力传动型推土机。SD32为标准型,SD32D为沙漠型,SD32W为岩石型。
SD32-3(CE)为液力传动的320kw(320马力)推土机。是SD32标准型的升级产品。
本手册对该推土机的结构、性能、驾驶操作、维护保养、故障排除及运输存放等事项,做了详细的阐述,为管理人员和操作人员高效、经济、完好地使用该设备,提供了基本知识。
1.2安全守则........................................................................................7
1.2.1安全原则...............................................................................................7
数控送料机使用说明书

地址:深圳市宝安区石岩镇应人石文韬工业区 D 栋
邮编:518000
网址:
E-mail:info@
2
深圳市艾确数控技术有限公司
数控冲床CNC系统
文件(F) 编辑(E) 设置(S) 查看(Y) 帮助(H)
设为零点F12 校对代码F4 设置断点F5 连续模式F7 继续加工F8 开始加工F9 仿真模式F10 模拟模式F11
深圳市艾确数控技术有限公司
深圳市艾确数控技术有限公司
地址:深圳市宝安区石岩镇应人石文韬工业区 D 栋
邮编:518000
网址:
E-mail:info@
1
深圳市艾确数控技术有限公司
一、开机准备 1、控制系统电压:单相 220V +/- 10% ; 2、气夹气压:0.5Mpa ; 3、同步传感器位置: 当曲轴位于最低点时,感应铁片触发同步信号 Q1;当曲轴离开加工板材 2 毫米时感应
连续模式:系统根据加工文件自动完成全部加工;
开始加工:用于全部开始或停止加工,快捷键为 CTRL + F8 ;
仿真模式:使系统加工时冲头和工作台都不动作,快捷键为 CTRL+F10; 模拟模式:使系统加工时冲头不动作,仅移动工作台,快捷键为 CTRL+F11; 手动控制:
地址:深圳市宝安区石岩镇应人石文韬工业区 D 栋
邮编:518000
网址:
E-mail:info@
10
X坐标 Y坐标 步数 已冲次数
同步次数 文件记录 G64 U10 V15 M10 N4 G00 X100 Y-300
深圳市艾确数控技术有限公司
X/Y 坐标:机器工作平台当前相对参考零点的坐标; 已冲次数:系统加工的孔记录数; 同步次数:系统检测的同步次数; 文件记录:系统加工的所有记录数(包括延时、定位等); 其他空白区为加工文件代码显示区,用户可以直接修改加工代码;
数控送料机使用说明书

2欢迎。下载
数控冲床CNC系统
文件(F) 编辑(E) 设置(S) 查看(Y) 帮助(H)
精品文档
设为零点F12 校对代码F4 设置断点F5 连续模式F7 继续加工F8 开始加工F9 仿真模式F10 模拟模式F11
文件图形
X坐标:
Y坐标: 步数: 已冲次数: 同步次数: 文件记录:
-X
系统版本v2.1 文件总记录=40/41 断点=0 光标位置x=50mm 光标位置y=54mm 当前记录=35
板卡参数( Q ) 手动参数( R ) 信号测试( S ) 设置断点( T ) 单步模式( U ) 开始加工( V ) 仿真模式( W ) 模似模式( X ) 手动控制( Y ) 设为零点( Z )
板卡参数:
运行参数:系统在加工时使用的参数。
系统参数设定
X
运行参数 手动参数 机器参数 回零参数
X轴
Y轴
的位置 。
G00 X30 Y20
G10 U0 L1
G10 U100 V150
M02
图形如下图 5-2 所示。表示从当前位置先移至绝对坐标为(30,20)的点,然后 X 轴向正方向移动 100 毫米, Y 轴向正方向移动 150 毫米,最终位置的坐标是(130,170)
图 5-01
图5-2
2.G02(※)
7欢迎。下载
精品文档
10测试
X
手动信号
Y+
回零
X-
Y-
动作 启动 停止 点动 自动
手动方式 紧急停止
限位
XX+
Y-
输出 冲头
气夹
原点
X Y
电机报警 X轴电机 Y轴电机
振动控制仪SD说明4

Workspace ScreenWorkspace MenuMaster Menu IconThe Monitor Workspace, Windows, and Menus OpenWindows and the Workspace Area:OpenWindows is the name of the Graphic User Interface (GUI) portion of the Solaris Operating System. All user input to Solaris, and output from Solaris to the user, is made via the GUI. All GUI input and output is displayed in the monitor screen. The screen area is called the Workspace or the Desktop. That area of the Workspace that is not covered by a window or menu is called the Workspace background.The Mouse, Mouse Pointer, and Mouse Buttons:The mouse device is the means by which you operate the GUI, control what windows are present in the Workspace and how they are arranged, indicate to the GUI what item of the Workspace shall be active, select function buttons and table and menu items; and specify the point-of-text-entry location.The mouse pointer is a symbol that you can position to any location on the Workspace by moving the mouse device on the mouse pad.The mouse device has three buttons, which you push to:• Specify a location on the Workspace• Indicate a point-of-entry in a text document or a UNIX command• Open a window or menu• Initiate execution of a functionThe mouse buttons are called the Select/left button, the Adjust/middle button, and the Menu/right button. (See also page 10.) Pushing the left button is called Select-click or just select; pushing the right button is called Menu-click.The Monitor Workspace, Windows, and Menus(continued)Workspace contents:Mouse pointer: An arrow symbol, which moves as you move the mouse deviceon the mouse pad. The point of the arrowhead indicates the point on the Workspace that is currently specified.Clock: A small window that displays the current date and time. Window: A window is a rectangular area placed on the screen by atask, either a system function or a user program. The taskis controlled by entering commands or text in the window; andthe results of task operation are displayed in the window.Active window: You can input information to a window only if that windowis present in the Workspace and is active. To activate a window,move the mouse pointer to any point within the window. TheTitle Bar of the active window then changes color or becomesdark. Note that only one window may be active at a time.Icon: A symbol displayed at the edge of the Workspace that representsa closed window. Closing (iconing) a window frees space in theWorkspace area for better visibility of other windows that maycurrently be of more importance.Menu: A table of selectable functions or utility operations. A menu caneither be opened directly from the Workspace, or is opened asa subordinate item from a window or another menu.The Monitor Workspace, Windows, and Menus(continued)Window contents:Each window contains some or all of: Title Bar, Function Bar, Drag Area, Resize Areas, Pane, Scroll Bar, Operation Buttons, Text Entry Fields, and Parameter Selection Fields. • Title Bar contents:Window title Identifies the window. Each window has a different title.Icon box Select-click in this box to close (iconize) the window.Select-click twice on the icon symbol to re-open a closed (iconized)window.Pushpin A symbol in the upper left corner of a window (see page 11).When you apply parameter changes or select a function buttonin the setup window of a vibration application program, thewindow disappears. Press the pushpin symbol to pin it, beforeapplying parameter changes or executing a window function, toprevent the window from vanishing when the changes areapplied or the function is executed.Pressing the pushpin symbol again will release (unpin) thepushpin and close the setup window.File names The title bar in the main menu window of an application programcontains the names of the currently selected test setup file andfile.setupschedule• Function Bar contents:Function buttons Buttons that identify the functions of this window.Arrowheads An arrowhead appearing next to the function name in athat there is a pull-down menuindicatesfunctionbuttonwith selectable sub-functions for this menu.Program version The Main Menu window of an application programcontains the version number of that program.The Monitor Workspace, Windows, and Menus(continued)Window contents (continued):Drop box This box is included in the function bar of the Main Menuwindow of an application program. The box is used toload into memory a test or schedule setup file that hasbeen selected via the File Manager program.When the icon symbol or name of the desired file isdragged from the File Manager window to this drop box,the file and its parameters are selected and loaded.• Drag area: This area is usually the Title Bar of a window. If you movethe mouse pointer to this area and click-and-hold theSelect mouse button, you can move the mouse pointer todrag the window to any location on the Workspace.• Resize symbols: Symbols at one or more of the corners of a window. If youmove the mouse pointer to this symbol and click-and-holdyou can drag the mouse pointer thebutton,mouseSelectand make the window larger or smaller. (See page 12.)• Pane: A rectangular area in the window containing a graphicdisplay or a table of parameters.• Scroll bar: A vertical bar at the edge of a pane. Click-and-hold themiddle mouse button and drag the mouse to scroll data inand out of the pane. (See page 12.)• Operation buttons: Buttons specifying window-dependent functions. Selectingone of these buttons executes the window function.• Parameter entry and Fields where numeric or text is entered, or arrowheads are selection areas used to select parameter values from a table.The Monitor Workspace, Windows, and Menus(continued)Menus:A menu is a table of selectable functions or system utilities. The Workspace menu is opened directly from the Workspace background. Other menus are opened from a window or from another menu.A Window menu is opened from the Title Bar of a window, and contains a number of standard window control functions.If there is an arrowhead to the right of an item in a menu, it indicates that there is a subordinate menu for that menu item, called a pop-up or pull-down menu. The top sub-function in this pull-down menu is enclosed in a ring called a default ring. If when selecting the function you Menu-click the arrowhead, the pull-down menu opens and you can then execute any of the sub-functions. If you Select-click the function name, the system will automatically select and execute the top menu sub-function in the default ring. If there is an ellipsis (...) to the right of a menu item, it indicates that there is a table subordinate to the item, which will open automatically if you select the item.Workspace Menu:The Workspace window opens when you Menu-click in the Workspace background.The Solaris Version 2 Workspace window contents are(Solaris 2)Workspace• Programs >♦Utilities >Properties...• Help...Desktop Intro...InfoWorkspace• Eject• XtermRestartExit...The Monitor Workspace, Windows, and Menus(continued)Workspace Menu (continued):Programs Opens a menu of Solaris utility programs. The SolarisVersion 2 Program menu contents are:Programs• File Manager...• Text Editor...Mail Tool...Calendar Manager...CommandTool...Tool...SpellClock...Calculator...Meter...PerformanceTool...PrintAudio Tool...Tape Tool...Image Tool...• Snapshot...IconEditor...Binder...• Answerbook...Demos...the Text Editor description.SeeEditorTextFile Manager See the File Manager description.Snapshot Prints area of Workspace (see Snapshot description).Help... Pages of help text for the Solaris Operating System.Eject Ejects the floppy disk from the Workstation.Xterm Opens an Xterm window in which you can enter UNIX commands.The Monitor Workspace, Windows, and Menus(continued)Window Menu:Menu/clicking in the window opens the Window menu of a window or menu or menu Title Bar. The Window menu opened from any window has one format (see page 11); the Window menu opened from a menu has a different format.(open from a window) (open from a menu)Window Window• Close • Dismiss >Full Size MoveResizeMoveResize • BackRefreshProperties• Back • Owner?Refresh• QuitClose Iconize the window.Back The window is moved behind any other windows in the Workspace that it is now obscuring.Quit Terminate the window and terminate any task that has been initiatedfromwindow.theDismiss Same as QuitOwner List the path of the current working directory where this window islocated.The Monitor Workspace, Windows, and Menus(continued)Mouse Control of Windows:Set a window active by moving the mouse pointer to any point in the window, and then if necessary select-click in the window title bar.Drag a window to desired location in the Workspace.Re-size a window to desired size and shape.Set window in front of or behind other windows in Workspace.• Set a window behind other windows by opening the Window menu from this window, and selecting Back.• Set a window in front of other windows by any of the following means:(1) Move the mouse pointer to a point in the Workspace that is occupied by thedesired window (even if there are other windows obscuring this window at thatWorkstation location), and then(2) Press the Front key at the left edge of the keyboard.(3) Left-click in the title bar or rim of the window.Close or Quit a window by opening the Window menu from this window, and selecting Close or Quit.Mouse ButtonsConventionsPush Pins - With push pin out the window disappears after selection. Clicking on the pushpin inserts it. The window will remain on the screen until the pin is removed by clicking on it again.Window Menu - Press [menu] with pointer on the menu button in the upper left hand corner of a window to bring up the window menu. The default selection is close (icon).Conventions(continued)Scroll Bar - Use scroll bar to scroll through a list in a menu. Click on arrows or drag to move scroll bar.Window (Sizing and Dragging) - Windows with corners (as shown above) are resized by clicking on the corner outline symbol and dragging the window to the desired size. Windows are moved by clicking on the (highlighted) title bar and dragging.Xterm and Console WindowsThe Console window, also called the cmdtool window, contains system-generated status, advisory, and error messages about the active system-initiated tasks, user-initiated tasks, and any active vibration application program. The contents of the Console window are useful for diagnostic information in case of error situations. The Console window can also be used for operator entry of UNIX commands to the Solaris Operating System.The Console window is usually present as an icon in the Workspace. To open the Console window from the icon, Select-click twice on the icon symbol. To close the Console window, Select-click in the window Title Bar to open the Window menu, and select Close or Quit.A X-Terminal window, usually called an Xterm window, is the primary means of interfacing directly with the Operating System and entering UNIX commands. You can open an Xterm window in two ways:• First open a Workspace menu in the Workspace background and then select Xterm in the menu.• Select the More function in the VCS Master Menu. Then select Xterm in the pull-down menu that opens.To close or Quit an Xterm window Select-click in the Xterm Title Bar to open the Window menu, and select Close, Dismiss, or Quit.Note that while there is only one Console window, you may open any number of Xterm windows. Each window represents a separate task, and you may execute two or more of these tasks concurrently by entering commands in the each of the various Xterm windows.Console or Command Tool WindowFile ManagerFunctions of the File Manager Program:Use the File Manager program to inspect the contents of selected portions of a file system, to delete files from the file system, to rename files, and to move or copy files and directories within a file system or between file systems.Note: Portions of the following sections of this document relate to the File Manager program and file systems:• UNIX File system Structure• Paths and Pathnames• Basic File and Directory CommandsExecuting the File Manager Program:Open the Workspace menu. Select the Programs entry in the menu to open the Programs sub-menu. Then select the File Manager program. The menus quit and the File Manager window opens and the Wastebasket icon appears.Wastebasket:Select-click twice on the Wastebasket icon to open the Wastebasket window. Select-click on the icon symbol in the Wastebasket window to close (iconize) the window.Files moved from the file system to the wastebasket are deleted from the file system, but they remain there until the wastebasket is emptied.File Manager window:The File Manager window (see Figures) consists of (1) a Title Bar; (2) a Function Bar; (3) an upper portion showing a selected portion of the "inverted tree structure" of the file system (one directory in the structure may be dark or opened to indicate it is selected); and (4) a lower portion showing the contents of the selected directory.The Title Bar contains a full path. The file system "tree structure" shown in the upper half of the File Manager window corresponds to this full path.The Function Bar contains several function buttons and a text entry area.File Manager(continued)Select a directory (folder) in the tree structure portion and display its contents: • Select-click twice on the symbol or name of a directory in either the upper or lower half of the File Manager window.or• Enter the full path of the desired tree structure portion in the text entry area in the Function Bar, and press <CR>.or• In the Function Bar: Select-click on the arrowhead in the Go to button. A pull-down menu containing a list of full paths opens. Select the desired path if it appears in this list.The full path in the Title Bar changes so that the lowest-level directory is the selected directory; and the contents in the upper and lower window portions change accordingly. Inspect contents of selected file system portion:symbolDirectory FolderSymbols:PagesymbolFilesymbolL ogoprogramExecutableFormats: Tree, Path, Icon, or NameOrder: by Name (alpha); type (dir/fil/pgm) then alpha; size; date formed or last modified(Xterm equivalent: A list of directory contents can also be generated by opening a Xterm window and entering the command "ls fullpath", where “fullpath” is the full path of the directory: e.g./usr/home/vcs/random/test.)Rename file or directory:Select all or a portion of the item name by Select-clicking on the name. (All or part of the name is then displayed in reverse video). Then enter new characters to modify or completely replace the name.File Manager(continued)Move a file or directory from one directory to another directory:1. Start the File Manager (F.M.) program twice, so that two separate F.M. windows areopen in the Workspace.2. In one F.M. window displays the contents of the source directory (the directorycontaining the item to be moved). In the second F.M. window displays the contents of the destination directory (to which the item is to be moved).3. Select-drag the symbol of the item to be moved from the source window to thedestination window.Note: The moved item is deleted from the source directory.Note: If the name of the moved item duplicates the name of an item already in the destination directory, the item already at the destination is deleted!Note: The item can also be moved by opening an Xterm window and entering the command "mv full_source_path full_dest_path".Copy a file or directory from one directory to another directory:Same procedure as for moving a file, except in step 3, press the Control key while you Select-drag the item symbol from the source to the destination directory. (This is called "Control-Select-drag".)Note: The copied item is NOT deleted in the source directory. However, if the name of the moved item duplicates the name of an item already in the destination directory, the item already at the destination is deleted!Note: The item can also be moved by opening an Xterm window and entering the command "cp full_source_path full_dest_path".Delete a file or directory using the Wastebasket icon:To delete a file or directory shown in the lower portion of the File Manager window, Select-drag the item symbol from the F.M. window to the Wastebasket icon and release the mouse pointer. After a pause the item symbol disappears from the F.M. window and the number of items in the Wastebasket increases by one.File Manager(continued)Inspect contents of Wastebasket:Select-click twice on the Wastebasket icon to open the Wastebasket window. The contents can then be inspected.Note: The Title Bar of the Wastebasket window contains the fullpath of the Wastebasket directory, e.g. "/home/vcs/.wastebasket". A list of the Wastebasket contents can also be generated by opening an Xterm window and entering the command"ls /home/vcs/.wastebasket".Retrieve item from Wastebasket:1. Locate item in wastebasket window.2. Select the destination directory (where the retrieved item will be stored) and cause itscontents to be displayed in the lower half of the F.M. window.3. Select-drag the item symbol from the Wastebasket window to the F.M. window. Empty the Wastebasket: Solaris Version 2 systems:Open the Wastebasket window and select the Empty button in the window Function Bar.File Manager (continued)File Manager (continued)File Manager (continued)Floppy Disk Operations for Solaris SystemsUsing the File ManagerPrepare a Floppy Disk for Use1. Insert floppy disk in Workstation disk drive.2. Menu-click in the Workspace background to open the Workspace menu and select"Programs" in the menu. The File Manager window opens.3. Select the arrowhead to the right of "Files" in the File Manager (F.M.) window. A pull-down menu opens.4. Select "Check for Floppy" in the menu. The floppy disk is read by the system and theFloppy Disk File Manager (F.D.F.M.) window opens.Note: If the floppy disk is new, it must be formatted before it can be used.Note: If the floppy disk has been formatted and files have already been written on it, it is now ready for further use.Note: A formatted disk with files on it may be re-formatted. Re-formatting erases all files previously written on the disk.Format a Floppy Disk1. Select "Format Floppy" in the F.D.F.M. window. A Format Floppy window opens.Select the format type (UNIX or PC). Enter a disk name for the floppy disk.2. Select the "Format Disk" button. The floppy disk is formatted (sector marks arewritten on the diskette surface), initialized (a file system is created for the disk), and mounted in the system (made available for storing and reading information). The disk name and the initial default contents of the floppy disk are displayed.3. The floppy disk is now ready for use.Note: Floppy disk operations are performed by initiating commands in the F.D.F.M.window. After a floppy operation is started, the mouse pointer is disabled in theF.D.F.M. window (i.e. no other command can be entered) and does not becomeactive again until the operation is completed.Floppy Disk Operations for Solaris SystemsUsing the File Manager(continued)Floppy Disk Device IdentifierThe floppy disk is identified and referred to in the system by a device identifier. The initial default name given to the disk is "/floppy/disk_name", where "disk_name" is the name you entered during the format operation.Eject Floppy Disk from WorkstationSelect the "Eject" button in the F.D.F.M. window.Important Note: Do NOT quit the File Manager program or the File Manager Floppy Disk window before you eject any floppy disk that you have inserted in the Workstation. (If you disobey this rule, it may be necessary to halt and re-boot the system before you can eject the floppy disk via the Eject button in the Workspace window or by entering an eject command in a Xterm window).Rename a Floppy Disk1. Select the arrowhead next to "File" in the F.D.F.M. window function bar. A pull-downmenu opens.2. Select "Rename Floppy" in this menu. The "Rename Floppy" window opens.3. Enter a new disk name for the floppy disk and press the "Rename Disk" button.4. The window closes and after a pause the new name is displayed in the F.D.F.M.window. The disk identifier for the floppy is now "/floppy/new_diskname".List Contents of Floppy DiskThe contents of the floppy disk are displayed in the F.D.F.M. window. Select the display format for the contents via the "View" button in the F.D.F.M. function bar.Rename file or directory on Floppy Disk:Select all or a portion of the item name by Select-clicking on the name. (All or part of the name is then displayed in reverse video). Then enter new characters to modify or completely replace the name. (These are the same instruction as given on page 17 for hard disk.)Floppy Disk Operations for Solaris SystemsUsing the File Manager(continued)Copy and Move Operations: General InformationNote: Before you can copy or move a file or directory between the hard disk and a floppy disk, you must (1) display in the F.M. window the contents of the hard diskdirectory that is the source or destination of the copy/move operation, and (2)display the contents of the floppy disk in the F.D.F.M. window.Note: If the destination directory already contains a file or directory with the same name as the item being copied or moved, then the move or copy will DELETE the itemalready at the destination.Copy or Move File or Directory from Floppy Disk to Hard Disk1. Locate the symbol for the item to be copied/moved in the F.D.F.M. window.2. Verify that the desired destination directory is displayed in the F.M. window.3. To MOVE the item, select and drag the symbol from the F.D.F.M. window into theF.M. window. After a pause, the symbol disappears in the F.D.F.M. window andappears in the F.M. window.4. To COPY the item, press the Control key and select and drag the symbol from theF.D.F.M. window into the F.M. window. After a pause, the symbol appears in the F.M.window. (It remains in the F.D.F.M. window.)Copy or Move File or Directory from Hard Disk to Floppy Disk1. Locate the symbol for the item to be copied/moved in the F.M. window.2. Verify that the desired destination directory is displayed in the F.D.F.M. window.3. To COPY the item, select and drag the symbol from the F.M. window into theF.D.F.M. window. After a pause, the symbol disappears in the F.M. window andappears in the F.D.F.M. window.4. NOTE: When transferring a file or directory from hard disk to floppy disk, the item isnot deleted form hard disk (i.e. the transfer is a COPY, not a MOVE) whether or not the Control key is pressed.To delete an item from the hard disk after copying it to a floppy, select and drag its icon from the F.M. window to the Wastebasket.Floppy Disk Operations for Solaris SystemsUsing the File Manager(continued)Delete/Remove File or (Empty or Non-empty) Directory1. Locate the Wastebasket icon in the Workspace.2. Select and drag the symbol of the item to be deleted, from the F.M. window (if theitem is on the hard disk) or from the F.D.F.M. window (if the item is on the floppy disk), to the Wastebasket icon.3. After a pause the item symbol will disappear from its present location (F.M. orF.D.F.M. window).Required use of the File Manager Program and Floppy Disk File Manager window Only a subset of the floppy disk operations can be performed via UNIX commands. The operations listed below are performed using the File Manager program. See the preceding section for a description of these operations,• Prepare a Floppy Disk for Use• Format a Floppy Disk• Floppy Disk Device Identifier• Eject Floppy Disk from WorkstationNote: When referencing the floppy disk in a UNIX command, use the device identifier "/floppy/disk name", where "disk name" is the name you entered when youformatted the floppy disk. If the floppy does not have a disk name, the systemgives it a default name of the form /floppy/unnamed_floppy #N (where N = 1 or 2or ...).Note: When the File Manager program is used to prepare a floppy disk for use, DO NOT quit the program until all desired UNIX-command floppy operations are completed and the disk is ejected. When you are through using the floppy disk, use the FileManager program to eject the floppy disk before quitting the program.This is important for the following reason: Only one task at a time can use the floppy disk. While the File Manager is the user of the floppy disk no other task can use the floppy disk.(E.g. if you open a Xterm window and enter the "eject" command, the command is rejected because the floppy is already in use.)If you quit the File Manager program without using it to eject the floppy, the floppy diskstill remains "in use" even if the task that was using it has been terminated.If this occurs, you must halt and re-boot the system to cancel that prior use of the floppy, so that another task can eject it.Floppy Disk Operations for Solaris Systemsusing UNIX CommandsList Contents of Floppy DiskOpen an Xterm window and enter the command:ls /floppy/diskname or ls -al floppy/diskname or (use other ls options)Copy or Move Files: General InformationNote: Before you can copy or move a file or directory between the hard disk and a floppy disk, you must determine (1) the name of the directory or file (here called"itemname"), (2) the full path to the hard disk directory that is the source ordestination of the copy/move operation, and (3) the diskname of the floppy disk. Note: If the destination directory already contains a file or directory with the same name as the item being copied or moved, then the move or copy will DELETE the itemalready at the destination.Copy or Move File or Directory from Hard Disk to Floppy DiskOpen an Xterm window and enter the command:cp /hard_disk_path/itemname /floppy/diskname/itemname (Saves source item)mv /hard_disk_path/itemname /floppy/diskname/itemname (Deletes source item) Copy or Move File or Directory from Floppy Disk to Hard DiskOpen an Xterm window and enter the command:cp /floppy/diskname/itemname /hard_disk_path/itemname (Saves source item)mv /floppy/diskname/itemname /hard_disk_path/itemname (Deletes source item) Rename a File on Floppy DiskOpen an Xterm window and enter the command:mv /floppy/diskname/filename /floppy/diskname/new_filename。
SD-ISC智能电容器说明书V1.0要点

目录1 概述 (1)2 产品型号 (1)3 产品功能 (2)3.1、测量计算功能 (2)3.2、无功补偿功能 (2)3.3、电容保护功能 (2)3.4、通信联网功能 (3)3.5、联网协同工作功能 (3)4 产品性能 (3)4.1、满足的技术标准 (3)4.2、应用环境条件 (3)4.3、电气安全 (3)4.4、电源条件 (4)4.5、测量误差 (4)4.6、保护时间 (4)4.7、无功补偿参数 (4)5 产品外形及安装固定尺寸 (4)6 接线端子排定义与配件 (5)6.1、三相共补和三相分补接线端子排列与定义 (5)6.2、配件 (6)7 产品应用电气连接及接线示意图 (7)7.1、产品与电源端的连接导线规格 (7)7.2、产品与产品间的连接 (7)7.3、综合模块的配套控制器及电容状态指示器的选型 (7)7.4、产品接线示意图 (7)8 显示面板与按键操作 (9)8.1、面板组成与按键说明 (10)8.2、数据查询 (10)8.3、参数设置 (12)8.4、参数修改 (14)9 检查与试验 (16)9.1、基本参数检查 (16)9.2、投切动作试验 (16)10 产品配件及说明 (16)11 订货须知 (16)1 概述SD-ISC智能电容器是应用于0.4kV电网的集成式无功补偿设备。
它由CPU测控模块、电容投切复合开关、电容保护模块、两台(△型)或一台(Y型)低压自愈式电力电容器组成一个独立完整的智能补偿单元。
由SD-ISC系列智能电容器组成的低压无功补偿成套装置具有补偿方式灵活(共补和分补可任意组合)、安装维护方便、保护功能强、装置体积小、补偿效果好、功耗低、可靠性高等特点,满足用户对无功补偿要求,切实达到提高功率因数、改善电压质量、节能降损的实际需求。
2 产品型号产品型号为SD-ISC X X / XXX-X+X,说明如图2-1-1所示:SD-ISC X X / XXX-X+X第二组电容器容量(kvar)第一组电容器容量(kvar)电容器额定电压(V)补偿方式:G(共补“∆”),F(分补“Y”)电容器类型:G(干式),Y(油浸或石蜡)产品型号公司名称图2-1-1型号定义根据电容器类型,产品分为干式智能电容器和油浸智能电容器,型号表分别如表2-1-1和表2-1-2所示:表2-1-1干式智能电容器型号表表2-1-2油浸智能电容器型号表3 产品功能3.1、测量计算功能▶采集低压母线电压、总进线电流,计算出有功、无功、功率因数等参数,▶采集每组电容器A、C相电流,计算电容电流有效值,电流谐波总畸变率1~19次谐波;▶计算低压总进线电流,谐波总畸变率1~19次谐波。
SDVC20、22智能数字调压振动送料控制器产品指导书
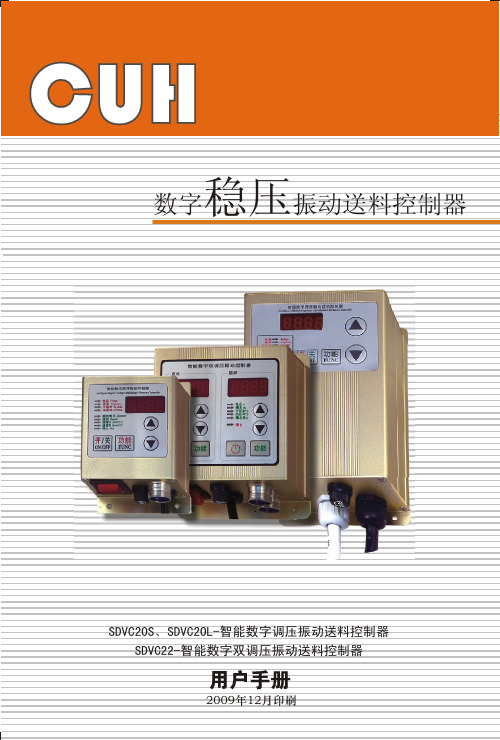
SDVC20、22 智能数字稳压振动送料控制器系列
输入电压范围:85V~420V 输出电压范围:35V~380V
为使本控制器具有更好的使用效果和更长的使用寿命,在安装时请注意以下 问题:
! 良好的通风散热环境。 ! 远离水滴、蒸气、灰尘、特别是油性灰尘。 ! 无腐蚀、易燃性的气体、液体。 ! 无漂浮性的尘埃及金属微粒。 ! 坚固无振动。 ! 远离电磁噪声干扰。 ! 使用环境温度为-10摄氏度到35摄氏度。
-34-
SDVC40 压电数字调频振动送料控制器系列
特
点
·自动稳压
·缓启动
·缓启动时间设置 ·智能光电传感
·线控调速
·控制输出
·键盘锁定
·最大输出限定
·波形指数设置 ·恢复出厂设置
·过热保护功能 ·过流保护功能
·短路保护功能
智能数字稳压振动送料控制器
第二章 安装指南
第一步: 打开控制器的外包装,取出控制器,使用随机附送的“输出航空插
-3-
智能数字稳压振动送料控制器
第三章 部件说明
本机面板共有四个可供用户操作的按键,它们分别是调整状态的“功能”键,增加设定 值的“▲”键,降低设定值的“▼”键及输出“开/关”键。
面板说明:
功能指示灯
LED显示屏
状态指示灯 轻触“开关键” “功能”按键
增加、减少 按键
SDVC22 双数字调压振动送料控制器
数字调压振动送料控制器
品名规格
SDVC10、11 数字稳压振动送料控制器系列
特
点
输入电压范围:150V~260V 输出电压范围:35V~250V
输出电流:0~5A
输出功率:1100VA
电源频率范围:40~70Hz
SD-ISC智能电容器说明书V1.0

目录1 概述 (1)2 产品型号 (1)3 产品功能 (2)3.1、测量计算功能 (2)3.2、无功补偿功能 (2)3.3、电容保护功能 (2)3.4、通信联网功能 (3)3.5、联网协同工作功能 (3)4 产品性能 (3)4.1、满足的技术标准 (3)4.2、应用环境条件 (3)4.3、电气安全 (3)4.4、电源条件 (4)4.5、测量误差 (4)4.6、保护时间 (4)4.7、无功补偿参数 (4)5 产品外形及安装固定尺寸 (4)6 接线端子排定义与配件 (5)6.1、三相共补和三相分补接线端子排列与定义 (5)6.2、配件 (6)7 产品应用电气连接及接线示意图 (7)7.1、产品与电源端的连接导线规格 (7)7.2、产品与产品间的连接 (7)7.3、综合模块的配套控制器及电容状态指示器的选型 (7)7.4、产品接线示意图 (7)8 显示面板与按键操作 (9)8.1、面板组成与按键说明 (10)8.2、数据查询 (10)8.3、参数设置 (12)8.4、参数修改 (14)9 检查与试验 (16)9.1、基本参数检查 (16)9.2、投切动作试验 (16)10 产品配件及说明 (16)11 订货须知 (16)1 概述SD-ISC智能电容器是应用于0.4kV电网的集成式无功补偿设备。
它由CPU测控模块、电容投切复合开关、电容保护模块、两台(△型)或一台(Y型)低压自愈式电力电容器组成一个独立完整的智能补偿单元。
由SD-ISC系列智能电容器组成的低压无功补偿成套装置具有补偿方式灵活(共补和分补可任意组合)、安装维护方便、保护功能强、装置体积小、补偿效果好、功耗低、可靠性高等特点,满足用户对无功补偿要求,切实达到提高功率因数、改善电压质量、节能降损的实际需求。
2 产品型号产品型号为SD-ISC X X / XXX-X+X,说明如图2-1-1所示:SD-ISC X X / XXX-X+X第二组电容器容量(kvar)第一组电容器容量(kvar)电容器额定电压(V)补偿方式:G(共补“∆”),F(分补“Y”)电容器类型:G(干式),Y(油浸或石蜡)产品型号公司名称图2-1-1型号定义根据电容器类型,产品分为干式智能电容器和油浸智能电容器,型号表分别如表2-1-1和表2-1-2所示:表2-1-1干式智能电容器型号表表2-1-2油浸智能电容器型号表3 产品功能3.1、测量计算功能▶采集低压母线电压、总进线电流,计算出有功、无功、功率因数等参数,▶采集每组电容器A、C相电流,计算电容电流有效值,电流谐波总畸变率1~19次谐波;▶计算低压总进线电流,谐波总畸变率1~19次谐波。
SDVC 智能数字调压振动送料控制器产品说明书
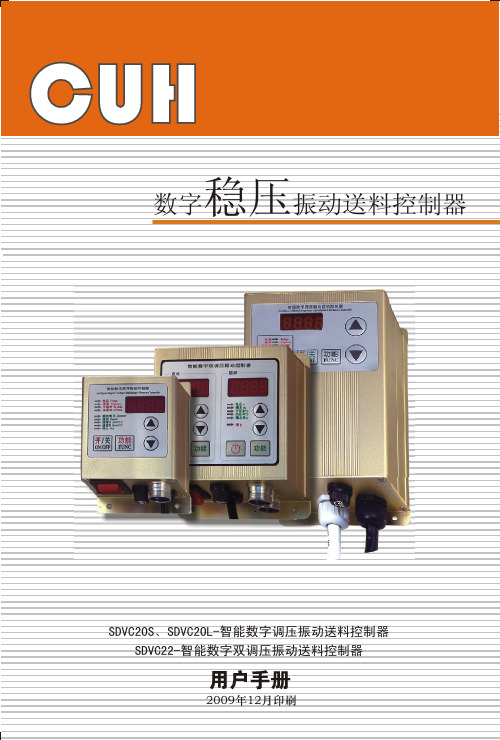
智能数字稳压振动送料控制器
第三章 部件说明
本机面板共有四个可供用户操作的按键,它们分别是调整状态的“功能”键,增加设定 值的“▲”键,降低设定值的“▼”键及输出“开/关”键。
面板说明:
功能指示灯
LED显示屏
状态指示灯 轻触“开关键” “功能”按键
增加、减少 按键
SDVC22 双数字调压振动送料控制器
输入电压
输出电压输出电流振频率输出功率 输出波形 电压调整精度 延迟时间范围 延迟时间精度 缓启动时间 辅助电源电压 辅助电源电流 空载功耗 显示方式
控制方式
工作环境温度 工作环境湿度
数值
最小 最大
85
260
85
440
0
260
0
440
-
5
-
10
50/100
60/120
-
1100
-
3800
正弦相切
1
4
9
13
3
8
12
2
7
11
1
6
备注: SDVC20-S型号输出12V电源 SDVC20-L、SDVC22型号输出24V电源 -23-
智能数字稳压振动送料控制器 智能数字振动送料控制器SDVC20-L外形尺寸
-29-
智能数字稳压振动送料控制器
附录E:智能数字振动送料控制器电器特性
项目
·双控制信号输入
·最大输出限定 ·波形指数调节
SDVC31 数字调频振动送料控制器系列
·自动稳压
·缓启动
·缓启动时间设置 ·加速功能
·智能光电传感 ·线控调速
·控制输出
·键盘锁定
·最大输出限定 ·波形指数设置
东讯 MMK-2200 MMK-2210 智慧振动规操作使用手册说明书

东讯智慧机电监测系统MMK-2200智慧振动规(ST) MMK-2210智慧振动规(SC) 操作使用手册目录簡介 (3)东讯智慧振动规 (4)1. 系统组合 (4)2. 振动规形式 (4)3. 系统容量 (5)4. 设备接线 (5)5. 接线方法 (6)6. 设备尺寸 (7)7. VB-200ST/VB-200SC 视图 (7)8. 振动规建议安装位置 (8)9. 安装注意事项 (10)10. 安装参考范例 (11)10-1 垂直(vertical) (11)10-2 水平(Horizontal) (12)10-3 轴向(Axial) (13)设备设定 (14)1. 马达配置 (14)2. VB200 设定 (14)APP应用软件操作 (17)簡介东讯智慧机电监测系统包括数据转换基站 AG-300 Plus ,温度传感器TT-300,加速度计VB-200和多功能电力仪表PM-300等。
适用于测量电源面板,机电,旋转机械市场的温度,振动和功率数据。
MMK-2200/2210智慧振动规 VB-200提供精确的旋转机电振动测量数据,可以让您轻松管理您的制造机电设备,确保您的设备处于健康状态,并预防灾难性停机。
马达 风扇发电机帮浦 变频器压缩机ADSL 调制解因特网位率 = 9600位率 = 115200 智慧振动规温度, 电压, 电流功率, 电能…等等传感器及仪表VB-200SC VB-200ST东讯智慧振动规东讯智能机电监测系统系列商品产品内容如下:本手册提供MMK-振动规ST(MMK-2200)和MMK-振动规SC(MMK-2210)的操作使用说明.1.系统组合(1)VB-200ST : 外贴式振动感知器(2)VB-200SC : 锁镙式振动感知器(3)VB-200STU : 磁吸式振动感知器(Pro-3200振动诊断仪专用)(4)智慧手机APP (iOS, Android)(5)操作使用手册(6)其它联机相关附件2.振动规形式2.1 VB-200ST : 底下为双面胶,可黏贴式振动规(此为产品示意图, 最终版本以实物为准)。
SDVC31使用说明书

H C U H C U H C U H C U C U H C U H C U H U H C U H C H C U HH C U H C U H C U H C U C U H C U H C U H U H C U H C H C U H 品名规格特 点品名规格特 点SDVC32智能数字调频振动送料控制器系列SDVC31数字调频振动送料控制器系列SDVC40压电数字调频振动送料控制器系列·频率调节·电压调节·智能跟踪·计数功能·料满停机·线控调速·控制输出··最大输出限定·波形指数调节双控制信号输入智能数字振动送料控制器相关产品压电数字调频振动送料控制器·自动稳压·缓启动··轻触开关····最大输出限定···过流保护功能···缓启动时间设置智能光电传感控制输出键盘锁定恢复出厂设置过热保护功能短路保护功能加速功能波形指数设置·自动稳压·缓启动··轻触开关····最大输出限定···过流保护功能··纯正正弦·任意负载类型缓启动时间设置智能光电传感控制输出键盘锁定恢复出厂设置过热保护功能短路保护功能H C U H C U H C U H C U C U H C U H C U H U H C U H C H C U HH C U H C U H C U H C U C U H C U H C U H U H C U H C H C U HH C U H C U H C U H C U C U H C U H C U H U H C U H C H C U H 工作与储存环境℃℃H C U H C U U H C U H C U HC U H C U H C U H U H C U H C H C U H SDVC31系列数字调频振动送料控制器第一章 性能特点-------------------------------------------------------------1第二章 快速安装及使用指南---------------------------------------------- 3第三章 部件说明-------------------------------------------------------------7第四章 功能说明-------------------------------------------------------------94.1 输出电压设定------------------------------------------------------94.2 输出频率设定----------------------------------------------------104.3 缓启动功能-------------------------------------------------------114.4 输出开关---------------------------------------------------------114.5 最大输出电压限制功能-------------------------------------------124.6 加速指数设定----------------------------------------------------134.7 波形指数设定----------------------------------------------------144.8 键盘锁定功能----------------------------------------------------154.9恢复出厂设定----------------------------------------------------16第五章 传感器与信号控制-----------------------------------------------175.1 智能光电传感功能-----------------------------------------------175.1.1 智能光电传感器接线方法--------------------------------------175.1.2 智能光电传感器开延时、关延时时间设定------------------------185.1.3智能光电传感器逻辑方向设定----------------------------------195.2 NPN型开关传感器(料满停机)的使用方法---------------------205.2.1 NPN型开关传感器接线方法-----------------------------------205.2.2 对射NPN型开关传感器接线方法--------------------------------215.2.3 对射光电传感器接线方法--------------------------------------215.2.4 对射式光纤传感器接线方法------------------------------------225.2.5 反射光电传感器接线方法--------------------------------------235.3 NPN型开关传感器开延时、关延时时间设定----------------------245.4 NPN型开关传感器(料满停机)逻辑方向设定-------------------255.5 控制信号逻辑关系设定------------------------------------------265.6 PLC控制振动送料控制器接线方法-------------------------------275.7 控制输出功能----------------------------------------------------285.7.1 控制输出接线方法--------------------------------------------285.7.2 控制输出逻辑方向设定----------------------------------------295.8 远程速度控制----------------------------------------------------30第六章 安全保护功能-----------------------------------------------------31附 录 附录 A 外形尺寸-----------------------------------------------------32附录 B 输出接口定义------------------------------------------------35附录 C 信号接口定义------------------------------------------------35附录 D 各功能对照表------------------------------------------------36目 录H C U H C U H C U H C U C U H C U H C U H U H C U H C H C U H 第一章 性能特点H C U H C U H C U H C U C U H C U H C U H U H C U H C H C U H 5H C U H C U H C U H C U C U H C U H C U H U H C U H C H C U H 第二章 快速安装及使用指南第一步:打开控制器的外包装,检查控制器外观及侧标型号,判断是否为所需的型号。
胜利仪器 VICTOR 63H振动采集分析仪使用说明书

VICTOR 63H振动数据采集分析系统使用说明深圳市驿生胜利科技有限公司VICTOR 63H振动数据采集分析系统使用说明目录一、系统组成 (4)1.在线监测分析系统 (4)2.频率测试系统 (5)3.采集器外观 (5)二、软件安装与运行 (6)1.安装步骤 (6)2.系统文件清单 (6)3.软件快捷启动 (7)4.软件卸载: (7)5.网络设置 (7)6.软件运行环境 (10)三、基本概念 (11)1.电厂/机组/通道 (11)2.连续测试记录/测试通道 (12)3.振动通道 (12)4.振动通道对 (13)5.键相通道 (13)6.振动特征值 (13)四、在线采集分析软件使用说明 (14)1.新建、复制、打开测试记录 (14)1.1 新建测试记录 (15)1.2 复制测试记录 (18)1.3 打开测试记录 (18)2.采集分析界面 (19)3.振动分析图表 (22)3.1 棒图 (22)3.2 数据列表 (23)3.3 时域波形 (24)3.4 频谱图 (26)3.5 轴心轨迹 (26)3.6 波德图 (28)3.7 趋势分析图 (31)3.8 极坐标图 (32)3.9 层叠图 (32)3.10 瀑布图 (33)4.趋势分析图表 (33)4.1 多点历史趋势曲线 (33)4.2历史数据列表查询 (35)5.时间操作 (37)5.1时间段设置 (37)6.图表设置 (38)6.1预定义图表配置 (38)6.2 图表显示属性 (39)6.3 图表组合显示 (40)6.4 新建临时图表显示 (41)7.数据采集与存贮 (42)7.1 采集参数设置 (42)7.2 数据处理参数设置 (42)7.3 数据存贮参数设置 (42)8.辅助功能 (42)8.1 图表打印 (42)8.2 图表图片输出 (43)8.3 转速趋势监视 (44)9.网络采集故障处理 (44)10.动平衡计算 (44)五、数据管理与分析系统使用说明: (48)1.系统界面 (48)1.1系统工具栏 (48)1.2 树状视图工具及弹出菜单 (49)1.3 图表工具栏 (49)2.数据库树状视图 (50)3.连续测试记录列表视图 (51)4.历史数据图表分析 (52)4.1连续数据分析 (53)4.2样本数据分析 (53)5.频率测试 (56)一、系统组成1.在线监测分析系统1台笔记本电脑(或台式上位机),可通过网络连接1台或多台VICTOR 63H 数据采集器,构成在线监测分析系统,如图1.1、图1.2所示:图1.1 单采集器在线监测分析系统组成图图1.2 网络化在线监测分析系统组成图单台VICTOR 63H采集器连接上位机,可直接使用交叉网络线连接,也可采样串行线连接;配置多台VICTOR 63H采集器时,需使用HUB或交换机,组成小型局域网;2.频率测试系统本系统上位机软件中,包含专用于频率测试的模块,VICTOR 63H采集器连接上位机,可用于叶片、结构频响测试、振动响应分析等场合。
