北京炜煌-A7、A8热敏打印机说明书
热敏纸相机操作方法
热敏纸相机操作方法
热敏纸相机是一种特殊的相机,它不像传统相机一样使用胶片或数字传感器来记录相片,而是使用热敏纸来制作图像。
以下是热敏纸相机的操作方法:
1. 打开热敏纸相机:通常,热敏纸相机的开关位于相机的顶部或侧面。
将开关切换到"ON"或"打开"的位置,相机就会启动。
2. 调整拍摄模式:有些热敏纸相机可能有不同的拍摄模式,如普通模式、黑白模式或怀旧模式。
通过相机顶部或侧面的旋转开关,选择你想要的拍摄模式。
3. 对焦:热敏纸相机通常有自动对焦功能。
将相机对准你要拍摄的主题,按下快门按钮,照相机会自动对焦。
4. 拍摄照片:按下快门按钮,相机就会捕捉当前场景的图像。
一些热敏纸相机可能会有快门延迟,所以在按下快门按钮后,保持相机稳定,直到照片完全拍摄。
5. 预览相片:一些热敏纸相机会在拍摄后立即显示相片。
如果你的相机不具备这个功能,你需要等待片片出来后,才能查看已拍摄的照片。
6. 打印照片:热敏纸相机会自动将照片打印在热敏纸上。
等待几秒钟后,相片就会完成打印。
7. 删除照片(可选):如果你拍摄了一张不满意的照片,一些热敏纸相机会有删除功能。
按下相机上的删除按钮,然后按照相机屏幕上的提示进行操作。
8. 关闭热敏纸相机:当你完成照相后,将相机开关切换到“OFF”或“关闭”的位置,相机就会关闭。
这是一般热敏纸相机的操作方法,不同品牌和型号的相机可能有所不同。
请在使用前阅读相机的使用手册,以了解更详细的操作说明。
AZSY微打安装使用说明
目 录一、面板式系统安装 (1)1.1、安装尺寸 (1)1.2、安装方法 (10)1.3、电源连接 (14)1.4、安装色带(热敏除外) (15)1.5、安装纸卷 (17)二、平台式系统安装 (24)2.1、外形尺寸及结构功能 (24)2.2、安装色带(热敏除外) (32)2.3、安装纸卷 (35)2.4、电源连接 (36)三、按钮开关的操作 (37)一、面板式系统安装1.1 安装尺寸1.1.1 A0型(原普通型)微打外形结构及外形尺寸如图1-1-1。
(单位:毫米)◆外形尺寸:111mm×62mm×63mm;◆开口尺寸:103mm(宽)×57mm(高);◆嵌入深度:55mm(具体视控制板宽度);◆可装最大直径40mm的打印纸。
A0型照片图样 图1-1-1- 1 - 炜煌汉字微打安装使用手册1.1.2 A1型(原前换纸Ⅰ型)微打外形结构及外形尺寸如图1-1-2。
(单位:毫米)◆外形尺寸:111mm×62mm×68mm;◆开口尺寸:103mm(宽)×57mm(高);◆嵌入深度:62mm(具体视控制板厚度);◆可装最大直径30mm 的打印纸。
A1型照片图样 图1-1-2 - 2 -1.1.3 A2型(原前换纸Ⅱ型)微打外形结构及外形尺寸如图1-1-3。
(单位:毫米)◆外形尺寸:120mm×120mm×56mm;◆开口尺寸:115mm(宽)×115mm(高);◆嵌入深度:47mm(如大控制板另加板厚);◆可装最大直径50mm的打印纸。
A2型照片图样 图1-1-3- 3 - 炜煌汉字微打安装使用手册1.1.4 A3型(原前换纸Ⅲ型)微打外形结构及外形尺寸如图1-1-4。
(单位:毫米)◆外形尺寸:111mm×65mm×91mm;◆开口尺寸:103mm(宽)×57mm(高);◆嵌入深度:83mm;◆可装最大直径40mm的打印纸。
3D打印机怎使用?看A7-3D打印机快速入门指南
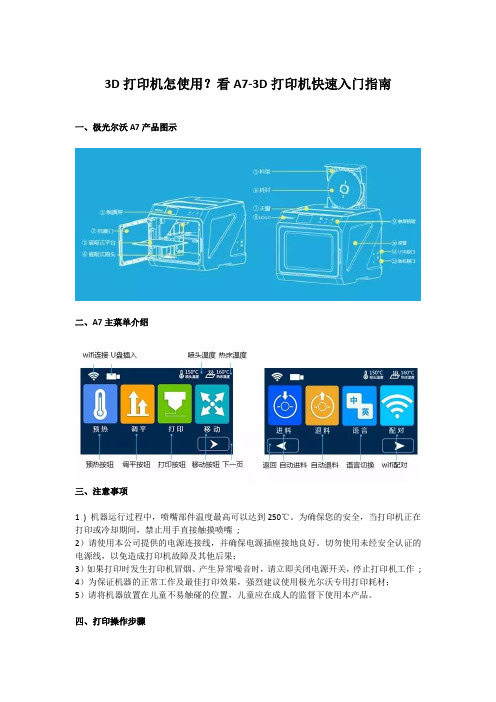
3D打印机怎使用?看A7-3D打印机快速入门指南一、极光尔沃A7产品图示二、A7主菜单介绍三、注意事项1 ) 机器运行过程中,喷嘴部件温度最高可以达到250℃。
为确保您的安全,当打印机正在打印或冷却期间,禁止用手直接触摸喷嘴;2)请使用本公司提供的电源连接线,并确保电源插座接地良好。
切勿使用未经安全认证的电源线,以免造成打印机故障及其他后果;3)如果打印时发生打印机冒烟、产生异常噪音时,请立即关闭电源开关,停止打印机工作; 4)为保证机器的正常工作及最佳打印效果,强烈建议使用极光尔沃专用打印耗材;5)请将机器放置在儿童不易触碰的位置,儿童应在成人的监督下使用本产品。
四、打印操作步骤1.打开机器门(产品图示②),取出机器内部保护棉;2.取出内包装上盖中的打印平台,并将平台正确放置于平台托架上;3.取出工具盒中的国标电源线,插上电源,并选择开机。
五、调整平台1.通过触摸屏上的“调平”按钮,选择调平,机器开始向着平台四角进行调平,重复循环三次,调平完成后回到原点;六、耗材安装1.点击触摸屏“预热”选项进入“预热菜单”,选择预热相应的耗材;2.在预热的过程中,点击操作面板上的升降料架(产品图示⑨)(按一次上升,再按一次收回)按指示方向进行耗材安装(如下图1.0示意),待温度升温到相应设定度数(参考温度值:PLA≈200℃,TPU≈200℃);3.通过触控屏,选择“设定”“进料”电机开始将耗材输送到喷嘴,并直至喷嘴有耗材流出;注:拉动耗材前端,料盘沿逆时针转动。
七、打印模型(准备电脑、切片软件、U盘(工具盒中))①切片软件安装:在工具盒中找出U盘插入电脑,将切片软件拷贝到电脑任意硬盘—双击软件安装图标—进入软件安装界面—点击下一步—安装成功。
②启动软件:选择添加打印机的型号。
③模型载入:通过点击“打印文件”选择要打印的模型或直接将模型拖入软件视窗。
④代码保存:待模型切片完成后点击右下角“保存文件”按钮,保Gcode代码的文件名不可是中文,必须是字母或数字组成。
T3-10使用说明

T3热敏打印机使用说明2009-08-31 北京炜煌科技发展有限公司版本控制信息版本日期拟稿和修改说明V01 2009-6-19 创建第1章 安全信息为有效、安全地使用您的打印机,请遵守以下规定。
在使用打印机前详细阅读操作指南,以掌握正确的使用方法。
将本[使用说明]放置在方便易取的位置,以便随时取出参阅和寻找问题解答。
1.1读者本手册的受众是系统软件开发人员、硬件设计人员和应用设计人员1.2关于本手册本文档分成多个章节,每个章节与主要的特性相对应。
1.3F 安全上的注意事项假如漠视下述注意内容,错误使用打印机的话,可能造成打印机损坏。
△ 注 意·如果出现卡纸情况,务必先断电,等待 10 秒钟,让机头冷却下来,才开始除掉塞纸。
·勿将本产品放置在潮湿或多尘的环境中,重压,不能堆放。
1.4F 使用上的注意事项1.4.1纸卷必须使用符合要求的纸卷(带纸轴)。
勿选用末端被黏合在纸轴上的纸卷,否则打印机便无法正确测出纸卷末端,也可能对打印机构造成损害。
不要长时间打印数据。
第2章 操作说明2.1走纸按压走纸键(面板右键),按下开始进纸,放开停止进纸。
自检在关机状态下按压走纸键(面板右键),然后开机,可以打印自检2.2设置参数关机状态下按住设置键(中间键),然后开机,可进入设置菜单,有六个项目可选择,如下:1.Setup Infrared(设置红外)2.Setup 232(设置232串口)3.Print Direction(改变方向)4.Gray Adjust(改变灰度)5.Poweroff(自动关机/休眠设置)6.Font&Codepage(选择字体或字符集)这时再按住设置键不放可听到连续的咔哒声。
当听到“咔哒”声响的次数与要选择的项目标号数一致时松开按键,即进入该选项。
同理可进行下一级选择。
按电源键(左键)可退出并进入上一级菜单,长按电源键可关机退出设置,重新开机新设置生效。
例如要更改232波特率为9600。
行式热敏打印机 技术手册

2-2 电源连接
本打印机需要使用外部供电电源,请使用随机附带电源或符合厂家 规格要求的电源。
◆ 电源输入:直流 24.0±5% V,平均电流:大约 2A,峰值8A。 ◆ 电源插座:在打印机背面,采用4PIN插座,见图2-4,电源引脚定 义:见表2-1。
1. 电源插座定义:
ESC 2
设置字符行间距为 1/6 英寸...... 23
ESC 3 n 设置行间距为 n 点行(n/203 英寸)23
ESC ! n 设置字符打印方式 .............. 23
ESC % n 允许/禁止用户自定义字符....... 24
ESC &
S n m 设定用户自定义字符 ..... 24
UP-AJ58AH-A UP-AJ58AH-D
行式热敏打印机
技术手册
(版本:C)
声明 此为 A 级产品,在生活环境中,该产品可能会造成无线电 干扰。在这种情况下,可能需要用户对其干扰采取切实可行的 措施。
生产商有权修改[技术手册]的内容而不做事先声明 !
安全信息
为有效、安全地使用您的打印机,请遵守以下规定。 使用前
注意:
当“锁盖”旋转至 90 度位置时严禁用手向外扳。
图 2-9 扣合机头
图 2-10 扣合前盖板
11
12
2-4 接口连接
您需要符合[技术手册]规定的接口电缆,把打印机连接到您的设备 或计算机上。
1. 串行接口 打印机的串行接口与RS232C标准兼容,支持DTR/DSR握手协议,其 接口插座为5PIN针型插座(在打印机背面)。串行接口插座的引脚序号 如图2-9所示:
2)如图2-8所示,向下按机头右边的绿色抬杠打开机头,将机头 胶辊部分向下打开。装好纸轴,将纸卷以热敏层正对印头方向 放入纸仓支架。
炜煌汉字微打

每行点数 96 96 144 144 240 240 96 96 144 144 240 240
每行字符 6×8 点阵 速度行/秒 字符集配置情况 16 1 字符集一、二 16 1 字符集一、二 24 0.7 字符集一、二 24 0.7 字符集一、二 40 0.4 字符集一、二 40 0.4 字符集一、二 16 1 字符集一、二 16 1 字符集一、二 24 0.7 字符集一、二 24 0.7 字符集一、二 40 0.4 字符集一、二 40 0.4 字符集一、二
A1 A2 A3 A4 A5 A6 A7 A8 A9 AA AB AC AD AE AF B0 B1 B2 B3 B4 B5 B6 B7 B8 B9 BA BB BC BD BE BF C0 C1 C2 C3 C4 C5 C6 C7 C8 C9 CA CB CC CD CE CF 1 2 3 4 5 6 7 8 9 10 11 12 13 14 15 16 17 18 19 20 21 22 23 24 25 26 27 28 29 30 31 32 33 34 35 36 37 38 39 40 41 42 43 44 45 46 47 、。· ˉ ˇ ¨ 〃 々 — ~ ‖ … ‘ ’“ ”〔 〕〈 〉《 》「 」『 』〖 〗【 】 ± × ÷ ∶ ∧ ∨ ∑ ∏ ∪ ∩ ∈ ∷ √ ⊥ ∥ ∠ ⅰ ⅱ ⅲ ⅳ ⅴ ⅵ ⅶ ⅷ ⅸ ⅹ ⒈ ⒉ ⒊ ⒋ ⒌ ⒍ ⒎ ⒏ ⒐ ⒑ ⒒ ⒓ ⒔ ⒕ ⒖ ⒗ ⒘ ⒙ ⒚ ⒛ ⑴ ⑵ ⑶ ⑷ ⑸ ⑹ ⑺ ⑻ ⑼ ⑽ ⑾ ! " # ¥ % & '( ) * + , - . / 0 1 2 3 4 5 6 7 8 9 :; < = > ? @ A B C D E F G H I J K L M N O ぁ あ ぃ い ぅ う ぇ え ぉ お か が き ぎ く ぐ け げ こ ご さ ざ し じ す ず せ ぜ そ ぞ た だ ち ぢ っ つ づ て で と ど な に ぬ ね の は ァ ア ィ イ ゥ ウ ェ エ ォ オ カ ガ キ ギ ク グ ケ ゲ コ ゴ サ ザ シ ジ ス ズ セ ゼ ソ ゾ タ ダ チ ヂ ッ ツ ヅ テ デ ト ド ナ ニ ヌ ネ ノ ハ Α Β Γ Δ Ε Ζ Η Θ Ι Κ Λ Μ Ν Ξ Ο Π Ρ Σ Τ Υ Φ Χ Ψ Ω α β γ δ ε ζ η θ ι κ λ μ ν ξ ο А Б В Г Д Е Ё Ж З И Й К Л М Н О П Р С Т У Ф Х Ц Ч Ш Щ Ъ Ы Ь Э Ю Я ā á ǎ à ē é ě è ī í ǐ ì ō ó ǒ ò ū ú ǔ ù ǖ ǘ ǚ ǜ ü ê ɑ ń ň ǹ ɡ ー ㄅ ㄆ ㄇ ㄈ ㄉ ㄊ ㄋ ㄌ ㄍ ㄎ ㄏ ╫ ╡ ─ ━ │ ┃ ┄ ┅ ┆ ┇ ┈ ┉ ┊ ┋ ┌ ┍ ┎ ┏ ┐ ┑ ┒ ┓ └ ┕ ┖ ┗ ┘ ┙ ┚ ┛ ├ ┝ ┞ ┟ ┠ ┡ ┢ ┣ ┤ ┥ ┦ ┧ ┨ ┩ ┪ ┫
热敏票据打印机使用手册

热敏票据打印机POS-58使用手册一、概述 (2)1、简介 (2)2、主要特点 (2)3、技术规格 (2)4、注意事项 (3)二、打印机安装 (3)1、部件清单 (3)2、打印机外型 (4)3、连接打印机 (4)3.1 串行接口型 (4)3.2 并行接口型 (5)3.3 USB接口型 (6)3.4以太网接口型 (6)4、连接钱箱 (6)三、打印机使用 (7)1、操作控制面板 (7)2、在线和离线 (7)3、进纸 (8)4、设定打印浓度 (8)5、设定打印速度 (8)6、设定波特率 (8)7、打印测试模式 (9)8、调试输出模式 (9)9、安装纸卷 (9)9、撕纸方法 (10)10、清洗打印机芯 (10)四、USB驱动程序的安装 (11)1、驱动程序的安装 (11)2、驱动程序的卸载 (12)3、系统需求 (13)五、PC工具软件使用 (13)1、工具软件的安装 (13)2、工具软件主界面 (15)六、故障排除 (15)七、ESC/POS打印控制命令 (16)1、打印命令一览表 (16)2、打印命令详解 (17)2.1 打印命令 (17)2.2 行间距设置命令 (18)2.3 字符设置命令 (18)2.4 图形打印命令 (20)2.5 钱箱控制命令 (21)2.6 按键控制命令 (22)2.7 初始化命令 (22)2.8 状态传输命令 (22)2.9 条码打印命令 (23)2.10位置和页模式命令 (25)附录1:代码页 (27)附录B:国际字符集 (29)声明此为A级产品,在生活环境中,该产品可能会造成无线电干扰,可能需要用户对其干扰采取切实可行的措施。
本公司保留对说明书修改而不通知用户的权利。
一、概述1、简介欢迎您使用POS-58行式热敏打印机。
POS-58是一款高性能的行式热敏打印机,具有打印速度快、噪声低、可靠性高等特点,可广泛用于商业POS系统、餐厅收费系统等各种需要现场打印输出的场所。
炜煌微打资料
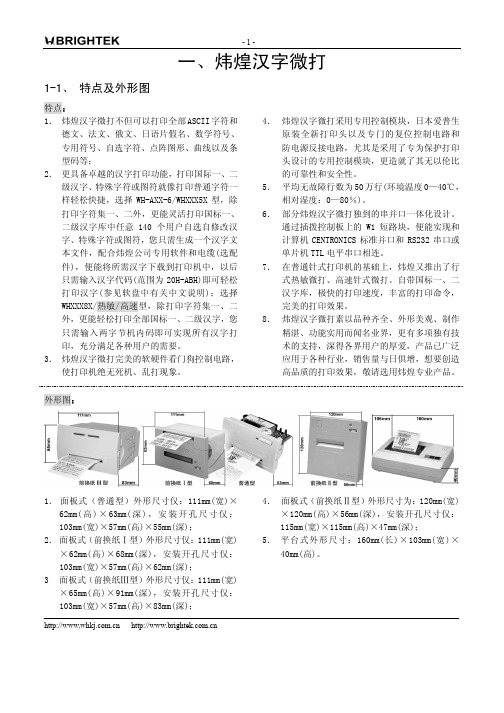
1. 面板式(普通型)外形尺寸仅:111mm(宽)× 62mm( 高 ) × 63mm( 深 ) , 安 装 开 孔 尺 寸 仅 : 103mm(宽)×57mm(高)×55mm(深); 2. 面板式(前换纸Ⅰ型)外形尺寸仅:111mm(宽) ×62mm(高)×68mm(深),安装开孔尺寸仅: 103mm(宽)×57mm(高)×62mm(深); 3 面板式(前换纸Ⅲ型)外形尺寸仅:111mm(宽) ×65mm(高)×91mm(深),安装开孔尺寸仅: 103mm(宽)×57mm(高)×83mm(深);
A1 A2 A3 A4 A5 A6 A7 A8 A9 AA AB AC AD AE AF B0 B1 B2 B3 B4 B5 B6 B7 B8 B9 BA BB BC BD BE BF C0 C1 C2 C3 C4 C5 C6 C7 C8 C9 CA CB CC CD CE CF 1 2 3 4 5 6 7 8 9 10 11 12 13 14 15 16 17 18 19 20 21 22 23 24 25 26 27 28 29 30 31 32 33 34 35 36 37 38 39 40 41 42 43 44 45 46 47 、。· ˉ ˇ ¨ 〃 々 — ~ ‖ … ‘ ’“ ”〔 〕〈 〉《 》「 」『 』〖 〗【 】 ± × ÷ ∶ ∧ ∨ ∑ ∏ ∪ ∩ ∈ ∷ √ ⊥ ∥ ∠ ⅰ ⅱ ⅲ ⅳ ⅴ ⅵ ⅶ ⅷ ⅸ ⅹ ⒈ ⒉ ⒊ ⒋ ⒌ ⒍ ⒎ ⒏ ⒐ ⒑ ⒒ ⒓ ⒔ ⒕ ⒖ ⒗ ⒘ ⒙ ⒚ ⒛ ⑴ ⑵ ⑶ ⑷ ⑸ ⑹ ⑺ ⑻ ⑼ ⑽ ⑾ ! " # ¥ % & '( ) * + , - . / 0 1 2 3 4 5 6 7 8 9 :; < = > ? @ A B C D E F G H I J K L M N O ぁ あ ぃ い ぅ う ぇ え ぉ お か が き ぎ く ぐ け げ こ ご さ ざ し じ す ず せ ぜ そ ぞ た だ ち ぢ っ つ づ て で と ど な に ぬ ね の は ァ ア ィ イ ゥ ウ ェ エ ォ オ カ ガ キ ギ ク グ ケ ゲ コ ゴ サ ザ シ ジ ス ズ セ ゼ ソ ゾ タ ダ チ ヂ ッ ツ ヅ テ デ ト ド ナ ニ ヌ ネ ノ ハ Α Β Γ Δ Ε Ζ Η Θ Ι Κ Λ Μ Ν Ξ Ο Π Ρ Σ Τ Υ Φ Χ Ψ Ω α β γ δ ε ζ η θ ι κ λ μ ν ξ ο А Б В Г Д Е Ё Ж З И Й К Л М Н О П Р С Т У Ф Х Ц Ч Ш Щ Ъ Ы Ь Э Ю Я ā á ǎ à ē é ě è ī í ǐ ì ō ó ǒ ò ū ú ǔ ù ǖ ǘ ǚ ǜ ü ê ɑ ń ň ǹ ɡ ー ㄅ ㄆ ㄇ ㄈ ㄉ ㄊ ㄋ ㄌ ㄍ ㄎ ㄏ ╫ ╡ ─ ━ │ ┃ ┄ ┅ ┆ ┇ ┈ ┉ ┊ ┋ ┌ ┍ ┎ ┏ ┐ ┑ ┒ ┓ └ ┕ ┖ ┗ ┘ ┙ ┚ ┛ ├ ┝ ┞ ┟ ┠ ┡ ┢ ┣ ┤ ┥ ┦ ┧ ┨ ┩ ┪ ┫
北京炜煌-A7,A8热敏编辑机使用说明
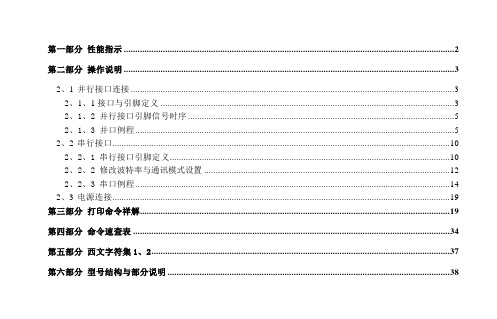
第一部分性能指示 (2)第二部分操作说明 (3)2.1并行接口连接 (3)2.1.1接口与引脚定义 (3)2.1.2 并行接口引脚信号时序 (5)2.1.3 并口例程 (5)2.2串行接口 (11)2.2.1 串行接口引脚定义 (11)2.2.2 修改波特率和通讯模式设置 (12)2.2.3 串口例程 (14)2.3电源连接 (19)第三部分打印命令祥解 (20)第四部分命令速查表 (34)第五部分西文字符集1、2 (38)第六部分型号结构和部分说明 (39)第一部分性能指示1、打印方法:直接热敏打印2、打印纸宽:57.5±0.5mm3、打印密度:8点/mm,384点/行4、打印头寿命:6×106字符行5、有效打印宽度:48mm6、走纸速度:根据打印机电源电压不现而不同。
电压越高,速度越快。
5V直流电源时为30mm/秒7、打印字符:6*8点阵西文字符集1、2;20h—7fh间的标准ASCII码半角字符。
国标一、二级汉字(16*16点阵、24*24点阵两种,可根据需要选用不同点阵类型的打印机)8、接口形式:并行接口IDE 26针插座,TTL电平串行接口IDE 10针插座,232电平或TTL电平9、操作温度:+5~50℃10、操作相对湿度:10~80%11、储存温度:-20~+60℃12、储存相对湿度:10~90%13、电源:直3.5V~9V,2A第二部分操作说明2.1 并行接口连接2.1.1接口与引脚定义本系列打印机并口与CENTRONICS兼容,支持BUSY/ACK握手协议,接口插座为IDE 26针插座。
并行接口插座引脚序号如下图所示:并行接口插座引脚序号IDE 26针并行接口各引脚信号的定义如下图表所示:面板式引脚信 号 方向 说 明 1-STB 入 数据选通触发脉冲,上升沿时读入数据 3DATA1 入 这些信号分别代表并行数据的第一至第八位信号,每个信号当其逻辑为“1”时为“高”电平,逻辑为“0”为“低”电平。
热敏打印机使用手册说明书
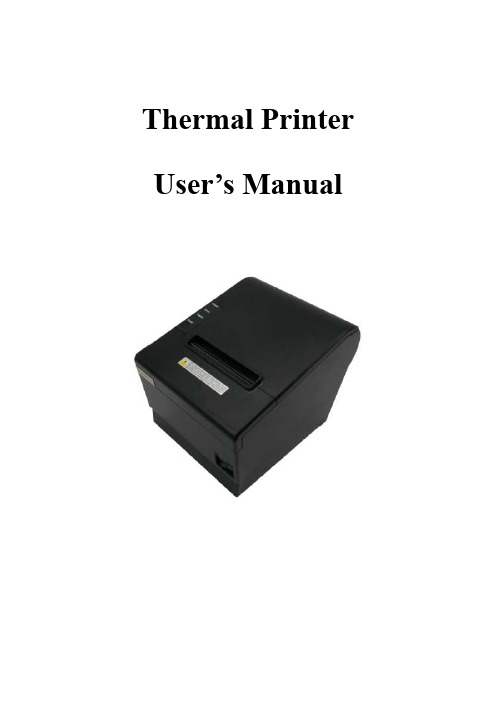
Thermal Printer User’s ManualCatalogue1 Introduction (2)1.1 Brief introduction (2)1.2 Main features (2)2 Specification (3)2.1 Specification (3)2.2 Printing material requirements (5)2.2.1 Paper parameters (5)2.2.2 Mark paper parameters (5)2.2.3 Paper using attention (5)2.3 Printing and paper cutting position (6)2.3.1 Printing position (6)2.3.2 Paper cutting position (6)3 Appearance and components (7)3.1 Appearance and components (7)3.2 Indicator and buzzer instruction (8)4 Printer installation (9)4.1 Open the package (9)4.2 Requirements of installation position (9)4.3 Connect to power adapter (9)4.4 Connect Communication cables (9)4.5 Connect to cash drawer (9)4.6 Paper roll loading (10)4.6.1 Printing paper type confirmation (10)4.6.2 Loading or change paper roll (10)4.7 DIP switch setting (12)4.8 Printing self-test page (12)4.9 Set Ethernet port IP Address. (12)5 Interface pin definitions (14)5.1 Parallel interface pin definition(DB25M) (14)5.2 USB interface pin definition(standard B type female base) (14)5.3 Power interface pin definition(MPC-3-001B) (15)5.4 Cash drawer interface pin definition(RJ11-6P6C) (15)5.5 Serial port pin definition(DB9F) (16)5.6 Ethernet interface pin definition(RJ45) (16)6 Faults handling (17)6.1 Printer does not work (17)6.2 Indicator error and buzzer warning (17)6.3 Problems when it is printing (17)6.4 Problems when cutting paper (18)6.5 Paper jam and cutter retraction troubles removal (18)1 Introduction1.1 Brief introductionCB821 is a thermal POS printer with auto-cutter. It has good printing quality, high printing speed and high stability, which is widely used in POS system, food service industry and many other fields.CB821 connects other devices via USB, Serial, Ethernet port. It offers drivers for WINDOWS and LINUX operating systems.The supported operating systems are as below:WINDOWS XPWINDOWS 7 32/64WINDOWS 8WINDOWS 10UBUNTU 12.04 32/64UBUNTU 14.04 32/64MAC OS1.2 Main features·Low noise, high-speed printing, 250mm/s·With auto-cutter·With cash drawer interface·USB, Serial, Ethernet port communication, Bluetooth optional.Long-life, high print quality, durable performance.Support mark paper and continuous paper printing.Easy paper loading design, widely used in various industries2 Specification2.1 SpecificationItem ParameterPrinting parameter Printing method Thermal printingResolution 203DPI,8 dots/mmPrinting width 72mm(576 dots)Printing speed About 250 mm/sInterfacesStandard: cash drawer / USB/ serial/ EthernetOptional Wireless Communication: BluetoothPage mode / SupportCommand set / ESC/POS compatible commandsStorageRAM RAM 8M bytes, receive buffer area 1M bytes FLASH FLASH 4M bytes, NV bitmap 256K bytescharactersChinese GB18030 24×24Words, figures ASCII 9×17,12×24User-defined SupportCode pagesOptional international character sets 45TRADITIONAL CHINESECHINESECP437 [U.S.A., Standard Europe]KatakanaCP850 [Multilingual]CP860 [Portuguese]CP863 [Canadian-French]CP865 [Nordic]WCP1251 [Cyrillic]CP866 Cyrillic #2MIK[Cyrillic /Bulgarian]CP755 [East Europe,Latvian 2]IranCP862 [Hebrew]WCP1252 Latin IWCP1253 [Greek]CP852 [Latina 2]CP858 Multilingual Latin Ⅰ+Euro)Iran IILatvianCP864 [Arabic]ISO-8859-1 [West Europe]CP737 [Greek]WCP1257 [Baltic]ThaiCP720[Arabic]CP855CP857[Turkish]WCP1250[Central Europe] CP775WCP1254[Turkish]WCP1255[Hebrew]WCP1256[Arabic]WCP1258[Vietnam]ISO-8859-2[Latin 2]ISO-8859-3[Latin 3]ISO-8859-4[Baltic]ISO-8859-5[Cyrillic]ISO-8859-6[Arabic]ISO-8859-7[Greek]ISO-8859-8[Hebrew]ISO-8859-9[Turkish]ISO-8859-15 [Latin 3] Thai2CP856Chart / Supports different density dots and images printingsSupports grating bitmap printingSupports download bitmap printing, every bitmap size should less than 256K, and the total capacity of download bitmap is 256K.Bar codes 1DUPC-A、UPC-E、EAN-8、EAN13、CODE39、ITF、CODEBAR、CODE128、CODE932D PDF417、QR CodeDetection function Sensor Paper out, cover opened, un-take out printed paper(optional)LED indicatorPower indicator Green Paper out indicator Red Error indicator RedPaper RequirementType Standard thermal receipt paper Width 79.5±0.5mmThickness 0.056~0.1mmDiameter 80mm(Max.)Physical characteristicsPaper loading Easy paper loadingPaper cutting Manual or automatically cut paper Operating condition -10℃~ 50℃,25% ~ 80%RH Storage condition ~40℃~ 70℃,≤93%RH(40℃)Outline dimension 145mm×195mm×144mm(W×L×H)Weight 1.8KgReliabilityTPH life 100kmCutter life 1,000,000 times Motor life 360,000 hoursSoftware function Driver procedure Windows(WIN7/WIN8/WIN10/Vista/XP/2000)Ubuntu 12.04 32/64, Ubuntu 14.04 32/64 MAC OS2.2 Printing material requirements2.2.1 Paper parameters1)Paper type: thermal receipt paper/thermal black mark paper2)Paper width:80±0.5 mm3)Paper roll diameter: 80 mm (Max.)4)Paper thickness:0.065 ~ 0.10mm2.2.2 Mark paper parametersBlack mark imprint position is on the front side of the receipt when using mark paper. The black mark reflectivity is no more than15%, the other parts of paper reflectivity should be more than 85%.There are not any patterns in black mark area, such as ad, and the mark size shall be satisfied with requirements as below:2.2.3 Paper using attentionNote:1)Please use good quality paper, otherwise, it will effect printing quality and even reduce printer head life.2)Don’t make the paper stick on axis.3)Paper will be fading out or reduced thermal sensitivity if it is polluted by chemical or oil, which will affectprinting effects.4)Don’t use nail or hard things to clash printing paper, otherwise, it will be fade out.5)Paper will be fading out if the environment temperature exceeds 70°C. So please take note the temperature,humidity and illumination effects.2.3 Printing and paper cutting position2.3.1 Printing positionL1-Paper storehouse’s width: 82±0.5mmL2-Effective printing width: 80mmL3-Distance between print head to paper storehouse’s left edge (fixed width): 3±0.3mmL4-Distance between print head to paper storehouse’s right edge (fixed width): 3±0.3mmL5-Left margin: Default is 4mmL6-Printing area width: it is set by commands (refer to programming manual). Default is 72mm. L7-Right margin: Default is 4mm.2.3.2 Paper cutting positionThe distance between print head to cutter: 12.5mm3 Appearance and components 3.1 Appearance and componentsFunction instruction of components1)Power switchPress “O” side to power off, press “I” side to power on.2)Power indicator(green)The indicator is on when power on, and it is off when power off.3)Error indicator (Red)Error indicator is on when it detects error. Such as: paper out, upper cover is open and cutter is stocked. 4)Paper indicator(red)Paper out indicator is on when it detects the paper is out. Please put a new paper roll to printer inside then.3.2 Indicator and buzzer instruction1)Function instruction of indicators and buzzerName Status InstructionPower indicator (Power) On Printer is power on Off Printer is power offError indicator (Error) On Printer is in error status Off Printer is in normal statusPaper out indicator (Paper)On Printer is in paper out status Off Printer is in normal statusDescription Power Indicator Error Indicator Paper Indicator Buzzer Open printer cover On On On It rings 6 times by 1.5s.Paper is enough On Off Off Silent Paper out On On On It rings 3 times by 1.5s.Note: Printer detects printer head temperature via thermal resistance. It will cut off print head powerand stop printing if print head is overheat. The print head protection temperature is 80℃.4 Printer installation4.1 Open the packagePlease make sure everything is in good status when you open the package. Otherwise, please contact to distributor in time.4.2 Requirements of installation position1)Put the printer on a stably place.2)Let the printer far away from water, fire, and sunlight.3)Avoid to put it on oscillatory and impassive place.4)Make sure to connect printer with ground safety4.3 Connect to power adapter1)Make sure the printer is power off.2)Connect power adapter’s DC output plug to the printer.3)Connect power adapter’s AC input plug to a power outlet.4)Please be careful to operate correctly when plug out the plug of power cord to avoid damage.4.4 Connect Communication cables1)Make sure the printer is power off.2)Connect communication cable to the printer’s port, and fix it as plug lag spike (or snap spring).3)Connect communication cable to the other side host.4.5 Connect to cash drawer1)Make sure the printer is power off.2)Connect cash drawer to cash drawer port behind the printer.Warning: The Voltage of cash drawer port is 24V. (It cannot connect to telephone cable.)4.6 Paper roll loading4.6.1 Printing paper type confirmationYou can load paper roll to print after connecting power adapter and communication cables. Please make sure the printing paper type before printing. The default paper type is continuous thermal receipt paper.4.6.2 Loading or change paper roll1)Power off the printer.2)Slide or press paper roll storehouse button, and then open storehouse cover.3)Draw out paper roll tap, and load paper roll as below.4)Draw out a printing paper, and leave some on the paper out month, then close the storehouse cover.Warning: Please make sure the paper roll in tense status, if not, it maybe cause paper jam or other problems.5)The status after paper loading4.7 DIP switch settingDIP switch Switch Function On Off Default 1 Cutter Forbidden Enable Off 2 Buzzer Enable Forbidden On 3 Printing density DarkLight Off 4 Multi-byte encoding Single-byte encodingmulti-byte encodingOff 5 Max. number of Printing characters in each line42 48 Off 6 Cash drawer EnableForbiddenOn 7 Baud rate options (bps)Ref. Chart 1Off 8OffChart 1:Baud rate optionsBaud rate Switch 7 Switch 8 Default9600 On Off 19200 19200 Off Off 38400 On On 115200Offon4.8 Printing self-test page1) Make sure the printer loaded paper roll correctly.2) Press down [FEED] button and hold on, then power on the printer, the printer will print a self-test page.4.9 Set Ethernet port IP Address.The printer ’s Ethernet IP address can be set directly via printer inserted web setting page. The operation steps are as below:1. Connect printer and PC in a same Ethernet LAN.2. Print a printer self-test page to get printer recent IP address (self-test page printing operation method refers to “4.8 printer self-test ” instruction):You can find the printer ’s IP address is same as 192.168.1.87 in self-test page “IP address: 192.168.1.87” 3. Set network card IP address in PC and printer IP address as different IP address in the same networksegment.(Such as 192.168.1.xxx, xxx is a number among 1 to 254);4. Please enter address “http://printer IP address ” in browse of PC after making sure that printer connects with Ethernet.(e.g.: If printer IP address is “192.168.1.87”, please enter “http://192.168.1.87”), then press Enter key,open Ethernet port setting page in browser as below:5. Click “Configure Interface” link in the left side, then enter the modified target IP and click “save” button tosave setting. Click “Reboot” button to reset printer if you want the setting to take effect.6. Enter the new IP address as the above step 4 procedure, and re-open printer Ethernet port setting web page, then click “Printer Status” link in the left side. And click “Printer Test Page” button to print self-test page, andcheck the IP Address contents in the self-test page is right or not.5 Interface pin definitionsThe printer has a cash drawer driver interface and many kinds of communication interfaces: parallel, serial (RS-232), USB and Ethernet ports. USB port and cash drawer interfaces are standard interfaces, and it has Ethernet, serial and parallel ports as optional.5.1 Parallel interface pin definition(DB25M)Number Signal Function Number Signal Function1 /STROBE Gate. Low level is10 /ACK Confirm. Low level is effectiveeffective2 DATA0Data bit is 011 BUSY Busy3 DATA1Data bit is 112 PE Paper out4 DATA2Data bit is 213 SEL Choose5 DATA3Data bit is 314 /AUTOFEED Change line automatically. Lowlevel is effective6 DATA4Data bit is 415 /ERROR Error. Low level is effective7 DATA5 Data bit is 516 /INIT Initialize. Low level is effective8 DATA6 Data bit is 617 /SELIN Choose input. Low level iseffective9 DATA7 Data bit is 718-25 GND Ground wire5.2 USB interface pin definition(standard B type female base)1)Pin definitionPin Number Signal name Typical wire color1 VBUS Red2 D- White3 D+ Green4 GND Black5.3 Power interface pin definition(MPC-3-001B)1)Pin definitionPin number Signal name1 +24V2 GND3 N.CSHELL F.G5.4 Cash drawer interface pin definition(RJ11-6P6C)1)Electrical specificationDriver voltage: DC24VDriver current: Max. 0.8A (within 510ms)Cash drawer status tests signal: “L” = 0~0.5 V ; “H” = 3~5 V2)Cash drawer interface socket uses RJ-11 6P type connector;3)Interface signal definitionPin number Signal function1 FG Printer cover2 DRAWER 1 Cash drawer 1 driver signal3 DRSW Cash drawer status detection signal4 VDR Cash drawer driver power5 DRAWER 2 Cash drawer 2 driver signal6 GND Common ground circuitNotes:1) Prohibit socket with power to pull out communication wire plug.2) Please avoid to parallel with strong power when wring communication cables av通讯线布线时应避免和强电并行;3) Communication cables use with shielded cables.5.5 Serial port pin definition(DB9F)Printer serial port is compatible with RS-232, the interface socket is DB9 female socket.User can check interface setting status via printing setting self-test page. Printer default serial interface is set as: baud rate 19200bps, 8 bit data bits, no parity,1 bit stop bit, and the handshakes method is DTR/DSR。
快速安装手册-北京炜煌科技发展有限公司说明书
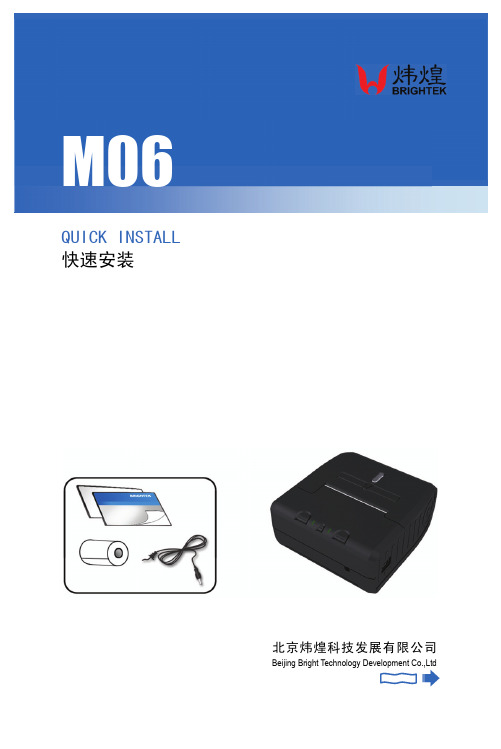
QUICK INSTALL 快速安装 北京炜煌科技发展有限公司Beijing Bright Technology Development Co.,Ltd快速安装手册●打印机各部件一览 Printer Parts Names1.纸仓盖 Paper Case Cover2.打印纸 Paper Roll3.色带 Ribbon4.电源指示灯 Power Indicator5.红外接口 IR Port6.电源开关 Power Button7.充电电源接口 Power Connector8.电池盖 Battery Cover9.电池 Battery 10.LF 键 LF Button 11.状态指示灯Status Indicator 12.SEL 键 SEL Button按钮开关的操作及指示灯开机:打印机按住电源开关3秒钟,电源打开。
工作状态指示灯闪亮。
少于3秒钟电源不动作。
关机:在开机状态,按压电源开关3秒钟,电源关闭,工作状态指示灯熄灭。
少于3秒钟电源不动作。
走纸:按压走纸键(LF 键),按下开始进纸,放开停止进纸。
自检测方式关机状态下按压走纸键(LF)键,然后开机,可以打印自检。
Operation SpecificationAfter press the power button and hold on for 3 seconds, then the power is on. The status indicator flashes.In the power-on state, press the power button and hold on for 3 seconds, then the power is off. The status indicator light turns off.Press the paper feed button (LF button), the printer starts feeding paper. If release the button, it will stop feeding paper. The Self TestIn the power-off state, press the paper feed button (LF button), notrelease and power on. Then the printer will print self-check scrip.快速安装手册●尺寸 SizeWH-M06型尺寸 Product Size:外形尺寸 Outline Dimension: 115.5mm×100mm×46mm●安装 Installation安装方法:如图推开电池盖,将电池下端两个卡位卡入打印机内,并用力将另一端扣入,电池盖推回即可。
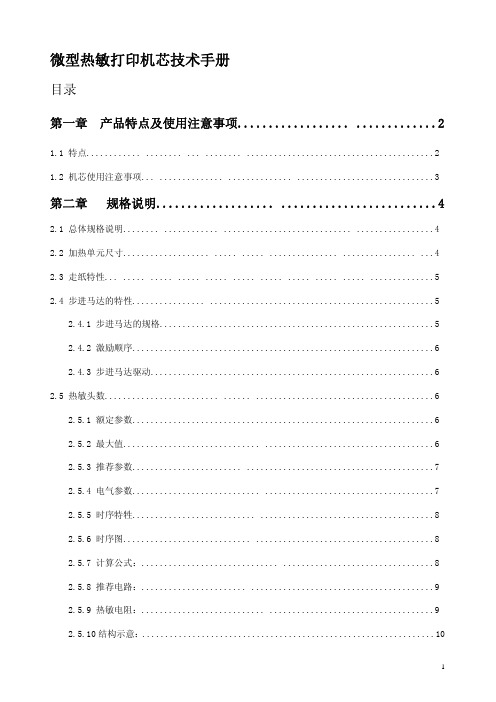
微型热敏打印机芯技术手册
工作温度(℃) 工作湿度(RH) 储藏温度(℃) 储藏湿度(RH)
规格
PT486F-B101
PT486F-B103
行式热敏打印 384 点/ 行
8 点/ 毫米 48 毫米
57±1 毫米
70×33.5×15 200 点线/ 秒(25 毫米/秒)( 电压5.0V) 450 点 线/ 秒(56.25 毫米/ 秒)( 电压7.2V)560 点线 / 秒70 毫米/秒)(电压8.0V)
2.4.1 步进马达的规格............................................................5 2.4.2 激励顺序..................................................................6 2.4.3 步进马达驱动..............................................................6 2.5 热敏头数......................... ...... .......................................6 2.5.1 额定参数..................................................................6 2.5.2 最大值.............................. .....................................6 2.5.3 推荐参数........................ .........................................7 2.5.4 电气参数............................ .....................................7 2.5.5 时序特牲........................... ......................................8 2.5.6 时序图............................ .......................................8 2.5.7 计算公式:.............................. .................................8 2.5.8 推荐电路:....................... ........................................9 2.5.9 热敏电阻:........................... ....................................9 2.5.10 结构示意:................................................................10
Printronix T8000 热敏打印机用户手册说明书
用户手册T8000热敏打印机Printronix对本资料不作任何声明或担保,包括但不限于适销性和用于特定目的适用性的暗示担保。
对于本资料包含的错误或疏漏或因本资料的提供、分发、执行或使用造成的任何直接或间接、意外或间接损害,Printronix 概不负责。
本手册所含信息如有更改,恕不另行通知。
本文档包含受版权法保护的专有信息。
未经 Printronix 书面许可,不得以任何形式或手段(手工、图片、电子、机械或其它方式)复制、复印、翻译此文档的任何部分或与其它任何资料进行合并。
© 2015 PRINTRONIX, INC.版权所有。
保留所有权利。
商标确认Printronix、IGP、Auto Label Mapping、LinePrinter Plus、 PGL、和PrintNet是Printronix,Inc的注册商标。
T8是Printronix, Inc.的注册商标。
Artifex、Artifex标识、Ghostscript和Ghostscript标识是Artifex Software, Inc.的注册商标。
PostScript是Adobe系统公司的商标。
HP是Hewlett-Packard Company的注册商标。
Code V是Quality Inc的商标。
QMS是Quality Micro Systems,Inc的注册商标。
IBM是商用机器公司(IBM)的注册商标。
MS-DOS和Windows是Microsoft Corporation的注册商标。
Centronics是Genicon公司的注册商标。
IEEE是电气和电子工程师协会(Institute of Electrical and Electronics Engineers,Inc)的注册服务标志。
EIA是电子工业协会(Electronics Industries Association)的注册服务商标。
ZPL、ZPL II、和Zebra是Zebra Technologies Corporation的注册商标。
热敏打印机使用说明书

CONFIGURATION MANUAL(Configuration Tool)Rev. A 0319 AURES TECHNOLOGIESThe manual and product are protected by copyright.THERMAL PRINTER1. Instruction32. Printer Option Setting43. Code Page Setting74. TCP/IP, Ethernet Setting95. Wi-Fi Setting116. Bluetooth Setting157. NFC Setting17You can change the configuration settings of your printer by using Utility.To configure the printer with Utility.1. Make sure that you have a PC running Windows or later.2. Download utility from the AURES Technical website ().3. Connect your printer to your PC using USB cable (Recommended).4. Run the utility.5. Select the connection in the Connected Printer’s Interface Type.6. Click the Check Communication.7. Click the button for the settings you want to configure.To configure Printer’s Options with Utility1. Click Read Printer Settings.2. Update or check your settings.3. Click Save Modified Printer Settings to finish.· Error BeepIf the cover is open or there is no paper, the error beep function is activated.This option allows you to enable / disable the error beep.- BEEP ON / BEEP OFF· Cut melody & Melody kindTo DK Port (Cash), Melody box or external buzzer can be connected.You can activate it from the Melody Setting menu, and the melody will operate afterthe cutting operation.- Melody Box : Melody is fixed and volume can be adjusted.- External Buzzer : 3 types of melody are output according to the Melody Type setting and volume control is not included.· Cutting when cover closeIf the cover is opened and then closed, decide if you want to cut the paper after the dummy feed. - Disabled / Enabled· Font replaceFONT SETTING menu can be change the Font mapping(FONT A / FONT B).If you did not want other side font, you can disable that.- FONT A : 12x24- FONT B : 9x17FONT SETTING1. FONT A -> A / FONT B -> B2. FONT A -> B / FONT B -> B3. FONT A -> A / FONT B -> A4. FONT A -> B / FONT B -> A· Mac osIt is a function for interlocking with MAC OS. When activated, it is registered as GenericPOS Printer in Device Manager.- Disabled / Enabled· Re-stick paperIt is a function for use the label paper.When using this function, the printer performs dummy feeding every minute.(This feature is only supported on certain models)- Disabled / Enabled· Paper ReduceReduce menu (Line space, Line feed, barcode[1D] height) was developed for paper saving.- Line space : Line space means the amount of feed when you intentionally generate newlines. - Line feed : Line feed means the amount of feed when there is an automatic line break.- Barcode Height : Barcode Height means the height of the barcode when creatinga one-dimensional barcode.EACH OPTION1. NORMAL2. REDUCE 50%3. REDUCE 75%4. REDUCE 90%Use the following table to Printer’s Options setting.To configure Code Page settings with Utility.1. Click Serial Settings tab.2. Update or check the Code Page.3. Click Save Modified Printer Settings to finish.Use the following table to Code Page Settings.CP_KATAKANA KatakanaISO_8859_1Latin Alphabet No. 1ISO_8859_2Latin Alphabet No. 2ISO_8859_7GreekISO_8859_9Latin Alphabet No. 5(Turkish) MAZOVIA PolishTIS11THAITIS13THAITIS14THAITIS16THAITIS17THAITIS18THAITIS42THAIFor more information, Please contact your supplier.To configure TCP/IP setting with Utility.1. Click TCP/IP Printer Configuration.2. Click Search to find the printer.(To Search using MAC Address, you need to check the Search using MAC Address)3. Update or check your settings.(To use DHCP Setting, you need to check the DHCP Setting)4. Click Test print to test the printer is set correctly.5. Click Save to finish.To configure Wireless LAN settings with Utility.1. Click Wi-Fi Printer Configuration.2. Click Open Port.3. Click Get Wi-Fi Information.4. Update or check your settings.5. Click Save Wi-Fi Information to finish.Use the following table to Wireless LAN setting.6. To Set Wi-Fi printer correctly, you need to check the AP’s or Router’s setting in advance. Ex) D-Link Router (Model: DIR-820L)- Reset(Factory Settings) : Wi-Fi setting will be factory reset.Initialization informationWi-Fi Mode : Soft-APChnannel : 1Encryption : NoneSSID : SW_XXXX / MOBILE_PRINTERXXXXXX(POS Printer / Mobile Printer)IP Address : 192.168.100.1Subnet Mask : 255.255.255.0Gateway : 192.168.100.1- WPS : Ability to automatically connect to AP even if user does not enter setting information. (AP must support WPS function.)How to use - Press the WPS button in the Wi-Fi setting utility andpress the AP WPS button to connect.To configure Bluetooth setting with Utility.1. Click Communication After Bluetooth Printer Configuration.2. Click Get Bluetooth Information.Use the following table to Bluetooth setting.3. Update or check your settings.4. Click Save Bluetooth Information to finish.1. Turn on the NFC function on your mobile devices.(Choose either NFC P2P mode or standard mode / Connection is not available with NFC card mode.) NOTE A display type can be slightly different depending on device models.2. If you take your mobile device close to the printer NFC tag,a mobile application will be automatically executed.NOTE If a mobile application is not installed on mobile devices, NFC function is not available.Go to CD -> AURES_NFCPrint to install the application.。
Seiko Epson TM-T88V电子标签打印机用户手册说明书

User’s ManualM00024501ENAll rights reserved. No part of this publication may be reproduced, stored in a retrieval system, or transmitted in any form or by any means, electronic, mechanical, photocopying, recording, or otherwise, without the prior written permission of Seiko Epson Corporation. No patent liability is assumed with respect to the use of the information contained herein. While every precaution has been taken in the preparation of this book, Seiko Epson Corporation assumes no responsibility for errors or omissions. Neither is any liability assumed for damages resulting from the use of the information contained herein.Neither Seiko Epson Corporation nor its affiliates shall be liable to the purchaser of this product or third parties for damages, losses, costs, or expenses incurred by purchaser or third parties as a result of: accident, misuse, or abuse of this product or unauthorized modifications, repairs, or alterations to this product, or (excluding the U.S.) failure to strictly comply with Seiko Epson Corporation’s operating and maintenance instructions.Seiko Epson Corporation shall not be liable against any damages or problems arising from the use of any options or any consumable products other than those designated as Original Epson Products or Epson Approved Products by Seiko Epson Corporation.EPSON is a registered trademark of Seiko Epson Corporation in Japan and other countries/regions.NOTICE: The contents of this manual are subject to change without notice.Copyright © 2010 by Seiko Epson Corporation, Nagano, Japan.Standards and ApprovalsThe following standards are applied only to the printers that are so labeled. (EMC is tested using the Epson power supplies.)markingEurope: CENorth America: FCC/ICES-003 Class AOceania:AS/NZS CISPR22 Class AWARNINGThis is a Class A product. In a domestic environment this product may cause radio interference in which case the user may be required to take adequate measures.The connection of a non-shielded printer interface cable to this printer will invalidate the EMC standards of this device. You are cautioned that changes or modifications not expressly approved by Seiko Epson Corporation could void your authority to operate the equipment.CE MarkingThe printer conforms to the following Directives and Norms:Directive 2004/108/ECEN 55022 Class AIEC61000-3-2IEC61000-3-3EN 55024IEC 61000-4-2IEC 61000-4-5IEC 61000-4-3IEC 61000-4-6IEC 61000-4-4IEC 61000-4-11Directive 2006/95/ECSafety Standard EN 60950-1FCC Compliance Statement For American UsersThis equipment has been tested and found to comply with the limits for a Class A digital device, pursuant to Part 15 of the FCC Rules. These limits are designed to provide reasonable protection against harmful interference when the equipment is operated in a commercial environment.This equipment generates, uses, and can radiate radio frequency energy and, if not installed and used in accordance with the instruction manual, may cause harmful interference to radio communications. Operation of this equipment in a residential area is likely to cause harmful interference, in which case the user will be required to correct the interference at his own expense.For Canadian UsersThis Class A digital apparatus complies with Canadian ICES-003.Important Safety InformationThis section presents important information intended to ensure safe and effective use of this product. Read this section carefully and store it in an accessiblelocation.Key to SymbolsThe symbols in this manual are identified by their level of importance, as defined below. Read the following carefully before handling the product.WARNING:Warnings must be followed carefully to avoid serious bodily injury.CAUTION:Cautions must be observed to avoid minor injury to yourself, damage to your equipment, or loss of data.Note:Notes have important information and useful tips on the operation of your equipment. Safety PrecautionsWARNING:Shut down your equipment immediately if it produces smoke, a strange odor, or unusual noise. Continued use may lead to fire or shock. Immediately unplug the equipment and contact your dealer or a Seiko Epson service center for advice.Never attempt to repair this product yourself. Improper repair work can bedangerous.Never disassemble or modify this product. Tampering with this product mayresult in injury, fire, or shock.Be sure to use the specified power source. Connection to an improper power source may cause fire.Never insert or disconnect the power plug with wet hands. Doing so may result in severe shock.Do not place multiple loads on the power outlet (wall outlet). Overloading the outlet may lead to fire.Be sure your power cord meets the relevant safety standards and includes a power-system ground terminal (PE terminal). Otherwise shock may result.Handle the cables with care. Improper handling may lead to fire or shock.Do not use the cables if it they are damaged.Do not modify or attempt to repair the cables.Do not place any object on top of the cables.Avoid excessive bending, twisting, and pulling of the cables.Do not place cables near heating equipment.Check that the plug is clean before plugging it in.Check that the AC inlet is clean before plugging the power connector in it.Be sure to push the prongs and power connector all the way in.Use the provided power cable only. Do not use the provided power cable with any other devices than the specified one. Doing so may lead to fire or shock.Never glue the AC inlet and the power cable together.Regularly remove the power plug from the outlet and clean the base of theprongs and between the prongs. If you leave the power plug in the outlet for a long time, dust may collect on the base of the prongs, causing a short and fire.Regularly confirm that the plug and AC inlet are not wet with liquid such aswater.Do not allow foreign matter to fall into the equipment. Penetration by foreign objects may lead to fire.If water or other liquid spills into this equipment, unplug the power cordimmediately, and then contact your dealer or a Seiko Epson service center for advice. Continued usage may lead to fire.Do not use aerosol sprayers containing flammable gas inside or around thisproduct. Doing so may cause fire.Do not connect a telephone line to the drawer kick-out connector; otherwise the printer and the telephone line may be damaged.CAUTION:Do not connect cables in ways other than those mentioned in this manual.Different connections may cause equipment damage and burning.Be sure to set this equipment on a firm, stable, horizontal surface. The product may break or cause injury if it falls.Do not use in locations subject to high humidity or dust levels. Excessive humidity and dust may cause equipment damage or fire.Do not place heavy objects on top of this product. Never stand or lean on this product. Equipment may fall or collapse, causing breakage and possible injury.Take care not to injure your fingers on the manual cutter•When you remove printed paper•When you perform other operations such as loading/replacing roll paperTo ensure safety, unplug this product before leaving it unused for an extended period.Caution LabelsThe caution labels on the product indicate the following precautions.CAUTION:Do not touch the thermal head because it can be very hot after printing. Restriction of UseWhen this product is used for applications requiring high reliability/safety, such as transportation devices related to aviation, rail, marine, automotive, etc.;disaster prevention devices; various safety devices, etc.; or functional/precision devices, etc.; you should use this product only after giving consideration toincluding fail-safes and redundancies into your design to maintain safety andtotal system reliability. Because this product was not intended for use inapplications requiring extremely high reliability/safety, such as aerospaceequipment, main communication equipment, nuclear power control equipment, or medical equipment related to direct medical care, etc., please make your own judgment on this product’s suitability after a full evaluation.Downloading Drivers, Utilities, and ManualsThe latest versions of drivers, utilities, and manuals can be downloaded from one of the following URLs.For customers in North America, go to the following web site:/ and follow the on-screen instructions.For customers in other countries, go to the following web site:/UnpackingThe following items are included with the standard specification printer.If any item is damaged, contact your dealer.Note:The shape of accessories varies between models and areas.Part NamesControl Panel(Power) LEDThis LED is on when the printer is on.Error LEDThis indicates an error.Paper LEDOn indicates a paper out. Flashing indicates standby. Feed buttonThis button feeds paper.Connecting the Cables CAUTION:For a USB interface, do not turn on the printer before installing the printer driver.Always supply power directly from a standard power outlet.Do not connect to electrical outlets close to devices that generate voltage fluctuations or electrical noise. In particular, stay clear of devices that use large electric motors.Never attempt to stretch the cables to enable a connection. The power cable must have adequate slack at all times during use.1.Make sure the printer is turned off.2.Connect the USB cable to the printer.3.Connect the other end of the USB cable to the computer.4.Connect the AC cable to the printer.USB cableAC cable5.Insert the AC plug into a socket.Installing the PrinterYou can install the printer horizontally on a flat surface (with the paper exit ontop) or vertically (with the paper exit at the front). Also, you can hang it on a wall using the included accessories.CAUTION:Take measures to prevent the printer from moving by vibration during papercutting and when using a drawer. Affixing tape is provided as an option. Installing the Printer VerticallyWhen installing the printer vertically, be sure to attach the included control panel label for vertical installation on the roll paper cover, and attach 4 rubber feet in the rectangular indents in the printer case, as shown in the illustration below.Note:You can install the printer so that the roll paper cover is upright to the mounting surface using the included wall hanging bracket.1.Attach the control panel label for vertical installation on the roll paper cover.2.Install the wall hanging bracket on the printer, and fix it using 2 included screws.3.Attach 2 rubber feet in the rectangular indents in the printer case, and attach 2rubber feet within the scribed line on the hanging bracket.4.Place the printer with the wall-hanging-bracket-side down.Hanging the Printer on a WallTo hang the printer on the wall, follow the steps below.CAUTION:To fix the printer securely, install the wall hanging bracket on a wall made ofwood, concrete, or metal. The thickness of the wall should be 10 mm {0.4”} or more.Be sure to use metallic screws.The screws on the wall side must have a pull-out strength of 150 N (15.3 kgf) or more.1.Install 2 screws (screw diameter: 4 mm {0.16"}, head diameter: 7 to 9 mm {0.28to 0.35"}) in the wall at an interval of 80 mm {3.15"}. Make sure the length ofthe screw’s body in the wall is 10 mm {0.39"} or more, and the length outsidethe wall is 3 to 4 mm {0.12 to 0.16"}. Array2.3.4.Align the holes in the wall hanging bracket with the screws on the wall, andhook it securely.Installing Roll PaperFollow the steps below to install the roll paper.e the cover open lever to open the roll paper cover.2.Remove the used roll paper core if any, and insert the roll paper. The correct direction of the paper is shown in the illustration below.3.Pull out some paper, and close the roll paper cover.When the printer power is on, the roll paper is automatically cut.Changing the Paper WidthYou can change the paper width from 80 to 58 mm by installing the included 58-mm width paper guide plate. Follow the steps below to change the paperwidth.CAUTION:Once you change the paper width from 80 to 58 mm, you cannot change it back to 80 mm.When changing the paper width, be sure to make the setting for the paper width with the utility software for the TM-T20.1.Open the roll paper cover.2.Align 3 projections on the 58-mm width paper guide plate with therectangular holes in the printer, and push it downwards. Array3.Install the roll paper.4.Close the roll paper cover.Attaching Cover on the Power SwitchThe enclosed power switch cover ensures that the power switch is not pressed accidentally.You can turn the power switch on and off by inserting a sharp-pointed object in the holes in the power switch cover. To detach the cover, also use a sharp-pointed object.A waterproof cover for the power switch is also included.To use these covers, install them as shown in the illustration below.WARNING:If an accident occurs with the power switch cover attached, unplug the power cord immediately. Continued use may cause fire or shock.TroubleshootingNo lights on the control panelCheck whether the power supply cable is correctly connected to the printer and the socket.Error LED on with no printing❏Check whether the roll paper cover is closed. If it is open, close it.❏If the Paper LED is on , check whether the roll paper is correctly installed and any roll paper remains.Error LED flashing with no printing❏Check whether a paper jam has occurred. If paper is jammed, remove the jammed paper referring to the description below and install the roll paper correctly.❏Printing stops if the head overheats and resumes automatically when it cools.❏For other cases, turn the printer off, and after 10 seconds, back on.When a paper jam occursWhen a paper jam occurs, never pull out the paper forcibly. Open the roll paper cover and remove the jammed paper.CAUTION:Do not touch the thermal head, because it can be very hot after printing.If the roll paper cover does not open, follow the steps below.1.Turn off the printer.2.Put the fingers in the indents in both sides of the cutter cover, and slide ittoward the arrow in the illustration below to remove it.3.Turn the knob until you see a triangle in the opening. This returns the cutter blade to the normal position. See the operating instructions on the back of the cutter cover.4.Install the cutter cover.5.Open the roll paper cover and remove the jammed paper.CleaningCleaning the Printer CaseBe sure to turn off the printer, and wipe the dirt off the printer case with a drycloth or a damp cloth.CAUTION:Never clean the product with alcohol, benzine, thinner, or other such solvents.Doing so may damage or break the parts made of plastic and rubber. Cleaning the Thermal HeadCAUTION:After printing, the thermal head can be very hot. Be careful not to touch it and to let it cool before you clean it.Do not damage the thermal head by touching it with your fingers or any hard object.Turn off the printer, open the roll paper cover, and clean the thermal elements of the thermal head with a cotton swab moistened with an alcohol solvent (ethanol or IPA).3Specifications80 mm paper width58 mm paper width*1 Printing method Thermal line printingDot density203 dpi × 203 dpi [dots per 25.4 mm {1"}]Printing direction Unidirectional with friction feedPrinting width Default72.1 mm {2.84"}, 576 dot positions52.6 mm {2.07"}, 420 dot positions42 c olumnmode*268.3 mm {2.69"}, 546 dot positions47.3 mm {1.86"}, 378 dot positionsCharacters per line Default Font A: 48; Font B: 64Font A: 35; Font B: 46 42 c olumnmode*2Font A: 42; Font B: 60Font A: 42; Font B: 31Character spacing Default Font A, Font B: 0.25 mm {.01"} (2 dots)42 c olumnmode*2Font A: 0.38 mm {.01"} (3 dots)Font B: 0.25 mm {.01"} (2 dots)Font A, Font B: 0.25 mm {.01"}(2 dots)Character sizes Standard/ Double-height/ Double-width/ Double-width/ Double-height Default Font A: 1.25 × 3.00/1.25 × 6.00/2.50 × 3.00/2.50 × 6.00 mmFont B: 0.88 × 2.13/0.88 × 4.26/1.76 × 2.13/1.76 × 4.26 mm42 c olumnmode*2Font A:1.25 × 3.00/1.25 × 6.00/2.50 ×3.00/2.50 × 6.00 mmFont B:0.88 × 2.13/0.88 × 4.26/1.76 × 2.13/1.76 × 4.26 mmFont A:0.88 × 2.13/0.88 × 4.26/1.76 × 2.13/1.76 × 4.26 mmFont B:1.25 × 3.00/1.25 × 6.00/2.50 ×3.00/2.50 × 6.00 mmCharacter structure Default Font A: 12 × 24 (including 2-dot horizontal spacing)Font B: 9 × 17 (including 2-dot horizontal spacing)42 c olumnmode*2Font A: 13 × 24 (including 3-dothorizontal spacing)Font B: 9 × 17 (including 2-dothorizontal spacing)Font A: 9 × 17 (including 2-dothorizontal spacing)Font B: 12 × 24 (including 2-dothorizontal spacing)Number of characters Alphanumeric characters: 95; International character sets: 18 setsExtended graphics: 128 × 43 pages (including user defined page) Printing speed150 mm/s {5.91"/s} max.; 40 lps (3.75 mm {0.15"} feed)Ladder bar code and 2D symbol: 100 mm/s {2.4"/s}The above speed values are approximate.The values are when the printer prints with density “Normal” at 25°C {77°F}.Speed is adjusted automatically depending on the voltage applied andhead temperature.Paper feed speed Approx. 150 mm/s {approx. 5.91"/s}(continuous paper feed with the Feed button.)Line spacing (default) 3.75 mm {0.15"}Roll paper (single-ply)Width79.5 mm ± 0.5 mm {3.13" ± 0.02"}57.5 mm ± 0.5 mm {2.26" ± 0.02"} Diameter Maximum outside diameter: 83 mm {3.27"}Spool Spool diameter: Inside: 12 mm {0.47"}; Outside: 18 mm {0.71"}Thermal paper type NTP080-80NTP058-80Interface USB [Compliance: USB 2.0, Communication speed: Full-speed (12Mbps)]Receive buffer4KB/45 bytesCash drawer function 2 drives80 mm paper width58 mm paper width*1 Power supply Supply voltage: AC100-240V 50/60Hz, Rated current: 1.0 A Temperature Operating: 5 to 45°C {41 to 113°F}Storage:–10 to 50°C {14 to 122°F}, except for paperHumidity Operating:10 to 90% RHStorage:10 to 90% RH, except for paperOverall dimensions146 × 140 × 199 mm {5.75 × 5.51 × 7.83"} (H × W × D)Weight (mass)Approx. 1.7 kg {3.74 lb}lps: lines per second dpi: dots per 25.4 mm (dots per inch)*1: The values are those when the paper width is changed to 58 mm by installing the 58-mm width paper guide plate and making the paper width setting with utility software for the TM-T20.For how to install the 58-mm width paper guide plate, see “Changing the Paper Width” on page14. *2: 42 column mode can be set using the utility software for the TM-T20.。
北京炜煌科技发展有限公司打印机快速安装手册说明书
QUICK INSTALL 快速安装 北京炜煌科技发展有限公司Beijing Bright Technology Development Co.,Ltd快速安装手册●打印机各部件一览 Printer Parts Names1.纸仓盖 Paper Case Cover2.固定架 Holder3.指示灯 Indicator Light4.纸卷 Paper Roll5.纸轴 Paper Roller6.SEL 键 SEL Button .7.LF 键 LF Button8.防尘盖 Dust cover9.电源接口 Power Connector 10.数据接口 Interface Connector按钮开关的操作及指示灯打印机上电后电源指示灯保持常亮状态,状态指示灯常亮为正常待机状态,即在线,打印机可以接收数据,状态指示灯灭为离线状态,不能接收数据。
热敏型打印机缺纸时状态指示灯闪,不能接收数据。
SEL 键切换打印机在线离线,离线状态下LF 键为走纸键。
自检测方式打印机上电之后,按SEL 键使打印机离线(新针打和热敏型省略此步骤),按住LF 键不放,接着按下SEL 键,同时放开LF 键和SEL 键,即打出自检条。
Operation SpecificationAfter turning on the printer, the indicator light is on, shows that the printer is online, and it is ready to receive data. The light is off, shows that the printer is offline, and it can not receive data. When the light flash to show the paper is lacking, and the printer can not receive data.The SEL button can switch online or offline status. When the printer is offline, press the LF button, and the printer will feed paper.The Self TestTurn on the printer, press the SEL button to make printer offline (when use new dot matrix printing and thermal printing model, no need to refer this step), press the LF button, and don ’t release, then press the SEL button, and then release the both two buttons at the same time, and then the printer will print out the self-check scrip.快速安装手册●尺寸 SizeWH-E16型尺寸 Product Size:外形尺寸:Outline Dimension: 120.3mm×120.3mm×55.4mm开口尺寸:Installation Dimension: 115+0.5mm(W)×115+0.5mm(H)嵌入深度:Inlaid Deepness: 52.4mm●安装 Installation安装方法:把打印机嵌入部分插入仪器或设备面板的安装孔内,并把塑料卡子从设备面板后面夹紧打印机(如图),左右对称各一套,安装方法相同。
SP-RMD8D微型热敏打印机使用说明书

SP-RMD8D微型热敏打印机使用说明书VER1.03北京思普瑞特科技发展有限公司目录目录 (2)简介 (3)第一章特征与性能指标 (4)1.1主要特征 (4)1.2性能指标 (4)第二章安装说明 (5)2.1打印机外型 (5)2.2外型尺寸 (5)2.3安装纸卷 (6)2.4安装耳朵工作示意图 (7)第三章操作说明 (8)3.1电源和通讯接口 (8)3.1.1串行接口连接 (8)3.1.2USB接口连接 (9)3.1.3打印机参数设置 (9)3.1.4电源连接 (9)3.2指示灯和按键操作 (9)3.3自检测和十六进制打印 (10)3.4打印机初始化 (10)第四章打印命令 (11)4.1概述 (11)4.2命令详解 (11)4.2.1纸进给命令 (11)4.2.2格式设置命令 (12)4.2.3字符设置命令 (17)4.2.4用户自定义字符设置命令 (21)4.2.5图形打印及代码页选择命令 (23)4.2.6初始化命令 (26)4.2.7数据控制命令 (27)4.2.8汉字打印控制命令 (27)4.2.9实时指令 (30)4.2.10条形码打印命令 (32)第五章使用与维护 (37)5.1机头维护 (37)5.2其它 (37)第六章打印机在WINDOWS下的使用 (38)附录1西文方式下字符有效代码表 (39)附录2中文方式下字符有效代码表 (41)附录3打印命令表 (42)附录4单片机接口实例 (44)简介SP-RMD8D微型热敏打印机是北京思普瑞特科技发展有限公司面向二十一世纪而开发生产的点阵式智能打印机。
机器本身采用全新进口机芯自带单片计算机,具有体积小、重量轻、功能完备、高速度、高清晰、外型美观、操作简单、连接方便等优点。
是医用器材、火警控制、工业控制以及其他各种仪器仪表更新换代的最理想的匹配产品。
SP-RMD8D微型热敏打印机在西文方式下有字符集1和字符集2,在中文方式下按汉字点阵的不同可以打印4种24点阵高的字符9*24、12*24、16*24、24*24和1种16点高的字符8*16,汉字有24*24、16*16的国标一、二级字库和16*16BIG5(大五码)字库选择,以及大量的数学符号、专用符号、图形、曲线。
北京炜煌A7A8热敏打印机说明书
第一部分性能指示 (2)第二部分操作说明 (3)2、1并行接口连接 (3)2、1、1接口与引脚定义 (3)2、1、2 并行接口引脚信号时序 (5)2、1、3 并口例程 (5)2、2串行接口 (10)2、2、1 串行接口引脚定义 (10)2、2、2 修改波特率与通讯模式设置 (12)2、2、3 串口例程 (14)2、3电源连接 (19)第三部分打印命令祥解 (19)第四部分命令速查表 (34)第五部分西文字符集1、2 (37)第六部分型号结构与部分说明 (38)第一部分性能指示1、打印方法: 直接热敏打印2、打印纸宽: 57、5±0.5mm3、打印密度: 8点/mm,384点/行4、打印头寿命: 6×10⁶字符行5、有效打印宽度: 48mm6、走纸速度: 根据打印机电源电压不现而不同。
电压越高,速度越快。
5V直流电源时为30mm/秒7、打印字符: 6*8点阵西文字符集1、2;20h—7fh间的标准ASCII码半角字符。
国标一、二级汉字(16*16点阵、24*24点阵两种,可根据需要选用不同点阵类型的打印机)8、接口形式: 并行接口 IDE 26针插座,TTL电平串行接口 IDE 10针插座,232电平或TTL电平9、操作温度: +5~50℃10、操作相对湿度: 10~80%11、储存温度: -20~+60℃12、储存相对湿度: 10~90%13、电源: 直3、5V~9V,2A第二部分操作说明2、1 并行接口连接2.1.1接口与引脚定义本系列打印机并口与CENTRONICS兼容,支持BUSY/ACK握手协议,接口插座为IDE 26针插座。
并行接口插座引脚序号如下图所示:并行接口插座引脚序号IDE 26针并行接口各引脚信号的定义如下图表所示:注: 1、“入”表示输入到打印机。
2、“出”表示从打印机输出。
3、信号的逻辑电平为TTL电平。
2.1.2 并行接口引脚信号时序并口时序如下图所示:并行接口信号时序图2.1.3 并口例程单片机控制打印机时汇编例程BUSYEQU P3、2 ; 定义BUSY 信号引脚 nSTBEQU P3、7 ; 定义nSTB 信号引脚 PEEQU P3、3 ; 定义纸检测信号引脚 nACK EQU P3、4 ; 定义应答信号引脚BUSY /ACK DATA /STB 0.5μS0.5μS 0.5μS 0.5μS0.5μSnERR EQU P3、1 ; 定义错误检测信号引脚nSEL EQU P3、0 ; 定义在线检测信号引脚ORG 0000HJMP startstart: MOV DPTR, #print_contentMOV R0, #9 ; 存待打印数据的字节数main: CLR AMOVC A, @ A + DPTRLCALL PRINTBINC DPTRDJNZ R0, MAINMOV A, #0DHLCALL PRINTBSJMP $ ;打印结束死循环;PRINTB子程序将累加器A中的一字节数据发送到打印机PRINTB:JB BUSY, $ ; 等待打印机到空闲MOV P1 , A ; 送数据到数据口CLR nSTB ; 置nSTB为低电平NOP ; 延长nSTB信号脉冲宽度以满足时序要求nopnopSETB nSTB ; 置nSTB为高电平(此时数据将被读入打印机)RETprint_content:DB '北京炜煌'DB 0dhEND单片机C51例程// 北京炜煌科技打印机示例程序// Nocky Tian// 2007-07-17#include <reg52、h>// Hardware configuration#define PRINTER_DATA P1 // 定义打印机数据线端口sbit BUSY = P3^2; // 定义打印机忙信号引脚sbit nSTB = P3^7; // 定义打印机nSTB信号引脚sbit PE = P3^3; // 定义打印机纸状态检测信号引脚sbit nACK = P3^2; // 定义打印机应答信号引脚sbit nERR = P3^1; // 定义打印机错误检测信号引脚sbit nSEL = P3^0; // 定义打印机在线检测信号引脚#define CR 0x0d#define LF 0x0avoid PrintByte(unsigned char byte_data);void PrintString(char* str);void PrintByteN(unsigned char* data_src,unsigned char N);void main(void){char str[] = "Printer demo";PrintString("WHKJ Printer");PrintByte(CR);while(1);}/* PrintByte()* Send a byte to printer* Nocky Tian @ 2006-7-17*/#include <intrins、h>void PrintByte(unsigned char byte_data){while( BUSY == 1 ){}PRINTER_DATA = byte_data;nSTB = 0;_nop_(); // 调整nSTB信号脉宽nSTB = 1;}/* PrintString()* Print a string which is ending with a '\0' character* To Excuted the print command a addition CR character is needed * Nocky Tian @ 2006-7-17*/void PrintString(char* str){while( *str ){PrintByte( *(str++));}}/* PrintByteN()* Print N bytes through printer* no more than 255 bytes could be printed by the function* If more than 255 bytes need printing, the type of N need changing* to unsigned int, even unsigned long if necessary、* Nocky Tian @ 2006-07-17*/void PrintByteN( unsigned char* data_src, // pointer to data sourceunsigned char N) // number of data(byte){while( N--){PrintByte(*(data_src++));}}2、2 串行接口2.2.1串行接口引脚定义本系列打印机串口电平标准为两种:TTL电平与232电平,当设为232电平时,其串口与标准RS-232接口兼容。
辉煌打印机RD-A型微打使用说明
第五章:485 接口的使用...................................................................................................................................................................................................................... - 9 -
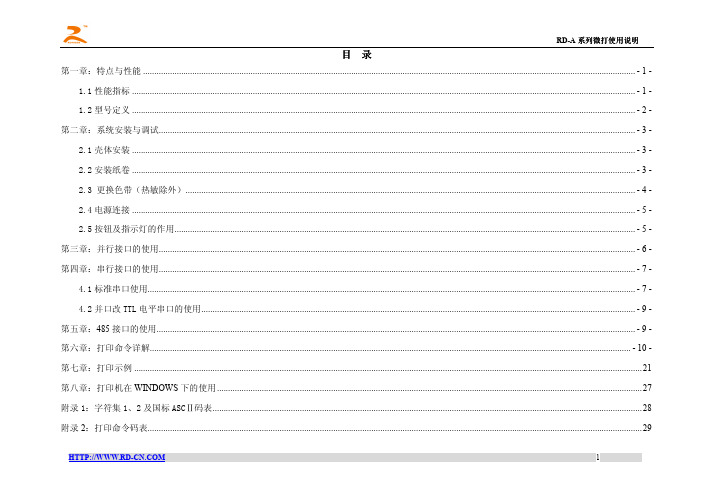
RD-A 型为后换纸结构设计,换纸操作须取下整台打印机进行换纸。A 型热敏系列与针打系列均采用原装进口打印头有效确保打印效果与打印机的使 用寿命。
1.1 性能指标
▲打印方式:针打:针式撞击点阵打印;热敏:热敏加热点阵打印 ▲打印速度:针打:1.0 行/秒,0.7 行/秒,0.4 行/秒(5×7 点阵字符);热敏:50 毫米/秒 ▲分 辨 率:针打:8 点/毫米,384 点/行。 ▲打印宽度:针打:33mm/48mm;热敏:48mm ▲字符数/行:针打:16/24/40;热敏:32 ▲打印字符:全部 448 个字符及图块,包括 96 个 ASCII 字符,352 个希腊文、德文、俄文、法文等字母,日文片假名,部分中文字,数字符号,打印字
2.4 电源连接 ................................................................................................................................................................................................................................. - 5 -
便携热敏打印机API参考手册

炜煌便携热敏打印机API参考手册Page 1 of 5
炜煌便携热敏打印机API参考手册
版本控制信息
目录
版本控制信息 (2)
目录 (3)
第1章概述 (4)
1.1 简述 (4)
第2章打印命令 (4)
2.1 PrintPDF417 (4)
附录 (5)
2.2 打印ASCII字符集 (5)
第1章概述
1.1简述
第2章打印命令
2.1PrintPDF417
该函数的功能是将待打印的文本按照一定的格式转化成打印机识别的PDF417条码数据格式1。
void PrintPDF417( unsigned char *data,
int *DataLen,
char *text,
int errorLevel,
int codeColumns);
【参数】
*data
[out]转化后的待发送的数据,因确保data指向足够多的内存空间。
*DataLen
[out]data的长度
*text
[in]待转化的文本数据
errorLevel
[in]校验等级(0~8)
codeColumns
[in]条码数据码字的列数2(1~5)
1PDF417条码数据格式详见《便携热敏打印机开发手册》
2注意:打印机支持条码的宽度受打印纸宽度的影响,应确保条码宽度在打印机可支持宽度范围内。
附录2.2打印ASCII字符集。
- 1、下载文档前请自行甄别文档内容的完整性,平台不提供额外的编辑、内容补充、找答案等附加服务。
- 2、"仅部分预览"的文档,不可在线预览部分如存在完整性等问题,可反馈申请退款(可完整预览的文档不适用该条件!)。
- 3、如文档侵犯您的权益,请联系客服反馈,我们会尽快为您处理(人工客服工作时间:9:00-18:30)。
炜煌热敏汉字微打使用手册第一部分性能指示 (2)第二部分操作说明 (3)2.1并行接口连接 (3)2.1.1接口与引脚定义 (3)2.1.2 并行接口引脚信号时序 (5)2.1.3 并口例程 (5)2.2串行接口 (10)2.2.1 串行接口引脚定义 (10)2.2.2 修改波特率和通讯模式设置 (12)2.2.3 串口例程 (14)2.3电源连接 (19)第三部分打印命令祥解 (20)第四部分命令速查表 (34)第五部分西文字符集1、2 (37)第六部分型号结构和部分说明 (38)第一部分性能指示1、打印方法:直接热敏打印2、打印纸宽: 57.5±0.5mm3、打印密度: 8点/mm,384点/行4、打印头寿命: 6×10⁶字符行5、有效打印宽度: 48mm6、走纸速度:根据打印机电源电压不现而不同。
电压越高,速度越快。
5V直流电源时为30mm/秒7、打印字符: 6*8点阵西文字符集1、2;20h—7fh间的标准ASCII码半角字符。
国标一、二级汉字(16*16点阵、24*24点阵两种,可根据需要选用不同点阵类型的打印机)8、接口形式:并行接口 IDE 26针插座,TTL电平串行接口 IDE 10针插座,232电平或TTL电平9、操作温度: +5~50℃10、操作相对湿度: 10~80%11、储存温度: -20~+60℃炜煌热敏汉字微打使用手册12、储存相对湿度: 10~90%13、电源:直3.5V~9V,2A第二部分操作说明2.1 并行接口连接2.1.1接口与引脚定义本系列打印机并口与CENTRONICS兼容,支持BUSY/ACK握手协议,接口插座为IDE 26针插座。
并行接口插座引脚序号如下图所示:并行接口插座引脚序号IDE 26针并行接口各引脚信号的定义如下图表所示:注: 1.“入”表示输入到打印机。
2.“出”表示从打印机输出。
3.信号的逻辑电平为TTL电平。
炜煌热敏汉字微打使用手册2.1.2 并行接口引脚信号时序并口时序如下图所示:并行接口信号时序图2.1.3 并口例程单片机控制打印机时汇编例程BUSYEQU P3.2 ; 定义BUSY 信号引脚 nSTBEQU P3.7 ; 定义nSTB 信号引脚 PEEQU P3.3 ; 定义纸检测信号引脚 nACK EQU P3.4 ; 定义应答信号引脚BU SY/A CK DA TA /S TB 0.5μS0.5μS 0.5μS 0.5μS0.5μSnERR EQU P3.1 ; 定义错误检测信号引脚nSEL EQU P3.0 ; 定义在线检测信号引脚ORG 0000HJMP startstart: MOV DPTR, #print_contentMOV R0, #9 ; 存待打印数据的字节数main: CLR AMOVC A, @ A + DPTRLCALL PRINTBINC DPTRDJNZ R0, MAINMOV A, #0DHLCALL PRINTBSJMP $ ;打印结束死循环;PRINTB子程序将累加器A中的一字节数据发送到打印机PRINTB:JB BUSY, $ ; 等待打印机到空闲MOV P1 , A ; 送数据到数据口CLR nSTB ; 置nSTB为低电平炜煌热敏汉字微打使用手册NOP ; 延长nSTB信号脉冲宽度以满足时序要求nopnopSETB nSTB ; 置nSTB为高电平(此时数据将被读入打印机)RETprint_content:DB '北京炜煌'DB 0dhEND单片机C51例程// 北京炜煌科技打印机示例程序// Nocky Tian// 2007-07-17#include <reg52.h>// Hardware configuration#define PRINTER_DATA P1 // 定义打印机数据线端口sbit BUSY = P3^2; // 定义打印机忙信号引脚sbit nSTB = P3^7; // 定义打印机nSTB信号引脚sbit PE = P3^3; // 定义打印机纸状态检测信号引脚sbit nACK = P3^2; // 定义打印机应答信号引脚sbit nERR = P3^1; // 定义打印机错误检测信号引脚sbit nSEL = P3^0; // 定义打印机在线检测信号引脚#define CR 0x0d#define LF 0x0avoid PrintByte(unsigned char byte_data);void PrintString(char* str);void PrintByteN(unsigned char* data_src,unsigned char N);void main(void){char str[] = "Printer demo";PrintString("WHKJ Printer");PrintByte(CR);while(1);}/* PrintByte()* Send a byte to printer* Nocky Tian @ 2006-7-17*/炜煌热敏汉字微打使用手册#include <intrins.h>void PrintByte(unsigned char byte_data){while( BUSY == 1 ){}PRINTER_DATA = byte_data;nSTB = 0;_nop_(); // 调整nSTB信号脉宽nSTB = 1;}/* PrintString()* Print a string which is ending with a '\0' character* To Excuted the print command a addition CR character is needed* Nocky Tian @ 2006-7-17*/void PrintString(char* str){while( *str ){PrintByte( *(str++));}}/* PrintByteN()* Print N bytes through printer* no more than 255 bytes could be printed by the function* If more than 255 bytes need printing, the type of N need changing* to unsigned int, even unsigned long if necessary.* Nocky Tian @ 2006-07-17*/void PrintByteN( unsigned char* data_src, // pointer to data sourceunsigned char N) // number of data(byte){while( N--){PrintByte(*(data_src++));}}2.2 串行接口2.2.1串行接口引脚定义本系列打印机串口电平标准为两种:TTL电平与232电平,当设为232电平时,其串口与标准RS-232接口兼炜煌热敏汉字微打使用手册容。
其接口分别如下图所示:说明:图中粗黑线条为短路块,当使用232电平时,T 接口接图所示插上短路块,R 接口为数据线接口;当使用TTL 电平时,R 接口闲置不用,T 接口为数据线接口。
接口引脚定义如下表所示:注: 1.“入”表示输入到打印机; 2.“出”表示从打印机输出2.2.2 修改波特率和通讯模式设置1、按SEL键不放手同时给打印机上电,打印机进入串口设置与打印方向设置状态,并打印出状态设置报告,2、此后,再按SEL键,打印机打印出串口状态设置报告,打印机进入串口设置状态。
3、进入串口设置状态后,由LF键设置切换打印机波特率,每按一次LF键即打印出串口设置状态报告,在1200、2400、4800、9600、和19200 B.P.S.内选择需要的波特率,出厂时设定波特率为9600 B.P.S.。
炜煌热敏汉字微打使用手册4、由SEL键切换设置串行口的工作方式,串行连接为方式1或方式3通信两种,出厂时设定工作方式1。
串行连接采用异步传输格式,如下图所示:串行口工作方式1:一帧信息为10位,1位起始位,8位数据位,1位停止位。
串行口工作方式3:一帧信息为11位,1位起始位,8位数据位,1位校验位,1位停止位。
5、修改完之后需要重新上电启动。
另附改变打印机打印浓度、打印方向的方法:●改变打印浓度操作1、按LF键不放手给打印机上电,打印机打印出打印浓度状态设置报告后,打印机进入打印浓度设置状态。
2、按SEL键,增量调整打印浓度,按LF键,减量调整打印浓度,得到自已满意的浓度后打印机重新上电●改变打印方向操作步骤1、按SEL键不放手同时给打印机上电,打印机进入串口设置与打印方向设置状态(并口打印机没有关于串口设置的提示),并打印出状态设置报告,2、此后,按LF键,打印机打印出打印方向设置报告,打印机进入打印方向设置状态。
3、按LF键,打印机正向打印,按SEL键,打印机反向打印。
得到想要的打印方向后,给打印机重新上电2.2.3 串口例程单片机控制打印机时汇编例程; 北京炜煌串口打印机示例程序; Nocky Tian; 2006-07-18BUSY EQU P3.0 ; 定义BUSY信号引脚ORG 0000HJMP startORG 30hstart: MOV DPTR, #print_contentMOV R2, #77 ; R2保存待打印数据的字节数LCALL SETUART ; 设置串口炜煌热敏汉字微打使用手册main: CLR AMOVC A, @A+DPTR ; 读出待打印字符MOV R0, ALCALL PRINTB ; 打印一个字节INC DPTRDJNZ R2, MAINMOV A, #0DHLCALL PRINTBSJMP $ ;打印结束无限循环;PRINTB子程序将累加器A中的一字节数据发送到打印机; 待发送数据通过R0传递PRINTB: PUSH ACCJB BUSY, $ ; 等待打印机到空闲JNB TI, $ ; 等到上一字节是否发送完,第一个字节发送前要手动置TI,见SETUART了函数CLR TIMOV A, R0 ; 保存待打印数据MOV SBUF, A ; 送数据到打印机POP ACCRET;设置串口子程序;不使用中断, 定时器1用作波特率发生器SETUART: MOV TMOD, #20H ;设置定时器T1工作模式3MOV TH1, #0FAHMOV TL1, #0FAH ; 设置波特率 9600bps @ 22.1184MHz SETB TR1 ; 启动定时器T1MOV SCON, #50H ; 设置串行口工作方式为异步串行口,模式1SETB TI ; 设置标志位,为发送数据作准备RET; 定义待打印数据内容; 保存在程序段print_content:DB '北京炜煌科技微型打印机', 0DH, 'MicroPrinter demo', 0DHDB '画线工具栏',0dhDB '-------------------------'END炜煌热敏汉字微打使用手册单片机C51例程#include <reg52.h>#define uchar unsigned charsbit BUSY=P3^0;// 定义一个发送字节数据到串口的函数void Print_Byte(uchar ch){while(BUSY){}SBUF=ch;while(!TI){}#include <REG52.H>TI=0;}//定义发送一个数组的数据到串口的函数void Print_Array(array,n)uchar array[];int n;{int i;for(i=0;i<n;i++)Print_Byte(array[i]);}//定义一个把字符串送到串口的函数void Print_String(uchar *str){while(*str){Print_Byte(*str++);}}void main(){int i;TMOD=0x20; // 定时器1工作于方式2SCON=0x40; // 串口工作于方式1TH1=0xfa; //装入初值,22.1184MHZ的晶振,9600的波特率TL1=0xfa;PCON=0x00; //波特率无倍增TR1=1; //开启定时器1开始工作Print_Byte(0x1C);炜煌热敏汉字微打使用手册Print_Byte(0x26);Print_Byte(0x00);Print_String("北京炜煌科技发展有限公司");Print_Byte(13);while(1);}2.3 电源连接本系列打印机采用DC 3.5V~9V 2A直流电源,电源插口如下图所示:说明:1接电源正极,2为空脚,3接电源负极。