美国黑人运动吉姆克罗法。
《绿皮书》背后的美国往事

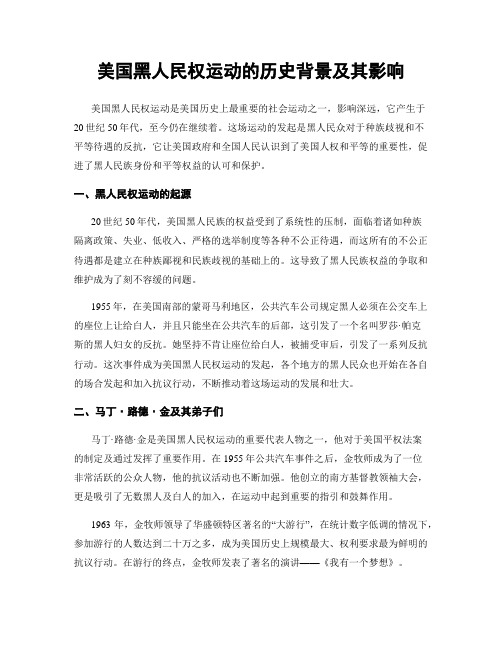
文化·CULTURE《绿皮书》背后的美国往事文|俞飞吉姆·克劳法究竟是怎样的法律?美国黑人如何掀起一波波民权抗争,赢得一场场动见观瞻的宪法官司,迎来第二次解放—1967年《民权法案》3月1日,一举斩获第91届奥斯卡最佳影片奖、最佳男配角奖、最佳原创剧本奖三个奖项的电影《绿皮书》,在国内上映。
这部豆瓣评分8.9分的电影,讲述了美国吉姆·克劳法(Jim Crow laws,俗称“种族隔离法”)废除前的1962年,美国南方种族隔离制度盛行,黑人钢琴家Don Shirley不得不雇用白人司机Tony Vallelonga,依赖一本“绿皮书”(the Green Book,黑人旅行指南),去南方巡回表演的故事。
绿皮书是什么?就是黑人专用的旅行手册。
20世纪五六十年代的美国,如果你是黑人,想在美国南部旅行,这本书几乎是必备。
它告诉你哪些餐厅和旅店是接待黑人的。
如果你不小心走错了,真有可能被打死。
“绿皮书”全名为“黑人旅游绿皮书”,最早为1936年纽约黑人邮递员维克多·雨果·格林个人出版。
别看加州现在这么包容,但在那个时候,许多餐厅都挂着侮辱性的牌子:黑人请进,如果你不怕我的枪。
类似的桥段在《绿皮书》中比比皆是。
当Don弹奏钢琴时,现场听众皆为白人,黑人仆从只能在窗外听。
当Don在庄园演奏完毕,想要上厕所,主任却表示他不能上客人用的厕所,而只能使用院子里一个简易棚子搭建的茅坑,那个时候在美国南方,黑人是明确不能和白人共用厕所的。
当Don去伯明翰的高档餐厅表演时,同样因为黑人身份,休64息室被安排在一间杂物间。
观影之余,许多观众不禁好奇:那是一个怎样的时期?南北战争已经过去了100年,为何美国南方仍然推行种族隔离制度?吉姆·克劳法究竟是怎样的法律?美国黑人如何掀起一波波民权抗争,赢得一场场动见观瞻的宪法官司,迎来第二次解放——1967年《民权法案》?吉姆·克劳法:荒谬的“隔离但平等”南北战争结束后,美国黑人获得解放了吗?没有。
美国黑人民权运动中的领袖及其思想

美国黑人民权运动中的领袖及其思想在美国历史上,黑人民权运动是一个重要的社会运动,它旨在为黑人争取平等、民主和自由的权利。
在这场社会运动中,一系列杰出的领袖们站了出来,他们奋发有为、顽强抗争,为黑人民权运动做出了重要贡献。
本文将介绍美国黑人民权运动中的一些重要领袖及其思想,其中涵盖了从20世纪初到20世纪中期这一时期。
一、杜波依斯 (W.E.B. Du Bois)杜波依斯是一个多产而杰出的黑人知识分子、约旦-墨尔顿奖获得者和社会活动家,他也是美国社会学的先驱者之一。
1903 年,他出版了《福音派(The Soulsof Black Folk)》一书,这是一本批判性的、反抗性的作品,对当时种族主义的社会和政治环境进行了揭露。
杜波依斯认为,黑人在美国社会中的地位卑微,不仅因为他们在经济上处于劣势和在教育上的落后,而且还因为种族歧视的存在使得他们不能获得应得的平等。
因此,他提出要采取一种积极的抗争方式,推动社会公义和民主原则的实现。
二、布卢姆 (James Weldon Johnson)布卢姆是一位作家、教育家和歌剧作曲家,他是黑人文学和艺术的创新者和积极推动者。
他曾担任国家协会的秘书长,也曾是纽约市文化委员会的成员,他深刻地体察到了“两种美国”的现实。
他认为,黑人社区不能仅抱怨种族歧视和贫困,还需通过艺术和文化的表现形式来提高其社会地位和尊严。
布卢姆相信,艺术是一种爱和创造力的表现,可以超越任何种族、阶级或道德上的差异。
他在他的作品中强调黑人文化的优点和独特性,同时也呼吁各个种族分享文化和艺术的乐趣和价值。
三、卡尔德威尔 (Mary McLeod Bethune)卡尔德威尔是美国历史上最著名的黑人女性之一,她曾经是总统的顾问,也是自由派的、民主的、福利主义的推动者。
她曾创办了一所贫穷的女子学校,这所学校给予了数千名黑女孩教育机会。
卡尔德威尔认为,教育是一种自由和机会,而不是一种特权。
她的信仰深深地根植在基督教的价值观之中,她相信人性的尊严和价值,主张要通过教育来传递爱和理解,提升人的尊严和自尊心。
美国民权运动

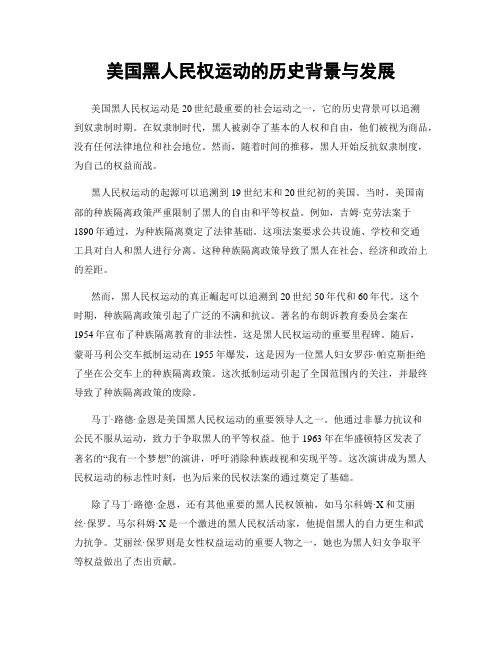
1955年12月1日,42岁的黑人 妇女、裁缝女工帕克 斯因拒绝在公共汽车上站起来为白人让座而被捕, 理由是蔑视当地关于公共汽车上实行种族隔离的法 规。由此引发了美国黑人民权运动风潮,开启了一 个整个种族为争取人权而抗争的时代。这最终导致 了1964年《联邦民权法案》的出台,该法案禁止公 共场合的种族歧视。帕克斯在黑人牧师马丁・路德 ・金的帮助下,从阿拉巴马州蒙哥马利市地方法院 打到美国联邦最高法院。这使路德・金成为美国黑 人民权运动领袖,帕克斯被尊称为“民权运动之 母”。
Rosa Parks has received numerous awards and tributes, including the NAACP‘s highest honor, the Spingarn Medal, in 1970 and the prestigious Martin Luther King, Jr. Award in 1980. Cleveland Avenue in the city of Montgomery was renamed Rosa Rosa Parks Boulevard in 1965. In 1996 U.S. president Bill Clinton awarded her the Presidential Medal of Freedom, the highest honor that the U.S. government can give to a civilian.
当时,亚拉巴马州实行吉姆·克劳法,这是一部对黑 人进行隔离、压制的种族歧视性法律。它规定黑人在 乘公交车、到餐厅以及其他公共设施时不能与白人坐 在一起。由于当时车上的人很多,司机要求罗莎·帕 克斯将座位让给一位白人男子,但她拒绝了。此后, 这个看似不起眼的“叛逆行为”发展成改变美国历史 进程的民权运动。罗莎·帕克斯自己回忆说:“那天 像平常日子一样,唯一使它 变得重要的是全体黑人的团 结。”底特律市市长基尔帕 特里克评价说:“她通过坐 下去而站了起来。”
吉姆克劳法案

吉姆克劳法案
这个形象成为了对黑人歧视的刻板印象典范,甚至也因此影响到了几代非裔美国人的命运。
吉姆克劳逐渐成为了对黑人的一种歧视性代称。
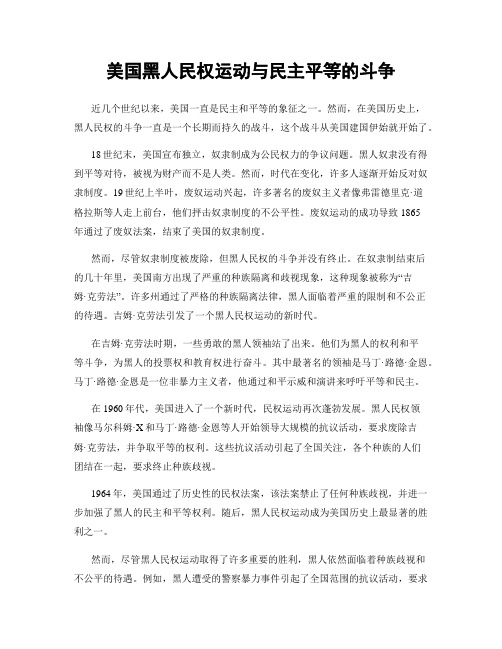
上世纪中期的种族隔离时代,黑人女性抗议“吉姆克劳必须失”。
不仅仅是歧视性代称,19世纪后期直到20世纪中叶,美国内战之后,美国诸多南方州制定了产生了大量的针对非裔美国人的种族隔离歧视性法案。
这些法案因此被统称为“吉姆克劳法”(jim crow laws)。
这些名为“吉姆克劳法”的法案是美国种族歧视制度的典范。
即使在林肯宣布废奴之后,这些法案仍旧是美国历史上相当黑暗的一面。
比如我们所熟知的“一滴血原则(one drop rule)”,即只要有一点黑人血统,就会被认为是有色人种;再比如在社会所有公共服务内,对白人和有色人种区别对待。
公交车、学校、铁路、餐厅、厕所、娱乐场所、乃至通婚等等,全面把有色人种隔离开来。
这些法规并不只是适用于非裔美国人,本土印第安人和亚洲移民,作为有色人种,同样也包含在被差别对待歧视之内。
没错,很多过去的华人移民也是“吉姆克劳法”的受害者(一处典型的种族隔离标牌,有色人种不能在同一处饮水,公共游泳池也只针对白人开放)直到二战结束后美国黑人民权运动兴起,最终在1964年约翰逊总统通过民权法案和1965年选举权法案通过,对美国少数族裔迫害了长达一个多世纪的“吉姆克劳法”,才
终于勉强结束。
持续了很长时间的“吉姆·克劳”这一黑人刻板印象,也彻底成为了历史。
美国黑人民权运动的领袖与策略

美国黑人民权运动的领袖与策略美国黑人民权运动是20世纪的一场重大社会运动,为黑人争取平等权益做出了巨大的贡献。
在这场运动中,出现了许多杰出的领袖和采取了多种策略,帮助推动了这一运动的进行。
本文将介绍几位美国黑人民权运动的领袖,并分析他们所采取的策略。
一、马丁·路德·金(Martin Luther King Jr.)马丁·路德·金是美国黑人民权运动的最重要的领袖之一。
他以非暴力和平抗议的方式争取平等权益,并通过演讲和写作向世界传递了他对平等和公正的追求。
马丁·路德·金的最著名演讲之一是1963年在华盛顿林肯纪念堂前的“我有一个梦想”演讲。
他运用了激情澎湃的演讲技巧,呼吁结束种族隔离和达成种族和谐。
他的努力最终导致了1964年通过的《民权法案》,对黑人权益进行了保护。
二、玛丽安娜·威廉姆斯(Marian Wright Edelman)玛丽安娜·威廉姆斯是美国非营利组织“儿童防务基金会”的创始人之一。
她致力于为贫困儿童和有色人种提供平等的教育和医疗资源,并在黑人民权运动中发挥了重要作用。
她倡导通过法律手段来保障儿童权益,提供平等的教育机会,并争取结束种族隔离。
玛丽安娜·威廉姆斯的努力为黑人儿童争取了更好的教育和医疗条件,并推动了种族平等的进程。
三、韦伯·尤金斯(Webb Eubank)韦伯·尤金斯是美国黑人青年领袖协会(SNCC)的一员,他在1960年代参与了数次非暴力抗议行动。
他通过静坐示威、游行和抗议活动来推动民权运动,并在抗议活动中遭受了警察的暴力镇压。
韦伯·尤金斯的活动鼓舞了许多其他黑人青年,激励他们投身于民权运动,并为平等权益进行斗争。
四、奥黛丽·洛丽(Audre Lorde)奥黛丽·洛丽是一位黑人女性作家和诗人,她在美国黑人民权运动中起到了重要的推动作用。
关于吉姆克劳法的书

关于吉姆克劳法的书吉姆·克劳法(Jim Crow)是指19世纪末至20世纪中叶的美国南部各州实施的一系列严格的种族隔离法律和制度。
这些法律和制度旨在剥夺非洲裔美国人的平等社会和政治权利,以及限制他们在公共场所活动和经济发展的自由。
吉姆·克劳法的实施对美国社会造成了严重的种族不平等,直到1954年布朗诉教育委员会案的胜利,这一制度才开始逐渐被废除。
吉姆·克劳法这个名称来源于扮演黑人角色时身穿夸张装束并使用贬低性亚裔美国人形象的白人演员托马斯·戈特瑟特的表演形象。
从1876年到1965年,虽然吉姆·克劳法没有一个具体的法律文书承认其存在,但这一时期美国南部的种族隔离制度已经广泛实行,并受到法律和制度的支持。
吉姆·克劳法的一项重要内容是对公共场所的种族隔离。
例如,各州规定了公共交通工具(如火车和巴士)、学校、图书馆、饭店、咖啡馆、剧院、游泳池等领域的种族隔离。
法律规定非洲裔美国人和白人必须在公共设施中分开,使用不同的出入口和设施,而且经常是非洲裔美国人使用的设施质量远远低于白人使用的设施。
此外,吉姆·克劳法还限制了非洲裔美国人在政治和法律领域的参与。
许多南方州创造了一系列法律,例如“智力测试”和“识字测试”,以限制非洲裔美国人的选举权和逃避他们的民主权利。
这些限制导致非洲裔美国人在选举中受到排斥,并被剥夺了获得公平待遇的机会。
吉姆·克劳法也对司法制度造成了巨大的不公正,常常看到对非洲裔美国人的偏见和不公正的判决。
吉姆·克劳法的实施对非洲裔美国人的生活有着深远的影响。
他们经历了严重的种族歧视和暴力,被迫生活在贫困、恐惧和不平等的环境中。
这种种族隔离和不平等的制度为社会不稳定和冲突埋下了种子,成为种族平等和社会正义的一个重要突破点。
尽管吉姆·克劳法在1950年代和1960年代的民权运动中被广泛抨击并在1965年通过《选民权法案》(Voting Rights Act)被废除,但它的影响仍然存在。
美国黑人民权运动的历史背景及其影响
美国黑人民权运动的历史背景及其影响美国黑人民权运动是美国历史上最重要的社会运动之一,影响深远,它产生于20世纪50年代,至今仍在继续着。
这场运动的发起是黑人民众对于种族歧视和不平等待遇的反抗,它让美国政府和全国人民认识到了美国人权和平等的重要性,促进了黑人民族身份和平等权益的认可和保护。
一、黑人民权运动的起源20世纪50年代,美国黑人民族的权益受到了系统性的压制,面临着诸如种族隔离政策、失业、低收入、严格的选举制度等各种不公正待遇,而这所有的不公正待遇都是建立在种族鄙视和民族歧视的基础上的。
这导致了黑人民族权益的争取和维护成为了刻不容缓的问题。
1955年,在美国南部的蒙哥马利地区,公共汽车公司规定黑人必须在公交车上的座位上让给白人,并且只能坐在公共汽车的后部,这引发了一个名叫罗莎·帕克斯的黑人妇女的反抗。
她坚持不肯让座位给白人,被捕受审后,引发了一系列反抗行动。
这次事件成为美国黑人民权运动的发起,各个地方的黑人民众也开始在各自的场合发起和加入抗议行动,不断推动着这场运动的发展和壮大。
二、马丁·路德·金及其弟子们马丁·路德·金是美国黑人民权运动的重要代表人物之一,他对于美国平权法案的制定及通过发挥了重要作用。
在1955年公共汽车事件之后,金牧师成为了一位非常活跃的公众人物,他的抗议活动也不断加强。
他创立的南方基督教领袖大会,更是吸引了无数黑人及白人的加入,在运动中起到重要的指引和鼓舞作用。
1963年,金牧师领导了华盛顿特区著名的“大游行”,在统计数字低调的情况下,参加游行的人数达到二十万之多,成为美国历史上规模最大、权利要求最为鲜明的抗议行动。
在游行的终点,金牧师发表了著名的演讲——《我有一个梦想》。
该演讲站在了美国宪法和二十世纪民族歧视的伦理沟壑之间,它用强有力的语言和威仪表达了对真正平等的祈求。
九十天后,约翰·肯尼迪总统在美国国会发表演说,宣布美国将拥有一项新的历史遗产,即立法废止种族隔离的政策。
美国黑人民权运动的历史背景与发展
美国黑人民权运动的历史背景与发展美国黑人民权运动是20世纪最重要的社会运动之一,它的历史背景可以追溯到奴隶制时期。
在奴隶制时代,黑人被剥夺了基本的人权和自由,他们被视为商品,没有任何法律地位和社会地位。
然而,随着时间的推移,黑人开始反抗奴隶制度,为自己的权益而战。
黑人民权运动的起源可以追溯到19世纪末和20世纪初的美国。
当时,美国南部的种族隔离政策严重限制了黑人的自由和平等权益。
例如,吉姆·克劳法案于1890年通过,为种族隔离奠定了法律基础。
这项法案要求公共设施、学校和交通工具对白人和黑人进行分离。
这种种族隔离政策导致了黑人在社会、经济和政治上的差距。
然而,黑人民权运动的真正崛起可以追溯到20世纪50年代和60年代。
这个时期,种族隔离政策引起了广泛的不满和抗议。
著名的布朗诉教育委员会案在1954年宣布了种族隔离教育的非法性,这是黑人民权运动的重要里程碑。
随后,蒙哥马利公交车抵制运动在1955年爆发,这是因为一位黑人妇女罗莎·帕克斯拒绝了坐在公交车上的种族隔离政策。
这次抵制运动引起了全国范围内的关注,并最终导致了种族隔离政策的废除。
马丁·路德·金恩是美国黑人民权运动的重要领导人之一。
他通过非暴力抗议和公民不服从运动,致力于争取黑人的平等权益。
他于1963年在华盛顿特区发表了著名的“我有一个梦想”的演讲,呼吁消除种族歧视和实现平等。
这次演讲成为黑人民权运动的标志性时刻,也为后来的民权法案的通过奠定了基础。
除了马丁·路德·金恩,还有其他重要的黑人民权领袖,如马尔科姆·X和艾丽丝·保罗。
马尔科姆·X是一个激进的黑人民权活动家,他提倡黑人的自力更生和武力抗争。
艾丽丝·保罗则是女性权益运动的重要人物之一,她也为黑人妇女争取平等权益做出了杰出贡献。
黑人民权运动的影响不仅仅局限于美国国内,它对全球范围内的民权运动产生了深远影响。
美国黑人解放运动的历史演变

美国黑人解放运动的历史演变20世纪60年代,是美国黑人解放运动的高峰期。
自从1865年奴隶制度被废除以来,美国的黑人仍然面临着严重的种族歧视和社会不公平待遇。
在这种背景下,黑人领袖和支持者们开始了一场不懈的斗争。
经过长时间的努力和牺牲,美国的黑人最终获得了自由、平等和尊严。
黑人解放运动的历史演变可以分为三个时期:赤手空拳的斗争时期、法律诉讼期和直接行动时期。
1. 赤手空拳的斗争时期自从废奴令颁布以来,黑人们一直处于弱势地位,他们遭受着各种种族歧视和暴力。
在20世纪初期,维吉尔·格鲁夫、马库斯·加维和W·E·B·杜波依斯等人开始倡导黑人自力更生和民权。
他们号召黑人们摆脱对白人的依赖,自己赚钱、学习和参与政治。
但这个时期最有代表性的黑人解放运动领袖是纳博科夫和格林斯伯勒。
他们成立了全美进步协会和玫瑰伯格运动,试图通过教育和道德上的改变来推动社会变革。
他们拒绝了使用暴力来谋求权利,相信自由和平的斗争方式最终会获得成功。
2. 法律诉讼期1930年代和1940年代,黑人解放运动的策略发生了重大变化。
黑人领袖将战争转向法律领域,通过起诉国家机构和私人企业来争取自己的权利。
在这个时期,NAACP这样的组织在法律诉讼的领域中起到了重要作用。
在20世纪50年代,NAACP着重于通过起诉来废除法律上的种族隔离,特别是在教育和公共交通等领域。
该组织赢得了一些重要的宪法案件,比如布朗诉教育委员会案和公交车座位事件。
通过这些法律胜利,黑人们获得了一些平等和尊严。
3. 直接行动时期60年代初期,黑人解放运动进入了另一个时期,即直接行动时期。
这个时期最著名的领袖是马丁·路德·金,他认为电击和崇高的理念都已经失效了。
他鼓励人们采取更直接的方式,例如罢工、抵制和集会等非暴力抗议活动。
在这个时期,金牧师领导了蒙哥马利公交车抵制运动和华盛顿抗议活动。
这些活动吸引了国内外媒体的关注,促使政策制定者作出了重要的改变。
评20世纪初的美国黑人运动

评20世纪初的美国黑人运动20世纪初的美国黑人运动是一个突破性的运动,这个运动通常被称为“黑人民权运动”或“黑人自由运动”。
它始于20世纪早期,旨在对抗种族歧视和黑人的不平等待遇,争取平等的社会地位和人权。
在运动的早期,黑人社区团结在一起,呼吁公正的法律和机会。
这一时期最有影响力的领袖是W.E.B. Du Bois和Booker T. Washington。
Du Bois提倡通过提高黑人的教育水平、打破种族隔离和反对种族主义来争取平等和公正。
而华盛顿则强调通过勤奋、节俭和逐渐适应白人社会来获得平等的机会。
在20世纪20年代和30年代,黑人社区对种族隔离和民权剥夺的抗议达到了高峰。
自1920年代起,一个新的领袖出现了:马丁·路德·金。
金通过非暴力抵抗来争取自由和平等,他的理念深受广大群众的认同,并在全国范围内引起了广泛的关注。
另一个对抗种族歧视的组织是美国国民协会。
它成立于1909年,旨在彻底消除美国的种族隔离。
该组织通过长期的努力,在1964年的民权法案中发挥了重要作用。
在20世纪60年代,黑人民权运动团结一致,发动了多次具有历史意义的示威活动,例如非暴力的游行和抵制,以及宣传和运动的示威,都得到了广泛关注和支持。
这场运动也吸引了不少白人的支持者,他们认为黑人应该享有平等的权利和机会。
在历经了几十年的奋斗之后,黑人社区逐渐取得了重大的社会进步,包括1964年通过的民权法案和1965年通过的选举权法案,它们为黑人争取了平等的权利和机会。
虽然仍然存在着种族歧视和不平等待遇,但黑人们通过自己的努力和团结,为自己的人权斗争维权争得了底气。
总之,20世纪初的美国黑人运动是一个重要的历史时期,这场运动没有仅仅是黑人社区内部的斗争,而是在全国范围内取得了巨大的影响。
这场运动奠定了人权和平等的基础,揭示了不平等问题的深刻本质,并为未来的民权斗争奠定了基石。
美国黑人的解放之路

美国黑人的解放之路2012年04月28日瞭望东方周刊马克思高度评价林肯:“他不屈不挠地迈向自己的伟大目标??他是一位达到了伟大境界而仍然保持自己的优良品质的罕有人物,这位出类拔萃和道德高尚的人竟是那样谦虚??”文|【美】庞忠甲【加】陈思进18世纪末叶,在英国首先发轫工业革命,随即遍及法国、比利时、德国等西欧国家。
美国虽然远隔重洋,但以欧裔新教徒为主的成分背景,加上有利的人文和自然环境条件,很快就跟上了工业化的脚步。
美国立国之时,国家经济以农业为主,手工业和商业为辅。
进入19世纪中期,美国北部发展工业资本主义经济较快,而温暖湿润的南方仍以种植园经济为主。
新旧经济体系之间必然产生矛盾和斗争。
北方需要扩大自由雇工劳动力来源,倾向于废除不人道、反人权的奴隶制度,并主张采行保护关税政策,以促进本国工业的发展。
南方则视奴隶制度为生命线,并力主实行低关税政策,以利低价购买工业制品。
随着美国获得西部的大片领土,成立新的州,就不断发生容许或禁止奴隶制存在的斗争。
关于奴隶制的争论,几乎涉及政治、经济、宗教、道德一切领域,成为美国政治挥之不去的浓重阴影。
美国南北双方奉行的政策不同,使得宗教界也面临严峻的考验。
北方教会不断设法通过对《圣经》的诠释对解放黑奴加以辩护。
南方教会一些领袖使用加尔文宗神学为奴隶制强辩。
美国最早起来批评奴隶制的是宗教界人士,其后开国元勋中也有人主张限制和废除奴隶制。
但那时尚限于个人行为,没有形成运动。
随着北方工业资本主义日益强大,奴隶制问题越来越引起社会骚动不安,废奴斗争从原来的分散活动逐渐发展成为社会团体的有组织的行动。
1833年,废奴主义者成立反对奴隶制协会,其纲领指出:“奴隶制度是同客观正义、共和制度以及基督教教义相对立的。
”废奴主义者和黑人奴隶采取了从舆论宣传到暴力抗争各种形式进行斗争。
1859年,白人废奴主义者约翰·布朗(JohnBrown,1800-1859)领导武装起义,试图在全国推翻奴隶制,遭到镇压并被处绞刑。
美国黑人民权运动

美国黑人民权运动美国黑人民权运动,又称美国民权运动,是指20世纪中后期,黑人为争取平等权利与民主自由所展开的一系列社会运动。
这一运动起源于美国南方的种族歧视和种族隔离制度,经过多年的斗争,最终促成了美国民权法案的颁布,实现了黑人在法律上的平等地位。
历史背景美国民权运动起源于19世纪末和20世纪初,当时美国南方的黑人受到严重的种族歧视和种族隔离制度的限制。
这些制度导致黑人在教育、就业、政治参与等方面受到不公平待遇,无法享有与白人相同的权利和机会。
随着黑人对平等权利的要求越来越强烈,黑人领袖和社会运动人士开始组织抗议行动,争取民权的公正和平等。
运动发展20世纪50年代和60年代,美国黑人民权运动进入了高潮阶段。
著名的黑人领袖马丁·路德·金恩以非暴力抗议为主导,领导了蒙哥马利公共汽车抵制和“华盛顿大游行”等活动,引起了全美国的关注和支持。
同时,黑人民权组织如南方基督教领袖会议(SCLC)、全国有色人种协进会(NAACP)等也起到了重要作用,帮助黑人争取平等权利。
法案通过美国政府在经历了多次社会动荡和示威之后,终于颁布了一系列民权法案,保障了黑人的平等地位。
其中最具有里程碑意义的是1964年通过的《公民权法案》和1965年通过的《选举权法案》,这两部法律取消了对黑人的种族歧视和投票权限制,为美国的民权运动作出了重大贡献。
影响美国黑人民权运动不仅在法律层面上取得了胜利,更深刻地改变了美国社会的种族关系和价值观念。
这次运动为其他少数民族和弱势群体争取权利提供了重要的范例和启示,推动了美国社会的多元化和包容性发展。
同时,黑人领袖们的非暴力抗议和坚定意志也影响了全世界,成为了国际民权运动的典范。
结语20世纪60年代的美国黑人民权运动是一次具有重大历史意义的社会运动,它为黑人争取平等权利的斗争树立了光辉的一页。
这次运动的成功背后,是无数黑人领袖和普通民众的不懈努力和牺牲奉献,他们的精神将激励后人继续走向平等、公正和和谐的未来。
第九章 非洲裔美国人ppt课件

种族等级制:吉姆· 克劳时代
《汤姆叔叔的小屋》 与废奴声再起 林肯就职与南北战争
战争结束后,奴隶制被废除。
1865-1877的战后重建时期,标志着白人与黑人 的父权式关系的结束,二者之间的竞争关系正式形 成。
获得了选举权的黑人,又面临了什么?
处于全盛发展时期的种族主义意识形态,助长了美国南北方的这种 种族隔离制度
黑人领袖们的努力
北向迁移
布克· 华盛顿:自力更 生,自主创业。 杜波依斯:武装反抗 ,白人接纳
整合or 分割?这是一 个问题
20世纪以后,大量黑 人劳工从南方迁移到 北方,种族歧视,种 族隔离成为了全国性 的现象。 1877年重建时代结束 一直到20世纪40年代 黑人和白人形成了有 限的竞争
奴隶
等级 流动的竞争:现代时期
种族
今日黑人人口状况
奴隶制:父权式统治
从仆人到奴隶 选定黑人:
利益的驱使 黑人的肤色特征,和截然不同的宗教信仰(差 异感) 松散的体制,没有可依靠的组织
种族主义意识形态的发展
从19世纪30年代初开始在美国北部兴起的要求彻 底废除黑人奴隶制的群众运动。早在殖民时代和独立
种族隔离的发展
“隔离但平等”一个 实例——教育隔离 建立一套规范制度— —白人不能与黑人握 手,称呼 三K党的暴力维持
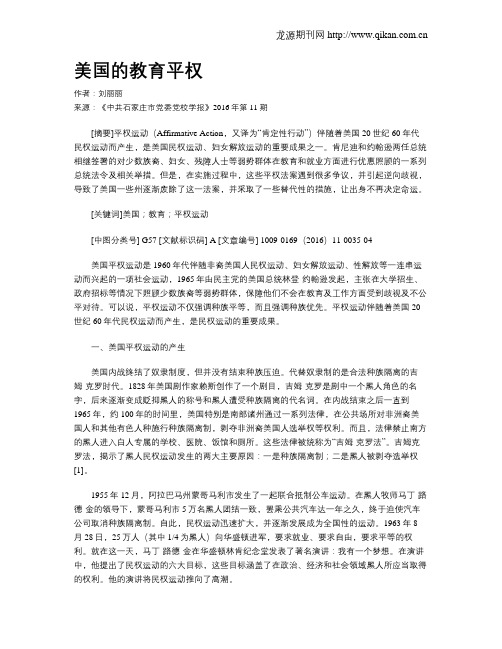
1892年6月7日,具有八分之一黑人血统的 荷马· 普莱西(Homer A. Plessy)故意登上 东路易斯安那铁路的一辆专为白人服务的列 车,根据路易斯安那州1890年通过的相关 法律,白人和有色种族必须乘坐平等但隔离 的车厢。根据该条法律,普莱西被认定为“ 有色种族”,遭到逮捕和关押。于是他将路 易斯安那州政府告上法庭,指责其侵犯了自 己根据美国宪法第13、14两条修正案而享 有的权利。但是法官约翰· 霍华德· 弗格森( John Howard Ferguson)裁决州政府有权 在州境内执行该法,普莱西最终败诉,以违 反隔离法为名被判处罚金300美元。普莱西 接着向路易斯安那州最高法院控告弗格森法 官的裁决,但该法院维持了弗格森的原判。 结论 1896年,普莱西上诉至美国最高法院。5月 18日,最高法院以7:1的多数裁决:路易 斯安那州的法律并不违反宪法第13和第14 修正案,因为“隔离但平等”并不意味着对 黑人的歧视,而只是确认白人和黑人之间由 于肤色不同而形成差别。
评20世纪初的美国黑人运动

评20世纪初的美国黑人运动20世纪初的美国黑人运动是美国历史上一段重要的社会运动,旨在争取黑人的平等权利和废除种族隔离政策。
这一运动在维权斗争、思想解放和社区组织方面都取得了显著进展,为后来的民权运动奠定了基础。
20世纪初,美国黑人社群仍然面临着严重的种族隔离和歧视。
南方各州实行了被称为“吉姆·克劳法”的法律,剥夺了黑人的选举权和公民权。
黑人被限制在贫困的住区里,接受低收入和低质量的教育,并遭受着经济和社会上的不平等待遇。
面对这种不公正和歧视,黑人社群开始组织起来寻求变革。
1905年,尼古拉斯·布雷斯福特创办了著名的“尼格罗独立学校”,为黑人提供了一种独立的教育方式。
这一举动鼓舞了其他黑人社区的建设,激发了黑人群体的骄傲和自信。
一些黑人领袖也开始在全国范围内提倡黑人权益。
著名的黑人记者和作家伯纳德·巴鲁克创办了《危险与机遇》杂志,通过文字和图像揭示了当时黑人所面临的困境。
他还组织了一系列的讲座和研讨会,唤起了广大黑人群众的觉醒和意识。
另一位杰出的黑人领袖是W.E.B.杜波依斯,他于1909年成立了全国有色人种进步协会(NAACP),致力于争取黑人的合法权利和废除种族歧视。
该组织努力推进了一系列的法律合理化活动,包括提起一系列诉讼挑战种族分离政策,并斥责了南方发生的种族主义暴力事件。
20世纪初的美国黑人运动还鼓励了黑人的自我教育和自我解放。
布兰顿·多德森创建了黑人历史协会,致力于记录、研究和传递黑人历史和文化。
许多黑人学者和艺术家也开始崛起,用自己的才华和创造力为黑人争取平等权利。
黑人文学和音乐迅速发展,产生了许多具有影响力的作品和艺术家。
20世纪初的美国黑人运动也面临了巨大的阻力。
1920年代,肃清时期的爆发带来了一波强烈的种族主义浪潮,在一些南方州恢复了种族隔离政策。
黑人领袖之间也存在分歧和争议,如杜波依斯和马库斯·加维争论的问题。
20世纪初的美国黑人运动为美国民权运动奠定了基础。
美国黑人民权运动与民主平等的斗争
美国黑人民权运动与民主平等的斗争近几个世纪以来,美国一直是民主和平等的象征之一。
然而,在美国历史上,黑人民权的斗争一直是一个长期而持久的战斗,这个战斗从美国建国伊始就开始了。
18世纪末,美国宣布独立,奴隶制成为公民权力的争议问题。
黑人奴隶没有得到平等对待,被视为财产而不是人类。
然而,时代在变化,许多人逐渐开始反对奴隶制度。
19世纪上半叶,废奴运动兴起,许多著名的废奴主义者像弗雷德里克·道格拉斯等人走上前台,他们抨击奴隶制度的不公平性。
废奴运动的成功导致1865年通过了废奴法案,结束了美国的奴隶制度。
然而,尽管奴隶制度被废除,但黑人民权的斗争并没有终止。
在奴隶制结束后的几十年里,美国南方出现了严重的种族隔离和歧视现象,这种现象被称为“吉姆·克劳法”。
许多州通过了严格的种族隔离法律,黑人面临着严重的限制和不公正的待遇。
吉姆·克劳法引发了一个黑人民权运动的新时代。
在吉姆·克劳法时期,一些勇敢的黑人领袖站了出来。
他们为黑人的权利和平等斗争,为黑人的投票权和教育权进行奋斗。
其中最著名的领袖是马丁·路德·金恩。
马丁·路德·金恩是一位非暴力主义者,他通过和平示威和演讲来呼吁平等和民主。
在1960年代,美国进入了一个新时代,民权运动再次蓬勃发展。
黑人民权领袖像马尔科姆·X和马丁·路德·金恩等人开始领导大规模的抗议活动,要求废除吉姆·克劳法,并争取平等的权利。
这些抗议活动引起了全国关注,各个种族的人们团结在一起,要求终止种族歧视。
1964年,美国通过了历史性的民权法案,该法案禁止了任何种族歧视,并进一步加强了黑人的民主和平等权利。
随后,黑人民权运动成为美国历史上最显著的胜利之一。
然而,尽管黑人民权运动取得了许多重要的胜利,黑人依然面临着种族歧视和不公平的待遇。
例如,黑人遭受的警察暴力事件引起了全国范围的抗议活动,要求终止针对黑人的暴力行为。
美国黑人民权运动的历史事件时间轴

美国黑人民权运动的历史事件时间轴(注意:本文所陈述的历史事件是根据实际发生顺序排列,并非按照时间轴的形式呈现。
)美国黑人民权运动是二十世纪美国历史上一场具有重要意义的社会运动,旨在争取黑人平等权益、消除种族隔离以及废除种族歧视。
以下是一份关于美国黑人民权运动历史事件的时间轴:美国黑人解放宣言(1863年):美国总统林肯签署了黑人解放宣言,宣布在南北战争中解放所有被奴役的黑人。
美国宪法第十三修正案(1865年):该修正案宣布废除奴隶制度,为黑人争取了基本的自由权利。
重建时期(1865-1877年):重建时期是南北战争结束后的一个时期,该时期内通过了一系列的法律,试图为黑人提供公民权利和政治平等。
五十年代布朗诉托皮卡教育案(1954年):美国最高法院裁定种族隔离教育制度违宪,为黑人争取到了平等的教育权益。
1955年蒙哥马利公交车抵制运动:著名黑人民权活动家罗莎·帕克斯拒绝在公交车上让座给白人,引发了全国性的抵制运动。
1963年华盛顿大游行:亨利·路易斯带领二十多万人参加这次历史性的抗议活动,演讲家马丁·路德·金发表了他的著名演讲《我有一个梦想》。
1964年民权法案通过:该法案禁止在公共场所进行种族隔离,提供了对黑人的平等保护,同时也为民权运动提供了重要法律支持。
萨利·海蒂·贝尔格案(1965年):这起案件为黑人争取到了选举权,通过颁布禁止对黑人进行选民登记的歧视性法律来确保黑人能够参与选举。
1968年马丁·路德·金遇刺:在田纳西州孟菲斯市,马丁·路德·金被刺身亡,引发了全国范围的哀悼和愤怒,进一步推动了民权运动。
美国第二次重建时期(1969-1974年):这个时期见证了进一步的民权法案通过,为黑人争取了更多的权益和机会。
奥巴马当选总统(2008年):巴拉克·奥巴马成为美国历史上第一位黑人总统,被普遍视为黑人民权运动取得的重要成果。
美国民权运动的起源和意义研究

美国民权运动的起源和意义研究美国历史上的民权运动是指黑人和其他少数族裔在追求平等权利方面所面对的长期斗争。
这一运动起源于美国南方的种族隔离制度,也称为“吉姆·克劳法时期”(Jim Crow Era),并一直延续到二十世纪后期,对美国社会和政治产生了深远的影响。
一、种族隔离制度和吉姆·克劳法时期在美国南部,种族隔离制度始于19世纪末,由于该地区的农业经济主要依赖黑人奴隶制度,南方政治家采取了一系列歧视措施来抵制黑人的政治和经济权利,这些措施被称为种族隔离制度。
1876年,民主党在南部州赢得了大选,黑人选民的权利遭到了先前被认为已经确立的压制。
1877年,吉姆·克劳法被制定出来,它是南部种族隔离制度时期最标志性的法律之一。
这项法律旨在保护白人的地位和权力。
这样的制度代表了极端的歧视和压迫,黑人在其中受到了各种各样的不公正对待,包括投票权被剥夺、公共场所和学校中的种族隔离、工作机会的歧视等等。
二、民权运动的崛起美国民权运动的首要支持者是黑人人权活动家,他们抗议暴力和种族隔离,并在种种限制下进行组织、行动和政治倡导。
随着二战时期工业和技术的进步,黑人消费者和工人变得更加有力,并且在20世纪50年代中期,民权运动开始进入全面发展时期。
在20世纪50年代初期,美国最高法院通过了历史性裁决布朗诉教育委员会案(Brown v. Board of Education),宣判了种族隔离政策在公立学校中的违宪性。
此举激发了一系列民权抗议和行动,为黑人争取平等权利打下了基础。
其中,马丁·路德·金恩,作为民权运动中最受欢迎的领袖之一,组织了许多类似游行、座谈会、公民不服从等活动,以表达他们的要求。
在1963年8月28日,他在华盛顿林肯纪念堂前的演讲中,描述了一个公正的美国梦的愿景,并呼吁结束种族隔离和歧视。
这次演讲被称为“我有一个梦想”的演讲,并成为美国民权运动的高峰之一。
美国的教育平权
美国的教育平权作者:刘丽丽来源:《中共石家庄市党委党校学报》2016年第11期[摘要]平权运动(Affirmative Action,又译为“肯定性行动”)伴随着美国20世纪60年代民权运动而产生,是美国民权运动、妇女解放运动的重要成果之一。
肯尼迪和约翰逊两任总统相继签署的对少数族裔、妇女、残障人士等弱势群体在教育和就业方面进行优惠照顾的一系列总统法令及相关举措。
但是,在实施过程中,这些平权法案遇到很多争议,并引起逆向歧视,导致了美国一些州逐渐废除了这一法案,并采取了一些替代性的措施,让出身不再决定命运。
[关键词]美国;教育;平权运动[中图分类号] G57 [文献标识码] A [文章编号] 1009-0169(2016)11-0035-04美国平权运动是1960年代伴随非裔美国人民权运动、妇女解放运动、性解放等一连串运动而兴起的一项社会运动,1965年由民主党的美国总统林登·约翰逊发起,主张在大学招生、政府招标等情况下照顾少数族裔等弱势群体,保障他们不会在教育及工作方面受到歧视及不公平对待。
可以说,平权运动不仅强调种族平等,而且强调种族优先。
平权运动伴随着美国20世纪60年代民权运动而产生,是民权运动的重要成果。
一、美国平权运动的产生美国内战终结了奴隶制度,但并没有结束种族压迫。
代替奴隶制的是合法种族隔离的吉姆·克罗时代。
1828年美国剧作家赖斯创作了一个剧目,吉姆·克罗是剧中一个黑人角色的名字,后来逐渐变成贬抑黑人的称号和黑人遭受种族隔离的代名词。
在内战结束之后一直到1965年,约100年的时间里,美国特别是南部诸州通过一系列法律,在公共场所对非洲裔美国人和其他有色人种施行种族隔离制,剥夺非洲裔美国人选举权等权利。
而且,法律禁止南方的黑人进入白人专属的学校、医院、饭馆和厕所。
这些法律被统称为“吉姆·克罗法”。
吉姆克罗法,揭示了黑人民权运动发生的两大主要原因:一是种族隔离制;二是黑人被剥夺选举权[1]。
有对这些道德理据中使用的概念进行...
肯定性行动的合法性争论 _ 赞成与反对论文摘要肯定性行动是美国政治社会生活中的重要组成部分, 它影响着个人的教育机会和就业机会,从而可能极大地改变个人的生活前景。
关于肯定性行动的发展、辩护和论证是同时沿着两条道路进行的。
一条道路是法律的和行政的, 这条道路主要是法院、立法机关、政府的行政部门制定和实施包含肯定性行动的法规。
另一条道路则是公共辩论, 优惠措施的实践导致了大量文献的产生, 这些文献既有赞成的也有反对的。
因此, 本文的主要内容也相应地包括这两部分。
第一部分是对与肯定性行动相关的司法判决、民权立法和行政命令做一个历史的叙述。
第二部分是论述在不同时期的公共辩论中赞成与反对的双方所运用的道德理据, 并且详细分析这些道德理据的优点和内在缺陷。
具体来看, 本文分为四章。
第一章叙述了肯定性行动的历史背景和具体的实施情况,主要包括吉姆?克劳法的实施与废除、民权法案的制定过程和民权法案之后肯定性行动的实施情况。
其余的三章主要关注肯定性行动公共辩论的三个阶段中所运用的不同道德理据。
第二章展现了公共辩论第一个阶段(二十世纪70年代) ,这个阶段中辩论的焦点在于补偿正义与应得观念之间的冲突。
第三章转向了公共辩论的第二个阶段(二十世纪 70 年代末到二十世纪 90 年代末) ,这个阶段更关注机会平等的观念, 以及由贝基案引发的关于宪法平等的争论。
第四章介绍了公共辩论的第三个阶段 (二十世纪 90 年代末至今) , 这个阶段主要聚焦于多样性和种族融合这两种工具性论证。
关键词:肯定性行动补偿正义应得平等多样性种族融合 ABSTRACTAs an important part of American political and social life, affirmative actionaffect the individual's educational and employment opportunities which coulddramatically change the life prospects of individuals. Thedevelopment, contestationand justification of affirmative action have proceeded along two paths. One has beenlegal and administrative as courts, legislatures, and executive departments ofgovernment have made and applied rules requiring affirmative action. The other hasbeen the path of public debate, where the practice of preferential treatment hasproduced a vast literature, for and against. The main content of this article includestwo parts accordingly. The first part is a historical narrative about judicial decisions,civil rights legislation and executive orders associated with affirmative action. Thesecond part is a detailed analysis of advantages and shortcomings of rationales used atdifferent times of public debateThe first chapter describes the historical background and implementation ofaffirmative action, including the implementation and abolition of Jim Crow laws, thedevelopment of civil rights bill and the implementation ofaffirmative action. Theremaining three chapters focused on the rationales for affirmative action in publicdebate during three stages. Chapter II illustrates the first stage of public debate 1970swhich focuses on the conflict between the conception of compensatory justice anddesert. Chapter III turns to the second phase of public debate from late 1970s to late1990s which is more concerned about the conception of equality of opportunity andthe meaning of constitutional equality after Bakke Case. Chapter IV describes thethird phase of public debate from late 1990s to present which mainly focuses on twoinstrumental arguments, that is, diversity and integrationKeywords: Affirmative Action; Compensatory justice; Desert; Equality;Diversity; Integration 目录导言:肯定性行动研究综述.1一、国外研究综述.1二、国内研究综述.2第一章肯定性行动的历史背景与实施情况..4第一节吉姆?克劳法的实施与废除:从南方重建到布朗案..4第二节民权法案的制定:艾森豪威尔、肯尼迪与约翰逊.8第三节肯定性行动的实施情况:从尼克松到小布什.11第二章补偿正义与应得..17第一节肯定性行动公共辩论的兴起..17第二节补偿正义:谁得到补偿,谁提供补偿?18第三节应得:绩效主义与补偿正义..22第四节“没有人应得他/ 她的天赋”.27第三章机会平等与宪法平等30第一节机会平等:形式的还是实质的?30第二节种族划分: “恶意的”与“善意的”34第三节宪法平等的阐释与平等原则的论证..38第四章多样性与种族融合.43第一节多样性:作为促进迫切的国家利益的手段..43第二节种族融合:作为实现其他重要价值的手段..47结语52附录 :译名对照表54参考文献.57后记61 华东师范大学硕士学位论文肯定性行动的合法性争论:赞成与反对导言:肯定性行动研究综述“肯定性行动” (affirmative action ) ,也译作“平权措施” ,指的是自二十世纪六、七十年代以来美国政府采取一些积极措施, 以增加历史上由于种族或性别因素而受到排斥的少数群体在就业、教育和经济领域的比例。
美国南部种族问题的反思:《杀死一只知更鸟》

美国南部种族问题的反思:《杀死一只知更鸟》引言《杀死一只知更鸟》是美国作家哈珀·李的经典小说,出版于1960年。
这部小说通过描绘20世纪30年代美国南部一个小镇的故事,深刻地反映了当时南部社会存在的极度不平等和种族歧视。
本文将对该小说中所呈现的美国南部种族问题进行反思。
南方社会背景在介绍《杀死一只知更鸟》中的种族问题之前,我们需要了解当时美国南部社会的背景。
20世纪初至中期,南方州份实行了种族隔离政策,即所谓的“吉姆·克劳法”。
这些法律使黑人与白人在社交、教育、就业等领域受到明显区别待遇。
小说情节概述《杀死一只知更鸟》以第一人称叙事者斯卡特·芬奇(Scout Finch)为主角,讲述了她和哥哥朱迪在亚拉巴马州玛科姆镇成长过程中发生的事情。
故事主要围绕着他们父亲阿提克斯(Atticus Finch)的一桩官司展开,他代表一位黑人被指控强奸白人女子。
小说通过这个官司,呈现了美国南部种族问题的方方面面。
种族不公正的揭示小说中,作者通过描写阿提克斯为黑人辩护的过程以及对审判过程和陪审团的批评,揭示了南部法治体系中根深蒂固的种族不公正。
尽管证据清楚地表明被告是无辜的,但由于种族偏见和社会压力,法庭仍然对其做出了不公平的verdict。
孩子们的视角和反思小说通过孩子们对周围事件和人物的观察,传达出对种族问题的纯真和无知所引发的纠结情感。
斯卡特和朱迪在成长过程中逐渐认识到自己生活在一个充满错综复杂种族问题的社会里,并开始质疑和反思这些不公正。
公民权利运动与改变借助历史背景,在小说发布后不久就发生了60年代初期的美国公民权利运动,这一运动的目标是消除种族隔离和对黑人的不平等待遇。
这一时期的社会变革进一步加速了人们对种族问题反思和改变。
结论《杀死一只知更鸟》呈现了20世纪30年代美国南部种族问题的复杂性。
通过小说中深入细致的描写和孩子们无邪眼睛背后蕴含的启示,读者可以获得值得深思和反思的经验教训。
- 1、下载文档前请自行甄别文档内容的完整性,平台不提供额外的编辑、内容补充、找答案等附加服务。
- 2、"仅部分预览"的文档,不可在线预览部分如存在完整性等问题,可反馈申请退款(可完整预览的文档不适用该条件!)。
- 3、如文档侵犯您的权益,请联系客服反馈,我们会尽快为您处理(人工客服工作时间:9:00-18:30)。
English 10
Jim Crow Presentation
You will work in groups of 3 or 4. You will choose 2 Jim Crow Laws, one Jim Crow Profile, and one Jim Crow Event to research and present to class. The links to the web sites you will go to for your information are listed below. You will search Google Images to find pictures to go in a Power Point project that will be part of your presentation.
Step 1: Set up your folders
Choose two of your group members whose SFUSD accounts you will use to you’re your research, pictures and the Power Point project. Make sure these are reliable students.
Create the following folders in your U: drive:
| English 10 | Last Name_JC
Open JCNotes_Template from the School Loop calendar and Save As Last Name_JCNotes in your JC folder. (It will appear next to your Pictures folder.)
Open JC_Narration_Template and Save As Last Name_JCNarration in your JC folder.
Type your period and group members’names on both documents. List the name of the student who is saving the Notes and Narration first and the name of the student saving the pictures and the Power Point project second.
Once you have selected your Laws, Person and Event, type in the Laws, the Person and the Event you are researching into your Notes and Narration.
Save your documents.
Step 2: Jim Crow Laws
Open your Notes. Go to this web site:
/race/02rights/jcrow02.htm
Cut and paste your laws into your notes. Read the laws together and write a response to each of the laws.
On the other computer, find one or two pictures for each law and Save them into your Pictures folder. (Be sure to rename the pictures as something that is useful to you, such as Laws_1, Laws_2 and so on.)
Save your Notes document.
Step 3: Jim Crow People
Open your Notes. On the other computer, go to Jim Crow Profiles web site:
/wnet/jimcrow/stories_people.html
Read the profile together and summarize. Pick out the important details that tell us who the person was and what he or she did that was important in the history of Jim Crow. Once your notes are typed up, find pictures to go with the summary. Save them in your Pictures folder. (Remember to name them appropriately.)
Save your Notes document.
Step 4: Jim Crow Events
Open your Notes. On the other computer, go to Jim Crow Profiles web site:
/wnet/jimcrow/stories_events.html
Follow the same instructions as Step 3. Be sure to pick out just the important events.
Save your Notes document.
Step 5: Write your narration
Open your Notes and your Last Name_JCNarration document. Cut and paste your notes into your Narration. Put your Laws into the two sections for Jim Crow Laws. Break your summaries for your Person and Event into several sections. If you need more rows, go under Table and select Insert Rows Above (or Rows Below) to create more rows.
Keep in mind you will be reading each section you paste to go along with Power Point slides. Rewrite the sections if necessary to make them clear and easy to understand.
Step 6: Plan your Power Point.
In the Slide # & Title column in your Narration, plan slides to go with your Narration. Number each one and write a title—a word or phrase that will go under the picture we see as you read your narration. Keep it short and simple—don’t clutter Power Point slides with a lot of text. Step 7: Create your Power Point
Open a new Power Point project and Save As Last Name_JC. Make slides to go with your narration, typing into each slide the titles you wrote in Step 6 and inserting the pictures you’ve been saving in your Pictures folder.
Tip: You have 3 sections—Laws, People, Events. Make a section heading slide for Laws, and then Duplicate (Control + D) it twice for the other 2 headings—just replace the text and insert new pictures. Now the headings will look similar. Do the same for the slides that go with your narration: make the first one, and then Duplicate it and replace the pictures and text for the rest of the slides. Use the Slide Sorter View to put the slides in order.。