FLUKE744功能演示
FLUKE744过程校准仪使用说明书

6
选择此参数的设定。例如,在您选择 Date Format 后将会显示如下信息: 4 按动▲或者▼键以将光标移至您想要的日期格式。 5 按动 ENTER 以返回 setup 显示。 6 重新开始另外一次选择,或者按动 Done 软键或者 setup 以保存您的设置并终止 Setup 模 式。 五、测量模式 提示 操作模式(即 MEASURE, SOURCE 模式)在显示屏上是以反向显示条的形式显示的。如果 校准仪未处于 MEASURE 模式,请按住 MEAS/SOURCE 直至 MEASURE 显示。您必须处 于 MEASURE 模式下才能对 MEASURE 参数进行更改。 测量范围 此校准仪通常会自动改变到适合的测量范围。显示屏的右下角视范围状态的不同而显示为 “Range”或者“Auto Range” 。Auto Range 切换点在本手册最后的规格中有显示。当您按动 Range 软键时,测量范围被锁定。再次按动将循环至下一个测量范围并锁定。当您选择另外 一个测量功能时,Auto Range 被重新激活。 如果测量范围已经锁定,超过此范围的输入将产生------的显示。在 Auto Range 状态时,超 过范围的输入将产生!!!!!!的显示。 测量电气参数 当您开启校准仪时,它同时启动直流电压测量功能。图 10 显示了电气测量连接。若您想从 SOURCE 或者 MEASURE/SOURCE 模式选择电气测量功能,请首先按动 MEAS/SOURCE 进入 MEASURE 模式,然后按照如下步骤进行: 1 测量电流请按动 mA ,测量直流电压请按动 V- ,测量交流电压请按动 V~/Hz∏一次,测 量频率请按动 V~/Hz∏两次,测量电阻请按动“欧姆” 。 提示 当测量频率时,您会得到您所进行的测量要低于 20 赫兹的提示。请按动▼以选择更低的频 率范围,然后按动 ENTER 。 2 请按照图 10 所示并依据测量功能的不同连接测试引线。 测试连续性 当测试连续性时,当“欧姆”MWAS 插头和其普通插头之间的电阻晓宇 25 欧时,校准仪会 发出报警声,并且显示屏会显示文字“Short” 。当电阻大于 400 欧时,显示屏上会显示文字 “Open” 。请按照如下步骤测试连续性:
FLUKE744在天然气管道控制系统测试中的应用
FLUKE744在天然气管道控制系统测试中的应用[摘要]天然气管道是石油、石化和化工等行业广泛使用的一种天然气输送设备。
在天然气输送过程中,天然气管道控制系统以及各种仪表作业为正常安全的天然气输送工作提供了技术支持和保证。
随着科学技术的进步和工业测试技术的发展,仪表产品更新换代加强,仪表维护及校验工作日益的科技化、智能化。
在天然气管道控制系统中同样采用了自动控制技术先进和高度智能化、网络化、数字化的仪表,这些先进仪表的使用,发挥了日益重要的作用,确保了大型企业天然气管道输送顺畅运行。
从中不难看出,先进仪表工作在天然气管道工作中至关重要,那么,仪表的维护以及故障分析更是管道工作系统中不可忽视的重要环节。
本文就从天然气管道控制系统的测试及故障诊断入手,介绍一种先进测试仪器FLUKE744并通过对它在HART技术应用、天然气SCADA系统仪表检查工作以及故障诊断中的应用进行简单的阐述来体现FLUKE744在天然气管道SCADA 控制系统测试上的强大功能和优越地位。
【关键词】FLUKE744;天然气管道;控制系统测试;现代仪表;技术应用;故障诊断;测试技术随着智能仪器在天然气工业应用的日趋广泛,对通过工业标准数字协议进行通讯以及控制测试的新型校准仪的需求开始增加。
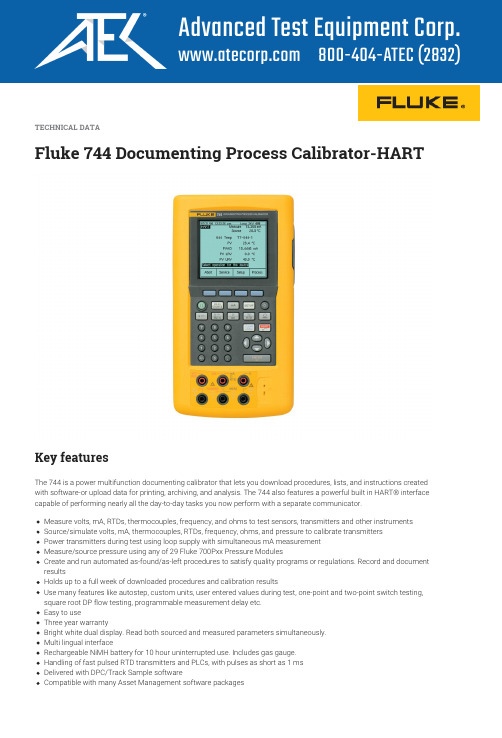
FLUKE744作为一种先进测试仪器登上了天然气管道控制系统测试工作的舞台,它是一种多功能过程认证校准器,是由美国福禄克公司生产的HART协议校准仪,。
FLUKE744极具智能化多能化,仅需一只小巧的手持式仪表,即可测量源输出、模拟和测量压力、温度和电信号等多种参数,它还可以自动生成校准程序并捕获数据。
FLUKE 744集成了多功能校准和HART通讯能力,坚固耐用,是HART和其他仪表的理想的校准、维护和检修工具。
一、FLUKE744在HART技术应用下的应用在天然气管道控制系统测试工作中,传统的智能变送器校对工作非常复杂,首先要用利用各种校验器对被检测仪器进行全面校准测试,然后把每个检测点的误差计算出来,再通过ROSEMOUNT HART275的细致调整来进行反复测试,直到测试控制系统安全合格为止。
压缩机电气及仪表自动化工法
大型燃气压缩机电气及仪表自动化系统安装与调试施工工法中国石油天然气管道第二工程公司倪兆生李宁傅强黄玉东顾生斌第1章前言西气东输管道增输工程酒泉压气站项目采用美国GE公司生产的两套离心式压缩机组,这是当时国内石油石化行业安装功率最大、质量要求最高的压气站工程。
压缩机组为PCL800系列,输出功率30MW,控制系统复杂,采用的仪表技术先进、精度要求高,如何按期保质保量地完成电气仪表安装与调试关系到整个工程能否按时竣工投产。
中国石油天然气管道局第二工程分公司在施工中通过采用电子绝缘电阻测试仪测试电缆电阻,采用“一表多用法”调校仪表,有效提高了工作效率和施工质量,酒泉压气站成为全线第一个压缩机按期点火的压气站,赢得了业主、监理和GE公司的一致好评。
第2章工法特点2.1 针对现场电缆根数多、芯数多,采用电子绝缘电阻测试仪表代替传统的手摇式绝缘电阻测试仪,一键式操作,并消除了人工数据读取误差,施工方便快捷;2.2 采用“一表多用法”进行仪表调校,大大提高了工效,降低了成本。
第3章适用范围适用于站场大型燃气压缩机电气仪表自动化系统的安装与调试工程。
第4章工艺原理压缩机电气仪表的施工主要为盘柜安装、电缆敷设、测试及接线、仪表调校。
施工中采用电子绝缘电阻测试仪可以一键式测试电缆绝缘电阻,阻值数字化,消除手摇式测试仪的读数误差。
采用功能强大的FLUKE744过程调校仪调试仪表,一表多用,有效节省成本,简化操作,提高工作效率。
第5章施工工艺流程及操作要点5.1 施工工艺流程5.2.1 图纸审查核对施工图和压缩机厂家提供的图纸,如发现不符之处,应与设计联系,及时纠正修改。
5.2.2 电气安装1.交直流不间断电源盘柜重量重、体积大,搬运至站控室之前可先放置在控制室内,如到货较晚,应在站控室附近交通便利处预留空间以方便搬运。
2.压缩机电机接线时应根据图纸确定采用Y还是△连接,接线时注意接线柱连接片放置的位置。
3.压缩机至配电室的电缆敷设在电缆沟内,然后通过钢管连接至设备,采用铠装电缆密封接头与设备相连。
744-743-741产品手册

Model: FLUKE 702 Serial: 6150203 User ID: JSmith 010 Cal. Status: 14 Loop Power: 24V As left 25-Jan-96 4:53 Measure: 4.000 to 20.000 mA Source: to Type: Pt100(3916) 2W RTD 40.0 70.0 癈 ITS-90 Test Tolerance: Tag ID:TT451 Serial: 987654321 0.25% Test Strategy: Task Name: Temp Transmitter RTD1234 3 ^v Output value: Units Error % Status MeasUEV 1,996.001.0025 Input Value: Units 3.998 mA 40.0 癈 -0.01 Passed Disabled 12.011 mA 55.0 癈 0.07 Passed Disabled 20.018 mA 70.0 癈 0.12 Passed Disabled 12.016 mA 55.0 癈 0.10 Passed Disabled 4.003 mA 40.0 癈 0.02 Passed Disabled
Fluke China
10
Fluke过程仪表认证校准器的优点
• 现场校准并产生文件档案 ,大大减少记录错误, 技术人员可更集中精力操作 • 输出同时进行测量,并提供回路电源 • 可记录校准所有过程参数 – 电压、电流、电阻、温度、压力、流量等 • 校准过程可预先从PC中装入 • 校准结果可送PC(存档,打印,管理) • 数据长时间记录和数据绘图
Fluke China
16
测试和输出能力
Fluke754的使用

1
压力变送器校验
Fluke 754 维护站内变送器
1
压力变送器校验
1、先向手动泵油杯内注入深度不少于2/3的介质。 再按照上图将手动泵、压力模块与压力变送器管线连接 好,接头密封至不漏油为止。然后将FLUKE744与压力 变送器、压力模块连接导线接好,并检查无误。(若不 修改变送器参数则不需连接HART线,下图中粗黑线为 HART连接线)。
⑮
数字键盘
④
TC(热电偶) 或
⑯
RTD(热电阻)测量、输出
测量/输出
⑤ 压力测量、输出
⑥ 功能键 ⑦ 亮度键
⑧ 设置键
⑨
HART键
⑩ 方向键
⑪
清除键
⑫
确认键
⑬
电阻测量
Fluke 754 界面、功能
2 Fluke 754 的插口界面
①HART 插口 ②压力模块连接口 ③热电偶输入/输出 ④⑤测量插口 ⑥⑦输出/测量插口 ⑧⑨输出插口 ⑩ 电池充电器插口 ⑪ USB 端口
Fluke 754 维护站内变送器
1
压力变送器校验
4、校验完毕: 将FLUKE744显示窗口退出到初始显示状态,停止向压力
变送器输出24伏直流电源,关闭FLUKE744电源。打开手动泵 的泄压阀将管线内压力泄放再关闭该阀。打开压力变送器的排 污阀将压力变送器气室内的压力泄放完毕。拆除FLUKE744与 压力变送器、压力模块连接导线。最后拆除压力变送器、手动 泵、压力模块之间的连接管线。
Fluke 754 维护站内变送器
3
温度变送器校验
1、按照上图用导线将FLUKE744与温度变送器连接,并确认接
线准确、牢靠。 2、开机:按SETUP键
按ENTER键
最新FLUKE744过程校准器在HART仪表校准中的应用

F L U K E744过程校准器在H A R T仪表校准中的应用FLUKE744过程校准器在HART仪表校准中的应用郑云龙摘要:本文主要叙述了FLUKE744过程校准器作为校准工具和HART通讯工具的使用方法,利用实例详细叙述了对ROSEMOUNT的3051型变送器的校准步骤并对我们对HART仪表的误区做了解释。
关键词:校准,HART,软键。
FLUKE744概述:FLUKE744过程认证校准器是一种由电池供电的便携式仪器,功能众多,可以对电气和物理参数进行测量和输出,如电压、电流、电阻、开关量、热电偶等,也能够做信号源输出多种参数,并在与HART变送器一起使用时提供基本的 HART通讯功能,还可以与FLUKE压力模块一起使用来对压力仪表进行校验。
FLUKE744的主要指标如下:直流电压:测量量程 0-300V测量精度 0.05%+0.005% (%读数+满量程)输出量程 0-15V输出精度 0.01%+0.015% (%输出+满量程)直流电流:测量量程 0-110mA测量精度 0.01%+0.015% (%读数+满量程)输出量程 0-22mA输出精度 0.01%+0.015% (%输出+满量程)电阻:测量量程 0-1100KΩ测量精度 0.1%+10mΩ (%读数+欧姆)输出量程 0-11000 KΩ输出精度 0.03%+0.5Ω (%输出+欧姆)压力模块的类型很多,配合使用时要选择正确地型号,压力模块的参考不确定度根据类型不同有微小不同,但一般的仪表校验都能适用。
HART仪表的校验误区人们往往有以下几种错误的概念:1、HART仪器的准确度和稳定性使它不需要校验。
2、HART仪器的校准可以只使用一个HART通讯装置,通过重新调整现场仪器的量程来完成。
3、控制系统可以以远程的方式来校准智能仪器。
这些概念都是错误的。
所有的仪器都具有漂移,仅仅使用通讯装置重新调整量程并不是校准,要进行校准就需要一台精密的校准器。
FLUKE744操作规程
FLUKE744操作规程1.概述FLUKE744是美国FLUKE公司生产的一款高端现场多功能过程校验仪,其主要功能如下:∙用于测量传感器、变送器和其他仪器的电压、电流(mA)、RTD、热电偶、频率,以及电阻。
∙输出/模拟变送器校准所需的电压、电流(mA)、热电偶、RTD、频率、电阻,以及压力。
∙电流测量的同时为变压器提供回路电源∙使用29块福禄克700Pxx 29压力模块测量/输出压力∙编制并运行as-found/as-left程序,以满足质量计划和规定。
按照所选文件格式记录测量结果。
∙对下载程序和校准结果可保存长达一周的时间∙具有多种功能,包括自动步进、自定义测量单位、在测试过程中输入数据、单点和两点切换测量、平方根DP流量测试、可编程测量延时等。
∙高亮度双显示屏.可以同时读取源参数和测量参数。
∙与多种Asset Management软件包兼容。
FLUKE744的主要技术指标如下:测量直流电压:0~±300V,交流电压:0~300V 20Hz~5KHz测量频率:1Hz~1KHz(100mV~300V rms)1KHz~30KHZ(0.5V~30V rms)30KHz~50KHz(1V~30V rms)测量电阻:0Ω~11KΩ测量直流电流:0~110mA测量压力:2.5kPa~69000kPa回路电源:24V或28V(22mA最大)2.操作步骤2.1 操作面板(见下图)各按键的功能见下表2.2 输出插孔见下图2.3 测量直流电压的方法是在测量状态按键按照下图插接线2.4 测量热电偶的方法是在测量状态按键按照下图插接线2.5 测量热电阻的方法是在测量状态按键按照下图插接线2.6 输出mA 值、Ω值、电压值的方法是在输出状态按键、键和键按照下图插接线2.7 测量mA电流的方法是在测量状态按键按照下图插接线2.8 模拟变送器(该变送器输出为mA)的方法是在输出状态按键后选择Simulate Transmitter状态按照下图插接线2.9 给变送器提供电源(该变送器输出为mA)的方法是在测量状态按键后再按键选择Enabled 24V后按ENTER键按照下图插接线00--2.10 测量变送器输出mA电流的方法是在测量状态按键按照下图插接线2.11 测量开关和线路通断的方法是在测量状态按两下键按照下图插接线。
FLUKE744操作规程

FLUKE744操作规程1.概述FLUKE744是美国FLUKE公司生产的一款高端现场多功能过程校验仪,其主要功能如下:∙用于测量传感器、变送器和其他仪器的电压、电流(mA)、RTD、热电偶、频率,以及电阻。
∙输出/模拟变送器校准所需的电压、电流(mA)、热电偶、RTD、频率、电阻,以及压力。
∙电流测量的同时为变压器提供回路电源∙使用29块福禄克700Pxx 29压力模块测量/输出压力∙编制并运行as-found/as-left程序,以满足质量计划和规定。
按照所选文件格式记录测量结果。
∙对下载程序和校准结果可保存长达一周的时间∙具有多种功能,包括自动步进、自定义测量单位、在测试过程中输入数据、单点和两点切换测量、平方根DP流量测试、可编程测量延时等。
∙高亮度双显示屏.可以同时读取源参数和测量参数。
∙与多种Asset Management软件包兼容。
FLUKE744的主要技术指标如下:测量直流电压:0~±300V,交流电压:0~300V 20Hz~5KHz测量频率:1Hz~1KHz(100mV~300V rms)1KHz~30KHZ(0.5V~30V rms)30KHz~50KHz(1V~30V rms)测量电阻:0Ω~11KΩ测量直流电流:0~110mA测量压力:2.5kPa~69000kPa回路电源:24V或28V(22mA最大)2.操作步骤2.1 操作面板(见下图)各按键的功能见下表2.2 输出插孔见下图2.3 测量直流电压的方法是在测量状态按键按照下图插接线2.4 测量热电偶的方法是在测量状态按键按照下图插接线2.5 测量热电阻的方法是在测量状态按键按照下图插接线2.6 输出mA 值、Ω值、电压值的方法是在输出状态按键、键和键按照下图插接线2.7 测量mA电流的方法是在测量状态按键按照下图插接线2.8 模拟变送器(该变送器输出为mA)的方法是在输出状态按键后选择Simulate Transmitter状态按照下图插接线2.9 给变送器提供电源(该变送器输出为mA)的方法是在测量状态按键后再按键选择Enabled 24V后按ENTER键按照下图插接线00--2.10 测量变送器输出mA电流的方法是在测量状态按键按照下图插接线2.11 测量开关和线路通断的方法是在测量状态按两下键按照下图插接线。
744用户手册补充说明书

Manual Supplement© 2000-2015 Fluke Corporation. All rights reserved.Manual Title: 744 Users Supplement Issue: 9 Part Number: 691287 Issue Date: 3/15Print Date: September 1998 Page Count: 10Revision/Date: 1, 2/99This supplement contains information necessary to ensure the accuracy of the above manual.744 Users Manual SupplementChange #1On page 78, replace step 24, and delete step 25.24. Exercise the switch by varying the applied pressure. Adjust the switch until the set point iscorrect.On page 112, change the second and third entries,From: 11.00 Hz to 109.99 Hz 0.01 HzTo: 11.00 Hz to 109.99 Hz 0.1 HzFrom: 110.0 Hz to 1099.9 Hz 0.01 HzTo: 110.0 Hz to 1099.9 Hz 0.1 HzOn page 113, change the Type E, third entry,From: -200 to –100 0.5 0.8 0.3 0.4To: -100 to 600 0.3 0.4 0.3 0.4On page 116, change the Range on the 120Ω Ni(672) Type,From: -200 to 260To: -80 to 26010/00 1Manual Supplement 744 Users2 3/02On page 117, change the Range on the 100Ω Pt(3916) Type,From: 0 to 360 To: 0 to 630Change #2On page 99, under Calibration Data , replace the first sentence with:The date the calibrator was last calibrated shows on the calibration sticker. The date the calibrator was last adjusted is shown on the last screen in Setup mode.Change #3On page 101, add the following to Table 9:Hart Communication Cable 689653 Serial Cable943738744 Users Manual SupplementChange #4On page 34, replace step 3 with the following:3. Press . Choose "TC", then the display prompts you to select the thermocouple type.On page 38, replace step 2 with the following:2. Press . Choose "RTD", then the display prompts you to select the RTD type.On page 46, replace step 2 with the following:2. Press for current, for dc voltage, for frequency, or for resistance.On page 55, replace step 3 with the following:3. Press , then select "TC" from the menu. The display prompts you to enter thermocoupletype.On page 56, replace step 2 with the following:2. Press , then select "RTD" from the menu.9/03 3Manual Supplement 744 Users4 9/03On page 59, before Source Scale , add the following:Sourcing Temperature using a Hart Scientific DrywellThe Fluke 744 can source temperature using a Hart Scientific Drywell. The following models are supported: 9009 (Dual Well) 9100S 9102S 9103 9140 9141The drywell driver is able to talk to other drywells from Hart Scientific, provided that they respond to Hart Scientifics standard serial interface commands.Connect the 744 to the drywell by plugging the drywell interface cable into the pressure module connector as shown in Figure A. If the drywell has a DB9 connector, plug the drywell interface cable directly into the drywell using the DB9 Null Modem adapter. Drywells with the 3.5 mm jack connector need to use the serial cable supplied with the drywell in addition to the 744 drywell interface cable. Join the DB9 connectors of the two cables, and connect the 3.5 mm jack to the drywell.744 Users Manual Supplement 744.ot99.epsFigure A. Sourcing Temperature using Drywell9/03 5Manual Supplement 744 Users6 9/03Be sure the drywell is configured for serial communication at 2400, 4800, or 9600 bits per second. Other rates are not supported by the 744.Proceed as follows to source a temperature using a drywell:1. If necessary, press for SOURCE mode.2. Press the button to display the temperature mode menu.3. Select "Drywell" from the list of options, and press .4. The calibrator will begin searching for a drywell. If the 744 shows "Attempting connection" formore than 10 seconds, double check your cable connections and drywell configuration. 5. If a dual well is recognized, a menu will pop up allowing selection of the "hot" or "cold" side ofthe dual well. Only one side of the drywell may be controlled at a time. Switching sidesrequires the drywell to be reconnected, by disconnecting the serial cable or by leaving drywell source mode and selecting it again. 6. When the drywell is connected, the primary display will show the actual temperature of thedrywell, as measured by the drywell internally. The drywell model number will appear above the primary reading. The setpoint for the drywell is displayed in the secondary display, at the bottom of the screen. Initially, the setpoint will be set to the value already stored in the drywell. 7. Enter the temperature you wish to source and press .744 Users Manual Supplement9/03 7The settled indicator will be cleared when the actual temperature is within one degree of the setpoint, and the actual temperature is not changing quickly. Refer to the drywell documentation for that model's recommendations for stabilization time.The upper temperature limit is restricted by the "High Limit" setting stored in the drywell. If the 744 will not set the drywell to temperatures within the drywell spec, refer to the drywell manual to check the "High Limit" setting.NoteWhen the 744 is set to display temperatures in Kelvin, the drywell readout will show Celsius, and when the 744 shows Rankine, the drywell will show Fahrenheit.Manual Supplement 744 Users8 3/15Change #5, 45265, 490On page 112, under Frequency Sourcing , replace the bottom portion of the table with the following:Waveform Choices : Zero-symmetric sine or positive square wave, 50 % duty cycle. Amplitude: 0.1 to 10 V pk (square wave, 0 V reference) 0.1 to 10 V p-p (sinewave)Amplitude Accuracy : S/N 9095999 or earlier: 0 Hz to 1099 Hz: 3 % of output + 0.5 % f.s.1.1 kHz to 10.9 kHz: 10 % of output + 0.5 % f.s. 11 kHz to 50 kHz: 30 % of output + 0.5 % f.s. Amplitude Accuracy : S/N 9096000 or later: 0 Hz to 50 kHz: 30 % of output + 0.5 % f.s. Maximum Input Voltage: 30 V dcChange #6On page 108, under Minimum Amplitude for Frequency Measurement (square ware) change the second entry: From: 1 kHz to 30 kHz : 4 mV p-pTo:1 kHz to 30 kHz : 1.4 V p-p744 Users Manual Supplement12/09 9Change #7On page 20, under Charging the Battery , replace the the first paragraph with the following:Before you use the calibrator for the first time, charge its battery pack in the external battery charger, Model BC7217.On page 22, replace the Battery Life section with the following:Battery LifeA battery gauge bar graph shows on the upper right of the display. Table 4 shows the typical operating time for a new, fully charged NiMH (Nickel-Metal Hydride) battery pack. Calibrator performance is guaranteed to meet specifications until the battery gauge reads empty ( ).To replace the battery, refer to “Replacing the Battery Pack”.On page 23, replace the Preserving Battery Life, paragraph with the following:An optional Auto Battery Save feature turns the calibrator off after a selected idle time. The default setting for AutoBattery Save is Off . The setting is preserved after you turn off the power. When using the battery eliminator, Auto Battery Save works the same and the symbol slows in the upper right corner. Turn on the Auto Battery Save feature as follows:On page 98, under Replacing the Battery Pack replace the third sentence with the following:To order a replacement battery, order Model BP7235 Nickel-Metal Hydride Battery Pack.Under the Note , delete Nickel-Cadmium from the first sentence.On page 100, under Service Center Calibration or Repair , delete nickel-cadmium from the first paragraph.Manual Supplement 744 UsersOn page 103, delete the following:•BP7217 Ni-Cd Battery Pack10 12/09。
FLUKE说明书
ENTER !"#$%& !"# !" 744
4
Auto Test ! !"#
!"#$%&#'()
!"#$%&' Send 4mA 20mA
!"#$%& Fetch
P !"# ì å á î É ê ë ~ ä Åçãã~åÇ e^oq
744 744 !"#$ sensor trim !"#$%&'() HART !"#$ 1 !"# !"#$%&'()*+',-. devide-specific command !"# 744 !"#$%&?
!"#$%&'$%( !"#$%#&'HART !"#$%&'() !"#$% smart !"# !"# 1 !"#$%&'()* !
Southwest Research Institute !"# Intech
!"#$%&'(
"#$%&'()*+, !" !"# !"#$%
!"#$%&'()*+ ,)!"#$%&'()*+,-( !"#$%&'()*+"# !"#$%&'() !"#$%&'()*+, !" # 2 !"#$% !"#$ !"#$ !" 3 !"
F744过程校准器快速应用指南

4、用于校准过程仪表
4.1 校准温度变送器
4.1.1 模拟热电偶 1. 将热电偶导线连接到合适的热电偶微型插头,然后再 连接到热电偶的输入/输出,如 图9 所示。 2、如果需要,按 进入 SOURCE 模式。 3、按 以进入提示您输入热电偶类型的屏幕。 4、按 或 键,然后选择所需热电偶类型。 5、按 或 键,然后按 选择 Linear T (线性T,默认)或 Linear mV(线性 mV)(用于校准一 个对毫伏输入有线性响应的温度变送器)。 6、按照屏幕提示输入想要模拟的温度,然后按 。
图 6 外部电源模拟 4 至 20 mA 变送器的连接方式
3.2.3 内部提供回路电源
校准器可以通过一个 250 Ω 的内部串联电阻提供 28 V 或 24 V(直流)的回路电源。将校准器与仪表电流回路串联 连接如图7所示。图 7 提供回路电源的连接
按照下列操作输出回路电源: 1、按 进入 Setup(设置)模式。 2、请注意,随后将突出显示 Loop Power(回路电源)、 Disabled(禁用)。按 。 3、使用 或 箭头选择 Enabled 24 V(启用24 V) 或 Enabled 28 V(启用 28 V)。 4、按 。再按 Done 软键。
3.2.4 输出压力
该校准器提供了一个输出压力显示功能,它需要使用一 个外部手动泵。使用此功能可以对需要一个压力源或差压测 量的仪表进行校准。Fluke 有多种压力模块可供您选择。要 使用输出压力显示,请参见图8,并操作如下: 1、如图8所示,将压力模块和压力源连接到校准器。 2、如果需要,按 进入 SOURCE 模式。 3、按 键。校准器将自动检测连接了何种压力模块,并 相应设置其量程。 4、按照模块说明书中的说明将压力模块调零。根据模块的 类型,模块调零步骤有所不同。您必须在执行一个输出或测 量压力的任务之前来执行此步骤。
Fluke754的使用

从键盘上输入温度值,读取相应的电流值。
Fluke 754 维护站内变送器
3
温度变送器校验
3、从FLUKE754键盘上输入温度值进行检定。上行程时 所输入的温度值按照温度变送器量程的0%、25%、50%、75%、 100%刻度点进行检定;下行程时所输入的温度值按照温度变送 器量程的100%、75%、50%、25%、0%刻度点进行检定。并读取相 应得电流值,然后比较上行程下行程时各个检定点的电流测量 值与理论值之间的误差是否小于最大允许误差;再比较上行程 下行程时同一检定点的电流差值是否小于最大回程误差。若两 项都小于,则该温度变送器是合格的,反之不合格。
Fluke 754 界面、功能
图表记录仪校准
压降测量
Fluke 754 界面、功能
监控 AC 线路电压和频率
变送器的输出电流测量
Fluke 754 界面、功能
精确电阻测量
检查开关
Fluke 754 界面、功能
转速计检查
涡街流量计检查
Fluke 754 维护站内变送器
1
压力变送器校验
Fluke 754 维护站内变送器
Fluke 754 界面、功能
3 Fluke 754 的显示界面
①时间和日期显示 ②HART 指示符 ③回路电源指示符 ④电池容量指示 ⑤背光灯指示符 ⑥输出状态 ⑦未阻尼(未稳定)指示符 ⑧自定义单位指示符 ⑨辅助值 ⑩功能键标签 ⑪ 测量值 ⑫ 模式指示符
Fluke 754 界面、功能
4
Fluke 754 的功能
Fluke 754 维护站内变送器
3
温度变送器校验
4、校验完毕: 将FLUKE744显示窗口退出到初始显示状态,停止
向温度变送器输出24伏直流电源,关闭FLUKE744电源。拆 除FLUKE744与温度变送器的连接导线即可。
Fluke 744 文档记录过程计ibrator-HART 说明书
TECHNICAL DATAFluke 744 Documenting Process Calibrator-HARTKey featuresThe 744 is a power multifunction documenting calibrator that lets you download procedures, lists, and instructions created with software-or upload data for printing, archiving, and analysis. The 744 also features a powerful built in HART® interface capable of performing nearly all the day-to-day tasks you now perform with a separate communicator.Measure volts, mA, RTDs, thermocouples, frequency, and ohms to test sensors, transmitters and other instruments Source/simulate volts, mA, thermocouples, RTDs, frequency, ohms, and pressure to calibrate transmitters Power transmitters during test using loop supply with simultaneous mA measurement Measure/source pressure using any of 29 Fluke 700Pxx Pressure ModulesCreate and run automated as-found/as-left procedures to satisfy quality programs or regulations. Record and document resultsHolds up to a full week of downloaded procedures and calibration resultsUse many features like autostep, custom units, user entered values during test, one-point and two-point switch testing,square root DP flow testing, programmable measurement delay etc.Easy to useThree year warrantyBright white dual display. Read both sourced and measured parameters simultaneously.Multi lingual interfaceRechargeable NiMH battery for 10 hour uninterrupted use. Includes gas gauge.Handling of fast pulsed RTD transmitters and PLCs, with pulses as short as 1 ms Delivered with DPC/Track Sample softwareCompatible with many Asset Management software packagesProduct overview: Fluke 744 Documenting Process Calibrator-HART Ready for AnythingAs more and more process plants begin to take advantage of smart transmitters, the need for a new generation ofcalibrators has emerged-calibrators that can communicate via industry standard digital protocols. The 744 combines HART communication capability to deliver an integrated communicating calibrator. This rugged, reliable tool is ideal for calibrating, maintaining, and troubleshooting HART and other instrumentation.The 744 does the work of several tools - sourcing, simulating and measuring pressure, temperature, and electrical signals inone rugged, hand-held device.For documentation, the 744 automates calibration procedures and captures your data. And, of course, it helps you meet rigorous standards like ISO 9000, FDA, EPA and OSHA regulations.HART CapabilitiesThe 744 is designed to take on nearly all the day-to-day tasks you now perform with a separate communicator. In fact, it offers the communication capabilities of the 275 HART communicator.Requires no external box or second tool for everyday HART calibration and maintenance.Offers fast HART communication.Supports popular models of HART transmitters, with more devise-specific command support than any other HART field calibrator.Works with multiple masters, burst mode, and multi-drop configurations.Is easy to update as additional instruments are added and new HART versions are released.Interrogate to determine device type, manufacturer, model, tag.Reconfigure the sensor mapping of dual sensor temperature transmitters.Read HART PV function and smart transmitter digital output while measuring analog mA output.Read and write HART configuration functions to make field adjustments to PV range points, damping, and other top-level configuration settings.Re-label smart transmitters by reading and writing to the HART tag field.Versatile HART Protocol supportThe 744 supports the commands contained in HART protocol Version 5.7. With 2 MB of memory, the 744 supports a substantial set of HART instructions:Universal commands provide functions that are implemented in all field devices, for example, read manufacturer anddevice type, read primary variable (PV), or read current output and percent of span.Common practice commands provide functions that are common to many but not all field devices, for example readmultiple variables, set damping time, or perform loop test.Device-specific commands provide functions that are unique to a particular field device, for example sensor trim.HART Operating Modes SupportedPoint to Point operation , the most commonly used mode, connects the 744 to a single HART device in a 4-20 mA loop.In Multi-Drop mode , several HART instruments can be bussed together. The 744 searches for each, identifies addresses in use, and allows you to select the instrument for calibration and related operations.In Burst Mode, the HART instrument transmits bursts of data without waiting to be interrogated by a master unit. The 744 can take transmitters out of burst mode during test or calibration, then later restore them to burst mode.744 V 2.5 Documenting Process Calibrator Software UpgradeThe Fluke 744 Version 2.5 software upgrade includes:Device-specific calibration support for new instruments:2 Fluke Corporation Fluke 744 Documenting Process Calibrator-HARThttps:///en-us/product/calibration-tools/multifunction-calibrators/fluke-744Micro Motion 2000, 2000 IS, 9701, 9712 and 9739 coriolis flow transmittersFuji FCX and FCXA2 pressure and FRC temperature transmitterNew features:Support for New Hart Scientific dry blocks: 7103, 9007, 9011, 9023, 9103, 9105, 9107, 9122, 9127, 9132, 9133 and 9150 Enhanced dry block delay setting for temperature switch testingSwitch test without resetThe upgrade is delivered on a floppy disk. One upgrade disk is required for each calibrator to be upgraded. Download fromyour PC to your calibrator using the serial cable originally supplied with your Fluke 744 Calibrator. Elapsed time for theprocess will be about 8 minutes. After the upgrade is complete, your calibrator will indicate “Version 2.5” at start up.The 2.5 upgrade is available from your regular Fluke dealer or representative as Fluke 744V20. For an available five-pack, askfor Fluke-744V2V.Pressure ModulesCovers virtually any pressure application including gauge, differential, dual (compound), absolute, and vacuum.Display pressure readings in any of 10 different pressure units you specify in the calibrator setup.Rugged urethane molded cases protect the modules from rough handling and harsh conditions.Features internal temperature compensation from 0º to 50º C for full accuracy performance.Includes NIST-traceable calibration certificate.Modules can be calibrated locally, helping to control costs.A family of 29 optional pressure modules provides pressure calibration and measurement capabilities. Twenty-eightmodules are available, with basic accuracy specs to 0.05%. Ranges start at 0 — 1 in H20 (0 — .25kPa) and go to 0 — 10,000psi (0 — 70,000 kPa). Additional information about pressure modules is available on the Pressure Modules Home Page. Automated ProceduresAllow you to quickly set up powerful, automated calibration procedures for linear transmitters, DP flow transmitters, andone- and two-point limit switches. Simply select the appropriate measure and/or source functions and fill out the procedure template. The 740 Series does the rest. It quickly performs the test, calculates the errors, and displays the final results, highlighting out of tolerance points.Custom UnitsEnable you to map one unit to another, such as mV to ºC or ºF. Allows you to use the Fluke 740 Series with millivolt output accessories such as the Fluke 80T-IR Temperature Probe, and to document tests using non-supported units such as partsper million or revolutions per minute.User-entered ValuesEnables technicians to record calibration results that were sourced and/or measured by other devices such as panel metersor readout-only devices.Limit Switch CalibrationProcedures perform fast, automated calibration of one and two-point limit switches for voltage, current, temperature, and pressure.Differential Pressure Flow Instrument CalibrationRoutines use a square root function to directly calibrate DP flow instruments.3 Fluke Corporation Fluke 744 Documenting Process Calibrator-HARThttps:///en-us/product/calibration-tools/multifunction-calibrators/fluke-744Additional FeaturesMultifunctionalCalibrate temperature, pressure, voltage, current, resistance, and frequency. Since it both measures and sources, you can troubleshoot and calibrate all with one rugged tool.Powerful, yet easy to useThe easy-to-follow menu-driven display guides you through any task. Get up to speed in minutes, not days. Programmable calibration routines enable you to create and run automated as-found/as-left procedures to ensure fast, consistent, calibrations.Records and documents resultsTo support your ISO-9000 or regulatory standards the Fluke 744 captures your calibration results, eliminating the need tojuggle a pen and pad in the field. The RS-232 interface lets you transfer the results to a PC, thus saving the time of having to manually transcribe them when you return to the shop.Truly hand-heldSmall enough to fit easily into a tool bag and to use in tight spaces. Runs an entire shift on a rechargeable NiMH batterypack.Rugged and reliableCount on Fluke's rugged design to deliver top accuracy and reliability in harsh environments. Overmolded urethane casestands up to rough handling in industrial environments.Bright white displayLets you read your results in any kind of light.Soft keysProvide one-touch access to enhanced functions such as task lists, automated procedures, scaling, min/max, stepping and ramping, and review memory.Three operating modesMeasure, Source, or simultaneous Measure/Source, - enable technicians to troubleshoot, calibrate, or maintain instrumentation with just one tool.Multi-lingual interfaceDisplays instructions in English, French, German, Spanish, and Italian.Built-in algebraic calculatorWith four functions-plus square root-stores, recalls, and performs calculations required for setting up instruments orevaluating data in the field. Use it to set the source function to a calculated value. There's no need to carry a pencil andpaper or a separate calculator.Programmable measurement delayInside automated procedures permits calibrating instruments that respond slowly.Specifications: Fluke 744 Documenting Process Calibrator-HART4 Fluke Corporation Fluke 744 Documenting Process Calibrator-HARThttps:///en-us/product/calibration-tools/multifunction-calibrators/fluke-7445 Fluke Corporation Fluke 744 Documenting Process Calibrator-HARThttps:///en-us/product/calibration-tools/multifunction-calibrators/fluke-7446 Fluke Corporation Fluke 744 Documenting Process Calibrator-HARThttps:///en-us/product/calibration-tools/multifunction-calibrators/fluke-7447 Fluke Corporation Fluke 744 Documenting Process Calibrator-HARThttps:///en-us/product/calibration-tools/multifunction-calibrators/fluke-7448 Fluke Corporation Fluke 744 Documenting Process Calibrator-HARThttps:///en-us/product/calibration-tools/multifunction-calibrators/fluke-744Ordering informationFluke 744Documenting Process Calibrator-HARTIncludes:BC7217 battery chargerBP7235 battery packDPC/TRACK Sample SoftwareInstruction manualNIST-traceable calibration report and dataOne set of TP220 test probesSerial port cable, HART communications cableTwo sets of AC220 test clipsTwo sets of TL224 industrial test leads9 Fluke Corporation Fluke 744 Documenting Process Calibrator-HARThttps:///en-us/product/calibration-tools/multifunction-calibrators/fluke-744Fluke. Keeping your world up and running.®Fluke CorporationPO Box 9090, Everett, WA 98206 U.S.A. For more information call:In the U.S.A. (800) 443-5853In Canada (800) 36-FLUKEFrom other countries +1 (425) 446-5500 ©2022 Fluke Corporation.Specifications subject to change without notice.10/2022Modification of this document is not permitted without written permission from Fluke Corporation.10 Fluke Corporation Fluke 744 Documenting Process Calibrator-HARThttps:///en-us/product/calibration-tools/multifunction-calibrators/fluke-744。
fluke使用说明书
福禄克FLUKE DTX系列(Dtx-1800,Dtx-1200,Dtx-lt)简单操作步骤说明:一、福禄克测试仪初始化步骤:1、充电:产品主机、辅机分别用电源适配器充电,直至电池显示灯转为绿色;2、设置语言:操作:将fluke dtx系列产品主机旋钮转至“SET UP”档位,按右下角绿色按钮开机;使用↓箭头;选中第三条“Instrument setting ”(本机设置)按“ENTER”进入参数设置,首先使用→箭头,按一下;进入第二个页面,↓箭头选择最后一项Language按“ENTER”进入; ↓箭头选择最后一项 Chinese 按“ENTER”选择。
将语言选择成中文后才进行以下操作。
3、自校准:取fluke dtx系列产品Cat 6A/Class EA 永久链路适配器,装在主机上,辅机装上Cat6A/Class EA 通道适配器。
然后将永久链路适配器末端插在Cat 6A/Class EA 通道适配器上;打开辅机电源,辅机自检后,“PASS”灯亮后熄灭,显示辅机正常。
“SPECIAL FUNCTIONS”档位,打开主机电源,显示主机、辅机软件、硬件和测试标准的版本(辅机信息只有当辅机开机并和主机连接时才显示),自测后显示操作界面,选择第一项“设置基准”后(如选错用“EXIT”退出重复),按“ENTER”键和“TEST”键开始自校准,显示“设置基准已完成”说明自校准成功完成。
二、设置福禄克测试仪基本参数操作:将fluke dtx系列产品主机旋钮转至“SET UP”档位,使用“↑↓”来选择第三条“仪器值设置”,按“ENTER”进入参数设置,可以按“←→”翻页,用“↑↓”选择你所需设置的参数,按ENTER进入参数修改,用“↑↓”选择你所需采用的参数设置,选好后按ENTER 选定并完成参数设置。
1、新机第一次使用需要设置的参数,以后不需更改。
(将旋钮转至“SET UP”档位,使用↓箭头;选中第三条:仪器设置值按ENTER进入如果返回上一级请按EXIT):1) 线缆标识码来源:(一般使用自动递增,会使电缆标识的最后一个字符在每一次保存测试时递增一般不用更改)2) 图形数据存储:(是)(否)通常情况下选择(是)3) 当前文件夹: DEFAULT 可以按ENTER进入修改其名称(你想要的名字)4) 结果存放位置:(使用默认值“内部存储器”假如有内存卡的话也可以选择“内存卡”)5) 按→进入第2个设置页面,操作员:You Name 按ENTER 进入按F3删除原来的字符“←→↑↓”来选择你要的字符选好后按ENTER确定6) 地点: Client Name,是你所测试的地点可以依照地e)小点进行修改7) 公司:You Company Name,你公司的名字8) 语言:Language,默认是英文9) 日期:输入现在日期10) 时间:输入现在时间11) 长度单位:通常情况下选择米(m)2、新机不需设置采用原机器默认值的参数:1) 电源关闭超时:默认30分钟2) 背光超时:默认1分钟3) 可听音:默认是4) 电源线频率:默认50Hz5) 数字格式:默认是6) 将旋钮转至“SET UP”档位选择双绞线按ENTER 进入后 NVP 不用修改7) 光纤里面的设置,在测试双绞线是不须修改3、使用过程中经常需要改动的参数:将旋钮转至“SET UP”档位,选择双绞线,按ENTER进入:线缆类型:按ENTER进入后按↑↓选择你要测试的线缆类型例如我要测试超5类的双绞线在按ENTER进入后选择UTP 按ENTER ↑↓选择“Cat 5e UTP ” 按ENTER 返回。
FLUKE744现场校准技术文集(精华经典)
2
种。如果在公布的指标中没有关于时间 的说明,最好应该向厂家索取这方面的 数据。
2、温度
指标中的温度范围也是非常重要 的。要确认指标的有效范围是否能满足 你的使用条件。
规定温度范围是必须的,因为它是 考虑了仪器中模拟电路的温度系数。常 用的温度范围是 23℃± 5℃度。这个范 围反映了大部分实际的使用情况。还应 该注意温度范围应在整个校准间隔之内 是有效的。
但增加了调整维修费用而且坏的质量损 害厂家的声誉。
可溯源测量不仅保持了公平交易而 且符合法律规定和标准的要求。
由于全球范围内对ISO9000质量标 准的认可,使得对测试仪器进行可溯源 的校准的商业要求越来越多。推行 ISO 9000 的目的在于考虑到产品质量和可 用性,保证在一个国家生产的产品基于 公认的测量标准和实验方法,能在另一 个国家被接受。
您购买的校准器大部分应该有很好 的性能,但也可能它的性能处在边缘指 标上或某些性能指标超标。
技术指标的关键部分
指标的分析是一件很复杂的事情。 为了对指标有清楚的了解,您需要注意 一些关键部分,并知道如何从脚标,小 的注释和指标本身中找出这些关键部分。 当比较不同厂家校准器的指标时每个指 标都应该仔细考虑,其中过程仪表认证 校准器指标中最主要的是以下四个部 分:时间,温度,置信度和可溯性。
一个好的技术指标应该有以下几个 特点:
l、它们必须是完备的; 2、它们易于理解和使用; 3、它们应该包括日常使用中其它 因素的影响,比如环境和负载等。 完备性要求提供充足的信息,这样 使用者能知道在所有可能遇到的输出 (或输入),所有列出的可能的或允许的 环境条件下,所有可能的负载情况下, 仪器的性能表现。 便于使用也是很重要的,许多指标 可能会导致混乱或难于理解。而错误的 理解会导致使用错误或错误的校准。 指标设计的完备性要求有时会与便 于使用这一原则相矛盾。两者不能兼 得。指标的设计所面临的挑战是同时满 足两者的要求。为达此目的,一般会采 用一种方法,即将各种误差的影响综合 考虑并置于一个可用的可操作的窗口之 内。例如,规定某一指标在 23℃± 5℃, 温度小于 80%,所有负载都在规定范围 之内,6 个月内有效。这就极大地方便
FLUKE744过程校准仪使用说明书

一, 测量和信号输出功能一览表 功 直流电压 交流电压 频率 电阻 直流电流 通断 热电偶 能 0~±300V 0~300V 有效值(rms)20Hz~5KHz 1Hz~1KHz(100Mv~300Vrms) 1KHz~30KHz(0.5V~30Vrms) 30KHz~50KHz(1V~30Vrms) 0Ω~11KΩ 0~110Ma 蜂鸣并显示 short 一词 测 量 无输出 1mV~10V,0Hz~50KHz 零点对称正弦波或方波 0Ω~11KΩ 0~22mA(28V 最大) 无 100Ω Platinum(3926) 100Ω Platinum(385) 120Ω Nickel(672) 200Ω Platinum(385) 500Ω Platinum(385) 1000Ω Platinum(385) 10Ω Copper(427) 100Ω Platinum(3916) 27 种压力模块从 2.5kPa 至 69,000kPa 24 或 28V(22mA 最大) * E,N,J,K,T,B,R,S,C,L,U 信号输出 0~15V(最大 10mA)
3
CLEAR(ZERO)键
便为读数归零 (1)调整显示对比度。 (2)在显示条目中选择 (3)在输出方式下,使用步进方式时,可增加和降低输出。 (4)计算时,提供数字功能(+ - ×÷) 。 确认信号的输入值,或从表中选择输入。计算模式时,提供等号功能 (=) 测量模式中在电阻和连续功能之间选择输出方式中选择电阻。 选择所需要的数字输入 测量方式中选择交流电压或频率,在输出方式中选择频率输出 测量方式中选择直流电压,输出方式中选择直流电压 电源开关
5
6 若您想改动暂停时间,请按动▼以显亮出现于 Battery Save Timeout 之后的暂停时间。 7 按动 ENTER 或者按动 Choices 软键。 8 请以分钟为单位输入您选择的暂停时间(可接受的范围:1~120 分钟) 。 9 请按动 Done 软键。 10 请按动 Done 或者 setup 以终止 Setup 模式 当具备交流电源时,您可以使用可选的型号为 BE9005 的 Fluke 电池电流转换装置以节省电 池能量。当使用电池电流转换装置时,电池在内部是断开的,因而可以将其从校准仪卸除。 电池电流转换装置主要用于在工作台上对工艺仪表进行故障分析。 当您在校准仪表时, 使用 电池电源将获得最佳的结果。 选择显示语言 此校准仪能以五种语言显示信息。缺省语言是英语。若您想更改显示语言,请按如下操作进 行: 1 请按动 setup 。 2 按动左边第三个软键两次。 3 按动▼三次。 4 按动 ENTER 。 5 按动▲或者▼以显亮您选择的语言。 6 请按动 ENTER 以确认您的选择。现在您所选择的语言将是接通电源时的缺省语言。 7 按动 setup 以终止 Setup 模式。 调节显示屏对比度 请按动▲或者→以增加对比度。 按动▼或←则用于降低对比度。 当▲或▼键已被占用于从列 表中选择条目,例如在 Setup 模式中时,此时请使用←或者→键调节对比度。在 Calculator 模式下,所有四个方向键都被用于算术功能。 显示日期和时间 在正常操作中,显示屏的顶部可以显示日期和时间。您可以在 Setup 模式下开启或者关闭日 期和时间显示。您还可以控制显示日期和时间的格式。不管您是否使用日期和时间显示, 您都应该设定日历和时钟,因为所有的已存储结果都应用了时间信息。 请按以下步骤设置日期和时间显示: 1 请按动 setup 。 2 按动 the Next Page 软键。显示屏将显示如下: 3 使用▲或者▼键将光标移动至您想要更改的参数,然后按动 ENTER 或者 Choices 软键以
FLUKE744功能讲解
输出同时工作模式。
选择正确的连线
F744和智能变送器的连接:
第一组连接:
HART通讯线.
第二组连接:
F744的输出与
智能变送器的输入
相连.
第三组连接:
智能变送器的输出
与F744的输入相连, F744可提供回路 电源.
用744校验智能变送器
1. 连接744
实现HART功能只需在744和变送 器间多连接一根HART通讯线
744的输出功能
提供回路电源:
744可为回路提供24V或28V电源。 28V可为除两线制变送器以外回路中两个或三个 4~20mA装置提供足够的电流。 如果除两线制变送器之外回路中负载只有一个或者 两个设备时可使用24V。(每个典型4~20mA回 路中的装置具有250Ω电阻,这样在20mA时其压 降为5V。为了保证在最大情况下变送器仍正常工 作,典型变送器的最小电压应为11V)。
3、使用数字键盘输入0%对应的值(0% Value)。
4、按ENTER=。 5、用数字键盘输入100%对应的值(100% Value) 。 6、按ENTER=。 7、按下Done功能键。
744的测量功能
设置开方百分比刻度:
1、按Scale功能键。
2、从屏幕菜单中选择√ %刻度 3、使用数字键盘输入0%对应的值(0% Value)。 4、按ENTER=。 5、用数字键盘输入100%对应的值(100% Value)。
测量压力:744配备多种规格的压力、压差模块。测
测量温度:测量热电偶时使用热电偶测量端,按
“TC/RTD”键选择正确的热电偶分度号进行测量; 测量热电阻时使用热电阻测量端,按“TC/RTD”键 选择正确的热电阻分度号进行测量。
- 1、下载文档前请自行甄别文档内容的完整性,平台不提供额外的编辑、内容补充、找答案等附加服务。
- 2、"仅部分预览"的文档,不可在线预览部分如存在完整性等问题,可反馈申请退款(可完整预览的文档不适用该条件!)。
- 3、如文档侵犯您的权益,请联系客服反馈,我们会尽快为您处理(人工客服工作时间:9:00-18:30)。
2. 获得变送器的信息
只需按下 “HART” 按键
3. 进行调整前校验(as found)
自动填写校验程序设置信息 计算偏差并存储数据表
4. 调整(如需要)
744将自动完成变送器输入和 输出部分的调整
5. 进行调整后校验(as left)
得到被输出或被测量的电流
值
发送数据到变送器并进行调
整
Fluke Introduction 11
Fluke Beijing
步骤 6 - “As-Left” 校验
执行 “As-Left” 校验
过程并存档最终设置数 据
Fluke Introduction 12
Fluke Beijing
福禄克压力校准器
Fluke Intr测量参数
按 “HART” 键 或
“Measure/Source” 键 到模拟方式
选择测量参数
模拟方式的毫安
数字方式的一级变量
Fluke Introduction 9
Fluke Beijing
步骤 4 - “As-Found” 测试
实现手操器的功能-传感器调整
按下 “Adjust”键
选择 “Sensor Trim” 按下“Enter”键选择 “Perform
User Trim - Both”,调节量程 上/下限 输入变送器的设定下限值,软键选择 “LRV”(下限), 然后按下”Trim”对应的软 键 继续对 URV (上限)的调整
1 Fluke Introduction 32
2 Fluke Beijing
实现手操器的功能-输出部分调 整
选择 “Output Trim” 等待变送器输出的4mA左右的电流
值稳定后,按下“Fetch”键,再按 下“send”键,将取回的电流值发 送给变送器,以改变PVAO值
同样的过程对20mA进行一遍。
F744和智能变送器的连接:
第一组连接:
HART通讯线.
第二组连接:
F744的输出与
智能变送器的输入
相连.
第三组连接:
智能变送器的输出
与F744的输入相连, F744可提供回路 电源.
Fluke Introduction 24
Fluke Beijing
用744校验智能变送器
1. 连接744
输入端连接包 括回路电源,这 与模拟变送器 一样
使用HART电
缆连接744串行 口和变送器电 源端。不必区 分电源极性
Fluke Introduction 7
Fluke Beijing
步骤2-读出配置信息
按 “HART”键可
能需要打开回路电源 在多点方式下,需要 选择同一回路的一台 主机。 读出器件配置信息
Fluke Introduction 22
Fluke Beijing
Fluke700PRV压力释放阀
防止误操作而造成的过压
两种调整范围 50公斤—200公斤 200公斤—400公斤
极力推荐与F-700HTP配合使
用
Fluke Introduction 23
Fluke Beijing
应用:校准温度变送器
Fluke Introduction 4
Fluke Beijing
应用:校准温度变送器
Fluke Introduction 5
Fluke Beijing
应用:校准温度变送器
Fluke Introduction 6
Fluke Beijing
步骤1-连接744
与变送器输出、
高准确度(0—50度温度范围和整个量程)
内部温度,线性和迟滞补偿
提供29种压力模块,包括差压,
表压,绝压,真空,复合,高压
与校准仪数字通讯,免受现场干扰
结构坚固
Fluke Introduction 19
Fluke Beijing
Fluke-700HTP液压泵
高压
最高到690公斤
Transducer 是智能现场设备与控制系统进行通讯的一种工业标准 是当今应用最广泛的工业现场数字通讯标准
HART委员会
是独立的非盈利性组织负责支持全球范围内HART技术应用
Fluke 公司是其成员之一 /hart
Fluke Introduction 17
一系列的紧凑型工具使过程技 术人员的工作更有效率
A family of compact tools that make process technicians more effective.
Fluke Introduction 13
Fluke Beijing
校准一个 P/I 变送器
一台仪器就可非常方便地快速校准P/I(压力/电流)变送 器 Fluke Introduction 14
双接口
与福禄克压力模块相连无须T
型连接头
提供与福禄克压力模块
连接的所有连接头
Fluke Introduction 20
Fluke Beijing
Fluke-700PTP气压泵
输出正压力和真空压力 -80KPa--2500kPa
双接口 与福禄克压力模块相连无 须T型连接头 提供与福禄克压力模块
Fluke Beijing
使用外部压力模块
Fluke Introduction 15
Fluke Beijing
使用外部手泵
Fluke Introduction 16
Fluke Beijing
什么是HART
什么是HART
高速可寻址远程变送协议Highway Addressable Remote
Fluke Introduction 2
0.025% .05% 0.01% 0.05% 5 counts 0.3oC 0.3oC
0.010% ----0.010% 0.010% 1 count 0.2oC 0.1oC 0.05%
Fluke Beijing
测试和输出能力
测量 直流电压 直流电流 0 - 300 V 0 - 22 mA 交流电压 0 - 300 V, 20 Hz - 40 kHz --- 电阻 0 - 11 kohms 0 - 11 kohms 频率 1 Hz - 50 kHz 0 Hz- 50 kHz 压力 -15 to 10,000 PSIG, 0 to 100 PSIA 热电偶 E, N, J, L, K, T, U, B, R, S, C RTDs 10 Cu, 100, 200, 500 and 1000 Pt, 120 W Ni Fluke Introduction 3 2-, 3-, & 4- wire Fluke Beijing 输出 0 - 15 V 0 - 110 mA
按 “As-Found”
需要的参数已经基本被自
动填入 仅需输入误差范围和 校准点数
执行测试
Fluke Introduction 10
Fluke Beijing
步骤 5 - 调整
按调整功能键
HART SERVICE 屏幕自动显
示供用户选择所支持器件的 有关选项
选择要执行的调整功能
提供多种功能
温度测量/输出(11种热电偶,8种RTDs) 压力(0-70000kPa,多种压力模块) 电压测量/输出 电流测量/输出 电阻测量/输出 频率测量/输出
Fluke Introduction 1
Fluke Beijing
基本精度
Model 743B为例, 1年指标(18oC至28oC): 测量 输出 DC Voltage AC Voltage DC Current Resistance Frequency Thermocouples RTDs Pressure 0.05%
1 Fluke Introduction 33
2 Fluke Beijing
“调整后” 校验
进行“调整后”校验,并捕获校验结果,直至数据完全合格为止
。
Fluke Introduction 34
Fluke Beijing
6. 校验压力/温度开关
压力开关
压力模块
手泵
Fluke Introduction 35
Fluke Introduction 28 Fluke Beijing
实现手操器功能
Setup-HART
information:
Manufacturer:生产厂家 Device: 装置型号 Device ID:装置ID
S/W Revision:软件版本
H/W Revision:硬件版本 Num of Preambles:
Fluke Introduction 25
Fluke Beijing
744的HART功能
Fluke Introduction 26
Fluke Beijing
744校准HART智能温度变送器
连接系统
Fluke Introduction 27
Fluke Beijing
获得HART参数
读取变送器HART参数– 按下“HART”键, 打开24V环路电源寻找644变送器的信息。
Fluke Introduction 29
Fluke Beijing
应用:校准温度变送 器
Fluke Introduction 30
Fluke Beijing
应用:校准温度变送 器
调整前数据不合格,数据带着位号串号及操作人的 姓名自动保留在744内
Fluke Introduction 31 Fluke Beijing
