GPRS Modem使用说明书
Delta-T Devices Ltd GPRS-UM-3.1 GPRS Modem 用户手册说明书
User Manual forGPRS ModemDelta-T Devices Ltd GPRS-UM-3.1CopyrightCopyright © 2013 Delta-T Devices Limited. All rights reserved. Under the copyright laws, this manual may not be copied, in whole or in part, without the written consent of Delta-T Devices Ltd. Under the law, copying includes translation into another language.CE conformityThe CE marking identifies this product as complying with all relevant directives in the European Union (EU). For use with the GP1, DL6 or GP2 Logger this may include one or more of the following products:If the equipment is used with any non Delta-T products it is the responsibility of the user to ensure the EMC compliance of any such measuring systems. Design changesDelta-T Devices Ltd reserves the right to change the designs and specifications of its products at any time without prior notice.User Manual Version: 3.1 Nov 2015Delta-T Devices Ltd Tel: +44 1638 742922130, Low Road, Burwell Fax: +44 1638 743155 CAMBRIDGE CB25 0EJ e-mail: ****************.ukU.K. www:ContentsContents 3Scope of This Document 4Introduction 5 Summary 5Support for GP1, DL6 or GP2 loggers 6 Health and Safety 7 Installation 7Batteries 7 Installing GPRS with a GP1, DL6 or GP2 logger 8 Requirements 8Modem Parts 9Parts and wiring used with GP2 Loggers 10Parts and wiring used with GP1 and DL6 loggers 12Overviews: In Use and When Configuring 131: Install GPRS Config Software 132: Install SIM Card 153: Ensure the modem is powered. 164: Insert the USB cable 195: Obtain SIM Card Information 206: Run the GPRS Config Utility Software 217: Set up DeltaLINK 27 Wiring 31 GPRS-GP2 Modem Cable Harness Wiring 31GP2 Network cabling Options with GPRS Modem 31GPRS Modem Wiring with GP2 Logger 31GPRS Modem Box Wiring Harness 33GPRS Modem Box Wiring with GP1 Logger 34 Warranty and Service 35 Terms and Conditions of Sale 35Service, Repairs and Spares 36Technical Support 36Contents 3Scope of This DocumentThese instructions describe the use of a GPRS modem in thefollowing systems;_GPRS Use with a GP2 logger:MD-GPRS-1: GPRS modem kit for mounting with GP2 Logger intoM-ENCL-B2 metal enclosure.The GP2 logger is mounted inside the metal enclosureGPRS Use with GP1 or DL6 loggers:GPRS-BX1/B: polymer Modem Box with GPRS and batteryGPRS-BX1/SP: polymer Modem Box with GPRS, solar power &battery.The GP1 or DL6 logger(s) are mounted outside the boxOther DocumentsYou may also need to refer to the following:- GP2 User Manual- GP1 Quick Start Guide- DL6 Quick Start Guide- Network Cabling for GP1 and DL6- Deltalink 3.1 or later on-line Help- Steca Solsum 6.6F Operating Manual- Solar Panel Manufacturer’s Instructions- SOL 4 Solar Panel Mounting Bracket Assembly Notes- Sierra Wireless AirLink FXT Series User Guide v6.14 Scope of This DocumentIntroductionSummary1.Install the modem configuration software on your PC.2.Install the right SIM card.3.Provide power to the modem.4.Connect modem to the PC with the mini USB cable.5.Obtain the SIM card information.6.Run the GPRS Config software and configure the modem foruse with the SIM card.Once that is done, the modem connects to the internet andthe logger is online.Remove cable from PC to modem.7.Tell the logger’s PC software DeltaLINK how to connect to thelogger via the internet.The logger, if selected, now appears directly connected toDeltaLINK and is ready to use.The internet has become like just another wire connecting thelogger to your PC.Introduction 56 IntroductionSupport for GP1, DL6 or GP2 loggersThe same GPRS device is used by these loggers but the cabling and mounting arrangements for each is slightly different, as shown below.The modem power comes from an LBAT 4 battery shown in the bottom of both boxes.Delta-T supplies these systems fully wired up so you don’t have to worry about wiring.The wiring arrangements are covered in later sections of this manual, one for each logger type.Next the instructions cover configuring the modem and then setting up the DeltaLINK logger software. These are largely the same for whichever logger you use.GPRS modem installed with aGP2 logger controller in an M-ENCL-B2 metal enclosure with SOL-4 solar power charger/regulator and LBAT4 battery.GPRS modem installed in a GPRS-BX1/SP polymer Modem Box with SOL-4 solar power charger/regulator and LBAT4 battery.Health and SafetyInstallationThe solar panels should be covered to exclude light beforestarting the installation.BatteriesBatteries that are prone to give off explosive gases at any stage oftheir charge or discharge cycle must not be mounted in theenclosure without sufficient additional ventilation.Do not use non-approved batteries or other batterycharger/regulators in un-ventilated enclosures.For optimum thermal protection the Solsum solarcharger/regulator should be installed in the same housing as anyexternal battery.See also Warnings in the M-ENCL-B User ManualHealth and Safety 7Installing GPRS with a GP1, DL6 or GP2 loggerRequirements1)DeltaLINK software version 3.1 or later.2)GPRS Config software3)PC with an internet connection.4) A SIM card. The SIM card needs to be GPRS enabled and havea “fixed public IP-Address”. Please contact your SIM providerto obtain this.Once you have received your SIM card, contact your SIMprovider for the “APN” details as well as the assigned “fixedpublic IP-Address”, which will look something likeAPN: “”APN Username: “user”APN Password: “password”IP-Address: 192.168.0.1These details will be needed later on, to connect to themodem and for the modem to connect to the internet.See also page 135)MD-GPRS-1: GPRS modem kit including mini USB cable andGP2 Logger mounted in an M-ENCL-B2 metal enclosure.orGPRS-BX1/B or GPRS-BX1/SP GPRS Modem Box includingmini USB cable6) A source of power is required for the modem, such as theLBAT4 and SOL4 solar power system.At 13.2V the modem’s average consumption is up to 166mA(1.2A peak) when communicating with DeltaLINK, and 3-8m Aotherwise.8 Installing GPRS with a GP1, DL6 or GP2 loggerInstalling GPRS with a GP1, DL6 or GP2 logger 9Modem Parts10 pin Microfitconnector for power supply and reset signal Mini USB interfaceused to connect to PC when setting up modemSUB-D 15 pin serial connectorSIM card slot with sliding latchFigure 1 Modem parts10 Installing GPRS with a GP1, DL6 or GP2 loggerParts and wiring used with GP2 LoggersFigure 2 Top: GP2 Logger/Controller in M-ENCL-B2 enclosure with GPRS modem, cabling, aerial, SOL4 solar power regulator and LBAT4 battery. At bottom: Wiring scheme. See also page 31.Enable text messageFigure 3 GP2-GPRS Cable harness functions. See also Fig 1 and page 31.Note : The cable harness is different for GP1 and DL6 loggers using theGPRS Modem Box, see page 33.(for future use)SIM cardTo logger (Serial comms + power)Text message alarm from logger relayPower+ Reset signal alarm 2A/250V Slow break fuse, 5.2mmx20mmParts and wiring used with GP1 and DL6 loggersFigure 4 Showing the layout of the GPRS modem in the GPRS Modem Box options, with or without solar power.Left : GPRS-BX1/B with battery.Right: GPRS-BX/SP solar power option, with solar power regulator /charger, solar panel (not shown) and battery.This GPRS Modem Box system is used with one or more externally connected GP1 or DL6 loggers via a GP1 network cable.See also GPRS Modem Box Wiring Harness on pages 33 & 34 .Overviews: In Use and When Configuring Figure 5 Showing the use of the mini-USB cable when configuring the1: Install the Modem SoftwareRun the GPRS Config Setup.exe program, which can be found on the Delta-T Software and Manuals DVD or online at Delta-T.Figure 6 Screen shots of the mainelements in the install sequence for the GPRS modem software2: Install SIM Card2.1 Ensure the SIM card meets the requirements on page 8.2.2 Insert your SIM card into the modem as shown. The modem is attached using velcro and is easily removed for access.Note the orientation of the SIM and also pay attention that you close the latch over the SIM card.The latch is the little black slider to the left of the SIM card slot.Figure 7 Adding a SIM card3: Ensure the modem is powered.Connect the battery to provide power to the modem.Powering the modem when using GP2 LoggersFigure 8 Typical power and signal cabling scheme for use with a GP2 logger controller.Figure 8 shows the GPRS powered by a GP2 logger via the GP2 serial cable. This particular GP2 is being itself powered from an external battery via a solar power regulator.WARNING: Cover the solar panel when wiring up the system, as it will be live. Power may also be supplied directly to the GP2 serial cable as shown in the GP2 network cabling diagram on page 31.PowerEnable text messageTo trigger text message connect the signal wire Fuse (6.3A 20mm)Powering the modem when using GP1 or DL6 LoggersPower to the GPRS modem is supplied via the cable harness in the GPRS Modem Box. Power is brought to the DIN rail either directly from the battery via a fuse or indirectly via the solar regulator charger. From the DIN rail it connects to both the modem and also to the external 8-way GP1 network cable socket built into the side of the Modem Box.This means that the battery power is also accessible to any GP1 or DL6 logger externally connected on the GP1 cabling network. (If you don’t want this toFigure 9 Cabling scheme using the GPRS Modem Box type GPRS-BX1/SPfor use with GP1 or DL6 loggers.Regulator/chargerhappen, the wiring at the DIN rail can easily be altered. See Cable harness wiring scheme on page 33)2.1 Check the Modem Flashes.Check to see the Modem LED start to flash next to the SIM card. This indicates that the modem is powered and it is trying to initialise the SIM card and connect to the GPRS network.Modem LED Flashing CodesLED stateFlash rateMeaningPermanently ON ON continuously Modem is ON but not registered on a networkSlow flashON 200ms, OFF 2sModem is ON and registered on a network (idle mode)Very quick flashON 100 ms, OFF 200 ms Modem is ON, but the softwaredownloaded is corrupted or incompatible (BAD software)OFFOFFModem either OFF, or Flash disabled when modem is asleep.Serial Connector LED Flash CodesLED state Flash rateMeaningFlashingOn 0.5s, OFF 0.5s Modem is initialisingFlashing slowlyOn 0.5s, OFF 9sModem connected to GPRS network and waiting for someone to connect from the outsideModem LEDSerial connector LEDReset buttonModem LEDQuick FlashingOn 0.5s, OFF 0.1s Something on the internet is connected to the modem and communicating with the logger OFFOFFModem software is not running correctly, or power is off.4: Insert the USB cableThis is inserted into the GPRS modem (just under the black connector (opposite side from the SIM card) and connect the modem directly to a PC.(There is no need to remove any other cables from the GPRS modem).You may notice Windows installing the modem. (This shouldhappen automatically once the GPRS software has been installed)Configuring the GPRS modemMini USB cableGPRS modemLogger5: Obtain SIM Card InformationMake sure you have obtained the following 5 pieces ofinformation:∙APN (Access point name)∙APN user name∙APN password∙The SIM card’s fixed IP address∙The Port numberThe information will look something like this...Example…APN: “”Username: “user”Password: “password”IP-Address: 192.168.0.1 (used in DeltaLINK)Port number: 8080Note on APN details and IP addressThe SIM card needs to be GPRS enabled and have a “fixed publicIP-Address”.Please contact your SIM card provider to ensure you can obtainthis.Once you have received your SIM card, contact your SIMprovider for the “APN” details as well as the assigned “fixedpublic IP-Address”, which will look something like the examplegiven above.Note on the port number:If you are connected to a larger network that has a firewall andother network policies, you will probably need to speak to yournetwork administrator to determine what “Port” you can use toconnect out to the internet and to the modem. Otherwise youcan use a default port like 8080 or similar.6: Run the GPRS Config Utility Software6.1 Run the GPRS Config UtilityThis can be found from your Start menu in theDelta-T Devices program group.At start up the title bar contains versioninformation.6.2 Select the COM port for your modem.If you know what it is, just select itfrom the drop-down list.Alternatively use the “Detect USB COM port” button. Follow the instructions and the application will detect your modem and update the COM port setting.If it cannot detect the USB COM port it will say so.Check the modem is powered and that the cable is securely attached to the modem and PC.Alternatively re-install the modem USB driver software by repeating step 1 on page 136.3 Click the GO buttonThis will retrieve the modem details, check the firmware version and also retrieve the current modem settings.If this is a new modem, the modem settings (shown on the left) may be empty - as shown in the example below.ModemdetailsFirmwaredetailsModem settingsOther details retrieved from the modem are shown on the right in the blue panel.Note that in the above image, all the checks are OK and green. If there is a problem, then you will be prompted to correct it. Follow the instructions to resolve the issue.6.4 Update Modem SettingsSelect the Update Modem Settings radio button to enable changes to be made to the text box fields, as shown below.For more information on each field, hover the mouse over the editable area and a hint should be displayed as below.6.5 Enter your modem detailsEnter the details as provided by your SIM card provider and your network administrator and press GO.See also page 20.On clicking “GO” your modem should be updated and the following progress bar may appear12Optional information - if you wishto use the logger relay to trigger atext messageBelow your modem has been updated. Note the green “SUCCESSFUL” text in the blue boxYour modem is now configured and you can proceed to try and connect to it from DeltaLINK.7: Set up DeltaLINK7.1 Check you have DeltaLINK version 3.1 or later on your PC7.2 Start DeltaLINK192.168.0.1:80807.3 In Connections select Add to display the ConnectionProperties and give your Connection a name7.4 On the Connectons tab, in Connect to Logger using select TCP/IP from the drop down list.7.5 On the Details tab enter the IP address of the SIM card and the Port Number (see page 20) and OK.192 . 168 . 0 . 18080Your new connection should now appear in the list of connections. In the example below we have called our connection“TCP/IP WS-GP2 @ Polytunnel”192.168.0.1:80807.6 Click on the connection name and OK.This tells DeltaLINK to connect to your logger.In the example below you can see DeltaLINk has successfully connected over the internet to a GP2 logger serial number 3-02. This is one of several GP2 loggers connected to this GPRS modem via GP2 network cabling at our test site.192.168.0.1:8080WiringGPRS-GP2 Modem Cable Harness WiringGP2 Network cabling Options with GPRS ModemGP2-NPTEnabletextmessageWiring 31Power Enable text messageTo trigger text messageconnect the signal wireFuse (6.3A 20mm)32 WiringWiring 33GPRS Modem Box Wiring HarnessFigure 11 Cable harness wiring scheme for Modem Box GPRS-BX1/B. This connects to an LBAT4 battery for power via a fuse on the DIN rail.Figure 12 Cable harness wiring scheme for Modem Box GPRS-BX1/SP . This has a fuse and the solar regulator/charger between the battery and the modem.Optional alarm signal from DIN railDIN railGPRS Modem Box Wiring with GP1 LoggerRegulator/chargerFigure 13 Wiring Scheme using Modem Box GPRS-BX1-SP whichincludes solar power, showing a GP1 logger connected34 WiringWarranty and ServiceTerms and Conditions of SaleOur Conditions of Sale (ref: COND: 1/07) set out Delta-T's legal obligations onthese matters. The following paragraphs summarise Delta-T's position butreference should always be made to the exact terms of our Conditions of Sale,which will prevail over the following explanation.Delta-T warrants that the goods will be free from defects arising out of thematerials used or poor workmanship for a period of twelve months from thedate of delivery.Delta-T shall be under no liability in respect of any defect arising from fair wearand tear, and the warranty does not cover damage through misuse or inexpertservicing, or other circumstances beyond their control.If the buyer experiences problems with the goods they shall notify Delta-T (orDelta-T’s local distributor) as soon as they become aware of such problem.Delta-T may rectify the problem by replacing faulty parts free of charge, or byrepairing the goods free of charge at Delta-T's premises in the UK during thewarranty period.If Delta-T requires that goods under warranty be returned to them fromoverseas for repair, Delta-T shall not be liable for the cost of carriage or forcustoms clearance in respect of such goods. However, Delta-T requires that suchreturns are discussed with them in advance and may at their discretion waivethese charges.Delta-T shall not be liable to supply products free of charge or repair any goodswhere the products or goods in question have been discontinued or havebecome obsolete, although Delta-T will endeavour to remedy the buyer’sproblem.Delta-T shall not be liable to the buyer for any consequential loss, damage orcompensation whatsoever (whether caused by the negligence of the Delta-T,their employees or distributors or otherwise) which arise from the supply of thegoods and/or services, or their use or resale by the buyer.Delta-T shall not be liable to the buyer by reason of any delay or failure toperform their obligations in relation to the goods and/or services if the delay orfailure was due to any cause beyond the Delta-T’s reasonable control.Warranty and Service 35Service, Repairs and SparesUsers in countries that have a Delta-T distributor or technical representativeshould contact them in the first instance.Spare parts for our own instruments can be supplied and can normally bedespatched within a few working days of receiving an order.Spare parts and accessories for products not manufactured by Delta-T may haveto be obtained from our supplier, and a certain amount of additional delay isinevitable.No goods or equipment should be returned to Delta-T without first obtainingthe return authorisation from Delta-T or our distributor.On receipt of the goods at Delta-T you will be given a reference number. Alwaysrefer to this reference number in any subsequent correspondence. The goodswill be inspected and you will be informed of the likely cost and delay.We normally expect to complete repairs within one or two weeks of receivingthe equipment. However, if the equipment has to be forwarded to our originalsupplier for specialist repairs or recalibration, additional delays of a few weeksmay be expected. For contact details see below.Technical SupportUsers in countries that have a Delta-T distributor or technical representativeshould contact them in the first instance.Technical Support is available on Delta-T products and systems. Your initialenquiry will be acknowledged immediately with a reference number. Make sureto quote the reference number subsequently so that we can easily trace anyearlier correspondence.In your enquiry, always quote instrument serial numbers, software versionnumbers, and the approximate date and source of purchase where these arerelevant.Contact Details:Tech Support TeamDelta-T Devices Ltd130 Low Road, Burwell, Cambridge CB25 0EJ, UKemail: ***********************.ukemail: ******************.ukweb: Tel: +44 (0)1638 742922Fax: +44 (0)1638 74315536 Warranty and Service。
金笛MG35 4频段工业级GSM GPRS MODEM商品说明书

公司介绍产品零缺陷,售后零服务。
不需要服务的产品才是更好的产品。
缺图01金笛是一家集硬件、软件研发、生产、销售一体的高科技企业,注册资金2000万元,产品行销海内外,业内享有极高的美誉度。
MU-106M1806-NC5M1806-ME MG301-FT MC323RS232MC323MG301M1206B-FTMG35-FT M1806-NC5M1806-ME M1806N-NC5MG35-N M1806N-ME MG301-N小一体机MN1604大一体机MN1408RJ45M1206BMG35产品概述03把方便留给客户,把麻烦留给我们。
能简单才不简单。
提供高可靠的短信软硬件,立志把可靠性做到极致。
产品经过十多年的技术积累和积淀,不断迭代升级,日趋完善。
产品选型图02金笛MG35是一款全球4频段工业级GSM/GPRS MODEM,是一款2G短信猫。
金笛MG35 GSM/GPRS Modem其工作频段是GSM850MHz,EGSM900MHz,DCS1800MHz,PCS1900MHz。
提供GSM短信,GPRS数传业务,可在全球大多数国家使用。
该产品采用射频基带一体化超小超薄核心芯片方案,具有超低功耗、超宽温度、更快的速度传输率,抗干扰能力强。
经过雷击、浪涌、电脉冲、温度冲击、跌落、盐雾等大量可靠性测试,可靠性达到99.99%,是短信监控、报警、通知和M2M应用的理想方案。
超小超薄核心芯片金笛MG35核心模块采用强劲的ESD保护,直接放电空气±10KV,接触±5KV,充分的FLASH保护机制和多重防呆机制,保证设备可以长期稳定运行。
强劲ESD保护金笛MG35网络兼容性强,发送速度快,另有基站定位、空中升级固件等专利技术,价格却比较亲民,有着超高性价比。
超高性价比串口款USB口款做高性能的短信猫金笛GSM MODEM MG35典雅、端庄,如同一件精致的艺术品,七分圆润三分刚硬每一个细节的品性、品质,都经过严格测试与检测,把可靠性做到极致外壳采用铝合金材质,防刮防指纹,坚固耐用磨砂工艺,高端时尚,质感十足USB款MG35产品配件您可能有这样的经历,插机箱前的USB不识别,插机箱后的USB就正常。
TD-8016GSGSMGPRSMODEM用户手册

TD-8016GS GSM/GPRS MODEM用户手册伊泰克科技(深圳)有限公司目录第一章伊泰克GSM/GPRS MODEM 概述1.1产品说明 (1)1.2技术规格 (1)第二章硬件安装2.1 标准包装内容 (2)2.2 外部接口 (2)2.3 LED指示灯 (3)2.4 硬件安装 (3)第三章常用AT命令集3.1 常见故障排除 (4)第四章疑难排解4.1 通过RS-232串口未正常连接到MODEM (6)4.2 接收到“ERROR”信息 (6)4.3 接收到“No Carrier”信息 (7)附表A:RS-232标准接口的定义 (7)第一章伊泰克GSM/GPRS MODEM 概述1.1 产品说明欢迎您使用伊泰克产品,TD-8016GS GPRS/GSM工业MODEM是一款基于分组无线业务(General Packet Radio Service)传输数据的专业工业控制MODEM。
具有完整的GSM/GPRS 语音和数据容量,和两个可互换双波段,支持锁频功能。
它不仅能够满足用户在GPRS方面的需求。
其严密的工业设计,和更宽的温度范围,特别适合电力监控,以及其他运行环境要求恶劣的室外数据采集的各项应用。
1.2技术规格1.2.1 产品标准●双频:EGSM 900/1800Mhz,GSM 850/1900Mhz(支持锁频功能);1.2.2 语音功能● EVRC及13kQCELP高质量语音●支持DTMF●支持FR/EFR/HR/AMR●音频控制:回声抑制、噪声抑制和增益控制1.2.3 数据功能●支持传真●编码方案:CS1到CS4● GPRS:Max Downlink85.6kbps● CSD:Max BR9.6kbps1.2.4 信息服务●支持TEXT和PDU1.2.5 天线●阻抗:50欧姆●增益(天线+线缆):0 dB i● VSWR(天线+线缆):-1 0 dB1.2.6 电源● 4pin方头、DC 12V/1A1.2.7 环境和机械参数●工作温度:-20℃到+65℃●存放温度:-25℃到+70℃●外形尺寸:96×54×26 mm●重量:105g第二章硬件安装2.1 标准包装内容内容说明TD-8016GS MODEM 1台用户手册1本4pin电源线1条天线1条(选配)15pin串口线1条(选配)当您收到本产品后,请仔细检查是否有因运送而导致的损坏,如发生请与运送者接洽,其他缺少组件或损坏,请与代理商或本公司直接联系。
GPRS联网模块使用说明书两篇

GPRS联网模块使用说明书两篇篇一:GPRS联网模块详细使用说明书安全注意事项1.非常感谢您购买我公司生产的GPRS通讯模块,请在安装及使用本产品前仔细阅读使用说明书,并妥善保管。
2.为确保产品能够正常工作,安装须有经验的技术人员进行,安装过程需严格按照本用户使用手册进行,禁止带电操作。
3.本产品应避免长期接触腐蚀性气体和潮湿环境。
4.切勿将本产品放置在潮湿、雨淋、暴晒、严重灰尘、震动、腐蚀及强烈电磁干扰的环境中。
5.请勿打开本产品外壳自行维修。
一.产品概述1﹑用途KX-GPRS是一款高性价比、稳定可靠,基于GPRS网络研发的数据通讯产品,一般安装于监控子站,实现子站现场设备和监控中心之间的远程数据无线通信。
广泛用于水利、石油、热力、环保、电力等行业的监控与管理.2﹑特点1、工业级设计,适用室外恶劣环境。
2、内置软硬件看门狗,不死机、不掉线。
3、支持数据透明传输。
4、支持域名解析功能。
5、支持组态软件和再次开发软件系统。
二.产品主要功能◆支持GPRS无线透明传输数据;支持与多中心进行数据通信。
◆自动校时功能:支持自动网络定时校时。
◆脱机定时功能:支持脱机自动定时发送开关数据指令(最多可网络设置10种以上脱机运行开关指令)。
◆采集功能:采集串口设备数据,如串口仪表、采集器、PLC等。
◆远程管理功能:支持远程参数设置、程序升级◆未涵盖的规格及要求可按客户要求协议定做.三.基本参数◆电源输入 DC12V ≥100MA◆环境条件工作温度0℃-80℃, 工作相对湿度20%-90%,◆储存温度-60℃~60℃储存相对湿度10%~93%◆通讯:GPRS与串口RS485双向透明传输◆数据格式:8 位数据位,停止位(1、2)可设定,校验位(奇、偶、无)可设定。
◆波特率:300、600、1200、2400、4800、9600、19200(Bit/S)可选。
◆安装方式:标准35MM导轨安装◆外型尺寸(长*宽*高)90*75*70(MM)四.产品外形、结构定义、接口、安装说明:1.产品外形2.结构定义序号名称备注1型号、名称型号、名称标识21 34567注意:(1)如果GPRS 模块安装在密闭的金属箱体内,无法接收GPRS 信号,建议使用吸盘/扩展式天线,天线的信号接收端放到金属箱体外面。
USB GPRS MODEM安装说明书

USB GPRS MODEM安装说明书
1、取下GPRS MODEM上的红色螺帽,并将天线拧上拧紧,如下图
2、用笔尖或大头针轻抵MODEM天线座侧的SIM卡插槽凹孔,SIM卡插槽会自动弹出。
在SIM卡插槽中放入手机SIM卡(芯片面向外),将插槽按原样放回MODEM里
3、将USB连接线的一端和MODEM有相应孔的地方连接;另一端连接上电脑的USB口
4、设备插入手机卡地方的工作指示灯长亮,约8秒钟后指示灯呈现规律闪烁,此时设备工
作正常。
如果始终长亮,则表示卡没插好或卡有问题或者天线未拧紧。
5、双击软件光盘里的USB驱动EXE程序来安装好驱动,或者将软件光盘放进光驱里,操
作系统提示找到新硬件时,选择高级,浏览到光驱的USB驱动程序目录来完成驱动的安装。
完成以上步骤后,就可以在软件的“设备管理”里启动设备,选择相应的COM口,如COM3,波特率如果是短信猫请选择9600,彩信猫选择115200连接上。
ME99 嵌入式 GPRS CDMA IP DTU MODEM 说明书
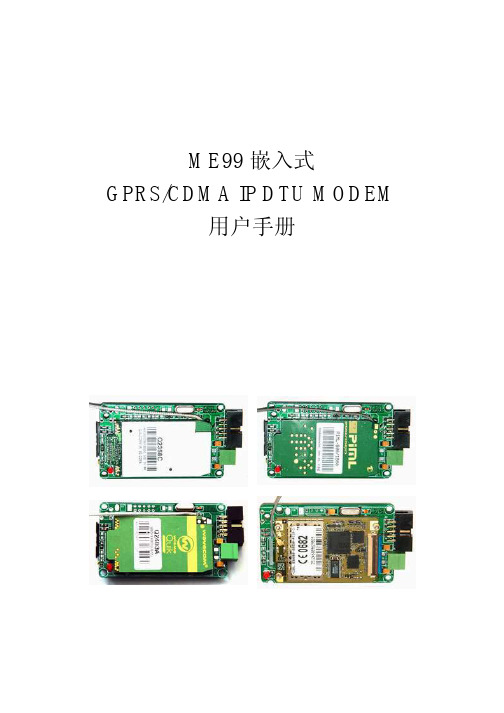
ME99嵌入式GPRS/CDMA IP DTU MODEM用户手册序言:本文档包含ME99嵌入式GSM-GPRS IP DTU MODEM的用户指南和常见问题解答,它可以帮助用户快速的了解产品,并快速应用到客户系统中。
在以下的介绍和说明中我们都用ME99来代表ME99 GSM-GPRS IP DTU MODEM系列无线调制解调器。
参考文档:MC35i module At Command SetCO110PC_ATi_Programmers_Manual_Ver_7_6ME99产品介绍ME99是一款内嵌TCP/IP协议的GPRS IP DTU Modem,它分为IP模块和GPRS模块两部分。
GPRS模块采用工业级的SIEMENS MC35i,兼容MC35i的所有AT命令集;ME99内嵌基于ARM7内核的TCP/IP协议栈控制芯片,软件接口为AT+I命令集,两个模块相对独立,但所有的标准AT命令均通过IP模块透明方式传给GPRS模块。
ME99通常适用于HOST主机没有TCP/IP协议栈,使用串口通讯的情况。
例如单片机数据采集传输系统。
ME99产品性能特点:高度集成GPRS和TCP/IP技术,将互连网和无线网络有机的结合起来支持多种TCP/IP协议,TCP,UDP,DNS,PPP等.支持完全透明传输模式,可完全取代数传电台,最大限度减少系统更新的投入 支持基于DNS协议的动态IP解析功能,可节省租用固定IP的资金支持点对点,点对多点等灵活的组网方式RS232电平或COMS 3.3V电平可选,适合嵌入式集成体积小巧(70 x 43mm),适合于嵌入式应用DC5V输入电压,应用方便支持永远在线模式,断线自动重连,心跳数据包功能。
注意:不能带电插拔SIM卡;不同的GPRS运营商对GPRS参数的要求不尽相同,本文档中所涉及的参数设置只适用于中国移动的GPRS网络。
客户在具体应用中使用的具体参数请咨询当地网络运营商。
嘉兴市鸿道通讯 M210 GPRS MODEM 操作说明书
嘉兴市鸿道通讯科技有限公司无线远程监控系统M210 GPRS MODEM操作说明书M210 GPRS MODEM操作说明书无线远程监控系统M210 GPRS MODEM操作说明书嘉兴市鸿道通讯科技有限公司浙江省嘉兴市城南路1369号科技园区四号楼电话:0573-******** 82651638 82651729 邮编:314001 传真:*************网址:http:// .重要提示:在您使用M210 GPRS MODEM前,请仔细阅读本文,本公司不负责因不按本文规定的方法使用M210 GPRS MODEM而造成的任何损坏。
这篇文档是本公司为M210 GPRS MODEM所作的产品说明,我们将尽最大的努力保证文中所含信息的可靠精确。
但由于产品或软件升级等原因有可能造成本文的部分或全部内容失效,我们不保证由此产生的一切后果,请注意版本变化,并及时更新。
为及时取得最新信息,请随时留意我们的网站: http:// .,如果您对这篇文档或M210 GPRS MODEM 的性能描述有什么不清楚,请联系你的供应商或与我们直接联系,电子信箱为************,以供咨询和解答。
版权本使用说明书包含的所有内容均受版权法的保护,未经嘉兴市鸿道通讯科技有限公司的书面授权,任何组织和个人不得以任何形式或手段对整个说明书和部分内容进行复制和转载。
目录第一章设备简介 (8)1.1 概述 (5)1.2 系统特点 (6)1.3 技术参数 (6)1.4 典型的系统应用方案 (7)第二章安装 (8)2.1 概述 (8)2.2 安全注意事项 (8)2.3 安装 (9)第三章参数设置 (10)3.1 站号设置参数ID (11)3.2 IP地址设置IP (11)3.3 设置IP端口号参数PORT (12)3.4设置短信号码参数PHONE (12)3.5 设置串口波特率参数BAUD (13)3.6设置串口校验方式参数PARITY (13)3.7 设置心跳帧发送间隔时间参数HTH (13)3.8 设置重拨间隔时间参数RDT (14)3.9 设置GPRS接入点参数APN (14)3.10 设置网络通讯协议参数3.11 设置域名解析服务器地址参数DNS (15)3.12 设置域名地址参数DM (15)3.13设置是否域名解析参数IFDNS (15)3.14 设置GPRS传输方式参数TR (16)3.15 设置短信显示方式参数MTR (16)3.16 设置短信发送模式参数SMC (17)3.17 设置短信中心号码参数CSCA (17)3.18参数初始化指令INIT (18)3.19复位指令REST (18)第四章系统参数查询 (19)4.1查询模块状态READ (19)4.2 各设置参数查询 (19)第五章通讯部分指令 (20)5.1发送GPRS数据指令SIP (20)5.2发送短信指令SPH (20)5.3发送短信指令 (20)5.4接收到GPRS数据 (20)5.5接收到短信数据 (21)5.6透明方式传输 (21)第一章设备简介本章概要的介绍M210 GPRS MODEM的构成、特点与工作原理等。
F7916 系列 IP MODEM 使用说明书
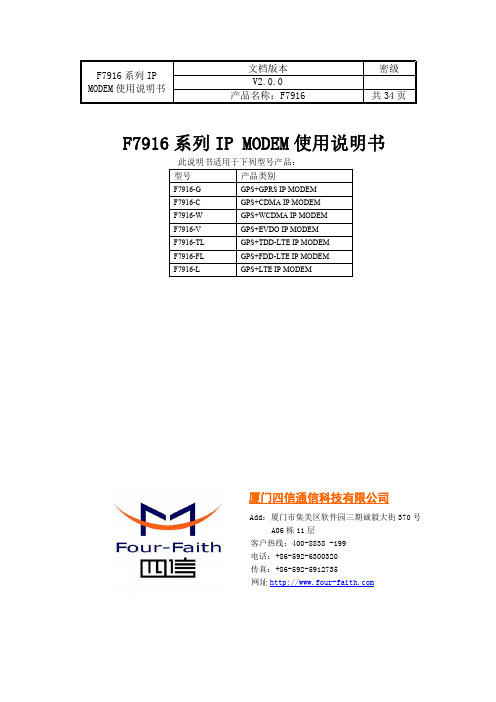
F7916系列IP MODEM使用说明书文档版本密级V2.0.0产品名称:F7916共34页F7916系列IP MODEM使用说明书此说明书适用于下列型号产品:型号产品类别F7916-G GPS+GPRS IP MODEMF7916-C GPS+CDMA IP MODEMF7916-W GPS+WCDMA IP MODEMF7916-V GPS+EVDOIP MODEMF7916-TL GPS+TDD-LTE IP MODEMF7916-FL GPS+FDD-LTE IP MODEMF7916-L GPS+LTE IP MODEM厦门四信通信科技有限公司Add:厦门市集美区软件园三期诚毅大街370号A06栋11层客户热线:400-8838-199电话:+86-592-6300320传真:+86-592-5912735网址文档修订记录日期版本说明作者2017-2-15V1.0.0初建WSP/Zhengli 2017-9-23V2.0.0更新地址Faine著作权声明本文档所载的所有材料或内容受版权法的保护,所有版权由厦门四信通信科技有限公司拥有,但注明引用其他方的内容除外。
未经四信公司书面许可,任何人不得将本文档上的任何内容以任何方式进行复制、经销、翻印、连接、传送等任何商业目的的使用,但对于非商业目的的、个人使用的下载或打印(条件是不得修改,且须保留该材料中的版权说明或其他所有权的说明)除外。
商标声明Four-Faith 、四信、、、均系厦门四信通信科技有限公司注册商标,未经事先书面许可,任何人不得以任何方式使用四信名称及四信的商标、标记。
目录第一章产品简介 (6)1.1产品概述 (6)1.3工作原理框图 (7)1.4产品规格 (8)第二章安装 (12)2.1概述 (12)2.2开箱 (12)2.3安装与电缆连接 (12)2.4电源说明 (15)2.5指示灯说明 (15)第三章参数配置 (16)3.1配置连接 (16)3.2参数配置方式介绍 (16)3.3参数配置详细说明 (16)3.3.1配置工具运行界面 (17)3.3.2设备上电 (18)3.3.4中心服务 (24)3.3.5串口 (26)3.3.6无线拔号 (27)3.3.7全局参数 (28)3.3.8设备管理 (29)3.3.9GPS参数 (30)3.3.10其它功能项 (31)第四章数据传输试验环境测试 (32)4.1试验环境网络结构 (32)4.2测试步骤 (32)第一章产品简介1.1产品概述F7916系列IP MODEM 是一种物联网无线数据终端,利用公用蜂窝网络为用户提供无线长距离数据传输功能,同时提供GPS 定位功能。
GPRS MODEM说明书

Baiyi 深圳百亿科技有限公司
目录
用户使用指南
第一章 产品说明 ......................................................................................................................................3 1、 产品介绍 ............................................................................................................................................3 第二章 产品特点 ......................................................................................................................................4 1、性能指标 ..............................................................................................................................................4 2 、基本特征 ............................................................................................................................................4 3、 配件 ....................................................................................................................................................4 4、硬件接口图 ..........................................................................................................................................5 第三章 用 AT 指测试 MODEM ...............................................................................................................6 1、准备工作 ..............................................................................................................................................6 2、新建超级终端 ......................................................................................................................................7 第四章 拔号上网 ......................................................................................................................................9 1、增加标准调制解调器 ..........................................................................................................................9 2、增加网络连接 ....................................................................................................................................12
金笛 GSM GPRS CDMA 猫池 用户手册说明书

金笛GSM/GPRS/CDMA猫池用户手册金笛无线北京春笛网络信息技术服务有限公司版权所有目录一、金笛串口(RS232)猫池 (4)(一)装箱清单 (5)(二)技术规格 (5)(三)安装步骤 (6)1、安装PCI扩展卡 (6)2、连接数据线、天线、电源线 (9)3、安装SIM卡 (12)4、安装串口猫池驱动 (13)5、测试 (19)二、金笛网口(RJ45)猫池 (24)(一)装箱清单 (24)(二)技术规格 (25)(三)安装步骤 (25)1、查找网口猫池的IP地址 (26)2、安装网口猫池驱动 (26)3、配置COM口 (31)4、保存网口猫池的IP地址 (33)5、测试 (34)三、金笛USB MODEM猫池(MU-106) (35)(一)装箱清单 (36)(二)技术规格 (37)(三)安装步骤 (37)1、安装SIM卡 (38)2、安装USB驱动 (39)3、测试 (43)四、常见故障及解决办法 (44)四、软件安装使用简要说明 (46)(一)金笛短信群发机器人(V2008) (46)(二)短信服务中间件 (48)1、产品目标 (48)2、简要说明 (49)3、技术特点 (49)(三)金笛短信二次开发包 (50)1、OCX、DLL (51)2、C#SDK(.NET) (53)3、JAVASDK (55)一、金笛串口(RS232)猫池背板接口(一)装箱清单序名称数量号1台1金笛GSM/GPRS/CDMA Modem池1U机架式(简称:猫池)2PCI多串口卡(带一拖八数据线)1片3SMA天线(吸盘或短棒选一)8根*(条)4RS232串口延长线8条* 5220V电源线1条6软件光盘(金笛软件光盘和串口扩展卡驱动)2张7用户使用说明书一本8加密狗可选购备注*:如果USB MODEM设备是四口的,天线为4条。
(二)技术规格内置8个通道,可插入8张SIM卡波特率300-115200bits/s支持EGSM900/GSM1800双频环境温度范围为-20°C到+65°C接口RS-232C尺寸440x180x45(mm)标准GSM AT指令输入电源220V50HZ发送速度4800条/小时(八通道同时发送)(三)安装步骤1、安装PCI扩展卡关闭计算机,切断计算机电源,打开主机机箱,将PCI多串口卡(如图1)插在空闲的PCI槽中(如图2)。
GSM双频GPRSCDMA功能数字移动电话机使用说明手册
目录1 基本知识 (9)1.1 简介 (9)1.2 安全须知 (9)1.3 安全警告和注意事项 (10)2 使用前 (16)2.1 各部分的名称和说明 (16)2.1.1技术参数(参数未确定需确认) (16)2.1.2按键说明 (17)2.1.3使用存储T卡 (20)2.2 电池 (21)2.2.1电池的拆卸和安装 (21)2.2.2电池的充电 (22)2.3 连接网络 (24)2.3.1SIM/UIM卡 (24)2.3.2SIM/UIM卡的插入和取出 (25)2.3.3开关机 (26)2.3.4 SIM卡的去锁 (26)2.3.5话机解锁 (27)2.3.6连接到网络 (27)3 基本操作 (28)3.1 拨打电话 (28)3.1.1拨打国内电话 (28)3.1.2拨打固定电话分机 (29)3.1.3拨打国际电话 (30)3.1.4拨打列表中电话 (30)3.2 紧急呼叫 (31)3.3 接听电话 (31)3.4 呼叫菜单 (32)4 功能菜单 (34)4.1 功能菜单的使用 (35)4.1.1滚动搜索选择功能 (35)4.1.2导航键功能 (35)4.1.3退出菜单 (36)4.2 功能菜单结构 (36)4.3 通话中心 (41)4.3.1通话记录 (41)4.3.2通话设置 (44)4.4 电话簿 (47)4.5 多媒体 (49)4.5.1相机 (49)4.5.2相册 (50)4.5.3视频录像器 (52)4.5.4视频播放器 (52)4.5.5音乐播放器 (53)4.5.6录音 (55)4.5.7调频广播 (56)4.6 互联星空 (57)4.7 天翼 (57)4.8 号码百事通 (58)4.9 情景模式 (58)4.10 信息 (59)4.10.1写信息 (59)4.10.2收件箱 (60)4.10.3草稿 (61)4.10.4发件箱 (62)4.10.5彩信 (63)4.10.6电子邮件 (66)4.10.7小区广播 (67)4.10.8模板 (67)4.10.9短信设置 (68)4.11 附加功能 (69)4.11.1文件管理 (69)4.11.2管理器 (69)4.11.3网络服务 (72)4.11.4快捷功能 (74)4.11.5计算器 (74)4.11.6汇率换算 (75)4.11.7码表 (75)4.11.8电子书 (76)4.12 客户服务 (76)4.13 娱乐和游戏 (76)4.14 设置 (77)4.14.1模式设置 (77)4.14.2手机设置 (78)4.14.3安全设置 (79)4.14.4外部连接 (82)4.14.5恢复出厂设置 (86)4.14.6音效 (86)5 输入法 (86)5.1 概述 (86)5.2 键盘定义 (86)5.3 输入法说明 (87)5.3.1智能拼音输入法 (87)5.3.2笔画输入法 (89)5.3.3英文和数字输入 (92)1 基本知识1.1 简介领略其完善的功能和简洁的操作方法。
WAVECOM M1206B 双频GSM外置调制解调器 说明书

WA VECOM M1206B GSM/GPRS MODEM双频GSM外置调制解调器EGSM900/1800Mhz或EGSM900/900MHz体积小及耐震铝外壳即装即用及即时上网已通过GSM Phase2+技术标准的所有认证话音,短信息,传真及数据传输为特定应用设计的AT命令遥控系统技术规范产品性能:双频GSM调制解调器(EGSM900/1800MHz或EGSM900/1900MHz),适用于数据,传真,短信息及话音应用已通过所有认证 其设计及开发符合ETSI GSM Phase2+标准(一般话机)输出功率:Class4(2W@900MHz)Class1(1W@1800/1900MHz)输入电压:5V-32V输入电流:5mA待机状态,140mA在GSM900MHz@12V 通话状态5mA待机状态,100mA在GSM1800/1900MHz@12V 通话状态温度范围:-20℃-+55℃工作状态-25℃-+70℃保存状态产品大小:98×54×25mm产品重量:130克话音,数据/传真,短信息功能●话音功能 呼叫 紧急电话语音编解码:全速率,增强全速率及半速率(FR/EFR/HR)双音多频功能(DTMF)●数据/传真功能 非同步数据电路,透明及非透明数据最高可达标14,400bits/s第三类自动传真机(Class1与Class2)MNP2,V42bis●短信息服务功能 文字及PDU点对点(MT/MO) 小区广播GSM附加业务功能●呼叫转移●呼叫限制●多方通话●呼叫等待及呼叫保持●来电显示●话费提示●非结构化数据补充业务(USSD)●封闭用户群●显示呼叫转移其他功能●开放软件平台(支持嵌入式用户应用系统)● ME+SIM电话簿管理●固定拨号● SIM卡增值服务Class2● SIM卡增值服务Class2● SIM卡,网络及服务供应商锁卡功能●实时时钟●闹钟管理● Xmodem协议作软件升级●支持文字档UCS2介 面● RS-232串连口及通过小型Sub-D15插头连接器的音频介面支持:用AT命令作遥控(GSM07.07及07.05)串连比突率由300至115,200bits/s自动比突率(300至38,400bits/s)●通过微型-FIT4插头连接器的电源● SMA天线接口●滑入式SIM卡储存器可随产品交付件●用户指南●电源线●数据线●用于数据及自动连接的Y型接线路(可选择)。
GPRS模块 MODEM上网操作流程
GPRS模块上网操作流程一)AT指令设置部分1.AT+CSQ 检查信号强度若返回10—31,0之间的信号数字则继续,如果信号是99,99,则应该考虑不停的键入A/命令,不停的让模块去搜寻网络。
2.AT+CIMI 获得SIM卡IMSI,确认SIM卡是否插入。
3.AT+CREG? 若返回为0,1则可以,确认是否能登录到GPRS网络。
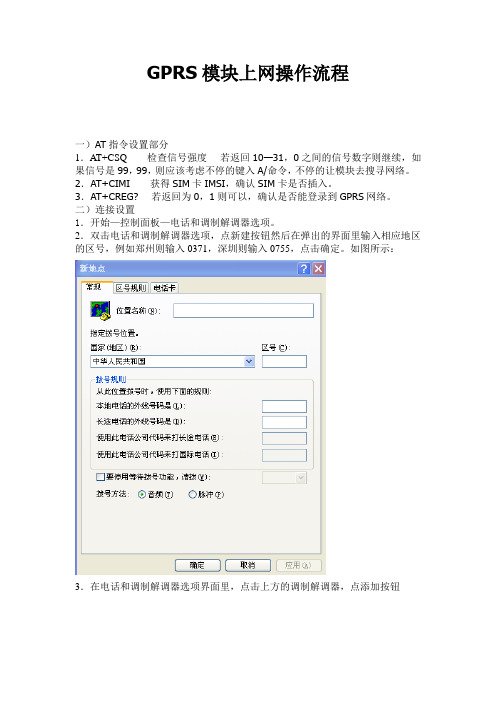
二)连接设置1.开始—控制面板—电话和调制解调器选项。
2.双击电话和调制解调器选项,点新建按钮然后在弹出的界面里输入相应地区的区号,例如郑州则输入0371,深圳则输入0755,点击确定。
如图所示:3.在电话和调制解调器选项界面里,点击上方的调制解调器,点添加按钮然后弹出如下一个界面,并在“不要检测我的调制解调器”前的小方框中打勾,如图所示:点击下一步按钮,并选择标准33600bps调制解调器,如下图所示:点下一步,如下图,选择COM1端口。
点下一步,系统正在安装调制解调器,最后点击完成。
安装完成之后会弹出如下一个界面:点属性按钮,弹出如下界面。
点上方的高级按钮,弹出如下界面。
在额外的初始化命令中输入一条AT+CGDCONT=1,"IP","CMNET" ,如下图所示。
点击确定按钮。
三)设置拨号网络。
电脑网络连接中,选择“创建一个新的连接”下一步“下一步”—“手动设置我的连接”下一步下一步下一步—下一步,最后点完成,此时会弹出如下一个界面。
用户名和密码不填,在拨号中输入*99***1#点拨号,如下图:点击拨号,如果调置正确,就能浏览网页了。
如果不能注册到计算机上,最好重启一下电脑。
诺微电子 EN2000 GPRS MODEM 说明书

EN2000GPRS MODEM 使用说明书重要提示:本使用说明说包含的所有内容均受版权法的保护,未经厦门一诺微电子科技有限公司的书面授权,任何组织和个人不得以任何形式或手段对整个说明书或部分内容进行复制和转载。
目录第一章设备简介1.1概述 (04)1.2产品功能 (04)1.3技术参数 (05)第二章安装设备2.1安装与电缆连接 (06)2.2安装SIM卡 (07)2.3天线安装 (07)2.4数据接口定义 (08)2.5供电电源 (09)2.6检测网络情况 (09)第一章产品简介1.1产品概述EN2000工业级GPRS MODEM是一款基于移动2.5G GPRS网络平台内嵌Siemens MC39i工业级模块的调制解调器,标准工业规格设计,具有中英文短信、语音等功能。
提供RS232标准接口,直接与工控机、工业电脑等上位机设备连接,实现GPRS拨号上网、短消息收发及CSD数据链路通信等功能。
1.2产品功能:◆使用方便、灵活、可靠◆支持双频GSM/GPRS◆标准的AT命令界面◆符合ETSI GSM Phase2+标准◆STK卡特殊功能配置◆提供RS-232标准串口◆支持A5/1&A5/5加密算法◆EMC抗干扰设计,适合电磁恶劣环境应用◆适应低温和高温工作环境厦门一诺微电子科技有限公司产品说明书1.3技术参数:◆所选模块Siemens MC39i◆外型尺寸80x55x21mm◆重量200g工作环境◆模块工作温度-25°C~60°C◆器件工作温度-40°C~85°C◆湿度范围0-95%,非冷凝◆储存温度-40°C~85°C电源◆电压范围DC5V~26V◆标准电源DC5V/1000mA◆功耗通信时平均电流100mA@+5VDC空闲时35mA@+5VDC接口◆天线接口50Ω/SMA阴头◆接收灵敏度-104dbm◆SIM卡3V/5V◆用户数据接口RS-232(DB9)◆波特率300~115200bits/s第二章安装设备●安装与电缆连接●安装SIM卡●天线安装●数据接口定义●供电电源●检测网络情况2.1安装与电缆连接:EN2000GSM MODEM封装在金属机壳内,可独立使用,两侧有固定的孔位,方便用户安装,具体的固定尺寸参见下图。
GF-6000AW 外置式 EDGE GPRS 调制解调器 说明书
GF-6000AW外置式EDGE/GPRS 调制解调器用户手册©北京嘉复欣科技有限公司地址:北京市海淀区阜成路115号北京印象2号楼213室电话:86-10-88122130 88153193 88153197传真:86-10-88122129网站:/上网数传更快捷……数据手册目录第一章 序 言 (1)参考文档 (1)声明 (1)第二章 GPRS与GF-6000AW概要 (2)GPRS的技术优势 (3)GF-6000AW产品介绍 (3)新特性 (4)第三章 基本功能测试 (5)准备工作 (5)详细测试步骤 (6)第四章 GPRS MODEM上网设置过程 (7)安装MODEM (7)设置19200调制解调器 (7)建立拨号网络 (7)设置拨号网络属性 (7)登陆网络 (7)第五章 CSD连接方式 (8)第一章序言本文档包含GF-6000AW GPRS MODEM的用户指南和常见问题解答,它可以帮助用户快速的了解产品,并快速应用到客户系统中。
在以下的介绍和说明中我们都用GF-6000AW来代表 GF-6000AW GPRS无线调制解调器。
参考文档GF-6000AW 硬件手册GF-6000AW 数据手册西门子MC75模块At命令集声明GF,是北京嘉复欣科技有限公司的注册商标;此文档的版权属于北京嘉复欣科技有限公司,任何个人和单位未经北京嘉复欣科技有限公司的许可,不得随意进行复制、传播、修改和引用,违者将受到法律的制裁。
第二章EDGE/GPRS与GF-6000A W概要概要介绍EDGE/GPRS网络特性、GF系列产品的功能、特点及其应用方式。
GPRS介绍GPRS(General Packet Radio Service)是通用分组无线业务的简称。
GPRS是GSM Phase2.1规范实现的内容之一,能提供比现有GSM网9.6kbit/s更高的数据率。
GPRS采用与GSM相同的频段、频带宽度、突发结构、无线调制标准、跳频规则以及相同的TDMA帧结构。
无线modem使用说明
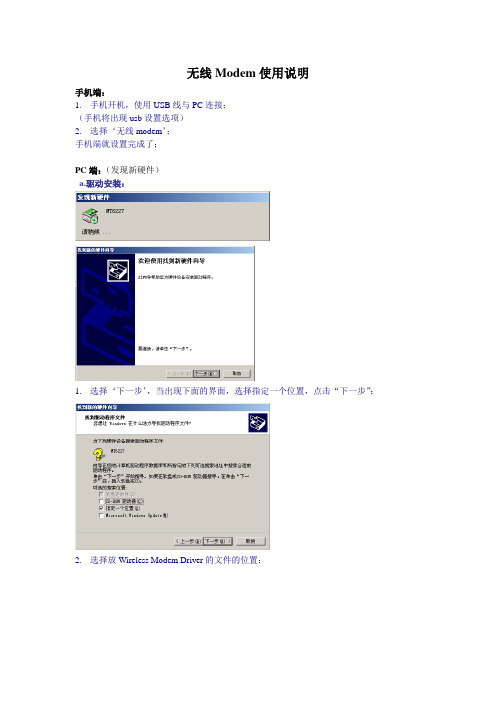
无线Modem使用说明
手机端:
1.手机开机,使用USB线与PC连接;
(手机将出现usb设置选项)
2.选择‘无线modem’;
手机端就设置完成了;
PC端:(发现新硬件)
a.驱动安装:
1.选择‘下一步’,当出现下面的界面,选择指定一个位置,点击“下一步”:
2.选择放Wireless Modem Driver的文件的位置:
注:PC系统是windows 2000和xp的请使用‘2K_XP_COM’里的驱动程序;
3.完成安装:
b.拨号软件的安装:
1.打开GPRS Dial-Up Setting v1.1文件夹,点击;
Connected port :使用默认的端口号(该端口号是连接手机的端口号);
2. Operator选择China_MOBILE;
3. 选择,完成后提示:
4.这时将跳出
5.打开GPRS Connection,选择拨号:
用户名和密码均为空。
6.连接完成:
注意:手机插入的SIM卡必须开通了GPRS。
厦门四信通信 无线数据终端 F2113 GPRS IP MODEM 说明书

无线数据终端F2113 GPRS IP MODEM地址:厦门市软件园观日路44号3层 1 总机:0592-*******目 录第一章产品简介 (3)1.1产品概述 (3)1.2产品特点 (3)1.3系统组成 (3)1.4工作原理 (3)1.5技术参数 (4)第二章 安装 (5)2.1概述 (5)2.2 开箱 (5)2.3安装与电缆连接 (5)2.4电源说明 (6)2.5指示灯说明 (6)第三章参数配置 (7)3.1 IP MODEM连接设置 (7)3.2 参数配置 (7)3.3 功能操作项 (16)3.4 工作状态切换 (17)第四章数据传输实验环境测试 (18)4.1 实验环境网络结构 (18)4.2 实验步骤 (18)第五章附录 (22)地址:厦门市软件园观日路44号3层 2 总机:0592-*******地址:厦门市软件园观日路44号3层 3 总机:0592-******* 第一章 产品简介1.1产品概述F2113 GPRS IP MODEM(本文简称IP MODEM) 利用GPRS 网络平台,为用户提供高速、稳定可靠、永远在线、透明传输的数据通道。
同时,为了满足客户组网方面的需要,可实现虚拟数据专用网。
该产品已广泛应用于移动POS 终端、金融、供应链自动化、智能化运输、工业自动化、智能建筑、智能家居、消防、公共安全、环境保护、气象、数字化医疗、遥感勘测、军事、空间探索、农业、林业、水务、电力、煤矿、石化等领域。
1.2产品特点采用低功耗高性能的嵌入式处理器,可高速处理协议和大量数据 内嵌标准的TCP/IP 协议栈,支持透明数据传输,数据终端永远在线 支持双数据中心备份传输及多数据中心同步传输(5个数据中心) 支持根据域名和IP 地址访问中心 支持虚拟数据专用网(APN )多种工作模式选择,使用方便、灵活 软硬件看门狗设计,保证系统稳定支持TTL 电平串口,速率 110~230400bits/s采用6PIN/2.54mm 间距的插座,外形小巧,专为嵌入式应用设计抗干扰设计,适合电磁环境恶劣的应用需求方便的系统配置和维护接口 支持串口软件升级和远程维护1.3系统组成IP MODEM 系统由下列组成部分: 高性能工业级MCU ,主频100M 256KB Sram & 512KB Flash 高性能工业级GPRS 无线模块1.4工作原理IP MODEM 原理框图如下:地址:厦门市软件园观日路44号3层 4 总机:0592-*******1.5技术参数无线参数:支持EGSM900/GSM1800无线网络 /2+ slot class 10 范速率和半速率持数据和短信功能 口 含电源接口,TTL 电平串口及在线指示接口 行数据速率 电流 <1000mA (4.2V) 嵌入式应用设计,外形小巧,尺寸 70x40x20 mm(不包括5ºC 相对湿度 95%(无凝结)Compliant to GSM phase 2 GPRS multi- GPRS Class BSMG31bis 符合技术规支持双音多频(DTMF ) 编码方案:CS1 - CS4支持全速率,增强全 支持完善的AT 命令 支接:天线接口 50Ω/SMA (阴头) SIM 卡 3V/1.8V 自动检测采用6PIN/2.54mm 间距插座,包 110~230400bits/s 串供:电压范围 3.8~4.6VDC通信电其它参数:不带外壳,专为天线和连接线)工作环境温度 -25~+6 储存温度 -40~+85ºC地址:厦门市软件园观日路44号3层 5 总机:0592-******* 第二章 安装2.1概述IP MODEM 必须正确安装方可达到设计的功能,通常设备的安装必须在本公司认可合格的工程师指导下进行。
- 1、下载文档前请自行甄别文档内容的完整性,平台不提供额外的编辑、内容补充、找答案等附加服务。
- 2、"仅部分预览"的文档,不可在线预览部分如存在完整性等问题,可反馈申请退款(可完整预览的文档不适用该条件!)。
- 3、如文档侵犯您的权益,请联系客服反馈,我们会尽快为您处理(人工客服工作时间:9:00-18:30)。
南京沃龙电子科技有限公司用户手册
GPRS无线上网modem
用户使用指南
产品名称:GPRS无线上网modem
产品型号:AL-GPRS/01型
版权属于南京沃龙电子科技有限公司(2007-2009)
电话:+86-025-********
传真:+86-025-********
网址:
E-mail:allooncn@
邮编:210007
目录
第一章功能简介 (3)
1.2 关于GPRS无线网络 (4)
第二章产品特点 (5)
第三章安装手册 (6)
3.1增加标准调制解调器 (7)
3.2增加网络连接 (9)
第四章GPRS无线上网卡服务程序的安装与使用.................................... 错误!未定义书签。
4.1 服务程序的安装................................................................................. 错误!未定义书签。
4.2 服务程序的使用 .............................................................................. 错误!未定义书签。
4.2.1系统的启动.......................................................................... 错误!未定义书签。
4.2.2 退出系统......................................................................... 错误!未定义书签。
4.2.3 系统管理............................................................................. 错误!未定义书签。
4.2.3.1 查询历史记录....................................................... 错误!未定义书签。
4.2.3.2 系统通讯管理薄编辑...................................... 错误!未定义书签。
4.2.4 功能操作............................................................................. 错误!未定义书签。
4.2.4.1 电话的拨打与接听 ............................................. 错误!未定义书签。
4. 2.4.2 GPRS无线上网...................................................... 错误!未定义书签。
4.2.4.4 检测“GPRS无线上网卡”数据 ................. 错误!未定义书签。
第一章功能简介
1.1 GPRS无线上网modem功能
●功能强大
GPRS无线上网moedm专为广大自由职业人员提供高效、便捷的无线通信。
无论何时何地通过手提电脑都可自由移动上网。
就象有线上网功能一样,不受W AP限制。
适用于所有主要的操作系统,包括WINDOWS(XP ,2000 ,NT,98,ME)。
•无线上网
•拨打电话
•接收和发送短消息
•查询短消息
•保存历史记录
•自动统计上网时间
•通讯薄功能
•导出SIM卡中的数据
•查询信号、电量状态
•浏览任意Internet网页;
•收发E-mail;
•电话语音功能;
•捕获最新股票信息、体育新闻;
•查询公司内部数据库等。
●容易使用
GPRS无线上网moedm向用户提供Internet/Intranet 服务,包括收发电子邮件及浏览网页;其通过无线方式,可24小时挂在网上,不占用任何资源。
●携带方便
尺寸小,重量轻,你可以方便的放进公文包。
无论你是在机场,在火车上,或者在户外,都可以随时开展你的工作。
最新的股票证券动态,公司内部信息,至关重要的球赛战报,都随时随地与你相伴。
●经济实惠
GPRS无线上网modem是同类无线产品中最经济的。
紧凑的设计,115K的速率,优质的性能,在市场竞争中处于有利地位。
你只需花费少量的费用,就可以随时随地与Internet保持连接。
●为你定制
我们为用户开发合适的产品。
在销售,交通运输,金融服务、环保、医疗等领域拥有广泛的前景。
1.2 关于GPRS无线网络
无线GPRS网络,又称为分组数据交换通信。
是基于数字蜂窝电话网GPRS实现分组数据交换传输。
GPRS网是覆盖范围广泛的全数字网,具备提供语音和数据服务的诸多优点,包括较低的误码率及极低的成本。
中国移动在全国范围都建有网络,并可实现全国漫游。
●安全性最成熟
事实上,未经认可的用户是不可能通过GPRS网络破解或获得网络信息的。
●优良的可靠性
GPRS无线上网modem的无线IP网络确保数据被安全地送到目标地址。
第二章产品特点
◆产品特征
GPRS无线上网modem是为语音、短消息、数据和GPRS无线上网而设计的。
输入电流:5mA 待机状态,200mA在通话状态
输入电压:5V–24V,外接电源
◆基本特征
支持AT命令,支持TCP/IP,UDP以及PPP协议
115Kbps 全双工传输率
双音多频功能(DTMF)
短信息服务功能
◆ 附加服务
来电显示
电话簿管理
SIM增值服务
◆GPRS数据特征
数据特性
标准RS-232接口,
高灵敏度天线
语音接口,来电通过语音接口可以收发语音
自动进入省电模式
3V活动SIM插槽
◆ 配件
外置高灵敏度天线
串口RS-232连接线
程序、说明光盘
电源
◆应用
语音通讯、短信息收发
无线收发电子邮件、GPRS无线上网
无线数据传输、移动办公及管理
第三章安装手册
GPRS无线上网modem是基于GPRS网络开发的终端产品。
外观精致小巧,待机状态仅耗电5毫安。
使用标准RS232接口,台式机、手提电脑均可使用,无论在何地让你随时随地网上冲浪!
产品清单如下:
1.GPRS无线上网modem一台;
2. 串口连接线一根;
3.外置高灵敏度天线一根;
4.电源1个。
●安装前信息
为了使您购置的“GPRS无线上网”在标准的GPRS网络中传送数据,你的电脑至少有Windows 98,XP,2000,ME以上的操作系统。
在安装“GPRS无线上网”之前,首先您必须确认您的电脑已做了如下配置:
●已安装有“TCP/IP”网络服务协议;
●已安装有“拨号网络
3.1增加标准调制解调器
1、在控制面板,双击“电话和调制解调器” (如图1-7)
1-7
2、按”添加” (如图1-8)
1-8
3 、不要检测我的调制解调器,我将从列表中选择。
(如图1-9)
1-9
4、选”标准调制解调器类型”, 标准33600bps调制解调器,(如图1-10)
1-10
5、选定的端口,如COM1, COM2,or COM3按”下一步”(如图1-11)
1-11
6、按”完成”.标准调制解调器安装完毕。
7、标准调制解调器,”属性”设置(如图1-12)
1-12
8、最大端口速率,”115200” ,按”确认”如图1-13
1-13 3.2增加网络连接
1、控制面板,双击”网络连接”如图1-14
1-14 2、创建一个新的连接,如图1-15
1-15
3、如图1-16所示, 点击“下一步”继续
1-16
4、点击“连接到Internet”点击“下一步”继续,如图1-17所示;
1-17
5、点击“手动设置我的连接”,点击“下一步”继续。
如图1-18
1-18
6、点击“用拨号调制解调器连接”。
如图1-19
1-19
7、出现如图1-15所示的画面, 点击“下一步”继续. 如图1-20
1-20
8、出现如图1-21所示的画面, 点击“下一步”继续。
1-21
9、出现如图1-22所示的画面, 点击“下一步”继续。
1-22
10、出现如图1-23所示的画面,用户名和密码不用填写,点击“下一步”继续.。
GPRS上网拨号电话号码用”*99***1#”。
1-23
11、点击“完成”.在电脑桌面上会自动添加一个GPRS连接的快捷方式。
双击刚才新建的拨号网络,置空用户名和密码,拨号进行,检测用户名和密码,通过之后登陆网络。
拨号网络的标志出现在右下角上,打开IE就可以浏览网页了。