SONY摄像机摄像机控制单元CCU-D50P 操作手册(简体中文)
索尼 PCS-G50 G50P视频通讯系统 说明书

如果远端会址5正在讲话
如果远端会址2正在讲话
全向型扬声器组成。该系统的设计可以在最大程度地 降低背景噪音的情况下提高当前讲话人的语音,从而 确保在所有方向都有清晰的音质。配合使用可选的
图3分频显示模式下的语音切换
视音频记录到Memory StickTM媒体
在视频会议的过程中捕捉音频和视频对于记录会议内 容是非常重要的。有了PCS-G50,在主监视器上显 示的音频和视频能够直接以MPEG-4格式记录 *4 到 记忆棒(Memory StickTM)媒体中,并且能够在任何使 用QuickTime 媒体播放器的计算机上重播。
系统配置范例
摄像装置 PC 监视器 摄像装置 扬声器
PCSA-DSB1S PC PCS-A1 监视器 电子白板 CTE-600
PCS-G50
PCS-G50
PCSA-B768S
IP网络 ISDN
PCSA-B384S
PCSA-B768S
PCS-1/1P
PCS-TL50
PCS-11/11P
PCS-1/1P
*5 发送数据需要采用可选PCSA-DSB1S双流盒(DSB) ,但是,接收数据 不需要DSB。 *6 要获得兼容数字白板的信息请联络当地的索尼销售处。
语音切换
PCS-G50缺省设置为语音切换,当设备为全屏模式 时,在监视器上显示正在讲话的远端会址。在分屏显 示模式下,正在讲话的会址以六个子屏幕中最大的一 个显示,而近端会址显示在原来远端会址显示的子屏 幕位置。
数据共享能力/数字白板支持
用户可以与视频会议的与会者分享源于计算机的数 据,从而使得沟通更加有效。任何能够在计算机上显 示的图片都可以原有的XGA分辨率发送或接收*5,这 样视频会议的与会各方可以共享数据。此外,与会各 方可以实时查看在电子白板*6上的信息或者捕捉并存 储这些信息以备以后的会议使用。
Sony NX5u Camcorder使用手册说明书
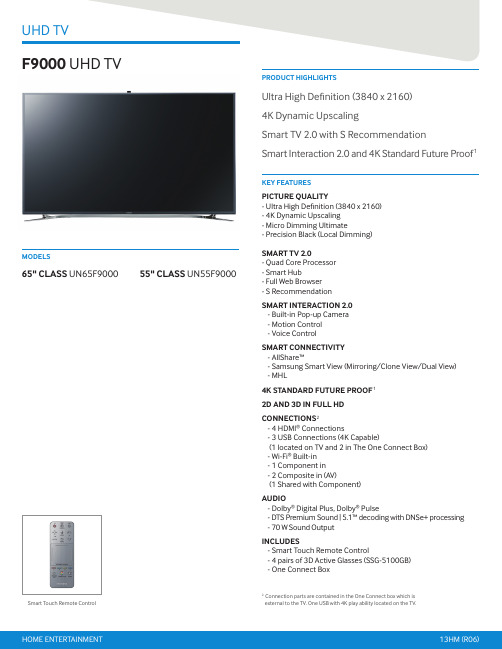
Sony NX5u GuideThis manual will explain how to use the main functions of the Sony NX5u Camcorder. It will be assumed that the camera is in the default settings. We will cover the most likely situations that you will encounter, however there are situations that may occur that are not covered by this manual. In that case we encourage you to use your head, think through the problem slowly and reference the cameras manual included with the rental.The basic camcorder package will contain the following items:Sony NX5u CamcorderPorta Brace BagSony ECM-XM1 Shotgun MicAssorted CablesRCA CableUSB CableComponentDC Power Cable (charger to Camera)AC Power Cable (Wall to Charger)Sony AC-VL1 Battery ChargerWhite CardManualCD ManualCD Content Management UtilityEye CupUSB Card ReaderRemote ControlSD Card 16GB Panasonic w/ caseReference Image #2Reference Image #4Turning the camera onThe camera can take power from either a wall outlet or a battery. The battery should be obvious so I will only describe the wall outlet option. Pgs. 12-16 in the manual1.Remove the battery charger, DC Power Cable (charger to Camera), and AC Power Cable (Wall toCharger) from the bag.2.Connect the power cord to the wall outlet3.Connect the DC coupler cord to the AC Adapter/Charger4.Set the mode switch of the AC Adapter/Charger to VCR/CAMERA.5.Attach the DC coupler to the Cameras battery slot.6.Turn on the Camera. Rotate the On/Off switch from off to on.Setting up the Memory CardsThe camera will record onto SD media cards with a Class 6 or higher rating. The station supplies a single 16GB Class 10 SD card for your use. Be sure to format or erase all data on the cards you intend to use prior to shooting as the camera cannot erase the cards during recording. Pgs. 19, 24-26 in the Manual.1.Insert your media card into the camera card slots located next to the battery.a.The protective cover opens from right to left.b.The angled corner on the SD card faces down.2.With the camera turned on, press MODE.3.Press MODE again and choose MANAGE MEDIA.4.Select MEDIA FORMAT and then the card you wish to format.5.Confirm twice and the selected media will be formatted.Changing the Record FormatIn this step you will be changing the record settings. This includes switching between SD/HD and changing the recording quality.1.Press the MODE button, Select CAMERA, and then MOVIE.2.Press MENU and navigate to REC/OUT SET and then REC SET.a.Choose the HD/SD mode that works for youb.The left column determines what will be recorded on the SD cards and the right columndetermines what will be recorded on the external hard drive (not included).3.Selection of an option returns you to the previous screen.4.Next open REC FORMAT.a.The left column is HD and the right column is SD.b.Only one column will be available. Which one depends on your choice in step 2.c.FX,FH,HQ,LP are quality settings. FX has the best recording quality and LP has thelongest runtime.d.I recommend shooting in 1080/30p FX or 720/60p FX.5.After making your selection, accept the change and press MENU to exit.6.You are ready to record.Adjusting for the shotThese are the settings that you need to change to adjust exposure and color balance for each shot.1.With the camera Turned on and the lens cap open, point the camera at your subject.2.Default the settings as follows.a.Set the AUTO-MAUNUAL button to MANUALb.Set the IRIS to F4c.Set the GAIN to L or 0DBd.Set the ND FILTER to OFFe.Set the SHUTTER to twice your frame rate.f.Set FOCUS to MAN3.Adjust the image so that it is properly exposed.a.Try to keep the F-Stop between F3.7-F5.6e the ND FILTER to reduce the light.e the GAIN to boost the lighti.Avoid using GAIN if at all possibleing the shutter to boost or reduce light also worksi.Be aware that the SHUTTER controls motion blur.4.White Balance the Cameraa.Place the white card nearest to the object you want to be the most correct in the shot.b.Zoom in as close as you can to the card and adjust the white balance appropriately.c.Refer to the camera manual for details on how to white balance.5.Your video should now be ready to record.Don’t forget the AudioAudio is an all too often overlooked aspect of video production. I will describe the process of routing and balancing your audio levels in the camera.1.Plug your microphone into INPUT 1 and/or INPUT2.ing the Input type panel located behind the XLR inputs, designate the appropriate mic typefor each input.a.Line for audio from devices, mic for dynamic microphones and mic+48V formicrophones that require phantom power3.Now look at the audio panel on the left side of the camera.a.This panel affects the recorded audio channels4.The left two switches are channel inputs.a.You are recording two audio channels at any point in time, these switches determinefrom where each channel receives its audio.b.Channel 1 can receive audio from either XLR Input 1 or the internal mic.c.Channel 2 can receive its audio from XLR Input 1, XLR Input 2, or the internal mic.5.The two switches in the middle change the gain controls from AUTO to MANUAL.a.Auto Gain Control or AGC is fairly accurate but cannot differentiate betweenbackground and foreground noise and will adjust itself.b.Manual mode will get the best results if you monitor and adjust the gain as needed.You are now ready to record your interviewOne of the great things about these cameras is the ease of reviewing the footage you just shot. Take your time with the setup and check your results and be sure to have fun.。
sony常见摄像机控制线说明

4、终端的控制接口的默认波特率为9600。 5、SONY摄像头的默认波特率为9600。
作为RS-485接口时的线序
引脚编号 1 2 3
4
5
6 78
信号定义 空 空 空
A
B
3; 收发送数据-
SONY D70的RS-422口
12
TX TXD D ININ+
3
RXD IN+
4
RXD IN-
5 GND
6
TXD OUT+
7
TXD OUT-
8
RXD OUT+
9
RXD OUT-
SONY系列摄像头的连线控制
9)终端使用RS-422接口控制时的连线:
终端端的COM2口 作为RS-422接口时的线序
引脚编号
1
信号定义
A
信号含义 接收数据
2 B 接收数据
345 6
7
空空空 空
Y
发送数据
8 Z 发送数据
SONY D70的RS-422口
12
TX TXD D ININ+
3
RXD IN+
SONY系列摄像头的连线控制
9)终端使用RS-232c接口控制多个摄像头时,摄像头之间需要有 一根特殊的线(菊花莲)。
1
2
2
1
3
5
4
4
5
3
相机基本使用操作规程(3篇)

第1篇一、准备工作1. 确保相机电量充足,如需长时间拍摄,请提前充电或更换电池。
2. 检查相机内存卡容量,如不足,请及时更换或格式化内存卡。
3. 清洁相机镜头,确保拍摄效果。
4. 熟悉相机各项功能及操作方法。
二、开机与关机1. 开机:将相机背面的电源开关拨至“ON”位置,待相机自动完成初始化后,即可正常使用。
2. 关机:将相机背面的电源开关拨至“OFF”位置,关闭相机电源。
三、设置相机参数1. 模式选择:根据拍摄需求,选择合适的拍摄模式,如自动模式(AUTO)、程序自动模式(P)、光圈先决模式(A)、快门先决模式(S)、手动模式(M)等。
2. 对焦模式:根据拍摄场景选择合适的对焦模式,如单次对焦(S)、连续对焦(C)、自动对焦(AF)等。
3. 测光模式:根据拍摄场景选择合适的测光模式,如点测光、中央重点测光、平均测光等。
4. 白平衡:根据拍摄场景选择合适的白平衡,如自动白平衡(AWB)、预设白平衡(如日光、阴天、荧光灯等)等。
5. ISO感光度:根据拍摄场景和光线条件调整ISO值,如ISO 100、ISO 200、ISO 400等。
6. 快门速度:根据拍摄需求调整快门速度,如1/60秒、1/125秒、1/250秒等。
7. 光圈值:根据拍摄需求调整光圈值,如f/2.8、f/5.6、f/8等。
四、拍摄操作1. 确保相机处于正常工作状态,调整好拍摄参数。
2. 将镜头对准拍摄对象,保持相机稳定。
3. 轻轻按下快门按钮,完成拍摄。
4. 如需拍摄连拍,请按住快门按钮不放,相机将自动连续拍摄。
5. 拍摄完成后,查看拍摄效果,如需调整,请重新设置相机参数。
五、存储与传输1. 拍摄完成后,将内存卡插入电脑或相机,将照片导入电脑。
2. 使用相机自带的数据线或无线传输功能,将照片传输至电脑。
3. 对照片进行整理、编辑和备份。
六、注意事项1. 避免在强光、高温或潮湿环境下使用相机,以免损坏相机。
2. 保持相机清洁,避免灰尘、油脂等污染镜头。
CCU590使用说明

SONY CCU -590 操作使用说明桐乡市广播电视台技术中心第一版目录概述 (1)功能和场景的片段和控制 (1)主面板 (1)后面板 (2)内部切换和内部板卡 (5)内部切换开关 (5)内部板卡 (6)连接到摄像机 (7)注意事项 (7)自检 (8)摄像机设置 (8)摄像机系统状态 (8)摄像机系统自检结果 (9)网络设置 (10)CCU内部板卡的自检结果 (11)摄像机内部板卡的自检结果 (14)ROM版本说明 (15)退出自检模式 (15)概述CCU 590 摄像机控制单元提供了多样化的摄像机远程控制和调试功能。
功能和场景的片段和控制主面板1.摄像机数字页签/信号指示灯有红色信号输入,则点亮为红色。
有绿色信号输入,则点亮为绿色。
显示的数字信号就是相连的摄像机号。
2.电源切换/摄像机和主指示灯电源切换按钮为整个摄像机系统提供电源提供控制,包括CCU590、摄像机和相连的远程控制单元。
MAIN和CAM指示灯在电源切换打开的时候点亮。
注:如果CCU上的风扇停止工作,那么MAIN指示灯会闪烁,提示不正常工作状况。
需要立刻切断电源,联系SONY售后服务。
3.连线警告指示灯OPEN:如果没有线连接到CCU后面板上的CAMERA摄像机连接器,或者有摄像机连接但连线信号非常低时,该指示灯点亮。
SHORT:连线过载时该指示灯点亮。
4.音频输入/输出/设置模块INCOM:XLR 5针连接头INCOM level control:调整输入电平。
MIC/PGM 切换器:ON:打开连接头麦克风OFF:关闭麦克风PGM:当有一个头戴在使用时输出音频。
如果切换到这个选项,INCOM电平会对输入音频电平进行调整。
PGM1和PGM2的电平可以通过在AU板上面板侧上的VR来调整。
INCOM 选择:通过INCOM/TALLY/PGM选择交换信号输入输出的路径。
PROD:产生者线路。
PRIV:产生者线路和工程线路被切断了,只有CCU和连接到该CCU后面板上的摄像机之间的通信是可以使用的。
SONY摄像机菜单设置详解

再现拍摄物体的真实质感和光感(5)
菜单调整方法: 3、调整DETAIL LEVEL;(-99~+99 默认值:0)
路漫漫其修远兮, 吾将上下而求索
再现拍摄物体的真实质感和光感(6)
细节: 细节调整可以锐化或柔化拍摄的画面,根据拍摄的需要可以调整。
细节校正信号
原始图像信号
路漫漫其修远兮, 吾将上下而求索
降低暗部细节功能带来的暗部噪波(3)
菜单调整方法: 2、打开LEVEL DEPEND功能;(默认)
路漫漫其修远兮, 吾将上下而求索
降低暗部细节功能带来的暗部噪波(5)
菜单调整方法: 3、调整LEVEL DEPEND LVL功能;(-99~+99)
路漫漫其修远兮, 吾将上下而求索
降低暗部细节功能带来的暗部噪波(5)
设置后的画面
低照度环境下增强暗部的色彩饱和度(3)
菜单调整方法: 1、打开BLACK GAMMA菜单;(在PAINT菜单下)
路漫漫其修远兮, 吾将上下而求索
低照度环境下增强暗部的色彩饱和度(4)
菜单调整方法: 2、打开BLACK GAMMA 菜单;(默认)
路漫漫其修远兮, 吾将上下而求索
低照度环境下增强暗部的色彩饱和度(5)
暗部区域的噪波下降
ቤተ መጻሕፍቲ ባይዱ
设置前的画面
路漫漫其修远兮, 吾将上下而求索
设置后的画面
降低暗部细节功能带来的暗部噪波(2)
SONY摄像机的特点: SONY摄像机具备的LEVEL DEPEND功能可以有效的控制暗部区域的噪波,
得到生动的画面。 菜单调整方法:
1、打开DETAIL 1菜单;(在PAINT菜单下)
路漫漫其修远兮, 吾将上下而求索
索尼F9000UHD电视说明书
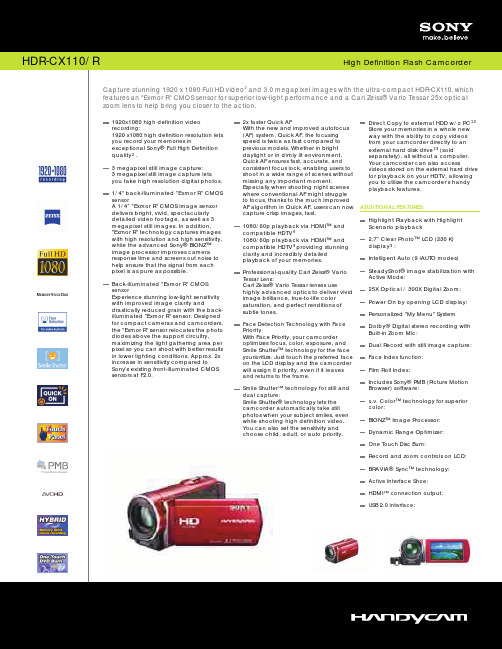
KEY FEATURESPICTURE QUALITY- Ultra High Definition (3840 x 2160)- 4K Dynamic Upscaling- Micro Dimming Ultimate- Precision Black (Local Dimming)SMART TV 2.0- Quad Core Processor- Smart Hub- Full Web Browser- S RecommendationSMART InTERACTIon 2.0- Built-in Pop-up Camera- Motion Control- Voice ControlSMART ConnECTIVITY- AllShare™- Samsung Smart View (Mirroring/Clone View/Dual View)- MHL4K STAnDARD FUTURE PRooF 12D AnD 3D In FULL HDConnECTIonS 2- 4 HDMI® Connections- 3 USB Connections (4K Capable)(1 located on TV and 2 in The One Connect Box)- Wi-Fi® Built-in- 1 Component in- 2 Composite in (AV)(1 Shared with Component)AUDIo- Dolby® Digital Plus, Dolby® Pulse- DTS Premium Sound | 5.1™ decoding with DNSe+ processing- 70 W Sound OutputInCLUDES- Smart Touch Remote Control- 4 pairs of 3D Active Glasses (SSG-5100GB)- One Connect BoxMoDELSUltra High Definition (3840 x 2160)4K Dynamic UpscalingSmart TV 2.0 with S RecommendationSmart Interaction 2.0 and 4K Standard Future Proof 1PRoDUCT HIGHLIGHTSSmart Touch Remote Control65" CLASS UN65F900055" CLASS UN55F90002. Connection parts are contained in the One Connect box which ise xternal to the TV. One USB with 4K play ability located on the TV.PICTURE QUALITYUltra High Definition (3840 x 2160):The Ultra High Definition picture is four times the resolution of a Full HD TV, delivering a crystal-clear picture.4K Dynamic Upscaling:The dynamic 4K upscaling engine automatically detects the kind of image you have, then seamlessly enhances it. So you enjoy nearly 4 times the resolution of Full HD TV.Micro Dimming Ultimate:Displays a picture that is as true-to-life as possible by maximizing the contrast between light and dark. Our innovative technology scans zones across the image and adjusts brightness to deliver deeper dark tones and brighter whites. It also eliminates the “halo” effect and image distortion that can happen with diffused lights. The Ultimate version of this technology optimizes the quality to new heights by scanning 2 times the number of zonesin the image.Precision Black (Local Dimming):Produces a much greater increase in contrast and black levels by dimming LEDs behind dark areas of the picture, thus making blacks darker without affecting brighter elements of the picture. SMART TV 2.0The Samsung Smart TV finds the movies and TV shows you like – and more. Speak into the mic on the Smart Touch Remote to get TV recommendations. Use gestures to swipe and navigate within the 5 Smart Hub content panels. Easily discover movies, shows, and social posts with less searching and more watching.Quad Core Processor:Explore and multi-task faster with our Quad Core Processor. This extra power gives you faster web browsing, smoother interaction and allows you to switch between content even faster than before. Smart Hub:Our new interface organizes your entertainment and content into 5 convenient panels: On TV, Movies and TV Shows, Social, Apps, and a panel for your Photos, Videos and Music.Full Web Browser:All the benefits of Full Web Browsing, right on your TV. From social sites like Facebook® and Twitter® to news, weather, entertainment, blogs and more. Discover even more content possibilities with your Smart TV.S Recommendation:Discover what you want to watch without surfing channels just by asking your TV. It will respond to your voice and find a selection of customized content options based on your preferences. Ask the TV for recommendations while you’re watching TV, for example "what football games are on?" Or visit the full S Recommendation hub to find new things to watch.SMART InTERACTIon 2.0Speaking into the built-in microphone on the Smart Touch Remote Control along with hand gestures all control your TV in new and unexpected ways. Use S Recommendation with Voice Interaction to ask your TV to find things to watch and get program suggestions.Built-in Pop-up Camera:Useful for video calling applications such as Skype™, the built-in camera is hidden within the top of the bezel and pops up when slight pressure is applied.SMART ConnECTIVITYAllShare™:Samsung AllShare Play lets you and your family seamlessly share your content across your DLNA®-connected Samsung devices, without the need for a network, cables or a connecting device. Samsung Smart View (Mirroring/Clone View/Dual View) compatible: Stream content playing on your TV straight to your mobile device so you never miss a second of the action.MHLA mobile audio/video interface standard for connecting and charging portable electronics devices to high-definition displays.4K STAnDARD FUTURE PRooF 1The One Connect Box 1 allows you to update your Smart TV in the future. The box plugs into your TV and updates it with new software and technology that will adapt to future Ultra HD standards and improve your TV performance –faster speed, more content, more features.1 One Connect Box accessory provided separately. Not available for all TV models. Available in 2014. Performance and specifications may vary.subject to hardware limitations.2D AnD 3D in FULL HDExperience vivid, lifelike detail and clarity in both 2D and immersing 3D. ConnECTIonS 2One Connect Box:External accessory that contains connection parts and where hardware and software updates can be updated.HDMI®:High-quality single-cable digital audio/video interface for connecting the TV to a digital cable box, satellite box, DVD and Blu-ray Disc® Player, PC computers, PC portable devices, new-generation tablets and devices featuring the HDMI® output. CEC capability permits the control of the TV and component from one remote control handset.USB:Connects a variety of computer, audio and video devices to the TV. USB movie capability allows the streaming of video from storage devices, cameras, camcorders and USB drives. All our USB connections allow you to play 4K content directly without an external device.Wi-Fi® Built-in:No additional equipment is needed to connect with an existing wireless router in your home network and to start accessing Samsung Apps or other Smart TV features.Component in:Analog video connection transmits HD RGB video using three RCA connections.Shared Composite in (AV):Analog video connection transmits video using one RCA connection.AUDIoDolby® Digital Plus / Dolby® Pulse:Optimizes the TV sound quality when viewing and listening to Internet movies, Internet music and other content played back from wired or wireless mobile phones, PCs and tablet devices.DTS Premium Sound | 5.1™ decoding with DNSe+ processing: Delivers immersive 5.1 surround sound from any DTS-encoded content and converts any two-channel audio content into a 5.1 DTS surround sound track for discrete surround sound playback. Samsung’s DNSe+ processing provides selectable custom settings for experiencing surround sound with maximum bass response, dialog clarity and consistent volume levels from any content source, including Blu-ray movies, TV programming, streaming and games.ACCESSoRIES InCLUDEDSmart Touch Remote Control:Enjoy all the benefits of a Universal Remote with the Smart Touch Remote Control. Use it to control multiple devices connected to your Smart TV, including the set top box, Blu-ray Disc™ Player and Home Entertainment System. The innovative touch pad allows for quick and intuitive navigation, while the built-in microphone provides an alternative way to control your Smart TV with your voice.3D Active Glasses:When combined with Samsung 3D entertainment, 3D Active Glasses bring viewing to vivid life. Samsung’s newest 3D Active Glasses offer even greater comfort over hours of viewing. WARRAnTY1-year parts and 1-year labor warranty (90-days parts and labor for commercial use) with in-home service, backed by Samsung toll-free support.Appearance and performance of products may vary. Some features may not be available inall areas. The guide is provided for dealer information purposes only. All information included herein is subject to change without notice. Samsung is not responsible for any direct or indirect damages, arising from or related to use of or reliance on the content.©2013 Samsung Electronics America, Inc. Samsung is a trademark or registered trademark of Samsung Electronics Co., Ltd. Blu-ray Disc® and Blu-ray™ are trademarks of the Blu-ray Disc® Association. All other brand, product, service names and logos are marks and/or registered trademarks of their respective owners. Screen images are simulated. Some devices may require Internet access. Apps may vary by product model.Screen images are simulated.TV without stand: 49.0" x 28.3" x 1.5" TV with stand: 49.0" x 29.8" x 12.2" Package: 57.5" x 32.3" x 7.3" WEIGHTTV without stand: 48.9 lbs.TV with stand: 52.0 lbs. Package: 68.3 lbs.。
SONIC 数码摄录放一体机 数码摄放一体机 操作指南

4
搜索开始位置 .................................................. 29 搜索最近一次录制的最后一个场景(END SEARCH) ......................29 手动搜索(EDIT SEARCH) ...........................................29 回顾最近一次录制的场景(录制回顾) ................................29
• 带有 标志的小型DV卡带(带有
Cassette Memory的小型DV卡带不相
容)(第96页)。
• 带有
,
标志的“Memory
Stick Duo”(第98页)。
关于使用摄像机 • 切勿握住以下部位持拿摄像机。
取景器
液晶显示面板
电池组
• 使用USB或i.LINK电缆将摄像机连接 至其它设备之前,必须以正确的方向 插入连接插头。 如果您以错误的方 向强行插入连接器插头,则可能损坏 端子,或导致摄像机故障。
• 将液晶显示屏、取景器或镜头长时间 暴露在直射阳光下可能会导致故障。
• 切勿瞄准太阳。 否则可能导致摄像 机故障。 只能在太阳亮度很低的情 况下拍摄太阳照片,如黄昏。
2
关于录制 • 开始录制之前,先测试录制功能,以
保证录制的图像和声音没有问题。 • 即使由于摄像机、储存媒质等故障而
无法录制或播放,也不对录制的内容 进行补偿。 • 电视机制式视国家/地区而异。若要 在电视机上观看录制的内容,您需要 PAL制式的电视机。 • 电视节目、底片、录像带和其它材料 可能含有版权。 未经授权对这些材 料进行录制可能违反版权法。
P使用说明简明

64 push(推按)键 65 腕带
66 lock(锁定)开关 67 power(电源)开关 68 start/stop(开始/停止)键
69 shutter speed(快门速度)键 70 存取指示灯
第54页/共58页
第55页/共58页
第32页/共58页
当nd 2 闪烁时,请将nd filter 选择开关设定为2 以使液晶显示屏或取景器中的nd2 指示消失。
当nd off 在液晶显示屏或取景器中闪烁时
不需要使用nd 滤光镜。请将nd filter 选择开关设定为off 以使液晶显示屏或取景器中的指示消失。
nd 滤光镜随之被禁用。
连接电源线
第1页/共58页
插入录像带
第2页/共58页
摄像
第3页/共58页
在液晶显示屏上监视播放图像
第4页/共58页
核查本机的附件
第5页/共58页
充电式电池的安装
(1) 拾起取景器
第6页/共58页
取下充电式电池
拾起取景器在按着batt release 的同时使充电式电池朝箭头方向滑出。
从录像机或电视机录像
第40页/共58页
使用a/v 连接电缆
可以从另一台录像机复制录像带或从带视频/音频输出接口的电视机录制电视节目。此时可将本摄像机用作录像机。
(1) 在摄像机中装入一盘空白录像带(或要重新录像的录像带)。若从录像机录制录像带,请将一盘有录像内容的录像带装入录像机。
正在拍摄的图像被显示在液晶显示屏上,并从取景器屏幕上消失。
(5) 按start/stop 键。本机开始拍摄。出现“rec”指示。位于本机前面和背面的摄像指示灯点亮。再按一次start/stop 键可停止摄像。
索尼HDR-CX110 R高清闪电摄像机手册说明书
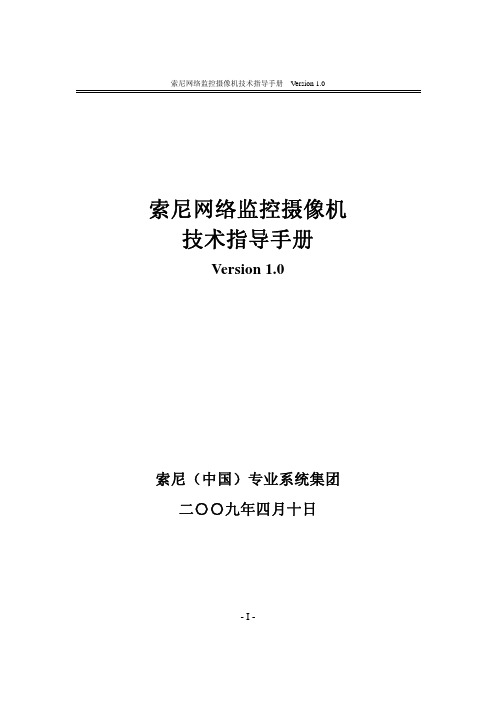
Capture stunning 1920 x 1080 Full HD video and 3.0 megapixel images with the ultra-compact HDR-CX110, whichfeatures an "Exmor R" CMOS sensor for superior low-light performance and a Carl Zeiss® Vario Tessar 25x optical zoom lens to help bring you closer to the action.21920x1080 high definition video recording:1920 x1080 high definition resolution lets you record your memories inexceptional Sony® Full High Definition quality .2 3 megapixel still image capture:3 megapixel still image capture lets you take high resolution digital photos.1/4" back-illuminated "Exmor R" CMOS sensorA 1/4” "Exmor R" CMOS image sensor delivers bright, vivid, spectacularly detailed video footage, as well as 3 megapixel still images. In addition, "Exmor R" technology captures images with high resolution and high sensitivity, while the advanced Sony® BIONZ™ image processor improves camera response time and screens out noise to help ensure that the signal from each pixel is as pure as possible.Back-illuminated "Exmor R" CMOS sensorExperience stunning low-light sensitivity with improved image clarity anddrastically reduced grain with the back-illuminated "Exmor R" sensor. Designed for compact cameras and camcorders, the "Exmor R" sensor relocates the photo diodes above the support circuitry,maximizing the light gathering area per pixel so you can shoot with better results in lower lighting conditions. Approx. 2x increase in sensitivity compared to Sony's existing front-illuminated CMOS sensors at F2.0.2x faster Quick AF With the new and improved autofocus (AF) system, Quick AF, the focusing speed is twice as fast compared to previous models. Whether in bright daylight or in dimly lit environment, Quick AF ensures fast, accurate, and consistent focus lock, enabling users to shoot in a wide range of scenes without missing any important moment. Especially when shooting night scenes where conventional AF might struggle to focus, thanks to the much improvedAF algorithm in Quick AF, users can now capture crisp images, fast.1080/60p playback via HDMI™ and compatible HDTV 1080/60p playback via HDMI™ andcompatible HDTV providing stunningclarity and incredibly detailedplayback of your memories.44 Professional-quality Carl Zeiss® VarioTessar Lens:Carl Zeiss® Vario Tessar lenses usehighly advanced optics to deliver vivid image brilliance, true-to-life color saturation, and perfect renditions of subtle tones.Face Detection Technology with Face PriorityWith Face Priority, your camcorder optimizes focus, color, exposure, and Smile Shutter™ technology for the face yourioritize. Just touch the preferred face on the LCD display and the camcorder will assign it priority, even if it leaves and returns to the frame.Smile Shutter™ technology for still and dual capture:Smile Shutter® technology lets the camcorder automatically take still photos when your subject smiles, even while shooting high definition video. You can also set the sensitivity and choose child, adult, or auto priority.Direct Copy to external HDD w/o PC Store your memories in a whole new way with the ability to copy videos from your camcorder directly to an external hard disk drive (sold separately), all without a computer. Your camcorder can also access videos stored on the external hard drive for playback on your HDTV, allowing you to utilize the camcorder’s handy playback features.13 13 ADDITIONAL FEATURES Highlight Playback with HighlightScenario playback 2.7” Clear Photo™ LCD (230 K) display :3 Intelligent Auto (9 iAUTO modes)SteadyShot® image stabilization with Active Mode:25X Optical / 300X Digital Zoom:Power On by opening LCD display:Personalized "My Menu" System Dolby® Digital stereo recording with Built-in Zoom Mic:Dual Record with still image capture:Face Index function:Film Roll Index:Includes Sony® PMB (Picture Motion Browser) software:x.v. Color™ technology for superior color:BIONZ™ Image Processor: Dynamic Range Optimizer:One Touch Disc Burn:Record and zoom controls on LCD:BRAVIA® Sync™ technology: Active Interface Shoe:HDMI™ connection output: USB 2.0 interface:Sony Electronics Inc. • 16530 Via Esprillo • S an Diego, CA 92127 • 1.800.222.7669 • w Last Updated: 06/07/2010Please visit the Dealer Source for more informationat /dealersourceSpecificationsGeneralPixel Gross: 4200KConvenience FeaturesMultiple Language Display: YesManual / Auto Lens Cover: Manual Quick On: Power On by LCDS/S & Zoom button on LCD: Yes Fader Effect(s): Black, WhiteOptics/LensAperture: F1.8-3.2Filter Diameter: 30mmFocal Distance: 2.5 - 62.5mmProgressive Shutter Mode: Yes (Still Image)Shutter Speed: Auto (Slow Shutter ON), 1/30 - 1/250; Auto (Slow Shutter OFF) 1/60 - 1/250; Scene Selection, 1/2 - 1/500 Optical Zoom: 25x Digital Zoom: 300xResolution: 3 megapixel stillLens Type: Carl Zeiss® Vario-Tessar®Focal Length (35mm equivalent): 37 - 1075mm (16:9), 45 - 1325mm (4:3)PowerBattery Type: InfoLITHIUM® with AccuPower™ Meter System (NP-FV50)Power Requirements: 7.2V (battery pack); 8.4V (AC Adaptor)Power Consumption (in Operation): 3.0WSoftwareOperating System Compatibility: "Windows XP SP3 * /Windows Vista SP2 ** /Windows7* 64-bit editions and Starter (Edition) are notsupported.The Windows Image Mastering API(IMAPI)Ver.2.0 or later is required to use the function for creating discs.** Starter (Edition) are not supported. Standard installation is required.Operation is not assured if the above OS has been upgraded or in a multi-boot environment. "Supplied Software: PMB Ver. 5.0 Supports Windows XP Service Pack3 (SP3)(32bit)/Windows Vista SP2/Windows 7Windows Vista Service Pack1 (SP1)(32bit/64bit). Not supported by Mac OS.LCD DisplayLCD Type: 2.7” Clear Photo™ LCD (230 K) displayAdvanced FeaturesFace Detection: Yes - video and stillImage Stabilization: SteadyShot® image stabilization w/ Active Mode x.v.Color™: YesSmile Shutter™ technology: YesIntelligent Auto: Yes (Auto, Landscape, Backlight, Twilight, Spotlight, Low light, Macro, Portrait, Baby, Tripod)RecordingVideo Actual (Pixel): 1350K Pixels (16:9) 1010K Pixels (4:3)Dual Record: 2.7 megapixel (16:9) Photo Capture from Movie: Yes Audio Format: Dolby® Digital 2chMicrophone/Speaker: Built-in Zoom Microphone Still Image Max Effective Resolution: 3 megapixel Still Image Mode: JPEGVideo Format: HD: MPEG4 AVC/H.264; SD: MPEG2 Video Signal: HD: 1920 x 1080/60i; SD: NTSC color, EIA standards Media Type: Memory Stick PRO Duo™ MARK2 Mediaand SD/SDHC/SDXC (Class 4) media (Sold Separately)Exposure SystemMinimum Illumination: 5 lux(Auto Slow Shutter ON, 1/30 Shutter Speed ) Exposure Settings: Yes (Touch Panel) D-Range Optimizer: YesScene Mode(s): Auto, Twilight, Candle, Sunrise & Sunset, Fireworks, Landscape, Portrait, Spotlight, Beach, SnowWhite Balance Mode: Auto, Outdoor, Indoor, One Push (via Touch panel)InterfaceDirect Copy: YesBRAVIA® Sync™: YesSD Output: Included (via A/V Remote Terminal) ; Video / S Video / Audio / Component Out / Remote USB Port(s): Hi-speed (2.0 compliant) HD Output: HDMI (mini) PhotoTV HD: YesImaging SensorProcessor: BIONZ™ image processorEffective Picture Resolution: 1180K Pixels (16:9) 1570K Pixels (4:3)Imaging Sensor: 1/4" back-illuminated "Exmor R" CMOS sensorFocus ControlFocus System: Full range Auto / Manual (Touch Panel)Service and Warranty InformationLimited Warranty Term: Limited Warranty --- 1 Year Parts; 90 Days LaborDimensionsWeight: w/o battery: 7oz (210g), w battery: 9oz (260g) Measurements: 2 x 2 1/4 x 4 1/2 inch (50 x 56 x 114mm)Supplied AccessoriesAC adaptor (AC-L200)Rechargable Battery Pack (NP-FV50) Component A/V CableA/V Connecting Cable Lithium Battery (CR2025)Application Software / USB Driver / (CD-ROM) USB CableOptional AccessoriesRechargeable InfoLITHIUM Batteries (NP-FV50/FV70/FV100) AC Adaptor/Charger for H series batteries (AC-VQV10) Travel Charger (BC-TRV)HDMI Cable (mini) (VMC-30MHD) UPC Code: 027*********1. 16GB equals 16 billion bytes, a portion (1.3GB) of the total storage is used for system management and/or application files.2.This camcorder captures high definition footage in the AVCHD format. High Definition AVCHD discs can be created using standard DVD media, the supplied software and a compatible PC. DVD mediacontaining AVCHD footage may be played on a compatible Blu-ray Disc™ player/recorder, PC with supplied software or PLAYSTATION®3 devices. DVD media containing AVCHD footage should not be used with standard DVD based players, as the DVD player may fail to eject the media and may erase its contents without warning. 3. Viewable area measured diagonally.4. HD viewing requires compatible HDTV and HDMI™ cable, both sold separately.5. Requires BRAVIA Sync feature in each product, including a compatible BRAVIA® HDTV. Please refer to owner’s manual to determine compatibility.7. By using Picture Motion Browser software, supplied with certain Sony cameras and camcorders*, a PC and a broadband Internetconnection, your photos can be shown on an online map service. The online map service is currently provided courtesy of Google, and is subject to change or termination without notice.9. Requires Microsoft Windows XP SP3/ Windows Vista SP2/Windows 7. Not supported by Mac OS.10. Smooth Slow Record captures 3 seconds of video which play back over 12 seconds.12. One Touch Disc Burn feature requires DVDirect burner or compatible PC with supplied PBM software (sold separately).13. Requires USB 2.0 connection via VMC-UAM1 cable (sold separately), AC power for camcorder, and hard drive formatted in FAT-32. Connection via USB-hub not supported. External HHD/USB media should be less than 2TB(Terabytes). © 2009 Sony Electronics Inc. All rights reserved. Reproduction in whole or in part without written permission is prohibited. Sony, AccuPower, BIONZ, BRAVIA, Clear Photo LCD Plus, ClearVid, Exmor R, Handycam, InfoLITHIUM, Optical SteadyShot, Smile Shutter, x.v. Color, Memory Stick Duo,Memory Stick PRO Duo, Memory Stick and the Memory Stick logo are trademarks or registered trademarks of Sony Corporation. PlayStation is a registered trademark of Sony Computer Entertainment. Microsoft, Windows, and Windows Vista are registered trademarks of MicrosoftCorporation in the United States and/or other countries. Blu-ray Disc and it’s logo are trademarks. Dolby is a registered trademark of Dolby Laboratories. HDMI is a trademark of HDMI Licensing LLC. All other trademarks are trademarks of their respective owners.*Logo mentions need to be included if logo shown or listed in copy。
索尼网络监控摄像机技术指导手册 V1.0
索尼网络监控摄像机技术指导手册 Version 1.0索尼网络监控摄像机 技术指导手册Version 1.0索尼(中国)专业系统集团二〇〇九年四月十日- I -索尼网络监控摄像机技术指导手册 Version 1.0目录第1章网络视频监控系统简介 (5)1.1 监控系统发展的历史 (5)1.2 网络监控摄像机 (7)1.3 网络视频监控系统的优势 (8)1.4 本章小节 (9)第2章视频编码技术和原理 (10)2.1 视频压缩的基本概念 (10)2.2 三种常见的视频压缩方式 (11)2.2.1 JPEG和Motion JPEG (11)2.2.2 MPEG4 (13)2.2.3 H.264 (15)2.2.4 三种编码方式的传输比特率与图像质量之间的关系 (15)2.3 Multi-codec视频压缩引擎技术 (16)2.4 本章小结 (17)第3章索尼网络监控摄像机典型功能分析 (18)3.1 CCD (18)3.1.1 SuperHAD CCD (19)3.1.2 ExwaveHAD CCD (19)3.1.3 SuperExwave CCD (20)3.1.4 SuperHAD CCD II (21)3.1.5 ExwavePRO CCD (22)3.1.6 百万像素(MEGA)网络监控摄像机 (23)3.1.7 聚光筒功能(Light Funnel) (23)3.2 宽动态(DynaView TM)技术 (24)3.3 动态帧合成(Dynamic Frame Integration)技术 (25)3.3.1 帧模式 (26)3.3.2 场模式 (26)3.3.3 动态帧合成(DFI)技术 (27)3.4 图像稳定技术(数字防抖) (27)3.5 动态区域遮盖技术 (29)- II -索尼网络监控摄像机技术指导手册 Version 1.03.6 移动目标侦测技术 (30)3.6.1 传统的移动目标检测技术 (31)3.6.2 智能移动检测技术 (32)3.6.3 智能目标检测技术 (32)3.6.4 DEPA智能视频分析技术 (33)3.7 PoE供电技术 (34)3.7.1 PoE标准供电系统的主要供电特性参数 (35)3.7.2 PoE以太网交换机为网络监控摄像机供电的工作过程 (36)3.8 FTP服务 (36)3.9 动态域名解析(DDNS)服务 (37)3.10 反篡改技术 (39)3.10.1 基本术语 (39)3.10.2 反篡改技术的实现基础 (40)3.10.3 反篡改基准数据的生成过程 (43)3.10.4 视频图像反篡改验证过程 (45)3.11 其他相关技术 (47)3.11.1 电子邮件通知功能 (47)3.11.2 字符叠加功能 (48)3.11.3 无线网络功能 (48)3.12 本章小结 (49)第4章索尼网络监控产品软件集成开发包 (50)4.1 索尼网络监控摄像机SDK (50)4.1.1 DLL和LIB (51)4.1.2 SNC Stream Library (52)4.1.3 SNC Audio Upload Library (53)4.1.4 SNC Version Up Library (54)4.1.5 SNC CGI Wrapper Library (55)4.1.6 SNC Joystick Library (56)4.1.7 SNC Core Library (57)4.1.8 SNC Automatic Discovery Library (58)4.2 索尼网络监控摄像机CGI命令介绍 (59)4.2.1 Motion video request commands (60)4.2.2 Audio data request commands (60)- III -索尼网络监控摄像机技术指导手册 Version 1.04.2.3 Audio output request command (60)4.2.4 Still image request commands (60)4.2.5 Setting commands of camera (60)4.2.6 Inquiry commands of camera parameters (61)4.2.7 Visca comnad via CGI (61)4.2.8 Control commands for Pan/Tilt/Zoom/Focus (61)4.2.9 Configuration command for motion detection or unattended detection (61)4.3 本章小节 (61)- IV -索尼网络监控摄像机技术指导手册 Version 1.0第1章网络视频监控系统简介随着安防行业的不断发展,传统的模拟闭路监控系统正在逐步地被网络监控系统所代替。
sony摄像机操作手册

主菜单(图 B-1)设定菜单(例如 EXPOSURE 菜单)(图 B-2)1 光标显示所选择的项目。
用 X/x 键将光标上移或下移。
2 菜单标题3 用户预设名称可将菜单设定预设为文件 A 和 B。
这将显示所选的预设名称。
4 菜单项目5 副菜单指示V 表示有菜单项目或设定项目的设定菜单。
6 设定项目显示当前可使用的项目。
7 设定值显示当前设定值。
用 C/c 键选择选项或设定值。
8 返回要恢复主菜单时,请将光标设定于返回并按 MENU/ENTER 键。
9 退出要取消菜单时,请将光标设定于退出并按 MENU/ENTER 键。
要进入菜单时按住 MENU/ENTER 键选择菜单模式以及设定系统语言。
要改变菜单上的设定时,请按以下步骤进行:1 按 X 或 x 键将光标移至想要改变设定的菜单项目处,然后按 MENU/ ENTER 键。
所选菜单项目的设定菜单出现。
2 按 X 或 x 键将光标移至想要改变的设定项目处。
3 按 C 或 c 键改变设定值。
按住该键可快速改变设定值。
要回到专业模式菜单的主菜单时将光标移至返回位置,然后按 MENU/ENTER 键。
要取消菜单时将光标移至退出位置,然后按 MENU/ENTER 键。
要切换菜单模式时1 将光标移至退出位置,然后按 MENU/ENTER 键退出当前菜单。
2 按住 MENU/ENTER 键重新选择菜单模式。
要保存设定值时改变设定后选择退出取消菜单时,当前所选预设文件(A 或 B)被用所变更的设定值改写。
在改变设定值后若改变用户预设文件(A 或 B),所改变的设定被自动保存在前面的预设文件中而无需选择退出。
要读取保存在预设文件中的设定时在主菜单中将光标设定于用户预设位置,并按 C 或 c 键显示 A 或 B。
然后按 MENU/ENTER 键读取保存在所选预设文件中设定。
要重新设定缺省设定时在主菜单中将光标设定于用户预设位置,并按 C 或 c 键显示出厂设定。
然后按 MENU/ENTER 键显示执行并再按此键一次。
DXC-D50系列数字视摄像机
DXC-D50/D50WS
(
)
4
EZ(
)
DXC-D50/D50W EZ
EZ EZ Mode(
EZ
)
EZ
EZ Focus
DXF-801
DXC-D50/D50WS
1.5 *
16:9 ?W7@@@@3VW&@@@@@@42@@@@@@@@I@@@@@@@@@4@@@@@@@@@@@@@@@@@@@06@@@@@@@@MX)@@@@@@@?eX1@@@5Hee??????????????????????
6000 Hz
60.1(NTSC)/50.2(PAL)Hz
HIGH SATURATION(
STANDARD( )
) FLORESCENT(
)
?W7@@@@3VW&@@@@@@42@@@@@@@@I@@@@@@@@@4@@@@@@@@@@@@@@@@@@@06@@@@@@@@MX)@@@@@@@?eX1@@@5Hee?????????????????????? ?W7@@@@3VW&@@@@@@42@@@@@@@@I@@@@@@@@@4@@@@@@@@@@@@@@@@@@@06@@@@@@@@MX)@@@@@@@?eX1@@@5Hee?????????????????????? ?W7@@@@3VW&@@@@@@42@@@@@@@@I@@@@@@@@@4@@@@@@@@@@@@@@@@@@@06@@@@@@@@MX)@@@@@@@?eX1@@@5Hee?????????????????????? ?W7@@@@3VW&@@@@@@42@@@@@@@@I@@@@@@@@@4@@@@@@@@@@@@@@@@@@@06@@@@@@@@MX)@@@@@@@?eX1@@@5Hee?????????????????????? ?W7@@@@3VW&@@@@@@42@@@@@@@@I@@@@@@@@@4@@@@@@@@@@@@@@@@@@@06@@@@@@@@MX)@@@@@@@?eX1@@@5Hee?????????????????????? ?W7@@@@3VW&@@@@@@42@@@@@@@@I@@@@@@@@@4@@@@@@@@@@@@@@@@@@@06@@@@@@@@MX)@@@@@@@?eX1@@@5Hee?????????????????????? ?W7@@@@3VW&@@@@@@42@@@@@@@@I@@@@@@@@@4@@@@@@@@@@@@@@@@@@@06@@@@@@@@MX)@@@@@@@?eX1@@@5Hee?????????????????????? ?W7@@@@3VW&@@@@@@42@@@@@@@@I@@@@@@@@@4@@@@@@@@@@@@@@@@@@@06@@@@@@@@MX)@@@@@@@?eX1@@@5Hee?????????????????????? ?W7@@@@3VW&@@@@@@42@@@@@@@@I@@@@@@@@@4@@@@@@@@@@@@@@@@@@@06@@@@@@@@MX)@@@@@@@?eX1@@@5Hee??????????????????????
SONY 数字摄像机DXC-D50系列 说明书

细节等级 • 提示灯等级(高 /低/关) • 两个红色 REC(录制)提示信号灯 • 压铸铝制机身 • 大范围屈光度调解
* 取景器区域以对角线进行测量
光学中密度滤光镜(ND filter)和电 子校色滤光镜(CC filter)
通过光学中性滤光镜轮和电子校色技术, DXC-D50P/D50WSP可以轻易获得最佳光 线和色彩控制。使用电子校色功能使得所 有滤光镜轮上的滤光镜都变为中性,从而 为操作者提供了较大的景深灵活性和曝光 控制。电子校色功能还可以通过遥控器进 行控制,这使得操作更加容易。
工厂预置矩阵
所提供的工厂预置矩阵文件使得操作者可以快速设定 和一般照明情况相配的摄像机参数,例如 STANDARD(标准),HIGH SATURATION(高饱和 度),FLORESCENT(直射日光)等等。
其他功能特性
可调节肩垫
肩垫的位置可以向前或向后调节,从而保证不 论连接摄像机适配器或者安装VTR时,均可以为 操作者提供舒适、平稳的摄像环境。
可配DXF-801取景器
EZ模式 用户只需按下EZ模式按钮,就 可以将主要摄像机参数快速设置 为标准或自动位置,从而使摄像 机可以立刻进入拍摄状态。如果 操作者需要在有限的时间内快速 设置摄像机,那么这一功能特性 就会相当便捷。
DXC-D50PL/D50WSPL配有一个1.5英寸 *黑 白取景器,取景器的功能特性如下:
4
暗部饱和度 图例6
采用传统摄像机,低亮度区通常会受到 饱和度降低的影响,从而使得这些区域 褪色。DXC-D50P 系列产品所具备的暗 部饱和度功能可以通过优化暗部区域彩色 饱和度扩展,使色彩重现更加自然,从而 帮助我们解决上述问题。
SONY宽动摄像机菜单说明

SONY宽动摄像机菜单说明一.按中间“ENTER”进入主菜单界面设置:MAIN MENU ;主菜单INITIAL SET EXEC ;初始化设置GENERAL SET SEL ;常规设置WDR MODE WDR ;宽动态模式WBC MODE PUSH ;白平衡模式ANTI-COLOR ROLLING OFF /ON ;色斑抑制开关FLICKERLESS OFF/ON ; 无闪烁电路MOTION DET OFF/ON ;移动侦测PRIV ACY OFF/ON ;遮蔽EXIT ←;退出主菜单二.进入主菜单界面后,按“(U)”、“(D)”键进行上、下选择每一项子菜单,按“L”、“R”键,进入每一项子菜单的功能设置。
三.常规设置GENERAL(常规)CAMERA ID 001~255/OFF) ;摄像机地址设置:从001到255或者关闭COLOR ON//OFF ;色彩:开启/关闭MIRROR/ROTATE OFF/MIRR/VERT/ROT ;镜像/旋转:关/镜像/旋转SHARPNESS OFF/LOW/MID/HIGH ;锐利度:关/低/中/高COLOR SUPPRESS OFF/ON ;色彩抑制(彩转黑):关/开APERTURE SUPPRESS OFF/ON ;光圈抑制:关.开DAY AND NIGHT DAY/NIGHT/EXT/AUTO ;白天和夜晚切换(滤光片):白天/夜晚/退出/自动打到AUTO时DAY TO NIGHT ←DB→030 ; 白天切换夜晚增益调节,从009DB~042DBNIGHT TO DAY ←DB→ 009 ; 夜晚切换白天增益调节, 从003DB~009DBAUTO IRIS INIT ADJ/DC ;自动光圈控制:调节/直流BACK TO MENU ←;返回菜单)→四.宽动态模式设置(有4种模式)WDR MODE(宽动态模式)WDR MODE WDRIRIS PRIORITY ;宽动态光圈优先模式WDRSHUTTER PRIORITY ;宽动态快门优先模式AEIRIS PRIORITY ;自动爆光光圈优先模式AESHUTTER PRIORITY ;自动爆光快门优先模式AGC LIMIT ←DB→000~042 ;增益调节范围:000 DB ~042DBSLOW LIMIT ←MS→020 ~320 ;慢快门范围:020MS~320MSY GAIN 032~063;亮度增益调节范围000~063C GAIN 032~063;色度增益调节范围000~063OBJECT SHUTTER (-----+-------) ;按"(L)"/"(R)"键调节范围SHUTTER (------+------) ;按"(L)"/"(R)"键调节范围BACK TO MENU(返回菜单)五.白平衡模式设置WBC MODEWBC MODE AUTO/PUSH/MANU/INDR/FLUO/OUTD;自动/预置/菜单/室外内荧光/室外其中MANU 可手动调节WBC ADJ (白平衡调节) ADJ(调节)BACK TO MENU (退出菜单)六.背光补偿此功能要在“AE IRIS PRIORITY ”及“AE SHUTTER PRIORITY”模式下进行. 按中间“ENTER”进入主菜单界面设置,选择“BACKLIGHT”,按“R”键进入以下界面设置:BACKLIGHT MODE SEL;背光补偿模式选择SENS OFF/ON ;灵敏度开关GAIN←X0-X4→ 000~015 ;背光补偿增益的调节范围:从000~015AREA MODE ;背光补偿区域的调节模式CENTER WTD OFF/ON;屏幕中心LOWER 1/3 WTD OFF/ON;屏幕下方的1/3位置CEN LEFT WTD OFF/ON;屏幕左中心CEN RIGHT WTD OFF/ON;屏幕右中心UPPER 1/3 WTD OFF/ON;屏幕上方的1/3位置UNWEIGHTED LEVEL 003BACK TO MENU ←七.电子变倍功能此功能要在“AE IRIS PRIORITY ”及“AE SHUTTER PRIORITY”模式下进行.1.在退出主菜单模式下,按“(U)”/“(D)”键可进行电子变倍,倍数范围1×~2.56×按“(L)”/“R”键,可进行“PAN/TILT”2.E ZOOM SPEED 001~015 ;电子变倍速度范围:000~015七.色斑抑制ANTI-COLOR ROLLING ON/OFF(开/关);色班抑制:开关八.无闪烁电路FLICKERLESS OFF/FIXS/GAIN/AUTO:关/固定/增强/自动九.移动侦测功能MOTION DET (移动侦测) OFF/ON(关/开)当移动侦测功能打开时显示以下菜单(有三种模式)1.打开”WIND”(开窗模式),界面显示如下:MOTION DETECTYPE (类型) WINDW(窗口)AREA(区域) 001/002/003/004DISPLAY(显示) ON/OFF(开/关)H. START 000~255;水平区域窗口开始范围:000~255H.END 000~255;水平区域窗口结束范围:000~255V.START 000~255;垂直区域窗口开始范围:000~255V.END 000~255;垂直区域窗口结束范围:000~255BACK TO MENU ;退出菜单2.打开“ LABEL”(标签)模式,界面显示如下::MOTION DETEC ;移动侦测TEPE LABEL;“标签”类型BACK TO MENU ;退出设置3.打开“ BLOCK”(方块)模式,界面显示如下:MOTION DETECTYPE (类型) BLOCK(方块)BACK TO MENU (退出设置)10. 遮蔽功能设置PRIV ACY (遮蔽) ON/OFF(开/关)遮蔽功能打开, 界面显示如下:MASK SETMASK NUMBER<1-8>003 ; 遮蔽功能设置有1到8个数量MASK SET OFF /ON; 遮蔽功能设置“开/关”遮蔽功能设置为开,界面显示如下:H.START 000~255;水平遮蔽开始范围:000~255H.END 000~255;水平遮蔽结束范围:000~255V.START 000~255;垂直遮蔽开始范围:000~255V.END 000~255;垂直遮蔽结束范围:000~255MASK COLOR RED/ORAN/YELL/GREE/BLUE;遮蔽颜色设置::红色/ 棕色/黄色/青色/蓝色BACK TO MENU (退出设置)11.EXIT ←;退出主菜单备注:分号后面是注释。
SONY HDR-CX550V 高清定义闪存手持相机摄像机说明书
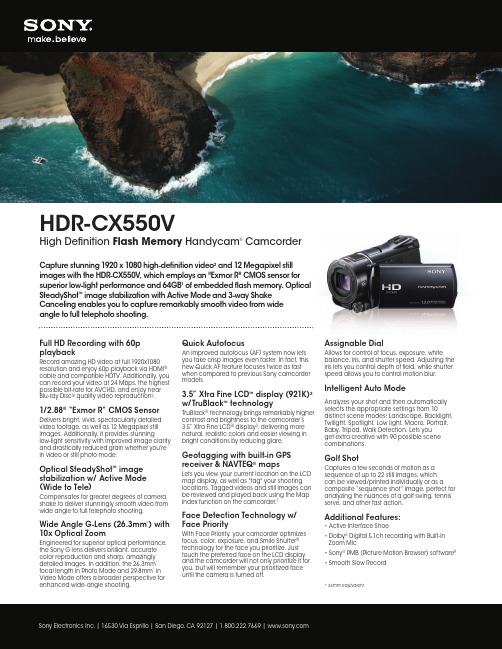
HDR-CX550VHigh Defi nition Flash Memory Handycam ®CamcorderCapture stunning 1920 x 1080 high-defi nition video 2 and 12 Megapixel still images with the HDR-CX550V, which employs an "Exmor R" CMOS sensor for superior low-light performance and 64GB 1 of embedded fl ash memory. Optical SteadyShot ™ image stabilization with Active Mode and 3-way Shake Canceling enables you to capture remarkably smooth video from wide angle to full telephoto shooting.Full HD Recording with 60p playbackRecord amazing HD video at full 1920x1080 resolution and enjoy 60p playback via HDMI ™ cable and compatible HDTV. Additionally, you can record your video at 24 Mbps, the highest possible bit-rate for AVCHD, and enjoy near Blu-ray Disc ™ quality video reproduction 2.1/2.88" “Exmor R” CMOS SensorDelivers bright, vivid, spectacularly detailed video footage, as well as 12 Megapixel still images. Additionally, it provides stunninglow-light sensitivity with improved image clarity and drastically reduced grain whether you're in video or still photo mode.Optical SteadyShot ™ image stabilization w/ Active Mode (Wide to Tele )Compensates for greater degrees of camera shake to deliver stunningly smooth video from wide angle to full telephoto shooting.Wide Angle G-Lens (26.3mm *) with 10x Optical ZoomEngineered for superior optical performance,the Sony G lens delivers brilliant, accurate color reproduction and sharp, amazingly detailed images. In addition, the 26.3mm * focal length in Photo Mode and 29.8mm * in Video Mode offers a broader perspective for enhanced wide-angle shooting.Quick AutofocusAn improved autofocus (AF ) system now lets you take crisp images even faster. In fact, this new Quick AF feature focuses twice as fast when compared to previous Sony camcorder models.3.5” Xtra Fine LCD ™ display (921K )3 w/TruBlack ™ technologyTruBlack ™ technology brings remarkably higher contrast and brightness to the camcorder’s 3.5” Xtra Fine LCD ™ display 3, delivering more natural, realistic colors and easier viewing in bright conditions by reducing glare.Geotagging with built-in GPS receiver & NAVTEQ ® mapsLets you view your current location on the LCD map display, as well as "tag" your shooting locations. Tagged videos and still images can be reviewed and played back using the Map Index function on the camcorder.7Face Detection Technology w/ Face PriorityWith Face Priority, your camcorder optimizes focus, color, exposure, and Smile Shutter ™ technology for the face you prioritize. Just touch the preferred face on the LCD display and the camcorder will not only prioritize it for you, but will remember your prioritized face until the camera is turned off.Assignable DialAllows for control of focus, exposure, whitebalance, iris, and shutter speed. Adjusting the iris lets you control depth of fi eld, while shutter speed allows you to control motion blur.Intelligent Auto ModeAnalyzes your shot and then automatically selects the appropriate settings from 10distinct scene modes: Landscape, Backlight, Twilight, Spotlight, Low light, Macro, Portrait, Baby, Tripod, Walk Detection. Lets you get extra creative with 90 possible scene combinations.Golf ShotCaptures a few seconds of motion as a sequence of up to 22 still images, which can be viewed/printed individually or as acomposite “sequence shot” image, perfect for analyzing the nuances of a golf swing, tennis serve, and other fast action.Additional Features:• Active Interface Shoe• D olby ® Digital 5.1ch recording with Built-in Zoom Mic• S ony ® PMB (Picture Motion Browser ) software 9• Smooth Slow Record* 35mm equivalentSony Electronics Inc. | 16530 Via Esprillo | San Diego, CA 92127 | 1.800.222.7669 | Specifi cationsImaging Device1/2.88” “Exmor R” CMOS Sensor with ClearVid array ProcessorBIONZ image processor Imager Pixel Gross Size 6631KVideo Actual 16:94150K pixels Video Actual 4:33110K pixelsVideo Resolution (Movie Quality )HD: 1920x1080/1440x1080; SD: 720 x 480Video Signal SystemHD: HDTV 1080/60i; SD: NTSC color Video Format (s ) Supported HD: AVCHD : MPEG-2Still Actual 16:94500K Still Actual 4:36000K Still Picture Resolution 12 MP Dual Record Resolution 8.3 MPAudio Recording Format Dolby Digital 5.1ch / Dolby Digital 2ch stereo Microphone Built-in Zoom Microphone Recording Media Memory Stick PRO Duo Media (Sold Separately ); SD/SDHC Media Internal Memory 64GB Rec. / Playback with Internal Memory When using 2ch: High Defi nition: FX = up to 360 min., High Defi nition: FH = up to 465 min., HQ = up to 935 min., LP = up to 1595 min. Standard Defi nition: HQ = up to 965 min.When using 5.1ch: High Defi nition: FX = up to 360 min., High Defi nition: FH = up to 460 min., HQ = up to 935 min., LP = up to 1520 min. Standard Defi nition: HQ = up to 935 min.Lens TypeG Lens35mm Equivalent 16:929.8 - 298mm 35mm Equivalent 4:336.5 - 365mm ApertureF1.8 - 3.4Exposure Control Yes (Touch Panel/Dial)Filter Diameter (mm )37mmFocal Distance (mm ) 3.8 - 38mmFocus SystemFull Range Auto/Manual (Touch Panel/Dial )Progressive Shutter Mode N/AShutter Speed Manual Dial: 1/8 - 1/10000; Scene Selection: 1/8 - 1/725STD: 1/60 - 1/725; Low Lux: 1/30 - 1/725; Smooth Slow Rec: 1/250 - 1/1000Minimum Illumination 11 lux (1/60 Shutter Speed )Optical Zoom 10x Digital Zoom 120xDisplay3.5" Xtra Fine LCD wide touch panel display View Finder 0.5cm (0.2 type )FlashYes (High / Normal / Low )Memory Card SlotYes (Memory Stick PRO Duo media, SD/SDHC media )Manual / Auto Lens Cover AutoAssignable Dial6 available settings: Focus, Exposure, AE Shift, WB Shift, Iris control, Shutter speed control S/S & Zoom Button on LCD YesAudio/Video Remote Terminal Video/S Video/Audio/Component Out/Remote Digital Audio/Video Output (s )HDMIUSB Port (s )Yes (mini B/Hi-Speed )Component Video (Y/Pb/Pr ) Output (s )A/V terminal HDMI Connection Output (s )Yes (mini )Headphone Jack Yes Microphone Input Yes Active Interface ShoeYesFace DetectionYes Smile Shutter Mode YesQuick OnYes, Power On with LCD BRA VIA Sync Control for HDMI (CEC )Yes Dynamic Range Optimizer YesImage Stabilization Optical SteadyShot Image Stabilization x.v.Color YesWhite Balance Auto / Outdoor / Indoor / Onepush (Touch Panel )Fader EffectsYesScene Selection Mode (s )Auto, Twilight, Twilight Portrait, Sunrise & Sunset, Fireworks, Landscape, Portrait, Spotlight, Beach, Snow Face Index Yes Film Roll IndexYes Photo Capture from Movie Yes Still Image Mode (s )JPEG Slide Show Mode Yes Easy HandycamNo One Touch Disc Burn Yes PhotoTV HDYes Multiple Language Display Yes Smooth Slow Record Yes Golf Shot YesPower Consumption 3.4WSupplied Battery Type InfoLITHIUM (NP-FV50)Power Requirements 7.2V (battery pack ); 8.4V (AC Adaptor )Dimensions (Approx.) 2 5/8 x 3 x 5 3/4 inch (66 x 74 x 143mm )Weight (Approx.)15oz (440g )AC AdaptorAC-L200C/AC-L200DRechargeable Battery PackInfoLITHIUM with AccuPower Meter System (NP-FV50)Remote Commander control unit RMT-835Clock Lithium (Installed )Yes Component Video Cable Yes Composite Video Cable Yes USB CableYesApplication Software (CD-ROM )PMB Ver.5.0Rechargeable InfoLITHIUM Batteries NP-FV50/FV70/FV100Starter KitACC-FV70, ACC-FV50A, ACC-HDV7AC Adaptor/Charger for V series batteries AC-VQV10/BC-TRVLensVCL-HGE0737C, VCL-HG1737C HDMI Cable (mini )VMC-15MHD, VMC-30MHDTripodVCT-80AV, VCT-60AV, VCT-50AV, VCT-R640Video Light HVL-10NH GPS Unit GPS-CS3KA1. 64GB equals 64 billion bytes. A portion of the total storage is used for system management and/or application fi les. The capacity that a user can use is approximately 62.8GB after deleting 650MB of demonstration video.2. T his camera captures high defi nition footage in the AVCHD format. High Defi nition AVCHD discs can be created using standard DVD media, the supplied software and a compatible PC. DVD media containing AVCHD foot-age may be played on a compatible Blu-ray Disc player/recorder, PC with supplied software or PlayStation®3 devices. DVD media containing AVCHD footage should not be used with standard DVD based players, as the DVD player may fail to eject the media and may erase its contents without warning.3. V iewable area measured diagonally.4. H D viewing requires compatible HDTV and HDMI cable, both sold separately.5. R equires BRAVIA Sync feature in each product, including a compatible BRAVIA HDTV . Please refer to owner’s manual to determine compatibility.7. N AVTEQ map detail on the camcorder is limited in some areas. By using a compatible PC, a broadband Inter-net connection, and supplied Picture Motion Browser software, your photos and videos can be shown on an online map service. The online map service is currently provided courtesy of Google, and is subject to change or termination without notice.9. R equires Microsoft Windows XP SP3/ Windows Vista SP2/Windows 7. Not supported by Mac OS.10. S mooth Slow Record captures 3 seconds of video which play back over 12 seconds.12. O ne Touch Disc Burn feature requires DVDirect burner or compatible PC with supplied PBM software (sold separately ).13. R equires USB 2.0 connection via VMC-UAM1 cable (sold separately ), AC power for camcorder, and hard drive format-ted in FAT-32. Connection via USB-hub not supported. External HHD/USB media should be less than 2TB (Terabytes ).20. W hen using movie mode Memory Stick PRO Duo with MARK2 (M2) logo, Memory Stick PRO-HG , SD/SDHCmedia (Class 4 or higher ) are recommended.cations and features are subject to change。
数码摄像机 说明书(5)
-7-
簡体中文
(2) 在电池充电时,自拍定时器LED灯会持续闪烁。在电池充电完成后,LED灯会 持续点亮。
(3) 电池每次完全充电约需3小时。
插入及取出SD卡
数字摄录机配备有16 MB的内建内存,可供您储存照片、影片、录音及音乐。您也可 以使用选用的SD或MMC记忆卡来将内存容量扩充到512MB。要插入记忆卡时,请参 考上图并: 1. 打开电池/SD记忆卡盖。 2. 插入记忆卡直到卡入定位为止。
分辨率
640*480 (1.8Mbps)
/ 30 fps 640*480 (1 Mbps) / 30 fps 320*240 (500 Kbps) / 30 fps
影像品
32MB
SD记忆卡
质
内建内存 64MB 128MB 256MB 512MB
超细致 1.19分 3.25分 7.5分
15分
30分
细致
切勿将DV数位摄录机暴露于湿气中,并确认并无水份渗入DV数位摄录机。 在雷雨时,如果您正使用AC变压器,请勿碰触电源插头。否则可能会发生电击的
危险。 如果有任何异物进入DV数字摄录机中,请不要使用DV数字摄录机。 切勿将DV数字摄录机放置在不稳定的位置,例如摇晃的桌面或倾斜的表面。 切勿将金属或其它异物经由任何孔洞,例如SD记忆卡插槽,插入或放入数位摄录
自拍定时器模式
(10) 8倍数位变焦
MPEG-4影片记录
-14-
簡体中文
数字摄录机开机后的预设模式为影片记录模式。您只需要按快门钮( )即可开始记 录像片。记录像片时,LCD监视器会显示时间符号。要停止记录时,请再按一下快 门钮。 要观看储存的影片时,请按一下录/放钮切换到播放模式。