Beckman 流式细胞仪-GALLIOS使用说明书
流式细胞仪---教材

1.流式细胞术概述 2.流式细胞仪概述 3.流式细胞仪系统结构 4.流式细胞仪软件介绍 5.流式细胞仪其它
目录
1.流式细胞术概述
1.流式细胞术概述
流式细胞术定义 流式细胞术发展史 流式细胞术特点
1.流式细胞术定义:
1.流式细胞术概述
流式细胞术(Flow Cytometry,FCM或 FACS):是利用流式细胞仪 对处在快速、直线、流动状态中的单细胞或生物颗粒进行多参数、 快速定量分析,同时对特定群体加以分选的现代细胞分析技术。
2.流式细胞仪概述
2.流式细胞仪的发展史与商品化:
•1953年:Parker 和 Hutcheon 描述一种全血细胞计数器装置,成为流 式细胞仪的雏型; •1969年:Van Dilla Fulwyler 发明第一台荧光检测细胞计; •1970年:Phywe研制脉冲细胞光度计,备有荧光镜的FCM,DNA定 量;同年Kamensky发明白细胞分类流式细胞仪,激光光源,吖啶橙 染色,测定淋巴、单核、中性粒C; •1972年: Len Herzenberg等在斯坦福大学研制荧光激活细胞分选仪 (FACS),氩离子激光,标志着流式细胞仪商品化时代到来; •1973年: Becton Dikinson (BD)公司投入市场,第一台FACS-Ⅰ问世, 其 后 2 0 多 年 来 不 断 改 进 完 善 产 品 , 先 后 推 出 FA C S A n a l y z e r 、 FACScan、FACSCalibur、FACSLSR-Ⅱ、FACSVantage、FACSDiva、 FACSAria等; •1975年: Kochler 和 Milstein 提出单克隆抗体技术,为细胞研究中 大量的特异性免疫试剂的应用奠定基础;鉴于商业仪器的发展;
流式细胞仪简介和使用方法

其他类型细胞
在组织中提取细胞通常使用酶消化法。同样对于不 同组织处理方法也各异,以下是讲述通用的胶原酶消 化法制备组织细胞。改良后的此法尚可用于制备人、 鼠上皮细胞。
14
材料
1. 解剖刀 2. 0.15%胰蛋白酶 3. Hanks’s缓冲盐或PBS,pH7.3 4. 不含Ca、Mg离子的HBSS 5. II型胶原酶 6. 1%BSA或5%FBS 7. 5ml的吸样管 8. 35um尼龙滤网 9. DNase
456
UV
Pyronin Y
545
565 514488
Thiazole Orange
509
533
488
YO-PRO-1
642
661
488
TO-PRO-3
642
661
630
LDS 751
543
712
488
39
细胞膜电位、离子、脂类探针
• 现已发现或开发出来了各种细胞膜电位、各类离子、 pH值、脂类探针,运用这些探针在流式细胞仪上可轻 易检测各种细胞功能,可实现一些异想不到的效果。
1,100ul外周血,加入100ul溶血剂 2,混匀后,室温下孵育10分钟 3,加入2ml蒸馏水,混匀后室温下孵育10分钟 4,根据实验需要,免洗直接上机检测或400g离心10分钟后PBS重悬 优点:试剂为温和型溶血剂,不影响细胞表面抗原及溶血时间无需精确把握
29
各 溶 血 剂 性 能 比 较
30
• 传统手工计数:耗时、准确度差 • 流式细胞仪计数: BD,Coulter仪器:高速4ul/秒,中速2ul/秒,低速0.5ul/秒? partec仪器:最为精密的细胞计数器,直接报告细胞浓度
21
美国贝克曼库尔特流式细胞分析仪
美国贝克曼库尔特流式细胞分析仪(Beckman coulter cell)产品型号:Cell Lab Quanta SC当前价格:0.00元产品数量:0新旧程度:全新有效期至:0000-00-00所在地:产品简介:仪器简介:T细胞亚群检测的CD45/CD4/CD8/CD3、CD45/CD56/CD19/CD3;阵发性血红蛋白尿(PNH)检测的CD55、CD59;血小板无力症(GT)检测的CD41、CD61等等详细信息仪器简介:T细胞亚群检测的CD45/CD4/CD8/CD3、CD45/CD56/CD19/CD3;阵发性血红蛋白尿(PNH)检测的CD55、CD59;血小板无力症(GT)检测的CD41、CD61等等。
但对于白血病/淋巴瘤免疫分型,国际上迄今为止也没有统一的抗体组合。
在2000年国际细胞分析学会(ISAC)大会上,临床血细胞计数协会组织了一次国际专家会议,以期对检测血液淋巴系统肿瘤所需最少、最有效的单抗数达成共识。
75%与会者一致认为,对于慢性淋巴系统增殖性疾病(CLD)有9种单抗:CD5,CD19,κ,λ,CD3,CD20,CD23,CD10,CD45对初诊来说是最基本的。
淋巴瘤和CLD相似,需要至少12-16种单抗。
对于急性白血病(AL),75%的与会者认为大约13-15种单抗是最基本的:CD10,CD19,CD79a,CD13,CD33,CD34,CD45,CD2,MPO,CD7,CD14,CD3,HLA-DR等,对初步鉴别白血病系列是必需的。
其他一些(CD16,CD56,CDw65,TdT,cyCD3)可能对某些病例有用。
几乎所有的投票者都认为,要对急性白血病完善分类所需单抗的恰当数量平均为20-24种。
但这些抗体之间组合也是一大难题,目前也无统一规定(如表二)。
大会多数发言者(11/13)指出,对已确诊病人的监护和分期来说,仅需较少单抗。
抗体的质量控制是实验的关键环节。
抗体的质量包括其特异性、灵敏度、精密度。
Beckman Coulter IgM测定手册说明书
Procedure:IgMOSR6x173 This procedure is valid for the following chemistry analyzers:•AU400/AU400e•AU640/AU640e•AU480 •AU680•AU600 •AU2700/AU5400Prepared By Date Adopted Supersedes Procedure # Review Date Revision Date SignatureDistributed to# ofCopies Distributed to# ofCopiesProcedure:IgMOSR6x173 PRINCIPLE:The spectrum of abnormalities in serum immunoglobulin concentrations is broad. Abnormal concentrations range from a virtual absence of one or more of the three major classes of immunoglobulin (IgA, IgG and IgM) to polyclonal increases in one or more immunoglobulins. Measurement of these immunoglobulins aids in the diagnosis of abnormal protein metabolism and the body's lack of ability to resist infectious agents.INTENDED USE:System reagent for the quantitative determination of IgM immunoglobulins in human serum and plasma on Beckman Coulter AU Clinical Chemistry analyzers.METHODOLOGY:Immune complexes formed in solution scatter light in proportion to their size, shape and concentration. Turbidimeters measure the reduction of incidence light due to reflection, absorption or scatter.In the Beckman Coulter AU procedure, the decrease in intensity of light transmitted (increase in absorbance) through particles suspended in solution is the result of complexes formed during the antigen-antibody reaction.Procedure:IgMOSR6x173SPECIMEN:P ATIENT P REPARATION:An 8 to 12-hour fast is recommended but not required in order tominimize any possible lipemia.Additional instructions for patient preparation as designated by this laboratory:T YPE:Fasting serum specimen, free from hemolysis, is the recommendedspecimen. EDTA and Lithium heparin plasmas may also be used. Avoid highly lipemic samples, which may produce excessively high scattersignals.1Additional type conditions as designated by this laboratory:H ANDLING C ONDITIONS:Specimens are stable up to three days at 2 - 8°C or longer when stored at <-20°C.1Additional handling conditions as designated by this laboratory:Procedure:IgMOSR6x173 EQUIPMENT AND MATERIALS:E QUIPMENT:Beckman Coulter AU400/AU400e, AU480, AU600, AU640/AU640e,AU680, AU2700, and AU5400 analyzers.M ATERIALS:Beckman Coulter AU System IgM ReagentFinal concentration of reactive ingredients:Tris buffer pH 7.2 50 mmol/LPolyethylene glycol 6000 3.5 %Goat anti-IgM antiserum Titer DependentAlso contains preservatives.Reagent storage location in this laboratory:Test tubes 12 -16 mm in diameter or sample cups (Catalog #AU1063) Storage location of test tubes or sample cups in this laboratory:Beckman Coulter AU Serum Protein Multi-Calibrator (ODR3021) Storage location of the calibrator in this laboratory:Procedure:IgMOSR6x173 Precautions:1.For in vitro diagnostic use.2.Do not ingest reagent or calibrator. Harmful if swallowed.3.Contains sodium azide as a preservative that may react with leadjoints in copper plumbing to form explosive compounds. Eventhough the reagent contains minute quantities of sodium azide,drains should be well flushed with water when discarding thereagent or calibrators.4.WARNING: POTENTIAL BIOHAZARDOUS MATERIAL. Thecalibrator is manufactured from human serum. No test method can offer complete assurance that HIV- 1/2, HCV, Hepatitis B, or otherinfectious agents are absent from biological materials, all calibrator material should be handled at the Biosafety Level 2 asrecommended for any infectious human serum or blood specimen in the CDC/National Institutes of Health manual, Biosafety inMicrobiological and Biomedical Laboratories, 1993.P REPARATION:The Beckman Coulter AU System IgM reagent is ready for use. No preparation is needed.The Beckman Coulter Serum Protein Multi-Calibrators are liquid, ready for use as supplied. Mix by gentle inversion to achieve a homogenous mixture prior to use.Storage Requirements:1.The unopened reagents and calibrators are stable until theexpiration date printed on the label when stored at 2 - 8°C.2.Opened bottles of reagent are stable for 90 days when stored in therefrigerated compartment of the Beckman Coulter AU analyzers.Procedure:IgMOSR6x1733.Opened bottles of calibrator are stable for 30 days providedstoppers and caps are replaced immediately after each use. TheMulti-calibrators should be stored at 2 - 8°C when not in use. Additional storage requirements as designated by this laboratory:Indications of Deterioration:Discoloration of the reagent or calibrators, visible signs of microbialgrowth, turbidity or precipitation in reagent or calibrators mayindicate degradation and warrant discontinuance of use.PERFORMANCE PARAMETERS:The following data was obtained using this IgM reagent on Beckman Coulter AU analyzers according to established procedures. Results obtained in individual laboratories may differ.P RECISION:7Estimates of precision, based on CLSI recommendations6 are consistent with typical performance. The within run precision is less than 4.2%CV and the total precision is less than 10%CV on the Beckman Coulter AU analyzers. Assays of serum pools and control sera were performed and the data reduced following CLSI guidelines.Procedure:IgMOSR6x173 N=80 Within run TotalMean, mg/dL SD CV% SD CV%48 1 1.69 2 3.44114 2 1.36 4 3.29217 5 2.19 9 4.08C OMPARISON:7Patient samples were used to compare the IgM Reagent.Representative performance data on AU analyzers is shown in the next table.Y Method AU640/AU640eX Method AU2700/AU5400/AU680Slope 1.02Intercept -2.3Correlation Coeff. (r) 0.999No. of Samples (n) 108Range (mg/dL) 21 - 468CALIBRATION:S TANDARD P REPARATION:Perform a multi-point calibration (5AB) using a water blank (blue rack) and the appropriate calibrators in a yellow calibration rack. Thefrequency of calibration is every 90 days. Calibration of this IgMprocedure is accomplished by use of the Serum Protein Multi-Calibrator (ODR3021), which is traceable to the International Reference PreparationProcedure:IgMOSR6x173 ERM® - DA470 (US designation RPPHS lot 91/0619) Standard. TheSerum Protein Multi-Calibrator is a 5 - level calibrator for IgM.This calibrator has not been tested for use with any other ChemistrySystems other than those listed above.The results obtained using this calibrator are dependent upon severalfactors, including proper storage of the calibrator and proper technique in use of the Beckman Coulter AU Clinical Chemistry analyzers and their respective reagents.C ALIBRATION P ROCEDURE:Recalibration is required when any of the following conditions occur:1. A reagent lot number has changed or there is an observed shift incontrol values.2.Major preventative maintenance was performed on the analyzer.3. A critical part was replaced.QUALITY CONTROL:During operation of the Beckman Coulter AU analyzer at least two levels of an appropriate immunology control material should be tested a minimum of once a day. In addition, these controls should be performed after calibration, with each new lot of reagents, and after specific maintenance or troubleshooting steps described in the appropriate AU User’s Guide. Quality control testing should be performed in accordance with regulatory requirements and each laboratory’s standard procedure.ANALYZER PARAMETERS:A complete list of Assay parameters and operating procedures can be found in the appropriate User’s Guide and at .Procedure:IgMOSR6x173 CALCULATIONS:For SI units (g/L), multiply the results by 0.01.REPORTING RESULTS:R EFERENCE R ANGES:Adults4: 45 - 281 mg/dLExpected values may vary with age, sex, diet and geographical location.Each laboratory should determine its own expected values as dictated by good laboratory practice.Expected reference ranges in this laboratory:P ROCEDURES FOR A BNORMAL R ESULTS:Abnormal results are flagged by the listed analyzers according to thenormal values entered by the user into the instrument parameters.R EPORTING F ORMAT:Results are automatically printed out for each sample in mg/dL at 37o C. Additional reporting information as designated by this laboratory:Procedure:IgMOSR6x173 LIMITATIONS:This Beckman Coulter AU System IgM assay is linear from 20 to 500 mg/dL. Samples exceeding the upper limit of linearity should be diluted and repeated. The sample may be diluted, repeated and multiplied by the dilution factor automatically utilizing the AUTO REPEAT RUN.A prozone effect has been observed with abnormally high IgM specimens. Certain abnormal samples, such as those from myeloma patients, may give abnormally low or normal results due to the slow reaction of the abnormal protein with the antibody. Specimens suspected as such should be diluted and retested.Samples with very high IgM concentrations (>10,000 mg/dL polyclonal) can generate false low results without appropriate “Z” flags due to excess antigen in the sample.I NTERFERING S UBSTANCES:Results of studies2 show that the following substances interfere with this IgM procedure.The criteria for no significant interference is recovery within 10% of the initial value.Bilirubin: No significant interference up to 40 mg/dL BilirubinHemolysis: No significant interference up to 500 mg/dL HemolysateLipemia: No significant interference up to 200 mg/dL Intralipid** Intralipid, manufactured by KabiVitrium Inc., is a 20% IV fat emulsion used to emulate extremely turbid samples.The information presented is based on results from Beckman Coulter AU studies and is current at the date of publication. Beckman Coulter AU America Inc., makes no representation about the completeness oraccuracy of results generated by future studies. For further information on interfering substances, refer to Young3 for a compilation of reported interferences with this test.Procedure:IgMOSR6x173©Beckman Coulter, Inc. 2010 Page 11 of 11 Laboratory specific procedure notes:REFERENCES:1. Rose, N.R., Friedman, H, and Fahey, J.L., Manual of Clinical Laboratory Immunology, Third Edition, American Society for Microbiology, Washington, DC, 1986.2. CLSI/NCCLS, Interference Testing in Clinical Chemistry, EP7-A2, 2004.3. Young, D.S., Effects of Drugs on Clinical Laboratory Tests, Fifth Edition, AACC Press, 2000.4. Beckman Coulter Inc. data on samples collected from 200 blood donors in North Texas.5. CLSI/NCCLS, Determination of Limits of Detection and Limits of Quantitation, EP 17-A, 2004.6. CLSI/NCCLS, Evaluation of Precision Performance of Quantitative Measurement Methods, EP5-A2, 2004.7. Data is on file for specific AU analyzers.。
美国贝克曼库尔特流式细胞分析仪
美国贝克曼库尔特流式细胞分析仪(Beckman coulter cell)产品型号:Cell Lab Quanta SC当前价格:0.00元产品数量:0新旧程度:全新有效期至:0000-00-00所在地:产品简介:仪器简介:T细胞亚群检测的CD45/CD4/CD8/CD3、CD45/CD56/CD19/CD3;阵发性血红蛋白尿(PNH)检测的CD55、CD59;血小板无力症(GT)检测的CD41、CD61等等详细信息仪器简介:T细胞亚群检测的CD45/CD4/CD8/CD3、CD45/CD56/CD19/CD3;阵发性血红蛋白尿(PNH)检测的CD55、CD59;血小板无力症(GT)检测的CD41、CD61等等。
但对于白血病/淋巴瘤免疫分型,国际上迄今为止也没有统一的抗体组合。
在2000年国际细胞分析学会(ISAC)大会上,临床血细胞计数协会组织了一次国际专家会议,以期对检测血液淋巴系统肿瘤所需最少、最有效的单抗数达成共识。
75%与会者一致认为,对于慢性淋巴系统增殖性疾病(CLD)有9种单抗:CD5,CD19,κ,λ,CD3,CD20,CD23,CD10,CD45对初诊来说是最基本的。
淋巴瘤和CLD相似,需要至少12-16种单抗。
对于急性白血病(AL),75%的与会者认为大约13-15种单抗是最基本的:CD10,CD19,CD79a,CD13,CD33,CD34,CD45,CD2,MPO,CD7,CD14,CD3,HLA-DR等,对初步鉴别白血病系列是必需的。
其他一些(CD16,CD56,CDw65,TdT,cyCD3)可能对某些病例有用。
几乎所有的投票者都认为,要对急性白血病完善分类所需单抗的恰当数量平均为20-24种。
但这些抗体之间组合也是一大难题,目前也无统一规定(如表二)。
大会多数发言者(11/13)指出,对已确诊病人的监护和分期来说,仅需较少单抗。
抗体的质量控制是实验的关键环节。
抗体的质量包括其特异性、灵敏度、精密度。
Beckman LX20操作手册
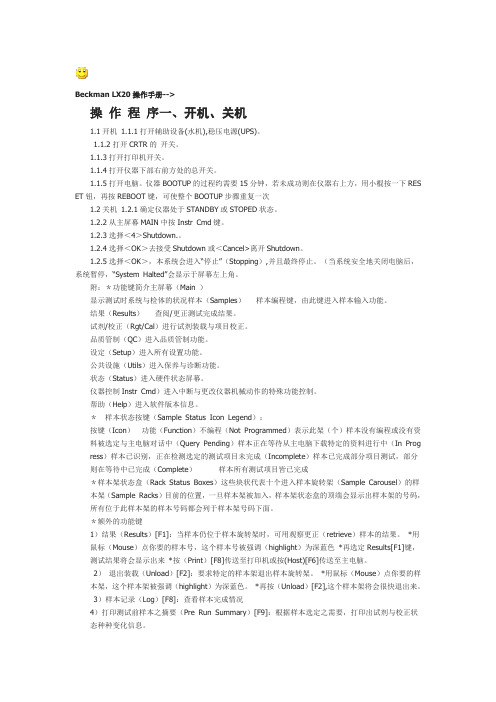
Beckman LX20操作手册-->操作程序一、开机、关机1.1开机1.1.1打开辅助设备(水机),稳压电源(UPS)。
1.1.2打开CRTR的开关。
1.1.3打开打印机开关。
1.1.4打开仪器下部右前方处的总开关。
1.1.5打开电脑。
仪器BOOTUP的过程约需要15分钟,若未成功则在仪器右上方,用小棍按一下RES ET钮,再按REBOOT键,可使整个BOOTUP步骤重复一次1.2关机1.2.1确定仪器处于STANDBY或STOPED状态。
1.2.2从主屏幕MAIN中按Instr Cmd键。
1.2.3选择<4>Shutdown.。
1.2.4选择<OK>去接受Shutdown或<Cancel>离开Shutdown。
1.2.5选择<OK>,本系统会进入“停止”(Stopping),并且最终停止。
(当系统安全地关闭电脑后,系统暂停,“System Halted”会显示于屏幕左上角。
附:*功能键简介主屏幕(Main )显示测试时系统与检体的状况样本(Samples)样本编程键,由此键进入样本输入功能。
结果(Results)查阅/更正测试完成结果。
试剂/校正(Rgt/Cal)进行试剂装载与项目校正。
品质管制(QC)进入品质管制功能。
设定(Setup)进入所有设置功能。
公共设施(Utils)进入保养与诊断功能。
状态(Status)进入硬件状态屏幕。
仪器控制Instr Cmd)进入中断与更改仪器机械动作的特殊功能控制。
帮助(Help)进入软件版本信息。
*样本状态按键(Sample Status Icon Legend):按键(Icon)功能(Function)不编程(Not Programmed)表示此架(个)样本没有编程或没有资料被选定与主电脑对话中(Query Pending)样本正在等待从主电脑下载特定的资料进行中(In Prog ress)样本已识别,正在检测选定的测试项目未完成(Incomplete)样本已完成部分项目测试,部分则在等待中已完成(Complete)样本所有测试项目皆已完成*样本架状态盒(Rack Status Boxes)这些块状代表十个进入样本旋转架(Sample Carousel)的样本架(Sample Racks)目前的位置,一旦样本架被加入,样本架状态盒的顶端会显示出样本架的号码,所有位于此样本架的样本号码都会列于样本架号码下面。
流式细胞仪使用方法
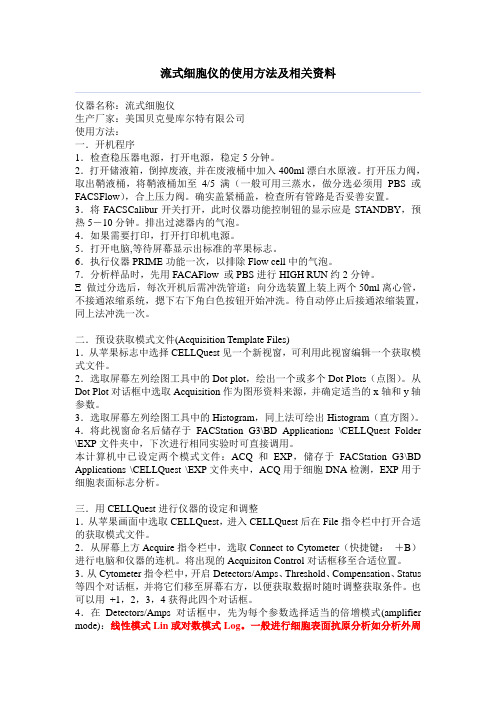
流式细胞仪的使用方法及相关资料仪器名称:流式细胞仪生产厂家:美国贝克曼库尔特有限公司使用方法:一.开机程序1.检查稳压器电源,打开电源,稳定5分钟。
2.打开储液箱,倒掉废液, 并在废液桶中加入400ml漂白水原液。
打开压力阀,取出鞘液桶,将鞘液桶加至4/5满(一般可用三蒸水,做分选必须用PBS或FACSFlow),合上压力阀。
确实盖紧桶盖,检查所有管路是否妥善安置。
3.将FACSCalibur开关打开,此时仪器功能控制钮的显示应是STANDBY,预热5-10分钟。
排出过滤器内的气泡。
4.如果需要打印,打开打印机电源。
5.打开电脑,等待屏幕显示出标准的苹果标志。
6.执行仪器PRIME功能一次,以排除Flow cell中的气泡。
7.分析样品时,先用FACAFlow 或PBS进行HIGH RUN约2分钟。
做过分选后,每次开机后需冲洗管道:向分选装置上装上两个50ml离心管,不接通浓缩系统,摁下右下角白色按钮开始冲洗。
待自动停止后接通浓缩装置,同上法冲洗一次。
二.预设获取模式文件(Acquisition Template Files)1.从苹果标志中选择CELLQuest见一个新视窗,可利用此视窗编辑一个获取模式文件。
2.选取屏幕左列绘图工具中的Dot plot,绘出一个或多个Dot Plots(点图)。
从Dot Plot对话框中选取Acquisition作为图形资料来源,并确定适当的x轴和y轴参数。
3.选取屏幕左列绘图工具中的Histogram,同上法可绘出Histogram(直方图)。
4.将此视窗命名后储存于FACStation G3\BD Applications \CELLQuest Folder \EXP文件夹中,下次进行相同实验时可直接调用。
本计算机中已设定两个模式文件:ACQ和EXP,储存于FACStation G3\BD Applications \CELLQuest \EXP文件夹中,ACQ用于细胞DNA检测,EXP用于细胞表面标志分析。
流式细胞仪使用规程
流式细胞仪使用程序1.目的规范流式细胞仪的相关使用操作、以及维护操作。
2.适用范围适用于本实验室使用流式细胞仪。
3.职责操作人员应熟练掌握并自觉遵守本标准操作程序。
如需获得更多信息,请参阅该仪器用户手册。
4.支持性文件流式细胞仪使用说明书。
5.操作规程5.1仪器开/关机程序5.1.1开机程序5.1.1.1 检查仪器鞘液桶和废液桶。
5.1.1.2 打开流式细胞仪。
5.1.1.3 气压阀置于加压位置,并排除管路中气泡。
5.1.1.4 打开电脑。
5.1.1.5 等待机器预热5—10分钟后可开始实验。
5.1.2关机程序5.1.2.1 用4ml10%漂白剂作样品,将样品支撑架置于旁位,以外管吸入2ml。
5.1.2.2 将样品支撑架置于中位,以HI RUN 5分钟,使内管吸入2ml。
5.1.2.3 将样品换成蒸馏水重复1-2步。
5.1.2.4 放置盛有1ml蒸馏水的试管于样品支撑架上。
5.1.2.5 选择Standby模式10分钟。
5.1.2.6 关闭电脑,再关掉仪器。
5.2仪器校验和分析参数设置程序(FACSComp操作程序)5.2.1CaliBRITE Beads 的准备5.2.1.1 在装有1ml鞘液的FALCON管加一滴充分混匀CaliBRITE Beads,并标上unlabeled;若配有双激光做四色,则须在unlabeled管中再加一滴APC-beads;5.2.1.2 在另一装有3ml鞘液的FALCON管加入unlabeled-、FITC-、PE-、PerCP-、和APC-beads(若做四色)各一滴,混匀,在管壁上标上mixed(PerCP不很稳定,最好在上机前加入);5.2.1.3 避光放置,准备上机。
5.2.2软件环境的设置5.2.2.1 从苹果菜单进入,选择FACSComp软件;5.2.2.2 在Sign In视窗中填入下列信息:操作者、机构、实验室主任(操作者是必须填入的,计算机将保存这些信息),点击Accept;5.2.2.3 进入Set Up视窗,在Assay Selection中,选择你需要的Assay:Lyse/Wash、Lyse/No Wash或HLA-B27 Calib;在CaliBRITE Beads Lot Ids中,根据每一种beads所对应的编码输入Lot ID;在Automatic Saving Options中,你可以选择自动保存或不保存Summary Report,你可以通过单击Location来更改文件名以及保存的位置;最后在Set Up视窗的右下角点击Run。
Beckman CX 简明操作手册
Beckman CX 简明操作手册(转载)操作程序一、开机、关机1.1.开机1.1.1打开辅助设备(水机、稳压电源)。
1.1.2打开CRT的开关。
1.1.3打开打印机开关。
1.1.4打开仪器下部右前方处的二个总开关1.2关机主屏幕下按IDLE键- Y- F4(RESUME)- Y- PREVSCREEN- <1>SHUTDOWN THE CX COUNSOLE。
关电脑、主机、CRT、打印机等。
附:*特殊键简介MASTER SCREEN:从本菜单返回至主菜单PREV SCREEN:从本菜单返回上一层菜单HOME:将机械装置恢复到原位IDLE:使仪器进入休眠状态STOP:紧急停机(立即停止一切测试)PAGE UP/DOWN:对多于一屏幕的内容进行上或下的翻页查阅PRINT SCREEN:打印目前的屏幕ALARM STATUS:仪器错误时所发警报声的消除START:开始化学分析CLEAR:清除当前所编辑内容SELECT:挑选所需选择,以大背景框表示确认,原位重复一则取消选择二、试剂准备2.1电解质部分装载(ISE LDAD):因电解质部分的试剂量较大,由2升或500ML的瓶进行贮存并且仪器会定时对电解质部分进行冲洗,故试剂无液面测试,因此仪器在对此部分的试剂采用自动计算消耗量,以(%)表示,其步骤如下:从主屏幕按<F2>REAGENT LDAD键按<F3>ISE LDAD将光标移至所欲选择的试剂处,按<SELECT>键加上背景框,再按F1<CONTINUDE>键继续,此时背景框会一直闪烁。
进行试剂更换,完毕后按F1<PRIME>键,此时新试剂将被抽吸,以排除更换时管道内的残留气体,在“PRIMING”时需稍等。
仪器将新装试剂以100%表示,不是满瓶的则需按<F1>ADJUST VOLUME键手动调节试剂量。
2.2试剂状态(REAGENT STATUS)在REAGENT LDAD菜单中,按<F5>REAGENT STATUS键。
流式细胞仪使用方法说明书

流式细胞仪使用方法说明书1. 概述流式细胞仪是一种用于细胞分析和排序的先进仪器。
本方法说明书旨在向用户介绍如何正确操作流式细胞仪以及最佳的使用方法。
请用户在使用前仔细阅读本说明书并遵循相关的安全操作规程。
2. 仪器组成流式细胞仪主要由以下几个组成部分构成:- 流体传送系统:用于将样本引入仪器并排除废弃物。
- 激光系统:产生激光束以激发样本中的荧光染料。
- 光学系统:收集样本产生的荧光信号并进行检测。
- 数据分析系统:用于解析和分析收集到的数据。
3. 使用准备在进行流式细胞仪实验之前,请确保以下几个步骤已经完成:- 仪器校准:根据仪器的使用手册进行仪器校准,确保仪器工作在最佳状态。
- 样本准备:按照实验需求,对待测样本进行合适的处理,例如细胞培养、染色等。
- 试剂准备:准备好所需的荧光染料、缓冲液等试剂。
4. 仪器操作以下是流式细胞仪的一般操作步骤:- 打开仪器电源,并等待仪器启动完成。
- 将样本装入合适的样本管,并在样本管中加入适量的荧光染料或其他试剂。
- 将样本管放入仪器中的样本槽,并调整流速和其他参数。
- 启动激光系统,并调整激光强度和波长以适应实验需求。
- 开始数据采集,根据仪器界面指示收集所需数据。
- 数据分析:根据实验需要,使用相应的数据分析软件对采集到的数据进行解析和处理。
5. 安全注意事项在使用流式细胞仪时,务必注意以下安全事项:- 佩戴个人防护装备,包括实验手套和护目镜。
- 遵循实验室的生物安全规程,确保样本处理符合相关的安全要求。
- 避免直接暴露于激光束下,以免损伤眼睛和皮肤。
- 在清洁仪器时使用合适的溶剂,并按照仪器清洁的标准程序进行操作。
6. 故障排除在实际操作中,有时可能会遇到仪器故障或其他问题。
以下是一些常见问题及其排除方法:- 仪器无法启动: 检查电源连接是否正常,重启仪器。
- 数据质量差: 检查样本制备和染色的质量,调整参数和仪器校准。
- 清洗困难: 检查是否有阻塞,按照清洁程序进行清洗。
流式细胞术(贝克曼)

通过将流式细胞术与基因组学、蛋白质组学等技术相结合, 未来有望实现个体化医疗的精准诊断和治疗。这将为患者提 供更加定制化的治疗方案,提高治疗效果和生存率。
THANKS
感谢观看
血液学研究
造血干细胞研究
利用流式细胞术研究造血干细胞的自我更新、分化等 过程,有助于血液疾病的诊断和治疗。
白血病分型与诊断
通过流式细胞术对白血病细胞进行分型和鉴别,有助 于白血病的诊断和治疗。
红细胞与血小板检测
利用流式细胞术检测红细胞和血小板的数量和质量, 有助于贫血和出血性疾病的诊断和治疗。
04
流式细胞术的优缺点
优点
快速
灵敏度高
流式细胞术可以在短时间内处理大量样本 ,提高了检测效率。
流式细胞术能够检测到低浓度的细胞,灵 敏度较高。
多参数分析
自动化程度高
流式细胞术可以对细胞进行多参数分析, 包括细胞表面抗原、细胞内蛋白质和DNA 等。
流式细胞术通常采用自动化仪器进行操作 ,减少了人为误差和操作时间。
发展历程
20世纪50年代
流式细胞术的原理被提出,并开始应用于细 胞计数和大小测量。
20世纪80年代
计算机技术的引入,实现了自动化数据分析。
20世纪70年代
荧光染料和荧光显微镜的引入,使得多参数 检测成为可能。
21世纪
高通量测序技术的发展,推动了流式细胞术 在基因组学和蛋白质组学领域的应用。
应用领域
免疫学研究
用于检测免疫细胞表 面标志物、细胞因子 等,研究免疫细胞的 分化、发育和功能。
血液学研究
用于检测血液细胞, 诊断血液疾病,如白 血病、淋巴瘤等。
肿瘤学研究
用于检测肿瘤细胞的 表面标志物、基因突 变等,为肿瘤的诊断 和治疗提供依据。
流式细胞仪操作

Fluorophore BV421 BV570
Pacific Blue Pacific Orange
V500 FITC/AF488 PerCP-Cy5.5
PE
PE-TR
PE-Cy5
PE-Cy7 APC/ AF647
AF700
APC-Cy7
Compensated
FL2-15%FL1
Over Compensated
FL2-30%FL1
Intensit y No. of Cells/Channel
Time (msec)
Signal Intensity (channel)
如何看流式图—散点图
这张图你能看出什么?
如何看流式图—直方图
单峰
流动室(分选)
软件分析系统
分析软件
1. 机器自带分析软件:SUMMIT 2.第三方分析软件:Kaluza, Flowjo, Facs express, CFCS 3.特殊分析软件 :周期分析软件Modifit , Wincyle
What does compensation mean?
PE-Cy7 PE-Cy5
Time Sample Left in Light
0 hours
PE (FL2)
2 hours
22.5 hours
Tandem Conjugates functionality can be sensitive to the environment
如何选择荧光染料
1、根据现有的仪器所有的激光器与通道进行选择,不能只有 488nm、633nm 的激光却选择405nm激光激发的荧光素 ,calibur 是 双激光4色的流式细胞仪,所包含通道FITC\PE\PERCP5-5\APC 2、表达比较弱的选择比较强的荧光素,表达比较强的选择较弱的荧光素
beckman cx 操作手册
Beckman CX 操作手册一、开机、关机二、试剂准备三、消耗品配制及装载四、校准五、室内质控样品检测六、样本检测七、特殊功能一、开机、关机1.1.开机1.1.1打开辅助设备(水机、稳压电源)。
1.1.2打开CRT的开关。
1.1.3打开打印机开关。
1.1.4打开仪器下部右前方处的二个总开关1.2关机主屏幕下按IDLE键- Y- F4(RESUME)- Y- PREVSCREEN- <1>SHUTDOWN THE CX COUNSOLE。
关电脑、主机、CRT、打印机等。
附:*特殊键简介MASTER SCREEN:从本菜单返回至主菜单PREV SCREEN:从本菜单返回上一层菜单HOME:将机械装置恢复到原位IDLE:使仪器进入休眠状态STOP:紧急停机(立即停止一切测试)PAGE UP/DOWN:对多于一屏幕的内容进行上或下的翻页查阅PRINT SCREEN:打印目前的屏幕ALARM STATUS:仪器错误时所发警报声的消除START:开始化学分析CLEAR:清除当前所编辑内容SELECT:挑选所需选择,以大背景框表示确认,原位重复一则取消选择<返回目录>二、试剂准备2.1电解质部分装载(ISE LDAD):因电解质部分的试剂量较大,由2升或500ML的瓶进行贮存并且仪器会定时对电解质部分进行冲洗,故试剂无液面测试,因此仪器在对此部分的试剂采用自动计算消耗量,以(%)表示,其步骤如下:从主屏幕按<F2>REAGENT LDAD键按<F3>ISE LDAD将光标移至所欲选择的试剂处,按<SELECT>键加上背景框,再按F1<CONTINUDE>键继续,此时背景框会一直闪烁。
进行试剂更换,完毕后按F1<PRIME>键,此时新试剂将被抽吸,以排除更换时管道内的残留气体,在“PRIMING”时需稍等。
仪器将新装试剂以100%表示,不是满瓶的则需按<F1>ADJUST VOLUME键手动调节试剂量。
beckman vi-cell xr说明书
beckman vi-cell xr说明书1、按下电源(Power)按钮,开启仪器。
显示开启界面。
2、自动细胞计数仪预设为细胞(Cell)模式。
如果是其他模式请设置改为细胞(Cells)模式。
3、将10μL样本加至10μL台盼蓝染料中,上下吹打,轻轻混匀。
4、将10μL样本混合物加入到细胞计数板一侧的计数池口中。
计数板的两个计数池分别标记为“A”和“B”,以便于追踪您的样本。
你既能够用一个计数池进行细胞计数,也能够两个同时使用。
5、插入细胞计数板,先把A侧样本插入到细胞计数板接口,保证A侧样本插入到仪器中。
若细胞计数板插入正确,那么就会听到咔嗒一声。
每个计数池单独计数。
6、按下计数细胞(CountCells)或下一个样本(NextSample)按钮。
7、按缩放(Zoom)按钮调节图像。
在网格中通过点击目标区域来导航。
8、通过缩放模式查看细胞时,可以使用焦距旋钮调节图像。
在对diyi个样本计数后,不需要又一次使用焦距旋钮。
若检测的多个样本大小差不多的话,就可以锁定焦距旋钮。
之后也可解锁焦距旋钮,调节图像。
调节图像使得活细胞(Livecells)中心亮,边缘暗,死细胞(Deadcells)的整个细胞区域呈均匀的蓝色,没有中心亮点,以便数据分析。
9、如果图像效果很好的话,按下计数细胞(CountCells)。
10、仪器完成一个样本的计数大概需要30秒,屏幕上会显示活细胞数、死细胞数、细胞总数以及存活率百分比。
记录细胞计数结果,或插入USB驱动器,保存(Save)数据。
11、计数完成后,按下详情(Details)按钮,查看每个细胞的计数情况。
细胞情况通过蓝色、红色或黑色圆圈显示。
蓝色表示细胞被计数为活细胞,红色表示被计数为死细胞,黑色表示目标没有被计数。
12、如果查看数据详情及图示数据,请选择更多数据(MoreData)按钮。
13、计数板A侧完成计数后,先将计数板轻轻向里一推,然后再拉出来,拿开计数板,对计数池的另一侧进行细胞计数(B侧)。
流式细胞仪使用方法及程序

流式细胞仪的使用程序------血液病实验诊断中心一.开机程序1.检查稳压器电源,打开电源,稳定5分钟。
2.打开储液箱,倒掉废液, 并在废液桶中加入400ml漂白水原液。
打开压力阀,取出鞘液桶,将鞘液桶加至4/5满(一般可用三蒸水,做分选必须用PBS或FACSFlow),合上压力阀。
确实盖紧桶盖,检查所有管路是否妥善安置。
3.将FACSCalibur开关打开,此时仪器功能控制钮的显示应是STANDBY,预热5-10分钟。
排出过滤器内的气泡。
4.如果需要打印,打开打印机电源。
5.打开电脑,等待屏幕显示出标准的苹果标志。
6.执行仪器PRIME功能一次,以排除Flow cell中的气泡。
7.分析样品时,先用FACAFlow 或PBS进行HIGH RUN约2分钟。
。
做过分选后,每次开机后需冲洗管道:向分选装置上装上两个50ml离心管,不接通浓缩系统,摁下右下角白色按钮开始冲洗。
待自动停止后接通浓缩装置,同上法冲洗一次。
二.预设获取模式文件(Acquisition Template Files)1.从苹果标志中选择CELLQuest见一个新视窗,可利用此视窗编辑一个获取模式文件。
2.选取屏幕左列绘图工具中的Dot plot,绘出一个或多个Dot Plots(点图)。
从Dot Plot对话框中选取Acquisition作为图形资料来源,并确定适当的x轴和y轴参数。
3.选取屏幕左列绘图工具中的Histogram,同上法可绘出Histogram(直方图)。
4.将此视窗命名后储存于FACStation G3\BD Applications \CELLQuest Folder \EXP文件夹中,下次进行相同实验时可直接调用。
. 本计算机中已设定两个模式文件:ACQ和EXP,储存于FACStation G3\BD Applications \CELLQuest \EXP文件夹中,ACQ用于细胞DNA检测,EXP用于细胞表面标志分析。
贝克曼流式细胞仪原理及软件介绍PPT课件
第31页/共44页
滤片
• 带通滤片 BAND PASS (BP)
• 只允许某些波长的光通过
630 nm BandPass Filter
White Light Source
Transmitted Light
• 二向色性滤片 DICHROIC FILTER
第16页/共44页
散射光信号—前向散射光(FS)
• FS----Forward (Angel Light) Scatter 在激光束正前方的检测器, 为前向散射光检测器
• FS的强度与细胞或其他颗粒的大小, 形状及 optical homogeneity 有 关
• FS用于检测细胞或其他粒子的表面属性 如:大小
Fluo-3,Fura R ed, Alexa 488
SS
620B P
488DLP
500LP
6
0
6
FL3 ECD
0
4
5
DL P
DS P
675B P
525B P
FL1
L
7
FL4
D
1
F IT
5
0
0
PC5
5 P
DL P
C
575BP
755BP
FL2
FL5
PE
PC7
第33页/共44页
第34页/共44页
Optics - Detectors
分析系统
• 以FC500机型的CXP软件介绍
第42页/共44页
第43页/共44页
感谢您的观看!
第44页/共44页
600
800
Beckman Coulter 产品说明书
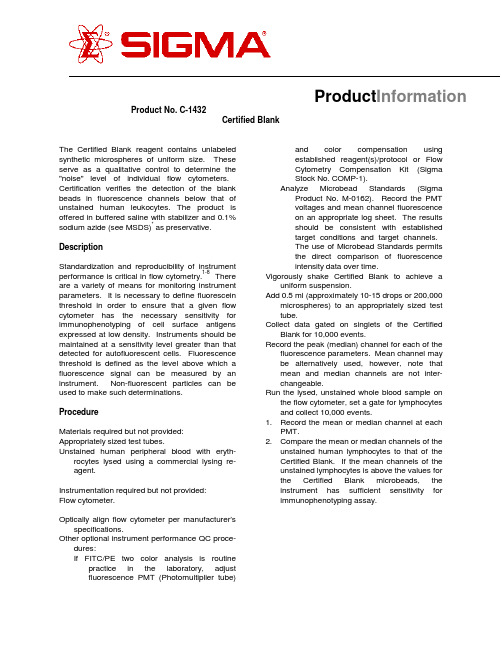
Product No. C-1432Certified BlankThe Certified Blank reagent contains unlabeled synthetic microspheres of uniform size. These serve as a qualitative control to determine the "noise" level of individual flow cytometers. Certification verifies the detection of the blank beads in fluorescence channels below that of unstained human leukocytes. The product is offered in buffered saline with stabilizer and 0.1% sodium azide (see MSDS)* as preservative. DescriptionStandardization and reproducibility of instrument performance is critical in flow cytometry.1-8 There are a variety of means for monitoring instrument parameters. It is necessary to define fluorescein threshold in order to ensure that a given flow cytometer has the necessary sensitivity for immunophenotyping of cell surface antigens expressed at low density. Instruments should be maintained at a sensitivity level greater than that detected for autofluorescent cells. Fluorescence threshold is defined as the level above which a fluorescence signal can be measured by an instrument. Non-fluorescent particles can be used to make such determinations.ProcedureMaterials required but not provided: Appropriately sized test tubes.Unstained human peripheral blood with eryth-rocytes lysed using a commercial lysing re-agent.Instrumentation required but not provided:Flow cytometer.Optically align flow cytometer per manufacturer’s specifications.Other optional instrument performance QC proce-dures:If FITC/PE two color analysis is routine practice in the laboratory, adjustfluorescence PMT (Photomultiplier tube)and color compensation usingestablished reagent(s)/protocol or FlowCytometry Compensation Kit (SigmaStock No. COMP-1).Analyze Microbead Standards (Sigma Product No. M-0162). Record the PMTvoltages and mean channel fluorescenceon an appropriate log sheet. The resultsshould be consistent with establishedtarget conditions and target channels.The use of Microbead Standards permitsthe direct comparison of fluorescenceintensity data over time.Vigorously shake Certified Blank to achieve a uniform suspension.Add 0.5 ml (approximately 10-15 drops or 200,000 microspheres) to an appropriately sized test tube.Collect data gated on singlets of the Certified Blank for 10,000 events.Record the peak (median) channel for each of the fluorescence parameters. Mean channel may be alternatively used, however, note that mean and median channels are not inter-changeable.Run the lysed, unstained whole blood sample on the flow cytometer, set a gate for lymphocytes and collect 10,000 events.1.Record the mean or median channel at eachPMT.pare the mean or median channels of theunstained human lymphocytes to that of the Certified Blank. If the mean channels of the unstained lymphocytes is above the values for the Certified Blank microbeads, the instrument has sufficient sensitivity for immunophenotyping assay.ProductInformationResultsThe Certified Blank should appear below (to the left of) unstained leukocytes. Each lot is accompanied by a lot-specific certificate verifying the expected mean channel values for a properly calibrated instrument. The Certified Blank serves as a qualitative control for monitoring flow cytometer sensitivity and the level of background fluorescent signals.Figure 1Fluorescence of the Certified Blank in the FITC PMT.Figure 2Autofluorescence of unstained lymphocytes in the FITC PMT.Figure 3Fluorescence of the Certified Blank in the PE PMT.Figure 4Autofluorescence of unstained lymphocytes in the PE PMT.LimitationsProper storage (2-8?C) and handling are essen-tial.This reagent is extremely sensitive to slight changes in pH. The Certified Blank microspheres are maintained at physiological pH (7.2). It is, therefore, critical that pH be carefully controlled in performing quantitative and qualitative flow cyto-metry analyses. Vigorously mixing microspheres prior to use is essential in obtaining a uniform suspension. Establishment of consistent, reproducible mean channel performance data for an appropriate reference standard, i.e., Microbead Standards, is crucial to proper interpretation of results obtained with Certified Blank.StorageStore at 2-8E C. Do Not Freeze.*Due to the sodium azide content a material safety data sheet (MSDS) for this product has been sent to the attention of the safety officer of your institution. Consult the MSDS for information regarding hazards and safe handling practices.References1.Proposed Guidelines: Clinical Applicationsof Flow Cytometry. Quality Assurance andImmunophenotyping of Peripheral BloodLymphocytes. National Committee forClinical Laboratory Standards. DocumentH42-P, 9, 13 (1989).1.Shapiro, H., Practical Flow Cytometry, 2ndEd., Alan R. Liss, Inc., New York, 267-270(1988).2.Keren, D., Flow Cytometry in Clinical Diag-nosis, ASCP Press, Chicago, 27-28 (1989).3.Horan, P., and M. Loken, "A Practical Guideto the Use of Flow Systems", In: Flow Cyto-metry Instrumentation and Data Analysis, M.Van Dilla, et al., (Eds.), Academic Press,NY, 260-280 (1985).4.Horan, P., and J. Kappler, J. Immunol.Meth., 18, 309 (1977).5.McCoy, J., et al., Am. J. Clin. Pathol., 93,Suppl. 1:S27-S37 (1990).6.Giorgi, J.V., et al., Clin. Immunol. Immunop-athol., 55, 173 (1990).7.Parker, J.W., et al., Clin. Immunol. Immuno-pathol., 55, 187 (1990).Sigma warrants that its products conform to the information contained in this and other Sigma publications. Purchaser must determine the suitability of the product for its particular use. See reverse side of invoice or packing slip for additional terms and conditions of the sale. Issued 08/95.。
- 1、下载文档前请自行甄别文档内容的完整性,平台不提供额外的编辑、内容补充、找答案等附加服务。
- 2、"仅部分预览"的文档,不可在线预览部分如存在完整性等问题,可反馈申请退款(可完整预览的文档不适用该条件!)。
- 3、如文档侵犯您的权益,请联系客服反馈,我们会尽快为您处理(人工客服工作时间:9:00-18:30)。
PN A75199AA (May, 2009)
1 of 20
2 of 20
PN A75199AA (May, 2009)
Startups
Check external Sheath tank, fill the Cleaning agent tank and Empty the Waste tank Power the Computer and Monitor On Enter a Windows password if any and select OK icon. Double click Select User name Enter User password and select Next Select Connect (to run samples) or Work Offline. Check gages System Pressure 30 Psi, Vac 17 in (Cytometer only) Resource Explorer
(Single parameter)– Select , Density plot – Select Select Parameter(s) and then OK Repeat for each plot Select each plot Focus (top of the plot) in turn and drag the plot to the desired location on the Workspace Press CTRL + T, select plot size, and then OK to arrange plots Instrument Settings: ▪ Single Tube Mode on the toolbar Select Place a sample for the application in position 10 on the carousel Select Run
Menus Toolbars Focus object Workspace Plot Panel file tab Worklist file tab
Protocols file tab Listmode file tab
Tabs Current Workspace protocol
Acquisition Manager Commonly Used Toolbars:
Select to turn off the cytometer Select Start >> Shutdown >> OK to shutdown the computer
4 of 20
PN A75199AA (May, 2009)
Creating a Protocol
Select Parameters: ▪ Create Plots: ▪ Select File >> New >> New Protocol to clear the workspace of all but one dotplot and single elliptical gate region. Select Yes to save old protocol or No if you do not wish to save it Select Cytometer Control on the toolbars Select Acquisition Setup tab Set Limits and Max events to stop accumulation later button Select Deselect unwanted parameters Select any desired parameters Optional: Set Ratio, Time and Derived Parameters Close shutters of unused lasers Select FS Collection angle and SS desired ND filter Select OK Select Yes, enter a name and select Save Dot Plots (2 parameter) – Select , Histogram Plot
Gallios TM Quick Reference
Purpose:
The purpose of this Quick Reference is to provide a simple step by step outline of the information needed to perform various tasks on the system. We begin with basic tasks like starting up or shutting down the system and then proceed to more involved software tasks. It is organized according to the modules in the Gallios Flow Cytometer Training Modules. Major Headings (in blue) are the major groups of tasks. These headings may be further subdivided into subsections of the major task and appear in a logical sequence. For example, the Major task of creating a protocol is subdivided into the subsections: Select Parameters, Create Plots, Instrument Settings, Create Regions, Gate, Analyze, and Save Protocol. A list of the major tasks appears below in the Table of Contents.
Table of Contents
Startups Shutdown Creating a Protocol Create a FlowPAGE AutoSetup Acquisition Manager (Panels) Database Offline Analysis System Setup P. 3 P. 4 P. 5 P. 7 P. 8 P. 9 P. 11 P. 15 P. 19
Place 2 ml of 10 % bleach solution in one tube Place 2 ml of de-ionized water in each of 3 tubes Select on the toolbar to clear the Acq. Mgr.
PN A75199AA (May, 2009)
5 of 20
Create Regions ▪
Deselect Setup Mode, QuickSET, and QuickCOMP Allow the system to collect the desired amount of data Select to stop or allow the system to reach a stop value
Select each plot in turn and add regions: Dot Plots (2 Parameter Plots only): Polygon - select Move the cursor to starting point on plot and left click Use a click move technique to create all the sides back to the starting point Rectangle – select Move the cursor to the starting corner and left click Move the cursor to the opposite corner and left Click to complete the rectangle Quadrant – Select Move the cursor to plot and leபைடு நூலகம்t click Move the region to anchor position and left click Autgogate – Select ellipse or contour Move the cursor to desired population and left click
Open Worklist
Customize Worklist
Acquisition Manager Toolbar
New Worklist
Save Worklist
Delete Current Tasks
Add Panel
Print Worklist
Open External Order
Shutdown
Select the tab on the Resource Explorer Select the Common Folder Select the cleanse.pnl and drag and drop it to the Acq. Mgr. Enter a carousel number Select button Select Yes if you wish to save the previous protocol or No if not When the panel is finished, remove all tubes Select Standby mode in the upper right to exit the When finished select software Select No