华三交换机命令大全图文稿
华三交换机命令详解

华三交换机命令详解华三交换机命令详解⽬录1 VLAN 配置命令1.1 VLAN 配置命令1.1.1 description1.1.2 display interface vlan-interface1.1.3 display vlan1.1.4 interface vlan-interface1.1.5 ip address1.1.6 name1.1.7 reset counters interface vlan-interface 1.1.8 shutdown1.1.9 vlan1.2 基于端⼝的 VLAN 配置命令1.2.1 display port1.2.2 port1.2.3 port access vlan1.2.4 port hybrid pvid1.2.5 port hybrid vlan1.2.6 port link-type1.2.7 port trunk permit vlan1.2.8 port trunk pvid1.3 基于 MAC 的 VLAN 配置命令1.3.1 display mac-vlan1.3.2 display mac-vlan interface1.3.3 mac-vlan enable1.3.4 mac-vlan mac-address1.3.5 mac-vlan trigger enable1.3.6 port pvid disable1.3.7 vlan precedence1.4 基于录录的 VLAN 配置命令1.4.1 display protocol-vlan interface 1.4.2 display protocol-vlan vlan 1.4.3 port hybrid protocol-vlan1.4.4 protocol-vlan1.5 基于 IP ⼦的⽹ VLAN 配置命令1.5.1 display ip-subnet-vlan interface 1.5.2 display ip-subnet-vlan vlan1.5.3 ip-subnet-vlan1.5.4 port hybrid ip-subnet-vlan2 Isolate-user-VLAN 配置命令2.1 Isolate-user-VLAN 配置命令2.1.1 display isolate-user-vlan2.1.2 isolate-user-vlan2.1.3 isolate-user-vlan enable2.1.4 isolated-vlan enable2.1.5 port isolate-user-vlan3 Voice VLAN 配置命令3.1 Voice VLAN 配置命令3.1.1 display voice vlan oui3.1.2 display voice vlan state3.1.3 voice vlan aging3.1.4 voice vlan enable3.1.5 voice vlan mac-address3.1.6 voice vlan mode auto3.1.7 voice vlan qos3.1.8 voice vlan qos trust3.1.9 voice vlan security enable1 VLAN配置命令1.1 VLAN配置命令1.1.1 description【命令】description textundo description【录录】VLAN录录/VLAN接⼝录录【缺省录录】2,系录录【】参数,描述VLAN或VLAN接⼝的描述字符串~可⽀持的描述字符包括英⽂可text 以包含录准字符;分⼤⼩的字母、字,、英⽂特殊字符、空格、以及符合区写数unicode录录录范的其他⽂字和符。
实验四:华三交换机的基本命令使用
实验四:交换机的基本命令使用一、理论基础人们在使用网络设备的过程中,往往要查看设备的配置信息,删除配置或者重新启动设备等等,在此我们介绍几个常用的公用命令,以便大家在后面的实验中能够避免一些不必要的麻烦。
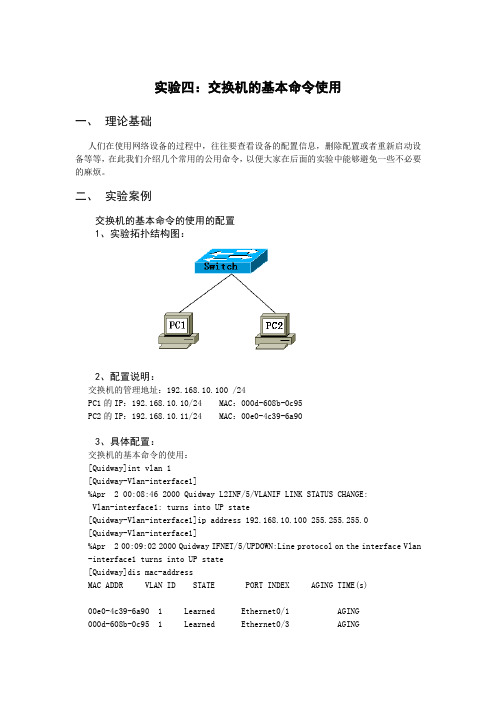
二、实验案例交换机的基本命令的使用的配置1、实验拓扑结构图:2、配置说明:交换机的管理地址:192.168.10.100 /24PC1的IP:192.168.10.10/24 MAC:000d-608b-0c95PC2的IP:192.168.10.11/24 MAC:00e0-4c39-6a903、具体配置:交换机的基本命令的使用:[Quidway]int vlan 1[Quidway-Vlan-interface1]%Apr 2 00:08:46 2000 Quidway L2INF/5/VLANIF LINK STATUS CHANGE:Vlan-interface1: turns into UP state[Quidway-Vlan-interface1]ip address 192.168.10.100 255.255.255.0[Quidway-Vlan-interface1]%Apr 2 00:09:02 2000 Quidway IFNET/5/UPDOWN:Line protocol on the interface Vlan -interface1 turns into UP state[Quidway]dis mac-addressMAC ADDR VLAN ID STATE PORT INDEX AGING TIME(s)00e0-4c39-6a90 1 Learned Ethernet0/1 AGING000d-608b-0c95 1 Learned Ethernet0/3 AGING--- 2 mac address(es) found ---[Quidway]dis mac-address ?H-H-H MAC addressaging-time Global aging timecount MAC entries countdynamic Dynamic entry, with aging, can be added/deleted, lost after reset interface Choose one interface to displaystatic Static entry, without aging, can be added/deleted, saved to the configuration filevlan VLAN<cr>[Quidway]dis mac-address aging-timeMac address aging time: 300s[Quidway]dis arpIP Address MAC Address VLAN ID Port Name Aging Type--- 0 entry found ---[Quidway]ping 192.168.10.10PING 192.168.10.10: 56 data bytes, press CTRL_C to breakReply from 192.168.10.10: bytes=56 Sequence=1 ttl=128 time = 20 msReply from 192.168.10.10: bytes=56 Sequence=2 ttl=128 time = 20 msReply from 192.168.10.10: bytes=56 Sequence=3 ttl=128 time = 20 msReply from 192.168.10.10: bytes=56 Sequence=4 ttl=128 time = 20 msReply from 192.168.10.10: bytes=56 Sequence=5 ttl=128 time = 20 ms--- 192.168.10.10 ping statistics ---5 packet(s) transmitted5 packet(s) received0.00% packet lossround-trip min/avg/max = 20/20/20 ms[Quidway]dis arpIP Address MAC Address VLAN ID Port Name Aging Type192.168.10.10 000d-608b-0c95 1 Ethernet0/3 20 Dynamic--- 1 entry found ---[Quidway]ping 192.168.10.11PING 192.168.10.11: 56 data bytes, press CTRL_C to breakReply from 192.168.10.11: bytes=56 Sequence=1 ttl=128 time = 30 msReply from 192.168.10.11: bytes=56 Sequence=2 ttl=128 time = 20 msReply from 192.168.10.11: bytes=56 Sequence=3 ttl=128 time = 20 msReply from 192.168.10.11: bytes=56 Sequence=4 ttl=128 time = 20 msReply from 192.168.10.11: bytes=56 Sequence=5 ttl=128 time = 20 ms--- 192.168.10.11 ping statistics ---5 packet(s) transmitted5 packet(s) received0.00% packet lossround-trip min/avg/max = 20/22/30 ms[Quidway]dis arpIP Address MAC Address VLAN ID Port Name Aging Type192.168.10.10 000d-608b-0c95 1 Ethernet0/3 20 Dynamic192.168.10.11 00e0-4c39-6a90 1 Ethernet0/1 20 Dynamic--- 2 entries found ---静态绑定PCB和E0/3端口:手动添加的静态表项没有老化时间(NOAGED)[Quidway]mac-address static 000d-608b-0c95 interface e0/3 vlan 1[Quidway]dis mac-addressMAC ADDR VLAN ID STATE PORT INDEX AGING TIME(s)00e0-4c39-6a90 1 Learned Ethernet0/1 AGING000d-608b-0c95 1 Config static Ethernet0/3 NOAGED--- 2 mac address(es) found ---此时把PC B和交换机的E0/5端口相连,那么再次显示表项时,会发现E0/5并没有学习到,因为静态表项优先于动态表项。
华三交换机命令

[Quidway-luser-huawei]service-type telnet ssh level 3
服务类型为SSH和telnet,且用户登陆后权限为管理员权限
[Quidway-luser-huawei]qu
[S3026-ui-vty0-4]set authentication-mode password simple 222
[S3026-ui-vty0-4]user privilege level 3
[Quidway-Ethernet0/1]duplex {half|full|auto} 配置端口双工工作状态
(2)系统视图(配置系统参数)[Quidway]:在用户视图下键入system-view
(3)以太网端口视图(配置以太网端口参数)[Quidway-Ethernet0/1]:在系统视图下键入interface ethernet 0/1
(4)VLAN视图(配置VLAN参数)[Quidway-Vlan1]:在系统视图下键入vlan 1
[Quidway]sysname 交换机命名
[Quidway]interface ethernet 0/1 进入接口视图
[Quidway]interface vlan x 进入接口视图
[Quidway-luser-huawei]password simple huawei
[Quidway-luser-huawei] service-type telnet level 3
4、VLAN配置方法
『配置环境参数』
SwitchA端口E0/1属于VLAN2,E0/2属于VLAN3
华三交换机命令大全
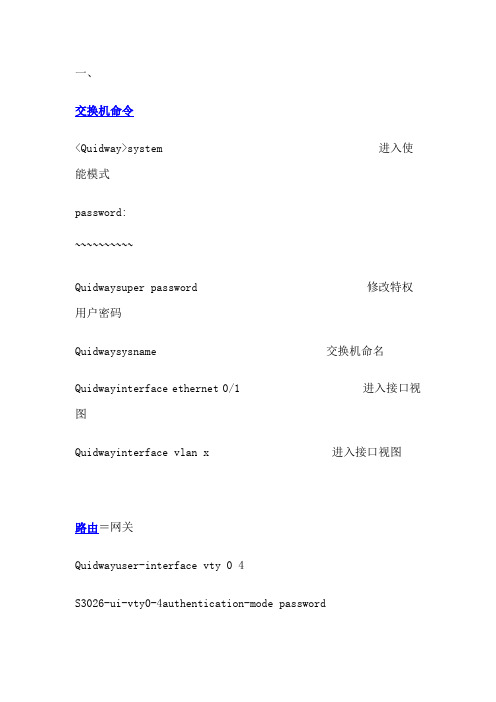
一、交换机命令<Quidway>system 进入使能模式password:~~~~~~~~~~Quidwaysuper password 修改特权用户密码Quidwaysysname 交换机命名Quidwayinterface ethernet 0/1 进入接口视图Quidwayinterface vlan x 进入接口视图路由=网关Quidwayuser-interface vty 0 4S3026-ui-vty0-4authentication-mode passwordS3026-ui-vty0-4set authentication-mode password simple 222 S3026-ui-vty0-4user privilege level 3Quidway-Ethernet0/1duplex {half|full|auto} 配置端口双工工作状态Quidway-Ethernet0/1speed {10|100|auto} 配置端口工作速率Quidway-Ethernet0/1flow-control 配置端口流控Quidway-Ethernet0/1mdi {across|auto|normal} 配置端口MDI/MDIX状态平接或扭接Quidway-Ethernet0/1port link-type {trunk|access|hybrid} 设置接口工作模式Quidway-Ethernet0/1shutdown 关闭/重起接口Quidway-Ethernet0/2quit 退出系统视图Quidwayvlan 3 创建/删除一个VLAN/进入VLAN模式Quidway-vlan3port ethernet 0/1 to ethernet 0/4 在当前VLAN 增加/删除以太网接口Quidway-Ethernet0/2port access vlan 3 将当前接口加入到指定VLANQuidway-Ethernet0/2port trunk permit vlan {ID|All} 设trunk允许的VLANQuidway-Ethernet0/2port trunk pvid vlan 3 设置trunk端口的PVIDQuidwaymonitor-port <interface_type interface_num> 指定和清除镜像端口Quidwayport mirror <interface_type interface_num> 指定和清除被镜像端口Quidwayport mirror int_list observing-port int_type int_num 指定镜像和被镜像Quidwaydescription string 指定VLAN 描述字符Quidwaydescription 删除VLAN描述字符Quidway display vlan vlan_id 查看VLAN设置Quidway stp {enable|disable} 开启/关闭生成树;默认关闭Quidwaystp priority 4096 设置交换机的优先级Quidwaystp root {primary|secondary} 设置交换机为根或根的备份Quidway-Ethernet0/1stp cost 200 设置交换机端口的花费SwitchA-vlanxisolate-user-vlan enable 设置主vlanSwitchAIsolate-user-vlan <x> secondary <list> 设置主vlan 包括的子vlanQuidway-Ethernet0/2port hybrid pvid vlan <id> 设置vlan 的pvidQuidway-Ethernet0/2port hybrid pvid 删除vlan 的pvidQuidway-Ethernet0/2port hybrid vlan vlan_id_list untagged 设置无标识的vlan如果包的vlan id与PVId一致;则去掉vlan信息. 默认PVID=1.. 所以设置PVID为所属vlan id; 设置可以互通的vlan为untagged. 二、sys 进入到系统视图Enter system view; return to user view with Ctrl+Z. Quidwayuser-interface aux 0Quidway-ui-aux0authentication-mode schemeNotice: Telnet or SSH user must be added ; otherwise operator cant loginQuidway-ui-aux0quQuidwaylocal-user huawei 增加用户名New local user added.Quidway-luser-huaweipassword simple huawei 配置密码;且密码不加密Quidway-luser-huaweiservice-type telnet ssh level 3服务类型为SSH和telnet;且用户登陆后权限为管理员权限Quidway-luser-huaweiquQuidwayuser-interface vty 0 4Quidway-ui-vty0-4authentication-mode schemeNotice: Telnet or SSH user must be added ; otherwise operator cant loginQuidway-ui-vty0-4<Quidway>save华为QuidWay交换机配置命令手册:1、开始建立本地配置环境;将主机的串口通过配置电缆与以太网交换机的Console口连接..在主机上运行终端仿真程序如Windows的超级终端等;设置终端通信参数为:波特率为9600bit/s、8位数据位、1位停止位、无校验和无流控;并选择终端类型为VT100..以太网交换机上电;终端上显示以太网交换机自检信息;自检结束后提示用户键入回车;之后将出现命令行提示符如<Quidway>..键入命令;配置以太网交换机或查看以太网交换机运行状态..需要帮助可以随时键入" "2、命令视图1用户视图查看交换机的简单运行状态和统计信息<Quidway>:与交换机建立连接即进入2系统视图配置系统参数Quidway:在用户视图下键入system-view 3以太网端口视图配置以太网端口参数Quidway-Ethernet0/1:在系统视图下键入interface ethernet 0/14VLAN视图配置VLAN参数Quidway-Vlan1:在系统视图下键入vlan 1 5VLAN接口视图配置VLAN和VLAN汇聚对应的IP接口参数Quidway-Vlan-interface1:在系统视图下键入interfacevlan-interface 16本地用户视图配置本地用户参数Quidway-luser-user1:在系统视图下键入local-user user17用户界面视图配置用户界面参数Quidway-ui0:在系统视图下键入user-interface3、其他命令设置系统时间和时区<Quidway>clock time Beijing add 8<Quidway>clock datetime 12:00:00 2005/01/23设置交换机的名称Quidwaysysname TRAIN-3026-1TRAIN-3026-1配置用户登录Quidwayuser-interface vty 0 4Quidway-ui-vty0authentication-mode scheme创建本地用户Quidwaylocal-user huaweiQuidway-luser-huaweipassword simple huaweiQuidway-luser-huawei service-type telnet level 34、VLAN配置方法『配置环境参数』SwitchA端口E0/1属于VLAN2;E0/2属于VLAN3『组网需求』把交换机端口E0/1加入到VLAN2 ;E0/2加入到VLAN3数据配置步骤『VLAN配置流程』1缺省情况下所有端口都属于VLAN 1;并且端口是access端口;一个access端口只能属于一个vlan;2如果端口是access端口;则把端口加入到另外一个vlan的同时;系统自动把该端口从原来的vlan中删除掉;3除了VLAN1;如果VLAN XX不存在;在系统视图下键入VLAN XX;则创建VLAN XX并进入VLAN视图;如果VLAN XX已经存在;则进入VLAN 视图..SwitchA相关配置方法一:1创建进入vlan2SwitchAvlan 22将端口E0/1加入到vlan2SwitchA-vlan2port ethernet 0/13创建进入vlan3SwitchA-vlan2vlan 34将端口E0/2加入到vlan3SwitchA-vlan3port ethernet 0/2方法二:1创建进入vlan2SwitchAvlan 22进入端口E0/1视图SwitchAinterface ethernet 0/13指定端口E0/1属于vlan2SwitchA-Ethernet1port access vlan 24创建进入vlan3SwitchAvlan 35进入端口E0/2视图SwitchAinterface ethernet 0/26指定端口E0/2属于vlan3SwitchA-Ethernet2port access vlan 3测试验证1使用命令disp cur可以看到端口E0/1属于vlan2;E0/2属于vlan3;2使用display interface Ethernet 0/1可以看到端口为access端口;PVID为2;3使用display interface Ethernet 0/2可以看到端口为access端口;PVID为35、交换机IP地址配置功能需求及组网说明『配置环境参数』三层交换机SwitchA有两个端口ethetnet 0/1、ethernet 0/2;分别属于vlan 2、vlan 3;『组网需求』PC1和PC2通过三层接口互通SwitchA相关配置1创建进入vlan2Quidwayvlan 22将端口E0/1加入到vlan2Quidway-vlan2port ethernet 0/13进入vlan2的虚接口Quidway-vlan2interface vlan 24在vlan2的虚接口上配置IP地址5创建进入vlan3Quidwayvlan 36将E0/2加入到vlan3Quidway-vlan3port ethernet 0/27进入vlan3的虚接口Quidway-vlan3interface vlan 38在vlan3的虚接口上配置IP地址测试验证1PC1和PC2都可以PING通自己的网关2PC1和PC2可以相互PING通6、端口的trunk配置『配置环境参数』1SwitchA 端口E0/1属于vlan10;E0/2属于vlan20;E0/3与SwitchB 端口E0/3互连2SwitchB 端口E0/1属于vlan10;E0/2属于vlan20;E0/3与SwitchA 端口E0/3互连『组网需求』1要求SwitchA的vlan10的PC与SwitchB的vlan10的PC互通2要求SwitchA的vlan20的PC与SwitchB的vlan20的PC互通数据配置步骤SwitchA相关配置1创建进入vlan10SwitchA vlan 102将E0/1加入到vlan10SwitchA-vlan10port Ethernet 0/13创建进入vlan20SwitchAvlan 204将E0/2加入到vlan20SwitchA-vlan20port Ethernet 0/25实际当中一般将上行端口设置成trunk属性;允许vlan透传SwitchA-Ethernet0/3port link-type trunk6允许所有的vlan从E0/3端口透传通过;也可以指定具体的vlan值SwitchA-Ethernet0/3port trunk permit vlan allSwitchB相关配置1创建进入vlan10SwitchB vlan 102将E0/1加入到vlan10SwitchB-vlan10port Ethernet 0/13创建进入vlan20SwitchBvlan 204将E0/2加入到vlan20SwitchB-vlan20port Ethernet 0/25实际当中一般将上行端口设置成trunk属性;允许vlan透传SwitchB-Ethernet0/3port link-type trunk7允许所有的vlan从E0/3端口透传通过;也可以指定具体的vlan值SwitchB-Ethernet0/3port trunk permit vlan all补充说明1如果一个端口是trunk端口;则该端口可以属于多个vlan;2缺省情况下trunk端口的PVID为1;可以在端口模式下通过命令port trunk pvid vlan vlanid 来修改端口的PVID;3如果从trunk转发出去的数据报文的vlan id和端口的PVID一致;则该报文的VLAN信息会被剥去;这点在配置trunk端口时需要注意.. 4一台交换机上如果已经设置了某个端口为hybrid端口;则不可以再把另外的端口设置为trunk端口..5一般情况下最好指定端口允许通过哪些具体的VLAN;不要设置允许所有的VLAN通过..测试验证1SwitchA vlan10内的PC可以与SwitchB vlan10内的PC互通2SwitchA vlan20内的PC可以与SwitchB vlan20内的PC互通3SwitchA vlan10内的PC不能与SwitchB vlan20内的PC互通4SwitchA vlan20内的PC不能与SwitchB vlan10内的PC互通7、端口汇聚配置『配置环境参数』1交换机SwitchA和SwitchB通过以太网口实现互连..2SwitchA用于互连的端口为e0/1和e0/2;SwitchB用于互连的端口为e0/1和e0/2..『组网需求』增加SwitchA的SwitchB的互连链路的带宽;并且能够实现链路备份;使用端口汇聚数据配置步骤SwitchA交换机配置1进入端口E0/1SwitchAinterface Ethernet 0/12汇聚端口必须工作在全双工模式SwitchA-Ethernet0/1duplex full3汇聚的端口速率要求相同;但不能是自适应SwitchA-Ethernet0/1speed 1004进入端口E0/2SwitchAinterface Ethernet 0/25汇聚端口必须工作在全双工模式SwitchA-Ethernet0/2duplex full6汇聚的端口速率要求相同;但不能是自适应SwitchA-Ethernet0/2speed 1007根据源和目的MAC进行端口选择汇聚SwitchAlink-aggregation Ethernet 0/1 to Ethernet 0/2 both SwitchB交换机配置SwitchBinterface Ethernet 0/1SwitchB-Ethernet0/1duplex fullSwitchB-Ethernet0/1speed 100SwitchBinterface Ethernet 0/2SwitchB-Ethernet0/2duplex fullSwitchB-Ethernet0/2speed 100SwitchBlink-aggregation Ethernet 0/1 to Ethernet 0/2 both补充说明1同一个汇聚组中成员端口的链路类型与主端口的链路类型保持一致;即如果主端口为Trunk端口;则成员端口也为Trunk端口;如主端口的链路类型改为Access端口;则成员端口的链路类型也变为Access 端口..2不同的产品对端口汇聚时的起始端口号要求各有不同;请对照操作手册进行配置..8、端口镜像配置『环境配置参数』3E0/24为交换机上行端口4Server接在交换机E0/8端口;该端口作为镜像端口『组网需求』1通过交换机端口镜像的功能使用server对两台pc的业务报文进行监控..根据Quidway交换机不同型号;镜像有不同方式进行配置:基于端口的镜像——基于端口的镜像是把被镜像端口的进出数据报文完全拷贝一份到镜像端口;这样来进行流量观测或者故障定位.. 基于流的镜像——基于流镜像的交换机针对某些流进行镜像;每个连接都有两个方向的数据流;对于交换机来说这两个数据流是要分开镜像的..S2008/S2016/S2026/S2403H/S3026等交换机支持的都是基于端口的镜像8016交换机支持基于端口的镜像3500/3026E/3026F/3050支持基于流的镜像5516/6506/6503/6506R支持对入端口流量进行镜像数据配置步骤以Quidway S3026C为例;通过基于二层流的镜像进行配置:1定义一个ACLSwitchAacl num 2002定义一个规则从E0/1发送至其它所有端口的数据包SwitchArule 0 permit ingress interface Ethernet0/1 egress interface Ethernet0/23定义一个规则从其它所有端口到E0/1端口的数据包SwitchArule 1 permit ingress interface Ethernet0/2 egress interface Ethernet0/14将符合上述ACL的数据包镜像到E0/8SwitchAmirrored-to link-group 200 interface e0/89、生成树STP配置『配置环境参数』1交换机SwitchA、SwitchB和SwitchC都通过GE接口互连2SwitchB和SwitchC交换机是核心交换机;要求主备..『组网需求』要求整个网络运行STP协议数据配置步骤1SwitchA交换机配置启动生成树协议: SwitchAstp enable1SwitchB交换机配置启动生成树协议:SwitchBstp enable3配置本桥为根桥SwitchBstp root primary4SwitchC交换机配置a 启动生成树协议SwitchCstp enableb 配置本桥为备份根桥SwitchCstp root secondary5SwitchD交换机配置a 启动生成树协议SwitchDstp enable补充说明1缺省情况下交换机的优先级都是32768;如果想人为指定某一台交换机为根交换机;也可以通过修改优先级来实现;2缺省情况下打开生成树后;所有端口都会开启生成树协议;请把接PC的端口改为边缘端口模式;3如果要控制某条链路的状态可以通过设置端口的cost值来实现.. 测试验证1使用display stp查看交换机STP运行状态2查看端口STP状态display stp interface Ethernet XX是否正确10、Quidway交换机维护显示系统版本信息:display version显示诊断信息:display diagnostic-information显示系统当前配置:display current-configuration显示系统保存配置: display saved-configuration显示接口信息:display interface显示路由信息:display ip routing-table显示VLAN信息:display vlan显示生成树信息:display stp显示MAC地址表:display mac-address显示ARP表信息:display arp显示系统CPU使用率:display cpu显示系统内存使用率:display memory显示系统日志:display log显示系统时钟:display clock验证配置正确后;使用保存配置命令:save 删除某条命令;一般使用命令: undo。
华三交换机命令大全

一、交换机命令<Quidway>system进入使能模式password:~~~~~~~~~~[Quidway]superpassword修改特权用户密码[Quidway]sysname交换机命名[Quidway]interface ethernet0/1 进入接口视图[Quidway]interface vlanx 进入接口视图[Quidway-Vlan-interfacex]ip address 10.65.1.1 255.255.0.0 [Quidway]ip route-static 0.0.0.0 0.0.0.0 10.65.1.2 静态路由=网关[Quidway]user-interface vty 0 4[S3026-ui-vty0-4]authentication-mode password[S3026-ui-vty0-4]set authentication-mode password simple 222 [S3026-ui-vty0-4]user privilege level 3[Quidway-Ethernet0/1]duplex{half|full|auto} 配置端口双工工作状态[Quidway-Ethernet0/1]speed {10|100|auto} 配置端口工作速率[Quidway-Ethernet0/1]flow-control配置端口流控[Quidway-Ethernet0/1]mdi{across|auto|normal} 配置端口MDI/MDIX状态平接或扭接[Quidway-Ethernet0/1]port link-type {trunk|access|hybrid} 设置接口工作模式[Quidway-Ethernet0/1]shutdown 关闭/重起接口[Quidway-Ethernet0/2]quit退出系统视图[Quidway]vlan3创建/删除一个VLAN/进入VLAN模式[Quidway-vlan3]port ethernet 0/1 to ethernet 0/4 在当前VLAN增加/删除以太网接口[Quidway-Ethernet0/2]port access vlan3 将当前接口加入到指定VLAN[Quidway-Ethernet0/2]port trunk permit vlan{ID|All} 设trunk允许的VLAN[Quidway-Ethernet0/2]port trunk pvid vlan 3 设置trunk 端口的PVID[Quidway]monitor-port <interface_typeinterface_num> 指定和清除镜像端口[Quidway]port mirror <interface_typeinterface_num> 指定和清除被镜像端口[Quidway]port mirror int_list observing-port int_type int_num 指定镜像和被镜像[Quidway]descriptionstring 指定VLAN描述字符[Quidway]description删除VLAN描述字符[Quidway]display vlan[vlan_id] 查看VLAN 设置[Quidway]stp{enable|disable}开启/关闭生成树,默认关闭[Quidway]stp priority4096 设置交换机的优先级[Quidway]stp root{primary|secondary} 设置交换机为根或根的备份[Quidway-Ethernet0/1]stp cost200 设置交换机端口的花费[SwitchA-vlanx]isolate-user-vlanenable 设置主vlan[SwitchA]Isolate-user-vlan <x> secondary <list> 设置主vlan包括的子vlan[Quidway-Ethernet0/2]port hybrid pvid vlan <id> 设置vlan的pvid[Quidway-Ethernet0/2]port hybridpvid 删除vlan的pvid [Quidway-Ethernet0/2]port hybrid vlan vlan_id_list untagged 设置无标识的vlan如果包的vlan id与PVId一致,则去掉vlan信息. 默认PVID=1。
华三交换机命令详解

华三交换机命令详解目录1 VLAN 配置命令1.1 VLAN 配置命令1.1.1 description1.1.2 display interface vlan-interface1.1.3 display vlan1.1.4 interface vlan-interface1.1.5 ip address1.1.6 name1.1.7 reset counters interface vlan-interface 1.1.8 shutdown1.1.9 vlan1.2 基于端口的 VLAN 配置命令1.2.1 display port1.2.2 port1.2.3 port access vlan1.2.4 port hybrid pvid1.2.5 port hybrid vlan1.2.6 port link-type1.2.7 port trunk permit vlan1.2.8 port trunk pvid1.3 基于 MAC 的 VLAN 配置命令1.3.1 display mac-vlan1.3.2 display mac-vlan interface1.3.3 mac-vlan enable1.3.4 mac-vlan mac-address1.3.5 mac-vlan trigger enable1.3.6 port pvid disable1.3.7 vlan precedence1.4 基于录录的 VLAN 配置命令1.4.1 display protocol-vlan interface 1.4.2 display protocol-vlan vlan1.4.3 port hybrid protocol-vlan1.4.4 protocol-vlan1.5 基于 IP 子的网 VLAN 配置命令1.5.1 display ip-subnet-vlan interface 1.5.2 display ip-subnet-vlan vlan1.5.3 ip-subnet-vlan1.5.4 port hybrid ip-subnet-vlan2 Isolate-user-VLAN 配置命令2.1 Isolate-user-VLAN 配置命令2.1.1 display isolate-user-vlan2.1.2 isolate-user-vlan2.1.3 isolate-user-vlan enable2.1.4 isolated-vlan enable2.1.5 port isolate-user-vlan3 Voice VLAN 配置命令3.1 Voice VLAN 配置命令3.1.1 display voice vlan oui3.1.2 display voice vlan state3.1.3 voice vlan aging3.1.4 voice vlan enable3.1.5 voice vlan mac-address3.1.6 voice vlan mode auto3.1.7 voice vlan qos3.1.8 voice vlan qos trust3.1.9 voice vlan security enable1 VLAN配置命令1.1 VLAN配置命令1.1.1 description【命令】description textundo description【录录】VLAN录录/VLAN接口录录【缺省录录】2,系录录【】参数,描述VLAN或VLAN接口的描述字符串~可支持的描述字符包括英文可text 以包含录准字符;分大小的字母、字,、英文特殊字符、空格、以及符合区写数unicode录录录范的其他文字和符。
华三交换机命令共14页文档

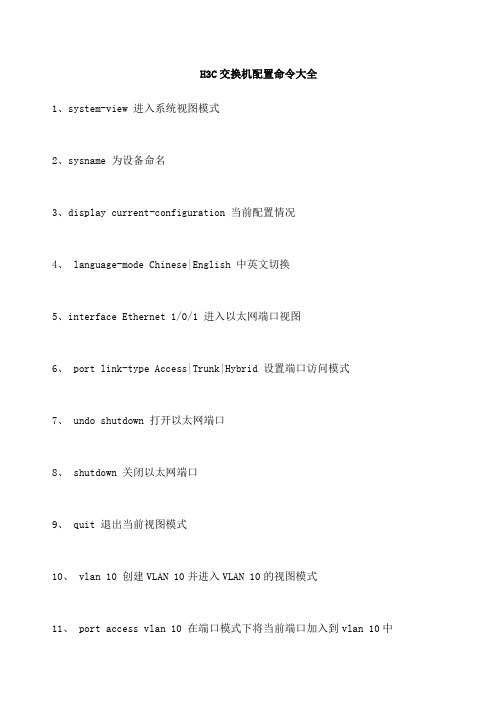
H3C交换机配置命令大全1、system-view 进入系统视图模式2、sysname 为设备命名3、display current-configuration 当前配置情况4、language-mode Chinese|English 中英文切换5、interface Ethernet 1/0/1 进入以太网端口视图6、port link-type Access|Trunk|Hybrid 设置端口访问模式7、undo shutdown 打开以太网端口8、shutdown 关闭以太网端口9、quit 退出当前视图模式10、vlan 10 创建VLAN 10并进入VLAN 10的视图模式11、port access vlan 10 在端口模式下将当前端口加入到vlan 10中12、port E1/0/2 to E1/0/5 在VLAN模式下将指定端口加入到当前vlan中13、port trunk permit vlan all 允许所有的vlan通过H3C路由器1、system-view 进入系统视图模式2、sysname R1 为设备命名为R13、display ip routing-table 显示当前路由表4、language-mode Chinese|English 中英文切换5、interface Ethernet 0/0 进入以太网端口视图6、ip address 192.168.1.1 255.255.255.0 配置IP地址和子网掩码7、undo shutdown 打开以太网端口8、shutdown 关闭以太网端口9、quit 退出当前视图模式10、ip route-static 192.168.2.0 255.255.255.0 192.168.12.2 description To.R2 配置静态路由11、ip route-static 0.0.0.0 0.0.0.0 192.168.12.2 description To.R2 配置默认的路由H3C S3100 SwitchH3C S3600 SwitchH3C MSR 20-20 Router1、调整超级终端的显示字号;2、捕获超级终端操作命令行,以备日后查对;3、language-mode Chinese|English 中英文切换;4、复制命令到超级终端命令行,粘贴到主机;5、交换机清除配置:<H3C>reset save ;<H3C>reboot ;6、路由器、交换机配置时不能掉电,连通测试前一定要检查网络的连通性,不要犯最低级的错误。
华三路由器交换机配置命令
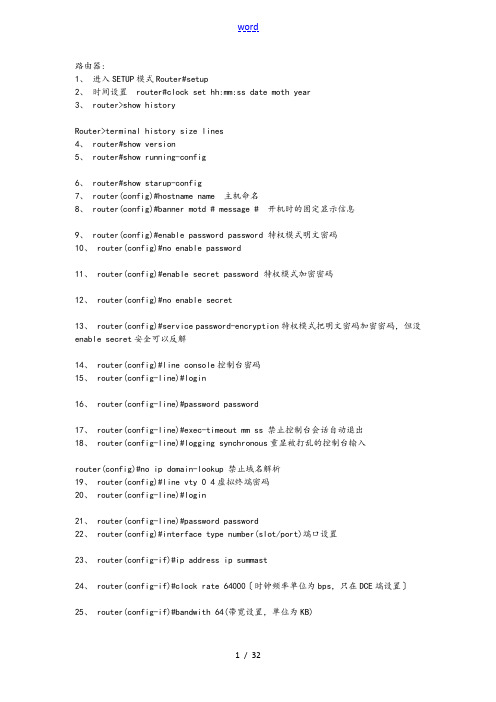
路由器:1、进入SETUP模式Router#setup2、时间设置router#clock set hh:mm:ss date moth year3、 router>show historyRouter>terminal history size lines4、 router#show version5、 router#show running-config6、 router#show starup-config7、 router(config)#hostname name 主机命名8、 router(config)#banner motd # message # 开机时的固定显示信息9、 router(config)#enable password password 特权模式明文密码10、 router(config)#no enable password11、 router(config)#enable secret password 特权模式加密密码12、 router(config)#no enable secret13、 router(config)#service password-encryption特权模式把明文密码加密密码,但没enable secret安全可以反解14、 router(config)#line console控制台密码15、 router(config-line)#login16、 router(config-line)#password password17、 router(config-line)#exec-timeout mm ss 禁止控制台会话自动退出18、 router(config-line)#logging synchronous重显被打乱的控制台输入router(config)#no ip domain-lookup 禁止域名解析19、 router(config)#line vty 0 4虚拟终端密码20、 router(config-line)#login21、 router(config-line)#password password22、 router(config)#interface type number(slot/port)端口设置23、 router(config-if)#ip address ip summast24、 router(config-if)#clock rate 64000〔时钟频率单位为bps,只在DCE端设置〕25、 router(config-if)#bandwith 64(带宽设置,单位为KB)26、 router(config-if)#no shutdown(shutdown)27、 router(config-if )#media-type type(10base) 为以太网端口选择适当的介质类型28、 router(config-if )#ctrl+z保存退出到特权模式29、 router#30、 router>用户模式enable进入router#特权模式config terminal进入router(config)#全局配置模式31、Interface Router(config-if)#端口设置Subinterface Router(config-subif)# 子端口设置Controller Router(config-controller)# 控制口设置Line Router(config-line)# 虚拟口设置Router Router(config-router)# 路由设置IPX router Router(config-ipx-router)#IPX路由设置32、 router#show interface33、 router#show interface Ethernet 034、 router#show interface serial 035、 router#show running-config36、 router#show starup-config37、 router#show flash38、 router#show controller39、 router#show controller interface type40、 router#show running-configrouter#copy running-config starup-configrouter#copy running-config tftprouter#copy starup-config tftprouter#copy flash tftprouter#copy tftp star-configrouter#copy tftp flash--------------------------------------------------------------------------------端口状态Serial1 is up, line protocol is up正常工作Serial1 is up, line protocol is down连接问题Serial1 is down, line protocol is down端口问题Serial1 is administratively down, line protocol is down人为关闭配置存放器的值1、关闭路由器的电源重新启动按住ctrl+break键入进2、>3、>o/r 0×2142(跳过nvarm启动恢复密码)4、>I5、当系统提示是否进入setup模式时,按N6、 router>7、 router>enable8、 router#9、进入修改后〔包括密码、存放器的值:0×2100为rom monitor启动、0×2101为setup 模式启动、0×2102为10、 router#copy running-config starup-config11、 router#reload12、也可以在router#setup进入setup模式静态路由协议设置router(config)#ip route network submask(要到达的网络号掩码)ip address(下一跳或出口ip地址)router(config)#ip route 0.0.0.0 s0〔出口端口或下一跳IP地址〕rip设置router(config)#router riprouter(config-router)#network network-numberrouter#show ip protocol查看RIP信息router#show ip route 查看路由表router#debug ip rip查看RIP更新信息router(config-router)#passive-interface e0(阻止发出作息)router(config-router)#ip rip receive version 1 2接收1、2RIP版本信息igrp设置router(config)#router igrp as numberrouter(config-router)#network network numberrouter#show ip route 查看路由表router#debug ip igrp events 查看IGRP路由更新大概信息router#debug ip igrp transaction 查看IGRP路由更新详细信息Router(config-router)#variance multiplier 控制 IGRP load balancingRouter(config-router)#traffic-share {balanced | min}控制load-balanced traffic 的分布eigrp设置router(config)#router eigrp as numberrouter(config-router)#network network numberrouter(config)#no auto-summry 关闭自动汇总router(config)# auto-summry 打开自动汇总〔默认是打开的〕router#show ip route eigrp 显示当前的路由表里的EIGRP条目router#show ip protocol 显示活动的路由协议进程的参数和当前的状态router#show ip eigrp neighbors 显示被EIGRP发现的邻居router#show ip eigrp traffic 显示发出和收到的IP EIGRP 包的数量router#show ip eigrp topology 显示IP EIGRP的拓扑表Router#debug ip eigrpospf设置1. Router(config)#router ospf process-idRouter(config-router)#network address(可以是网络号也可以是Ip地址 mask〔通配掩码〕area area-idRouter(config-if)# ip ospf priority numbe 配置OSPF的优先级Router#show ip protocols 验证OSPF的配置Router#show ip route 显示路由器学到的所有路由Router#show ip ospf interface type number 显示 area-ID 和邻接信息Router#show ip ospf neighbor 基于每接口显示OSPF邻居信息Router#debug ip ospf eventsRouter#debug ip ospf packet2. Router(config)# interface loopback number〔lookback回路配置〕Router(config-if)# ip address ip-address subnet-maskRouter(config-if)# ip ospf cost cost-numbe 修改OSPF 的Cost数值Router(config-if)# ip ospf authentication-key key 配置明文口令Router(config-if)# ip ospf messge-digest-key keyid md5 key 配置MD5口令(keyid和key必须配对一致,两邻居才可以通信)Router(config-route)# area area-id authentication [message-digest]message-digest为可选项,使用后路由器只传送口令消息的摘要〔或散列〕配置OSPF区域的验证:3. Router(config-if)# ip ospf hello-interval seconds 配置hello间隔:Router(config-if)# ip ospf dead-interval seconds配置down机判断间隔--------------------------------------------------------------------------------访问列表1.标准访问列表(standard access lists):只使用源IP地址来做过滤决定Router(config)#access-list 10 permit anyRouter(config)#int e1Router(config-if)#ip access-group 10 out使用IP标准ACL来控制VTY线路的访问.Router(config)#line vty 0 4Router(config-line)#access-class 50 in删除IP标准ACLRouter(config-line)#no ip access-class 50 inRouter(config)#no access-list 502.扩展访问列表(extended access lists):它比拟源IP地址和目标IP地址,层3的协议字段,层4端口号来做过滤决定Router(config)#access-list 110 deny tcp any host 172.16.30.5 eq 21Router(config)#access-list 110 deny tcp any host 172.16.30.5 eq 23Router(config)#access-list 110 permit ip any anyRouter(config)#int e1Router(config-if)#ip access-group 110 outrouter(config)#line vty 0 4outer(config-line)#access-class 12 in3.show ip interface:只显示IP访问列表信息4.show ip interface:显示所有接口的信息和配置的ACL信息5.show ip interface [接口号]:显示具体某个接口的信息和配置的ACL信息6.show running-config:显示DRAM信息和ACL信息,以与接口对ACL的应用信息. 交换机配置交换机上设置登陆口令Switch(config)# enable password level level passwordSwitch(config)# no enable password level level passwordhostname1900/2900(config)#hostname hostnameIP Address1900(config)#ip address {ip address} {mask}2950(config#interface vlan 12950(config-if)#ip address {ip_address} {mask}2950(config)#interface vlan 1default gateway1900/2950(config)#ip default-gateway {ip address}查看交换机的IP地址1900#show ipManagement VLAN: 12950#show interface vlan 1Vlan1 is up, line protocol is upHardware is Cat5k Virtual Ethernet, address is 0010.f6a9.9800 (bia 0010.f6a9.9800)设置双工选项1900(config)#interface e0/11900(config-if)#duplex {auto | full |full-flow-control | half}2950(config)#interface fe0/12950(config-if)#duplex {auto | full | half}设置端口速度:switch(config-if)# speed {10|100|auto}查勘双工选项Switch#show interfaces fastethernet0/3查看MAC地址表1900/2950#show mac-address-table配置永久MAC地址1900(config)#mac-address-table permanent {mac-address type module/port}1900(config)#mac-address-table permanent 2222.2222.2222 ethernet 0/31900#show mac-address-table2950(config)#mac-address-table static mac_addr {vlan vlan_id} [interface int1 [int2 ... int15]]--------------------------------------------------------------------------------配置受限静态MAC地址1900(config)#mac-address-table restricted static {mac-address type module/port src-if-list}1900(config)#mac-address-table restricted static 1111.1111.1111 e0/4 e0/11900#show mac-address-table2950(config)#mac-address-table secure mac-addr interface [vlan vlan-id]2950(config)#mac-address-table secure 0003.3333.3333 fa 0/1 vlan 12950#show mac-address-table配置端口安全性1900(config-if)#port secure max-mac-count count1900(config)#interface e0/41900(config-if)#port secure1900(config-if)#port secure max-mac-count 11900(config)#address-violation {suspend | disable | ignore1900# show mac-address-table security2950(config-if)#port security max-mac-count count2950(config)#interface fa0/12950(config-if)#port security2950(config-if)#port security max-mac-count 102950(config-if)#port security action {shutdown | trap} 2950#show mac-address-table secure2950#show port-security管理配置文件1900#copy nvram tftp://host/dst_file1900#copy tftp://host/src_file nvram2950#copy startup-config tftp://host/dst_file去除 NVRAM1900#delete nvram2950#erase startup-configvlan配置1900 VLAN建立1900下,使用vlan [vlan#] name [name] [vlan#]命令, 如下: >en#config t(config)#hostname 19001900(config)#vlan 2 name sales1900(config)#vlan 3 name marketing1900(config)#vlan 4 name mis1900(config)#exit端口分配1900(config)#int e0/21900(config-if)#vlan-membership static 21900(config)#int e0/41900(config-if)#vlan-membership static 31900(config)#int e0/51900(config-if)#vlan-membership static 41900(config-if)#exit1900(config)#exitVLAN验证1900#sh vlan2900 VLAN建立在2950下创建VLAN,在特权模式下使用vlan database命令2950#vlan database2950(vlan)#vlan 2 name MarketingVLAN 2 modified:Name: Marketing2950(vlan)#vlan 3 name AccountingVLAN 3 added:Name: Accounting2950(vlan)#applyAPPLY plete2950(vlan)#Ctrl+C2950#端口分配2950下的端口配置,使用switchport access vlan [vlan#]命令, 2950(config-if)#int f0/22950(config-if)#switchport access vlan 22950(config-if)#int f0/32950(config-if)#switchport access vlan 32950(config-if)#int f0/42950(config-if)#switchport access vlan 42950(config-if)#exit2950(config)#exit验证配置信息,如下:2950#sh vlan或2950#sh vlan brieftrunk配置1900 trunk配置1900(config)#int f0/261900(config-if)#trunk on2950下在接口配置模式,使用switchport命令,如下:2950(config)#int f0/122950(config-if)#switchport mode trunk2950(config-if)# switchport trunk encapsulation {isl|dot1q}2950(config-if)#^Z将某VLAN从中继中删除2950(config-if)# switchport trunk allowed vlan remove vlan-list添加某个VLAN到中继线路2950(config-if)# switchport trunk allowed vlan add vlan-listConfiguring Inter-VLAN Routing给连接1900的trunk端口配置,使用encapsulation isl [vlan#]命令,如下:2600Router(config-subif)#encapsulation isl [vlan#]2600Router(config-subif)#ip add ip add submask给连接2950的这样配置,如下:2600Router(config-subif)#encapsulation dot1q [vlan#]2600Router(config-subif)#ip add ip add submask--------------------------------------------------------------------------------VTP配置1900(config)#vtp server1900(config)#vtp domain noco1900(config)#vtp password noko在特权模式下使用show vtp命令验证,如下:1900#sh vtpVTP version: 1Configuration revision: 0Maximum VLANs supported locally: 1005Number of existing VLANs: 5VTP domain name: nocoVTP password: nokoVTP operating mode: Server2950如下:2950(config)#vtp mode server2950(config)#vtp domain noco验证信息,如下:2950#sh vtp ?counters VTP statisticsstatus VTP domain status2950#sh vtp statusNAT配置配置静态转换Router(config)#ip nat inside source static local-ip global-ipRouter(config-if)#ip nat insideRouter(config-if)#ip nat outside配置动态地址转换Router(config)#ip nat pool name start-ip end-ip {netmask netmask | prefix-length prefix-length}Router(config)#access-list access-list-number permit source [source-wildcard]Router(config)#ip nat inside source listaccess-list-number pool name配置OverloadingRouter(config)#access-list access-list-number permitsource source-wildcardRouter(config)#ip nat inside source listaccess-list-number interface interface overload去除NAT Translation TableRouter#clear ip nat translation * 去除所有的动态地址转换条目Router#clear ip nat translation inside global-iplocal-ip [outside local-ip global-ip] 去除一个简单的动态地址转换条目〔、外〕Router#clear ip nat translation outsidelocal-ip global-ip去除一个简单的动态地址转换〔外〕Router#clear ip nat translation protocol inside global-ipglobal-port local-ip local-port [outside local-iplocal-port global-ip global-port] 去除一个扩展动态地址转换条目Show命令输出信息Router#show ip nat translations------------------------------------------------------------------------------------------------------------------------------------------------------------------------------------------------------------------------------------------------------------------------------------------------------------------------------------------------------------------------------------------------------------------------------------------------------------------------------------------------------------------------------------------------------------------交换机:1.在基于IOS的交换机上设置主机名/系统名:switch(config)# hostname hostname在基于CLI的交换机上设置主机名/系统名:switch(enable) set system name name-string2.在基于IOS的交换机上设置登录口令:switch(config)# enable password level 1 password在基于CLI的交换机上设置登录口令:switch(enable) set passwordswitch(enable) set enalbepass3.在基于IOS的交换机上设置远程访问:switch(config)# interface vlan 1switch(config-if)# ip address ip-address netmaskswitch(config-if)# ip default-gateway ip-address在基于CLI的交换机上设置远程访问:switch(enable) set interface sc0 ip-address netmask broadcast-addressswitch(enable) set interface sc0 vlanswitch(enable) set ip route default gateway4.在基于IOS的交换机上启用和浏览CDP信息:switch(config-if)# cdp enableswitch(config-if)# no cdp enable为了查看Cisco邻接设备的CDP通告信息:switch# show cdp interface [type modle/port]switch# show cdp neighbors [type module/port] [detail]在基于CLI的交换机上启用和浏览CDP信息:switch(enable) set cdp {enable|disable} module/port为了查看Cisco邻接设备的CDP通告信息:switch(enable) show cdp neighbors[module/port] [vlan|duplex|capabilities|detail] 5.基于IOS的交换机的端口描述:switch(config-if)# de脚本ion de脚本ion-string基于CLI的交换机的端口描述:switch(enable)set port name module/number de脚本ion-string6.在基于IOS的交换机上设置端口速度:switch(config-if)# speed{10|100|auto}在基于CLI的交换机上设置端口速度:switch(enable) set port speed moudle/number {10|100|auto}switch(enable) set port speed moudle/number {4|16|auto}7.在基于IOS的交换机上设置以太网的链路模式:switch(config-if)# duplex {auto|full|half}在基于CLI的交换机上设置以太网的链路模式:switch(enable) set port duplex module/number {full|half}8.在基于IOS的交换机上配置静态VLAN:switch# vlan databaseswitch(vlan)# vlan vlan-num name vlaswitch(vlan)# exitswitch# configure teriminalswitch(config)# interface interface module/numberswitch(config-if)# switchport mode accessswitch(config-if)# switchport access vlan vlan-numswitch(config-if)# end在基于CLI的交换机上配置静态VLAN:switch(enable) set vlan vlan-num [name name]switch(enable) set vlan vlan-num mod-num/port-list9. 在基于IOS的交换机上配置VLAN中继线:switch(config)# interface interface mod/portswitch(config-if)# switchport mode trunkswitch(config-if)# switchport trunk encapsulation {isl|dotlq}switch(config-if)# switchport trunk allowed vlan remove vlan-listswitch(config-if)# switchport trunk allowed vlan add vlan-list在基于CLI的交换机上配置VLAN中继线:switch(enable) set trunk module/port [on|off|desirable|auto|nonegotiate]Vlan-range [isl|dotlq|dotl0|lane|negotiate]--------------------------------------------------------------------------------10.在基于IOS的交换机上配置VTP管理域:switch# vlan databaseswitch(vlan)# vtp domain domain-name在基于CLI的交换机上配置VTP管理域:switch(enable) set vtp [domain domain-name]11.在基于IOS的交换机上配置VTP 模式:switch# vlan databaseswitch(vlan)# vtp domain domain-nameswitch(vlan)# vtp {sever|cilent|transparent}switch(vlan)# vtp password password在基于CLI的交换机上配置VTP 模式:switch(enable) set vtp [domain domain-name] [mode{ sever|cilent|transparent }][password password]12. 在基于IOS的交换机上配置VTP版本:switch# vlan databaseswitch(vlan)# vtp v2-mode在基于CLI的交换机上配置VTP版本:switch(enable) set vtp v2 enable13. 在基于IOS的交换机上启动VTP剪裁:switch# vlan databaseswitch(vlan)# vtp pruning在基于CL I 的交换机上启动VTP剪裁:switch(enable) set vtp pruning enable14.在基于IOS的交换机上配置以太信道:switch(config-if)# port group group-number [distribution {source|destination}] 在基于CLI的交换机上配置以太信道:switch(enable) set port channel moudle/port-range mode{on|off|desirable|auto}--------------------------------------------------------------------------------15.在基于IOS的交换机上调整根路径本钱:switch(config-if)# spanning-tree [vlan vlan-list] cost cost在基于CLI的交换机上调整根路径本钱:switch(enable) set spantree portcost moudle/port costswitch(enable) set spantree portvlancost moudle/port [cost cost][vlan-list]16.在基于IOS的交换机上调整端口ID:switch(config-if)# spanning-tree[vlan vlan-list]port-priority port-priority在基于CLI的交换机上调整端口ID:switch(enable) set spantree portpri {mldule/port}priorityswitch(enable) set spantree portvlanpri {module/port}priority [vlans]17. 在基于IOS的交换机上修改STP时钟:switch(config)# spanning-tree [vlan vlan-list] hello-time secondsswitch(config)# spanning-tree [vlan vlan-list] forward-time secondsswitch(config)# spanning-tree [vlan vlan-list] max-age seconds在基于CLI的交换机上修改STP时钟:switch(enable) set spantree hello interval[vlan]switch(enable) set spantree fwddelay delay [vlan]switch(enable) set spantree maxage agingtiame[vlan]18. 在基于IOS的交换机端口上启用或禁用Port Fast 特征:switch(config-if)#spanning-tree portfast在基于CLI的交换机端口上启用或禁用Port Fast 特征:switch(enable) set spantree portfast {module/port}{enable|disable}19. 在基于IOS的交换机端口上启用或禁用UplinkFast 特征:switch(config)# spanning-tree uplinkfast [max-update-rate pkts-per-second]在基于CLI的交换机端口上启用或禁用UplinkFast 特征:switch(enable) set spantree uplinkfast {enable|disable}[rate update-rate] [all-protocols off|on]--------------------------------------------------------------------------------20. 为了将交换机配置成一个集群的命令交换机,首先要给管理接口分配一个IP地址,然后使用如下命令: switch(config)# cluster enable cluster-name cv21. 为了从一条中继链路上删除VLAN,可使用如下命令:switch(enable) clear trunk module/port vlan-range22. 用show vtp domain 显示管理域的VTP参数.23. 用show vtp statistics显示管理域的VTP参数.24. 在Catalyst交换机上定义TrBRF的命令如下:switch(enable) set vlan vlan-name [name name] type trbrf bridge bridge-num[stp {ieee|ibm}]--------------------------------------------------------------------------------25. 在Catalyst交换机上定义TrCRF的命令如下:switch (enable) set vlan vlan-num [name name] type trcrf{ring hex-ring-num|decring decimal-ring-num} parent vlan-num26. 在创建好TrBRF VLAN之后,就可以给它分配交换机端口.对于以太网交换,可以采用如下命令给VLAN分配端口:switch(enable) set vlan vlan-num mod-num/port-num27. 命令show spantree显示一个交换机端口的STP状态.28. 配置一个ELAN的LES和BUS,可以使用如下命令:ATM (config)# interface atm number.subint multiointATM(config-subif)# lane serber-bus ethernet elan-name29. 配置LECS:ATM(config)# lane database database-nameATM(lane-config-databade)# name elan1-name server-atm-address les1-nsap-addressATM(lane-config-databade)# name elan2-name server-atm-address les2-nsap-addressATM(lane-config-databade)# name …--------------------------------------------------------------------------------30. 创建完数据库后,必须在主接口上启动LECS.命令如下:ATM(config)# interface atm numberATM(config-if)# lane config database database-nameATM(config-if)# lane config auto-config-atm-address31. 将每个LEC配置到一个不同的ATM子接口上.命令如下:ATM(config)# interface atm number.subint multipointATM(config)# lane client ethernet vlan-num elan-num32. 用show lane server 显示LES的状态.33. 用show lane bus显示bus的状态.34. 用show lane database显示LECS数据库可容.35. 用show lane client显示LEC的状态.36. 用show module显示已安装的模块列表.37. 用物理接口建立与VLAN的连接:router# configure terminalrouter(config)# interface media module/portrouter(config-if)# de脚本ion de脚本ion-stringrouter(config-if)# ip address ip-addr subnet-maskrouter(config-if)# no shutdown38. 用中继链路来建立与VLAN的连接:router(config-ig)# encapsulation[isl|dotlq] vlan-numberrouter(config-if)# ip address ip-address subnet-mask39. 用LANE 来建立与VLAN的连接:router(config)# interface atm module/portrouter(config-if)# no ip addressrouter(config-if)# atm pvc 1 0 5 qsaalrouter(config-if)# atm pvc 2 0 16 ilnirouter(config-if)# interface atm module/port.subinterface multipoint router(config-if)# ip address ip-address subnet-maskrouter(config-if)# lane client ethernet elan-numrouter(config-if)# interface atm module/port.subinterface multipointrouter(config-if)# ip address ip-address subnet-namerouter(config-if)# lane client ethernet elan-namerouter(config-if)# …--------------------------------------------------------------------------------40. 为了在路由处理器上进展动态路由配置,可以用如下IOS命令来进展:router(config)# ip routingrouter(config)# router ip-routing-protocolrouter(config-router)# network ip-network-numberrouter(config-router)# network ip-network-number 〔FengNet.〕41. 配置默认路由:switch(enable) set ip route default gateway42. 为一个路由处理器分配VLANID,可在接口模式下使用如下命令:router(config)# interface interface numberrouter(config-if)# mls rp vlan-id vlan-id-num43. 在路由处理器启用MLSP:router(config)# mls rp ip44. 为了把一个外置的路由处理器接口和交换机安置在同一个VTP域中:router(config)# interface interface numberrouter(config-if)# mls rp vtp-domain domain-name45. 查看指定的VTP域的信息:router# show mls rp vtp-domain vtp domain name46. 要确定RSM或路由器上的管理接口,可以在接口模式下输入如下命令:router(config-if)#mls rp management-interface47. 要检验MLS-RP的配置情况:router# show mls rp48. 检验特定接口上的MLS配置:router# show mls rp interface interface number49. 为了在MLS-SE上设置流掩码而又不想在任一个路由处理器接口上设置访问列表:set mls flow [destination|destination-source|full]50. 为使MLS和输入访问列表可以兼容,可以在全局模式下使用如下命令:router(config)# mls rp ip input-acl--------------------------------------------------------------------------------51. 当某个交换机的第3层交换失效时,可在交换机的特权模式下输入如下命令:switch(enable) set mls enable52. 假如想改变老化时间的值,可在特权模式下输入以下命令:switch(enable) set mls agingtime agingtime53. 设置快速老化:switch(enable) set mls agingtime fast fastagingtime pkt_threshold54. 确定那些MLS-RP和MLS-SE参与了MLS,可先显示交换机引用列表中的容再确定:switch(enable) show mls include55. 显示MLS高速缓存记录:switch(enable) show mls entry56. 用命令show in arp显示ARP高速缓存区的容。
华三华为交换机路由器配置常用命令汇总
H3C交换机配置命令大全1、system-view 进入系统视图模式2、sysname 为设备命名3、display current-configuration 当前配置情况4、 language-mode Chinese|English 中英文切换5、interface Ethernet 1/0/1 进入以太网端口视图6、 port link-type Access|Trunk|Hybrid 设置端口访问模式7、 undo shutdown 打开以太网端口8、 shutdown 关闭以太网端口9、 quit 退出当前视图模式10、 vlan 10 创建VLAN 10并进入VLAN 10的视图模式11、 port access vlan 10 在端口模式下将当前端口加入到vlan 10中12、port E1/0/2 to E1/0/5 在VLAN模式下将指定端口加入到当前vlan中13、port trunk permit vlan all 允许所有的vlan通过H3C路由器配置命令大全1、system-view 进入系统视图模式2、sysname R1 为设备命名为R13、display ip routing-table 显示当前路由表4、 language-mode Chinese|English 中英文切换5、interface Ethernet 0/0 进入以太网端口视图7、 undo shutdown 打开以太网端口8、 shutdown 关闭以太网端口9、 quit 退出当前视图模式10、 ip route-H3C S3100 SwitchH3C S3600 SwitchH3C MSR 20-20 Router1、调整超级终端的显示字号;2、捕获超级终端操作命令行,以备日后查对;3、 language-mode Chinese|English 中英文切换;4、复制命令到超级终端命令行,粘贴到主机;5、交换机清除配置 :<H3C>reset save ;<H3C>reboot ;6、路由器、交换机配置时不能掉电,连通测试前一定要检查网络的连通性,不要犯最低级的错误。
H3C交换机命令大全
H3C交换机命令大全用户视图<H3C>************************************************************************************** *****systen*view系统视图************************************************************************************** *****[H3C]?[H3C]super password 修改super密码[H3C]sysname 交换机命名[H3C]interface ethernet 0/1 进入接口视图[H3C]quit 退出系统视图[H3C]info*center console channel console 信息输出设置[H3C]monitor*port ethernet 0/1 配置端口镜像配置端口************************************************************************************** *****[H3C*Ethernet0/1]duplex {half|full|auto} 配置端口双工工作状态[H3C*Ethernet0/1]speed {10|100|auto} 配置端口工作速率[H3C*Ethernet0/1]flow*control 配置端口流控(防止拥塞丢包)[H3C*Ethernet0/1]mdi {across|auto|normal} 配置端口MDI/MDIX状态[H3C*Ethernet0/1]shutdown/undo shutdown 关闭/打开接口VLAN基本配置************************************************************************************** *****[H3C]vlan 3 创建/删除一个VLAN/进入VLAN配置视图[H3C]undo vlan 3[H3C*vlan3]port ethernet0/1 to ethernet0/4 给VLAN增加/删除以太网接口[H3C*Ethernet0/2]port access vlan 3 将端口加入到指定VLAN[H3C*Ethernet0/2]port link*type {trunk|access|hybrid} 设置端口工作模式[H3C*Ethernet0/2]port trunk permit vlan {ID|All} 设置trunk端口允许通过的VLAN [H3C*Ethernet0/2]port trunk pvid vlan 3 设置trunk端口的PVID************************************************************************************** *****交换机端口的3种工作模式:Access模式:不支持802.1q帧的传送Hybird模式:允许多个vlan的报文发送时不打标签Trunk 模式:只允许缺省vlan的报文发送时不打标签若trunk端口上收到了非802.1q帧时,交换机会给该帧加上802.1q的标志字段,该标志字段中的VLAN ID即该端口的PVID,使用port trunk pvid vlan vlan*id 配置端口的PVID配置端口聚合************************************************************************************** *****端口聚合,也称为端口汇聚或端口干路,是将多个端口聚合在一起,实现对出/入流量在各成员端口间进行分担的一种技术,解决上行链路的瓶颈问题,完成所有接入端口流量总和的传输。
华三交换机命令大全(终审稿)

华三交换机命令大全文稿归稿存档编号:[KKUY-KKIO69-OTM243-OLUI129-G00I-FDQS58-一、<Quidway>system 进入使能模式password:~~~~~~~~~~[Quidway]super password 修改特权用户密码[Quidway]sysname 交换机命名[Quidway]interface ethernet 0/1 进入接口视图[Quidway]interface vlan x 进入接口视图=网关[Quidway]user-interface vty 0 4[S3026-ui-vty0-4]authentication-mode password[S3026-ui-vty0-4]set authentication-mode password simple 222 [S3026-ui-vty0-4]user privilege level 3[Quidway-Ethernet0/1]duplex {half|full|auto} 配置端口双工工作状态[Quidway-Ethernet0/1]speed {10|100|auto} 配置端口工作速率[Quidway-Ethernet0/1]flow-control 配置端口流控[Quidway-Ethernet0/1]mdi {across|auto|normal} 配置端口MDI/MDIX 状态平接或扭接[Quidway-Ethernet0/1]port link-type {trunk|access|hybrid} 接口工作模式[Quidway-Ethernet0/1]shutdown 关闭/重起接口[Quidway-Ethernet0/2]quit 退出视图[Quidway]vlan 3 创建/删除一个VLAN/进入VLAN模式[Quidway-vlan3]port ethernet 0/1 to ethernet 0/4 在当前VLAN增加/删除以太网接口[Quidway-Ethernet0/2]port access vlan 3 将当前接口加入到指定VLAN[Quidway-Ethernet0/2]port trunk permit vlan {ID|All} 设trunk允许的VLAN[Quidway-Ethernet0/2]port trunk pvid vlan 3 设置trunk端口的PVID[Quidway]monitor-port <interface_type interface_num> 指定和清除镜像端口[Quidway]port mirror <interface_type interface_num> 指定和清除被镜像端口[Quidway]port mirror int_list observing-port int_type int_num 指定镜像和被镜像[Quidway]description string 指定VLAN描述字符[Quidway]description 删除VLAN描述字符[Quidway] vlan [vlan_id]查看VLAN设置[Quidway] {enable|disable} 开启/关闭生成树,默认关闭[Quidway]stp priority 4096 设置交换机的优先级[Quidway]stp root{primary|secondary} 设置交换机为根或根的备份[Quidway-Ethernet0/1]stp cost 200 设置交换机端口的花费[SwitchA-vlanx]isolate-user-vlan enable 设置主vlan[SwitchA]Isolate-user-vlan <x> secondary <list> 设置主vlan包括的子vlan[Quidway-Ethernet0/2]port hybrid pvid vlan <id> 设置vlan的pvid[Quidway-Ethernet0/2]port hybrid pvid 删除vlan的pvid[Quidway-Ethernet0/2]port hybrid vlan vlan_id_list untagged 设置无标识的vlan如果包的vlan id与PVId一致,则去掉vlan信息. 默认PVID=1。
H3C交换机命令大全
H3C【内部】交换机命令集用户视图<H3C>-------------------------------------------------------------------------------------------systen-view系统视图-------------------------------------------------------------------------------------------[H3C]?[H3C]super password修改super密码[H3C]sysname交换机命名[H3C]interface ethernet0/1进入接口视图[H3C]quit退出系统视图[H3C]info-center console channel console信息输出设置[H3C]monitor-port ethernet0/1配置端口镜像配置端口-------------------------------------------------------------------------------------------[H3C-Ethernet0/1]duplex{half|full|auto}配置端口双工工作状态[H3C-Ethernet0/1]speed{10|100|auto}配置端口工作速率[H3C-Ethernet0/1]flow-control配置端口流控(防止拥塞丢包)[H3C-Ethernet0/1]mdi{across|auto|normal}配置端口MDI/MDIX状态[H3C-Ethernet0/1]shutdown/undo shutdown关闭/打开接口VLAN基本配置-------------------------------------------------------------------------------------------[H3C]vlan3创建/删除一个VLAN/进入VLAN配置视图[H3C]undo vlan3[H3C-vlan3]port ethernet0/1to ethernet0/4给VLAN增加/删除以太网接口[H3C-Ethernet0/2]port access vlan3将端口加入到指定VLAN[H3C-Ethernet0/2]port link-type{trunk|access|hybrid}设置端口工作模式[H3C-Ethernet0/2]port trunk permit vlan{ID|All}设置trunk端口允许通过的VLAN [H3C-Ethernet0/2]port trunk pvid vlan3设置trunk端口的PVID-------------------------------------------------------------------------------------------交换机端口的3种工作模式:Access模式:不支持802.1q帧的传送Hybird模式:允许多个vlan的报文发送时不打标签Trunk模式:只允许缺省vlan的报文发送时不打标签若trunk端口上收到了非802.1q帧时,交换机会给该帧加上802.1q的标志字段,该标志字段中的VLAN ID即该端口的PVID,使用port trunk pvid vlan vlan-id配置端口的PVID配置端口聚合-------------------------------------------------------------------------------------------端口聚合,也称为端口汇聚或端口干路,是将多个端口聚合在一起,实现对出/入流量在各成员端口间进行分担的一种技术,解决上行链路的瓶颈问题,完成所有接入端口流量总和的传输。
华三交换机常用命令

华三交换机常⽤命令1、查看全部端⼝的配置display current-configurationdisplay current-configuration interfacedis cu int2、查看指定端⼝的配置display current-configuration interface <int-type int-number>或interface <int-type int-number> 进⼊端⼝配置模式display this 查看当前端⼝⽣效配置其中int-type和int-number为端⼝类型和端⼝号,像e1/0/1、g2/0/10等。
3、查看所有端⼝的详细状态信息display interface4、查看指定端⼝的详细状态信息display interface <int-type int-number>⼀般将故障锁定到某⼀个或⼏个特定端⼝后,然后可以使⽤此条命令,指定查看单个端⼝的详细信息,从中分析故障原因。
如下图所⽰,如果我们要单独查看H3C 3600交换机上e1/0/1的端⼝信息,可以使⽤命令:dis int e1/0/3(这⾥⽤缩写,e表⽰百兆⼝),就可以看到下边列出了e1/0/1端⼝的各项信息。
可能有些⼈还不太清楚上⾯的端⼝信息每⼀项表⽰什么含义,这⾥就简单说明⼀下(其实挺复杂的):第⼀条:Ethernet 1/0/1 current state : DOWN显⽰端⼝状态为DOWN,即关闭状态。
第⼆条:IP Sending Frames Format is PKTFMT_ETHNT_2 , Hardware address is 000f-e265-cfb5显⽰输出数据帧的封装格式为PKTFMT_ETHNT_2,MAC地址为000f-e265-cfb5。
第三条:Media type is twisted pair , lookback not set显⽰接⼝的传输介质类型为双绞线,且没有设置环回⼝。
华三交换机-路由器配置命令
H3C交换机配置命令大全1、system-view 进入系统视图模式2、sysname 为设备命名3、display current-configuration 当前配置情况4、language-mode Chinese|English 中英文切换5、interface Ethernet 1/0/1 进入以太网端口视图6、port link-type Access|Trunk|Hybrid 设置端口访问模式7、undo shutdown 打开以太网端口8、shutdown 关闭以太网端口9、quit 退出当前视图模式10、vlan 10 创建VLAN 10并进入VLAN 10的视图模式11、port access vlan 10 在端口模式下将当前端口加入到vlan 10中12、port E1/0/2 to E1/0/5 在VLAN模式下将指定端口加入到当前vlan中13、port trunk permit vlan all 允许所有的vlan通过H3C路由器1、system-view 进入系统视图模式2、sysname R1 为设备命名为R13、display ip routing-table 显示当前路由表4、language-mode Chinese|English 中英文切换5、interface Ethernet 0/0 进入以太网端口视图6、ip address 192.168.1.1 255.255.255.0 配置IP地址和子网掩码7、undo shutdown 打开以太网端口8、shutdown 关闭以太网端口9、quit 退出当前视图模式10、ip route-static 192.168.2.0 255.255.255.0 192.168.12.2 description To.R2 配置静态路由11、ip route-static 0.0.0.0 0.0.0.0 192.168.12.2 description To.R2 配置默认的路由H3C S3100 SwitchH3C S3600 SwitchH3C MSR 20-20 Router1、调整超级终端的显示字号;2、捕获超级终端操作命令行,以备日后查对;3、language-mode Chinese|English 中英文切换;4、复制命令到超级终端命令行,粘贴到主机;5、交换机清除配置:<H3C>reset save ;<H3C>reboot ;6、路由器、交换机配置时不能掉电,连通测试前一定要检查网络的连通性,不要犯最低级的错误。
- 1、下载文档前请自行甄别文档内容的完整性,平台不提供额外的编辑、内容补充、找答案等附加服务。
- 2、"仅部分预览"的文档,不可在线预览部分如存在完整性等问题,可反馈申请退款(可完整预览的文档不适用该条件!)。
- 3、如文档侵犯您的权益,请联系客服反馈,我们会尽快为您处理(人工客服工作时间:9:00-18:30)。
华三交换机命令大全文件管理序列号:[K8UY-K9IO69-O6M243-OL889-F88688]一、<Quidway>system 进入使能模式password:~~~~~~~~~~[Quidway]super password 修改特权用户密码[Quidway]sysname 交换机命名[Quidway]interface ethernet 0/1 进入接口视图[Quidway]interface vlan x 进入接口视图=网关[Quidway]user-interface vty 0 4[S3026-ui-vty0-4]authentication-mode password[S3026-ui-vty0-4]set authentication-mode password simple 222 [S3026-ui-vty0-4]user privilege level 3[Quidway-Ethernet0/1]duplex {half|full|auto} 配置端口双工工作状态[Quidway-Ethernet0/1]speed {10|100|auto} 配置端口工作速率[Quidway-Ethernet0/1]flow-control 配置端口流控[Quidway-Ethernet0/1]mdi {across|auto|normal} 配置端口MDI/MDIX 状态平接或扭接[Quidway-Ethernet0/1]port link-type {trunk|access|hybrid} 接口工作模式[Quidway-Ethernet0/1]shutdown 关闭/重起接口[Quidway-Ethernet0/2]quit 退出视图[Quidway]vlan 3 创建/删除一个VLAN/进入VLAN模式[Quidway-vlan3]port ethernet 0/1 to ethernet 0/4 在当前VLAN增加/删除以太网接口[Quidway-Ethernet0/2]port access vlan 3 将当前接口加入到指定VLAN[Quidway-Ethernet0/2]port trunk permit vlan {ID|All} 设trunk允许的VLAN[Quidway-Ethernet0/2]port trunk pvid vlan 3 设置trunk端口的PVID[Quidway]monitor-port <interface_type interface_num> 指定和清除镜像端口[Quidway]port mirror <interface_type interface_num> 指定和清除被镜像端口[Quidway]port mirror int_list observing-port int_type int_num 指定镜像和被镜像[Quidway]description string 指定VLAN描述字符[Quidway]description 删除VLAN描述字符[Quidway] vlan [vlan_id]查看VLAN设置[Quidway] {enable|disable} 开启/关闭生成树,默认关闭[Quidway]stp priority 4096 设置交换机的优先级[Quidway]stp root{primary|secondary} 设置交换机为根或根的备份[Quidway-Ethernet0/1]stp cost 200 设置交换机端口的花费[SwitchA-vlanx]isolate-user-vlan enable 设置主vlan[SwitchA]Isolate-user-vlan <x> secondary <list> 设置主vlan包括的子vlan[Quidway-Ethernet0/2]port hybrid pvid vlan <id> 设置vlan的pvid[Quidway-Ethernet0/2]port hybrid pvid 删除vlan的pvid[Quidway-Ethernet0/2]port hybrid vlan vlan_id_list untagged 设置无标识的vlan如果包的vlan id与PVId一致,则去掉vlan信息. 默认PVID=1。
所以设置PVID为所属vlan id, 设置可以互通的vlan为untagged.二、sys 进入到系统视图Enter system view, return to user view with Ctrl+Z.[Quidway]user-interface aux 0[Quidway-ui-aux0]authentication-mode schemeNotice: Telnet or SSH user must be added , otherwise operator cant login![Quidway-ui-aux0]qu[Quidway]local-user huawei 增加用户名New local user added.[Quidway-luser-huawei]password simple huawei 配置密码,且密码不加密[Quidway-luser-huawei]service-type telnet ssh level 3类型为SSH和telnet,且用户登陆后权限为员权限[Quidway-luser-huawei]qu[Quidway]user-interface vty 0 4[Quidway-ui-vty0-4]authentication-mode schemeNotice: Telnet or SSH user must be added , otherwise operator cant login![Quidway-ui-vty0-4]<Quidway>save华为QuidWay交换机配置命令手册:1、开始建立本地配置,将主机的串口通过配置电缆与以太网交换机的Console 口连接。
在主机上运行终端仿真程序(如的超级终端等),设置终端通信参数为:波特率为9600bit/s、8位位、1位停止位、无校验和无流控,并选择终端类型为VT100。
以太网交换机上电,终端上显示以太网交换机自检信息,自检结束后提示用户键入回车,之后将出现命令行提示符(如<Quidway>)。
键入命令,配置以太网交换机或查看以太网交换机运行状态。
需要帮助可以随时键入""2、命令视图(1)用户视图(查看交换机的简单运行状态和统计信息)<Quidway>:与交换机建立连接即进入(2)系统视图(配置系统参数)[Quidway]:在用户视图下键入system-view(3)以太网端口视图(配置以太网端口参数)[Quidway-Ethernet0/1]:在系统视图下键入interface ethernet 0/1(4)VLAN视图(配置VLAN参数)[Quidway-Vlan1]:在系统视图下键入vlan 1(5)VLAN接口视图(配置VLAN和VLAN汇聚对应的IP接口参数)[Quidway-Vlan-interface1]:在系统视图下键入interface vlan-interface 1 (6)本地用户视图(配置本地用户参数)[Quidway-luser-user1]:在系统视图下键入local-user user1(7)用户界面视图(配置用户界面参数)[Quidway-ui0]:在系统视图下键入user-interface3、其他命令设置系统时间和时区<Quidway>clock time Beijing add 8<Quidway>clock datetime 12:00:00 2005/01/23设置交换机的名称[Quidway]sysname TRAIN-3026-1[TRAIN-3026-1]配置用户登录[Quidway]user-interface vty 0 4[Quidway-ui-vty0]authentication-mode scheme创建本地用户[Quidway]local-user huawei[Quidway-luser-huawei]password simple huawei[Quidway-luser-huawei] service-type telnet level 34、VLAN配置方法『配置环境参数』SwitchA端口E0/1属于VLAN2,E0/2属于VLAN3『组网需求』把交换机端口E0/1加入到VLAN2 ,E0/2加入到VLAN3数据配置步骤『VLAN配置流程』(1)缺省情况下所有端口都属于VLAN 1,并且端口是access端口,一个access端口只能属于一个vlan;(2)如果端口是access端口,则把端口加入到另外一个vlan的同时,系统自动把该端口从原来的vlan中删除掉;(3)除了VLAN1,如果VLAN XX不存在,在系统视图下键入VLAN XX,则创建VLAN XX并进入VLAN视图;如果VLAN XX已经存在,则进入VLAN 视图。
【SwitchA相关配置】方法一:(1)创建(进入)vlan2[SwitchA]vlan 2(2)将端口E0/1加入到vlan2[SwitchA-vlan2]port ethernet 0/1(3)创建(进入)vlan3[SwitchA-vlan2]vlan 3(4)将端口E0/2加入到vlan3[SwitchA-vlan3]port ethernet 0/2方法二:(1)创建(进入)vlan2[SwitchA]vlan 2(2)进入端口E0/1视图[SwitchA]interface ethernet 0/1(3)指定端口E0/1属于vlan2[SwitchA-Ethernet1]port access vlan 2(4)创建(进入)vlan3[SwitchA]vlan 3(5)进入端口E0/2视图[SwitchA]interface ethernet 0/2(6)指定端口E0/2属于vlan3[SwitchA-Ethernet2]port access vlan 3测试验证(1)使用命令disp cur可以看到端口E0/1属于vlan2,E0/2属于vlan3;(2)使用display interface Ethernet 0/1可以看到端口为access端口,PVID为2;(3)使用display interface Ethernet 0/2可以看到端口为access端口,PVID为35、交换机IP地址配置需求及组网说明『配置环境参数』三层交换机SwitchA有两个端口ethetnet 0/1、ethernet 0/2,分别属于vlan 2、vlan 3;『组网需求』PC1和PC2通过三层接口互通【SwitchA相关配置】(1)创建(进入)vlan2[Quidway]vlan 2(2)将端口E0/1加入到vlan2 [Quidway-vlan2]port ethernet 0/1 (3)进入vlan2的虚接口[Quidway-vlan2]interface vlan 2 (4)在vlan2的虚接口上配置IP地址(5)创建(进入)vlan3 [Quidway]vlan 3(6)将E0/2加入到vlan3 [Quidway-vlan3]port ethernet 0/2 (7)进入vlan3的虚接口[Quidway-vlan3]interface vlan 3 (8)在vlan3的虚接口上配置IP地址测试验证(1)PC1和PC2都可以PING通自己的网关(2)PC1和PC2可以相互PING通6、端口的trunk配置『配置环境参数』(1)SwitchA 端口E0/1属于vlan10,E0/2属于vlan20,E0/3与SwitchB 端口E0/3互连(2)SwitchB 端口E0/1属于vlan10,E0/2属于vlan20,E0/3与SwitchA 端口E0/3互连『组网需求』(1)要求SwitchA的vlan10的PC与SwitchB的vlan10的PC互通(2)要求SwitchA的vlan20的PC与SwitchB的vlan20的PC互通数据配置步骤【SwitchA相关配置】(1)创建(进入)vlan10[SwitchA] vlan 10(2)将E0/1加入到vlan10[SwitchA-vlan10]port Ethernet 0/1(3)创建(进入)vlan20[SwitchA]vlan 20(4)将E0/2加入到vlan20[SwitchA-vlan20]port Ethernet 0/2(5)实际当中一般将上行端口设置成trunk属性,允许vlan透传[SwitchA-Ethernet0/3]port link-type trunk(6)允许所有的vlan从E0/3端口透传通过,也可以指定具体的vlan值[SwitchA-Ethernet0/3]port trunk permit vlan all【SwitchB相关配置】(1)创建(进入)vlan10[SwitchB] vlan 10(2)将E0/1加入到vlan10[SwitchB-vlan10]port Ethernet 0/1(3)创建(进入)vlan20[SwitchB]vlan 20(4)将E0/2加入到vlan20[SwitchB-vlan20]port Ethernet 0/2(5)实际当中一般将上行端口设置成trunk属性,允许vlan透传[SwitchB-Ethernet0/3]port link-type trunk(7)允许所有的vlan从E0/3端口透传通过,也可以指定具体的vlan值[SwitchB-Ethernet0/3]port trunk permit vlan all【补充说明】(1)如果一个端口是trunk端口,则该端口可以属于多个vlan;(2)缺省情况下trunk端口的PVID为1,可以在端口模式下通过命令port trunk pvid vlan vlanid 来修改端口的PVID;(3)如果从trunk转发出去的数据报文的vlan id和端口的PVID一致,则该报文的VLAN信息会被剥去,这点在配置trunk端口时需要注意。