Flex快速入门
FLEX4_Flex4教程
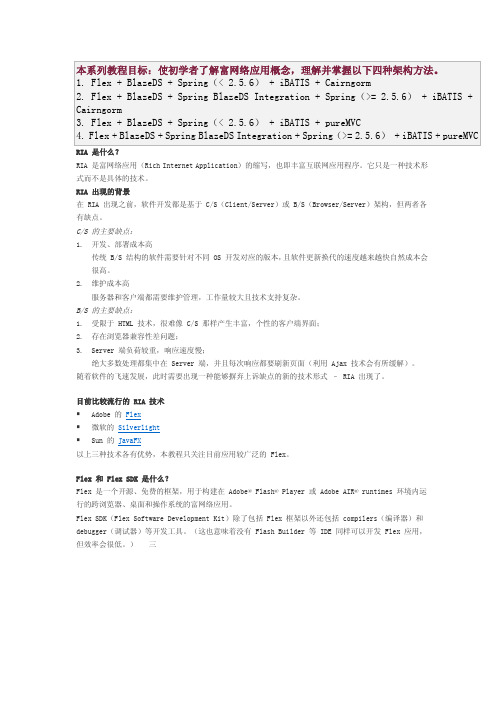
Flex 应用的构建形式 尽管用 Flex 开发 RIA 有多种形式,但现在主流的架构是:Flex 作为 Client(客户端),Java、PHP、 Asp、Ruby 等技术作为 Server(服务器端)。
本教程之后的内容主要介绍 Flex 与 Java 技术的整合。
Flex 访问服务器端数据的 3 种方式 既然 Flex 可以和 Java 等 Sever 端技术整合,那么它们之间怎样实现通信的呢?Flex 通过 HTTPService,WebService 和 RemoteObject 这 3 个组件实现与 Server 端的通信。
外观与样式设计 使用 CSS 和图形属性编辑器自定义应用程序外观。快速设置最常用的属性,并在“Design”(设计) 视图中预览结果。使用新的 Theme Browser(主题浏览器)浏览可用主题,并将它们应用于您的项目。
与 Adobe Creative Suite 设计工具集成 导入使用 Adobe Flash Professional、Illustrator®、Photoshop® 或 Fireworks® 软件创建的设计 资源,或导入使用 Flash Catalyst 创建的整个应用程序用户界面。Flash Professional 与 Flash Builder 之间的新工作流程简化了自定义 Flex 组件的导入和更新。
HTTPService 组件
HTTPService 组件允许你与 HTTP 服务交互,可以是接收 HTTP 请求和发送 HTTP 响应的任何 HTTP URI。 你可以通过 HTTPService 组件调用任何类型的 Server 端技术,包括 PHP pages, ColdFusion Pages, JavaServer Pages, Java servlets, Ruby on Rails 和 ASP pages。 HTTPService 组件允许你发送 HTTP GET、POST、HEAD、OPTIONS、PUT、TRACE 和 DELETE 请求,并典 型的以 XML 形式返回。
flex——弹性布局的属性及使用

1.父元素id为flex,子元素class为items#flex {width: 100%;height: 100%;display: flex;padding:15px;padding-top: 200px;border: 1px solid red;box-sizing: border-box;}#flex .items {width: 18%;border: 1px solid blue;height: 200px;}效果如下图2.flex-direction 在flex容器里的所有的block元素的流动方向row 默认,从左到右column 从上到下row-reverse 从右到左column-reverse 从上到下父元素添加flex-direction: row;父元素添加flex-direction:row-reverse父元素添加flex-direction:column父元素添加flex-direction:column-reverse3.flex-wrap 控制如果当前行的位置不足时,是否换行,默认是不换行,会一直在一行中挤压,会改变在该行元素的宽度,将其排在一行之中nowrap 不换行wrap 换行,空间不足,就向下另起一行。
wrap-reverse 换行,与wrap不同的是,这个是向当前行的上面另起一行。
注意:flex-direction和flex-wrap经常一起使用所有有个缩写属性flex-flow:flex-direction flex-wrap。
父元素添加flex-flow:row nowrap;父元素添加flex-flow:row wrap;父元素添加flex-flow:row wrap-reverse;4.justify-content主轴的对齐方式,元素在容器中的对齐方式,与左对齐,右对齐,居中对齐类似取值:flex-start 靠近主轴的开始方向,如果从左到右就靠左,相反就靠右。
Flex入门培训

Flex核心机制
3. 手工派发事件: Flex中可以通过dispatchEvent()方法手工派发事件, 所有 UIComponent的子类都可以调用此方法. 语法: 组件对象.dispatchEvent(new Event("event_type"):Boolean 参数event_type是Event对象的type属性. 函数的返回值总是True. 可以使用此方法派发任意事件, 而不仅仅是用户自定义事件, 比如: 可以派发一个Button 的Click事件. var result:Boolean = buttonInstance.dispatchEvent(new Event(MouseEvent.CLICK));在Flex应用中不是必须对新派发的事件进行处理, 如果触 发了一个事件, 而没有对应的Listener时,Flex忽略此事件.
Flex核心机制
绑定机制 Flex绑定机制的原理就是事件,在被Flex绑定的对象上增加了改变事件的监听,一旦某个 被Flex绑定对象改变后,就会分发一个“propertyChange”事件(默认的,也可以改变成 自己定义的事件),在其他组件中,会有propertyChange的事件监听,当捕捉到该事件后, 则会去更新组件的属性并显示。如果想让变量、类、方法的值与组件的值进行绑定,请在这 些对象上加上[Bindable]标记
Flex与Java通信示例
需求:
Flex有一个输入框、按钮和Lable,在输入框中输入信息后点击按钮,可以通过 RemoteObject方法调用java类中的方法。通过该类中的方法对数据进行处理并返回,将处 理后的数据显示在Lable上。
Flex与Java通信示例
.mxml
生编 成译 时
pelco videoxpert professional flex 系列快速入门指南说明书
VideoXpert Professional Flex系列快速入门指南初始系统配置您的视频管理系统(VMS)、VideoXpert Professional(VxPro)已安装所有驱动和软件,可以使用。
只要插入到您的系统,即可开始使用VxPro。
关于您的VxPro硬件和软件的更多信息,请转到/vxpro。
关于VxProl您的系统已安装服务器侧VxPro组件。
VxOpsCenter未安装;不应将此系统作为客户端工作站使用。
请参阅使用VxOpsCenter和VxPro以获取更多信息。
l VxPro Server记录视频、路由媒体、管理用户和权限,并执行希望您的VMS执行的服务器侧操作。
l VxToolbox是VxPro的管理应用程序;您可以通过VxToolbox配置VxPro服务器并查找摄像头。
定位后面板上的连接设置您的系统1.打开服务器包装。
2.连接系统及其外设。
l连接监视器到独立视频控制器(项目13位于定位后面板上的连接);板载VGA已禁用。
l使用其中一个以太网端口将VxPro系统联网(项目4或5位于定位后面板上的连接)。
l您也可以连接到iDRAC 端口(项目11位于定位后面板上的连接),以远程配置和监控系统;但是,iDRAC端口将不会连接VxPro系统到网络。
3.连接电源(项目1位于定位后面板上的连接)到电气插头。
4.按下电源按钮或使用iDRAC打开系统电源。
VxPro入门启动VxPro系统后,您将启动VxPro软件的完整功能60天试用版。
在60天期限到期之前,您必须安装许可证,以继续使用VxPro。
1.启动您的VxPro硬件。
这将启动VxToolbox。
2.使用以下默认Windows用户帐户凭证登录:l用户名:Pelcol密码:Pel28991003.立即更改默认密码,以确保安全访问该系统。
4.在Welcome(欢迎)屏幕上单击Get Started(开始)。
注:这将开始VxPro软件的60天试用期。
Flex布局语法教程菜鸟教程

Flex布局语法教程菜鸟教程⽹页布局(layout)是CSS的⼀个重点应⽤。
布局的传统解决⽅案,基于盒状模型,依赖display属性 + position属性 + float属性。
它对于那些特殊布局⾮常不⽅便,⽐如,垂直居中就不容易实现。
2009年,W3C提出了⼀种新的⽅案—-Flex布局,可以简便、完整、响应式地实现各种页⾯布局。
⽬前,它已经得到了所有浏览器的⽀持,这意味着,现在就能很安全地使⽤这项功能。
Flex布局将成为未来布局的⾸选⽅案。
本⽂介绍Flex布局的语法。
以下内容主要参考了下⾯两篇⽂章:A Complete Guide to Flexbox和A Visual Guide to CSS3 Flexbox Properties。
⼀、Flex布局是什么?Flex是Flexible Box的缩写,意为”弹性布局”,⽤来为盒状模型提供最⼤的灵活性。
任何⼀个容器都可以指定为Flex布局。
.box{display: flex;}⾏内元素也可以使⽤Flex布局。
.box{display: inline-flex;}Webkit内核的浏览器,必须加上-webkit前缀。
.box{display: -webkit-flex; /* Safari */display: flex;}注意,设为Flex布局以后,⼦元素的float、clear和vertical-align属性将失效。
⼆、基本概念采⽤Flex布局的元素,称为Flex容器(flex container),简称”容器”。
它的所有⼦元素⾃动成为容器成员,称为Flex项⽬(flex item),简称”项⽬”。
容器默认存在两根轴:⽔平的主轴(main axis)和垂直的交叉轴(cross axis)。
主轴的开始位置(与边框的交叉点)叫做main start,结束位置叫做main end;交叉轴的开始位置叫做cross start,结束位置叫做cross end。
PowerFlex 750快速入门
给变频器上电 . . . . . . . . . . . . . . . . . . . . . . . . . . . . . . . . . . . . . . . . . . . . . . . . . . 12 变频器设置. . . . . . . . . . . . . . . . . . . . . . . . . . . . . . . . . . . . . . . . . . . . . . . . . . . . . 13
对于因使用本手册中所述信息、电路、设备或软件而引起的专利问题,罗克韦尔自动化不承担任何责任。
未经罗克韦尔自动化公司书面许可,任何单位或个人不得复制本手册之全部或部分内容。
在整本手册中,我们在必要的地方使用了以下注释,来提醒您注意相关的安全事宜。
警告:标识在危险环境下可能导致爆炸,进而造成人员伤亡、财产损坏或经济损失的 行为或情况的信息。
步骤 1:收集所需的信息
记录电机铭牌数据 . . . . . . . . . . . . . . . . . . . . . . . . . . . . . . . . . . . . . . . . . . . . . . 7
步骤 2:验证变频器安装
识别您的变频器类型 . . . . . . . . . . . . . . . . . . . . . . . . . . . . . . . . . . . . . . . . . . . . 8 查验电源线. . . . . . . . . . . . . . . . . . . . . . . . . . . . . . . . . . . . . . . . . . . . . . . . . . . . . . 8 查验电源跳线配置 . . . . . . . . . . . . . . . . . . . . . . . . . . . . . . . . . . . . . . . . . . . . . . 9 查验 I/O 接线 . . . . . . . . . . . . . . . . . . . . . . . . . . . . . . . . . . . . . . . . . . . . . . . . . . . 9 信号源连接位置. . . . . . . . . . . . . . . . . . . . . . . . . . . . . . . . . . . . . . . . . . . . . . . . 10
西斯特(Westcott)Flex Cine LED Mat 快速入门指南说明书

LED MA T QUICK START GUIDEFlex Cine 1' x 1' RGBW Mat Metal CornersLEDsIP64 Rated SurfaceFastener EdgingEach CornerMagnets in Dimmer TE-9 Pin ConnectorFlex Cine Mats have an IP rating of 64, which is stated as being protected from total dust ingress and from water spraying from any direction onto the mat and cable area closest to the mat. After contact with water, dry the Flex’s surface with a cloth and store in a dry location.The TE-9 Pin connector that connects to a Flex Cine Dimmer is not IP64 rated.• Use only with a Westcott Flex Cine Dimmer• Do not crease• Do not sharply fold• Keep away from fire or extreme temperatures• Do not submerge in water• Do not leave in wet conditions for extended amounts of time • Do not get cable connector wet• Avoid direct contact with any heat source or extreme cold• Do not attempt to disassemble or repair LED chips Flex Cine Mats require a Flex Cine Dimmer and power source for operation. Flex Cine RGBW Mats require a Flex Cine Wireless DMX Dimmer.DMX Dimmer AC Adapter or 26V V-Mount BatteryAll Mats14.4 or 14.8V V-Mount Battery1' x 1' Daylight and 1' x 1' Bi-Color MatsNever force entry or removal of the connector.Wipe Flex Cine Mat with a damp cloth. Store in a dry environment.Connecting to a Flex Cine Dimmer1. Ensure the dimmer is turned OFF .2. Plug the Flex Cine mat’s TE-9 Pin connector into the TE-9 Pin receiver located on the top of the Flex Cine Dimmer. Proper connection may require the connector to be turned until the pins align and it easily inserts into the dimmer’s receiver.3. Once connected, rotate the locking ring 3/4 clockwise on the cable connector to secure.4. Connect the dimmer to a compatible power source. See the Power section for compatibility and connecting details.Disconnecting from a Flex Cine Dimmer1. Ensure the dimmer is turned OFF .2. Grasp the locking ring and rotate counterclockwise 3/4 turn.3. Gently pull the cable connector straight out and away from the dimmer.Flex Cine Mats are pliable and can be shaped for mounting or adjusting light spread. Gently roll the mat into your desired position. Do not crease or sharply fold.BarndoorsYokesLearn more atVisit for videos, pro tips, inspiration, and more!Westcott products are made to the company’s traditionally high standards of quality and comply with all applicable government safety regulations and requirements. In an effort to provide the best quality products possible, we periodically make product modifications. Actual products may not be identical to items pictured. Made in Korea. ©F.J. Westcott Co. All rights reserved. HW0918Register your new gear online atWestcott Flex Cine LED Mats have been manufactured under the highest standards of quality and workmanship. Westcott’s warranty obligations for this product are limited to the following terms.The F.J. Westcott Co. (“Westcott”) warrants to the original end-user purchaser for as long as the original end-user purchaser owns their Flex Cine LED Mat (“Warranty Period”), that this Flex LED Mat will function under normal use and will be free from defects in material and manufacturing workmanship. If a defect arises and a valid claim is received within the Warranty Period, at its option and to the extent permitted by law, Westcott will either (1) repair the defect at no charge, using new or refurbished replacement parts, or (2) exchange the product with a product that is new or which has been manufactured from new or serviceable used parts and is at least functionally equivalent to the original product. This Limited Warranty applies only to products manufactured by or for Westcott that can be identified by the Westcott trademark, trade name, or logo affixed to them.This warranty does not apply to: (a) damage caused by accident, abuse, misuse, flood, fire, earthquake, mold, or other external causes; (b) damage caused by operating the product outside the permitted or intended uses described by Westcott; (c) a product or part that has been modified to alter functionality or capability without the written permission of Westcott; or (d) cosmetic damage, including but not limited to scratches, dents and broken plastic.This Lifetime Limited Warranty covers Westcott Flex Cine LED Mats only. This warranty does not cover any accessories or controllers associated with the Westcott Flex System. Westcott Flex Mats purchased through a third-party retailer must be registered with Westcott using the Product Warranty Registration form within one year of the original purchase date.Disclaimer: By purchasing, borrowing and/or using this product for any event, both public or private, you, the customer, accepts all responsibility and releases Westcott, and its associates, of any and all liability in the event of manufacturer’s defect, malfunction or misuse of the product which may lead to further injuries or complications unforeseen by the user. Westcott is not responsible for any potential or incurred damage caused by failure to properly mount, hang, or store the product, which includes, but is not limited to damage to cameras, electronics, electrical equipment, buildings, building materials, personal injury, death, or disability, fire damage, or any and all other damage not mentioned previously.Please contact Westcott’s Repair Department for a Return Authorization Number “RMA” prior to requesting warranty service. This RMA must be clearly written on the outside of the box to the left of the shipping label. Items sent in without pre-authorization or that do not fall under the limited warranty will be returned at the expense of the sender.Repair Department: 800-886-1689 / 419-243-7311 (International)Email:**********************Shipping: F.J. Westcott Co, 1425-B Holland Rd. Maumee, OH 43537。
英威腾Flex系列I O系统产品手册说明书

Flex系列I/O系统产品手册关于我们Flex系列I/O系统产品手册公司简介1集团华东地区核心产业基地及华东研发中心苏州科技产业园集团总部及新品研发与新业务孵化基地深圳光明科技产业园深圳市英威腾电气股份有限公司(以下简称英威腾),国家火炬计划重点高新技术企业, 专注于工业自动化和能源电力领域, 拥有完整的研发、 销售、 供应链和服务平台, 是行业的主流供应商之一。
未来, 英威腾将竭尽全力提供物超所值的产品和服务, 让客户更有竞争力, 与客户一起共同为世界“可持续发展”贡献力量。
英威腾成立于2002年, 2010年在深交所A股上市, 股票代码:002334。
制造实力: 英威腾拥有15家控股子公司, 4个大型生产工厂, 员工人数超4000人, 深圳福永工业园及苏州科技产业园产能达300万台/年。
研发实力: 英威腾拥有11个研发中心, 1300多件授权专利证书, 200多件软件著作权证书, 实验室拥有国内工控行业首家TÜV SÜD颁发的ACT资质, 并通过UL目击实验室及CNAS 国家实验室认证。
营销实力: 英威腾海内外设有40余家分支机构、 600多个渠道合作伙伴, 营销和服务网络遍布全球100多个国家和地区。
英威腾业务覆盖工业自动化、新能源汽车、 网络能源等主要领域。
工业自动化: 产品主要包括变频器、 伺服系统、 电机、 控制器、人机界面、 传感器、 电梯驱动系统、 工业互联网等。
其中,低压变频器长期在国产品牌处于领先地位, 市场份额持续增长。
网络能源: 产品主要包括UPS、 精密空调、 供配电、 动环监控、 机柜、冷热通道等, 产品广泛应用于云数据中心、能源电力、 制造业、 交通、 市政、 医疗卫生、 影视传媒、 体育赛事等。
光伏储能: 产品主要包括并网逆变器、 离网逆变器、 储能逆变器等, 广泛应用于国内和海外的商用和户用市场。
新能源汽车: 产品主要包括各类电机控制器、 车载电源、 充电桩及各类集成控制器, 产品成熟应用于新能源客车、 物流车、 环卫车、 乘用车等各类车型。
flex布局详解

flex布局详解flex布局详解说明flex 布局是CSS3中新增加的⼀套布局⽅案,属于⼀维布局模型。
flex提供了强⼤的空间分布和对齐能⼒。
想要理解和使⽤flex进⾏⽹页布局,需要先来学习和理解下⾯的⼏个概念:flex的两根轴线: 主轴和交叉轴flex容器和flex⼦元素基本概念的解释flex的两根轴线当使⽤flex进⾏布局的时候,⾸先需要了解的,就是flex的两根轴线:主轴和交叉轴。
为什么⼀定要理解这两个轴线呢,因为所有的flex属性都和这两根轴线有关系。
⼀般来说,元素在容器内部排列的顺序都是按照从左向右的顺序来进⾏排列的,⽽在flex中,决定元素排列的是主轴。
默认情况下flex中主轴上的元素排列⽅式和⾮flex情况下是⼀样的。
flex的特性,就是元素沿着主轴或者交叉轴进⾏排列。
flex容器和flex⼦元素想要使⽤flex布局⽅案,需要在容器属性上使⽤display:flex或者display:inline-flex。
⽽⼀旦设置了任意⼀个属性,那么这个标签就变成了flex容器,也可以称之为是弹性容器。
⽽相对应的,容器当中的⼦元素就变成了flex⼦元素也就是弹性⼦元素。
flex 的相应属性分类想要更⾼的学习和使⽤flex布局,需要了解flex中包含的属性。
⼀般来说,flex的属性可以分成两类:flex容器属性(flex-container)flex⼦元素属性(flex-item)所谓的flex容器属性就是将属性设置在flex容器上,⽽flex⼦元素则是将属性设置在⼦元素的⾝上。
flex容器属性flex-direction通过flex-direction属性,可以设置主轴的⽅向,它包括下⾯的⼏个值:row(默认值): 主轴为⽔平⽅向,项⽬排列起点在左端。
row-reverse: 主轴为⽔平⽅向,起点在右端。
column: 主轴为垂直⽅向,起点在上沿。
column-reverse: 主轴为垂直⽅向,起点在下沿。
Flex学习大全
1.1 Flex可视化组件开发-1
mx.,collections.ICollectionView接口和mx.collections.IList接口 2.3.2 Flex集合类特征
2.3.2.1 确保数据源更改后数据及时更新. 2.3.2.2 提供了运行远程数据源的分页机制. 2.3.2.3 提供了数据源中的数据操作,可以通过index修改数据源中的数据,而不用关心数据源的具体实现,如 Array和XML 2.3.2.4 支持单独数据集合作为多个可视化组件的数据源.(一个ArrayCollection可以显示在多个组件中); 2.3.2.5 使用集合类的方法可以访问数据源中的数据.(如,可以访问sql,mysql,db2,oralce,access,sybase) 2.3.3 Flex可视化组件均支持dataProvider属性: 2.3.3.1 例:
1.1 Flex可视化组件开发-1
2.5 容器组件,可视化组件的结合形式 <mx:Application xmlns:mx="/2006/mxml" layout="absolute">
flex入门完全教程
第一章Flex是如何工作的该部分文档的内容是为用户提供关于Adobe®Flex工作机制的一个快速综述。
通过本章节的学习,你可以创建你的第一个Flex应用程序,并将它与你以前所熟悉的Web开发技术进行比较,以领会Flex的内涵和精髓。
第一节构建并运行Flex应用程序Flex是一个提供开发设计和运行支持的架构,它可以使开发人员创建利用Adobe®Flash®Player9作为前台的“富客户端互联网应用程序/rich Internet applications/RIA”,以满足用户更为直观和极具交互性的在线体验。
开发Flex应用程序的典型步骤如下(通常是这样):1.选取一系列预先定制好的、用于设计应用程序界面的组件(如表格、按钮等等)2.布置组件以设计用户界面。
3.使用样式和主题来增强视觉方面的设计。
4.添加动态行为(例如程序部件之间的相互作用)。
5.定义并连接所需的数据库服务。
6.将源代码编译成SWF文件,然后在Flash Player中运行。
一个典型的Flex应用程序包括如下元素:1.Flex frameworkAdobe®Flex2framework包含了创建RIA所需要的所有组件,它们是:用于应用程序布局规划的容器;针对用户界面和从用户处获取数据的控制(例如文本框和按钮);广泛支持的数据绑定、数据格式化、以及有效值验证;事件驱动的开发模式。
Flex framework被包含在公用组件库(SWC)文件中。
2.MXML每个Flex应用程序至少包含有一个MXML文件,它被作为该程序的主文件。
MXML是一种标记语言,它是基于XML的一种实现,用来创建Flex应用程序。
你可以使用它去声明程序中所使用的标签结构的定义。
3.ActionScript3.0你可以使用ActionScript3.0为应用程序添加动态行为,它是基于ECMAScript的一种实现,类似于Jav aScript。
XO IP Flex 及 IP Flex with VPN 的快速入门指南说明书

XO IP Flex, IP Flex with VPN, SIP ServiceCall CenterFor Group AdministratorsThis optional service enables business groups to set up a basic Call Center using Online Feature Management. Using Call Center, you can establish technical assistance lines, customer support numbers, or order-taking centers that serve your customers.About Call CenterThe Call Center provides a complete, business-ready application with enhanced call handling features, such as queuing, music on hold, and agent login/logout control. You may assign one or more Call Centers to different departments, and you may request an e-mail at the end of the day, displaying statistics that monitor the performance of Call Centers and track the performance of individual agents.To use this feature, you must:• Purchase this optional feature when you order services, or• Contact XO Customer Care to initiate the feature.How It WorksA Call Center automatically processes incoming calls received by a single phone number and distributes them to the next available agent. Call Centers inherit all of the characteristics of Hunt Group service and are also provided with sophisticated call-handling features, including:• Uniform distribution of incoming calls to the available agents• Queuing of the incoming calls that cannot be answered immediately• Overflow to a given destination when the group is unable to accept calls• No-answer policy to redirect a call to the next agent if not answered in a specific number of rings by the previous agent• Music on hold, comfort messages, and personalized names (You can upload a custom .wav/MP3 file to be broadcast into Online Feature Management using the Browse function.)Please note that:• Call Center settings override individual line features• “Barge-in” monitoring of a call is not supported• Call center agents cannot log in to the queue as they become available; instead, the call center response has to be set up through Online Feature Management in the XO Business Center• Note that you must order voice mail separately from the Call Center in order to use both features. You can access Call Center voice mail from the Voice Portal or from Online Feature Management in the XO Business Center. Call center customers can use voice mail to set Call Forwarding No Answer to roll to voicemail. When this occurs, if a call center is busy and the maximum number of callers in a queue is reached), the incoming call will roll automatically to voice mail.Figure 1: Accessing Call Center Click on a Call Center to: • Edit Call Center Profile• Set Announcements• Set Routing Policies• Obtain Statistics• Reset passcode forCall Center• Set personalized namefor the Call CenterAccessing Call Center in Online Feature ManagementConfiguring General Call Center SettingsOFM > Call Center > General SettingsFigure 2: General SettingsIdentify call center and Calling Line ID (if you want to change this information, click Change User ID ) Select Call Center Department , if you wish. (Select None in the drop down menu if you do not wish to select a department).Confirm language and time zone.Select queue scheme you want to use to route calls:• Circular means that agents are visited in order, starting where the last hunt group ended.• Regular means that agents are visited in order, always starting with the same agent.• Simultaneous means that calls are presented to all idle agents simultaneously,• Uniform means that calls are distributeduniformly to the agents, starting with the most idle agent. If no agent is available, caller hears welcome message, then Comfort message until an agent picks up.Note: See the figures on subsequent pages of this guide to view instructions for using these sub-menus.Remember to Save ChangesUse the Bandwidth and QoS settings to set preferred announcement/music codec for external and internal calls. If you choose None from the drop down menu, callers will not hear music or an announcement.Note: Remember to Save ChangesBandwidth and Quality of Service (QoS) SettingsAABBCC DDFigure 4: Call Center SettingsYou can specify queue length, thatis the number of calls waiting inline for the next available agent.This is configurable to a maximumof 50 calls.You can also select the optionsyou prefer for callers in the queue.Note:Remember to Save ChangesABABAgent SettingsCDEFigure 6: Call PoliciesYou can set call center policies for theconnected line or for the forwarded call from this page.Note: Remember to Save Changes(A) Entrance , (B) Comfort and (C) Music Default or .Remember to Save ChangesAACall PoliciesCall Center AnnouncementsFigure 8: Announcements – Comfort MessageFor Comfort message, you can select Defaultor Custom, and if you choose Custom, youcan upload a .wav file.Note:Remember to Save ChangesFor Music on hold message, you can selectDefault or Custom. If you choose Custom, you can upload a .wav file.Note:Remember to Save ChangesBCC BUse this menu to select and enable distinctivering tones to associate with specific callcenter calls.Note:Remember to Save ChangesAAFigure 11: Routing Policies – OverflowUse this menu to select how you want callsanswered when the call center number isalready busy/full, and you are still receivingincoming calls.AACall Center Routing Policies-OverflowThis menu allows you to determine thetreatment of calls remaining in the queueduring busy or extended periods of waiting.Note:Remember to Save ChangesAAStatistics Report SettingsFigure 13: Statistics Report SettingsYou can get reports generated by an agent orby a call center supervisor.This page allowsyou to set up the duration of reports and whoshould receive them.The report is in a CSV file format, and containsstatistics for the group and by agent.AASamples of Report TypesNote:Remember to Save ChangesEnable Personalized NameFigure 14: Call Center PasscodeIn Online Feature Management, you can reset the Voice Portal passcode for a call center pilot number.When you change the passcode on the Call Center page, the passcode is automatically changed for other location services, including Hunt Groups and Auto Attendant.It does not change the passcode for individual telephone lines or users. The owner of this telephone line will need to permanently reset the passcode through the Voice Portal.To reset the Voice Portal passcode for the Call Center pilot number:Enter the new passcodeConfirm the passcodeClick Save Changes to confirm.You can upload an audio file with a personalized name for the entire call center group. To do this:Check the box Enable Personalized Name Upload the fileClick Set Personalized Name to confirm.A A ABB B BA© 2013 XO Communications, LLC. All rights reserved.。
SPM Flex单点监测单点报警气体传感器快速入门指南说明书

SPM Flex ® Single PointMonitor Gas Detector Warnings and cautionsUnpacking the boxThe contents of the box:• the SPM Flex gas detector • the handle assembly (for portable models only)• power adaptor and cable • shoulder strap (for portable models only)• mounting bracket (for fixed units only)• a CD containing the Technical Manual • this Quick Start Guide Save the packaging to re-use for service requests.External connectionsThe detector is supplied with weather-sealed connectors for power, Ethernet, and communications (for relays or 4-20 mA). See the SPM Flex manual if the detector is being mounted in a fixed location.Portable detectors must be charged at least four hours. (They can be used while charging.) Honeywell Analytics recommends leaving the detector connected to the power source/charger when not in use to keep the battery fully charged.Figure 1: terminals and portsTurning the detector on and offFigure 2: SPM Flex buttons and color LCD display 1.Verify that the rocker switch under the cover is in the on position. (Typically, it is switched off only for transport or service.) Do not power up the detector with a flash drive attached.2. Press and hold the Power/Cancel button until the green LED begins blinking. The detector will then complete the start-up sequence.3.To turn the detector off, press and hold the Power/Cancel button for 5 seconds or select “Power Off” from the menu.NavigationAll SPM Flex menus are navigated by the four buttons shown in Figure 2.Pressing either of the arrows or the Accept/Select button will access the menu from the main display screen. The arrows are used to scroll up and down through lists of options. The Accept/Select button is used to initiate a highlighted option. During navigation, the Power/Cancel button will cancel a command or, when pressed for more than 3 seconds, it will exit to the main display.The displayFigure 3 shows the common elements of the display.Figure 3: Battery indicatorCurrent status indicatorConcentration indicatorMonitor mode IndicatorGas name Gas concentration UnitsBar graphw/upper, lower alarm limitsSPM Flex display - In Monitor modeIn the status bar, the color of the status bar changes according to theconditions (blue ^ out of Monitor mode, gr een ^ st atus OK, yello w ^ fault, r ed ^ alarm).See Figure 10 (over) for the detector’s menu map.The interface consists of a color LCD, a 4-button keypad, and four color status LEDs. The menu options are navigated using these buttons:detector:Figure 4: Main menu Figure 5: Out of monitor modeFigure 6: Alarm mode Figure 7: Maintenance faultPart No. 1998M0846Revision 4 © 2015-2021Quick Start GuideOpening the Chemcassette ®cartridge door Figure 8: Opening the Chemcassette cartridge doorLoading a Chemcassette ® cartridgeFigure 9: Loading a Chemcassette cartridge1. Navigate to the “Change Chemcassette” menu option.2. Follow the on-screen instructions to install or change the cartridge.3. Remove the paper optics card from the gate.4.Insert the Chemcassette cartridge in the detector (it will fit in only one orientation). The take-up spindle will rotate slightly to allow the cartridge to snap into place easily.5. Close the cover.6.A summary of the current configuration will be displayed. Select either to enter monitor mode or to remain out of monitor mode (i.e., idle).Removing a Chemcassette ®cartridge1. Navigate to Maintenance > Open/Close gate.2. Select “Open Gate.”3. Remove the cartridge.4. Inert the optics card in the gate if the detector will be stored or transported.5.Select “Close Gate.”Changing the selected gas1. While out of monitor mode, navigate to Set-up > Monitoring > Gas.2. Select “Current gas” and pick the desired gas from the selection box3.Select “Save.”Entering monitor modeFrom the main menu, navigate to the “Monitor Mode” option and select “Enter monitor mode.”1. If a Chemcassette cartridge has been installed, the detector will enter Monitor Mode.2.If a Chemcassette cartridge has not been installed, a user with thenecessary passcode can inititate the Chemcassette wizard. Otherwise, the detector will not enter monitor mode.Wiring and tubingThe SPM Flex detector has flexible installation options to allow the user to select the one most suitable for a specific application. The 4-20 mA output is a three-wire connection that is configurable as sink, source, or isolated. Thedetector is equipped with three relays.The overall maximum load on the pump between the inlet and the exhaust should not exceed 10 inches H 2O.The SPM Flex detector is supplied with the standard Ethernet, power, and communications connectors installed. The Ethernet connector can beremoved and provides a 1-inch conduit port which allows a direct connection to the PCB communication terminals. Refer to the Wiring and tubing section of the user manual for more information.Attaching the shoulder strapIf the shoulder strap is to be used with a portable detector, attach its spring clips to each of the rings on the detector’s handle.Product labelHave questions?Honeywell Analytics 405 Barclay Boulevard Lincolnshire, Ilinois 60069Tel: =184****8200Toll free: =180****0363Fax: =184****8208***********************Figure 10. SPM Flex menu mapMenu MapFigure 11. SPM Flex labelAccess manuals onHoneywell Analytics website。
Flex基础

Flex安装配置
解决创建的错误如下图
找到Problems看到有一个错误后肉我们右键选重新创 建HTML模板。这里错误已经解决,但是新的问题又 来了,src是java的源文件夹存java源代码的地方,但 是现在被 flex占用了
Flex安装配置
更改flex的项目源文件为flex_src,右键项目属性找到 flex构建路径的主源文件夹把src改为flex_src如下图
使用ActionScript
While和do while
while循环在循环开始前检查条件;如果循环开始条件 不成立,则不会执行 do while 在循环结束后检查条件,这就适合无论测试条 件是否 成立,都至少将部分代码运行一次。
使用ActionScript
条件语句(if和switch)
Flex安装配置
然后把src文件夹 里面的flexweb.mxml移动到flex_src 文件夹里面。最终目录如下图
(二)实现Flex与JAVA通信
实现Flex与JAVA通信
在src目录创建Java文件MyTest如下图
实现Flex与JAVA通信 配置WebRoot/WEB-INF/flex/remoting-config.xml 如下图
Flex的ActionScript支持两种主流注释形式:行内注释和多行注释 行内注释
行内注释以双斜杠开头,从双斜杠到当前行末尾之间的文本是一条 注释。换行意味着注释结束。
多行注释
如果想添加更多的注释用多行注释,多行注释的开始位置以斜杠加 星号(/*)标示。结束位置以星号加斜杠(*/)
很多时候不方便在MXML创建组件中 的定义事件,如组件是根据动 态 数据创建的,这些事件就需要使用Actionscript代码来动态的定义 事件。
Flex教程
//requiredFieldError属性表示必填项没填入数据的时的提示错误信息
//wrongLengthError:表示输入的数据阿拉伯数字长度小于10时提示的错误信息
//invalidCharError:表示输入数据不是阿拉伯数字时提示的错误信息
//设置验证器
v.source = phoneInput;
v.property = "text";
}
]]>
</mx:Script>
<mx:TextInput id="phoneInput" creationComplete="createValidator();"/>
还可以加入按钮触发器,并修改默认提示错误//trigger:表示触发验证事件的对象
//在脚本中定义图片的scale-9像框缩放功能就可以保持边框的清晰,
(旋转嵌入的scale-9图像的实例会关闭该图像的scale-9功能[
[Embed(
source="assets/fancy_border.png",
scaleGridTop="55", scaleGridBottom="137",
downSkin: Embed("assets/box_new.png");
}
</mx:Style>
<mx:Button/>
3), SWFLoader控件:通常用来加入Flex应用程序(可以使用AS与其通信),当然也能用于加入Image控件所能加入的富媒体资源。//外载入SWF程序
flex4基础
flex4mxml文件就是.MXML的xml文件actionscript文件.as 编写代码编译成swf文件flex4 应用程序需要使用flash builder4的软件来创建flash catalyst事件数据绑定1、基础知识介绍1.1、了解fl ex和flash平台开发工具—flash builder开源框架---flex内嵌组件扩展组件语言---ActionScript3.0类库(符合ECMA标准的脚本语言,主要用来实现业务逻辑)语言---MXML(基于XML的描述式语言,主要用来描述UI布局的)Flex SDKFlex框架软件开发包---编译器---调试器Flash Builer开发工具Flex SDK所有的功能提供一些额外的特性提高生产力---上下文的代码提示---一个可交互的逐步调试器---一个可视化的设计环境(布局和样式)---连接到服务器端数据的数据服务向导---内存和性能检测---自动测试支持及更多的特性Flash Builder版本:---标准版---增强版:致力用创建关键业务应用,包含了标准版所有特性,并添加了一些企业及的特性在里面,包括内存和性能检测以及自动测试。
增强版的数据可视化支持你创建图表和丰富的可视化面板。
1.2、了解flash Bulid er 和flex项目默认的工作空间位于:Document and settings→user directory→adobe flash builer beta2.metadata和configuration目录包含了flash builder工作空间的设置。
默认情况下,flash builder会把我的flex应用程序编译到我的项目文件夹下面的一个名为“bin-debug”的目录下。
源文件将会保存在项目目录中的“src”目录下。
组件设置:MX+Spark(同时使用两个库)MX only(这个mx库比较老)修改编辑器中的字体大小:General→Appearance→Colors and fonts→basic→text font改变代码间距:Flash builder→indentation→actionscript.并且取消方法中的对齐参数。
FLEX 中文手册

FLEX 中文手册一些简单的例子 输入文件的格式 模式 如何匹配输入 动作 生成的扫描器 开始条件 文件结尾规则 与 yacc 一起使用一、一些简单的例子首先给出一些简单的例子,来了解一下如何使用 flex。
下面的 flex 输入所定 义的扫描器,用来将所有的“ username”字符串替换为用户的登陆名字: %% username printf("%s", getlogin()); 默认情况下,flex 扫描器无法匹配的所有文本将被复制到输出,所以该扫描 器的实际效果是将输入文件 复制到输出,并对每一个“username”进行展开。
在这个例子中,只有一个规 则。
“username”是模式 (pattern),“printf”是动作(action)。
“%%”标志着规则的开始。
这里是另一个简单的例子:int num_lines = 0, num_chars = 0;%% \n ++num_lines; ++num_chars; . ++num_chars; %% int main(void){ yylex(); printf("# of lines = %d, # of chars = %d\n", num_lines, num_chars); }该扫描器计算输入的字符个数和行数(除了最后的计数报告,并未产生其它 输出)。
第一行声明了两 个全局变量,“num_lines”和“num_chars”,可以在 yylex()函数中和第二个 “%%”后面声明的 main()函数中 使用。
有两个规则,一个是匹配换行符(“\n”)并增加行数和字符数,另一个 是匹配所有不是换行符的 其它字符(由正规表达式“.”表示)。
一个稍微复杂点的例子: /* scanner for a toy Pascal-like language */ %{/* need this for the call to atof() below */ #include <math.h>%} DIGIT [0-9] ID [a-z][a-z0-9]* %%{DIGIT}+ {printf( "An integer: %s (%d)\n", yytext, atoi( yytext ) ); }{DIGIT}+"."{DIGIT}* {printf( "A float: %s (%g)\n", yytext, atof( yytext ) ); }if|then|begin|end|procedure|function {printf( "A keyword: %s\n", yytext ); }{ID} printf( "An identifier: %s\n", yytext ); "+"|"-"|"*"|"/" printf( "An operator: %s\n", yytext ); "{"[^}\n]*"}" /* eat up one-line comments */ [ \t\n]+ /* eat up whitespace */ . printf( "Unrecognized character: %s\n", yytext ); %% int main(int argc, char **argv){ ++argv, --argc; /* skip over program name */ if ( argc > 0 ) yyin = fopen( argv[0], "r" ); else yyin = stdin; yylex(); }这是一个类似 Pascal 语言的简单扫描器的初始部分, 用来识别不同类型的标 志(tokens)并给出报告。
flex+jump的培训资料

flex+jump的培训资料Flex程序员培训教程Flex产品概述学习FLEX,必须了解什么是RIA。
RIA,Rich Internet Application ,也就是富互联⽹应⽤。
这个富字是重点。
传统的HTML页⾯元素⾮常有限,开发⼈员在页⾯刷新和相应速度都受到较⼤的困扰。
FLEX ,最开始是由Macromedia公司2004年发布,2005年4 ⽉,Adobe公司收购Macromedia公司,现在FLEX系Adobe公司系列产品。
官⽅⽹站:/doc/941ed93a5727a5e9856a615d.html .Flex拥有两种开发语⾔:MXML:⼀种XML标识语⾔,⽤来进⾏组件布局,数据绑定等,和HTML语⾔有点类似。
ActionScript:现在⽤的版本是3.0,flex的编程语⾔,⼀般业务逻辑操作需要⽤到,可以完成MXML的所有操作。
Flex3包含以下⼏个部分:Flex3 SDK是Flex产品最基础也是必需的组件。
包括编译器、Flex类库以及调试⼯具。
Flex Builder 3/flash Builder 4是基于eclipse的集成开发环境。
⽀持可视化界⾯以及MXML和ActionScript编写,可以下载独⽴的Flex 开发⼯具(Flex Builder 3/flash Builder 4),也可以下载插件(作为eclipse的插件)使⽤。
Flex的安装Flex Builder 3和Flash Builder 4安装基本⼀样。
选择好语⾔环境,点击OK,开始安装:安装完成以后,启动FlexFlex Builder 3的启动页⾯安装好的Flex 对应的⽬录结构如下:Flex 开发⼊门Hello world 案例的开发案例描述通过经典的“Hello World ”案例来了解Flex 的运⾏⽅式。
开发步骤启动Flex Builder 3通过“开始→程序→Adobe →Flex Builder 3”启动Flex 开发环境。
Flex布局总结之flex的主要属性及参数用法
Flex布局总结之flex的主要属性及参数⽤法这篇笔记是系统学习flex时所记,适合复习使⽤,新⼿学习还是要配合图⽰和代码来学习更容易理解。
flex布局模型:弹性盒⼦( Flexible Box 或 flexbox),是⼀种当页⾯需要适应不同的屏幕⼤⼩以及设备类型时确保元素拥有恰当的⾏为的布局⽅式。
引⼊弹性盒布局模型的⽬的是提供⼀种更加有效的⽅式来对⼀个容器中的⼦元素进⾏排列、对齐和分配空⽩空间。
⾸先要弄清楚⼏个重要概念:flex-container:弹性盒⼦容器flex-items:flex-container⾥⾯的直接⼦元素叫做flex-items主轴:main axis:main start & main end & main size交叉轴:cross axis:cross start & cross end & cross size⽤在flex container上的CSS属性:flex-flow、flex-direction、flex--wrap、justify-content、align-items、align-content应⽤在flex items上的CSS属性:flex、flex-grow、flex-basis、flex-sshrink、order、align-self开启flex布局:.box { display:flex or inline-flex; } // 块级元素或⾏内元素1. flex-direction :决定了main axis主轴⽅向,默认沿着main axis主轴从main start开始从main start开始往main end⽅向排布。
row---默认从左⾄右, row-reverse----从右⾄左, column----从上⾄下, column-reverse----从下⾄上2. justify-content:决定了flex items在主轴上的对齐⽅式flex-start-----默认与main start对齐, flex-end------与main end对齐, center-------居中对齐space-between-----两边对齐中间等分间距对齐, space-evenly-----等分间距对齐, space-around-----边距时中间距离⼀半3. align-items:决定了flex items在cross axis上的对齐⽅式normal------效果相当于stretch-----当flex items在cross axis⽅向的size为auto时,会⾃动拉伸⾄填充flex containerflex-start----默认与cross start对齐, flex-end------与cross-end对齐, center------居中对齐, baseline------基线对齐,第⼀⾏⽂本底部为基线4. flex-wrap:默认nowrap,不换⾏;wrap,换⾏。
- 1、下载文档前请自行甄别文档内容的完整性,平台不提供额外的编辑、内容补充、找答案等附加服务。
- 2、"仅部分预览"的文档,不可在线预览部分如存在完整性等问题,可反馈申请退款(可完整预览的文档不适用该条件!)。
- 3、如文档侵犯您的权益,请联系客服反馈,我们会尽快为您处理(人工客服工作时间:9:00-18:30)。
Flex 快速入门无衣摘自/cn/ (版权归原作者所有)Flex 快速入门: 使用 MXML 和 ActionScript 进行编码Adobe® 将 Flex 实施为 ActionScript 类库。
该类库包含组件 (容器和控件)、管理器类、数据服务类和所有其他功能的类。
您通过将 MXML 和 ActionScript 语言与该类库一起使用来开发应用程序。
MXMLMXML 是用于为 Adobe® Flex™ 应用程序进行用户界面组件布局的 XML 语言。
您还使用 MXML 来显式定义应用程序的非可视方面, 例如访问服务器端数据源和用户界面组件与数据源之间的数据绑定。
例如, 您通过使用下面的 MXML 语句, 使用 <mx:Button> 标签来创建 Button 控件的实例:<mx:Button id="myButton" label="I'm a button!"/>您设置 id 属性以赋予 Button 实例一个唯一的名称, 以后可以使用该名称引用到它。
label属性设置在 Button 实例上显示的标签的文本。
下面的示例显示创建显示 Button 控件的 Flex 应用程序所需的完整代码:<?xml version="1.0" encoding="utf-8"?><mx:Applicationxmlns:mx="/2006/mxml"horizontalAlign="center" verticalAlign="center"><mx:Button id="myButton" label="I'm a button!" /></mx:Application>在编写 Flex 应用程序之后, 您必须使用 Flex 编译器来编译它。
Flex 编译器是称为 mxmlc 的一个很小的可执行文件, 处于 Flex 2 安装文件夹下的 Flex SDK 2.0\bin 文件夹中。
提示: 确保 Flex 2 installation folder\Flex SDK 2.0\bin 文件夹处于您的系统的路径中。
让 Flex 编译器处于您的路径中, 使您不管当前处于哪个文件夹中, 都可以从命令行调用它。
说明1.在您喜爱的文本编辑器 (如, 记事本) 中创建一个新文件并将它另存为MyFirst.mxml。
2.从前面的示例中将代码输入到 MyFirst.mxml 中并保存您的文件。
3.通过选择“开始”>“所有程序”>“附件”>“命令提示符”, 打开命令窗口。
4.将您的当前目录更改为包含您在步骤 1 中保存的 Flex 应用程序的文件夹。
5.键入下面的命令来调用 Flex 编译器:mxmlc --strict=true --file-specs MyFirst.mxml以双短划线开头的命令字符串中的项目被称为编译器选项, 它们被用于定义 Flex 编译器的行为。
在前面的示例中, 您将 --strict 选项设置为 true 以强制编译器进入 Strict 模式。
在 Strict 模式下, 编译器对您的代码具有较高的期望。
例如, 它期望您以静态方式键入变量。
您使用 --file-specs 选项来指定被编译的 MXML 文件。
6.在 Windows 资源管理器中双击 SWF 文件或在命令行中输入其名称, 在独立的 AdobeFlash Player 9 中打开它。
此示例会产生下列 SWF 文件:提示: 您还可以使用 Adobe Flex Builder 2 创建和编译 Flex 应用程序, Adobe Flex Builder 2 是包含可视设计视图的用于 Flex 开发的集成开发环境 (IDE)。
有关 Flex Builder 2 的详细信息, 请参阅使用 Flex Builder 2。
ActionScriptMXML 标签与 ActionScript 类或类的属性相对应。
当您编译 Flex 应用程序时, Flex 会解析 MXML 标签并生成相应的 ActionScript 类。
接着它将这些 ActionScript 类编译成存储在 SWF 文件中的 SWF 字节码。
提示: 若要查看 Flex 生成的中间 ActionScript 文件, 请将 --keep-generated-actionscript 选项添加到 mxmlc 命令中。
继续上面的例子, Flex 提供定义 Flex Button 控件的 ActionScript Button 类。
注意: 在前面的示例中, <mx:Button> 标签中的 mx 前缀是一个名称空间。
它是通过使用 Application 标签中的唯一 URL 声明的。
mx 前缀将 mx 名称空间中的每个组件映射到其完全合格的类名称。
这就是 Flex 编译器可以找到与 mx 名称空间中的 MXML 标签相对应的 ActionScript 类的方式。
下面的示例阐述如何通过使用 ActionScript 创建 Button 控件。
该结果与该 MXML 版本是相同的。
<?xml version="1.0" encoding="utf-8"?><mx:Applicationxmlns:mx="/2006/mxml"viewSourceURL="src/GettingStartedActionScript/index.html"creationComplete="creationCompleteHandler();"width="300" height="80"><mx:Script><![CDATA[import mx.controls.Button;import mx.events.FlexEvent;private var myButton:Button;private function creationCompleteHandler():void{// Create a Button instance and set its labelmyButton = new Button();bel = "I'm a button!";// Get notified once button component has been created and processed for layoutmyButton.addEventListener (FlexEvent.CREATION_COMPLETE, buttonCreationCompleteHandler);// Add the Button instance to the DisplayListaddChild (myButton);}private function buttonCreationCompleteHandler ( evt:FlexEvent ): void{// Center the buttonmyButton.x = parent.width/2 - myButton.width/2;myButton.y = parent.height/2 - myButton.height/2;}]]></mx:Script></mx:Application>通过 ActionScript 创建 Flex 组件时, 必须导入组件的类。
您还必须通过使用 addChild() 方法使组件可见, 将组件添加到应用程序的 DisplayList 中。
通过将此示例的长度和复杂性与其等同的 MXML 版本相比较, 您可以看到 MXML 的简单的基于标签的声明性语法是如何使您免于编写许多ActionScript 代码行来进行组件布局的。
此示例会产生下列 SWF 文件:注意: 此示例阐述线上 ActionScript 与 Script 标签的使用, 这是在 Flex 应用程序中包含 ActionScript 的一个可能的方法。
其他方法有: 将脚本块分隔到外部ActionScript 文件中, 或使用外部ActionScript 类。
Flex 快速入门: 创建您的第一个应用程序MXML 文件是普通的 XML 文件, 所以可以选择多种开发环境。
简单的文件编辑器、专用的 XML 编辑器或者支持文本编辑的集成开发环境 (IDE) 均可用于 MXML 代码编写。
Flex 提供专用的 IDE, 称为 Adobe® Flex™ Builder™ 2, 您可以使用它来开发应用程序。
MXML 文件的第一行是 XML 声明。
此行必须成为每个 MXML 文件的第一行。
下一行是 <mx:Application> 标签, 它定义始终是 Flex 应用程序的根标签的 Application 容器。
<mx:Panel> 标签定义包含一个标题栏、一个标题、一条状态消息、一个边框和其子级的一个内容区域的 Panel 容器。
其 title 属性被设置为 "My Application"。
<mx:Label> 标签代表一个 Label 控件, 一个用于显示文本的非常简单的用户界面组件。
其 text 属性被设置为 "Hello, World!"。
<mx:Label> 标签的 fontWeight 和 fontSize 属性改变使用的字体的样式。
还可以使用 CSS 来设置组件的样式。
有关详细信息, 请参阅 Flex 2 开发人员指南*中的“使用层叠样式表(CSS)”。
注意: 可以通过使用命令行编译器 mxmlc 或 Flex Builder 2 编译 Flex 应用程序。
有关使用 mxmlc 编译应用程序的说明, 请参阅使用 MXML 和 ActionScript 进行编码教程。
示例<?xml version="1.0" encoding="utf-8"?><mx:Applicationxmlns:mx="/2006/mxml"viewSourceURL="src/HelloWorld/index.html"horizontalAlign="center" verticalAlign="middle"width="300" height="160"><mx:PanelpaddingTop="10" paddingBottom="10" paddingLeft="10" paddingRight="10"title="My Application"><mx:Label text="Hello World!" fontWeight="bold" fontSize="24"/></mx:Panel></mx:Application>结果Flex 快速入门: 入门处理事件Adobe® Flex™ 应用程序是事件驱动的。
