AT200安装调试操作手册
AT5220多路电池测试仪说明书

用户手册User’s GuideRev.B固件说明:适用于主程序Rev.A2.0及以上的版本AT5220多路电池测试仪20通道扫描测试43/4位交流电阻读数,5位直流电压读数电阻测试范围:0.01mΩ~3.3000kΩ电压测试范围:0.0001V~60.000VDC0.5%的电阻准确度,0.05%的电压准确度HANDLER 接口RS-232C接口@常州安柏精密仪器有限公司.江苏省常州市钟楼区宝龙国际61-3层电话:*************传真:*************销售服务电子邮件:*****************技术支持电子邮件:****************©2005-2016 Applent Instruments Ltd.2 AT5220 用户手册安全须知当你发现有以下不正常情形发生,请立即终止操作并断开电源线。
立刻与安柏科技销售部联系维修。
否则将会引起火灾或对操作者有潜在的触电危险。
●仪器操作异常。
●操作中仪器产生反常噪音、异味、烟或闪光。
●操作过程中,仪器产生高温或电击。
●电源线、电源开关或电源插座损坏。
●杂质或液体流入仪器。
安全信息为避免可能的电击和人身安全,请遵循以下指南进行操作。
免责声明用户在开始使用仪器前请仔细阅读以下安全信息,对于用户由于未遵守下列条款而造成的人身安全和财产损失,安柏科技将不承担任何责任。
仪器接地为防止电击危险,请连接好电源地线。
不可在爆炸性气体环境使用仪器不可在易燃易爆气体、蒸汽或多灰尘的环境下使用仪器。
在此类环境使用任何电子设备,都是对人身安全的冒险。
不可打开仪器外壳非专业维护人员不可打开仪器外壳,以试图维修仪器。
仪器在关机后一段时间内仍存在未释放干净的电荷,这可能对人身造成电击危险。
不要使用已经损坏的仪器如果仪器已经损害,其危险将不可预知。
请断开电源线,不可再使用,也不要试图自行维修。
不要使用工作异常的仪器如果仪器工作不正常,其危险不可预知,请断开电源线,不可再使用,也不要试图自行维修。
AP200快速设置说明书

4.请用稍湿的软布清洁接收器。切勿使用任何类型的砂纸、 碱性清洁剂、 洗衣粉或酒精、 汽油等溶剂。
5.潮湿的手切勿触摸交流电源线或本装置。如果用潮湿的手将交流电源线插头插入或拔出本装置,则可能引起触电。
6.请定期清洁交流电源插头。如果插头被灰尘覆盖并受潮,则插头的绝缘性能可能下降并会导 致火灾。请定期拔掉交流电源插头进行清洁。
ALLPLAY
安全信息
请遵守以下注意事项以确保接收器的安全不会受到任何方式的威胁。
1.切勿将任何物体塞入接收器,否则可能引起火灾或触电。切勿将任何液体溅到接收器上。如果有液体或固体物掉入接收器内,请立即关闭接收器并由专业人员进行检查。
2.切勿将接收器放置在高温、 潮湿或满是灰尘的地方。切勿将接收器安装在可能受机械振动或电磁辐射的地方。 切勿将任何物品放置在接收器上。为了防止火灾,请将易燃物品或明火(如蜡烛)远离接收器放置。
成功连接网络 成功连接网络后即可在主页界面里面进入各个网络应用 APP 收看丰富的 网络视频节目了。
4
ALLPLAY
如果没有发现频道 如果没有发现和储存频道,请检查天线是否连接,然后按菜单并选择设 定重复自动调台操作步骤。 如果您仍然无法接收到信号,请让天线安装公司检查天线。
OTT 部分:
第一次开启数字电视接收器时,将自动进入 DTV 状态出现画面黑屏显示 “ 无信号” ,此时按“ 主页” 按钮进入主页界面进行 WiFi 连接的步骤。 1 按←/→按钮选择光标到设置。 2 按↑/↓按钮选择网络连接 3 按“ OK” 按钮选择转换“ 关闭” 状态为“ 打开” 后,屏幕会显示所有 可以连接的 WiFi 网络名称。 4 按↑/↓按钮选择可连接的网络名称后按“ OK” 按钮进入输入 WiFi 密 码的界面。 5 用↑/↓/←/→按钮在屏幕软键盘上移动光标选择合适的按键然后按 “ OK” 按钮选择字母,数字部分可以直接按遥控器上的 0-9 数字按钮输 入,输入了所有的密码后按“ 返回” 按钮后移动光标到“ 连接” 后按“ OK” 确认连接 WiFi 网络,成功连接后网络名称下会显示“ 已连接” 表示无线 网络已经连接成功。 6 开机时已经连接有线网络网线并且有线网络有效的情况下会优先自动 连接有线网络。
fortigate 200简易使用手册

1.FortiGate-200Afortigate-200a设备包装盒中部件:1 fortigate-200a防火墙设备2 一根橙色以太网交叉线缆(fortinet 部件号:cc300248)3 一根灰色以太网普通线缆(fortinet 部件号:cc300249)4 一根rj-45到db-9串连线缆(fortinet 部件号:cc300302)5 两个19英寸大小的安装架6 一根电源线7 fortigate-200a设备快速启动指南册页8 fortinet技术手册cd一张图1:fortigate-200a设备部件安装fortigate-200a可以固定在标准的19英寸的机架上。
需要占据机架1u的垂直空间。
fortigate-200a 设备也可作为独立的器件放置在任何水平的表面。
表1:技术参数尺寸:16.8×10×1.75英尺(42×25.4×4.5厘米)重量:7.3磅(3.3千克)功率:最大功率:50w工作需求:ac输入电压:100至240vacac输入电流:1.6a频率:50至60hz工作温度:32至104华氏度(0至40度摄氏度)工作环境:放置温度:-13至158华氏度(-25至70摄氏度)湿度:5至95%(非冷凝)2.启动FortiGate设备1. 确定fortigate设备背面的电源开关是关闭的。
2. 将电源线与位于fortigate设备背面的电源接口连接。
3. 将电源线连接到电源插座。
4. 闭合电源开关。
数秒后, led 显示system staring(系统启动)。
系统启动后,led显示menu (主菜单)。
fortigate设备开始运行,led指示灯亮起。
fortigate设备启动过程中led状态指示灯闪烁并在设备启动后保持亮着状态。
表6:led显示关闭fortigate设备请在闭合电源开关之前,关掉fortigate操作系统,以免造成硬件损伤。
通讯设备安装与调试技术手册

通讯设备安装与调试技术手册第1章设备安装基础知识 (3)1.1 设备安装前的准备工作 (3)1.2 安装工具及设备的选择 (3)1.3 安装现场环境要求 (4)第2章通讯设备安装流程 (4)2.1 设备拆箱与检查 (4)2.2 设备定位与安装 (4)2.3 设备接线与连接 (4)第3章通讯设备调试基础 (4)3.1 调试工具与设备 (4)3.2 调试前的准备工作 (4)3.3 调试方法与技巧 (4)第4章传输设备安装与调试 (4)4.1 传输设备安装步骤 (4)4.2 传输设备调试要点 (4)4.3 传输设备故障排查 (4)第5章交换设备安装与调试 (4)5.1 交换设备安装步骤 (4)5.2 交换设备调试方法 (4)5.3 交换设备功能测试 (4)第6章无线设备安装与调试 (4)6.1 无线设备安装流程 (4)6.2 无线设备调试要点 (4)6.3 无线设备信号优化 (4)第7章网络设备安装与调试 (4)7.1 网络设备安装步骤 (4)7.2 网络设备调试方法 (4)7.3 网络设备功能测试 (4)第8章通信电源设备安装与调试 (4)8.1 通信电源设备安装要点 (4)8.2 通信电源设备调试方法 (4)8.3 通信电源设备维护保养 (4)第9章综合布线系统安装与调试 (5)9.1 综合布线系统安装流程 (5)9.2 综合布线系统调试方法 (5)9.3 综合布线系统故障排查 (5)第10章通讯设备安全与防护 (5)10.1 设备安全措施 (5)10.2 设备防护措施 (5)10.3 安全处理 (5)第11章通讯设备验收与维护 (5)11.1 设备验收标准 (5)11.2 设备验收流程 (5)11.3 设备维护与保养 (5)第12章通讯设备常见问题与解决方案 (5)12.1 设备安装常见问题 (5)12.2 设备调试常见问题 (5)12.3 设备运行常见问题 (5)第1章设备安装基础知识 (5)1.1 设备安装前的准备工作 (5)1.1.1 熟悉设备资料 (5)1.1.2 准备安装工具 (5)1.1.3 检查设备配件 (5)1.1.4 确定安装位置 (6)1.2 安装工具及设备的选择 (6)1.2.1 安装工具的选择 (6)1.2.2 设备的选择 (6)1.3 安装现场环境要求 (6)1.3.1 环境温度 (6)1.3.2 环境湿度 (6)1.3.3 环境清洁度 (6)1.3.4 安全防护 (6)第2章通讯设备安装流程 (6)2.1 设备拆箱与检查 (6)2.2 设备定位与安装 (7)2.3 设备接线与连接 (7)第3章通讯设备调试基础 (7)3.1 调试工具与设备 (7)3.1.1 调试工具 (8)3.1.2 调试设备 (8)3.2 调试前的准备工作 (8)3.2.1 熟悉设备原理和结构 (8)3.2.2 准备调试工具和设备 (8)3.2.3 确认设备工作状态 (8)3.2.4 阅读调试手册 (8)3.3 调试方法与技巧 (8)3.3.1 系统调试 (9)3.3.2 分段调试 (9)3.3.3 对比调试 (9)3.3.4 逐步调试 (9)3.3.5 实时监测 (9)第4章传输设备安装与调试 (9)4.1 传输设备安装步骤 (9)4.2 传输设备调试要点 (10)4.3 传输设备故障排查 (10)第5章交换设备安装与调试 (11)5.1 交换设备安装步骤 (11)5.2 交换设备调试方法 (11)5.3 交换设备功能测试 (12)第6章无线设备安装与调试 (13)6.1 无线设备安装流程 (13)6.1.1 准备工作 (13)6.1.2 安装步骤 (13)6.2 无线设备调试要点 (13)6.2.1 设备配置 (13)6.2.2 信号测试 (13)6.2.3 故障排除 (13)6.3 无线设备信号优化 (14)第7章网络设备安装与调试 (14)7.1 网络设备安装步骤 (14)7.2 网络设备调试方法 (15)7.3 网络设备功能测试 (15)第8章通信电源设备安装与调试 (16)8.1 通信电源设备安装要点 (16)8.2 通信电源设备调试方法 (16)8.3 通信电源设备维护保养 (17)第9章综合布线系统安装与调试 (17)9.1 综合布线系统安装流程 (17)9.2 综合布线系统调试方法 (18)9.3 综合布线系统故障排查 (18)第十章通讯设备安全与防护 (19)10.1 设备安全措施 (19)10.2 设备防护措施 (19)10.3 安全处理 (20)第11章通讯设备验收与维护 (20)11.1 设备验收标准 (20)11.2 设备验收流程 (21)11.3 设备维护与保养 (21)第12章通讯设备常见问题与解决方案 (22)12.1 设备安装常见问题 (22)12.2 设备调试常见问题 (22)12.3 设备运行常见问题 (23)第1章设备安装基础知识1.1 设备安装前的准备工作1.2 安装工具及设备的选择1.3 安装现场环境要求第2章通讯设备安装流程2.1 设备拆箱与检查2.2 设备定位与安装2.3 设备接线与连接第3章通讯设备调试基础3.1 调试工具与设备3.2 调试前的准备工作3.3 调试方法与技巧第4章传输设备安装与调试4.1 传输设备安装步骤4.2 传输设备调试要点4.3 传输设备故障排查第5章交换设备安装与调试5.1 交换设备安装步骤5.2 交换设备调试方法5.3 交换设备功能测试第6章无线设备安装与调试6.1 无线设备安装流程6.2 无线设备调试要点6.3 无线设备信号优化第7章网络设备安装与调试7.1 网络设备安装步骤7.2 网络设备调试方法7.3 网络设备功能测试第8章通信电源设备安装与调试8.1 通信电源设备安装要点8.2 通信电源设备调试方法8.3 通信电源设备维护保养第9章综合布线系统安装与调试9.1 综合布线系统安装流程9.2 综合布线系统调试方法9.3 综合布线系统故障排查第10章通讯设备安全与防护10.1 设备安全措施10.2 设备防护措施10.3 安全处理第11章通讯设备验收与维护11.1 设备验收标准11.2 设备验收流程11.3 设备维护与保养第12章通讯设备常见问题与解决方案12.1 设备安装常见问题12.2 设备调试常见问题12.3 设备运行常见问题第1章设备安装基础知识设备安装是工程项目中的环节,为保证安装质量和工程顺利进行,以下是设备安装的基础知识。
梅特勒-托利多-AT天平操作说明书

1.1 准备工作
在首次安装天平或每次更换天平的放置位 置之后 您都需要按照如下指示进行工 作
选择合适的位置
您的AT天平会以提供极好的称量结果来感谢
您为其安排最佳的放置位置 - 稳定 无振动的位置 越水平越好
- 无阳光直射
- 无极强的温度起伏
- 无强气流 如 强力空调系统形成的气 流
欲知其他有关天平最佳放置位置的方法和信 息 请参阅与您天平所配套之手册 用梅特 勒 -托 利 多 进 行 正 确 称 重
技术数据 ....................................
48
梅特勒-托利多AT天平操作手册
设置称量过程适配器
可读性
4)
半微量程
5)
校 验
设置振动适配器 全自动控门功能
自动置零 校准和线性化
状态指示器 蜂鸣器
输送方式 结束方式
菜 单 菜单选择 菜单选项选择
设置选择 取消更改并回到称量方式 存储当前菜单并回到称量方式
24 螺旋脚
25 数字显示器 真空荧光显示器或液晶显示器
26 状态指示器
27 称量单位
28 梅特勒动态图形显示器源自 录页码1 AT简化了称量方法 .........................
2
1.1 准备工作 ........................................ 2
2.3 您的天平是否是梅特勒变量程天平 ................. 11
2.4 如何在粗量程和细量程中称量 ....................... 12
3 您的天平具有很强的适应性 ..................
14
AyTs C20,C30,控制器操作手册
转换开关在手动模式,功能可用
操作代码
编程
显示
编程
空载测试
编程代码
编程
显示
转换开关在自动"AUT"模式,功能可用
操作代码
操作
空载测试
空载测试
主电源 相失去
主电源 相返回
相运转控制
此功能仅在电源1是3NBL, 4NBL 和 41NBL型电网时可用 1 如果检测到故障,电源可用1 将不显示 1
V1 OK
V3
54
接触器输入模式:可设定继电器O2
断路器输入模式:断开断路器电源 2
301 位置1信号辅助触点
302 位置0信号辅助触点
303 位置2信号辅助触点
304 可编程输入1
305 可编程输入2
316 特殊供电电压
公共端301-310
RJ 遥控界面
特性 440 VAC (相-相) 最大 254 VAC (相-地) 最大 440 VAC (相-相) 最大 从9VDC到30VDC 干触点 5A AC1/ 250 V 5 A AC1/ 250 V
溯高美说明书号: 532 214 A
9
控制器 ATyS C20/C30系列 ATyS C20/C30 接 线
控制器 ATyS
接线
电动操作
电源
ATyS C20/C30整合了2个输入电源(104-106, 203-205), 并且考虑到选择可用电源来保证产 品运转 当直流型产品端子电压>100VAC时,仅有1路 电源输入
开关状态 2个绿色led - 开关1状态 - 开关2状态 * 仅限 ATyS C30
软件版本
复位后显示 (断电3分钟后允许复位)
键盘 退出
molex+at-200+空气驱动压接工具+使用说明书

AT-200 AIR-POWERED CRIMPING TOOLOperating and Maintenance Instructions withWith Optional Bench Adapter and Foot Switch shownOrder No. 19279-0001▪Description▪Operation▪MaintenanceSafety Warnings and InformationThis symbol is used to call your attention to hazards or unsafe practices which could result in an injury or property damage. The signal word, defined below, indicates the severity of the hazard. The message after the signal word provides information for preventing or avoiding the hazard.DANGERWARNINGCAUTIONAlwaysOperating or servicing this equipment. Heavy ObjectTo avoid muscle strain or back injury, use lifting aids and proper lifting techniques when removing or replacing.NeverThat could potentially hang into the equipement and get caught. Neverconnected to any electrical power source. Disconnect power by unplugging the press from its power source.Nevermachine without proper instruction and without first reading and understanding the instructions in this manual and all applicable press and/or Neverconnected to the compressed air source.Neverdevices that are intendedto prevent hands from remaining in the die space.Always wear proper ear protection when Operating or servicing this equipment.CAUTIONThe Molex at-200 air powered crimping tool is designed to be used with air powered crimp tools heads and tooling supplied by Molex. Use of tool heads or tooling from any other source may result in damage or injury.Molex will not be liable for any damage or injury from use of non-Molex components in this tool.Never perform any service or maintenance other than as described in this manual.NeverMolex crimp specifications are valid only when used with Molex terminals, applicators and tooling.Tooling Technical AssistanceMolex offers tooling technical assistance for customers who may need some guidance for tooling adjustments. This support can be obtained by calling either of the two numbers listed below and asking for the Molex Tooling Group. Call Toll Free 1-800-786-6539 (US) 1-630-969-4550 (Global).This assistance is limited to the operation and set-up of a c ustomer’s tool. Questions with regard to Molex connector products or how to identify the proper tooling and/ or tooling documentation should be directed to your local Molex personnel or Customer Service Representative.When calling for service on the press a copy of the Operation Manual and Specific Applicator Tooling Specification Sheet should be present and a person that is familiar with the applicator should be present. Be sure the following information is supplied:1.Customer name2.Customer address3.Person to contact such as (name, title, e-mail, and telephone number4.Applicator order number (Lease number also if applicable)5.Serial number (Lease number also if applicable)6.Molex Connector product order number7.Urgency of request8.Nature of problemMolex Application Tooling Group2200 Wellington CourtLisle, IL 60532, USATel: +1 (630) 969-4550Fax:+1 (630) 505-0049Visit our Web site at Table of ContentsContentsAT-200 AIR-POWERED CRIMPING TOOL (1)Order No. 19279-0001 (1)Safety Warnings and Information (2)Table of Contents (4)Section 1 (5)General Description (5)1.1Description (6)1.2Features (6)1.3Technical Specification (6)1.4Delivery Check (6)1.5Tools (6)1.6Specification Sheets (6)Section 2 (7)2.1Set-Up (8)2.2Operation (9)Section 3 (10)Adjustments (10)3.1Changing Crimp Tool Heads (11)3.2Insulation Support Crimp Adjustment (12)3.3Insulation Support Crimp Adjustment (12)3.4Terminal Crimping (12)3.5Maintenance (12)3.6Warranty (13)Section 4 (14)Parts List and Assemblies (14)4.119279-0001 Parts List and Assembly Drawings (15)4.219279-0135 Parts List (16)4.219279-0135 Assembly Drawings (17)4.319078-0307 (Optional) Parts List and Assembly Drawings (18)4.464001-4000 (Optional) Parts List and Assembly Drawing (19)4.519279-0099 Parts List and Assembly Drawings (20)Section 1 General Description1.1 Description1.2 Features1.3 Technical Specifications1.4 Delivery Check1.5 Tools1.6 Specification SheetsGeneral Description1.1 DescriptionThe AT-200 Air-Powered Crimping Tool is a hand held pneumatic tool weighting less than two pounds. It is designed to crimp high quality and consistent crimped terminals. This tool operates on standard shop air (85 to 95 PSI) and crimps wire ranges from 26 to 8AWG.1.2 Features▪Crimping dies are easily and quicklyinterchanged to reduce production down time. ▪Complete portable system that allows tool to be moved and stored easily.▪Tool may be used as a Potable tool, suspended over head or bench mounted.▪Higher volume output with less operator fatigue.1.3 Technical Specification Pneumatic:Supply Pressure: 100 PSI (6.9 Bars) maxCycle Time:15 secondsWeight0.9kg (2lbs)1.4 Delivery CheckCarefully remove the AT-200 Air-Powered Crimping Tool from its shipping container and determine that the following items are included in the package.✓19279-0001 Air-Powered Crimping Tool✓19279-0140 Air Hose 1/8 NPT Male✓TM-192790001 Instruction Manual 1.5 ToolsThe following tools are recommended for setup and adjustments to this tool.1.Metric standard hex wrench set2.Inch standard hex wrench set3.Adjustable wrench4.Wire stripper / cutter5.Screw driverCan Also Be Used With:19078-0307 Bench Adapter Assembly with FootSwitch64001-4000 Electrical Control Box1.6 Specification SheetsMolex ships specification sheets with every Air Crimp Tool Head. These Tool Heads are not included with the AT-200 Air-Powered Crimp Tool. They are ordered separately. The specification sheet contains the following:▪Terminal numbers▪Wire AWG ranges▪Insulation diameter ranges▪Strip lengths▪Pull Force▪Crimp heights▪Bell mouth▪Bend, twist and roll limits▪Tooling parts list and assemblyThese are available on the Molex website ().Section 22.1 Setup2.2 OperationCONNECT TUBING FROM FOOT SWITCHRead the following instructions before attempting to operate this tool.2.1 Set-Up1. Connect the air hose to the tool and to the air supply 85 to 95 PSI. Do not exceed 100 PSI. May cause injuryIf changing to the Optional bench adapter (Order No. 19078-0307) remove the air hose (Order No. 19279-0140) from the Air-Powered Crimp Tool and connect the tubing from the footswitch. See Figure 2-2. If using the Optional Electrical Controls (Order No. 64001-4000), see Appendix A.(SAFETYSQUEEZE HERE Note: Always use the safety or disconnect air supply when changing crimping heads.2.2 Operation1.For the proper crimping head, use the tool order number specified on the label of connector container.2.Strip the proper wire to the length specified on the label of connector container or on the air powered crimptool head specification sheet.3.Load the desired terminal into the crimp nest. Insert the properly stripped wire into the terminal barrel.For the Bench Mount Application1.Slide the Air Powered Crimp Tool into the base. The safety will bump against the base top and the trigger onthe crimp tool will unlock. See Figure 2-3.CAUTION: Air-Powered Crimp Tool will not operate if the safety in trigger is locked.1.2.Remove the crimped terminal. Inspect for proper crimp location.For Hand Held Application3.Push on the wire to assure it is fully seated in the terminal.4.Activate the AT-200 Crimp Tool by sliding the safety on the trigger forward using your thumb and thensqueezing the trigger until the crimp jaws are fully closed. See Figure 2-4.5.Release the trigger and remove the crimped terminal. Inspect for proper crimp location.Section 3 Adjustments3.1.Changing Crimp Tool Heads3.2.Insulation Support Crimp Adjustment(Older style fixed jaw air powered crimp tools heads) 3.3.Insulation Support Crimp Adjustment(Newer style insertion air powered crimp tools heads) 3.4.Terminal Crimping3.5.MaintenanceFigure 3-23.1a) position trigger is up.b) c) 4. shown in Figure 3-3. 5. into the body of the power unit until the side plates of the crimp tool head butt against the steps in the power unit. Be sure thejaw return springs clear the cam in the power unit. See Figure 3-3.6. Line up the holes in the crimp tool head with the holes in the housing of the power unit.7. Replace the (2) #1/4-20 screws and tighten securely. The tool is now ready for use.BUTTS UP AGAINST STEPS SCREWS (2)3.2 Insulation Support Crimp Adjustment(Older style fixed jaw air powered crimp tools heads)1.The crimp tool heads for the insulated terminals and theconnectors feature an adjustable insulation support crimp toaccommodate varying wire insulation diameters (See Figure3-4) for old style crimp tool head.2.The adjustment screw on each crimp head tool is set at thefactory at the M position. This setting will give the bestcrimp on most wires. Two other adjustment settings areavailable: S, the smallest configuration and L, the largestconfiguration.3.Crimp a terminal or connector and inspect the insulationsupport sleeve crimp or configuration. A properly crimped sleeve snugly grasps the wire insulation.4.If the crimp configuration is too loose, change the adjustment setting by removing the air powered crimp toolhead from the AT-200 and setting adjustment screw to the S position. Re-insert the air powered crimp tool head into the AT-200 and crimp, and inspect the insulation support sleeve.5.If crimp configuration is too tight, change adjustment setting by removing the air powered crimp tool head fromthe AT-200 and setting adjustment screw to the L position. Re-insert the air powered crimp tool head into the AT-200 and crimp, and inspect insulation support sleeve.3.3 Insulation Support Crimp Adjustment(Newer style jaw air powered crimp tools)For the new style crimp head tools, if the insulation part of the crimp needs to be adjusted, first loosen the M4 screw on the bottom tool jaw, then insert a 3/32” Hex wrench (supplied) into the bottom of the lower die. See Figure 3.1. A clockwise (CW) rotation decreases the insulation crimp while a counter-clockwise (CCW) rotation increases the insulation crimp. After adjusting retighten the M4 screw.3.4 Terminal CrimpingSpecifications and Instructions for crimping are included with the individual air powered crimp tool heads.3.5 MaintenanceCAUTION: Always disconnect air supplybefore all maintenance.It is recommended that each operator of the toolbe made aware of, and responsible for, thefollowing maintenance steps:1.Remove dust, moisture and othercontaminants with a clean brush, or soft,lint-free cloth.2.INSULATION CRIMPING3.Make certain all pins; pivot points and bearing surfaces are protected with a thin coat of high quality machineoil. Do not oil excessively. This tool needs cleaning and lubrication for a maximum service life of trouble-free crimping. Using a light oil, such as 30 weight automotive oil on the oil points shown in Figure 3-5, every 5,000 crimps or monthly will significantly enhance the tool life and ensure a stable calibration.4.When tool is not in use store the tool in a clean, dry area.3.6 WarrantyThis tool is for electrical terminal crimping purposes only. This tool is made of the best quality materials. All vital components are long-life tested. All tools are warranted to be free of manufacturing defects for a period of 30 days. Should such a defect occur, we would repair or exchange the tool free of charge. This repair or exchange will not be applicable to altered, misused or damaged tools.If seals are damaged the warranty is invalid.CAUTION: Molex crimp specifications are valid only when used with Molex terminals and tooling.Section 4Parts List and Assemblies 4.1 19279-0001 Parts List and Assembly Drawings4.2 19279-0135 Parts List and Assembly Drawings4.3 19078-0307 Parts List and Assembly Drawings (Optional) 4.4 64001-4000 Parts List and Assembly Drawings (Optional) 4.5 19279-0099 Parts List and Assembly Drawings4.1 19279-0001 Parts List and Assembly Drawings4.2 19279-0135 Parts List4.2 19279-0135 Assembly Drawings4.5 19279-0099 Parts List and Assembly Drawings(See ATS-19279-00099 specification sheet for installation)This assembly is included in the AT-200 Air-Powered Crimp Tool 19279-0001 however for older models of this tool it is recommended to purchase the Trigger Safety Kit 19279-0099.Visit our Web site at 。
ATControls 4-20mA 转位传感器安装与维护手册说明书
INTRODUCTION:The 4-20mA Transmitter is designed to operate over 90º, 180º, 360º (option dependent) rotation with ± 5° of over-travel at each end. The Transmitter is direct acting, reverse acting and is also suitable for split ranging (typical setting: 4-12mA or 12-20mA). Position feedback is accomplished through a precision potentiometer that is conductive resin and environmentally sealed. The Triac transmitter features a non-interactive zero and span for easy one step calibration.INSTALLATION:A.Attach proper actuator mounting kit to the transmitter housing using the M6x8 socket head cap screwsprovided.B.Align the switch output shaft to the top of the actuator accessory output shaft and engage the two shaftstogether (or use coupler with non-ISO/NAMUR actuators).C.Attach the bracket assembly to the actuator but do not tighten. Stroke the actuator to allow thetransmitter and actuator to self-align.D.Tighten the transmitter assembly on to the actuator. Note: Steps 3 and 4 can be done prior to calibration. CALIBRATION:A.First select the ‘Action’, direct or reverse. This is accomplished through the location of thepotentiometer ribbon connector plug. Brown wire to ‘D’ for direct or brown wire to ‘R’ for reverse.Factory default setting is ‘D’B.Wire output (+ and -) of transmitter to a regulated current source such as Transmation TM, Altek TM, orFluke TM, meter.C.Operate valve to 50% position (45°). The large spur gear is attached to the drive shaft with a setscrew.Loosen setscrew to disengage the gear. Rotate small spur gear on potentiometer until 12mA is visible on meter. Re-engage large spur gear and tighten the setscrew.D.Rotate actuator closed and turn zero potentiometer (clockwise for higher and counter-clockwise forlower) until meter reads 4mA.E.Rotate actuator open and turn span potentiometer (clockwise for higher and counter-clockwise forlower) until meter is at 20mA.F.For split ranging follow steps 3, 4 and 5 setting zero and span to proper split range: 4 to 12mA or 12 to20 mA.G.Important Note: Disconnect test equipment supply power prior to removing test meter wiring (thetransmitter has CMOS circuitry and is sensitive to voltage/current surges).H.The transmitter is ready for field wiring. Note: If more than one current device is in the loop with thetransmitter, they must be wired in series. Damage may occur if wired incorrectly.SHIELDING:The transmitter is a sensitive precision instrument and if not properly wired is susceptible to intrinsic noise.This could include EMF from inductive loads or RFI from wand held radios.A.The size of wire is dependent on the length of run, it is recommended to use no less than 18 gaugeshielded wire.B.The shield should only be grounded at one end (preferably the source). This acts as an antenna anddirects all noise to ground.TROUBLESHOOTING:1. Problem:Output not continuous throughout actuator/valve stroke (experience a band of max. output).Probable Cause/Solution:Potentiometer out of adjustment (see calibration steps 3 through 9).2. Problem:Transmitter does output 4 or 20mA at desired end of travel.Probable Cause/Solution:Zero or span trim potentiometer is out of adjustment (see calibration steps 4 and 5).3. Problem:Transmitter module has no current signal or provides a constant signal.Probable Cause/Solution:Circuit Board LED not lit:1. Loose or shorted signal connection (no loop power)2. Controller board not responding (replace board).3. Check control sourceCircuit Board LED lit:1. Potentiometer disengaged2. Defective potentiometer or controller board (replace).3. Check control source.SPECIFICATIONS:OHM10KPotentiometer30VDC–12VoltageSupplyLinearity ± 0.5% of full scaleDeadband ± 0.25% of full scaleHysterisis&Action Direct or ReverseZero – Span 20 Turn Trim Potentiometer (Non-interactive)CMOS-ASICLogic/ProcessorA-T Controls products when properly selected, is designed to perform its intended function safely during its useful life. However, the purchaser or user of A-T Controls products should be aware that A-T Controls products might be used in numerous applications under a wide variety of industrial service conditions. Although A-T Controls can provide general guidelines, it cannot provide specific data and warnings for all possible applications. The purchaser / user must therefore assume the ultimate responsibility for the proper sizing and selection, installation, operation, and maintenance of A-T Controls products. The user should read and understand the installation operation maintenance (IOM) instructions included with the product, and train its employees and contractors in the safe use of A-T Controls products in connection with the specific application.While the information and specifications contained in this literature are believed to be accurate, they are supplied for informative purposes only. Nothing contained in this literature should not be considered certified or as a guarantee of satisfactory regarding any matter with respect to this product. Because A-T Controls is continually improving and upgrading its product design, the specifications, dimensions and information contained in this literature are subject to change without notice. Should any question arise concerning these specifications, the purchaser / user should contact A-T Controls.For more information about A-T ControlsFor product specifications go to /A-T Controls, Inc.11363 Deerfield RoadCincinnati, OH 45242Phone: (513) 530-5175Fax: (513) 247-5462。
AT2000说明书

3. 不允许将身体任何部位靠近或置于旋转或移动部件上。 4. 钻机起动和运转时不允许打开钻机主机上的任何部件。 5. 钻机工作时必须装夹牢固可靠,切勿超负荷工作。 6. 如需带电维修,必须由专门培训过的专业人员进行。 7. 钻机的安装、保养和检修必须经专门培训过的专业人员进
4.1.9 扩孔刀头 ……………………………………………13
4.1.10 辅助工具 ……………………………………………14
5.液压系统 ………………………………………………………16
5.1 说明 … ……………………………………………………16
5.2 主集成块 ……………………………………………………17
该钻机采用双马达、全液压驱动技术。具有大扭矩,钻进无级 调速,结构紧凑,安装简单方便,抗冲击性能好,工作可靠等特 点;与其它普通凿岩法相比,天井钻机具有生产效率高,成井质 量好,操作安全,钻孔偏斜率小。
采用双油缸推进,钻进平稳,成井效率高 其全新设计的机械手,设计合理,动作稳定可靠,大大减轻了 工人的劳动强度; 全新设计的液压系统,采用国内外先进的液压元器件,简化了 液压管路结构,无溢流设计减少了系统发热从而提高了液压系统 的稳定性。 1.2.AT2000 天井钻机应用 主要用于地下矿山和其它工程的岩层中,正向钻进Ф250mm(Ф 280mm)的导向孔并反向扩Ф2000mm 的通风井、充填井或者管道井等, 也可以作为矿山地下掘进大断面天井和溜井,钻进深度 400 米,钻进 倾角 60°~90°。
5
湖南有色重型机器有限责任公司
AT2000 天井钻机安全说明书
3.2.3. 电器设备的检查 ※ 检查安全装置的运行情况。分别地定期检查操纵台上指示 灯。 ※ 电源电压波动大会损坏设备,过电压会损坏零件,而在低电 压下起动会损坏发动机起动电路的元件。 ※ 电线接头应该结合牢固,否则会发生危险。损坏的电线和电 缆可引发起火或造成严重的人身事故。 ※ 电气元件需要检查、维护和修理时必须将该元件的电流切 断。 ※ 在故障修好之前及必要的测量、试验和试运行完成之前,不 能使用该设备。 ※ 始终要与电缆保持一段安全距离!离动力线最近的设备部件 不至于发生事故的距离被认为是安全距离。参照关于安全工作距离的 地方电气安全规程。 ※ 钻机的接地可能会改善安全性。
AT2000变送器调试

变送器现场技术指导手册1.表头无显示无输出:●供电电源是否为DC 16V-45V(标准24V);●电源极性是否接反;●接线端子是否有被腐蚀或强电击坏;●表头的电源插线(红、白色)是否插好;●是否有进水、腐蚀等现象2.测量值与实际值不符,误差大:●过程连接是否正确、连接管道有微漏;●零点与量程设置是否正确;●卸压通大气后是否归零,如表头压力显示不为零请清零键归零;●变送器输出函数方式是否正确(开方输出/线性输出);●导压管有渣滓沉淀等;●阀门未完全开或关3、表头无显示有信号输出●液晶显示屏有虚焊●主板电路故障4、法兰表安装完成后出现漂移、缓慢周期性变化●变送器使用环境温度是否有变化过大●安装时法兰膜片是否使膜片损坏●安装时密封圈是否压到膜片●毛细管是否固定有震动源5、表头显示HL或单显H、L:●显示HL检查表头主板与信号板的排线是否连接正常或腐蚀;●显示HL也可为信号板坏;●单独显示H、L为过压保护(不排除传感器被压坏的可能);6、测量值比实际值大/小●安装好后未调零点或带压校零,卸压后重新清零;●高低端接反;●量程设置错误(迁移);●检查短路或多点接触;●导压管可能存在液体管道中的气体或气体管道中的液体或渣滓沉淀等;●在现场安装时引压管可能会比取压口高或者低,此情况会对压力有明显影响,应消除这种影响。
(迁移或者调零)7、进水,起雾:●变送器壳体的前后盖是否拧紧;●电缆线应该由下而上引入变送器电缆接头处;●变送器表头应该垂直向上,传感器部分应该垂直向下(可以有一定的倾斜角度尽量垂直)●变送器不能安装在有蒸汽能够直接喷射到的位置,应采取隔离措施;●对于已经进水的变送器应立即拆下电路板将水擦干并烘干;8、法兰表清零开始使用后短时间内表头变为负值:●在密码管理项输入“050110“取消ZSC功能●是否有带压清零,应取消零点校准功能;9、加压无反应:●引压管堵;●量程设置错误;●被测介质的粘度太大,流动性差;●传感器故障;●在对大气的情况下,检查SUB 10的no.0项值如果大于0.2则表明传感器存在故障;10、室外低温环境下使用:●尽量采用垂直安装方式;●当环境温度过低时须加伴热(不低于零下40℃);11、高温环境下使用:●介质温度较高时必须采取隔离措施(加隔离液、冷凝罐等);●环境温度较高时应有防护措施远离高温源(环境温度不高于80℃)12、测量差压时输出最大或最小:●H/L端其中一端有堵或微漏;●H/L端接反;●如果电流低于3.9mA或高于21mA,主板电路有故障;●三阀组阀门故障;13、汽包水位调试●测汽包水位时通常为负迁移表,调试时需要将L端灌满水将4mA校准;13、流量测量注意事项●测量蒸汽流量时,取压口应开在管道侧面,变送器安装位置应比取压口低。
施耐德ATV变频器说明书

施耐德A T V变频器说明书Last revised by LE LE in 2021ATV312变频器安装及编程手册施耐德电气善用其效尽享其能全球能效管理专家施耐德电气为世界100多个国家提供整体解决方案,其中在能源与基础设施、工业过程控制、楼宇自动化和数据中心与网络等市场处于世界领先地位,在住宅应用领域也拥有强大的市场能力。
致力于为客户提供安全、可靠、高效的能源,施耐德电气 2009 年的销售额为 158 亿欧元,拥有超过 100000 名员工。
施耐德电气助您——善用其效,尽享其能!施耐德电气在中国 1987 年,施耐德电气在天津成立第一家合资工厂梅兰日兰,将断路器技术带到中国,取代传统保险丝,使得中国用户用电安全性大为增强,并为断路器标准的建立作出了卓越的贡献。
90年代初,施耐德电气旗下品牌奇胜率先将开关面板带入中国,结束了中国使用灯绳开关的时代。
施耐德电气的高额投资有力地支持了中国的经济建设,并为中国客户提供了先进的产品支持和完善的技术服务,中低压电器、变频器、接触器等工业产品大量运用在中国国内的经济建设中,促进了中国工业化的进程。
目前,施耐德电气在中国共建立了77个办事处,26家工厂,6个物流中心,1个研修学院,3个研发中心,1 个实验室,500 家分销商和遍布全国的销售网络。
施耐德电气中国目前员工数近22000 人。
通过与合作伙伴以及大量经销商的合作,施耐德电气为中国创造了成千上万个就业机会。
施耐德电气能效管理平台凭借其对五大市场的的深刻了解、对集团客户的悉心关爱,以及在能效管理领域的丰富经验,施耐德电气从一个优秀的产品和设备供应商逐步成长为整体解决方案提供商。
今年,施耐德电气首次集成其在建筑楼宇、IT、安防、电力及工业过程和设备等五大领域的专业技术和经验,将其高质量的产品和解决方案融合在一个统一的架构下,通过标准的界面为各行业客户提供一个开放、透明、节能、高效的能效管理平台,为企业客户节省高达30%的投资成本和运营成本。
KTKE AT100磁性伸缩液位变送器
K-TEK磁致伸缩液位变送器(AT100/AT200)操作手册一:介绍K-TEK磁致伸缩液位变送器广泛用于工业各种容器的液位精确测量。
二,环 境 要 求环境温度范围: -40 到 +150F环境湿度范围:0 到 100%R.H(相对湿度)三,安 装注意:当采用预压紧工艺连接接头时,K-TEK厂家发货时,带有一套TEFLON垫圈和一套不锈钢垫圈,TEFLON垫圈仅用于低压应用,对于高温工况,必须使用不锈钢垫圈。
3.1,接线电气连接接头为1/2”NPT螺纹连接,18G 屏蔽电缆。
4-20MA回路与变送器请按下图连接端子+:24VDC(+14VDC 最小 到 +36VDC最大)端子-:公共端接地螺丝:接地端3.2,液位输出标定3.2.1,使用按钮手动标定设定4MA输出点: 把浮子移动到0%液位及零位液位位置,同时按▲▼键 1秒种,按▼键1秒钟,输出信号为4MA 设定20MA输出点:把浮子移动到100%液位及满量程液位位置,同时按▲▼键 1秒种,按▲键1秒钟,输出信号为20MA注意:此标定步骤可根据实际要求,多次重复使用3.2,2, 带有LCD液晶显示面板的设置菜单。
设定4MA输出点:在CAL 菜单下,进入LRV(下限值) 菜单,输入数值,无须移动浮子4MA输出点将被设定。
设定20MA输出点:在CAL 菜单下,进入URV(上限值) 菜单,输入数值, 无须移动浮子20MA输出点将被设定。
3. 3:反向设定3.3.1,如果采用安装方式进行反向设定,步骤如下●拆除电子模块固定螺丝,并取出电子模块。
●找出带有插座的黑白导线●将插座旋转180度后,插上插座●重新安装上电子模块3,3,2:反向标定●调整50%液位点(±10%)同时按▲▼键 1秒种,进入标定方式,按▼键1秒钟,设定4MA输出●调整液位到新的量程点同时按▲▼键 1秒种,进入标定方式,按▲键1秒钟,设定20MA输出●调整液位到新零位点同时按▲▼键 1秒种,进入标定方式,按▼键 1秒种,设定4MA输出●第二次调整液位到新的量程点同时按▲▼键 1秒种,进入标定方式,按▲键 1秒种, 设定20MA输出编 程 流 程 图3.4:模拟量输出的设定仅用于双浮子变送器的设定(同时测量总液位和界面液位),在SET菜单下,通过CFG菜单,进入PV=菜单选项。
K-TEK AT200 智能阀门位置传感器说明书

FEATURES∙ High Accuracy .01 % of Full Scale with PatentedMagnetostrictive Sensing Technology∙ No Direct Connection Between Valve Stem and Transmitter∙ Microprocessor Based∙ Simple Calibration: Pushbutton or HART Protocol ∙ Never Requires Recalibration∙ Dual Compartment Housing with Separate Field Terminal Compartment ∙ Field Replaceable Module ∙ Built-in RFI/EMI FilterDESCRIPTIONThe AT200 Valve Positioner is a compact, high accuracy valve position transmitter that uses K-TEK’spatented Magnetostrictive sensing technology. In the valve positioning application, the transmitter is bolted to the yoke of the actuator with two (2) mounting brackets that are supplied with the transmitter. A third bracket is secured to the stem con-nector. This bracket holds the magnet that provides the signal to the transmitter. The clearance between the magnet and the sensing tube of the AT200 is approximately 1/4” (6.35mm). This dimension is not critical and can vary slightly along the length of the transmitter. The magnet should not contact the sensing tube at any point in its travel. The brackets supplied with the transmitter do not include mounting holes. These will be drilled in the field to accommodate the various sizes of actuators that will be encountered. The transmitter is calibrated in place by using either the integral pushbuttons or LCD. The vertical alignment of the transmitter is not critical and the zero and span can be set anywhere along the active portion of the transmitter. There is an unusable range of 2” (50.8 mm) at the transmitter and 3.5” (88.9 mm)on the bottom end of the sensing tube.SPECIFICATIONSElectronic TransmitterHousing Type Explosion Proof Powder Coated Cast Aluminum, Dual Compartment Standard Optional 316L Stainless Steel, Dual Compartment Electrical Connection 1/2” FNPTMounting Includes magnet with valve stem bracket and two (2) activator yoke mounting brackets Measuring Range 0.5 - 30 ft. (0.15 - 9.1 m)Repeatability 0.005% of full scale or 0.015”, whichever is greater Non-Linearity 0.01% of full scale or 0.35”, whichever is greater Accuracy 0.01% of full scale or 0.050”, whichever is greater Loop Supply Voltage 13.5 to 36 VDCPolarity Protection Diode in series with loopOutput Standard 4-20 mAdc; Manual field calibration via pushbuttons;Optional: HART protocol, Honeywell DE, Foundation Fieldbus ITK4.01 Compliant Dampening Field Adjustable by means of pushbuttons. Range: 0.1 to 36 seconds Burnout Jumper selectable upscale (21 mAdc) or downscale (3.6 mAdc) Temperature -40 to 170°F (-40 to 77°C) ambient Humidity 0 to 100% R.H., non-condensingSensor Tube Material 316L Stainless Steel standardApprovals FM Factory Mutual Research Corp and CSA Canadian Standards Association Hazardous XP/ I /1/ ABCD / T6; DIP / II, III / 1 / EFG / T6IS / I / 1 / CD / T4—ELE0001 / A [excludes RI (secondary analog output) & Honeywell DE option] NI / I / 2 / ABCD / T4 Type 4X ATEX:Flameproof: II 1/2 GD EEx d IIC T6 T80°C; 02 ATEX 132659 Intrinsically Safe: II 1/2 GD EEx ia IIB T6; 02 ATEX 132658 [excludes RI secondary analog output) & Honeywell DE option]Ingress protection classification: IP67OPTIONS∙ Local Indication with scrolling LCD Display∙ HART Protocol Output ∙ Honeywell DE Output∙ Foundation Fieldbus Output ∙ Glass Viewing Window ∙ 316L SS Enclosure∙21-Segment Strapping TableAT200 Valve PositionerORDERING INFORMATION AT200/a/b/c/d/e/f/g/h: /a Mounting B Bottom Connected Electronic Housing BW Bottom Connected Electronic Housing with Window cover T Top Connected Electronic Housing TW Top Connected Electronic Housing with Window Cover /b Transmitter Configuration L Standard Local Transmitter Process Temperature up to 200°F (93°C) /c Transmitter Housing A Standard Dual Compartment Aluminum Housing S Dual Compartment Stainless Steel Housing /d Probe Type R1 5/8” OD Probe Standard /e Electronic Module with One Analog Output X None M4A One Level, LCD Indicator. HART Protocol or Honeywell DE Protocol Default is HART Add “D” suffix to module option for Honeywell DE (class 0 support) Add “F” suffix to module option for Foundation Fieldbus ITK 4.01 compliant Add “S” suffix to module option for 21 segment strapping table (not available with “D” suffix) /f Second Analog Output (Hart protocol only) X None RI Second Electronic Module with One Analog Output and LCD Indicator Notes: 1. Available only with HART Protocol module M4A 2. Housing type will be the same as primary transmitter housing (/c above) /g Approvals FM Factory Mutual and CSA Canadian Standard Association CEX ATEX Flameproof, NEPSI CEI ATEX I.S., NEPSI /h Measuring Length ML Specify the measuring length in inches or mmAvailable Accessories:VP: Valve Positioning Transmitter (This ordering code is required to order AT200 with positioning capabilities)MGT: Magnet Assembly (includes magnet with valve stem bracket and two (2) actuator yoke mounting brackets) Note: This accesory is required . Please specify the following: Valve Type/Size, Actuator Type/Size, and Valve Stem length and O.D. dimensions.VI-Transmitter: Vibration Isolator (One Isolator includes: one (1) rubber grommet one (1) split ring collar and one (1) mounting bracket)M20 ISO Fitting: M20 Female Electrical Connection05390036 ActuatorMagnet AssemblyExample Installation: AT200 Valve Positioner and Hydraulic Control ValveMagnetMounting BracketsPrairieville, Louisiana 70769 USA Telephone: +(1) 225-673-6100 AT200VP-0202-1 Rev e (08-2010)For latest version of this data sheet, visitEmail:******************Website: 。
AT100安装调试操作手册解析
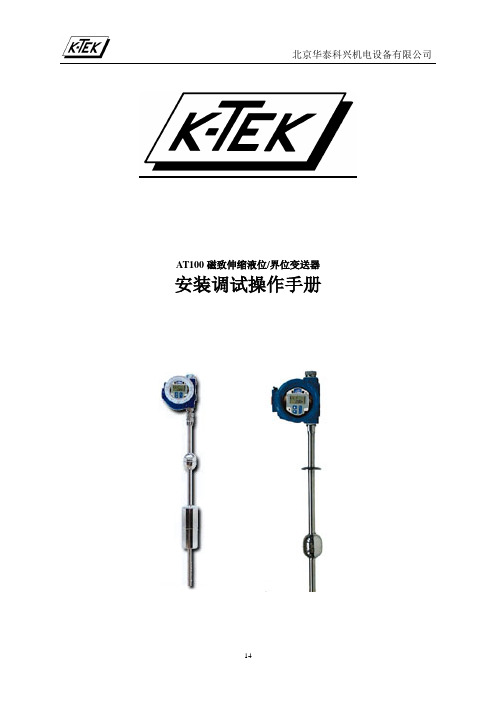
AT100磁致伸缩液位/界位变送器安装调试操作手册目录1. 概述 (3)2. 存放 (3)3. 安装和启动3.1 接线 (4)3.2 液位输出标定 (4)3.2.1 通过按钮标定 (4)3.2.2 通过LCD设置菜单标定 (4)3.3 反安装3.3.1 如果倒置安装 (4)3.3.2 倒转标定的步骤 (5)3.4 挑选一个主要变量 (5)3.5 挑选测量所用的工程单位 (5)3.6 挑选温度单位 (5)3.7 温度输出标定 (6)3.8 液位偏移 (6)3.9 阻尼 (6)3.10 跳线设定 (6)3.11 温度重置 (6)4. 通信选项4.1 HART协议界面选项 (7)4.1.1用A 268 罗斯蒙特通讯器或等同设备 (7)4.1.2 用A 265 罗斯蒙特通讯器或等同设备 (7)4.2 HONEYWELL DE 协议 (7)4.2.1 协同性和适应等级 (7)4.2.2 操作模式 (7)5. 体积计量表5.1 计量表是如何工作的 (7)5.2 设定(或重设)计量表 (8)5.3 设定输入模式(自动或手动) (8)5.4 设定计量表点 (8)5.5 计量表用法注意事项 (9)5.6 存储/载入一个计量表 (9)5.7 基于体积设定电流输出 (9)6. 故障处理信息6.1 确认变送器正确上电 (9)6.2 确认电流输出稳定 (10)6.3 起始液位调节 (10)7.附录A7.1 接线图 (11)7.2 典型回路接线图 (13)LCD操作菜单 (14)一、概述K-TEK AT100变送器在世界范围内广泛应用于过程容器的精确液位测量。
高精度和免维护成为选择这种产品的两个重要原因。
拥有温度高达427℃和压力达207bar的可选等级。
K-TEK磁致伸缩液位变送器几乎适合所有的应用条件。
HART和HONEYWELL DE通讯协议选项使AT100和大多数的控制系统可以更加方便的进行数字连接。
内置LCD可以提供4-20mA,百分比和其他工程单位显示。
AT200磁致伸缩液位计安装调试操作手册

AT200磁致伸缩液位/界位变送器安装调试操作手册目录1. 概述 (4)2. 存放 (5)3. 安装和启动3.1 接线 (5)3.2 液位输出标定 (5)3.2.1 通过按钮标定 (5)3.2.2 通过LCD设置菜单标定 (6)3.3 反安装3.3.1 如果倒置安装 (6)3.3.2 倒转标定的步骤 (6)3.4 挑选一个主要变量 (7)3.5 挑选测量所用的工程单位 (7)3.6 挑选温度单位 (7)3.7 温度输出标定 (7)3.8 液位偏移 (8)3.9 阻尼 (8)3.10 跳线设定 (8)3.11 温度重置 (8)4. 通信选项4.1 HART协议界面选项 (8)4.1.1用A 268 罗斯蒙特通讯器或等同设备 (8)4.1.2 用A 265 罗斯蒙特通讯器或等同设备 (9)4.2 HONEYWELL DE 协议 (9)4.2.1 协同性和适应等级 (9)4.2.2 操作模式 (9)5. 体积计量表5.1 计量表是如何工作的 (9)5.2 设定(或重设)计量表 (10)5.3 设定输入模式(自动或手动) (10)5.4 设定计量表点 (10)5.5 计量表用法注意事项 (10)5.6 存储/载入一个计量表 (11)5.7 基于体积设定电流输出 (11)6. 故障处理信息6.1 确认变送器正确上电 (11)6.2 确认电流输出稳定 (12)6.3 起始液位调节 (12)7.附录A7.1 接线图 (13)7.2 典型回路接线图 (15)LCD操作菜单 (16)1. 概述K-TEK A T200变送器(外挂于KM26液位指示器)在世界范围内广泛应用于过程容器的精确液位测量。
高精度和免维护成为选择这种产品的两个重要原因。
拥有高达800℉/427℃和3000PSI/207bar的可选等级,K-TEK磁致伸缩液位变送器几乎适合所有的应用条件。
HART和HONEYWELL DE通讯协议选项使AT200和大多数的控制系统更加方便的进行数字连接。
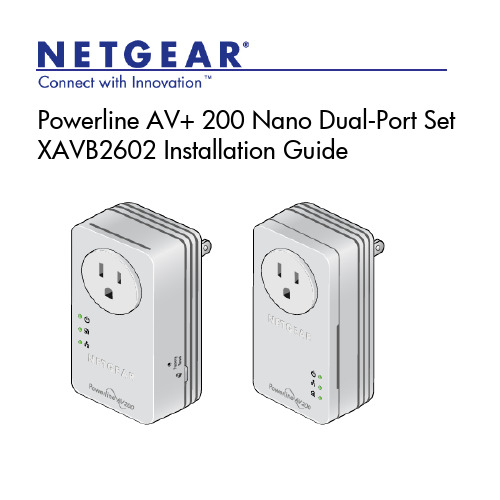
NETGEAR Powerline AV+ 200 Nano Dual-Port 设备安装指南说明书
Package Contents
Ethernet cables (2)
XAV2602 and XAV1601
Products sold in some locations include a
Powerline 200 Mbps Adapters Resource CD.
3
Your XAV2602 Powerline adapter might look like one of these:
11
Technical Support
Thank you for selecting NETGEAR products.
After installing your device, locate the serial number on the label of your product and use it to register your product at https://. Registration is required before you can use the telephone support service. Registration through the NETGEAR website is strongly recommended.
The Pick A Plug feature lets you pick the electrical outlet with the strongest link rate, indicated by the color displayed by the Powerline LED:
-
Green: Link rate > 80 Mbps (Best)
Factory Reset button Security button
同三维T200AE(T200E)安装使用说明

4.同三维录播软件下的应用 双击桌面上[同三维视频录播软件]运行同三维录播软件。
点[设置]进行参数调整。
存储:中可以设置保存的路径和文件名,以及采集的格式,一般 RMS 格式是多路集成在一 起,只有我们自动的播放器才能回放,HTML 格式可以通过网页形式回放,也可以通过其 它通用或常用播放器回放,同时也可以单个视频文件调入到非编再进行编辑。FLASH 格式 一般教学用的比较多,自动生存 EXE 文件,在任何电脑上都可以双击播放。
SDK 说明
本卡支持 Directshow 二次开发,所以 SDK 只提供 VGA 信号接口,BNC 接口采用 WDM 标 准,使用 Directshow 标准开发。下边对 VGA 信号的 SDK 讲解 运行[SDKPublish\T200AESDKs.20100429.exe]进行安装 SDK。函数说明如下: 1.将 Include 文件夹添加到您的工程目录下,打开该工程,在工程属性页中选择 C/C++,选 择"General",在属性表中" Additional Include Directories"中输入刚刚相对的"Include"目录,然后即可添加头文件,如 #include "dshow.h"。 2.将 Lib 文件夹添加到您的工程目录下,打开该工程,您可以通过如此种方式 #pragma comment(lib, "Lib/quartz.lib") 来添加所有的 lib 文件; 也 可 以 在 工 程 属 性 页 中 选 择 "Linker", 选 择 "General" , 在 属 性 表 中 "Additional Library Directories"中输入刚 刚相对的"Lib"目录; 然后在"Input"属性"Additional Dependencies"中输入各个所需 lib 文件名。 3.lib 文件分为两类: (1)debug: winmm.lib strmbasd.lib
K-TEK AT200外装安装磁慨水位传感器数据表 DS AT200-EN Rev. W说明书

AT200External Mount Magnetostrictive Level TransmitterFeatures–Certified SIL 2/3 Capable IEC 61508*–Designed to Mount Externally to K-TEK KM26 or other Magnetic Level Gauge–High Accuracy: .01% of Full Scale–Superior Piezo Ceramic Sensor (Patent # 5,473,245)–Local Indication with LCD Display–Never Requires Re-Calibration: Set It & Forget It–Dual Compartment Housing with Separate Field Terminal Compartment–Loop Powered to 50’ (15.24M) Probe Length–Total and/or Interface Level Measurement–Temperature Range: -320 to 800º F (-195.5 to 426.6ºC) with options–Field Replaceable / Upgradable Electronics Module–Built In RFI / EMI Filter–Digital Communications* Transmitters equipped with 4-20mA/HART module option only Options–Two Level Indications–FOUNDATION Fieldbus Output –Glass Viewing Window–316 Stainless Steel Enclosure –20 Point Strapping TableHigh accuracyliquid level and interface level detectionK-TEK Level ProductsMeasurement made easy1Measurement accuracy is recorded at factory ambient conditions (75o F +/-10o) using a calibration magnet. Accuracy may be further influenced by other factors such as float hysterisis, installation, process conditions and ambient conditions.2Some agency approvals may differ.-200-1000100200300400500-320o F (-196o C)-320o F (-196o C)800o F (427o C)800o F (427o C)500o F (260o C)500o F (260o C)300o F (148o C)200o F (93.3o C)200o F (93.3o C)-320o F (-196o C)-40o F (-40o C)-40o F (-40o C)-40o F (-40o C)-40o F (-40o C)-40o F (-40o C)200o F (93.3o C)Notes:1. If ambient temperatures are also below 320F (00C), then an “L” transmitter selection can be used2. The IW sensor is preferred for cryogenic insulated chambers. To use this option, chamber top must be dome or flat cap3. Cryogenic insulation recommended at these process temperatures4. Maximum probe length on L9 and L9C probes is 25ftPRINCIPLE OF OPERATION:The AT200 is based upon the magnetostrictive principle. The sensing tube contains a wire which is pulsed at fixed time intervals creating a magnetic field around the wire. The interaction of the magnetic field around the wire and the magnetic float causes a torsional stress wave to be induced on the wire. This torsional wave propagates along the wire at a known velocity, from the position of the magnetic float and toward both ends of the wire. A patented piezo ceramic sensing element placed in the transmitter assembly converts the received mechanical torsion into an electrical return pulse. The microprocessor based electronics measures the elapsed time between the start and return pulses and converts it into a position measurement which is proportional to the level of the float.AT200 DimensionsMAGNETIC FLOATASSEMBLYSENSOR WIREPIEZO-MAGNETICSENSOR CURRENT PULSESTART PULSEPrinciple of OperationTUBE LENGTH ML + 6.375”1.75”ML4”1.75”1.75”2.625”Measuring Length on AT200Measuring Length (ML)Inches xxx IN Millimeters xxxxx MMMARKINGS.5” NPT & M20NOTE: N1, N2, N3 Approvals Require Additional .75” for plug.Bottom Mount - LocalNOTE: N1, N2, N3 Approvals Require Additional .75” for plug.NOTE: N1, N2, N3 Approvals Require Additional .75” for plug.NOTE: N1, N2, N3 Approvals Require Additional .75” for plug.Bottom Mount w/cryogenic L9C extension NOTE: N1, N2, N3 Approvals Require Additional .75” for plug.D S /A T 200-E N R e v . WContact usABB Inc.17100 Manchac Park Lane - Suite B Baton Rouge, LA 70817 USA Phone: +1 225 408 0800Service: +1 225 408 0898Fax: +1 225 408 0897E-mail:******************.comServicee-mail:*******************.com ABB Inc.Industrial Automation 125 E. County Line Road Warminster, PA 18974 USA Tel:: +1 215 674 6000Fax: +1 215 674 7183ABB Engineering (Shanghai) Ltd.No. 5, Lane 369, Chuangye RoadKangqiao Town, Pudong District Shanghai, 201319, P .R. China Phone: +86 10 64231407Service: +86 21 61056421Fax: +86 10 64371913E-mail:**************.comServicee-mail:**************.com /levelNoteWe reserve the right to make technical changes or modify the contents of this document without prior notice. With regard to purchase orders, the agreed particulars shall prevail. ABB does not accept any responsibility whatsoever for potential errors or possible lack of information in this document.We reserve all rights in this document and in the subject matter and illustrations contained therein. Any reproduction, disclosure to third parties or utilization of its contents - in whole or in parts – is forbidden without prior written consent of ABB.Copyright© 2017 ABB All rights reserved3KXL142001R1001SalesService。
- 1、下载文档前请自行甄别文档内容的完整性,平台不提供额外的编辑、内容补充、找答案等附加服务。
- 2、"仅部分预览"的文档,不可在线预览部分如存在完整性等问题,可反馈申请退款(可完整预览的文档不适用该条件!)。
- 3、如文档侵犯您的权益,请联系客服反馈,我们会尽快为您处理(人工客服工作时间:9:00-18:30)。
安装调试操作手册目录1. 概述 (4)2. 存放 (5)3. 安装和启动3.1 接线 (5)3.2 液位输出标定 (5)3.2.1 通过按钮标定 (5)3.2.2 通过LCD设置菜单标定 (6)3.3 反安装3.3.1 如果倒置安装 (6)3.3.2 倒转标定的步骤 (6)3.4 挑选一个主要变量 (7)3.5 挑选测量所用的工程单位 (7)3.6 挑选温度单位 (7)3.7 温度输出标定 (7)3.8 液位偏移 (8)3.9 阻尼 (8)3.10 跳线设定 (8)3.11 温度重置 (8)4. 通信选项HART协议界面选项 (8)4.14.1.1用A 268 罗斯蒙特通讯器或等同设备 (8)4.1.2 用A 265 罗斯蒙特通讯器或等同设备 (9)4.2 HONEYWELL DE 协议 (9)4.2.1 协同性和适应等级 (9)4.2.2 操作模式 (9)5. 体积计量表5.1 计量表是如何工作的 (9)5.2 设定(或重设)计量表 (10)5.3 设定输入模式(自动或手动) (10)5.4 设定计量表点 (10)5.5 计量表用法注意事项 (10)5.6 存储/载入一个计量表 (11)5.7 基于体积设定电流输出 (11)6. 故障处理信息6.1 确认变送器正确上电 (11)6.2 确认电流输出稳定 (12)6.3 起始液位调节 (12)7.附录A7.1 接线图 (13)7.2 典型回路接线图 (15)LCD操作菜单 (16)1. 概述K-TEK AT200变送器(外挂于KM26液位指示器)在世界范围内广泛应用于过程容器的精确液位测量。
高精度和免维护成为选择这种产品的两个重要原因。
拥有高达800℉/427℃和3000PSI/207bar的可选等级, K-TEK磁致伸缩液位变送器几乎适合所有的应用条件。
HART和HONEYWELL DE通讯协议选项使AT200和大多数的控制系统更加方便的进行数字连接。
内置LCD可以提供4-20MA,百分比,和其他工程单位显示。
当用在储罐上时,考虑到高精度、低维护和合理的开销,促使用户安装KM26带可视指示并用AT200连接到DCS系统。
可选的内置20节增长表允许AT200在卧罐或球罐中提供精确的输出。
(见体积计量表第4节)K-TEK家族的AT200系列用做“浮筒替代器”。
在动态处理时大多数浮筒液位计都在操作中重复发现如下问题:大多数输出误差是由比重改变,扭波管渗漏,过程介质黏结在扭波管和转换器上产生的。
为AT200提供的新的外浮筒(KM26液位指示器)可以解决上述问题。
精度也可以实现巨大的提高。
另外,这是一个更新气动浮筒变送器的非常方便的办法。
磁致伸缩液位计可以被用于界面测量。
AT200是目前最好的液位界面测量和控制的技术。
K-TEK家族AT200系列可以提供两个独立输出:一,界面;二,总体液位。
可以适用于比重差降至0.02的情况。
常用于油水界面的测量,和其它包括酸罐,丙烷容器,除盐器和污水池等。
利用AT200系列的非接触式测量AT200可以用做阀门定位器。
在阀门尾部粘附着一块磁铁,AT200就置于阀门尾部的旁边。
AT200变送器所固有的0.01%的高精度使其可以比其它产品能更好的测量和控制阀门位置。
在进行精确控制时不需要重新标定。
AT200也可以用做设备定位器。
工业设备需要对仪器精确定位。
这可以通过磁致伸缩(非接触测量)实现。
它应用于许多器具,包括,大门,天窗,风门,液压缸等。
K-TEK有按键结构,和4-20MA的输出优势,复杂的设计结构保证了用户有简易的安装和长期的使用寿命。
AT200系列变送器的特征包括高精度0.01%满量程;简易按键标定;遗忘技术(永不需要重新标定);不受电介质,水蒸气成分,温度压力变化影响。
2. 存放如果需要,应该存放在优于安装条件的环境温度下并置于室内。
不要超出以下条件:温度范围:-40-65.5℃。
湿度:0-100% R.H. 无冷凝警告:带/SW3选项的变送器,其探头为柔性软缆,外有不蜜蜂的不锈钢护套,当把柔性软缆滩头移出不锈钢护套时,小心不要使探头受潮,并防止水分进入不锈钢护套。
3. 安装和启动3.1 接线连接导线到1/2"电器接口,连接18线规双绞线到变送器外壳。
参照所附接线图。
变送器按以下方式回路供电:VDC(+14VDC最小到+36VDC最大)# TerminalBlock+:24Block-:共同端# TerminalBlock:接地# Terminal3.2 液位输出标定本产品是一个不需要重复标定的数字变送器。
如果需要重新标定,可以通过按键或HART通讯装置(针对已选HART选项)或者LCD驱动菜单(针对已选LCD选项的装置)来改变。
3.2.1 用按键标定设定4毫安点:同时按下UP和DOWN一秒钟进入标定模式。
使浮球置于0%处按住DOWN键一秒钟设定输出为4.00毫安。
设定20毫安点:同时按下UP和DOWN一秒钟进入标定模式。
使浮球置于100%处按住UP键一秒钟设定输出为20.00毫安。
注意:上述步骤可以根据需要任意重复。
3.2.2 用LCD设置菜单标定:设定4毫安点:在CAL菜单下,进入LRV(低范围值)选项。
按SELECT改变要设定的4毫安点的值(以工程单位表示)。
设定20毫安点:在CAL菜单下,进入URV(高范围值)选项。
按SELECT改变要设定的20毫安点的值(以工程单位表示)。
注意:上述步骤可以根据需要任意重复。
3.3 反安装如果需要,变送器输出可以通过以下步骤被反转(注意:仅仅反转4-20mA输出,不是工程单位读数)3.3.1 如果倒置安装:移去固定电子模块的两个直缝螺钉。
把黑线和白线用连接器连接。
将接线器反转180度。
重置电子模块。
在倒转标定之前倒转安装。
3.3.2 倒转标定的步骤使浮球置于50%处(+或-10%)同时按下UP和DOWN一秒钟进入标定模式。
按住DOWN键一秒钟设定输出为4.00毫安。
使浮球置于新的满量程点同时按下UP和DOWN一秒钟进入标定模式。
按住UP键一秒钟设定输出为20.00毫安。
使浮球置于需要设定的零点同时按下UP和DOWN一秒钟进入标定模式。
按住DOWN键一秒钟设定输出为4.00毫安。
重设满量程点同时按下UP和DOWN一秒钟进入标定模式。
按住UP键一秒钟设定输出为20.00毫安。
3.4 选择一个主要变量(PrimAry Variable)注意:这部分仅仅适用于双浮球变送器。
对一个双浮球变送器来说,主要变量(LL1或LL2)决定着用来计算输出电流的浮球。
如果主要变量设为LL1,将由最靠近变送器外壳的浮球决定电流输出。
相反,如果PV值设为LL2,将由最远离变送器外壳的浮球决定电流输出。
设定PV在SET菜单下,进入CFG子菜单,然后找到PV=菜单选项。
按SELECT,然后按UP或DOWN循环选择LL1和LL2(选择时LCD会闪光)。
当LCD上显示您需要的选项时,再按一次SELECT确定PV值(这时将停止闪光)。
3.5 选择测量所用的工程单位本装置可以用英寸,英尺,毫米,厘米,米,或百分数来显示液位输出。
在CFG菜单下,找到EUN菜单选项。
按SELECT,然后按UP或DOWN循环选择工程单位。
当LCD上显示您需要的单位时,再按一次SELECT确定工程单位(这时将停止闪光)。
3.6 选择温度单位注意:这部分只针对有温度输出选项的变送器。
温度值将以摄氏度或华氏度显示。
在CFG菜单下,找到EUN TMP菜单选项。
按SELECT,然后按UP或DOWN选择摄氏或华氏。
当LCD上显示您需要的单位时,再按一次SELECT确定温度单位(这时将停止闪光)。
3.7 温度输出标定注意:这部分只针对有温度输出选项的变送器。
本装置出厂时标定到有±0.5℃精确度,大约-200~300℃的测量范围。
要对自定义量程的正确标定和调整可以通过以下步骤:设定低温微调(LTT)把传感器(位于变送器探头的底部)置于温度范围低端的温度下。
在CFG菜单下,找到LTT选项。
按SELECT来改变LTT到现在传感器的温度。
设定高温微调(UTT)把传感器(位于变送器探头的底部)置于温度范围高端的温度下。
在CFG菜单下,找到LTT选项。
按SELECT来改变UTT到现在传感器的温度*见手册最后用一个Decade Box模拟温度。
**必须在厂家标定可接受的10℃以内微调。
3.8 液位偏移如果需要,液位输出可以与厂家标定偏移。
改变液位偏置找到L1O(Level 1 Offset液位1偏移)菜单选项,按SELECT改变需要的液位偏移值(以工程单位表示)。
对于双浮球装置,液位2可以在L2O菜单选项里通过上述步骤偏移。
3.9 阻尼输出阻尼可以如下方式改变(厂家默认设置是 .8 Sec)同时按住SELECT和UP键一秒可使阻尼增加一倍。
同时按住SELECT和DOWN键一秒可使阻尼减少一倍。
注意:阻尼值范围从 .1Sec到 36Sec。
3.10 跳线设定跳线位于电子模板的左上角,可以设置如下:报警:(左跳线)当有信号丢失,或变送器故障时,把跳线置于低位使输出变为21.00mA。
当有信号丢失,或变送器故障时,把跳线置于低位使输出变为3.62mA。
注意:为了使变化生效,变送器电源需要循环开关。
写保护(右跳线)当跳线在低位时,变送器配置不可以通过LCD或手持通讯器改变。
3.11 温度重置如果需要,本装置的温度设定(LTT和UTT)可以被重置为出厂时默认标定,只需要找到TMP RSET菜单选项,按SELECT就可以了。
4. 通讯选项4.1 HART协议界面选项K-TEK变送器可以订购有HART协议选项的,它在厂家作为电子生产线的一部分进行装配。
当变送器有HART协议选项时,变送器可以和以下通讯器兼容。
4.1.1 用A 268 罗斯蒙特通讯器或等同设备由于K-TEK变送器不是大家所熟知的罗斯蒙特产品,所以268就在GENERIC模式里提上日程。
这个模式支持有限数量的命令。
主要如下:读写输出高低范围值。
读写输出阻尼值。
读写变送器标识,描述,信息,日期等。
执行输出数字微调。
测试循环输出。
设置轮询地址。
4.1.2 用A 275 罗斯蒙特通讯器或等同设备在K-TEK产品设备描述内没有安装的A275将默认GENERIC模式。
在这个模式里,可用命令和用268通讯器的一样。
4.2 HONEYWELL DE 协议4.2.1 协同性和适应等级HONEYWELL DE协议选项针对精巧变送器利用了HONEYWELL专有的数字增强协议。
适应登记支持如下:DCS配置应该设为Class 0, 4字节模式。
0:以脉冲形式连续发送下列参数:ClassPV1:主要变量;LEVEL #1 in%PV2:次要变量(针对双浮球);LEVEL #2 in%PV状态:好,临界,坏4.2.2 操作模式具有HONEYWELL DE 协议选项的K-TEK变送器可以用两种方法操作,这两种方法可以通过本装置上的设置菜单选择。
