SP30证卡打印机使用手册
SP30 Quick reference 说明书
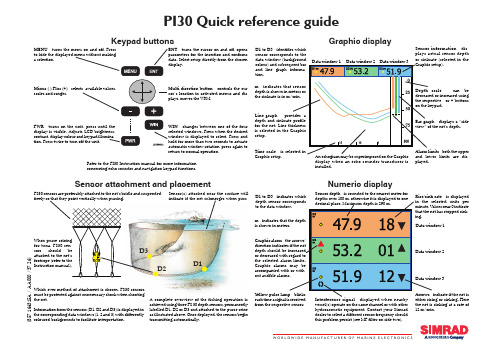
(857-164315A / A A 000 /37-26)W O R L D W I D E M A N U F A C T U R E R O F M A R I N E E L E C T R O N I C SPI30 Quick reference guideMENU - turns the menu on and off. Pressto hide the displayed menu without makinga selection.Keypad buttonsGraphic displaySensor attachment and placementNumeric displayMulti-direction button - controls the cur-sor’s location in activated menus and dis-plays, moves the VRM.ENT - turns the cursor on and off, opens parameters for the insertion and confirms data. Select setup directly from the chosen display.Minus (-) Plus (+) - selects available values, scales and ranges.PWR - turns on the unit, press until the display is visible. Adjusts LCD brightness, contrast, display colour and keypad illumina-tion. Press twice to turn off the unit.WIN - changes between one of the four selected windows. Press when the desired window is displayed to select. Press and hold for more than two seconds to actuate automatic window rotation, press again to return to normal operation.Refer to the PI30 Instruction manual for more information concerning echo sounder and navigation keypad functions.D1 to D3 - indicates which depth sensor m Y from the respective sensor.Sensor depth - is rounded to the nearest meter for Rise/sink rate - is displayed units per the net is sinking at a rate of 12 m/min.Interference signal - displayed when nearby vessel(s) operate on the same channel or with other hydroacoustic equipment. Contact your Simrad dealer to select a different sensor frequency should this problem persist (see MP filter on side two).Graphic alarm depth should be the selected Graphic alarms scale - can be - displays a “side - both the upper limits are dis-played.Time scale - is Graphic setup.display when an echo sounder transducer is installed.Line graph - depth and for the net. Line is selected in the setup.D1 to D3 - identifies which sensor corresponds to the data window (background and line graph tion.m - indicates Sensor information - dis-plays actual sensor depth or sinkrate (selected in the PS30 sensors are preferably attached to the net’s bridle and suspended freely so that they point vertically when pursing.When purse for tuna, PS30 sors should Which ever method of attachment is chosen, PS30 sensors must be protected against unnecessary shock when shooting the net.Sensor(s) attached near the surface will indicate if the net submerges when purs-Information from the sensors (D1, D2 and D3) is displayed in the corresponding data windows (1, 2 and 3) with differently coloured backgrounds to facilitate interpretation.A complete overview of the fishing operation isachieved using three PS 30 depth sensors, permanentlylabelled D1, D2 or D3 and attached to the purse seine as illustrated above. Once deployed, the sensors begintransmitting automatically.Negative charging/fastening lug (-)Positive charging/fastening lug (+)Status displayInstallation / Configuration / Receiver parametersSensor maintenance, programming and calibrationCharging and testing- software version - error message - channel- Black = break- Red = short circuit - Y ellow = OKband by pressing the respective - or + buttons on the keypad (wait for the unit to update the display). The graph represents background noise and signal strength of the frequency band selected.from an inter-faced GPS or integrated echo sounder if the unit is con-nected to a transducer.The Status display sensor data, signal olds and of present conditions and the for reliable signal includes cable gram version, tion if the ment is connected.Defines sensors 1 to 3 and keeps track of their attachment the net.AGC gain provide range.MP filter - interference ment configured where the in use .Max shooting speed - compensation for doppler shift when shooting the net. Maximum speed may be limited by channel separation. Effective only when the vessel is in motion.Detection threshold - increases the DT if false sig-nals are detected on a chan-nel where a sensor is in use. A high DT indicates that only the strongest signals will be received. A low DT may provided a longer range under favorable conditions.MPF level - is activated when the MP Filter is ON. Reduce the MPF level value in small steps to increase the filter’s effectiveness. Avoid reducing the level so low that the sensors’ signals are also blocked.Select the channel shown on the sensors’ labels and/or the visual LED identification signal dis-Sensor filter :- OFF = no effect (fastest update of data)- Light = average of the last four pings- Heavy = average of the last eight pingsThe PI30 must receive at least four pins when first powered up to gener-ate data. Should one or two pings be missing, the predicted value will be displayed in grey. If the signal is lost, *.* is displayed.Calibration - is performed on board the vessel to set the sensors’ reference levels to one meter as follows: Suspend the sensors over the side of the vessel individually or together at a depth of one meter, the draft plus one meter or the reference level that is to be defined as one meter. Once the sensors’ depth readings have stabilised, set the Calibration parameter to YES. Sensor calibration takes one minute and the data will be temporarily displayed as grey during this time. Once the process is complete, the data will again be displayed in black with updated offset values and a depth of one meter. Note: Sensors not submerged in saltwater will not be calibrated.Charging - connect the red and black alligator clamps to the positive and negative fastening lugs labelled “+” and “-” respectively. Check that the charging lamp on the sensor charger is illuminated and that the sensor being charged blinks every four seconds. If it does not blink in this manner (indicating charging mode), the battery will not be fully charged. Note: Never charge a sensor with wet rope in contact with the fastening lugs.A fully depleted sensor (representing about 30 hours of continuous service) must be charged for at least 16 hours to restore its battery to full capacity. Optimal charging temperature is from +10ºC to 25ºC. Never charge sensors at temperatures below freezing.Warning! The use of chargers not specified by Simrad may lead to personal injury and/or material damage.T esting - touch the sea water detector (serial no below 300: touch the cover) and a fastening lug at the same time. This will cause the sensor to switch ON and identify the channel it transmits on with a series of blinks (see the Instruction manual) and begin sending data if it is not programmed differently.• If the sensor does not blink when switched ON, it indicates a depleted battery and should be charged for a few minutes and tested again. If it blinks and begins to send data, it should be charged for at least 16 hours. • If the sensor continues to just blink when switched ON it indicates a close to empty battery. Charge the sensor for 10 minutes and test. If it resume normal operation, charge for ~ 16 hours.• If the sensor repeats the start up blinking sequence with a four seconds interval, it indicates fault with the depth cover. Contact your nearest Simrad dealer.Programming - of sensors is accomplished using a PC connected to their charging/fastening lugs. T o program a sensor both the software, Simrad number: 889-24037 and a special cable number: 380-204728 are required. The dealer is normally respon-sible for programming the various channel selections and other functions.Maintenance - rinse sensors with fresh water to avoid depleting their batteries after use. A saltwater film on the exterior of a sensor can complete the circuit from the sea water detector to a fastening lug. This phenomenon may also cause the red LED on the sensor charger not to illuminate when a sensor’s battery is deeply depleted. T o remedy this problem, wash the sensor with fresh water and wait several minutes. The sensor may then be Sensor 1, 2 or 3Channel 1 to 30Other depths - if the sensor is programmed to start at a depth of 2 m, it should be suspended at 3 m during the calibration procedure. Cali-brate the sensor as described and note the offset values. Reduce the offset values by 2 m after calibration...Sea water detector(serial no 300 and above)。
SP30CN专网版调机手册
SP30CN专网版调机手册一.说明:SP30CN专网交换机版本(DT_SP30CN_SBME_O_V1.11ZW001)是在(DT_SP30CN_SBME_V1.11NBI009)的基础之上生成。
SP30CN专网人机台程序(DT_SP30CN_MMP_O_V1.11ZW001)是在(DT_SP30CN_MMP_O_V1.11NBI009)的基础之上生成。
除保留有它的全部功能外,还增加了适用于专网的一些特殊功能。
本版本在处理机的配置,双机数据的配置及交换程序加载参数与SP30CN独立BM完全相同。
它是为满足专网交换机在接口、信令、编号、计费等方面的特殊需求而开发,适用于专网内的端局或小交换机,也可用于公网内的小交换机。
工程调测时,请参阅SP30CN有关的资料及《SP30CN专网用户手册》。
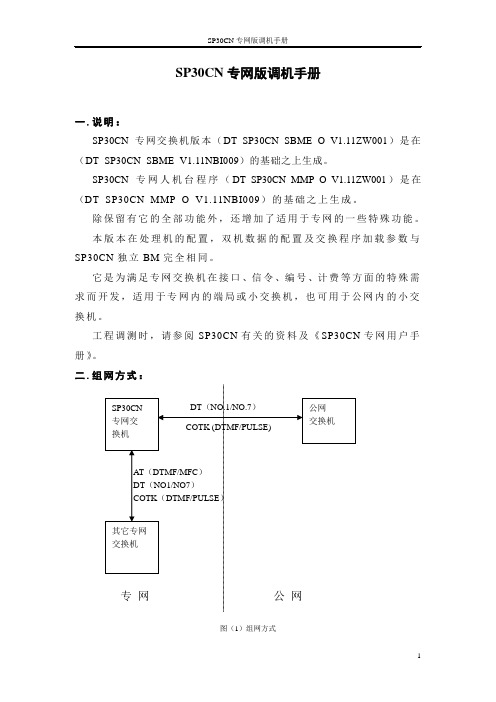
二.组网方式:图(1)组网方式1.与公网连接:与公网连接有两种方式:DT连接与COTK连接。
若采用DT连接,则本局用户与公网本地网等位编号,占用公网号码的资源,采用(DOD1+DID)方式入网,局间信令采用NO.1或NO.7。
专网的局常要求内部呼叫使用内部号码,局外呼叫使用大号,这样一来,本局用户可做成群用户,内部呼叫使用群内号码(即内部号码),出入局呼叫才使用公网号码。
若采用COTK连接,比较容易实现。
有的地区电信局因各种原因无法提供2M接口,这样就可使用COTK连接。
公网交换机不增加任何设备,也不占用公网号码资源,采用(DOD2+DID)方式接入,只需向电信局申请若干用户线,连到本局COTK即可。
对于公网交换机来说,COTK连到它的用户线和普通话机连它的用户线,是相同的,没有任何区别。
这些用户线的号码就是本局的引示号,入局呼叫时,它局用户只需拨叫COTK所连用户线对应的号码。
图(2)COTK与对方局的用户电路相连。
注意:对于公网交换机来说,它的用户线连接COTK和连普通话机无任何区别。
出局呼叫:拨公网接入码,占用COTK,一般不听二次拨号音,连续拨被叫号码。
Smart证卡打印机中文使用说明书

2.1.7 页版工具列 2.1.7.1 正面页版 --------------------------------------------------------------------------------------- 19 2.1.7.2 背面页版 --------------------------------------------------------------------------------------- 19 2.1.7.3 设于彩色页版 --------------------------------------------------------------------------------- 19 2.1.7.4 设于黑色页版 --------------------------------------------------------------------------------- 19 2.1.7.5 设于护膜页版 --------------------------------------------------------------------------------- 20 2.1.7.6 检视彩色页版 --------------------------------------------------------------------------------- 20 2.1.7.7 检视黑色页版 --------------------------------------------------------------------------------- 20 2.1.7.8 检视护膜页版 --------------------------------------------------------------------------------- 20 2.1.7.9 翻转护膜页版 --------------------------------------------------------------------------------- 20
Datacard SP30 Plus卡机使用说明

DataCard SP30 Plus 人像证卡打印机使用说明请用户在使用前阅读本说明后再进行该系统的软硬件操作2010年11月印制第一部分 SP30 Plus打印机的硬件连接与驱动程序的安装一、打印机的硬件连接1、如何开盖与安装清洁滚轴2、如何安装色带3、如何装载卡片4、如何连接电源二、SP30 Plus系列打印机驱动程序的安装3、电脑会自动搜索新硬件,自动安装新硬件驱动。
4、待屏幕右下角出现图标时,即完成打印机驱动的安装。
第二部分 使用打印机工具栏一 、调出打印机工具栏双击电脑任务栏右边的打印机图标,调出打印机工具栏。
状态状态一栏提供打印机的一般设置,日常维护清洁,打印样卡和磁条卡,打印机暂停等功能。
点击-高级设置,进入打印机打印头设置,图如下。
二、打印头设置三、色彩设置四、边到边设置五、打印次数及耗材打印次数记录打印机的入卡数量、卡片完成数量、拒卡数量及失卡数量。
耗材如下图:第三部分 使用打印机诊断程序当打印机出现故障并需要更改打印机参数时,用户可通过使用打印机诊断程序进行修改,以下为使用打印机诊断程序修改打印机参数的步骤。
具体修改哪个参数、修改数值为多少,当打印机需要调整参数时,请与供经销商联系,或按经销商电话指导进行,请用户不要擅自修改。
打印机诊断程序的安装1、将驱动光盘放入光驱中,待弹出的安装界面中选择打印机支持(p)…,再点击打印机诊断(s)按钮,如下图2、回车,或者单击点Next>3、回车,或者单击Finish,完成安装。
运行诊断程序安装完打印机诊断程序后,在桌面上找到打印机诊断程序的快捷方式图标,双击该图标,运行打印机诊断程序。
运用诊断程序修改打印机参数的步骤1、启动打印诊断程序,进入程序界面。
选择打印机,只安装一台Datacard打印机的用户,点击OK直接进入诊断程序主界面。
安装多台Datacard打印机的用户,在下拉菜单中选择你需要修改参数的打印机,点击OK即可。
打印机诊断程序主界面如下图,图中灰色和绿色的方块为打印机传感器工作状态指示标志。
DataCardSP35证卡打印机简易操作说明

DataCardSP35证卡打印机简易操作说明DataCard SP35证卡打印机简易操作说明一.硬件安装1.按包装箱内图示,把清洁轮套入轴内,打开机器盖子,放入指定位置;2.按包装箱内图示,打开机器盖子,拿出色带架,把色带套入色带架。
再把色带架放回原来正确位置;3.把卡放入卡盒;4.接线:首先把USB线两头分别与电脑及打印机连接好,然后再接通电源。
关机时,请先断开电源,后再拔USB线。
二.驱动安装1.接通电源后,等电脑自动找到新硬件(DataCard SP35证卡打印机)。
把驱动光盘放入光驱。
按电脑提示完成驱动安装。
(注:安装驱动一定要让电脑自动找到新硬件,不能手动运行setup去强行安装);2.安装好重新启动计算机后,在电脑屏幕右下角会自动生成一个打印机图标,在连接正常的情况下图标显示为蓝色。
三.维护保养1.为了防止灰尘对机器使用寿命的影响,不使用时,请用布或罩子把打印机盖起来;2.清洁工具的使用:①清洁笔是用来擦打印头的,一般一个月擦一次,擦时轻轻的往一个方向擦;②清洁轮如果脏了,没粘性了,请及时更换;③清洁卡是用来清洁走卡通道的。
双击电脑屏幕右下角蓝色打印机图标,选择清洁打印机,按提示步骤完成操作。
(注:清洁卡是含酒精的一次性耗材,酒精一挥发就不能再用了。
建议开包后,及时使用,可多清洁几遍。
)四.简单故障1.如果遇进卡不畅的情况,请用清洁卡及时清洁一次,或用手轻推卡片;2.如遇色带断带,可用胶带粘住或重新卷紧。
然后双击电脑右下角打印机图标,在弹出的对话栏中点击高级---打印头---把打印头的左右值修改一下,范围在(135—150)之间,如接近150可向下修改为145.如低于130值,可向上修改为135.修改完成后点击保存.打印色彩调节步骤:(根据需要调节)1.首先把DAT A CARD SMART DRIVER光盘放入驱动器。
2.打开光盘中Support文件夹,再打开Diagnostics文件夹,运行setup,安装完成后,在桌面会自动生成一个像打印机的图标,名称为smatr driver Diagnostics。
Polaroid P3500S单面身份证打印机指南说明书
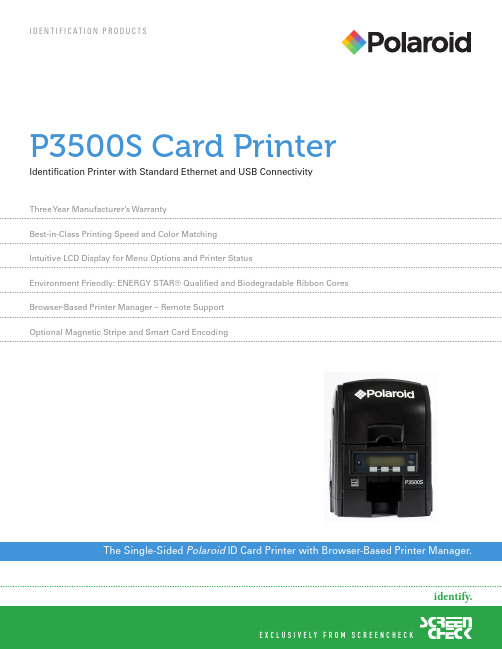
P3500S Card Printer Identification Printer with Standard Ethernet and USB ConnectivityThree Y ear Manufacturer’s WarrantyBest-in-Class Printing Speed and Color MatchingIntuitive LCD Display for Menu Options and Printer StatusEnvironment Friendly: ENERGY STAR® Qualified and Biodegradable Ribbon Cores Browser-Based Printer Manager – Remote SupportOptional Magnetic Stripe and Smart Card EncodingCopyright © 2010 All Rights ReservedPolaroid , Polaroid & Pixel, and SecureShield are trademarks of PLR IP Holdings, LLC, used under license. All other trademarks are the property of the respective owner, who has not sponsored, endorsed or approved this product. PLR IP Holdings, LLC does not manufacture this product or provide any Manufacturer’s Warranty or support.1-866-ID PHOTO Color QualitysRGB color matching produces unparalleled print qualityMag and Smart Card OptionMagnetic stripe and dual contact/contactless smart cardsEnvironment FriendlyENERGY STAR® qualified and uses biodegradable ribbon coresRemote SupportEmbedded Linux OS and Printer ManagerP3500S Card PrinterThe PolaroidP3500S brings plastic card printer manufacturing back to the United States—print quality, print speed, and reliability are unquestioned with this best-in-class printer. It features standard Ethernet and USB connectivity and an LCD display that indicates printer status and easy-to-navigate menu options. The P3500S has an embedded operating system and a browser-based Printer Manager that is accessible through Ethernet or USB connectivity which allows for integration into just about any application or IT environment. The P3500S printer is ENERGY STAR® qualified because it consumes less power, includes an automatic power-down button, and uses biodegradable ribbon cores. New integrated printing technology ensures the screen color closely matches the printed card colors. Get crisp, clean printing results consistently from every card.。
硕方标牌机SP300、SP600说明书
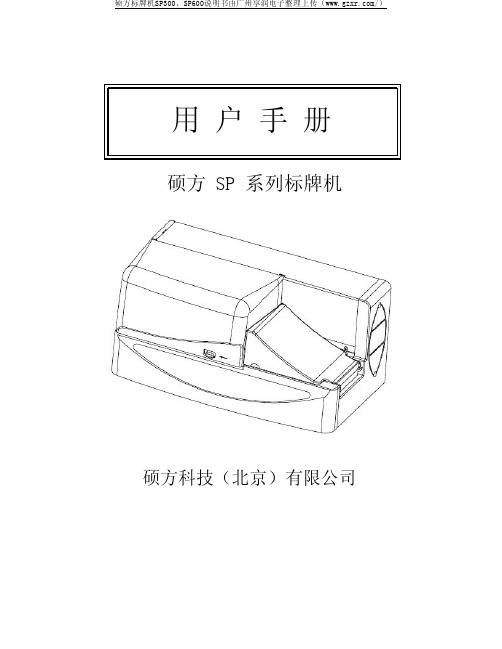
硕方标牌机SP300、SP600说明书由广州享润电子整理上传(/)硕方 SP 系列标牌机硕方科技(北京)有限公司硕方标牌机SP300、SP600说明书由广州享润电子整理上传(/)目录序言 (1)第一章产品简介1.1 附件·······················1.2 SP600 各部件名称·················1.3 SP300 各部件名称·················1.4 重要的安全信息··················第二章硬件安装2.1 安装电源线及 USB 线················2.2 电源的开关····················2.3 安装色带·····················2.4 安装打印标牌···················2.5 设定打印标牌厚度·················2.6 安装打印贴纸···················2.7 清洁辊的拆卸···················2.8 安装清洁带····················2 5 6 791011 1316172021第三章软件安装3.1 SP600 的操作面板 (23)3.2 SP300 的显示面板 (25)3.3 软件安装使用 (26)第四章维护4.1 问题解答·····················4.2 信息提示·····················4.3 日常维护·····················4.3 打印介质的清洁和保存···············27 293132第五章附录5.1 主要性能 (33)1硕方科技SUPVAN 序言序言我们很荣幸能邀请您加入,并成为使用硕方 SP 系列标牌机的一员。
Evolis Zenius塑料卡打印机说明书
SETTING NEW STANDARDS IN CARD PRINTINGWith Zenius , Evolis unveils its new conception of plastic card personalization, with a clear focus on the user and unmatched printing quality. Zenius, the fi rst eco-designed printer, stands out with its optimized features and a compact and sleek design.Zenius benefi ts from the new Evolis High Trust ® consumables and the Evolis Premium Suite ® software to provide ease of use and performance levels that set the new benchmark in the market.The Evolis Premium Suite ® software, at the core of all new Evolis printers. This software architecture supplies the Print Center, a printing and confi guration system that monitors all communications between the printer and the user. The printer’s operation can be managed entirely right from the user’s interface and through pop-up notifi cations on the printing status, ribbon availability and maintenance tasks. This Printer Manager also offers direct access to the Evolis Web-based Support Center, available on a 24/7 basis.The Evolis High Trust ® range of consumables is specifi cally designed to deliver premium graphic performances and ease of use. Installing the ribbon cassette is a simple one-step process, and with its integrated chip, Zenius instantly identifi es the ribbon type and confi gures all settings accordingly.ZENIUS: WHEN INNOVATION MEETS EFFICIENCYZenius comes with two major innovations:Zenius is the one-stop solution to print high-quality single-sided cards, in monochrome or color, and encode technology cards, in single or small runs, for a variety of applications: employee badges, access control badges, payment cards, transportation passes, and more.EASY-TO-USEZenius makes it easy for you every step of the way! Discover a wealth of advanced features loaded in a contemporary yet compact design.SCALABLEEquipped with state-of-the-art printing technologies, the Expert version of Zenius can be upgraded onsite with multiple encoders. These fl exible features ensure that you will always be in line with your current and future requirements in plastic card printing.COMPACT, LIGHTWEIGHT AND SILENTWith a sound level of just 46 dB (A) and its amazingly small size, Zenius can beaccommodated in virtually any environment, be it a welcome desk, a sales counter, or an offi ce desk. Zenius weighs 3.3 kg (7.3 lbs) and is the lightest printer in its category.ECO-DESIGNEDZenius has earned the coveted ENERGY STAR certifi cation and complies with thereduced energy consumption guidelines from the ErP European Directive.SIMPLEC ard feeder and outputtray located at the front of the printer M anual feeder C ontrol panel with LEDsFLEXIBLED irect access to portsO nsite integration of specifi c modules* M agnetic and smart card encoders can be combined within the same printer**Expert version and abover d P r i n t e r. A l l r i g h t s r e s e r v e d . A c t u a l p r o d u c t (s ) m a y d i f f e r f r o m i n f o r m a t i o n c o n t a i n e d i n t h i s d o c u m e n t . A l l i n f o r m a t i o n , s p e c i fi c a t i o n s o r g r a p h i c s a r e s u b j e c t t o c h a n g e w i t h o u t p r i o r n o t i c e . A l l t r a d e m a r k s m e n t i o n e d h e r e i n b e l o n g t o t h e i r r e s p e c t i v e o w n e r s . P i c t u r e s : O l i v i e r C a l v e z . 06/2011. K B -Z E N 1-64E -AEUROPE - MIDDLE-EAST - AFRICAEvolis Card Printer - 14 avenue de la Fontaine - ZI Angers - 49070 Beaucouzé - France T+33(0)241367606-F+33(0)*************************1 Under specifi c conditions / 2 Depending on your Windows version / 3 Requires .net 4.0 client profi le / 4 For versions prior to Windows XP-SP2, please contact Evolis Services5 Available from November 2011 and for the “Expert” version or above /6 Expected by September 2011SPECIFICATIONSSingle-sided printing module, edge-to-edge printing Color-dye sublimation and monochrome thermal transfer 300 dpi print head (11.8 dots/mm) 16 MB of RAMPRINTING PERFORMANCESColor: from 120 to 150 cards per hour Monochrome: from 400 to 500 cards per hourCARD MANAGEMENT AND SPECIFICATIONSChoice of automated or manual feeding Feeder capacity: 50 cards (0.76 mm - 30 mil) Output tray capacity: 20 cards (0.76 mm - 30 mil)C ard thickness: 0.25 to 0.76 mm (10 to 30 mil), calibration via the gaugeT ypes of cards: all PVC, Composite PVC, PET, ABS and special varnish cardsC ard format: ISO CR-80 - ISO 7810 (53.98 mm x 85.60 mm - 3.375” x 2.125”)EVOLIS HIGH TRUST ® RIBBONSMaximize the quality and durability of printed cards, the lifespan ofyour print head and the overall reliability of your printer! A utomatic detection and setupR ibbon embedded in a cassette for ease of use R ibbon saver feature for monochrome printing R ibbon capacity:ååså9-#+/ å åCARDS ROLL ååså+/ å åCARDS ROLLååså-ONOCHROMEåRIBBON åUPåTOå åCARDSåPERåROLL ååså(OLOGRAMåRIBBON å åCARDS ROLLINTERFACESUSB 1.1 (compatible with 2.0) Ethernet available as an optionDISPLAYLEDsG raphic notifi cations from the printer : empty feeder, cleaning, “approaching end-of-ribbon” and “end-of-ribbon” warningsSOFTWARES upplied with the Evolis Premium Suite for Windows:ååså0RINTERåDRIVERååså%VOLISå0RINTå#ENTERåFORåPRINTERåMANAGEMENTåANDåSETUP ååså%VOLISå0RINTERå-ANAGERåFORåTWO WAYåNOTIl åCATIONS ååså3UPPORTSå7INDOWSå80å30 åORåLATER å6ISTAå å7 å S upplied with the eMedia CS Card Designer (30-day free trial to be downloaded from Mediasoft’s website) O ther OS:ååså-ACåANDå,INUX åUPONåREQUESTWARRANTY2 years (printer and print head)SIZE AND WEIGHTåå3IZE å(EIGHTå åMMå v åXåLENGTHå åMMå v åXåWIDTHå310 mm (12.2”) W eight: 3.3 kg (7.3 lbs)SOUND (EVALUATED ACCORDING TO THE ISO 7779 STANDARD)3OUNDåPRESSUREåLEVEL å,P!M åBYSTANDERåPOSITIONå 9-#+/åCOLORåMODEW hen operating: 46 dB (A) I n sleep mode: background noise onlySAFETYåå3UPPORTåFORå+ENSINGTON lock D ata encryption for magnetic encoding PACKAGING CONTENTP rinter C D-ROM with the printer driver and user manual C leaning kit U SB cable P ower supply and cordsOPTIONS & ACCESSORIESA vailable colors: Fire Red or Grey Brown E thernet TCP-IP E ncoding options , than can be combined. Upgrade can be carried out onsite, by adding new modules:ååsåå-AGNETICåSTRIPEåENCODER åSMARTåCARDåCONTACTåSTATION åSMARTåcard encoder and contactless smart card encoder ååså/THERåENCODERSåAVAILABLEåUPONåREQUESTECO-FRIENDLY DESIGN, CERTIFICATIONS AND STATEMENT OF COMPLIANCES leep mode and reduced energy consumption C E, FCC, IEC, VCCI, CCC å+##åå%R0å #% å%.%2'9å34!2 å2O(3POWERåå0OWERåSUPPLY å å6å!# å å(Z å å!P rinter: 24 V DC, 3 AENVIRONMENTM in/max operating temperature: 15° / 30° C (59° / 86° F ) åå(UMIDITY å åTOå åNON CONDENSING M in/max storage temperature: -5° / +70° C (23° / 158° F)åå3TORAGEåHUMIDITY å åTOå åNON CONDENSING O perating ventilation: Open airRESIDENT FONTSA rial 100, Arial Bold 100B ar code: Code 39, code 128, EAN 13, Interleaved 2 of 5ECO-DESIGNEDS tandby and Sleep modes E NERGY STAR certifi cation C ompliance with the ErP European Directive N oise reduced to 46 dB (A) only。
爱丽斯证卡打印机说明书

本标志表明最终用户希望抛弃本产品时,必须将本产品送至适当的设施进行回收或者循环。 请勿将本产品与生活垃圾一起丢弃,从而减少焚烧或者掩埋的垃圾数量,节省自然资源。 您的Evolis打印机应根据您当地的标准进行回收。更多信息,请致函info@。
2
目录
简介
4 . . . . . . . . . . . . . . . . . . . . . . . . . . . . . . . . . . . . . . . . . . . . . . . . . . . . . . . . . . . . . . . . . . . . . . . . . . . . . .
Windows用户 14 . . . . . . . . . . . . . . . . . . . . . . . . . . . . . . . . . . . . . . . . . . . . . . . . . . . . . . . . . . . .
带有USB接口的Windows用户 15 . . . . . . . . . . . . . . . . . . . . . . . . . . . . . . . . . . . . . . . . . . .
取出已打印完毕的卡片 13 . . . . . . . . . . . . . . . . . . . . . . . . . . . . . . . . . . . . . . . . . . . . . . . . .
安装的其他阶段 13 . . . . . . . . . . . . . . . . . . . . . . . . . . . . . . . . . . . . . . . . . . . . . . . . . . . . . . . . . . . . . .
sp35卡机说明书2000-XP
DataCard SP35人像证卡打印机使用说明请用户在使用前阅读本说明后再进行该系统的软硬件操作。
2008年4月印制第一部分 SP35打印机的硬件连接与驱动程序的安装(一)打印机的硬件连接 一、如何开盖与安装色带二、如何连接电脑与打印机如图安装好USB 数据线 如图安装好电源线三如何安装清洁滚轴(二)DATACARD SP—35打印机驱动程序的安装当您在此次安装新驱动前请在光盘根目录下运行“\Support\ Cleanup\ Cleanup”将上次您安装的驱动卸载掉,具体方法如下:1.运行Cleanup2.以下各步骤全部选择“是”3.电脑自动重起后进行以下操作WIN2000,WINXP驱动的安装1,在光盘根目录下运行“\ XP-2000\setup.exe";2,3,4,此时将打印机电源线安好,USB线与电脑连接等待1分钟,单击"next"(如果是usb打印线则会弹出找到新的硬件,点击自动安装)5,安装完成.第二部分使用打印机高级设置一调出高级设置双击屏幕右下角打印机图标之后,将弹出打印机状态栏单击高级设置,将弹出高级设置菜单二、打印头设置点击打印头,出现如下图示上一栏打印密度,为分别调节K(黑)覆膜的强度。
下一栏位置打印Position Printing为调节打印在卡片上下左右的位置。
比如说卡片左有一白边打不到,那么可将滑杆往左拖一点点,幅度为3—5个值。
上下打印位置的调节道理一样。
当参数被修改后,确认按钮会变为实心,点击该按钮,使更改生效。
退出高级设置。
三 打印机色彩设置用户单击色彩设置,即可调出色彩管理菜单。
用户移动滑标,可改变数值。
当数值改变后,单击确认更改保存更改的数值。
当所有的设置完成后,可点取按钮最小退出设置。
第三部分 使用打印机诊断程序当打印机出现故障并需要更改打印机参数时,用户可通过使用打印机诊断程序进行修改,以下为使用打印机诊断程序修改打印机参数的步骤。
Datacard SP30 Plus卡机使用说明
DataCard SP30 Plus 人像证卡打印机使用说明请用户在使用前阅读本说明后再进行该系统的软硬件操作2010年11月印制第一部分 SP30 Plus打印机的硬件连接与驱动程序的安装一、打印机的硬件连接1、如何开盖与安装清洁滚轴2、如何安装色带3、如何装载卡片4、如何连接电源二、SP30 Plus系列打印机驱动程序的安装3、电脑会自动搜索新硬件,自动安装新硬件驱动。
4、待屏幕右下角出现图标时,即完成打印机驱动的安装。
第二部分 使用打印机工具栏一 、调出打印机工具栏双击电脑任务栏右边的打印机图标,调出打印机工具栏。
状态状态一栏提供打印机的一般设置,日常维护清洁,打印样卡和磁条卡,打印机暂停等功能。
点击-高级设置,进入打印机打印头设置,图如下。
二、打印头设置三、色彩设置四、边到边设置五、打印次数及耗材打印次数记录打印机的入卡数量、卡片完成数量、拒卡数量及失卡数量。
耗材如下图:第三部分 使用打印机诊断程序当打印机出现故障并需要更改打印机参数时,用户可通过使用打印机诊断程序进行修改,以下为使用打印机诊断程序修改打印机参数的步骤。
具体修改哪个参数、修改数值为多少,当打印机需要调整参数时,请与供经销商联系,或按经销商电话指导进行,请用户不要擅自修改。
打印机诊断程序的安装1、将驱动光盘放入光驱中,待弹出的安装界面中选择打印机支持(p)…,再点击打印机诊断(s)按钮,如下图2、回车,或者单击点Next>3、回车,或者单击Finish,完成安装。
运行诊断程序安装完打印机诊断程序后,在桌面上找到打印机诊断程序的快捷方式图标,双击该图标,运行打印机诊断程序。
运用诊断程序修改打印机参数的步骤1、启动打印诊断程序,进入程序界面。
选择打印机,只安装一台Datacard打印机的用户,点击OK直接进入诊断程序主界面。
安装多台Datacard打印机的用户,在下拉菜单中选择你需要修改参数的打印机,点击OK即可。
打印机诊断程序主界面如下图,图中灰色和绿色的方块为打印机传感器工作状态指示标志。
证卡打印机使用规范

证卡打印机使用规范
-- 出处:北京法高阳光邹1360106-8729)
为何我们打印厂家提供的样卡非常漂亮,而打印自己设计的卡片时有时却不太完美呢?以下几点经验供大家参考。
1.设计卡片时首先要保证图片的精度,不低于300DPI。
如果是照片只要达到300DPI即可。
2.背景避免用大面积单一彩色块。
色彩要搭配。
厂家提供的样卡图片是经过分色处理,所以打印出来非常精美。
3.除了专业美工调节图片质量外呢,也可通过更改证卡打印机参数使得卡片色带艳丽。
(但建议您,证卡打印机的参数适量调节即可)
证卡打印机在出厂时都经过了色彩测试,每台新打印机都会附带一张彩色的测试卡,告诉您这台打印机可以实现什么样的效果,只要您图片设计质量好的话,一定也可以实现预期效果。
我们的技术人员经过严谨的测试,建议对打印机相关参数进行一定的优化设置。
以Fargo4250/C11/C15/C16证卡打印机机为例,说明如下:
在打印机的打印首选项中:
Contrast对比度
Gamma灰阶
Yellow Balance 黄色
Magenta Balance 洋红
Cyan Balance 蓝色
Dye-Sub Intensity (YMCB) 整体颜色
Resin Heat (K) 黑色
Contrast 和Gamma的参数改动如下(Contrast:15,Gamma:5),其他均可保持默认值。
如果您觉得效果还是不好,可以略微的提高Dye-Sub Intensity (YMCB)到10%。
纯黑色文本的最好打印效果,Resin Heat (K)的值最好在25%或30%之间。
SP3060SP30120型数字合成扫频仪操作说明书.

相位测量
相位测量参数键,按此键进入相位测量参数设置菜单,设置相位测量参数,测量相位参数。(目前 不具备)
频标
频标功能键,按此键进入频标功能设置菜单。该菜单为了使用户更便捷地使用,提供了峰值搜寻、 标记的自动移动、参考线的自动搜寻和设置、-3dB 带宽和谐振电路的 Q 值的测量等功能。
目录
第一章概述…………………………………………………………… 1 第二章主要特征……………………………………………………… 2 第三章技术参数……………………………………………………… 3
一、 信号源……………………………………………………… 3 二、 输入通道…………………………………………………… 3 三、 显示特性…………………………………………………… 4 四、 其它………………………………………………………… 4 第四章面板说明……………………………………………………… 5 一、 前面板说明………………………………………………… 5 二、 前面板按键………………………………………………… 6 三、 后面板说明………………………………………………… 9 第五章使用说明……………………………………………………… 11 一、 测量前的准备工作………………………………………… 11 二、 仪器的开启………………………………………………… 11 三、 屏幕显示信号描述………………………………………… 11 四、 菜单和菜单功能描述……………………………………… 12 五、 图例………………………………………………………… 27 第六章遥控操作使用说明…………………………………………… 31 一、 遥控操作前的准备工作…………………………………… 31 二、 SCPI 指令的语法……………………………………………31 三、 SCPI 指令的详细说明………………………………………31 第七章注意事项与检修……………………………………………… 43 第八章 附 录 USB 接口…………………………………………… 44 第九章 仪器整套设备及附件……………………………………… 47
证卡打印机使用手册
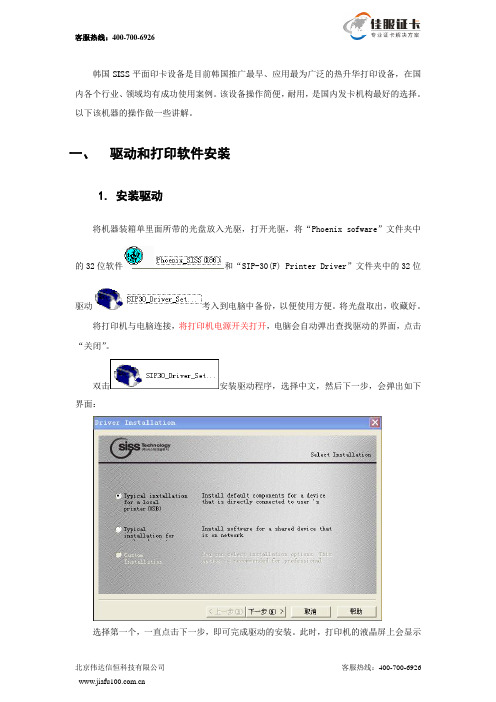
韩国SISS平面印卡设备是目前韩国推广最早、应用最为广泛的热升华打印设备,在国内各个行业、领域均有成功使用案例。
该设备操作简便,耐用,是国内发卡机构最好的选择。
以下该机器的操作做一些讲解。
一、驱动和打印软件安装1.安装驱动将机器装箱单里面所带的光盘放入光驱,打开光驱,将“Phoenix sofware”文件夹中的32位软件和“SIP-30(F) Printer Driver”文件夹中的32位驱动考入到电脑中备份,以便使用方便。
将光盘取出,收藏好。
将打印机与电脑连接,将打印机电源开关打开,电脑会自动弹出查找驱动的界面,点击“关闭”。
双击安装驱动程序,选择中文,然后下一步,会弹出如下界面:选择第一个,一直点击下一步,即可完成驱动的安装。
此时,打印机的液晶屏上会显示出READY CLASS的字样,如果装得不正确会显示Off Line.2.安装打印软件安装打印制版软件,打开刚拷贝的文件,双击,选择中文,然后点击下一步、安装即可完成。
安装完成后并没有生成快捷方式,需要手动创建。
二、单张打印3.启动软件如果现在只打印一张,点击电脑左下角的“开始”,在程序中找到Phoenix,打开软件。
每次打开软件的时候,界面最前端都会弹出一幅图,如下:点击图片,它会自动消失。
4.输入文字要输入文字,请点击,然后在白色的面板上左击鼠标,拖拽,出现如下编辑框,双击它会弹出如下窗口:可以编辑想要的文字。
在位置输入文字,点击修改文字的大小和颜色。
在面板上调整好位置,就可以打印了如图:继续输入其它文字重复以上步骤即可。
5.插入照片要插入个人照片,请点击,然后在白色的工作区域,按住鼠标左键拖拽,画出合适的图片位置和大小。
双击这个图形,会出现如下弹出窗口:单击按钮,弹出文件选择窗口,如下:,根据自己的照片位置,找到图片并选择打开,照片出现在白色工作区域:如果需要重新调整照片的大小、位置和其他属性,双击照片,在弹出的窗口中根据需要进行精确调整即可。
Datacard SP30 Plus 美国直印式证卡机
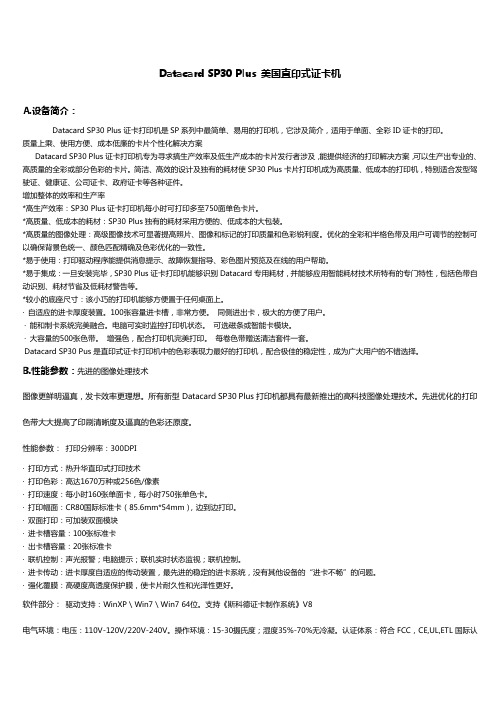
Datacard SP30 Plus 美国直印式证卡机A.设备简介:Datacard SP30 Plus证卡打印机是SP系列中最简单、易用的打印机,它涉及简介,适用于单面、全彩ID证卡的打印。
质量上乘、使用方便、成本低廉的卡片个性化解决方案Datacard SP30 Plus证卡打印机专为寻求搞生产效率及低生产成本的卡片发行者涉及,能提供经济的打印解决方案,可以生产出专业的、高质量的全彩或部分色彩的卡片。
简洁、高效的设计及独有的耗材使SP30 Plus卡片打印机成为高质量、低成本的打印机,特别适合发型驾驶证、健康证、公司证卡、政府证卡等各种证件。
增加整体的效率和生产率*高生产效率:SP30 Plus证卡打印机每小时可打印多至750面单色卡片。
*高质量、低成本的耗材:SP30 Plus独有的耗材采用方便的、低成本的大包装。
*高质量的图像处理:高级图像技术可显著提高照片、图像和标记的打印质量和色彩锐利度。
优化的全彩和半格色带及用户可调节的控制可以确保背景色统一、颜色匹配精确及色彩优化的一致性。
*易于使用:打印驱动程序能提供消息提示、故障恢复指导、彩色图片预览及在线的用户帮助。
*易于集成:一旦安装完毕,SP30 Plus证卡打印机能够识别Datacard专用耗材,并能够应用智能耗材技术所特有的专门特性,包括色带自动识别、耗材节省及低耗材警告等。
*较小的底座尺寸:该小巧的打印机能够方便置于任何桌面上。
· 自适应的进卡厚度装置。
100张容量进卡槽,非常方便。
同侧进出卡,极大的方便了用户。
· 能和制卡系统完美融合。
电脑可实时监控打印机状态。
可选磁条或智能卡模块。
· 大容量的500张色带。
增强色,配合打印机完美打印。
每卷色带赠送清洁套件一套。
Datacard SP30 Pus是直印式证卡打印机中的色彩表现力最好的打印机,配合极佳的稳定性,成为广大用户的不错选择。
B.性能参数:先进的图像处理技术图像更鲜明逼真,发卡效率更理想。
Dterm SP30软电话操作指南说明书
Dterm SP30 Soft Phone The next level of communicationVolume control button VideoMute buttonMain PanelFunction Key PanelDisplays lines and functions set for PBX and enables changing of button name and pop-up. Short Message Log PanelDisplays transmission, reception and error logs of simple messages and lets user select a log to telephone or reply to a sender.Call Forward Settings PanelFor setting or cancelling Call Forwarding—All Calls/Busy Line/Don’t Answer/Log Out for PBX.Call Log PanelA user can see origination and termination types,times, telephone numbers, conversation times, and speech memos; then save them in CSV-format file.Select a log for origination/termination, speech memo input, or deletion.Configuration PanelFor setting origination rules, termination actions,voices, video conference actions, simple message actions, the number of logs, user names, automatic log in, and other convenient functions.Video Conference PanelUsing cameras in conjunction with this panel, you can see video of calling party in the upper panel and yourself in the lower panel.Application Sharing PanelFor application sharing and white board functions.10-Key Keypad PanelCan be used like the dial pad of a telephone.Subpanels and FunctionsVideo Conference PanelG REATER UTILITY FOR ALLAdvanced functions for better communicationsTelephones may not convey enough essential information in this era of advanced technology. So NEChas devised a solution: Dterm SP30 Soft Phone. With the power to share applications, conduct videoconferences and visualize ideas using virtual white boards and other visual aids over seamlesslyintegrated networks, it sets a superior standard for comprehensive communication.O UTSTANDING OFFICE SUPPORTUpgrading networks for maximum speed and flexibilityThese days, companies must be prepared to change personnel, projects and organizational structure ondemand. NEC Dterm SP30 Soft Phone offers supremely fast, flexible office support that administratorsneed to manage evolving business environments. By taking advantage of NEC network capabilities,various scales of enterprise can operate and communicate with greater efficiency and less effort thanever before.E XCELLENT EXECUTIVE POTENTIALLower costs, greater efficiency and a higher profile boost your bottom lineBy transforming the quality of communications, NEC Dterm SP30 Soft Phone can sharpen yourcompany’s cutting edge. IP network-based tools not only boost operating efficiency and capability –they also expand, integrate and simplify your office environment. Yet, Dterm SP30 Soft Phone can beset up at minimal initial cost.FOR EASIER,EXTENDED COMMYou can hold a meeting while sharing Windows and white board applications. (2-way call only)White Board Sharing panelWhite board application is started.Application Sharing panel Select the file and start.Short Message Log panel displayShort Message Sending panelThe “To” field automatically filled in.Short Text MessagingShort messages can be sent and received by active Dterm SP30 parties. The person who receives the short message can make a call and/or reply to the sending party. User can utilize this service for Busy/Not Available status.Receiving:Note: Keep period can be setwithin a month-month period range.The fixed-form message can be set up beforehand and reflection to send message is possible.After message is input,click on “Send” button.Make call to other partyMessage reply to other party New messageOpened received messageSent messageSending:Application Sharing3-way callDialing and calling Dialing only (no calling)Indentifying Icons:Dterm SP30 Soft Phone RequirementsOperating EnvironmentNotes1 The USB handset/headset (without dial pad) that is currently usable: SN546 HANDSET-A2 A USB camera can be used for videoconferencing if it is compatible with NetMeeting. A USB handset is not available for camera with microphone.Cameras authorized for use: blue eye (from CHESCOM INTERNATIONAL), Qcam Express (from Logitech)3 To use a USB handset together with a USB camera, a PC with two or more USB host controllers and one USB host controller controlling one USB port are recommended. Connect the handset and camera directly to the main PC USB jacks. If one controller is used for both USB handset and USB camera, the USB handset and USB camera could possibly interfere with each other due to a band deficiency.4 Compatible PBXs are NEAX2400IPX (FP8700-R14 or more recent) or NEAX2000IPS (FP3300-R8 or more recent).Operating Requirements1 Dterm SP30 Soft Phone will not respond to incoming calls when the PC is in a Standby mode.2 When activating screen saver, status won’t change, even if there are incoming calls or short messages. (You cannot cancel screen saver by command from Dterm SP30 Soft Phone)NEC reserves the right to change specifications, prices and designs of the products described in this document without prior notice.The colors of products shown in photos of this document may differ from actual product colors.Visit our website at ND-91775(E)0305X0010KMPrinted in JapanRevision 1.0。
DATACARD—SP35证卡打印机使用手册
一、概述1、打印机外部手柄:往上扳动手柄,由此打开机器顶盖入卡仓:向上打开放入需要打印的卡片出卡仓:从此处拿出打印好的卡片开关:暂停或启动打印机指示灯:帮助你了解打印机的运转情况通讯端口及电源接口在打印机的左面:手动旋钮:用来滚动卡在机器内的卡片、旋转内部的滚轮电源接口:接上电源线来使机器运行线支架:安全地支撑好数据线可选智能卡USB 端口(后面会详解)可选智能卡连续端口(后面会详解)USB 数据端口:用数据同步传输电缆连接打印机的接口2、 打印机内部顶盖轴:保持打印机盖和打印头固定在正确的位置打印头:通过它来把图象打印到卡面上,包括“YMC ”彩色和“K ”单色打印打印机标签:包括打印机的产品序列号和机器信息(位于打印机的左面在此图中不可见)清洁轮(在图中不可见):用来清洁卡面,粘去 卡面上的灰尘等杂物另提示:向上扳动手柄即可打开打印机顶 盖,便可以查看打印机内部3、 特点及选择打印机的特点及功能选择均可以在打印机标签上识别出来● 打印机标签上,如果有“K ”标记的话,则只能打印单色;“C ”标记则为全彩色打印。
● 所有的SP35打印机均为USB 端口来连接电脑● 磁条模块可以是三条磁道或单磁道模块,这个磁条模块由客户来选择使用,在印机内部可以看见● 智能卡模块(可选择)可以是以下的一种:1、 联络结合装置(在打印机标签上为SC430):在打印机内部可以看见,打印机有一个USB 端口2、 不可联络结合装置(SC680):有一些连续的端口3、 联络位置(SCCS ):在打印机内部可以看见,包括一些连续的端口4、 组合智能卡结合装置(SC4/6):430和680组合装置,在打印机内不可以看见,包括USB端口和连续端口二、装卡片1、 向上打开进卡盒(最大程度)2、 放入卡片,盖好进卡盒注意:在打印卡前尽量不要去触摸卡面(人手上的油腻会影响打印效果),装卡的时候应握住卡的四边放入或者戴手套操作;为了防止卡片粘在一起,可以把卡片放成一个弧形。
新北洋BST-3300 证卡扫描仪用户手册

BST-3300证卡扫描仪用户手册山东新北洋信息技术股份有限公司声明本手册内容未经同意不得随意更改,山东新北洋信息技术股份有限公司(以下简称新北洋)保留在技术、零部件、软件和硬件上变更产品的权利。
用户如果需要与产品有关的进一步信息,可与新北洋或经销商联系。
未经新北洋的书面许可,本手册的任何章节不得以任何形式、通过任何手段进行复制或传送。
版权本手册于2011年印制,版权属于新北洋。
中国印制。
1.0版本。
商标新北洋使用的注册商标是:警告、注意警告必须遵守,以免伤害人体,损坏设备。
注意给出了扫描仪操作的重要信息及提示。
新北洋质量管理体系通过下列认证ISO9001 质量管理体系认证ISO14001环境管理体系认证OHSAS18001职业健康安全管理体系认证IECQ QC080000危害物质过程管理体系认证安全须知在使用扫描仪之前,请仔细阅读下面的注意事项。
1.安全警告警告请按照手册警告提示的要求进行规范操作,避免因操作不当造成设备功能异常。
2.注意事项(1)扫描仪应安装在一个平整、稳固的地方;(2)在扫描仪的周围留出足够的空间,以便操作和维护;(3)扫描仪应远离水源并避免阳光、强光和热源的直射;(4)不要在高温、潮湿以及污染严重的地方使用和保存扫描仪;(5)避免将扫描仪放在有振动和冲击的地方;(6)不允许在能导致扫描仪表面结露的环境下使用,如果已经形成,在露水消除之前不要打开扫描仪电源;(7)将扫描仪的电源适配器连接到一个适当的接地插座,避免与大型电机或其它能够导致电源电压波动的设备使用同一插座;(8)如果较长时间不使用扫描仪,请拔下扫描仪电源适配器;(9)避免水或导电的物质(例如:金属)进入扫描仪内部,一旦发生,应立即关闭电源;(10)用户不得自行拆卸扫描仪进行检修;(11)妥善保管本手册,以备使用参考。
目录1 产品介绍 (1)1.1 简介 (1)1.2 开箱检查 (1)1.3 扫描仪安装位置 (1)1.4 连接电源适配器 (1)1.5 连接通讯电缆 (2)2 扫描仪操作 (3)2.1 整机外观尺寸 (3)2.2 外观和组件 (3)2.3 指示灯功能说明 (4)2.4 启动扫描仪 (4)2.4.1 开机与自检 (4)2.4.2 传感器、CIS校验 (4)2.5 软件安装和使用 (4)2.5.1 驱动程序安装 (5)2.5.2 工具软件使用 (7)3 接口信号 (9)3.1 USB接口 (9)3.2 电源接口定义 (10)3.3 串口定义 (10)4 扫描仪日常维护 (11)4.1 CIS玻璃清洁 (11)4.2 传感器清洁 (11)4.3 胶辊清洁 (11)5 故障处理方法 (12)5.1 指示灯状态指示 (12)附录 (13)附录1技术规格 (13)1产品介绍1.1简介BST-3300是一款身份证卡扫描产品,可以作为整机应用,也可以作为嵌入式扫描机芯应用。
- 1、下载文档前请自行甄别文档内容的完整性,平台不提供额外的编辑、内容补充、找答案等附加服务。
- 2、"仅部分预览"的文档,不可在线预览部分如存在完整性等问题,可反馈申请退款(可完整预览的文档不适用该条件!)。
- 3、如文档侵犯您的权益,请联系客服反馈,我们会尽快为您处理(人工客服工作时间:9:00-18:30)。
证卡打印机使用手册
一、安装使用 (2)
二、日常维护 (14)
三、使用注意事项 (18)
四、常见故障及解决方法 (23)
五、技术支持及售后服务 (26)
证卡打印机的安装使用
首先按照下图正确安装好色带以及清洁套筒确定一切就绪通上电源待打印机指示灯变为绿色后接上数据线
一、色带和清洁轴的安装
二、驱动的安装
1.将驱动光盘放入光驱.,出现如下界面:点击””,
2.出现如下界面:
3、出现如下界面:
4、点击”I ……” ,然后,等待中:
5、出现如下界面:然后点击
6、出现如下界面:然后连接上打印机的电源线和数据线
7、电脑右下角出现”发现新硬件” ,
打印机自动安装打印机驱动。
8、完成安装后重新启动电脑. 任务栏出现"打印机工具栏". 双击它.
在打印机工具栏里可以进行一些简单的设置以及给打印机做清洁.
如果想调整打印黑色的深浅度可以进入高级设置里进行调整:
其他参数基本不做改变,保持原来的出厂值就可以了.
证卡打印机日常维护
打印机日常维护除了打印机外观的清洁主要会用到以下清洁用品:清洁笔(只能对打印头做清洁)、清洁卡(对机器内各个滚轮进行清洁)、清洁套筒(对进入打印机的卡片表面进行清洁)
注:一盒色带里包含有一张清洁卡和一个清洁套筒正常情况下色带在短时间内(3天左右)使用完应对打印机使用一张清洁卡更换一个清洁套筒若色带长时间没有用完又未使用清洁卡机器内灰尘增多各个滚轮变脏后摩擦力变小会造成堵卡故清洁套筒和清洁卡须及时更换、使用。
当一盒色带内的清洁用品不能满足需要时可另行购买以保证机器正常运转增加其使用寿命
一、清洁打印机(当打印卡片数达到一定量或进卡不顺畅时需做清洁)
1、双击电脑右下角打印机工具栏图标
点击“清洁打印机”按钮
并按提示取出色带架和清洁轮
2、将清洁卡从包装带内取出,放进入卡箱.(注意清洁卡上清洁液不能过多,否则容易滴漏在主板上造成短路,可等卡片上清洁液挥发一点再使用.)
3、清洁完毕后一两分钟再使用打印机.
二、清洁打印头
1、揭开打印机上盖即可看见打印头(绿色块前边的金属条)
2、用清洁笔将打印头从左到右进行单方向擦拭(不能来回擦拭),清洁笔使用完后一定把盖盖紧以防止笔内清洁液挥发.
三、更换清洁筒
取出清洁滚轮,把清洁套筒从滚轮中取出,换上新清洁套筒即可.(清洁套筒无粘性即需更换)
证卡打印机使用注意事项
一、取放色带架时注意保护打印头,避免色带架或手上的戒指.手表等硬物碰伤打印头,一旦打印头损坏就只能更换,不能维修.
二、色带上的白色感应线圈避免磁场若此线圈被磁化或者丢失机器将不能识别色带即色带报废(一卷色带配备一个线圈没有多余)
三、放回色带架应注意轻放,避免定位器(色带架上一个很薄的金属片)和探测装置发生碰撞,造成定位器松动脱落
四、使用清洁笔对打印头做清洁时只能单方向擦拭.一定不能做来回擦拭.清洁笔使用完后将盖子盖紧避免笔内的清洁液挥发
五、使用清洁卡时保证卡片上清洁液不能过多可等卡片上清洁液挥发一点再使用(使用过的清洁卡不能重复使用,有客户自行将用过的清洁卡洒上酒精对打印机清洁结果造成主板烧毁)
六、色带的保存: 一定避免周围有高温高磁的物体比如手机音箱等等
七、打印之前最好对卡片进行清洁筛选掉卡片表面划痕较多凹凸不平的卡减少坏卡对打印头的损伤增加打印头的使用寿命
八、掌握正确的持卡方法能提高卡片打印质量握住卡片两侧不要直接握住卡片打印面否则容易沾上指纹、油渍、污物等影响打
印效果
打印机常见故障及解决方法
一、打印机进卡不太顺畅有时进不去卡
造成原因: 1.进卡轮灰尘过多,造成滚轮与卡片接触时打滑,无法顺畅的将卡片送入打印机内
2.卡片之间有静电及压力粘附力较强
解决办法: 1.使用清洁卡对打印机的滚轮进行清洁
2.一叠新卡拿出来后在桌面上抖落几下使卡片之间进入空气消除静电
二、卡片在打印机内传输费劲经常堵塞在打印机中间
造成原因:打印机内各滚轮灰尘过多传输卡片时摩擦力不够打滑造成堵卡
解决办法:使用清洁卡对打印机进行清洁
三、打印出来的卡片有一条或多条白线贯穿卡片
造成原因:打印头损坏(打印头打印达到一定数量或者有灰尘、颗粒等进入打印机将打印头打坏)
解决办法:因打印头无法维修故只能更换新打印头
四、打印过程中色带断裂部分色带粘在卡面上
造成原因: 设计的版面底色太深造成打印头电压过大
解决办法: 适当将版面底色调浅一点色带断裂后可用透明胶将其粘上再往使用过的一端卷几圈即可
北京万优创业科技有限公司
卢秀娟。