思科cisco2950交换机配置手册(中文)word版本
最新思科cisco2950交换机配置手册(中文)

2950交换机简明配置维护手册目录第1章说明 (3)第2章产品特性 (3)第3章配置端口 (3)3.1配置一组端口 (3)3.2配置二层端口 (5)3.2.1配置端口速率及双工模式 (6)3.2.2端口描述 (7)3.3监控及维护端口 (8)3.3.1监控端口和控制器的状态 (8)3.3.2刷新、重置端口及计数器 (10)3.3.3关闭和打开端口 (10)第4章配置VLAN (11)4.1理解VLAN (11)4.2可支持的VLAN (12)4.3配置正常范围的VLAN (12)4.3.1生成、修改以太网VLAN (13)4.3.2删除VLAN (15)4.3.3将端口分配给一个VLAN (15)4.4配置VLAN Trunks (16)4.4.2使用STP实现负载均衡 (19)第5章配置Cluster (23)第1章说明本手册只包括日常使用的有关命令及特性,其它未涉及的命令及特性请参考英文的详细配置手册。
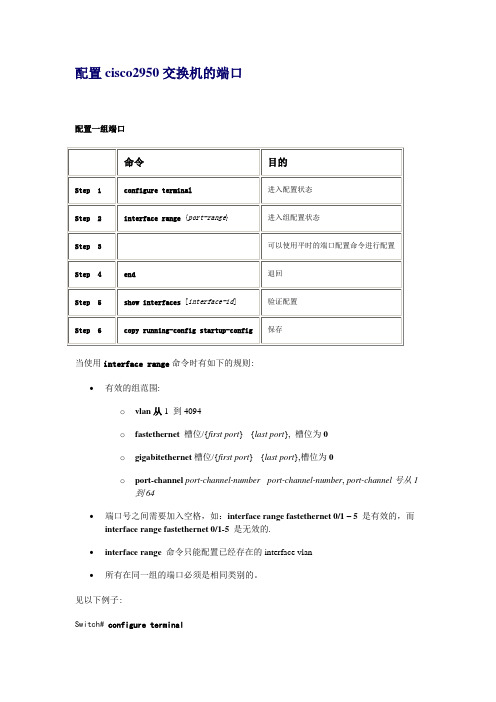
第2章产品特性2950是只支持二层的交换机支持VLAN•到250 个VLAN•支持VLAN ID从1到4094(IEEE 802.1Q 标准)•支持ISL及IEEE 802.1Q封装安全•支持IOS标准的密码保护•支持标准及扩展的访问列表来定义安全策略•支持基于VLAN的访问列表监视•交换机LED指示端口状态•SPAN及远端SPAN (RSPAN) 可以监视任何端口或VLAN的流量•内置支持四组的RMON监控功能(历史、统计、告警及事件)第3章配置端口3.1 配置一组端口当使用interface range命令时有如下的规则:•有效的组范围:o vlan从1 到4094o fastethernet槽位/{first port} - {last port}, 槽位为0o gigabitethernet槽位/{first port} - {last port},槽位为0o port-channel port-channel-number - port-channel-number, port-channel号从1到64•端口号之间需要加入空格,如:interface range fastethernet 0/1 –5是有效的,而interface range fastethernet 0/1-5是无效的.•interface range命令只能配置已经存在的interface vlan•所有在同一组的端口必须是相同类别的。
Cisco交换机配置手册

2950交换机简明配置维护手册目录说明 (3)产品特性 (3)配置端口 (4)配置一组端口 (4)配置二层端口 (6)配置端口速率及双工模式 (6)端口描述 (7)监控及维护端口 (8)监控端口和控制器的状态 (8)刷新、重置端口及计数器 (10)关闭和打开端口 (10)配置VLAN (11)理解VLAN (11)可支持的VLAN (12)配置正常范围的VLAN (12)生成、修改以太网VLAN (13)删除VLAN (14)将端口分配给一个VLAN (15)配置VLAN Trunks (16)使用STP实现负载均衡 (19)配置Cluster (23)说明本手册只包括日常使用的有关命令及特性,其它未涉及的命令及特性请参考英文的详细配置手册。
产品特性2950是只支持二层的交换机支持VLAN∙到250 个VLAN∙支持VLAN ID从1到4094(IEEE 802.1Q 标准)∙支持ISL及IEEE 802.1Q封装安全∙支持IOS标准的密码保护∙支持标准及扩展的访问列表来定义安全策略∙支持基于VLAN的访问列表监视∙交换机LED指示端口状态∙SPAN及远端SPAN (RSPAN) 可以监视任何端口或VLAN的流量∙内置支持四组的RMON监控功能(历史、统计、告警及事件)配置端口配置一组端口当使用interface range命令时有如下的规则:∙有效的组范围:o vlan从1 到4094o fastethernet槽位/{first port} - {last port}, 槽位为0o gigabitethernet槽位/{first port} - {last port},槽位为0o port-channel port-channel-number - port-channel-number, port-channel号从1到64∙端口号之间需要加入空格,如:interface range fastethernet 0/1 – 5是有效的,而interface range fastethernet 0/1-5是无效的.∙interface range命令只能配置已经存在的interface vlan∙所有在同一组的端口必须是相同类别的。
Cisco 产品配置手册

/univercd/cc/td/doc/product/core/7200vx/misc/vpn_cg/index.htm
Cisco IOS Software Configuration
/univercd/cc/td/doc/product/software/index.htm
IOS Command Reference
/univercd/cc/td/doc/product/lan/cat6000/122sx/cmdref/index.htm
System Message Guide
/univercd/cc/td/doc/product/lan/cat6000/122sx/msgguide/index.htm
Command Reference
/univercd/cc/td/doc/product/lan/cat3750/12225see/cr/index.htm
System Message Guide
/univercd/cc/td/doc/product/lan/cat3750/12225see/smg1/index.htm
/univercd/cc/td/doc/product/lan/cat6000/mod_icn/index.htm
2600
Configuration Guide
/univercd/cc/td/doc/product/access/acs_mod/cis3700/sw_conf/37_swcf/index.htm
4500
Configuration Guide
/univercd/cc/td/doc/product/lan/cat4000/12_2_31s/conf/index.htm
2950交换机简要配置手册(中文)

2950交换机简明配置维护手册目录说明 (3)产品特性 (3)配置端口 (4)配置一组端口 (4)配置二层端口 (6)配置端口速率及双工模式 (6)端口描述 (7)监控及维护端口 (8)监控端口和控制器的状态 (8)刷新、重置端口及计数器 (10)关闭和打开端口 (10)配置VLAN (11)理解VLAN (11)可支持的VLAN (12)配置正常范围的VLAN (12)生成、修改以太网VLAN (13)删除VLAN (14)将端口分配给一个VLAN (15)配置VLAN Trunks (16)使用STP实现负载均衡 (19)配置Cluster (23)说明本手册只包括日常使用的有关命令及特性,其它未涉及的命令及特性请参考英文的详细配置手册。
产品特性2950是只支持二层的交换机支持VLAN•到250 个VLAN•支持VLAN ID从1到4094(IEEE 802.1Q 标准)•支持ISL及IEEE 802.1Q封装安全•支持IOS标准的密码保护•支持标准及扩展的访问列表来定义安全策略•支持基于VLAN的访问列表监视•交换机LED指示端口状态•SPAN及远端SPAN (RSPAN) 可以监视任何端口或VLAN的流量•内置支持四组的RMON监控功能(历史、统计、告警及事件)配置端口配置一组端口当使用interface range命令时有如下的规则:•有效的组范围:o vlan从1 到4094o fastethernet槽位/{first port} - {last port}, 槽位为0o gigabitethernet槽位/{first port} - {last port},槽位为0o port-channel port-channel-number - port-channel-number, port-channel号从1到64•端口号之间需要加入空格,如:interface range fastethernet 0/1 – 5是有效的,而interface range fastethernet 0/1-5是无效的.•interface range命令只能配置已经存在的interface vlan•所有在同一组的端口必须是相同类别的。
CISCO交换机路由器配置手册
CISCO交换机路由器配置手册王国栋编著……………… 目录………………交换机1、cisco 2950 交换机2、cisco 1950 交换机3、VLAN 间的通信路由器一、路由器配置1、路由器基本配置2、路由器的密码恢复3、恢复出厂设置4、备份IOS5、恢复IOS6、备份路由器配置7、静态路由的配置8、RIP路由协义配置9、IGRP路由协议配置10、EIGRP路由协议配置11、ospf路由协议基本配置12、点到点链路上的ospf13、广播链路上的ospf14、基于区域的ospf简单口今及MD5认证15、多区域的OSPF16、OSPF末节区域和完全末节区域17、OSPF命令汇总二、ACL NAT DHCP1、标准访问控制列表(Access Control Iists ) (list 列表)2、扩展访问控制列表(Access Control Iists ) (list 列表)3、命名ACL4、NAT(network address translation)网络地址翻译(1)、静态NAT配置(2)、动态NAT(3)、PAT(端口地址转换)配置5、DHCP (dynamic host configuration protocol) 动态主机配置协议三、远程接入、VPN1、HDLC (高级数据链路控制high-level data link control)2、路由器serial端口的基本配置3、PPP(1)、PPP的PAP认证(2)、PPP的CHAP认证4、帖中继(1)、帧中继基本配置(2)、点对多点帧中继(3)、|点对点帧中继上的RIP协议5、DDN(Digital Data Network 数字数据网)和数字链路6、ISDN7、ADSL Asymmetrical digital subscriber loop 非对称数字用户环路8、VPN 虚专用网络(Virtual Private Networks)交换机部分一、交换机配置图:二、环境说明:S2950-1 S2950-2 为12端口快速以太网交换机三、配置实例:1、cisco 2950 交换机//switch>enable//进入特权模式//switch #configure terminal//进入全局配置模式//switch (config)#hostname s2950-1//给交换机命名为S2950-1enable password 123456//设置密码ip address 192.168.0.1 255.255.255.0ip default-gateway 192.168.0.254ip domain-name //设置IP 、网关和域名ip name-server 200.0.0.1//设置域名服务器interface fastethernet 0/1//进入端口配置模式//s2950-1 (config-if)#speed auto//将接口速率设置成自适应(默认)//speed 100 10 auto//将接口速率设置成10/100自适应duplex full//将接口设置成全双功(默认)//duplex full falf autoend//s2950-1#copy running-config startup-config//保存配置文件valn database//从特权模式进入VLAN配置子模式//s2950-1 (vlan)#vtp server//VTP就是VLAN中继协议//设置交换机为VTP服务模式//vtp server client transparentvtp domain name-vtp-server//设置管理域的域名为name-vtp-server//创建管理域并命名end//s2950-1#configure terminal//s2950-1 (config)#interface fastethernet 0/1//s2950-1 (config-if)#switchport mode trunk//将端口fastethernet0/1设置为主干端口end//s2950-1#vlan database//s2950-1 (vlan)#//进入VLAN 配置模式valn 2 name namevlan-2//创建VLAN 2 并命名为namevlan-2//交换机默认所有未配置VLNA的交换机均为VLAN 1 //所以这里从VLAN 2 开始设置valn 3 name namevlan-3//创建VLAN 3并命名为namevlan-3valn 4 name namevlan-4valn 5 name namevlan-5exit//s2950-1#configure terminal//s2950-1 (config)#interface fastethernet 0/2//s2950-1 (config-if)#switchport mode access//设置当前端口为静态VLAN模式switchport access vlan 2//把当前端口分配给V ALN 2exit//s2950-1 (config)#interface fastethernet 0/3//s2950-1 (config-if)#switchport mode accessswitchport access vlan 3exit//s2950-1 (config)#interface fastethernet 0/4//s2950-1 (config-if)#switchport mode accessswitchport access vlan 4exit//s2950-1 (config)#interface fastethernet 0/5//s2950-1 (config-if)#switchport mode accessswitchport access vlan 5end//s2950-1#copy running-config startup-config//writeshow running-config//show vtp status//show vlan//show interface//show interface brief//show version2、cisco 1950 交换机//switch>enable//switch #configure terminal//switch (config)#hostname s2950-1enable password 123456username text1 password text2ip address 192.168.0.1 255.255.255.0ip default-gateway 192.168.0.254ip domain-name ip name-server 200.0.0.1interface fastethernet 0/1//s1950-1 (config-if)#speed auto//speed 100 10 autoduplex full//duplex full falf autoend//s1950-1#copy running-config startup-config//s1950-1#configure terminal//s1950-1 (config)#vtp server//在配置模式下设置交换机为VTP服务器//vtp server client transparent//也可以根据需要将交换机设置为VTP客户模式,或透明模式vtp domain name-vtpserver//创建VTP管理域并设置域名为name-vtpserverend//S1950VTP这块配置内容和s2950不一样//s1950-1#configure terminal//s1950-1 (config)#interface fastethernet 0/1//s1950-1 (config-if)#trunk on//设置VLAN主干端口//trunk on|off|desirable|autoEnd//trunk 的内容和S2950不一样//s1950-1#vlan database//s1950-1 (vlan)#valn 2 name namevlan-2//创建VLAN 2 并命名为namevlan-2//交换机默认所有未配置VLNA的交换机均为VLAN 1 ,//所以这里从VLAN 2 开始设置valn 3 name namevlan-3valn 4 name namevlan-4valn 5 name namevlan-5exit//s1950-1#configure terminal//s1950-1 (config)#interface fastethernet 0/2//s1950-1 (config-if)#vlan-membership static namevlan-2//划分VLAN端口//将本端口设置为namevlan-4的成员//S1950这块配置内容和s2950不一样exit//s1950-1 (config)#interface fastethernet 0/3//s1950-1 (config-if)#vlan-membership static namevlan-3exit//s1950-1 (config)#interface fastethernet 0/4//s1950-1 (config-if)#vlan-membership static namevlan-4exit//s1950-1 (config)#interface fastethernet 0/5//s1950-1 (config-if)#vlan-membership static namevlan-5end//s1950-1#copy running-config startup-configshow running-config//show vtp status//show vlan//show interface//show ip interface brief//显示所有接口的简短信息//show version3、VLAN间的通信(1)、利用三层交换机实现VLAN间的通信拓朴图:配置实例:S2950#vlan databaseS2950(vlan)#vlan 2 name namevlan-2S2950(vlan)#vlan 3 name namevlan-3S2950(vlan)#exitS2950#configure terminalS2950(config)#interface fastethernet 0/5S2950(config-if)#switchport mode accessS2950(config-if)#switchport access vlan 2S2950(config-if)#exitS2950(config)#interface fastethernet 0/6S2950(config-if)#switchport mode accessS2950(config-if)#switchport access vlan3S2950(config-if)#exitS2950(config)#ip routing//打开三层交换机的路由功能S2950(config)#interface vlan 2//将VLAN当成一个接口进行配置S2950(config-if)#no shutdownS2950(config-if)#ip address 192.168.0.1 255.255.255.0 S2950(config-if)#exitS2950(config)#interface vlan 3S2950(config-if)#no shutdownS2950(config-if)#ip address 192.168.1.1 255.255.255.0S2950(config-if)#endS2950#show ip router//由于是在同一三层交换机上,用show ip router 可以看到自动生存的路由表(2)、利用路由器实现VLAN间的通信配置拓朴图:配置实例:S2950#vlan databaseS2950(vlan)#vlan 2S2950(vlan)#vlan 3S2950(vlan)#exitS2950#configure terminalS2950(config)#interface fastehernet 0/1S2950(config-if)#switchport mode accessS2950(config-if)#switchport access vlan 2S2950(config-if)#exitS2950(config)#interface fastethernet 0/6S2950(config-if)#switchport mode accessS2950(config-if)#switchport access vlan 3S2950(config-if)#exitS2950(config)#(end)RouterA(config)#interface ethernet 0RouterA(config-if)#no shutdownRouterA(config-if)#ip address 192.168.0.1 255.255.255.0 RouterA(config-if)#exitRouterA(config)#interface ethernet 1RouterA(config-if)#no shutdownRouterA(config-if)#ip address 192.168.1.1 255.255.255.0 RouterA(config-if)#endRouterA#show ip route//可以看到由路器自动生成的两条路由表路由器部分一、路由器配置1、路由器基本配置(1)路由器基本的配置拓扑图:(2)、环境说明:Cisco 1605路由器(3)、配置实例://Router>enable//Router#configure terminal//Router(config)#enable password text1//enable secret texe2hostname R1no ip domain lookup//不用DNS 解析主机IPinterface fastethernet 0/1//R1605-1(config-if)#ip address 192.168.0.2 255.255.255.0no shutdownexit//R1605-1 (config)#interface fastethernet 0/2//R1605-1 (config-if)#ip address 192.168.0.2 255.255.255.0no shutdownexit//R1605-1 (config)#ip route 0.0.0.0 0.0.0.0 192.168.1.2//配置默认路由//no ip route 0.0.0.0 0.0.0.0 192.168.1.2ip routing//起动路由功能//R1605-1(config)#line vty 0 4//VTY是路由器给远程登陆准备的虚拟端口//0 4表示可以同时打开5个会话//line vty 0 4是进入VTY端口(也就是同时充许5个会话登陆),对VTY端口//进行配置//R1605-1(config-line)#password 123456//设置telnet登陆时使用的密码//no password 这样就不能从telnet登陆了.(当你no password 取消掉了密码,//telnet会拒绝连接,这样就关闭了telnet)//要想明确禁止从telnet登陆最好使用ACL关闭23端口login//要求输入密码方能从telnet远程登陆,//no login 不使用密码就可以从telnet登陆end//R1605-1#write//copy running-config startup-config ,保存配置end//R1605-1#Show running-config//show version//show interface//show ip interface brief//显示所有接口的简短信息//show ip route//traceroute ip 192.168.3.1//show ip arp//show ip rip database//show runing-configexit2、路由器的密码恢复(1)、密码恢复的基本原理对CISCO的网络设备进行密码恢复的主要武器是配置注册码。
思科2950交换机配置说明

0 watchdog, 0 multicast, 0 pause input
0 input packets with dribble condition detected
1 packets output, 64 bytes, 0 underruns
2,从配置模式下创建VLAN,如图:
我们可以看到,从配置模式创建VLAN时只要直接输入vlan命令加VLAN号就可以创建VLAN
上图为成功创建VLAN后的下一个界面,用“?”号同样可以查询到在此VLAN配置模式下可以使用的所有命令。
2.2.3
不同交换机相同VLAN间如需要互访,需要将交换机相连端口设置为中继模式,并且各接口封装模式要相同(在2950上只支持802.1q封装,端口配置为中继后自动开启802.1q协议),否则中继将不起作用。
在配置模式下可以给交换机命名、配置VLAN、STP、VTP、VLAN中继、访问控制列表、以太通道(端口绑定)、SNMP、AAA认证等高级特性,从而达到满足不同用户不同需求的目的。
举例如下:
1,给交换机命名
使用命令“hostname“加欲命名的名字,就能够修改交换机的名字。
如图:
输入“hostname2950_test”命令回车后,交换机的名字立刻由原来的“cisco2950”变为“2950_test”。
1 default active
2 VLAN2 active Fa0/1, Fa0/2, Fa0/3, Fa0/4
Fa0/5
3 VLAN3 active Fa0/6, Fa0/7, Fa0/8, Fa0/9
Fa0/10
基本配置模式:switchcisco2950
1.基本配置模式:switchcisco2950〉提示符
2.从基本配置模式进入到用户配置模式(switch#)时,需要键入enable 回车,在输入密码回车即可;
3.进入特权模式(switch(config)#)时,在用户配置模式的基础上键入configure t回车,再回车即可;4.进入到端口配置模式(switch(config-if)#)时,在特权模式的基础上键入interface vlan1回车即可;switch(config-if)#键入ip address ip地址和子网掩码回车(给交换机的vlan1配置ip地址的方法)
注:刚刚配置的ip地址临时存放在缓
存中,但还仍需保存在系统上,因此从端口配置模式退到用户配置模式——用exit命令即可,用copy running start来保存该配置信息。
查看配置信息,请在用户配置模式键入show interface 回车。
交换机基础及2950的配置-资料

交换机 B 网段 2
交换机不停地发出广播信息
重复帧
服务器/主机 X 单点帧 交换机 A
单点帧
路由器 Y
网段 1 单点帧
交换机 B
网段 2
• 主机X发送一单点帧给路由器Y • 路由器Y的MAC地址还没有被交换机A和B学习到 • 路由器Y会收到同一帧的两个拷贝
MAC地址表不稳定
服务器/主机 X 单点帧 交换机 A
4
1
100 Mbps
19
10
10 Mbps
100
100Leabharlann 生成树端口 0交换机 Z Mac 0c0011110000 缺省的优先级 32768
交换机X
端口0
MAC 0c0011111111
缺省的优先级 32768
端口1
100baseT
端口 0
端口1
100baseT
请指出: • 根桥 • 指派端口、非指派端口和根端口? • 各端口分别是转发还是阻塞状态?
学习
• Forwarding 转发
• Disabled (off) 失效
Listening
Blocking
Learning
Forwarding
生成树重新生成关键: 收敛时间
100baseT
交换机 X
MAC 0c0011111111 缺省优先级 32768
网段 1 单点帧
端口0 交换机 B
端口1
网段 2
• 主机X发送一单点帧给路由器Y • 路由器Y的MAC地址还没有被交换机A和B学习到 • 交换机A和B都学习到主机X的MAC地址对应端口0 • 到路由器Y的数据帧在交换机A和B上会泛洪处理 • 交换机A和B都错误学习到主机X的MAC地址对应端口 1
(完整word版)思科交换机配置命令大全

(完整word版)思科交换机配置命令大全思科交换机配置命令大全switch> 用户模式1:进入特权模式enableswitch> enableswitch#2:进入全局配置模式configure terminalswitch> enableswitch#configure terminalswitch(conf)#3:交换机命名hostname aptech2950 以aptech2950为例switch> enableswitch#configure terminalswitch(conf)#hostname aptch-2950aptech2950(conf)#4:配置使能口令enable password cisco 以cisco为例switch> enableswitch#configure terminalswitch(conf)#hostname aptch2950aptech2950(conf)# enable password cisco5:配置使能密码enable secret ciscolab 以cicsolab为例switch> enableswitch#configure terminalswitch(conf)#hostname aptch2950aptech2950(conf)# enable secret ciscolab6:设置虚拟局域网vlan 1 interface vlan 1switch> enableswitch#configure terminalswitch(conf)#hostname aptch2950aptech2950(conf)# interface vlan 1aptech2950(conf-if)#ip address 192.168.1.1 255.255.255.0 配置交换机端口ip和子网掩码aptech2950(conf-if)#no shut 是配置处于运行中aptech2950(conf-if)#exitaptech2950(conf)#ip default-gateway 192.168.254 设置网关地址7:进入交换机某一端口interface fastehernet 0/17 以17端口为例switch> enableswitch#configure terminalswitch(conf)#hostname aptch2950aptech2950(conf)# interface fastehernet 0/17aptech2950(conf-if)#8:查看命令showswitch> enableswitch# show version 察看系统中的所有版本信息show interface vlan 1 查看交换机有关ip 协议的配置信息show running-configure 查看交换机当前起作用的配置信息show interface fastethernet 0/1 察看交换机1接口具体配置和统计信息show mac-address-table 查看mac地址表show mac-address-table aging-time 查看mac地址表自动老化时间9:交换机恢复出厂默认恢复命令switch> enableswitch# erase startup-configureswitch# reload10:双工模式设置switch> enableswitch#c onfigure terminalswitch2950(conf)#hostname aptch-2950aptech2950(conf)# interface fastehernet 0/17 以17端口为例aptech2950(conf-if)#duplex full/half/auto 有full , half, auto 三个可选项11:cdp相关命令switch> enableswitch# show cdp 查看设备的cdp全局配置信息show cdp interface fastethernet 0/17 查看17端口的cdp配置信息show cdp traffic 查看有关cdp包的统计信息show cdp nerghbors 列出与设备相连的cisco设备12:csico2950的密码恢复拔下交换机电源线。
Cisco 2950交换机基本配置命令

switch(config-if)#switchport access vlan 2(把该接口划分itch(config-if)#no shutdown(激活端口)
switch(config-if)#exit
switch(config)#interface f0/2
Switch(config)#snmp-server group qycx123 v3 noauth
b、分别配置只读和可写community 如:
Switch(config)#snmp-server community qycx123 ro
Switch(config)#snmp-server community qycx123 rw
Switch(config-line)#login
Switch(config-line)#exit
b、更改进入全局配置模式时的密码
Switch#configure terminal
Switch(config)#enable secret qycx123
switch(config)#interface f0/3
switch(config-if)#switchport mode trunk(设置此口为中继模式)
switch(config-if)#no shutdown
witch(config-if)#exit(这里可以直接用ctrl+z或end直接退出到特权模式)
router(config-subif)#ip address 192.168.3.1 255.255.255.0
router(config-subif)#exit
router(config)#interface f0/0
cisco2950 交换机 简单配置 2950 是只支持二层的交换机 支持 VLAN 第 1 步

cisco2950 交换机简单配置2950 是只支持二层的交换机支持VLAN 第1 步:单击“开始”按钮,在“程序”菜单的“附件”选项中单击“超级终端” 第2 步:在“名称”文本框中键入“Cisco” 第3 步:在“连接时使用”下拉列表框中选择与交换机相连的计算机的串口。
台式机为“com 1”,笔记本为“com 3 或者com 5”。
第4 步:在“波特率”下拉列表框中选择“9600”-确定. 如果通信正常的话就会出现类似于如下所示的主配置界面,并会在这个窗口中就会显示交换机的初始配置情况。
enter enter enter no!1)配置交换机姓名switch>ena switch#configure enter switch#configure terminal (进入配置状态) Switch(config)#hostname 配置的交换机姓名如:30FLoor-2960-1 30FLoor-2960-1(config)#end 30FLoor-2960-1# 2)配置交换机的ip 30FLoor-2960-1#configure terminal (进入配置状态) 30FLoor-2960-1(config)#interface vlan 1 30FLoor-2960-1(config)#ip address ip 地址子网掩码例如:30FLoor-2960-1(config)#ip address 10.11.90.10 255.255.255.0 30FLoor-2960-1(config)#no shutdown 30FLoor-2960-1(config)#end 30FLoor-2960-1# 30FLoor-2960-1# 3)配置交换机的默认网关30FLoor-2960-1(config)#ip default-gateway 网关ip 例如:30FLoor-2960-1(config)#ip default-gateway 10.11.90.254 4)设置路由30FLoor-2960-1(config)#ip route 0.0.0.0 X.X.X.X 5)设置console 口密码30FLoor-2960-1(config)#line console 0 30FLoor-2960-1(config-line)#password 输入密码30FLoor-2960-1(config-line)#login 30FLoor-2960-1(config-line)#end 6)设置telnet 的密码30FLoor-2960-1(config)#line vty 0 10 30FLoor-2960-1(config-line)#password 输入密码(yuxuan)30FLoor-2960-1(config-line)#login 30FLoor-2960-1(config-line)#end7)设置交换机的enable 密码30FLoor-2960-1(config)#enable password 输入密码(xuan)30FLoor-2960-1(config)#enable secret 输入密码(yuxuan)30FLoor-2960-1(config)#end 8)将当前配置信息保存到闪存中30FLoor-2960-1(config)#write 9)查看交换机信息30FLoor-2960-1# show version 查看交换机版本信息show ip interfaces 查看交换机的ip 地址show interface vlan 1 验证管理ip 地址已经配置并开启show ip redirect 查看交换机的网关show running-configure 查看交换机当前的配置信息show configure 查看交换机保存的配置信息switch#write ;保存配置信息switch#show vtp ;查看vtp 配置信息switch#show run ;查看当前配置信息switch#show vlan ;查看vlan 配置信息switch#show interface ;查看端口信息switch#show int f0/0 ;查看指定端口信息10)交换机基本配置步骤1.登陆到交换机2.进入特权模式命令:enable 3.进入全局配置模式命令:configure terminal 4.进入相应的配置子模式如:接口子模式命令:interface vlan 1 交换机基本状态:switch: ;ROM 状态,路由器是rommon> hostname> ;用户模式hostname# ;特权模式hostname(config)# ;全局配置模式hostname(config-if)# ;接口状态交换机口令设置:switch>enable ;进入特权模式switch#config terminal ;进入全局配置模式switch(config)#hostname ;设置交换机的主机名switch(config)#enable secret xxx ;设置特权加密口令switch(config)#enable password xxa ;设置特权非密口令switch(config)#line console 0 ;进入控制台口switch(config-line)#line vty 0 4 ;进入虚拟终端switch(config-line)#login ;允许登录switch(config-line)#password xx ;设置登录口令xx switch#exit ;返回命令交换机VLAN 设置:switch#vlan database ;进入VLAN 设置switch(vlan)#vlan 2 ;建VLAN 2 switch(vlan)#no vlan 2 ;删vlan 2 switch(config)#int f0/1 ;进入端口 1 switch(config-if)#switchport access vlan 2 ;当前端口加入vlan 2 switch(config-if)#switchport mode trunk ;设置为干线switch(config-if)#switchport trunk allowed vlan 1,2 ;设置允许的vlan switch(config-if)#switchport trunk encap dot1q ;设置vlan 中继switch(config)#vtp domain ;设置发vtp 域名switch(config)#vtp password ;设置发vtp 密码switch(config)#vtp mode server ;设置发vtp 模式switch(config)#vtp mode client ;设置发vtp 模式交换机设置IP 地址:switch(config)#interface vlan 1 ;进入vlan 1 switch(config-if)#ip address ;设置IP 地址switch(config)#ip default-gateway ;设置默认网关switch#dir flash: ;查看闪存交换机显示命令:switch#write ;保存配置信息switch#show vtp ;查看vtp 配置信息switch#show run ;查看当前配置信息switch#show vlan ;查看vlan 配置信息switch#show interface ;查看端口信息switch#show int f0/0 ;查看指定端口信息思科2950 交换机VLAN 划分cisco 首先配置一下交换机SC-2950> SC-2950>en SC-2950#conf t Enter configuration commands, one per line. End with CNTL/Z. SC-2950(config)#config-register 0x2102 SC-2950(config)#end 添加三个VLAN SC-2950#vlan data SC-2950(vlan)#vlan 10 name v1 VLAN 10 added: Name: v1 SC-2950(vlan)#vlan 20 name v2 VLAN 20 added: Name: v2 SC-2950(vlan)#vlan 30 name v3 VLAN 30 added: Name: v3 SC-2950(vlan)#exitAPPLY completed. Exiting.... SC-2950# 划分接口到各个VLAN SC-2950#conf t Enter configuration commands, one per line. End with CNTL/Z. SC-2950(config)#int fa0/1 //留给管理员SC-2950(config-if)#switchport mode access SC-2950(config-if)#sw acc vlan 10 SC-2950(config-if)#no shutdown SC-2950(config-if)#exit SC-2950(config)#int range f0/2 - 15 SC-2950(config-if-range)#sw mode acc SC-2950(config-if-range)#sw acc vlan 20 SC-2950(config-if-range)#no sh SC-2950(config-if-range)#exit SC-2950(config)#int range f0/16 - 24 SC-2950(config-if-range)#sw mode acc SC-2950(config-if-range)#sw acc vlan 30 SC-2950(config-if-range)#no sh SC-2950(config-if-range)#exit 激活VLAN,并且给VLAN 10 加个IP 以便管理SC-2950(config)#int vlan 10 SC-2950(config-if)#ip add 192.168.1.1 255.255.255.0 SC-2950(config-if)#no sh SC-2950(config-if)#exit SC-2950(config)#int vlan 20 SC-2950(config-if)#no sh SC-2950(config-if)#exit SC-2950(config)#int vlan 30 SC-2950(config-if)#no sh SC-2950(config-if)#exit 将交换机指向网关SC-2950(config)#ipdefault-gateway 192.168.1.254 SC-2950(config)#end SC-2950# 检测配置SC-2950#sh vlan brief VLAN Name Status Ports ---- -------------------------------- --------- ------------------------------1 default active 10 v1 active Fa0/1 20 v2 active Fa0/2, Fa0/3, Fa0/4,Fa0/5 Fa0/6, Fa0/7, Fa0/8,Fa0/9 Fa0/10, Fa0/11, Fa0/12,Fa0/13 Fa0/14, Fa0/1530v3activeFa0/16, Fa0/17, Fa0/18, Fa0/19 Fa0/20, Fa0/21, Fa0/22, Fa0/23 Fa0/24 Prot down down down up up downSC-2950#sh ip int b Interface IP-Address ocol FastEthernet0/23 unassigned FastEthernet0/24 unassigned Vlan1 unassigned Vlan10 192.168.1.1 Vlan20 unassigned Vlan30 unassigned SC-2950#sh run Building configuration... Current configuration : 1482 bytes ... ! interface FastEthernet0/24 switchport access vlan 30 ! interface Vlan1 no ip address ! interface Vlan10 ip address 192.168.1.1 255.255.255.0 ! interface Vlan20 no ip address ! interface Vlan30 no ip address ! ip default-gateway 192.168.1.254 ip http server ! ... 保存配置SC-2950#write Building configuration... [OK] cisco 2960 交换机安装配置基础新设备配置内容:1. interface vlan 1 的ip,gateway conf t int vlan 1 ip address xx.xx.xx.xx 255.255.255.0OK? Method Status YES unset up YES unset up YES unset up YES manual up YES unset up YES unset upip default-gateway ip-address no shutdown exit 2.en 的密码3.line vty 0-4 telnet 的密码4.wr 存盘show interface vlan 1 show run 将F0/1-10 端口加入到VLAN20 中,对应以下命令interface range f0/1 -10 switchport mode acccess switchport access vlan 20 注意,f0/1 后面有个空格,然后才是-10 cisco 2950 常用配置命令产品相关命令1、配置IP 地址交换机要能够被网管,必须给它标识一个管理IP 地址,默认情况下CISCO 交换机的VLAN 1 为管理VLAN,为该VLAN 配上IP 地址,交换机就可以被网管了。
[VIP专享]2950交换机的启动及基本设置
![[VIP专享]2950交换机的启动及基本设置](https://img.taocdn.com/s3/m/a9656d5c4a7302768e9939e1.png)
本实验是对Cisco Catalyst 2950系列交换机的启动和基本设置的操作。
1.实验目的 通过本实验,读者可以掌握以下技能: ●熟悉2950交换机的开机界面; ●对2950交换机进行基本的设置; ●理解2950交换机的端口及其编号。
2.设备需求 本实验需要以下设备: ●Cisco Catalyst 2950系列交换机1台。
型号不限; ●PC机1台,操作系统为Windows系列,装有超级终端程序; ●Console电缆1条及相应的接口转换器。
3.线缆连接及配置说明 如图A.1所示,PC机通过串口与交换机的Console端口相连。
Cisco 2950交换机的Console端口的缺省设置如下。
●端口速率:9600bit/S。
●数据位:8。
●奇偶校验:无。
●停止位;1。
●流控:无。
把PC机超级终端程序中串行端口的属性设置成与上述参数一致后,便可以开始实验。
4.实验配置及监测结果 在超级终端正常开启的情况下,接通2950交换机的电源,开始实验。
第1部分;2950交换机的启动 监测清单A-1记录了2950交换机的启动界面和缺省配置。
监测清单A-1 Catalyst 2950交换机的启动界面及缺省配置 ! line con 0 line vty 515 ! end Switch# (1)上述第1段记录了2950交换机的启动界面,其中较为重要的内容已经在监测清单中进行了标注和讲解。
启动过程提供了丰富的信息,利用这些信息,我们可以对2950交换机的硬件结构和软件加载过程有直观的认识。
在产品验货时,有关部件号。
序列号、版本号等信息非常重要。
(2)第2段列出的2950交换机的缺省配置。
缺省配置下,历有接口处于可用状态,并且都属于VLAN1。
与1900系列交换机相比,2950交换机的缺省配置有以下两点显著不同: 有2个千兆以太网接口; 有1个Vlan1接口。
在下面的配置中将看到Vlan1的作用。
2950交换机简要配置手册(中文)20页word

2950交换机简明配置维护手册目录说明 (3)产品特性 (3)配置端口 (3)配置一组端口 (3)配置二层端口 (5)配置端口速率及双工模式 (5)端口描述 (6)监控及维护端口 (7)监控端口和控制器的状态 (7)刷新、重置端口及计数器 (9)关闭和打开端口 (9)配置VLAN (10)理解VLAN (10)可支持的VLAN (11)配置正常范围的VLAN (11)生成、修改以太网VLAN (11)删除VLAN (13)将端口分配给一个VLAN (13)配置VLAN Trunks (14)使用STP实现负载均衡 (17)配置Cluster (21)说明本手册只包括日常使用的有关命令及特性,其它未涉及的命令及特性请参考英文的详细配置手册。
产品特性2950是只支持二层的交换机支持VLAN∙到250 个VLAN∙支持VLAN ID从1到4094(IEEE 802.1Q 标准)∙支持ISL及IEEE 802.1Q封装安全∙支持IOS标准的密码保护∙支持标准及扩展的访问列表来定义安全策略∙支持基于VLAN的访问列表监视∙交换机LED指示端口状态∙SPAN及远端SPAN (RSPAN) 可以监视任何端口或VLAN的流量∙内置支持四组的RMON监控功能(历史、统计、告警及事件)配置端口配置一组端口当使用interface range命令时有如下的规则:∙有效的组范围:o vlan从1 到4094o fastethernet槽位/{first port} - {last port}, 槽位为0o gigabitethernet槽位/{first port} - {last port},槽位为0o port-channel port-channel-number - port-channel-number, port-channel号从1到64∙端口号之间需要加入空格,如:interface range fastethernet 0/1 – 5是有效的,而interface range fastethernet 0/1-5是无效的.∙interface range命令只能配置已经存在的interface vlan∙所有在同一组的端口必须是相同类别的。
4506-2950参数配置文档

CATALYST4506/2950交换机配置文档1交换机操作基础 (2)1.1 登录 (2)1.2 工作模式 (2)1.2.1用户模式 (2)1.2.2特权模式 (3)1.2.3全局配置模式 (3)1.2.4端口配置模式 (4)1.2.5路由配置模式 (4)1.3 基本操作命令 (4)1.3.1保存配置 (4)1.3.2帮助 (5)1.3.3显示配置信息 (5)1.3.4显示路由信息 (5)1.3.5显示端口信息 (5)1.3.6显示VLAN信息 (5)1.3.7显示HSRP运行状况 (5)1.3.8ping、telnet、traceroute (5)1.3.9用命令方式重新启动交换机 (5)2 CA TAL YST4506配置 (6)2.1 基本信息配置 (6)2.2 VLAN配置 (7)2.3 配置第三层接口 (7)2.4 配置HSRP (8)2.5 配置路由 (9)2.6 设置TRUNK及端口绑定 (9)2.6.1TRUNK配置 (9)2.6.2端口绑定 (10)3 CA TAL YST2950配置 (10)3.1 基本信息配置 (10)3.2 配置VLAN (11)3.3 分配管理IP (12)3.4 配置静态路由 (12)鸿联95呼叫中心网络核心设备由2台CATAL YST4506交换机构成,二层交换机CA TAL YST2950分别以双千兆链路连接核心交换机。
关于本文档中的LVAN划分及IP地址分配,请详见《VLAN规划表》及《IP地址分配表》。
本文档按实际配置需求进行部分举例说明(不是全部配置),维护人员参照此文档配置步骤及相应命令,进行参数设置。
1 交换机操作基础1.1 登录登录CATALYST交换机有多种方式,常用的方式为CONSOLE口登录及TELNET登录。
如果交换机第一次被使用,必须通过CONSOLE口登录才可以对交换机进行设置。
CATALYST交换机随机配备一条CONSOLE线及1个9针转接头,CONSOLE线两头为RJ-45接口,一头可接入交换机的CONSOLE端口,另一头可连接9针转接头,并与PC 的COM口连接。
配置cisco2950交换机的端口
配置cisco2950交换机的端口配置一组端口当使用interface range命令时有如下的规则:•有效的组范围:o vlan从1 到4094o fastethernet槽位/{first port} - {last port}, 槽位为0o gigabitethernet槽位/{first port} - {last port},槽位为0o port-channel port-channel-number - port-channel-number, port-channel号从1到64•端口号之间需要加入空格,如:interface range fastethernet 0/1 – 5是有效的,而interface range fastethernet 0/1-5是无效的.•interface range命令只能配置已经存在的interface vlan•所有在同一组的端口必须是相同类别的。
见以下例子:Switch# configure terminalSwitch(config)# interface range fastethernet0/1 - 5Switch(config-if-range)# no shutdownSwitch(config-if-range)#以下的例子显示使用句号来配置不同类型端口的组:Switch# configure terminalSwitch(config)# interface range fastethernet0/1 - 3, gigabitethernet0/1 - 2 Switch(config-if-range)# no shutdownSwitch(config-if-range)#配置二层端口2950的所有端口缺省的端口都是二层口,如果此端口已经配置成三层端口的话,则需要用switchport来使其成为二层端口。
配置端口速率及双工模式可以配置快速以太口的速率为10/100Mbps及千兆以太口的速率为10/100/1000-Mbps; 但对于GBIC端口则不能配置速率及双工模式,有时可以配置nonegotiate,当需要联接不支持自适应的其它千兆端口时Switch# configure terminalSwitch(config)# interface fastethernet0/3Switch(config-if)# speed 10Switch(config-if)# duplex half端口描述Use the no description interface configuration command to delete the description.This example shows how to add a description on Fast Ethernet interface 0/4 and to verify the description:Switch# config terminalEnter configuration commands, one per line. End with CNTL/Z.Switch(config)# interface fastethernet0/4Switch(config-if)# description Connects to MarketingSwitch(config-if)# endSwitch# show interfaces fastethernet0/4 descriptionInterface Status Protocol DescriptionFa0/4 up down Connects to Marketing 监控及维护端口监控端口和控制器的状态主要命令见下表:举例如下:Switch# show interfaces statusSwitch# show interfaces fastethernet 0/1 switchportSwitch# show running-config interface fastethernet0/2刷新、重置端口及计数器Note clear counters 命令只清除用show interface所显示的计数,不影响用snmp得到的计数举例如下:Switch# clear counters fastethernet0/5Clear "show interface" counters on this interface [confirm] ySwitch#*Sep 30 08:42:55: %CLEAR-5-COUNTERS: Clear counter on interface FastEthernet0/5by vty1 (171.69.115.10)可使用clear line命令来清除或重置某一端口或串口,在大部分情况下并不需要这样做: Switch# clear interface fastethernet0/5关闭和打开端口使用no shutdown命令重新打开端口.举例如下:Switch# configure terminalSwitch(config)# interface fastethernet0/5 Switch(config-if)# shutdownSwitch(config-if)#Switch# configure terminalSwitch(config)# interface fastethernet0/5 Switch(config-if)# no shutdownSwitch(config-if)#(完)。
Cisco2950交换机安装配置
Cisco2950交换机安装配置、故障排除手册网络配置 2008-09-12 16:45 阅读121 评论0字号:大大中中小小目录第一部分交换机安装. 21.1 安装前相关考虑. 21.2 在机架上固定交换机. 21.3 安装GBIC模块. 41.4 安装连接线缆. 5第二部分交换机基本配置. 82.1 加电后首次配置. 82.2 通过浏览器配置交换机. 92.3 通过CONSOLE口进入命令行配置. 11第三部分高级配置. 20第四部分安全配置. 22第五部分故障排除. 275.1 检查设备状态指示灯. 275.2 检查配置及相关信息. 295.3 已知的问题及解决方式. 33第六部分常见问题. 35第一部分交换机安装1.1 安装前相关考虑Warning :To prevent the switch from overheating, do not operate it in anarea that exceeds the maximum recommended ambient temperature of 113\xb0 F (45\xb0 C). To prevent airflow restriction, allow at least 3 inches (7.6 cm) of clearance around the ventilation openings。
Warning:When installing the unit, the ground connection must always bemade first And disconnected last.1.2 在机架上固定交换机l Attaching Brackets (Front Panel Forward)l Attaching Brackets (Rear Panel Forward)l Mounting the Switch in a Rackl Attaching the Optional Cable Guide1.3 安装GBIC模块l Installing a 1000BASE-X GBIC Module in the Switchl Installing a 1000BASE-T GBIC Module in the Switchl Installing a GigaStack GBIC Module in the Switch1.4 安装连接线缆注意:交换机端口速率、双工的设置Ø Let the ports autonegotiate both speed and duplex.Ø Set the port speed and duplex parameters on both ends of the connection.When connecting to workstations, servers, routers, and Cisco IP Phones, connect a straight-through Category 5 cable to an RJ-45 connector on the front panel.When connecting to switches or repeaters, use a crossover Category 5 cable。
- 1、下载文档前请自行甄别文档内容的完整性,平台不提供额外的编辑、内容补充、找答案等附加服务。
- 2、"仅部分预览"的文档,不可在线预览部分如存在完整性等问题,可反馈申请退款(可完整预览的文档不适用该条件!)。
- 3、如文档侵犯您的权益,请联系客服反馈,我们会尽快为您处理(人工客服工作时间:9:00-18:30)。
2950交换机简明配置维护手册目录说明 (3)产品特性 (3)配置端口 (3)配置一组端口 (3)配置二层端口 (5)配置端口速率及双工模式 (6)端口描述 (7)监控及维护端口 (8)监控端口和控制器的状态 (8)刷新、重置端口及计数器 (10)关闭和打开端口 (10)配置VLAN (11)理解VLAN (11)可支持的VLAN (12)配置正常范围的VLAN (12)生成、修改以太网VLAN (13)删除VLAN (14)将端口分配给一个VLAN (15)配置VLAN Trunks (16)使用STP实现负载均衡 (19)配置Cluster (23)第1章说明本手册只包括日常使用的有关命令及特性,其它未涉及的命令及特性请参考英文的详细配置手册。
第2章产品特性2950是只支持二层的交换机支持VLAN•到250 个VLAN•支持VLAN ID从1到4094(IEEE 802.1Q 标准)•支持ISL及IEEE 802.1Q封装安全•支持IOS标准的密码保护•支持标准及扩展的访问列表来定义安全策略•支持基于VLAN的访问列表监视•交换机LED指示端口状态•SPAN及远端SPAN (RSPAN) 可以监视任何端口或VLAN的流量•内置支持四组的RMON监控功能(历史、统计、告警及事件)第3章配置端口3.1 配置一组端口当使用interface range命令时有如下的规则:•有效的组范围:o vlan从1 到4094o fastethernet槽位/{first port} - {last port}, 槽位为0o gigabitethernet槽位/{first port} - {last port},槽位为0o port-channel port-channel-number - port-channel-number, port-channel号从1到64•端口号之间需要加入空格,如:interface range fastethernet 0/1 –5是有效的,而interface range fastethernet 0/1-5是无效的.•interface range命令只能配置已经存在的interface vlan•所有在同一组的端口必须是相同类别的。
见以下例子:Switch# configure terminalSwitch(config)# interface range fastethernet0/1 - 5Switch(config-if-range)# no shutdownSwitch(config-if-range)#*Oct 6 08:24:35: %LINK-3-UPDOWN: Interface FastEthernet0/1, changed state to up*Oct 6 08:24:35: %LINK-3-UPDOWN: Interface FastEthernet0/2, changed state to up*Oct 6 08:24:35: %LINK-3-UPDOWN: Interface FastEthernet0/3, changed state to up*Oct 6 08:24:35: %LINK-3-UPDOWN: Interface FastEthernet0/4, changed state to up*Oct 6 08:24:35: %LINK-3-UPDOWN: Interface FastEthernet0/5, changed state to up*Oct 6 08:24:36: %LINEPROTO-5-UPDOWN: Line protocol on Interface FastEthernet0/05, changed state to up*Oct 6 08:24:36: %LINEPROTO-5-UPDOWN: Line protocol on Interface FastEthernet0/3, changedstate to up*Oct 6 08:24:36: %LINEPROTO-5-UPDOWN: Line protocol on Interface FastEthernet0/4, changedstate to up以下的例子显示使用句号来配置不同类型端口的组:Switch# configure terminalSwitch(config)# interface range fastethernet0/1 - 3, gigabitethernet0/1 - 2Switch(config-if-range)# no shutdownSwitch(config-if-range)#*Oct 6 08:29:28: %LINK-3-UPDOWN: Interface FastEthernet0/1, changed state to up*Oct 6 08:29:28: %LINK-3-UPDOWN: Interface FastEthernet0/2, changed state to up*Oct 6 08:29:28: %LINK-3-UPDOWN: Interface FastEthernet0/3, changed state to up*Oct 6 08:29:28: %LINK-3-UPDOWN: Interface GigabitEthernet0/1, changed state to up *Oct 6 08:29:28: %LINK-3-UPDOWN: Interface GigabitEthernet0/2, changed state to up *Oct 6 08:29:29: %LINEPROTO-5-UPDOWN: Line protocol on Interface GigabitEthernet0/ 1, changed state to up*Oct 6 08:29:29: %LINEPROTO-5-UPDOWN: Line protocol on Interface FastEthernet0/ 2, changed state to up*Oct 6 08:29:29: %LINEPROTO-5-UPDOWN: Line protocol on Interface FastEthernet0/ 3, changed state to up3.2 配置二层端口2950的所有端口缺省的端口都是二层口,如果此端口已经配置成三层端口的话,则需要用switchport来使其成为二层端口。
3.2.1配置端口速率及双工模式3.2.1.1 可以配置快速以太口的速率为10/100Mbps及千兆以太口的速率为10/100/1000-Mbps; 但对于GBIC端口则不能配置速率及双工模式,有时可以配置nonegotiate,当需要联接不支持自适应的其它千兆端口时Switch# configure terminalSwitch(config)# interface fastethernet0/3Switch(config-if)# speed 10Switch(config-if)# duplex half3.2.2端口描述Use the no description interface configuration command to delete the description.This example shows how to add a description on Fast Ethernet interface 0/4 and to verify the description:Switch# config terminalEnter configuration commands, one per line. End with CNTL/Z.Switch(config)# interface fastethernet0/4Switch(config-if)# description Connects to MarketingSwitch(config-if)# endSwitch# show interfaces fastethernet0/4 descriptionInterface Status Protocol DescriptionFa0/4 up down Connects to Marketing3.3 监控及维护端口3.3.1监控端口和控制器的状态主要命令见下表:举例如下:Switch# show interfaces statusPort Name Status Vlan Duplex Speed TypeGi0/1 connected routed a-full a-100 10/100/1000Base TXGi0/2 wce server 20.20.2 disabled routed auto auto 10/100/1000Base TX Gi0/3 ip wccp web-cache notconnect routed auto auto 10/100/1000Base TXGi0/4 notconnect routed auto auto 10/100/1000Base TX Gi0/5 notconnect routed auto auto 10/100/1000Base TX Gi0/6 disabled routed auto auto 10/100/1000Base TX Gi0/7 disabled routed auto auto 10/100/1000Base TX Gi0/8 disabled routed auto 100 10/100/1000Base TX Gi0/9 notconnect routed auto auto 10/100/1000Base TX Gi0/10 notconnect routed auto auto 10/100/1000Base TX Gi0/11 disabled routed auto auto unknownGi0/12 notconnect routed auto auto unknownSwitch# show interfaces fastethernet 0/1 switchportName: Fa0/1Switchport: EnabledAdministrative Mode: static accessOperational Mode: downAdministrative Trunking Encapsulation: dot1qNegotiation of Trunking: OffAccess Mode VLAN: 1 (default)Trunking Native Mode VLAN: 1 (default)Trunking VLANs Enabled: ALLPruning VLANs Enabled: 2-1001Protected: falseUnknown unicast blocked: disabledUnknown multicast blocked: disabledVoice VLAN: dot1p (Inactive)Appliance trust: 5Switch# show running-config interface fastethernet0/2Building configuration...Current configuration : 131 bytes!interface FastEthernet0/2switchport mode accessswitchport protectedno ip addressmls qos cos 7mls qos cos overrideend3.3.2刷新、重置端口及计数器Note clear counters 命令只清除用show interface所显示的计数,不影响用snmp得到的计数举例如下:Switch# clear counters fastethernet0/5Clear "show interface" counters on this interface [confirm] ySwitch#*Sep 30 08:42:55: %CLEAR-5-COUNTERS: Clear counter on interface FastEthernet0/5by vty1 (171.69.115.10)可使用clear line命令来清除或重置某一端口或串口,在大部分情况下并不需要这样做:Switch# clear interface fastethernet0/53.3.3关闭和打开端口使用no shutdown命令重新打开端口.举例如下:Switch# configure terminalSwitch(config)# interface fastethernet0/5Switch(config-if)# shutdownSwitch(config-if)#*Sep 30 08:33:47: %LINK-5-CHANGED: Interface FastEthernet0/5, changed state to a administratively downSwitch# configure terminalSwitch(config)# interface fastethernet0/5Switch(config-if)# no shutdownSwitch(config-if)#*Sep 30 08:36:00: %LINK-3-UPDOWN: Interface FastEthernet0/5, changed state to up 第4章配置VLAN4.1 理解VLAN一个VLAN就是一个交换网,其逻辑上按功能、项目、应用来分而不必考虑用户的物理位置。