Linux内核源代码漫游
软件系统分析与设计02LINUX内核源程序文件组织和内核结构

4.头文件主目录include(2)
<stdarg.h> 标准参数头文件。以宏的形式定义变量参数列表。 主要说明了-个类型(va_list)和三个宏(va_start, va_arg 和 va_end),用于vsprintf、vprintf、vfprintf 函数。 <stddef.h> 标准定义头文件。定义了NULL, offsetof(TYPE, MEMBER)。 <string.h> 字符串头文件。主要定义了一些有关字符串操作的 嵌入函数。 <termios.h> 终端输入输出函数头文件。主要定义控制异步通信 口的终端接口。 <time.h> 时间类型头文件。其中最主要定义了tm 结构和一些有 关时间的函数原形。 <unistd.h> Linux 标准头文件。定义了各种符号常数和类型,并 申明了各种函数。如定义了__LIBRARY__,则还包括系统调 用号和内嵌汇编_syscall0()等。 <utime.h> 用户时间头文件。定义了访问和修改时间结构以及 utime()原型。
系统专用数据结构子目录include/sys
<sys/stat.h> 文件状态头文件。含有文件或文件 系统状态结构stat{}和常量。 <sys/times.h> 定义了进程中运行时间结构tms 以及times()函数原型。 <sys/types.h> 类型头文件。定义了基本的系统 数据类型。 <sys/utsname.h> 系统名称结构头文件。 <sys/wait.h> 等待调用头文件。定义系统调用 wait()核waitpid()及相关常数符号。
Linux 内核专用头文件子目录include/linux
linux内核原理

linux内核原理Linux内核是一个开放源代码的操作系统内核,它是由林纳斯·托瓦兹(Linus Torvalds)在上世纪90年代初开发而来。
Linux内核的设计遵循了Unix操作系统的许多原则,并且具有高度的可移植性、可扩展性和稳定性。
它是目前世界上被广泛使用的最流行的操作系统内核之一。
要了解Linux内核的工作原理,首先要明白内核的主要功能是什么。
内核的主要任务是管理计算机硬件资源的分配和控制,为上层应用程序提供操作系统服务和功能。
它是操作系统的核心部分,负责处理硬件设备的输入输出、内存管理、进程调度、文件系统等基本功能。
Linux内核的设计基于模块化的原则,它由多个不同的模块组成,每个模块负责不同的功能。
这种模块化的设计使得Linux内核具有灵活和可定制的特性,允许用户根据自己的需求选择加载或卸载不同的功能模块。
内核的开发过程通过一个分布式的方式进行,每个开发者都可以独立地开发和贡献代码。
这种开发模式使得内核的开发过程高效且灵活,有助于快速解决问题和推出新的功能。
同时,内核的开放源代码使得任何人都可以查看和修改内核的代码,从而更好地适应不同的硬件平台或应用需求。
Linux内核的主要组成部分包括进程管理、内存管理、文件系统、设备驱动等功能模块。
进程管理模块负责管理系统中的各个进程,包括进程的创建、终止、调度等。
内存管理模块负责管理系统的内存资源,包括内存的分配和回收、虚拟内存管理等。
文件系统模块负责管理系统中的文件和目录,包括文件的读写和权限控制等。
设备驱动模块负责管理系统中的硬件设备,包括设备的初始化、中断处理等。
在Linux内核的运行过程中,不同的模块之间通过系统调用和中断机制进行通信和协调。
系统调用是用户程序与内核之间的接口,用户程序可以通过系统调用请求内核提供各种操作系统服务,如文件读写、进程创建等。
中断是外部设备向内核发出的一种异步请求,例如硬盘IO完成、时钟中断等。
内核需要及时响应这些中断请求,并根据需要做出相应的操作。
Linux 源码介绍说明文档
源码说明一、什么是源码包软件;顾名思义,源码包就是源代码的可见的软件包,基于Linux和BSD系统的软件最常见;在国内源可见的软件几乎绝迹;大多开源软件都是国外出品;在国内较为出名的开源软件有fcitx;lumaqq;Lumaqq及scim等;但软件的源代码可见并不等于软件是开源的,我们还要以软件的许可为准;比如有些软件是源码可见的,但他约定用户只能按他约定的内容来修改;比如vbb论坛程序;所以一个软件是否是开源软件,得具备两个条件;一是源代码可见;二是要有宽松的许可证书,比如GPL 证书等;在GNU Linux或BSD社区中,开发人员在放出软件的二进制软件包的同时,也会为我们提供源代码软件包;二、源代码有何用?一个软件的如果有源码,是任何人都能看到他是怎么开发而来的,就像一个瓶子,比如瓶子制作的模具是什么;需要什么材料;具体的用途以及瓶子的详细说明书等等。
软件的开放源码就是类似,开发者在给我们软件的同时,也会告诉我们软件是怎么开发出来的;只要我们的水平足够的高,所有的代码都在那里,我们就可以修改和定制软件,以适合我们的需要;如果Windows开放源代码,并以GPL发布,一样是有人能造出来N多的Windows发行版;遗憾的是Windows并不是开源系统;所以软件的源代码的用处无非是以下两点;1、软件根据用户的需要加以定制;2、二次开发;注:要根据软件的许可证书约定为准,开发者许可二次开发才行;三、怎样安装以源码包打包的软件;1、源码包的打包格式;源代码一般以file.tar.gz file.tar.bz2或file.src.rpm 打包;file.tar.gz和file.tar.bz2格式的解包命令如下;[root@localhost beinan]# tar jxvf file.tar.bz2[root@localhost beinan]# tar zxvf file.tar.gz至于file.src.rpm 的用法,请参见:/set/39788.html">《file.src.rpm 使用方法的简介》2、如何编译安装源码包;(大多数)1)解开软件包查看帮助文档;我们解开一个包后,进入解压包,一般都能发现README(或reame)和INSTALL( 或install);或doc(或DOC)目录;看名字就知道个差不多;比如我们下载一个比较新的fcitx 的软件包,比如是 fcitx-3.2-050827.tar.bz2我们在解开这个软件包会会发现如下的文件;[root@localhost fcitx]# tar jxvf fcitx-3.2-050827.tar.bz2[root@localhost fcitx]#cd fcitx[root@localhost fcitx]# lsaclocal.m4 config.guess configure debian INSTALL Makefile.in src xpmAUTHORS config.h.in configure.in depcomp install-sh missing THANKSautogen.sh config.rpath COPYING doc lib mkinstalldirs TODOChangeLog config.sub data fcitx.spec.in Makefile.am README tools所以我们就可以看fcitx的INSTALL 和doc目录的安装文档了;里面都告诉我们如何安装;有时安装文档也会在开发者的主页上有详细的说明,及常见问题的处理等;比如/info/38307.html" target=_blank>LumaQQ2)编译安装软件的条件;首先我们在Linux系统中至少得把开发工具安装上,比如gcc ;perl;python;glibc;gtk;make ;automake 等开发工具或基础包;还要安装一些相应的开发包,一般是文件名包括dev的,比如kernel-devel;还有一些开发库,比如以lib开头的;如果您在编译软件时,有时提示缺少什么东西之类的,大多少的是这些开发工具和开发库等;从光盘中找出安装就是了;有时光盘没有提供,请用google搜索相应的软件包,有时可能也会用到源码包编译安装所依赖的包;有时本来系统中已经安装了所依赖的包,但系统提示找不到应该怎么办?这时需要我们设置一下PKG_CONFIG_PATH的环境变量就行了;#export PKG_CONFIG_PATH=/usr/lib/pkgconfig或#export PKG_CONFIG_PATH=/usr/local/lib/pkgconfig然后我们再来运行编译的./configure ;make ;make install ,尝试着来吧;以java开发的工具开发的程序,要用到 jre或者jdk ;jdk已经包括jre了,所以如果我们只是要求有一个java程序运行的环境,只需要安装jre就行了;安装好jre,配置一下java 的环境变量就可以用了。
linux操作系统内核版表达方式

Linux操作系统内核源代码的表达方式Linux操作系统内核源代码的表达方式是指内核代码中所使用的语法和结构。
它决定了内核代码的可读性、可维护性和可移植性。
内核源代码的表达方式主要包括以下几个方面:语法:Linux内核源代码使用C语言编写。
C语言是一种广泛使用的通用编程语言,具有丰富的库和工具支持,并且很容易移植到不同的平台上。
结构:Linux内核源代码由许多相互关联的文件组成,这些文件包含了内核的各种功能和模块。
内核源代码的结构通常是分层的,每一层都包含了不同的功能。
命名约定:Linux内核源代码使用了严格的命名约定,这使得内核代码更容易阅读和维护。
例如,内核中的函数通常以“sys_”或“do_”开头,而结构体通常以“struct_”开头。
注释:Linux内核源代码中包含了大量的注释,这些注释解释了代码的功能和用法。
注释对于理解内核代码非常有用,尤其是对于新内核开发者来说。
Linux内核源代码的表达方式的特点Linux内核源代码的表达方式具有以下几个特点:简洁:Linux内核源代码非常简洁,代码中没有多余的注释和代码段。
这种简洁性使得内核代码更容易阅读和维护。
模块化:Linux内核源代码是模块化的,内核中的各个模块可以独立编译和加载。
这种模块化设计使得内核更容易扩展和维护。
可移植性:Linux内核源代码具有很强的可移植性,它可以移植到不同的硬件平台上。
这种可移植性使得Linux内核成为世界上最受欢迎的操作系统之一。
Linux内核源代码的表达方式的优点Linux内核源代码的表达方式具有以下几个优点:可读性:Linux内核源代码非常可读,代码中的注释和命名约定使得内核代码很容易理解。
这种可读性对于内核开发者来说非常重要,它可以帮助开发者快速理解和修改内核代码。
可维护性:Linux内核源代码也非常可维护,代码中的模块化设计使得内核更容易扩展和维护。
这种可维护性对于内核的长期发展非常重要,它可以确保内核能够不断更新和改进。
Linux内核源代码漫游
Linux内核源代码漫游Linux教程-编程开发-Linux内核源代码漫游本章试图以顺序的方式来解释Linux源代码,以帮助读者对源代码的体系结构以及很多相关的unix特性的实现有一个很好的理解。
目标是帮助对Linux 不甚了解的有经验的C程序员对整个Linux的设计有所了解。
这也就是为什么内核漫游的入点选择为内核本身的启始点:系统引导(启动)。
这份材料需要对C语言以及对Unix的概念和PC机的结构有很好的了解,然而本章中并没有出现任何的C代码,而是直接参考(指向)实际的代码的。
有关内核设计的最佳篇幅是在本手册的其它章节中,而本章仍趋向于是一个非正式的概述。
本章中所参阅的任何文件的路径名都是指主源代码目录树,通常是/usr/src/linux。
这里所给出的大多数信息都是取之于Linux发行版1.0的源代码。
虽然如此,有时也会提供对后期版本的参考。
这篇漫游中开头有图标的任何小节都是强调1.0版本后对内核的新的改动。
如果没有这样的小节存在,则表示直到版本1.0.9-1.1.76,没有作过改动。
有时候本章中会有象这样的小节,这是指向正确的代码以对刚讨论过的主题取得更多信息的指示符。
当然,这里是指源代码。
引导(启动)系统当PC的电源打开后,80x86结构的CPU将自动进入实模式,并从地址0xFFFF0开始自动执行程序代码,这个地址通常是ROM-BIOS中的地址。
PC机的BIOS将执行某些系统的检测,在物理地址0处开始初始化中断向量。
此后,它将可启动设备的第一个扇区读入内存地址0x7C00处,并跳转到这个地方。
启动设备通常是软驱或是硬盘。
这里的叙述是非常简单的,但这已经足够理解内核初始化的工作过程了。
Linux的最最前面部分是用8086汇编语言编写的(boot/bootsect.S),它将由BIOS读入到内存0x7C00处,当它被执行时就会把自己移到绝对地址0x90000处,并将启动设备(boot/setup.S)的下2kB字节的代码读入内存0x90200处,而内核的其它部分则被读入到地址0x10000处。
Linux0.01内核源代码及注释
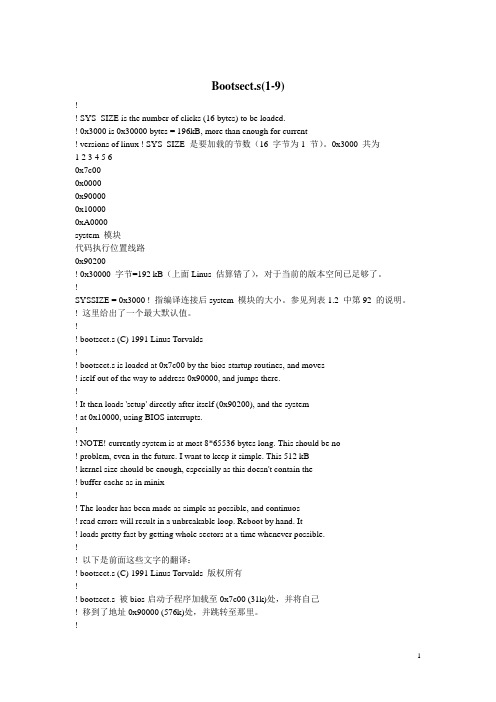
Bootsect.s(1-9)!! SYS_SIZE is the number of clicks (16 bytes) to be loaded.! 0x3000 is 0x30000 bytes = 196kB, more than enough for current! versions of linux ! SYS_SIZE 是要加载的节数(16 字节为1 节)。
0x3000 共为1 2 3 4 5 60x7c000x00000x900000x100000xA0000system 模块代码执行位置线路0x90200! 0x30000 字节=192 kB(上面Linus 估算错了),对于当前的版本空间已足够了。
!SYSSIZE = 0x3000 ! 指编译连接后system 模块的大小。
参见列表1.2 中第92 的说明。
! 这里给出了一个最大默认值。
!! bootsect.s (C) 1991 Linus Torvalds!! bootsect.s is loaded at 0x7c00 by the bios-startup routines, and moves! iself out of the way to address 0x90000, and jumps there.!! It then loads 'setup' directly after itself (0x90200), and the system! at 0x10000, using BIOS interrupts.!! NOTE! currently system is at most 8*65536 bytes long. This should be no! problem, even in the future. I want to keep it simple. This 512 kB! kernel size should be enough, especially as this doesn't contain the! buffer cache as in minix!! The loader has been made as simple as possible, and continuos! read errors will result in a unbreakable loop. Reboot by hand. It! loads pretty fast by getting whole sectors at a time whenever possible.!! 以下是前面这些文字的翻译:! bootsect.s (C) 1991 Linus Torvalds 版权所有!! bootsect.s 被bios-启动子程序加载至0x7c00 (31k)处,并将自己! 移到了地址0x90000 (576k)处,并跳转至那里。
Linux文件系统与案例详解及源码导读

[文件系统]Linux文件系统—源代码导读众所周知,文件系统是Unix系统最基本的资源。
最初的Unix系统一般都只支持一种单一类型的文件系统,在这种情况下,文件系统的结构深入到整个系统内核中。
而现在的系统大多都在系统内核和文件系统之间提供一个标准的接口,这样不同文件结构之间的数据可以十分方便地交换。
Linux也在系统内核和文件系统之间提供了一种叫做VFS(virtual file system)的标准接口。
这样,文件系统的代码就分成了两部分:上层用于处理系统内核的各种表格和数据结构;而下层用来实现文件系统本身的函数,并通过VFS来调用。
这些函数主要包括:* 管理缓冲区(buffer. c)。
* 响应系统调用fcntl() 和ioctl()(fcntl.c and ioctl.c)。
* 将管道和文件输入/输出映射到索引节点和缓冲区(fifo.c, pipe.c)。
* 锁定和不锁定文件和记录(locks.c)。
* 映射名字到索引节点(namei.c, open.c)。
* 实现select( )函数(select . c)。
* 提供各种信息(stat.c)。
* 挂接和卸载文件系统(super.c)。
* 调用可执行代码和转存核心(exec.c)。
* 装入各种二进制格式(bin_fmt*.c)。
VFS接口则由一系列相对高级的操作组成,这些操作由和文件系统无关的代码调用,并且由不同的文件系统执行。
其中最主要的结构有inode_operations 和file_operations。
file_system_type是系统内核中指向真正文件系统的结构。
每挂接一次文件系统,都将使用file_system_type组成的数组。
file_system_type组成的数组嵌入到了fs/filesystems.c中。
相关文件系统的read_super函数负责填充super_block结构。
--------------------------------------------------------------------------------源码导读*Linux 如何维护它支持的文件系统中的文件*描述了虚拟文件系统(Virtual File System VFS )*解释了Linux 核心中真实的文件系统如何被支持Linux 的一个最重要的特点之一使它可以支持许多不同的文件系统。
Linux内核源代码(free)

Linux系统的好处 Linux的运行及相关基本概念
什么是Linux?
Linux是一个类Unix(Unix-like)的操作系统, 在1991年发行了它的第一个版本 在Linux内核维护网站上,“What is Linux?”
Portable Operating System Interface Standard 可移植操作系统接口标准 由IEEE制订,并由ISO接受为国际标准。 Institute for Electrical and Electronic Engineers 电气电子工程师学会[美] International Organization for Standardization 国际标准化组织 制定各行各业各种产品和服务的技术规范(国际标准)
Linux简介
什么是Linux? “Linux”在不同的语境下的含义 Linux发展简史 Linux操作系统的主要内容 Linux版本
内核版本 发行版本
Linux系统的好处 Linux的运行及相关基本概念
“Linux”
在不同的语境下,“Linux”具有不同的内涵,例 如:
Linux发展简史
1991年11月,芬兰赫尔辛基大学的学生 Linus Torvalds写了个小程序,后来取名为Linux,放在 互联网上。他表达了一个愿望,希望借此搞出一 个操作系统的“内核”来,这完全是一个偶然事 件 1993,在一批高水平黑客的参与下,诞生了Linux 1.0 版 1994年,Linux 的第一个商业发行版 Slackware 问 世
基于I386的Linux使用int 0x80进行系统调用
I386系统的基本概念
代码的运行 堆栈的概念 内核态与用户态 中断/异常/系统调用 虚拟内存
怎样读Linux内核源代码

Linux内核分析方法2010-9-12Linux的最大的好处之一就是它的源码公开。
同时,公开的核心源码也吸引着无数的电脑爱好者和程序员;他们把解读和分析Linux的核心源码作为自己的最大兴趣,把修改Linux 源码和改造Linux系统作为自己对计算机技术追求的最大目标。
Linux内核源码是很具吸引力的,特别是当你弄懂了一个分析了好久都没搞懂的问题;或者是被你修改过了的内核,顺利通过编译,一切运行正常的时候。
那种成就感真是油然而生!而且,对内核的分析,除了出自对技术的狂热追求之外,这种令人生畏的劳动所带来的回报也是非常令人着迷的,这也正是它拥有众多追随者的主要原因:•首先,你可以从中学到很多的计算机的底层知识,如后面将讲到的系统的引导和硬件提供的中断机制等;其它,象虚拟存储的实现机制,多任务机制,系统保护机制等等,这些都是非都源码不能体会的。
等等,这些都是非读源码不能体会的。
•同时,你还将从操作系统的整体结构中,体会整体设计在软件设计中的份量和作用,以及一些宏观设计的方法和技巧:Linux的内核为上层应用提供一个与具体硬件不相关的平台;同时在内核内部,它又把代码分为与体系结构和硬件相关的部分,和可移植的部分;再例如,Linux虽然不是微内核的,但他把大部分的设备驱动处理成相对独立的内核模块,这样减小了内核运行的开销,增强了内核代码的模块独立性。
•而且你还能从对内核源码的分析中,体会到它在解决某个具体细节问题时,方法的巧妙:如后面将分析到了的Linux通过Botoom_half机制来加快系统对中断的处理。
•最重要的是:在源码的分析过程中,你将会被一点一点地、潜移默化地专业化。
一个专业的程序员,总是把代码的清晰性,兼容性,可移植性放在很重要的位置。
他们总是通过定义大量的宏,来增强代码的清晰度和可读性,而又不增加编译后的代码长度和代码的运行效率;他们总是在编码的同时,就考虑到了以后的代码维护和升级。
甚至,只要分析百分之一的代码后,你就会深刻地体会到,什么样的代码才是一个专业的程序员写的,什么样的代码是一个业余爱好者写的。
linux 内核空间 用户空间 跨空间回调函数

linux 内核空间用户空间跨空间回调函数Linux 内核空间、用户空间及跨空间回调函数Linux 是一个开源的操作系统内核,它将操作系统的核心功能实现为内核空间和用户空间两个部分。
内核空间运行在系统的特权模式下,具有直接访问硬件设备和系统资源的能力,负责管理和执行系统的底层任务。
用户空间是运行在用户模式下的,是用户应用程序执行的地方。
内核空间是操作系统内核的核心部分,它负责处理系统的底层硬件和资源管理任务,如处理系统调用、中断处理、进程管理、内存管理、文件系统等。
内核空间的代码运行在特权模式下,可以直接访问系统的硬件设备和资源,以确保操作系统的正常运行和稳定性。
用户空间是应用程序运行的地方,和内核空间相隔离。
用户空间包括各种应用程序,如图形界面、命令行工具、服务器等。
用户空间中的应用程序通过系统调用的方式与内核空间进行通信,向内核请求资源或执行操作。
内核空间将这些请求处理后返回结果给用户空间。
在 Linux 操作系统中,内核空间和用户空间是通过上下文切换来进行交互的。
上下文切换是指从一个运行上下文切换到另一个运行上下文的过程。
在内核空间和用户空间的切换过程中,会涉及到函数的调用和返回。
跨空间回调函数是一种特殊的函数调用机制,用于在内核空间和用户空间之间进行函数调用。
跨空间回调函数通常是在用户空间中定义和注册的,它们提供给内核空间使用的接口。
当内核空间需要调用用户空间的函数时,可以通过跨空间回调函数实现。
在将跨空间回调函数注册给内核空间之后,内核在特定的条件或事件触发时,可以调用用户空间中的跨空间回调函数。
跨空间回调函数的实现需要借助特殊的机制,例如系统调用和中断处理。
在用户空间中定义的跨空间回调函数需要通过特定的接口和约定进行注册,并将相关的参数和数据传递给内核空间。
内核空间在调用跨空间回调函数时,需要将当前的状态保存下来,然后将控制权切换到用户空间中执行跨空间回调函数。
执行完成后,再将状态恢复并返回给内核空间。
Linux 源代码分析
Linux内核(2.6.13.2)源代码分析苗彦超摘要:1系统启动1.1汇编代码head.S及以前设置CPU状态初值,创建进程0,建立进程堆栈:movq init_rsp(%rip), %rsp,init_rsp定义.globl init_rspinit_rsp:.quad init_thread_union+THREAD_SIZE-8即将虚地址init_thread_union+THREAD_SIZE-8作为当前进程(进程0)核心空间堆栈栈底,init_thread_union定义于文件arch/x86_64/kernel/init_task.c中:union thread_union init_thread_union __attribute__((__section__(".data.init_task"))) ={INIT_THREAD_INFO(init_task)};INIT_THREAD_INFO定义于文件include/asm-x86_64/thread_info.h中,初始化init_thread_union.task = &init_task,init_task同样定义于文件init_task.c中,初始化为:struct task_struct init_task = INIT_TASK(init_task);INIT_TASK宏在include/linux/init_task.h中定义。
全部利用编译时静态设置的初值,将进程0的控制结构设置完成,使进程0可以按普通核心进程访问。
init_task.mm = NULL; init_task.active_mm = INIT_MM(init_mm), init_m = “swapper”INIT_MM将init_mm.pgd初始化为swapper_pg_dir,即init_level4_pgt,定义与head.S中。
linux trace原理

linux trace原理
Linux Trace是一个Linux内核跟踪机制,它可以记录系统中发生的各种事件和操作,如系统调用、进程创建、文件操作等。
Linux Trace的原理可以分为以下几个方面:
1. 事件源:Linux Trace利用内核中的tracepoint机制来实现跟踪。
tracepoint是一种特殊的代码注释,它标识了内核中的关键事件点,当程序运行到这些事件点时,会自动触发相应的跟踪操作。
2. 事件记录:当事件发生时,Linux Trace会生成一个事件记录(trace event)。
事件记录包含了事件的类型、时间戳、进程信息、参数等。
这些事件记录会被保存到内核中的缓冲区中。
3. 缓冲区管理:Linux Trace通过创建一个循环缓冲区来管理事件记录。
缓冲区分为多个段(buffer segment),每个段包含多个事件记录。
当一个段被填满时,Linux Trace会自动切换到下一个段,最后将填满的段写入到磁盘中。
4. 用户空间工具:为了方便用户使用和分析跟踪数据,Linux Trace提供了一些用户空间的工具,如trace-cmd和perf。
这些工具可以从内核中读取事件记录,并进行过滤、分析和可视化。
总的来说,Linux Trace的原理就是通过tracepoint机制捕获内核中的关键事件,将事件记录保存到缓冲区中,最后通过用户空间工具进行分析和可视化。
这样可以帮助开发人员和系统管理员更好地
了解系统的运行状况,发现问题和性能瓶颈。
linux内核源码介绍

Linux的内核源代码Linux的内核源代码可以从很多途径得到,我一般常常去看看。
一般来讲,在安装的linux系统下,usr/src/linux目录下的东西就是内核源代码。
源码的版本号有一个非常简单的编号约定:任何偶数的核心(例如2.0.30)都是一个稳定地发行的核心,而任何奇数的核心(例如 2.1.42)都是一个开发中的核心。
另外还可以从互连网上下载,解压缩后文件一般也都位于linux目录下。
内核源代码有很多版本,目前最新的稳定版是2.2.14。
核心源程序的文件按树形结构进行组织,在源程序树的最上层你会看到这样一些目录:· Arch :arch子目录包括了所有和体系结构相关的核心代码。
它的每一个子目录都代表一种支持的体系结构,例如i386就是关于intel cpu及与之相兼容体系结构的子目录。
PC机一般都基于此目录;· Include: include子目录包括编译核心所需要的大部分头文件。
与平台无关的头文件在 include/linux 子目录下,与 intel cpu相关的头文件在include/asm-i386子目录下,而include/scsi目录则是有关 scsi设备的头文件目录;· Init:这个目录包含核心的初始化代码(注:不是系统的引导代码),包含两个文件main.c和Version.c,这是研究核心如何工作的一个非常好的起点。
· Mm :这个目录包括所有独立于 cpu 体系结构的内存管理代码,如页式存储管理内存的分配和释放等;而和体系结构相关的内存管理代码则位于arch/*/mm/,例如arch/i386/mm/Fault.c· Kernel:主要的核心代码,此目录下的文件实现了大多数linux系统的内核函数,其中最重要的文件当属sched.c;同样,和体系结构相关的代码在arch/*/kernel中;· Drivers:放置系统所有的设备驱动程序;每种驱动程序又各占用一个子目录:如,/block 下为块设备驱动程序,比如ide(ide.c)。
Linux内核调试机制源代码分析
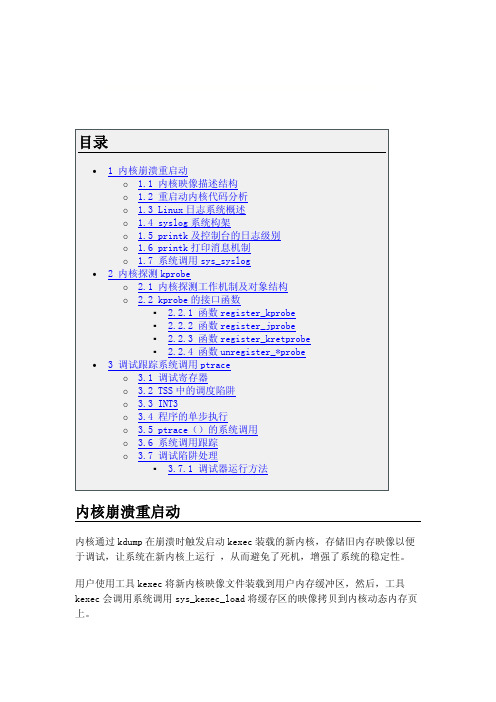
kimage_entry_t *entry; kimage_entry_t *last_entry; unsigned long destination; unsigned long start; struct page *control_code_page; struct page *swap_page; unsigned long nr_segments; struct kexec_segment segment[KEXEC_SEGMENT_MAX]; /*段数组*/ struct list_head control_pages; struct list_head dest_pages; struct list_head unuseable_pages; /* 分配给崩溃内核的下一个控制页的地址*/ unsigned long control_page; /* 指定特殊处理的标识*/ unsigned int type : 1; #define KEXEC_TYPE_DEFAULT 0 #define KEXEC_TYPE_CRASH 1 unsigned int preserve_context : 1; };
内核 kexec 接口函数说明如下:
extern void machine_kexec(struct kimage *image); /*启动内核映像*/ extern int machine_kexec_prepare(struct kimage *image); /*建立内核映 像所需要的控制页*/ extern void machine_kexec_cleanup(struct kimage *image); extern asmlinkage long sys_kexec_load(unsigned long entry, unsigned long nr_segments, struct kexec_segment __user *segments, unsigned long flags); /*装 载内核的系统调用*/ extern int kernel_kexec(void); /*启动内核*/
【Linux连载】Linux内核源码目录树解析
【Linux连载】Linux内核源码目录树解析要进行嵌入式Linux产品的内核驱动开发,需要先了解内核目录的各文件夹下源码的作用,本文介绍Linux内核源码目录树下的各目录文件的作用。
目录树概览解压Linux内核源码压缩包,将得到内核源码。
内核源码很复杂,包含多级目录,形成一个庞大的树状结构,通常称为Linux源码目录树。
进入源码所在目录,可以看到目录树顶层通常包含如下目录和文件:arch/ crypto/ fs/Kbuild MAINTAINERS README security/ virt/ block/ Documentation/ include/ Kconfig MakefileREPORTING-BUGSsound/ COPYING drivers/init/kernel/ mm/ samples/ tools/CREDITS firmware/ ipc/ lib/ net/ scripts/ usr/ 各个目录文件的简要说明如表1所列。
表1 Linux源码顶层目录简要说明目录内容arch/包含各体系结构特定的代码,如arm、x86、ia64、mips等,在每个体系结构目录下通常都有:-boot 内核需要的特定平台代码-kernel 体系结构特有的代码-lib 通用函数在特定体系结构的实现-math-emu 模拟FPU的代码,在ARM中,使用mach-xxx代替-mm 特定体系结构的内存管理实现-include 特定体系的头文件block/存放块设备相关代码crypto/存放加密、压缩、CRC校验等算法相关代码Documentation/存放相关说明文档,很多实用文档,包括驱动编写等drivers/存放Linux内核设备驱动程序源码。
驱动源码在Linux内核源码中站了很大比例,常见外设几乎都有可参考源码,对驱动开发而言,该目录非常重要。
该目录包含众多驱动,目录按照设备类别进行分类,如char、block、input、i2c、spi、pci、usb等firmware/存放处理器相关的一些特殊固件fs/存放所有文件系统代码,如fat、ext2、ext3、ext4、ubifs、nfs、sysfs等include/存放内核所需、与平台无关的头文件,与平台相关的头文件已经被移动到arch平台的include目录,如ARM的头文件目录init/包含内核初始化代码ipc/存放进程间通信代码kernel/包含Linux内核管理代码lib/库文件代码实现mm/存放内存管理代码net/存放网络相关代码samples/存放提供的一些内核编程范例,如kfifo;后者相关用户态编程范例,如hidrawsrcipts/存放一些脚本文件,如menuconfig脚本security/存放系统安全性相关代码sound存放声音、声卡相关驱动tools/编译过程中一些主机必要工具usrcpio相关实现virt/内核虚拟机KVM。
[重点]linux源码分析
![[重点]linux源码分析](https://img.taocdn.com/s3/m/0c4f44f3312b3169a551a443.png)
[重点]linux源码分析linux源码分析Linux内核源代码中的C语言代码Linux 内核的主体是以 GNU的 C 语言编写的,GNU为此提供了编译工具gcc。
GNU对 C 语言本身(在 ANSI C 基础上)做了不少扩充,可能是读者尚未见到过的。
另一方面,由于内核代码,往往会用到一些在应用程序设计中不常见的语言成分或编程技巧,也许使读者感到陌生。
本书并非介绍 GNU C语言的专著,也非技术手册,所以不在这里一一列举和详细讨论这些扩充和技巧。
再说,离开具体的情景和上下文,罗列一大堆规则,对于读者恐怕也没有多大帮助。
所以,我们在这里只是对可能会影响读者阅读 Linux 内核源程序,或使读者感到困惑的一些扩充和技巧先作一些简单的介绍。
以后,随着具体的情景和代码的展开,在需要时还会结合实际加以补充。
首先,gcc 从 C++语言中吸收了“inline”和“const”。
其实,GNU 的 C 和C++是合为一体的,gcc既是 C 编译又是 C++编译,所以从 C++中吸收一些东西到 C 中是很自然的。
从功能上说,inline 函数的使用与#define 宏定义相似,但更有相对的独立性,也更安全。
使用 inline函数也有利于程序调试。
如果编译时不加优化,则这些inline 就是普通的、独立的函数,更便于调试。
调试好了以后,再采用优化重新编译一次,这些 inline函数就像宏操作一样融入了引用处的代码中,有利于提高运行效率。
由于 inline 函数的大量使用,相当一部分的代码从.c 文件移入了.h 文件中。
还有,为了支持 64 位的CPU结构(Alpha 就是 64 位的),gcc 增加了一种新的基本数据类型“longlong int”,该类型在内核代码中常常用到。
许多 C 语言都支持一些“属性描述符”(attribute),如“aligned”、“packed”等等;gcc 也支持不少这样的描述符。
这些描述符的使用等于是在 C 语言中增加了一些新的保留字。
linux内核编程
Linux内核编程目录1.HELLO, WORLD ................................................................................................ 一EXHELLO.C .............................................................................................................. 一1.1内核模块的编译文件........................................................................................................ 二1.2多文件内核模块.................................................................................................................. 三2.字符设备文件 ....................................................................................................... 六2.1多内核版本源文件........................................................................................................ 十四3./PROC文件系统 .............................................................................................. 十五4.使用/PROC进行输入 ...................................................................................... 二十5.和设备文件对话(写和IOCTLS) ........................................................... 二十八6.启动参数 ....................................................................................................... 四十二7.系统调用 ....................................................................................................... 四十五8.阻塞进程 ....................................................................................................... 五十一9.替换PRINTK’S ........................................................................................... 六十一10.调度任务 ..................................................................................................... 六十四11.中断处理程序.............................................................................................. 六十九11.1I NTEL 结构上的键盘 ......................................................................................... 六十九12.对称多处理 ................................................................................................. 七十三常见的错误 ......................................................................................................... 七十四2.0和2.2版本的区别 ........................................................................................ 七十四除此以外.............................................................................................................. 七十四其他...................................................................................................................... 七十六G OODS AND S ERVICES..................................................................................................... 七十六GNU GENERAL PUBLIC LICENSE........................................................................ 七十六注.......................................................................................................................... 八十二1.Hello, world当第一个穴居的原始人程序员在墙上凿出第一个“洞穴计算机”的程序时,那是一个打印出用羚羊角上的图案表示的“Hello world”的程序。
[linux的内核及其内核源码分析].U-Boot.Quick.Reference
![[linux的内核及其内核源码分析].U-Boot.Quick.Reference](https://img.taocdn.com/s3/m/ded6690bf78a6529647d5328.png)
Freescale Semiconductor Quick ReferenceLITE5200BUBPGRev. 0, 5/2006 Contents1OverviewThis manual is a Quick Reference for U-Boot commands on the Lite5200B Development Platform. Each command overview gives a description, directions for usage, and an execution example.A list of U-Boot commands can be accessed while in the U-Boot prompt. Type help for a complete listing of available commands for the development platform.1Overview . . . . . . . . . . . . . . . . . . . . . . . . . . . . . . . . . . . . . 1 2Attribution . . . . . . . . . . . . . . . . . . . . . . . . . . . . . . . . . . . . 2 3Disclaimer . . . . . . . . . . . . . . . . . . . . . . . . . . . . . . . . . . . . 2 4List of Commands . . . . . . . . . . . . . . . . . . . . . . . . . . . . . . 3U-Boot Quick Reference for the Lite5200B Development Platformby:Jonathan WangInfotainment, Multimedia, and Telematics DivisionAttribution2AttributionThis manual is excerpted from the Denx UBOOT manual as described below. Primarily it has been made specific to the Lite5200B board and has been reformatted. It is subject to GPL copyright restrictions as described below and at the URL given below. You have the freedom to distribute copies of this document in any format or to create a derivative work of it and distribute it provided that you:•Distribute this document or the derivative work at no charge at all. It is not permitted to sell this document or the derivative work or to include it into any package or distribution that is not freely available to everybody.•Send your derivative work (in the most suitable format such as sgml) to the author.•License the derivative work with this same license or use GPL.•Include a copyright notice and at least a pointer to the license used.•Give due credit to previous authors and major contributors.This document is derived from the DENX™ U-Boot User Manuals. (Copyright © 2001-2006 by Wolfgang Denk, DENX Software Engineering.)The manual can be found at:http://www.denx.de/wiki/DULG/Manual3DisclaimerUse the information in this document at your own risk. Freescale disavows any potential liability for the contents of this document. Use of the concepts, examples, and/or other content of this document is entirely at your own risk. All copyrights are owned by their owners, unless specifically noted otherwise. Use of a term in this document should not be regarded as affecting the validity of any trademark or service mark. Naming of particular products or brands should not be seen as endorsements.List of Commands 4List of Commands4.1AUTOSCRRun script from memory:autoscr [addr] - run script starting at addr - A valid autoscr header must be present The autoscr command allows “shell” scripts to run under U-Boot. To create a U-Boot script image, commands are written to a text file. Then the mkimage tool [of a suitable compiler] is used to convert this text file into a U-Boot image using the image type script. This image can be loaded like any other image file. Autoscr runs the commands in this image.For example, consider the following text file:echoecho Network Configuration:echo ----------------------echo Target:printenv ipaddr hostnameechoecho Server:printenv serverip rootpathechoConvert the text file into a U-Boot script image using the mkimage command as follows: bash$ mkimage -A ppc -O linux -T script -C none -a 0 -e 0 \> -n "autoscr example script" \> -d /tftpboot/TQM860L/example.script /tftpboot/TQM860L/example.imgImage Name: autoscr example scriptCreated: Mon Apr 8 01:15:02 2002Image Type: PowerPC Linux Script (uncompressed)Data Size: 157 Bytes = 0.15 kB = 0.00 MBLoad Address: 0x00000000Entry Point: 0x00000000Contents:Image 0: 149 Bytes = 0 kB = 0 MBLoad and execute this script image in U-Boot:=> tftp 100000 /tftpboot/TQM860L/example.imgARP broadcast 1TFTP from server 10.0.0.2; our IP address is 10.0.0.99Filename '/tftpboot/TQM860L/example.img'.Load address: 0x100000Loading: #doneBytes transferred = 221 (dd hex)=> autoscr 100000## Executing script at 00100000Network Configuration:----------------------Target:List of Commandsipaddr=10.0.0.99hostname=tqmServer:serverip=10.0.0.2rootpath=/opt/hardhat/devkit/ppc/8xx/target4.2BASEPrint or set address offset:base - print address offset for memory commandsbase off - set address offset for memory commands to 'off'Use the base command (short: ba) to print or set a "base address" used as an address offset for all memory commands; the default value of the base address is 0, so all addresses you enter are used unmodified. However, when you repeatedly have to access a certain memory region (like the internal memory of some embedded PowerPC processors) it can be very convenient to set the base address to the start of this area and then use only the offsets:=> baseBase Address: 0x00000000=> md 0 c00000000: feffffff 00000000 7cbd2b78 7cdc3378 ........|.+x|.3x00000010: 3cfb3b78 3b000000 7c0002e4 39000000 <.;x;...|...9...00000020: 7d1043a6 3d000400 7918c3a6 3d00c000 }.C.=...y...=...=> base 40000000Base Address: 0x40000000=> md 0 c40000000: 27051956 50504342 6f6f7420 312e312e '..VPPCBoot 1.1.40000010: 3520284d 61722032 31203230 3032202d 5 (Mar 21 2002 -40000020: 2031393a 35353a30 34290000 00000000 19:55:04)......=>4.3BDINFOPrint board info structure:The bdinfo command (short: bdi) prints the information that U-Boot passes about the board such as memory addresses and sizes, clock frequencies, MAC address, etc. This type of information is generally passed to the Linux kernel.=> bdinfomemstart = 0x00000000memsize = 0x04000000flashstart = 0x40000000flashsize = 0x00800000flashoffset = 0x00030000sramstart = 0x00000000sramsize = 0x00000000immr_base = 0xFFF00000bootflags = 0x00000001intfreq = 50 MHzbusfreq = 50 MHzethaddr = 00:D0:93:00:28:81IP addr = 0.0.0.0baudrate = 115200 bps=>List of Commands 4.4BMPManipulate bmp image data:bmp info <imageAddr> - display image infobmp display <imageAddr> [x y] - display image at x,y4.5BOOTDBoot default, i.e., run 'bootcmd'.The bootd (short: boot) executes the default boot command, i.e. what happens when you don't interrupt the initial countdown. This is a synonym for the run bootcmd command.4.6BOOTMBoot application image from memory:bootm [addr [arg ...]] - boot application image stored in memory passing arguments 'arg ...'; when booting a Linux kernel,‘arg' can be the address of an initrd imageThe bootm command is used to start operating system images. From the image header it gets information about the type of the operating system, the file compression method used (if any), the load and entry point addresses, etc. The command will then load the image to the required memory address, uncompressing it on the fly if necessary. Depending on the OS it will pass the required boot arguments and start the OS at it's entry point. The first argument to bootm is the memory address (in RAM, ROM or flash memory) where the image is stored, followed by optional arguments that depend on the OS.For Linux, exactly one optional argument can be passed. If it is present, it is interpreted as the start address of a initrd ramdisk image (in RAM, ROM or flash memory). In this case the bootm command consists of three steps: first the Linux kernel image is uncompressed and copied into RAM, then the ramdisk image is loaded to RAM, and finally control is passed to the Linux kernel, passing information about the location and size of the ramdisk image.To boot a Linux kernel image without a initrd ramdisk image, the following command can be used: => bootm $(kernel_addr)If a ramdisk image is used, type:=> bootm $(kernel_addr) $(ramdisk_addr)Both examples imply that the variables used are set to correct addresses for a kernel and a initrd ramdisk image.When booting images that have been loaded to RAM (for instance using TFTP download) you have to be careful that the locations where the (compressed) images were stored do not overlap with the memory needed to load the uncompressed kernel. For instance, if you load a ramdisk image at a location in low memory, it may be overwritten when the Linux kernel gets loaded. This will cause undefined system crashes.List of Commands4.7BOOTPBoot image via network using bootp/tftp protocol:bootp [loadAddress] [bootfilename]4.8CMPMemory compare:cmp [.b, .w, .l] addr1 addr2 (count)The cmp command tests of the contents of two memory areas and determines whether or not the contents of the two memory areas are identical or not. The command will either test the whole area as specified by the 3rd (count) argument or stop at the first difference if the count argument is not specified.The following example demonstrates comparing the memory ranges 0x100000 - 0x10002F to 0x400000 - 0x40002F. The contents of the two memory ranges are shown below.00100000: 27051956 50ff4342 6f6f7420 312e312e '..VP.CBoot 1.1.00100010: 3520284d 61722032 31203230 3032202d 5 (Mar 21 2002 -00100020: 2031393a 35353a30 34290000 00000000 19:55:04)......40000000: 27051956 50504342 6f6f7420 312e312e '..VPPCBoot 1.1.40000010: 3520284d 61722032 31203230 3032202d 5 (Mar 21 2002 -40000020: 2031393a 35353a30 34290000 00000000 19:55:04)......=> cmp 100000 40000000 400word at 0x00100004 (0x50ff4342) != word at 0x40000004 (0x50504342)Total of 1 word were the same=>Like most memory commands the cmp command accesses the memory in different sizes: 32 bit (long word), 16 bit (word) or 8 bit (byte) data. If invoked just as cmp the default size (32 bit or long words) is used; the same can be selected explicitly by typing cmp.l instead. To access memory as 16 bit (word data), use the variant cmp.w; to access memory as 8 bit (byte data) use cmp.b. Please note that the count argument specifies the number of data items to process, i.e. the number of long words or words or bytes to compare.4.9CONINFOPrint console devices and information.The coninfo command (short: conin) displays information about the available console I/O devices.=> coninList of available devices:serial 80000003 SIO stdin stdout stderr=>The output contains the device name, flags, and the current usage. For example, the output “serial 80000003 SIO stdin stdout stderr” means that the serial device is a system device (flag 'S') whichList of Commands provides input (flag 'I') and output (flag 'O') functionality and is currently assigned to the 3 standard I/O streams stdin, stdout, and stderr.4.10CPMemory copy:cp [.b, .w, .l] source target count- copy memoryThe memory copy command copies data in memory, starting at the “source” address to the “target” address. The “count” field specifies then number of bytes, words or long words to be copied depending upon the extension field of the cp command. If a “.b” extension is used, the count field specifies the number of bytes. Likewise, if a “.w” or “.l” extension is used, the count field respectively specifies the number of words or long words.The cp command is used as a FLASH programming command.The cp command can copy data from one memory element to another memory element. The source can be RAM/ROM/FLASH/EPROM or any other type of memory. The destination or target memory is usually RAM; however the target memory can also be FLASH or other type of programmable, non-volatile memory. If the destination for the data is FLASH or other type of programmable, non-volatile memory, the U-Boot monitor program will determine the type of memory used as the destination and choose the appropriate programming algorithm.The following is a typical sequence to program FLASH memory on the Media5200 Board using U-Boot.setenv ldlx tftp 1000000 /tftpboot/uImagesetenv ldfs tftp 1000000 / tftpboot/fsimgsetenv uplx run ldlx \; erase ffe00000 ffefffff \; cp.b 1000000 ffe00000 \$\(filesize\) setenv upfs run ldfs \; erase ff05000 ffdfffff \; cp.b 1000000 ffe00000 \$\(filesize\) setenv bootdelay 2saveenv4.11CRC32Checksum calculation:5crc32 address count [addr]- compute CRC32 checksum [save at addr]=> crc 100004 3FCCRC32 for 00100004 ... 001003ff ==> d433b05b=>The crc32 command (short: crc) can be used to calculate a CRC32 checksum over a range of memory: => crc 100004 3FCCRC32 for 00100004 ... 001003ff ==> d433b05b=>When used with 3 arguments, the command stores the calculated checksum at the given address: => crc 100004 3FC 100000CRC32 for 00100004 ... 001003ff ==> d433b05b=> md 100000 400100000: d433b05b ec3827e4 3cb0bacf 00093cf5 .3.[.8'.<.....<.=>List of CommandsAs you can see, the CRC32 checksum was not only printed, but also stored at address 0x100000.4.12DCACHEEnable or disable data cache:dcache [on, off]- enable or disable data (writethrough) cache4.13DHCPInvoke dhcp client to obtain ip/boot params.4.14DISKBOOTBoot from ide device.diskboot loadAddr dev:part4.15ECHOEcho args to console:echo [args..] - echo args to console;\c suppresses newlineThe echo command echoes the arguments to the console:=> echo The quick brown fox jumped over the lazy dog.The quick brown fox jumped over the lazy dog.=>4.16EEPROMEeprom sub-system:eeprom read addr off cnteeprom write addr off cnt- read/write `cnt' bytes at EEPROM offset `off4.17ERASEErase flash memory:reset - No help available.erase start end- erase FLASH from addr 'start' to addr 'end'erase N:SF[-SL]- erase sectors SF-SL in FLASH bank # Nerase bank N- erase FLASH bank # Nerase all- erase all FLASH banksList of Commands 4.18FATINFOPrint information about filesystem:fatinfo <interface> <dev[:part]> - print information about filesystem from 'dev' on 'interface'=>4.19FATLOADLoad binary file from a dos filesystem:fatload <interface> <dev[:part]> <addr> <filename> [bytes] - load binary file 'filename' from 'dev' on 'interface'to address 'addr' from dos filesystem=>4.20FATLSList files in a directory (default /):fatls <interface> <dev[:part]> [directory]4.21FLINFOPrint flash memory information:flinfo- print information for all FLASH memory banksflinfo N- print information for FLASH memory bank # N=>The command flinfo (short: fli) can be used to get information about the available flash memory (see Flash Memory Commands below).=> fliBank # 1: FUJITSU AM29LV160B (16 Mbit, bottom boot sect)Size: 4 MB in 35 SectorsSector Start Addresses:40000000 (RO) 40008000 (RO) 4000C000 (RO) 40010000 (RO) 40020000 (RO)40040000 40060000 40080000 400A0000 400C0000400E0000 40100000 40120000 40140000 4016000040180000 401A0000 401C0000 401E0000 4020000040220000 40240000 40260000 40280000 402A0000402C0000 402E0000 40300000 40320000 4034000040360000 40380000 403A0000 403C0000 403E0000Bank # 2: FUJITSU AM29LV160B (16 Mbit, bottom boot sect)Size: 4 MB in 35 SectorsSector Start Addresses:40400000 40408000 4040C000 40410000 4042000040440000 40460000 40480000 404A0000 404C0000404E0000 40500000 40520000 40540000 40560000List of Commands40580000 405A0000 405C0000 405E0000 4060000040620000 40640000 40660000 40680000 406A0000406C0000 406E0000 40700000 40720000 4074000040760000 40780000 407A0000 407C0000 407E0000=>4.22GOStart application at address 'addr':go addr [arg ...]- start application at address 'addr'passing 'arg' as argumentsU-Boot has support for so-called standalone applications. These are programs that do not require the complex environment of an operating system to run. Instead they can be loaded and executed by U-Boot directly, utilizing U-Boot's service functions like console I/O or malloc() and free().This can be used to dynamically load and run special extensions to U-Boot like special hardware test routines or bootstrap code to load an OS image from some filesystem. The go command is used to start such standalone applications. The optional arguments are passed to the application without modification.4.23HELPPrint online help:help [command ...]- show help information (for 'command')'help' prints online help for the monitor commands.Without arguments, it prints a short usage message for all commands.To get detailed help information for specific commands you can type'help' with one or more command names as arguments.The help command (short: h or ?) prints online help. Without any arguments, the help command prints a list of all U-Boot commands that are available in your configuration of U-Boot. You can get detailed information for a specific command by typing its name as argument to the help command:4.24ICACHEEnable or disable instruction cache:icache [on, off]- enable or disable instruction cache4.25ICRC32Checksum calculation:icrc32 chip address [.0, .1, .2] count -- compute CRC32 checksum4.26IDEIDE sub-system:ide reset - reset IDE controlleride info - show available IDE deviceside device [dev] - show or set current deviceide part [dev] - print partition table of one or all IDE deviceside read addr blk# cntide write addr blk# cnt - read/write `cnt' blocks starting at block `blk#' to/from memory address `addr'4.27ILOOPInfinite loop on address range:iloop chip address[.0, .1, .2] [# of objects]- loop, reading a set of addresses4.28IMDI2C memory display:imd chip address[.0, .1, .2] [# of objects]- i2c memory display4.29IMINFOPrint header information for application image:iminfo addr [addr ...]- print header information for application image starting ataddress 'addr' in memory; this includes verification of theimage contents (magic number, header and payload checksums)Iminfo (short: imi) is used to print the header information for images like Linux kernels or ramdisks. It prints (among other information) the image name, type and size and verifies that the CRC32 checksums stored within the image are OK.=> imi 100000## Checking Image at 00100000 ...Image Name: Linux-2.4.4Created: 2002-04-07 21:31:59 UTCImage Type: PowerPC Linux Kernel Image (gzip compressed)Data Size: 605429 Bytes = 591 kB = 0 MBLoad Address: 00000000Entry Point: 00000000Verifying Checksum ... OKNOTEThe exact operation of this command can be controlled by the settings ofsome U-Boot environment variables.4.30IMLSList all images found in flash:imls- Prints information about all images found at sectorboundaries in flash.4.31IMMI2C memory modify (auto-incrementing):imm chip address[.0, .1, .2]- memory modify, auto increment address4.32IMWMemory write (fill):imw chip address[.0, .1, .2] value [count]- memory write (fill)4.33INMMemory modify (constant address):inm chip address[.0, .1, .2]- memory modify, read and keep address4.34IPROBEProbe to discover valid I2C chip addresses.4.35ITESTReturn true/false on integer compareitest [.b, .w, .l, .s] [*]value1 <op> [*]value24.36LOADBLoad binary file over serial line (kermit mode)loadb [ off ] [ baud ]- load binary file over serial line with offset 'off' and baudrate 'baud'With kermit you can download binary data via the serial line. Here we show how to download uImage, the Linux kernel image. Configuring the "kermit" command and then type:## Ready for binary (kermit) download ...Ctrl-\c(Back at denx.denx.de)----------------------------------------------------C-Kermit 7.0.197, 8 Feb 2000, for LinuxCopyright (C) 1985, 2000,Trustees of Columbia University in the City of New York.Type ? or HELP for help.Kermit> send /bin /tftpboot/pImage...Kermit> connectConnecting to /dev/ttyS0, speed 115200.The escape character is Ctrl-\ (ASCII 28, FS)Type the escape character followed by C to get back,or followed by ? to see other options.----------------------------------------------------= 550260 Bytes## Start Addr = 0x00100000=> iminfo 100000## Checking Image at 00100000 ...Image Name: Linux-2.4.4Created: 2002-07-02 22:10:11 UTCImage Type: PowerPC Linux Kernel Image (gzip compressed)Data Size: 550196 Bytes = 537 kB = 0 MBLoad Address: 00000000Entry Point: 00000000Verifying Checksum ... OK4.37LOADSLoad S-Record file over serial line:loads [ off ]- load S-Record file over serial line with offset 'off'4.38LOOPInfinite loop on address range:loop [.b, .w, .l] address number_of_objects- loop on a set of addressesThe loop command reads in a tight loop from a range of memory. This is intended as a special form of a memory test, since this command tries to read the memory as fast as possible. This command will never terminate. There is no way to stop it but to reset the board!=> loop 100000 84.39MDMemory display:md [.b, .w, .l] address [# of objects]- memory display00100000: 48616c6c 6f202020 01234567 312e312e Hallo .#Eg1.1.00100010: 3520284d 61722032 31203230 3032202d 5 (Mar 21 2002 -00100020: 2031393a 35353a30 34290000 00000000 19:55:04)......00100030: 00000000 00000000 00000000 00000000 ................4.40MMMEMORY MODIFY (AUTO-INCREMENTING)mm [.b, .w, .l] address- memory modify, auto increment addressThe mm is a method to interactively modify memory contents. It will display the address and current contents and then prompt for user input. If you enter a legal hexadecimal number, this new value will be written to the address. Then the next address will be prompted. If you don't enter any value and just press Enter, then the contents of this address will remain unchanged. The command stops as soon as you enter any data that is not a hex number:=> mm 10000000100000: 27051956 ? 000100004: 50504342 ? AABBCCDD00100008: 6f6f7420 ? 012345670010000c: 312e312e ? .=> md 100000 1000100000: 00000000 aabbccdd 01234567 312e312e .........#Eg1.1.00100010: 3520284d 61722032 31203230 3032202d 5 (Mar 21 2002 -00100020: 2031393a 35353a30 34290000 00000000 19:55:04)......00100030: 00000000 00000000 00000000 00000000 ................=>Again this command can be used with the type extensions .l, .w and .b :=> mm.w 10000000100000: 0000 ? 010100100002: 0000 ? 020200100004: aabb ? 432100100006: ccdd ? 876500100008: 0123 ? .=> md 100000 1000100000: 01010202 43218765 01234567 312e312e ....C!.e.#Eg1.1.00100010: 3520284d 61722032 31203230 3032202d 5 (Mar 21 2002 -00100020: 2031393a 35353a30 34290000 00000000 19:55:04)......00100030: 00000000 00000000 00000000 00000000 ................=>=> mm.b 10000000100000: 01 ? 4800100001: 01 ? 6100100002: 02 ? 6c00100003: 02 ? 6c00100004: 43 ? 6f00100005: 21 ? 2000100006: 87 ? 2000100007: 65 ? 2000100008: 01 ? .4.41MTESTSimple ram test:mtest [start [end [pattern]]]- simple RAM read/write testThe mtest provides a simple memory test.=> mtest 100000 200000Testing 00100000 ... 00200000:Pattern 0000000F Writing... Reading...=>This tests writes to memory, thus modifying the memory contents. It will fail when applied to ROM or flash memory. This command may crash the system when the tested memory range includes areas that are needed for the operation of the U-Boot firmware (like exception vector code, or U-Boot's internal program code, stack or heap memory areas).4.42MWMemory write (fill):mw [.b, .w, .l] address value [count]- write memoryThe mw is a way to initialize (fill) memory with some value. When called without a count argument, the value will be written only to the specified address. When used with a count, then a whole memory areas will be initialized with this value:=> md 100000 1000100000: 0000000f 00000010 00000011 00000012 ................00100010: 00000013 00000014 00000015 00000016 ................00100020: 00000017 00000018 00000019 0000001a ................00100030: 0000001b 0000001c 0000001d 0000001e ................=> mw 100000 aabbccdd=> md 100000 1000100000: aabbccdd 00000010 00000011 00000012 ................00100010: 00000013 00000014 00000015 00000016 ................00100020: 00000017 00000018 00000019 0000001a ................00100030: 0000001b 0000001c 0000001d 0000001e ................=> mw 100000 0 6=> md 100000 1000100000: 00000000 00000000 00000000 00000000 ................00100010: 00000000 00000000 00000015 00000016 ................00100020: 00000017 00000018 00000019 0000001a ................00100030: 0000001b 0000001c 0000001d 0000001e ................=>=> mw.w 100004 1155 6=> md 100000 1000100000: 00000000 11551155 11551155 11551155 .....U.U.U.U.U.U00100010: 00000000 00000000 00000015 00000016 ................00100020: 00000017 00000018 00000019 0000001a ................00100030: 0000001b 0000001c 0000001d 0000001e ................=> mw.b 100007 ff 7=> md 100000 1000100000: 00000000 115511ff ffffffff ffff1155 .....U.........U00100010: 00000000 00000000 00000015 00000016 ................00100020: 00000017 00000018 00000019 0000001a ................00100030: 0000001b 0000001c 0000001d 0000001e ................=>4.43NFSBoot image via network using nfs protocol:nfs [loadAddress] [host ip addr:bootfilename]4.44NMMemory modify (constant address):nm [.b, .w, .l] address- memory modify, read and keep addressThe nm command (non-incrementing memory modify) can be used to interactively write different data several times to the same address. This can be useful for instance to access and modify device registers: => nm.b 10000000100000: 00 ? 4800100000: 48 ? 6100100000: 61 ? 6c00100000: 6c ? 6c00100000: 6c ? 6f00100000: 6f ? .=> md 100000 800100000: 6f000000 115511ff ffffffff ffff1155 o....U.........U00100010: 00000000 00000000 00000015 00000016 ................=>4.45PCIList and access pci configuration space:pci [bus] [long]- short or long list of PCI devices on bus 'bus'pci header b.d.f- show header of PCI device 'bus.device.function'pci display[.b, .w, .l] b.d.f [address] [# of objects]- display PCI configuration space (CFG)pci next[.b, .w, .l] b.d.f address- modify, read and keep CFG addresspci modify[.b, .w, .l] b.d.f address- modify, auto increment CFG addresspci write[.b, .w, .l] b.d.f address value- write to CFG address4.46PINGSend icmp echo_request to network host:ping pingAddressPrint environment v ariables:printenv- print values of all environment variablesprintenv name ...- print value of environment variable 'name'The printenv command prints one, several or all variables of the U-Boot environment. When arguments are given, these are interpreted as the names of environment variables which will be printed with their values:=> printenv ipaddr hostname netmaskipaddr=10.0.0.99hostname=tqmnetmask=255.0.0.0=>Without arguments, printenv prints all a list with all variables in the environment and their values, plus some statistics about the current usage and the total size of the memory available for the environment.=> printenvbaudrate=115200serial#=TQM860LDDBA3-P50.203 10226122 4ethaddr=00:D0:93:00:28:81bootdelay=5loads_echo=1clocks_in_mhz=1load=tftp 100000 /tftpboot/ppcboot.binupdate=protect off all;era 1:0-4;cp.b 100000 40000000 $(filesize);setenv filesize;saveenv rtai=tftp 100000 /tftpboot/pImage.rtai;run nfsargs;run addip;bootmpreboot=echo;echo Type "run flash_nfs" to mount root filesystem over NFS;echonfsargs=setenv bootargs root=/dev/nfs rw nfsroot=$(serverip):$(rootpath)addip=setenv bootargs $(bootargs)ip=$(ipaddr):$(serverip):$(gatewayip):$(netmask):$(hostname):$(netdev):off panic=1flash_nfs=run nfsargs;run addip;bootm $(kernel_addr)kernel_addr=40040000netdev=eth0hostname=tqmrootpath=/opt/hardhat/devkit/ppc/8xx/targetramargs=setenv bootargs root=/dev/ram rwflash_self=run ramargs;run addip;bootm $(kernel_addr) $(ramdisk_addr)ramdisk_addr=40100000bootcmd=run flash_selfstdin=serialstderr=serialstdout=serialfilesize=ddnetmask=255.0.0.0ipaddr=10.0.0.99serverip=10.0.0.2Environment size: 992/16380 bytes=>。
Linux内核源代码的阅读和工具介绍(一)

Linux内核源代码的阅读和工具介绍(一)Linux的内核源代码可以从很多途径得到。
一般来讲,在安装的linux 系统下,/usr/src/linux目录下的东西就是内核源代码。
另外还可以从互连网上下载,解压缩后文件一般也都位于linux目录下。
内核源代码有很多版本,目前最新的版本是2.2.14。
许多人对于阅读Linux内核有一种恐惧感,其实大可不必。
当然,象Linux内核这样大而复杂的系统代码,阅读起来确实有很多困难,但是也不象想象的那么高不可攀。
只要有恒心,困难都是可以克服的。
任何事情做起来都需要有方法和工具。
正确的方法可以指导工作,良好的工具可以事半功倍。
对于Linux内核源代码的阅读也同样如此。
下面我就把自己阅读内核源代码的一点经验介绍一下,最后介绍Window平台下的一种阅读工具。
对于源代码的阅读,要想比较顺利,事先最好对源代码的知识背景有一定的了解。
对于linux内核源代码来讲,基本要求是:⑴操作系统的基本知识;⑵对C语言比较熟悉,最好要有汇编语言的知识和GNUC 对标准C的扩展的知识的了解。
另外在阅读之前,还应该知道Linux内核源代码的整体分布情况。
我们知道现代的操作系统一般由进程管理、内存管理、文件系统、驱动程序、网络等组成。
看一下Linux内核源代码就可看出,各个目录大致对应了这些方面。
Linux内核源代码的组成如下(假设相对于linux目录):arch这个子目录包含了此核心源代码所支持的硬件体系结构相关的核心代码。
如对于X86平台就是i386。
include这个目录包括了核心的大多数include文件。
另外对于每种支持的体系结构分别有一个子目录。
init此目录包含核心启动代码。
mm此目录包含了所有的内存管理代码。
与具体硬件体系结构相关的内存管理代码位于arch/*/mm目录下,如对应于X86的就是arch/i386/mm/fault.c。
drivers系统中所有的设备驱动都位于此目录中。
- 1、下载文档前请自行甄别文档内容的完整性,平台不提供额外的编辑、内容补充、找答案等附加服务。
- 2、"仅部分预览"的文档,不可在线预览部分如存在完整性等问题,可反馈申请退款(可完整预览的文档不适用该条件!)。
- 3、如文档侵犯您的权益,请联系客服反馈,我们会尽快为您处理(人工客服工作时间:9:00-18:30)。
让轮子转动起来
在处理了分, 尤其是:
设置内存边界和调用 paging_init(); 初始化中断、IRQ 通道和调度; 分析(解析)命令行; 如果需要,就分配一个数据缓冲区(profiling buffer)以及其它一些小部分; 校正延迟循环(计算“ BogoMips” 数); 检查中断 16 是否能与协处理器工作。 最后,为了生成初始进程,内核准备好了移
至 move_to_user_mode(),它的代码也是在 同一个源代码文件中的。然后,所谓的空闲任务,进程号 0 就进入无限的空闲循环中运 行。 接着初始进程(init process)尝试着运行/etc/init、/bin/init 或者/sbin/init。 如果它们没有一个运行成功的,就会去执行代码“ /bin/sh /etc/rc” 并且在第一个终 端上生成一个根命令解释程序(root shell)。这段代码回溯至 Linux 0.01,当时操作系 统只有一个内核,并且没有登录进程。 在从一个标准的地方(让我们假定我们有)用 exec()执行了 init 初始化程序之后,内 核就对程序的执行没有了直接的控制。 从现在起它的规则是提供对系统调用的处理, 以及为 异步事件服务比如硬件中断等)任务的环境已经建立,现在起是 init 程序通过 fork() 派 ( 多 。 从 生出的系统进程和登录进程来管理多用户的访问了。 由于内核是负责提供服务的, 这个漫游文章将通过观察这些服务 “ 系统调用” ) ( 以及 通过提供基本数据结构的原理和代码的组织结构继续讨论下去。
第 1 9 页 页 共
Linux 内核源代码漫游
创建时间:2001-10-11 21 时 13 分
因为我对相应的代码不是很熟],在那里,所有 32 比特的设置启动被完成: IDT、GDT 以 及 LDT 被加载,处理器和协处理器也已确认,分页工作也设置好了;最终调用 start_kernel 子程序。 述操作的源代码是在 boot/head.S 中的,可能是整个内核中最有诀窍 上 这 的代码了。 注意如果在前述任何一步中出了错, 计算机就会死锁。 在操作系统还没有完全运转 之前 是处理不了出错的。 start_kernel()是位于 init/main.c 中的, 并且没有任何返回结果。 从现在起的任何代 码都是用 C 语言编制的,除了中断管理和系统调用的入/出代码(当然,还有大多数的宏 都 嵌入了汇编代码)。
第 2 9 页 页 共
Linux 内核源代码漫游
创建时间:2001-10-11 21 时 13 分
过在 kernel/sched.c 中的调度程序来改变。然而,由于所有的进程都必须访问它,所以使 用了宏 for_each_task。当系统负荷很轻时,它要比数组的顺序扫描快得多。 进程总是运行于“ 用户模式” 或“ 内核模式” 。用户程序的主体是运行于用户模式而其 中的系统调用则运行于内核模式中。 在这两种执行模式中进程所用的堆栈是不一样的 -- 常 规的堆栈段用于用户模式, 而一个固定大小的堆栈 (一页, 由该进程所有) 则用于内核模式。 内核堆栈页是从不交换出去的,因为每当一个系统调用进入时它就必须存在着。 内核中的系统调用(system calls)是作为 C 语言函数存在的,它们的‘ 正规’ 名称是 以‘ sys_’ 开头的。例如一个名为 burnout 的系统调用将调用内核函数 sys_burnout()。 系统调用机制在本手册的第三章中进行了讨论。观看在 include/linux/sched.h 中的 for_each_task 和 SET_LINKS 能够帮助理解进程表中的列表和树结构。
Linux 内核源代码漫游
创建时间:2001-10-11 21 时 13 分
Linux 内核源代码漫游
Alessandro Rubini 著, rubini@pop.systemy.it 赵 炯 译,gohigh@ ()
本章试图以顺序的方式来解释 Linux 源代码, 以帮助读者对源代码的体系结构以及很多 相关的 unix 特性的实现有一个很好的理解。目标是帮助对 Linux 不甚了解的有经验的 C 程 序员对整个 Linux 的设计有所了解。 这也就是为什么内核漫游的入点选择为内核本身的 启始 点:系统引导(启动)。 这份材料需要对 C 语言以及对 Unix 的概念和 PC 机的结构有很好的了解, 而本章中 然 并 没有出现任何的 C 代码, 而是直接参考 (指向) 实际的代码的。 有关内核设计的最佳篇 幅是 在本手册的其它章节中,而本章仍趋向于是一个非正式的概述。 本章中所参阅的任何文件的路径名都是指主源代码目录树,通常是/usr/src/linux。 这里所给出的大多数信息都是取之于 Linux 发行版 1.0 的源代码。虽然如此, 有 时也会提供对后期版本的参考。 这篇漫游中开头有 图标的任何小节都是强调 1.0 版 本 后对内核的新的改动。如果没有这样的小节存在,则表示直到版本 1.0.9-1.1.76,没 有作 过改动。 有时候本章中会有象这样的小节,这是指向正确的代码以对刚讨论过的主题取得 更多信息的指示符。当然,这里是指源代码。
引导(启动)系统
当 PC 的电源打开后,80x86 结构的 CPU 将自动进入实模式,并从地址 0xFFFF0 开 始自 动执行程序代码,这个地址通常是 ROM-BIOS 中的地址。PC 机的 BIOS 将执行某些 系统的检 测, 在物理地址 0 处开始初始化中断向量。 此后, 它将可启动设备的第一个扇区 读入内存地 址 0x7C00 处,并跳转到这个地方。启动设备通常是软驱或是硬盘。这里的叙 述是非常简单 的,但这已经足够理解内核初始化的工作过程了。 Linux 的最最前面部分是用 8086 汇编语言编写的(boot/bootsect.S),它将由 BIOS 读 入到内存 0x7C00 处,当它被执行时就会把自己移到绝对地址 0x90000 处,并将启 动设备 (boot/setup.S)的下 2kB 字节的代码读入内存 0x90200 处, 而内核的其它部分则被读入到地 址 0x10000 处 。 在 系 统 加 载 期 间 将 显 示 信 息 "Loading..." 。 然 后 控 制 权 将 传 递 给 boot/Setup.S 中的代码,这是另一个实模式汇编语言程序。 启动部分识别主机的某些特性以及 vga 卡的类型。 如果需要, 它会要求用户为控制台选 择显示模式。然后将整个系统从地址 0x10000 移至 0x1000 处,进入保护模式并跳转至系 统 的余下部分(在 0x1000 处)。 下一步是内核的解压缩。0x1000 处的代码来自于 zBoot/head.S,它初始化寄存器并调 用 decompress_kernel(), 它们依次是由 zBoot/inflate.c、 zBoot/unzip.c 和 zBoot/misc.c 组 成。 被解压的数据存放到了地址 0x10000 处(1 兆), 这也是为什么 Linux 不能运行于少于 2 兆内存的主要原因。[在 1 兆内存中解压内核的工作已经完成,见 Memory Savers--ED] 将内核封装在一个 gzip 文件中的工作是由 zBoot 目录中的 Makefile 以及工具 完 成的。它们是值得一看的有趣的文件。 内核发行版 1.1.75 将 boot 和 zBoot 目录下移到了 arch/i386/boot 中了, 这个 改 动意味着对不同的体系结构允许真正的内核建造,不过我将仍然只讲解有关 i386 的信 息。 解压过的代码是从地址 0x10100 处开始执行的[这里我可能忘记了具体的物理地址 了,
执行程序
在调用了 fork()之后, 有同一个程序的两个拷贝在运行了, 常一个程序使用 exec() 就 通 执行另一个程序。 exec()系统调用必须定位该执行文件的二进制映像, 加载并执行它。 词语 ‘ 加载’ 并不一定意味着 将二进制映像拷贝进内存” , “ 因为 Linux 支持按需加载。 exec() 的 Linux 实现支持不同的二进制格式。这是通过 linux_binfmt 结构来达到的,其中内嵌了 两个指向函数的指针--一个是用于加载可执行文件的, 另一个用于加载库函数, 每种二进制 格式都实现有这两个函数。共享库的加载是在 exec()同一个源程序中实现的,但我们只讨 论 exec()本身。 Unix 系统提供了六种 exec()函数。除了一个以外,所有都是以库函数 的 形式实现的, 并且, Linux 内核是单独实现 sys_execve()调用的。 它执行一个非常简单 的任 务:加载可执行文件的头部,并试着去执行它。如果头两个字节是“ #!” ,那么就会解 析该 可执行文件的第一行并调用一个解释器来执行它, 否则的话, 就会顺序地试用各个注册 过的 二进制格式。 Linux 本身的格式是由 fs/exec.c 直接支持的,并且相关的函数是
创建和结束进程
unix 系统是通过 fork()系统调用创建一个进程的,而进程的终止是通过 exit()或收到 一个信号来完成的。它们的 Linux 实现位于 kernel/fork.c 和 kernel/exit.c 中。 派生 出 一个进程是很容易的,所以 fork.c 程序很短并易于理解。它的主要任务是为新的进程 填写 数据结构。除了填写各个字段以外,相关的步骤有: 取得一个空闲内存页面来保存 task_struct 找到一个空闲的进程槽(find_empty_process()) 为内存堆栈页 kernel_stack_page 取得另一个空闲的内存页面 将父辈的 LDT 拷贝到子进程 复制父进程的 mmap 信息 sys_fork() 同样也管理文件描述符和 inode。 1.0 的内核也对线程提供某些不够完善的支持, 所以 fork()系统调用对此也给出了 某些示意。内核的线程是主流内核以外的过程产品。 从一个进程中退出是比较有窍门的,因为父进程必须被通告有关任何子进程的退出。而 且,一个进程可以由另外一个进程使用 kill()而退出(这些是 Unix 的特性),所以除了 sys_exit()之外,sys_kill()以及 sys_wait()的各种特性也存在于 exit.c 之中了。 这里不对 exit.c 的代码加以讨论---因为它一点也不令人感兴趣。 为了以一致的状态退 出系统, 它涉及到许多细节。 POSIX 标准对于信号则是要求相当严格的, 而 所以这里必须对 其加以叙述。
