面条机设计说明书
YMZD350I(500)型自动压面机使用说明
YMZD350I(500)型自动压面机使用说明&YMZD350I(500)执行标准:Q/ZCJ002专利号:ZL03218168,ZL03351218?3 1自动压面机是我厂单位经过广泛市场调研和征求用户意见吸收国内、外各类机型特点而开发的新产品。
该机适用于各食品制作单位及大专院校和大、中型食堂、饮食单位,揉压各种酥韧性面团。
由于采用了我厂专利技术,使面团输送、折叠和揉压自动连续完成,无需人工翻动及折叠,即卫生又安全。
它的研制成功填补了国内饮食加工机械一项空白,深受用户青睐。
它具有自动化的性能,更是配置各类面食加工生产线的理性设备。
22.1结构特征:自动压面机主要有机架、传动部分、输送折叠部分、翻压部分组成。
传动部分主要采用链传动,具有传动平稳、噪音小的特点。
输送折叠部分采用我厂专利技术,运用不同线速度,实现了自动折叠,代替了繁重的手工操作,即卫生又安全,实现了文明生产。
翻压面部分有上轧辊、下轧辊和可调轧辊组成,可调轧辊采用我厂专利技术,操作方便可靠。
2.2工作原理:将定量面团放在下输送带上,开动机器,自动输送到轧辊间,面团在输送带和轧辊作用下自动完成喂入和压面工程。
压完后经上输送带自动传倒下输送带,由于采用不同线速度,使面皮自动完成折叠和输送、喂入,转下道工序。
经过反复揉压达到理想压面效果。
轧辊间隙调整是通过一涡轮副和偏心机构实现厚薄无级可调,用户可根据实际情况及面食工艺自行掌握。
3YMZD350I YMZD500 类别型号5—25mm 8—25mm 轧辊调整范围74r/min 79r/min 轧辊转速2.2kw 3kw 额定输入功率380V 3~ 380V 3~ 额定电压50Hz 50Hz 额定频率A1219—3 A1473—3 普通V带Y100L配用电动机 1—4 2.2kw Y100L2—4 3kwIPX1 IPX1 防水等级1035*650*1065mm 1130*755*1240mm 外形尺寸245kg 330kg 机器重量4YMZD350IYMZD5004.1使用前的准备和检查。
Hauswirt海氏厨师机制作面条器产品说明书手册
7
6
技术规格与参数
本配件可搭配的机器有海氏Hauswirt HM750和HM790,这两款厨师技术规格如下:
产品名称 多功能厨师机 多功能厨师机
产品型号 HM750 HM790
额定电压 220V-50Hz 220V-50Hz
产品功率 1000W 1200W
产品容量 4.5升 5.5升
本产品已经通过相关国际要求测试,例如:电磁兼容性、低电压指令、安全技术规 章等。技术规格如有更改,恕不另行通知。
息30分钟。 12.本机器电机自带过热保护,当机器过热时,会自动停止运转,直到冷却后才会
再次运转。
特别声明 1.本产品按家用标准设计制造,请勿商用或做工业用途。 2.产品不使用时,请不要倾倒放置。 3.不要在无人监督情况下使用本产品,如果确实要离开,应先关闭开关或拔掉
插头。 4.定期检查本产品是否有损坏,如果已经损坏请不要继续使用。 5.不要尝试自行维修本产品,应联系客服服务中心,或送交专门维修点检查维修。
导致触电、火灾的危险。 5.请将产品放置在结实的水平台面上使用,放置不平、倾落会造成人身伤害。 6.请不要靠近热源处放置或使用本产品,会导致产品损坏而产生故障。 7.请不要让电源线从台面边缘垂下,电源线缠绕物品或身体会使产品跌落而造成
伤害。 8.设备必须插入一个接地的电源插座,本机器的额定电压是220v-50Hz,请检查使
1
注意事项:
使用环境 1.禁止在室外使用,在可能被雨淋的地方使用会导致产品漏电产生触电危险。 2.禁止在潮湿或易沾水的地方使用,绝缘降低会导致产品漏电产生触电危险。 3.禁止在电源线插头破损或整机跌落有破损时使用,破损状态下使用会导致烧伤、
触电甚至会引起火灾。 4.非技术人员禁止对本产品进行拆卸、修理,异常动作造成伤害、修理不彻底,有
Philips 迷你面条机 HR2355 01 商品说明书

Philips Avance Collection面条机500 克200 瓦HR2355/01轻松享用新鲜自制面条可自动制作多种不同面条的解决方案360 度挤出技术让您在 15 分钟内即可享受新鲜、美味的面条!加入有营养的原料,如鸡蛋、菠菜和胡萝卜汁可为全家制作出健康无忧的自制面条!轻松快速地制作面条•快速制作面条 - 只需 15 分钟•自动制作面条易于使用•LED 显示屏,显示工作过程•智能抽屉设计,便于存放塑形嘴•特殊的清洁工具,轻松清洁塑形嘴各种形状的面条•多种塑形嘴,可制作不同类型的面条安全、地道的面条•用各种新鲜食材制作地道的面条食品级材料(不含双酚 A)•与食品接触的所有部件均采用食品级材料(不含双酚 A)制造产品亮点强劲的挤出技术强劲的和面和挤出管不仅有助于自动制作面条,还能彻底地和面和快速地挤出快速制作面条只需 15 分钟即可揉面和挤出:制作出大约 500 克面条多种塑形嘴允许您作出 4 种类型的面条:细圆面条、粗圆面条、细扁面条和粗扁面条安全、地道的面条加入鸡蛋、菠菜汁或胡萝卜汁等新鲜食材,制作营养健康的面条。
完全由您掌控,百分之百安全食品级材料(不含双酚 A )与食品接触的所有部件均采用食品级材料(不含双酚 A )制造,您可以放心使用智能存储空间智能抽屉设计,将所有塑形嘴存放在一个地方特殊的清洁工具特殊的清洁工具,清洁塑形嘴更方便LED 屏幕LED 显示屏,显示工作过程,带给您更好的控制感。
发行日期 2022-06-29版本: 1.1.1EAN: 06 92341 07320 78© 2022 Koninklijke Philips N.V.保留所有权利。
规格如有更改,恕不另行通知。
所有商标是Koninklijke Philips N.V. 或它们各自所有者的财产。
规格设计•颜色: White & purple•功率: 200 W•颜色: 白色和紫色•随附: Cleaning tool, Measuring cup •外壳材料: 塑料•内壳材料: 塑料•频率: 20 Hz•容量: 500 g•原产地: 中国尺寸•产品重量: 7.8 kg 服务•2 年全球保修: Yes可持续发展•包装: <gt/> 90% recycled materials•用户手册: 100% recycled paper包装数据•12NC: 8832 355 01710•包装盒尺寸(长x宽x高): 40.5x30x34.5•包装盒重量: 0.2 kg•EAN 产品代码: 6923410732078。
家用面条机设计

家用全自动面条机的设计姓名:学号:学院:农业工程与食品科学学院班级:一、设计背景众所周知,面条是中华民族的传统美食,也是我们日常生活的主食之一,面条不仅含有丰富的蛋白质、脂肪、碳水化合物等多种营养成分,而且易于消化吸收,有改善贫血、增强免疫力、平衡营养吸收等功效,所以面条备受人们的喜爱。
然而,面条好吃难做,不仅需要和面,还要压面、切面,十分麻烦,并且如果面和不好,将严重影响面条的口感。
为了满足人们日常生活的需求,让人们方便快捷的制作出美味的面条,我设计了家用全自动面条机。
二、结构组成及工作原理家用全自动面条机的结构如图一所示:主要由小机筒1、模具固定螺母2、模具刀头3、大机筒5、小螺杆7、大螺杆8、传动系统、控制系统等部分组成。
机体材料为塑料。
其中螺杆是最关键的部件,螺杆有两个作用,一是和面,二是输送面团。
并在前端对面团进行挤压,设计上把螺杆做成拆分式,分别为小螺杆7(如图二所示)和大螺杆8(如图三所示)两部分。
小螺杆无螺旋的一端插在大螺杆中,并插入空心传动轴11中,小螺杆无螺旋一段做成方轴,相应的大螺杆内孔和传动轴内孔也做成方形,转动时传动轴带动小螺杆,小螺杆带动大螺杆。
螺杆采用变螺距、变根径的螺旋,即螺距后大前小,根径后小前大,这样使螺杆与筒壁之间的容积减小实现对面团的挤压。
利用电机的正反转实现和面和挤压两个过程。
按下和面按钮时,电机反转,螺杆反向转动,面在大螺杆的搅拌作用下被和好;按下挤压按钮时,电机正转,和好的面团被输送到挤压室,在模孔中被挤压出。
模具刀头3是面团从挤压室排除的通道,通道的横截面积远小于螺杆与机筒间空隙的横截面积,面团经过模孔时由原来的螺旋运动变为直线运动,有利于面团的组织化作用,模孔处为挤压的最后一处剪切作用区,提高了面团的混合和混炼效果,模孔横截面的形状可控制面条的横截面形状,如圆形、矩形等。
三、操作过程使用时先将模具刀头3在开水中浸泡一分钟,安装上用紧固螺母固定。
打开机筒上盖6,将适量面粉加入机筒,盖好上盖,按下和面按钮开始和面,和面过程中要从上盖的加水孔中加入事先准备好的盐水或果汁、蔬菜汁等,边和面边加水,水要一点一点的加,不能使面太干,也不能使面太湿,三分钟后,待面和成均匀的小团时,按下挤压按钮,这时就可以出面条了。
小型电动压面机的说明书

小型电动压面机的说明书目录摘要 (1)关键词 (1)1 前言 (1)2 总体结构 (2)3 压辊的设计 (4)3.1 压辊的结构和规格 (4)3.2 压辊的轴承 (4)3.3 压辊与轴系零件的连接 (4)3.4 压辊的表面技术参数 (5)3.4.1 齿数 (5)3.4.2 压齿的斜度 (5)3.4.3 齿形 (5)3.4.4 压辊的表面参 (5)3.4.5 在选择辊速时考虑的因素 (6)3.4.6 横压力 (6)3.4.7 压辊的清理及冷却 (6)4 进料机构 (6)4.1 进料板 (7)5 切面棍 (7)6 计算部分 (7)6.1 传动设计、选配电机 (7)6.1.1 传动方案的拟定 (7)6.1.2 电机的选择 (7)6.1.3 V带的设计··························································错误!未定义书签。
6.1.4 双面圆弧同步带的设计·····································错误!未定义书签。
机械设计之家用面条机

有关家用电动面条机的设计面条机的工作原理是把面粉经过面辊相对转动挤压形成面片,再经前机头切面刀对面片进行切条,从而形成面条。
面条机有三部分组成,分别是传动机构、搅拌机构和压面机构。
1.电动机传动机构1.1设计齿轮机构首先根据的要求,设计齿轮机构。
搅拌机构的电动机转速1440r/min,可以取带传动的传动比i带=d2/d1=3,确定齿轮机构的传动级数,各齿轮的齿数如图中所示(直齿轮的传动比i不大于5、斜齿圆柱齿轮的传动比i不大于8)。
然后,由搅拌机拌勺的运动轨迹要求并考虑有急回特性的要求,设计曲柄摇杆机构。
搅拌机容器转动的转速可取为8r/min,确定蜗轮蜗杆机构的传动比及蜗杆头数z1、蜗轮齿数i2。
2、设计搅拌机的曲柄摇杆机构2.1根据曲柄每分钟的转数48r/min设计出去柄摇杆机构的机构运动简图。
根据图,画出拌勺所受载荷和拌勺深度的关系图:在完成曲柄摇杆机构设计的基础上进行运动分析:由各构件的重量、转动惯量进行动态静力分析(仅考虑连杆和摇杆的惯性力),拌勺E所受阻力的方向与E点的速度方向相反(搅拌机容器的自传引起的分速度忽略不计),求出加于曲柄上的平衡力矩。
包括用解析法建立数学模型,绘制程序框图,计算结果,并根据计算结果绘制运动线路图(位移、速度、加速度线图)和平衡力矩线图。
根据机器运动的不均匀系数&,具有定传动比的各构件的重量Q3,Q4及转动惯量j3、j4,曲柄的转速n2及某些齿轮的参数z1、z2;由动态静力分析所得的平衡力矩Mb,驱动力矩为常数,将飞轮安装在曲柄轴上,进行飞轮计算。
2.2设计驱动搅拌机容器转动的蜗轮蜗杆机构由上面知蜗轮蜗杆机构的电动机转速为970r/min,计算蜗轮蜗杆机构的传动比以及蜗轮蜗杆的参数。
2.3设计搅拌机的齿轮机构取小带轮直径d=130,大带轮直径d=200,齿轮模数m=3mm,齿轮分度圆压力角@=20度;齿轮为正常齿制,工作情况为开式传动,进行齿轮机构的设计计算。
飞利浦家用面条机 HR2358 06 说明书
Always there to help you Register your product and get support atQuestion?Contact Philips EN User manual 2ZHS 用户手册 342 EnglishCongratulations on your purchase, and welcome to Philips!To fully benefit from the support that Philips offers, register your product at /welcome.Read this user manual carefully before you install and use the appliance. Save it for future reference.Shaping discsShapingdiscsCleaning tools CleaningtoolsAngel Hair Pappardelle/ flat wide Lasagna,Ravioli &Dumpling Skin Metal cores *Penne Spaghetti **FettuccineWater cup User manual Recipe bookMain unit Flour cupFlat cleaning toolUse the flat cleaning tool for the above shaping discsWhat's in the box* T he Lasagna shaping disc and Ravioli & Dumpling Skin share the same plastic part but are provided with different metal cores (1.2mm for Lasagna, 0.8mm for Ravioli & Dumpling Skin).** The spaghetti shaping disc is assembled on the appliance upon purchase.Ravioli & DumplingSkin 0.8mmLasagna 1.2mmEnglish 3Disassembling and cleaning before rst use 2345112453Quick Start GuideAssembling1234567812Using the pasta and noodle maker1234567812 910111213144 EnglishContentsWhat's in the box �����������������2 Quick Start Guide �����������������3 Important �����������������������6 Overview ������������������������10 Disassembling and cleaning before first use �����������������������������12 Assembling ����������������������14 Using the pasta and noodle maker ���16 Cleaning �����������������������24 Troubleshooting ������������������27 Product information ��������������30 Recycling �����������������������30 Warranty ������������������������31English 5ImportantSafetyRead this user manual carefully before you use the appliance, and save it for future reference.• Before you connect the appliance to the power, make sure that the voltage indicated on thebottom of the appliance corresponds to the local power voltage.• Make sure that your hands are dry before youinsert the plug into the power outlet.• Do not immerse the main unit in water.• To prevent a short circuit or an electric shock,do not pour water or any liquid into the safetyswitch.• Make sure that the plug is firmly inserted into the power outlet.• Never connect this appliance to a timer switch. • Make sure that the appliance is assembledcorrectly before you insert the plug into thepower outlet.• If the power cord, the plug, or other parts aredamaged, do not use the appliance.• If the power cord is damaged, you must have itreplaced by Philips, a service center authorized by Philips or similarly qualified persons to avoida hazard.• Do not replace parts of the appliance by yourself. • This appliance shall not be used by children.Keep the appliance and its power cord out ofreach of children.Warning6 EnglishWarning• This appliance is not intended for use bypersons with reduced physical, sensory ormental capabilities, or lack of experienceand knowledge, unless they have been given supervision or instruction concerning use ofthe appliance by a person responsible for their safety.• Children should be supervised to ensure that they do not play with the appliance.• To prevent any accidents, do not use the appliance if it is damaged for any reason.Caution• Before using the appliance for the first time, disassemble and wash the accessories thoroughly (refer to the chapter “Disassemble and cleaning before first use”).• This appliance is intended for household use only.• Never use any accessories or parts from other manufacturers or that Philips does not specifically reommend. If you use such accessories or parts, your guarantee becomes invalid.English 7Caution• Do not use this appliance on an unstable oruneven surface.• Do not disconnect the power cord before theprocessing is complete. If you have to stopprocessing, disconnect the power cord beforeyou perform other operations.• To better protect the lifetime of the appliance,we recommend the continuous working time to be less than 45 minutes. You can restart usingthe appliance after 15 minutes.• If you intend to use the appliance continuously, clean the shaping disc with the supplied cleaning tool each time after use. For easy cleaning, donot soak the shaping disc into water directly. • Do not bend, jerk, twist, or bundle the powercord forcibly, nor put it under heavy objects.• Do not put metal or flammable objects in themixing chamber.• Unplug the appliance when not in use.• Do not use the appliance near flammableobjects such as table cloth or drapes.• Pull out the power plug immediately after youdetect smoke.• When unplugging the power cord, do not pullthe cable but grab the plug part.8 EnglishCaution• Keep the power plug clean.• Do not put heavy objects on the appliance.• This appliance is designed as consumer kitchenappliance. Do not use for any other purpose.• Do not move the appliance while it is operating. • Disconnect the power cord if the applianceis left unattended and before assembling,disassembling or cleaning.• Place the appliance in a dry and well ventilatedplace after use.Electromagnetic fields (EMF)This Philips appliance complies with all applicable standards and regulations regarding exposure to electromagnetic fields.English 94 Put the shaping disc onto the disc holder ❶, and make sure it is firmly fixed on the disc holder .Note:• Make sure the inner cavity of the shapingdisc and disc holder isproperly fitted.5 Attach the front panel to the main unit.Disc holder safety switch leverNote:• Make sure the front panel is completelyfastened before using the appliance.• The front panel is heavy. Take extra caution when assembling it.6 Fasten the front panel control knobs.Note:• If the front panel or the shaping disc is notproperly assembled, the safety switch willprevent the appliance from working.7 Close the mixing chamber lid properly.Note:• If the mixing chamber lid is not properlyinstalled, the safety switch will prevent theappliance from working.12112ImportantUsing the pasta and noodle makerPreparing the ingredients1 Connect the power plug to any 230V ACoutlet. The pasta and noodle maker willsound once, and all indicators will flashonce.Note:• Make sure that all the parts are wellassembled before plugging in.• Place the product on the flat surface and prevent table shaking or vibration.• Make sure that all the parts are well assembled before plugging in.• Do not shake or move the appliance when it is weighing the flour.• Do not put your hands or any other object on top of the appliance when it is weighing the flour.• Do not move or touch the power cord when the appliance is weighing the flour.• Do not put less than 200g or more than 500g (2 cups) of flour in the chamber.• Press the liquid calculation button after the flour weight is confirmed on the display.• Pour in the liquid slowly through the water slot after the appliance start kneading.• If you want to dispose of the weighed flour before processing with the next batch, empty the chamber and restart the appliance by unplugging and plugging in again.• Do not put any ingredients that are 60°C / 140°F or above into the pasta and noodle maker, nor place the pasta and noodle maker in surroundings with high temperature (60°C / 140°F), for instance in a high temperature sterilization. This will deform the appliance.• Never pour water into the mixing chamber before you place the chamber lid onto the chamber. Do not pour any liquids into the safety switch hole.2 Wait until displays on the screen.3 Remove the chamber lid.4 Wait until displays on the screen..5 Measure the flour with the flour cup. Onefull cup is equivalent to 1-2 servings..Note:• One full cup of flour weighs around 250gram (1-2 servings).6 Pour the flour into the chamber. If youwant to make 3-4 servings, add a secondcup of flour as you will need 2 cups(~500g) of flour in total.Note:• Do not put less than 200g or more than 500g offlour in the chamber.If you put too little or too muchflour in the chamber,the appliance will not operate.7 The appliance automatically weighs theflour, and shows the flour weight ingrams.Note:• Do not shake or move the appliance when itis weighing the flour.• Do not put any object on the appliancewhen it is weighing the flour.• Do not move or touch the power cord whenthe appliance is weighing the flour.• Some recipes (for example cookies, gluten free pasta) require you to skip the weighing part. In this case, press the start/pause buttonfor 3 seconds, and the appliance will start kneading and extrudingdirectly.8 Close the chamber lid properly.Note:• Insert the two hooks into the appliance first, and then push the lid against the main unit .• The appliance will not start working if the chamber lid is not properly closed. During the pasta/noodle making process, if the chamber lid becomes loose, the appliance will automatically stop working.129 Press the program selection button tochoose the type of pasta/noodle youwant to make.Program Tip Corresponding recipePlain Pasta/ noodle When you are making pasta/noodle with flour and wateronly, select the "Plain Pasta"program .Wheat pasta/noodleDurum pasta/noodleRamenUdonCurried pasta/noodleEgg/ Flavored Pasta/ noodle When you are making pasta/noodle with flour and otheringredients (eggs or veggiejuice), select the "Egg/Flavored Pasta" program .For dumpling sheet or soba,select this program as well.Wheat pasta/noodleDurum pasta/noodleDumpling sheetWhole wheat pasta/noodleSpelt pasta/noodleCarrot pasta/noodleTomato pasta/noodleSobaBeet pasta/noodleSpinach lasagna/dumpling/wontonFennel pepper pasta/noodlePasta neroHerb pasta/noodle10 Wait until the flour weight is confirmed,and then press the liquid calculationbutton and the required amount ofwater or water and egg mixture displayson the screen.Note:• Only press the liquid calculation buttonafter the flour weight is confirmed on thedisplay.11 Measure the correct amount of water,egg mixture or vegetable mixture withthe supplied water cup.Note:• Make sure to measure the liquid volume ateye level on a flat surface.• When making the egg mixture, crack theegg into the water cup. Add water up to therequired amount, and then whisk the waterand egg to combine.• If preferred, 2 eggs can be used instead of 1.• When making the vegetable mixture, crackthe egg into the water cup. Add vegetablejuice up to the required amount, and thenwhisk the juice and egg to combine.Starting the pasta/noodle making programImportant• Do not select the extra extrusion program before the dough mixing is complete. Otherwise, this will damage the pasta and noodle maker and its lifetime.• Do not disconnect the power cord before the processing is complete.If you have to stop processing, press the start/pause button tostop the working process and then disconnect the power cord from outlet before performing other operations.• To better protect the lifetime of the appliance, the continuous working time should be less than 45 minutes. You can restart using theappliance after a 15 minute rest.• If you intend to use the appliance continuously, clean the shaping disc with the supplied cleaning tool each time after each pasta/noodlemaking session. For cleaning ease, do not soak the shaping discdirectly in water.1 Press the start/pause button to startprocessing, and the processing timestarts to count down.2 After the kneading starts, slowly pour inthe water or water and egg mixture alongthe entire length of the slot in the lid.Note:• During dough mixing, do not add otheringredients after you have poured in thewater. Otherwise, it will affect the results ofthe pasta/noodle texture.3 After the pasta and noodle makerfinishes kneading, it will beep a fewtimes and the pasta/noodle extrusionwill start after a few seconds. Place acontainer right under the outlet. Cut thepasta/noodle into the length you needwith the flat cleaning tool.Note:• If the ratio of liquid and flour is not correct,the extrusion will not succeed. In this case,prepare the ingredients again.• Move the cleaning tool downwards to cut the pasta/noodle.• After the extrusion process is complete, the appliance will beep a few times. The whole working process (including kneading and extruding) takes 15 minutes for 500g of flour.4 After the pasta/noodle making is complete, if you notice some leftoverdough inside the chamber, you can press the extra extrusion button first, and then press the start/pause button for extra extrusion.Note:• The countdown timer of the extra extrusion program is 3 minutes.• You may find some fine pasta/noodle threads on the pasta/noodlesurface. This is normal.• The cooking time of the pasta/noodle varies depending on personal preferences, pasta/noodle shapes, and number of servings.5 If you want to make another batch of pasta/noodle right after thefirst batch is finished, press the program selection button and wait until displays on the screen. Then start from step 3 (remove the chamber lid) at Page 17, and all the rest steps are the same as thefirst batch.Note:• Make sure that all the parts (including the chamber lid) are wellassembled before plugging in.Pasta/noodle type reference tableThis table is for your reference to select the right program to make various pasta/noodle. You can find the recipes in the recipe book.Program Tip Corresponding recipePlain Pasta/ noodle When you are making pasta/noodle with flour and wateronly, select the "Plain Pasta"program .Wheat pasta/noodleDurum pasta/noodleRamenUdonCurried pasta/noodleEgg/ Flavored Pasta/ noodle When you are making pasta/noodle with flour and otheringredients (eggs or veggiejuice), select the "Egg/Flavored Pasta" program .For dumpling sheet or soba,select this program as well.Wheat pasta/noodleDurum pasta/noodleDumpling sheetWhole wheat pasta/noodleSpelt pasta/noodleCarrot pasta/noodleTomato pasta/noodleSobaBeet pasta/noodleSpinach lasagna/dumpling/wontonFennel pepper pasta/noodlePasta neroHerb pasta/noodleImportant• The pasta/noodle recipes provided in the recipe book have been tested for success. If you experiment with or use other pasta/noodle recipes, the flour and water/egg ratios will need to be adjusted to the flour and water cup ratios included with the pasta and noodle maker. The pasta and noodle maker will not operate successfully without adjusting the new recipe accordingly.Note:• To help ensure the quality of the pasta/noodle, add therecommended liquid proportion.• Using ingredients from different regions may affect the flour/water ratio.• When making egg pasta/noodles or vegetable pasta/noodles follow these steps:• Measure the egg and liquid to the recommended level.• Whisk the mixture evenly before pouring it into the chamberthrough the slot in the lid.• See the recipe book provided for more delicious pasta/noodle ideas.Important1 Disconnect the plug from the poweroutlet.2 Remove the chamber lid from theappliance.Cleaning• Disconnect the power and remove the power cord before cleaning or disassembling this appliance.• Do not immerse the main unit in water.• Do not use a scourer, caustic cleaners, or abrasive cleaners (forexamples, gasoline, alcohol, and propanol) to clean the appliance.• Clean the appliance each time after use, or the appliance might not operate properly.• Take extra caution when cleaning the appliance to avoid getting cut by any sharp edges.• The shaping discs and all detachable parts of the appliance aredishwasher proof. When you clean them in a dishwasher, make sure to set the temperature below 60ºC (140ºF).3 Loosen the front panel control knobs.Note:• The front panel is heavy. Take extra cautionwhen removing it.4 Disassemble the front panel, the shaping disc, the shaping disc holder, the mixing paddle, and the mixing chamber in order.5 Use a dry cloth to clean flour residue inthe hole ❶ where the mixing paddle isplaced.6 Clean the shaping disc with the suppliedcleaning tool to remove the doughresidues. After that, you can clean it withwater.Tip:• For the spaghetti, angel hair and fettuccineshaping discs, put the shaping disc into the freezer for 2 hours. Then use the corresponding cleaning tool to poke out the dough in the holes.2345117 Clean all detachable parts.8 Use a dry cloth to clean the main unit,control panel, and the exterior of thepasta and noodle maker.9 Store the pasta and noodle maker in adry, well ventilated place after use.Note:• After cleaning, make sure all parts and the shaping disc air drythoroughly before storing. Assemble the pasta and noodle makerback for next use.Storing the shaping discs and cleaning tools1 Insert the shaping disc ❶ and cleaning tool ❷together. Put ❶ and ❷into the storage drawer. Move the sliding bar ❸ to secure the shaping discs and cleaning tools.Make sure the cleaning tools and shaping discs are dry before putting them into the storage drawer.231TroubleshootingThis chapter summarizes the most common problems you could encounter with the appliance. If you are unable to solve the problem with theinformation below, visit /support or refer to page 31 for the consumer care number to call for assistance.The indicators do not light up.After pressing the start/pause button the appliance sounds but does not work.• The power plug is not connected correctly.Check whether the power plug is connected correctly and the outlet is working properly.• The chamber is assembled incorrectly.The shaping disc, or the front panel is assembled incorrectly.Make sure you follow the user manual to assemble all parts correctly.The safety switch is triggered and the appliance suddenly stops or restartsduring the processing.• The front panel knob is loose.Make sure the front panel is securely assembled.• Excessive ingredients in the pasta and noodle maker.The maximum amount of flour used for each batch is 500g. If more than 500g is added, reduce the amount of flour before next batch.During processing, the appliance stops. There is no alarm sound or flashes.• The pasta and noodle maker has overheated due to long continuous working time.Disconnect from the power outlet, and allow the pasta and noodle maker to cool down. To better protect the lifetime of the appliance, the continuous working time should be less than 45 minutes. You can restart using the appliance after a 15-minute rest.When weighing the flour, the weight shown on the screen changes all the time.• You are touching the appliance or the power cord.When the appliance is weighing the flour, do not touch the appliance or the power cord.Small amount of water is leaking from the appliance.The mixing paddle is running idle, and there is no pasta/noodle coming out.The appliance stops during processing, EEEE displays on the screen, the indicators are flashing quickly, and the alarm sounds.Too much leftover dough inside the chamber.• Water is added before the program starts.Follow the user manual instructions to add water right after the program starts.• The ratio of the flour and water is incorrect.Disconnect the plug from the power outlet and discard dough. Clean the pasta and noodle maker, re-measure ingredients correctly and follow the user manual instructions again to restart the pasta/noodle making.• The mixing paddle may be blocked by some foreign objects.The dough may be too dry.The wrong program is selected.Disconnect from the power outlet, clean the pasta and noodle maker, and follow the user manual again to restart the pasta/noodle making.• The flour is either exposed to moisture before use, or the dough is too wet.Keep your flour dry during storage. Follow the user manual instructions to restart the pasta/noodle making.• The chamber, the mixing paddle, the shaping disc are not cleaned properly before use.Make sure all parts are clean before use.• The mixing paddle or the chamber is still wet.Make sure all parts are completely dry before use.• Water is not added in the right order.The flour type is not correct.Follow the user manual instructions to make pasta/noodle.Unable to make pasta/noodle successfuly with the liquid calculation function.• The required liquid amount indicated on the display screen does not apply to some recipes (for example cookies, gluten free pasta/noodle).These recipes require you to skip the liquid calculation part. In this case, press the start/pause button for 3 seconds, and the appliance will start kneading and extruding directly.E3 displays on the screen.• The weighing system has been reset.When using the appliance, make sure to put it on a flat and stable surface. If the problem persists, refer to page 31 for the consumer care number to call for assistance.E4 displays on the screen.• Software in the appliance is not working.Refer to page 31 for the consumer care number to call for assistance.E5 displays on the screen.• The total weight exceeds the upper limit of the weighing system (approximately 999 grams).Unplug the appliance, remove any objects placed on the appliance, empty the mixing chamber, and start again from step 1 in chapter “Preparing the ingredients” (page 16).EEEE displays on the screen.• Excessive current is flowing through the circuit.Pull power plug out of outlet first and then plug in again to reset the appliance.The kneading process does not start and E1 displays on the screen.• There are more than 500g of flour in the mixing chamber.Make sure that you do not put more than 500g of flour in the mixing chamber for one batch.After the flour is poured in the mixing chamber, the weight shown on the display screen changes a bit after the lid is closed.• After the appliance is plugged in, the chamber lid is removed when the weighing system is still calibrating.Strictly follow steps 2, 3 and 4 on page 17The kneading process does not start and E2 displays on the screen.• There are less than 200g of flour in the mixing chamber.Make sure that you do not put less than 200g of flour in the mixing chamber for one batch.ProductinformationModel HR2358/06Motor power200WRated voltage AC220-240V (50Hz)Dimensions (L x W x H)343mm x 215mm x 315mm /13.5 in x 8.5 in x 12.4 inNet weight 6.9kg• For rated voltage and frequency information, refer to the typeplate on the product. Product information is subject to change without prior notice.RecyclingDo not throw away the product with the normal household waste at the end of its life, but hand it in at an official collection point for recycling. By doing this, you help to preserve the environment.Warranty2-YEARWARRANTYIMPORTANT:Please keep this warranty cardtogether with your proof ofpurchase for use when claiming.AUSTRALIAPhilips Consumer Care: 1300 363 391 Website: /supportNEW ZEALANDPhilips Consumer Care: 0800 658 224 Website: /support10/12/15 09:29English 31Philips Electronics Australia Limited and Philips New Zealand Commercial LimitedWarranty against DefectsIn this warranty:We or us means Philips Electronics Australia Limited ACN 008 445 743 or Philips New Zealand Commercial Limited NZBN: 9429041782170, and our contact details are set out at the end of this warranty;Y ou means the purchaser or the original end-user of the Goods;Supplier means the authorised distributor or retailer of the Goods that sold you the Goods in Australia or New Zealand; andGoods means the product or equipment which was accompanied by this warranty and purchased in Australia or New Zealand.If you require assistance with the operation of the product, its features orin Australia or 0800 658 224 in New Zealand.Australia: Our Goods come with guarantees that cannot be excluded under the Australian Consumer Law. Y ou are entitled to a replacement or refund for a major failure and for compensation for any other reasonably foreseeable loss or damage.Y ou are also entitled to have the Goods repaired or replaced if the goods fail to be of acceptable quality and the failure does not amount to a major failure. This is nota complete statement of your legal rights as a consumer.New Zealand: Our Goods come with guarantees that cannot be excluded under the Consumer Guarantees Act 1993. This guarantee applies in addition to theconditions and guarantees implied by that legislation.Additional Warranty:In addition to the rights and remedies that you have under the AustralianConsumer Law, Consumer Guarantees Act of New Zealand or any otherapplicable law, we provide the following warranty against defects:1. 2 years from their date of purchase from the Supplier(Warranty Period), the Goods prove defective by reason of improperworkmanship or materials and none of your statutory rights or remedies apply,we will repair or replace the Goods without charge.32 English2. W e do not have to repair or replace the Goods under this Additional Warrantyif the Goods have been used for a commercial purpose; misused, improperlyor inappropriately installed, operated or repaired; abused; damaged; or not maintained in accordance with the manufacturer’s instructions.3. E ven when we do not have to repair or replace the Goods, we may decideto do so anyway. In some cases, we may decide to substitute the Goods witha similar alternative product of our choosing. All such decisions are at our absolute discretion.4.this Additional Warranty for the time remaining on the original Warranty Period.5. T his Additional Warranty is limited to repair, replacement or substitution only.As far as the law permits, we will not be liable for any loss or damage caused to property or persons arising from any cause whatsoever.6. I n order to claim under this Additional Warranty you must telephone uson 1300 363 391 in Australia or 0800 658 224 in New Zealand within the Warranty Period. Y ou will be asked for details of the Goods, a description of the defect and your personal details. Upon accepting your claim, we shall assist you with either returning the Goods to the Supplier for replacement or to the most convenient Philips Authorised Service Centre for your Goods to be repaired.In some case we may require that you return to the Goods to us (at the address below) for repair, replacement or substitution.- A ll returned Goods must be accompanied by satisfactory proof of purchasewhich clearly indicates the name and address of the Supplier, the date and- Y ou must bear any expense for return of the Goods or otherwise associatedwith making your claim under this Additional Warranty.7. This warranty is only valid and enforceable in Australia and New Zealand.Contact us or the place of purchase for further details.Philips Electronics Australia Limited Philips New Zealand Commercial Limited65 Epping Road North Ryde Level 3, 123 Carlton Gore RoadNorth Ryde SYDNEY NSW 2113 Newmarket AUCKLAND 1023 Consumer Care: 1300 363 391 Consumer Care: 0800 658 224 Website: /support Website: /support4222.005.0272.4English 33。
工业设计课程设计面食机设计说明
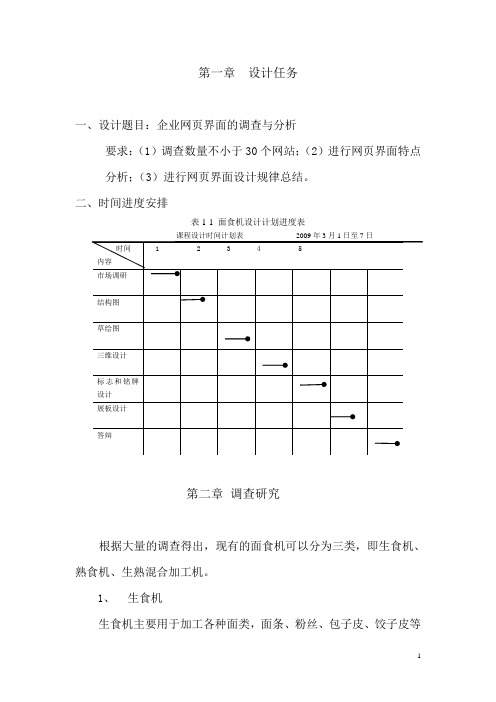
第一章设计任务一、设计题目:企业网页界面的调查与分析要求:(1)调查数量不小于30个网站;(2)进行网页界面特点分析;(3)进行网页界面设计规律总结。
二、时间进度安排表1-1 面食机设计计划进度表课程设计时间计划表2009年3月1日至7日第二章调查研究根据大量的调查得出,现有的面食机可以分为三类,即生食机、熟食机、生熟混合加工机。
1、生食机生食机主要用于加工各种面类,面条、粉丝、包子皮、饺子皮等等。
生食机体积较小,主要由搅拌机构、滚压机构、自动切皮机构组成。
以下是调查结果:图2-1 生食面食机产品简介:MS系列多功能面食机是能够加工多种花样面食的食品加工机械。
该产品采用全封闭机械传动、结构紧凑,运转平稳,工作可靠;通过更换不同的出面器可生产出通心面、麻花面、小田螺等面食,以及粗细不同的面条;接触食品的零部件都采用不锈钢或铜合金制造,符合卫生要求,且外形美观高雅,操作方便,易于清洁。
MS9多功能面食机同时可配B8搅拌机面粉,也可用小型和面机拌面粉。
本机适合宾馆、酒楼、餐厅、食堂、食品加工厂制作花色面食之用。
2、熟食机熟食机主要用于加工各种零食类面食,包括膨化食品、桃酥、锅巴、猫耳等类型的食品。
一般用于批量加工出售,家庭很少使用。
机器内部主要包括成形机构,油锅等。
调查结果如下:3、生、熟混合机这类机器外形比较庞大,也是用来批量生产供销售使用。
它是将生食机、熟食机的功能结合起来,提高了生产效率。
调查结果如下:图2-4 生、熟混合面食机多功能面食机简介:1、体小轻便外观新颖漂亮该机在生产过程中力求简单实用、功能齐全。
单机重量在70--100公斤,占地小,并安装有滑动脚轮,方便移动,即可固定作业也可流动生产。
2、自动化程度高易于操作该机自动搅拌、吞料、送料、挤出、切块、成形一次完成,男女老少均可操作,性能十分稳定。
3、结构结实耐用使用寿命长该机采用优质钢材框架,外壳采用美观漂亮的乳白色装饰板材,劲显高档、美观、于净卫生,螺旋曲轴采用优质碳钢,管筒采用纯正厚度无缝钢管,内部精选优质推力轴承,整机无易损件,坚固耐用。
电动面条机用户手册
电动面条机用户手册【用户名】电动面条机用户手册一、产品概述电动面条机是一种方便快捷的厨房小家电,能够自动制作面条。
本手册旨在向用户介绍电动面条机的使用方法、注意事项及常见问题解决方案,以便用户能够正确操作并享受到最佳使用体验。
二、产品规格1. 尺寸:30cm(长)× 20cm(宽)× 15cm(高)2. 重量:2kg3. 材质:不锈钢、ABS塑料4. 颜色:白色5. 电源:220V,50Hz6. 功率:400W7. 操作方式:按钮控制三、操作指南1. 准备工作:a. 将电动面条机放在平坦稳固的表面上,插入电源插座。
b. 确保电动面条机的滚轮已经安装好并牢固锁定。
2. 面团制作:a. 准备好新鲜的面团,并按照面团制作说明中的比例添加所需配料。
b. 将面团放入面团槽中,并轻轻按下,确保面团紧密粘附在滚轮上。
3. 面条制作:a. 按下电动面条机上的“开始”按钮,电动面条机会启动。
b. 当面条开始出现时,用双手轻轻拉伸面条,让它们流畅地通过滚轮。
c. 随着面条不断出现,持续拉伸并轻轻控制面条的形状和长度。
4. 完成与清洁:a. 当您满意所制作的面条时,按下电动面条机上的“停止”按钮,电动面条机会停止工作。
b. 拔下电源插头,然后用湿布清洁面条机的表面,注意不要将机器浸入水中。
c. 可以将未用完的面团放入密封的容器中,保存在冰箱中,以备下次使用。
四、安全注意事项为了保证您的安全,请务必遵守以下事项:1. 在操作电动面条机之前,确保您已完全阅读并理解本用户手册。
2. 请勿将手或任何物体伸入电动面条机的滚轮部分,以免造成意外伤害。
3. 请确保电动面条机的电线没有损坏,并远离水源以防止电击。
4. 使用完毕后,请拔下电源插头,并将电动面条机放置在儿童无法触及的地方。
5. 请勿将电动面条机用于其它非面条制作的食品。
五、常见问题解决方案以下是一些用户常见问题及其解决方案:1. 问题:面团粘在滚轮上无法流畅制作面条。
面条机设计说明书
课程设计指导老师:***学生:迟维月日期:2005年1月1日学号:*******目录一摘要二市场调研 (3)三方案设计 (3)第一种方案 (5)第二种方案 (10)第三种方案...................................11方案对比. (14)方案结论 (14)四结构设计 (15)五结束语 (16)六参考资料 (18)一摘要用机械实现用以和好的面团加工成为面条。
二市场调研本人以米饭为主食,但也爱吃用小麦粉和荞麦粉做的面条,口感光滑,食用方便,许多人每天都要吃一顿面条。
日本的面条的制作方法与意大利的通心粉一样,用强粘度的小麦粉掺水加盐后揣揉并擀开切成细条,荞麦面条是在荞麦粉里掺入小麦粉和水制成的,当然不同的地区都有各自不同的面条制作方法。
传说吃面条的习惯起源于中国,在奈良时代面条从中国(唐朝)传来日本,并在江户时代得到普及。
面条的吃法一般是先把面条煮熟,然后浸蘸或淋上用汤汁冲淡的酱油。
浸蘸食法中有“锅汤面条”,即把煮面条的汤水盛在碗里一起吃。
而淋浇汤汁或佐料(葱、五香粉等),这在关西地区被称为“素面条”,而在关东地区被称为“盖交面条”。
还有些地方是在面条上放上或浇上油炸物、鸡蛋、咖喱等,总称为“盖交汤面”。
面条的味道因东西部地区的差异而不同。
一般来说,关西是在用淡酱油做成的汤汁里放入绿色葱料,而关东是在浓酱油的汤汁里加入白葱等。
面条不粘法2004-10-25 四川饮食网以往我们吃剩下的面条到了第二天就会粘在一起,这样的面条不但很难再从新加热,而且吃起来口感极差,现在就给大家介绍一种可以让面条不粘的方法。
其实很简单,就是把剩下的面条放入冷水里过一下,然后把水沥干,放入一些香油,拌匀,这样就可以防止面条粘住了。
本次设计的家庭用便携式面条机主要面向的市场是个人家庭,目前在现有市场上同类型的面条机体积都比较大,操作也比较复杂,且大多适合批量生产,从经济实用角度上来看大都不太适合家用。
面条机设计说明书

安阳工学院创新设计面条机设计说明书**: **学号:************班级:08级专升本机械设计制造与自动化1班一摘要用机械实现用以和好的面团加工成为面条。
二市场调研本次设计的家庭用便携式面条机主要面向的市场是个人家庭,目前在现有市场上同类型的面条机体积都比较大,操作也比较复杂,且大多适合批量生产,从经济实用角度上来看大都不太适合家用。
为了此次课程设计,我做了一定程度的市场调研,具体了解了以下一些情况。
膨化式双筒面条机的工艺流程及主要技术参数如下:生产能力75-100kg(面条Noodles)/h(Productivity)面条规格:0.8、1.0、1.2mm(Noodles Diameter)电源:380V/50-60Hz,11.0+5.5kW(Power Supply)外形尺寸:140×51×142cm(Size)重量:≈300kg(Weight)95%以上熟化、弹性大、表面滑润、口感好。
More than 95% of the noodles cooked well; smooth surface,excellentelasticity and good taste该设备采用的是膨化式直接发面制面条的方法,该设备可以任意选择面条粗细,切工艺合理,生产能力强,但是因其外形尺寸比较大,重量也大,从生产能力和耗电量角度来看都不适合家庭用,而是适合大批量生产。
鉴于以上信息,本次设计,在考虑实用性和主要面向的市场上,我们设计了家庭用便携式面条机,本机重量轻,便于携带,适合小批量生产,经济实用。
正文第一种方案面团面条说明:在面团槽中放入糅合好的面团,然后插入压杆,推动压杆,面团从小孔中挤出,面条因重力直接掉入水锅中,煮熟即可。
杆,充分利用了杠杆原理。
在下盖上有孔(螺旋孔),顺着拧进去,推动推块前进. 为了实现不同的面条粗细及形状,可以把上盖的小孔加工成各种形状,例如;圆形,方形等等。
压面机技术说明

小型手摇压面机技术说明我们设计制作的是一种小型家庭压面机,机器整体规格为260×200×450(mm),与传统压面机比较,我们设计制作的压面机有以下几个优点:1、结构简单装拆方便。
2、压面滚筒之间间隙由大变小,大大减小滚筒所受反压力。
3、我们采用可换位齿轮传动,使齿轮可两两啮合传动,减小了人的劳作力。
一、设计理念利用变为齿轮实现与其他齿轮的啮合,从而实现压面饼和面条,面条的宽度可以根据使用不同刀来控制,主要针对青年人而设计的,由于面饼的厚度是固定的所以只能实现一种厚度的面饼,也因此,对喜欢吃薄面的人的来说,产生了一种被重视的感觉,这也是此产品销售的一大特点。
用扳手实现换位,省时省力。
大托板用一个螺栓连接,可以转动,能实现防尘的效果,也减少了存放空间。
用两个圆头挡板来实现刀具的径向固定,用两个卡板实现刀具的轴向定位。
利用螺杆来控制两立板之间的距离。
利用UG三维绘图软件对压面机的各部分零件进行三维建模,并组装成三维模型,在装配过程中通过配合关系检查零件模型是否有误,从而确定上述设计过程中确定的结构及尺寸等是否正确,并根据工艺及外观随时修改各尺寸值,达到结构最优的目的。
由于中心距是固定的,对轴尺寸精度要求比较高,采用公差是0.05mm,对立板上的轴承孔的位置和尺寸精度的要求较高。
二、生产能力分析由于条件有限,大部分部件主要采用车削加工和锉削加工,其中用到普通车床,数控车床,虎钳台,钻床,锯床,线切割机,焊机,除齿轮和轴承外,其余零件都是自己加工完成。
三、各部分零件及规格1..轴承考虑到整个机构中所需要轴承只受径向力作用,轴向力不大,选用了深沟球轴承。
所选轴承的规格由于结构要求选用一个滚针轴承,内径12,外径16,厚度8,数量12..齿轮3.滚筒为了增加效率,设计两组滚筒,直径55,采用硬质塑料可以减轻重量。
滚筒直径为55,第一组滚筒中心距60,第二组中心距58.4.刀具刀具是可拆卸的,可跟换多种类型的刀具,生产出宽度不同的面。
螺旋压面机设计说明书
螺旋压面器设计说明书目录姚都(中北大学机械工程与自动化学院04021404班28号,山西太原 030051)机构示意图 (1)技术要求 (1)主要参数 (1)传动方案的分析和拟订 (1)传动机构 (1)机械传动可用来实现的功能 (1)螺旋传动的分类 (2)动力选择 (2)工作原理 (2)装置主要零件和连接的设计 (2)压面器压盖的设计 (2)螺杆与推板连接的设计 (3)压面器手柄的设计 (3)压面器出面口的设计 (3)装置材料的选择 (4)零件尺寸的设计计算 (4)螺旋传动的螺杆与螺母的计算 (4)底板平头螺钉的计算 (5)螺旋压面器设计装配图 (5)设计小结 (5)参考文献 (5)螺旋压面器设计说明书姚都(中北大学机械工程与自动化学院04021404班28号,山西太原 030051)随着人们生活水平的提高,越来越多的创新设计应用到了人们的衣食住行,极大的方便了我们的生活,螺旋压面器便是其中的一例,通过使用螺旋压面器,可以很方便的压出面条,不但节省了时间和体力,而且压出的面条也不错,不过,现有的螺旋压面器还是存在一些缺点,如压出的面只有圆形而且粗细不可以改变,压盖螺母需要旋拧比较费事,握柄不能折叠比较占地方,不便于存放等等,所以我准备对现有的螺旋压面器进行改进,使之能够更加方便我们的生活。
机构示意图技术要求:出面尺寸和形状可变,压盖螺母可快速联结,握柄可折叠。
主要参数:旋转手柄扭矩T=10 Nm=160 mm最大行程hmax传动方案的分析和拟定传动机构传动机构是把原动机的动力和运动传送到执行机构的传动装置。
以传递动力为主的传动又称为动力传动。
以传递运动为主的运动传动。
机械传动是最常见的一种传动形式。
在机械传动系统中,原动机的动力和运动传递给执行机构,使之实现预定动作(包括运动和动力)的装置。
它由各种传动元件或装置,轴及轴系部件,离合,制动,换向和蓄能(如飞轮)等元件组成。
机械传动可用来实现的功能:降低或增高原动机输出的速度,以适合执行机构的需要;采用变速传动来满足执行机构的经常变速要求;将原动机输出的转距,变换为执行机构的所需要的转距或力;将原动机输出的等速旋转运动转变为执行机构所要求的,其速度按某种规律变化的旋转或非旋转运动;由一个或几个原动机驱动若干个相同或不同速度的执行机构;由于受机体外型,尺寸的限制,或为了安全和操作方便,执行机构不宜与原动机直联时,也需要用传动装置来连接。
家用电动面条机的设计【家用电动压面机】
前言“北方面条,南方米饭”这句话概括了古代中国的地方主食的特色。
由于古代中国食品卫生条件较差,相对于其他食品而言,经过煮沸的面条最为洁净,可以极大地减少肠胃疾病的发生,因此面条成为中国最常见的食品之一。
在目前农产品加工的机械化的背景下,传统的手擀面条生产效率低、操作困难,买面条不经济划算,还费时费力。
适用于家庭使用的面条机受到了人们的追捧,因此家庭面条机的设计成为了设计课题。
本次的毕业设计参考了大型面条机的设计方案,对家庭面条机结构进行了设计和研究,从整体结构而言,重点对压面机的压面机构、切面部件、减速系统进行了重点设计和研究。
设计步骤首先在明确设计任务要求及其背景的情况下,查找资料并与老师深入沟通明确了设计纲领,并通过三维设计Solidworks对其中的重要部件做了设计并完成建模,并不断优化设计,最后绘制CAD 图纸文件,完成了总装图和部件图以及重要的零件图。
关键词:家用电动压面机;压片机构;辊刀目录1引言 (1)1.1国内外面条机概况及发展现状 (1)1.2研究的目的与意义 (1)1.3预期目标 (1)1.4任务要求及实现预期目标的可行性分析 (1)1.5重点研究的关键问题及解决思路 (2)2面条机的设计思路和总体方案设计 (2)2.1设计思路 (2)2.2总体结构图 (3)2.3工作原理 (3)3面条机主要部件的设计 (3)3.1压片机构的设计说明 (3)3.2辊刀的设计说明. (5)4面条机传动部件的设计 (6)4.1电动机的选择 (6)4.2带轮的设计 (6)4.3齿轮的设计 (8)5轴的设计 (12)5.1轴结构的设计 (13)5.2轴的设计计算 (13)总结 (15)致谢 (16)参考文献 (17)1引言1.1国内外面条机概况及发展现状面条作为中国的传统美食,深受人们的喜爱,其发展历史悠久,在世界各地也都有了属于自己的面文化。
面条的做法也演变出多种,捞、焖、炒、汤等各种做法,我们在全国各地甚至是全世界各地,都可以吃到美味的特色面条。
和面机设计说明书2(可编辑)

和面机设计说明书2(可编辑)(文档可以直接使用,也可根据实际需要修改使用,可编辑推荐下载)目录目录 (1)第一章绪论 (3)1.1食品加工机械简述 (3)1.2食品加工机械的设计要求 (3)1.3和面机概述 (3)1.4和面机设计选择 (6)第二章和面机现状 (7)第三章和面机设计 (10)3.1皮带轮设计 (10)3.1.1 计算功率Pc (10)3.1.2 V带选型 (10)3.1.3 带轮设计 (10)3.1.4 验算带速V (10)L和中心距a (10)求V带基准长度d3.1.6 小包角的计算 (11)3.1.7 求带根数Z (11)3.2 蜗轮传动设计 (13)3.2.1 选择材料并确定其许用应力 (13)z,并估计传动效率 (13)3.2.2 选择蜗杆头数1T (13)3.2.3 确定蜗轮转矩23.2.4 确定使用系数K A,综合弹性系数Z E (13)Z (13)确定接触系数ρ3.2.6 计算中心距a (13)z,q,γ,a等参数 (13)确定m,23.2.8 校核弯曲强度 (14)3.3 蜗杆上轴承设计并校核 (16)3.3.1 计算蜗轮蜗杆的扭矩 (16)3.3.2 计算蜗杆的力 (16)3.3.3 轴承的选择 (16)3.4 轴的尺寸结构及校核 (18)3.4.1 按扭转强度条件初估直径 (18)3.4.2 按弯扭合成强度校核 (18)3.4.3 主轴应力分布图 (19)3.5 主轴上的滚动轴承结构尺寸和强度校核 (21)3.5.1 角接触球轴承设计 (21)3.5.2 深沟球轴承的设计 (22)3.6 搅拌器尺寸结构及校核 (23)3.7 电动机的选择 (24)3.8 密封和润滑 (25)第四章总结 (26)第五章参考文献 (27)第一章绪论1.1食品加工机械简述食品加工机械是指加工食品过程中所应用的机械装备及设备,它在国民经济建设中起着积极重要的作用。
食品加工机械可分为以下十大类:面类食品机械,糖果及巧克力加工机械,乳制品机械,罐头制品机械,肉类加工机械,饮料、酒制品机械,饮食机械,其它加工机械。
压面机机械结构设计__毕业设计说明

设计的目的与意义
本设计主要是设计压面机的压面机械结构部分,压面机动力 传动机械结构部分和压面机切面的机械结构部分以及压面机 机架结构。在参考市场上普通家用的压面机机械机构的基础 上,根据课本《机械设计基础》中所学到的机械设计的基本 原理来对市场上压面机原有的机构进行了解和进行适当的改 良。其中设计也满足了机械设计的一些基本要求:(1)良好 的使用性能,(2)基本的安全要求,(3)机器的可靠,耐用, (4)经济实惠,可以大众化普及,(5)符合环保要求。除 此之外,使产品具有市场竞争力,力求产品的外形美观。
由于自己的知识水平有限,机架的结构和一 些零部件的设计仍有待改进。
谢谢各位~!
O(∩_∩)O~
知识回顾 Knowledge Review
设计内容
传动部分的设计(带轮,传送带,齿轮) 压面辊的设计 切面辊的设计 机架的设计(从压面机的特点,部件的安装
出发) 一些零部件的设计
压面机的总体装配图
送面板 压面辊
切面辊(可以取出)
机架
调节机构
齿轮传动
带传动
调节机构
轴承的固定
省去轴承 盖,节约 材料。
有待改进
可以改为电机带动和手动。在带轮那里穿一 个方形的孔,在设计一个摇杆,没电的时候 可以手动驱动。
压面机机械结构设计
压面机的工作原理
面条机的工作原理是把面团经过面辊相对转 动挤压形成面片,再经过切面刀对面片进行 切条,从而形成面条。面条的形状取决于切 面刀的规格,所有机型均可安装不同规格的 切面刀,故一台机器经过更换不同规格的面 刀可以做成各种规格的面条。
家用压面机的特点
1) 动力传输稳定,可靠。 2) 压面机的结构合理,美观实用。 3) 压面机的效率高 4) 压面机的的机械结构简单
- 1、下载文档前请自行甄别文档内容的完整性,平台不提供额外的编辑、内容补充、找答案等附加服务。
- 2、"仅部分预览"的文档,不可在线预览部分如存在完整性等问题,可反馈申请退款(可完整预览的文档不适用该条件!)。
- 3、如文档侵犯您的权益,请联系客服反馈,我们会尽快为您处理(人工客服工作时间:9:00-18:30)。
目录
一摘要
二市场调研 (3)
三方案设计 (3)
第一种方案 (5)
第二种方案 (10)
第三种方案 (11)
方案对比 (14)
方案结论 (14)
四结构设计 (15)
五结束语 (16)
六参考资料 (18)
一摘要
用机械实现用以和好的面团加工成为面条。
二市场调研
本次设计的家庭用便携式面条机主要面向的市场是个人家庭,目前在现有市场上同类型的面条机体积都比较大,操作也比较复杂,且大多适合批量生产,从经济实用角度上来看大都不太适合家用。
为了此次课程设计,我做了一定程度的市场调研,具体了解了以下一些情况。
膨化式双筒面条机的工艺流程及主要技术参数如下:
生产能力75-100kg(面条Noodles)/h
(Productivity)
面条规格:0.8、1.0、1.2mm
(Noodles Diameter)
电源:380V/50-60Hz,11.0+5.5kW
(Power Supply)
外形尺寸:140×51×142cm
(Size)
重量:≈300kg
(Weight)
95%以上熟化、弹性大、表面滑润、口感好。
More than 95% of the noodles cooked well; smooth surface,excellent
elasticity and good taste
该设备采用的是膨化式直接发面制面条的方法,该设备可以任意选择面条粗细,切工艺合理,生产能力强,但是因其外形尺寸比较大,重量也大,从生产能力和耗电量角度来看都不适合家庭用,而是适合大批量生产。
鉴于以上信息,本次设计,在考虑实用性和主要面向的市场上,我们设计了家庭用便携式面条机,本机重量轻,便于携带,适合小批量生产,经济实用。
第一种方案
面条
说明:在面团槽中放入糅合好的面团,然后插入压杆,推动压杆,面团从小孔中挤出,面条因重力直接掉入水锅中,煮熟即可。
以上为:原理图..在机筒中,连接螺旋推杆,把螺旋推杆的力压向面团.螺旋推杆,充分利用了杠杆原理。
在下盖上有孔(螺旋孔),顺着拧进去,推动推块前进. 为了实现不同的面条粗细及形状,可以把上盖的小孔加工成各种形状,
例如;圆形,方形等等。
为了实现大的加工效率,可以加工成多孔。
. 螺钉孔中拧入螺钉,以保证螺钉头插入丝杠头中的环行导槽内,可以使推块和螺旋推杆相对运动时连接在一起。
说明以上为:机筒。
它的功能为:手柄,手持手柄手柄上的小孔可以任意悬挂,机筒中放置糅合好的面团机筒有两端连接上,下端盖
1.机筒说明
说明以上为:机筒。
它的功能为:
a手柄,手持手柄
b 手柄上的小孔可以任意悬挂,
c 机筒中放置糅合好的面团
d 机筒有两端连接上,下端盖
2
原理:为了实现不同的面条粗细及形状,可以把上盖的小孔加工成各种形状,例如;圆形,方形等等。
为了实现大的加工效率,可以加工成多孔。
孔的加工方法:可以用电转转,如果上盖的材料选择塑料,则可以用铁针烫出各种形状。
圆形孔的一种方案图。
矩形孔的方案
方案对比:圆形孔比较容易加工,但因个人喜好不同,还是应该加工成各种不同的形状,以供客户选择。
材料也可以进行选择,例如,从经济,耐用度,加工成本,外形美观等角度考虑,塑料材质易于加工,质量轻,便于携带,适合市场。
螺钉孔
3推块及其说明
功能原理1:.在机筒中,连接螺旋推杆,把螺旋推杆的力压向面团.螺旋推杆,充分利用了杠杆原理。
在下盖上有孔(螺旋孔),顺着拧进去,推动推块前进.
功能原理2:螺钉孔中拧入螺钉,以保证螺钉头插入丝杠头中的环行导槽内,可以使推块和螺旋推杆相对运动时连接在
4
功能原理2:螺钉孔中拧入螺钉,以保证螺钉头插入丝杠头中的环行导槽内,可以使推块和螺旋推杆相对运动时连接在
一起。
丝杠:实现转动变为缓慢的径向进给运动,以推动推块的径向运动。
丝杠可以用塑料压缩成型,可以选用不锈刚材质。
原理:丝杠旋转产生缓慢的径向进给运动,
第二种方案:a利用杠杆原理
盆
支柱
杠杆
优点:结构简单,质量轻,体积小,
第三种方案b利用压滚及片刀来加工面条
压滚作用:把面条压成面片
刀片作用:把面片切成面条,
滚动底盘的作用:和压滚一起实现面的进给
运动.它的进给运动由压滚和地面的传送带由压力和摩擦力共同驱动前进。
由于压滚的直径并不相同,面团在压滚与传送带的缝隙中被压成面片。
传送进给示意图如下:
此为压滚工作原理示意图.压滚的外表面是半径不相等的圆周,在半径大的地方两压滚夹住传送带,靠摩擦力带动传送带前进.在半径小的圆周上,面团在传送带与压滚的间隙中被压成面片
以上为侧面的布置图.在传送带四周的四个滚柱的作用为撑开传送带,实现传送带变换方向,大压滚和小压滚实现传送带的进给运动.
刀具布置图如下:
带轮
刀片
套桶的高等于面条的高等于两个刀片的距离。
作用为固定刀片。
方案对比:
第一种方案:适合于固定在地面上。
可以实现各种面条形状粗细的加工。
此方案的优点是:本机重量轻,便于携带,适合小批量生产,经济实用。
还可以因需要而加工成各种不同的形状,以供客户选择。
材料也可以进行选择,例如,从经济,耐用度,加工成本,外形美观等角度考虑,塑料材质易于加工,质量轻,便于携带,适合市场。
第二种方案,适合于手持。
充分利用了杠杆原理,此方案的优点是结构简单,质量轻,而且经济便宜加工成本低。
此方案的缺点是组装空间较大,并且杆向上提,不便于操作。
此方案的缺点是:由于体积较小,加工面量少,不能实现连续加工,工作效率低。
在两次加工之间需要拧开螺纹连接的端盖,费时费力。
第三种方案:适合于固定于桌面。
此方案的优点是:可以实现连续加工,加工效率高。
可以通过调节套筒间距,在一次加工中实现改变刀距从而改变面
条的粗细程度。
或者通过改变滚筒与传送带间的距离来改变面条的粗细。
方案结论:经过以上的方案对比,我选用第三种方案。
四结构设计:
位于下箱之中,一共有三个。
作用为支撑三个齿轮,实现由辘轳来的运动分给压滚和刀片轴。
把传动机构布置在下箱,目的是为了防止与面粉相接触,产生污染和腐蚀。
同时齿轮和轴比较重,在下面放使重心低,比较稳定。
齿轮:
位于下箱之中,一共有三个。
作用传递运动的三个齿轮,实现由辘轳来的运动分给压滚和刀片轴。
把传动机构布置在下箱,目的是为了防止与面粉相接触,产生污染和腐蚀。
同时齿轮和轴比较重,在下面放使重心低,比较稳定。
齿轮类型为圆柱直齿轮。
从传动的平稳性,加工方便易于实现传动方向的改变等方
面考虑,选用圆柱直齿轮为佳。
六结束语
本次课程设计是对我们大四下学期做毕业设计的良好铺垫,也是对我们以前所学的知识和所培养的综合能力的一次检测,经过几个星期的努力,在张华老师的悉心指导下,终于圆满的画上了句号。
本次课程设计——家庭用便携式面条机,现在在市场上是没有应用的。
现在市场上有的面条机都是适合大批量生产的,从经济实用角度考虑都不适合家庭用。
我们经过调查,查找资料,分析研究,并在老
师的细心讲解下,从掌握起工作原理到逐步认识结构到弄清楚具体细节,循序渐进,为开展具体的设计打下了良好的基础。
在认识的基础上,经过细心的准备工作,我们便展开了细致,具体的设计工作,通过设计发现问题,研究问题,进一步完善设计思路,处理细节的问题。
设计中我们查阅了许多相关资料,并对过去所学过的知识有了更深成次的了解,它使我认识到了理论和实践相结合的重要性,只有通过实践才能把所学的知识融会贯通,前人的经验是我们宝贵的财富,是我们值得学习和借鉴的,“闭门造车”不可能取得最有效的结果,许多新的发明都是在前人的基础上进一步创造的结果。
课程设计虽然已经告一段落,但是在此次课程设计中所学到的知识和总结的经验却是深刻的。
它使我认识到了基础知识的重要性,综合设计是基础知识的堆积,创新的过程,基础知识不牢固,必然会导致在设计中漏洞百出,更不可能设计出符合实际需要的合格产品。
另外在设计重要始终保持严谨认真的态度,细心做好每一步,这对我们今后步入社会,踏上工作岗位从事具体工作具有重要意义,它在很到程度上为我们打下了一个良好的基础。
本次设计的全面过程中,张华老师提供了多方面的帮助,讲解问题细致,易懂且始终如一认真负责,在这里仅表示由衷的谢意。
最后,恳请各位老师指出我设计中的不足和缺点。
十参考资料
《机械设计手册》哈工大出版社《机械设计课程设计》东北大学出版社《机械制图》高等教育出版社《机械零部件设计》机械工业出版社《机械设计系统设计东北大学出版社《机械设计手册》化工学院出版社《机械设计》东北大学出版社《机械原理课程设计》清华大学出版社
《机械原理》东北大学出版社忽略此处..。