Truetime2.0安装
eye xo2 安装指南说明书

NoticeGrounding InstructionsIn the event of a malfunction or breakdown, grounding provides a path of least resistance for electrical current to reduce the risk of electric shock. This tool is equipped with an electrical cord having an equipment grounding conductor and a grounding plug. The plug must be plugged into a matching outlet that is properly installed and grounded in accordance with all local codes and ordinances.Step 1: Hardware Installation GuideStep 2: Software Installation GuideContentsSectionPageWARNING: To Ensure Safe Use4 - 51. Installation Environment62. Included Items73. Hardware Install8 3.1 Mounting Bracket 9 3.2 Slide Sensor 10 3.3 Connection3.4 Connection Status 11 125. Software Install13 - 206. Club Sticker Guide21 - 2728To Ensure Safe UseImproper handling or operation of this machine may result in injury or damage to property. Points which must be observed to prevent injury or damage are described as follows.WARNING Used for instructions intended to alert the user to therisk of severe injury should the unit be usedimproperly.Used for instructions intended to alert the user to the Cautionrisk of injury or material damage should the unit beused improperly. Material damage refers to damageto home, furnishing, or anything within the unit’svicinity.NEVER This symbol alerts the user to items that should neverbe carried out.To Ensure Safe Use - ContinuedInstall in a level and stable location. Failure to do so may result in falling of the machine, leading to injury.Never attempt to disassemble, repair, or modifyshock, or injury. Entrust repairs to a trained technician.Never use outside or in any location where exposure to water or high humidity may occur. Do not touch the power cord or electrical outlet with wet or dirty hands.Doing so may result in electrical shock.Conduct play in a clean and brightly lit location. Operating in a dark or cluttered space may lead toaccidents.Be aware of your surroundings and use cautiously with children around. Swinging the club during playwithout being aware will result in serious injury or death.WARNINGThis is a heavy machine.Installation EnvironmentPC Specifications:Category RequirementCPU Intel i5 8400 or higher*RAM8 GBGraphics Card GeForceGTX 1060 or higherOperating System Windows 10 (64bit) Version 1803 or higher Resolution1920 x 1080Connectivity Ethernet Port Required* AMD: 3rd gen Ryzen or higher and AMD Ryzen 3600 or higher (AMD 2700 is not compatible).Installation Environment 9’-Included ItemsThe following items are included with the sensor. Make sure they are all present and accounted for.EYEXO2 Sensor BarBracketEmail – Software InstallerCalibration ChartPower CablePower Adapter Power Connector USB Ethernet AdapterEthernet LAN CableLevelClub StickersM4 32mm screwsM6 15mm screws M6 15mm high screws M6 15mm low screwsIncluded ItemsHardware InstallWARNINGSection 1 “Installation Requirements,” and outlinebracket location on ceiling.Consult with building manager or landlord aboutbefore installation. The sensor and bracket are approximately 30 lbs and 9 M4 32mm screws are required to screw in the bracket and hold the sensor. Failure to do so may result in serious injury or damage toproperty.CAUTIONTwo or more persons are recommended for mounting the bracket on the ceiling and extreme caution is required while on the ladder. Failure may result in serious injury ordamage to property.LadderPhillips Screwdriver M4 32mmScrew x9 BracketSensor BarNecessary ToolNecessary Part(s)HardwareWARNINGStep 1: Mount BracketThe EYE XO2 Sensor and bracket come attached together in the box. Slightly loosen the black M6 15 mm screws that are holding the sensor to the bracket so you can remove it. Please make sure you have measured 3.5 feet from the front and middle of the sensor to your tee position. Do NOT align to the bracket.Place the ladder under the location on the ceiling where the bracket will be mounted. Place the bracket flat against the ceiling with the hinges facing down toward the ground. The longer side of the hinges must be closet towards theimpact screen.With the bracket in position, grab the 10 silver M4 32mm screws and screw them in the locations below in the diagram.M9 32mm (5)M9 32mm (5)132HardwareStep 2: Slide SensorAfter the bracket has been firmly mounted to the ceiling, you will install the sensorbar.The sensor bar comes with 6 black M6 15mm screws already inserted; 3 screws in the front and 3 screws in the back. Make sure all 6 screws are about halfway into the bar and even in length.Slide the sensor bar with the 6 screws up and over through the bracket hinges. Make sure the screws are secured in the hook part of the hinges. Once the sensor is secured in the bracket hinges, tighten the 6 screws to the bracket.The tilt of the sensor can be adjusted with the high and low M6 15mm screws. The regular M6 15mm screws are already screwed into the sensor. You can change this outwith the M6 155 High or Low screws to adjust the angle/ tilt.M6 15mmM6 Low 15mmM6 High 15mm Hardware3123.3Hardware Install - Continued Step 3: ConnectionEthernet LANCable Power Cord Power AdapterPowerConnectorNecessary PartsTake out the Ethernet LANcable from the box. Connectthe end with the tag that reads“Connect this side of LAN cableto Sensor ONLY” to the sensor.Connect the other endDIRECTLY to your PC ethernetport and NOT the USB adapter.Take out all 3 components ofthe power source: powercable, power adapter, andpower connector. Connect all3 accordingly and connect the“Power Connector” enddirectly to the sensor asshown below. Turn on redswitch.Note: The plug must be plugged into a matching outlet that is properly installed andgrounded in accordance with all local codes and ordinances.An extra green grounding wire is provided on the end of the power connector in caseyour outlet is not grounded.Hardware 12EYE XO2 INSTALLATION GUIDE113.4Hardware Install – ContinuedStep 4: Connection StatusMake sure to check the connection status before you start thesoftware installation process.Check and see if the power is on. You will see a bright red light on the switch of the sensor.Check and see if your EYE XO2 Sensor and PC are paired through the network.Hardware12Please refer to our “Network Setup Guide” below to set the IPaddress.NETWORK GUIDEEYE XO2 INSTALLATION GUIDE12Software Install WARNINGPlease make sure PC requirements are met from section1 “Installation Environment,” before the installationprocess. Failure to do will result in installation issues and slow gameplay .WARNINGPlease make sure the connection statuses are clear and everything is paired. Failure to do will result in installation issues.SoftwareSoftware Install – Continued EYE XO2 InstallationYou will receive an email with a license codefrom your retailer which looks like this:Please download it and save it to the UneekorFolderClick here: EYE XO2 Installer LinkCtrl + Click the EYE XO2 Installer link above to begin EYE XO2 Installation or manually enter the URL: https:///dist/EYEXO2/Uneekor_EYEXO2_Setup.exeUnder downloads you will see,“Uneekor_EYEXO2_Setup.exe” Clickopen file.“Uneekor EYE XO2 (2.10.0.0)Setup” will open. Click “Next.” Software23 41EYEXO2_30000XXXXX.license.3.5 Software Install – ContinuedEYE XO2 Software InstallationKeep the destination folder as“C:\Uneekor” and click Install.Please wait while installercompletes installation.5 6Software3.6 Software Install – ContinuedEYE XO2 Software Installation**If these two pop-ups occur, please hit ok for both.The “Run Uneekor EYE XO2” is checked. Uncheck it and click finish .7Software3.7 S oftware Install - ContinuedEYE XO2 Sensor ActivationGo to the C: Drive-> Uneekor Folder -> Device -> Launch Monitor -> EYEXOFind and double click “EYEXO2_Check”In the “EYEXO” folder click on “EYEXO2_Activation”Click “Browse” to find the license key saved from step 1 above.Then click “Activation” After adding the license please click “Activate.”The EYE XO2 Sensor installation is now complete.2If you don’t get the Sensor LAN connection, please refer to our “Network Settings Guide.”Make sure the Sensor LAN connection is good before the software installation process.1EYEXO2_40000XXXXX.licenseSoftware3.8 Software Install - ContinuedEYE XO2 Network Config1Once the sensor has been activated,you will have a screen like the oneon the right. Click Set NetworkParam & Firewall to continue2After the selection, you will be askedto restart the PC. Click Yes to restartto finish the Sensor installation3.8 Software installation - ContinuedEYE XO2 CalibrationTo complete the installation of the EYE XO2.Follow the calibration guide linked below:EYE XO2 Calibration Guide3.9Software Install – ContinuedVIEW Software InstallationClick here: VIEW Installer Ctrl + click on the VIEW Installer above or enter the URL manually: https:///dist/View/VIEW_Setup.exeOpen downloads on the right.If you receive this warning, follow the steps below.3.8.1Hover over the download,click the 3 dots on the rightside, and click keep.3.8.2Click the “Show more” dropdown and click “Keep anyway.”3.8.3Then click “Open file” underdownloads.“VIEW_SETUP 20220721 Setup” will open. Click “Next.”Software125.6 Software Install – ContinuedVIEW Software InstallationKeep the Destination Folder as “C:\VIEW” and click “Install.”Check the “I agree” box and click “Install.”If a error pops up, click close and continue to VIEW Setup.Click “Start setup”34SoftwareIf the C++ files are already installedon your PC, you may receivethe error on the rightClick Close and then nextto continueOptional :5.7 Software Install – ContinuedVIEW Software InstallationMake sure all boxes are checked and the Directory matches the picture on the right, then Click “Next.”Click “Finish”Click “browse” and select the license file you saved in the Uneekor folder from the earlier steps, and click “Activation. Then click “Activate” VIEW Software installation isnow complete.567SoftwareThe speed of the club before impact.The amount of energy transferred from the club head to the golf ball.The angle difference between Face Angle and Club Path.angle is measured relative to the horizon.The in to out or out to in movement of the club head’s geometric center atthe time of impact. Club Path is the directon (right or left) the club head ismoving at impact and is measured relative to the target line.The direction (right or left) the club face is pointed at impact. It ismeasured relative to the target line.GUIDE22The amount of loft of the club face at the center point of impact.Where you strike the ball on the club face.FPOFPO2-2.4 inches13Driver 48 groove1. Bar StickerAlign the middle of the Bar Sticker to the horizontal center line or the 7th groove.2. Dot StickerAlign to the middle of the bar sticker andparallel between the grooves.15 61Center Groove*In the case where you do have to raise the horizontal line beyond the center to fit all 4 corners of the Bar Sticker, the data will be calculated higher.262277.1 SpecificationsEYE XO2 INSTALLATION GUIDE 28Items Contents Components 3 High Speed Cameras 4Infrared LED Boards1 Control Board1 Power BoardData Interface Ethernet (CAT6 and above) Communication Speed 1 GbpsSpin Data Total Spin ±12,000 rpmMeasurement Range Ball Speed Putter: 0.1 m/s ~ 30 m/s Ball Speed Driver/Iron: 5 m/s ~ 100 m/sSensing Angle Driver: -5 ~ 50 DegreeIron: 0.1 ~ 80 Degree (shots over 60° can damage the unit)***************** *******************。
UCenter Home 2.0 安装方法详细介绍
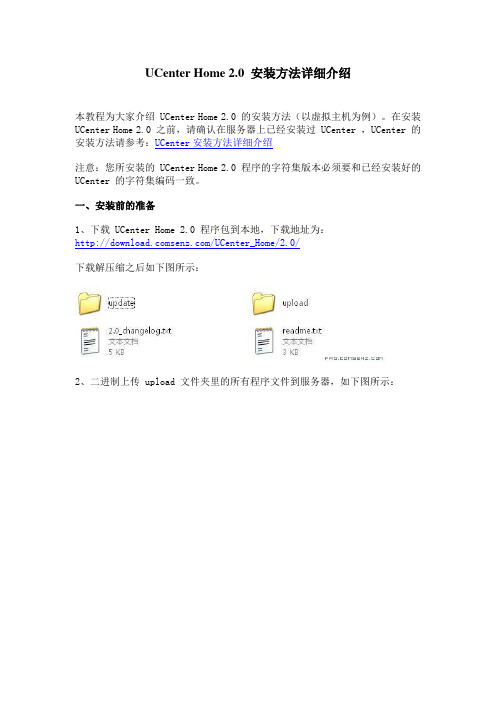
UCenter Home 2.0 安装方法详细介绍本教程为大家介绍 UCenter Home 2.0 的安装方法(以虚拟主机为例)。
在安装UCenter Home 2.0 之前,请确认在服务器上已经安装过 UCenter ,UCenter 的安装方法请参考:UCenter安装方法详细介绍注意:您所安装的 UCenter Home 2.0 程序的字符集版本必须要和已经安装好的UCenter 的字符集编码一致。
一、安装前的准备1、下载 UCenter Home 2.0 程序包到本地,下载地址为:/UCenter_Home/2.0/下载解压缩之后如下图所示:2、二进制上传 upload 文件夹里的所有程序文件到服务器,如下图所示:注:虚拟主机上传文件请一定使用二进制方式上传,独立主机直接在服务器上下载解压缩即可。
几种常见的 FTP 软件的二进制设置说明:http:///?action-viewnews-itemid-3733、重命名 config.new.php 为 config.php4、修改文件和目录属性如果您的主机为 *nix 操作系统,请设置如下文件夹权限改为 777,Windows 主机设置 Internet 来宾帐号可读写的权限。
attachmentdatadata/*.*uc_client/dataconfig.php (安装完毕 777 取消)如果你对修改文件属性不太明确,请参考更详细的教程:文件权限修改方法二、开始安装1、进入 UCenter 后台 => 应用管理 => 添加新应用,如下图所示:选择安装方式:使用 URL 安装应用程序安装地址:输入http://***.com/install /index.php 注意:***.com 是您的 UCenter Home 域名,见下图:点击安装,开始安装 UCenter Home 2.0安装界面如下图所示:接受授权协议,开始安装 UCenter Home。
truetime仿真
基于Truetime的网络调度策略仿真【实验目的】通过matlab和truetime插件对网络控制系统进行仿真,对比EDF和RM调度算法。
该系统中包括PID控制器、被控对象、传感器、执行器,其中控制器与执行器,传感器与控制器的通讯通过以太网。
【实验步骤】仿真过程首先需要配置matlab中的truetime环境,然后配合simulink相关组件完成系统框图的连接,然后编写truetime模块中的初始化文件,最后进行仿真。
1、truetime组件配置addpath([getenv(’TTKERNEL’)])addpa th([getenv(’TTKERNEL’) ’/matlab/help’])addpath([getenv(’TTKERNEL’) ’/matlab’])按照官方手册中给出的配置步骤,安装truetime 2.0B7。
2、编辑网络控制系统仿真模型网络控制系统包括,执行器,传感器,控制器,被控对象,网络,以及一些其他的辅助功能模块,如参考信号,示波器等。
3、执行器actuator配置执行器的输入信号由控制器通过网络给定,输出直接控制被控对象,因此无输入管脚,有一个输出管脚,连接到网络1,节点2。
初始化文件编写,参照示例中的控制器,改写初始化文件。
function actuator_init% Distributed control system: sensor node%% Samples the plant periodically and sends the samples to the% controller node. Actuates controls sent from controller.% Initialize TrueTime kernelttInitKernel('prioDM'); % deadline-monotonic scheduling% Sporadic actuator taskdeadline = 10.0;ttCreateTask('actuator_task', deadline, 'actuator_code');% Network handlerprio = 1.0;data = 'actuator_task';ttCreateHandler('network_handler', prio, 'nwhandler_code', data);ttAttachNetworkHandler('network_handler')4、传感器sensor配置传感器输入信号由被控对象给定,然后将信号通过以太网反馈给控制器。
ComsenzEXP2.0.0安装图文教程详解
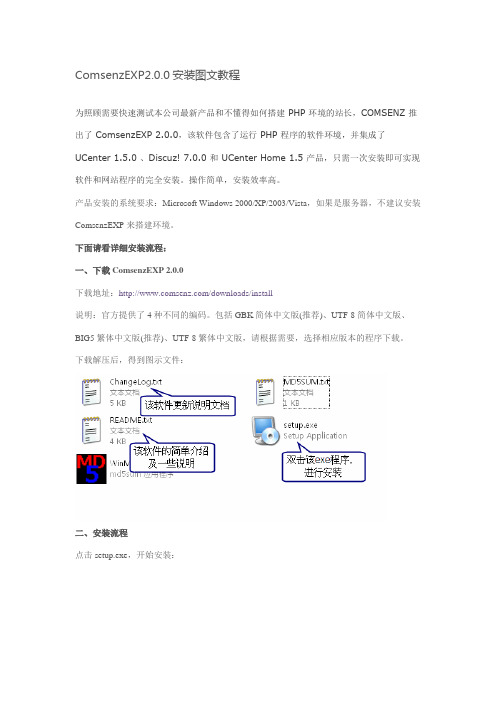
ComsenzEXP2.0.0安装图文教程为照顾需要快速测试本公司最新产品和不懂得如何搭建 PHP 环境的站长,COMSENZ 推出了 ComsenzEXP 2.0.0,该软件包含了运行 PHP 程序的软件环境,并集成了UCenter 1.5.0 、Discuz! 7.0.0 和 UCenter Home 1.5 产品,只需一次安装即可实现软件和网站程序的完全安装。
操作简单,安装效率高。
产品安装的系统要求:Microsoft Windows 2000/XP/2003/Vista,如果是服务器,不建议安装ComsenzEXP 来搭建环境。
下面请看详细安装流程:一、下载 ComsenzEXP 2.0.0下载地址:/downloads/install说明:官方提供了 4 种不同的编码。
包括 GBK 简体中文版(推荐)、UTF-8 简体中文版、BIG5 繁体中文版(推荐)、UTF-8 繁体中文版,请根据需要,选择相应版本的程序下载。
下载解压后,得到图示文件:二、安装流程点击 setup.exe,开始安装:点击”下一步“,阅读许可协议:点击”下一步“,设置安装目录:点击”下一步“,设置快捷方式名称,即计算机的开始菜单中该程序的名称:点击”下一步“,确认设置的安装信息:点击”下一步“,开始自动安装:点击”下一步“,配置 MySQL 运行所需信息:点击”下一步“,配置 Apache HTTP 服务器信息:点击”下一步“,配置 PHP 信息:点击”下一步“,即可看到安装完成的提示信息:点击”下一步“,设置自己要进行的操作:如果您选择了”启动ComsenzEXP“,那么点击”完成“,将会看到启动窗口,如图:启动完成后,会自动打开网站首页,如图:三、安装完成后1、安装目录介绍打开 ComsenzEXP 安装目录,如下图:打开 wwwroot 目录:打开bbs目录:2、添加其他应用如果您需要添加其他应用,请先在 wwwroot 目录下新建一个目录,来安装该应用。
uiautumator2用法 -回复
uiautumator2用法-回复uiautomator2用法uiautomator2是一个用于Android系统的自动化测试框架,它允许开发人员编写自动化脚本来模拟用户在Android设备上的操作。
本文将一步一步回答有关uiautomator2用法的问题。
1. 什么是uiautomator2?uiautomator2是由谷歌开发的Android自动化测试框架,用于编写自动化脚本以测试和模拟用户在Android设备上的操作。
它提供了一组API来访问设备的UI元素,包括按钮、文本框、下拉菜单等,并允许开发人员对这些元素进行操作和验证。
2. 如何安装uiautomator2?在开始使用uiautomator2之前,您需要确保已将其安装在您的开发环境中。
您可以通过以下步骤安装uiautomator2:- 首先,确保您的Android设备已连接到开发计算机,并且您有权访问设备的ADB(Android Debug Bridge)。
- 其次,您需要安装Python开发环境,并确保已安装pip(Python 包管理器)。
- 然后,使用pip命令安装uiautomator2库(pip install uiautomator2)。
- 最后,确保您的设备已启用开发者选项,并已启用USB调试模式。
3. 如何编写uiautomator2脚本?uiautomator2脚本可以使用Python编写,您可以使用任何您喜欢的Python编辑器来创建和编辑这些脚本。
以下是编写uiautomator2脚本的一般步骤:- 首先,导入必要的uiautomator2模块和依赖项(如uiautomator2、uiautomator、time等)。
- 其次,创建一个与设备的连接,并实例化uiautomator2对象。
- 接下来,使用uiautomator2对象的API方法来识别和操作设备上的UI元素。
例如,您可以使用"device(text='Hello')"来查找具有文本“Hello”的元素,并使用".click()"来单击该元素。
REX 2.0安装说明
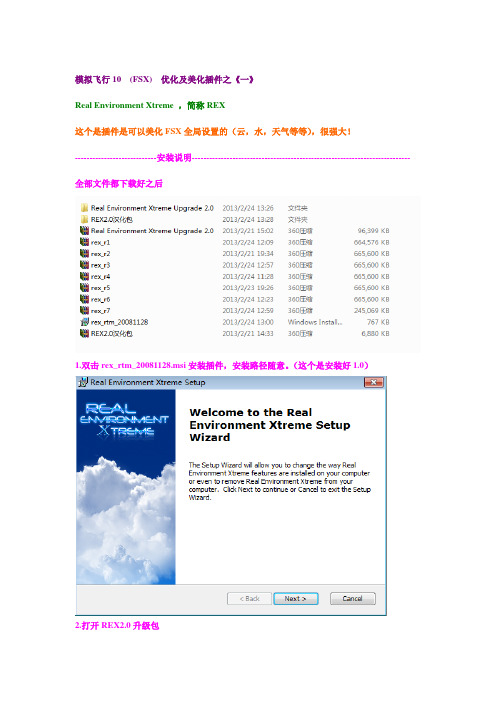
模拟飞行10 (FSX) 优化及美化插件之《一》Real Environment Xtreme ,简称REX这个是插件是可以美化FSX全局设置的(云,水,天气等等),很强大!----------------------------安装说明--------------------------------------------------------------------------- 全部文件都下载好之后1.双击rex_rtm_20081128.msi安装插件,安装路径随意。
(这个是安装好1.0)2.打开REX2.0升级包双击Real Environment Xtreme Upgrade 2.0安装升级包,安装路径和1.0的一样(这个是升级2.0)3.打开REX2.0汉化包复制汉化包里面的全部内容到插件的安装文件夹粘贴,覆盖原文件,就汉化了。
----------------------------设置说明---------------------------------------------------------------------------两个程序:前者是REX主程序,后者是气象引擎以及气象雷达,由于我们用ASE美化气象,所以不管它。
打开REX,参照《FSX初级优化教程》,点,这个里面设置的是一些基本文件设置,比如你游戏装在哪个盘啊,需不需要备份材质文件啊之类的,下面是我的设置我去掉了这几项:开启REX天气引擎,在FSX启动时自动打开REX天气引擎,开启自动加载FSX,当FSX启动后最小化REX,前面的钩。
低空能见度50平方米,调到最大,气象雷达随便调,反正我们不用REX的气象,凡是REX气象相关的选项我们都调到最小或关闭。
设置完了保存。
点,这个里面是设置你需要把哪些项目进行美化,就在哪些前面打勾,下面是我的设置机场环境,跑道滑行道,天空效果,闪电,太阳和耀斑,全钩,天气主题是水效果,虽然我们用FSWC美化水(FSWC是另一个专门美化水的插件),但还是把水的项目全部勾上,你可以先看看REX的水什么效果,再看看FSWC的效果,不满意再换回来就行,换的方法:假如你先用REX美化了水体,不满意,又用FSWC美化了水体,但还是想换回REX的水,那么直接再用REX美化不行,你得在FSWC目录点uninstall 把FSWC删除,那么此时水体就自动换回REX效果了,若再想用FSWC,再安装就是。
TrueTime安装详细说明
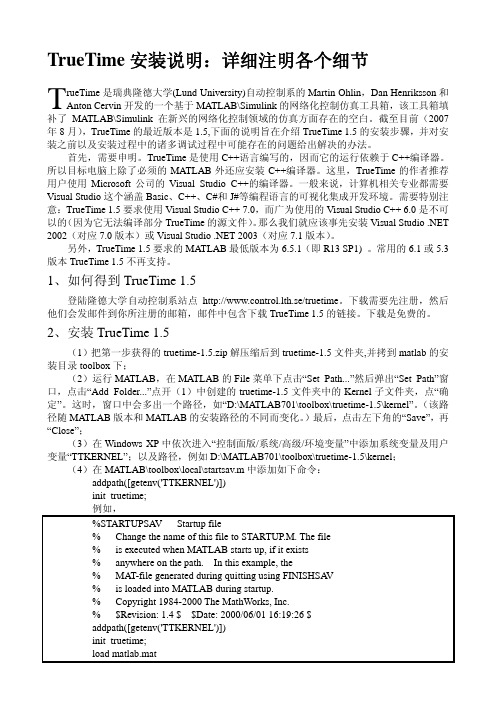
TrueTime安装说明:详细注明各个细节TrueTime是瑞典隆德大学(Lund University)自动控制系的Martin Ohlin,Dan Henriksson和Anton Cervin开发的一个基于MATLAB\Simulink的网络化控制仿真工具箱,该工具箱填补了MATLAB\Simulink在新兴的网络化控制领域的仿真方面存在的空白。
截至目前(2007年8月),TrueTime的最近版本是1.5,下面的说明旨在介绍TrueTime 1.5的安装步骤,并对安装之前以及安装过程中的诸多调试过程中可能存在的问题给出解决的办法。
首先,需要申明。
TrueTime是使用C++语言编写的,因而它的运行依赖于C++编译器。
所以目标电脑上除了必须的MATLAB外还应安装C++编译器。
这里,TrueTime的作者推荐用户使用Microsoft公司的Visual Studio C++的编译器。
一般来说,计算机相关专业都需要Visual Studio这个涵盖Basic、C++、C#和J#等编程语言的可视化集成开发环境。
需要特别注意:TrueTime 1.5要求使用Visual Studio C++ 7.0,而广为使用的Visual Studio C++ 6.0是不可以的(因为它无法编译部分TrueTime的源文件)。
那么我们就应该事先安装Visual Studio .NET 2002(对应7.0版本)或Visual Studio .NET 2003(对应7.1版本)。
另外,TrueTime 1.5要求的MATLAB最低版本为6.5.1(即R13 SP1) 。
常用的6.1或5.3版本TrueTime 1.5不再支持。
1、如何得到TrueTime 1.5登陆隆德大学自动控制系站点http://www.control.lth.se/truetime。
下载需要先注册,然后他们会发邮件到你所注册的邮箱,邮件中包含下载TrueTime 1.5的链接。
可可通安装教程

一、环境搭建(软件是通用软件)1、IIS安装2、NET FRAMEWORK 2.0安装3、SQL SERVER 2000安装(记清sa密码)4、SQL SP4安装补丁安装二、数据库安装1、打开企业管理器,新建callback数据库2、打开企业管理器,新建voipswitch数据库3、恢复原始数据库中call到callback(强制还原)4、恢复原始数据库中vps到voipswitch(强制还原)5、ODBC创建DSN数据源callback使用用户名sa到默认数据库callbackvoipswitch使用用户名sa到默认数据库voipswitch三、VPS安装及配置1、解压VOIPSWITCH安装包,安装VOIPSWITCHDEMO.MSI2、解压voipswitc 2.0 覆盖到安装后的目录3、打开VPS,配置正确数据库连接及名字4、进入vps配置,在GW用户里加入服务器的IP并保存四、callback安装1、解压dallcall到D盘call目录2、进入d:\call\callbackivr 打开CallbackIVR.ini进行配置(ip、密码)3、打开cfg3237231.val cfg323729a.val两个文件,配置ip4、执行d:\call\Install.bat 安装IVR系统5、安装号码提交软件,打开后测试是否连接成功五、数据库配置1、打开企业管理器2、找到callback数据库,打开T-route表,把IP都改成服务器IP3、打开T_BMSUser表,更改或记下网站的管理员名字和密码六、网站配置1、IIS中新建站点,主目录指向d:\call\web2、admin/fxs/user三个目录新建程序(admin目录是管理员,fxs是代理商,user是用户)3、打开d:\call\web各目录下的web.config文件,配置IP、数据库名、sa及密码七、callback和VPS的配合测试。
Truetime网络仿真(可修改)
网络控制系统的调度研究与仿真(Truetime工具)1.节点的驱动方式网络控制系统中的传感器一般采用时钟驱动,传感器的时钟即为系统的时钟,而控制器和执行器既可以是时钟驱动,也可以是事件驱动。
但事件驱动相比于时钟驱动具有以下优点:(1)控制器或执行器为事件驱动方式时,从源节点(传感器或控制器)发送的数据一旦到达目标节点(控制器或执行器)便马上执行,而在时钟驱动方式时控制器或执行器的数据被执行要等到规定的时间点,因此事件驱动方式客观上减少了网络诱导时延;(2)控制器或执行器为事件驱动方式时,避免了控制器或执行器为时钟驱动方式时与传感器时钟同步的困难;(3)控制器或执行器采用事件驱动方式时,避免了控制器或执行器为时钟驱动方式时容易出现的空采样和数据丢失,提高了反馈数据的利用率。
事件驱动相对于时钟驱动也有一定缺点:(1)在实际运用中事件驱动较难实现。
(2)部分实际的网络控制系统不支持事件驱动方式。
2. TrueTime工具箱结构与功能Truetime是由瑞典Lund工学院Henriksson等人开发的一个基于Matlab/Simulink的实时网络控制系统的仿真工具箱,为NCS理论的仿真研究提供了简易可行、功能齐全的手段,拜托了软件编程实现特定的网络通讯协议、通信延迟所带来的困难,支持控制与实时调度同时仿真可以方便地仿真实时系统中的资源调度问题。
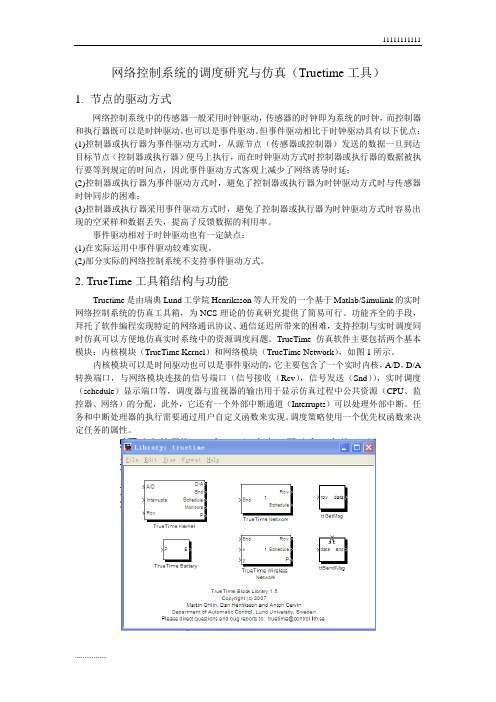
TrueTime仿真软件主要包括两个基本模块:内核模块(TrueTime Kernel)和网络模块(TrueTime Network),如图1所示。
内核模块可以是时间驱动也可以是事件驱动的,它主要包含了一个实时内核,A/D,D/A 转换端口,与网络模块连接的信号端口(信号接收(Rcv),信号发送(Snd)),实时调度(schedule)显示端口等,调度器与监视器的输出用于显示仿真过程中公共资源(CPU、监控器、网络)的分配,此外,它还有一个外部中断通道(Interrupts)可以处理外部中断。
TrueTime安装
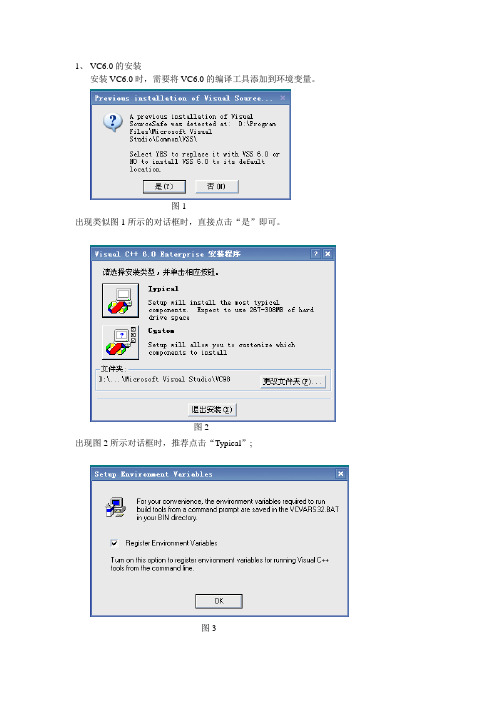
1、VC6.0的安装安装VC6.0时,需要将VC6.0的编译工具添加到环境变量。
图1出现类似图1所示的对话框时,直接点击“是”即可。
图2出现图2所示对话框时,推荐点击“Typical”;图3图3即为添加环境变量对话框,选中“Register Environment Variables ”点击”OK ”。
安装完成后,安装程序会提示安装MSDN ,可以直接取消安装。
2、 TrueTime 的安装将TrueTime 的源码包解压到D 盘根目录下(也可以解压到其它盘符,这里以解到D 盘为例)。
解压完成后,打开TrueTime 文件夹,并进入kernel 目录。
复制地址栏的地址(类似于D:\truetime-1.5\kernel)。
右键点击“我的电脑”,点击“高级”选项卡,点击“环境变量”按钮。
出现如图4所示画面在“Administrator 的用户变量”栏中,点击“新建”按钮。
在“变量名”中填入“TTKERNEL ”, 变量值中,粘贴之前复制的地址即可。
如图5.图4 图5至此,环境变量添加完成。
打开如下路径$MA TLAB7\toolbox\local($MA TLAB表示MA TLAB安装路径)。
新建“startup.m”文件。
编辑该文件,在文件中添加如下两行代码:addpath(getenv(‘TTKERNEL’))init_truetime;保存即可。
此时,启动matlab时就会自动加载TrueTime组件。
在matlab命令行中输入mex –setup出现图6所示画面。
图6回车,出现图7所示提示行。
图7选择”Microsoft Visual C/C++ version 6.0 ……”,在图中即为2。
继续回车,直至完成设置。
执行make_truetime,即可看到一系列编译信息。
表明编译器已成功配置。
编译完成后,直接运行truetime即可启动TrueTime图形界面。
至此,TrueTime安装完成。
PS2.0安装教程

再点--Activate(激活)就行了!
6.如果还不明的话请看文件夹的“注册演示.GIF”
7.如果面板字体感觉太小可以在预置--常规--
界面字体大小--选中,再重启PS就行了。
此版本为标准加强版,测试比较稳定,由于一些滤镜导致内存不稳定,所以暂时不集成了,以后再做把!
1.由英文零售版+汉化整合的汉化版本,并不是官方中文版!了,不用再注册的了!
4.软件安装不需要注册码,但需要激活!
5.联机激活说明:
运行Photoshop.exe 在弹出激活介面中,
点击--Activate Online(联机激活),
再点击--Phone Activation(电活激活),
复制随机生成的第2行激活代码,
然后运行key.exe,
在注册机激活选择版本--选Photoshop CS2 9.0,
然后把复制PS随机生成的激活代码,
粘贴到激活代号处--点生成,
最后把生成的代码复制和粘贴到PS的注册框,
更新说明:
1.解决严重吃内存问题
2.解决非正常退出问题
3.解决第一次使用UPDATE错误提示
4.增加最新插件:
Mask Pro
Photoshop CS2双语精灵
测试环境:
WindowsXPsp2,Windows2003sp1,Windows2000sp4ru1
软件说明:
TrueTime安装备忘
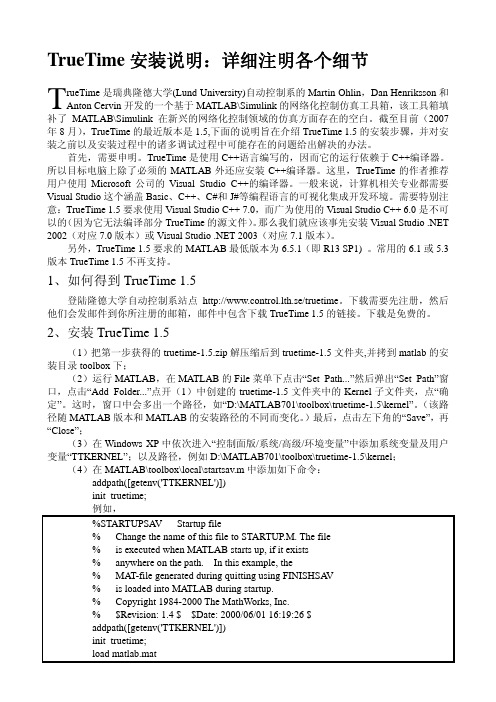
TrueTime安装说明:详细注明各个细节TrueTime是瑞典隆德大学(Lund University)自动控制系的Martin Ohlin,Dan Henriksson和Anton Cervin开发的一个基于MATLAB\Simulink的网络化控制仿真工具箱,该工具箱填补了MATLAB\Simulink在新兴的网络化控制领域的仿真方面存在的空白。
截至目前(2007年8月),TrueTime的最近版本是1.5,下面的说明旨在介绍TrueTime 1.5的安装步骤,并对安装之前以及安装过程中的诸多调试过程中可能存在的问题给出解决的办法。
首先,需要申明。
TrueTime是使用C++语言编写的,因而它的运行依赖于C++编译器。
所以目标电脑上除了必须的MATLAB外还应安装C++编译器。
这里,TrueTime的作者推荐用户使用Microsoft公司的Visual Studio C++的编译器。
一般来说,计算机相关专业都需要Visual Studio这个涵盖Basic、C++、C#和J#等编程语言的可视化集成开发环境。
需要特别注意:TrueTime 1.5要求使用Visual Studio C++ 7.0,而广为使用的Visual Studio C++ 6.0是不可以的(因为它无法编译部分TrueTime的源文件)。
那么我们就应该事先安装Visual Studio .NET 2002(对应7.0版本)或Visual Studio .NET 2003(对应7.1版本)。
另外,TrueTime 1.5要求的MATLAB最低版本为6.5.1(即R13 SP1) 。
常用的6.1或5.3版本TrueTime 1.5不再支持。
1、如何得到TrueTime 1.5登陆隆德大学自动控制系站点http://www.control.lth.se/truetime。
下载需要先注册,然后他们会发邮件到你所注册的邮箱,邮件中包含下载TrueTime 1.5的链接。
uiautomato2用法 -回复
uiautomato2用法-回复UAutomator2是一个UI自动化测试框架,专门用于Android设备上的UI测试。
它提供了一系列API和工具,可用于模拟用户交互、获取屏幕上的UI元素,并对UI元素进行操作和验证。
本文将针对UAutomator2的用法进行详细介绍,包括环境搭建、API使用、测试脚本编写等方面。
一、环境搭建在使用UAutomator2之前,需要搭建好相应的开发环境。
首先,需要安装Android SDK,并配置好环境变量。
然后,需要安装Python,并使用pip工具安装uiautomator2库。
接下来,还需要在Android设备上安装uiautomator2的服务端。
1. 安装Android SDK:前往官网下载Android SDK,并解压到合适的目录。
2. 配置环境变量:将Android SDK的路径添加到系统的PATH变量中。
3. 安装Python:前往Python官网下载对应版本的Python,并进行安装。
4. 安装uiautomator2库:在命令行中使用pip进行安装,命令如下:pip install uiautomator25. 安装uiautomator2服务端:在Android设备上执行如下命令,下载并安装服务端应用:python3 -m uiautomator2 init二、API使用UAutomator2提供了丰富的API,用于控制设备和操作UI元素。
下面是一些常用的API示例:1. 连接设备:使用connect方法连接到指定设备。
pythonimport uiautomator2 as u2d = u2.connect('设备序列号')2. 获取设备信息:使用info属性获取设备的基本信息。
pythonprint()3. 查找UI元素:使用xpath、text、description等属性进行元素查找。
pythonbutton = d.xpath('button[text="点击我"]')4. 操作UI元素:使用click、set_text等方法对元素进行操作。
TORA路由协议研究与实现

摘要无线传感器网络作为将信息世界以及物理世界融合的网络,它依靠监测范围中节点采集、处理以及传输数据信息,改变了人与自然的交互方式,极大地扩展了网络的功能以及人类认识世界的能力,受到了国内外学者的高度重视。
路由协议作为无线传感器网络重点探究内容,不断地优化和改进显得极具价值。
TORA (Temporally Ordered Routing Algorithm)是一种按需路由协议,通过引入高度机制进行链路选择,可以在源—目节点间形成一条或者多条有效链路,具有高鲁棒性和高效性等优点,被广泛应用在各个领域,但也存在网络负载不均、开销大等问题。
针对上述问题,本文在对经典TORA深入研究的基础上提出一种结合负载均衡策略和低开销策略的优化协议—TORA-p。
它利用网络MAC层信息计算所得的节点空闲度,定义链路可用性这一参数,将该参数作为选路的优先参考指标,优化节点下一跳选择,分散了网络数据流量;同时,它以互联网封装协议IMEP(Internet MANET Encapsulation Protocol)应答机制中BEACON包发送间隔内节点链路变化得分为参数,定义网络变化率,自适应地调整OBM包的最大重发次数,减少链路故障误检带来的不必要路由维护开销。
为了验证TORA-p的优越性,本文在TrueTime2.0平台上对算法做了仿真对比。
首先选取路由开销和节点能量均衡性两个指标验证了低开销策略和负载均衡策略的可行性,同时,仿真结果也说明优化后的TORA-p节点能量更加均衡,网络整体开销更低;接着通过仿真实验比较本文优化算法与按需协议DSR以及AODV的优劣,首先在发包率变化以及节点最大移动速度变化的情况下测试了各算法的时延、分组递交率、路由开销以及网络能耗的表现,接着选取网络生存时间指标进一步测试各算法。
结果表明:从总体来看,TORA-p在降低时延、提升分组递交率、减少路由开销和能耗上更加具有优势,提升了网络可靠性的同时也延长了网络生存时间。
时间管理系统怎么安装软件

时间管理系统怎么安装软件时间管理系统是一种帮助我们有效利用时间、提高工作效率的工具。
为了使用时间管理系统,我们需要先安装相应的软件。
本文将介绍如何安装时间管理系统软件,帮助您快速上手使用。
选择适合的时间管理系统软件在安装时间管理系统软件之前,首先需要选择适合自己的软件。
市场上有许多时间管理系统软件可供选择,您可以根据个人需求和使用习惯,选择一款适合自己的软件。
常见的时间管理系统软件有:1.Todoist:一款简单易用、界面清晰的任务管理软件,可以帮助您管理日常任务和提醒事项。
2.Trello:一款灵活的项目管理软件,可以以看板的形式组织任务和项目。
3.Microsoft To Do:由微软推出的任务管理软件,与其他微软产品无缝集成,适合使用Office套件的用户。
4.Evernote:一款强大的笔记和任务管理软件,可以方便地记录和跟踪任务。
选择适合自己的时间管理系统软件后,我们可以开始安装。
下载和安装时间管理系统软件1.打开您选择的时间管理系统软件的官方网站或在应用商店搜索该软件,找到相应的下载链接。
2.点击下载链接,开始下载软件的安装包。
3.下载完成后,打开安装包。
4.按照软件安装向导的提示,选择安装位置和其他安装选项。
5.点击“下一步”或“安装”按钮,开始安装软件。
6.等待软件安装完成。
配置时间管理系统软件安装完成后,我们还需要进行一些基本的配置,以确保时间管理系统软件能够正常工作。
1.打开安装完成的时间管理系统软件。
2.根据软件的引导,创建一个新账号或使用已有账号进行登录。
部分时间管理系统软件可能需要您提供电子邮件地址和密码进行注册。
3.根据软件的设置选项,调整软件的界面、样式和首选项。
4.如有必要,根据软件的指引将您的任务和项目导入时间管理系统。
5.如果软件提供了移动应用或桌面应用,请根据需要下载并安装相应的移动应用或桌面应用。
开始使用时间管理系统软件安装和配置完成后,您可以开始使用时间管理系统软件,提高工作和生活的效率。
uptime kuma 使用手册

uptime kuma 使用手册Uptime Kuma是一个开源的、易于使用的服务器监控工具,它可以帮助用户监视他们的服务器和网络设备的运行时间、性能和可用性。
下面我将从安装、配置和使用三个方面来回答你的问题。
首先,让我们来看一下Uptime Kuma的安装。
要安装Uptime Kuma,你需要确保你的系统满足以下要求,Node.js(版本8或更高)、MongoDB(版本3.6或更高)和Yarn(可选)。
你可以通过Git将Uptime Kuma的源代码克隆到你的服务器上,然后使用Yarn 安装依赖项。
接下来,你需要配置Uptime Kuma的环境变量,包括数据库连接信息等。
最后,你可以使用Node.js来启动Uptime Kuma应用程序。
其次,让我们来看一下Uptime Kuma的配置。
一旦Uptime Kuma安装完成,你可以通过编辑配置文件来配置Uptime Kuma的各种参数,比如服务器的监控项、报警设置、用户权限等。
你还可以通过Web界面来进行更详细的配置,比如添加新的监控设备、设置报警规则、查看监控数据等。
最后,让我们来看一下Uptime Kuma的使用。
一旦UptimeKuma配置完成,你可以通过Web界面来监控你的服务器和网络设备的运行时间、性能和可用性。
你可以查看实时监控数据、生成报表、设置报警通知等。
此外,Uptime Kuma还提供了RESTful API接口,你可以通过编程的方式来访问监控数据,实现自动化的监控和报警。
总的来说,Uptime Kuma是一个功能强大、易于安装和配置的服务器监控工具,它能帮助你实时监控你的服务器和网络设备,及时发现并解决问题,保障系统的稳定性和可靠性。
希望以上信息能够帮助你更好地了解Uptime Kuma的使用手册。
Tidyverse 2.0.0 安装和加载包帮助说明书

Package‘tidyverse’February22,2023Title Easily Install and Load the'Tidyverse'Version2.0.0Description The'tidyverse'is a set of packages that work in harmony because they share common data representations and'API'design.This package is designed to make it easy to install and load multiple'tidyverse'packages in a single step.Learn more about the'tidyverse'at<https://>.License MIT+file LICENSEURL https://,https:///tidyverse/tidyverseBugReports https:///tidyverse/tidyverse/issues Depends R(>=3.3)Imports broom(>=1.0.3),conflicted(>=1.2.0),cli(>=3.6.0),dbplyr(>=2.3.0),dplyr(>=1.1.0),dtplyr(>=1.2.2),forcats(>=1.0.0),ggplot2(>=3.4.1),googledrive(>=2.0.0),googlesheets4(>=1.0.1),haven(>=2.5.1),hms(>=1.1.2),httr(>=1.4.4),jsonlite(>=1.8.4),lubridate(>=1.9.2),magrittr(>=2.0.3),modelr(>=0.1.10),pillar(>=1.8.1),purrr(>=1.0.1),ragg(>=1.2.5),readr(>=2.1.4),readxl(>=1.4.2),reprex(>=2.0.2),rlang(>=1.0.6),rstudioapi(>=0.14),rvest(>=1.0.3),stringr(>=1.5.0),tibble(>=3.1.8),tidyr(>=1.3.0),xml2(>=1.3.3)Suggests covr(>=3.6.1),feather(>=0.3.5),glue(>=1.6.2),mockr (>=0.2.0),knitr(>=1.41),rmarkdown(>=2.20),testthat(>=3.1.6)VignetteBuilder knitrConfig/Needs/website tidyverse/tidytemplateConfig/testthat/edition3Encoding UTF-8RoxygenNote7.2.3NeedsCompilation no12tidyverse_conflicts Author Hadley Wickham[aut,cre],RStudio[cph,fnd]Maintainer Hadley Wickham<******************>Repository CRANDate/Publication2023-02-2209:20:06UTCR topics documented:tidyverse_conflicts (2)tidyverse_deps (3)tidyverse_logo (3)tidyverse_packages (4)tidyverse_sitrep (4)tidyverse_update (5)Index6 tidyverse_conflicts Conflicts between the tidyverse and other packagesDescriptionThis function lists all the conflicts between packages in the tidyverse and other packages that you have loaded.Usagetidyverse_conflicts(only=NULL)Argumentsonly Set this to a character vector to restrict to conflicts only with these packages.DetailsThere are four conflicts that are deliberately ignored:intersect,union,setequal,and setdiff from dplyr.These functions make the base equivalents generic,so shouldn’t negatively affect any existing code.Examplestidyverse_conflicts()tidyverse_deps3 tidyverse_deps List all tidyverse dependenciesDescriptionList all tidyverse dependenciesUsagetidyverse_deps(recursive=FALSE,repos=getOption("repos"))Argumentsrecursive If TRUE,will also list all dependencies of tidyverse packages.repos The repositories to use to check for updates.Defaults to getOption("repos").tidyverse_logo The tidyverse logo,using ASCII or Unicode charactersDescriptionUse cli::ansi_strip()to get rid of the colors.Usagetidyverse_logo(unicode=cli::is_utf8_output())Argumentsunicode Whether to use Unicode symbols.Default is TRUE on UTF-8platforms.Examplestidyverse_logo()4tidyverse_sitrep tidyverse_packages List all packages in the tidyverseDescriptionList all packages in the tidyverseUsagetidyverse_packages(include_self=TRUE)Argumentsinclude_self Include tidyverse in the list?Examplestidyverse_packages()tidyverse_sitrep Get a situation report on the tidyverseDescriptionThis function gives a quick overview of the versions of R and RStudio as well as all tidyverse packages.It’s primarily designed to help you get a quick idea of what’s going on when you’re helping someone else debug a problem.Usagetidyverse_sitrep()tidyverse_update5 tidyverse_update Update tidyverse packagesDescriptionThis will check to see if all tidyverse packages(and optionally,their dependencies)are up-to-date, and will install after an interactive confirmation.Usagetidyverse_update(recursive=FALSE,repos=getOption("repos"))Argumentsrecursive If TRUE,will also list all dependencies of tidyverse packages.repos The repositories to use to check for updates.Defaults to getOption("repos").Examples##Not run:tidyverse_update()##End(Not run)Indexcli::ansi_strip(),3tidyverse_conflicts,2tidyverse_deps,3tidyverse_logo,3tidyverse_packages,4tidyverse_sitrep,4tidyverse_update,56。
- 1、下载文档前请自行甄别文档内容的完整性,平台不提供额外的编辑、内容补充、找答案等附加服务。
- 2、"仅部分预览"的文档,不可在线预览部分如存在完整性等问题,可反馈申请退款(可完整预览的文档不适用该条件!)。
- 3、如文档侵犯您的权益,请联系客服反馈,我们会尽快为您处理(人工客服工作时间:9:00-18:30)。
Truetime2.0 仿真实验
一、实验目的
通过matlab 和truetime 插件对网络控制系统进行仿真,了解和掌握truetime 的安装和使用方法。
Truetimea 工具箱中包括Truetime Kernel、Truetime Network、Truetime Send、Truetime Receive、Truetime Battery、Truetime Wireless Network 和truetimeUltrasound Network 等模块。
该工具箱针对每一特定的网络协议,可以实现控制系统与实时调度的综合仿真研究,是目前网络控制系统理想的虚拟仿真工具之一。
二、实验步骤
仿真过程首先需要下载和配置matlab 中的truetime 环境,然后配合simulink相关组件完成系统框图的连接,然后编写truetime 模块中的初始化文件,最后进行仿真。
1、truetime 工具箱的下载和配置
1) Truetime 的工具箱的下载
2) Truetime 工具箱的配置
a) 把truetime-2.0 压缩包【truetime-2.0.zip】解压缩后到truetime-2.0 文件夹,并拷
到matlab 的安装目录toolbox 下。
图1 拷贝truetime-2.0
b) 在MATLAB 中的SETPATH 下添加truetime-2.0 文件夹中的Kernel(如图2)。
图 2 设置truetime 的路径
图 3 添加Kernel 子目录
添加子文件夹时要注意:要把Kernel 下的子目录包括进去(图3)。
最后,点击左下角的“Save”,再“Close”。
c) 环境变量配置
依次进入“系统属性/高级系统设置”中添加系统变量及用户变量“TTKERNEL”;以及
变量值【路径】,设置完成后重启电脑(如图4)。
图 4 设置环境变量
d)打开C:\File\matlab\toolbox\local\startupsav.m,做
如下修改。
addpath(getenv('TTKERNEL'))
init_truetime
如图5
图5修改startupsav.m
e) 在MATLAB 中打开下列文件C:\File\matlab\toolbox\local\matlabrc.m,并用SAVE
WORKPLACE 命令把文件命名为matlab.mat。
并保存到并保存在C:\File\matlab\toolbox\local 目录下(如图6)。
图6使用Save Workspace 配置
f) 把C:\File\matlab\toolbox\truetime-2.0\kernel 文件夹下的init_truetime.m 文件拷到matlab 安装目录下的local 文件夹中。
图7拷贝文件
g) 安装VC++编译器,这里电脑系统是64 位的win7 系统,编译器用的是vs2015
h) 在matlab 中运行“mex-setup”,设定编译器运行mex-setup 和选择y;然后选择要采用的编译器,这里选择‘1’后,再选择y(如图8)。
图8设置编译器
i) 在matlab 中运行“make_truetime”。
结果如图9所示:
图9运行make_truetime
2、运行truetime 示例程序
1) 在matlab 中执行“truetime执行上述命令后,可以看到truetime 工具箱被打开
(如图10)。
图10 Truetime2.0 工具箱
2) 选择执行truetime 示例
进入界面,选择要执行的示例程序的文件夹,并将其设置为当前文件夹。
如图11所示,将current folder 设置成要执行的示例程序文件目录下。
图11 打开示例
图12设置Current Folder
三、实验结果
示例输入:(如图13)
图13 示例输入结果
示例输出:(如图14)
图14 示例输出结果
Schedule:(如图15)
图15Schedule
四、实验心得与体会
本次实验是在Matlab下安装Truetime 2.0,总体比较简单,根据实验指导书中的步骤一步一步做完成了Truetime 2.0的安装,在安装C++编译器的过程中,由于实验机器中已预先安装好Microsoft Visual C++ 2015,故省去了一些步骤。
最后运行的实例程序也十分成功,也说明了正确安装了Truetime 2.0。
Matlab是十分强大的工具,在物联网控制课程中,可以通过matlab 和truetime 插件对网络控制系统进行仿真,省去实际的实验步骤,得到理想的数据和结果。
学习使用好Matlab将会在今后的工作学习中为我们带来诸多便利。
