Device problem of OMP20140802
电脑蓝屏错误代码及解决方法方法

电脑蓝屏错误代码及解决方法方法由于windows操作系统的结构相当复杂,用户在在使用过程中,有时候因为使用环境,人为操作不当或者去改变电脑的内部设置等,引发windows系统出现蓝屏故障,造成系统的崩溃或者导致用户数据丢失。
下面就由店铺跟大家分享电脑蓝屏错误代码及修复方法,欢迎大家来阅读学习~电脑蓝屏错误代码及解决方法电脑蓝屏错误代码0X0000000 操作完成0X0000001 不正确的函数0X0000002 系统找不到指定的文件0X0000003 系统找不到指定的路径0X0000004 系统无法打开文件0X0000005 拒绝存取0X0000006 无效的代码0X0000007 内存控制模块已损坏0X0000008 内存空间不足,无法处理这个指令0X0000009 内存控制模块位址无效0X000000A 环境不正确0X000000B 尝试载入一个格式错误的程序0X000000C 存取码错误0X000000D 资料错误0X000000E 内存空间不够,无法完成这项操作0X000000F 系统找不到指定的硬盘0X0000010 无法移除目录0X0000011 系统无法将文件移到其他的硬盘0X0000012 没有任何文件0X0000019 找不到指定扇区或磁道0X000001A 指定的磁盘或磁片无法存取0X000001B 磁盘找不到要求的装置0X000001C 打印机没有纸0X000001D 系统无法将资料写入指定的磁盘0X000001E 系统无法读取指定的装置0X000001F 连接到系统的某个装置没有作用0X0000021文件的一部分被锁定,现在无法存取0X0000024 开启的分享文件数量太多0X0000026 到达文件结尾0X0000027 磁盘已满0X0000036 网络繁忙0X000003B 网络发生意外的错误0X0000043 网络名称找不到0X0000050 文件已经存在0X0000052 无法建立目录或文件0X0000053 INT24失败(什麼意思?还请高手指点站长一二)0X000006B 因为代用的磁盘尚未插入,所以程序已经停止0X000006C 磁盘正在使用中或被锁定0X000006F 文件名太长0X0000070 硬盘空间不足0X000007F 找不到指定的程序0X000045B 系统正在关机0X000045C 无法中止系统关机,因为没有关机的动作在进行中0X000046A 可用服务器储存空间不足0X0000475 系统BIOS无法变更系统电源状态0X000047E 指定的程序需要新的windows版本0X000047F 指定的程序不是windwos或ms-dos程序0X0000480 指定的程序已经启动,无法再启动一次0X0000481 指定的程序是为旧版的 windows所写的0X0000482 执行此应用程序所需的程序库文件之一被损0X0000483 没有应用程序与此项操作的指定文件建立关联0X0000484 传送指令到应用程序无效0X00005A2 指定的装置名称无效0X00005AA 系统资源不足,无法完成所要求的服务0X00005AB系统资源不足,无法完成所要求的服务0X00005AC系统资源不足,无法完成所要求的服务110 0x006E 系统无法开启指定的装置或档案。
HP Color LaserJet Enterprise MFP M776用户指南说明书
Legal informationCopyright and License© Copyright 2019 HP Development Company, L.P.Reproduction, adaptation, or translation without prior written permission is prohibited, except as allowedunder the copyright laws.The information contained herein is subject to change without notice.The only warranties for HP products and services are set forth in the express warranty statementsaccompanying such products and services. Nothing herein should be construed as constituting anadditional warranty. HP shall not be liable for technical or editorial errors or omissions contained herein.Edition 1, 10/2019Trademark CreditsAdobe®, Adobe Photoshop®, Acrobat®, and PostScript® are trademarks of Adobe Systems Incorporated.Apple and the Apple logo are trademarks of Apple Inc., registered in the U.S. and other countries.macOS is a trademark of Apple Inc., registered in the U.S. and other countries.AirPrint is a trademark of Apple Inc., registered in the U.S. and other countries.Google™ is a trademark of Google Inc.Microsoft®, Windows®, Windows® XP, and Windows Vista® are U.S. registered trademarks of MicrosoftCorporation.UNIX® is a registered trademark of The Open Group.iiiT able of contents1 Printer overview (1)Warning icons (1)Potential shock hazard (2)Printer views (2)Printer front view (2)Printer back view (4)Interface ports (4)Control-panel view (5)How to use the touchscreen control panel (7)Printer specifications (8)T echnical specifications (8)Supported operating systems (11)Mobile printing solutions (12)Printer dimensions (13)Power consumption, electrical specifications, and acoustic emissions (15)Operating-environment range (15)Printer hardware setup and software installation (16)2 Paper trays (17)Introduction (17)Load paper to Tray 1 (multipurpose tray) (17)Load Tray 1 (multipurpose tray) (18)Tray 1 paper orientation (19)Use alternative letterhead mode (24)Enable Alternative Letterhead Mode by using the printer control-panel menus (24)Load paper to Tray 2 (24)Load Tray 2 (24)Tray 2 paper orientation (26)Use alternative letterhead mode (29)Enable Alternative Letterhead Mode by using the printer control-panel menus (29)Load paper to the 550-sheet paper tray (30)Load paper to the 550-sheet paper tray (30)550-sheet paper tray paper orientation (32)Use alternative letterhead mode (35)Enable Alternative Letterhead Mode by using the printer control-panel menus (35)ivLoad paper to the 2 x 550-sheet paper trays (36)Load paper to the 2 x 550-sheet paper trays (36)2 x 550-sheet paper tray paper orientation (38)Use alternative letterhead mode (41)Enable Alternative Letterhead Mode by using the printer control-panel menus (41)Load paper to the 2,700-sheet high-capacity input paper trays (41)Load paper to the 2,700-sheet high-capacity input paper trays (41)2,700-sheet HCI paper tray paper orientation (43)Use alternative letterhead mode (45)Enable Alternative Letterhead Mode by using the printer control-panel menus (45)Load and print envelopes (46)Print envelopes (46)Envelope orientation (46)Load and print labels (47)Manually feed labels (47)Label orientation (48)3 Supplies, accessories, and parts (49)Order supplies, accessories, and parts (49)Ordering (49)Supplies and accessories (50)Maintenance/long-life consumables (51)Customer self-repair parts (51)Dynamic security (52)Configure the HP toner-cartridge-protection supply settings (53)Introduction (53)Enable or disable the Cartridge Policy feature (53)Use the printer control panel to enable the Cartridge Policy feature (54)Use the printer control panel to disable the Cartridge Policy feature (54)Use the HP Embedded Web Server (EWS) to enable the Cartridge Policy feature (54)Use the HP Embedded Web Server (EWS) to disable the Cartridge Policy feature (55)Troubleshoot Cartridge Policy control panel error messages (55)Enable or disable the Cartridge Protection feature (55)Use the printer control panel to enable the Cartridge Protection feature (56)Use the printer control panel to disable the Cartridge Protection feature (56)Use the HP Embedded Web Server (EWS) to enable the Cartridge Protection feature (56)Use the HP Embedded Web Server (EWS) to disable the Cartridge Protection feature (57)Troubleshoot Cartridge Protection control panel error messages (57)Replace the toner cartridges (58)T oner-cartridge information (58)Remove and replace the cartridges (59)Replace the imaging drums (62)Imaging drum information (62)Remove and replace the imaging drums (63)Replace the toner-collection unit (66)T oner-collection unit information (66)vRemove and replace the toner-collection unit (67)Replace the staple cartridge (M776zs model only) (70)Staple cartridge information (70)Remove and replace the staple cartridge (71)4 Print (73)Print tasks (Windows) (73)How to print (Windows) (73)Automatically print on both sides (Windows) (74)Manually print on both sides (Windows) (74)Print multiple pages per sheet (Windows) (75)Select the paper type (Windows) (75)Additional print tasks (76)Print tasks (macOS) (77)How to print (macOS) (77)Automatically print on both sides (macOS) (77)Manually print on both sides (macOS) (77)Print multiple pages per sheet (macOS) (78)Select the paper type (macOS) (78)Additional print tasks (79)Store print jobs on the printer to print later or print privately (79)Introduction (79)Create a stored job (Windows) (79)Create a stored job (macOS) (80)Print a stored job (81)Delete a stored job (81)Delete a job that is stored on the printer (81)Change the job storage limit (82)Information sent to printer for Job Accounting purposes (82)Mobile printing (82)Introduction (82)Wi-Fi, Wi-Fi Direct Print, NFC, and BLE printing (82)Enable wireless printing (83)Change the Wi-Fi Direct name (83)HP ePrint via email (83)AirPrint (84)Android embedded printing (85)Print from a USB flash drive (85)Enable the USB port for printing (85)Method one: Enable the USB port from the printer control panel (85)Method two: Enable the USB port from the HP Embedded Web Server (network-connectedprinters only) (85)Print USB documents (86)Print using high-speed USB 2.0 port (wired) (86)Method one: Enable the high-speed USB 2.0 port from the printer control panel menus (86)Method two: Enable the high-speed USB 2.0 port from the HP Embedded Web Server (network-connected printers only) (87)vi5 Copy (88)Make a copy (88)Copy on both sides (duplex) (90)Additional copy tasks (92)6 Scan (93)Set up Scan to Email (93)Introduction (93)Before you begin (93)Step one: Access the HP Embedded Web Server (EWS) (94)Step two: Configure the Network Identification settings (95)Step three: Configure the Send to Email feature (96)Method one: Basic configuration using the Email Setup Wizard (96)Method two: Advanced configuration using the Email Setup (100)Step four: Configure the Quick Sets (optional) (104)Step five: Set up Send to Email to use Office 365 Outlook (optional) (105)Introduction (105)Configure the outgoing email server (SMTP) to send an email from an Office 365 Outlookaccount (105)Set up Scan to Network Folder (108)Introduction (108)Before you begin (108)Step one: Access the HP Embedded Web Server (EWS) (108)Step two: Set up Scan to Network Folder (109)Method one: Use the Scan to Network Folder Wizard (109)Method two: Use Scan to Network Folder Setup (110)Step one: Begin the configuration (110)Step two: Configure the Scan to Network Folder settings (111)Step three: Complete the configuration (118)Set up Scan to SharePoint (118)Introduction (118)Before you begin (118)Step one: Access the HP Embedded Web Server (EWS) (118)Step two: Enable Scan to SharePoint and create a Scan to SharePoint Quick Set (119)Scan a file directly to a SharePoint site (121)Quick Set scan settings and options for Scan to SharePoint (122)Set up Scan to USB Drive (123)Introduction (124)Step one: Access the HP Embedded Web Server (EWS) (124)Step two: Enable Scan to USB Drive (124)Step three: Configure the Quick Sets (optional) (125)Default scan settings for Scan to USB Drive setup (126)Default file settings for Save to USB setup (126)Scan to email (127)Introduction (127)Scan to email (127)Scan to job storage (129)viiIntroduction (129)Scan to job storage on the printer (130)Print from job storage on the printer (132)Scan to network folder (132)Introduction (132)Scan to network folder (132)Scan to SharePoint (134)Introduction (134)Scan to SharePoint (134)Scan to USB drive (136)Introduction (136)Scan to USB drive (136)Use HP JetAdvantage business solutions (138)Additional scan tasks (138)7 Fax (140)Set up fax (140)Introduction (140)Set up fax by using the printer control panel (140)Change fax configurations (141)Fax dialing settings (141)General fax send settings (142)Fax receive settings (143)Send a fax (144)Additional fax tasks (146)8 Manage the printer (147)Advanced configuration with the HP Embedded Web Server (EWS) (147)Introduction (147)How to access the HP Embedded Web Server (EWS) (148)HP Embedded Web Server features (149)Information tab (149)General tab (149)Copy/Print tab (150)Scan/Digital Send tab (151)Fax tab (152)Supplies tab (153)Troubleshooting tab (153)Security tab (153)HP Web Services tab (154)Networking tab (154)Other Links list (156)Configure IP network settings (157)Printer sharing disclaimer (157)View or change network settings (157)Rename the printer on a network (157)viiiManually configure IPv4 TCP/IP parameters from the control panel (158)Manually configure IPv6 TCP/IP parameters from the control panel (158)Link speed and duplex settings (159)Printer security features (160)Introduction (160)Security statements (160)Assign an administrator password (160)Use the HP Embedded Web Server (EWS) to set the password (160)Provide user access credentials at the printer control panel (161)IP Security (161)Encryption support: HP High Performance Secure Hard Disks (161)Lock the formatter (161)Energy-conservation settings (161)Set the sleep timer and configure the printer to use 1 watt or less of power (161)Set the sleep schedule (162)Set the idle settings (162)HP Web Jetadmin (163)Software and firmware updates (163)9 Solve problems (164)Customer support (164)Control panel help system (165)Reset factory settings (165)Introduction (165)Method one: Reset factory settings from the printer control panel (165)Method two: Reset factory settings from the HP Embedded Web Server (network-connectedprinters only) (166)A “Cartridge is low” or “Cartridge is very low” message displays on the printer control panel (166)Change the “Very Low” settings (166)Change the “Very Low” settings at the control panel (166)For printers with fax capability (167)Order supplies (167)Printer does not pick up paper or misfeeds (167)Introduction (167)The printer does not pick up paper (167)The printer picks up multiple sheets of paper (171)The document feeder jams, skews, or picks up multiple sheets of paper (174)Clear paper jams (174)Introduction (174)Paper jam locations (174)Auto-navigation for clearing paper jams (175)Experiencing frequent or recurring paper jams? (175)Clear paper jams in the document feeder - 31.13.yz (176)Clear paper jams in Tray 1 (13.A1) (177)Clear paper jams in Tray 2 (13.A2) (182)Clear paper jams in the fuser (13.B9, 13.B2, 13.FF) (188)ixClear paper jams in the duplex area (13.D3) (194)Clear paper jams in the 550-sheet trays (13.A3, 13.A4) (199)Clear paper jams in the 2 x 550 paper trays (13.A4, 13.A5) (206)Clear paper jams in the 2,700-sheet high-capacity input paper trays (13.A3, 13.A4, 13.A5, 13.A7) (213)Resolving color print quality problems (220)Introduction (220)Troubleshoot print quality (221)Update the printer firmware (221)Print from a different software program (221)Check the paper-type setting for the print job (221)Check the paper type setting on the printer (221)Check the paper type setting (Windows) (221)Check the paper type setting (macOS) (222)Check toner-cartridge status (222)Step one: Print the Supplies Status Page (222)Step two: Check supplies status (222)Print a cleaning page (222)Visually inspect the toner cartridge or cartridges (223)Check paper and the printing environment (223)Step one: Use paper that meets HP specifications (223)Step two: Check the environment (223)Step three: Set the individual tray alignment (224)Try a different print driver (224)Troubleshoot color quality (225)Calibrate the printer to align the colors (225)Troubleshoot image defects (225)Improve copy image quality (233)Check the scanner glass for dirt and smudges (233)Calibrate the scanner (234)Check the paper settings (235)Check the paper selection options (235)Check the image-adjustment settings (235)Optimize copy quality for text or pictures (236)Edge-to-edge copying (236)Improve scan image quality (236)Check the scanner glass for dirt and smudges (237)Check the resolution settings (238)Check the color settings (238)Check the image-adjustment settings (239)Optimize scan quality for text or pictures (239)Check the output-quality settings (240)Improve fax image quality (240)Check the scanner glass for dirt and smudges (240)Check the send-fax resolution settings (242)Check the image-adjustment settings (242)Optimize fax quality for text or pictures (242)Check the error-correction setting (243)xSend to a different fax machine (243)Check the sender's fax machine (243)Solve wired network problems (244)Introduction (244)Poor physical connection (244)The computer is unable to communicate with the printer (244)The printer is using incorrect link and duplex settings for the network (245)New software programs might be causing compatibility problems (245)The computer or workstation might be set up incorrectly (245)The printer is disabled, or other network settings are incorrect (245)Solve wireless network problems (245)Introduction (245)Wireless connectivity checklist (245)The printer does not print after the wireless configuration completes (246)The printer does not print, and the computer has a third-party firewall installed (246)The wireless connection does not work after moving the wireless router or printer (247)Cannot connect more computers to the wireless printer (247)The wireless printer loses communication when connected to a VPN (247)The network does not appear in the wireless networks list (247)The wireless network is not functioning (247)Reduce interference on a wireless network (248)Solve fax problems (248)Checklist for solving fax problems (248)What type of phone line are you using? (249)Are you using a surge-protection device? (249)Are you using a phone company voice-messaging service or an answering machine? (249)Does your phone line have a call-waiting feature? (249)Check fax accessory status (249)General fax problems (250)The fax failed to send (250)No fax address book button displays (250)Not able to locate the Fax settings in HP Web Jetadmin (250)The header is appended to the top of the page when the overlay option is enabled (251)A mix of names and numbers is in the recipients box (251)A one-page fax prints as two pages (251)A document stops in the document feeder in the middle of faxing (251)The volume for sounds coming from the fax accessory is too high or too low (251)Index (252)xiPrinter overview1Review the location of features on the printer, the physical and technical specifications of the printer,and where to locate setup information.For video assistance, see /videos/LaserJet.The following information is correct at the time of publication. For current information, see /support/colorljM776MFP.For more information:HP's all-inclusive help for the printer includes the following information:●Install and configure●Learn and use●Solve problems●Download software and firmware updates●Join support forums●Find warranty and regulatory informationWarning iconsUse caution if you see a warning icon on your HP printer, as indicated in the icon definitions.●Caution: Electric shock●Caution: Hot surface●Caution: Keep body parts away from moving partsPrinter overview1●Caution: Sharp edge in close proximity●WarningPotential shock hazardReview this important safety information.●Read and understand these safety statements to avoid an electrical shock hazard.●Always follow basic safety precautions when using this product to reduce risk of injury from fire orelectric shock.●Read and understand all instructions in the user guide.●Observe all warnings and instructions marked on the product.●Use only a grounded electrical outlet when connecting the product to a power source. If you do notknow whether the outlet is grounded, check with a qualified electrician.●Do not touch the contacts on any of the sockets on the product. Replace damaged cordsimmediately.●Unplug this product from wall outlets before cleaning.●Do not install or use this product near water or when you are wet.●Install the product securely on a stable surface.●Install the product in a protected location where no one can step on or trip over the power cord.Printer viewsIdentify certain parts of the printer and the control panel.Printer front viewLocate features on the front of the printer.2Chapter 1 Printer overviewPrinter front view3Printer back viewLocate features on the back of the printer.Interface portsLocate the interface ports on the printer formatter. 4Chapter 1 Printer overviewControl-panel viewThe control panel provides access to the printer features and indicates the current status of the printer.NOTE:Tilt the control panel for easier viewing.The Home screen provides access to the printer features and indicates the current status of the printer.screens.NOTE:The features that appear on the Home screen can vary, depending on the printerconfiguration.Control-panel view5Figure 1-1Control-panel view?i 12:42 PM6Chapter 1 Printer overviewHow to use the touchscreen control panelPerform the following actions to use the printer touchscreen control panel.T ouchT ouch an item on the screen to select that item or open that menu. Also, when scrolling T ouch the Settings icon to open the Settings app.How to use the touchscreen control panel 7SwipeT ouch the screen and then move your finger horizontally to scroll the screen sideways.Swipe until the Settings app displays.Printer specificationsDetermine the specifications for your printer model.IMPORTANT:The following specifications are correct at the time of publication, but they are subject to change. For current information, see /support/colorljM776MFP .T echnical specificationsReview the printer technical specifications.Product numbers for each model ●M776dn - #T3U55A ●Flow M776z - #3WT91A ●Flow M776zs - #T3U56APaper handling specificationsPaper handling features Tray 1 (100-sheet capacity)Included Included Included Tray 2 (550-sheet capacity)IncludedIncludedIncluded8Chapter 1 Printer overview550-sheet paper trayOptional Included Not included NOTE:The M776dn models accept one optional550-sheet tray.Optional Included Included2 x 550-sheet paper tray and standNOTE:The M776dn models accept one optional550-sheet tray that may be installed on top of thestand.Optional Not included Not included2,700-sheet high-capacity input (HCI) paper trayand standNOTE:The M776dn models accept one optional550-sheet tray that may be installed on top of theoptional printer stand.Printer standOptional Not included Not included NOTE:The M776dn models accept one optional550-sheet tray that may be installed on top of theoptional printer stand.Inner finisher accessory Not included Not included Included Automatic duplex printing Included IncludedIncludedIncluded Included Included10/100/1000 Ethernet LAN connection with IPv4and IPv6Hi-Speed USB 2.0Included Included IncludedIncluded Included IncludedEasy-access USB port for printing from a USBflash drive or upgrading the firmwareIncluded Included Included Hardware Integration Pocket for connectingaccessory and third-party devicesHP Internal USB Ports Optional Optional OptionalOptional Optional OptionalHP Jetdirect 2900nw Print Server accessory forWi-Fi connectivity and an additional Ethernet portOptional IncludedIncludedHP Jetdirect 3100w accessory for Wi-Fi, BLE, NFC,and proximity badge readingPrints 45 pages per minute (ppm) on Letter-sizepaper and 46 ppm on A4-size paperEasy-access USB printing for printing from a USBIncluded Included Includedflash driveT echnical specifications9Included Included Included Store jobs in the printer memory to print later orprint privatelyScans 100 pages per minute (ppm) on A4 andIncluded Included Included letter-size paper one-sidedIncluded Included Included 200-page document feeder with dual-headscanning for single-pass duplex copying andscanningNot included Included Included HP EveryPage T echnologies including ultrasonicmulti-feed detectionNot included Included Included Embedded optical character recognition (OCR)provides the ability to convert printed pages intotext that can be edited or searched using acomputerIncluded Included Included SMART Label feature provides paper-edgedetection for automatic page croppingIncluded Included Included Automatic page orientation for pages that haveat least 100 characters of textIncluded Automatic tone adjustment sets contrast,Included Includedbrightness, and background removal for eachpageIncluded Included Includedfolders on a networkIncludedSend documents to SharePoint®Included IncludedIncluded Included Included NOTE:Memory reported on the configurationpage will change from 2.5 GB to 3 GB with theoptional 1 GB SODIMM installed.Mass storage: 500 GB hard disk drive Included Included IncludedSecurity: HP Trusted Platform Module (TPM)Included Included IncludedT ouchscreen control panel Included Included IncludedRetractable keyboard Not included Included Included 10Chapter 1 Printer overviewFax Optional Included IncludedSupported operating systemsUse the following information to ensure printer compatibility with your computer operating system.Linux: For information and print drivers for Linux, go to /go/linuxprinting.UNIX: For information and print drivers for UNIX®, go to /go/unixmodelscripts.The following information applies to the printer-specific Windows HP PCL 6 print drivers, HP print driversfor macOS, and to the software installer.Windows: Download HP Easy Start from /LaserJet to install the HP print driver. Or, go tothe printer-support website for this printer: /support/colorljM776MFP to download the printdriver or the software installer to install the HP print driver.macOS: Mac computers are supported with this printer. Download HP Easy Start either from /LaserJet or from the Printer Support page, and then use HP Easy Start to install the HP print driver.1.Go to /LaserJet.2.Follow the steps provided to download the printer software.Windows 7, 32-bit and 64-bit The “HP PCL 6” printer-specific print driver is installed for this operating system aspart of the software installation.Windows 8.1, 32-bit and 64-bit The “HP PCL-6” V4 printer-specific print driver is installed for this operating systemas part of the software installation.Windows 10, 32-bit and 64-bit The “HP PCL-6” V4 printer-specific print driver is installed for this operating systemas part of the software installation.Windows Server 2008 R2, SP 1, 64-bit The PCL 6 printer-specific print driver is available for download from the printer-support website. Download the driver, and then use the Microsoft Add Printer tool toinstall it.Windows Server 2012, 64-bit The PCL 6 printer-specific print driver is available for download from the printer-support website. Download the driver, and then use the Microsoft Add Printer tool toinstall it.Windows Server 2012 R2, 64-bit The PCL 6 printer-specific print driver is available for download from the printer-support website. Download the driver, and then use the Microsoft Add Printer tool toinstall it.Windows Server 2016, 64-bit The PCL 6 printer-specific print driver is available for download from the printer-support website. Download the driver, and then use the Microsoft Add Printer tool toinstall it.Windows Server 2019, 64-bit The PCL 6 printer-specific print driver is available for download from the printer-support website. Download the driver, and then use the Microsoft Add Printer tool toinstall it.Supported operating systems11macOS 10.13 High Sierra, macOS 10.14 MojaveDownload HP Easy Start from /LaserJet , and then use it to install the print driver.NOTE:Supported operating systems can change.NOTE:For a current list of supported operating systems and HP’s all-inclusive help for the printer, go to /support/colorljM776MFP .NOTE:For details on client and server operating systems and for HP UPD driver support for this printer, go to /go/upd . Under Additional information , click Specifications .●Internet connection●Dedicated USB 1.1 or 2.0 connection or a network connection● 2 GB of available hard-disk space ●1 GB RAM (32-bit) or2 GB RAM (64-bit)●Internet connection●Dedicated USB 1.1 or 2.0 connection or a network connection●1.5 GB of available hard-disk spaceNOTE:The Windows software installer installs the HP Smart Device Agent Base service. The file size is less than 100 kb. Its only function is to check for printers connected via USB hourly. No data is collected. If a USB printer is found, it then tries to locate a JetAdvantage Management Connector (JAMc) instance on the network. If a JAMc is found, the HP Smart Device Agent Base is securelyupgraded to a full Smart Device Agent from JAMc, which will then allow printed pages to be accounted for in a Managed Print Services (MPS) account. The driver-only web packs downloaded from for the printer and installed through the Add Printer wizard do not install this service.T o uninstall the service, open the Control Panel , select Programs or Programs and Features , and then select Add/Remove Programs or Uninstall a Programto remove the service. The file name isHPSmartDeviceAgentBase.Mobile printing solutionsHP offers multiple mobile printing solutions to enable easy printing to an HP printer from a laptop, tablet, smartphone, or other mobile device.T o see the full list and to determine the best choice, go to /go/MobilePrinting .NOTE:Update the printer firmware to ensure all mobile printing capabilities are supported.●Wi-Fi Direct (wireless models only, with HP Jetdirect 3100w BLE/NFC/Wireless accessory installed)●HP ePrint via email (Requires HP Web Services to be enabled and the printer to be registered with HP Connected)●HP Smart app ●Google Cloud Print12Chapter 1 Printer overview。
Infoprint 250 導入と計画の手引き 第 7 章ホスト
SUBNETMASK
255.255.255.128
Type of service...............: TOS
*NORMAL
Maximum transmission unit.....: MTU
*LIND
Autostart.....................:
AUTOSTART
*YES
: xx.xxx.xxx.xxx
: xx.xxx.xxx.xxx
*
(
)
IEEE802.3
60 1500
: xxxx
48 Infoprint 250
31. AS/400
IP
MTU
1
1
IPDS TCP
CRTPSFCFG (V3R2)
WRKAFP2 (V3R1 & V3R6)
RMTLOCNAME RMTSYS
MODEL
0
Advanced function printing............:
AFP
*YES
AFP attachment........................:
AFPATTACH
*APPC
Online at IPL.........................:
ONLINE
FORMFEED
*CONT
Separator drawer......................:
SEPDRAWER
*FILE
Separator program.....................:
SEPPGM
*NONE
Library.............................:
生成对抗网络的生成模型训练中的问题解决方法分享(Ⅱ)

生成对抗网络(GAN)是一种深度学习模型,由生成器和判别器两部分组成。
生成器负责生成数据样本,而判别器则负责判断生成的样本是真实的还是伪造的。
生成对抗网络的训练过程中存在一些常见问题,本文将分享一些解决方法。
一、梯度消失和梯度爆炸问题在生成对抗网络的训练过程中,梯度消失和梯度爆炸是常见的问题。
梯度消失指的是在反向传播过程中,梯度逐渐减小到接近零,导致模型无法收敛;而梯度爆炸则是指梯度逐渐增大,导致模型发散。
为了解决这一问题,可以采用合适的激活函数和初始化方法,以及对网络结构进行调整。
其次,可以尝试使用梯度裁剪技术,即限制梯度的大小,防止梯度爆炸。
此外,合理设置学习率和采用正则化方法也可以有效缓解梯度消失和梯度爆炸问题。
二、模式崩溃问题在生成对抗网络的训练过程中,模式崩溃是一个常见的问题。
模式崩溃指的是生成器只学习到数据分布中的部分模式,导致生成的样本缺乏多样性。
为了解决模式崩溃问题,可以采用多样性促进方法,如在损失函数中引入多样性惩罚项,或者使用多样性促进的评价指标来指导训练过程。
此外,可以通过增加生成器和判别器的容量,以及引入噪声等方法来增加模型的多样性。
同时,合理设计损失函数,平衡生成器和判别器的训练目标,也可以有效缓解模式崩溃问题。
三、模态崩溃问题模态崩溃指生成器只生成数据分布中的部分模态,而忽略了其他模态的情况。
为了解决模态崩溃问题,可以采用多模态损失函数,引入额外的监督信息来指导生成样本的多模态分布。
另外,可以通过增加噪声输入、扩大生成器的输入空间以及增加样本多样性等方法来增加模型的多模态性。
此外,合理设计生成器的网络结构,增加网络的深度和宽度,也可以有效缓解模态崩溃问题。
四、训练不稳定问题在生成对抗网络的训练过程中,训练的不稳定性是一个普遍存在的问题。
为了解决训练不稳定问题,可以采用一些稳定性训练技巧,如渐变惩罚技术、正则化技术等。
此外,采用逐步训练的方法,即先训练生成器,再训练判别器,可以有效提高训练的稳定性。
Indradrive 系列 故障代码
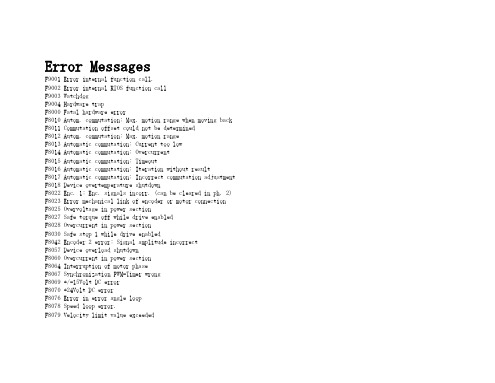
Error MessagesF9001 Error internal function call.F9002 Error internal RTOS function callF9003 WatchdogF9004 Hardware trapF8000 Fatal hardware errorF8010 Autom. commutation: Max. motion range when moving back F8011 Commutation offset could not be determinedF8012 Autom. commutation: Max. motion rangeF8013 Automatic commutation: Current too lowF8014 Automatic commutation: OvercurrentF8015 Automatic commutation: TimeoutF8016 Automatic commutation: Iteration without resultF8017 Automatic commutation: Incorrect commutation adjustment F8018 Device overtemperature shutdownF8022 Enc. 1: Enc. signals incorr. (can be cleared in ph. 2) F8023 Error mechanical link of encoder or motor connectionF8025 Overvoltage in power sectionF8027 Safe torque off while drive enabledF8028 Overcurrent in power sectionF8030 Safe stop 1 while drive enabledF8042 Encoder 2 error: Signal amplitude incorrectF8057 Device overload shutdownF8060 Overcurrent in power sectionF8064 Interruption of motor phaseF8067 Synchronization PWM-Timer wrongF8069 +/-15Volt DC errorF8070 +24Volt DC errorF8076 Error in error angle loopF8078 Speed loop error.F8079 Velocity limit value exceededF8091 Power section defectiveF8100 Error when initializing the parameter handlingF8102 Error when initializing power sectionF8118 Invalid power section/firmware combinationF8120 Invalid control section/firmware combinationF8122 Control section defectiveF8129 Incorrect optional module firmwareF8130 Firmware of option 2 of safety technology defectiveF8133 Error when checking interrupting circuitsF8134 SBS: Fatal errorF8135 SMD: Velocity exceededF8140 Fatal CCD error.F8201 Safety command for basic initialization incorrectF8203 Safety technology configuration parameter invalidF8813 Connection error mains chokeF8830 Power section errorF8838 Overcurrent external braking resistorF7010 Safely-limited increment exceededF7011 Safely-monitored position, exceeded in pos. DirectionF7012 Safely-monitored position, exceeded in neg. DirectionF7013 Safely-limited speed exceededF7020 Safe maximum speed exceededF7021 Safely-limited position exceededF7030 Position window Safe stop 2 exceededF7031 Incorrect direction of motionF7040 Validation error parameterized - effective thresholdF7041 Actual position value validation errorF7042 Validation error of safe operation modeF7043 Error of output stage interlockF7050 Time for stopping process exceeded8.3.15 F7051 Safely-monitored deceleration exceeded (159)8.4 Travel Range Errors (F6xxx) (161)8.4.1 Behavior in the Case of Travel Range Errors (161)8.4.2 F6010 PLC Runtime Error (162)8.4.3 F6024 Maximum braking time exceeded (163)8.4.4 F6028 Position limit value exceeded (overflow) (164)8.4.5 F6029 Positive position limit exceeded (164)8.4.6 F6030 Negative position limit exceeded (165)8.4.7 F6034 Emergency-Stop (166)8.4.8 F6042 Both travel range limit switches activated (167)8.4.9 F6043 Positive travel range limit switch activated (167)8.4.10 F6044 Negative travel range limit switch activated (168)8.4.11 F6140 CCD slave error (emergency halt) (169)8.5 Interface Errors (F4xxx) (169)8.5.1 Behavior in the Case of Interface Errors (169)8.5.2 F4001 Sync telegram failure (170)8.5.3 F4002 RTD telegram failure (171)8.5.4 F4003 Invalid communication phase shutdown (172)8.5.5 F4004 Error during phase progression (172)8.5.6 F4005 Error during phase regression (173)8.5.7 F4006 Phase switching without ready signal (173)8.5.8 F4009 Bus failure (173)8.5.9 F4012 Incorrect I/O length (175)8.5.10 F4016 PLC double real-time channel failure (176)8.5.11 F4017 S-III: Incorrect sequence during phase switch (176)8.5.12 F4034 Emergency-Stop (177)8.5.13 F4140 CCD communication error (178)8.6 Non-Fatal Safety Technology Errors (F3xxx) (178)8.6.1 Behavior in the Case of Non-Fatal Safety Technology Errors (178)8.6.2 F3111 Refer. missing when selecting safety related end pos (179)8.6.3 F3112 Safe reference missing (179)8.6.4 F3115 Brake check time interval exceeded (181)Troubleshooting Guide | Rexroth IndraDrive Electric Drivesand ControlsI Bosch Rexroth AG VII/XXIITable of ContentsPage8.6.5 F3116 Nominal load torque of holding system exceeded (182)8.6.6 F3117 Actual position values validation error (182)8.6.7 F3122 SBS: System error (183)8.6.8 F3123 SBS: Brake check missing (184)8.6.9 F3130 Error when checking input signals (185)8.6.10 F3131 Error when checking acknowledgment signal (185)8.6.11 F3132 Error when checking diagnostic output signal (186)8.6.12 F3133 Error when checking interrupting circuits (187)8.6.13 F3134 Dynamization time interval incorrect (188)8.6.14 F3135 Dynamization pulse width incorrect (189)8.6.15 F3140 Safety parameters validation error (192)8.6.16 F3141 Selection validation error (192)8.6.17 F3142 Activation time of enabling control exceeded (193)8.6.18 F3143 Safety command for clearing errors incorrect (194)8.6.19 F3144 Incorrect safety configuration (195)8.6.20 F3145 Error when unlocking the safety door (196)8.6.21 F3146 System error channel 2 (197)8.6.22 F3147 System error channel 1 (198)8.6.23 F3150 Safety command for system start incorrect (199)8.6.24 F3151 Safety command for system halt incorrect (200)8.6.25 F3152 Incorrect backup of safety technology data (201)8.6.26 F3160 Communication error of safe communication (202)8.7 Non-Fatal Errors (F2xxx) (202)8.7.1 Behavior in the Case of Non-Fatal Errors (202)8.7.2 F2002 Encoder assignment not allowed for synchronization (203)8.7.3 F2003 Motion step skipped (203)8.7.4 F2004 Error in MotionProfile (204)8.7.5 F2005 Cam table invalid (205)8.7.6 F2006 MMC was removed (206)8.7.7 F2007 Switching to non-initialized operation mode (206)8.7.8 F2008 RL The motor type has changed (207)8.7.9 F2009 PL Load parameter default values (208)8.7.10 F2010 Error when initializing digital I/O (-> S-0-0423) (209)8.7.11 F2011 PLC - Error no. 1 (210)8.7.12 F2012 PLC - Error no. 2 (210)8.7.13 F2013 PLC - Error no. 3 (211)8.7.14 F2014 PLC - Error no. 4 (211)8.7.15 F2018 Device overtemperature shutdown (211)8.7.16 F2019 Motor overtemperature shutdown (212)8.7.17 F2021 Motor temperature monitor defective (213)8.7.18 F2022 Device temperature monitor defective (214)8.7.19 F2025 Drive not ready for control (214)8.7.20 F2026 Undervoltage in power section (215)8.7.21 F2027 Excessive oscillation in DC bus (216)8.7.22 F2028 Excessive deviation (216)8.7.23 F2031 Encoder 1 error: Signal amplitude incorrect (217)VIII/XXII Bosch Rexroth AG | Electric Drivesand ControlsRexroth IndraDrive | Troubleshooting GuideTable of ContentsPage8.7.24 F2032 Validation error during commutation fine adjustment (217)8.7.25 F2033 External power supply X10 error (218)8.7.26 F2036 Excessive position feedback difference (219)8.7.27 F2037 Excessive position command difference (220)8.7.28 F2039 Maximum acceleration exceeded (220)8.7.29 F2040 Device overtemperature 2 shutdown (221)8.7.30 F2042 Encoder 2: Encoder signals incorrect (222)8.7.31 F2043 Measuring encoder: Encoder signals incorrect (222)8.7.32 F2044 External power supply X15 error (223)8.7.33 F2048 Low battery voltage (224)8.7.34 F2050 Overflow of target position preset memory (225)8.7.35 F2051 No sequential block in target position preset memory (225)8.7.36 F2053 Incr. encoder emulator: Pulse frequency too high (226)8.7.37 F2054 Incr. encoder emulator: Hardware error (226)8.7.38 F2055 External power supply dig. I/O error (227)8.7.39 F2057 Target position out of travel range (227)8.7.40 F2058 Internal overflow by positioning input (228)8.7.41 F2059 Incorrect command value direction when positioning (229)8.7.42 F2063 Internal overflow master axis generator (230)8.7.43 F2064 Incorrect cmd value direction master axis generator (230)8.7.44 F2067 Synchronization to master communication incorrect (231)8.7.45 F2068 Brake error (231)8.7.46 F2069 Error when releasing the motor holding brake (232)8.7.47 F2074 Actual pos. value 1 outside absolute encoder window (232)8.7.48 F2075 Actual pos. value 2 outside absolute encoder window (233)8.7.49 F2076 Actual pos. value 3 outside absolute encoder window (234)8.7.50 F2077 Current measurement trim wrong (235)8.7.51 F2086 Error supply module (236)8.7.52 F2087 Module group communication error (236)8.7.53 F2100 Incorrect access to command value memory (237)8.7.54 F2101 It was impossible to address MMC (237)8.7.55 F2102 It was impossible to address I2C memory (238)8.7.56 F2103 It was impossible to address EnDat memory (238)8.7.57 F2104 Commutation offset invalid (239)8.7.58 F2105 It was impossible to address Hiperface memory (239)8.7.59 F2110 Error in non-cyclical data communic. of power section (240)8.7.60 F2120 MMC: Defective or missing, replace (240)8.7.61 F2121 MMC: Incorrect data or file, create correctly (241)8.7.62 F2122 MMC: Incorrect IBF file, correct it (241)8.7.63 F2123 Retain data backup impossible (242)8.7.64 F2124 MMC: Saving too slowly, replace (243)8.7.65 F2130 Error comfort control panel (243)8.7.66 F2140 CCD slave error (243)8.7.67 F2150 MLD motion function block error (244)8.7.68 F2174 Loss of motor encoder reference (244)8.7.69 F2175 Loss of optional encoder reference (245)Troubleshooting Guide | Rexroth IndraDrive Electric Drivesand Controls| Bosch Rexroth AG IX/XXIITable of ContentsPage8.7.70 F2176 Loss of measuring encoder reference (246)8.7.71 F2177 Modulo limitation error of motor encoder (246)8.7.72 F2178 Modulo limitation error of optional encoder (247)8.7.73 F2179 Modulo limitation error of measuring encoder (247)8.7.74 F2190 Incorrect Ethernet configuration (248)8.7.75 F2260 Command current limit shutoff (249)8.7.76 F2270 Analog input 1 or 2, wire break (249)8.7.77 F2802 PLL is not synchronized (250)8.7.78 F2814 Undervoltage in mains (250)8.7.79 F2815 Overvoltage in mains (251)8.7.80 F2816 Softstart fault power supply unit (251)8.7.81 F2817 Overvoltage in power section (251)8.7.82 F2818 Phase failure (252)8.7.83 F2819 Mains failure (253)8.7.84 F2820 Braking resistor overload (253)8.7.85 F2821 Error in control of braking resistor (254)8.7.86 F2825 Switch-on threshold braking resistor too low (255)8.7.87 F2833 Ground fault in motor line (255)8.7.88 F2834 Contactor control error (256)8.7.89 F2835 Mains contactor wiring error (256)8.7.90 F2836 DC bus balancing monitor error (257)8.7.91 F2837 Contactor monitoring error (257)8.7.92 F2840 Error supply shutdown (257)8.7.93 F2860 Overcurrent in mains-side power section (258)8.7.94 F2890 Invalid device code (259)8.7.95 F2891 Incorrect interrupt timing (259)8.7.96 F2892 Hardware variant not supported (259)8.8 SERCOS Error Codes / Error Messages of Serial Communication (259)9 Warnings (Exxxx) (263)9.1 Fatal Warnings (E8xxx) (263)9.1.1 Behavior in the Case of Fatal Warnings (263)9.1.2 E8025 Overvoltage in power section (263)9.1.3 E8026 Undervoltage in power section (264)9.1.4 E8027 Safe torque off while drive enabled (265)9.1.5 E8028 Overcurrent in power section (265)9.1.6 E8029 Positive position limit exceeded (266)9.1.7 E8030 Negative position limit exceeded (267)9.1.8 E8034 Emergency-Stop (268)9.1.9 E8040 Torque/force actual value limit active (268)9.1.10 E8041 Current limit active (269)9.1.11 E8042 Both travel range limit switches activated (269)9.1.12 E8043 Positive travel range limit switch activated (270)9.1.13 E8044 Negative travel range limit switch activated (271)9.1.14 E8055 Motor overload, current limit active (271)9.1.15 E8057 Device overload, current limit active (272)X/XXII Bosch Rexroth AG | Electric Drivesand ControlsRexroth IndraDrive | Troubleshooting GuideTable of ContentsPage9.1.16 E8058 Drive system not ready for operation (273)9.1.17 E8260 Torque/force command value limit active (273)9.1.18 E8802 PLL is not synchronized (274)9.1.19 E8814 Undervoltage in mains (275)9.1.20 E8815 Overvoltage in mains (275)9.1.21 E8818 Phase failure (276)9.1.22 E8819 Mains failure (276)9.2 Warnings of Category E4xxx (277)9.2.1 E4001 Double MST failure shutdown (277)9.2.2 E4002 Double MDT failure shutdown (278)9.2.3 E4005 No command value input via master communication (279)9.2.4 E4007 SERCOS III: Consumer connection failed (280)9.2.5 E4008 Invalid addressing command value data container A (280)9.2.6 E4009 Invalid addressing actual value data container A (281)9.2.7 E4010 Slave not scanned or address 0 (281)9.2.8 E4012 Maximum number of CCD slaves exceeded (282)9.2.9 E4013 Incorrect CCD addressing (282)9.2.10 E4014 Incorrect phase switch of CCD slaves (283)9.3 Possible Warnings When Operating Safety Technology (E3xxx) (283)9.3.1 Behavior in Case a Safety Technology Warning Occurs (283)9.3.2 E3100 Error when checking input signals (284)9.3.3 E3101 Error when checking acknowledgment signal (284)9.3.4 E3102 Actual position values validation error (285)9.3.5 E3103 Dynamization failed (285)9.3.6 E3104 Safety parameters validation error (286)9.3.7 E3105 Validation error of safe operation mode (286)9.3.8 E3106 System error safety technology (287)9.3.9 E3107 Safe reference missing (287)9.3.10 E3108 Safely-monitored deceleration exceeded (288)9.3.11 E3110 Time interval of forced dynamization exceeded (289)9.3.12 E3115 Prewarning, end of brake check time interval (289)9.3.13 E3116 Nominal load torque of holding system reached (290)9.4 Non-Fatal Warnings (E2xxx) (290)9.4.1 Behavior in Case a Non-Fatal Warning Occurs (290)9.4.2 E2010 Position control with encoder 2 not possible (291)9.4.3 E2011 PLC - Warning no. 1 (291)9.4.4 E2012 PLC - Warning no. 2 (291)9.4.5 E2013 PLC - Warning no. 3 (292)9.4.6 E2014 PLC - Warning no. 4 (292)9.4.7 E2021 Motor temperature outside of measuring range (292)9.4.8 E2026 Undervoltage in power section (293)9.4.9 E2040 Device overtemperature 2 prewarning (294)9.4.10 E2047 Interpolation velocity = 0 (294)9.4.11 E2048 Interpolation acceleration = 0 (295)9.4.12 E2049 Positioning velocity >= limit value (296)9.4.13 E2050 Device overtemp. Prewarning (297)Troubleshooting Guide | Rexroth IndraDrive Electric Drivesand Controls| Bosch Rexroth AG XI/XXIITable of ContentsPage9.4.14 E2051 Motor overtemp. prewarning (298)9.4.15 E2053 Target position out of travel range (298)9.4.16 E2054 Not homed (300)9.4.17 E2055 Feedrate override S-0-0108 = 0 (300)9.4.18 E2056 Torque limit = 0 (301)9.4.19 E2058 Selected positioning block has not been programmed (302)9.4.20 E2059 Velocity command value limit active (302)9.4.21 E2061 Device overload prewarning (303)9.4.22 E2063 Velocity command value > limit value (304)9.4.23 E2064 Target position out of num. range (304)9.4.24 E2069 Holding brake torque too low (305)9.4.25 E2070 Acceleration limit active (306)9.4.26 E2074 Encoder 1: Encoder signals disturbed (306)9.4.27 E2075 Encoder 2: Encoder signals disturbed (307)9.4.28 E2076 Measuring encoder: Encoder signals disturbed (308)9.4.29 E2077 Absolute encoder monitoring, motor encoder (encoder alarm) (308)9.4.30 E2078 Absolute encoder monitoring, opt. encoder (encoder alarm) (309)9.4.31 E2079 Absolute enc. monitoring, measuring encoder (encoder alarm) (309)9.4.32 E2086 Prewarning supply module overload (310)9.4.33 E2092 Internal synchronization defective (310)9.4.34 E2100 Positioning velocity of master axis generator too high (311)9.4.35 E2101 Acceleration of master axis generator is zero (312)9.4.36 E2140 CCD error at node (312)9.4.37 E2270 Analog input 1 or 2, wire break (312)9.4.38 E2802 HW control of braking resistor (313)9.4.39 E2810 Drive system not ready for operation (314)9.4.40 E2814 Undervoltage in mains (314)9.4.41 E2816 Undervoltage in power section (314)9.4.42 E2818 Phase failure (315)9.4.43 E2819 Mains failure (315)9.4.44 E2820 Braking resistor overload prewarning (316)9.4.45 E2829 Not ready for power on (316)。
【国家自然科学基金】_omp_基金支持热词逐年推荐_【万方软件创新助手】_20140802
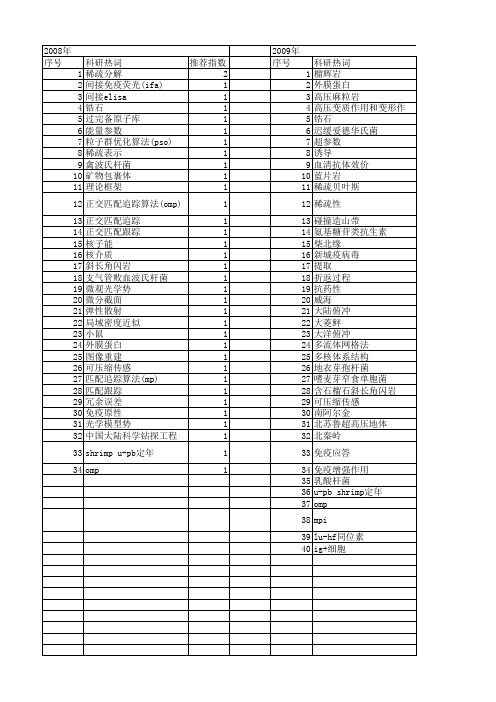
2009年 序号 1 2 3 4 5 6 7 8 9 10 11 12 13 14 15 16 17 18 19 20 21 22 23 24 25 26 27 28 29 30 31 32 33 34 35 36 37 38 39 40
科研热词 榴辉岩 外膜蛋白 高压麻粒岩 高压变质作用和变形作用 锆石 迟缓爱德华氏菌 超参数 诱导 血清抗体效价 蓝片岩 稀疏贝叶斯 稀疏性 碰撞造山带 氨基糖苷类抗生素 柴北缘 新城疫病毒 提取 折返过程 抗药性 威海 大陆俯冲 大菱鲆 大洋俯冲 多流体网格法 多核体系结构 地衣芽孢杆菌 嗜麦芽窄食单胞菌 含石榴石斜长角闪岩 可压缩传感 南阿尔金 北苏鲁超高压地体 北秦岭 免疫应答 免疫增强作用 乳酸杆菌 u-pb shrimp定年 omp mpi lu-hf同位素 ig+细胞
科研热词 推荐指数 正交匹配追踪 6 压缩感知 6 信道估计 3 细菌外膜蛋白质类 2 紫单胞菌,龈 2 正交频分复用 2 外膜蛋白 2 鱼肠道弧菌 1 高斯观测矩阵 1 阵列信号处理 1 超宽带 1 表面增强激光解吸电离飞行时间质谱 1 荧光抗体 1 色谱法,液相 1 联合子空间 1 绵羊附睾种布鲁氏菌019株 1 稀疏表示 1 稀疏编码 1 稀疏性 1 稀疏分解 1 稀疏信道 1 稀疏信号 1 短时平稳性 1 特征提取 1 泄漏电流 1 沙门菌 1 正交匹配 1 数字广播 1 抗原性 1 序列 1 小波变换 1 宽带chirp信号 1 奇异变形杆菌 1 多克隆抗体 1 外膜蛋白基因 1 外膜蛋白d 1 基追踪 1 基质辅助激光解析/电离飞行时间串联质谱 1 图像编码 1 图像处理 1 周期非均匀采样 1 原核表达 1 压缩传感理论 1 单层小波变换 1 分布式语音压缩与重构 1 pcr 1 doa估计 1
苹果手机故障
苹果手机故障
出现英文:
We apologize for the inconvenience, but spring board has just crashed.
Mobile substrate /did not / cause this problem: it has protected you from it.
Your device is now running in sefe mode, All extensions that support this safety system are disabled.
Ok restart help
译文一:
我们为不便道歉,但弹簧板已经坠毁。
移动基板/不/引起这个问题:它既保护你吧。
现在您的设备在安全模式下运行,所有的扩展支持此安全系统被禁用。
可以重新启动帮助
译文二:
我们为不便道歉,但弹簧板已经坠毁。
移动基板/不/引起这个问题:它既保护了你吧。
您的设备是NOE在安全模式下运行,所有的扩展支持这个安全系统被禁用。
可以重新启动帮助
解决方法:
选择“重新启动”即可。
生成对抗网络中常见问题的解决方法

生成对抗网络中常见问题的解决方法生成对抗网络(Generative Adversarial Network,简称GAN)是一种由生成器网络和判别器网络组成的机器学习模型。
它在近年来取得了很大的成功,被广泛应用于图像生成、视频生成、文本生成等任务中。
然而,GAN在应用过程中也面临一些常见的问题,如模式崩溃、模式塌陷、训练不稳定等。
本文将对其中一些常见问题进行介绍,并提供相应的解决方法。
首先,我们来介绍一下GAN中的模式崩溃问题。
模式崩溃指的是生成器网络只能生成非常有限的样本多样性,导致生成的样本缺乏多样性。
造成模式崩溃的原因有很多,比如生成器和判别器的不平衡、训练数据的质量问题等。
解决模式崩溃问题的方法有以下几种:1.增加训练数据:通过增加训练数据的数量和多样性,可以提高生成样本的多样性。
可以使用数据增强技术,如随机裁剪、旋转、缩放等来增加数据的多样性。
2.修改损失函数:通过修改生成器和判别器的损失函数,可以使模型更加关注样本多样性。
比如使用信息论中的最大似然估计损失函数,或采用多目标优化策略,同时优化样本多样性和真实性。
3.调整网络结构:通过增加或减少网络层数、调整网络的参数设置,可以改变模型的复杂度,从而提高生成样本的多样性。
下面我们来介绍GAN中的模式塌陷问题。
模式塌陷指的是生成器和判别器陷入局部最优解,无法生成高质量的样本。
模式塌陷的原因也有很多,比如生成器和判别器的能力不足、网络结构设计问题等。
解决模式塌陷问题的方法有以下几种:1.增加网络容量:通过增加生成器和判别器的网络容量,使其具备更强的建模能力。
可以尝试增加网络的宽度、深度等,或者使用更复杂的网络结构,如卷积神经网络、循环神经网络等。
2.采用正则化技术:通过引入正则化项,如L1正则化、L2正则化,可以控制模型的复杂度,防止模型陷入局部最优解。
此外,还可以尝试使用Batch Normalization等技术,提高网络的稳定性。
3.改变优化算法:通过修改优化算法,如使用不同的学习率、动量等参数,可以改变模型的收敛性,提高模型的稳定性。
cudagetdeviceproperties returned 802
cudagetdeviceproperties returned 802题目:CUDA获取设备属性返回802的解析与解决方法引言:在进行CUDA(计算统一设备架构)编程时,使用`cudagetdeviceproperties`函数是常见的一步,该函数用于获取当前设备的一些属性信息。
然而,当我们尝试调用该函数时,有时会遇到一个名为“802”的返回错误码,这可能会使我们陷入困惑。
本文将一步一步解析这个问题,并提供解决方法。
一、错误码802的含义当`cudagetdeviceproperties`()函数返回802时,意味着该函数无法获取当前设备的属性。
为了更好地理解这个问题,我们需要了解CUDA中设备的概念。
在CUDA中,设备是指使用GPU来加速计算的硬件。
每个GPU都有一组特定的属性,如计算能力,核心数,内存大小等。
`cudagetdeviceproperties`函数能够让我们查询这些设备属性。
然而,当返回错误码802时,很可能是由以下几种原因造成的。
二、设备驱动不兼容设备驱动是连接CPU和GPU之间的桥梁,它负责将CUDA函数的调用翻译成GPU能够理解的指令。
当设备驱动与CUDA版本不兼容时,就会导致`cudagetdeviceproperties`函数返回802。
解决方法:1.检查CUDA版本是否与设备驱动兼容。
CUDA版本通常在函数名中标明。
确保CUDA版本与设备驱动版本匹配。
2.更新设备驱动程序。
访问GPU制造商的官方网站,下载并安装最新的设备驱动程序。
三、设备初始化失败设备初始化是GPU首次被访问时所进行的一系列操作。
如果设备初始化失败,那么再次调用`cudagetdeviceproperties`函数将返回802。
解决方法:1.检查GPU是否正常工作。
可以尝试重启计算机,并确保GPU正确连接,电源供应稳定。
2.检查硬件设备是否支持CUDA。
某些旧的或低端的GPU可能不支持CUDA。
3.尝试在不同的PCIe插槽上安装GPU。
无法计算分离步骤 1 的初始残差。
在深度学习模型训练中,无法计算分离步骤1的初始残差往往是一个重要的问题。
深度学习模型通过多层神经网络进行训练,每一层的输出都会作为下一层的输入,而在每一层的输出和输入之间都存在着残差,即当前层的输出和上一层的输入之间的差异。
无法计算分离步骤1的初始残差意味着在模型训练的初始阶段,无法有效地计算残差,这可能会导致模型的训练过程出现问题,甚至无法收敛到理想的结果。
这个问题的产生通常与模型的初始化、数据的预处理、激活函数的选择等因素有关。
在实际应用中,我们需要对这些因素进行全面评估,以确保模型能够正确地计算分离步骤1的初始残差,并顺利进行训练。
对于模型的初始化,我们需要选择合适的初始化方法,以确保模型在初始阶段就能够接近最优解。
常见的初始化方法包括随机初始化、Xavier初始化、He初始化等。
针对不同类型的神经网络结构和激活函数,合适的初始化方法也会有所不同。
在选择初始化方法时,我们需要考虑到模型的具体结构和激活函数的选择,以避免无法计算分离步骤1的初始残差。
数据的预处理也是影响模型训练的重要因素之一。
在进行数据的预处理时,我们需要考虑到数据的分布情况、标准化、归一化等因素,以确保训练数据能够更好地适应模型的训练过程。
如果数据的预处理不当,就可能会导致模型无法有效地计算初始残差,从而影响模型的训练效果。
激活函数的选择也是影响模型训练的重要因素之一。
不同的激活函数对于模型的训练效果有着不同的影响,如果选择不当,就可能会导致模型无法有效地计算初始残差。
在选择激活函数时,我们需要考虑到它的非线性特性、导数的性质等因素,以确保模型能够正确地计算初始残差。
在深度学习模型训练中,无法计算分离步骤1的初始残差是一个影响模型训练效果的重要问题。
为了解决这个问题,我们需要对模型的初始化、数据的预处理、激活函数的选择等因素进行全面评估,并据此进行相应的调整和优化,以确保模型能够顺利进行训练,并收敛到理想的结果。
个人观点上,我认为解决无法计算分离步骤1的初始残差问题需要综合考虑模型结构、数据特性和训练参数等多个方面的因素。
colab提示:此笔记本是通过不...
colab提示:此笔记本是通过不...
表白:黑白圣堂血天使,天剑鬼刀阿修
罗。
讲解对象:/colab提示:此笔记本是通
过不公开输出项打开的。
系统将不会保存输出
项。
您可以在笔记本设置中停用此设置
作者:融水公子 rsgz
Colab教程
Colab教程
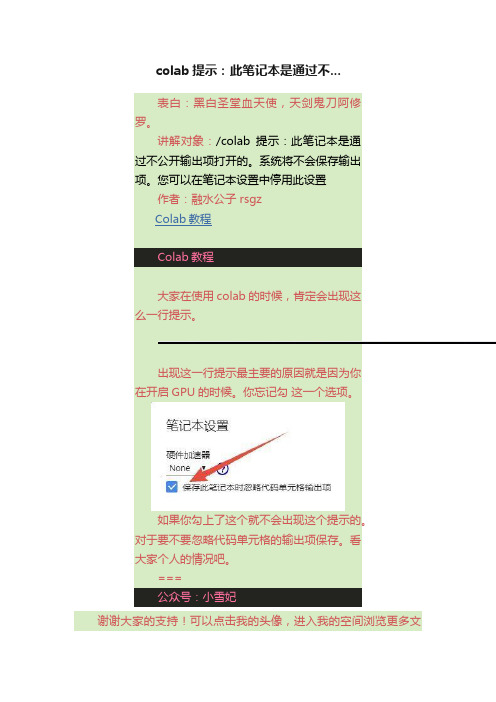
大家在使用colab的时候,肯定会出现这
么一行提示。
出现这一行提示最主要的原因就是因为你
在开启GPU的时候。
你忘记勾这一个选项。
如果你勾上了这个就不会出现这个提示的。
对于要不要忽略代码单元格的输出项保存。
看
大家个人的情况吧。
===
公众号:小雪妃
谢谢大家的支持!可以点击我的头像,进入我的空间浏览更多文
章呢。
建议大家360doc[]注册一个账号登录,里面真的有很多优秀的文章,欢迎大家的到来。
---。
limbo disk read error -回复
limbo disk read error -回复Limbo Disk Read Error(极限失落磁盘读取错误)引言:在使用计算机时,我们经常会遇到各种各样的错误和问题。
其中一个常见的问题是“极限失落磁盘读取错误”,它给我们带来了很多困扰。
它是什么?为什么会发生?如何解决这个问题?在本文中,我们将一步一步地回答这些问题。
第一部分:了解极限失落磁盘读取错误在计算机领域,磁盘读取错误是指当计算机无法从硬盘驱动器读取或访问数据时发生的错误。
有时会在启动计算机时出现。
而“极限失落磁盘读取错误”是指发生在玩家较长时间玩游戏《极限失落》(Limbo)时,计算机无法读取或访问游戏数据的错误。
第二部分:为什么会发生极限失落磁盘读取错误?极限失落磁盘读取错误可能是由多个原因引起的,下面列举了其中一些常见原因:1. 损坏的文件:游戏文件可能已损坏或缺失,导致计算机无法读取或访问这些文件。
2. 硬盘问题:硬盘驱动器可能存在物理或逻辑问题,例如坏道、扇区故障或其他硬盘故障,导致无法正常读取数据。
3. 不兼容的硬件或软件:某些硬件或软件可能与游戏不兼容,导致极限失落磁盘读取错误。
第三部分:解决极限失落磁盘读取错误的方法现在,让我们一步一步地了解如何解决这个问题:1. 检查游戏文件:首先,我们需要确保游戏文件没有损坏或缺失。
可以通过在计算机上搜索游戏文件并验证其完整性来进行检查。
如果发现损坏或缺失的文件,可以尝试重新安装游戏或修复文件。
2. 检查硬盘驱动器:接下来,我们要检查硬盘驱动器是否存在问题。
可以使用硬盘工具来扫描和修复硬盘驱动器中的错误。
如果发现硬盘故障,可能需要更换硬盘驱动器。
3. 更新驱动程序和软件:有时,驱动程序或软件的过期版本可能导致与游戏的兼容性问题。
因此,我们应该确保驱动程序和软件都是最新版本。
可以通过访问硬件制造商和游戏开发商的官方网站来下载最新的驱动程序和软件更新。
4. 关闭后台进程:在运行游戏时,一些后台进程可能会占用系统资源,导致计算机无法正确读取游戏数据。
生成式对抗网络中的模式崩溃问题分析与解决方法(六)
生成式对抗网络(GAN)是一种深度学习模型,由两个神经网络组成:生成器和判别器。
生成器负责生成与真实数据类似的假数据,而判别器则负责判断输入的数据是真实数据还是生成器生成的假数据。
这两个网络通过对抗训练的方式相互竞争,以达到生成高质量数据的目的。
然而,在实际应用中,GAN模型也存在一些问题,其中最重要的问题之一是模式崩溃。
模式崩溃是指生成器在训练过程中只学习到数据的少量模式,而没有学习到数据的全局分布。
这导致生成的假数据缺乏多样性,而且往往只能生成相似的样本。
模式崩溃问题严重影响了生成器的性能,使得GAN模型难以生成高质量的数据。
下面我们将从几个方面分析模式崩溃问题的原因和解决方法。
首先,模式崩溃问题的根本原因是生成器和判别器之间的不平衡。
在训练过程中,如果判别器的能力过强,它会很快判断出生成器生成的假数据,导致生成器无法得到有效的梯度更新,从而无法学习到全局分布。
相反,如果生成器的能力过强,它可能会忽略一些数据的细微差异,导致生成的假数据缺乏多样性。
因此,平衡生成器和判别器的能力是解决模式崩溃问题的关键。
其次,解决模式崩溃问题的方法之一是改进损失函数。
传统的GAN模型使用的是最小二乘损失函数或交叉熵损失函数,这些损失函数在处理模式崩溃问题时往往效果不佳。
一种改进的损失函数是Wasserstein距离,它可以有效地缓解模式崩溃问题。
Wasserstein距离可以更好地度量生成器生成的假数据与真实数据之间的差异,从而更好地引导生成器学习到全局分布。
另外,生成器的架构设计也对模式崩溃问题有重要影响。
传统的生成器架构往往是单向的,即输入是一个随机向量,通过一系列的转换层生成输出。
这种架构容易导致模式崩溃问题,因为生成器无法有效地利用输入随机向量的信息。
一种改进的生成器架构是自注意力生成器,它可以更好地利用输入随机向量的信息,从而生成更多样化的假数据。
此外,样本稳定性和正则化方法也可以帮助缓解模式崩溃问题。
生成式对抗网络中的模式崩溃问题分析与解决方法(五)
生成式对抗网络中的模式崩溃问题分析与解决方法生成式对抗网络(GAN)是一种深度学习模型,由两个神经网络组成: 生成器和判别器。
生成器负责生成数据,判别器负责鉴别生成的数据与真实数据。
两个网络在训练过程中相互对抗,通过这种对抗学习的方式,生成器能够逐渐生成更逼真的数据。
然而,在实际应用中,生成式对抗网络经常遇到模式崩溃的问题,即生成的数据过于单一、缺乏多样性。
本文将对生成式对抗网络中的模式崩溃问题进行分析,并提出解决方法。
1. 模式崩溃问题的原因分析生成式对抗网络中的模式崩溃问题通常是由于训练过程中的不平衡导致的。
在训练开始的阶段,生成器的性能往往较差,生成的数据质量低,判别器容易区分真实数据和生成数据。
随着训练的进行,生成器的性能逐渐提升,生成的数据也变得逼真。
然而,当生成器的性能超过了一定阈值时,就会出现模式崩溃问题,生成的数据过于单一,缺乏多样性。
这是因为生成器在优化过程中往往会偏向于生成训练数据中的高频模式,而忽视了低频模式,导致生成的数据缺乏多样性。
2. 对抗生成网络中的解决方法为了解决生成式对抗网络中的模式崩溃问题,需要采取一系列措施来提高生成器的多样性。
以下是一些解决方法:引入正则化项一种解决生成式对抗网络模式崩溃问题的方法是引入正则化项。
通过向生成器的损失函数中添加正则化项,可以促使生成器在生成数据时更加多样化。
常用的正则化方法包括最大均值差异(MMD)和信息瓶颈等。
多样性损失另一种解决方法是引入多样性损失,即通过在生成器的损失函数中添加鼓励多样性的项,来促使生成器生成更加多样化的数据。
例如,可以使用最大似然估计(MLE)来对多样性进行建模,并将多样性作为额外的损失项加入到生成器的训练过程中。
扩展训练数据在生成式对抗网络中,扩展训练数据也是一种有效的解决模式崩溃问题的方法。
通过对训练数据进行扩展,可以使生成器学习到更多的数据分布,从而生成更加多样化的数据。
3. 结语生成式对抗网络是一种强大的深度学习模型,但在实际应用中常常会遇到模式崩溃的问题。
生成式对抗网络中的模式崩溃问题分析与解决方法(七)
生成式对抗网络(GAN)是一种深度学习模型,由生成器和判别器两个部分组成。
生成器负责生成虚假数据,比如图像或文本,而判别器则尝试区分真实数据和虚假数据。
GAN模型在图像生成、风格转换等领域取得了很大的成功,但是在训练过程中,经常会遇到模式崩溃(mode collapse)的问题。
一、模式崩溃问题的定义模式崩溃是指生成器在训练过程中陷入一个局部模式,导致生成的样本过于单一或者缺乏多样性。
在图像生成任务中,这可能导致生成的图像过于相似,缺乏多样性和真实感。
模式崩溃是GAN模型的一个常见问题,也是影响模型性能的重要因素。
二、模式崩溃问题的原因分析1. 训练数据分布不均匀生成式对抗网络的训练数据分布对模型的性能具有重要影响。
如果训练数据中某些模式出现的频率较低,生成器可能会忽略这些模式,导致模式崩溃问题的出现。
这种情况下,生成器很可能只生成训练数据中出现频率较高的模式,而忽略了其他模式。
2. 生成器和判别器之间的不平衡竞争生成式对抗网络的训练过程是一个动态博弈过程,生成器和判别器之间存在竞争关系。
如果生成器和判别器的能力差距过大,可能导致模式崩溃问题的出现。
例如,生成器的能力过强,判别器无法有效区分真实数据和虚假数据,从而导致生成的样本缺乏多样性。
三、解决模式崩溃问题的方法1. 针对训练数据分布不均匀的问题,可以采用过采样或者增强训练数据的方法。
通过增加训练数据中低频模式的出现次数,可以帮助生成器更好地学习到这些模式,从而减轻模式崩溃问题的发生。
2. 通过调整损失函数和训练策略,可以缓解生成器和判别器之间的不平衡竞争。
例如,可以采用Wasserstein GAN等替代的GAN损失函数,来优化生成器和判别器的训练过程,提高模型的稳定性和多样性。
3. 引入正则化项或者限制条件,可以帮助生成器学习到更多的模式。
例如,可以在生成器的损失函数中引入多样性约束,来鼓励生成器生成多样化的样本。
四、模式崩溃问题的研究现状与展望目前关于生成式对抗网络中的模式崩溃问题的研究较为活跃,研究者们提出了许多有效的方法来缓解模式崩溃问题。
生成式对抗网络中的模式崩溃问题分析与解决方法(十)

生成式对抗网络(GAN)是一种深度学习模型,由生成器和判别器两个部分组成。
生成器试图生成与真实数据相似的样本,而判别器则试图区分真实数据和生成器生成的数据。
通过不断的对抗训练,生成器和判别器不断提升自己的性能,最终达到动态平衡。
虽然GAN在图像生成、语音合成等领域取得了一些成功,但是在训练过程中会出现一些问题,其中最常见的就是模式崩溃问题。
一、模式崩溃问题的产生原因模式崩溃问题是指生成器在训练过程中只学到了数据的部分模式,导致生成的样本过于单一和缺乏多样性。
这个问题通常是由于生成器和判别器之间的不平衡造成的。
在训练初期,生成器的能力较弱,判别器很容易区分生成的假样本,因此生成器很难从判别器的反馈中学到有效的信息。
而在训练后期,生成器的能力不断提升,判别器反而无法有效地对抗生成器,导致生成器只学到了部分数据分布的模式,造成模式崩溃问题的产生。
二、解决模式崩溃问题的方法1. 充分训练数据集解决模式崩溃问题的一种方法是充分训练数据集。
在训练GAN时,数据集的质量和多样性对模型的性能至关重要。
如果训练数据集缺乏多样性,生成器很难学到数据的完整分布,从而导致模式崩溃问题的产生。
因此,可以通过增加训练数据集的多样性,包括不同角度、光照、背景等,来提高生成器的泛化能力,从而减轻模式崩溃问题的发生。
2. 优化损失函数损失函数在训练GAN时起着至关重要的作用。
针对模式崩溃问题,可以对损失函数进行优化,以平衡生成器和判别器之间的训练过程。
一种常见的方法是引入正则化项,如L1正则化、L2正则化等,来约束生成器的输出,使其更加平衡和多样化。
3. 添加噪声为了缓解模式崩溃问题,可以在训练过程中向输入数据添加噪声。
噪声可以帮助生成器更好地学习数据的分布,从而提高生成样本的多样性。
同时,添加噪声还可以增加数据的随机性,减少模型对特定模式的依赖,有助于缓解模式崩溃问题的发生。
4. 使用自监督学习自监督学习是一种无监督学习的方法,可以有效地避免模式崩溃问题的产生。
生成式对抗网络中的模式崩溃问题分析与解决方法(Ⅰ)
生成式对抗网络(GAN)是一种深度学习模型,由生成器和判别器组成,通过博弈的方式来训练模型,以生成逼真的数据。
然而,在生成过程中,GAN模型常常遭遇模式崩溃问题,即生成器无法产生多样化和高质量的样本。
本文将分析生成式对抗网络中的模式崩溃问题,并探讨解决方法。
一、模式崩溃问题分析1. 生成器和判别器的不平衡在训练过程中,生成器和判别器之间的不平衡是导致模式崩溃问题的主要原因之一。
如果生成器的能力过强,判别器很难区分真实样本和生成样本,这会导致判别器无法提供有效的梯度信号,使得生成器无法得到有效的训练。
反之,如果生成器的能力过弱,判别器会很容易识别生成样本的不真实之处,从而无法生成高质量的样本。
2. 训练样本的分布问题在实际应用中,训练样本的分布通常是不均匀的,有些类别的样本数量很少,而有些类别的样本数量很多。
这种不均匀的分布会导致生成器更倾向于生成数量较多的类别,而忽略数量较少的类别,从而导致模式崩溃问题的发生。
3. 梯度消失和梯度爆炸在训练过程中,生成式对抗网络很容易遭遇梯度消失或梯度爆炸的问题。
梯度消失会导致生成器无法得到有效的更新,而梯度爆炸则会导致训练不稳定,从而使得生成器无法生成高质量的样本。
二、解决方法1. 引入正则化为了解决生成器和判别器之间的不平衡问题,可以采用正则化的方法来平衡二者的能力。
例如,可以在生成器和判别器的损失函数中引入正则项,使得二者的能力更加平衡,从而避免模式崩溃问题的发生。
2. 多样性惩罚为了解决训练样本分布不均匀的问题,可以引入多样性惩罚的方法,以促使生成器生成更加多样化的样本。
例如,可以在损失函数中引入多样性惩罚项,使生成器在生成样本时更加注重样本的多样性,从而避免模式崩溃问题的发生。
3. 渐变惩罚为了避免梯度消失和梯度爆炸的问题,可以引入渐变惩罚的方法。
例如,可以在训练过程中对梯度进行截断,以避免梯度爆炸的问题;同时,可以采用梯度惩罚的方法,使得梯度更加稳定,以避免梯度消失的问题。
dynamips报错及非正常现象的解决办法
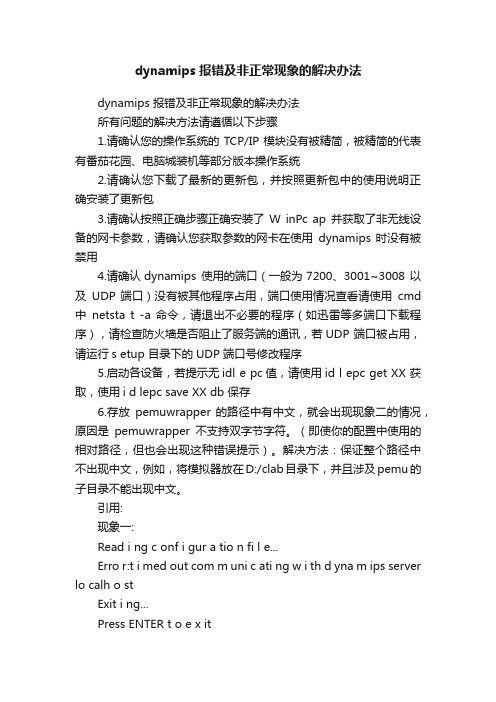
dynamips报错及非正常现象的解决办法dynamips 报错及非正常现象的解决办法所有问题的解决方法请遵循以下步骤1.请确认您的操作系统的TCP/IP模块没有被精简,被精简的代表有番茄花园、电脑城装机等部分版本操作系统2.请确认您下载了最新的更新包,并按照更新包中的使用说明正确安装了更新包3.请确认按照正确步骤正确安装了W inPc ap并获取了非无线设备的网卡参数,请确认您获取参数的网卡在使用dynamips 时没有被禁用4.请确认dynamips 使用的端口(一般为7200、3001~3008 以及UDP 端口)没有被其他程序占用,端口使用情况查看请使用cmd 中netsta t -a 命令,请退出不必要的程序(如迅雷等多端口下载程序),请检查防火墙是否阻止了服务端的通讯,若UDP 端口被占用,请运行s etup 目录下的UDP 端口号修改程序5.启动各设备,若提示无idl e pc值,请使用id l epc get XX 获取,使用i d lepc save XX db 保存6.存放pemuwrapper 的路径中有中文,就会出现现象二的情况,原因是pemuwrapper不支持双字节字符。
(即使你的配置中使用的相对路径,但也会出现这种错误提示)。
解决方法:保证整个路径中不出现中文,例如,将模拟器放在D:/clab目录下,并且涉及pemu的子目录不能出现中文。
引用:现象一:Read i ng c onf i gur a tio n fi l e...Erro r:t i med out com m uni c ati ng w i th d yna m ips server lo calh o stExit i ng...Press ENTER t o e x it请参照步骤3、4引用:现象二:Erro r:l o st c omm u nic a tio n wi t h pe muw r appe r s e rve r lo ca lhostIt m a y have crashed. Check t he pe muw r appe r s e rve r ou tp ut.请参照步骤3、4引用:现象三:Read i ng c onf i gur a tio n fi l e...*** W arn i ng:Co n nec t ing SW1 por t 2 t o access 1 N IO_ge n_et h:\D e vic e\NP F_{******* *-****-****-****-************} r e sul t ed i n:206-unab l e t o create gene ric eth e rne t NIO*** E rro r:e rro r s during loading of the topology fi le,pl e ase cor r ect them Press ENTER t o c o nti nue请参照步骤4引用:现象四:Read i ng c onf i gur a tio n fi l e...*** D yna gen has crashed ****Please open a bug re p ort aga i nst Dynagen at h ttp://w ww.ipf l ow.u tc.f r/b t s/ Include a de s cri p tio n of wha t you we r e doing when the erro r oc c ure d, y o ur network file, any er r ors output by d y nam i ps, and the f ollo w ing traceback da ta: Traceback (m o st r ece n t c a ll l ast):Fi l e"d yna g en",li ne 910, i n ?Fi l e"d yna g en",li ne 729, i n i m por t_co n figFi l e"d yna m ips_lib.pyc",li ne282,in__in i tFi l e"d yna m ips_lib.pyc",li ne2033,in senderro r:(10054,'C onne cti on r e set by p eer')Press ENTER t o e x it请参照步骤3引用:现象五:=> s t art R1Warn i ng: Sta r tin g R1 with no idl e-pc val ue100-V M'R1' s tar t ed请参照步骤5引用:现象六:请关闭所有d yna m ips相关窗口,然后清空tmp 目录引用:现象七:v lan database exit 时% no t enough space on f l as h t o s t or e vl an d ata b ase.t ry ing squ e eze...F i rs t create squeeze l og by erasing the e ntir e device% er r or squeezing fl a sh- (M i ssi ng o r co r rup t ed l og) % no t enough space on f l as h t o s t or e vl an d ata b ase.t ry ing squ e eze...F i rs t create squeeze l og by erasing the e ntir e device % er r or squeezing fl a sh- (M i ssi ng o r co r rup t ed l og)请先eraser fla s h:在配置vlan 或将net 文件中的ram 值增大。