富士通扫描仪fi-6130更换扫描仪耗材
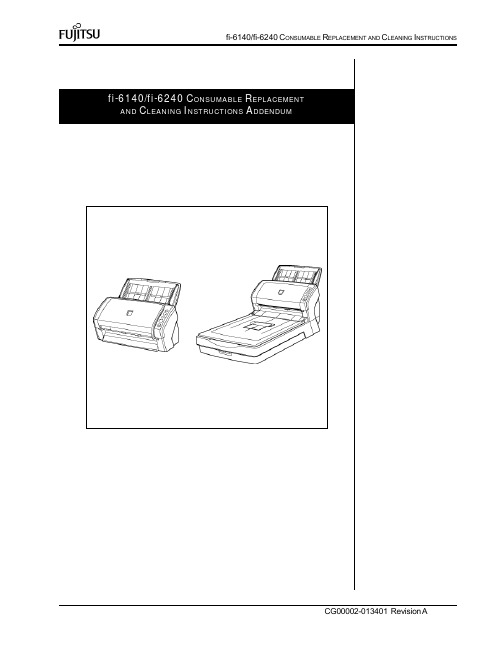
Fujitsu fi-6140 fi-6240 消耗品替换与清洁指南说明书
4
fi-6140/fi-6240 CONSUMABLE REPLACEMENT AND CLEANING INSTRUCTIONS Clean the Pick Rollers(5) by removing them from the scanner and cleaning with a lint free cloth moistend with F1 cleaner. Using the same lint free cloth moistend with F1 clean the Glass(4), Plastic Rollers(6) and Ultrasonic Sensor(7). Clean the paper path of any loose debris using a soft cloth0 CONSUMABLE REPLACEMENT AND CLEANING INSTRUCTIONS
Slide the worn Pick Roller (2)
from the Pick Roller Shaft (3)
while pulling up on the locking tab on the end of the pick roller (1).
fi-6140/fi-6240 CONSUMABLE REPLACEMENT AND CLEANING INSTRUCTIONS
fi-6140/fi-6240 CONSUMABLE REPLACEMENT AND CLEANING INSTRUCTIONS ADDENDUM
CG00002-013401 Revision A
REPLACING CONSUMABLES
From the [start] menu, select [All Programs] ([Scanner Utility for Microsoft Windows]([Software Operation Panel].
扫描仪驱动安装步骤
扫描仪驱动安装步骤一、安装注意:安装扫描仪驱动前,请不要启动扫描仪。
1、打开光盘,双击“电子档案扫描必备软件”->“扫描仪软件”->“扫描仪驱动”2、双击“setup.exe”图标,点击“下一步”3、点击“下一步”4、点击“下一步”5、点击“是”6、选择要安装的目录,建议不与操作系统安装在同一磁盘里,点击“下一步”7、点击“下一步”8、点击“下一步”9、点击“下一步”10、点击“完成”二、更新1、打开光盘,双击“电子档案扫描必备软件”->“扫描仪软件”->“扫描仪补丁”->“ScannPatch”2、双击“FhkSp”图标,显示“安装成功”,点击“确定”。
三、安装扫描仪设置软件1、打开光盘,双击“电子档案扫描必备软件”->“扫描仪软件”->“ScandAll”,双击“ScandAllPRO”的图标2、去掉“安装 Scan to Microsoft SharePoint。
”前面的选项“√”,点击“ok”3、点击“下一步”4、选择“我接受许可证协议中的条款”,点击“下一步”5、点击“下一步”6、选择要安装的目录,建议不与操作系统安装在同一磁盘里,点击“下一步”7、点击“下一步”8、点击“下一步”9、点击“完成”四、配置扫描仪1、打开扫描仪开关,启动扫描仪2、双击桌面快捷方式图标,打开扫描仪配置软件3、点击菜单栏中的“扫描”->“选择扫描仪”4、如下图所示,选择扫描仪fi-6130,点击选择5、点击菜单栏中的“扫描”->“设置”6、进入设置界面,在“图像模式”下拉选项中,选择“灰度”7、点击下面的“选项”按钮8、在“旋转”选项卡中,“自动检测尺寸和偏斜”选项中,选择“自动页面尺寸检测”。
9、在“工作/缓存”选项卡中,“预先抓纸”选项中,选择“重叠检测(超声波)”。
扫描仪维修和保养技巧
扫描仪维修和保养技巧扫描仪是一种被广泛应用于计算机的输入设备。
作为光电、机械一体化的高科技产品,它是我们常用的办公设备,可它一旦出现故障就会令我们束手无策,有些故障需要*人员维修,也有许多故障是自己就可以排除的。
下面就向大家介绍一些常见故障的排除方法:一、扫描仪的拆卸在维护和检修时往往需要拆卸扫描仪,因此首先为大家介绍扫描仪拆卸的基本方法:1.首先拆除玻璃平台,用十字旋具伸入圆孔中拧下螺钉,即可向上取下顶盖和玻璃平台。
打开扫描仪后,即可看到步进电动机、传动带、扫描头和电路板等部件。
有些扫描仪的上下两部分不是用螺钉而是用塑料卡扣衔接,拆卸时用平口小旋具*到缝隙中撬开塑料卡扣,即可分离上下两部分,撬塑料卡扣时动作要轻,不要损坏塑料部件。
2.拔下数据软排线。
扫描仪内部一般有两块电路板,-块固定在扫描头后侧,另-块安装在扫描仪后侧,两块电路板通过数据软排线相连接。
取下扫描头之前需先取下数据软排线。
数据软排线卡在电路板上的排线卡槽中,取下软排线时需先将排线卡槽两侧的卡销向外拨,而后即可很轻松地向外抽出软排线。
3.拆卸扫描头。
扫描头大多穿在圆形金属杆(导轨)上,由传动带带动沿扫描仪纵向运动,只需将圆形金属杆从底座上的塑料卡座中取下,使扫描头脱离传动带,即可向上取下扫描头和圆形金属杆,而后将圆形金属杆从扫描头上抽出。
4.取下灯管。
灯管位于扫描头顶部,沿扫描头横向放置,卡在扫描头两侧的塑料卡座上,其供电电源*头*在扫描头后侧的电路板上。
只需取下电路板上灯管的供电电源*头,即可从扫描头上取下灯管。
最细的灯管只有火柴棍粗细,拆卸、放置时需特别小心。
5.拆除电路板。
拧下两粒螺钉即可取下扫描头上的电路板,在电路板正面就能看到双列直*封装的CCD器件。
由于CCD器件需正对扫描光路中光学透镜,安装还原不当会影响扫描质量,建议不要随便拆下扫描头上的电路板。
二、常见故障原因与排除1.整幅图像只有一小部分被获取故障原因与排除:聚焦矩形框仍然停留在预览图像上;只有矩形框内的区域被获取。
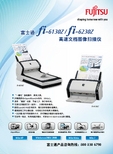
富士通fi-6130z fi-6230Z 高速文档图像扫描仪 产品手册
Win XPWinServer2003/ 2008Win Vista Win 7“一键式”按钮操作,简单方便。
扫描速度达40ppm/80ipm(A4纵向,200dpi)。
多种 “智能”功能,节省人力、物力和时间。
可进行扫描后打印(选件),方便归档和查找。
绑定ScandAll PRO 应用软件,满足多种图像处理需求。
增强型的工作分隔功能,令您的文件归档更方便高效。
一次扫描3张不同的塑料卡片,并对薄纸扫描进行纸张保护。
可在同一地点,利用网络扫描仪,对多台fi-6130Z/fi-6230Z 进行管理。
富士通6130Z /高速文档图像扫描仪6230Zfi-6130Zfi-6230Z富士通产品咨询热线:800 830 679040ppm/80ipm自动纠偏智能多页进纸检测自动检查纸张大小自动检查彩色/黑白集中管理异地扫描仪同类产品中,性价比更高●彩色/灰度/黑白:40ppm/80ipm(A4,200dpi),30ppm/60ipm(A4,300dpi)。
●“一键式”按钮操作,连续扫描50张不同厚度和尺寸的混合文档。
●一次可扫描3张塑料卡片,包括浮字卡。
集中管理异地扫描仪●在同一地点对多台图像扫描仪和网络扫描仪进行安装和操作的集中管理功能,有效削减了费用成本。
具备多种“智能”功能,扫描更高效●智能多页进纸检测,更人性化,方便准确。
在多页检测功能打开时,实现贴有票据的纸张顺利通过,而正 常发生重张的纸张又能被扫描仪捕捉到,从而正确发出报警或 暂停扫描。
●纸张保护功能,防止纸张在扫描过程中被损坏。
●自动删除图像中的打孔区域。
●自动识别彩色/黑白,自动识别大小,自动纠偏功能。
●自动裁剪功能:可扫描附有标签的纸张。
绑定了ScandAll PRO软件,提供强大的图像处理功能●图像浏览、文件归档同步进行。
●进行插入/删除等缩略图管理操作。
●输出多流图像。
●通过条码来实现图像的分隔归档。
可识别出条码信息,实现以条码信息来命名分割文件夹的归档 方法。
富士通S6130拆解
内涵源于设计:富士通S6130笔记本彻底拆解 2004年04月27日 13:55 太平洋电脑网[笔记本报价] [笔记本新品] [笔记本行情] [笔记本论坛] [笔记本大全] [笔记本频道]文/笔记本刽子手富士通这几年在中国铺开的产品阵容可以说是相当豪华,从超小型的便携机,到高性能的台式机替代机型;从AMD处理器到Pentium-M迅驰;从早期带手写功能的P系列,到现在的平板电脑T3000,有着这样齐全产品线的品牌恐怕再难找第二家,这也为富士通在中国市场赢得更多消费群与行业客户打下了非常好的基础。
从太平洋评测室陆陆续续地对每一系列产品进行的评测里面,我们也看到了富士通笔记本电脑产品有着自己以银白色为主的时尚外观特色,以及每一类产品相应能够满足消费者需求的性能表现。
在这么多的产品里面,究竟其内的在结构设计又有什么样的特点呢?今天,富士通给评测室送来了S6130这款高端的的13寸的迅驰商务机型,通过对S6130的拆解,我们来从中了解富士通这么豪华的产品阵容是如何打造出来的。
结构设计首先,还是来进行一步步的拆解过程,了解它的结构设计特点,然后再针对用户比较关心的硬件、散热系统等进行逐个分析。
图为:富士通S6130笔记本电脑这就是我们今天的主角了,Fujitsu S6130,一款采用了Intel最新平台Intel 855GME 的13寸的迅驰机型,处理器主频为1.4GHz,标配256M DDR333内存,硬盘采用的是HITAHI40G 4200转,内置DVD combo光驱。
因为S6130是以13.3寸的液晶屏尺寸大小为基础的机型,所以整体来看还是蛮轻薄的,加上其比较活泼的外观特点,非常适合年轻的商务办公消费群体,或是学生在校使用。
言归正传,我们还是先进行拆机的第一步,把底部的电池、硬盘、小盖板,以及可以抽换的光驱全部都拆下来:把底部的电池、硬盘、小盖板,以及可以抽换的光驱全部都拆下来硬盘与电池都位于其腕托下面,把硬盘的盖板拆下来后,就可以直接把硬盘取出来,从上图中可以看到硬盘盒仓底部布满圆孔的金属层。
扫描仪故障排除

富士通扫描仪
柯达扫描仪
佳能扫描仪
富士通、柯达、佳能、虹光等高速扫描仪耗材配件提供:(搓纸轮、分页片、皮带、齿轮、胶辊、灯管、电源适配器、CCD镜头、控制芯片、主板等)
富士通fi-5120C、fi-5220C、fi-6130、fi-6230、fi-6140、fi-6240、fi-4340、fi-4530、fi-5530、fi-5650、fi-5750、fi-6670、fi-6770;柯达i30、i40、Kodak SS100、Kodak SS500、i1210、i1220、i1320;佳能DR3080C、DR7080C、dr9080C等高速扫描仪保养维护知识:
e按下ADF中心,使它返回启始位置。
当ADF返回到其初始位置时,您会听见“咔”的声音。
B更换抓纸辊
a移走ADF送纸斜槽上的所有文档。
b开ADF。
d从扫描仪移除抓纸辊。
e用您的手指抓住导板上的插销,向上抬起并移走。
f按箭头所示的方向旋转抓纸辊轴套。
g如图中箭头方向所示,抬高并移走抓纸辊轴。
A根据具体扫描的纸张的类型以及扫描仪使用和清洁的频率,更换周期可能会有所不同
a从ADF送纸斜槽移走文档。
b按下ADF按钮,打开ADF。
c移走搓纸皮垫。
夹住搓纸皮垫两侧,面向您的方向拔出来。进行此操作时,不要碰着抓纸辊弹簧。
d安装新的搓纸皮垫。
抓住搓纸皮垫的两侧并将它安装在其安装部位。进行此操作时,不要碰着抓纸辊弹簧。
B清洁部位
清洁ADF
做为指导原则,每扫描1,000页清洁ADF一次。注意:这条原则因您所扫描的文档类型不同而有所区别。例如,您扫描其上的调色剂还没有充分凝固的文档时,就要经常清洁ADF。
扫描仪维修保养技巧
扫描仪维修保养技巧扫描仪作为图像输入设备,已经普及到千家万户,那么在使用当中怎样正确地去维护保养也是值得注意的问题。
今天,编者就为大家介绍一下扫描仪日常维护保养要注意的地方。
1、不要随意热插拔数据传输线。
一般家用扫描仪都是EPP接口,在扫描仪通电后,如果随意热插拔接口的数据传输线,会损坏扫描仪或计算机的接口,更换起来就比较麻烦了,尽管你试了一下没有出现问题也请不要这样做。
2、不要经常插拔电源线与扫描仪的接头。
这样经常插拔电源线与扫描仪的接头,会造成连接处的接触不良,导致电路不通,维修起来也是十分麻烦。
正确的电源切断应该是拔掉电源插座上的直插式电源变换器。
3、不要中途切断电源。
由于镜组在工作时运动速度比较慢,当扫描一幅图像后,它需要一部分时间从底部归位,所以大家在正常供电的`情况下不要中途切断电源,等到扫描仪的镜组完全归位后,再切断电源。
现在有一些扫描仪为了防止运输中的震动,还对镜组部分添加了锁扣,可见镜组的归位对镜组的保护有多么的重要。
4、放置物品时要一次定位准确。
有些型号的扫描仪是可以扫描小型立体物品的,在使用这类扫描仪时应当注意:放置物品时要一次定位准确,不要随便移动以免刮伤玻璃,更不要在扫描的过程之中移动物品。
5、不要在扫描仪上面放置物品。
因为办公或家庭空间的限制,而扫描仪又比较占地方,所以有些用户常将一些物品放在扫描仪上面,时间长了,扫描仪的塑料遮板因中空受压将会导致变形,影响使用。
6、长久不用时请切断电源。
一些扫描仪并没有在不使用时完全切断电源开关的设计,当长久不用时,扫描仪的灯管依然是亮着的,由于扫描仪灯管也是消耗品,所以建议用户在长久不用时切断电源。
7、建议不要在靠窗的位置使用扫描仪。
由于扫描仪在工作中会产生静电,时间长了会吸附灰尘进入机体内部影响镜组的工作,所以尽量不要在靠窗或容易吸附灰尘的位置使用扫描仪,另外要保持扫描仪使用环境的湿度,减少浮尘对扫描仪的影响。
8、机械部分的保养。
扫描仪故障解决方法简介
扫描仪故障解决方法简介扫描仪故障解决方法简介一、扫描仪的拆卸在维护和检修时往往需要拆卸扫描仪,因此首先为大家介绍扫描仪拆卸的基本方法:1、首先拆除玻璃平台,用十字旋具伸入圆孔中拧下螺钉,即可向上取下顶盖和玻璃平台。
打开扫描仪后,即可看到步进电动机、传动带、扫描头和电路板等部件。
有些扫描仪的上下两部分不是用螺钉而是用塑料卡扣衔接,拆卸时用平口小旋具插到缝隙中撬开塑料卡扣,即可分离上下两部分,撬塑料卡扣时动作要轻,不要损坏塑料部件。
2、拔下数据软排线。
扫描仪内部一般有两块电路板,-块固定在扫描头后侧,另-块安装在扫描仪后侧,两块电路板通过数据软排线相连接。
取下扫描头之前需先取下数据软排线。
数据软排线卡在电路板上的排线卡槽中,取下软排线时需先将排线卡槽两侧的卡销向外拨,而后即可很轻松地向外抽出软排线。
3、拆卸扫描头。
扫描头大多穿在圆形金属杆(导轨)上,由传动带带动沿扫描仪纵向运动,只需将圆形金属杆从底座上的塑料卡座中取下,使扫描头脱离传动带,即可向上取下扫描头和圆形金属杆,而后将圆形金属杆从扫描头上抽出。
4、取下灯管。
灯管位于扫描头顶部,沿扫描头横向放置,卡在扫描头两侧的塑料卡座上,其供电电源插头插在扫描头后侧的电路板上。
只需取下电路板上灯管的供电电源插头,即可从扫描头上取下灯管。
最细的灯管只有火柴棍粗细,拆卸、放置时需特别小心。
5、拆除电路板。
拧下两粒螺钉即可取下扫描头上的电路板,在电路板正面就能看到双列直插封装的CCD器件。
由于CCD器件需正对扫描光路中光学透镜,安装还原不当会影响扫描质量,建议不要随便拆下扫描头上的电路板。
二、常见故障原因与排除1、整幅图像只有一小部分被获取故障原因与排除:聚焦矩形框仍然停留在预览图像上;只有矩形框内的区域被获取。
在做完聚焦后,点击一下去掉聚焦矩形框,反复试验以获得图像。
2、图像中有过多的图案(噪声干扰)故障原因与排除:扫描仪的工作环境湿度超出了它的允许范围(也许是扫描仪在允许范围外被存放或运输了)。
fi-7030 扫描仪耗材更换和清洁说明书
fi-7030 CONSUMABLE REPLACEMENT AND CLEANING INSTRUCTIONSConsumable Replacement ProcedurePick Roller Assembly Qty 1 Brake Roller Qty 1Pick Roller Assembly (with shaft – included) Brake Roller Assembly (with shaft – not included)REPLACING THE BRAKE ROLLERThe Glass inside the ADF becomes very hot when the scanner is being used. Before you replace the consumables, turn off the power, unplug the power cable, and let cool for 15 minutes1. Remove all documents from the ADF paper chute2. Open the ADFWhen the ADF is open, it might close accidentally. Use caution when the ADF is open.3. Remove the Brake Roller Shaft Assemblya. Hold both Ends of the cover and open it in the direction of the arrow.b. Lift the right side of the roller. Pull out the shaft form the slot on the left4. Remove the brake roller from the Brake Roller Shaft Assembly5. Attach a new brake roller on the Brake Roller Shaft Assemblya. Insert the Protrusion on the Brake Roller Shaft Assembly into the slot on the brake roller.6. Attach the Brake Roller Shaft Assemblya. Insert the left end of the Brake Roller Shaft Assembly into the hole in accordance with thehole shape and then attack the right side of the shaftb. Close the cover7. Close the ADF8. Reset the Brake Roller CounterReplacing the Pick RollerThe Glass inside the ADF becomes very hot when the scanner is being used. Before you replace the consumables, turn off the power, unplug the power cable, and let cool for 15 minutes1. Remove the documents from the ADF paper Chute2. Remove the ADF Paper Chute3. Open the ADF - Open the ADF by pressing the ADF Open Lever and Pull the ADF towardsthe front of the scanner in the direction of the arrow shown in the pictures below.When the ADF is open, it might close accidentally. Use caution when the ADF is open.4. Remove the Pick Shaft Assemblya. Open the sheet guide by lifting the tabsb. Rotate the bushing on the Pick Shaft Assembly in the direction of the arrowc. Remove the Pick Shaft Assemblyd. Hold and lift the bushing in the direction of the arrow below (1)e. Pull the bushing up in the direction of the arrow below (2)f. Lift the Pick Shaft Assembly up in the direction of the arrow below (3)*Be careful not to touch the gear near the bushing on the shaft as it contains grease*5.Reinstall the Pick Shaft Assemblya.Insert the left end of the shaft into the slot and lower the other end gradually.b.Rotate the bushing on the pick shaft in the direction of the arrow belowc.Close the sheet guide. Make sure that both ends of the sheet guide are locked firmly.Confirm that the pick Shaft Assembly is installed properlyOtherwise, it may cause feeding errors such as paper jams6.Close the ADF7.Attach the ADF paper Chute8.Reset the pick Roller CounterIf you find the counts are close t o or over 200,000 and cleaning doesn’t resolve a feeding issue it might be time to replace the consumables.1. Checking and resetting the Sheet Counters After Consumable Replacementa. Start up the Software Operation Panel (SOP)b. From the listing on the left, Select “Device Setting”c. Resetting the sheet countersd. Click the “Clear(2) button for “Brake Roller” -> the counter is reset to “0”e. Click the “Clear(3) button for “Pick Roller” -> the counter is reset to “0”If the glass surface or the rollers are still dirty after they are wiped with a dry cloth, use a cloth moistened with 90% or higher Isopropyl Alcohol. As the scanner continues to feed documents, paper dust will accumulate inside the ADF and it may cause scanning errors. Cleaning should be performed approximately every 5,000 sheers scanned.∙The glass inside the ADF can be very hot when the scanner is being used. Before you start cleaning the inside, make sure to turn off the power, unplug the power cable and wait at least 15 minutes for the inside of the ADF to cool down.Note -∙Do not use water or mild detergent to clean the ADF∙When using Isopropyl Alcohol, use small quantities. Excessive amount of alcohol may take a while to dry∙Do not us alcohol on the plastic frame. It may deteriorate the frameCLEANING INSTRUCTIONSThe following table shows the specifications of consumables and their standard replacement cycle. It is recommended that you stock extra consumables before the ones in the scanner reach the end of their service life. The consumables must be replaced periodically. You can check the number of scanned pages for the Brake roller unit and the Pick roller unit by referring to each counter on this scanner.Description Qty Life Fujitsu P/NPick Roller 1 200,000 Roller SetBrake Roller 1 200,000 PA03706-0001Note: Replacement Cycles are estimated guidelines established by testing with A4/Letter sized wood free and wood based 17 lb paper. NCR or Carbonless paper has chemical composition which damages the pad and the pick roller. Cleaning of the consumables will be required more frequently to avoid feed problems. Consumable life will be reduced if NCR or Carbonless paper is scanned.C LEANING THE S CANNERThe Scanners Automatic Document Feeder (ADF) should be cleaned at least every 5000 pages. This is very dependent on the types of paper being scanner, when scanning documents with toner that has not fused will or have ink, the scanner may require more frequent cleaning.2. Turn off the scanner and wait for at least 15 minutes3. Open the ADF by pressing the ADF Open Lever and Pull the ADF towards the front of thescanner in the direction of the arrow shown in the pictures below.When the ADF is open, it might close accidentally. Use caution when the ADF is open.4. Clean the following parts with a dry lint free cloth or moistened with F1[1] Cleaning the Brake Roller (x2)a. Remove the Brake Roller (Refer to )b. Gently wipe off any dirt or dust along the grooves, taking care not todamage the roller surface.[2] Cleaning the Pick Roller (x2)Gently wipe off any dirt along the grooves as you rotate the roller manually, taking care not to damage the roller surface. Make sure that it is wipedproperly because black residue on the roller will affect the feedingperformance.[3] Cleaning the Plastic Idler Roller (x4)Gently wipe off any dirt or dust on the roller, taking care not to damage theroller surface. Make sure that it is wiped properly because black residue on the roller will affect the feeding performance. When wiping the roller, becareful not to damage the sponge that is attached to the middle of the plastic idler roller.[4] Cleaning the Glass (x2)Gently wipe off any dirt or dust on surface of the glass sections[5] Ultrasonic Senor (x2)See pictures belowGently wipe the dirt and dust off the surface of the ultrasonic sensors.If it is difficult to clean, use a cotton swab[6] Feed Roller (x2)[7] Eject Roller (x2)To Clean the Feed/Eject rollers, turn the rollers in the machine to clean theentire roller surface.The power must be turned on to rotate the feed/eject rollers(1) Connect the power cable and turn on the scanner.(2)After “1” is displayed on the function number display on the operatorpanel, open the ADF(3) When you press the [Send to] and [Scan/Stop] buttons on the operator panel at the same time, the feed/eject rollers rotate a certain amount(4) Use a lint free cloth or cleaning wipe moistened with isopropyl alcohol to wipe the roller surface horizontally.Wipe off any dust or dirt on the roller surface by pressing the [Send to] and [Scan/Stop] buttons at the same time to rotate the rollers.Be sure to clean thoroughly as any residue left on the rollers could affect the feeding performance.As a guideline, pressing the [Send to] and [Scan/Stop] buttons simultaneously seven times will rotate the feed/eject rollers one complete revolution.(5) Close the ADF.Checking and resetting the Sheet Counters After Cleaninga. Start up the Software Operation Panel (SOP)b. From the listing on the left, Select “Device Setting”1. Checking when to perform Cleaning2. Check After Cleaning3. This counter turns yellow when the page count after cleaningreaches 100% of the value specified in “Cleaning Cycle” (Scannercleaning cycle setting) in Software Operation Panel.c. Resetting the sheet countersd. Click the “Clear(1) button for “After Cleaning” -> the counter is reset to “0”。
富士通文档扫描器fi-6110颜色双面桌面扫描机用户手册说明书
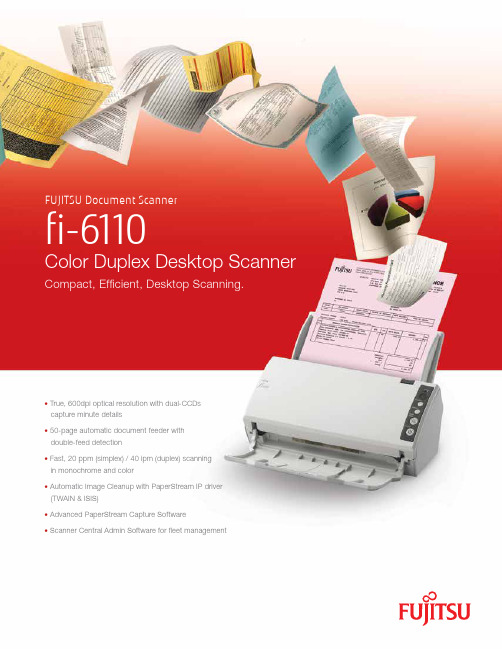
•True, 600dpi optical resolution with dual-CCDs capture minute details•50-page automatic document feeder withdouble-feed detection•Fast, 20 ppm (simplex) / 40 ipm (duplex) scanningin monochrome and color•Automatic Image Cleanup with PaperStream IP driver (TWAIN & ISIS)•Advanced PaperStream Capture Software•Scanner Central Admin Software for fleet management/fcpa*****************.com11 mm- The surrounding border is not required.- Label must be in black, white or green. Background may be in any color.19 mm ©2014 Fujitsu Computer Products of America, Inc. All rights reserved. Fujitsu and the Fujitsu logo are registered trademarks of Fujitsu Limited. Microsoft, SharePoint, Windows and Vista are either registered trademarks or trademarks of Microsoft Corporation in the United States and/or other countries. ISIS is a registered trademark of Pixel Translations, a division of Captiva Software Corporation. PaperStream is a registered trademark of PFU LIMITED Japan. ABBYY, FineReader are trademarks of ABBYY Software House. All other trademarks are the property of their respective owners. All statements herein are valid only in the U.S. for U.S. residents, are based on normal operating conditions, are provided for informational purposes only, and are not intended to create any implied warranty of merchantability or fitness for a particular purpose. Fujitsu Computer Products of America, Inc. reserves the right to modify at any time without prior notice these statements, our products, their performance specifications, availability, price and warranty, post-warranty and service programs. Printed in the U.S.A. Qty. 10M DS404001205Get paperwork out of the way with this powerful desktop scanning solutionThe Fujitsu fi-6110 scanner’s small footprint and advanced feature set make it an ideal solution for decentralized scanning environments. With its true, 600-dpi optical resolution and dual-CCD cameras, it captures your documents’ finest details in color, grayscale, and monochrome. What’s more, it shares much of the advanced technology found in higher-end scanners, including a 50-sheet automatic document feeder (ADF) that accommodates a wide range of document sizes (2.1 in. x 2.9 in. to 8.5 in. x 14 in.), ultrasonic double-feed detection for greater security, and a Carrier Sheet function for feeding fragile or oversized (A3) docu-ments. Plus at speeds up to 20 ppm (simplex) / 40 ipm (duplex) it quickly and efficiently transforms your paper documents into more manageable digital files. PaperStream IP and PaperStream Capture utilities are included with the Fujitsu fi-6110scanner, which allow you to quickly and easily integrate it into your workflow.Fleet ManagementScanner Central Admin provides IT departments an efficient wayto manage medium to large scanner deployments. With remotely accessible fleet information, IT departments can now allocate resources effectively based on scan volume, consumable wear, depreciation schedules and maintenance expiration.Help maximize uptime with service by Fujitsu.The fi-6110 scanner includes a one-year Limited Warranty andis eligible for our Advance Exchange Program for fast up-time response and total peace-of-mind. For full details on the Limited Warranty and on all service programs, go to or call (800) 626-4686.About Fujitsu Computer Products of America, Inc.Fujitsu Computer Products of America, Inc., a subsidiary of Fujitsu Ltd., is an established leader in the Document Imaging industry, delivering innovative scanning solutions and services that enable our customers to solve critical business productivity issues and streamline operations. We provide cutting-edge docu-ment capture and workflow solutions for business and personalenvironments, backed by a comprehensive portfolio of service andsupport programs.fi-6110Color Duplex Desktop Scanner1 Maximum output resolutions may vary, depending upon the size of the area being scanned and whether the scanner is scanningin simplex or duplex.。
富士通高速图像扫描仪fi6130技术规格
功能说明1、实现影像数据库和目录数据库自动批量挂接和归档2、用户可自由定义和添加各种索引字段3、目录数据库的形成,即可手工录入,也可以直接导入现有的目录资料4、图像数据库的形成,即可使用扫描的影像,也可以直接导入现有的影像资料5、可将挂接和归档完毕的资料上传光盘,局域网、互联网进行发布6、通过“用户管理”功能,使多用户的操作责任分明7、能有效识别中英文文档,表格,图表混合文档,处理PDF 文件8、可拼接一次性不能扫描完成的大图片ADF 容量 50张(A4,80g/㎡) 或3张卡片最大扫描长度3048mm 背景 黑/白背景可选 接口 USB 2.0 驱动 标准TWAIN & ISIS捆绑软件 ScanAll PRO 、Adobe Acrobat8.0、专业数字文档处理软件AURORA Document v 7.0。
体积(长× 宽 × 高)310 × 567 × 229 毫米重量 8.8公斤保修免费保修一年上门服务,包镜头性能简述富士通fi-6230是一款ADF双面彩色图像扫描仪(USB2.0接口),在同类产品中,性能更优。
它所具有的高效,多功能和高可靠的特点,为富士通用户的未来工作提供高效的解决方式。
∙同类产品中,性能更优o彩色:30ppm60ipm(A4,200dpi)。
灰度/黑白:40ppm60ipm(A4,200dpi)o连续扫描50张不同厚度和尺寸的混合文档。
o一次可扫描3张塑料卡片。
∙具备多种“智能”功能,扫描更高效o智能多页进纸检测,更人性化,方便准确。
o自动删除图像中的打孔区域。
o自动识别彩色/黑白,自动识别大小,自动纠偏功能。
o自动裁剪功能:可扫描附有标签的纸张。
∙ScandAll PRO V1.5提供强大的图像处理功能o图像浏览、文件归档同步进行。
o进行插入/删除等缩略图管理操作。
o输出图像一分为二。
o通过条码/补码识别来分隔工作。
富士通图像扫描仪iX1300消耗品替换与清洁指南CG00002-304601版本A日常护理说明书
FUJITSU Image ScanneriX1300 Consumable Replacement and Cleaning GuideCG00002-304601 Revision ADaily CareThis section describes how to clean the scanner.Cleaning MaterialsATTENTIONIn order to use the cleaning materials safely and correctly, read the precautions on each product thoroughly.Name Part No. NotesCleaner F1PA03950-0352100 mlLiquid cleaner to use for removing dirt and stainsCleaning SheetCA99501-00121 pack (10 sheets) Used with Cleaner F1Cleaning WipePA03950-04191 box (24 packets)Pre-moistened with Cleaner F1. It can be used instead of moistening a cloth with Cleaner F1.Cotton swabCommercially AvailableUsed to clean a tiny part such as the document sensor.Dry clothUsed to wipe off dirt and stains. Moisten it with Cleaner F1 for cleaning.● Do not use aerosol spray or spray that contains alcohol. Paper dust blownup by strong air from the spray may enter inside the scanner, which may cause the scanner to fail or malfunction.Also note that sparks generated by static electricity may cause a fire.● The inside of the ADF becomes very hot when the scanner is being used.Before you start cleaning the inside of the ADF, make sure to turn off the power, unplug the power cable and wait for at least 15 minutes for the inside of the ADF to cool down.CAUTIONFor more information about the cleaning materials, contact the distributor/dealer where you purchased this product. Refer to the contact information in the Contact List or the Contact for Inquiries section in Safety Precautions bundled with this product and make an inquiry.Location and FrequencyATTENTIONCleaning cycles may vary depending on the condition of the documents. Also, cleaning must be performed more frequently when the following types of documents are scanned:●Smooth-faced documents such as coated paper●Documents with printed text/graphics that almost cover the entire surface●Chemically-treated documents such as carbonless paper●Documents containing a large amount of calcium carbonate●Documents written in lead pencil●Documents on which the toner is not sufficiently fusedCleaning the Outside of the ScannerClean the outside of the ScanSnap, the ADF paper chute (cover), and the ADF top section regularly.Disconnect the cables from the ScanSnap and then clean the outside of the ScanSnap with a dry cloth, or a cloth moistened with Cleaner F1/mild detergent.ATTENTION∙The bottom part of the ScanSnap may become hot when the ScanSnap is being used, but this does not affect ScanSnap operation or cause any physical harm. Becareful not to drop the ScanSnap when carrying it.∙To avoid deformation and discoloration, never use paint thinner or any other organic solvents.∙Be careful not to let any moisture or water inside the scanner during cleaning.∙It may take a long time to dry if an excessive amount of Cleaner F1/mild detergent is used. Use only a small amount. Wipe off the cleaner completely to leave noresidue on the cleaned parts.∙When cleaning the ScanSnap, prevent liquids from entering the ScanSnap.The inside of the ADF can be cleaned with a piece of cloth moistened with Cleaner F1, or a sheet of Cleaning Wipe.As the scanner continues to feed the documents, paper dust will accumulate inside the ADF and it may cause scanning errors. Cleaning should be performed approximately every 1,000 sheets scanned. Note that this guideline varies depending on the types of documents you scan. For instance, it may be necessary to clean the scanner more frequently when you scan documents on which the toner is not sufficiently fused.The inside of the ADF becomes very hot when the scanner is being used.Before you start cleaning the inside of the ADF, make sure to turn off the power, unplug the power cable and wait for at least 15 minutes for the inside of the ADF to cool down.1. Turn off the scanner, unplug the power cable and wait for at least 15 minutes.2. Remove any documents from the ADF paper chute (cover).3. Clean the eject rollers in four places that are located outside the ADF top section .4. Gently wipe the dirt and dust off the rollers as you rotate them manually with a clothmoistened with Cleaner F1.Be careful not to damage the surface of the rollers.Make sure that they are cleaned properly because residue on the rollers will affect the feeding performance.Notice:Make sure that the document support tab is open.Otherwise, a paper jam may occur.If the document support tab is closed, pull it up with your fingers.5. Pull the ADF release tab towards you to open the ADF top section .6. Gently wipe the dirt and dust off the glass sections with a cloth moistened withCleaner F1.7. Also, clean the following locations with a cloth moistened with Cleaner F1o Glass (x2)∙Pick roller (x1 )/feed roller (x 2)/eject roller (x 2)Gently wipe the dirt and dust off the rollers as you rotate them manually.Be careful not to damage the surface of the rollers.Make sure that they are cleaned properly because residue on the rollers willaffect the feeding performance.∙Pad unit (x1)Wipe the rubber surface of the pad downward to remove any dirt and dust.Be careful not to accidentally get your hand or a cloth on the pick spring(metal part).∙Document sensor (x 4)Gently wipe the dirt and dust off the surface of the document sensors. If it isdifficult to clean the document sensors, use cotton swabs.8. Clean the feed rollers and the eject rollers (that are located on the scanner side) withthe ScanSnap turned on.1. Plug in the power cable, then press the [Scan] button for 3 seconds with the ADFtop section open.Notice:Plug in the power cable only when cleaning the feed rollers and eject rollers.2. Clean the following locations with a cloth moistened with Cleaner F1.Feed roller (x 2)/eject roller (x 2)Press the [Scan] button to rotate the rollers.Gently wipe the dirt and dust off while taking care not to damage thesurface of each roller.Make sure that they are cleaned properly because residue on the rollers willaffect the feeding performance.* Pressing the [Scan] button seven times will rotate the feed rollers and theeject rollers one revolution.9. Close the ADF top section.Close the ADF top section together with the stacker until it locks into position,Indicated by a clicking sound.Notice:Make sure that the ADF top section is completely closed. Otherwise, paper jams or other feeding errors, or image faults may occur.TheCarrier Sheet/Photo Carrier Sheet/Booklet Carrier Sheet should be cleaned with either apiece of dry cloth, a cloth moistened with Cleaner F1/mild detergent, or a sheet of Cleaning Wipe.Gently wipe dirt and dust off the surface and the inside of the Carrier Sheet/Photo Carrier Sheet/Booklet Carrier Sheet.As you keep using the Carrier Sheet/Photo Carrier Sheet/Booklet Carrier Sheet, dirt and dust will accumulate on the surface and the inside.Clean it regularly because it may result in scanning errors.Consumable ReplacementReplacing the ConsumablesThis section explains how to replace the consumables for the scanner.This device has consumables that need to be replaced in a certain period of time. It isrecommended that the user replace the consumables periodically.Consumable Replacement CyclesNote that the suggested replacement cycles are guidelines for using A4 (80 g/m2 [20 lb.]) wood-free or wood-containing paper, as these cycles vary depending on the type ofdocuments scanned and how often the scanner is used and cleaned.For information on purchasing the consumables, contact the distributor/dealer where you purchased this product. Refer to the contact information in the Contact List if supplied with this product, or refer to the contact information in the Contact for Inquiries section if provided in Safety Precautions supplied with this product, and then make an inquiry.Check the status of a consumable and replace the consumable if the page count of the consumable has reached the number of sheets for the suggested replacement cycle.1. Connect the customer's computer to the ScanSnap and start ScanSnap Home.2.Click [Settings].3. Click [Preferences]:4. Click [Scanner]:5. Select a desired scanner:6. Click [Details] (for Windows) or [Check consumable status] (for Mac OS).To check the number of consumable usageCheck the value for [Pad count] or [Pick roller count].To reset the number of consumable usage(1) Click [Reset] for [Pad count] or [Pick roller count].(2) When a confirmation window appears, click the [Yes] button.The value for [Pad count] or [Pick roller count] becomes [0].Replace the pad unit in following procedure.Warning:Before replacing the consumable, you must turn off the ScanSnap and unplug the power cable from the AC outlet. Not doing so may cause fire or electrical shock.Do not place internal parts such as the pad unit and the pick roller within reach of small children. Doing so may cause injury.Notice:The bottom part of the ScanSnap may become hot when the ScanSnap is being used, but this does not affect ScanSnap operation or cause any physical harm.Be careful not to drop the ScanSnap when carrying it.1. Unplug the power cable from the AC outlet2. Remove any documents from the ADF paper chute (cover).3. Pull the ADF release tab towards you to open the ADF top section.4. Squeeze both ends of the pad unit (the gray parts protruding outwards) and pull itout.Notice:Do not hold any parts other than both ends of the pad unit (the gray parts protruding outwards).5. Attach the new pad unit.Fit the protrusions of the pad unit in the slots.Notice:Attach the pad unit with the front side up.If the pad unit is attached upside down, paper jams or other feeding errors may occur.Attach the pad unit firmly.Otherwise, paper jams or other feeding errors may occur.6. Make sure that the arms of the pad unit are not raised.If the arms of the pad unit are raised, push them down.7. Close the ADF top section.Close the ADF top section together with the stacker until it locks in place.Notice:Make sure that the ADF top section is completely closed.Otherwise, paper jams or other feeding errors, or image faults may occur.8. Connect the power cable to the AC outlet, and turn on the ScanSnap.9. Reset the pad unit count.Replace the pick roller in following procedure.Warning:- Before replacing the consumable, you must turn off the ScanSnap and unplug the power cable from the AC outlet.Not doing so may cause fire or electrical shock.- Do not place internal parts such as the pad unit and the pick roller within reach of small children. Doing so may cause injury.Notice:The bottom part of the ScanSnap may become hot when the ScanSnap is being used, but this does not affect ScanSnap operation or cause any physical harm. Be careful not to drop the ScanSnap when carrying it.1. Unplug the power cable from the AC outlet.2. Remove any documents from the ADF paper chute (cover).3. Pull the ADF release tab towards you to open the ADF top section.4. Open the sheet guide.5. Pull out the pick roller from the shaft, and then lift it upward to remove it.6. Attach a new pick roller.Insert the protrusion of the shaft into the slot of the pick roller.Notice:Attach the pick roller firmly. Otherwise, paper jams or other feeding errors may occur.7. Close the sheet guide.Make sure that both ends of the sheet guide are locked firmly.8. Close the ADF top section.Close the ADF top section together with the stacker until it locks in place.Notice:Make sure that the ADF top section is completely closed.Otherwise, paper jams or other feeding errors, or image faults may occur.9. Connect the power cable to the AC outlet, and turn on the ScanSnap.10. Reset the pick roller count.。
FUJITSU扫描仪SP1120、SP1125和SP1130消耗品替换和清洁指南说明书
SP1120\1125\1130Consumables and Replacement Cyclesperiodically. It is recommended that youkeep a stock of new consumables forreplacement before it reaches the end of itslife. The scanner records the number ofsheets scanned after replacing theconsumables, which allows you to check thestatus of the consumables.Note that the suggested replacement cyclesare references for using A4 (80 g/m2 (20 lb)wood-free or wood-containing paper, asthese cycles vary depending on the type ofdocuments scanned and how often thescanner is used and cleaned.HINTOnly use the specified consumables.To purchase the consumables, contact yourFUJITSU scanner dealer or an authorizedFUJITSU scanner service provider.Replacing the Roller SetThe roller set consists of a brake roller and a pick roller. Replace each roller in the following procedure.5. Attach a new brake roller on the shaft1 Remove all documents from the ADF paper chute (feeder).2 Open the ADF..3Remove the brake roller. a. Press the cover bushing of the brake roller to open the cover in the direction of the arrow.CAUTIONBe careful not to have your fingers caught when the ADF closes.b. Pull out the left side of the brake roller shaft, and then pull out the right side of the shaft from the hole.4. Remove the brake roller from its shaftBrake RollerBrake Roller ShaftBrake Roller ShaftInsert the protrusion on the shaft into the slot.6. Attach the shaft.a. Attach the notch, which is on the brake roller shaft, to the slot on the right then attach the left side of the shaft.b. Close the cover.Notch Brake Roller ProtrusionBrake Roller Shaft7. Remove the pick roller.a. Open the side guide fully to both sides. Then place your finger into the depression and open the sheet guide in the direction of the arrow.b. Slide the pick roller and remove it from the top.Side GuideDepressionSide Guide Sheet Guide8. Attach a new pick roller from the bottom.a. Check the direction of the notch on the pick roller and of the small roller, and insert it in the hole.b. Close the sheet guide.9. Close the ADF.Be careful not to have your fingers caught when the ADF closes.10. Reset the roller set counter.Start the Software Operation Panel and reset the counter.NotchSmall RollerCAUTIONChecking and Resetting the Sheet CountersChecking the sheet countersThe status on each consumable part can be checked to determine when to replace the consumables.When a consumable needs to be replaced soon, the background color of the counter for the consumable changes. The background color of the roller set counter turns light yellow when the number of sheets scanned reaches 95,000, and turns yellow when it reaches 100,000.Start the Software Operation PanelCheck that the scanner is connected to the computer, then turn on the scanner.Display the [Software Operation Panel] window.∙Windows Vista/Windows Server 2008/Windows 7o Select the [Start] menu - [All Programs] –[SP Series] - [SoftwareOperation Panel].∙Windows Server 2012/Windows 8o Right-click the Start screen, and select [All apps] on the app bar - [Software Operation Panel] under [SP Series].∙Windows Server 2012 R2/Windows 8.1∙Select [|] on the lower left side of the Start screen - [Software Operation Panel] under [SP Series]From the listing on the left, select[Device Setting].Resetting the sheet countersWhen you have replaced or cleaned a consumable part, reset the corresponding counter by using the following procedure.1Click the [Clear] button for the consumable that you replaced.2 Click the [OK] button in the Software Operation Panel.A confirmation message appears.3 Click the [OK] button.The settings are saved.Cleaning Materials and Locations that Require CleaningNotesPart No.Name Cleaning MaterialsCleaner F1 PA03950- 03521 bottle (100 ml)Moisten a cloth or Cleaning Paper with this liquid to wipe the scanner clean. It may take a long time to dry if an excessive amount is used. Use it in small quantity. Wipe off thecleaner completely to leave no residue on the cleaned parts.CleaningPaperCA99501- 00121 pack (10 sheets)Use this non-woven sheet with Cleaner F1.Cleaning WipePA03950- 04191 box (24 packets) Pre-moistened with Cleaner F1. It can be used instead of moistening a cloth with CleanerCLEANING SWAB (100 / PK)CG90000-120601 CLEANING CLOTH (25/PK) FUJITSU scanner dealer or an authorized FUJITSU scanner service provider.CG90000-120001Location and FrequencyATTENTIONCleaning cycles may vary depending on the condition of the documents. Also, cleaning must be performed more frequently when the following types of documents are scanned:•Smooth-faced documents such as coated paper•Documents with printed text/graphics that almost cover the entire surface•Documents containing a large amount of calcium carbonate •Documents written in lead pencil•Documents on which the toner is not sufficiently fusedCleaning the OutsideThe outside of the scanner, including the ADF paper chute (feeder) and the stacker, should be cleaned with a piece of dry cloth, a cloth moistened with Cleaner F1/mild detergent, or a sheet of Cleaning Wipe. ATTENTIONTo avoid deformation and discoloration, never use paint thinner or any other organic solvents.Be careful not to let any moisture or water get inside the scanner during cleaning.It may take a long time to dry if an excessive amount of Cleaner F1/ mild detergent is used. Use it insmall quantity. Wipe off the cleaner completely to leave no residue on the cleaned parts Cloth Cleaner F1 or milddetergentCleaning the Inside Cleaning the ADF (with Cleaning Paper)∙Turn on the scanner.∙Spray the Cleaning Paper with Cleaner F1∙Pull out the chute extensions according to the length of the Cleaning Paper. Lift the stacker and stacker extension according to the length of the Cleaning Paper.∙Load the Cleaning Paper in the ADF paper chute (feeder).Adjust the side guides to the width of the Cleaning Paper. Do not leave space between the side guides and theCleaning Paper. Otherwise, the Cleaning Paper may be fed skewedThe ADF can be cleaned with a sheet of Cleaning Paper moistened with Cleaner F1.As the scanner continues to feed the documents, paper dust will accumulate inside the ADF and it may cause scanning errors.Cleaning should be performed approximately every 3,000 sheets scanned. Note that the cleaning frequency varies depending on the types of documents you scan. For instance, it may be necessary to clean the scanner more frequently when you scan documents on which the toner is not sufficiently fused.ATTENTION•Do not use water or mild detergent to clean the ADF.•It may take a long time to dry if an excessive amount of CleanerF1 is used. Use it in small quantity.∙Start an application for scanning and perform a scan.Cleaning the ADF (with Cloth)The ADF can be cleaned with a piece of cloth moistened with Cleaner F1 or a sheet of Cleaning Wipe. As the scanner continues to feed the documents, paper dust will accumulate inside the ADF and it may cause scanning errors.Cleaning should be performed approximately every 3,000 sheets scanned. Note that the cleaning frequency varies depending on the types of documents you scan. For instance, it may be necessary to clean the scanner more frequently when you scan documents on which the toner is not sufficiently fused.The inside of the scanner becomes very hot when the scanner is being used.Before you start cleaning the inside, make sure to turn off the power, unplug the powercable and wait at least 15 minutes for the ADF glass to cool down.ATTENTION∙Do not use water or mild detergent to clean the ADF.∙It may take a long time to dry if an excessive amount of Cleaner F1 is used. Use it in small quantity.Wipe off the cleaner completely to leave no residue on the cleaned parts1.Turn off the scanner and wait for at least 15 minutes2.Open the ADF.3.Clean the following locations with a cloth moistened with Cleaner F1 or a sheet of Cleaning Wipe.Glass (x2)ATTENTIONMake sure that the cloth does not get caught and damage the document sensors.Brake roller (x 2)Remove the roller from the scanner. Gently wipe the surface of the rollers Pick roller (x 6)Gently wipe the surface as you rotate the roller manually, taking care not to damage the roller surface. Make sure that it is cleaned properlybecause residue on the roller will affect the feeding performance. Plastic idler roller (x 4)Gently wipe the surface as you rotate the roller manually, taking care not to damage the roller surface. Make sure that it is cleaned properly because residue on the roller will affect the feeding performance. Glass (x 2)Gently wipe dirt and dust off the surface of the glass sections.ATTENTIONVertical streaks may appear on a scanned image when the glass is dirty.Ultrasonic sensor (x 2)Gently wipe dirt and dust off the surface of the ultrasonic sensorsUltrasonic SensorFeed roller (x 2)/Eject roller (x 2)The power must be turned on to rotate the feed/eject rollers for cleaning.Turn on the scanner.When the operator panel is in ready status, open the ADF.When you press the scan/stop button on the operator panel for more than 2 seconds, the feed/eject rollers rotateScan/Stop ButtonPut a piece of cloth moistened with Cleaner F1 or a sheet of Cleaning Wipe against the roller surface,and wipe horizontally. Wipe the whole surface by pressing the scan/stop button to rotate the rollers.Make sure that it is cleaned properly because residue on the roller will affect the feeding performance.CAUTION When you press the Scan/Stop button, the feed/eject rollers rotate at the same time. Be careful not to touch the rollers with your hand while they are rotating.Fujitsu Computer Products of America, Inc./fcpa1250 East Arques Avenue Sunnyvale, CA 94085-4701(800) 626-4686 (408) 746-7000*****************.com© 2015 Fujitsu Computer Products of America, Inc. All rights reserved, Fujitsu and the Fujitsu Logo are registered trademarks, ScanCare and ScanAid are trademarks of Fujitsu Computer Products of America, IncAll statements herein are valid only in the U.S. for U.S. residents, are based on normal operating conditions, are provided for informational purposes only and are not intended to create any implied warranty of merchantability or fitness for a particular purpose. Fujitsu Computer Products of America, Inc. reserves the right to modify at any time without prior notice these statements, our products, their performance specifications, availability, price and warranty, post-warranty and service。
Fi-7300NX型号扫描仪日常保养及耗材更换指南说明书

Consumable Replacement and Cleaning InstructionsFi-7300NX Daily Care and Consumable Replacement GuideThis section describes how to clean the scanner.∙Do not use aerosol spray or spray that contains alcohol. Paper dust blown up by strong air from the spray may enter inside the scanner which may cause the scanner to fail or malfunction.Also note that sparks generated by static electricity may cause a fire.∙The inside of the ADF becomes very hot when the scanner is being used. Before you start cleaning the inside of the ADF, make sure to turn off the power, unplug the power cable and wait for at least 15 minutes for the inside of the ADF to cool down.Cleaning MaterialsFor more Information about the cleaning materials, contact the distributor/dealer where you purchased this product. Or, make an Inquiry by referring to the contact Information at the Contact for Inquiries section In Safety Precautions bundled with this product.Location and FrequencyThe Inside of the scanner (ADF) needs to be cleaned regularly for every certain number of sheets scanned. The scanner records the number of sheets scanned so that you can check the number of sheets scanned after you cleaned it last. The procedure to check the number of sheets scanned is as follows.1. On the touch screen, press -> [Cleaning & Maintenance] -> [Consumable counters].2. On the [Consumable counters] screen, check the value for [After cleaning].o When the background color of the counter is yellowIt is about time to clean the scanner.o When the background color of the counter is redIt is time to clean the scanner. Clean the scanner.Cleaning the Outside of the Scanner∙ScannerThe scanner including the ADF paper chute (feeder) and the stacker should be cleaned with either a piece of dry cloth, a cloth moistened with Cleaner F1/mild detergent, or a sheet of Cleaning Wipe.∙Touch screenTo avoid the surface of the touch screen becoming dirty, clean it regularly by gently wiping dirt and dust off witha soft, dry cloth.Clean the touch screen with care. Do not rub or tap the surface with hard objects as doing so may damage the surface.Cleaning the Inside of the Scanner (ADF) with Cleaning PaperThe Inside of the ADF can be cleaned with a sheet of Cleaning Paper moistened with Cleaner F1.As the scanner continues to feed the documents, paper dust will accumulate Inside the ADF and it may cause scanning errors. Cleaning should be performed approximately every 5,000 sheets scanned. Note that this guideline varies depending on the types of documents you scan. For Instance, It may be necessary to clean the scanner more frequently when you scan documents on which the toner is not sufficiently fused.1. Turn on the scanner.2. On the touch screen, press -> [Cleaning & Maintenance] -> [Cleaning] -> [Cleaning Paper].The [Cleaning Paper] screen is displayed.3. Spray the Cleaning Paper with Cleaner F1.4. Pull out the chute extension according to the length of the Cleaning Paper.5. Adjust the stacker according to the length of the Cleaning Paper.6. Load the Cleaning Paper in the ADF paper chute (Feeder).7. Adjust the side guides to the width of the Cleaning Paper.Move the side guides so that there is no space between the side guides and the Cleaning Paper.Otherwise, the Cleaning Paper may be fed skewed.8. On the touch screen, press the [Start] button on the [Cleaning Paper] screen.The Cleaning Paper is fed and ejected onto the stacker.9.Clear the sheet counter after cleaning.a. On the touch screen, press -> [Cleaning & Maintenance] -> [Consumable counters].b. On the [Consumable counters] screen, press the [Clear] button for [After cleaning].Cleaning the Inside of the Scanner (ADF) with a ClothThe Inside of the ADF can be cleaned with a piece of cloth moistened with Cleaner F1, or a sheet of Cleaning Wipe.As the scanner continues to feed the documents, paper dust will accumulate Inside the ADF and it may cause scanning errors. Cleaning should be performed approximately every 5,000 sheets scanned. Note that this guideline varies depending on the types of documents you scan. For Instance, it may be necessary to clean the scanner more frequently when you scan documents on which the toner is not sufficiently fused.The Inside of the ADF becomes very hot when the scanner is being used.Before you start cleaning the Inside of the ADF, make sure to turn off the power, unplug the power cable and wait for at least 15 minutes for the Inside of the ADF to cool down.1. Turn off the scanner, unplug the power cable and wait for at least 15 minutes.2. Open the ADF.When the ADF is open. It might close accidentally. Be careful not to get your fingers caught.3. Clean the following locations with a cloth moistened with Cleaner F1, or a sheet of Cleaning Wipe.Brake Roller (x 2)Remove the brake roller from the scanner.Gently wipe off any dirt or dust along the grooves, taking care not to damage the roller surface.Pick Roller (x 2)Gently wipe off any dirt or dust along the grooves as you rotate the roller manually, taking care not to damage the roller surface. Make sure that it is wiped properly because black residue on the rollers will affect the feeding performance.Plastic Idler Roller (x 4)Gently wipe dirt and dust off the roller, taking care not to damage the roller surface. Make sure that it is wiped properly because black residue on the rollers will affect the feeding performance.Be careful not to damage the sponge that is attached to the plastic idler roller.Glass (x 2)Gently wipe dirt and dust off the surface of the glass sections.Ultrasonic Sensor (x 2) / Document Sensor (x 8)Gently wipe dirt and dust off the surface of the ultrasonic and document sensors.Feed Roller (x 2)/Eject Roller (x 2)The power must be turned on to rotate the feed/eject rollers for cleaning.a.Plug in the power cable and turn on the scanner.b. On the touch screen, press -> [Cleaning & Maintenance] -> [Cleaning] -> [Cleaning Wipe].The [Cleaning Wipe] screen is displayed.c. Open the ADF.d.On the touch screen, press the [Start] button on the [Cleaning Wipe] screen.The feed/eject rollers rotate a certain amount simultaneously.If you press and hold the [Start] button, the feed/eject rollers rotate continuously.Be careful not to touch the rollers with your hand while they are rotating.e.Put a piece of cloth moistened with Cleaner F1 or a sheet of Cleaning Wipe against the surface of therotating feed/eject roller, and wipe horizontally to clean dirt and dust off the whole surface.Make sure that it is wiped properly because black residue on the rollers will affect the feedingperformance.4.Close the ADF.Be careful not to get your fingers caught when closing the ADF.5.Clear the sheet counter after cleaning.a. On the touch screen, press -> [Cleaning & Maintenance] -> [Consumable counters].b. On the [Consumable counters] screen, press the [Clear] button for [After cleaning].Cleaning the Carrier SheetThe Carrier Sheet should be cleaned with either a piece of dry cloth, a cloth moistened with Cleaner F1 /mild detergent, or a sheet of Cleaning Wipe.Gently wipe dirt and dust off the surface and the Inside of the Carrier Sheet.As you keep using the Carrier Sheet, dirt and dust will accumulate on the surface and the Inside.Clean it regularly because it may result in scanning errors.Replacing the ConsumablesThis section explains how to replace the consumables for the scanner.The inside of the ADF becomes very hot when the scanner is being used.Before you replace the consumables, make sure to turn off the power, unplug the power cable and wait for at least 15 minutes for the inside of the ADF to cool down.Consumables and Replacement CyclesConsumables need to be replaced periodically. It is recommended that you keep a stock of new consumables and replace them before it reaches the end of the consumable life. Also, the scanner records the number of sheets scanned for each consumable (brake roller and pick roller), which allows you to determine when to replace the consumables. The procedure to check the number of sheets scanned is as follows.1.On the touch screen, press -> [Cleaning & Maintenance] -> [Consumable counters].2. On the [Consumable counters] screen, check the [After Replacing the Brake Roller] and[After Replacing the Pick Roller] counters.o When the background color of the counter is yellowIt is about time to replace the brake roller or pick roller.o When the background color of the counter is redIt is time to replace the brake roller or pick roller. Replace the brake roller or pick roller.Note that the suggested replacement cycles are guidelines for using A4 (80 g/m2 [20 lb.]) wood-free or wood-containing paper, as these cycles vary depending on the type of documents scanned and how often the scanner is used and cleaned.For information on purchasing the consumables, contact the distributor/dealer where you purchased this product. Or, make an inquiry by referring to the contact information at the Contact for Inquiries section in Safety Precautions bundled with this product.Replacing the Brake RollerReplace the brake roller in following procedure.1. Turn off the scanner, unplug the power cable and wait for at least 15 minutes.2. Remove all documents From the ADF paper chute (feeder).3. Open the ADF.4. Remove the brake roller.a. Hold both ends of the cover, and open it in the direction of the arrow.When the ADF is open, it might close accidentally. Be careful not to get your fingers caught.b. Lift the right side of the roller First, then pull out the shaft from the slot on the left.5. Remove the brake roller From Its shaft.6. Attach a new brake roller on the shaft.Insert the protrusion on the shaft into the slot.7. Attach the shaft.a. Insert the left end of the shaft into the hole In accordance with the hole shape, and then attach theright side of the shaft.b. Close the brake roller cover.8. Close the ADF.Be careful not to get your fingers caught when closing the ADF.9. Plug in the power cable and turn on the scanner.10. Clear the brake roller counter.a. On the touch screen, press -> [Cleaning & Maintenance] -> [Consumable counters].b. On the [Consumable counters] screen, press the [Clear] button for [After Replacing the Brake Roller].Replacing the Pick RollerReplace the pick roller in following procedure.1. Turn off the scanner, unplug the power cable and wait for at least 15 minutes.2. Remove all documents from the ADF paper chute (feeder).3. Remove the ADF paper chute (feeder).Hold both ends of the ADF paper chute (feeder), then lift it in the direction of arrow 1 and pull it out in the direction of arrow 2.4. Open the ADF.When the ADF is open, it might close accidentally. Be careful not to get your fingers5. Remove the pick roller.a. Open the sheet guide by lifting the tab.b. Rotate the bushing on the shaft in the direction of the arrow.c. Hold the bushing on the shaft to lift up the shaft end, pull the other shaft end out of the slot, and then liftup the pick roller to remove it.6. Remove the pick rollers (x 2) one by one from the shaft.a. Pull out the pick roller from the shaft as you lift the retaining clip.b. Pull out the other pick roller from the shaft as you lift the retaining clip.7. Attach new pick rollers (x 2) on the shaft one by one.a. Insert the retaining clip of the pick roller into the slot.b. Insert the retaining clip of the other pick roller into the slot.8. Attach the shaft.a. Hold the bushing on the shaft and insert the other shaft end into the slot on the right diagonally from theupper left. Lower the shaft end with the bushing to fit the entire shaft in and rotate the bushing backward until the shaft locks in place.b. Close the sheet guide. Make sure that both ends of the sheet guide are locked firmly.9. Close the ADF.Be careful not to get your fingers caught when closing the ADF.10. Attach the ADF paper chute (feeder).Insert the tabs into the slots on the back of the scanner in the direction of arrow 1 and tilt the ADF paper chute (feeder) downwards in the direction of arrow 2 until it locks in place. Attach the ADF paper chute (feeder) with the side guides facing upwards.11. Plug In the power cable and turn on the scanner.12. Clear the pick roller counter.a.On the touch screen, press -> [Cleaning & Maintenance] -> [Consumable counters].b.On the [Consumable counters] screen, press the [Clear] button For [After Replacing the Pick Roller].Clearing the Sheet CountersWhen you have replaced or cleaned a consumable part, clear the corresponding counter.1.Start up the Software Operation Panel.2.From the list on the left, select [Device Setting] and click the [Clear] button for [After cleaning] when cleaning isperformed or click the [Clear] button for the consumable that you replaced.The counter is reset to "0".3.Click the [OK] button.A message window appears.4.Click the [OK] button.The settings are savedMessages for Cleaning or Replacing ConsumablesThe following message may appear on the computer while the scanner is in use.Example: Message for replacing consumablesExample: Message for cleaningCheck the message, and replace the consumable or perform cleaning accordingly.Note that, when this message appears, the touch screen displays a notification on to replacing the consumables or cleaning the scanner.Scanner Cleaning Cycle [Cleaning Cycle]Specify the cleaning cycle for the scanner inside.The background color of the [After cleaning] counter in [Device Setting] changes to yellow when the counter reaches the specified value for this item.You can also display a cleaning instruction message that is described in Messages for Cleaning or Replacing Consumables.1.Start up the Software Operation Panel.2.From the list on the left, select [Device Setting 2] -> [Cleaning Cycle].3. Specify a value for the cleaning cycle.The value can range from 1,000 to 255,000 sheets (in increments of 1,000).The factory default setting is "5".4. Specify whether or not to display the cleaning Instruction message.The [Show cleaning instructions] check box is cleared for the factory default settings.Replacement Cycle of Consumables [Life Counter Alarm Setting]Specify the replacement cycle for the consumables.The background color of the counter for [Brake Roller] or [Pick Roller] in [Device Setting] changes to light yellow when the sheet count (after a consumable replacement) reaches 95% of the value specified for this setting and turns yellow when the sheet count reaches 100%.You can also display the message for replacing consumables, which is described in Messages for Cleaning or Replacing Consumables.1.Start up the Software Operation Panel.2. From the list on the left, select [Device Setting 2] -> [Life Counter Alarm Setting].3. Specify a value as the replacement cycle for each of the consumables (brake roller and pick roller).The value can range from 10,000 to 2,550,000 sheets (in increments of 10,000).The factory default setting is "20".。
FUJITSU Image Scanner N7100E 消耗品更换与清洁指南 CG00002-30
FUJITSU Image ScannerN7100E Consumable Replacement and Cleaning GuideDaily Care This section describes how to clean the scanner. Cleaning Materials ATTENTIONIn order to use the cleaning materials safely and correctly, read the precautions on each product thoroughly.● Do not use aerosol spray or spray that contains alcohol. Paper dust blown up bystrong air from the spray may enter inside the scanner, which may cause thescanner to fail or malfunction.Also note that sparks generated by static electricity may cause a fire.● The inside of the ADF becomes very hot when the scanner is being used.Before you start cleaning the inside of the ADF, make sure to turn off the power,unplug the power cable and wait for at least 15 minutes for the inside of the ADFto cool down.CAUTIONFor more information about the cleaning materials, contact the distributor/dealer where you purchased this product. Refer to the contact information in the Contact List or the Contact forLocation and FrequencyATTENTIONCleaning cycles may vary depending on the condition of the documents. Also,cleaning must be performed more frequently when the following types of documents are scanned:●Smooth-faced documents such as coated paper●Documents with printed text/graphics that almost cover the entire surface●Chemically-treated documents such as carbonless paper●Documents containing a large amount of calcium carbonate●Documents written in lead pencil●Documents on which the toner is not sufficiently fusedFujitsu Computer Products of America, Inc./fcpa1250 East Arques Avenue Sunnyvale, CA 94085-4701 (800) 626-4686 (408) 746-*********************.com© 2020 Fujitsu Computer Products of America, Inc. All rights reserved, Fujitsu andthe Fujitsu Logo are registered trademarks, ScanCare and ScanAid are trademarksof Fujitsu Computer Products of America, IncAll statements herein are valid only in the U.S. for U.S. residents, are based onnormal operating conditions, are provided for informational purposes only and arenot intended to create any implied warranty of merchantability or fitness for a particular purpose. Fujitsu Computer Products of America, Inc. reserves the right tomodify at any time without prior notice these statements, our products, their performance specifications, availability, price and warranty, post-warranty and service programs.Printed in the U.S.A.。
扫描仪故障排除

当ADF返回到其起始位置时,您会听到“咔”的声音。
安装ADF送纸斜槽。
高速文档扫描仪专业维修、维护、保养、耗材更换
迪利科技是专业的高速文档扫描仪维护供应商,是国内最早从事高扫行业的公司之一,具备长达10年的专业资质,拥有一批专业的高扫维修工程师,自备光学组件、主板、电机、皮带、灯管等大量常用备件并与国外同行共享庞大配件库,无需等待配件即可快速维修富士通、佳能、柯达、虹光等品牌的全线机型,可提供配件供应、送修、上门等各种维修服务,也可为大客户提供全保服务,服务专业、快捷、高效,马上联系,马上解决问题,欢迎广大高扫用户联系咨询。
柯达(Kodak):
I30 / i40 / i50 / i55 / i60 / i65 / i1120 / i1210 / i1220 / i1310 / i1320 /ss100/ss500/ i1405 / i1410 / i1420 / i1440 / i1840 / i1860 / i150 / i160 / i250 / i260 / i280 / i610 / i620 / i640 / i660 / i730 / i750 / i780 / i810 / i820 / i830 / i840 / 1500D / 2500D / 3500D / 3510D / 3520D / 3590C / 4500C
任何高速扫描仪在使用过程中为保障设备正常运转及延长使用寿命要定期的进行清洁,更换耗材等日常保养和维护。下面以富士通fi-5120C扫描仪进行说明解析。
1、注意事项:
要把扫描仪放置在一个使它的任何部分都不能悬空的平面上,例如桌面。而且,要确保扫描仪放置在一个平坦而水平的平面上。请不要把扫描仪放置在不稳定的平面上。要把扫描仪安放在一个水平的不会晃动的表面上,以避免扫描仪倾斜。确保扫描仪底板散热,不能用布或纸张书本等阻碍散热的物体放置于扫描仪底下请不要堵塞通风口。如果通风口被堵塞,那么设备内部将会过热,从而可能导致火灾或故障的发生。扫描仪从寒冷的地方搬进温暖的室内后,请不要立即使用。扫描仪从寒冷的地方移出后,请不要立即搬进温暖的室内。这样,可能导致凝结水珠,从而引起扫描仪故障。在您使用以前,让扫描仪先干燥1到2小时。
Fujitsu fi-6800 消耗品替换和清洁说明书
2C ONSUMABLES L ISTDescription Qty Life Fujitsu P/N Pick Rollers 1 Set600,000PA03575-K011 Separator Roller1600,000PA03575-K012 Brake Roller1600,000PA03575-K013Note:To insure the longest possible consumable life, it is strongly recommended that all the consumables listed above be replaced at the same time. Not replacing all the consumables at the same time will decrease the life of the consumables.NCR or Carbonless paper has chemical composition which damages the consumables listed above. Cleaning of these items will be needed more frequently to avoid feed problems. Also their life will be reduced if this paper is scanned.Pick RollersBrake Roller Separator Roller3R EPLACING THE P ICK R OLLERSWorn, defective, or improperly installed Pick Rollers will cause misfeeds and paper jams. The Pick Rollers have an approximate life of 600,000pages. If NCR or carbonless paper is used the life span of the PickRollers may be decreased by half.TabRoller CoverPick Roller•Make sure there is no paper in the stacker.•Grab the ADF Release Tab and lift it up to open the ADF.Note:When you stop pushing up on the ADF it stays at that location.•Open the Roller Cover by grabbing the tabs on the left and right sides with your fingers and pull down.•Pull out on the tab that locks the Pick Roller in place in the direction of the arrow and slide the Pick Roller off the shaft.•Repeat the procedure above to remove the second Pick Roller.Note:The roller shaft and the hole in the Pick Rollers are keyed and will only slide on in one orientation.•Install the new Pick Rollers by aligning the hole in the rollers with the roller shaft.4R EPLACING THE P ICK R OLLERS (CONT.)•Install the new Pick Rollersby aligning the hole in therollers with the roller shaft.•Close the Roller Cover.•Close the ADF Cover.•Reset the Pick RollerCounter in the SoftwareOperation Panel or on theScanner Operator Panel.5R EPLACING THE S EPARATOR R OLLERA worn or improperly installed Separator Roller will cause multiple feeds and paper jams. Separator Roller has an approximate life of 600,000pages. If NCR or carbonless paper is used the life span of the theserollers may be decreased by half.TabRoller CoverLeverSeparator RollerLeverSeparator Roller•Make sure there is no paper in the stacker.•Grab the ADF Release Tab and lift it up to open the ADF.Note:When you stop pushing up on the ADF it stays at that location.•Open the Roller Cover by grabbing the tabs on the left and right sides with your fingers and pull down.•Pull down the lever which is located on the right side of the Separator Roller.•Pull down the lever which is located on the left side of the Separator Roller.6•Pull the lever on the left sideof the Separator Rollertowards you and remove italong with the shaft.•Install the new SeparatorRoller by inserting the rightside of the shaft first, thenthe left side so that the tabfits in the groove.•Push up the lever which islocated on the left side of theSeparator Roller.•Push up the lever which islocated on the right side ofthe Separator Roller.TabSeparator RollerSeparator RollerSeparator RollerLever R EPLACING THE S EPARATOR R OLLER (CONT.)Separator RollerLever7R EPLACING THE S EPARATOR R OLLER (CONT.)•Close the Roller Cover.Note:Make sure that both ends of the cover are locked firmly.•Close the ADF Cover.•Reset the Separator Roller Counter in the Software Operation Panel or on the Scanner Operator Panel.Roller Cover8R EPLACING THE B RAKE R OLLERA worn or improperly installed Brake Roller will cause multiple feeds and paper jams. The Brake Roller has an approximate life of 600,000 pages. If NCR or carbonless paper is used the life span of the Brake Roller may be decreased by half.•Make sure there is no paperin the stacker.•Grab the ADF Release Taband lift it up to open the ADF.Note:When you stop pushing up on the ADF it stays at that location.•Grab the Roller Cover by thelower middle and lift to open.•Lift the left side of the BrakeRoller and then pull the shaftout from left to right.•Install the new Brake Rollerby inserting the right end ofthe shaft into the mountinghole, then place the left endinto the mounting bracket.•Close the Roller Cover.Roller CoverBrakeRollerBrakeRollerR EPLACING THE B RAKE R OLLER (CONT.)•Close the ADF Cover.•Reset the Brake Roller Counter in the Software Operation Panel or onthe Scanner Operator Panel.910C HECKING AND R ESETTING THE C ONSUMABLE & C LEANING C OUNTERS The following instructions show you how to check the life count of each consumable and also how to reset the counter after the consumables have been replaced. To insure accurate consumable life tracking, it is very important to reset the consumable counters every time consumables are replaced.C HECKING C ONSUMABLE C OUNTS•Turn on the scanner and confirm it is communicating properly to your PC.•From the S TART M ENU, select A LL P ROGRAMS/S CANNERU TILITY FOR M ICROSOFT W INDOWS/S OFTWARE O PERATIONP ANEL.•The S OFTWARE O PERATION P ANEL opens.•From the listing on the left, select Device SettingC HECKING AND R ESETTING THE C ONSUMABLE & C LEANING C OUNTERS (CONT .)CounterDescriptionTotal Page Count(ADF)Pages scanned by the fi-6800 Scanner.After Cleaning Number of pages scanned since the last time the scanner was cleaned.Brake Roller Number of pages scanned since the Brake Roller was replaced.Pick Roller Number of pages scanned since the Pick Rollers were replaced.Separator Roller Number of pages scanned since the Separation Rollers were replaced.Assist RollerNumber of pages scanned since the Assist Roller was replaced. This counter cannot be reset by the user.The screen on the previous page displays the Life Count of the Scannerand the number of pages scanned by each consumable.R ESETTING THE C ONSUMABLE C OUNTERS U SING THE S OFTWARE O PERATION P ANELOnce consumables are replaced, it is very important to reset theConsumable Counters. This will allow the user to accurately track the page count of each consumable.•Click the C LEAR B UTTON beside the replaced consumable.•Click the OK B UTTON.C HECKING AND R ESETTING THE C ONSUMABLE C OUNTERS (CONT.)R ESETTING THE C ONSUMABLE C OUNTERS U SING THE S CANNER M ENUThe consumable counters can also be reset from the scanner Operator Panel.•Make sure the scanner is on and Ready.•Press the M ENU B UTTON.•Press the [] or [] and select [23: Show/Clear Counters].•Press the F UNCTION/E NTER B UTTON.•Press the [] or [] until the replaced consumable is displayed on the LCD.•Press the C OUNTER R ESET B UTTON.•Make sure that YES is highlighted and press the F UNCTION/E NTERB UTTON to confirm.C LEANING L OCATIONS AND F REQUENCIESNote:The scanner will need to be cleaned more frequently than stated above if the following paper is scanned.•Paper with special coating such as carbonless paper (NCR).•Paper with large amount of printing. (Heavy toner or ink)•Paper filled in with Pencil.•Documents containing a large amount of calcium carbonate.•Documents with toner that is not fused properly.Cleaning ClothsCG90000-120001Cleaning SheetsCA99501-0016Cleaner F1PA03950-0352C LEANING MATERIALSCleaning WipesPA03951-0419Cleaning Swabs CG90000-120601LocationProtective PaperCleaning SheetLeft Hopper GuideCleaning SheetC LEANING THE R OLLERS WITH THE C LEANING S HEETSThe cleaning sheets are designed to remove only loose paper dust and ink from the rollers. Use them approximately every 10,000 sheets scanned.They are to be used in between the thorough cleanings of the ing the cleaning sheets does not take the place of the more com-plete cleanings described later in this section •Make sure the scanner is ON.•Press the M ENU B UTTON .•Press the [] or [] and select [21: Show/Clear Counters].•Press the F UNCTION /E NTER B UTTON .•Set the Hopper Guides to their maximum width.•Adjust the Stacker Extension to the length of the Cleaning Sheet and pull up on the Paper Stopper.Stacker ExtensionPaper StopperHopper Side Guide•Remove the protective paper from the cleaning sheet.•Place the cleaning sheet on the Hopper against the Left Hopper Guide, adhesive side up to clean the Upper Transport Path.•Press the S CAN B UTTON .•The cleaning sheet is fed through the scanner.•Place the same cleaning sheet on the Hopper against the Right Hopper Guide,adhesive side up.•Press the S CAN B UTTON .•The cleaning sheet is fed through the scanner.•Repeat the previous steps with the adhesive side face down to clean the lower Transport Path.•Press the S TOP B UTTON .•Reset the Cleaning Counter in the Software Operation Panel or on the Scanner Operator Panel.C LEANING THE R OLLERS WITH THE C LEANING S HEETS (CONT .)Right HopperGuideCleaning SheetC LEANING THE C ONSUMABLE F EED C OMPONENTSIt is very important to clean the scanner consumables on a regular basis to avoid mis-picking, double feeding and paper jam problems. These items should be cleaned every 10,000 sheets. More frequent cleaning will be required if scanning paper with a large amount of printing,documents filled out in pencil, or carbonless multipart forms.•Make sure there is no paper in the stacker.•Grab the ADF Release Tab and lift it up to open the ADF.•Remove the Pick Rollers (Refer to page 3).•Using a cloth with F1Cleaner or isopropyl alcohol gently wipe across the Pick Rollers, along the grooves of the roller surface.•Reinstall the Pick Rollers•Remove the Separator Roller (Refer to page 5).•Using a cloth with F1Cleaner or isopropyl alcohol gently wipe across the Separator Roller, along the grooves of the roller surface.•Reinstall the Separator Roller.Note:Proper cleaning of the Pick Rollers, Brake Roller and Separator Rollers will increase the life of each component.C LEANING THE C ONSUMABLE F EED C OMPONENTS (CONT.)•Remove the Brake Roller (Refer to page 8).•Using a cloth with F1Cleaner or isopropyl alcoholgently wipe along thedirection of the grooves ofthe roller surface•Reinstall the Brake Roller.•Reset the Cleaning Counter in the Software Operation Panel or on the Scanner Operator Panel.C LEANING THE P INCH AND F EED R OLLERSIt is very important to clean the scanner pinch and feed rollers on a regular basis to avoid paper feeding problems. These rollers should be cleaned every 10,000 sheets. More frequent cleaning will be required if scanning paper with a large amount of printing, documents filled out in pencil, or carbonless multipart forms.•Open the Top Cover by grabbing the Top Cover Release Tab and pushing up.•Clean the Feed Rollers in the upper area of the scanner with a lint free clothmoistened with F1 Cleaner or isopropyl alcohol. Clean the whole surface of the rollers by rotating them manually.Below is a location of the different types of rollers in the scanner.Top Cover Release TabTop CoverFeed RollersFeed RollersPinch RollersC LEANING THE P INCH AND F EED R OLLERS (CONT .)•Open the ADF.•Clean the Feed Rollers in the lower area of the scanner with a lint free cloth moistened with F1 Cleaner or isopropyl alcohol. Clean the whole surface of the rollers by rotating them manually.•Clean the Assist Roller in the roller area of the scanner with a lint free cloth moistened with F1 Cleaner or isopropyl alcohol. Clean the whole surface of the rollers by rotating them manually.•Clean the Pinch Rollers in the upper area of the scanner with a lint free cloth moistened with F1Cleaner or isopropyl alcohol.Clean the whole surface of the rollers by rotating them manually.•Clean the Pinch Rollers in the ADF of the scanner with a lint free cloth moistened with F1 Cleaner or isopropyl alcohol. Clean the whole surface of the rollers by rotating them manually.Feed RollersAssist RollerPinch RollersPinch Rollers•Close the ADF Cover.•Reset the Cleaning Counter in the Software Operation Panel or on the Scanner Operator Panel.C LEANING THE P APER P A TH S HEET G UIDESKeeping the transport path clean will avoid paper feeding issues and the marking of scanned paper.•Open the ADF.•Clean the metal sheet guides in the upper section of the ADF with a lint free cloth moistened with F1 Cleaner or isopropyl alcohol.•Clean the metal sheet guides in the lower section of the ADF with a lint free cloth moistened with F1 Cleaner or isopropyl alcohol.Note:If the transport path contains a large amount of paper dust use a vacuum cleaner to clean.•Reset the Cleaning Counter in the Software Operation Panel or on the Scanner Operator Panel.Dirty Glass Areas can cause vertical streaks in the scanned image. It isvery important to keep these areas free of paper dust, ink and toner.•Clean the Glass Areas on the upper side of the ADF with a lint free cloth.Note:Under normal conditions the Removable Glass assembly should nothave to be removed. If there is a large amount of paper dust in the scanner and the scanned images continue to have vertical streaks,follow the directions below to clean behind the glass.•Loosen the screw on the GlassAssembly. This is a captivescrew so it will not come free.•Tilt the Glass to the angle shownon the right.•Remove the Glass as you slide itto the right.•Clean the backside of the glassyou removed with a lint freecloth.•Using a cotton swab, clean theglass inside the area where theGlass was removed.•Reinstall the Glass Assembly.C LEANING THE G LASS AREASRemovable GlassNon-Removable GlassGlassC LEANING THE G LASS A REAS (CONT .)•Clean the Glass Areas on the lower side of the ADF with a lint freecloth.Note:Under normal conditions the Removable Glass assembly should nothave to be removed. If there is a large amount of paper dust in thescanner and the scanned images continue to have vertical streaks,follow the directions below to clean behind the glass.•Loosen the screw on the GlassAssembly. This is a captivescrew so it will not come free.•Tilt the Glass to the angle shownon the right.•Remove the Glass as you slide itto the left.•Clean the backside of the glassyou removed with a lint freecloth.•Using a cotton swab, clean theglass inside the area where theGlass was removed.•Reinstall the Glass Assembly.•Reset the Cleaning Counter in the Software Operation Panel or on theScanner Operator Panel.Removable GlassNon-Removable GlassGlassDirty Document Sensors can cause false paper jam messages.C LEANING THED OCUMENT S ENSORS•Open the scanner Top Cover.•Clean the Document Sensorin the top section of thescanner with a lint free cloth.•Open the ADF.•Clean the Document Sensors in the upper section of the ADF area withthe a lint free cloth moistened with F1 Cleaner or isopropyl alcohol.•Clean the Document Sensors in the lower section of the ADF area withthe a lint free cloth moistened with F1 Cleaner or isopropyl alcohol.•Close the ADF.•Reset the Cleaning Counter in the Software Operation Panel or on the Scanner Operator Panel.Document SensorDocument Sensors Document SensorsDocument SensorsDocument SensorsC LEANINGTHE H OPPER F RICTION P ADS•Make sure the Hopper is open.•Clean the Friction Pads with a lint free cloth moistened with F1 Cleaneror isopropyl alcohol.•Reset the Cleaning Counter in the Software Operation Panel or on theScanner Operator Panel.Friction PadsDirty Hopper Friction Pads can cause multifeeds when the Hopper only hasa few sheets stacked on it.Fujitsu Computer Products of America, Inc./fcpaPrinted in the U.S.A.。
Fujitsu S1300 S300 消耗品更换与清洁说明书
S1300/S300 S2K IT C ONTENTSCleaning Cloths Qty 1 - 24/packPick Roller Qty 0Pad AssemblyQty 33C ONSUMABLES L ISTDescription Qty Life Fujitsu P/N Pick Roller 1100,000PA03541-0001Pad Assembly110,000PA03541-0002Note:Replacement Cycles are estimated guidelines established by testing with A4/Letter sized woodfree and wood based 17 lb paper. NCR or Carbonless paper has chemical composition which damages the Pad, and the Pick Roller. Cleaning of the consumables will be required more frequently to avoid feed problems. Consumable life will be reduced if NCR or Carbonless paper is scanned.Pad AssemblyPick Roller4R EPLACING THE P AD A SSEMBLY•Remove all documentsfrom the ADF PaperChute. Open theScanner. Right click onthe ScanSnap ManagerICONon the Task Bar.•Check consumablesupplies.....•Check consumable statuswindow to see how manypages have been runsince changing the PadASSY. See Consumableslist on page 2 of thisdocument for replacementlife counts.•Remove the PadAssembly by pressing twoknobs on the top of thepad assembly and slidingit up to remove it. Use theReset Button for the PadASSY Count afterchanging the Pad.A defective or improperly installed Pad Assembly can cause misspicks, skew, or double fed documents. To replace the Pad Assembly perform the following steps.Note:After replacement of any consumable reset the counter for that consumable by following the instructions in your Operator’s Guide. These instructions can be found under the “Replacing Consumables”section of the Operator’s Guide.5R EPLACING THE P ICK R OLLERThe Pick Roller should only be replaced at 100,000 pages run. It is not supplied in the Kit and can be ordered using the part number shown onpage 3 of this booklet.•Remove all documents from the ADF PaperChute. Right click on the ScanSnap Manager ICONon the Task Bar.•Check consumable supplies.....•Check consumable status window to see how many pages have been run since changing the Pick Roller. See Consumables list on page 2 of thisdocument for replacement life counts.•Remove the Pick Roller by pinching the Pick-Up Tab on the sheet guide and lifting up to remove the sheet guide.•Rotate the Pick Roller bushing, remove the shaft with the pick roller by moving it towards the left side. Use the Resetbutton in the Consumable status window to set the Pick Roller Count to 0after changing.6•Attach the new Pick Roller bysliding it on to the shaft.Rotate the Pick Roller toalign the screw protrusion onthe shaft with the slot on thePick Roller. Be sure the PickRoller tab clicks and the PickRoller is locked in place onthe shaft before reinstallingthe shaft.•Reinstall the Pick RollerShaft with the new PickRoller installed in reverseorder used to remove thePick Roller Shaft.R EPLACING THE P ICK R OLLER (CONT.)•Use a paper clip to pull up the pick roller tab and slide the pick rolleroff of the shaft.C LEANING L OCATIONS AND F REQUENCIESLocationNote:The scanner will need to be cleaned every day (or possibly more thanonce a day) if the following paper is scanned.•Paper with special coating such as carbonless paper.•Paper with large amount of printing. (Heavy toner or ink)•Documents with toner that is not fused properly.· D O NOT USE WA TER OR NEUTRAL DETERGENT TO CLEAN THE INSIDE OF THESCANNER.· D O NOT USE AEROSOL SPRAYS TO CLEAN THE SCANNER. A EROSOL SPRAYSCAUSE DIRT AND DUST TO ENTER THE SCANNER, RESULTING IN MALFUNCTIONS.· I T MAY TAKE A LONG TIME FOR THE CLEANER TO VAPORIZES IF A LARGE AMOUNTOF RESIDUE IS LEFT AFER CLEANING P ARTS.· W HEN CLEANING THE SCANNER P ARTS USING THE CLEANING WIPES, WIPE OFF THEEXCESS CLEANER COMPLETEL Y WITH A SOFT LINT-FREE CLOTH TO ELIMINATERESIDUE ON THE SURFACE OF THE CLEANED P ARTS.C LEANING M ATERIALSCleaning Wipes78C LEANING I NSIDE THE S CANNER WITH C LEANING W IPES•Open the Cover onthe ADF by pullingthe Cover OpenLever in thedirection shown.•Clean the placesshown in the drawingto the right using aCleaning Wipe anddrying with a lint freecloth. Be sure topower off the scannerbefore cleaning withCleaning Wipe oralcohol on lint freecloths.Pad Assy Plastic Roller x4Eject RollerFeed RollerPickRollerWhiteSheets 2placesGlass 2places☯Clean the Pad Assy by wiping in a downward motion with a Cleaning wipe being careful not to catch the Cleaning wipe on any metalsprings.☯Gently clean the 2 white sheets and 2 glass covers using a cleaning wipe.☯Clean the Pick Roller, plastic rollers, feed rollers and eject rollers usinga cleaning wipe. Clean well as dirt or dust on these rollers will causepick, or feed problems during scanning. Be careful not to scratch thesurface of any rollers in the scanner as this may affect the scannersoperation when feeding paper to be scanned.With the ADF open, hold the Scan Button to advance the Feed andEject Rollers. This allows access to the entire roller surface for cleaning.Fujitsu Computer Products of America, Inc./fcpa1255 East Arques Avenue Sunnyvale, CA 94085-4701 (800)626-4686 (408)746-7000*****************.com© 2008 Fujitsu Computer Products of America, Inc. All rights reserved, Fujitsu and theFujitsu Logo are registered trademarks, ScanCare and ScanAid are trademarks ofFujitsu Computer Products of America, IncAll statements herein are valid only in the U.S. for U.S. residents, are based on normaloperating conditions, are provided for informational purposes only and are not intendedto create any implied warranty of merchantability or fitness for a particular purpose.Fujitsu Computer Products of America, Inc. reserves the right to modify at any timewithout prior notice thse statements, our products, their performance specifications,availability, price and warranty, post-warranty and service programs.Printed in the US.A9。
