PM66(40~2000秒)高音质播放模组
HeadAmp 6 Pro 6 声道耳机放大器系统用户手册说明书

HeadAmp 6 Pro6 CHANNEL HEADPHONE AMPLIFIER SYSTEMUSER’S GUIDEIMPORTANT SAFETY INSTRUCTIONS – READ FIRSTThis symbol, wherever it appears, This symbol, wherever it appears, alerts alerts you to the presence of uninsulated you to important operating and maintenance dangerous voltage inside the enclosure. Voltage instructions in the accompanying literature.that may be sufficient to constitute a risk of shock. Please read manual.Read Instructions:Retain these safety and operating instructions for future reference. Heed all warnings printed here and on the equipment. Follow the operating instructions printed in this user guide.Do Not Open:There are no user serviceable parts inside. Refer any service work to qualified technical personnel only.Power Sources:Only connect the unit to mains power of the type marked on the rear panel. The power source must provide a good ground connection.Power Cord:Use the power cord with sealed mains plug appropriate for your local mains supply as provided with the equipment. If the provided plug does not fit into your outlet consult your service agent. Route the power cord so that it is not likely to be walked on, stretched or pinched by items placed upon or against.Grounding:Do not defeat the grounding and polarization means of the power cord plug. Do not remove or tamper with the ground connection on the power cord.Ventilation:Do not obstruct the ventilation slots or position the unit where the air required for ventilation is impeded. If the unit is to be operated in a rack, case or other furniture, ensure that it is constructed to allow adequate ventilation.Moisture:To reduce the risk of fire or electrical shock do not expose the unit to rain, moisture or use in damp or wet conditions. Do not place a container of liquid on it, which may spill into any openings.Heat:Do not locate the unit in a place close to excessive heat or direct sunlight, as this could be a fire hazard. Locate the unit away from any equipment, which produces heat such as: power supplies, power amplifiers and heaters. Environment:Protect from excessive dirt, dust, heat, and vibration when operating and storing. Avoid tobacco ash, drink spillage and smoke, especially that associated with smoke machines.Handling:To prevent damage to the controls and cosmetics avoid rough handling and excessive vibration. Protect the controls from damage during transit. Use adequate padding if you need to ship the unit. To avoid injury to yourself or damage to the equipment take care when lifting, moving or carrying the unit.Servicing:Switch off the equipment and unplug the power cord immediately if it is exposed to moisture, spilled liquid, objects fallen into opening, or the power cord or plug becomes damaged during a lightning storm or if smoke odor or noise is noted. Refer servicing to qualified technical personnel only.Installation:Install the unit in accordance with the instructions printed in the user guide.The ART HeadAmp 6 Pro6 Channel Headphone Amplifier SystemIMPORTANT SAFETY INSTRUCTIONS – READ FIRST (3)INTRODUCTION (5)INSTALLATION (5)AC Power Hookup (5)Analog Audio Connections (5)CONTROLS and JACKS (6)Front Panel (6)Direct In Jack (6)Master Volume Control (6)Mono L and Mono R Switches (6)Out Jack (6)Bass Control (7)Treble Control (7)Balance Control (7)Level Control (7)Power Switch (7)Rear Panel (7)Balanced Main Inputs (8)Balanced Main Thru (8)Stereo Headphone Outputs (8)Stereo Aux Inputs (8)HEADAMP 6 PRO OPERATION (9)APPLICATIONS (10)WARRANTY INFORMATION (12)SERVICE (13)HEADAMP 6 PRO SPECIFICATIONS (14)List of FiguresFIGURE 1 - Master Input and Channel One (6)FIGURE 2 - Rear Panel Inputs (7)FIGURE 3 - Rear Panel Headphone Outputs and Aux Inputs (8)FIGURE 4 - Headphone Distribution Application (10)FIGURE 5 - “More Me” Foldback Application (11)INTRODUCTIONThe ART HeadAmp 6 Pro is a six-channel stereo headphone amplifier that includes a six-channel auxiliary input section that can be used to provide the popular “More-Me” function on each headphone mix. Each output channel also features a dual function BALANCE control which will pan between LEFT & RIGHT sides of the main signal bus, or vary the MIX between the main signal bus and the AUXILIARY input for that respective channel.Bass and treble controls are included on each output channel for fine-tuning the tone. Outputs include both front and rear panel stereo 1/4-inch TRS jacks for ease of installation and quick patching capability. Two MONO select buttons on each channel select between four operating modes; 1) Stereo, 2) Mono Left, 3) Mono Right, 4) Mono Both (Left & Right) for versatile monitoring solutions.Input options include XLR and 1/4-inch TRS balanced inputs with matching “Thru” jacks for bridging multiple HeadAmp 6 Pro units. An additional front panel stereo 1/4-inch TRS jack for quick patch override of the rear panel inputs is included for quick insertion of any stereo source. Eight-segment LED level indicators provide visual feedback of the signal level on all channels as well as the main signal bus. INSTALLATIONThe HeadAmp 6 Pro may be used in a wide variety of applications and environments. Its rack-mountable steel and aluminum enclosure is both attractive and designed for continuous professional use. Mounting location is not critical. However, for greater performance reliability we recommend that you not place the unit on top of power amps or other sources of extreme heat, or strong magnetic fields.AC Power HookupThe HeadAmp 6 Pro has an internal power supply. Only connect the unit to mains power of the type marked on the rear panel. The power source must provide a good ground connection, and the ground pin on the mains plug should never be defeated.Analog Audio ConnectionsAudio connections to and from the HeadAmp 6 Pro are:Rear Balanced Inputs and Outputs: [XLR] Pin 2 = Pos(+), Pin 3 = Neg (-), Pin 1 = Ground[1/4-inch] Tip = Pos (+), Ring = Neg (-), Sleeve = Ground Rear Stereo Aux 1/4-inch Inputs: Tip = Left, Ring = Right, Sleeve = GroundFront Direct 1/4-inch Input: Tip = Left, Ring = Right, Sleeve = GroundFront and Rear Stereo Headphone 1/4-inch Outputs: Tip = Left, Ring = Right, Sleeve = GroundCONTROLS and JACKSFront PanelFIGURE 1 - Master Input and Channel OneDirect In JackThe 1/4-inch TRS (Tip, Ring, Sleeve) jack on the front panel provides a stereo unbalanced input which when used will override the rear panel balanced inputs. This input is useful for when you want to temporarily insert a different main input signal from what is connected to the rear inputs, or simply make an unbalanced TRS style connection to another headphone output source.Master Volume ControlThis control adjusts the level of the main signal bus. The audio level on the main signal bus is displayed by the eight-segment LED level meter located just to the left of the MASTER VOLUME control.Mono L and Mono R SwitchesThese switches set the stereo headphone outputs to one of four operating modes. (This affects only the headphone outputs and occurs post (after) the mixing, level, and tone control sections.)1) Both Switches Out = Stereo2) Mono L In & Mono R Out = Mono Left Channel Only3) Mono R In & Mono L Out = Mono Right Channel Only4) Mono L In & Mono R In = Mono Left & Right Channels TogetherOut JackThis stereo TRS 1/4-inch jack provides a connection for each of six output channels to stereo headphones or to additional headphone distribution amplifiers. A second identical output jack is provided on the rear panel for each channel as well.Bass ControlThis control can be used to boost or cut the low frequencies in each respective channel. The bass response is flat when the control is set to the 12 o’clock position.Treble ControlThis control can be used to boost or cut the high frequencies in each respective channel. The treble response is flat when the control is set to the 12 o’clock position.Balance ControlThis control provides one of two functions depending on whether there is a plug inserted into the rear panel STEREO AUX INPUT for a particular channel.With no plug inserted into the rear panel jack, the control will vary the Left / Right balance of the main signal bus.With a plug inserted into the rear panel jack, the control changes function to vary the balance between the stereo signals coming from the main signal bus and the stereo signals coming from the rear panel STEREO AUX INPUT for that respective channel. (By feeding a return signal for only the vocal microphone of a particular musician they can use the BALANCE control as a ‘More Me” control by varying the mix between their microphone signal alone, and the main signal bus audio. This effect is heard only in that individual headphone channel.)Level ControlThis control varies the audio output level coming from the front and rear panel 1/4-inch stereo output jacks for each respective channel. The audio level for each channel output is displayed by the eight-segment LED level meter located just to the left of the front panel 1/4-inch output jack.Power SwitchThis rocker switch turns the AC power On and Off. A small LED indicator in the rocker button illuminates to indicate that the power is on.Rear PanelFIGURE 2 - Rear Panel InputsBalanced Main InputsThese XLR and 1/4-inch TRS jacks are active balanced and are used for line level signals. The gain sensitivity is identical for both the XLR and 1/4-inch TRS jacks. (NOTE: the front panel DIRECT IN jack overrides these inputs when it is used.)Balanced Main ThruThese XLR and 1/4-inch TRS jacks are hardwired in parallel with the corresponding BALANCED MAIN INPUT jacks. The BALANCED MAIN THRU jacks are useful for daisy chaining multiple HeadAmp 6 Pro units together.FIGURE 3 - Rear Panel Headphone Outputs and Aux InputsStereo Headphone OutputsThese stereo TRS jacks are the main outputs for each channel of the headphone amplifier. They are wired in parallel with the corresponding output jacks on the front panel. Either front panel, rear panel, or both front and rear panel outputs can be used simultaneously to drive headphones or they can be used as feeds to additional headphone amplifiers in a distributed audio network. (NOTE: The HeadAmp 6 Pro is optimized to drive typical headphone load impedances of 32 to 600 Ohms. It is not recommended to drive total impedances lower than 16 Ohms however it can be done and will result in limited maximum output power, and possible clipping distortion depending on the output level and load. When driving multiple headphones from an individual output channel of the HeadAmp 6 Pro (paralleling), the available output power is split among the various headphones, and due to the combined load impedances the output may also become limited by premature clipping of the output signal. Most modern headphones are mid to high impedance and require only milliwatts to achieve full acoustic output so this should rarely be a problem. If it is a problem simply lower the total count of headphones on a particular channel in order to raise to total load impedance as seen by the channel output.)There is no direct relationship between headphone load impedance and SPL output. The relevant specification that determines acoustic output is the sensitivity spec of the headphone, i.e. how much SPL it will put out for a given level of input signal, usually rated at 1 mW. Sensitivity is determined by the overall design and construction of the transducer. Typically the power required is about 1/1000th of the equivalent amplifier power required to drive a speaker. Therefore typical headphone amplifiers provide power levels in the 10 to 20 mW range in order to achieve a very reasonable SPL output. Even an 8 Ohm headphone (if you can find one since they are rare) can be driven to full SPL output by the HeadAmp 6 Pro if it has a high enough sensitivity, regardless of the fact that the output voltage swing will be limited due to the overload protection circuitry. Stereo Aux InputsThese stereo TRS jacks provide a means of inserting a direct stereo signal into an individual headphone channel. When a plug is inserted into an AUX INPUT jack the BALANCE control for that particular channel changes function to become a balance (or mix) control adjusting the mix between the signal coming into the STEREO AUX INPUT and the main signal bus.HEADAMP 6 PRO OPERATIONStart with the MASTER VOLUME and LEVEL controls on all channels set fully counter-clockwise. Set the BASS, TREBLE, and BALANCE controls to their 12 o’clock positions. Set all mono switches to their “OUT” position.Using the appropriate balanced or unbalanced cables, (unbalanced cables will work in the rear panel inputs as well, but with the remote possibility of increased noise), connect the rear panel BALANCED MAIN INPUTs to the audio monitor signal source to be distributed to the headphones. Alternatively connect the audio signal source to the front panel DIRECT IN jack using a stereo TRS 1/4-inch plug.If connecting more than one HeadAmp 6 Pro to the same audio monitor signal source, simply daisy-chain the units by connecting from the BALANCED MAIN THRU connectors of the first unit to the BALANCED MAIN INPUT connectors of the next unit, etc. (NOTE: Daisy chaining only works with the rear panel connectors. The front panel DIRECT IN jack only feeds its respective HeadAmp 6 Pro unit directly.)Connect headphones, or leads to additional headphone amps, (like the ART HeadAmp 4) to either the front or rear panel HEADPHONE OUTPUT jacks (or both) using stereo 1/4-inch TRS plugs.If using the HeadAmp 6 Pro Auxiliary Mixer function, connect the stereo signals that are to be mixed into individual output channels to the appropriate rear panel STEREO AUX INPUT jacks using a stereo 1/4-inch TRS plug. (NOTE: For a mono signal use a TRS plug with the Tip and Ring tied together, or use one of the front panel MONO buttons to create a mono output to the headphones.) The AUX INPUT signal will only be heard in that individual channel depending on the position of the BALANCE and LEVEL controls for that particular channel.Turn on the POWER switch and with the audio monitor signal active and playing increase the MASTER VOLUME control to achieve a reading on the MASTER LED bar-graph level indicator which is high enough to light the green and yellow LEDs yet avoid lighting the RED CLIP LED on loud passages and audio peaks. Doing this will assure that a strong signal is available to drive each of the six individual channel amplifiers, and subsequently each channel amplifier will be able to run with less gain (a lower setting of the LEVEL control), thereby helping to optimize the signal-to-noise ratio at the outputs.Next set the LEVEL control on each channel to a comfortable listening level for the particular headphones being used.Set the BASS, TREBLE, and BALANCE controls to listening preference.NOTE: When using the Auxiliary Mixer to add a signal such as a direct vocal into an individual headphone channel in order to enhance that particular vocal in the mix (providing “More Me”) for the person listening to that headphone channel, the relative phase of the signal coming into the STEREO AUX INPUT will determine whether the STEREO AUX INPUT signal sums or subtracts from the main signal bus. The “More Me” effect will only result if the two signals add together in phase. If they are antiphase (180 degrees out of phase), the STEREO AUX INPUT signal will actually subtract the vocal out of the mix in the headphones for that one channel. Most consoles and microphone preamps will have a phase invert switch with which to set the desired operating mode.APPLICATIONSFIGURE 4 - Headphone Distribution ApplicationFIGURE 5 - “More Me” Foldback ApplicationWARRANTY INFORMATIONLimited Warranty:Applied Research and Technology will provide warranty and service for this unit in accordance with the following warrants:Applied Research and Technology, (A R T) warrants to the original purchaser that this product and the components thereof will be free from defects in workmanship and materials for a period of three years from the date of purchase. Applied Research and Technology will, without charge, repair or replace, at its option, defective product or component parts upon prepaid delivery to the factory service department or authorized service center, accompanied by proof of purchase date in the form of a valid sales receipt.Exclusions:This warranty does not apply in the event of misuse or abuse of the product or as a result of unauthorized alterations or repairs. This warranty is void if the serial number is altered, defaced, or removed.A R T reserves the right to make changes in design or make additions to or improvements upon this product without any obligation to install the same on products previously manufactured.A R T shall not be liable for any consequential damages, including without limitation damages resulting from loss of use. Some states do not allow limitations of incidental or consequential damages, so the above limitation or exclusion may not apply to you. This warranty gives you specific rights and you may have other rights, which vary, from state to state.For units purchased outside the United States, an authorized distributor of Applied Research and Technology will provide service.SERVICEThe following information is provided in the unlikely event that your unit requires service.1) Be sure that the unit is the cause of the problem. Check to make sure the unit has power, all cables are connected correctly, and the cables themselves are in working condition. You may want to consult with your dealer for assistance in troubleshooting or testing your particular configuration.2) If you believe the ART unit is at fault, go to . You may contact Customer Service for more assistance, or directly request a Return Authorization for service in the “resources” area of the website.3) If you are returning the unit for service, pack the unit in its original carton or a reasonable substitute. The original packaging may not be suitable as a shipping carton, so consider putting the packaged unit in another box for shipping. Print the RA number clearly on the outside of the shipping box.4) Include, with your unit, a note with the RA number and your contact information including a daytime phone number, preferably attached to the top of the unit.Fill in the following information for your reference:Date of purchase ______________________________________fromPurchasedSerial number ___________________HEADAMP 6 PRO SPECIFICATIONSInput ImpedanceBalanced Main Input XLR and 1/4-inch TRS Jacks....................40K Ohm BalancedDirect In TRS Jack.....................................................................9.9K OhmStereo Aux Input TRS Jacks......................................................≤ 21K to ≥ 15K OhmCMRR @ 1KHz..........................................................................≥ 40dBOutput ImpedanceHeadphone output......................................................................≤ 12 OhmsFrequency ResponseWith Tone Controls Set Flat.......................................................20 Hz – 50 KHz +0, -2dBHigh Frequency EQ....................................................................± 12dB @ 10 KHz ShelvingLow Frequency EQ.....................................................................± 12dB @ 100 Hz ShelvingMaximum Input Level ...................................................................................................+21.5dBuDynamic RangeRef: 130mW @ 600 Ohms (unit set to max gain).......................≥101 dB (typical)Maximum Gain@ 1KHz With Tone Controls Set To Flat....................................25.6 dBMaximum Output Level600 Ohm Headphones @ 1 KHz................................................150 mW32 Ohm Headphones @ 1 KHz..................................................500 mW8 Ohm Headphones @ 1 KHz....................................................150 mWDimensions (H x W x D) ...................................................................................................1.75 Inches x 19.0 Inches x 7.55 Inches ...................................................................................................44.5 mm x 482.6 mm x 190.5 mmWeight ...................................................................................................6.8 lbs. 3.1 kg.Power Requirements A – 105-125 VAC AC 60 Hz Consumption..............................................................................60 Watts Maximum - 18 Watts Idle ..................................................................................Export units configured for country of destination.Ref: 0 dBu = 0.775VAC RMSART maintains a policy of constant product improvement. ART reserves the right to make changes in design or make additions to or improvements upon this product without any obligation to install the same on products previously manufactured. Therefore, specifications are subject to change without notice.E-mail:***********************© 2008 Applied Research & Technology806-5004-101。
Autodesk Nastran 2023 参考手册说明书
FILESPEC ............................................................................................................................................................ 13
DISPFILE ............................................................................................................................................................. 11
File Management Directives – Output File Specifications: .............................................................................. 5
BULKDATAFILE .................................................................................................................................................... 7
ArenaMatch Utility 小前景 补声扬声器 AMU105 AMU108 AMU206
规范信息
本产品符合所有适用的欧盟指令要求。您可以从网站 /compliance 找到完整的符合性声明。
此符号表示不得将此产品作为生活垃圾丢弃,应将其送到合适的 回收站点进行回收。正确处理和回收有助于保护自然资源、人类 健康和环境。想要获得更多关于此产品的处理和回收的信息,请 联系当地市政当局、垃圾处理服务部门或您购买此产品的商店。
中国危险物质限用表
有毒或有害物质或元素名称及成分
有毒或有害物质和元素
零件名称
铅
汞
(Pb) (Hg)
镉 ()
六价铬 (CR(VI))
多溴化 联苯 (PBB)
印刷电路板 X
O
O
O
O
金属零件
X
O
O
O
O
塑料零件
O
O
O
O
O
扬声器
X
O
O
O
O
线缆
X
O
O
O
O
此表格依据 SJ/T 11364 的要求制定。
O:表示此零件中所有均质材料所包含的此类有毒或有害物质均低于 GB/T 26572 中的限定要求。
6. 只能使用制造商指定的附件/配件。
7.
只能使用制造商指定或随本设备一起销售的推车、支架、
三角架、托架或工作台。如果使用推车,则在移动推车/设
备时应格外小心,以免因倾倒而造成伤害。
警告/小心:
包含可能导致窒息危险的小部件。不适合 3 岁以下的儿童使用。
本产品含有磁性材料。有关这是否会影响到您的植入式医疗器 械,请咨询您的医生。
包装清单................................................................................................................................................................................................... 5 可选配件................................................................................................................................................................................................... 5 检查和维护....................................................................................................................................................................................................... 6 保持防风雨性........................................................................................................................................................................................... 6 推荐使用的工具.............................................................................................................................................................................................. 6 产品尺寸........................................................................................................................................................................................................... 7 ArenaMatch Utility AMU105........................................................................................................................................................... 7 ArenaMatch Utility AMU108........................................................................................................................................................... 8 ArenaMatch Utility AMU206.......................................................................................................................................................... 9 ArenaMatch Utility AMU208........................................................................................................................................................ 10
AM6200 95高功率中高频扬声器系统说明书
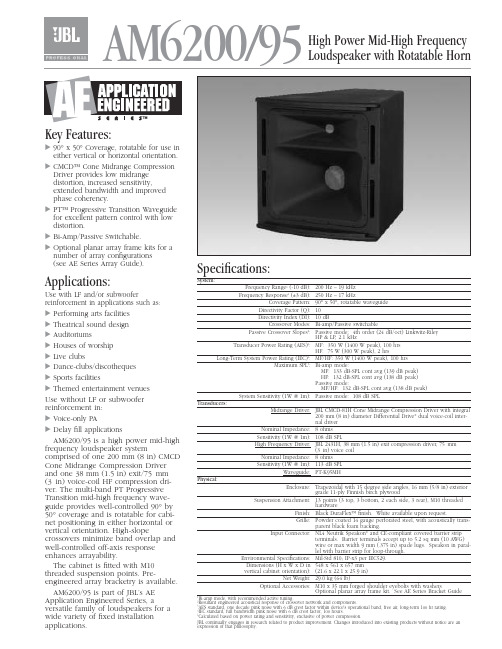
AM6200/95High Power Mid-High Frequency Loudspeaker with Rotatable HornKey Features:᭤90°x 50°Coverage, rotatable for use in either vertical or horizontal orientation. ᭤CMCD™ Cone Midrange Compression Driver provides low midrange distortion, increased sensitivity,extended bandwidth and improved phase coherency.᭤PT™ Progressive Transition Waveguide for excellent pattern control with low distortion.᭤Bi-Amp/Passive Switchable.᭤Optional planar array frame kits for a number of array configurations (see AE Series Array Guide).Applications:Use with LF and/or subwooferreinforcement in applications such as:᭤Performing arts facilities ᭤Theatrical sound design ᭤Auditoriums᭤Houses of worship ᭤Live clubs᭤Dance-clubs/discotheques ᭤Sports facilities᭤Themed entertainment venues Use without LF or subwoofer reinforcement in:᭤Voice-only PA᭤Delay fill applicationsAM6200/95 is a high power mid-high frequency loudspeaker systemcomprised of one 200 mm (8 in) CMCD Cone Midrange Compression Driver and one 38 mm (1.5 in) exit/75mm (3in) voice-coil HF compression dri-ver. The multi-band PT Progressive Transition mid-high frequency wave-guide provides well-controlled 90°by 50°coverage and is rotatable for cabi-net positioning in either horizontal or vertical orientation. High-slopecrossovers minimize band overlap and well-controlled off-axis response enhances arrayability.The cabinet is fitted with M10threaded suspension points. Pre-engineered array bracketry is available.AM6200/95 is part of JBL’s AE Application Engineered Series, aversatile family of loudspeakers for a wide variety of fixed installation applications.Specifications:System:Frequency Range 1(-10 dB):200 Hz – 19 kHz Frequency Response 1(±3 dB):250 Hz – 17 kHzCoverage Pattern:90°x 50°, rotatable waveguide Directivity Factor (Q):10Directivity Index (DI):10 dBCrossover Modes:Bi-amp/Passive switchablePassive Crossover Slopes 2:Passive mode: 4th order (24 dB/oct) Linkwitz-Riley HP & LP, 2.1 kHzTransducer Power Rating (AES)3:MF: 350 W (1400 W peak), 100 hrs HF: 75 W (300 W peak), 2 hrsLong-Term System Power Rating (IEC)4:MF/HF: 350 W (1400 W peak), 100 hrs Maximum SPL 5:Bi-amp mode:MF: 133 dB-SPL cont avg (139 dB peak)HF: 132 dB-SPL cont avg (138 dB peak)Passive mode:MF/HF: 132 dB-SPL cont avg (138 dB peak)System Sensitivity (1W @ 1m):Passive mode: 108 dB SPLTransducers:Midrange Driver:JBL CMCD-81H Cone Midrange Compression Driver with integral200 mm (8 in) diameter Differential Drive ®dual voice-coil inter-nal driverNominal Impedance:8 ohms Sensitivity (1W @ 1m):108 dB SPLHigh Frequency Driver:JBL 2431H, 38 mm (1.5 in) exit compression driver, 75mm(3in) voice coilNominal Impedance:8 ohms Sensitivity (1W @ 1m):113 dB SPLWaveguide:PT-K95MHPhysical:Enclosure:Trapezoidal with 15 degree side angles, 16 mm (5/8 in) exteriorgrade 11-ply Finnish birch plywoodSuspension Attachment:13 points (3 top, 3 bottom, 2 each side, 3 rear), M10 threadedhardwareFinish:Black DuraFlex™ finish. White available upon request.Grille:Powder coated 14 gauge perforated steel, with acoustically trans-parent black foam backing.Input Connector:NL4 Neutrik Speakon ®and CE-compliant covered barrier stripterminals. Barrier terminals accept up to 5.2 sq mm (10 AWG)wire or max width 9 mm (.375 in) spade lugs. Speakon in paral-lel with barrier strip for loop-through.Environmental Specifications:Mil-Std 810; IP-x3 per IEC529.Dimensions (H x W x D in 548 x 561 x 657 mm vertical cabinet orientation):(21.6 x 22.1 x 25.9 in)Net Weight:29.0 kg (64 lb)Optional Accessories: M10 x 35 mm forged shoulder eyebolts with washersOptional planar array frame kit. See AE Series Bracket GuideBi-amp mode, with recommended active tuning.Resultant engineered acoustical response of crossover network and components. AES standard, one decade pink noise with 6 dB crest factor within device's operational band, free air, long-term 100 hr rating.IEC standard, full bandwidth pink noise with 6 dB crest factor, 100 hours.Calculated based on power rating and sensitivity, exclusive of power compression.JBL continually engages in research related to product improvement. Changes introduced into existing products without notice are anexpression of that philosophy.᭤AM6200/95 High Power Mid-High Frequency Loudspeaker with Rotatable HornHorizontal 1/3 Octave PolarsSS AM6200/95CRP 5M 10/04᭤AM6200/95 High Power Mid-High Frequency Loudspeaker with Rotatable HornVertical 1/3 Octave PolarsJBL Professional8500 Balboa Boulevard, P.O. Box 2200Northridge, California 91329 U.S.A.©Copyright 2002 JBL ProfessionalAHarman International Company。
XENYX QX602MP3 音频混音器 快速启动向导说明书
XENYX QX602MP3Premium 6-Input 2-Bus Mixer with XENYX Mic Preamps, British EQs, MP3 Player and Multi-FXV 5.0保修条款法律声明带有此标志的终端设备具有强大的电流, 存在触电危险。
仅限使用带有 ¼'' TS 或扭锁式插头的高品质专业扬声器线。
所有的安装或调整均须由合格的专业人员进行。
此标志提醒您, 产品内存在未绝缘的危险电压, 有触电危险。
此标志提醒您查阅所附的重要的使用及维修说明。
请阅读有关手册。
小心为避免触电危险, 请勿打开机顶盖 (或背面挡板)。
设备内没有可供用户维修使用的部件。
请将维修事项交由合格的专业人员进行。
小心为避免着火或触电危险, 请勿将此设备置于雨淋或潮湿中。
此设备也不可受液体滴溅, 盛有液体的容器也不可置于其上, 如花瓶等。
小心维修说明仅是给合格的专业维修人员使用的。
为避免触电危险, 除了使用说明书提到的以外, 请勿进行任何其它维修。
所有维修均须由合格的专业人员进行。
1. 请阅读这些说明。
2. 请妥善保存这些说明。
3. 请注意所有的警示。
4. 请遵守所有的说明。
5. 请勿在靠近水的地方使用本产品。
6. 请用干布清洁本产品。
7.请勿堵塞通风口。
安装本产品时请遵照厂家的说明。
8. 请勿将本产品安装在热源附近,如 暖 气 片, 炉子或其它产生热量的设备 ( 包 括功放器)。
9. 请勿移除极性插头或接地插头的安全装置。
接地插头是由两个插塞接点及一个接地头构成。
若随货提供的插头不适合您的插座, 请找电工更换一个合适的插座。
10. 妥善保护电源线, 使其不被践踏或刺破, 尤其注意电源插头、多用途插座及设备连接处。
11. 请只使用厂家指定的附属设备和配 件。
12. 请只使用厂家指定的或随货销售的手推车, 架子, 三 角架, 支架和桌子。
若使用手推车来搬运设备, 请注意安全放置设备, 以 避免手推车和设备倾倒而受伤。
途观L PHEV 使用维护说明书

本说明书适用于下列表中各种型号的上汽大众新途观L插电式混合动力版多用途乘用车。
用户在使用本公司产品以前,必须认真阅读本使用维护说明书,阅读后需妥善保存,任何不当的使用、保养和修理都可能导致车辆的损坏及影响质量担保服务。
因此,在使用产品前请认真阅读本使用维护说明书,并对照表中的型号确认您的车型。
本使用维护说明书描述了该车型车辆在当前范围的配置、功能及操作的一般通用信息,但用户车辆的实际配置和功能等信息以具体交付时的为准。
本公司将持续对各种车型进行改进,各车型在外形、配置、功能和结构设计等方面也可能随时会发生变化,故本公司有权在法律法规允许的范围内对本说明书有关版本进行更改、补充,若用户对此有疑义请及时拨打上汽大众客户服务热线400-820-1111予以咨询。
未经本公司书面同意,不得复制、翻译或摘录本使用维护说明书。
上汽大众汽车有限公司依法保留对本说明书有关版本进行更改、补充等的一切权利。
中国印刷。
上汽大众汽车有限公司公司地址:中国上海安亭于田路邮政编码:201805企业标准号:Q/JQAB 353-2021致尊敬的用户尊敬的用户:感谢您对上汽大众的信任与厚爱!在您选择了上汽大众产品的同时,您已启动了全新的汽车生活之旅。
目前,上汽大众旗下已拥有1000余家大众品牌特许经销商/特约维修站,截至2018年末,已有100余家特许经销商/特约维修站将竭诚为您提供新能源车的售后服务,并且源源不断地有新的经销商伙伴加入到这个队伍中。
衷心希望您的每一天行车生活,都因有上汽大众的同行而更精彩!如果您对车辆使用有任何疑问,上汽大众经销商随时随地为您提供帮助,我们的上汽大众客户服务中心全国统一寻呼400-820-1111也将是您的坚强后盾。
2005年10月18日,上汽大众正式发布了“Techcare”服务品牌。
2014年9月,上汽大众以“匠心·挚诚”重新定义售后服务,将其作为上汽大众售后服务品牌的全新服务理念。
最详细的PM66芯片使用手册20131214
PM66DATASHEET
图 2 并行按键模式,DAC*音频输出方式接线图
PWM*:SPP 和 SPN 两脚严禁接地,或串接喇叭后直接接地或正电源。 DAC*:SPN 不可接地(本示意图以三极管 8050 作为放大器件,用户可根据实际功率需求自行选择 功放器件)
-7-
PM66DATASHEET
5,4 6,7 8, 9 12 10,16,11,15
描述 触収输入引脚(低有效)
输出引脚 接喇叭两端
电源正端 电源地 系统复位端(低有效) 编程控制端
-5-
PM66DATASHEET
2 PM66 的典型应用电路及 MCU 控制方式
2.1 典型线路
图 1 并行按键模式,PWM* 音频输出方式接线图
下表为各种型号在丌同的采样频率下可存放声音的秒数对照表。
采样频(HZ)
4.8K
型号 存储时长(秒)
PM66S(S)02 40
PM66S(S)04 125
PM66S(S)08 250
PM66S(S)16 500
PM66S(S)32 1000
PM66S(S)64 2000
PM66S128* 4000
*PM66系列不提供PM66S来自128PM66 系列诧音芯片在按键模式下,K1~K8 作为 8 个触収端,每个触収端可以存储最多 100 组 (Group),每个组(Group)中可存储 200 个独立声音段。K1~K8 可以分别触収不其对应的声音(低 有效),在烧录芯片的时候,可以设置为下降沿触収戒者低电平触収等多种触収模式。K1~K8 端口 有内置上拉电阻,并有防抖动设计,可接按键,也可用单片机 I/O 口线直接对其操作。如图 1。
图 3 串行接口工作方式电路
PM66语音芯片资料
PM66语音芯片PM66系列是中青世纪科技公司于2009年推出的一款智能语音产品。
该系列芯片在使用方式及外部电路上基本可以和PM50系列兼容,但较PM50具有录音时间更长,放音音质更佳的优势,是一个整合了录放音电路,快闪存储,ADPCM编、解码器,功率放大器,稳压器等线路的全功能录放系统。
因为我们已经把它包装成标准的COB-28管脚,所以使用者可以很方便的将PM66设计整合到需要录放音的场合上,只需接上电源、喇叭、按键,PM66就是一个独立的声音播放系统。
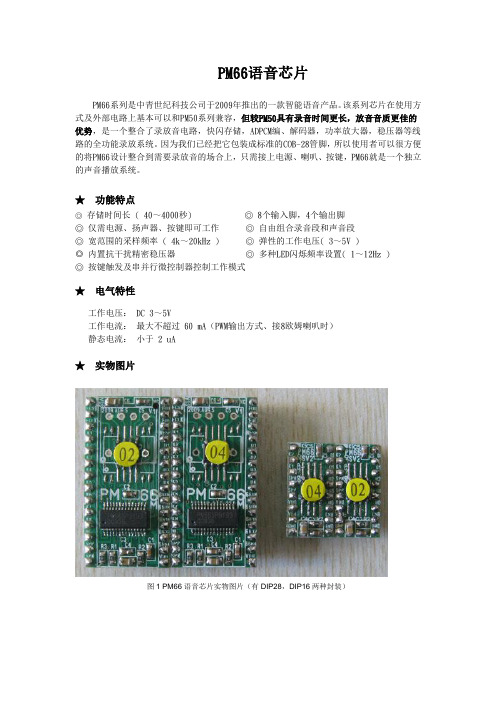
★功能特点◎存储时间长 ( 40~4000秒) ◎ 8个输入脚,4个输出脚◎ 仅需电源、扬声器、按键即可工作◎ 自由组合录音段和声音段◎ 宽范围的采样频率 ( 4k~20kHz ) ◎ 弹性的工作电压( 3~5V )◎内置抗干扰精密稳压器◎ 多种LED闪烁频率设置( 1~12Hz )◎ 按键触发及串并行微控制器控制工作模式★电气特性工作电压: DC 3~5V工作电流:最大不超过 60 mA(PWM输出方式、接8欧姆喇叭时)静态电流:小于 2 uA★实物图片图1 PM66语音芯片实物图片(有DIP28,DIP16两种封装)图2 PM66编程器实物图1 PM66语音芯片型号及引脚定义(1)PM66系列按照录音时间区分,共有6种产品型号,下表为各种型号在不同的采样频率下可存放的时间对照表。
(2)PM66引脚定义及实际图片2 PM66的典型应用电路及控制方式(1)、并行模式、按键操作在PM66系列芯片的并行控制方式下可以分8段语音录放,K1~K8脚可以分别触发与其对应的8段语音(低有效),在烧录芯片的时候,可以设置为下降沿触发或者低电平触发。
K1~K8端口有内置上拉电阻和防抖动设计,可直接外接按键来触发放音。
也可用单片机口线直接对其操作。
如图1:图1 并行按键模式,PMW音频输出方式接线图连接扬声器的两种方式(PWM和DAC)音频输出方式的选择,首先需要在编程软件中设定,烧写芯片后按照以下说明连接。
千寻魔方 MC120M 北斗高精度定位模组数据手册说明书
3.1 管脚定义 ..............................................................................................................................................................9 3.2 管脚定义表 ..........................................................................................................................................................9 3.3 参考设计 ........................................................................................................................................................... 10 3.4 机械尺寸 ........................................................................................................................................................... 11
2 模组接口说明 .........................................................................................................................................................7
Hewlett-Packard 说明书

開始使用手冊Hewlett-Packard 產品和服務的唯一擔保列於隨產品和服務所附的明示保證聲明中。
本文件的任何部份都不可構成任何額外的擔保。
HP 不負責本文件在技術上或編輯上的錯誤或疏失。
對於在非HP提供的設備上使用其軟體的情況下,HP 概不負責。
本文件所含之所有權資訊均受版權保護。
未經 HP 事先書面許可,不得影印、複製本文件之任何部分或將其翻譯成其他語言。
Hewlett-Packard CompanyP.O. Box 4010Cupertino, CA 95015-4010USACopyright © 2000–2005 Hewlett-Packard Development Company, L.P.本產品採用版權保護技術,該技術受 Macrovision Corporation 和其他權利持有人所持有的某些美國專利和其他智慧財產權條例聲明之保護。
此版權保護技術的使用需經 Macrovision Corporation 授權,且僅限於家庭和其他有限的觀賞使用。
未經 Macrovision Corporation 授權,不得在其他場合使用。
嚴格禁止反工程或反向組譯。
美國專利第 4,631,603、4,577,216、4,819,098 及 4,907,093 號之裝置聲明僅授權有限觀賞之使用。
Microsoft 和 Windows 為 Microsoft Corporation 的美國註冊商標。
Apple、iTunes、FireWire 及 iPod 為 Apple Computer, Inc.在美國和其他國家/地區的註冊商標。
FireWire 標誌為 Apple Computer, Inc.的註冊商標。
HP 支持您合法使用科技,但不認可或鼓勵在違反著作權法的情況下使用我方產品。
本文件所包含之資訊可隨時更改,恕不另行通知。
目錄安裝電腦 (1)安裝您的電腦 (1)連接電腦 (2)首次啟動電腦 (3)設定與連線到Internet帳戶 (4)安裝軟體與硬體裝置 (5)將舊的電腦資料和檔案轉移到新電腦 (5)使用桌面圖示 (6)使用 Compaq Organize 軟體 (6)使用鍵盤 (7)自訂鍵盤按鈕 (9)設定音效 (11)使用喇叭 (11)設定3個插孔的音效 (12)配置DVD播放程式的多聲道音效輸出 (14)設定6個插孔的音效 (14)決定音效配置軟體 (16)配置Sound Effect Manager(6個插孔) (16)使用Sound Effect Manager(6個插孔)配置喇叭 (16)配置以Sound Effect Manager錄音的音效(6個插孔) (17)使用Realtek HD Sound Effect Manager(Realtek HD音效管理員)(6個插孔、多音源音訊) (19)配置Realtek HD Sound Effect Manager(Realtek HD音效管理員)(6個插孔、多音源音訊) (19)配置錄音音效與Realtek HD Sound Effect Manager(Realtek HD音效管理員)(6-個插頭、多音源音訊) (20)目錄v重新分配Realtek HD Sound Effect Manager(Realtek HD音效管理員)的插孔(6-個插孔、多音源音訊) (20)配置多音源音訊(6個插孔、多音源音訊) (20)設定多音源音訊 (22)使用讀卡機 (25)使用讀卡機 (25)媒體插入說明 (26)使用安全地移除硬體公用程式 (27)將電視當作顯示器使用 (29)辨識可能需要的連接線 (29)連接到電視機 (29)在電視螢幕上觀看電腦影像 (30)nView標籤 (31)Ge Force標籤 (31)顯示標籤 (32)停用電視選項 (32)nView標籤(停用) (33)Ge Force標籤(停用) (33)顯示標籤(停用) (33)中斷電視連接 (34)使用HP Personal Media Drive (35)連接磁碟機 (35)插入磁碟機 (36)尋找磁碟機與指定磁碟機代號 (37)使用磁碟機 (38)中斷連接磁碟機 (39)處理數位影像 (41)處理數位影像 (41)使用HP Image Zone Plus (41)播放CD和DVD (45)用iTunes播放音樂CD (45)用Windows Media Player播放CD和DVD (46)用InterVideo WinDVD播放DVD影片 (46)使用國家/地區代碼 (48)用InterVideo WinDVD播放CD (VCD) (48)用Windows Media Player 9播放影像CD (VCD) (49)vi開始使用手冊建立音訊和資料光碟 (51)錄製前先清除可重寫光碟 (52)使用音訊CD (52)檢查錄製好的音訊光碟沒有錯誤 (53)音訊CD秘訣 (53)製作音訊CD (54)製作Jukebox光碟 (54)使用資料DVD和CD (55)檢查錄製好的資料光碟沒有錯誤 (55)資料光碟秘訣 (56)製作資料光碟 (56)複製DVD或CD (57)將檔案收集歸檔於CD或DVD上 (58)使用映像檔案 (58)建立映像檔案 (59)從映像檔案進行燒錄 (59)使用LightScribe建立光碟標籤 (59)LightScribe需求 (60)使用Sonic Express Labeler燒錄LightScribe標籤 (60)在使用iTunes燒錄後再燒錄LightScribe標籤 (61)使用自黏光碟標籤 (62)相容性資訊 (62)光碟功能和相容性表 (63)光碟機快速參考表 (64)軟體快速參考表 (65)建立視訊光碟和影片 (67)開始擷取視訊之前 (67)Sonic MyDVD視訊專案 (68)建立視訊專案 (68)將檔案加入視訊專案 (69)擷取視訊到視訊專案 (69)將投影片加入視訊專案 (70)將子功能表加入視訊專案 (70)編輯視訊專案的樣式 (71)編輯影片檔案 (71)燒錄視訊專案到光碟 (72)使用Direct-to-Disc精靈建立視訊專案 (73)視訊品質和光碟大小 (74)DVD錄製時間 (75)目錄vii尋求協助 (77)尋找螢幕手冊 (77)尋找網路上的手冊 (77)使用螢幕上的「說明及支援中心」 (78)使用「Compaq線上服務」 (78)接收訊息 (78)關閉訊息 (79)重新啟動訊息 (79)使用 [PC說明和工具] (79)索引 (81)viii開始使用手冊安裝電腦警告:在安裝及將電腦接上電源系統之前,請先參閱《保固及支援手冊》的〈安全資訊〉一節。
富了么 FX100+ 吉他效果器中文说明书
/CLEAR功能; 08 PLAY:切换回主界面; 09 SAVE:保存当前音色; 10 EXP:踏板模块; 11 RHYTHM:鼓机模块; 12 TAP:TAPTEMPO打点设速; 13 SYSTEM:系统设置,可调节INPUTLEVEL(输入音量)、SCREEN(屏幕亮度)、CABSIMTHRU
04
01 02
03
04
05 06 07 08
OUTPUT
9V 300mA
01 AUXIN:1/8'立体声音频输入接口,可通过外置音频输入进行同步练习; 02 INPUT:1/4'单声道输入接口,连接至吉他或其他效果器的输出口; 03 LEFT/MONO:1/4'单声道(左)输出接口,连接至音箱、声卡、调音台等音频设备或其他效果器
www.fl深圳市富了么电子科技有限公司
02
面板描述
01
04 03 02 05
14
08 09 10 11 12 13
06
07
www.fl深圳市富了么电子科技有限公司
www.fl深圳市富了么电子科技有限公司
07
音色编辑
FX100共有9个效果模块,FX、DS、AMP、CAB、NS、EQ、MOD、DELAY、REVERB,共包括151个效果类型, 支持9个效果模块同时使用,每个效果模块支持选择使用一种类型。
安全注意事项: 1.请仔细阅读本说明书 2.请保存好本说明书 3.注意所有警告事项 4.遵循说明书指示 5.请勿将设备靠近水源或湿度大的环境 6.用干毛巾擦拭清洁 7.请确保使用时远离收音机和电视机或者其他有磁场产生的设备,以免造成干扰 8.请勿暴力使用开关及控制元件 9.请勿让纸屑、金属制品及其他物体落入机内 10.请勿摔落以及让本机受到冲击和过度按压
PM66语音模块参数
PM66语音模块参数1.芯片类型:采用高性能的数字信号处理器(DSP)芯片,可实现高质量的语音处理和嵌入式语音识别。
2.音频输入:支持多种音频输入方式,包括模拟音频输入和数字音频输入。
模拟音频输入可以通过电容麦克风或线性输入接口实现,数字音频输入可以通过I2S或PCM接口实现。
3.音频输出:支持多种音频输出方式,包括模拟音频输出和数字音频输出。
模拟音频输出可以通过DAC接口实现,数字音频输出可以通过I2S 或PCM接口实现。
4.语音压缩算法:内置多种高效的语音压缩算法,可以实现高品质的语音压缩和解压缩,支持音频文件的压缩和存储。
5.语音识别功能:支持实时语音识别和离线语音识别两种模式。
实时语音识别可以实现实时语音指令的识别和执行,离线语音识别可以实现离线语音识别和关键词唤醒等功能。
6.语音合成功能:支持多种语音合成算法和语音合成引擎,可以实现高质量的语音合成和语音播放,支持多种语音效果和音调变化。
7.语音编解码器:支持多种语音编解码器,包括AMR、G.711、G.729等标准语音编解码器,可以实现高质量的语音传输和语音通信。
8.接口类型:支持多种接口类型,包括UART、SPI、I2C等,可以方便地与主控芯片或其他外部设备进行通信和控制。
9.供电和工作电压:支持宽电压输入,可以适应不同的供电电压和电流要求,工作电压范围通常为3.3V至5V之间。
10.开发工具和软件支持:提供丰富的开发工具和软件支持,包括开发文档、SDK和示例代码等,方便开发人员进行快速开发和应用。
总结:PM66语音模块是一款功能强大、性能卓越的语音模块,具有高品质的语音处理和语音识别能力,适用于多种语音应用场景。
它具有多种接口类型、多种音频输入输出方式和多种语音编解码器,可以满足不同的应用需求。
开发工具和软件支持完善,便于开发人员进行开发和集成。
雷士Nommo Chroma游戏扬声器说明书

The Razer Nommo Chroma is designed for gamers who want to flood their rooms with the sounds of their favorite games, music and movies. With Kevlar®-coated 77mm drivers, a wide sound field with high positional accuracy, dedicated rear-facing firing bass ports and bass control with automatic gain control technology, you have the ultimate in power and versatility.CONTENTS1. PACKAGE CONTENTS / SYSTEM REQUIREMENTS (3)2. REGISTRATION / TECHNICAL SUPPORT (4)3. TECHNICAL SPECIFICATIONS (5)4. DEVICE LAYOUT (6)5. SETTING UP YOUR RAZER NOMMO CHROMA (7)6. INSTALLING RAZER SYNAPSE FOR YOUR RAZER NOMMO CHROMA (10)7. USING YOUR RAZER NOMMO CHROMA (11)8. CONFIGURING YOUR RAZER NOMMO CHROMA (14)9. SAFETY AND MAINTENANCE (24)10. LEGALESE (26)1. PACKAGE CONTENTS / SYSTEM REQUIREMENTSPACKAGE CONTENTS▪Razer Nommo Chroma 2.0 gaming speakers▪ 3.5mm audio cable▪Power adapter with interchangeable plugs*▪Important Product Information Guide*May vary for specific regionsSYSTEM REQUIREMENTSPRODUCT REQUIREMENTS▪PC or Mac with a free USB portRAZER SYNAPSE 3 REQUIREMENTS▪Windows® 7 (or higher)▪Internet connection▪500 MB of free hard disk spaceRAZER SYNAPSE REQUIREMENTS▪OS X 10.9® (or higher)▪Internet connection▪100 MB of free hard disk space3. TECHNICAL SPECIFICATIONSTECHNICAL SPECIFICATIONS▪ 2 x 77mm full range drivers (1 x per speaker) ▪Frequency response: 50-20,000khz▪USB audio▪ 1 x 3.5mm aux input jack▪ 1 x 3.5mm headphone jack▪Bass and Volume Control▪Chroma enabled4. DEVICE LAYOUTA.Full range speakersB.Left speaker portC.Bass controlD.Power button / volume controlB connectorF.Left speaker cableG.Aux input portH.DC power portI.Headphone output portJ. 3.5 mm audio cableK.Power adapterL.Regional plugs5. SETTING UP YOUR RAZER NOMMO CHROMA1.Attach the regional plug to the power adapter.2.Plug the power adapter from your speakers to an appropriate power source.3.Plug the left speaker cable to the left speaker port.4.Connect your Razer Nommo Chroma to the USB port of your computer.SETTING THE DEFAULT PLAYBACK DEVICEIf you are using the Razer Nommo Chroma for the first time, you may be required to set up the device as your system’s default playback device.FOR WINDOWS USERSStep 1: Open your Sound settings from Control Panel > Hardware and Sound > Manage audio devices. You can also right-click your sound icon on the system tray and select Playback devices.Step 2: In the Playback tab, select Razer Nommo Chroma from the list and click the Set Default button.FOR MAC USERSStep 1: Open your Sound settings from System Preferences > Sound.Step 2: In the Output tab, select Razer Nommo Chroma from the list.6. INSTALLING RAZER SYNAPSE FOR YOUR RAZER NOMMO CHROMAStep 1: Make sure your Razer device is connected to the USB port of your computer.Step 2: Install Razer Synapse 3 when prompted* or download the installer from /synapse.Step 3: Create your Razer ID or log into Razer Synapse with an existing account.*Applicable for Windows 8 or later.7. USING YOUR RAZER NOMMO CHROMAPOWERING ON / OFFTo power on the speakers, simply press the volume control until you hear a click and press the volume control again to power off the speakers.USING THE VOLUME CONTROLWhile powered on, rotate the volume control to increase or decrease the volume. This function also works on the headphone that is connected to your Razer Nommo Chroma.USING THE BASS CONTROLRotate the bass control clockwise to increase or counter-clockwise to decrease the bass levels. This function also works on the headphone that is connected to your Razer Nommo Chroma.USING THE AUX INPUT PORTPlug the 3.5mm cable from the aux input port of your Razer Nommo Chroma to your audio device. If the audio input port and aux input port are in use, Razer Nommo Chroma will combine both sounds.USING THE HEADPHONE OUTPUT PORTWhile powered on, connect your headphone to the headphone output port of your Razer Nommo Chroma.Note: The sound output will automatically switch from the speakers to the headphones.8. CONFIGURING YOUR RAZER NOMMO CHROMADisclaimer: The features listed here require you to log in to Razer Synapse. These features are also subject to change based on the current software version and your Operating System.SYNAPSE TABThe Synapse tab is your default tab when you first launch Razer Synapse 3. This tab allows you to navigate the Dashboard subtab.DashboardThe Dashboard subtab is an overview of your Razer Synapse 3 where you can access all your Razer devices, modules, and online services.AUDIO TABThe Audio tab is the main tab for your Razer Nommo Chroma. From here, you can customize your device’s settings to unleash its full potential. Changes made under this tab are automatically saved to your system and cloud storage.SoundThe Sound subtab is for modifying your device’s volume, equalizer presets, and sound properties.ProfileProfile is a data storage for keeping all your Razer peripheral’s settings. By default, the profile name is based on your system’s name. To add, rename, duplicate, or delete a profile, simply press the Miscellaneous button ( ).VolumeThis option enables you to mute, increase, or decrease the audio output settings.EqualizerThe equalizer setting allow you to change the frequency response of the speakers, changing the bass, midrange, and treble to better suit your listening preference.Sound PropertiesClicking the link will launch the Windows sound properties window.ReferenceReference is a visual representation of your Razer Nommo Chroma highlighting key elements on the product.LightingThe Lighting subtab enables you to modify your Razer device’s light settings.BrightnessYou can turn off your Razer device’s lighting by toggling the Brightness option or increase/decrease the luminance using the slider.Switch Off LightingThis is a power saving tool which allows you to disable your device’s lighting in response to your system’s display turning off and/or automatically power down when your Razer Nommo Chroma has been idle for a set amount of time.Quick EffectsA number of quick effects can be selected and applied to your mouse’s lighting, as listed here:Name Description How to set upIf you have other supported Razer Chroma-enabled devices, you can synchronize their quick effectswith your Razer device by clicking the Chroma Sync button ( ).Advanced EffectsThe Advanced Effects option allows you to choose a Chroma Effect you want to use on your Razer Chroma-enabled peripheral. To start making your own Chroma Effect, simply press the Chroma Studiobutton ( ). Click here to learn more about the Chroma StudioPROFILES TABThe Profiles tab is a convenient way of managing all your profiles and linking them to your games and applications.DevicesView which Razer device is using a specific profile using the Devices subtab. To create a new profile within the selected device, simply click the add button ( ). To rename, duplicate, or delete a profile, simply press the Miscellaneous button ( ). Each profile can be set to automatically activate when you run an application using the Link Games option.Linked GamesThe Linked Games subtab gives you the flexibility to add games, view peripherals that are linked to games, or search for added games. You can also sort games based on alphabetical order, last played, or most played. Added games will still be listed here even if it is not linked to a Razer device.CHROMA TABThe Chroma tab enables you to either create advanced lighting effects through the Studio subtab or enable/disable third party integrated apps to all Razer Chroma-enabled devices for a truly immersive lighting and gaming experience.StudioThe Studio subtab enables you to create and edit your own Chroma Effects which you can apply to all supported Razer Chroma-enabled devices. This tab can also be accessed un der the Dashboard’s Chroma module.To add, rename, duplicate, or delete a Chroma Effect, simply click the Miscellaneous button ( ). To revert the selected layer to its original setting, click the Reset button ( ). And to apply and save a modified layer, click the Save button ( ).Quick SelectionsThe Quick Selections menu are a preset of lighting regions which you can use to easily customize your Razer device. Alternatively, you can individually select an LED by clicking on the area or select multiple LEDs by using click and drag.Effect LayerLighting effects are arranged in layers wherein the topmost layer takes priority. . You can group multiple lighting effects by clicking the Add Group button ( ) and dragging the layers you want to group to the newly added folder, duplicate a layer by clicking the Copy button ( ), or delete a layer by clicking the Trash button ( ). Some layers may have overlapping effects so you may need to arrange layers in a specific order.Add EffectAll supported quick effects are listed under the Add Effect option which you can click to insert onto the Effect Layer. Quick Effects can be edited on the Chroma Studio by allowing you to change its preset color, properties, and playback options.AppsThe Apps subtab is where you can enable or disable third party integrated apps for your Razer Chroma-enabled peripherals. The Apps tab can also direct you to the Chroma Workshop where you can download these third-party apps.SETTINGS WINDOWThe Settings window, accessible by clicking the () button on Razer Synapse 3, enables you to configure the startup behavior, change language, view your Razer device’s master guide, or perform factory reset on any connected Razer device.General tabThe default tab of the Settings window, The General tab enables you to change the software’s display language and start-up behavior, or view the master guide of all connected Razer devices.Reset tabThe Reset tab allows you to perform a factory reset on all connected Razer devices with on-board memory. All profiles stored on the selected device’s on-board memory will be erased.Note: Performing a factory reset on devices without on-board memory will only create a new profile for your device on Razer Synapse 3 using the default settings.About tabThe About tab displays brief software information, its copyright statement, and also provides relevant links for its terms of use. You may also use this tab to check for software updates, or as a quick access t o Razer’s social communities.9. SAFETY AND MAINTENANCESAFETY GUIDELINESIn order to achieve maximum safety while using your Razer Nommo Chroma, we suggest that you adopt the following guidelines:Should you have trouble operating the device properly and troubleshooting does not work, unplug the device and contact the Razer hotline or go to for support.Do not take apart the device (doing so will void your warranty) and do not attempt to operate it under abnormal current loads.Keep the device away from liquid, humidity or moisture. Operate the device only within the specific temperature range of 0°C (32°F) to 40°C (104°F). Should the temperature exceed this range, unplug and/or switch off the device in order to let the temperature stabilize to an optimal level.COMFORTResearch has shown that long periods of repetitive motion, improper positioning of your computer peripherals, incorrect body position, and poor habits may be associated with physical discomfort and injury to nerves, tendons, and muscles. Below are some guidelines to avoid injury and ensure optimum comfort while using your Razer Nommo Chroma.▪Position your keyboard and monitor directly in front of you with your mouse next to it. Place your elbows next to your side, not too far away and your keyboard within easy reach.▪Adjust the height of your chair and table so that the keyboard and mouse are at or below elbow-height.▪Keep your feet well supported, posture straight and your shoulders relaxed.▪During gameplay, relax your wrist and keep it straight. If you do the same tasks with your hands repeatedly, try not to bend, extend or twist your hands for long periods.▪Do not rest your wrists on hard surfaces for long periods. Use a wrist rest to support your wrist while gaming.▪Customize the keys on your keyboard to suit your style of gaming in order to minimize repetitive or awkward motions while gaming.▪Do not sit in the same position all day. Get up, step away from your desk and do exercises to stretch your arms, shoulders, neck and legs.If you should experience any physical discomfort while using your mouse, such as pain, numbness, or tingling in your hands, wrists, elbows, shoulders, neck or back, please consult a qualified medical doctor immediately.MAINTENANCE AND USEThe Razer Nommo Chroma requires minimum maintenance to keep it in optimum condition. Once a month we recommend you unplug the device from the computer and clean it using a soft cloth or cotton swab with a bit of warm water to prevent dirt buildup. Do not use soap or harsh cleaning agents.To get the ultimate experience in movement and control, we highly recommend a premium mouse mat from Razer. Some surfaces will cause undue wear on the feet requiring constant care and eventual replacement.Do note that the sensor of the Razer Nommo Chroma is ‘tuned’ or optimized especially for the Razer mouse mats. This means that the sensor has been tested extensively to confirm that the Razer Nommo Chroma reads and tracks best on Razer mouse mats.10. LEGALESECOPYRIGHT AND INTELLECTUAL PROPERTY INFORMATION©2018 Razer Inc. All rights reserved. Razer, the triple-headed snake logo, Razer logo, “For Gamers. By Gamers.”, and “Powered by Razer Chroma” logo are trademarks or registered trademarks of Razer Inc. and/or affiliated companies in the United States or other countries. All other trademarks and trade names are the property of their respective owners and other company and product names mentioned herein may be trademarks of their respective companies.Windows and the Windows logo are trademarks or registered trademarks of the Microsoft group of companies.Mac OS, Mac and the Mac logo are trademarks or registered trademarks of Apple.OS X, Mac and the Mac logo are trademarks or registered trademarks of Apple.Android™ and Google Play™ are trademarks of Google Inc.The Bluetooth® word mark and logos are registered trademarks owned by Bluetooth SIG, Inc., and any use of such marks by Razer is under license.Apple, the Apple logo, iPod, iPhone and iPad are trademarks of Apple Inc., registered in the U.S. and other countries. iOS is a trademark or registered trademark of Cisco in the U.S. and other countries and is used under license. App Store is a service mark of Apple Inc. "Made for iPod," "Made for iPhone," and "Made for iPad" mean that an electronic accessory has been designed to connect specifically to iPod, iPhone, or IPad, respectively, and has been certified by the developer to meet Apple performance standards. Apple is not responsible for the operation of this device or its compliance with safety and regulatory standards.© 2016 Blizzard Entertainment, Inc. All rights res erved. Overwatch™ is a trademark and Blizzard Entertainment is a trademark and/or registered trademark of Blizzard Entertainment, Inc., in the U.S. and/or other countries.Manufactured under license from Dolby Laboratories. Dolby, Dolby Digital Plus Home Theater Edition and the double-D symbol are trademarks of Dolby Laboratories.Thunderbolt and the Thunderbolt logo are trademarks of Intel Corporation in the U.S. and/or other countries.。
富满电子集团 FM9606B 紧凑型移动电源 PMU说明书
FM9606B(文件编号:S&CIC1488)1A同步移动电源IC概述FM9606B是一款主要用于移动电源的紧凑型PMU,将充电管理,电量显示,手电筒驱动以及同步升压DC-DC功能集成于一体,尤其适用于小体积移动电源以及其他便携式电子设备。
芯片内置充电管理,按照标准的涓流、恒流、恒压三段式充电方式对电池进行充电,有效保障充电安全以及电池使用寿命,并确保电池达到满充电量,并有相应的电量指示灯驱动.内置同步升压DC-DC,内部集成功率开关,外部仅需电感电容即可实现完整的升压功能,无需外接肖特基二极管,可输出最高1.0A 电流。
FM9606B内置短路以及过流保护功能,无需外部开关器件即可独立实现输出短路保护功能,在异常负载接入的情况下仍然能保障系统安全可靠。
输出电量指示灯驱动,可以显示移动电源剩余电量。
特点1.0A同步升压转换器,放电效率高达90%4颗LED电量显示,内置照明灯驱动自动切换待机模式与按键关机模式支持按键开关及自动负载识别充电电压精度:±1.0%;升压电压精度:±1.0% 内置900MA锂电池充电,可外加电阻编程充电,电流最大1A。
过流保护(OCP),过压保护(OVP),短路保护(SCP),过温保护(OTP) ESD2KV,可靠性高极低的BOM成本待机电流小于50uA支持4.2V、4.35V电池封装形式:SOP-16产品应用移动电源IPAD及其他数码设备备用电源FM9606B(文件编号:S&CIC1488)1A同步移动电源ICFM9606B(文件编号:S&CIC1488)1A同步移动电源IC电性能参数注:最大极限参数是指超出该工作范围IC可能会损坏。
推荐工作范围是指在该范围内IC工作正常,但不完全保证满足个别性能指示。
电气参数定义了器件在工作范围内并且在保证特定性能指示的测试条件下的直流和交流电气参数规范。
对于未给定的上下限参数,该规范不予保证其精度,但其典型值合理反映了器件性能。
LG HX996TS 蓝光3D组合音响 使用说明书
yy 预先录制的 DVD 被自动设定为这些标 准。 可录制光碟格式有许多不同类 型(包括含有 MP3 或 WMA 文件的 CD-R),需要具备特定的前提条件才能 确保兼容的播放。
yy 用户应注意,若要从互联网下载 MP3/ WMA 文件和音乐,您需要获得许可。本 公司不负责此类许可。您可以从版权所 有者那里获得下载 MP3 文件的许可。
开始 9
关于“7”符号显示
在操作过程中电视屏幕上出现“7”时,表示
此手册中介绍的功能对于指定的媒体无法使
用。
1
开始
10 开始
开始
文件要求
电影文件
1
类型 /
扩展名
视频格式
音频格式
字幕
区分
光碟、 USB
“.avi”、 “.divx”、 “.mpg”、 “.mpeg”、 “.mkv”、 “.mp4”、 “.asf”、 “.wmv”、 “.m4v” (DRM free)
电源线注意事项
危险。
多数电器都建议使用专用电路;
三角形内的惊叹号提醒用户,随 设备一起提供的印刷品中包含重 要的操作和维护(维修)指南。
警告:为了减少火灾或电击的危险,请勿使此 产品淋雨或暴露在潮湿的空气中。 警告:不要将此设备安装在狭窄的空间中, 例如书柜或类似的空间。 小心:不要挡住任何通风孔。 按照制造商的使用说明进行安装。机壳上的槽 和开孔供通风之用,以确保产品能够可靠工作 并防止内部过热。请不要将此产品放置在床 上、沙发上、地毯或其它类似物品上,以免堵 住通风孔。此产品不能采用内置式安装,如安 装在书架或其它架子上,除非能够充分通风或 者制造商的说明书中允许这样安装。
惠普 电脑 说明书

入门指南HP 产品和服务的所有保修限于这些产品与服务所附带的明确声明。
本文的任何条款都不应视作构成保修声明的附加条款。
HP不对本文的技术性错误、编印错误或冗长负任何责任。
对于在非HP 提供的设备上 HP 软件的使用和可靠性,HP 概不负责。
本文档包含的所有权信息均受版权保护。
未经 HP 事先书面许可,不得将本文档的任何部分影印、复制或翻译成其他语言。
Hewlett-Packard CompanyP.O. Box 4010Cupertino, CA 95015-4010USACopyright © 2000–2005 Hewlett-Packard Development Company, L.P.此产品使用了受版权保护的技术,应 Macrovision 公司和其他权利持有人为保护其美国专利和其他知识产权的要求,我们采取了一些保护措施。
在使用此版权保护技术之前必须得到Macrovision 公司的授权,且只能作为家用和其他受限的观赏用途,除非得到 Macrovision 公司的授权才能另作他用。
禁止反编译。
根据美国专利号 4,631,603、4,577,216、4,819,098 和 4,907,093 的许可要求,与之相关的产品只能作为受限观赏用途。
Microsoft 和 Windows 是 Microsoft Corporation 在美国的注册商标。
Apple、iTunes、FireWire 和 iPod 是 Apple Computer, Inc. 在美国和其他国家/地区的注册商标。
FireWire 徽标是 Apple Computer, Inc. 的商标。
HP 支持科技产品在法律允许范围内的使用,我们不认可、也不鼓励我们的产品被用于著作权法所不允许的目的。
本文档中的内容可随时更改,恕不另行通知。
目录安装电脑 (1)组装电脑 (1)连接到电脑 (2)首次启动您的电脑 (3)建立并连接到您的 Internet 帐户 (4)安装软件和硬件设备 (5)使用 HP 产品 (5)将旧电脑中的信息和文件转移到新电脑中 (5)使用桌面图标 (6)使用 HP Organize 软件 (6)使用键盘 (7)自定义键盘按钮 (9)使用电脑机箱顶部 (11)使用支撑架 (11)设置声音 (15)使用扬声器 (15)设置 3 接口的声音 (16)为 DVD 播放机设置多声道音频输出 (18)设置 6 接口的声音 (18)确定音频配置软件 (20)使用 Sound Effect Manager(6 接口) (20)使用 Sound Effect Manager(6接口)配置扬声器 (20)配置声音以使用 Sound Effect Manager 录音(6接口) (21)使用 Realtek HD Sound Effect Manager(6 接口、多音源音频) (23)配置 Realtek HD Sound Effect Manager(6 接口、多音源音频) (23)使用 Realtek HD Sound Effect Manager(6 接口、多音源音频)配置用于录音的声音设置 (24)目录v使用 Realtek HD Sound Effect Manager(6 接口、多音源音频)重新定义音频接口 (24)配置多音源音频(6 接口、多音源音频) (24)设置多音源音频 (26)使用读卡器 (29)使用读卡器 (29)媒体插入指南 (30)使用安全删除硬件实用程序 (32)将电视用作显示器 (33)确认您可能用到的电缆 (33)连接到电视机 (33)在电视屏幕上观看电脑画面 (34)nView 选项卡 (35)Ge Force 选项卡 (35)显示选项卡 (36)禁用电视选项 (36)nView 选项卡(禁用) (37)Ge Force 选项卡(禁用) (37)显示选项卡(禁用) (37)断开与电视的连接 (38)使用 HP Personal Media Drive (39)连接硬盘驱动器 (39)插入硬盘驱动器 (40)定位硬盘驱动器并为之分配一个盘符 (41)使用硬盘驱动器 (42)断开硬盘驱动器 (43)处理数码图像 (45)处理数码图像 (45)使用 HP Image Zone (45)播放 CD 和 DVD (49)用 iTunes 播放音乐 CD (49)用 Windows Media Player 播放 CD 和 DVD (50)使用 InterVideo WinDVD 播放 DVD 影片 (50)使用国家/地区编码 (52)使用 InterVideo WinDVD 播放 VCD(影碟) (52)使用 Windows Media Player 播放 VCD(影碟) (53)vi入门指南制作音频和数据光盘 (55)刻录前请擦除光盘上的内容 (56)制作音频 CD (56)验证是否音频文件刻录无误 (57)音频 CD 提示 (57)制作音频 CD (58)制作 jukebox 光盘 (58)制作数据 DVD 和 CD (59)验证数据光盘刻录是否无误 (59)数据光盘提示 (60)制作数据光盘 (60)复制 DVD 或 CD (61)将文件归档至 CD 或 DVD (62)处理映像文件 (62)制作映像文件 (63)从映像文件进行烧录 (63)使用 LightScribe 制作光盘标签 (63)Lightscribe 需求 (64)使用 Sonic Express Labeler 烧录 LightScribe 标签 (64)使用 iTunes 烧录后刻录 LightScribe 标签 (65)使用胶粘光盘标签 (66)兼容性信息 (66)光盘特性及兼容性图表 (67)光驱快速参考图表 (68)软件快速参考图表 (69)制作视频光盘和影片 (71)开始捕获影片之前 (71)Sonic MyDVD Video 项目 (72)制作视频项目 (72)添加将文件到视频项目 (73)为视频项目捕获视频 (73)将幻灯片添加到视频项目 (74)将子菜单添加到视频项目 (74)编辑视频项目的样式 (75)编辑影片文件 (75)将视频项目刻录到光盘 (76)使用 Direct-to-Disc 向导制作视频项目 (77)视频质量和光盘尺寸 (78)DVD 刻录时间 (79)目录vii使用 muvee autoProducer 制作影像 (81)制作影像的基本步骤 (81)查找 muvee autoProducer (82)使用 muvee autoProducer (83)入门 (83)从数码视频摄像机截取影像 (84)加入影像 (85)加入图片 (86)加入音乐 (86)选择风格 (87)更改设置 (87)加入开场标题和结束署名 (88)制作影像 (89)保存影像项目 (89)将影像项目刻录到光碟 (90)获取帮助 (91)查找联机指南 (91)从网络上查找指南 (91)使用联机的“帮助和支持中心” (92)使用 HP 更新信息 (92)获取信息 (92)关闭消息 (93)重新激活消息 (93)使用 PC 帮助和工具 (93)索引 (95)viii入门指南安装电脑警告:安装电脑并将其连接到电源之前,请阅读《保修和支持指南》中的“安全信息”。
M866精彩升级纽曼薄机魅力加倍
D 2 DR 高速双通道 内存 ,配合 8 GB超大容量硬盘存储 空间,如此强大 的内在 刷技术股份有 限公 司,是有名 的品牌 印刷 打印耗材 生产 品牌企 0
码 ,就可 以直接进入 Wid ws 界面 ,真正达 到方便 、快捷 、安全 。而 V O no ? AI 证 ,就是最好 的证明。P i T 现在登陆中国 ,致力开 发与提供质优 硬盘保护功能可以在 电脑遭受摇动或震动时将硬盘磁头放置在安 全的位置 以 价廉 的各类打印墨盒、硒鼓、色带、碳粉等耗材。它 的进入从 保 护磁盘免遭刮擦 ,为有效保 护商务用户 的数据又加 了一道安全砝码。 在中国大陆市场 ,S n tl o ySye限量销售 的V I GN T 3 C / AO V — X 8 PL的零售 价格是 2 9 8元,在主机 中特别附加了三年延长保修 服务 ,最大限度地提升 18 了安全保障 ,满足高标准 的商务需求 。特 别赠送 的尊贵礼 品国际知名品 牌 全保护 , 同时精 良工艺和上乘材质恰到好处的搭配了V N— X 8 PL的唯美 G T3 C/பைடு நூலகம்整体 来看 ,为国内的兼容耗材市场注入 了新鲜的活力 ,但是对 国内产业来说 ,这个力量强大 的外敌入境 ,又 为国内本 以烽烟 四起的耗材市场 ,添 了一把大火。 除了价格优势 以外 ,品牌型
升 级后 的 M 8 6 ( . 6 2O)版 ,更 是 从 功 能 方面 的 提 升 为 这款 超 薄
MP 3增 添 非 凡 的表 现 。
M8 620版在 音 乐播 放 方 面 不仅 支持 MP 、 MA播 放 格 6 3 W 最新升级型号 V O T 3系列笔记本 电脑。V O T 3系列秉承 了 T AI X AI X ×系列笔 式 ,更 支 持 高音 质 的 OG G、AS F等格 式 的音 乐播 放 ,你 可 以尽 记本 电脑 至薄极美的设计理念 ,携全新英特尔酷睿单核 处理器 的强大性能 , 情 的将 高音质 的音乐 曲目下载其 中,图片浏 览方面也增添 了支
Modicon TM3AM6模块说明书

Radiated emissions, test level: 40 dBμV/m QP class A (10 m at 30...230 MHz) conforming to EN/IEC 55011 Radiated emissions, test level: 47 dBμV/m QP class A (10 m at 230 MHz...1 GHz) conforming to EN/IEC 55011
Analogue input number Analogue input type
Analogue output number Analogue output type
Modicon TM3
Input/output analog module
Modicon M221 Modicon M241 Modicon M251
Load type Load impedance ohmic Stabilisation time Conversion time Sampling duration Absolute accuracy error Temperature drift Repeat accuracy Non-linearity Output ripple Cross talk [Us] rated supply voltage Supply voltage limits Type of cable Current consumption
1/4
The information provided in this documentation contains general descriptions and/or technical characteristics of the performance of the products contained herein. This documentation is not intended as a substitute for and is not to be used for determining suitability or reliability of these products for specific user applications. It is the duty of any such user or integrator to perform the appropriate and complete risk analysis, evaluation and testing of the products with respect to the relevant specific application or use thereof. Neither Schneider Electric Industries SAS nor any of its affiliates or subsidiaries shall be responsible or liable for misuse of the information contained herein.
秦皇岛千目电子有限公司语音播报器BG-06说明书
BG06语音播报器说明书V1.1(型号:BG-06)(USB口下载)秦皇岛千目电子有限公司电话:************传真:************/1.产品特性 (2)2.产品图片、接口介绍 (2)2.1产品外形和接口图片 (2)2.2接口介绍 (3)3.语音录制过程 (3)3.1准备音频文件 (3)3.2录音下载 (3)3.2.1驱动安装 (3)3.2.2连接设备 (5)3.2.3录音 (5)3.3参数设置 (6)3.3.1统一设置 (6)3.3.2分路设置 (7)3.4放音测试 (7)4.控制方式 (7)4.1开关控制-6路开关 (7)4.2控制方式 (8)5.技术支持及联系方式 (8)语音控制器说明书(型号:BG-06)BG-06语音模块是秦皇岛千目电子有限公司2016年全新工业级产品。
具有价格低、稳定可靠、可重复录音、开关触点控制、体积小、音频下载方便等特点。
通过6组触点控制语音播放。
主要应用范围:安防工程、报警提示、产品扩展语音功能等。
1.产品特性●板载功放模块,最高可输出功率达3w,声音响亮。
●全新电路设计,抗干扰能力强。
●USB口下载语音,音频更换更方便。
●WAV音频格式,音频录制时间可达24分钟。
●板载音量调节,根据实际需要调节音量大小。
●全新音频播放控制算法,音质更好。
●6组触点控制,可接入常开、常闭触点控制,控制方便。
●板载FLASH存储,成本低、可靠性更好。
●性能参数工作电源电压:直流12-24V1A工作温度:-20~85℃音频输出功率:8欧3W2.产品图片、接口介绍2.1产品外形和接口图片标注单位(毫米):长*宽*高:104*100*452.2接口介绍◆电源接口:工业电源接口,可接入12-24V直流电源。
V+:DC12V电源正极G:DC12V电源负极◆1-6:可外接6路独立开关。
与DC12V电源负极(V+)短接,触发语音播放。
◆USB接口:USB接口下载音频,音频更换更方便。
翠鸟模组说明书范文
翠鸟模组说明书范文翠鸟模组是一款蓝牙音箱模组,适用于各种便携式音响设备。
本文将详细介绍这款模组的功能、特点和使用方法。
功能:1.蓝牙连接:翠鸟模组支持蓝牙无线连接,可与手机、电脑和其他蓝牙设备进行配对,方便用户随时享受高质量音乐。
2.高音质:翠鸟模组采用先进的音频解码技术,支持高清无损音频播放,音质清晰、音量大,用户可以获得更好的音乐体验。
3.多种播放方式:翠鸟模组支持通过蓝牙、AUX等多种方式进行音乐播放,满足用户的不同需求。
4.内置电池:翠鸟模组内置高容量锂电池,可提供长时间的音乐播放,方便用户在户外或无电源环境下使用。
特点:1.小巧便携:翠鸟模组体积小巧轻便,便于携带,可以随时随地享受音乐。
2.高品质外观:翠鸟模组采用高品质材料制造,外观精美时尚,具有很好的观赏性。
3.操作简便:翠鸟模组的操作非常简单,只需按下相应按钮即可实现开机、配对、音量调节等功能。
4.耐用性强:翠鸟模组具有很强的耐用性,材质坚固,外部设计能够抵御一定程度的摔落和冲击。
使用方法:1.开启机器:长按模组上的电源按钮,待指示灯亮起后,即可开启翠鸟模组。
2.连接蓝牙:开启手机或其他设备的蓝牙功能,并连接“翠鸟模组”。
3.音乐播放:打开手机中的音乐APP,选择相应歌曲或音频,即可通过翠鸟模组进行播放。
4.音量调节:翠鸟模组上配有音量加减按钮,可以根据需要进行调节。
5.免提通话:当手机接入翠鸟模组后,模组上的免提按钮可实现无线通话功能。
注意事项:1.请勿将翠鸟模组浸入水中或暴露在湿润环境中,以免损坏电路。
2.使用时请注意保护好模组的外壳,避免摔落或受到剧烈冲击。
3.在无需连接蓝牙设备时,请及时关闭翠鸟模组,以节省电量。
4.请勿在高温环境下使用翠鸟模组,以免影响电池寿命。
总结:。
- 1、下载文档前请自行甄别文档内容的完整性,平台不提供额外的编辑、内容补充、找答案等附加服务。
- 2、"仅部分预览"的文档,不可在线预览部分如存在完整性等问题,可反馈申请退款(可完整预览的文档不适用该条件!)。
- 3、如文档侵犯您的权益,请联系客服反馈,我们会尽快为您处理(人工客服工作时间:9:00-18:30)。
PM66(40~2000秒)高音质播放模组
来源:中青世纪科技有限公司点击:899 次[论坛交流]
(点击可放大图片) 1. 产品特色◎PM66 DIP28脚位完全相容PM50系列◎长秒数( 40 ~ 4000秒) ◎8个输入脚,4个输出脚◎不需额外元件,自由组后声音段◎大范围的取样频率( 4 ~ 20K Hz ) ◎弹性的工作电压( 3 ~ 5V ) ◎多种LED 闪烁频率( 1 ~ 12 Hz
-------------------------点击《PM66软件下载》
PM66系列是中青世纪科技公司于2009年推出的一款智能语音产品。
该系列芯片在使用方式及外部电路上基本可以和PM50系列兼容,但较PM50具有录音时间更长,放音音质更佳的优势,是一个整合了录放音电路,快闪存储,ADPCM编、解码器,功率放大器,稳压器等线路的全功能录放系统。
因为我们已经把它包装成标准的COB-28管脚,所以使用者可以很方便的将PM66设计整合到需要录放音的场合上,只需接上电源、喇叭、按键,PM66就是一个独立的声音播放系统。
★功能特点
◎存储时间长( 40~4000秒) ◎8个输入脚,4个输出脚
◎仅需电源、扬声器、按键即可工作◎自由组合录音段和声音段
◎宽范围的采样频率( 4k~20kHz ) ◎弹性的工作电压( 3~5V )
◎内置抗干扰精密稳压器◎多种LED闪烁频率设置( 1~12Hz )
◎按键触发及串并行微控制器控制工作模式
★电气特性
工作电压:DC 3~5V
工作电流:最大不超过60 mA(PWM输出方式、接8欧姆喇叭时)
静态电流:小于 2 uA
★实物图片
图1 PM66语音芯片实物图片(有DIP28,DIP16两种封装)
图2 PM66编程器实物图
PM66简易编程器
一、 PM66语音芯片型号及引脚定义
(1)PM66系列按照录音时间区分,共有6种产品型号,下表为各种型号在不同的采样频率下可存放的时间对照表。
(2)PM66引脚定义
PM66(DIP28)引脚定义
PM66(DIP16)引脚定义
2 PM66的典型应用电路及控制方式
(1)、并行模式、按键操作
在PM66系列芯片的并行控制方式下可以分8段语音录放,K1~K8脚可以分别触发与其对应的8段语音(低有效),在烧录芯片的时候,可以设置为下降沿触发或者低电平触发。
K1~K8端口有内置上拉电阻和防抖动设计,可直接外接按键来触发放音。
也可用单片机口线直接对其操作。
如图1:
图1 并行按键模式,PMW音频输出方式接线图
连接扬声器的两种方式(PWM和DAC)
音频输出方式的选择,首先需要在编程软件中设定,烧写芯片后按照以下说明连接。
A、 PWM方式
PM66芯片13和14脚直接接喇叭端,直接驱动8欧姆0.5W喇叭。
如上图1
注:任何喇叭端严禁接地或串接喇叭后直接接地或正电源。
B、 DAC方式:(本示意图以三极管8050作为放大器件,用户可根据实际功率需求自行选择功放器件)更多信息请登陆查询。
PM66芯片的13脚(SP1/DAC)作为音频输出,14脚(SP2)悬空。
接线图如下图2.
图2 并行按键模式,DAC音频输出方式接线图
(2)、微控制器控制方式
PM66在微处理器控制方式下,最多可以录放256段语音。
PM60向客户提供了两种微控制器处理方式:串行输入接口和并行地址接口。
(A)串行输入接口
在串行输入接口工作方式下,K1为数据端,K2为同步时钟端,O1,O2为忙信号端。
地址数据在时钟上升沿锁存输入到PM66芯片内。
语音段的地址为0x00H~0xFFH。
外部单片机直接送入要放音的段地址即
可播放,结束时PM60的忙信号拉低,在判断一段语音结束时,外部单片机再送下一段语音的段地址。
串行接口工作方式下的连接电路如图2,单片机串行输入控制时序图如图3,K2时钟为10Hz~500Hz内均可。
图2 串行接口工作方式电路
上图中O1,O2为忙信号反馈端。
在芯片放音期间分别输出高电平(O1脚)和低电平(O2脚),使用者可根据自己需要选择其中一条进行接收。
如果不需要侦测放音是否完毕,则可不接,省下单片机IO口。
(B)并行地址接口
在并行地址接口工作方式下,K1为同步时钟端,K2~K8为7位并行地址输入端,最大可分为27=128段。
O1、O2位两种极性相反的忙信号输出,可由用户选择使用其中一条输出。
作为忙信号,O1在播放语音时为高,放音完毕拉低;O2与其正好相反。
并行地址接口工作方式的电路如图4,工作时序如图5。
图4 并行地址接口工作方式电路
图5 并行地址接口工作方式时序图
(C)RESET时序
用单片机口线控制PM66的复位时,需要注意给完RESET管脚低信号后需要延迟300ms的时间,才能开始PM66的放音操作,否则不能正常复位。
3 PM66编程软件介绍
PM66烧录软件是配合PM66编程器使用的PC软件,界面友好,功能强大,与PM50烧录软件操作界面和使用方法基本一致。
与PM50烧录软件不同的是,PM60烧录软件只有“智能2代编辑”这一种编辑模式,这种模式是集合了并行、串行以及并行地址模式为一体的烧录方式。
主界面如下图所示
图1
PM66烧录软件界面
关于PM66烧录软件更详尽的介绍,及使用案例请登陆。
