1.SRX初始化配置
1.SRX初始化配置
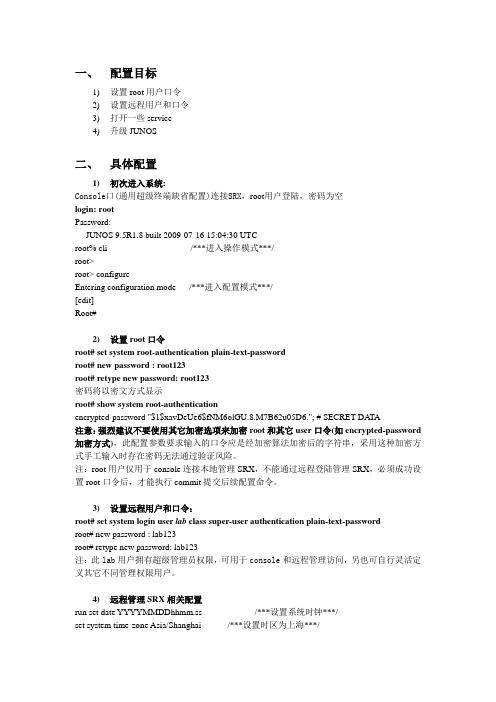
一、配置目标1)设置root用户口令2)设置远程用户和口令3)打开一些service4)升级JUNOS二、具体配置1)初次进入系统:Console口(通用超级终端缺省配置)连接SRX,root用户登陆,密码为空login: rootPassword:--- JUNOS 9.5R1.8 built 2009-07-16 15:04:30 UTCroot% cli /***进入操作模式***/root>root> configureEntering configuration mode /***进入配置模式***/[edit]Root#2)设置root口令root# set system root-authentication plain-text-passwordroot# new password : root123root# retype new password: root123密码将以密文方式显示root# show system root-authenticationencrypted-password "$1$xavDeUe6$fNM6olGU.8.M7B62u05D6."; # SECRET-DATA注意:强烈建议不要使用其它加密选项来加密root和其它user口令(如encrypted-password 加密方式),此配置参数要求输入的口令应是经加密算法加密后的字符串,采用这种加密方式手工输入时存在密码无法通过验证风险。
注:root用户仅用于console连接本地管理SRX,不能通过远程登陆管理SRX,必须成功设置root口令后,才能执行commit提交后续配置命令。
3)设置远程用户和口令:root# set system login user lab class super-user authentication plain-text-passwordroot# new password : lab123root# retype new password: lab123注:此lab用户拥有超级管理员权限,可用于console和远程管理访问,另也可自行灵活定义其它不同管理权限用户。
常用SRX配置和维护命令
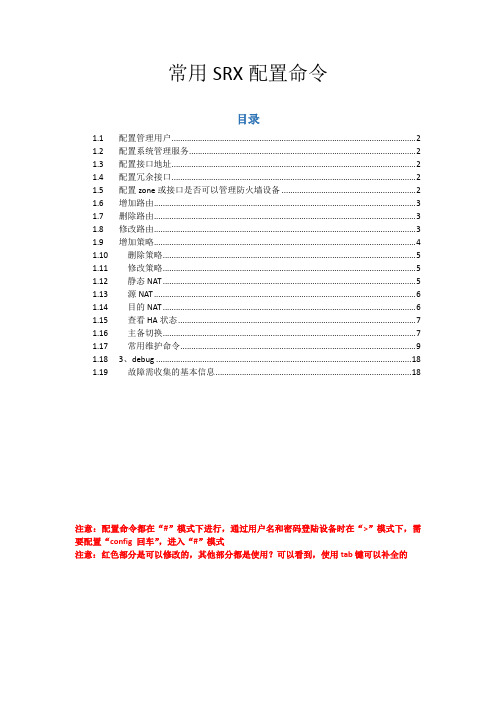
常用SRX配置命令目录1.1 配置管理用户 (2)1.2 配置系统管理服务 (2)1.3 配置接口地址 (2)1.4 配置冗余接口 (2)1.5 配置zone或接口是否可以管理防火墙设备 (2)1.6 增加路由 (3)1.7 删除路由 (3)1.8 修改路由 (3)1.9 增加策略 (4)1.10 删除策略 (5)1.11 修改策略 (5)1.12 静态NAT (5)1.13 源NAT (6)1.14 目的NAT (6)1.15 查看HA状态 (7)1.16 主备切换 (7)1.17 常用维护命令 (9)1.18 3、debug (18)1.19 故障需收集的基本信息 (18)注意:配置命令都在“#”模式下进行,通过用户名和密码登陆设备时在“>”模式下,需要配置“config 回车”,进入“#”模式注意:红色部分是可以修改的,其他部分都是使用?可以看到,使用tab键可以补全的基础配置1.1 配置管理用户配置比如配置lab用户set system login user lab class super-userset system login user lab authentication plain-text-password###回车后需要两次输入密码1.2 配置系统管理服务配置ssh、telnet、http、https登陆设备set system services sshset system services telnetset system services web-management http interface ge-0/0/0.0(可以进行的管理接口)set system services web-management http interface allset system services web-management https system-generated-certificateset system services web-management https interface all1.3 配置接口地址reth接口是防火墙HA后的冗余接口,这个接口包含配置在主设备和备设备的两条链路set interfaces ge-0/0/0 unit 0 family inet address 10.1.10.1/24set interfaces reth5 unit 0 family inet address 1.1.70.5/241.4 配置冗余接口把主设备的g-0/0/6接口,备设备的ge-9/0/6接口(物理接口位置与主设备相同)捆绑到冗余接口reth5中set interface ge-0/0/6 gigether-options redundant-parent reth5set interface ge-9/0/6 gigether-options redundant-parent reth5set interface reth5 redundant-ether-options redundancy-group 11.5 配置zone或接口是否可以管理防火墙设备A、配置zone trust,并且可以管理防火墙,分配接口ge-0/0/0.0接口到trust区域set security zones security-zone trust host-inbound-traffic system-services allset security zones security-zone trust interfaces ge-0/0/0.0B、配置zone untrust可以管理防火墙,但其中的ge-0/0/8.0只能用telnet和http管理,其他的不允许:set security zones security-zone untrust interfaces ge-0/0/8.0 host-inbound-trafficsystem-services httpsset security zones security-zone untrust interfaces ge-0/0/8.0 host-inbound-trafficsystem-services ssh路由配置1.6 增加路由A、配置静态路由,目标地址段是61.189.2.0/24 下一跳地址2.1.1.1set routing-options static route 61.189.2.0/24 next-hop 2.1.1.1B、缺省路由下一跳地址是2.1.1.1set routing-options static route 0.0.0.0/0 next-hop 2.1.1.1C、OSPF路由,ge-0/0/3.0接口在area 0中set protocols ospf area 0 interface ge-0/0/3.01.7 删除路由A、删除静态路由delete routing-options static route 61.189.2.0/24 next-hop 2.1.1.1B、删除缺省路由delete routing-options static route 0.0.0.0/0 next-hop 2.1.1.1C、删除OSPF路由delete protocols ospf area 0 interface ge-0/0/3.01.8 修改路由修改61.189.2.0/24的下一跳为3.1.1.1delete routing-options static route 61.189.2.0/24 next-hop 2.1.1.1set routing-options static route 61.189.2.0/24 next-hop 3.1.1.1策略配置A、从trust区域到untrust区域全部允许set security policies from-zone trust to-zone untrust policy trust2un match source-address anyset security policies from-zone trust to-zone untrust policy trust2un matchdestination-address anyset security policies from-zone trust to-zone untrust policy trust2un match application any set security policies from-zone trust to-zone untrust policy trust2un then permitB、从trust访问untrust的部分网段192.168.1.0/24的http,ftp服务定义untrust区域地址池,地址池名字192.168.1.0/24,地址192.168.1.0/24set security zones security-zone untrust address-book address 192.168.1.0/24192.168.1.0/24set security policies from-zone trust to-zone untrust policy trust2un match source-address anyset security policies from-zone trust to-zone untrust policy trust2un matchdestination-address 192.168.1.0/24set security policies from-zone trust to-zone untrust policy trust2un match application junos-httpset security policies from-zone trust to-zone untrust policy trust2un match application junos-ftpset security policies from-zone trust to-zone untrust policy trust2un then permitC、从trust访问untrust的部分网段192.168.1.0/24的自定义服务TCP 3389端口定义untrust区域地址池,地址池名字192.168.1.0/24,地址192.168.1.0/24set security zones security-zone untrust address-book address 192.168.1.0/24192.168.1.0/24定义tcp 3389服务,定义服务名称TCP3389set applications application TCP3389 protocol tcp destination-port 3389set security policies from-zone trust to-zone untrust policy trust2un match source-address anyset security policies from-zone trust to-zone untrust policy trust2un matchdestination-address 192.168.1.0/24set security policies from-zone trust to-zone untrust policy trust2un match application TCP3389set security policies from-zone trust to-zone untrust policy trust2un then permitdelete security policies from-zone trust to-zone untrust policy trust2un1.11 修改策略A、增加目的地址set security zones security-zone untrust address-book address 192.168.2.0/24192.168.2.0/24set security policies from-zone trust to-zone untrust policy trust2un match destination-address 192.168.2.0/24B、增加443端口应用set applications application TCP443 protocol tcp destination-port 443set security policies from-zone trust to-zone untrust policy trust2un match application TCP443C、去掉443端口应用delete security policies from-zone trust to-zone untrust policy trust2un match application TCP443NAT部分1.12 静态NAT外网untrust区域2.1.1.11与内网的trust区域192.168.20.1做静态NAT。
SRX集群设置说明
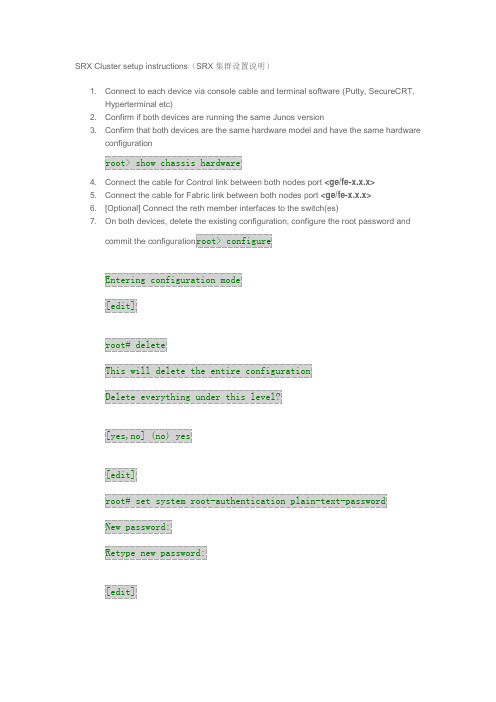
SRX Cluster setup instructions(SRX 集群设置说明) 1. Connect to each device via console cable and terminal software (Putty, SecureCRT, Hyperterminal etc) 2. Confirm if both devices are running the same Junos version 3. Confirm that both devices are the same hardware model and have the same hardware configurationroot> show chassis hardware4. Connect the cable for Control link between both nodes port <ge/fe-x.x.x> 5. Connect the cable for Fabric link between both nodes port <ge/fe-x.x.x> 6. [Optional] Connect the reth member interfaces to the switch(es) 7. On both devices, delete the existing configuration, configure the root password and commit the configuration root>configureEntering configuration mode [edit]root# delete This will delete the entire configuration Delete everything under this level?[yes,no] (no) yes[edit] root# set system root-authentication plain-text-password New password: Retype new password:[edit]root# commit commit complete8. On the device that will be node0, enable chassis cluster as followsroot> set chassis cluster cluster-id 1 node 0 reboot(the luster-id can be any number in the range 1-15). 9. On the device that will be node1, enable chassis cluster as followsroot> set chassis cluster cluster-id 1 node 1 reboot(the same cluster-id needs to be used for both nodes) 10. After both devices have booted up, check if both nodes are joined in the clusterroot> show chassis cluster status11. Add the generated configuration to node0 (it will be synchronized to the other node automatically){primary:node0}root@srx-a> configure warning: Clustering enabled; using private edit warning: uncommitted changes will be discarded on exit Entering configuration mode{primary:node0}[edit] root@srx-a# load set terminal [Type ^D at a new line to end input]...paste the configuration here ... ...press ctrl-D...12. Commit the configuration{primary:node0}[edit] root@srx-a# commitnode0: commit complete node1: commit complete13. DONE。
JuniperSRX高端防火墙简明配置手册

Juniper SRX防火墙简明配置手册目录一、 JUNOS 操作系统介绍 (3)1.1层次化配置结构 (3)1.2 JunOS 配置管理 (4)1.3 SRX 主要配置内容 (4)二、 SRX 防火墙配置说明 (5)2.1初始安装 (5)2.1.1登陆 (5)2.1.2设置 root 用户口令 (9)2.1.3JSRP 初始化配置 (9)2.1.4设置远程登陆管理用户 (14)2.1.5远程管理 SRX相关配置 (15)2.1.6ZONE 及相关接口的配置 (15)2.2 Policy (16)2.3 NAT (17)2.3.1Interface based NAT (18)2.3.2Pool based Source NAT (18)2.3.3Pool base destination NAT (19)2.3.4Pool base Static NAT (20)2.4 IPSEC VPN (21)2.5 Application and ALG (22)三、 SRX 防火墙常规操作与维护 (22)3.1单机设备关机 (22)3.2单机设备重启 (23)3.3单机操作系统升级 (23)3.4双机模式下主备 SRX 关机 (23)3.5双机模式下主备设备重启 (24)3.6双机模式下操作系统升级 (24)3.7双机转发平面主备切换及切换后恢复 (25)3.8双机控制平面主备切换及切换后恢复 (25)3.9双机模式下更换备SRX (25)3.10双机模式下更换主SRX (26)3.11双机模式更换电源 (27)3.12双机模式更换故障板卡 (27)3.13配置备份及还原方法 (27)3.14密码修改方法 (28)3.15磁盘文件清理方法 (28)3.16密码恢复 (28)3.17常用监控维护命令 (29)四、 SRX 防火墙介绍 (31)Juniper SRX防火墙简明配置手册SRX系列防火墙是 Juniper 公司基于 JUNOS操作系统的安全系列产品,JUNOS集成了路由、交换、安全性和一系列丰富的网络服务。
SRX配置
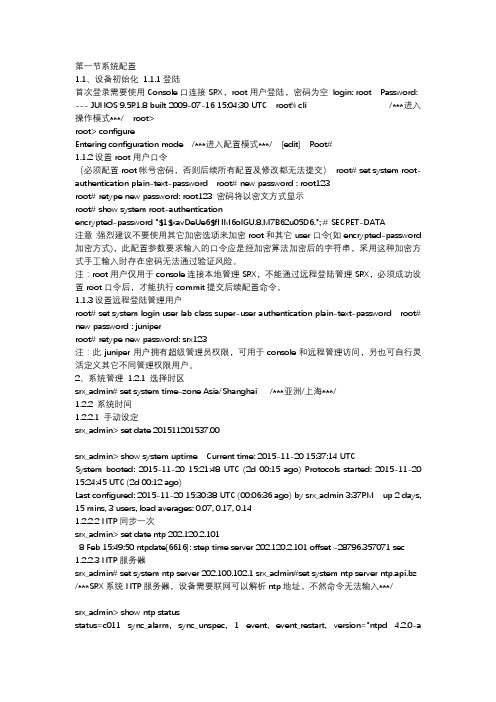
第一节系统配置1.1、设备初始化1.1.1登陆首次登录需要使用Console口连接SRX,root用户登陆,密码为空login: root Password: --- JUNOS 9.5R1.8 built 2009-07-16 15:04:30 UTC root% cli /***进入操作模式***/ root>root> configureEntering configuration mode /***进入配置模式***/ [edit] Root#1.1.2设置root用户口令(必须配置root帐号密码,否则后续所有配置及修改都无法提交)root# set system root-authentication plain-text-password root# new password : root123root# retype new password: root123 密码将以密文方式显示root# show system root-authenticationencrypted-password "$1$xavDeUe6$fNM6olGU.8.M7B62u05D6."; # SECRET-DATA注意:强烈建议不要使用其它加密选项来加密root和其它user口令(如encrypted-password 加密方式),此配置参数要求输入的口令应是经加密算法加密后的字符串,采用这种加密方式手工输入时存在密码无法通过验证风险。
注:root用户仅用于console连接本地管理SRX,不能通过远程登陆管理SRX,必须成功设置root口令后,才能执行commit提交后续配置命令。
1.1.3设置远程登陆管理用户root# set system login user lab class super-user authentication plain-text-password root# new password : juniperroot# retype new password: srx123注:此juniper用户拥有超级管理员权限,可用于console和远程管理访问,另也可自行灵活定义其它不同管理权限用户。
srx使用手册
srx使用手册一、简介SRX是一款功能强大的远程协作工具,可以帮助您在不同的地理位置之间进行高效的沟通和协作。
通过SRX,您可以使用多种通讯方式,如实时聊天、语音通话、视频会议等,以便更好地与您的团队成员或客户进行交流。
二、安装与配置在开始使用SRX之前,您需要先下载并安装该软件。
安装完成后,您需要按照以下步骤进行配置:1. 打开SRX应用程序;2. 在主界面上,点击“设置”按钮;3. 在设置页面中,选择“账户”选项;4. 填写您的个人信息,包括姓名、电子邮件地址和密码等;5. 点击“保存”按钮,完成配置。
三、主要功能1. 实时聊天:您可以使用SRX的实时聊天功能与团队成员或客户进行实时的文字交流。
您可以在聊天窗口中发送文字、表情符号和文件等。
2. 语音通话:SRX支持多人语音通话,您可以通过该功能与团队成员或客户进行高效的语音交流。
您可以在通话中自由发言或静音,同时还可以共享屏幕和应用程序。
3. 视频会议:SRX支持高清视频会议,最多可支持100人同时在线。
您可以在会议中共享屏幕、演示文档和应用程序等,同时还可以录制会议内容以便回顾。
4. 文件共享:您可以使用SRX的文件共享功能将文件或文件夹发送给其他SRX用户。
接收方可以直接下载或在线预览文件,确保文件传输的安全性和便捷性。
5. 任务管理:SRX的任务管理功能可以帮助您创建、分配和跟踪任务。
您可以在任务中添加描述、截止日期和里程碑等,同时还可以设置任务的优先级和责任人。
6. 集成扩展:SRX具有开放性和可扩展性,可以与多个第三方工具和应用程序集成。
通过集成扩展,您可以进一步提高SRX的功能和便捷性。
四、使用技巧1. 在实时聊天中,使用快捷回复功能可以快速回复常见消息,提高沟通效率。
2. 在语音通话中,使用静音功能可以让您在会议中随时发言或静音,以便更好地控制自己的音量和发言时间。
3. 在视频会议中,使用演示文档功能可以方便地展示PPT、PDF 和其他文档。
JuniperSRX高端防火墙简明配置手册

Juniper SRX防火墙简明配置手册目录一、 JUNOS 操作系统介绍 (3)1.1层次化配置结构 (3)1.2 JunOS 配置管理 (4)1.3 SRX 主要配置内容 (4)二、 SRX 防火墙配置说明 (5)2.1初始安装 (5)2.1.1登陆 (5)2.1.2设置 root 用户口令 (9)2.1.3JSRP 初始化配置 (9)2.1.4设置远程登陆管理用户 (14)2.1.5远程管理 SRX相关配置 (15)2.1.6ZONE 及相关接口的配置 (15)2.2 Policy (16)2.3 NAT (17)2.3.1Interface based NAT (18)2.3.2Pool based Source NAT (18)2.3.3Pool base destination NAT (19)2.3.4Pool base Static NAT (20)2.4 IPSEC VPN (21)2.5 Application and ALG (22)三、 SRX 防火墙常规操作与维护 (22)3.1单机设备关机 (22)3.2单机设备重启 (23)3.3单机操作系统升级 (23)3.4双机模式下主备 SRX 关机 (23)3.5双机模式下主备设备重启 (24)3.6双机模式下操作系统升级 (24)3.7双机转发平面主备切换及切换后恢复 (25)3.8双机控制平面主备切换及切换后恢复 (25)3.9双机模式下更换备SRX (25)3.10双机模式下更换主SRX (26)3.11双机模式更换电源 (27)3.12双机模式更换故障板卡 (27)3.13配置备份及还原方法 (27)3.14密码修改方法 (28)3.15磁盘文件清理方法 (28)3.16密码恢复 (28)3.17常用监控维护命令 (29)四、 SRX 防火墙介绍 (31)Juniper SRX防火墙简明配置手册SRX系列防火墙是 Juniper 公司基于 JUNOS操作系统的安全系列产品,JUNOS集成了路由、交换、安全性和一系列丰富的网络服务。
JuniperSRX中文配置手册及图解
JuniperSRX中文配置手册及图解前言、版本说明 (1)一、界面菜单管理 (3)2、WEB管理界面 (4)(1)Web管理界面需要浏览器支持Flash控件。
(4)(2)输入用户名密码登陆: (4)(3)仪表盘首页 (5)3、菜单目录 (7)二、接口配置 (12)1、接口静态IP (12)2、PPPoE (13)3、DHCP (14)三、路由配置 (16)1、静态路由 (16)2、动态路由 (16)四、区域设置Zone (18)五、策略配置 (20)1、策略元素定义 (20)2、防火墙策略配置 (22)3、安全防护策略 (25)六、地址转换 (26)1、源地址转换-建立地址池 (26)2、源地址转换规则设置 (27)七、VPN配置 (30)1、建立第一阶段加密建议IKE Proposal (Phase 1) (或者用默认提议) (30)2、建立第一阶段IKE策略 (31)3、建立第一阶段IKE Gateway (32)4、建立第二阶段加密提议IKE Proposal (Phase 2) (或者用默认提议) (33)5、建立第一阶段IKE策略 (34)6、建立VPN策略 (35)八、Screen防攻击 (38)九、双机 (39)十、故障诊断 (39)前言、版本说明产品:Juniper SRX240 SH版本:JUNOS Software Release [9.6R1.13]注:测试推荐使用此版本。
此版本对浏览速度、保存速度提高了一些,并且CPU占用率明显下降很多。
9.5R2.7版本(CPU持续保持在60%以上,甚至90%)9.6R1.13版本(对菜单操作或者保存配置时,仍会提升一部分CPU)一、界面菜单管理1、管理方式JuniperSRX系列防火墙出厂默认状态下,登陆用户名为root密码为空,所有接口都已开启Web管理,但无接口地址。
终端连接防火墙后,输入用户名(root)、密码(空),显示如下:root@srx240-1%输入cli命令进入JUNOS访问模式:root@srx240-1% cliroot@srx240-1>输入configure进入JUNOS配置模式:root@srx240-1% cliroot@srx240-1> configureEntering configuration mode[edit]root@srx240-1#防火墙至少要进行以下配置才可以正常使用:(1)设置root密码(否则无法保存配置)(2)开启ssh/telnet/http服务(3)添加用户(root权限不能作为远程telnet帐户,可以使用SHH方式)(4)分配新的用户权限2、WEB管理界面(1)Web管理界面需要浏览器支持Flash控件。
Juniper_SRX中文配置手册簿及现用图解
Juniper_SRX中⽂配置⼿册簿及现⽤图解实⽤标准⽂档
前⾔、版本说明 (2)
⼀、界⾯菜单管理 (3)
2、WEB管理界⾯ (4)
(1)Web管理界⾯需要浏览器⽀持Flash控件。
(4)
(2)输⼊⽤户名密码登陆: (4)
(3)仪表盘⾸页 (5)
3、菜单⽬录 (8)
⼆、接⼝配置 (13)
1、接⼝静态IP (13)
2、PPPoE (14)
3、DHCP (15)
三、路由配置 (17)
1、静态路由 (17)
2、动态路由 (17)
四、区域设置Zone (19)
五、策略配置 (21)
1、策略元素定义 (21)
2、防⽕墙策略配置 (23)
3、安全防护策略 (26)
六、地址转换 (27)
1、源地址转换-建⽴地址池 (27)
2、源地址转换规则设置 (28)
七、VPN配置 (31)
1、建⽴第⼀阶段加密建议IKE Proposal (Phase 1) (或者⽤默认提议) (31)
2、建⽴第⼀阶段IKE策略 (32)
3、建⽴第⼀阶段IKE Gateway (33)
4、建⽴第⼆阶段加密提议IKE Proposal (Phase 2) (或者⽤默认提议) (34)
5、建⽴第⼀阶段IKE策略 (35)
6、建⽴VPN策略 (36)
⼋、Screen防攻击 (38)
九、双机 (39)
⼗、故障诊断 (39)
⽂案⼤全
上⼀页下⼀页。
1.SRX 系统演变 基本配置
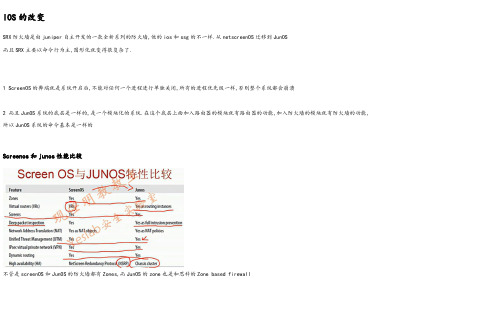
IOS的改变SRX防火墙是由juniper自主开发的一款全新系列的防火墙,他的ios和ssg的不一样.从netscreenOS迁移到JunOS而且SRX主要以命令行为主,图形化就变得很复杂了.1 ScreenOS的弊端就是系统开启后,不能对任何一个进程进行单独关闭,所有的进程优先级一样,否则整个系统都会崩溃2 而且JunOS系统的底层是一样的,是一个模块化的系统.在这个底层上面加入路由器的模块就有路由器的功能,加入防火墙的模块就有防火墙的功能, 所以JunOS系统的命令基本是一样的Screenos和junos性能比较不管是screenOS和JunOS的防火墙都有Zones,而JunOS的zone也是和思科的Zone based firewallScreenos有虚拟路由器,Junos也有,不过叫做路由实例Screens功能更两者都有深度包检测在junos就是ips的功能了都有nat vpn 动态路由协议 utm(就是防御病毒,防御垃圾邮件的功能)SRX防火墙的管理方式有命令行和网页管理SRX产品线第一种是分支SRX系列的,这个产品线主要是中小型企业用的,像路由器,防火墙,交换机等等第二种是数据中心的SRX系列的,这款系列就是主要针对大型企业的,像吞吐量达到10G的数据中心和IPS两个系列的features其实是有共同的,但是都有自己特别的feature的就是了Branch SRX系列Branch SRX系列特性介绍中小型企业的srx系列设备能够支持病毒检测,垃圾邮件过滤,url过滤,而数据中心是不支持的Ips的能力比数据中心的要弱.而这次分支srx多了一个动态vpn的客户端的功能,它能够让客户直接打开网页,下载客户端输入密码就能够连上vpn,好方便.咋这是数据中心不支持的有3G和wifi有mpls能够支持广域网接口,像帧中继,adsl这些Branch SRX Series授权这个系列的SRX的授权几乎都要买的,除了BGP是永久的.其他都是要购买.这的conbined set是一个集合,是防病毒,防御垃圾邮件,url过滤的一个集合,而动态vpn客户端一般来说只能并发连接时2-3个,但是要到5个或者更多的话就必须买授权系列型号这款SRX100的最大吞吐量是650Mbps,而且也是有两个选择,一个是512MB的内存,一个是1G内存功能也是差老远.如果你是买了512内存的SRX100,那么你只有基本的防火墙功能和vpn功能,对应用层的过滤你是办不到的就算买了授权也不能对病毒,垃圾邮件和url过滤,必须得将内存升级到1GB,然后再买授权才能用.SRX100是不支持广域网模块的SRX200这个产品和SRX100几乎差不多(就是功能上),性能还是比srx100好的.,而且多了一个广域网接口,红色框住的地方SRX600就是一个很大的跨度了.最大吞吐量也达到了7Gbps,而却ips的吞吐量也有1.5Gpbs,很牛逼的性能DATA Center SRX数据中心的SRX防火墙主要是高性能,高稳定,但并不是feature多JunOS的基本操作(命令)操作模式介绍在一个新的设备上面,在login的界面上直接输入root就能登录,并不需要密码,而且必须要敲cli才能进入命令行界面admin@% cliadmin>这个”admin>”的模式是操作模式,这个模式下面可以实现show \clear\ monitor这三个操作,相当于思科的”#”模式Show interfaces就能看到这个设备所有接口的状态信息然后如果要进入配置模式必须敲configure,这样就能进入配置模式Junos的配置模式是#号的,这个模式可以进行configure\save\set\delet\load\show命令而且这个模式也可以show interfaces,不过这个模式下面show interfaces是查看所有接口的配置简单命令介绍查看接口命令第一句命令root>show interfaces terse是很简略的,相当于show ip int bri,能看见接口的up/down状态,地址,第二句命令root>show interfaces brief就比第一条命令查看的内容详细root>show interfaces detail更加详细,能够看到接口的速率,包的数目最后一个是最详细的,root>show interfaces extensive,这里就不显示了。
juniper srx恢复出厂设置
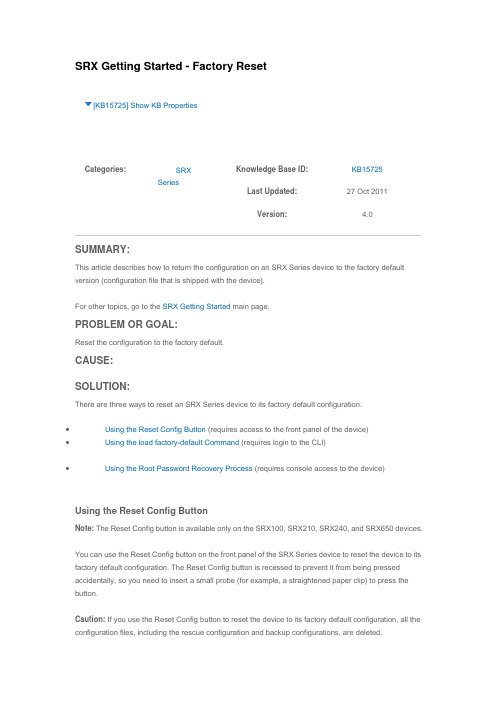
SRX Getting Started - Factory Reset[KB15725] Show KB PropertiesCategories:∙SRXKnowledge Base ID: KB15725SeriesLast Updated: 27 Oct 2011Version: 4.0 SUMMARY:This article describes how to return the configuration on an SRX Series device to the factory default version (configuration file that is shipped with the device).For other topics, go to the SRX Getting Started main page.PROBLEM OR GOAL:Reset the configuration to the factory default.CAUSE:SOLUTION:There are three ways to reset an SRX Series device to its factory default configuration.∙Using the Reset Config Button (requires access to the front panel of the device)∙Using the load factory-default Command (requires login to the CLI)∙Using the Root Password Recovery Process (requires console access to the device)Using the Reset Config ButtonNote: The Reset Config button is available only on the SRX100, SRX210, SRX240, and SRX650 devices.You can use the Reset Config button on the front panel of the SRX Series device to reset the device to its factory default configuration. The Reset Config button is recessed to prevent it from being pressed accidentally, so you need to insert a small probe (for example, a straightened paper clip) to press the button.Caution: If you use the Reset Config button to reset the device to its factory default configuration, all the configuration files, including the rescue configuration and backup configurations, are deleted.For more information, see the Hardware Guide for your device at/techpubs/hardware/junos-srx/index.html.To reset the device to its factory default configuration, press and hold the Reset Config button on the front panel of the SRX Series device for at least 15 seconds, until the Status LED glows amber.Using the load factory-default CommandIf you are still able to log in to the device with the CLI, you can use the load factory-default command to return the device to its factory default configuration. The load factory-default command loads and commits the factory configuration, but using this command does not delete other configuration files on the device.For more information about the load factory-default command, see/techpubs/software/junos-security/junos-security10.0/junos-security-admin-guide/f actory-defaults-router-context-to-secure-context-section.html#factory-defaults-router-context-to-secure-c ontext-section.1. Enter the load factory-default command.root@host# load factory-default2. Use the set system root-authentication plain-text-password command toset a new root password for the device.root@host# set system root-authentication plain-text-password3. Enter the root password, and enter it again for confirmation.New password:Retype new password:Caution: Before you commit changes, if you do not assign an IP address for the ge-0/0/0 interface, create a local user account, and enter routing information, either from CLI configuration or using DHCP, the SRX device is no longer remotely accessible. To manage the SRX device, you must connect a PC or laptop to the physical console, or attach the PC or laptop to a subnet that is directly connected to thege-0/0/0 interface, which is assigned an IP address of 192.168.2.1.4. Use the commit and-quit command to commit the configuration and exit fromconfiguration mode if the configuration contains no errors and the commit succeeds.root@host# commit and-quitAfter the commit, the factory default configuration is the running configuration.Using the Root Password Recovery ProcessIf you can no longer log in to the device, you can use the root password recovery process to reset the device to its factory default configuration. You must have console access to use the password recovery process.For instructions on how to recover the root password, see/techpubs/en_US/junos10.4/information-products/topic-collections/config-guide-sy stem-basics/index.html?topic-31396.html.Note that for SRX Branch devices running 10.0R1 or later JUNOS versions password recovery may fail due to watchdog timeout while entering single-user mode. Refer to KB17565 for details.PURPOSE:ImplementationRELATED LINKS:。
Juniper_SRX配置手册
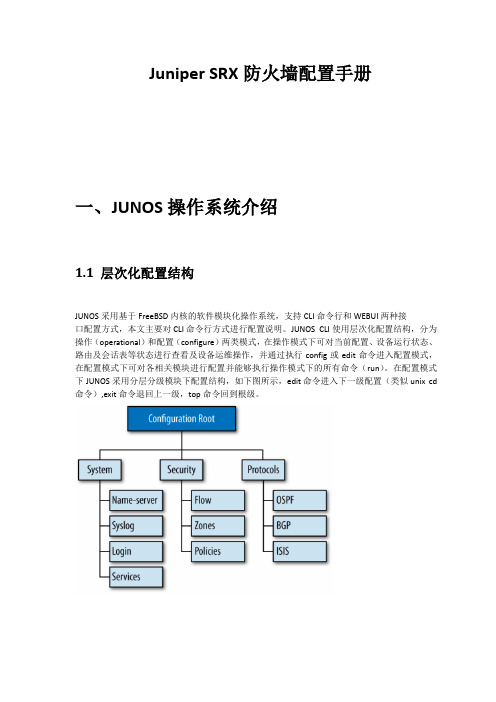
Juniper SRX防火墙配置手册一、JUNOS操作系统介绍1.1 层次化配置结构JUNOS采用基于FreeBSD内核的软件模块化操作系统,支持CLI命令行和WEBUI两种接口配置方式,本文主要对CLI命令行方式进行配置说明。
JUNOS CLI使用层次化配置结构,分为操作(operational)和配置(configure)两类模式,在操作模式下可对当前配置、设备运行状态、路由及会话表等状态进行查看及设备运维操作,并通过执行config或edit命令进入配置模式,在配置模式下可对各相关模块进行配置并能够执行操作模式下的所有命令(run)。
在配置模式下JUNOS采用分层分级模块下配置结构,如下图所示,edit命令进入下一级配置(类似unix cd 命令),exit命令退回上一级,top命令回到根级。
1.2 JunOS配置管理JUNOS通过set语句进行配置,配置输入后并不会立即生效,而是作为候选配置(Candidate Config)等待管理员提交确认,管理员通过输入commit命令来提交配置,配置内容在通过SRX 语法检查后才会生效,一旦commit通过后当前配置即成为有效配置(Active config)。
另外,JUNOS 允许执行commit命令时要求管理员对提交的配置进行两次确认,如执行commit confirmed 2命令要求管理员必须在输入此命令后2分钟内再次输入commit以确认提交,否则2分钟后配置将自动回退,这样可以避免远程配置变更时管理员失去对SRX的远程连接风险。
在执行commit命令前可通过配置模式下show命令查看当前候选配置(Candidate Config),在执行commit后配置模式下可通过run show config命令查看当前有效配置(Active config)。
此外可通过执行show | compare比对候选配置和有效配置的差异。
SRX上由于配备大容量硬盘存储器,缺省按先后commit顺序自动保存50份有效配置,并可通过执行rolback和commit命令返回到以前配置(如rollback 0/commit可返回到前一commit配置);也可以直接通过执行save configname.conf手动保存当前配置,并执行load override configname.conf / commit调用前期手动保存的配置。
JuniperSRX中文配置手册及图解
前言、版本说明 (2)一、界面菜单管理 (4)2、WEB管理界面 (4)(1)Web管理界面需要浏览器支持Flash控件。
(4)(2)输入用户名密码登陆: (4)(3)仪表盘首页 (5)3、菜单目录 (7)二、接口配置 (12)1、接口静态IP (12)2、PPPoE (13)3、DHCP (14)三、路由配置 (16)1、静态路由 (16)2、动态路由 (16)四、区域设置Zone (18)五、策略配置 (20)1、策略元素定义 (20)2、防火墙策略配置 (22)3、安全防护策略 (25)六、地址转换 (26)1、源地址转换-建立地址池 (26)2、源地址转换规则设置 (27)七、VPN配置 (30)1、建立第一阶段加密建议IKE Proposal (Phase 1) (或者用默认提议) (30)2、建立第一阶段IKE策略 (31)3、建立第一阶段IKE Gateway (32)4、建立第二阶段加密提议IKE Proposal (Phase 2) (或者用默认提议) (33)5、建立第一阶段IKE策略 (34)6、建立VPN策略 (35)八、Screen防攻击 (38)九、双机 (39)十、故障诊断 (39)前言、版本说明产品:Juniper SRX240 SH版本:JUNOS Software Release [9.6R1.13]注:测试推荐使用此版本。
此版本对浏览速度、保存速度提高了一些,并且CPU占用率明显下降很多。
9.5R2.7版本(CPU持续保持在60%以上,甚至90%)9.6R1.13版本(对菜单操作或者保存配置时,仍会提升一部分CPU)一、界面菜单管理1、管理方式JuniperSRX系列防火墙出厂默认状态下,登陆用户名为root密码为空,所有接口都已开启Web管理,但无接口地址。
终端连接防火墙后,输入用户名(root)、密码(空),显示如下:root@srx240-1%输入cli命令进入JUNOS访问模式:root@srx240-1% cliroot@srx240-1>输入configure进入JUNOS配置模式:root@srx240-1% cliroot@srx240-1> configureEntering configuration mode[edit]root@srx240-1#防火墙至少要进行以下配置才可以正常使用:(1)设置root密码(否则无法保存配置)(2)开启ssh/telnet/http服务(3)添加用户(root权限不能作为远程telnet帐户,可以使用SHH方式)(4)分配新的用户权限2、WEB管理界面(1)Web管理界面需要浏览器支持Flash控件。
Juniper SRX防火墙配置手册
Juniper SRX防火墙简明配置手册Juniper Networks, Inc.北京市东城区东长安街1号东方经贸城西三办公室15层1508室邮编:100738电话:65288800目录一、JUNOS操作系统介绍 (3)1.1 层次化配置结构 (3)1.2 JunOS配置管理 (3)1.3 SRX主要配置内容 (4)二、SRX防火墙配置对照说明 (5)2.1 初始安装 (5)2.1.1 登陆 (5)2.1.2 设置root用户口令 (5)2.1.3 设置远程登陆管理用户 (5)2.1.4 远程管理SRX相关配置 (6)2.2 Policy (6)2.3 NAT (6)2.3.1 Interface based NAT............................................................. 错误!未定义书签。
2.3.2 Pool based Source NAT......................................................... 错误!未定义书签。
2.3.3 Pool base destination NAT................................................. 错误!未定义书签。
2.3.4 Pool base Static NAT (7)2.4 IPSEC VPN (7)2.5 Application and ALG (8)2.6 JSRP ........................................................................................................ 错误!未定义书签。
三、SRX防火墙常规操作与维护 (9)3.1 设备关机 (9)3.2 设备重启 (9)3.3 操作系统升级 (10)3.4 密码恢复 (10)3.5 常用监控维护命令 (11)Juniper SRX防火墙简明配置手册SRX系列防火墙是Juniper公司基于JUNOS操作系统的安全系列产品,JUNOS集成了路由、交换、安全性和一系列丰富的网络服务。
(完整word版)Juniper_SRX防火墙Web配置手册

Juniper SRX防火墙配置手册1系统配置 (1)1。
1 配置ROOT帐号密码 (1)1。
2 配置用户名和密码 (2)2接口配置 (7)2。
1 IPV4地址配置 (8)2.2 接口T RUNK模式配置 (12)2。
3 接口A CCESS模式配置 (13)3VLAN配置 (14)3。
1 创建VLAN配置 (14)4路由配置 (18)4。
1 静态路由配置 (20)5自定义应用配置 (21)5。
1 自定义服务配置 (21)5。
2 应用组配置 (22)6地址组配置 (23)6。
1 地址簿配置 (23)6.2 地址组配置 (24)7日程表配置 (26)8NAT配置 (29)8.1 S TATIC NAT配置 (29)1 系统配置1.1 配置root帐号密码首次登陆设备时,需要采用console方式,登陆用户名为:root,密码为空,登陆到cli下以后,执行如下命令,设置root帐号的密码。
root# set system root—authentication plain-text—passwordroot# new password : root123root# retype new password: root123密码将以密文方式显示。
注意:必须要首先配置root帐号密码,否则后续所有配置的修改都无法提交。
SRX系列低端设备在开机后,系统会加载一个默认配置,设备的第一个接口被划分在trust 区域,配置一个ip地址192。
168.1.1,允许ping、telnet、web等管理方式,可以通过该地址登陆设备.登陆后显示页面如下:在该页面上,可以看到设备的基本情况,在左边的chassis view中可以看到端口up/down 情况,在system identification中可以看到设备序列号、设备名称、软件版本等信息,在resource utilization中可以看到cpu、menory、session、存储空间等信息,在security resources中可以看到当前的会话统计、策略数量统计等信息。
juniper srx恢复出厂设置

SRX Getting Started - Factory Reset[KB15725] Show KB PropertiesCategories:∙SRXKnowledge Base ID: KB15725SeriesLast Updated: 27 Oct 2011Version: 4.0 SUMMARY:This article describes how to return the configuration on an SRX Series device to the factory default version (configuration file that is shipped with the device).For other topics, go to the SRX Getting Started main page.PROBLEM OR GOAL:Reset the configuration to the factory default.CAUSE:SOLUTION:There are three ways to reset an SRX Series device to its factory default configuration.∙Using the Reset Config Button (requires access to the front panel of the device)∙Using the load factory-default Command (requires login to the CLI)∙Using the Root Password Recovery Process (requires console access to the device)Using the Reset Config ButtonNote: The Reset Config button is available only on the SRX100, SRX210, SRX240, and SRX650 devices.You can use the Reset Config button on the front panel of the SRX Series device to reset the device to its factory default configuration. The Reset Config button is recessed to prevent it from being pressed accidentally, so you need to insert a small probe (for example, a straightened paper clip) to press the button.Caution: If you use the Reset Config button to reset the device to its factory default configuration, all the configuration files, including the rescue configuration and backup configurations, are deleted.For more information, see the Hardware Guide for your device at/techpubs/hardware/junos-srx/index.html.To reset the device to its factory default configuration, press and hold the Reset Config button on the front panel of the SRX Series device for at least 15 seconds, until the Status LED glows amber.Using the load factory-default CommandIf you are still able to log in to the device with the CLI, you can use the load factory-default command to return the device to its factory default configuration. The load factory-default command loads and commits the factory configuration, but using this command does not delete other configuration files on the device.For more information about the load factory-default command, see/techpubs/software/junos-security/junos-security10.0/junos-security-admin-guide/f actory-defaults-router-context-to-secure-context-section.html#factory-defaults-router-context-to-secure-c ontext-section.1. Enter the load factory-default command.root@host# load factory-default2. Use the set system root-authentication plain-text-password command toset a new root password for the device.root@host# set system root-authentication plain-text-password3. Enter the root password, and enter it again for confirmation.New password:Retype new password:Caution: Before you commit changes, if you do not assign an IP address for the ge-0/0/0 interface, create a local user account, and enter routing information, either from CLI configuration or using DHCP, the SRX device is no longer remotely accessible. To manage the SRX device, you must connect a PC or laptop to the physical console, or attach the PC or laptop to a subnet that is directly connected to thege-0/0/0 interface, which is assigned an IP address of 192.168.2.1.4. Use the commit and-quit command to commit the configuration and exit fromconfiguration mode if the configuration contains no errors and the commit succeeds.root@host# commit and-quitAfter the commit, the factory default configuration is the running configuration.Using the Root Password Recovery ProcessIf you can no longer log in to the device, you can use the root password recovery process to reset the device to its factory default configuration. You must have console access to use the password recovery process.For instructions on how to recover the root password, see/techpubs/en_US/junos10.4/information-products/topic-collections/config-guide-sy stem-basics/index.html?topic-31396.html.Note that for SRX Branch devices running 10.0R1 or later JUNOS versions password recovery may fail due to watchdog timeout while entering single-user mode. Refer to KB17565 for details.PURPOSE:ImplementationRELATED LINKS:。
JuniperSRX中文配置手册及图解

前言、版本说明 (2)一、界面菜单管理 (4)2、WEB管理界面 (4)(1)Web管理界面需要浏览器支持Flash控件。
(4)(2)输入用户名密码登陆: (4)(3)仪表盘首页 (5)3、菜单目录 (7)二、接口配置 (12)1、接口静态IP (12)2、PPPoE (13)3、DHCP (14)三、路由配置 (16)1、静态路由 (16)2、动态路由 (16)四、区域设置Zone (18)五、策略配置 (20)1、策略元素定义 (20)2、防火墙策略配置 (22)3、安全防护策略 (25)六、地址转换 (26)1、源地址转换-建立地址池 (26)2、源地址转换规则设置 (27)七、VPN配置 (30)1、建立第一阶段加密建议IKE Proposal (Phase 1) (或者用默认提议) (30)2、建立第一阶段IKE策略 (31)3、建立第一阶段IKE Gateway (32)4、建立第二阶段加密提议IKE Proposal (Phase 2) (或者用默认提议) (33)5、建立第一阶段IKE策略 (34)6、建立VPN策略 (35)八、Screen防攻击 (38)九、双机 (39)十、故障诊断 (39)前言、版本说明产品:Juniper SRX240 SH版本:JUNOS Software Release [9.6R1.13]注:测试推荐使用此版本。
此版本对浏览速度、保存速度提高了一些,并且CPU占用率明显下降很多。
9.5R2.7版本(CPU持续保持在60%以上,甚至90%)9.6R1.13版本(对菜单操作或者保存配置时,仍会提升一部分CPU)一、界面菜单管理1、管理方式JuniperSRX系列防火墙出厂默认状态下,登陆用户名为root密码为空,所有接口都已开启Web管理,但无接口地址。
终端连接防火墙后,输入用户名(root)、密码(空),显示如下:root@srx240-1%输入cli命令进入JUNOS访问模式:root@srx240-1% cliroot@srx240-1>输入configure进入JUNOS配置模式:root@srx240-1% cliroot@srx240-1> configureEntering configuration mode[edit]root@srx240-1#防火墙至少要进行以下配置才可以正常使用:(1)设置root密码(否则无法保存配置)(2)开启ssh/telnet/http服务(3)添加用户(root权限不能作为远程telnet帐户,可以使用SHH方式)(4)分配新的用户权限2、WEB管理界面(1)Web管理界面需要浏览器支持Flash控件。
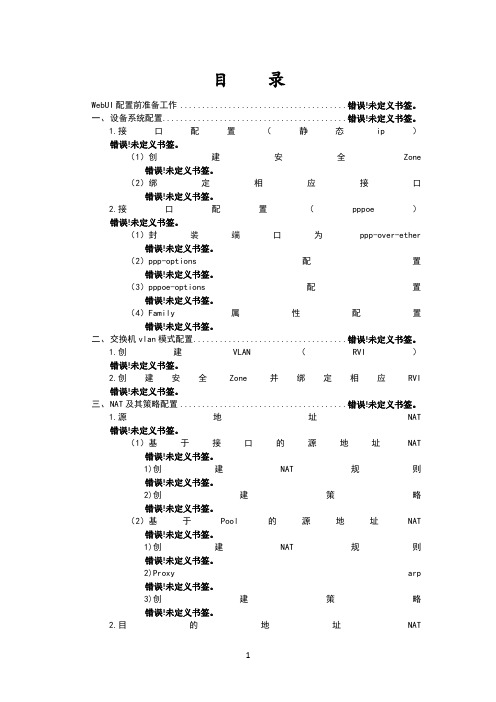
SRX WebUI 配置手册
目录WebUI配置前准备工作 ......................................错误!未定义书签。
一、设备系统配置..........................................错误!未定义书签。
1.接口配置(静态ip)错误!未定义书签。
(1)创建安全Zone 错误!未定义书签。
(2)绑定相应接口错误!未定义书签。
2.接口配置(pppoe)错误!未定义书签。
(1)封装端口为ppp-over-ether 错误!未定义书签。
(2)ppp-options配置错误!未定义书签。
(3)pppoe-options配置错误!未定义书签。
(4)Family属性配置错误!未定义书签。
二、交换机vlan模式配置...................................错误!未定义书签。
1.创建VLAN(RVI)错误!未定义书签。
2.创建安全Zone并绑定相应RVI错误!未定义书签。
三、N AT及其策略配置......................................错误!未定义书签。
1.源地址NAT错误!未定义书签。
(1)基于接口的源地址NAT 错误!未定义书签。
1)创建NAT规则错误!未定义书签。
2)创建策略错误!未定义书签。
(2)基于Pool的源地址NAT 错误!未定义书签。
1)创建NAT规则错误!未定义书签。
2)Proxy arp错误!未定义书签。
3)创建策略错误!未定义书签。
2.目的地址NAT错误!未定义书签。
(1)创建NAT规则错误!未定义书签。
(2)创建策略错误!未定义书签。
1)创建地址列表错误!未定义书签。
2)创建服务列表错误!未定义书签。
3)创建策略并调用相关地址及服务错误!未定义书签。
3.Static NAT错误!未定义书签。
(1)创建NAT规则错误!未定义书签。
(2)创建策略错误!未定义书签。
1)创建地址列表错误!未定义书签。
- 1、下载文档前请自行甄别文档内容的完整性,平台不提供额外的编辑、内容补充、找答案等附加服务。
- 2、"仅部分预览"的文档,不可在线预览部分如存在完整性等问题,可反馈申请退款(可完整预览的文档不适用该条件!)。
- 3、如文档侵犯您的权益,请联系客服反馈,我们会尽快为您处理(人工客服工作时间:9:00-18:30)。
一、配置目标1)设置root用户口令2)设置远程用户和口令3)打开一些service4)升级JUNOS二、具体配置1)初次进入系统:Console口(通用超级终端缺省配置)连接SRX,root用户登陆,密码为空login: rootPassword:--- JUNOS 9.5R1.8 built 2009-07-16 15:04:30 UTCroot% cli /***进入操作模式***/root>root> configureEntering configuration mode /***进入配置模式***/[edit]Root#2)设置root口令root# set system root-authentication plain-text-passwordroot# new password : root123root# retype new password: root123密码将以密文方式显示root# show system root-authenticationencrypted-password "$1$xavDeUe6$fNM6olGU.8.M7B62u05D6."; # SECRET-DATA注意:强烈建议不要使用其它加密选项来加密root和其它user口令(如encrypted-password 加密方式),此配置参数要求输入的口令应是经加密算法加密后的字符串,采用这种加密方式手工输入时存在密码无法通过验证风险。
注:root用户仅用于console连接本地管理SRX,不能通过远程登陆管理SRX,必须成功设置root口令后,才能执行commit提交后续配置命令。
3)设置远程用户和口令:root# set system login user lab class super-user authentication plain-text-passwordroot# new password : lab123root# retype new password: lab123注:此lab用户拥有超级管理员权限,可用于console和远程管理访问,另也可自行灵活定义其它不同管理权限用户。
4)远程管理SRX相关配置run set date YYYYMMDDhhmm.ss/***设置系统时钟***/set system time-zone Asia/Shanghai/***设置时区为上海***/set system host-name SRX3400-A/***设置主机名***/set system name-server 1.1.1.1 /***设置DNS服务器***/set system services ftpset system services telnetset system services web-management http/***在系统级开启ftp/telnet/http远程接入管理服务***/root# set interfaces fxp0 unit 0 family inet address 192.168.3.81/24[edit]root# commitcommit complete/**为管理端口配置ip地址fxp默认在系统中看不到**/5)升级JUNOS:root> show versionModel: srx3600JUNOS Software Release [9.4R2.9] /**查看现在系统的版本**/我们现在要升级到目标为10.1R1.8,通过juniper网站产看升级顺序,发现必须把软件升级到9.4以上的版本才能直接升级到10.1R1.8版本,所以我们首先把版本升级到9.6R1.13我们首先要在电脑上有相应的系统软件,其次需要FTP 软件用户拷贝软件到SRX上Eg:root> ftp 192.168.3.100/**ftp到服务器**/Connected to 192.168.3.100.220 ArGoSoft FTP Server for Windows NT/2000/XP, Version 1.4 (1.4.3.7)Name (192.168.3.100:root): test331 Need passwordPassword:230 User test logged in successfully **Remote system type is UNIX.Using binary mode to transfer files.ftp> binary200 Type set to Image (binary)ftp> hash /**hash校验**/Hash mark printing on (1024 bytes/hash mark).ftp> get junos-srx3000-9.6R1.13-domestic.tgz /**上传软件到系统**/local: junos-srx3000-10.1R1.8-domestic.tgz remote: junos-srx3000-10.1R1.8-domestic.tgz200 Port command successful150 Opening binary data connection100% |**************************************************| 172 MB 00:00 ETA 226 Transfer complete180486271 bytes received in 500.33 seconds (352.28 KB/s)ftp> bye /**退出ftp**/221 Aba heroot> request system software add junos-srx3000-9.6R1.13-domestic.tgz unlink no-copy /**升级软件**/NOTICE: Validating configuration against junos-srx3000-9.6R1.13-domestic.tgz. NOTICE: Use the 'no-validate' option to skip this if desired.Checking compatibility with configurationInitializing...Verified manifest signed by PackageProduction_9_4_0Using /cf/root/junos-srx3000-9.6R1.13-domestic.tgzChecking junos requirements on /Available space: 500934 require: 163950Saving boot file package in /var/sw/pkg/junos-boot-srx3000-9.6R1.13.tgzVerified manifest signed by PackageProduction_9_6_0Hardware Database regeneration succeededValidating against /config/juniper.conf.gzmgd: commit completeValidation succeededInstalling package '/cf/root/junos-srx3000-9.6R1.13-domestic.tgz' ...Verified SHA1 checksum of issu-indb.tgzVerified junos-boot-srx3000-9.6R1.13.tgz signed by PackageProduction_9_6_0Verified junos-srx3000-9.6R1.13-domestic signed by PackageProduction_9_6_0Available space: 500934 require: 163950Saving boot file package in /var/sw/pkg/junos-boot-srx3000-9.6R1.13.tgzJUNOS 9.6R1.13 will become active at next rebootWARNING: A reboot is required to load this software correctlyWARNING: Use the 'request system reboot' commandWARNING: when software installation is completeSaving state for rollback ...Removing /cf/root/junos-srx3000-9.6R1.13-domestic.tgzroot>request system reboot /**重启**/Reboot the system ? [yes,no] (no) yesShutdown NOW![pid 2541]升级到9.6R1.13,重启,下一步升级到目标版本root> ftp 192.168.3.100/**ftp到服务器**/Connected to 192.168.3.100.220 ArGoSoft FTP Server for Windows NT/2000/XP, Version 1.4 (1.4.3.7)Name (192.168.3.100:root): test331 Need passwordPassword:230 User test logged in successfully **Remote system type is UNIX.Using binary mode to transfer files.ftp> binary200 Type set to Image (binary)ftp> hash /**hash校验**/Hash mark printing on (1024 bytes/hash mark).ftp> get junos-srx3000-10.1R1.8-domestic.tgzlocal: junos-srx3000-10.1R1.8-domestic.tgz remote: junos-srx3000-10.1R1.8-domestic.tgz200 Port command successful150 Opening binary data connection100% |**************************************************| 172 MB 00:00 ETA 226 Transfer complete180486271 bytes received in 500.33 seconds (352.28 KB/s)ftp> bye /**退出ftp**/221 Aba heroot> request system software add junos-srx3000-10.1R1.8-domestic.tgz unlink no-copy/**升级软件**/NOTICE: Validating configuration against junos-srx3000-10.1R1.8-domestic.tgz.NOTICE: Use the 'no-validate' option to skip this if desired.Checking compatibility with configurationInitializing...Verified manifest signed by PackageProduction_9_6_0Using /cf/root/junos-srx3000-10.1R1.8-domestic.tgzChecking junos requirements on /Available space: 476376 require: 185474Saving boot file package in /var/sw/pkg/junos-boot-srx3000-10.1R1.8.tgzVerified manifest signed by PackageProduction_10_1_0Hardware Database regeneration succeededValidating against /config/juniper.conf.gzcp: /var/validate/chroot/var/etc/resolv.conf and /etc/resolv.conf are identical (not copied).cp: /var/validate/chroot/var/etc/hosts and /etc/hosts are identical (not copied).mgd: commit completeValidation succeededInstalling package '/cf/root/junos-srx3000-10.1R1.8-domestic.tgz' ...Verified SHA1 checksum of issu-indb.tgzVerified junos-boot-srx3000-10.1R1.8.tgz signed by PackageProduction_10_1_0Verified junos-srx3000-10.1R1.8-domestic signed by PackageProduction_10_1_0Available space: 476376 require: 185474Saving boot file package in /var/sw/pkg/junos-boot-srx3000-10.1R1.8.tgzJUNOS 10.1R1.8 will become active at next rebootWARNING: A reboot is required to load this software correctlyWARNING: Use the 'request system reboot' commandWARNING: when software installation is completeSaving state for rollback ...Removing /cf/root/junos-srx3000-10.1R1.8-domestic.tgzroot> request system reboot /**重启**/Reboot the system ? [yes,no] (no) yesShutdown NOW![pid 1815]最后查看软件版本root> show versionModel: srx3600JUNOS Software Release [10.1R1.8]升级成功清除系统中的一些垃圾root> request system storage cleanupList of files to delete:Size Date Name756.3M Feb 25 07:40 /var/crash/core-CPP0.core.04358B Feb 26 08:08 /var/log/messages.0.gz59.4K Feb 26 08:06 /var/log/messages.1.gz271B Feb 26 08:08 /var/log/smartd.trace.0.gz2846B Feb 26 08:06 /var/log/smartd.trace.1.gz27B Feb 26 08:06 /var/log/wtmp.0.gz287B Feb 26 08:02 /var/log/wtmp.1.gz148B Jan 29 09:59 /var/log/wtmp.2.gz162B Dec 7 02:22 /var/log/wtmp.3.gz1857.7K Feb 26 07:57 /var/sw/pkg/junos-boot-srx3000-10.1R1.8.tgz1854.4K Feb 26 07:40 /var/sw/pkg/junos-boot-srx3000-9.6R1.13.tgz190B Feb 5 15:50 /var/tmp/flowd_xlr.log.SPC7_PIC0.00B Dec 5 20:51 /var/tmp/gres-tp/lock3460B Feb 5 15:50 /var/tmp/iked_cfg_log_140B Dec 5 20:51 /var/tmp/spu_kmd_initDelete these files ? [yes,no] (no) yes查看系统配置:root# show或者root# show | display set设备关机:SRX因为主控板上有大容量硬盘,为防止强行断电关机造成硬件故障,要求设备关机必须按照下面的步骤进行操作:user@host> request system halt…The operating system has halted.Please press any key to reboot(除非需要重启设备,此时不要敲任何键,否则设备将进行重启)等待console输出上面提示信息后,确认操作系统已停止运行,关闭机箱背后电源模块电源。
