指明JKW-16
无功补偿控制器说明书

目录1产品功能简介 (1)2产品型号及含义 (3)3使用条件 (3)4技术参数 (4)5面板图示 (6)6投切判定 (8)7基本操作 (9)7.1初始运行 (10)7.2自动运行 (11)7.3参数设置 (15)7.4手动投切 (24)7.5其它 (25)8超限及警报信息 (26)9设备通讯 (27)10注意事项 (28)11接线图示 (29)12外形及开孔尺寸 (30)1产品功能简介JKW-18J无功补偿与配电监测控制器,是依据JB/T9663—1999标准及城乡电网改造的技术条件而设计开发的一种新型控制器,具有无功补偿、数据采集、通讯、电网参数分析等功能,适用于交流50Hz、0.4kV低压配电系统的监测及无功补偿控制。
本产品具有以下功能:(1)数据采集●电压;电流;功率因数●有功功率;无功功率●有功电度;无功电度●频率;电压谐波;电流谐波●日电压、电流最大值、最小值;●有关数据存储多达60天(2)数据通讯具有RS232通讯接口,通讯方式可采用现场采集或远程采集,配备无线转接模块可近距离(50米以内)无线抄收数据。
(3)数据管理1基于WINDOWS2000/XP操作平台,通讯数据自动生成各种报表、曲线及棒图。
(4)无功补偿●取样物理量为无功功率,无投切振荡、无补偿呆区;●输出多达18路;●电容器投切执行元件采用固态继电器。
(5)运行保护●两相失电时,不影响数据的采集、存储、通讯。
●对过压、欠压、缺相及谐波、零序进行报警并做出相应动作。
(6)显示●采用128×64背光液晶显示器●全中文人机对话界面●实时显示电网有关参数●直观显示预置参数22产品型号及含义JK W—18 J Q板前接线型配电监测输出电路数:单相18取样物理量:无功功率无功功率自动补偿控制器3使用条件空气温度:空气温度不高于+55℃,不低于–20℃。
大气条件:空气湿度在+20℃时不超过90%。
海拔高度: 不超过2000m。
9V NEDA 1604(Eveready 216或等效产品)电源替换
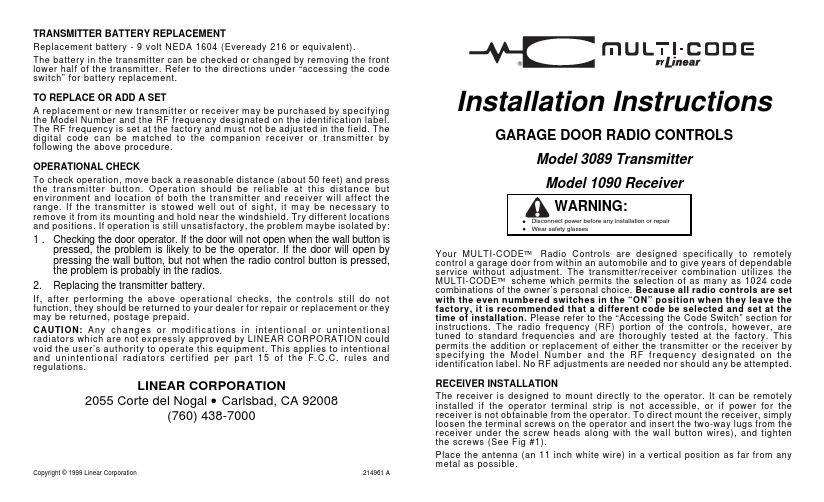
TRANSMITTER BATTERY REPLACEMENTReplacement battery - 9 volt NEDA 1604 (Eveready 216 or equivalent).The battery in the transmitter can be checked or changed by removing the front lower half of the transmitter. Refer to the directions under “accessing the code switch” for battery replacement.TO REPLACE OR ADD A SETA replacement or new transmitter or receiver may be purchased by specifying the Model Number and the RF frequency designated on the identification label. The RF frequency is set at the factory and must not be adjusted in the field. The digital code can be matched to the companion receiver or transmitter by following the above procedure.OPERATIONAL CHECKTo check operation, move back a reasonable distance (about 50 feet) and press the transmitter button. Operation should be reliable at this distance but environment and location of both the transmitter and receiver will affect the range. If the transmitter is stowed well out of sight, it may be necessary to remove it from its mounting and hold near the windshield. Try different locations and positions. If operation is still unsatisfactory, the problem maybe isolated by: 1 .Checking the door operator. If the door will not open when the wall button ispressed, the problem is likely to be the operator. If the door will open by pressing the wall button, but not when the radio control button is pressed, the problem is probably in the radios.2.Replacing the transmitter battery.If, after performing the above operational checks, the controls still do not function, they should be returned to your dealer for repair or replacement or they may be returned, postage prepaid.CAUTION: Any c hanges or m odifications in intentional or unintentional radiators which are not expressly approved by LINEAR CORPORATION could void the user’s authority to operate this equipment. This applies to intentional and unintentional radiators certified per part 15 of the F.C.C. rules and regulations.LINEAR CORPORATION2055 Corte del Nogal • Carlsbad, CA 92008(760) 438-7000Copyright © 1999 Linear Corporation214961 AInstallation Instructions GARAGE DOOR RADIO CONTROLSModel 3089 TransmitterModel 1090 ReceiverWARNING:•Disconnect power before any installation or repair•Wear safety glassesYour MULTI-CODE™ Radio Controls are designed specifically to remotely control a garage door from within an automobile and to give years of dependable service without adjustment. The transmitter/receiver combination utilizes the MULTI-CODE™ scheme which permits the selection of as many as 1024 code combinations of the owner’s personal choice. Because all radio controls are set with the even numbered switches in the “ON” position when they leave the factory, it is recommended that a different code be selected and set at the time of installation. Please refer to the “Accessing the Code Switch” section for instructions. The radio frequency (RF) portion of the controls, however, are tuned to standard frequencies and are thoroughly tested at the factory. This permits the addition or replacement of either the transmitter or the receiver by spec if ying the M odel N um ber and the R F frequency designated on the identification label. No RF adjustments are needed nor should any be attempted.RECEIVER INSTALLATIONThe receiver is designed to mount directly to the operator. It can be remotely installed if the operator terminal strip is not accessible, or if power for the receiver is not obtainable from the operator. To direct mount the receiver, simply loosen the terminal screws on the operator and insert the two-way lugs from the receiver under the screw heads along with the wall button wires), and tighten the screws (See Fig #1).Place the antenna (an 11 inch white wire) in a vertical position as far from any metal as possible.®For remote installation the receiver may be mounted near the operator head on a joist or the ceiling by using the mounting tab. Order Model 1092-06 adapter, which permits connection between the operator terminal and the two-way lugs on the receiver.Slip on connectors at one end of the adapter connect to the flat side of each spade lug on the receiver, and spade connectors at the other end connect to the operator terminal. Connect the wires as follows:(a)White wire to terminal “1” or “24v”(b)Black wire to terminal “2” or “Relay”(c)Red wire to terminal “3” or “Common” (“Radio Power”)(d) Connect push button wires to terminal “1” and “2” (See Figure #2). Where power for the radio receiver is not available from the operator order aM od el 1092-01 po w er t r an s f o r m e r ad ap t or f or c o nn e ction betw een the operator and the remote receiver.ACCESSING THE CODE SWITCHUsing a small screwdriver, pry the rectangular hatch from the receiver for access to the code switch. On the transmitter the entire front lower half of the case is removable. Grasp the front lower half of the case near the bottom on both sides and pull upward away from the transmitter, this will disengage the lower end. Then pull down ward to remove the lower cover, this will expose both the code switch and battery compartment. Set both switches to the code of your choice, being sure both are set the same since a different setting of just one switch will prevent operation. The digital code is determined by the position of 10 s m al l s w it c h es n um be r e d 1 t h rou gh 10 loc ated in the receiver and transmitter. Any combination of “on” or “off” positions can be selected by using a pencil or ball point pen. (Note: The switches are in the “on” position when the switch is depressed toward the number.) See Figure #3.Once the codes have been set, check operation and reinsert the hatches. TRANSMITTER INSTALLATIONThe transmitter is completely self contained, including battery, and can be operated while mounted in the car. It is supplied with a clip for attaching to the sun visor, if desired. If the clip is used attach to the case by sliding it into the recess provided on the back of the transmitter until the small dimples fit into the holes in the clip.CAUTION:Keep the clip flat when pushing it into position so that is doesn’t extend down into the case where it could touch the circuit board and cause damage.OPERA TOR TERMINA L24 VOLTRELA Y COMMON 1 2 3WA LL B UTTON 2 - WA Y LUGSCODE SWITCH MA TCHMOUNTING TA BA NTENNAFigure 1OPERATORTERMINALSTRIPTO WALLPUSH BUTTONSWITCHWhiteBlackRed WhiteBlackRedFigure 212345678910Figure 3OPEN。
2. 3. 1化学反应速率与限度(1)
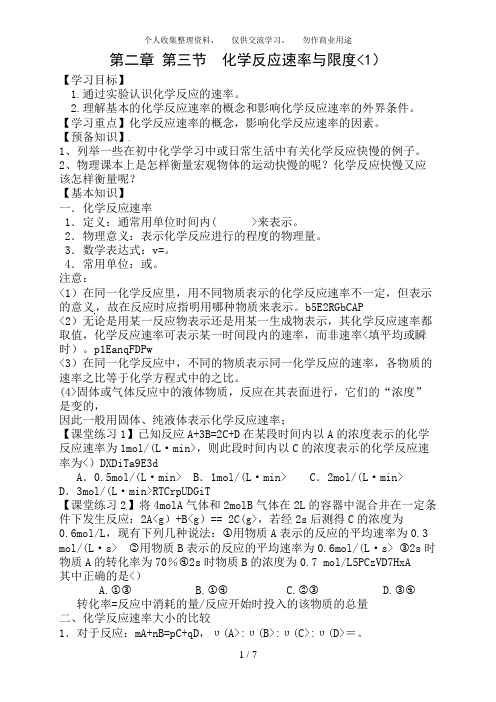
第二章第三节化学反应速率与限度<1)【学习目标】1.通过实验认识化学反应的速率。
2.理解基本的化学反应速率的概念和影响化学反应速率的外界条件。
【学习重点】化学反应速率的概念,影响化学反应速率的因素。
【预备知识】1、列举一些在初中化学学习中或日常生活中有关化学反应快慢的例子。
2、物理课本上是怎样衡量宏观物体的运动快慢的呢?化学反应快慢又应该怎样衡量呢?【基本知识】一.化学反应速率1.定义:通常用单位时间内( >来表示。
2.物理意义:表示化学反应进行的程度的物理量。
3.数学表达式:v=。
4.常用单位:或。
注意:<1)在同一化学反应里,用不同物质表示的化学反应速率不一定,但表示的意义,故在反应时应指明用哪种物质来表示。
b5E2RGbCAP<2)无论是用某一反应物表示还是用某一生成物表示,其化学反应速率都取值,化学反应速率可表示某一时间段内的速率,而非速率<填平均或瞬时)。
p1EanqFDPw<3)在同一化学反应中,不同的物质表示同一化学反应的速率,各物质的速率之比等于化学方程式中的之比。
(4>固体或气体反应中的液体物质,反应在其表面进行,它们的“浓度”是变的,因此一般用固体、纯液体表示化学反应速率;【课堂练习1】已知反应A+3B=2C+D在某段时间内以A的浓度表示的化学反应速率为1mol/(L·min>,则此段时间内以C的浓度表示的化学反应速率为<)DXDiTa9E3dA.0.5mol/(L·min> B.1mol/(L·min> C.2mol/(L·min> D.3mol/(L·min>RTCrpUDGiT【课堂练习2】将4molA气体和2molB气体在2L的容器中混合并在一定条件下发生反应:2A<g)+B<g)== 2C(g>,若经2s后测得C的浓度为0.6mol/L,现有下列几种说法: 用物质A表示的反应的平均速率为0.3 mol/(L·s> 用物质B表示的反应的平均速率为0.6mol/(L·s> ●2s时物质A的转化率为70%❍2s时物质B的浓度为0.7 mol/L5PCzVD7HxA其中正确的是<)A. ●B. ❍C. ●D.●❍转化率=反应中消耗的量/反应开始时投入的该物质的总量二、化学反应速率大小的比较1.对于反应:mA+nB=pC+qD,υ(A>:υ(B>:υ(C>:υ(D>=。
JKW控制器说明书
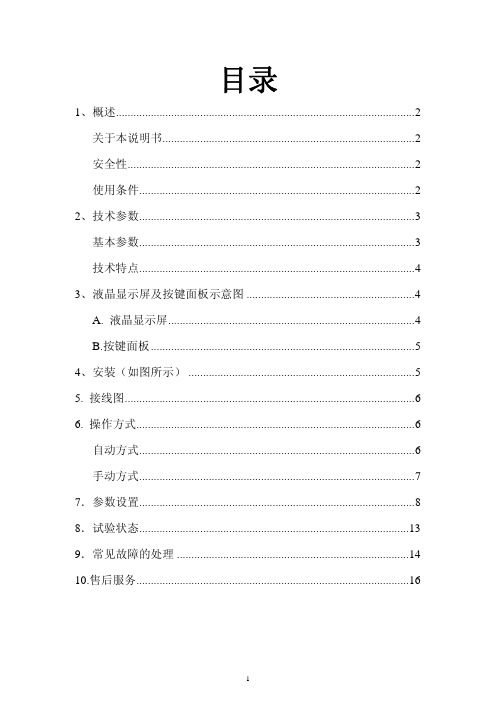
目录1、概述 (2)关于本说明书 (2)安全性 (2)使用条件 (2)2、技术参数 (3)基本参数 (3)技术特点 (4)3、液晶显示屏及按键面板示意图 (4)A. 液晶显示屏 (4)B.按键面板 (5)4、安装(如图所示) (5)5. 接线图 (6)6. 操作方式 (6)自动方式 (6)手动方式 (7)7.参数设置 (8)8.试验状态 (13)9.常见故障的处理 (14)10.售后服务 (16)1、概述关于本说明书本说明书旨在指导用户进行JKW型三相低压无功补偿控制器的安装和操作。
在使用该产品之前,请认真阅读本说明书,并予以妥善保管。
控制器只有在正确地设置了参数后,才能正确可靠地使用。
安全性1)该控制器的安装、维护和操作需由具有相关专业知识和技能的人员进行。
2)确保该控制器的工作电压在AC380V±20%、50HZ±10%范围内。
3)不要随意打开控制器的外壳,以防触电。
4)在断开与控制器连接的电流互感器之前,要确定该互感器已进行了短路或并联了另一个足够小阻抗值的负载。
使用条件1)环境温度:-25℃至 +65℃2)海拨高度:不超过2000M3)大气条件:空气湿度不超过90%4)环境条件:介质无导电尘埃2、技术参数执行标准:电力工业行业标准《 DL / T 597—1996 》基本参数工作电压:AC 380V±20%50Hz ± 10%(可根据用户要求提供220V电压)取样电压:AC 380V±20%50Hz ± 10%(可根据用户要求提供220V电压)取样电流:AC 0-5A本机功耗:≤12V A测量灵敏度:100mA测量精度:电压:0.5级电流:0.5级功率因数:0.5级有功功率:1.0级无功功率:1.0级频率:0.1级外形尺寸:144×144×110mm安装开孔尺寸:138×138mm技术特点1)控制物理量:无功功率,无补偿呆区,小负荷不产生投切振荡。
JKWF12D 16D说明书

JKWF-12D/16D无功补偿控制器使用说明书深圳市友邦怡电气技术有限公司技术支持:0755-83209213-15联系电话:0755-********传真:0755-********网址:E-MAIL:szyby8888@一、产品概述JKWF-12D/16D型无功补偿控制器成功引进了国外先进技术,集实时监测、谐波保护、无功补偿以及保护示警等功能于一体,适用于交流0.4KV、50Hz低压配电系统的监测及无功补偿控制。
安装符合DIN标准。
整机符合JB/T9663-1999标准。
二、使用条件空气温度:空气温度不高于+40℃,不低于-5℃。
大气条件:空气温度在20℃时,湿度不超过90%,在温度较低时,允许有较高的相对湿度。
海拔高度:不超过2000米。
环境条件:周围介质无爆炸危险,无足以损坏绝缘及腐蚀金属的气体,无导电尘埃。
三、技术参数1.基本参数电源电压:AC220V±10%电源频率:50Hz±5%取样电压:AC220V±10%取样电流:0~5A本机功耗:≤15W控制回路:12路、16路2.其他整机性能:符合JB/T9663-1999抗干扰性能:符合GB/T15153.1-1998重量:约1Kg外形尺寸:144mm×144mm×90mm(开孔尺寸:138mm×138mm)四、数据采集三相电压、三相电流、三相功率因数有功功率、无功功率频率、电压谐波畸变率、电流谐波总畸变率五、无功补偿取样物理量为无功功率,运行时无投切振荡,无补偿呆区。
补偿方式:Y型、Δ型、Y+Δ型混合补偿方式选择控制方式:自动投切、手动投切投切方式:模糊投切六、运行保护电网电压过压、欠压、谐波超限时逐一切除电容器电网缺相时快速切除电容器,并且报警自检复位功能:保证每次通电后输出回路处于断开状态断电数据保护:断电后设置数据永久保留。
七、面板图示JKWF-12D与JKWF-16D区别仅在于JKWF-12D只有12个输出回路,而JKWF-16D有16个输出回路;性能、程序、操作、设置基本都一样。
GUXTA16一款全球通用紧捆带光纤铅丝(改善鼠窝保护)LSZH外壳16纤维SM OS2 G.652

IEC 60754-2 - Halogen Acid Gas Amount - Max. Conductivity:
10 µS/mm
IEC 60754-2 - Halogen Acid Gas 4.3 Amount - Min. pH:
IEC 61034-2 - Smoke Density Min. Transmittance:
Buffer Specification
Fiber Type Buffer Construction
Buffer Material
Buffer Diameter
OS2
Tight
LSZH - Low Smoke Zero Halogen (Flame Retardant) 0.9 mm
Cable Core Water Tight: Cable Core Waterblocking: Bulk Cable Weight:
Yes Waterblocking Glass Yarns 92 kg/km
Jacket Specifications
Number of Jackets: Type of Armor:
Single Jacket Non-Armored
Outer Jacket Specifications
Outer Jacket
© 2023 Belden, Inc
All Rights Reserved.
Although Belden makes every reasonable effort to ensure their accuracy at the time of this publication, information and specifications described here in are subject to error or omission and to change without notice, and the listing of such information and specifications does not ensure product availability.
QD77MS16模块参数

信号名称对应地址轴一轴二轴三轴四轴五轴六轴七轴八可编程控制器就绪Y0全部伺服ON Y1准备完毕X0发脉冲置ON X10X11X12X13X14X15X16X17定位启动Y10Y11Y12Y13Y14Y15Y16Y17出错检测G 2417.D G 2517.D G 2617.D G 2717.D G 2817.D G 2917.D G3017.D G3117.D 启动完成G 2417.E G 2517.E G 2617.E G 2717.E G 2817.E G 2917.E G3017.E G3117.E 定位完成G 2417.F G 2517.F G 2617.F G 2717.F G 2817.F G 2917.F G3017.F G3117.F 轴停止G30100.0G30110.0G30120.0G30130.0G30140.0G30150.0G30160.0G30170.0JOG 正转G30101.0G30111.0G30121.0G30131.0G30141.0G30151.0G30161.0G30171.0JOG 反转G30102.0G30112.0G30122.0G30132.0G30142.0G30152.0G30162.0G30172.0信号名称对应地址轴九轴十轴十一轴十二轴十三轴十四轴十五轴十六可编程控制器就绪Y0全部伺服ON Y1准备完毕X0发脉冲置ON X18X19X1A X1B X1C X1D X1E X1F 定位启动Y18Y19Y1A Y1B Y1C Y1D Y1E Y1F 出错检测G3217.D G3317.D G3417.D G3517.D G3617.D G3717.D G3817.D G3917.D 启动完成G3217.E G3317.E G3417.E G3517.E G3617.E G3717.E G3817.E G3917.E 定位完成G3217.F G3317.F G3417.F G3517.F G3617.F G3717.F G3817.F G3917.F 轴停止G30180.0G30190.0G30200.0G30210.0G30220.0G30230.0G30240.0G30250.0JOG 正转G30181.0G30191.0G30201.0G30211.0G30221.0G30231.0G30241.0G30251.0JOG 反转G30182.0G30192.0G30202.0G30212.0G30222.0G30232.0G30242.0G30252.0QD77MS16手动数据表(1)项目设置值设置范围默认值设置值缓冲存储器地址轴一轴二轴三轴四轴五轴六轴七轴八JOG正转0至1 (状态)0G30101.0G30111.0G30121.0G30131.0G30141.0G30151.0G30161.0G30171.0 JOG反转0至1 (状态)0G30102.0G30112.0G30122.0G30132.0G30142.0G30152.0G30162.0G30172.0JOG速度JOG速度限制范围内0G4318G4319G4418G4419G4518G4519G4618G4619G4718G4719G4818G4819G4918G4919G5018G5019微动移动量0至65535 (pulse)0G4317G4417G4517G4617G4717G4817G4917G5017加速时间10至8388608(pulse)1000G36G37G186G187G336G337G486G487G636G637G786G787G936G937G1086G1087加速时间20至8388608(pulse)1000G38G39G188G189G338G339G488G489G638G639G788G789G938G939G1088G1089加速时间30至8388608(pulse)1000G40G41G190G191G340G341G490G491G640G641G790G791G940G941G1090G1091减速时间10至8388608(pulse)1000G42G43G192G193G342G343G492G493G642G643G792G793G942G943G1092G1093减速时间20至8388608(pulse)1000G44G45G194G195G344G345G494G495G644G645G794G795G944G945G1094G1095减速时间30至8388608(pulse)1000G46G47G196G197G346G347G496G497G646G647G796G797G946G947G1096G1097JOG速度限制0至200000(pulse)20000G48G49G198G199G348G349G498G499G648G649G798G799G948G949G1098G1099QD77MS16手动数据表(1)项目设置值设置范围默认值设置值缓冲存储器地址轴一轴二轴三轴四轴五轴六轴七轴八JOG运行加速时间选择K0:加速时间00G50G200G350G500G650G800G950G1100 K1:加速时间1K2:加速时间2K3:加速时间3JOG运行减速时间选择K0:减速时间00G51G201G351G501G651G801G951G1101 K1:减速时间1K2:减速时间2k3:减速时间3QD77MS16手动数据表(2)项目设置值设置范围默认值设置值缓冲存储器地址轴九轴十轴十一轴十二轴十三轴十四轴十五轴十六JOG正转0至1 (状态)0G30181.0G30191.0G30201.0G30211.0G30221.0G30231.0G30241.0G30251.0 JOG反转0至1 (状态)0G30182.0G30192.0G30202.0G30212.0G30222.0G30232.0G30242.0G30252.0JOG速度JOG速度限制范围内0G5118G5119G5218G5219G5318G5319G5418G5419G5518G5519G5618G5619G5718G5719G5818G5819微动移动量0至65535 (pulse)0G5117G5217G5317G5417G5517G5617G5717G5817加速时间10至8388608(pulse)1000G1236G1237G1386G1387G1536G1537G1686G1687G1836G1837G1986G1987G2136G2137G2286G2287加速时间20至8388608(pulse)1000G1238G1239G1388G1389G1538G1539G1688G1689G1838G1839G1988G1989G2138G2139G2288G2289加速时间30至8388608(pulse)1000G1240G1241G1390G1391G1540G1541G1690G1691G1840G1841G1990G1991G2140G2141G2290G2291减速时间10至8388608(pulse)1000G1242G1243G1392G1393G1542G1543G1692G1693G1842G1843G1992G1993G2142G2143G2292G2293减速时间20至8388608(pulse)1000G1244G1245G1394G1395G1544G1545G1694G1695G1844G1845G1994G1995G2144G2145G2294G2295减速时间30至8388608(pulse)1000G1246G1247G1396G1397G1546G1547G1696G1697G1846G1847G1996G1997G2146G2147G2296G2297JOG速度限制0至200000(pulse)20000G1248G1249G1398G1399G1548G1549G1698G1699G1848G1849G1998G1999G2148G2149G2298G2299QD77MS16手动数据表(2)项目设置值设置范围默认值设置值缓冲存储器地址轴九轴十轴十一轴十二轴十三轴十四轴十五轴十六JOG运行加速时间选择K0:加速时间00G1250G1400G1550G1700G1850G2000G2150G2300 K1:加速时间1K2:加速时间2K3:加速时间3JOG运行减速时间选择K0:减速时间00G1251G1401G1551G1701G1851G2001G2151G2301 K1:减速时间1K2:减速时间2k3:减速时间3QD77MS16OPR数据表格(1)项目设置值设置范围默认值设置值缓冲存储器地址轴一轴二轴三轴四轴五轴六轴七轴八回原方法K0:近点狗方法0G70G220G370G520G670G820G970G1120 K1:限位器1K2:限位器2K3:限位器3K4:计数1K5:计数2回原复归方向K0:正向0G71G221G371G521G671G821G971G1121 K1:反向原点完成地址-2147483648至2147483647(脉冲)0G72G73G222G223G372G373G522G523G672G673G822G823G972G973G1122G1123回原高速 1 至 200000 pulse/s1G74G75G224G225G374G375G524G525G674G675G824G825G974G975G1124G1125爬行速度 1 至 200000 pulse/s1G76G77G226G227G376G377G526G527G676G677G826G827G976G977G1126G1127原点复归重试K0:不通过极限开关进行原点复归重试0G78G228G378G528G678G828G978G1128 k1:通过极限开关进行原点复归重试QD77MS16OPR数据表格(1)项目设置值设置范围默认值设置值缓冲存储器地址轴一轴二轴三轴四轴五轴六轴七轴八近点狗ON后的移动量设置0~2147483647(pulse)0G80 G81G230G231G380G381G530G531G680G681G830G831G980G981G1130G1131原点复归加速时间选择K0:加速时间00G82G232G382G532G682G832G982G1132 K1:加速时间1K2:加速时间2K3:加速时间3原点复归减速时间选择K0:减速时间00G83G233G383G533G683G833G983G1133 K1:减速时间1K2:减速时间2k3:减速时间3QD77MS16OPR数据表格(2)项目设置值设置范围默认值设置值缓冲存储器地址轴九轴十轴十一轴十二轴十三轴十四轴十五轴十六回原方法K0:近点狗方法0G1270G1420G1570G1720G1870G2020G2170G2320 K1:限位器1K2:限位器2K3:限位器3K4:计数1K5:计数2回原复归方向K0:正向0G1271G1421G1571G1721G1871G2021G2171G2321 K1:反向原点完成地址-2147483648至2147483647(脉冲)0G1272G1273G1422G1423G1572G1573G1722G1723G1872G1873G2022G2023G2172G2173G2322G2323回原高速 1 至 200000 pulse/s1G1274G1275G1424G1425G1574G1575G1724G1725G18G674G1875G2024G2025G2174G2175G2324G2325爬行速度 1 至 200000 pulse/s1G1276G1277G1426G1427G1576G1577G1726G1727G1876G1877G2026G2027G2176G2177G2326G2327原点复归重试K0:不通过极限开关进行原点复归重试0G1278G1428G1578G1728G1878G2028G2178G2328 k1:通过极限开关进行原点复归重试QD77MS16OPR数据表格(2)项目设置值设置范围默认值设置值缓冲存储器地址轴九轴十轴十一轴十二轴十三轴十四轴十五轴十六近点狗ON后的移动量设置0~2147483647(pulse)0G1280G1281G1430G1431G1580G1581G1730G1731G1880G1881G2030G2031G2180G2181G2330G2331原点复归加速时间选择K0:加速时间00G1282G1432G1582G1732G1882G2032G2182G2332 K1:加速时间1K2:加速时间2K3:加速时间3原点复归减速时间选择K0:减速时间00G1283G1433G1583G1733G1883G2033G2183G2333 K1:减速时间1K2:减速时间2k3:减速时间3项目控制模式设置值默认值轴一轴二轴三轴四轴五轴六轴七轴八运行模式定位结束000000H G6000G7000G8000G9000G10000G11000G12000G13000连续定位控制01连续轨迹控制11控制方法ABS 直线 101H INC 直线02定距进给 103H 正转 速度 104H 反转 速度 105H 正转 速·位06H反转 速·位07H正转 位·速08H反转 位·速09HABS 直线 20AHINC 直线 20BH定距进给 20CHABS 圆弧插补0DH项目控制模式设置值默认值轴一轴二轴三轴四轴五轴六轴七轴八控制方法INC 圆弧插补0EH0000H G6000G7000G8000G9000G10000G11000G12000G13000 ABS 圆弧右0FHABS 圆弧左10HINC 圆弧右11HINC 圆弧左12H正转速度 213H反转速度 214HABS 直线 315HINC 直线 316H定距进给 317H正转速度 318H反转速度 319HABS 直线 41AHINC 直线 41BH定距进给 41CH正转速度 41DH项目控制模式设置值默认值轴一轴二轴三轴四轴五轴六轴七轴八控制方法反转 速度 41EH 0000H G6000G7000G8000G9000G10000G11000G12000G13000NOP80H 当前值更改81H JUMP 指令82H LOOP(次数)83H LEND84H 加速时间加速时间 000加速时间 101加速时间 110加速时间 311减速时间减速时间 000减速时间 101减速时间 210减速时间 311项目控制模式设置值默认值轴九轴十轴十一轴十二轴十三轴十四轴十五轴十六运行模式定位结束000000H G14000G15000G16000G17000G18000G19000G20000G21000连续定位控制01连续轨迹控制11控制方法ABS 直线 101H INC 直线02定距进给 103H 正转 速度 104H 反转 速度 105H 正转 速·位06H反转 速·位07H正转 位·速08H反转 位·速09HABS 直线 20AHINC 直线 20BH定距进给 20CHABS 圆弧插补0DH项目控制模式设置值默认值轴九轴十轴十一轴十二轴十三轴十四轴十五轴十六控制方法INC 圆弧插补0EH0000H G14000G15000G16000G17000G18000G19000G20000G21000 ABS 圆弧右0FHABS 圆弧左10HINC 圆弧右11HINC 圆弧左12H正转速度 213H反转速度 214HABS 直线 315HINC 直线 316H定距进给 317H正转速度 318H反转速度 319HABS 直线 41AHINC 直线 41BH定距进给 41CH正转速度 41DH项目控制模式设置值默认值轴九轴十轴十一轴十二轴十三轴十四轴十五轴十六控制方法反转 速度 41EH 0000H G14000G15000G16000G17000G18000G19000G20000G21000NOP80H 当前值更改81H JUMP 指令82H LOOP(次数)83H LEND84H 加速时间加速时间 000加速时间 101加速时间 110加速时间 311减速时间减速时间 000减速时间 101减速时间 210减速时间 311项目指定插补轴设置值默认值轴一轴二轴三轴四轴五轴六轴七轴八插补对象轴轴 1 指定0H0000H G6003G7003G8003G9003G10003G11003G12003G13003轴 2 指定1H轴 3 指定2H轴 4 指定3H轴 5 指定4H轴 6 指定5H轴 7 指定6H轴 8 指定7H轴 9 指定8H轴 10 指定9H轴 11 指定AH轴 12 指定BH轴 13 指定CH轴 14 指定DH轴 15 指定EH轴 16 指定FH项目指定插补轴设置值默认值轴九轴十轴十一轴十二轴十三轴十四轴十五轴十六插补对象轴轴 1 指定0H0000H G14003G15003G16003G17003G18003G19003G20003G21003轴 2 指定1H轴 3 指定2H轴 4 指定3H轴 5 指定4H轴 6 指定5H轴 7 指定6H轴 8 指定7H轴 9 指定8H轴 10 指定9H轴 11 指定AH轴 12 指定BH轴 13 指定CH轴 14 指定DH轴 15 指定EH轴 16 指定FH轴一启动编号定位编号运行模式控制方法加速时间减速时间插补对象指令速度定位地址圆弧地址G43001G6000G6003G6004 (双字)G6006 (双字)G6008 (双字) 2G6010G6013G6014 (双字)G6016 (双字)G6018 (双字) 3G6020G6023G6024 (双字)G6026 (双字)G6028 (双字) 4G6030G6033G6034 (双字)G6036 (双字)G6038 (双字) 5G6040G6043G6044 (双字)G6046 (双字)G6048 (双字) 6G6050G6053G6054 (双字)G6056 (双字)G6058 (双字) 7G6060G6063G6064 (双字)G6066 (双字)G6068 (双字) 8G6070G6073G6074 (双字)G6076 (双字)G6078 (双字) 9G6080G6083G6084 (双字)G6086 (双字)G6088 (双字) 10G6090G6093G6094 (双字)G6096 (双字)G6098 (双字)轴一启动编号定位编号运行模式控制方法加速时间减速时间插补对象指令速度定位地址圆弧地址G430011G6100G6103G6104 (双字)G6106 (双字)G6108 (双字) 12G6110G6113G6114 (双字)G6116 (双字)G6118 (双字) 13G6120G6123G6124 (双字)G6126 (双字)G6128 (双字) 14G6130G6133G6134 (双字)G6136 (双字)G6138 (双字) 15G6140G6143G6144 (双字)G6146 (双字)G6148 (双字) 16G6150G6153G6154 (双字)G6156 (双字)G6158 (双字) 17G6160G6163G6164 (双字)G6166 (双字)G6168 (双字) 18G6170G6173G6174 (双字)G6176 (双字)G6178 (双字) 19G6180G6183G6184 (双字)G6186 (双字)G6188 (双字) 20G6190G6193G6194 (双字)G6196 (双字)G6198 (双字)轴二启动编号定位编号运行模式控制方法加速时间减速时间插补对象指令速度定位地址圆弧地址G44001G7000G7003G7004 (双字)G7006 (双字)G7008 (双字) 2G7010G7013G7014 (双字)G7016 (双字)G7018 (双字) 3G7020G7023G7024 (双字)G7026 (双字)G7028 (双字) 4G7030G7033G7034 (双字)G7036 (双字)G7038 (双字) 5G7040G7043G7044 (双字)G7046 (双字)G7048 (双字) 6G7050G7053G7054 (双字)G7056 (双字)G7058 (双字) 7G7060G7063G7064 (双字)G7066 (双字)G7068 (双字) 8G7070G7073G7074 (双字)G7076 (双字)G7078 (双字) 9G7080G7083G7084 (双字)G7086 (双字)G7088 (双字) 10G7090G7093G7094 (双字)G7096 (双字)G7098 (双字)轴二启动编号定位编号运行模式控制方法加速时间减速时间插补对象指令速度定位地址圆弧地址G440011G7100G7103G7104 (双字)G7106 (双字)G7108 (双字) 12G7110G7113G7114 (双字)G7116 (双字)G7118 (双字) 13G7120G7123G7124 (双字)G7126 (双字)G7128 (双字) 14G7130G7133G7134 (双字)G7136 (双字)G7138 (双字) 15G7140G7143G7144 (双字)G7146 (双字)G7148 (双字) 16G7150G7153G7154 (双字)G7156 (双字)G7158 (双字) 17G7160G7163G7164 (双字)G7166 (双字)G7168 (双字) 18G7170G7173G7174 (双字)G7176 (双字)G7178 (双字) 19G7180G7183G7184 (双字)G7186 (双字)G7188 (双字) 20G7190G7193G7194 (双字)G7196 (双字)G7198 (双字)轴三启动编号定位编号运行模式控制方法加速时间减速时间插补对象指令速度定位地址圆弧地址G45001G8000G8003G8004 (双字)G8006 (双字)G8008 (双字) 2G8010G8013G8014 (双字)G8016 (双字)G8018 (双字) 3G8020G8023G8024 (双字)G8026 (双字)G8028 (双字) 4G8030G8033G8034 (双字)G8036 (双字)G8038 (双字) 5G8040G8043G8044 (双字)G8046 (双字)G8048 (双字) 6G8050G8053G8054 (双字)G8056 (双字)G8058 (双字) 7G8060G8063G8064 (双字)G8066 (双字)G8068 (双字) 8G8070G8073G8074 (双字)G8076 (双字)G8078 (双字) 9G8080G8083G8084 (双字)G8086 (双字)G8088 (双字) 10G8090G8093G8094 (双字)G8096 (双字)G8098 (双字)轴三启动编号定位编号运行模式控制方法加速时间减速时间插补对象指令速度定位地址圆弧地址G450011G8100G8103G8104 (双字)G8106 (双字)G8108 (双字) 12G8110G8113G8114 (双字)G8116 (双字)G8118 (双字) 13G8120G8123G8124 (双字)G8126 (双字)G8128 (双字) 14G8130G8133G8134 (双字)G8136 (双字)G8138 (双字) 15G8140G8143G8144 (双字)G8146 (双字)G8148 (双字) 16G8150G8153G8154 (双字)G8156 (双字)G8158 (双字) 17G8160G8163G8164 (双字)G8166 (双字)G8168 (双字) 18G8170G8173G8174 (双字)G8176 (双字)G8178 (双字) 19G8180G8183G8184 (双字)G8186 (双字)G8188 (双字) 20G8190G8193G8194 (双字)G8196 (双字)G8198 (双字)轴四启动编号定位编号运行模式控制方法加速时间减速时间插补对象指令速度定位地址圆弧地址G46001G9000G9003G9004 (双字)G9006 (双字)G9008 (双字) 2G9010G9013G9014 (双字)G9016 (双字)G9018 (双字) 3G9020G9023G9024 (双字)G9026 (双字)G9028 (双字) 4G9030G9033G9034 (双字)G9036 (双字)G9038 (双字) 5G9040G9043G9044 (双字)G9046 (双字)G9048 (双字) 6G9050G9053G9054 (双字)G9056 (双字)G9058 (双字) 7G9060G9063G9064 (双字)G9066 (双字)G9068 (双字) 8G9070G9073G9074 (双字)G9076 (双字)G9078 (双字) 9G9080G9083G9084 (双字)G9086 (双字)G9088 (双字) 10G9090G9093G9094 (双字)G9096 (双字)G9098 (双字)轴四启动编号定位编号运行模式控制方法加速时间减速时间插补对象指令速度定位地址圆弧地址G460011G9100G9103G9104 (双字)G9106 (双字)G9108 (双字) 12G9110G9113G9114 (双字)G9116 (双字)G9118 (双字) 13G9120G9123G9124 (双字)G9126 (双字)G9128 (双字) 14G9130G9133G9134 (双字)G9136 (双字)G9138 (双字) 15G9140G9143G9144 (双字)G9146 (双字)G9148 (双字) 16G9150G9153G9154 (双字)G9156 (双字)G9158 (双字) 17G9160G9163G9164 (双字)G9166 (双字)G9168 (双字) 18G9170G9173G9174 (双字)G9176 (双字)G9178 (双字) 19G9180G9183G9184 (双字)G9186 (双字)G9188 (双字) 20G9190G9193G9194 (双字)G9196 (双字)G9198 (双字)轴五启动编号定位编号运行模式控制方法加速时间减速时间插补对象指令速度定位地址圆弧地址G47001G10000G10003G10004 (双字)G10006 (双字)G10008 (双字) 2G10010G10013G10014 (双字)G10016 (双字)G10018 (双字) 3G10020G10023G10024 (双字)G10026 (双字)G10028 (双字) 4G10030G10033G10034 (双字)G10036 (双字)G10038 (双字) 5G10040G10043G10044 (双字)G10046 (双字)G10048 (双字) 6G10050G10053G10054 (双字)G10056 (双字)G10058 (双字) 7G10060G10063G10064 (双字)G10066 (双字)G10068 (双字) 8G10070G10073G10074 (双字)G10076 (双字)G10078 (双字) 9G10080G10083G10084 (双字)G10086 (双字)G10088 (双字) 10G10090G10093G10094 (双字)G10096 (双字)G10098 (双字)轴五启动编号定位编号运行模式控制方法加速时间减速时间插补对象指令速度定位地址圆弧地址G470011G10100G10103G10104 (双字)G10106 (双字)G10108 (双字) 12G10110G10113G10114 (双字)G10116 (双字)G10118 (双字) 13G10120G10123G10124 (双字)G10126 (双字)G10128 (双字) 14G10130G10133G10134 (双字)G10136 (双字)G10138 (双字) 15G10140G10143G10144 (双字)G10146 (双字)G10148 (双字) 16G10150G10153G10154 (双字)G10156 (双字)G10158 (双字) 17G10160G10163G10164 (双字)G10166 (双字)G10168 (双字) 18G10170G10173G10174 (双字)G10176 (双字)G10178 (双字) 19G10180G10183G10184 (双字)G10186 (双字)G10188 (双字) 20G10190G10193G10194 (双字)G10196 (双字)G10198 (双字)轴六启动编号定位编号运行模式控制方法加速时间减速时间插补对象指令速度定位地址圆弧地址G48001G11000G11003G11004 (双字)G11006 (双字)G11008 (双字) 2G11010G11013G11014 (双字)G11016 (双字)G11018 (双字) 3G11020G11023G11024 (双字)G11026 (双字)G11028 (双字) 4G11030G11033G11034 (双字)G11036 (双字)G11038 (双字) 5G11040G11043G11044 (双字)G11046 (双字)G11048 (双字) 6G11050G11053G11054 (双字)G11056 (双字)G11058 (双字) 7G11060G11063G11064 (双字)G11066 (双字)G11068 (双字) 8G11070G11073G11074 (双字)G11076 (双字)G11078 (双字) 9G11080G11083G11084 (双字)G11086 (双字)G11088 (双字) 10G11090G11093G11094 (双字)G11096 (双字)G11098 (双字)轴六启动编号定位编号运行模式控制方法加速时间减速时间插补对象指令速度定位地址圆弧地址G480011G11100G11103G11104 (双字)G11106 (双字)G11108 (双字) 12G11110G11113G11114 (双字)G11116 (双字)G11118 (双字) 13G11120G11123G11124 (双字)G11126 (双字)G11128 (双字) 14G11130G11133G11134 (双字)G11136 (双字)G11138 (双字) 15G11140G11143G11144 (双字)G11146 (双字)G11148 (双字) 16G11150G11153G11154 (双字)G11156 (双字)G11158 (双字) 17G11160G11163G11164 (双字)G11166 (双字)G11168 (双字) 18G11170G11173G11174 (双字)G11176 (双字)G11178 (双字) 19G11180G11183G11184 (双字)G11186 (双字)G11188 (双字) 20G11190G11193G11194 (双字)G11196 (双字)G11198 (双字)轴七启动编号定位编号运行模式控制方法加速时间减速时间插补对象指令速度定位地址圆弧地址G49001G12000G12003G12004 (双字)G12006 (双字)G12008 (双字) 2G12010G12013G12014 (双字)G12016 (双字)G12018 (双字) 3G12020G12023G12024 (双字)G12026 (双字)G12028 (双字) 4G12030G12033G12034 (双字)G12036 (双字)G12038 (双字) 5G12040G12043G12044 (双字)G12046 (双字)G12048 (双字) 6G12050G12053G12054 (双字)G12056 (双字)G12058 (双字) 7G12060G12063G12064 (双字)G12066 (双字)G12068 (双字) 8G12070G12073G12074 (双字)G12076 (双字)G12078 (双字) 9G12080G12083G12084 (双字)G12086 (双字)G12088 (双字) 10G12090G12093G12094 (双字)G12096 (双字)G12098 (双字)轴七启动编号定位编号运行模式控制方法加速时间减速时间插补对象指令速度定位地址圆弧地址G490011G12100G12103G12104 (双字)G12106 (双字)G12108 (双字) 12G12110G12113G12114 (双字)G12116 (双字)G12118 (双字) 13G12120G12123G12124 (双字)G12126 (双字)G12128 (双字) 14G12130G12133G12134 (双字)G12136 (双字)G12138 (双字) 15G12140G12143G12144 (双字)G12146 (双字)G12148 (双字) 16G12150G12153G12154 (双字)G12156 (双字)G12158 (双字) 17G12160G12163G12164 (双字)G12166 (双字)G12168 (双字) 18G12170G12173G12174 (双字)G12176 (双字)G12178 (双字) 19G12180G12183G12184 (双字)G12186 (双字)G12188 (双字) 20G12190G12193G12194 (双字)G12196 (双字)G12198 (双字)轴八启动编号定位编号运行模式控制方法加速时间减速时间插补对象指令速度定位地址圆弧地址G50001G13000G13003G13004 (双字)G13006 (双字)G13008 (双字) 2G13010G13013G13014 (双字)G13016 (双字)G13018 (双字) 3G13020G13023G13024 (双字)G13026 (双字)G13028 (双字) 4G13030G13033G13034 (双字)G13036 (双字)G13038 (双字) 5G13040G13043G13044 (双字)G13046 (双字)G13048 (双字) 6G13050G13053G13054 (双字)G13056 (双字)G13058 (双字) 7G13060G13063G13064 (双字)G13066 (双字)G13068 (双字) 8G13070G13073G13074 (双字)G13076 (双字)G13078 (双字) 9G13080G13083G13084 (双字)G13086 (双字)G13088 (双字) 10G13090G13093G13094 (双字)G13096 (双字)G13098 (双字)轴八启动编号定位编号运行模式控制方法加速时间减速时间插补对象指令速度定位地址圆弧地址G500011G13100G13103G13104 (双字)G13106 (双字)G13108 (双字) 12G13110G13113G13114 (双字)G13116 (双字)G13118 (双字) 13G13120G13123G13124 (双字)G13126 (双字)G13128 (双字) 14G13130G13133G13134 (双字)G13136 (双字)G13138 (双字) 15G13140G13143G13144 (双字)G13146 (双字)G13148 (双字) 16G13150G13153G13154 (双字)G13156 (双字)G13158 (双字) 17G13160G13163G13164 (双字)G13166 (双字)G13168 (双字) 18G13170G13173G13174 (双字)G13176 (双字)G13178 (双字) 19G13180G13183G13184 (双字)G13186 (双字)G13188 (双字) 20G13190G13193G13194 (双字)G13196 (双字)G13198 (双字)轴九启动编号定位编号运行模式控制方法加速时间减速时间插补对象指令速度定位地址圆弧地址G51001G14000G14003G14004 (双字)G14006 (双字)G14008 (双字) 2G14010G14013G14014 (双字)G14016 (双字)G14018 (双字) 3G14020G14023G14024 (双字)G14026 (双字)G14028 (双字) 4G14030G14033G14034 (双字)G14036 (双字)G14038 (双字) 5G14040G14043G14044 (双字)G14046 (双字)G14048 (双字) 6G14050G14053G14054 (双字)G14056 (双字)G14058 (双字) 7G14060G14063G14064 (双字)G14066 (双字)G14068 (双字) 8G14070G14073G14074 (双字)G14076 (双字)G14078 (双字) 9G14080G14083G14084 (双字)G14086 (双字)G14088 (双字) 10G14090G14093G14094 (双字)G14096 (双字)G14098 (双字)轴九启动编号定位编号运行模式控制方法加速时间减速时间插补对象指令速度定位地址圆弧地址G510011G14100G14103G14104 (双字)G14106 (双字)G14108 (双字) 12G14110G14113G14114 (双字)G14116 (双字)G14118 (双字) 13G14120G14123G14124 (双字)G14126 (双字)G14128 (双字) 14G14130G14133G14134 (双字)G14136 (双字)G14138 (双字) 15G14140G14143G14144 (双字)G14146 (双字)G14148 (双字) 16G14150G14153G14154 (双字)G14156 (双字)G14158 (双字) 17G14160G14163G14164 (双字)G14166 (双字)G14168 (双字) 18G14170G14173G14174 (双字)G14176 (双字)G14178 (双字) 19G14180G14183G14184 (双字)G14186 (双字)G14188 (双字) 20G14190G14193G14194 (双字)G14196 (双字)G14198 (双字)轴十启动编号定位编号运行模式控制方法加速时间减速时间插补对象指令速度定位地址圆弧地址G52001G15000G15003G15004 (双字)G15006 (双字)G15008 (双字) 2G15010G15013G15014 (双字)G15016 (双字)G15018 (双字) 3G15020G15023G15024 (双字)G15026 (双字)G15028 (双字) 4G15030G15033G15034 (双字)G15036 (双字)G15038 (双字) 5G15040G15043G15044 (双字)G15046 (双字)G15048 (双字) 6G15050G15053G15054 (双字)G15056 (双字)G15058 (双字) 7G15060G15063G15064 (双字)G15066 (双字)G15068 (双字) 8G15070G15073G15074 (双字)G15076 (双字)G15078 (双字) 9G15080G15083G15084 (双字)G15086 (双字)G15088 (双字) 10G15090G15093G15094 (双字)G15096 (双字)G15098 (双字)轴十启动编号定位编号运行模式控制方法加速时间减速时间插补对象指令速度定位地址圆弧地址G520011G15100G15103G15104 (双字)G15106 (双字)G15108 (双字) 12G15110G15113G15114 (双字)G15116 (双字)G15118 (双字) 13G15120G15123G15124 (双字)G15126 (双字)G15128 (双字) 14G15130G15133G15134 (双字)G15136 (双字)G15138 (双字) 15G15140G15143G15144 (双字)G15146 (双字)G15148 (双字) 16G15150G15153G15154 (双字)G15156 (双字)G15158 (双字) 17G15160G15163G15164 (双字)G15166 (双字)G15168 (双字) 18G15170G15173G15174 (双字)G15176 (双字)G15178 (双字) 19G15180G15183G15184 (双字)G15186 (双字)G15188 (双字) 20G15190G15193G15194 (双字)G15196 (双字)G15198 (双字)轴十一启动编号定位编号运行模式控制方法加速时间减速时间插补对象指令速度定位地址圆弧地址G53001G16000G16003G16004 (双字)G16006 (双字)G16008 (双字) 2G16010G16013G16014 (双字)G16016 (双字)G16018 (双字) 3G16020G16023G16024 (双字)G16026 (双字)G16028 (双字) 4G16030G16033G16034 (双字)G16036 (双字)G16038 (双字) 5G16040G16043G16044 (双字)G16046 (双字)G16048 (双字) 6G16050G16053G16054 (双字)G16056 (双字)G16058 (双字) 7G16060G16063G16064 (双字)G16066 (双字)G16068 (双字) 8G16070G16073G16074 (双字)G16076 (双字)G16078 (双字) 9G16080G16083G16084 (双字)G16086 (双字)G16088 (双字) 10G16090G16093G16094 (双字)G16096 (双字)G16098 (双字)轴十一启动编号定位编号运行模式控制方法加速时间减速时间插补对象指令速度定位地址圆弧地址G530011G16100G16103G16104 (双字)G16106 (双字)G16108 (双字) 12G16110G16113G16114 (双字)G16116 (双字)G16118 (双字) 13G16120G16123G16124 (双字)G16126 (双字)G16128 (双字) 14G16130G16133G16134 (双字)G16136 (双字)G16138 (双字) 15G16140G16143G16144 (双字)G16146 (双字)G16148 (双字) 16G16150G16153G16154 (双字)G16156 (双字)G16158 (双字) 17G16160G16163G16164 (双字)G16166 (双字)G16168 (双字) 18G16170G16173G16174 (双字)G16176 (双字)G16178 (双字) 19G16180G16183G16184 (双字)G16186 (双字)G16188 (双字) 20G16190G16193G16194 (双字)G16196 (双字)G16198 (双字)轴十二启动编号定位编号运行模式控制方法加速时间减速时间插补对象指令速度定位地址圆弧地址G54001G17000G17003G17004 (双字)G17006 (双字)G17008 (双字) 2G17010G17013G17014 (双字)G17016 (双字)G17018 (双字) 3G17020G17023G17024 (双字)G17026 (双字)G17028 (双字) 4G17030G17033G17034 (双字)G17036 (双字)G17038 (双字) 5G17040G17043G17044 (双字)G17046 (双字)G17048 (双字) 6G17050G17053G17054 (双字)G17056 (双字)G17058 (双字) 7G17060G17063G17064 (双字)G17066 (双字)G17068 (双字) 8G17070G17073G17074 (双字)G17076 (双字)G17078 (双字) 9G17080G17083G17084 (双字)G17086 (双字)G17088 (双字) 10G17090G17093G17094 (双字)G17096 (双字)G17098 (双字)轴十二启动编号定位编号运行模式控制方法加速时间减速时间插补对象指令速度定位地址圆弧地址G540011G17100G17103G17104 (双字)G17106 (双字)G17108 (双字) 12G17110G17113G17114 (双字)G17116 (双字)G17118 (双字) 13G17120G17123G17124 (双字)G17126 (双字)G17128 (双字) 14G17130G17133G17134 (双字)G17136 (双字)G17138 (双字) 15G17140G17143G17144 (双字)G17146 (双字)G17148 (双字) 16G17150G17153G17154 (双字)G17156 (双字)G17158 (双字) 17G17160G17163G17164 (双字)G17166 (双字)G17168 (双字) 18G17170G17173G17174 (双字)G17176 (双字)G17178 (双字) 19G17180G17183G17184 (双字)G17186 (双字)G17188 (双字) 20G17190G17193G17194 (双字)G17196 (双字)G17198 (双字)轴十三启动编号定位编号运行模式控制方法加速时间减速时间插补对象指令速度定位地址圆弧地址G55001G18000G18003G18004 (双字)G18006 (双字)G18008 (双字) 2G18010G18013G18014 (双字)G18016 (双字)G18018 (双字) 3G18020G18023G18024 (双字)G18026 (双字)G18028 (双字) 4G18030G18033G18034 (双字)G18036 (双字)G18038 (双字) 5G18040G18043G18044 (双字)G18046 (双字)G18048 (双字) 6G18050G18053G18054 (双字)G18056 (双字)G18058 (双字) 7G18060G18063G18064 (双字)G18066 (双字)G18068 (双字) 8G18070G18073G18074 (双字)G18076 (双字)G18078 (双字) 9G18080G18083G18084 (双字)G18086 (双字)G18088 (双字) 10G18090G18093G18094 (双字)G18096 (双字)G18098 (双字)轴十三启动编号定位编号运行模式控制方法加速时间减速时间插补对象指令速度定位地址圆弧地址G550011G18100G18103G18104 (双字)G18106 (双字)G18108 (双字) 12G18110G18113G18114 (双字)G18116 (双字)G18118 (双字) 13G18120G18123G18124 (双字)G18126 (双字)G18128 (双字) 14G18130G18133G18134 (双字)G18136 (双字)G18138 (双字) 15G18140G18143G18144 (双字)G18146 (双字)G18148 (双字) 16G18150G18153G18154 (双字)G18156 (双字)G18158 (双字) 17G18160G18163G18164 (双字)G18166 (双字)G18168 (双字) 18G18170G18173G18174 (双字)G18176 (双字)G18178 (双字) 19G18180G18183G18184 (双字)G18186 (双字)G18188 (双字) 20G18190G18193G18194 (双字)G18196 (双字)G18198 (双字)轴十四启动编号定位编号运行模式控制方法加速时间减速时间插补对象指令速度定位地址圆弧地址G56001G19000G19003G19004 (双字)G19006 (双字)G19008 (双字) 2G19010G19013G19014 (双字)G19016 (双字)G19018 (双字) 3G19020G19023G19024 (双字)G19026 (双字)G19028 (双字) 4G19030G19033G19034 (双字)G19036 (双字)G19038 (双字) 5G19040G19043G19044 (双字)G19046 (双字)G19048 (双字) 6G19050G19053G19054 (双字)G19056 (双字)G19058 (双字) 7G19060G19063G19064 (双字)G19066 (双字)G19068 (双字) 8G19070G19073G19074 (双字)G19076 (双字)G19078 (双字) 9G19080G19083G19084 (双字)G19086 (双字)G19088 (双字) 10G19090G19093G19094 (双字)G19096 (双字)G19098 (双字)轴十四启动编号定位编号运行模式控制方法加速时间减速时间插补对象指令速度定位地址圆弧地址G560011G19100G19103G19104 (双字)G19106 (双字)G19108 (双字) 12G19110G19113G19114 (双字)G19116 (双字)G19118 (双字) 13G19120G19123G19124 (双字)G19126 (双字)G19128 (双字) 14G19130G19133G19134 (双字)G19136 (双字)G19138 (双字) 15G19140G19143G19144 (双字)G19146 (双字)G19148 (双字) 16G19150G19153G19154 (双字)G19156 (双字)G19158 (双字) 17G19160G19163G19164 (双字)G19166 (双字)G19168 (双字) 18G19170G19173G19174 (双字)G19176 (双字)G19178 (双字) 19G19180G19183G19184 (双字)G19186 (双字)G19188 (双字) 20G19190G19193G19194 (双字)G19196 (双字)G19198 (双字)轴十五启动编号定位编号运行模式控制方法加速时间减速时间插补对象指令速度定位地址圆弧地址G57001G20000G20003G20004 (双字)G20006 (双字)G20008 (双字) 2G20010G20013G20014 (双字)G20016 (双字)G20018 (双字) 3G20020G20023G20024 (双字)G20026 (双字)G20028 (双字) 4G20030G20033G20034 (双字)G20036 (双字)G20038 (双字) 5G20040G20043G20044 (双字)G20046 (双字)G20048 (双字) 6G20050G20053G20054 (双字)G20056 (双字)G20058 (双字) 7G20060G20063G20064 (双字)G20066 (双字)G20068 (双字) 8G20070G20073G20074 (双字)G20076 (双字)G20078 (双字) 9G20080G20083G20084 (双字)G20086 (双字)G20088 (双字) 10G20090G20093G20094 (双字)G20096 (双字)G20098 (双字)。
JKW
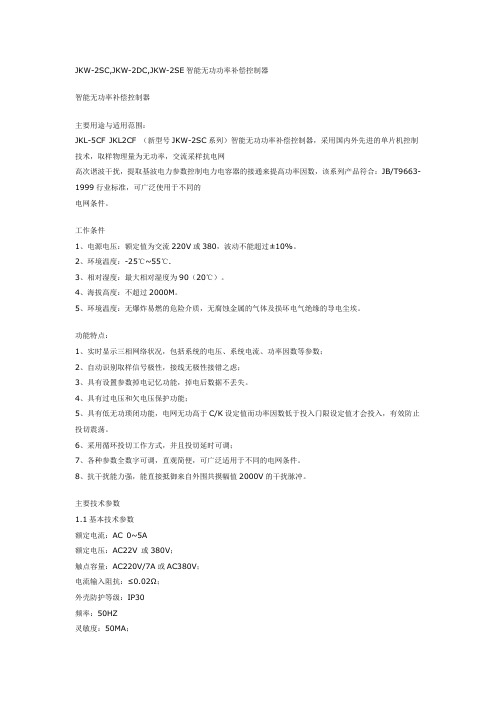
JKW-2SC,JKW-2DC,JKW-2SE智能无功功率补偿控制器智能无功率补偿控制器主要用途与适用范围:JKL-5CF JKL2CF (新型号JKW-2SC系列)智能无功功率补偿控制器,采用国内外先进的单片机控制技术,取样物理量为无功率,交流采样抗电网高次谐波干扰,提取基波电力参数控制电力电容器的接通来提高功率因数,该系列产品符合:JB/T9663-1999行业标准,可广泛使用于不同的电网条件。
工作条件1、电源电压:额定值为交流220V或380,波动不能超过±10%。
2、环境温度:-25℃~55℃.3、相对湿度:最大相对湿度为90(20℃)。
4、海拔高度:不超过2000M。
5、环境温度:无爆炸易燃的危险介质,无腐蚀金属的气体及损坏电气绝缘的导电尘埃。
功能特点:1、实时显示三相网络状况,包括系统的电压、系统电流、功率因数等参数;2、自动识别取样信号极性,接线无极性接错之虑;3、具有设置参数掉电记忆功能,掉电后数据不丢失。
4、具有过电压和欠电压保护功能;5、具有低无功琐闭功能,电网无功高于C/K设定值而功率因数低于投入门限设定值才会投入,有效防止投切震荡。
6、采用循环投切工作方式,并且投切延时可调;7、各种参数全数字可调,直观简便,可广泛适用于不同的电网条件。
8、抗干扰能力强,能直接抵御来自外围共摸幅值2000V的干扰脉冲。
主要技术参数1.1基本技术参数额定电流:AC 0~5A额定电压:AC22V 或380V;触点容量:AC220V/7A或AC380V;电流输入阻抗:≤0.02Ω;外壳防护等级:IP30频率:50HZ灵敏度:50MA;绝缘电压:660V1.2控制器参数;技术参数代码可调范围可调步长出厂设置定值投入门限B 0.80~0.99 0.01 0.95延时预置C 1~250S 1 30S过压预置D 230~300V/400~500V 1 245/440VC/K比值E 0.00~1.00 0.01 0.10切除门限F 滞后0.91~超前-0.90 0.01 1.00控制组数L 1~12或1~16回路1 硬件允许最大值主要规格型号产品型号开孔尺寸取样电压信号频率控制组数显示器整机重量代替型号JKW-2SC 113*113 380V 50/60HZ 1`~12 数码0.9KG JKL5CFJKW-2DC 113*113 220V 50/60HZ 1`~12 数码0.9KG JKL2CFJKW-2SE 142*102 380V 50/60HZ 1`~12 数码0.9KG JKL1BFJKW-2DE 142*102 220V 50/60HZ 1`~12 数码0.9KG JKL1BJJKW-2SB 162*102 380V 50/60HZ 1`~12 数码0.95KG JKL3BFJKW-2DB 162*102 220V 50/60HZ 1`~12 数码0.95KG JKLL2BF/JKG2B/JKGF产品型号:JKW-2SC原产地:上海产品品牌:JCH。
油膜轴承

油膜轴承是一种主要表面加工精度、表面粗糙度以及相关参数匹配非常理想的滑动轴承,它的主要特点有:1、承载能力大,轴承的外径相同油膜轴承的承载能力要远大于滚动轴承。
2、使用寿命长:从原理上讲,油膜轴承是不会发生磨损的。
但是实际上,即使正确的使用和妥善地维护,也是要发生磨损的,只是很轻微而已。
其理论上寿命可达15年左右,一般实际由于润滑和轧机设备等原因,寿命在5-10年左右。
3、速度范围宽:轧机油膜轴承可以在很低的速度下工作,也可以在很高的速度下运行,还可以使用可逆轧机:有正转速到零,再由零到负转速的状态下工作,速度范围十分之宽。
4、结构尺寸小:在相同的承载能力下,油膜轴承轮廓尺寸要比滚动轴承小。
5、摩擦系数低:油膜轴承轴承的摩擦系数一般在0.001-0.005之间,摩擦系数低,从而摩擦损耗低。
6、抗冲击能力强:油膜轴承中的油膜的挤压效应对于冲击载荷的承受能力,使得油膜轴承能很好地承受冲击载荷。
16系列轴承16系列轴承使用部位摩根图号轴承类型制造型号备注二齿轮增速机A 162250 成对球轴承MRC 7334D1B二齿轮及三轴高速增速机B 162250 滚子轴承MCS-140-160三轴增速机及锥箱长轴C 162250 成对球轴承MRC 7226D10ECA 162250 球轴承MRC 7226D11S三轴增速机D 162250 滚子轴承MRC-128-107DA 162250 滚子轴承MRC-128-108锥箱长轴E 162250 成对球轴承MRC 7224D10EF 162250 滚子轴承U-1024-EMR-305从动轴及锥箱长轴G 162250 滚子轴承MRC MR126KC10滚子轴承U-1026-EMR-103从动轴GA 162250 滚子轴承MRC MR126KC11GB 162250 滚子轴承MRC MR126KC9GO 162250 滚子轴承MRC R126KC9GD 162250 滚子轴承MRC R126KC7GE 162250 滚子轴承MRC R126KC8从动轴及惰轴H 162250 滚子轴承MRC MR312C4HA 162250 滚子轴承MRC MR312C4HB 162250 滚子轴承MRC R3122011HC 162250 滚子轴承U-1211-EMR-107HD 162250 滚子轴承MRC MR215C5HE 162250 滚子轴承MRC MR210KC1HF 162250 滚子轴承MRC MR211C3HG 162250 滚子轴承MRC MR319C2HH 162250 滚子轴承MRC R312C12HJ 162250 滚子轴承MRC MR212C6HK 162250 滚子轴承MRC MR315C5惰轴K 162250 成对球轴承MRC 309RD9BKA 162250 球轴承MRC 309S34KC 162250 锥型滚子轴承ASSEMBL Y#462-903056"辊轴LL 162250 成对球轴承MRC 720 7208PD5F162250 成对球轴承7208 BMP6DFLA 162250 成对球轴承MRC 7309PD7F6"辊及惰轴LB 162250 成对球轴承MRC 7307DBF4"辊轴LC 162250 成对球轴承MRC 7206PD1F8"辊轴M 162250 球轴承BA2B-475881162250 球轴承MRC 5310C2MA 162250 球轴承B42B-475882162250 球轴承MRC 5311C2MB 162250 成对球轴承MRC 7310PD8SMC 162250 成对球轴承MRC 7310D5E162250 成对球轴承7310 BMP5DB 102辊箱辊缝调节丝杆N 162250 球轴承6208 2RS1/W64CK121 162250 球轴承NOT A V AILABLENA 162250 球轴承62052RS1调节丝杆P 162250 球轴承6207-2ERS1162250 球轴承NOT A V AILABLE 207SSTQ 162250 球轴承6210-2RS1/W64CVK121162250 球轴承NOT A V AILABLE二齿轮增速机R 162250 成对球轴承MRC 7326D2B二齿轮及三轴增速机S 162250 滚子轴承MCS-134-104 6"辊轴T 162250 球轴承二齿轮及三轴增速机U 162250 球轴承MRC134KS1V 162250 滚子轴承U-1228-EMR-302162250 滚子轴承MRC MR228C1输入轴VA 162250 滚子轴承MRC MR228C2二齿轮及三轴增速机W 162250 球轴承BB1B-447022 162250 球轴承228SWA 162250 球轴承MRC 9228S1三轴增速机X 162250 球轴承MRC 9128KS输入轴XA 162250 球轴承6026/C3锥箱长轴Y 162250 球轴承MRC 7126KRD5E起重轴Y A 162250 球轴承MRC 126KRDZE锥箱长轴Z 162250 成对球轴承MRC 7124KRDE17系列轴承17系列轴承轴承类型尺寸重量摩根型号无沟槽6" 0.25 172050-C 6" 0.60 172050-E6" & 8" 0.15 172050-A8" 0.75 172050-L8" 0.75 172050-JA8" 1.1010" 2.00 172050-S12" 4.30 172050-ZA14" 13.50 172050-ZC带沟槽6" 0.25 172050-D 6" & 8" 0.15 172050-B8" 1.00 172050-M8" 0.75 172050-KA8" 1.0010" 2.00 172050-T12" 4.3013.50 172050-ZB 14" 0.25 172050-ZD6" 0.60 172050-DB无油槽6" 172050-F&FB有油槽172050-MA无油槽172050-LA172050-EC有油槽172050-FC。
JKW系列TD型 动态无功功率补偿控制器使用说明书

广州市金矢电子有限公司地址:广东省广州市番禺区石楼镇华山路6号************邮编:511447网址:信箱:**************JKW系列TD型动态无功功率补偿控制器广州市金矢电子有限公司GUANGZHOU KINGSER ELECTRONICS CO.,LTD由于产品升级、版本更新,本手册所述内容可能无法完全涵盖。
如有错误、遗漏等不当之处,敬请各位用户谅解。
目录一、产品概述---------------------------------2二、型号说明-----------------------------------------2三、使用条件-----------------------------------------3四、产品外形及安装尺寸-----------------------------3五、基本功能(一)显示功能------------------------------------3(二)设置功能------------------------------------3(三)无功补偿功能------------------------------3(四)保护功能------------------------------------4(五)实时数据通迅功能--------------------------4(六)数据管理功能-------------------------------4(七)超限及故障警示功能------------------------4(八)抄表机功能---------------------------------4六、技术参数1、基本参数--------------------------------------52、控制参数--------------------------------------53、测量精度--------------------------------------54、通迅------------------------------------------5七、安装调试-----------------------------------------5八、开箱检查----------------------------------------14九、简单故障排除-----------------------------------14八、开箱检查打开外包装,检查控制器外观是否完好,附件和说明书是否认齐全,如发现控制器外壳有损坏,或附件和说明书不齐全时,请及时与供应商联系。
PortServer TS 16 用户指南说明书

PortServer TS 16Setup CardAbout This CardThis card provides the following information on your PortServer TS 16:• A brief introduction• A setup overview that identifies the major steps required fordevice setup•Guidance on where to find more detailed information thatmay be required to complete setup and administrative tasksKey FeaturesThe following are some of the key features of PortServer TS 16:Console ManagementPortServer TS 16 provides the following console management features:•Secure access to remote systems using SSHv2•“Solaris Ready” certification from Sun Microsystems•Inbound and outbound PPP connections for remote access tonetwork equipment•Port buffering of up to 64 KB per port to diagnose networkproblems Terminal ServerPortServer TS 16 provides the following terminal server features:•Serial ports capable of supporting asynchronous, high-speedconnections to printers, modems, terminals, and otherdevices. Support extends to full modem control and hardware handshaking.•Local TTY and COM port functionality using Digi RealPortsoftware GeneralPortServer TS 16 provides the following general features:•Auto-sensing 10/100 TX Ethernet connection•Industry standard surge suppression and ESD protection to 15kilovolts on all signal pins•LED indicators to display network information•Local configuration using a terminal or PC and remote con-figuration using either a Telnet connection or a web browser •Remote monitoring and IP address configuration using DigiPort Authority - Remote•Upgradable firmware using TFTP or HTTPPackage ContentsThe package contains the following items:•One PortServer TS 16 with an integrated power supply•One RJ-45-to-DB-25 crossover cable and one RJ45-to-DB9crossover cableNote: These are intended for connecting a terminal or PC so that you can configure your PortServer TS 16 using the com-mand line interface.•One Sun Netra crossover cable to connect to SUN Netra serv-ers and Cisco routers and switches (Rack Mount units only)Note: For additional cables, contact your dealer or distributor.•Optional Rack Mount Kit (19” and 23”)•One loopback plug •Access Resource CD•This card, an Access Resource CD card, and associatedpaperworkSetup OverviewThis overview identifies the major steps required to set up your PortServer TS 16. It provides simple methods for accomplishing common setup tasks. For information on alternative methods, see the online documentation. Step A: Set Up the Hardware1.Connect the PortServer TS 16 to a proper power source andthe PortServer TS 16 to the network. See the Specifications table on the backside of this document for details.2.Connect peripherals to serial ports. See the Terminal ServerCable Guide for information on cabling peripherals to serial ports. Step B: Install and Set Up DPA-RemoteThis step is not required if you do not intend to use DPA-Remote to configure the IP address or to monitor ports.Notes: (1) DPA-Remote cannot be used to change the IP address of a PortServer TS 16 that has already been assigned one; it can only be used to configure the initial IP address. (2) DPA remote cannot assign an IP address on a network that has an active DHCP server.For information on installing DPA-Remote, see the online Digi Port Authority - Remote Device Monitor Setup Guide . Step C: Configure an IP AddressThe following are 4 methods for configuring an IP address. Use the one that is most convenient for you.Method 1: Using DP A-Remote 1.Run DPA-Remote.2.If DPA-Remote is not set for ADDP, choose ADDP as theDiscovery Protocol.3.Choose Discover. A list of Digi devices with IP addresses of0.0.0.0 appears.4.Select a PortServer TS 16 from the list and then choose Con-figure.5.Supply an IP address, subnet mask, and default gateway andthen choose OK.DPA-Remote configures the IP address, subnet mask, and default gateway.Method 2: Using Ping-ARPUse this section to configure an IP address by manually updating a server’s ARP table and then pinging the PortServer TS 16.1.Record the MAC address of the PortServer TS 16. It islocated on the back of the unit.2.Access a server on the same subnet as the PortServer TS 16.3.Manually update the server’s ARP table using the PortServerTS 16’s MAC address and the IP address you want assigned to the PortServer TS 16. The following is an example of how this is done on a Windows NT 4.0 system:arp -s 143.191.2.1 00-40-9d-22-23-604.Ping the PortServer TS 16 using the IP address just assigned. The following is an example:ping 143.191.2.1The ping will probably time out before there is a response. 5.Wait a few seconds and then ping again.The PortServer TS 16 replies to the ping, indicating that the IP address has been configured.Method 3: Using DHCP or RARP1.Record the MAC address of the PortServer TS 16, which islocated on the back of the unit.2.Set up an entry on a DHCP or RARP server. If you intend touse RealPort, do the following:•Reserve a permanent IP address.•Record the IP address. You will need it when you config-ure the RealPort driver.3.Power on the PortServer TS 16.Method 4: Using the Command Line1.Connect a terminal or PC to a serial port on the PortServer TS16.•For a terminal, use the cable that came in your package. •For a Windows Hyperterminal connection, use the cablethat came in the package, a straight-through DB25-to-DB9 modem cable, and gender changers as required.2.Configure the parameters of the terminal or terminal emula-tion software to work with the serial port. The default port settings are below:3.Log in to the PortServer TS 16 as root by entering the follow-ing commands: (You may have to press the Enter key to get a Login prompt.)•At the login prompt, type root .•At the password prompt, type dbps (which is the defaultpassword. If the password has been changed, use the new password.)See the newpass command in the online Digi One/PortServer TS Command Reference for information on changing the root password.4.Configure an IP address with the following command:set config dhcp=off ip=ip-addr submask=maskwhere ip-addr is the IP address to configure and mask is the subnet mask used by the network Exampleset config dhcp=off ip=192.10.7.3 submask=255.255.255.05.Reboot at the reboot prompt.Step D: Configuring Ports Using the Web Interface1.Access the PortServer TS 16 from a web browser by specify-ing the unit’s IP address in the URL window.2.Log in to the PortServer TS 16 as root by entering the follow-ing:•At the login prompt, type root .•At the password prompt, type dbps (which is the defaultpassword. If the password has been changed, use the new password.)e the web interface to configure ports. See the online helpfor information on configuration fields.4.If you intend to use RealPort, install RealPort software on aserver. See the online RealPort library for more information. Step E: Configure other Features as RequiredSee “Where to Find Information” on this card for ideas onadditional features to configure and directions as to where to find setup information.Step F: Troubleshoot Setup ProblemsEnsure that your setup works as you intend. If you encounter setup problems, see the troubleshooting section in the online Configuration and Administration Guide.PortServer TS 16 LibraryAccess Resource CD CardThis card provides information on the contents of the Access Resource CD. It includes the CD mounting instructions required to access the CD on many Unix systems.Digi One/PortServer TS Command ReferenceThis online manual, available on the Access Resource CD, provides complete information on commands.PortServer TS 8/16 Configuration and Administration Guide This online manual, available on the Access Resource CD, provides procedural information for setup.RealPort Setup GuidesThese online manuals provide information on setting up servers for RealPort software.Digi Port Authority - Remote Device Monitor Setup Guide This online manual provides information on installing and using Digi Port Authority - Remote software. Online Help for the Web UIThis online help provides information on configuration fields used with the web browser configuration interface. Terminal Server Cable GuideThis online manual provides cabling information.•VT 100 emulation • 1 stop bit •9600 baud •No parity•8-bit characterWhere to Find Information Safety Considerations and Warnings•AC only- Do not attempt to defeat the safety feature of the3-wire, ground-connection plug that comes with PortServerTS 16. If you are unable to insert this plug into an outlet,have an electrician replace the obsolete outlet.•AC only- Ensure that the ampere rating of all equipmentplugged into wall outlets does not overload the outlet.•AC only- If you require an extension cord, ensure that theampere rating of all equipment plugged into the extensioncord does not exceed the ampere rating of the cord.CAUTION! This product contains a lithium-ion battery that isembedded in one of the components on the printed circuit board.The battery is not field-replaceable, and improperly installing thecomponent could result in an explosion.CAUTION! Do not cover or obstruct ventilation slots.Thesedevices generate heat and require adequate circulation to maintainproper operating temperatures.CAUTION! Do not switch or disconnect devices in the groundingcircuit conductor between the DC source and the point ofconnection of the grounding electrode conductor.CAUTION! Do not allow the PortServer TS 16 to get wet. Do notinstall near high-powered radio transmitters or electricalequipment. Any of these conditions can cause safety hazards andequipment failure or damage.Rack Mounting Installation•Distribute weight evenly in the rack to avoid overloading.•Ensure proper ventilation with at least 12 inches (30 centime-ters) of clearance on all sides.•Check equipment nameplate ratings before connecting to thesupply circuit to avoid overloads which may damage over-current protection devices and supply wiring.•Maintain reliable earthing for rack-mounting equipment,especially for supply connections.•Install equipment in Restricted Access Areas only (dedicatedequipment rooms/closets) in accordance with Articles 110-16,110-17, and 110-18 of the National Electrical Code, ANSI/NFPA 70.•Connect equipment to a DC supply source (reliably earthed)that is electrically isolated from the AC source.•Directly connect the equipment chassis to the DC supply sys-tem-grounding electrode conductor or a bonding jumper froma grounding terminal bar (or bus) that is connected to the DCsupply system grounding electrode conductor.•Contain equipment that has a connection between thegrounded conductor of the same DC supply circuit, thegrounding conductor, and also the point of grounding of theDC system in the same immediate area. Do not ground theequipment elsewhere.•Locate the DC supply source within the same premises as theequipment.•Route away and secure all DC input wiring from sharp edgesto prevent chaffing as well as provide strain relief.•Provide a readily accessible disconnect device and protectivedevice a fixed wiring for a DC power supply suitable for thespecified rated voltage and current. Disconnect and protectivedevices to be rated 2A Amps maximum.SpecificationsRegulatory NoticesThis product complies with the following standards:Electromagnetic Emissions•FCC Part 15 Class B -- See Also: Declaration of Conformity•EN55022 Class B•EN61000-3-2 and EN61000-3-3•VCCI Class II•ICES 003 Class B•AS3548Electromagnetic ImmunityEN55024Product Safety•UL 60950•CSA 22.2 No.60950•EN60950•NOMS•AS3260Declaration of ConformityIn accordance with FCC Dockets 96-208 and 95-19Digi International declares that the products:to which this declaration relates, meet the requirements specifiedby the Federal Communications Commission as detailed in thefollowing specifications:•Part 15, Subpart B, for Class B Equipment•FCC Docket 96-208 as it applies to Computers andPeripheralsThe products listed have been tested at an External TestLaboratory certified per FCC rules and have been found to meetthe FCC, Part 15, Class B, Emission Limits. Documentation is onfile and available from the Digi International HomologationDepartment.ICES 003 Class BThis digital apparatus does not exceed the Class B limits for radionoise emissions from digital apparatus set out in the RadioInterference Regulations of the Canadian Department ofCommunications.Le present appareil numerique n'emet pas de bruitsradioelectriques depassant les limites applicables aux appareilsnumeriques de la class B prescrites dans le Reglement sur lebrouillage radioelectrique edicte par le ministere desCommunications du Canada.Copyright © 2001, 2002 Digi International Inc. All RightsReserved. DisclaimerThis manual may contain inaccurate or erroneous information. This manual issubject to change at any time. This manual, including all information containedherein, is provided “as is” without warranty of any kind, either express or implied,including, but not limited to, any implied warrantees of merchantability or fitnessfor particular purpose. Digi International Inc. makes no representations,warranties, or commitments with regard to any data or information contained inthis manual. If you rely on data or information contained in this manual, suchreliance is at your own risk.To set up...See...An IP address•The web interface and associated helpNote: The initial IP address cannot be set upwith the web interface.•The set config command in the online Com-mand Reference•The section on configuring the Ethernetinterface in the online Configuration andAdministration Guideautoconnection •The web interface and associated help•The set user and set ports commands in theonline Command Reference•The section on configuring autoconnection inthe online Configuration and AdministrationGuideDPA - Remote•The online Digi Port Authority - RemoteDevice Monitor Setup GuideMenus•The web interface and associated help•The set menu command in the online Com-mand ReferencePorts •The web interface and associated help•The set ports, set flow, and set line com-mands in the online Command Reference•The sections on configuring ports forRealPort, modems, terminals, and printers inthe online Configuration and AdministrationGuidePort Buffering•The web interface and associated help•The set buffers commands in the onlineCommand Reference•The section on Console Management in theonline Configuration and AdministrationGuidePPP•The web interface and associated help•The set user command in the online Com-mand Reference•The PPP section in the Configuration andAdministration GuideRealPort•The web interface and associated help•The set ports command in the online Com-mand Reference•The online RealPort librarySSH•The web interface and associated help•The set user command in the online Com-mand Reference•The sections on Security Features and Con-sole Management in the online Configurationand Administration GuideSNMP agent •The set snmp command in the online Com-mand Reference•The section on configuring the SNMP agentin the onlineConfiguration and Administra-tion GuideUsers•The web interface and associated help •The set user and newpass commands in the online Command Reference•The section on configuring users in the Con-figuration and Administration GuidePower Requirements•16-Port Desktop•16-Port Rack (AC)115-230 VAC,50-60 Hz, .8A maxinternal power supply•16-Port Rack (DC)36-72 VDC, .45 A at 48 VDC maxTerminations:•+ = Source•- = Reference• = Earth groundThe terminal lug must be attachedto a suitable earth ground for safeoperation.EnvironmentalAmbient temperature60°F (15.6°C) to 90°F (32.2°C)Relative humidity20% to 80% non-condensingAltitude0 to 7,000 feet (0 to 2,134 meters)Mechanical16-Port Rack Width: 16.8 inches (42.672 cm)Height: 1.6 inches (4.064 cm)Depth: 6.5 inches (16.510 cm)Weight: 3.75 pounds (1.701 kg)16-Port Desktop Width: 13.5 inches (34.290 cm)Height: 1.375 inches (3.493 cm)Depth: 6.5 inches (16.510 cm)Weight: 3 pounds (1.360 kg)Manufacturer's Name: Digi International Inc.Corporate Headquarters: 11001 Bren Road EastMinnetonka MN 55343Manufacturing Headquarters: 10000 West 76th StreetEden Prairie MN 55344Product Name Model #PortServer TS 16 DesktopPortServer TS 16 Rack ACPortServer TS 16 Rack DC700017337000174270001747See list of product names andmodel numbers.Tested to Comply with FCCStandardsFOR HOME OR OFFICE USE。
JKWR使用说明书
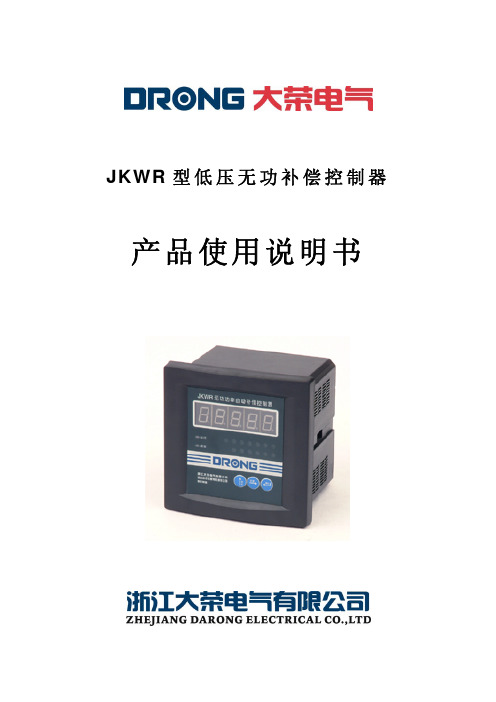
JKWR型低压无功补偿控制器产品使用说明书非常感谢您选择了我们的产品!使用之前请仔细阅读并妥善保管本说明书。
目录第1章 概 述................................................................................................................................11.1 产品概述............................................................................................................................11.2 执行标准............................................................................................................................1第2章 主要技术条件及功能........................................................................................................12.1 型号命名............................................................................................................................12.2 使用条件............................................................................................................................12.3 外观与结构........................................................................................................................22.4 安全性能............................................................................................................................22.5 测量精度............................................................................................................................22.6 动作误差............................................................................................................................22.7 灵敏度...............................................................................................................................22.8 数据采样测量值................................................................................................................22.9 控制方式和控制物理量....................................................................................................22.10 投切方式..........................................................................................................................22.11 最大输出回路..................................................................................................................32.12 响应时间..........................................................................................................................32.13 补偿方式..........................................................................................................................32.14 功耗.................................................................................................................................32.15 主要功能..........................................................................................................................3第3章 安装....................................................................................................................................43.1 外形及安装尺寸图............................................................................................................43.2 安装接线图........................................................................................................................43.3 检查输入CT变比............................................................................................................6第4章 运行及操作方法................................................................................................................64.1 控制器面板介绍................................................................................................................64.2 工作状态指示....................................................................................错误!未定义书签。
Klixon 16HM 三相电机保护设备说明说明书

34HM | MOTOR PROTECTORSHermetically Sealed On-Winding, 3-Phase SPECIFICATIONSFProduct DescriptionLine Break Operation• Protect WYE (Star) wound 3-phase motors from 1 to 6HP. Used in refrigeration compressors, submersible pumps and other restrictive environments.shape allows for close coupling to motor windings.• Hermetic reliability designed for leakage rates less than 1 x 10⁻⁹ cc per second of air with 1 atmosphere pressure differential.• Klixon® snap-action discs assure positive make and break action and controlled temperature differential.• Designed for low and high side pressure applications.Klixon® 16HM motor protectors are line break automatic reset controls which are wired in series with the motor windings. These protectors are designed to track winding temperatures and to respond to changes in line current. When properly applied, the 16HM can provide protection againstmotor overheating under the following conditions:This protector is designed to protect 3-phase refrigeration and air conditioning compressor motors from excessive winding temperature; however, device to be installed directly on motor windings for closely coupled temperature monitoring, thus enhancing over-temperature protection against loss of refrigeration charge, low voltage locked rotor, and secondary single-phasing (loss of phase). The 34HM is designed to reduce installation costs by replacing pilot control systems with a simple, economical, compact device.The basic element of the 34HM is the famous Klixon® Snap ActMaximum Recommended Locked Rotor CurrentCurrent ratings are based on life test data which has demonstrated high reliability at 5K cycles (standard series) and 2K cycles (high capacity series) at 0.7 ower factor on Sensata life test boards. These capacities are intended as a guide for application work.Standard Operating TemperaturesDIAGRAMS34HM Hermetic Motor ProtectorElectrical SchematicWUnitInsmmW0.67017.0H1.14029.0P10.55614.1L1.17029.7P20.0892.3P30.2506.4A0.58514.9B1.08027.4Standard / High Capacity DeviceProtector ShellCompressorMotorWindings34HM CODE SYSTEMQuick ConnectsWire LeadsSleeves, etc.When making an inquiry on Klixon® hermetically sealed motor protectors, be certain to specify the entire part number for your application,AGENCY APPROVALS & CERTIFICATIONSPage 5CONTACT USSensata Technologies, Inc. (“Sensata”) data sheets are solely intended to assist designers (“Buyers”) who are developing systems thatincorporate Sensata products (also referred to herein as “components”). Buyer understands and agrees that Buyer remains responsiblefor using its independent analysis, evaluation and judgment in designing Buyer’s systems and products. Sensata data sheets havebeen created using standard laboratory conditions and engineering practices. Sensata has not conducted any testing other than thatspecifically described in the published documentation for a particular data sheet. Sensata may make corrections, enhancements,improvements and other changes to its data sheets or components without notice.Buyers are authorized to use Sensata data sheets with the Sensata component(s) identified in each particular data sheet. HOWEVER, NOOTHER LICENSE, EXPRESS OR IMPLIED, BY ESTOPPEL OR OTHERWISE TO ANY OTHER SENSATA INTELLECTUAL PROPERTY RIGHT, ANDNO LICENSE TO ANY THIRD PARTY TECHNOLOGY OR INTELLECTUAL PROPERTY RIGHT, IS GRANTED HEREIN. SENSATA DATA SHEETSARE PROVIDED “AS IS”. SENSATA MAKES NO WARRANTIES OR REPRESENTATIONS WITH REGARD TO THE DATA SHEETS OR USEOF THE DATA SHEETS, EXPRESS, IMPLIED OR STATUTORY, INCLUDING ACCURACY OR COMPLETENESS. SENSATA DISCLAIMSANY WARRANTY OF TITLE AND ANY IMPLIED WARRANTIES OF MERCHANTABILITY, FITNESS FOR A PARTICULAR PURPOSE, QUIETENJOYMENT, QUIET POSSESSION, AND NON-INFRINGEMENT OF ANY THIRD PARTY INTELLECTUAL PROPERTY RIGHTS WITH REGARDTO SENSATA DATA SHEETS OR USE THEREOF.All products are sold subject to Sensata’s terms and conditions of sale supplied at SENSATA ASSUMES NO LIABILITYFOR APPLICATIONS ASSISTANCE OR THE DESIGN OF BUYERS’ PRODUCTS. BUYER ACKNOWLEDGES AND AGREES THAT IT IS SOLELYRESPONSIBLE FOR COMPLIANCE WITH ALL LEGAL, REGULATORY AND SAFETY-RELATED REQUIREMENTS CONCERNING ITS PRODUCTS,AND ANY USE OF SENSATA COMPONENTS IN ITS APPLICATIONS, NOTWITHSTANDING ANY APPLICATIONS-RELATED INFORMATIONAmericas+1 (508) 236-2551electrical-protection-sales@sensata.comEurope, Middle East & Africa+1 (760) 597 7042*****************************************************.comChina +86 (21)2306 1651Japan +81 (45)277 7104Korea +82 (53) 644 9685India +91 (40)4033 9611Rest of Asia +886 (2) 27602006ext 2808。
JKW11_16无功功率自动补偿控制器

21
14
过压门限
分补 路 分补 路 分补 路 共补 路
分补 路 分补 路 分补 路 共补 路
15
补偿方案
分补 路 分补 路 分补 路 共补 路
16
分补 路 分补 路 分补 路 共补 路
图 1 JKW11-12 控制器面板
无功功率自动补偿控制器
1 6
2
5
电网参数
控制参数
4
自动运行 手动运行
自动/手动
7
┃
┃ ┗━━━━ 输出方式,J 表示开关触点输出,F 表示 DC -12V 输出,不标注表示 DC +12V 输出
┃
┗━━━━━━ 输出回路数,“12”为 12 回路输出(可不标注),“16”为 16 回路输出
┗━━━━━━━━━━ 表示无功功率自动补偿控制器。
2
7 控制器面板
JKW11-12 控制器面板见图 1;JKW11-16 控制器面板见图 2。
JKW11
无功功率自动补偿控制器
使用说明书
苏州天业电器有限公司
目录
1 概述 ……………………………………………………………………………………………………………………2 2 功能特点 ………………………………………………………………………………………………………………2 3 使用条件 ………………………………………………………………………………………………………………2 4 控制器的分类 …………………………………………………………………………………………………………2 5 技术数据 ………………………………………………………………………………………………………………2 6 型号命名 ………………………………………………………………………………………………………………2 7 控制器面板 ……………………………………………………………………………………………………………3 8 按键和指示灯 …………………………………………………………………………………………………………4 9 控制器接线图 …………………………………………………………………………………………………………6 10 参数预置 ………………………………………………………………………………………………………………7 10.1 自动运行与手动运行方式的选择 …………………………………………………………………………………7 10.2 目标功率因数的预置 ………………………………………………………………………………………………8 10.3 投入延时的预置 ……………………………………………………………………………………………………8 10.4 切除延时的预置 ……………………………………………………………………………………………………9 10.5 共补电容器组输出回路的预置 ……………………………………………………………………………………9 10.6 分补电容器组输出回路的预置 …………………………………………………………………………………10 10.7 共补电容器组输出编码的预置 …………………………………………………………………………………10 10.8 分补电容器组输出编码的预置 …………………………………………………………………………………11 10.9 第一只共补电容器容量的预置 …………………………………………………………………………………11 10.10 第一只分补电容器容量的预置 …………………………………………………………………………………12 10.11 总电流互感器变比的预置 ………………………………………………………………………………………12 10.12 过压门限的预置 …………………………………………………………………………………………………13 10.13 电压畸变率门限的预置 ………………………………………………………………………………………13 10.14 补偿方案的预置 …………………………………………………………………………………………………14 10.15 通讯地址的预置 …………………………………………………………………………………………………14 10.16 通讯波特率的预置 ………………………………………………………………………………………………15 11 关于补偿参数的使用说明 …………………………………………………………………………………………15 11.1 补偿方案 …………………………………………………………………………………………………………15 11.2 输出回路数 …………………………………………………………………………………………………………15 11.3 输出编码 …………………………………………………………………………………………………………16 11.4 第一只电容器容量 ………………………………………………………………………………………………16 11.5 总电流互感器变比 …………………………………………………………………………………………………16 12 控制器在各补偿方案下分补和共补输出端子功能的定义 …………………………………………………………16 13 补偿方案应用举例 ……………………………………………………………………………………………………17 14 控制器工作原理 ………………………………………………………………………………………………………18 15 报警原因 ………………………………………………………………………………………………………………18 15.1 过电压、欠电压报警 ……………………………………………………………………………………………18 15.2 过补偿报警 ………………………………………………………………………………………………………18 15.3 欠补偿报警 ………………………………………………………………………………………………………18 15.4 过畸变率报警 ……………………………………………………………………………………………………18 16 电压输出与开关触点输出的特点 ……………………………………………………………………………………18 17 通讯接口 ………………………………………………………………………………………………………………19 18 出厂预置参数 …………………………………………………………………………………………………………19 19 外形尺寸及安装方式 …………………………………………………………………………………………………19 20 故障排除 ……………………………………………………………………………………………………………19 附录 1 JKW11-12 控制器与 TEF1 系列复合式接触器接线示意图 ………………………………………………… 21 附录 2 JKW11-16 控制器与 TEF1 系列复合式接触器接线示意图 ………………………………………………… 22 附录 3 TEF1 系列复合式接触器与 JKW11 控制器安装注意事项 ………………………………………………… 23
FANUC_16系统参数说明

FANUC_16系统参数说明FANUC 16系统参数系统参数不正确也会使系统报警。
另外,工作中常常遇到工作台不能回到零点、位置显示值不对或是用MDI键盘不能输入刀偏量等数值,这些故障往往和参数值有关,因此维修时若确认PMC信号或连线无误,应检查有关参数。
一.16系统类参数1.SETTING 参数参数号符号意义16-T 16-M0/0 TVC 代码竖向校验O O0/1 ISO EIA/ISO代码O O0/2 INI MDI方式公/英制O O0/5 SEQ 自动加顺序号O O2/0 RDG 远程诊断O O3216 自动加程序段号时程序段号的间隔O O2.RS232C口参数20 I/O通道(接口板):0,1: 主CPU板JD5A2: 主CPU板JD5B3: 远程缓冲JD5C或选择板1的JD6A(RS-422)5: Data Server10 :DNC1/DNC2接口O O100/3 NCR 程序段结束的输出码O O100/5 ND3 DNC运行时:读一段/读至缓冲器满O OI/O 通道0的参数:101/0 SB2 停止位数O O101/3 ASII 数据输入代码:ASCII或EIA/ISO O O101/7 NFD 数据输出时数据后的同步孔的输出O O102 输入输出设备号:0:普通RS-232口设备(用DC1-DC4码)3:Handy File(3″软盘驱动器)O O103 波特率:10:480011:960012:19200 O OI/O 通道1的参数:111/0 SB2 停止位数O O111/3 ASI 数据输入代码:ASCII或EIA/ISO O O111/7 NFD 数据输出时数据后的同步孔的输出O O112 输入输出设备号:0:普通RS-232口设备(用DC1-DC4码)3:Handy File(3″软盘驱动器)O O113 波特率:10:480011:960012:19200 O O其它通道参数请见参数说明书。
s16r2-ptaw技术参数
技术参数一、概述1. 技术参数的定义技术参数是指产品或设备在设计、制造和使用过程中所必须具备的一系列性能指标和特征参数,用于客观地描述和衡量产品或设备的技术水平和性能表现。
2. 技术参数的重要性技术参数直接关系到产品或设备的质量和性能,是制定产品标准、进行产品对比和评价的重要依据。
合理的技术参数可以有效地指导产品设计和制造过程,保证产品质量和性能达到预期的要求。
二、技术参数的分类1. 性能参数性能参数是指产品或设备在正常工作状态下所具备的功能和性能指标,如功率、速度、精度、效率等。
2. 结构参数结构参数是指产品或设备在设计和制造过程中的结构形式和特征参数,如尺寸、重量、外观等。
3. 环境参数环境参数是指产品或设备在特定环境条件下所能适应的工作环境和使用要求,如温度、湿度、压力等。
三、技术参数的制定方法1. 行业标准和规范行业标准和规范是制定技术参数的重要依据,通过参考和遵循相关标准和规范,可以确保技术参数的科学性和合理性。
2. 技术研究和测试通过技术研究和实验测试,可以获取产品或设备的各项性能指标和特征参数,并据此制定合理的技术参数。
3. 用户需求和市场反馈充分了解用户需求和市场反馈,可以帮助制定符合实际需求和市场趋势的技术参数,提高产品或设备的竞争力和适用性。
四、技术参数的应用1. 产品设计和优化技术参数是产品设计和优化的重要依据,合理的技术参数可以有效地指导产品设计和制造过程,提高产品质量和性能。
2. 产品对比和选择技术参数可以帮助用户进行产品对比和选择,根据不同产品的技术参数进行评估和比较,选择符合自身需求的最佳产品或设备。
3. 质量控制和检测技术参数可以作为质量控制和检测的标准,对产品或设备的质量和性能进行监控和评估,保证产品质量符合技术要求。
五、技术参数的管理与优化1. 技术参数的管理建立完善的技术参数管理体系,明确技术参数的编制、审核和变更流程,确保技术参数的科学性和一致性。
2. 技术参数的优化不断跟踪行业发展和市场需求,及时调整和优化技术参数,保持产品或设备的竞争优势和市场适应性。
万能式断路器dw16
Us
220、230、380、400
110、220
操作电动机
Us
220、230、380、400
110、220
辅助触头
Us
127.220.230.380.400
110、220
4.4 辅助触头的约定发热电流为6A,额定工作电流为300/Ue(交流)和60/Ue(直 流)。辅助触头通常为五常开五常闭(5a、5b)或三常开三常闭(3a、3b)常规配 置为三常开三常闭,如果其他组合方式请在订货时注明。辅助触头与RL6-25/6熔 断器串联使用,能可靠分断预期短路电流1000A。
表7
弧触头终压力 N
弧触头开距 mm
68.6~83.3
36~40
8.6 在触头检查及调整完毕后,应对断路器其他部分(如过电流脱扣器)进行检查。 8.7 热继电器在过载保护动作后必须手动复位。 9 订货须知
客户在订货时必须提出下列内容: 9.1 断路器名称型号; 9.2 主电路额定电压、额定电流及频率; 9.3 用途:一般出厂为配电用; 9.4 欠压及分励脱扣器的额定电压:一般出厂时为380V。
转推动杠杆使杠杆解脱,在断开弹簧和触头弹簧的反作用力的作用下,断路器断开。 用手动断开时,机构从闭合位置沿反时针方向旋转,由于杠杆被扣片钩住
被固定,因此手柄只能沿着杠杆的横槽转动, 这样杠杆与杠杆连接解脱,断路 器即迅速断开。
用电动机操作的断路器必须由任一脱扣器使断路器断开。 6.2 过电流脱扣器
6.2.1 瞬时过电流脱扣器
电动机操作机构由单相串激电机、传动机构和电气控制部分组成,当电气控制部 分给单相串激电机发主令信号, 电机转动, 带动传动机构使断路器闭合。电动机操作 机构的控制线路如图5、6, 操作电压为额定控制电源电压的85%~110%。 6.5 杠杆操作机构
