思锐使用手册
思瑞高度尺II型中文说明书

目录一.开机前准备-------------------------------------- 二.功能按键----------------------------------------- 1.高度测量模式--------------------------------- 2.圆测量模式------------------------------------ 3.角度测量模式--------------------------------- 4.极值测量模式--------------------------------- 5.单位转换--------------------------------------- 6.参考点------------------------------------------ 7.偏差测量模式--------------------------------- 8.复位及清零------------------------------------ 9.测针校准--------------------------------------- 10.计算-------------------------------------------- 11.其它按键--------------------------------------三.2D测量模式-------------------------------------- 1.2D坐标获取----------------------------------- 2.坐标平移---------------------------------------- 3.坐标旋转---------------------------------------- 4.拟合圆------------------------------------------- 5.拟合直线---------------------------------------- 6.极坐标系统------------------------------------- 7.直角坐标系统---------------------------------- 8.建造虚拟点------------------------------------- 9.返回原始坐标---------------------------------- 10.圆心-圆心距离------------------------------- 11.圆心-原点-X轴角度------------------------ 12.圆心-圆心-圆心角度------------------------ 13.圆心-圆心-X轴角度------------------------ 14.计算结果列表-------------------------------- 15.原测量值列表-------------------------------- 16.保存计算结果-------------------------------- 17.退出2D----------------------------------------四.常见问题及解决方法--------------------------- 五.保修卡--------------------------------------------- 六.各地维修点---------------------------------------一.开机准备1. 当您打开包装箱时,请您按以下清单清点物品:Pioneer高度测量仪主机1台控制器1台说明书1本测针(直径4mm) 1支工具2把校准训练块1个充电器1个M6螺丝2只以上附件如有缺少,请与您的经销商接洽。
Illustra Essentials 室内 室外高清迷你圆顶红外摄像机用户手册说明书

Illustra Essentials Indoor / Outdoor HD Mini Dome with IRUser Manual 8200-1102-04 C0NoticePlease read this manual thoroughly and save it for future use before attempting to connect or operate this unit.The information in this manual was current when published. The manufacturer reserves the right to revise and improve its products. All specifications are therefore subject to change without notice.CopyrightUnder copyright laws, the contents of this manual may not be copied, photocopied, reproduced, translated orreduced to any electronic medium or machine-readable form, in whole or in part, without prior written consent of Tyco Security Products. © 2015 Tyco Security Products. All rights reserved.Customer ServiceThank you for using Tyco Security Products. We support our products through an extensive worldwide network of dealers. The dealer through whom you originally purchased this product is your point of contact if you needservice or support. Our dealers are empowered to provide the very best in customer service and support.Dealers should contact Tyco Security Products at (800) 507-6268 or (561) 912-6259 or on the Web at.TrademarksThe trademarks, logos, and service marks displayed on this document are registered in the United States [orother countries]. Any misuse of the trademarks is strictly prohibited and Tyco Security Products. willaggressively enforce its intellectual property rights to the fullest extent of the law, including pursuit of criminalprosecution wherever necessary. All trademarks not owned by Tyco Security Products. are the property of their respective owners, and are used with permission or allowed under applicable laws.Product offerings and specifications are subject to change without notice. Actual products may vary fromphotos. Not all products include all features. Availability varies by region; contact your sales representative.Important Safeguards and Warnings 1.Electrical safetyAll installation and operation should conform to your local electrical safety codes.The power shall conform to the requirement in the SELV (Safety Extra Low Voltage) and the Limited power source is rated 12V DC or 24V AC in the IEC60950-1. (Refer to general introduction)Please note: Do not connect two power supplying sources to the device at the same time; it may result in device damage! The product must be grounded to reduce the risk of electronic shock.We assume no liability or responsibility for all the fires or electrical shock caused by improper handling or installation.We are not liable for any problems caused by unauthorized modification or attempted repair. 2.Transportation securityHeavy stress, violent vibration or water splash are not allowed during transportation, storage andinstallation.3.InstallationDo not apply power to the camera before completing installation.Please install the proper power cut-off device during the installation connection.Always follow the instruction guide the manufacturer recommended.4.Qualified engineers neededAll the examination and repair work should be done by the qualified service engineers.We are not liable for any problems caused by unauthorized modifications or attempted repair. 5.EnvironmentThis series network camera should be installed in a cool, dry place away from direct sunlight,inflammable, explosive substances and etc.Please keep it away from the electromagnetic radiation object and environment.Please make sure the CCD (CMOS) component is out of the radiation of the laser beam device.Otherwise it may result in CCD (CMOS) optical component damage.Please keep the sound ventilation.Do not allow the water and other liquid falling into the camera.Thunder-proof device is recommended to be adopted to better prevent thunder.The grounding studs of the product are recommended to be grounded to further enhance the reliability of the camera.6. Daily MaintenancePlease shut down the device and then unplug the power cable before you begin daily maintenance work.Do not touch the CCD (CMOS) optic component. You can use the blower to clean the dust on the lens surface.Always use the dry soft cloth to clean the device. If there is too much dust, please use the water to dilute the mild detergent first and then use it to clean the device. Finally use the dry cloth to clean the device.Please put the dustproof cap to protect the CCD (CMOS) component when you do not use the camera.Dome enclosure is the optical component, do not touch the enclosure when you are installing the device or clean the enclosure when you are doing maintenance work. Please use professional optical clean method to clean the enclosure. Improper enclosure clean method (such as use cloth) may result in poor IR effect of camera with IR function.7. AccessoriesBe sure to use all the accessories recommended by manufacturer.Before installation, please open the package and check all the components are included.Contact your local retailer ASAP if something is broken in your package.Accessory Name AmountNetwork Camera Unit 1Quick Start Guide 1Installation Accessories Bag 1CD 1Table of ContentsImportant Safeguards and Warnings (iii)Table of Contents (v)General Introduction (1)Overview (1)Features (1)Specifications (2)Structure (5)Components (5)Framework and Dimension (6)Device Installation (7)Quick Configuration Tool (8)Overview (8)Operation (8)Web Operation (10)Network Connection (10)Login and Main Interface (10)FAQ (12)Appendix Toxic or Hazardous Materials or Elements (13)General Introduction OverviewThis series network camera integrates the traditional camera and network video technology. It adopts video data collection, transmission together. It can connect to the network directly without any auxiliary device.This series network camera uses standard H.264 video compression technology, which maximally guarantees the video quality.It supports the IR night vision function. In the night environments, the device can use the IR light to highlight the object which is suitable for the surveillance function in the low illumination environments.The waterproof design conforms to the IP 66 level. It has the sound waterproof function suitable for usein the outdoor environments.It can be used alone or used in a network area. When it is used lonely, you can connect it to the network and then use a network client-end. Due to its multiple functions and various uses, this series network camera is widely used in many environments such office, bank, road monitor and etc.FeaturesUser Management ●Different user rights for each group, one user belongs to one group.●The user right shall not exceed the group right.Storage Function ●Support central server backup function in accordance with your configuration andsetup in alarm or schedule setting●Support record via Web and the recorded file are storage in the client-end PC.●Support network storage function such as FTP.Network Monitor ●Network camera supports one-channel video data transmit to network terminaland then decode. Delaying time is within 270ms (network bandwidth support needed)●Max supports 20 connections.●Adopt the following video transmission protocol: HTTP, TCP, UDP, MULTICAST,RTP/RTCP, RTSP and etc.●Support web access.Network Management ●Realize network camera configuration and management via Ethernet.●Support device management via web or client-end.Power ●External power adapter DC 12V.●Some series support PoE.CAUTIONDo not connect these two power supplying sources to the device at the same time; it may result in device damage!Assistant Function ●Log function●Support system resource information and running status real-time display.●Day/Night mode auto switch.●Support picture parameter setup such as electronic shutter and gain setup.●Support motion detect.●Backlight compensation: screen auto split to realize backlight compensation toadjust the bright.●Support video watermark function to avoid vicious video modification.●Built-in IR light. Support IR night vision.●The enclosure conforms to the IP 66 protection. Has the waterproof function.SpecificationsNetwork Wire Network 1-ch 10/100 Base-T EthernetNetwork Protocol HTTP, TCP/IP, ARP,IGMP, ICMP, RTSP, RTP,UDP, RTCP, SMTP, FTP, DHCP, DNS, DDNS, PPPOE, UPNP, NTPRemote Operation Monitor, system setup, file download, log information, maintenance , upgrade and etcIR light IR light 30M.General Parameter Power DC12V power and PoE.Power Consumption3.8W MAX Working Temperature-30℃~+60℃ Working Humidify ≤95%Dimensions(mm)Φ108×84 Weight0.25kg InstallationCeiling and wall mountPrivacy MaskSupports max 4 privacy mask zones Video SetupSupport parameter setup such as bright, contrast. Video InformationChannel title, time title, motion detect, tampering. Lens3.6mm. Fixed focus. Lens InterfaceM12. Lens is the default accessories VideoMotion Detect 396 (18*22) detection zones; sensitivity level ranges from 0 to 100; area threshold ranges from 0 to 100. Activation event: video storage, image snapshot, log, email function and etc. RecordRecord Priority Manual >Video detect>Schedule NetworkWire Network 1-ch 10/100M Ethernet, RJ45 port Network Protocol HTTP, TCP/IP, ARP,IGMP, ICMP, RTSP, RTP,UDP, RTCP, SMTP, FTP, DHCP, DNS, DDNS, PPPOE, UPNP, NTP Remote Operation Monitor, system setup, file download, log information, maintenance , upgrade and etc IR light IR light 30M. General ParameterPower DC12V power and PoE. Power Consumption 4.4W MAX Working Temperature -30℃~+60℃ Working Humidify ≤95% Dimensions(mm) Φ108×84 Weight 0.25kg Installation Ceiling and wall mountStructureComponentsYou can refer to the following figures for product appearance information. See Figure 1.Figure 1Please refer to the following sheet for detailed information.Component Component NameComponent 1 Device lensComponent 2 Dome bodyComponent 3 Dome enclosureConnector Port Name Connector Note 4 LAN Network port Ethernet5 DC12V DC 12VpowerTo connect to DC12V powersupply.Framework and DimensionPlease refer to the following two figures for dimension information. The unit is mm. See Figure 2 to Figure 3.Figure 2 Dimension of Plastic Dome 1Figure 3 Dimension of Plastic Dome 2Device Installation NoteBefore the installation, please make sure the installation environments can at least support 3x weight of the camera.Please follow the steps listed below to install the device. Please refer to Figure 4 for reference.Figure 4 Device installation illustration 1Step 1Rotate decoration ring clockwise and take it out.Step 2Take out installation map in accessories bag, and according to monitoring area, paste it on ceiling or wall there device will be installed. Dig three hole at the position marked on installation map, and take out three expansion bolts in accessories bag to insert them into the holes.Step 3Adjust position of pedestal, and aim the three holes on device pedestal at the three expansion bolts on installation surface. Fasten the three self-tapping screws into the three expansion bolts to secure the pedestal. Loosen the M3X8 cross pan head screw on pedestal, and be careful do not loosen completely.Now you can adjust position according to monitoring area. After adjustment, fasten the M3X8 cross pan head screw with sheeting.Step 4Rotate decoration ring bottom up and face the three spigots toward the three slots. When you hear a “Ca” sound, it is rotated in place.Quick Configuration Tool OverviewQuick configuration tool can search current IP address, modify IP address. At the same time, you can use it to upgrade the device.Please note the tool only applies to the IP addresses in the same segment.OperationDouble click the “ConfigTools.exe” icon, you can see an interface is shown as in Figure 5.In the device list interface, you can view device IP address, port number, subnet mask, default gateway, MAC address and etc.Figure 5 Search interfaceSelect one IP address and then right click mouse, you can see an interface is shown as in Figure 6.Select the “Open Device Web” item; you can go to the corresponding web login interface.Figure 6 Search interface 2If you want to modify the device IP address without logging in the device web interface, you can go to the configuration tool main interface to set.In the configuration tool search interface please select a device IP address and then double click it to open the login interface. Or you can select an IP address and then click the Login button to go to the login interface. See Figure 7.In Figure 7, you can view device IP address, user name, password and port. Please modify the corresponding information to login.Please note the port information here shall be identical with the port value you set in TCP port in Web Network interface. Otherwise, you cannot login the device.If you are using device background upgrade port 3800 to login, other setups are all invalid.Figure 7 Login promptAfter you logged in, the configuration tool main interface is shown as below. See Figure 8.Figure 8 Main interfaceWeb OperationThis series network camera products support the Web access and management via PC. Web includes several modules: Monitor channel preview, system configuration, alarm and etc.Network ConnectionPlease follow the steps listed below for network connection.• Make sure the network camera has connected to the network properly. • DHCP is enabled by default.•Please set the IP address, subnet mask and gateway of the PC and the network camera respectively. Network camera default IP address is 192.168.1.168. Subnet mask is 255.255.255.0. Gateway is 0.0.0.0 •Use order ping ***.***.***.***(* network camera address) to check connection is OK or not.Login and Main InterfaceOpen IE and input network camera address in the address bar. See Figure 9.Figure 9 IP addressThe login interface is shown as below. See Figure 10. Please input your user name and password. Default factory name is admin and password is admin. NoteFor security reasons, please modify your password after you first login.Figure 10 Web loginAfter you successfully logged in, please install WEB plug-in unit. Please refer to the Web OperationManual included in the resource CD for detailed operation instruction.Figure 11 Web monitoring windowFAQ BugThe water leakage occurred. The unauthorized front or rear cap remove many result in water leakage.The glass front cap has sustained heavy push or strike.The waterproof plug of the rear cap becomes loosen.IR video is poor. Do not use the proper supplying power. The IR light can not turn oncompletely.The object is out of the IR distance range of current device.IR-CUT does not turn to the night mode. The photosensitive chip of thefront-end can not sense the IR light.I can not upgrade the device via network. When network upgrade operation failed, you can use port 3800 to continue upgrade.I can not login the client-end or the WEB. For Windows OS 98 or Windows ME user, if you can not install the client-end or can not view after the installation. We recommend the win2000sp4 OS or install the client-end of the low version.The Active X control is blocked.The display card version shall be dx8.1 or higher.Network connection error occurred.Invalid network setup.Invalid user name or password.I can not play the download file. There is no player.There is no DX8.1 or higher.For the MEDIA PLAYER, there shall be Div X503Bundle.exe plugin if you play the .AVI file.For Windows XP user, you need to install the pluginDivX503Bundle.exe and ffdsho-2004 1012.exe.To guarantee setup update After you modified the important setup, please reboot the device via the software to make sure the setup has been updated to the storage medium.Power adapter The general power adapter can work ranging from 0℃ to 40 ℃. Thedevice may result in unstable power supply when the temperatureexceeds the working temperature.Please replace an industry-level power adapter if you are using in theharsh environments.Appendix Toxic or Hazardous Materials or ElementsComponent NameToxic or Hazardous Materials or ElementsPb Hg Cd Cr VI PBB PBDECircuit BoardComponent○○○○○○Device Case ○○○○○○Wire and Cable ○○○○○○PackingComponents○○○○○○Accessories ○○○○○○O: Indicates that the concentration of the hazardous substance in all homogeneous materials in the parts is below the relevant threshold of the SJ/T11363-2006 standard.X: Indicates that the concentration of the hazardous substance of at least one of all homogeneous materials in the parts is above the relevant threshold of the SJ/T11363-2006 standard. During the environmental-friendly use period (EFUP) period, the toxic or hazardous substance or elements contained in products will not leak or mutate so that the use of these (substances or elements) will not result in any severe environmental pollution, any bodily injury or damage to any assets. The consumer is not authorized to process such kind of substances or elements, please return to the corresponding local authorities to process according to your local government statutes.Note•This user’s manual is for reference only. Slight difference may be found in user interface.•All the designs and software here are subject to change without prior written notice.•All trademarks and registered trademarks mentioned are the properties of their respective owners.•If there is any uncertainty or controversy, please refer to the final explanation of us.•Please visit our website for more information.。
GR LENS A12 28mm F2.5 操作说明书

GR LENS A12 28mm F2.5包装内物品使用本理光镜头之前,请确认包装内包含下列物品。
照相机单元序号位于照相机单元底部。
镜头盖安装在照相机单元上。
操作说明书 (本说明书) 保修证接口盖安装在照相机单元上。
软套简介要使用本镜头,需要将其安装至兼容的照相机机身。
有关如何操作摄影和回放功能、更改设定的详细信息,请参阅数码照相机使用说明书(机身篇),并阅读重要的使用注意事项。
本操作说明书将说明仅在当照相机单元与相应的照相机机身组合使用时可用的功能和操作步骤。
也请参阅GXR数码照相机使用说明书(机身篇)。
为了能充分利用本产品的功能,请在使用前仔细阅读本说明书。
并将其妥善保管以方便查阅。
株式会社理光安全警示请仔细阅读所有安全警示以确保安全使用照相机。
摄影测试在重要的场合拍摄照片之前,请预先进行摄影测试以确保照相机正常工作。
著作权以著作权为目的的书籍、杂志和其它资料,限定在个人或家庭内及其它类似目的的范围内使用。
除此之外,禁止擅自进行复制和改动。
责任豁免若因本产品故障导致无法记录和回放图像,株式会社理光不承担法律责任,敬请谅解。
保修证本产品所附带的保修证只在购买国内有效。
制造商不承担产品在其它国家的售后服务及相关费用。
电波干扰在其它电子设备附近操作本产品时,可能会同时对照相机及其它设备造成不良影响。
在收音机或电视机旁边使用照相机时将更可能产生干扰。
该问题可通过以下方式解决:将照相机尽可能地远离其它设备,改变收音机或电视机等的天线方向,或者将收音机或电视机的插头改插到其它插座上。
© 所有版权 2010 归株式会社理光所有。
未经理光公司的明确书面许可,严禁擅自转载本说明书的全部或部分内容。
理光公司保留可随时更改本说明书内容的权利,恕不另行通知。
本公司已竭尽全力来确保此说明书之内载信息的准确性。
若您仍然发现有错误或遗漏,请按照本说明书封底所列通讯地址联系我们,对此,我们深表感谢。
安全警示警告符号在本操作说明书和照相机上的各种符号是为了您安全正确地使用本产品以避免您和他人的人身安全以及财产受到损害。
方正锐思文字识别软件使用手册

在适应性方面,加强了对老样张的处理,能准确地将粘连在一起的字符区分开来,这对识别一些铅印的样张尤为重要。
方正锐思3.5分为专业版和标准版。专业版相对标准版增加了可识别的字体范围和字符集,适应要求更高的专业文字识别需求。
注意:在后编改时假如需要编辑图像的话,方正锐思3.5会清除识别结果。
4
通过后编改后的文字内容就可以输出了。选择【文件】菜单下的【输出识别结果】命令,弹出对话框,把当前正在编辑的文本输出为一个WORD文件或文本文件,或两种文件格式同时输出。
若选择【输出识别结果到同一文件】,则把当前工程里所有图像的识别结果都输出到一个文件里。
方正锐思3.5以源图像文件名来命名输出后的文本文件名。
简单版面:按照版面分析划分出的块的顺序,将每块内容依次输出成文本。版面比较简单。没有文本框,便于在文本编辑工具中编辑排版。
复杂版面:利用文本框,将各块内容作较复杂排版输出,尽可能实现与原件中排版一致。较复杂版面输出时推荐使用。
注意:只有执行过【识别】的文件可以输出。
识别完成后,方正锐思3.5自动进入后编改窗口,如图4-3所示。
图4-3后编改状态
后编改窗口的最上面显示出当前光标所在位置的字符以及前相关字符和后相关字符供选择。
后编改窗口支持输入和删除,可直接进行编辑修改。其中,输入的字符以紫色显示。
或者通过选择【编辑】菜单的【上一疑问处】和【下一疑问处】命令对有疑问的字(蓝色字符)进行修正。修正后的字符以紫色显示。
若输入文件名相同的文件,方正锐思3.5会弹出提示“下列文件已经存在:XXXX”.用户确认无误后选择【确定】即可。
注意:在WIN98系统下使用方正锐思3.5时,请把系统的颜色模式(“显示属性”里)设置为“增强色(16位)”或者“256色”。否则有些图像输入不进来。
思锐使用手册

思锐(TID)使用手册1行车前检查1.1启动前检查1.检查驾驶证、行车证、通行证等证件是否齐全。
2.检查随车工具是否齐备。
3.检查轮胎气压是否正常。
4.检查燃油量和机油量是否合适。
5.检查水箱水位是否符合要求。
6.检查变速箱是否在正确档位(手档:空挡,自动挡:P挡)7.检查灯光是否完好。
1.2启动后检查1.检查各仪表工作是否正常。
2.检查各种故障指示灯是否熄灭,车辆是否处于正常工作的状态。
3.驾驶员坐在驾驶室内后,调整最佳坐姿。
正确的驾驶姿势可以有效保护驾驶者的安全,若是座椅位置不合适,会影响驾驶员视线和操控的灵敏度,甚至导致交通事故。
因此开车前要调整好驾驶员座椅的高度。
正确的座椅高度应调整到驾驶者的视线既不会被转向盘挡住,又可以清楚地看见所有的重要仪表及街道标志。
4.在调整好座椅的高度后,还要调整座椅的前后高低位置,调节到一个驾驶时舒适的位置。
注意的是,不要让膝盖顶在转向柱上,要保持一定的距离,否则会使脚的动作受到影响,反应不及时。
5.一定要系上安全带。
2启动归纳总结并研究分析各位大师观点,自动档思锐汽车启动方法步骤:1.按“启动”键(开启多媒体);2.再按“启动”键(开启行车电脑),等待车辆自检完成;3.踩脚刹+换档柄从P档排至N档;4.踩脚刹+按“启动”键。
(发动机启动)解释:这样可以避免在P档打着火后,推至D档时需要经过R档,使变速箱经历一次短暂的反向冲击。
(供参考,亦可P档启动)3操控3.1起步1.冷车起步:N档怠速30秒(手刹拉起状态),踩刹车+档杆从N档挂入D档→松手刹(电子手刹可省略)→松脚刹→踩油门,起步;(注:“+”表示同时操作,例如“踩刹车+档杆从N档排入D档”表示踩刹车的同时把档杆从N档排入D档,下同)2.等红灯或短时间停车起步:档位在D档时,松脚刹→踩油门,起步;档位在N档时,踩脚刹+档杆从N档至D档(或S档)→松手刹(电子手刹可省略)→松脚刹→踩油门,走起;3.2行车3.2.1D档行车(经济模式)正常驾驶时使用此档位。
inspire user manual zh-cn说明书

用户手册版本 2.1目录开始 (5)包装盒内容 (5)设置 Inspire (6)为智能设备充电 (6)使用手机或平板电脑进行设置 (7)使用 Windows 10 电脑进行设置 (7)在 Fitbit 应用程序上查看您的数据 (8)佩戴 Inspire (9)请将 Inspire 佩戴在您的手腕上 (9)固定腕带 (9)用手习惯 (10)将 Inspire 置于配夹中 (10)佩戴配夹 (11)更换表带 (12)移除腕带 (12)安装腕带 (12)基础信息 (13)导航 Inspire (13)基本浏览指南 (13)快速设置 (15)保养Inspire (15)更改钟面 (16)通知 (17)设置通知 (17)查看收到的通知 (17)关闭通知 (18)计时功能 (19)设置闹钟 (19)关闭或延后闹钟 (20)使用计时器应用程序 (20)活动和睡眠情况 (21)追踪每日活动目标 (22)选择目标 (22)追踪每小时的活动 (22)自动追踪您的锻炼 (22)追踪您的睡眠 (23)设定睡眠目标 (23)了解您的睡眠习惯 (23)更新、重启和清除 (24)更新 Inspire (24)重启 Inspire (24)清除 Inspire (24)故障排除 (25)设备无响应 (25)一般信息和规格 (26)传感器 (26)材料 (26)无线技术 (26)触觉反馈 (26)电池 (26)内存 (26)显示屏 (26)腕带尺寸 (26)环境条件 (27)了解更多 (27)退货政策和保修 (27)法规及安全注意事项 (28)美国:联邦通讯协会 (FCC) 声明 (28)加拿大:加拿大工业部 (IC) 声明 (29)欧盟 (EU) (30)阿根廷 (31)澳大利亚和新西兰 (31)中国 (31)以色列 (33)日本 (33)墨西哥 (33)摩洛哥 (33)尼日利亚 (34)阿曼 (34)巴基斯坦 (34)菲律宾 (35)塞尔维亚 (35)韩国朝鲜 (35)台湾 (36)阿联酋 (37)赞比亚 (38)安全声明 (38)开始Fitbit Inspire 是一款非常友好的健康运动手环,可每天帮助您建立健康的生活习惯。
索思锐SDI HDMI有线 无线HD视频编码器 2020 版 快速上手指南说明书

Connect one end of the network cable to the encoder Ethernet port. The other end is connected to the network switch or the computer'sUsing the power adapter (DC 12v) connect to the main product, after the power is turned on, then the product starts working immediately.Connect WiFi antenna(for wireless encoder only) Connect the WiFi antenna with the device antenna interface.101112Connect WIFI(for wireless encoder only)07Quick reset and rebootFirmware upgradingRestore factory settingsHold the ‘Reset’ button more than 5 seconds, restoring factory setting will lead to the device reboot, and restarting course will last about 20s.NOTE:These parameters will be restored after restoring factory setting:● Login username and password will be as admin;IP address will be restored as 192.168.1.168, subnet mask will be ● 255.255.255.0;All encoding parameters of video and audio will be restored to factory ● default value;Media transmission parameters will be restored as factory default value.●Restore factory settingsTwo methods for restoring factory settings:If users change parameters that lead encoder couldn’t work(The typical situation is changed network address, so it couldn’t be visited encoder by network), users could restore factory setting to default value.①Choose”Basic Settings>Restore factory settings”on the web console.②Press “Reset” button.Firmware upgradingThis device supports online firmware upgrading for upgrading software. Select”Basic Settings”, pull downward and click”Update firmware ”.On the page, click”Browse” to select the upgrading file, and click”Upgrade” to upgrade the device.NOTE:After uploading firmware file successfully, the encoder will automatically restart, this process will take about 30s-60s(the time will be different according to upgrade content), and please be patient.After the upgrade is complete, via the web interface”system information>versioninformation” to check whether the latest version information in accordance with expected and confirm the upgrade succeeded.Quick reset and Reboot“Quick Reset” function is to reset encoding service, normally used for making changed parameters to effect immediately. The whole process lasts around 3s.“Reboot” function is used for encoder reboot. Device rebooting lasts around 20s.NOTE:Select”Quick Reset”,current encoding will be suspended for a while;Select”Reboot”, the encoder will ‘warm’ reboot.Under some circumstances, reboot maybe with the help of ‘cold’ reboot:power down then power up the device.①Click web management interface”Network&Service Settings-Network manager”②Click “Configuration” under wifi for Wifi setting interface③Users could configure according to the related parameters of Wifi hotspots. Put in password, after succeed, it could transmit through wireless network.Note:When using the encoder Wifi function, don't connect to the wired network or optionally delete the gateway address of the wired network. Because the wired network priority is higher than Wifi, the simultaneous connection may cause the WiFi network to push stream unsuccessfully.Coding and pushing08Encoder supports H.264 encoding, support a variety of push-flow methods, such as RTP, RTMP, RTMPS, UDP, HLS, etc.The RTSP services is always enable for the device , all tools which support the standard RTSP protocol and H.264 decoding (such as VLC media player) can be connected to the encoder and get video streams.Main: rtsp://encoder IP address:554/ch01SUB: rtsp://encoder IP address:554/sub01Note:”ch01”, ”sub01” is the RTSP session ID.You can change the session ID in the Web console.The default RTSP accessing URL is:The following is an example of RTMP to introduce the configuration of push flow. Other push flow methods can be login to the device page for detailed configuration.RTMP Live Streaming09Add RTMP pushing streaming serviceAdd streaming serviceOur device’s H.264 main/sub stream supports adding up to 8 same or different streaming media service, to meet your needs of adopting same/different stream media protocols for multi-goal pushing.On the management interface of “Encoding&Stream-Encoding and Stream Settings”, for main/sub stream to choose “add one stream service”, users can add the needed service type.Currently main video live streaming platforms require”RTMP” service. After adding RTMP pushing service, click set icon to configure RTMP parameters.Take YouTube for an example“Streaming point” is RTMP address given by platform ( Take YouTube as an example ). ( Other platforms are similar, if questions please contact platform technical support for help ).RTMP push-flow must first get a push-flow URL address from the platform Login to YouTube, got below address:Streaming point should be like Server URL+Stream name/key,for example: rtmp:///live2/9ja6-9u28-uz4j-8x6rAfter you get the RTMP URL address, you need to set it up in the encoder. If the platform requires user name and password verification, you also need to fill in the corresponding parameters in the encoder.In the case of rtmps push mode, fill in rtmps URL at Push point and set Use old RTMP version to yes, so that it can be supported.NOTE:。
InSPIre-510a 操作手册
3D InSPIre Solder Paste Inspection Systems三维在线焊膏检测设备Operation Manual操作手册(Sinic-Tek InSPIre-510a Series)Sinic-Tek Vision Technology Co., Ltd.思泰克光电科技有限公司Email: info@Web-Site:Page 1Copyright by Sinic-Tek Vision Technology Co., Ltd.在使用设备之前请详细阅读本说明书,并且充分理解说明书的内容后再操作。
未接受过有关本设备培训的人员禁止操作此设备。
目录一.安全注意事项........... .. (3)二.机器开关及指示灯 (6)三.机器开机操作..... .. (7)四.程序的制作 (8)4.1如何导入Gerber文件并转换 (8)4.2如何编辑检测Job程序 (8)4.3如何使用检测Job程序进行检测 (9)五.机器关机操作... . (10)六.软件主界面的介绍 (11)6.1 用户主界面 (11)6.2Gerber转换软件 (12)6.3 编程软件Peditor (14)6.4 过程控制软件SPC (21)七.本产品使用时的承诺事项 (26)Page 2Copyright by Sinic-Tek Vision Technology Co., Ltd.三.机器开机操作1.打开机器电源开关(按顺时针方向90度旋转),白色电源指示灯变亮。
2.打开电脑电源开关,在Windows桌面打开e-SPIre软件。
3.按下机器的运行开关,绿色运行指示灯变亮。
4.点击主界面上的Home ,机器将自动做初始化处理。
(如气压不正常,SMEMA信号错误,安全门未锁好等原因,机器将停止初始化) Page 7Copyright by Sinic-Tek Vision Technology Co., Ltd.四.程序的制作4.1 如何导入Gerber文件并转换成*.mdb文件4.1.1 在主界面上点击菜单下的PEdit 。
比亚迪思锐多媒体系统维修手册(可编辑)

比亚迪思锐多媒体系统维修手册多媒体系统组件位置系统概述诊断流程故障诊断表终端诊断全面诊断准备工具拆卸与安装组件位置多媒体系统概述警告:DVD播放主机是通过激光束镭射实现的,放射性泄露可能造成危险,请务必按照说明操作。
本多媒体系统是结合数字影像以及多机一体的系列产品,让您的爱车变成一台小型的移动式影音剧院,不管是播放光盘影音、观看TV,还是收听AM/FM广播、使用车载电话、智能GPS导航,都尽善尽美地满足您的要求。
主要组成部件:多媒体主机中控面板车载电话多功能方向盘外置功放扬声器(两高音扬声器、两前门中低音扬声器、两后扬声器)车载电视模块玻璃印刷天线及天线馈线天线放大器GPS天线1 DVD主机概述(a)DVD机通过激光镭射扫描刻在光盘上的数字信号,并传送信号给其他媒体组件进行播放。
提示:不要拆卸主机任何组件不要向主机插入除12厘米标准光盘之外的东西(b)可用光盘DVD Video、DVD Audio、CD Digital Audio、CD-TEXT、MP3、WMA格式的光盘(c)光盘清洗提示:不要用镜头清洗液清洗,可能对DVD主机造成影响。
(1)如果灰尘在光盘表面上,请用柔软的干布如眼镜布从光盘中心沿径向向外擦拭。
提示:用手按光盘或用硬布擦拭光盘可能造成光盘表面划伤。
2 MP3/WMA 文件播放(a)可播放的MP3文件(b)可播放的WMA文件(c)文件名只有扩展名为“.mp3”“.wap”格式的文件才能够被识别并播放。
以后缀名“.mp3”“.wap”保存文件提示:如果非MP3或WMA文件以后缀名“.mp3”“.wma”保存,则会以mp3,wma文件识别并播放,可能会产生噪音甚至导致扬声器损坏。
3 收音机描述(a)收音频段收音机波段:AM:522KHz~1620KHzFM:87.5MHz~108.0MHz(b)FM与AM的广播范围有很大不同,有时AM能够很清楚的收到,但FM(立体声)不能收到,FM(立体声)服务区很小,并且更易于受到静电或其它类型的干扰(如,噪音)。
AXIS Q8665-E PTZ网络摄像头说明书
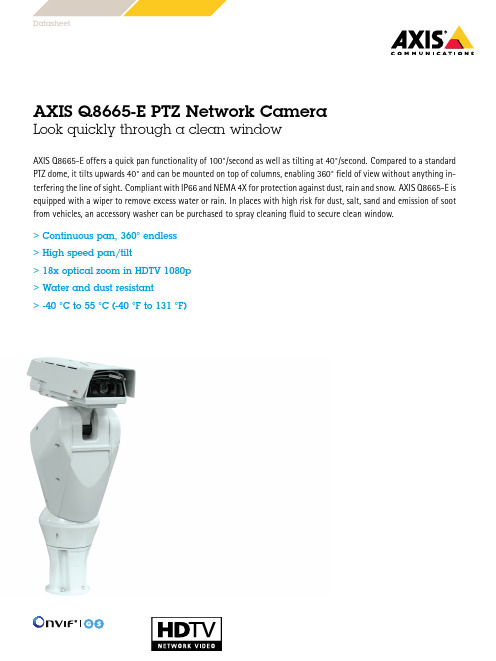
DatasheetAXIS Q8665-E PTZ Network CameraLook quickly through a clean windowAXIS Q8665-E offers a quick pan functionality of100°/second as well as tilting at40°/pared to a standard PTZ dome,it tilts upwards40°and can be mounted on top of columns,enabling360°field of view without anything in-terfering the line of pliant with IP66and NEMA4X for protection against dust,rain and snow.AXIS Q8665-E is equipped with a wiper to remove excess water or rain.In places with high risk for dust,salt,sand and emission of soot from vehicles,an accessory washer can be purchased to spray cleaning fluid to secure clean window.>Continuous pan,360°endless>High speed pan/tilt>18x optical zoom in HDTV1080p>Water and dust resistant>-40°C to55°C(-40°F to131°F)AXIS Q8665-E PTZ Network Camera Models AXIS Q8665-E24V ACAXIS Q8665-E120V ACAXIS Q8665-E230V ACCameraImage sensor1/2.9"progressive scan RGB CMOSLens Varifocal,4.7–84.6mm,F1.6-2.8Horizontal field of view:59°-4°Vertical field of view:35°-2°Diagonal field of view:68°-4°Autofocus,automatic day/nightDay and night Automatically removable infrared-cut filter in night modeMinimum illumination Color:0.5lux at30IRE F1.6 B/W:0.04lux at30IRE F1.6Shutter time1/28000s to2sPan/Tilt/Zoom Pan:360°endless,0.02°/s to100°/sTilt:-90°to+40°,0.02°/s to40°/sZoom:18x optical zoom,12x digital zoomPreset accuracy:0.02°Preset positions,guard tour,driver selection,control queue VideoVideo compression H.264(MPEG-4Part10/AVC),H.264Main and Baseline Profiles Motion JPEGResolution1920x1080HDTV1080p to160×90Frame rate Up to25/30fps(50/60Hz)in all resolutionsVideo streaming Multiple,individually configurable streams in H.264andMotion JPEGControllable frame rate and bandwidthVBR/MBR H.264Image settings Manual shutter time,compression,color,brightness,sharpness,white balance,exposure control,exposure zones,WDR–dynamiccontrast,backlight compensation,fine tuning of behavior at lowlight,rotation,text and image overlay,day/night shift level NetworkSecurity Password protection,IP address filtering,HTTPS a encryption,IEEE802.1X a network access control,digest authentication,useraccess log,centralized certificate managementSupported protocols IPv4/v6,HTTP,HTTPS a,SSL/TLS a,QoS Layer3DiffServ,FTP,SFTP, CIFS/SMB,SMTP,Bonjour,UPnP TM,SNMP v1/v2c/v3(MIB-II), DNS,DynDNS,NTP,RTSP,RTP,TCP,UDP,IGMP,RTCP,ICMP,DHCP, ARP,SOCKS,SSHSystem integrationApplication Programming Interface Open API for software integration,including VAPIX®and AXIS Camera Application Platform,specifications at AXIS Video Hosting System(AVHS)with One-Click Connection ONVIF®Profile S and ONVIF®Profile G,specification at Analytics AXIS Video Motion Detection,active tampering alarm,gatekeeper Support for AXIS Camera Application Platform enablinginstallation of third-party applications,see /acap Event triggers Analytics,edge storage eventsEvent actions Day/night mode,overlay text,video recording to edge storage,pre-and post-alarm video bufferingFile upload via FTP,SFTP,HTTP,HTTPS,network share and emailNotification via email,HTTP,HTTPS and TCPData streaming Event dataBuilt-ininstallation aidsPixel counterGeneralCasing IP66-and NEMA4X-rated aluminum casing and ABSColor:RAL9002Wiper includedMemory256MB RAM,128MB FlashPower24V AC120V AC230V ACTypical:40WMax:55WConnectors RJ4510BASE-T/100BASE-TX network connectorPower connector CN1Signal connector REL1in CN4Storage Support for microSD/microSDHC/microSDXC cardSupport for SD card encryptionSupport for recording to network-attached storage(NAS)For SD card and NAS recommendations see Operatingconditions-40°C to55°C(-40°F to131°F)Humidity10–100%RH(condensing)Arctic Temperature Control enables camera start-up attemperatures as low as-40ºC/ºFStorageconditions-40°C to65°C(-40°F to149°F)Approvals EMCEN55022Class A,EN61000-3-2,EN61000-3-3,EN55024,EN61000-6-1,EN61000-6-2,FCC Part15Subpart B Class A,VCCI Class A ITE,ICES-003Class A,C-tick AS/NZS CISPR22Class A,EN50121-4120V AC and230V AC:KCC KN22Class A,KN24EnvironmentIEC/EN60529IP66,NEMA2504xSafetyIEC/EN60950-1,IEC/EN60950-2224V AC and120V AC:UL60950-1,UL60950-22 Dimensions258x584x463mm(103/16x23x181/4in)Weight17.5kg(38.6lb)IncludedaccessoriesInstallation GuideRequiredhardwareAXIS Wall Bracket K or AXIS Column Bracket KOptionalaccessoriesAXIS Washer Kit AAXIS T95A64Corner BracketAXIS T95A67Pole BracketAXIS T98A15-VE Media Converter Cabinet AFor more accessories,see VideomanagementsoftwareAXIS Companion,AXIS Camera Station,Video managementsoftware from Axis’Application Development Partners availableon /vmsLanguages English,German,French,Spanish,Italian,Russian,SimplifiedChinese,Japanese,Korean,Portuguese,Traditional Chinese Warranty Axis3-year warranty and AXIS Extended Warranty option,see/warrantya.This product includes software developed by the OpenSSL Project for use in the OpenSSL Toolkit.(),and cryptographic software written by Eric Young(*****************).Environmental responsibility:/environmental-responsibility©2015-2017Axis Communications AB.AXIS COMMUNICATIONS,AXIS,and VAPIX are registered trademarks or trademarkapplications of Axis AB in various jurisdictions.All other company names and products are trademarks or registeredtrademarks of their respective companies.We reserve the right to introduce modifications without notice.T10052657/EN/M8.2/1707。
AXIS Q6125-LE PTZ 网络摄像机用户手册说明书

AXIS Q6125-LE PTZ Network Camera 用户手册目录产品概述 (3)在网络上查找设备 (4)访问设备 (4)安全密码 (4)其他设置 (5)网页概览 (5)图像质量 (7)隐私遮罩 (8)叠加 (9)水平转动、垂直转动和变焦(PTZ) (9)流式传输和存储 (10)事件 (11)应用 (13)故障排查 (14)重置为出厂默认设置 (14)检查当前固件 (14)升级固件 (14)技术问题、线索和解决方案 (15)性能考虑 (16)规格 (17)LED指示灯 (17)SD卡槽 (17)按钮 (17)连接器 (17)产品概述产品概述在网络上查找设备在网络上查找设备若要在网络中查找安讯士设备并为它们分配Windows®中的IP地址,请使用AXIS IP Utility或AXIS设备管理器。
这两种应用程序都是免费的,可以从/support上下载。
有关如何查找和分配IP地址的更多信息,请参阅设备页上的文档如何分配一个IP地址和访问您的设备。
访问设备1.打开一个浏览器并输入IP地址或安讯士设备的主机名。
如果您有一台Mac电脑(OS X),则转到Safari,单击Bonjour并在下拉菜单中选择该设备。
要将Bonjour添加为一个浏览器书签,则转到Safari>偏好。
如果您不知道IP地址,请使用AXIS IP Utility或AXIS设备管理器在网络上查找设备。
2.输入用户名和密码。
如果您是首次访问设备,则必须为root用户设置密码。
请参见为根账户设置一个新密码在第4页。
3.实时浏览页面将在您的浏览器中打开。
安全密码重要安讯士设备通过网络以明文形式发送初始设置的密码。
若要在首次登录后保护您的设备,请设置安全加密的HTTPS连接,然后更改密码。
设备密码是对数据和服务的主要保护。
安讯士设备不会采用密码政策,因为它们可能会在不同类型的装置中使用。
为保护你的数据,我们强烈建议你:•使用至少包含8个字符的密码,而且密码建议由密码生成器生成。
DJI Inspire 1 安全使用指南说明书

Reading Inspire 1 ManualsThe following tutorials and manuals have been produced to help you make full use of your DJI Inspire 1:1. In The Box2. Disclaimer and Warning3. Intelligent Flight Battery Safety Guidelines4. INSPIRE 1 Safety Guidelines5. INSPIRE 1 Quick Start Guide6. INSPIRE 1 User ManualCheck all of the included parts listed in the In The Box document. Read the Disclaimer and Warning, Intelligent Flight Battery Safety Guidelines, and INSPIRE 1 Safety Guidelines before flight. Then prepare for your first flight by using the INSPIRE 1 Quick Start Guide and watching all of the tutorial videos. If you have questions, refer to the INSPIRE 1 User Manual for more comprehensive information. Experienced users, particularly those who have previously used DJI products, may choose to skip to the Inspire 1 Quick Start Guide to begin preparing for flight.Individual PartsRemote Controller1. Linking is required if you wish to replace your remote controller or receiver, or add a new remote controller. Refer to the user manual for more information about how to link the aircraft.2. If the remote controller is powered on and has not been used for 5 minutes, it will sound an alert. After 10 minutes it will automatically power off. Move the sticks or perform some other action to cancel the alert.3. A Slave remote controller cannot be linked with the aircraft and cannot control the aircraft’s flight. You may change it to a Master remote controller via the DJI Pilot app, and then link it to the aircraft to control flight.4. Ensure the Mobile Device Holder is firmly in place and does not slip.5. For the GPS in the remote controller to function properly, and the Dynamic Home Point to be accurate, ensure the DJI logo is facing the sky and keep the remote controller away from any metal objects.6. Repair or replace the remote controller if damaged. A damaged remote controller antenna will greatly decrease performance.7. When on the go, you may charge the remote controller from the aircraft’s Intelligent Flight Battery. Camera1. Photos or videos cannot be transmitted or copied from the camera if the Intelligent Flight Battery is powered off.2. Be sure to power off the Intelligent Flight Battery correctly, otherwise your camera parameters will not be saved and any recorded videos may be damaged.3. Test the camera by shooting a few test images to check that it is operating correctly before shooting important pictures.4. Respect the privacy of others when using the camera. Make sure you comply with local privacy laws, regulations and moral standards.5. Check camera settings before use to make sure you can adjust them to fit your needs.Gimbal1. The gimbal and gimbal connector are very delicate. Handle with care and do not touch the gimbal connector, as any damage will cause it to function abnormally.2. A gimbal motor error may occur if: (1) The aircraft is placed on uneven ground or other objects obstruct the gimbal’s full range of motion, or (2) The gimbal has undergone an excessive impact, e.g. a collision. Please only takeoff from flat, open areas and protect the gimbal after powering up.3. Hold the gimbal firmly when detaching or reattaching it, so it does not drop.4. Do not add any payloads to the gimbal, as this may cause the gimbal to function abnormally, or even 2© 2014 DJI. All Rights Reserved.EN location and try again.Parameter SettingsThe Inspire 1 features a built-in flight control system to make operation as safe as possible. However, it is good practice to remove all propellers before switching it on for calibration or changing other parameter settings.BatteryRefer to the Intelligent Flight Battery Safety Guidelines and battery sticker for usage and maintenance information.Storage and Transportation1. Store the Intelligent Flight Battery and remote controller in a cool, dry place away from direct sunlight,to ensure the built-in LiPo battery does not overheat. Recommended storage temperature: between22°C and 28°C for storage periods of more than three months. Never store in environments outside the temperature range of -20°C to 45°C.2. Do not allow the camera to come into contact with, or become immersed in, water or other liquids. If itgets wet, wipe dry with a soft, absorbent cloth. Turning on an aircraft that has fallen into water may cause permanent component damage. Do not use substance containing alcohol, benzene, thinners or other flammable substances to clean or maintain the camera. Do not store the camera in humid or dusty areas.3. Always keep all parts out of the reach of children, as the cables, straps or small parts may be dangerousif swallowed. If swallowed, go to the hospital immediately.4. Detach the gimbal from the Inspire 1 when storing for a long period of time or transporting over long distances. Also replace the Gimbal Cover when storing.Maintenance and Upkeep1. Check every part of the aircraft if it is violently impacted. If you have any problems or questions, please contact a DJI authorized dealer.2. Old, chipped, or broken propellers or motors should never be used.3. Regularly check the Battery Level Indicators to see the current battery level and overall battery life. Whenthe battery life reaches 0%, it can no longer be used.4. After every 50 hours of flight time, DJI recommends you perform a thorough inspection of your Inspire 1and all of its parts and components to ensure the safe operation of your aircraft.© 2014 DJI. All Rights Reserved. 3Flight Environment Requirements1. Do not use the aircraft in severe weather conditions. These include wind speed exceeding 10m/s, snow, rain, smog, heavy wind, hail, lightning, tornado or hurricane.2. Do not use the aircraft in dust or sandstorms.3. Fly in open areas, as tall buildings or steel structures may affect the accuracy of the onboard compass and block the GPS signal.4. Keep the aircraft away from obstacles, people, animals, high voltage power lines, trees, and bodies of water when in flight.5. Avoid interference between the remote controller and other wireless equipment. Make sure to turn off the Wi-Fi on your mobile device.6. Do not fly near areas with magnetic or radio interference. These include but are not limited to: high voltage lines, large scale power transmission stations, mobile base stations and broadcasting towers. Failing to do so may compromise the transmission quality of this product, cause remote controller and video transmission errors may affect flight orientation and location accuracy. The aircraft may behave abnormally or fall out of control in areas with too much interference.7. P mode is unavailable in polar zones. Users can use ATTI mode instead.8. Do not fly the aircraft within no-fly zones specified by local laws and regulations.Flight WarningsFailsafe and Return to Home1. Return to Home will not work if the GPS signal is insufficient or GPS is not active.2. Press the RTH Button on the remote controller to bring the aircraft back to the Home Point instead of turning off the remote controller.3. Tall buildings may adversely affect the Failsafe function. Please adjust the aircraft location, altitude and speed while returning home to avoid obstacles.4. Make sure to always fly the aircraft within the transmission range of the remote controller.5. When updating the Home Point, do not block the GPS signal of the remote controller and ensure the new Home Point is correct on the live map.6. Do not update the Home Point near tall buildings, as the GPS may be blocked and lead to an incorrect location being stored.7. Only use the Failsafe and Return to Home functions in case of emergency, as they may be affected by the weather, the environment, or any nearby magnetic fields.Low Battery1. When the Critical Battery Level Warning activates and the aircraft is descending automatically, you may push the throttle upward to hover the aircraft and navigate it to a more appropriate location for landing.2. When battery warnings are triggered, please bring the aircraft back to the Home Point or land to avoid losing power during flight.Vision Positioning System1. The Vision Positioning System cannot work properly over surfaces that do not have pattern variations. The effective altitude for Vision Positioning System to function correctly is less than2.5 meters.2. Vision Positioning System may not function properly when the aircraft is flying over water.3. Vision Positioning System may not be able to recognize patterns on the ground in low light conditions (less than 100 lux).4. Keep your pets away from the aircraft when Vision Positioning System is activated, as the sonar sensors emit high frequency sound that is only audible to some pets.5. Note that Visual Positioning System may not function properly when the aircraft is flying too fast or too low. 4© 2014 DJI. All Rights Reserved.EN Preflight Checklist1. Check that all parts are in good condition. Do not fly with aging or damaged parts.2. Remote controller, Intelligent Flight Battery and mobile device are all fully charged.3. Propellers are mounted correctly and securely.4. Lens is clear.5. Micro-SD card has been inserted, if necessary.6. Gimbal is functioning as normal.7. Gimbal is correctly attached to the aircraft.8. Motors can start and are functioning as normal.9. The DJI Pilot app can connect to the camera and all firmware has been updated to the latest version.© 2014 DJI. All Rights Reserved. 5INSPIRE 1手册使用指南DJI 为Inspire 1 用户提供了教学视频和以下文档资料:1.《物品清单》2.《免责声明》3.《智能飞行电池安全使用指引》4.《INSPIRE 1 安全使用指南》5.《INSPIRE 1 快速入门指南》6.《INSPIRE 1 用户手册》建议用户使用《物品清单》进行核对。
2020 Hyundai Veloster 用户指南说明书

2020 HyundaiVELOSTERGetting Started GuideAudio, Connectivity, and Navigationhe device (Elantra) found by your phone. 32NoteBluetooth settings can be found in the SETTINGS app on most phones. Refer to Press the BLUETOOTH ®* icon on the screen. Then press BLUETOOTH CONNECTION .Press ADD NEW . Then turn on your phone’s BLUETOOTH and select the device (Veloster) found by your phone.5The vehicle will confirm that your contacts download The vehicle will confirm that your phone has been successfully connected.Image shown may differ from actual product display.Image shown may differ from actual product display.• Contact list may start with First or Last Name, depending on phone models21Press the PUSH TO TALK * button located on the steering wheel. You will hear a beep.Make sure your phone has been paired and your contacts have instructions on the previous pages.4To end the call, press the END CALL * button located on the steering wheel.Here are a few common voice commands to useafter your phone has been paired:Note Compatibility and performance may vary based on your phone, the phone’s software, and your wireless carrier.32Enjoy using the applications displayed on your vehicle’s multimedia screen.Android Auto users will be prompted to view a tutorial. Select your optionAndroid AutoAndroid AutoAndroid AutoApple CarPlayApple CarPlay calling, navigation, text messaging, and playing music all from your driver’s seat.2For Apple CarPlay, you will see these screens:For Android Auto, you will see these screens:Press the PUSH TO TALK ** button located on the steering wheel and say a command after the beep.Note *USB data port will typically be located in or near the front in-dash console.4To end the call, press the END CALL* button located on the steering wheel.123The results will be listed on the screen. Say the line item number to make your selection.Example: “THREE ”After the beep, say a command. Example: “FIND COFFEE SHOP .”Press the PUSH TO TALK * button located on the steering wheel and say “CANCEL ROUTE ” after the prompt to stop navigation guidance.54123Touch the SEARCH box.5Press the PUSH TO TALK * button located on the steering wheel and say “CANCEL ROUTE ” after the prompt to stop navigation guidance.4Note The system will search for addresses or destinations located within the state theHere are a few common voice commands to use after your phone has been paired:“HELP ” provides guidance on commands that canNote Blue Link® subscription is required. To enroll, please visit your dealer or visit . All product names, trademarks, logos, and brands are property of 32 A list of nearby destinations matching your searchPress the DESTINATION SEARCH BY VOICE * button.When prompted, you can say the name of a Point of Interest (POI), an address, or a POI in a city.Example: “FIND COFFEE SHOP IN FOUNTAIN VALLEY, CALIFORNIA .”and route guidance will begin.Initial Setup2Select from the listed options ** to set as your custom button.For example, select PHONE .Select from the listed options ** to set as your custom button.For example, select HOME .11Press the CUSTOM BUTTON .*。
AXIS M1055-L 高清1080P深度学习扫描仪说明书
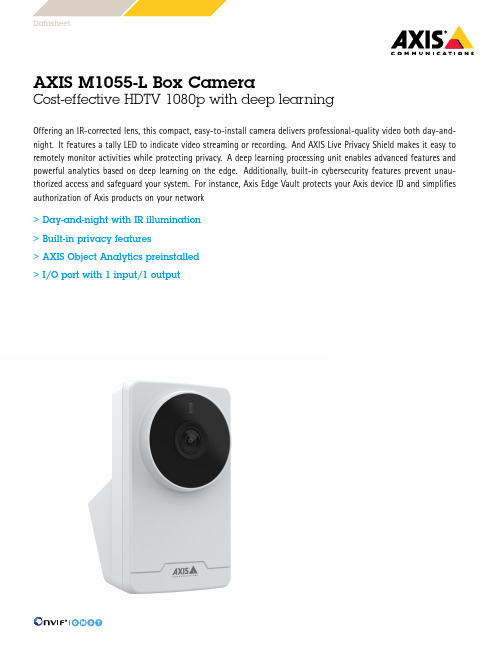
DatasheetAXIS M1055-L Box CameraCost-effective HDTV1080p with deep learningOffering an IR-corrected lens,this compact,easy-to-install camera delivers professional-quality video both day-and-night.It features a tally LED to indicate video streaming or recording.And AXIS Live Privacy Shield makes it easy to remotely monitor activities while protecting privacy.A deep learning processing unit enables advanced features and powerful analytics based on deep learning on the edge.Additionally,built-in cybersecurity features prevent unau-thorized access and safeguard your system.For instance,Axis Edge Vault protects your Axis device ID and simplifies authorization of Axis products on your network>Day-and-night with IR illumination>Built-in privacy features>AXIS Object Analytics preinstalled>I/O port with1input/1outputAXIS M1055-L Box Camera CameraImage sensor1/2.9”progressive scan RGB CMOSLens Fixed focal length,3.16mm,F2.0Horizontal field of view:103°Vertical field of view:55°Fixed iris,IR correctedDay and night Automatically removable infrared-cut filterMinimum illumination Color:0.18lux at50IRE,F2.0 B/W:0.04lux at50IRE,F2.0 0lux with IR illumination onShutter speed1/19000s to1/5sSystem on chip(SoC)Model CV25Memory1024MB RAM,512MB Flash ComputecapabilitiesDeep learning processing unit(DLPU) VideoVideo compression H.264(MPEG-4Part10/AVC)Main and High Profiles H.265(MPEG-H Part2/HEVC)Main Profile Motion JPEGResolution1280x960to320x240(4:3)1920x1080to640x360(16:9)Frame rate Up to25/30fps(50/60Hz)with H.264and H.265a in allresolutionsVideo streaming Multiple,individually configurable streams in H.264,H.265,and Motion JPEGAxis Zipstream technology in H.264and H.265Controllable frame rate and bandwidthVBR/ABR/MBR H.264/H.265Image settings Saturation,contrast,brightness,sharpness,WDR:up to120dBdepending on the scene,white balance,day/night threshold,exposure mode,exposure zones,compression,rotation:0°,90°,180°,270°including corridor format,mirroring,dynamic overlay,polygon privacy masksNetworkNetwork protocols IPv4,IPv6USGv6,ICMPv4/ICMPv6,HTTP,HTTPS,HTTP/2,TLS,QoS Layer3DiffServ,FTP,SFTP,CIFS/SMB,SMTP,mDNS(Bonjour), UPnP®,SNMP v1/v2c/v3(MIB-II),DNS/DNSv6,NTP,NTS,RTSP, RTCP,RTP,SRTP/RTSPS,TCP,UDP,IGMPv1/v2/v3,DHCPv4/v6,SSH, LLDP,MQTT v3.1.1,Secure syslog(RFC3164/5424,UDP/TCP/TLS), Link-Local address(ZeroConf)System integrationApplication Programming Interface Open API for software integration,including VAPIX®metadata and AXIS Camera Application Platform;specifications at One-click cloud connectionONVIF®Profile G,ONVIF®Profile M,ONVIF®Profile S,and ONVIF®Profile T,specification at Onscreen controls Privacy masks Media clipIR illuminationEvent conditions Device status:above operating temperature,above or belowoperating temperature,below operating temperature,IP addressremoved,live stream active,network lost,new IP address,systemready,within operating temperatureEdge storage:recording ongoing,storage disruption,storagehealth issues detectedI/O:digital input is active,digital output is active,manual trigger,virtual input is activeMQTT:subscribeScheduled and recurring:scheduleVideo:average bitrate degradation,day-night mode,tampering Event actions Day-night mode:use day-night mode while the rule is activeI/O:toggle I/O once,toggle I/O while the rule is activeIllumination:use lights,use lights while the rule is activeImages:FTP,HTTP,HTTPS,SFTP,email and network shareMQTT:publishNotification:HTTP,HTTPS,TCP and emailOverlay text:use overlay text,use overlay text while the rule isactiveRecordings:record video,record video while the rule is activeSNMP trap messages:send,send while the rule is activeStatus LED:flash status LED,flash status LED while the rule isactiveVideo clips:FTP,HTTP,HTTPS,SFTP,email and network shareWDR mode:set WDR mode,set WDR mode while the rule isactiveAnalyticsAXIS ObjectAnalyticsObject classes:humans,vehicles(types:cars,buses,trucks,bikes)Trigger conditions:line crossing,object in areaUp to10scenariosMetadata visualized with color-coded bounding boxesPolygon include/exclude areasPerspective configurationONVIF Motion Alarm eventMetadata Object data:Classes:humans,faces,vehicles(types:cars,buses, trucks,bikes),license platesConfidence,positionEvent data:Producer reference,scenarios,trigger conditions Applications IncludedAXIS Object Analytics,AXIS Video Motion DetectionSupportedAXIS Live Privacy ShieldSupport for AXIS Camera Application Platform enablinginstallation of third-party applications,see /acap CybersecurityEdge security Software:Signed firmware,brute force delay protection,digest authentication,password protection,AES-XTS-Plain64256bitSD card encryptionHardware:Secure boot,Axis Edge Vault with Axis device ID,signed video,secure keystore(CC EAL4+certified hardwareprotection of cryptographic operations and keys)Network security IEEE802.1X(EAP-TLS),IEEE802.1AR,HTTPS/HSTS,TLS v1.2/v1.3, Network Time Security(NTS),X.509Certificate PKI,IP addressfilteringDocumentation AXIS OS Hardening GuideAxis Vulnerability Management PolicyAxis Security Development ModelAXIS OS Software Bill of Material(SBOM)To download documents,go to /support/cybersecu-rity/resourcesTo read more about Axis cybersecurity support,go to/cybersecurityGeneralCasing Aluminum and plastic casingColor:white NCS S1002-BSustainability PVC and BFR/CFR free,70%recycled plasticsPower Power over Ethernet(PoE)IEEE802.3af/802.3at Type1Class2Typical2.2W,max4.3WConnectors Network:Shielded RJ4510BASE-T/100BASE-TX PoEI/O:4-pin2.5mm terminal block for1alarm input and1output(12V DC output,max load25mA)IR illumination OptimizedIR with power-efficient,long-life850nm IR LEDRange of reach18m(59ft)or more depending on the scene Storage Support for microSD/microSDHC/microSDXC cardSupport for SD card encryption(AES-XTS-Plain64256bit)For SD card and NAS recommendations see Operatingconditions0°C to35°C(32°F to95°F)Humidity10–85%RH(non-condensing)Storageconditions-40°C to65°C(-40°F to149°F)Humidity5–95%RH(non-condensing)Approvals EMCEN55032Class A,EN55035,EN61000-6-1,EN61000-6-2,FCC Part15Subpart B Class A,ICES-3(A)/NMB-3(A),KS C9832Class A,KS C9835,RCM AS/NZS CISPR32Class A,VCCI Class ASafetyCAN/CSA C22.2No.62368-1ed.3,IEC/EN/UL62368-1ed.3,IEC62471(exempt),IS13252NetworkNIST SP500-267Dimensions105x60x93mm(4.1x2.4x3.7in) Weight137g(0.30lb)Included accessories Installation guide,Windows®decoder1-user license,wall mount, terminal block connectorOptional accessories AXIS T8415Wireless Installation ToolAXIS Surveillance CardsFor more accessories,see VideomanagementsoftwareAXIS Companion,AXIS Camera Station,video managementsoftware from Axis Application Development Partners availableat /vmsLanguages English,German,French,Spanish,Italian,Russian,SimplifiedChinese,Japanese,Korean,Portuguese,Polish,Traditional ChineseWarranty5-year warranty,see /warrantya.Reduced frame rate in Motion JPEG©2022-2023Axis Communications AB.AXIS COMMUNICATIONS,AXIS,ARTPEC and VAPIX are registered trademarks ofAxis AB in various jurisdictions.All other trademarks are the property of their respective owners.We reserve the right tointroduce modifications without notice.T10180156/EN/M3.3/2304。
思锐 R272 高清隐藏式行车记录仪 使用说明书

尊敬的用户:您好!首先非常感谢您使用我们公司的系列产品,能够为您服务是我们的荣幸!为确保您正确使用本公司产品,请仔细阅读本手册。
手册采用图文并茂的方式,配合文字的插图详细直观地阐述产品的操作,由于产品生产日期、批次不同,说明可能会与实际使用的产品有差异,请以实物为准。
最后再次感谢您的惠顾与支持,同时也希望您在使用过程中反馈一些宝贵意见。
因为这些意见,能够使我们不断地去完善产品。
因为我们都呼吁安全第一,生命无价!也希望每一位驾驶员都遵守好交通规则,快快乐乐地出门,平平安安地回家! 祝各位:万事如意,事事顺心!(以下所有图片仅供参考)高清隐藏式记录仪使用说明书R272安装指南产品规格及参数服务产品中有毒有害物质的名称及含量行车录像仪说明书所提供信息仅供参考,用户在使用过程中请以实物为准。
本产品为行车辅助工具,对用户行车过程中的违章罚款或交通意外不担保,我公司不承担任何责任。
行车录像仪视频循环录制功能,请用户及时保存重要视频;本产品不排除在使用过程中出现意外中断记录情况的可能,若因此而没有记录视频或图像资料,我公司不承担任何责任。
购买此产品,视同已遵守此声明;有条件完整保修服务正常使用状态下产生的损坏,购买后享有一年质保服务,但不包外壳更新服务,如需外壳更新服务需收费;非自然损害之人为自行破坏机身或机身上有易碎禁止拆卸贴纸损坏者,公司有权拒绝维修服务,自然损坏及故障应送回原厂维修,否则原厂享有不维修服务权利,但若更换零件者,仍应灼收零件材料费用;保修期限内维修在保修期限内维修,有自然损坏需维修时看直接送交经销商或邮寄公司维修;而在本公司与归还时,会依你的保固条件寄至府上,但您未附上保修书或保修期已过,均酌收维修费用,所以务必经销商为您填妥保修书并盖上经销商章及购买日期,才不会造成日后保固上的困扰;(运送费均由客户支付)保修期限外维修缺少保修凭证者,视同已经超过保修期限。
如果您仍然此项服务而维修费用在人民币100元以上的,我们的工程师会通知您,你可以选择修理或不修理退还您的设备;邮件送修需知,应注明故障原因,并附保修书的复印件,并写清楚您联络方式;邮寄送修费用邮寄送修费用支付方式,由所有人送或送修人支付;邮寄送修前检查项目,使用结实纸盒包装,交由可靠的运货公司,加值保险直接寄达公司;必须填明您的姓名、住址、固定电话或移动电话,详细说明故障事由或发生的问题。
LS6 EPSON机械手手册

标签
控制器
软件
RC90
EPSON RC+ 7.0
LS3-401* EPSON RC+ 7.0
7.0.1版或更早版本 7.0.2版或更新版本
RC90控制器固件 7.0.2.0版或更新版本
!!! OK
OK: 可连接 可使用EPSON RC+ 7.0与控制器具备的所有功能。
!!!: 可连接 虽然可连接,但推荐使用EPSON RC+ 7.0版本7.0.2或更新版本。
Epson Deutschland GmbH Factory Automation Division Otto-Hahn-Str.4 D-40670 Meerbusch Germany TEL : +49-(0)-2159-538-1391 FAX : +49-(0)-2159-538-3170 E-MAIL : s@epson.de
1.2.1 滚珠丝杠花键的强度 ....................................................................... 5 1.3 操作注意事项.............................................................................................. 6 1.4 紧急停止 ..................................................................................................... 8
1.1 关于正文中的符号 ...................................................................................... 3 1.2 设计与安装注意事项................................................................................... 4
ZEISS VISUREF 150 眼科自动检测仪说明书
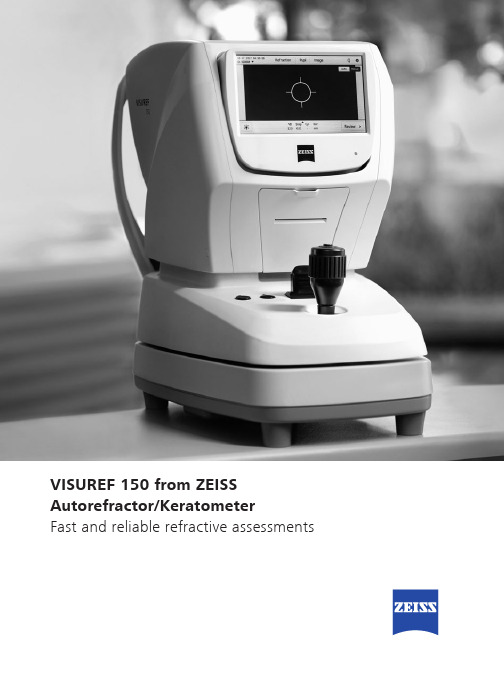
VISUREF 150 from ZEISS Autorefractor/KeratometerFast and reliable refractive assessmentsA reliable toolin the practiceWhat you face every dayComplex practice processes flow smoothly when routine tasks are easy to perform. Refraction assessment is part of the daily pretest workflow.A high patient throughput in this area is key forthe success of every eye care facility, as is the dependability of pretest results as well as the comfort of the patients.How we can helpVISUREF® 150 from ZEISS is a basic diagnostic instrument that combines reliable performance with great user convenience. It delivers fast, trustworthy refraction and keratometry results for an in-depth assessment of patient condition. Easy to set up and use, the ZEISS VISUREF 150 can be operated after only a short training period.Apart from refraction and keratometry the intuitive workflow-oriented user interface also conducts cornea and pupil diameter measurements, image capture and contact lens base curve measurements. Adaptable illumination parameters allow measurements of patients with implanted intraocular lenses (IOLs). The automatic fogging incorporates an infinity scene that reduces the effects of accommodation.The ZEISS VISUREF 150 has all the qualities needed to quickly become a valuable assetin the practice environment. With its modern communication technology, the device seamlessly fits into many practice setups, supporting efficient diagnostic workflows.Modern operating conceptThe intuitive user interface guides the user throughthe main workflow steps of the refractive assessment. Choose from different measurement settings(e.g. manual, auto trigger) and various illumination parameters (e.g. IOL mode) for optimal results.Flexible instrument controlConducting measurements with the touch screenand joystick is very easy. Diagnostic information is displayed in excellent resolution on the adjustablecolor touch monitor. Patients are quickly and comfortably positioned with the motorized chinrest. The integrated quick release brake prevents unintended movements of the instrument base.Data managementQuickly retrieve previous measurements via thelocal device memory. View all details for up to 10 measurements per eye and their average values. Printout results with the integrated thermal printer or as aPDF file over a network printer. Review measurementdata on a PC via the web server interface.Versatile connectivity optionsConnect the device to your EMR/PMS or to FORUM®from ZEISS. Import patient work lists with an iPad or PConto the ZEISS VISUREF 150 and directly select patientsfor measurement. Transfer data in common file formats (e.g. PDF, XML) to a USB stick or to a local network folder, and access data via a local web server. Export objective refraction data to the ZEISS acuity chart system to presetthe VISUPHOR® 500 digital phoropter from ZEISS.Key benefits for you and your patients• Fast, accurate data for high-quality patient care• Operator and patient comfort through ergonomic design • Convenient measurements and data handling• Enhanced connectivity for efficient workflowsTechnical dataZEISS VISUREF 150Four different operation modes• Combined refraction and keratometry mode • Pupil and cornea diameter measurement mode • Image capture mode• Contact lens base curve measurement modeE N _33_010_0009I P r i n t e d i n G e r m a n y . C Z -I /2018 I n t e r n a t i o n a l e d i t i o n : O n l y f o r s a l e i n s e l e c t e d c o u n t r i e s . T h e c o n t e n t s o f t h e b r o c h u r e m a y d i ff e r f r o m t h e c u r r e n t s t a t u s o f a p p r o v a l o f t h e p r o d u c t o r s e r v i c e o ff e r i n g i n y o u r c o u n t r y . P l e a s e c o n t a c t o u r r e g i o n a l r e p r e s e n t a t i v e s f o r m o r e i n f o r m a t i o n . S u b j e c t t o c h a n g e s i n d e s i g n a n d s c o p e o f d e l i v e r y a n d d u e t o o n g o i n g t e c h n i c a l d e v e l o p m e n t . V I S U R EF , V I S U P H O R a n d F O R U M a r e e i t h e r t r a d e m a r k s o r r e g i s t e r e d t r a d e m a r k s o f C a r l Z e i s s M e d i t e c AG o r o t h e r c o m p a n i e s o f t h e Z E I S S G r o u p i n G e r m a n y a n d /o r o t h e r c o u n t r i e s . i P a d i s a t r a d e m a r k o f A p p l e I n c ., r e g i s t e r e d i n t h e U .S . a n d o t h e r c o u n t r i e s . © C a r l Z e i s s M e d i t e c A G , 2018. A l l r i g h t s r e s e r v e d .Carl Zeiss Meditec AGGoeschwitzer Strasse 51–52 07745 Jena Germany/visuref150 /med/contacts0297Refraction Sphere -25.00 D to +22.00 D in steps of 0.12 D / 0.25 D Cylinder 0.00 D to ±10.00 D in steps of 0.12 D / 0.25 D Axis0° to 180°, in steps of 1°Corneal vertex distance 0.00, 10.00, 12.00, 13.50, 15.00 mm Pupil distance (PD)10 mm to 85 mm Min. pupil diameter 2 mmKeratometry Corneal curvature 5.00 to 10.20 mm, in steps of 0.01 mm Corneal refraction 33.00 D to 67.50 D, in steps of 0.12 D / 0.25 D Corneal astigmatism 0.00 D to -15.00 D, in steps of 0.12 D / 0.25 D Axis0° to 180°, in steps of 1°Corneal diameter 2.00 to 12.00 mm, in steps of 0.10 mm Chin rest movement 65 mm, motorizedPrinter Internal thermal printer (paper width 57 mm), printable PDF via optional network printer Connectivity1 x serial interface RS 232; fully isolated 2MOPP1 x network connection (LAN 10 / 100); fully isolated 2MOPP Supported data output options:• to EMR, PMS systems or ZEISS FORUM • file-based to network folder and USB stick Web service interface for data retrieval 1 x USB interface (for USB stick only)1 x VGA monitor outputOutput data format XML (JOIA), PDFPower supply 100 V to 240 V AC ±10 %; 50 / 60 Hz Dimensions (W x D x H)275 mm x 525 mm x 450 mm Weight18 kg。