MB786测试指导书
实验二 自动变速器测试指导书

实验二自动变速器测试指导书一、设备简介(01M变速器-大众)自动变速器测试机是一种检测自动变速器总成包括变扭器、齿轮传动系统(含离合器、制动器、单向离合器)液压控制系统(含控制电磁阀)工作状态的专门设备。
本机采用变频电机做为动力,驱动所测变速器运转,在变速器输出部分加装电涡流机模拟车辆的行驶阻力。
本机配备电磁阀驱动装置,模拟汽车控制电脑,操纵变速器电磁阀工作从而实现自动变速器的升降档及变扭器锁止、油压调节功能。
本变速器为四速前驱动桥式,变速杆位置为P、R、N、D、3、2、1。
有七个控制电磁阀,其中EV1、EV2、EV3为换档阀,EV5和EV7为换档控制阀,EV6为压力控制阀,EV4为锁止控制阀,依照设备使用方法1变速器安装方法所示,将自动变速器安装在主机上加油后检察液位并预热变速器ATF后便可进行测试。
01M油位检测没有油尺,只需在变速器预热后,在变扭器运转状态下打开油底螺丝,在添加ATF时有少许油量流出即可。
后需拧上油底螺丝。
1、打开主机弹出初始界面,选择自动变速器型号为01M,设置自动加载量为80。
2、打开抽屉内ZDC200012V电源开关,启动转换盒上的开关按键,ZDC2000主机显示屏灯点亮,选择02为01M电磁阀驱动模式,档位锁定在1档。
二、实验设备与项目1、实验设备WATC-8型自动变速器测试仪、01M变速器(大众)2、实验项目(1)油压测试针对变速器工作状态下,各油压测试口,在变档杆相关档位的油压进行测试,根据不同变速器油压调节的类型做出范围调整检测。
(2)速比测试在变速器运转中记录各档位及时速比。
三、常规运转测试步骤1、电脑主机选择综合显示界面。
2、拔动PN开关至N位,启动电机正向旋转(注:只有少部分本田车为反向旋转)并调节转速为750至800转。
3、打开ZDC2000 F1键,此时油压调节阀的占空比为50%,油压测试口1显示为怠速油压。
4、拔动PN开关至R位,半轴输出为反转自动变速器接通倒档,并观察R 位怠速油压,加速电机至1500转,关闭ZDC2000 F1键,此时油压表测试口1显示为最高油压,同时观察倒档速比后将输入转速返回怠速运转。
JDSU JD786A CellAdvisor RF Analyzer 产品说明书

JD786ACellAdvisor™ RF AnalyzerSpectrum Analyzer: 9 kHz to 8 GHzCable and Antenna Analyzer: 5 MHz to 6 GHz Power Meter: 10 MHz to 8 GHzSpecification* ConditionsThe JD786A specifications apply under these conditions:•The instrument has been turned on for at least 15 minutes •The instrument is operating within a valid calibration period •Data with no tolerance are considered typical values•Cable and antenna measurements apply after calibration to the OSL standard •Typical and nominal values are defined as:–Typical: expected performance of the instrument operating under 20° to 30°C after being at this temperature for 15 minutes –Nominal: a general, descriptive term or parameterSpectrum Analyzer (Standard)FrequencyFrequency range9 kHz to 8 GHzInternal 10 MHz Frequency Reference Accuracy ±0.05 ppm + aging (0 to 50°C) Aging ±0.5 ppm/year Frequency Span Range 0 Hz (zero span) 10 Hz to 8 GHz Resolution1 HzResolution Bandwidth (RBW)–3 dB bandwidth 1 Hz to 3 MHz 1-3-10 sequenceAccuracy ±10% (nominal)Video Bandwidth (VBW)–3 dB bandwidth 1 Hz to 3 MHz 1-3-10 sequenceAccuracy ±10% (nominal)Single Sideband (SSB) Phase NoiseFc 1 GHz, RBW 10 kHz, VBW 1 kHz, RMS detector Carrier offset:30 kHz100 kHz1 MHz–100 dBc/Hz (–102 dBc/Hz, typical)–105 dBc/Hz (–112 dBc/Hz, typical)–115 dBc/Hz (–120 dBc/Hz, typical)Measurement Range DANL to +25 dBmInput attenuator range0 to 55 dB, 5 dB stepsMaximum Input LevelAverage continuous power +25 dBm DC voltage±50 VDCDisplayed Average Noise Level (DANL)1 Hz RBW, 1 Hz VBW, 50 Ω termination, 0 dB attenuation, RMS detector Preamplifier off:10 MHz to 3 GHz>3 GHz to 5 GHz>5 GHz to 7 GHz>7 GHz to 8 GHz–140 dBm (–145 dBm, typical)–138 dBm (–142 dBm, typical) –135 dBm (–138 dBm, typical) –132 dBm (–135 dBm, typical)Preamplifier on:10 MHz to 3 GHz>3 GHz to 5 GHz>5 GHz to 7 GHz>7 GHz to 8 GHz–160 dBm (–165 dBm, typical)–158 dBm (–162 dBm, typical) –155 dBm (–158 dBm, typical) –152 dBm (–155 dBm, typical)*All specifications are subject to change without notice.1981Display Range Log scale and units (10 divisions displayed) 1 to 20 dB/division in 1 dB steps dBm, dBV, dBmV, dBµV Linear scale and units (10 divisions displayed)V, mV, mW, WDetectors Normal, positive peak, sample, negative peak, RMS Number of traces 6Trace functionsClear/write, maximum hold, minimum hold, capture, load view on/offTotal Absolute Amplitude AccuracyPreamplifier off, power level >–50 dBm, auto-coupled 1 MHz to 8 GHz ±1.3 dB (±0.5 dB typical) Add ±1.0 dB 20°C to 30°C–10°C to 55°C after60-minute warm up Reference Level Setting range –120 to +100 dBm Setting resolution Log scale Linear scale0.1 dB1% of reference levelMarkers Marker types Normal, delta, delta pair, noise, frequency count marker Number of markers 6Marker functionsPeak, next peak, peak left, peak right, minimum search marker to center/start/stopRF Input VSWR 1 MHz to 8 GHz1.5:1 (typical)Atten >20 dBSecond Harmonic Distortion Mixer level = –25 dBm 50 MHz to 2.6 GHz <–65 dBc (typical) >2.6 GHz to 8 GHz<–70 dBc (typical)Third-Order Inter-Modulation (Third-order Intercept: TOI)200 MHz to 3 GHz +10 dBm (typical) >3 GHz to 8 GHz +12 dBm (typical)SpuriousInherent residual responseInput terminated, 0 dB attenuation, preamplifier off, RBW at 10 kHz –90 dBm (nominal)Exceptions –**************,1.95,2.57264,3.2, and4.5 GHz–*************.8GHzInput-related spurious <–70 dBc (nominal)Dynamic Range2/3 (TOI-DANL) in 1 Hz RBW >104 dB @ 2 GHzSweep Time Range 0.4 ms to 1000 s 24 µs to 200 sSpan = 0 Hz (zero span)Accuracy ±2%Span = 0 Hz (zero span)ModeContinuous, singleGated Sweep Trigger source External, video, and GPS Gate length 1 µs to 100 ms Gate delay 0 to 100 msTriggerTrigger source Free run, video, external Trigger delay Range Resolution0 to 200 s 6 µsMeasurements*Channel powerOccupied bandwidth Spectrum emission mask Adjacent channel power Spurious emissions Field strengthAM/FM audio demodulation Route map* CW signal generator (Option 003) can be set up simultaneously.Cable and Antenna Analyzer (Standard)Frequency Range 5 MHz to 6 GHz Resolution 10 kHz Accuracy ±1 ppmData Points126, 251, 501, 1001, 2001Measurement SpeedMeasurement Accuracy Corrected directivity 40 dB Reflection uncertainty ±(0.3 + |20log (1+10-EP/20)|) (typical)EP = directivity – measured return lossOutput Power High 5 MHz to 5.5 GHz, 0 dBm (typical) 5.5 GHz to 6 GHz, –5 dBm (typical)Low5 MHz to6 GHz, –30 dBm (typical)Dynamic Range Reflection60 dBMaximum Input Level Average continuous power +25 dBm (nominal) DC voltage±50 VDC Interference immunity On channelOn frequency+17 dBm @ >1.4 MHz from carrier frequency (nominal)0 dBm within ±10 kHz from the car-rier frequency (nominal)Measurements Reflection (VSWR) VSWR rangeReturn loss range Resolution1 to 65 0 to 60 dB 0.01Distance to Fault (DTF) Vertical VSWR range Vertical return loss range Vertical resolution Horizontal rangeHorizontal resolution1 to 65 1 to 60 dB 0.010 to (# of data points – 1) x horizontal resolution Maximum = 1500 m (4921 ft)(1.5 x 10⁸) x (V P )/(delta)V P = propagation velocityDelta = stop freq – start freq (Hz)Cable Loss (1-port) Range Resolution0 to 30 dB 0.01 dB 1-port Phase Range Resolution–180° to +180° 0.01°Smith Chart Resolution 0.01RF Power Meter (Standard)General Parameters Display range –100 to +100 dBm Offset range 0 to 60 dBResolution0.01 dB or 0.1xW (x = m, u, p)Internal RF Power Sensor Frequency range 10 MHz to 6 GHz Span1 kHz to 100 MHz Dynamic range –120 to +25 dBm Maximum power +25 dBmAccuracySame as spectrum analyzerExternal RF Power Sensors Directional Power Sensor JD731BFrequency range 300 MHz to 3.8 GHz Dynamic range 0.15 to 150 W (average)4 to 400 W (peak)Connector type Type-N female on both ends Measurement type Forward/reverse average power, forward peak power, VSWR Accuracy±(4% of reading + 0.05 W)1,2Directional Power Sensor Frequency range JD733A150 MHz to 3.5 GHz Dynamic range 0.1 to 50 W (average)0.1 to 50 W (peak)Connector type Type-N female on both ends Measurement type Forward/reverse average power, forward peak power, VSWR Accuracy±(4% of reading + 0.05 W)1,2Terminating Power Sensor JD732BFrequency range 20 MHz to 3.8 GHz Dynamic range –30 to +20 dBm Connector type Type-N male Measurement type Average Accuracy±7%1Terminating Power Sensor JD734BFrequency range 20 MHz to 3.8 GHz Dynamic range –30 to +20 dBm Connector type Type-N male Measurement type Peak Accuracy±7%1Terminating Power Sensor JD736BFrequency range 20 MHz to 3.8 GHz Dynamic range –30 to +20 dBm Connector type Type-N male Measurement type Average and Peak Accuracy±7%11. CW condition at 25°C ±10°C.2. Forward power.Optical Power Meter (Option 13)Optical Power Meter Display range –100 to +100 dBm Offset range 0 to 60 dBResolution0.01 dB or 0.1 mWExternal Optical Power Sensors Optical Power Sensor Wavelength range MP-60780 to 1650 nm Max permitted input level +10 dBm Connector input Universal 2.5 and 1.25 mm Accuracy ±5%Optical Power Sensor Wavelength range MP-80780 to 1650 nm Max permitted input level +23 dBm Connector input Universal 2.5 and 1.25 mm Accuracy ±5%2-Port T ransmission Measurements (Option 001)FrequencyFrequency range 5 MHz to 6 GHz Frequency resolution 10 kHzOutput Power High 5 MHz to 5.5 GHz, 0 dBm (typical) 5.5 GHz to 6 GHz, –5 dBm (typical)Low5 MHz to6 GHz, –30 dBm (typical)Measurement Speed Vector 1.6 ms/point (typical)Scalar3.4 ms/point (typical)Dynamic Range Vector 5 MHz to 3 GHz, 80 dB >3 GHz to 6 GHz, 75 dB @average 5@average 5Scalar5 MHz to 4.5 GHz, >110 dB 4.5 GHz to6 GHz, >105 dBMeasurements Insertion Loss/Gain Range Resolution–120 to 100 dB 0.01 dB 2-Port Phase Range Resolution–180° to +180° 0.01°Bias-Tee (Option 002)VoltageVoltage range +12 to +32 V Voltage resolution 0.1 VPower8 W MaxCW Signal Generator (Option 003)FrequencyFrequency range 25 MHz to 6 GHz Frequency reference ±1 ppm maximum Frequency resolution 10 kHzOutput Power Range 5 MHz to 5.5 GHz, –60 to 0 dBm >5.5 to 6 GHz, –60 to –5 dBm Step 1 dBAccuracy±1.5 dB (20 to 30 °C)GPS Receiver and Antenna (Option 010)GPS IndicatorLatitude, longitude, altitudeHigh-Frequency AccuracySpectrum, interference, and signal analyzer GPS lock ±25 ppb Hold over (for 3 days) ±50 ppb (0 to 50°C)15 minutes aftersatellite lockedConnectorSMA, femaleInterference Analyzer (Option 011)Measurements Spectrum analyzer Sound indicator, AM/FM audio demodulation, interference ID, spectrum recorder Spectrogram Collects up to 72 hours of data RSSICollects up to 72 hours of dataInterference finder Spectrum replayerChannel Scanner (Option 012)Frequency Range1 MHz to 8 GHzMeasurement Range–110 to +25 dBmMeasurements Channel scanner 1 to 20 channels Frequency scanner 1 to 20 frequenciesCustom scanner1 to 20 channels or frequenciesGeneral InformationInputs and Outputs RF inSpectrum analyzer Connector Impedance Damage level Type-N, female 50 Ω (nominal)>+33 dBm, ±50 VDC (nominal), 3 min Reflection/RF out Cable and antenna analyzer Connector Impedance Damage level Type-N, female 50 Ω (nominal)>+40 dBm, ±50 VDC (nominal), 3 min RF inCable and antenna analyzer Connector Impedance Maximum levelType-N, female 50 Ω (nominal)>+25 dBm, ±50 VDC (nominal)External trigger, GPS Connector Impedance SMA, female 50 Ω (nominal)External ref Connector ImpedanceInput frequency Input range SMA, female 50 Ω (nominal)10 MHz, 13 MHz, 15 MHz –5 to +5 dBmUSBUSB host 1 USB client 2Type A, 1 port Type B, 1 portLANRJ45, 10/100Base-T GPIO RJ45Audio jack 3.5 mm headphone jack External power 5.5 mm barrel connector SpeakerBuilt-in speakerDisplay Type Resistive touch screenSize 8 inch, LED backlight, transflective LCD with anti-glare coating Resolution800 x 600PowerExternal DC input 12 to 19 VDC Power consumption37 W49 W maximum(when charging battery)Battery Type10.8 V, 7800 mA/hr (Lithium ion)Operating time >3 hours (typical)Charge time2.5 hours (80%), 5 hours (100%)Charging temperature 0° to 45°C (32° to 104°F) ≤85% RH Discharging temperature –20° to 55°C (4° to 131°F) ≤85% RH Storage temperature 30° to 25°C (32° to 77°F) ≤85% RH (non-condensing)Data Storage Internal 4Maximum 100 MBExternal 5Limited by size of USB flash driveEnvironmentalOperating temperature AC Power 0° to 40°C (32° to 104°F) with no derating Battery 0° to 40°C (32° to 104°F) @charging–10° to 55°C (14° to 131°F) @dischargingMaximum humidity 85% RH (non-condensing)Shock and vibration MIL-PRF-28800F Class 2Storage temperature6–55° to 71°C (–67° to 160°F)EMCIEC/EN 61326-1:2006 (complies with European EMC)CISPR11:2009 +A1:2010ESDIEC/EN 61000-4-2Size and Weight (standard configuration)Weight (with battery)<4.3 kg (9.5 lb) Size (W x H x D)295 x 195 x 82 mm(11.6 x 7.7 x 3.2 in)Warranty 2 yearsCalibration Cycle 1 year1. Connects flash drive and power sensor.2. Connects to PC for data transfer.3. 20 to 85% RH, store battery pack in low-humidity environment.Extended exposure to temperature above 45°C could significantly degrade battery performance and life.4. Up to 3800 traces.5. Supports USB 2.0 compatible memory devices.6. With the battery pack removed.Optional Calibration KitsStandard JD786A9 kHz to 8 GHz Spectrum analyzer5 MHz to6 GHz Cable and antenna analyzer 110 MHz to 8 GHz RF power meter (internal mode)OptionsNOTE: Upgrade options for the JD786A use the designation JD786AU before the respective last three-digit option number.JD786A0012-Port Transmission Measurement 2JD786A002 Bias-Tee (requires optionJD786A001)JD786A003CW Signal Generator JD786A010GPS Receiver and Antenna JD786A011Interference Analyzer 3, 4JD786A012Channel Scanner JD786A013Optical Power Meter 5Standard AccessoriesG710550326AC/DC power adapter 6G710550335Cross LAN cable (1.5 m)6GC73050515USB A to B cable (1.8 m)6GC72450518>1 GB USB memory 6G710550325Rechargeable lithium ion battery 6G710550323Automotive cigarette lighter 12 VDC adapter 6G710550316Stylus pen 6JD780A361JD780A Series user’s manual and applicationsoftware — CD1. Requires calibration kit.2. Requires dual-port calibration kit.3. Highly recommend adding GPS receiver JD786A010.4. Highly recommend adding antennas G7*******x and/or G7*******x.5. Requires MP-60 or MP-80.6.Standard accessories can be purchased separately.Optional RF Power Sensors JD731B Directional Power Sensor (peak and average power)Frequency: 300 MHz to 3.8 GHzPower: average 0.15 to 150 W, peak 4 to 400 WJD733A Directional Power Sensor (peak and average power)Frequency: 150 MHz to 3.5 GHz Power: average/peak 0.1 to 50 WJD732B Terminating Power Sensor (average power)Frequency: 20 MHz to 3.8 GHz Power: –30 to +20 dBmJD734B Terminating Power Sensor (peak power)Frequency: 20 MHz to 3.8 GHz Power: –30 to +20 dBmJD736B Terminating Power Sensor (peak and average power)Frequency: 20 MHz to 3.8 GHz Power: –30 to +20 dBm Optional Optical Power Sensors MP-60 Miniature USB 2.0 Optical Power SensorWavelength Range: 780 to 1650 nm1300, 1310, 1490, 1550 nm: –50 to +10 dBm 850 nm: –45 to +10 dBmMP-80 Miniature USB 2.0 Optical Power SensorWavelength range: 780 to 1650 nm 1300, 1550 nm: –35 to +23 dBm 850 nm: –30 to +23 dBmOptional RF Adapters G710050570 Adapter Type-N(f) to Type-N(f), DC to 6 GHz, 50 ΩG710050571Adapter Type-N(m) to DIN(f), DC to 4 GHz, 50 ΩG710050572Adapter DIN(m) to DIN(m), DC to 4 GHz, 50 ΩG710050573Adapter Type-N(m) to SMA(f), DC to 18 GHz, 50 ΩG710050574Adapter Type-N(m) to BNC(f), DC to 1.5 GHz, 50 ΩG710050576Adapter Type-N(m) to DIN(m), DC to 4 GHz, 50 ΩG710050577Adapter Type-N(f) to DIN(f), DC to 4 GHz, 50 ΩG710050578Adapter Type-N(f) to DIN(m), DC to 4 GHz, 50 ΩG710050579Adapter DIN(f) to DIN(f), DC to 4 GHz, 50 Ω Optional Miscellaneous G710050581Attenuator 40 dB, 100 W, DC to 4 GHz(unidirectional)JD74050341Soft carrying case JD71050342Hard carrying case JD74050343Backpack carrying case G710050585RF directional coupler, 700 MHz to 4 GHz, 30 dB,input/output; Type-N(m) to Type-N(f), tap off; Type-N(f)7G710050586RF Combiner, 700 MHz to 4 GHz, Type-N(f) toType-N(m)7G710550324External battery charger JD780A362JD780A series user’s manual – printed version7. Highly recommended for LTE testing.Test & Measurement Regional SalesProduct specifications and descriptions in this document subject to change without notice. © 2013 JDS Uniphase Corporation 30173455 001 0713 JD786ARFA.DS.CPO.TM.AE July 2013。
全自动胶纸机产品测试指导书
全自动胶纸机产品测试指导书
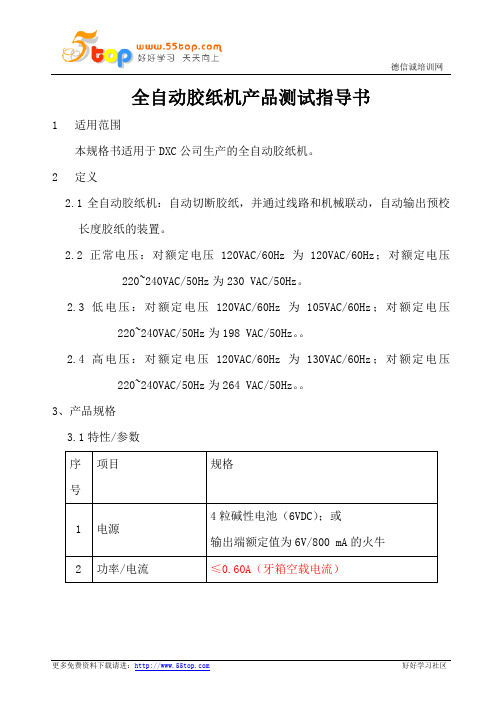
1 适用范围
本规格书适用于DXC公司生产的全自动胶纸机。
2 定义
2.1 全自动胶纸机:自动切断胶纸,并通过线路和机械联动,自动输出预校
长度胶纸的装置。
2.2正常电压:对额定电压120VAC/60Hz为120VAC/60Hz;对额定电压
220~240VAC/50Hz为230 VAC/50Hz。
2.3低电压:对额定电压120VAC/60Hz为105VAC/60Hz;对额定电压
220~240VAC/50Hz为198 VAC/50Hz。
2.4高电压:对额定电压120VAC/60Hz为130VAC/60Hz;对额定电压
220~240VAC/50Hz为264 VAC/50Hz。
3、产品规格
3.1特性/参数
3.2外观与颜色
--外观、颜色不可有明显的缺点,如脱色、凹陷、裂痕及脏污;
--印有指示应正确、及印于规定位置;
--外壳应光滑,不能有利边,且段差小于0.3mm;
--外观型状与结构图相符,如不能以结构图作出评定标准,则与“可接收”样板相符;
--详细颜色参考《YBOM》。
3.3 主要部件材质
3.4 标识
3.5结构
--产品每部分之结构、尺寸、用料都要与《YBOM》及《Y爆炸图》一致;。
VCTA-B486操作手册

4.2 界面功能介绍 ....................................................................................................................................................17
VCTA-B486(OFF-LINE AOI) 操作手册(MANUAL)
Version 4.0
深圳市振华兴科技有限公司
ZHEN HUA XING TECHNOLOGY (SHENZHEN) CO.,LTD
振华兴科技
VCTA
目录
VCTA-B486 操作手册
目录 .................................................................................................................................................................. 2 前言 .................................................................................................................................................................. 5 使用的注意事项 .............................................................................................................................................. 6 安全上的要点 .................................................................................................................................................. 7 VCTA-B486(Off-Line AOI)技术参数 ........................................................................................................... 8 第一章 测试原理及机械结构....................................................................................................................11
MTK校准综测作业指导校准功能测试指导书.doc

MTK-atedemo校准/综测作业指导一.目的:规范我公司主板校准/综测操作方法,保证产品质量。
二. 计算机的配置要求生产用计算机应采用运行稳定的工控机,CPU在PIII800以上,内存256M,Windows2000 以上。
预装Agilent 或着NI 的GPIB 卡及其驱动。
三. 系统硬件的连接该测试系统的硬件由手机综测仪、程控直流电源和工控机组成。
手机综合测试仪支持Agilent 8960 和CMU200。
程控直流电源支持Agilent663XX 系列,和Keithley23XX 系列电源。
程控直流电源为可选件,如不提供,则可采用假电池的方式给主板供电。
连接如下图所示:四.安装软件先将港利发布的安装包解压到本地目录后,运行其中的setup.exe 文件,安装过程中会提示选择适当的安装路径,默认的安装路径是C:\Program Files\MTK-atedemo\五.打开软件在软件安装路径下点击MTK_atedemo即可运行该综合测试软件。
打开后的界面如下图一所示六.测试选项配置点击上图Report system选项,出现下图选择测试选项,综合测试仪地址,电源地址,CPU型号,电脑端口(我司会根据不同机型,在给出校准参数的同时会抓配置图片告知测试选项).六.校准参数配置A.点击上图Select NVRAM Database file选项,配置该测试机型Database文件.B.点击上图中Select Config file选项,配置校准参数中的.CFG文件。
C.点击上图中的Select Calibration file 选项,配置校准参数中的.ini文件.D.点击上图中Select Test Setup file选项,配置校准参数中的SETUP文件。
配置完成后,点击Save Change 保存配置并退出。
回到初始界面下图Initial Final Test 只综测Initial Calibration 只校准Initial Cal and Final 校准加综测根据我司要求选择不同选项初始化仪器,OK后出现下图界面接上待测试主板,接上RF射频线,电击Calibration Test开始测试作业。
ESD测试作业指导书(中英文)

ESD测试作业指导书ESD Testing Work Instruction1.环境控制I. Environmental Control:1)所有工作区的相对湿度和温度应该保持在一定的范围并进行监测。
一旦相对湿度百分比降至限度以下,立即通知QC和工程部进行处理。
Relative Humidity andtemperature in all works areas shall be monitored and maintained. If % relative humidity falls beyond the limits, immediately inform QC and engineering for disposition.2)在将装配的产品置于无静电工作站前,在整个生产期间,使用离子发生器的生产线都应处于工作状态。
离子发生器被安装在容易发生静电的区域。
检测其衰减时间,小于或等于5秒钟,或者根据客户要求;检测平衡电压,小于或等于5伏,或者根据客户要求。
Lines that uses Ionizers shall be in operations prior to handling of assembled products to static free work stations and shall be operating during the entire period ofproduction. Ionizers are installed on areas where the chances of static build up occur.Check for the decay time , =/ < 5 seconds or as required by the customer, and thebalance voltage =/< 5 volts or as required by the customer.2.个人接地线系统Personnel Grounding System1)在生产线的不同站点,随机抽检十个员工。
贝塔电容测试仪手册Handbook_Capscan_KG2000_English

e d I s s u e /R e v : 5CapScan 2000Eurofast DeviceNet connector interfaceINSTRUCTION HANDBOOK(for suitably qualified personnel only)Manual Part Number: MAN/E1321-5053 • Revision 5 • © Copyright November 2004Beta LaserMike Inc.8001 Technology Blvd.Dayton, OH 45424USABeta LaserMike Limited Stirling RoadCressex Business Park Buckinghamshire High Wycombe UKBeta LaserMike Asia PacificRoom 606, Suncome Liauw’s Plaza No. 738 Shangcheng Rd.Shanghai 200120,P.R. Chinae d I s s u e /R e v : 5ContentsEuropean Commission Requirements....................................................................3Declaration of Conformity........................................................................................4Safety information.....................................................................................................5Introduction................................................................................................................5Mechanical installation.............................................................................................6KG2008 Dimensions - mm (inches).............................................................................7KG2016 Dimensions - mm (inches).............................................................................8KG2025 Dimensions - mm (inches).............................................................................9KG2050 Dimensions - mm (inches)...........................................................................10KG2065 Dimensions - mm (inches)...........................................................................11Electrical installation...............................................................................................12Electronics module connector panel..........................................................................12Profibus Gland Connections......................................................................................13Earth (ground) connection..........................................................................................13Threading the conduit (KG2008 model only).............................................................14Termination of Eurofast connectors...........................................................................15RS232 communications..........................................................................................17RTS.............................................................................................................................17CTS.............................................................................................................................17Connecting CapScan to a computer or terminal.......................................................17Non continuous data transmission.............................................................................18Continuous data transmission....................................................................................21Analog outputs............................................................................................................23Profibus communication........................................................................................26General information....................................................................................................26Profibus information specific to CapScan 2000.........................................................34DeviceNet communication......................................................................................37DeviceNet Configuration via RS232..........................................................................37Data Format and Units...............................................................................................38Identity Object (DeviceNet Class = 1)........................................................................39DeviceNet Object (DeviceNet Class = 3)...................................................................40Assembly Object (DeviceNet Class = 4)....................................................................41Connection Object (DeviceNet Class = 5).................................................................43Parameter Object (DeviceNet Class = 15)................................................................44FFT Object (DeviceNet Class = 100).........................................................................47DeviceNet communication specific to CapScan........................................................53CANopen communication.......................................................................................57General and Specific CANopen information..............................................................57Setting jumpers on main PCB................................................................................67Calibration................................................................................................................68KG2025 / 2050 / 2065 connections...........................................................................68KG2008 / 2016 connections and basic procedure....................................................69Options.....................................................................................................................73Determining which options have been purchased.....................................................73Indicator KI1000.........................................................................................................74In-head FFT mode.....................................................................................................75Fast analog output mode...........................................................................................75High Bandwidth Option..............................................................................................75Maintenance.............................................................................................................75Troubleshooting......................................................................................................76Specification............................................................................................................77Index. (79)e d I s s u e /R e v : 5European Commission Requirementse d I s s u e /R e v : 5Declaration of ConformityDeclaration of Conformitye d I s s u e /R e v : 5Safety informatione d I s s u e /R e v : 5see Specification/Environmental Conditions .xxFor dry installation 2 caps essential.For submerged installation 1optional cap (inlet side) used for For submerged installation 1 optional cap (inlet side) used for bubble clearance.Detachable end for threading (KG2008 only).See Electrical installation for details.Electronics box0.75m (30 in) Flexible conduit(not applicable to KG2050 & KG2065)Mounting collars(not applicable to KG2050 & KG2065)The neck of the KG2008tube can be mounted to the trough (instead of using the mounting collars).Measuring tubeOptional special caps.See Options table below.e d I s s u e /R e v : 5e d I s s u e /R e v : 5e d I s s u e /R e v : 5l e x i b l e t u b e m i n b e n d r a d (3.94)100with caps 742(29.21)without caps60(2.36)adjustable:g f o r p i p e(830 22.5(0.89)∅e d I s s u e /R e v : 5Ø121(476Compression fitting for pipe Ø28(1.1)Water inletcap (optional)19.75(0.77)140.4(5.52)38(1.5)263(10.351237(48.7) with caps1158(45.59) withoutElectrodes bore max Ø612(24.094 holes M6 equi-spaced 104(4.09) P.C.D.91(3.58)162(6.38)230.5(9.07)F o r d e t a i l s s e e o t h e r K G d i m e n s i o n d r a w i n g se d I s s u e /R e v : 5e d I s s u e /R e v : 5* Problems may occur with longer cables. Refer to Specification/RS232 Cable length .All connections except the Profibus are made by IP67 MIL spec. connectors. The Profibus connection is made with PCB mounted screw terminals with the cables fed through IP68 EMC glands.Profibusin Profibus outEarth (ground)studC analog fast (option)D analog slowE analog comm.F n/c Gn/cPin Function 1Drain 2V+ (24V)3V- (24V –rtn)4CAN High 5CAN LowA GNDB TXDC RXD D RTS *E CTS *Fn/ce d I s s u e /R e v : 511. Insert washer with smaller hole over cores.12. Clamp braid between washers and cut off any excess braid.13. Screw on the gland cover nut and tighten.14. Remove any excess plastic and cores.15. The cores leading to the screw terminals (Profi input and Profi output) should beas short as possible. Cut cores to exact length.CoresWasher with smaller holeBraid (to be clamped in-between washers)Washer with bigger holeRubber insertGland cover nutNote: Cable colours may vary.e d I s s u e /R e v : 5Disconnect power connector (connector 3) from electronics box.Loosen 4 screws on electronics box lid and remove lid.Use antistatic wristband or touch casing to discharge any static electricity.The following few steps describe the removal of all 3 wires from electronics box and the removal of gland A from these wires.Disconnect all connectors leading from conduit to PCB in electronics box.On the outside of the electronics box unscrew cable clamp body from electronics box.Pull the guard wire out of the electronics box, earthing collet and cable clamp body.If Screening clamps are used, simply push the wires through the earthing collet and through the cable clamp body.It is recommended that this part of gland is not disconnectedfrom electronics box.Earthing colletCable clamp bodyFig 2:guard wireGland nut for securing gland body to trough or bulkhead.Gland (B)bodyGland (A)connecting conduit toelectronics box.Fig 1:Gland clamping nut for securing conduit to gland body.not needed for thisconnection.Connectors(BNC connectors are shown here, but Screening clamps may also be supplied instead)e d I s s u e /R e v : 58. Screw the clamp screw (together with cable clamp) onto the connector body.Use tool for final tightening.9. Insert plastic insulator into connector body ensuring that the cut-out in theinsulator lines up with the internal groove in the connector body.Connector bodyTop ofscreen clampClamp screwConnector bodyCutoute d I s s u e /R e v : 5Screw on Connector to Connector body as shown on photo below.The cable is now correctly terminated and ready for use.ConnectorWiresConnectorConnector bodye d I s s u e /R e v : 5e d I s s u e /R e v : 5e d I s s u e /R e v : 5e d I s s u e /R e v : 5e d I s s u e /R e v : 5e d I s s u e /R e v : 5e d I s s u e /R e v : 5e d I s s u e /R e v : 5e d I s s u e /R e v : 5e d I s s u e /R e v : 5e d I s s u e /R e v : 5e d I s s u e /R e v : 5e d I s s u e /R e v : 5e d I s s u e /R e v : 5e d I s s u e /R e v : 5e d I s s u e /R e v : 5e d I s s u e /R e v : 5e d I s s u e /R e v : 5e d I s s u e /R e v : 5Example of a typical FFT operation1) Select the required FFT sampling frequency (parameter 102), and thenumber of FFT points (parameter 100).2) Set the line speed (parameter 3).3) To start the FFT operation set the SF bit in the output control word to 1. NB itis advised to wait a few master cycles before resetting this bit to ensure thestart command was recognised.4) Wait for the FC bit in the input data word base+3 to be set. This indicatesthat the FFT operation has been completed and the data is ready.5) Valid data can now be read from parameters 105 and 110 to 129 indicatingthe largest 20 amplitudes. Also, all of the FFT result data can be read inblocks using parameter 104 to control the transfer see below.Block transfer of FFT dataWhen FFT data is valid it can be read out from the gauge in blocks of 9 wordsat a time. This data is located in the input data words base+8 to base+16. Thedata in this area does not change until a new block is requested. A block of datais requested by outputting the PKW data words (PKE/base+0 to PWE2/base+2)set up to write parameter 104 with the required block number as the parametervalue (PWE2/base+2). The request is completed when the input PKW dataindicates a response to the write word request and the required block number isreturned as the parameter value (PWE2/base+2). When the request iscompleted the input data words base+8 to base+16 will contain the requestedFFT data block.5:veR/eussIdee d I s s u e /R e v : 5e d I s s u e /R e v : 5e d I s s u e /R e v : 5e d I s s u e /R e v : 5e d I s s u e /R e v : 5e d I s s u e /R e v : 5e d I s s u e /R e v : 5Connection Object (DeviceNet Class = 5)The Beta LaserMike gauges fully implement the DeviceNet ‘group 2 only, pre-defined master/slave connection set ’.Each gauge fully supports concurrent explicit message, polled IO, bit-strobeIO, and Change-Of-State (COS) / Cyclic connections.COS/Cyclic connections may be acknowledged or unacknowledged, and all theassociated production/consumption paths, path lengths, production triggers,and initial communication characteristics are configured appropriately as per thepre-defined master/slave connection set instantiation rules.Please note the following points regarding the DeviceNet pre-definedmaster/slave connection set specification:1. COS/Cyclic connections are mutually exclusive (they are the sameconnection but with a different production trigger mechanism).2. The master can only produce output data over the polled connection, but maydo so using the polled, change-of-state, or cyclic mechanisms according tohow the connection was instantiated.3. When the polled connection and the COS/Cyclic connection are instantiatedat the same time, or the polled connection is instantiated followed by theCOS/Cyclic connection, then the master supplies output data to the gaugeusing the polled connection, and the gauge provides input data to the masterusing both the polled connection and the COS/Cyclic connection. This isbehaviour defined in the DeviceNet specification.4. The bit-strobe connection provides 1 bit of output data from the master toeach slave. The Beta LaserMike gauges make no use of this bit, but willrespond with appropriate bit-strobe input data (each response is limited to 8-bytes, as per the DeviceNet specification).Normally the master control computer ’s DeviceNet drivers/library will take careof establishing connections according to parameters supplied. See theDeviceNet specification for exact details regarding attributes of the connectionclass and connection instances. However, it is worth mentioning here that theBeta LaserMike DeviceNet implementation fully supports the followingconnection instance attributes (where appropriate to the connection type):1. Expected packet rates: to a 10ms resolution.2. ACK retry limit – for acknowledged COS/Cyclic connections.3. ACK timeout: for acknowledged COS/Cyclic connections, to a 10ms resolution.4. Production inhibit time: for COS connections, to a 10ms resolution.5. Watchdog timeout action: including: time out (IO only), auto-delete, auto-reset (IO only), and deferred delete (explicit message only).e d I s s u e /R e v : 5e d I s s u e /R e v : 5e d I s s u e /R e v : 5e d I s s u e /R e v : 5e d I s s u e /R e v : 5e d I s s u e /R e v : 5Attempting to access a member at index 0 for any of the FFT arrays will returnan ‘invalid parameter error’. DeviceNet reserves member index 0 for analternative use not supported by the Beta LaserMike gauges.A read request for zero members will return an ‘invalid parameter’ error.A read request for which the starting index is beyond the end of the spike arrayor beyond the end of the discrete arrays will return an '’invalid parameter’ error.Attempting to read from the discrete arrays before an FFT has been performedwill return an ‘invalid parameter’ error. It is possible to begin reading the FFTdata as soon as the first FFT has started, but the returned data will bemeaningless; wait for the ‘FFT complete’ bit to transition from a 0 to a 1 beforebeginning collection of FFT results. It is possible to read spike informationbefore an FFT has been performed, but the returned data will be all zero.A master application should use the ‘get member extended’ service (or ‘getattribute’ in association with the FFT_MEMBER_IDX andFFT_MEMBER_COUNT attributes), according to the maximum number of bytesthat can be accepted by the master in an explicit message response.Remember to account for any explicit message header and ‘get memberextended’ protocol response bytes when calculating the maximum number ofvalues that may be requested. The gauge will respond with a maximum of 64FFT results for a single request, no matter what format they are requested in.When determining how many values to obtain in a single request, the systemdesigner should take the master’s response buffer size and CAN bus prioritiesand bandwidth into account. Requesting large blocks of data from the gaugemay prevent devices with higher MacId’s from transmitting IO data. Becauseeach explicit message fragment must be acknowledged by the master, thegauge cannot transmit blocked FFT results in a back-to-back manner andtherefore the impact on other DeviceNet servers may not be as significant asmight otherwise be expected. Internally, the CapScan assigns higher priority toIO data production than to explicit message production and therefore anysolicited or Cyclic / Change-Of-State IO messages will be transmitted in-between the explicit message fragments forming the blocked FFT results.Note that a request to start an FFT (using the ‘Output Control Word’) mayappear to fail if there is no product within the measuring gate of the gauge. Thisis normal gauge behaviour and not a function of the DeviceNet protocolimplementation.5:veR/eussIde。
压敏胶带持粘性测试仪CZY-6S的试验操作方法

压敏胶带持粘性测试仪CZY-6S的试验操作方法压敏胶带持粘性测试仪CZY-6S的试验操作方法Labthink兰光CZY-6S压敏胶带持粘性测试仪适用于压敏胶粘带、医用贴剂、不干胶标签、保护膜等产品进行持粘性测试试验。
压敏胶带持粘性测试仪,又可称为持粘性测试仪,持粘性测定仪,持粘力试验机,胶带持粘力测定仪,胶带保持力试验机,胶带保持力测试仪,不干胶持粘试验机,标签持粘性测试仪,持粘力测试仪,保持力试验仪,持粘力测定仪,持粘性试验机,保持力测试仪,胶带持粘仪。
以下为大家简单介绍一下CZY-6S设备的试验操作方法!CZY-G压敏胶带持粘性测试仪的试验操作方法:1)水平放置仪器,打开电源开关,并将砝码放置在吊架下方槽内。
2)不使用的工位可按“关闭”键停止使用,重新计时可按“开启/清零”键。
3)按标准规定制取的试样用标准压辊以300mm/min的速度来回滚压三次粘帖在试验板和加载板上。
4)规定温度、时间调节组合试样后,吊挂于支架销轴上。
5)提起砝码,迅速将砝码吊勾置于加载板下部消孔中,测试计时自动开始。
6)观察测量规定时间试样粘脱滑移量,或读取试样脱落时自动计定的时间。
7)胶带测试试验必须按照GB/T 4851有关标准进行。
8)试验结束后,必须切断仪器电源,保持设备清洁。
Labthink兰光,专业致力于为包装、食品、医药、日化、印刷、胶粘剂、汽车、石化、生物、建筑及新能源等领域客户提供行业咨询、产品销售、售后服务、风险控制解决方案。
Labthink兰光目前生产销售的设备百余款,检测仪器涉及包装材料的阻隔性能检测、厚度检测、物理机械性能检测、包装容器的密封性能检测等方面,致力于为客户提供全面、专业、精湛的包装安全解决方案,帮助客户从风险控制入手,提高企业质量安全意识,减少企业成本流失。
Labthink兰光检测设备有:胶带剥离试验机、拉力试验机、包装残氧分析仪、纸箱耐压试验机、透气性测试仪、雾化试验仪、透光率雾度测定仪、薄膜热收缩率测试仪、透气度测试仪、透湿性测试仪、揉搓试验仪、纸张撕裂度仪、瓶盖扭矩仪、蒸发残渣恒重仪、光泽度仪、落镖冲击测试仪、薄膜透氧仪、高温蒸煮锅、落球冲击测试仪、初粘性测定仪、摩擦系数试验仪、摆锤冲击试验仪、热粘拉力试验仪、透气性测试仪、持粘性试验机、气相色谱仪、标准光源箱、油墨耐磨试验机、薄膜厚度仪、电池隔膜透气率测试仪、有机气体渗透测试仪、薄膜热封检测仪、包装密封测试仪等。
双通道高速运算放大器评估板 用户指南说明书

评估板用户指南UG-082 One Technology Way • P.O. Box 9106 • Norwood, MA 02062-9106 • Tel: 781.329.4700 • Fax: 781.461.3113 • 双通道高速运算放大器评估板(16引脚、4 mm×4 mm LFCSP封装,带专用反馈引脚)特性可快速实现试验板试验/原型操作用户自定义电路配置支持边缘安装型SMA连接器可轻松连接至测试设备和其它电路两个独立电路可增强灵活性概述EB-O16CP44-2Z旨在帮助用户评估双通道高速运算放大器。
EB-O16CP44-2Z是裸板(即评估板上未焊接任何器件),用户可以快速完成各种运算放大器电路的原型设计,从而最大程度地降低风险,加快产品上市。
EB-O16CP44-2Z评估板支持ADI公司所有采用16引脚、4 mm×4 mm引脚架构芯片级封装(LFCSP)并带专用反馈引脚的双通道高速运算放大器。
图1和图2分别显示的是评估板的器件侧和电路侧。
图3显示的是评估板原理图。
该4层评估板的输入端和输出端支持边缘安装型SMA连接器,可高效快速连接至测试设备或其它电路。
评估板接地层、器件放置和电源旁路经过优化设计,可以最大程度地提高电路的灵活性和性能。
评估板支持多种SMT元件尺寸:0402、0508、0603和7343。
图4和图6显示的是评估板装配图。
图5和图7显示的是将评估板连接到运算放大器和支持电路的金属布局图。
评估板的器件侧和电路侧图片图1. EB-O16CP44-2Z PCB的器件侧图2. EB-O16CP44-2Z PCB的电路侧UG-082 评估板用户指南目录特性 (1)概述 (1)评估板的器件侧和电路侧图片 (1)修订历史......................................................................................2评估板原理图. (3)装配图和布局图 (4)订购信息 (5)物料清单 (5)修订历史2010年5月—修订版0至修订版A更改图1 (1)增加图2;重新按序编号 (1)增加表1 (5)2010年1月—修订版0:初始版评估板用户指南 UG-082评估板原理图图3.通用评估板原理图UG-082评估板用户指南装配图和布局图图4.评估板器件侧装配图图5.评估板器件侧布局图图6.评估板电路侧装配图图7.评估板电路侧布局图评估板用户指南 UG-082订购信息物料清单表 1数量索引标识符描述封装6 +IN1, +IN2, −IN1, −IN2, OUT1, OUT2 SMA/SMT SMA/SMT6 C1, C2, C3, C4, C15, C16 0.1 μF电容C05082 C17, C18 用户自定义电容C06032 C19, C20 用户自定义电容C04024 C11, C12, C13, C14 10 μF电容C603214 R1, R2, R3, R4, R5, R6, R7, R8, R9, R10, R11, R12, R13, R14 用户自定义电阻R04024 R17, R18, R19, R20 0 Ω,两个电源短接在一起R06034 R15, R16, R21, R22 1 kΩR06039 PD1/DIS1, PD2/DIS2, GND1 to GND3, +VS1, −VS1, +VS2, −VS2 测试点TP1 P1 3位接头Molex 22-23-20312 W1, W2 3引脚直插接头Molex 22-03-2031 2 JP1, JP2 用户自定义跳线焊接跳线1 U1 放大器SOICUG-082 评估板用户指南注释评估板用户指南 UG-082注释UG-082评估板用户指南ESD警告ESD(静电放电)敏感器件。
786D 787D 788C方向式探测器使用与维护指南说明书

ErrataTitle & Document Type: 786D / 787D / 788C Directional Detectors Operating and Service ManualManual Part Number: 00786-90001Revision Date: May 1977About this ManualWe’ve added this manual to the Agilent website in an effort to help you support your product. This manual provides the best information we could find. It may be incompleteor contain dated information, and the scan quality may not be ideal. If we find a bettercopy in the future, we will add it to the Agilent website.HP References in this ManualThis manual may contain references to HP or Hewlett-Packard. Please note that Hewlett- Packard's former test and measurement, life sciences, and chemical analysisbusinesses are now part of Agilent Technologies. The HP XXXX referred to in this document is now the Agilent XXXX. For example, model number HP8648A is now model number Agilent 8648A. We have made no changes to this manual copy.Support for Your ProductAgilent no longer sells or supports this product. You will find any other availableproduct information on the Agilent Test & Measurement website:Search for the model number of this product, and the resulting product page will guideyou to any available information. Our service centers may be able to perform calibrationif no repair parts are needed, but no other support from Agilent is available.。
办公自动化设备测试流程

办公自动化设备测试流程下载温馨提示:该文档是我店铺精心编制而成,希望大家下载以后,能够帮助大家解决实际的问题。
文档下载后可定制随意修改,请根据实际需要进行相应的调整和使用,谢谢!并且,本店铺为大家提供各种各样类型的实用资料,如教育随笔、日记赏析、句子摘抄、古诗大全、经典美文、话题作文、工作总结、词语解析、文案摘录、其他资料等等,如想了解不同资料格式和写法,敬请关注!Download tips: This document is carefully compiled by the editor. I hope that after you download them, they can help yousolve practical problems. The document can be customized and modified after downloading, please adjust and use it according to actual needs, thank you!In addition, our shop provides you with various types of practical materials, such as educational essays, diary appreciation, sentence excerpts, ancient poems, classic articles, topic composition, work summary, word parsing, copy excerpts,other materials and so on, want to know different data formats and writing methods, please pay attention!随着科技的不断发展,办公自动化设备已经成为办公室中必不可少的一部分。
SEFRAM 7862 数字电视天线测量仪用户手册说明书

SEFRAM 7862SeframState-of-art specificationswith unique designWith its ultra fast spectrum, NIT, Cell-ID, impulse response, check-sat mode and autoset, the SEFRAM 7862 will save your precious time during antennas setup.With only 2,1kg, the SEFRAM 7862 will be your ideal compa-nion for all your measurements on the field. Its compact size will provide better safety and makes your work easier.With its panoramic 7 inch LCD screen (16:9), the reading of measurements will be easier than any other product available on the market.Panoramic displayAll SEFRAM TV Meters use the same PC software: TR7836KI TTR7836 (P/N 978551000) includes the USB cable and the software CD-ROM. To get the best from your instrument, we recommand to order this kit with your TV Meter.SEFRAM TV metersThe SEFRAM 7862 provides all necessary measurements for DVB-T (COFDM), DVB-S and DVB-S2 (QPSK/8PSK),DVB-C (QAM). The panoramic display will show all parameters for the selected channelDirect access to functions makes the SEFRAM 7862 very easy to use.Getting started with this TV Meter will be like a game!•Panoramic 7 inch LCD coloured screen •Weight: 2,1kg only•Display free to air programs for digital terrestrial and satellite •Full measurements DVB-T, DVB-S and DVB-S2,DVB-C (QAM)•Ultra fast spectrum analysis •Convenient checksat mode•Battery with 1 hour charging time •Rugged carrying bag•Water proof front panel with sensitive buttons •Wi-fi networks measurements*•Simplified procedure to update internal software: USB memory stickSEFRAM 7862For more information, contact our local distributor or us on +33 (0).4.77.59.36.81SEFRAM 7861SEFRAM 7862SEFRAM 7863SEFRAM 7865SEFRAM 7856Frequency rangeTerrestrial 45-865MHz Terrestrial 45-865MHz Cable/Terrestrial Terrestrial 5-865MHz Terrestrial 5-865MHz Satellite 950-2150MHzSatellite 950-2150MHz5-865MHzSatellite 950-2150MHzSatellite 950-2150MHzDVB-T / COFDM✔✔✔✔DVB-S, DVB-S2 / 8PSK-QPSK ✔✔✔✔DVB-C / QAM✔, (45-865 MHz)✔✔✔DVB-C / QAM with return path ✔TV pictures MPEG-2✔✔✔✔✔Fast spectrum analysis ✔✔✔✔✔Check sat mode✔✔✔✔Constellation pattern, audio/video PID ✔✔Graphical display of measurements ✔✔DiSEqC 1.2✔✔✔, full ✔, full GPS and ASI output ✔Wi-fi measurements✔*✔*✔*✔*Selection guide* with optional accessorySEFRAM TV Metersare designedand manufacturedin our plantof Saint-Etienne(France)SEFRAM 7862Panoramic TV Meter.SeframOptional accessories :Pouch for accessories: P/N 978656500Wi-fi adaptor: P/N 978651000Kit TR7836: USB cable + TR7836 software (CD-ROM) for Windows ®Car cigarette lighter power supply (P/N 978361000)F/BNC adaptor: P/N 213200002 - BNC / TV adaptor: P/N 213200010TR7836 software is commun for all SEFRAM TV MetersSpecifications subject to change without notice- - FT7862 A0032, rue Edouard Martel • BP 5542100 - St Etienne cedex - France+33 (0).4.77.59.01.01Fax. +33 (0).4.77.57.23.23Web:www.sefram.fr•e-mail:***************(*) the display of digital programs (encrypted) is possible if user has a valid user card and if the encryption type supported by the TV Meter - Please check with our sales department when ordering Supplied with :main adaptor (90-245V), a rugged carrying pouch, F/BNC adaptor, a user manual。
数字式绝缘-导通测试仪MODEL3005A-3007A 使用说明

4. 各部件名称
4-1.部件名称
1) LCD 显示屏 2) TRAC-LOK 开关(仅 3007A) 3) 量程选择开关 4) 测试开关 5) 端口 6) 背光灯开关(仅 3007A) 7) 功能开关 8) 测试探棒(红) 9) 测试探棒(黑) 10) 鳄口夹(黑) 11) 探棒盖帽(黑、红)
This Manual: /file/1366372
精确度
±1.5%rdg±5dgt
±1.5%rdg±3dgt
z AC 电压显示 0~600V ±5%rdg±3dgt
z 测量标准数据(电源电压的中间值为 8V)
绝缘电阻量程:0.5 MΩ时约 1000 次/分钟
导通电阻量程:1Ω时约 700 次/分钟
z 操作错误(IEC 61557-2,-4)
功能
量程
将测试探棒的一端完全插入仪器端口。 黑色探棒连接接地端,红色探棒连接回路端。
6. 测量
6-1. 切断并检查被测回路的电源 危险
● 为避免触电事故请勿在通电回路中测量。 ● 请勿在测量时打开电池盖或仪器外壳。
This Manual: /file/1366372
IEC61010-1 过电压 CAT III 300V 污染度 2 IEC61010-2-31(探棒安全规格) ● 显示屏的背光灯使工作人员可以在昏暗处操作。(仅 3007A 型) ● 长条图显示测量结果。 ● 肩带可允许工作人员双手操作。 ● 带电回路的蜂鸣警示功能 ● 自动放电功能 测量绝缘电阻时,在测量后可以释放回路中所存储的电量。在电压条形图上可显示放电情况。 ● 自动关机功能 为避免在测量后忘记关闭电源并延长电池使用量,最后测量结束后 10 分钟左右仪器将自动关机。 ● LOK 模式(仅 K3007A 型) 为防止电池损耗,一旦到达稳定读数,将会自动消除测试电流。
Motorola MOTOTRBO 自动测试与校准指南说明书

Motorola MOTOTRBO™ Auto-Testand Alignment3920B Radio Test PlatformThis guide describes how to setup and use the Motorola MOTOTRBO Auto-Test application on the 3920B. Supported Models by RegionNorth America Asia Europe Latin America CM200d / CM300d XiR M3188 / 3688 DM1400 / 1600 DEM 300 / 400 CP200d XiR P3688 DP1400 DEP 450SL300 SL1M SL1600 SL470 / 500 SL7550 / 7580 / 7590 SL1K SL4000 / 4010 SL8050 / 8550 XPR 2500 XiR M6660 DM2600 DEM 500 XPR 3300 / 3500 XiR P6600 / 6620 DP2400 / 2600 DEP 550 / 570XPR 4350 / 4380 / 4550 /4580 XiR M8220 / 8228 / 8260 /8268DM3400 / 3401 / 3600 /3601DGM 4100 / 4100+ / 6100 /6100+XPR 5350 / 5380 / 5550 /5580 XiR M8620 / 8628 / 8660 /8668 / CM7668DM4400 / 4401 / 4600 /4601 DGM 5000 / 5500 / 8000XPR 6100 / 6300 / 6350 / 6380 /6500 / 6550 / 6580 XiR P8100 / 8200 / 8208 /8260 / 8268DP3200 / 3400 / 3401 /3600 / 3601DGP 4050 / 4150 / 4150+ /6150 / 6150+XPR 7350 / 7380 / 7550 /7580 XiR P8600 / 8608 / 8620 /8628 / 8660 / 8668 /CP7668 / GP328D /GP338DDP4401 / 4600 / 4601 /4800 / 4801DGM 4100 / 4100+ / 6100 /6100+Equipment Requirements3920B with options• Option 061 – Tracking Generator• Option 400 – DMR Conventional Operation• Option 401 – Auto-Test II for DMR• Option 610 – Motorola MOTOTRBO Series Auto-Test and AlignmentTest Hardware• VIAVI 112277 – 10 Amp Current Shunt 0.01 Ohm (for Mobile PA BIAS Alignment)• Radio Programming Cable (See Table 1)• Audio Test Box – RLN4460 (See Table 1 for model compatibility)• Variable Power Supply (30 Amp rating for High Power mobiles)• Battery Eliminator and Interface Box (for portables)o Battery Eliminator (See Table 1)o Motorola RLN 4510 if available)• Test Cable (Low Loss Phase Stable recommended for best accuracy) BNC (M) – BNC (M)• Reference Cable (Short 6”) BNC (M) – BNC (M)• 10 dB attenuator BNC (M) – BNC (F) (Optional but recommended for best accuracy)• Connector Adapterso BNC (F) – BNC (F)o N (M) – BNC (F)o Antenna Test Adapter (See Table 1)o Antenna Adapter Holder (See Table 1)• For best accuracy, the 3920B should be connected and configured to use an external 10 MHz Standard.• For best accuracy, the 3920B should be connected and configured to use an external 10 MHz Standard.Motorola Part NumbersSubscriber Type ProgrammingCableBatteryEliminatorAudio TestBoxAntennaAdapterAntennaAdapterHolderCP200d portable PMKN4128 0180305K08EPP RLN4460 5886564Z01 n/a XPR 3300 /3500 portable PMKN4115 PMNN4428 RLN4460 PMLN6154 PMLN6201 XPR 6100 /6300 / 6350 /6380 / 6500 /6550 / 6580portable PMKN4012 PMNN4076 RLN4460 5880348B33 n/aXPR 7500 IS portable PMKN4012B+ PMLN6430 RLN4460 5880384G68 n/a XPR 7350 /7380 / 7550 /7580portable PMKN4012B+ PMNN4428 RLN4460 PMLN6154 PMLN6155 SL 300 portable CB000262A01 HW000405A01 RLN4460 28012039001 HW000406A01 SL 7550 / 7580/ 7590 portable 25-124330-01R HW000405A01 n/a 28012039001 7012042001 CM200d /CM300d mobile PMKN4147 n/a RLN4460 n/a n/a XPR 2500 mobile PMKN4147 n/a RLN4460 n/a n/aXPR 4350 / 4380 / 4550 /4580 mobile PMKN4010 n/a RLN4460 n/a n/aXPR 5350 /5380/ 5550 /5580mobile HKN6184 n/a RLN4460 n/a n/aTable 1Note: The above table includes radio models for the North American region. For a list of the comparable model names for all regions please reference the above supported models list or Motorola’s documentation.Before you Begin• Before testing begins, be sure to check the system software version of your 3920. Press the UTILS key (twice) to access the Utilities menu. Choose Software Settings>Software Upgrade to see theinstalled software versions.• The system software version is indicated next the “BASE_CONFIG”. The Motorola MOTOTRBO application version is indicated to the right of OPTION_604.• Check for software updates on the VIAVI 3920 Series Software webpage at/en-us/software-download/3920-series-software. The current systemsoftware version is displayed next to 3920 Series Software Update.• If the system software version is older than the version listed on this site, download the software, release notes, and installation instructions and update your system software. The system software download includes the latest Auto-Test Software Update.• If the system software version is current, check your Auto-Test application version, as the test scripts are updated more frequently than system software. The Auto-Test Release Notes will list currentversions in order of most recently updated.• The Auto-Test Software Update includes all currently released test scripts.MOTOTRBO Portable Interconnect1. Connect a 12 VDC power supply to the RLN4510 or battery eliminator.2. If the RLN4510 is not available, set the power supply to 7.5 VDC. The power supply should be ratedat 5 Amps.3. Connect radio ANT to 3920 T/R port.4. Connect radio programming cable to 3920 USB port.5. Connect radio programming cable to RLN4460 audio test box and audio cable to 3920 Audio In 1port if performing audio tests.MOTOTRBO Mobile Interconnect1. Connect radio TX Out to 3920 T/R port.2. Connect radio programming cable to 3920 USB port.3. Connect power supply to mobile with positive leadthrough the current shunt if PA BIAS alignment is to beperformed. The current shunt is not required for powertesting.4. The power supply should be capable of supplying therequired amount of current and the current limitingshould not be set too low. Proper gauge wires shouldalso be used.5. Connect radio programming cable to RLN4460 audio test box and audio cable to 3920 Audio In 1port if performing audio tests.Access to the Application through Auto-Test II1. On the 3920, press the CONFIG key (twice) to gain access to the System menu and select Auto-Test II. This can also be accomplished by right clicking with a mouse and selecting Auto-Test II.2. Select the Motorola MOTOTRBO Auto-Test from the Auto-Test II menu.Test Screen - Test SelectionsThe selections on this screen allow any combination of tests or alignments to be performed. The application will not attempt to perform invalid operations on the radio if the test or alignment is not supported by the radio that is connected.When first accessing the test screen, use the Read Radio key to query the radio. Note that most of the test options are not selectable initially until a radio is read.Select All Tests - This will enable all tests.Reset Test Menu - This will disable all tests.View Results while testing• When selected and the test or alignment function has been executed, the screen will change and will display all tests and alignments as they occur. If not selected, the application willstay on this screen and show only the current status, Testing / Passed / Failed / Skipped.Beep at end of test• The 3920 will produce an audible beep at the completion of all tests and alignments to notify the operator that the test or alignment is complete.Enable long format logging• Diagnostic mode that shows all adjustments to soft pot values.Results at end of test• Determines what the 3920 does with the current test results after the test is complete. The options are Ask, Save (default), Print, Save & Print, or Skip.Test Screen - Function keysF1 – Test• Starts testing the radio. No alignments will be made. A test report of Pass / Failresults will be recorded.F2 – Align and Test• All selected items that are capable of being aligned will be aligned.Performance tests will also be performed to validate the alignment.F3 – Read Radio• This will query the radio and determine the model of radio under test. Beforethis is performed, not all options will be available, such as Test or Align andTest.F4 – Edit Specs• Only required when initially setting up the system for a specific model of radio.Must be reviewed prior to testing a new model of radio or when changing testcables.F5 –Results• Views results of the last test performed. Also allows test results to be copied toa USB drive.Note: Motorola recommends retuning of radios only if it is a part of an issue resolution or engineering recommendation. Reference oscillator should be checked and tuned (if necessary) for radios instorage for six months or more.Edit Specs ScreenInfo lines• Allows three lines of user text to be entered that will be visible at the beginning of the printout in the Test Results file. These could be used to identify a Technician ID, CompanyName or anything that might be useful at the beginning of the printout.F1 – Save As• Save all modifications to specifications to a user specified file. Information on all models is saved in a single file.F2 – Save• Save all modifications of specifications to the currently loaded specification configuration file.F3 – Recall• Recall a saved specification file from memory.F5 – Cable Loss• Access to the cable loss measurement application.Note: This is one of the first things that should be done prior to testing a radio.F6 – Restore Defaults• Resets specifications to the factory defaults. Note, these values are not permanently stored unless you answer yes when prompted or press the Save Key. This does not impact Radioselection, Info lines, Offset or cable selections.** This operation should be performed after updating the application to a new version.Model Selection• This is used to access the specifications for supported models.Note that the specifications used when testing a radio areautomatically determined after the radio model has been identifiedat the beginning of a test sequence.Copy• Copies currently selected Cable to:• All Portables• All Mobiles• All Radios• Additionally allows copying entries in the info lines to the selected list.Note: This will automatically save to the currently selected specification file.Offset / Cable Loss• These values are used to correct the power meter for TX Tests and RF Generator for RX Tests. If you are using an external 6 dB high power attenuator, you can enter a negativevalue as an offset. You can additionally use a cable sweep plot to compensate for a testcable. This feature is primarily needed for testing or aligning Transmitter power levels.Note: If it is not possible to perform the cable sweep, enter a fixed negative value in the offsetfield to compensate for the connecting cable. This value will be used at all frequencies tocompensate the power meter. A higher loss value entry would cause the Power meter to readhigher values.• The offset entry will be applied in addition to a cable loss selection.Power Levels• For Portables and Mobiles, the default values should match the MIN and MAX values in the radio’s code plug. These are the TEST MODE power levels that Auto-Test uses. Auto-Testcannot transmit the user programmed power levels.Reference Oscillator• These values are used for test evaluation only. If Alignment is selected, the radio will be aligned to within 30 Hz error. Note that an External Reference is recommended.RX BER Tests• The number of frames is the number of frames that are averaged in the radio prior to reporting a BER reading. The BER Level is the RF Injection level from the 3920. The radioshould have 5% or less BER at this test level.Cable Loss ScreenCable 1 - 3• Choose up to 3 differentcable plots. These areinitially flat with nocalibration. After makinga selection, prompts willbe provided for cableconnection and the cableinsertion loss will bemeasured.Delete Data• Deletes cable data.Test Cable CalibrationReference Cable• The 3920 will use its spectrum analyzer and tracking generator to sweep a reference cable and will establish this sweep as a zero reference.• This cable is used ONLY for calibration purposes and will not be used for testing the radio.Getting more accurate results• To obtain better results from this process, use a 3 or 6 dB attenuator at the end of the reference cable that is connected to the T/R port of the 3920. This will improve the VSWR ofthe cable when it is connected to the Radio Testing Cable.Reference Cable Sweep• Gen port -> Reference Cable -> 3 or 6 dB Attenuator (optional) ->TR portRadio Testing Cable Sweep• After the Reference cable sweep has been completed, you will be prompted to connect the Radio Testing Cable in line with the Reference cable. The 3920 will again use its spectrumanalyzer and tracking generator to sweep the combined cables and will plot the differencebetween the two sweeps as the insertion loss of the cable that was added.Radio Testing Sweep• Gen port -> Reference Cable -> 3 or 6 dB Attenuator (optional) -> Adapter -> Radio Testing Cable -> TR portNOTE: The on-screen instructions make no mention of the use of an external attenuator for thiscalibration.Results of Cable CalibrationCable 1• This calibration wasperformed as directedwithout the use of the 6dB external attenuator.Cable 2• This calibration wasperformed with thesame Radio Test Cablebut a 6 dB attenuatorwas used as explainedabove.Cable 3• This calibration wasperformed with theexternal 6 dB attenuatorand a high quality, lowloss, double shieldedRadio Test Cable.The Difference• Results will vary depending on the quality and length of the test cable. This test was done with a 3ft RG-58 test cable.• Notice that Cable 1 response is not as smooth as the Cable 2 response. These waves are caused by a VSWR mismatch at the point where the cables are connected together. Use of the 6 dB attenuator at this junction improves the VSWR and minimizes some of thesestanding waves.The Impact• When calibrating the transmitter power, even small amounts of error in the insertion loss measurement can cause the radio to fail the test. An insertion loss of 0.4 dB that is notaccounted for can cause up to a 10% error in power measurement.• With Dual Band radios, it is important to note that the insertion loss at low frequencies is less than the insertion loss at higher frequencies so one fixed entry for cable loss will not correct the power meter in both bands correctly.ResultsDisplays the most recent test result.• Shows Time Date stamp along with the 3920’s serial number and version information for both the system and the application.• Shows radio model, serial number along with radio software versions and configurations.• Shows the Flash CodeLoad File• Allows a different test results file to be loaded and displayed.Print Results• Prints the test results to a printer that is connected to the 3920 or a network printer if configured for this in the systems printer configuration screen.Clear• Clears the currently displayed results from the screen.Copy Results to USB• Copies ALL test result files from the 3920’s hard drive to a connected USB flash drive.Clear Results Data• Deletes all test results files from the 3920’s hard drive.Running the Auto-Test, Step by Step1. Select the Auto-Test II system and select the Motorola MOTOTRBO Auto-Test.2. Connect the Portable or Mobile radio to be tested and select “Read Radio”.3. Edit Specs Screen1. Verify specifications are set appropriately.2. If cable loss factors have not been created, then access the Cable Loss screen and eithersweep the test cable or enter appropriate correction factors if known.3. Select the cable to be used for this radio on the Edit Specs screen.4. Press Return.4. Main Test Screen1. Select the tests or alignments to be performed.2. Press the Test or Align and Test softkey.5. Failed tests should be confirmed by re-testing.Contact Us +1 800 835 2352 *******************************To reach the VIAVI office nearest you,visit /contacts© 2021 VIAVI Solutions Inc. Productspecifications and descriptions inthis document are subject tochange without notice.。
BCM智能电池合路器测试指导书范文V
BCM166智能电池合路器产品测试指导书版本:拟制审核批准日期校正记录:序号校正内容校正日期作者1底稿2016/7/02 234567BCM166智能电池合路器产品测试指导书要点词:BCM166,电池合路器,测试指导摘要:本文档主要描述了BCM166产品的测试指导要求。
缩略语:缩略语英文全称中文释义BCM BatteryCombinerMonitor电池共用管理器PSU PowerSupplyUnit电源模块目录1.归纳...................................................................1.1.本指导书目的......................................................1.2.版本描述..........................................................2.系统功能描述............................................................2.1.系统主要功能描述..................................................2.2.系统主要功能列表..................................................2.3.系统外观布局......................................................2.4.测试组网表示......................................................2.5.测试准备条件......................................................3.测试用例...............................................................3.1.测试用例1:系统放电管理测试......................................3.2.测试用例2:系统充电管理测试......................................3.3.测试用例3:电池状态检测测试......................................3.4.测试用例4:电池故障检测测试......................................3.5.测试用例5:电池共用管理器故障测试................................4.测试目标结果............................................................归纳1.1.本指导书目的本测试指导书主要依照《BCM166电池合路器产品设计规格书》相关规格要求拟定。
KA01021PZH Deltabar S PMD70-75 FMD76-78 Profibus 差压测量简明操作指南

minuteman M28036TDQP 产品说明书

OPERATION■ SERVICE ■ PARTS ■ CARELumina 28 Traction Drive Battery Burnisher Model: M28036TDQPTable of ContentsIMPORTANT SAFETY INSTRUCTIONS (1)OPERATING INSTRUCTIONS (2)INSPECTION (2)ELECTRICAL (2)BATTERIES (2)OPERATION (2)AFTER USE (2)MAINTENANCE (2)BATTERY SERVICE AND INSTALLATION (3)CHARGING OF BATTERIES (3)MACHINE OVERVIEW (3)DASHBOARD CONTROL PANEL (3)PAD INSTALLATION (4)PAD PRESSURE ADJUSTMENTS (4)CIRCUIT BREAKER PROTECTION (4)CARBON BRUSH REPLACEMENT (4)CARBON BRUSH SERVICE (4)EXPLODED VIEWS (5)BASE ASSEMBLY (5)BASE ASSEMBLY BOM (6)MAINFRAME ASSEMBLY (7)MAINFRAME ASSEMBLY BOM (8)PAD DRIVER ASSEMBLY (9)ELECTRICAL ASSEMBLY (10)ELECTRICAL ASSEMBLY BOM (11)CONSOLE ASSEMBLY (12)CONSOLE ASSEMBLY BOM (13)DASHBOARD ASSEMBLY AND BOM (14)SCHEMATICS (17)Minuteman International Made Simple Commercial Limited Warranty (22)IMPORTANT SAFETY INSTRUCTIONSCAUTION: Operators must read and understand this manual before operating or maintaining this machine.Keep hands and feet clear of moving parts while machine is in operation.Disconnect the power to the machine by pressing the Red Emergency Disconnect Button when charging batteries or during installation or removal of pads.During operation, loose objects on the floor can become dangerous projectiles if struck by the high speed pad. Special attention should be paid in removing or avoiding loose floor tile, electrical cables, telephone connection boxes.Electrical motors and components can cause an explosion when operated near explosive materials Or vapors. Do not operate this machine near flammable materials such as solvents, thinners, fuels, grain dust, etc.Keep machine moving to reduce the risk of damaging floor finish and floor.Make sure the Red Emergency Disconnect Button is pressed and the battery connector is unplugged from the machine before performing any maintenance procedures.Store or park this machine on a level surface only.These machines are designed for level floor operation only. Do not operate on ramps or inclines.Battery acid can cause burns. When working on or around batteries, wear protective clothing, safety glasses and remove metal jewelry. Do not lay tools or metal objects on top of batteries.Charging batteries generates explosive gases. DO NOT CHARGE BATTERIES WHEN OPEN FLAMES OR SPARKS ARE PRESENT. DO NOT SMOKE. Charge the batteries in a well-ventilated area with the battery cover open.Maintenance and repairs must be performed by authorized personnel.SAVE THESE INSTRUCTIONSOPERATING INSTRUCTIONSINSPECTIONCarefully unpack and inspect your burnisher for shipping damage. Each unit is tested and thoroughly inspected before shipment; any damage is the responsibility of the delivery carrier who should be notified immediately.ELECTRICALThis machine is battery operated and designed to operate on 36 volts DC (6) 6 volt batteries. BATTERIESBurnishers are shipped with batteries. (6 required)Part No. 956744 6V 325AH 20 Hr. Rate (Optional)We do not recommend mixing AMP hour capacities. Any alternate battery sets can be used if they equal physical size and capacity. On board battery charger must be recalibrated if alternate batteries are used. Contact Minuteman Engineering for procedure. See next page for service and installation. OPERATIONBefore starting, familiarize yourself with the machine and its controls (see “Machine Overview” and “Dashboard Control Panel” diagrams). To turn the machine ON, do the following:1. Make sure 28” high speed pad is used. Make sure the pad is installed on the machine byfollowing instructions under ”Pad Installation.”2. Make sure that the battery charger is unplugged and cord is safely stored.3. Lift the red emergency disconnect button so it is in the up position.4. Lower the pad driver assembly by pushing the pedal slightly outward on the machine (unlockit), and then release it slowly.5. Place hands on the bails and squeeze the bail lever to start the operation of the machine.Move forward in a straight line, check the reading on the Operating Range Meter and make sure you are in the Green Zone.6. Adjust the pad pressure as needed by pressing the pressure adjust rocker switch. (See PadPressure Adjustments.)7. Adjust speed as needed by turning the speed control knob accordingly.AFTER USETo raise the pad driver, push down until the pedal arm engages into the pedal catch. Turn machine off by turning the key switch on the control panel. Machine can be cleaned with a mild detergent and a damp cloth. Batteries should be charged after each use or when the battery condition meter shows a low charge. Once the battery charger reads 0 amps, the batteries are recharged. This should take approximately 11 hours if the batteries are completely discharged.MAINTENANCEPeriodically remove batteries from machine. Clean the batteries and battery tray with a solution of baking soda and water. Check all battery cables and wiring for signs of damage and wear. Replace as needed. Grease front wheel and rear caster zerks once a month for best operation.BATTERY SERVICE AND INSTALLATIONWARNING: Battery acid can cause burns. When working on or around batteries, wear protective clothing, safety glasses and remove metal jewelry. Do not lay tools or metal objects on top of batteries.CHARGING OF BATTERIESCharging batteries generates explosivegasses. DO NOT CHARGE BATTERIESWHEN OPEN FLAMES OR SPARKS AREPRESENT. DO NOT SMOKE. Charge thebatteries in a well-ventilated area withbattery cover open. Fluid levels should bechecked before and after charging andmaintained at the proper levels. If theburnisher is not used for extended periodsof time, batteries should be kept fullycharged with a boost charge once a week.MACHINE OVERVIEW1 – Dashboard Control Panel2 – Emergency Belly Bar Stop3 – Emergency Stop Button4 – Circuit Breaker, 3 AMP5 – Circuit Breaker, 20 AMP6 – Circuit Breaker, 125 AMP7 – Charger, 36 VDC, 25 AMP8 – Circuit Breaker, 2 AMP9 – Foot PedalDASHBOARD CONTROL PANEL1 - On / Off Key Switch2 - Battery Gauge3 - Traction Drive Directional Switch4 - Traction Drive Speed Control5 - Pad Pressure GaugePAD INSTALLATIONThe red emergency disconnect button and the key switch must be in the OFF position before installation and the pad driver assembly in the RAISED position. Remove center cup locking device by gripping on outer edges and turning clockwise. NOTE: Center cup cannot be pulled out; it must be unscrewed. After removing used pad, place new pad on pad driver assembly using outer flange of pad driver to center the pad. Push centering locking cup through the pad and into the pad driver assembly. The ratchet teeth on the center cup will engage into the pad driver assembly and should be pushed in as far as possible. If further tightening is needed, rotate the center-locking cup counter-clockwise.PAD PRESSURE ADJUSTMENTSThe pad pressure adjust switch is located on the control panel. Different floors, conditions, and pads produce carrying pad load conditions. Ideal burnishing conditions are maintained while the operating range meter remains in the Green Zone. If the meter reads in the Red Zone decrease the pad pressure. When the machine is operated in the Red Zone for a long period of time motor overload will occur and the 125-amp circuit breaker for the motor will trip. If the motor circuit trips:1. Check pad condition.2. Decrease pad pressure.3. Reset circuit breaker.CIRCUIT BREAKER PROTECTION125 amp circuit breaker protects pad driver motor from excessive overload conditions.20 amp circuit breaker protects drive motor, second 20 amp circuit breaker protects vacuum motor (optional).3 amp circuit breaker protects control circuits against possible electrical shorts. If either circuit breaker trips, first determine the cause and correct the condition before resetting the breakers. CARBON BRUSH REPLACEMENTDesign life of carbon brushes is between 1800-2000 hours. Replace brushes if worn to 3/8" or less, broken, or chipped. All carbon brushes should be replaced when motor is serviced. Four (4) are required, P/N 572003. Red indicator on control panel (above Emergency Disconnect Button, below the Dashboard) will glow when carbon brush service is required.CARBON BRUSH SERVICE1. Disconnect batteries from machine.2. Remove two screws that hold dust control housing and motor cover to motor.3. Blow out top of motor with air line.4. Loosen screw and remove carbon brush lead.5. Slide brush spring off the back of carbon brush and remove brush.6. Reverse order for installation of new carbon brushes.SCHEMATICS192021Minuteman International Made Simple Commercial Limited WarrantyMinuteman International, Inc. warrants to the original purchaser/user that the product is free from defects in workmanship and materials under normal use. Minuteman will, at its option, repair or replace without charge, parts that fail under normal use and service when operated and maintained in accordance with the applicable operation and instruction manuals. All warranty claims must be submitted through and approved by factory authorized repair stations.This warranty does not apply to normal wear, or to items whose life is dependent on their use and care, such as belts, cords, switches, hoses, rubber parts, electrical motor components or adjustments. Parts not manufactured by Minuteman are covered by and subject to the warranties and/or guarantees of their manufacturers. Please contact Minuteman for procedures in warranty claims against these manufacturers.Special warning to purchaser -- Use of replacement filters and/or prefilters not manufactured by Minuteman or its designated licensees, will void all warranties expressed or implied. A potential health hazard exits without original equipment replacement.All warranted items become the sole property of Minuteman or its original manufacturer, whichever the case may be.Minuteman disclaims any implied warranty, including the warranty of merchantability and the warranty of fitness for a particular purpose. Minuteman assumes no responsibility for any special, incidental or consequential damages.This limited warranty is applicable only in the U.S.A. and Canada, and is extended only to the original user/purchaser of this product. Customers outside the U.S.A. and Canada should contact their local distributor for export warranty policies. Minuteman is not responsible for costs or repairs performed by persons other than those specifically authorized by Minuteman. This warranty does not apply to damage from transportation, alterations by unauthorized persons, misuse or abuse of the equipment, use of non-compatible chemicals, or damage to property, or loss of income due to malfunctions of the product.If a difficulty develops with this machine, you should contact the dealer from whom it was purchased.This warranty gives you specific legal rights, and you may have other rights which vary from state to state. Some states do not allow the exclusion or limitation of special, incidental or consequential damages, or limitations on how long an implied warranty lasts, so the above exclusions and limitations may not apply to you.Cord Electric Group………. Three years parts, two years labor, ninety days travel (Not to exceed two hours) Exceptions………. Port-A-Scrub, one year parts, six months laborMPV 13, one year partsMPV 14 and 18, two years parts, one year laborRapidAir blower, one year parts, one year laborExplosion-Proof Vacuum, one year parts, one year laborPneumatic Vacuums, three years parts, one year laborBattery Operated Group….. Three years parts, two years labor, ninety days travel(Not to exceed two hours)Exceptions……Sweepers, one year parts, one year labor, ninety days travel(Not to exceed two hours)Internal Combustion Group….One year parts, one year labor, ninety day travel(Not to exceed two hours)Replacement Parts……………..Ninety daysBatteries………………………….0-3 months replacement, 4-12 months pro-ratePolypropylene Plastic Tanks…Ten years, no additional laborA Member of the Hako Group of Companies111 South Rohlwing Road · Addison, Illinois 60101 USA 988174 Phone 630- 627-6900 · Fax 630- 627-1130 Rev A 10/06 E-Mail, Printed in USA22。
- 1、下载文档前请自行甄别文档内容的完整性,平台不提供额外的编辑、内容补充、找答案等附加服务。
- 2、"仅部分预览"的文档,不可在线预览部分如存在完整性等问题,可反馈申请退款(可完整预览的文档不适用该条件!)。
- 3、如文档侵犯您的权益,请联系客服反馈,我们会尽快为您处理(人工客服工作时间:9:00-18:30)。
修订号修改日期
一步骤1:
1.量其短路电压 TP8 5V \ TP7 3.3V \ TP6
2.5V \ TP9 2.8V \ TP10 1.8V \ TP17 1.2V 等。
2.上短路帽,装上BT1电池、CN15摄像头。
二步骤2:第一步程序下载
1.连上治具USB、把板子放到治具上5V供电。
2.打开IAR EmbeddedWorkbench 5.4 版本
出现下对话筐
图1
单击FiIE--Oper--WorKspace出现以下对话筐,在查找范围单击桌面选中ProgrammingBIN by EWARM(ST)V2双击出现STW32-BIN-Write打开。
图2
修订号修改日期
下图单击下载:
图3
3.下载完后关掉叉(如上图)、拔掉5V电源第一步下载完毕。
三步骤3:第二步程序下载及USBCN8 CN9测试,程序用最新V1.0版本,
STM3220G-EVAL_Test5-21.zip
1.打开IAR 5.5版本,单击File--Open--Workspace出现以下对话筐,在查找MB786 Test sourse--EvalBoard--STM3220G-EVAL_USB.eww打开,注意红色箭头,下载完成看屏幕有显示
图1
2.下载MB786-USB程序
图2
修订号修改日期
3.下载(USB分两部分下)红色箭头为第一步、绿色为第二步,注意:把SW1 SW2开关拨到0 位置。
图3
4.第一步下载根据红色箭头选择完成后屏幕有显示USB OTG FS Device连接USB到CN8接口看LD6亮,电脑光标在左右移动,屏幕有显示一窜USB数据表示可以。
5.第二步下载根据绿色箭头选择完成后屏幕有显示USB MSC Host Demo Hs连接USB断线到CN9接口看LD7亮,写读验证文件OK,屏幕有数据显示OK表示测试可以。
6.单击File--Open--Workspace出现以下对话筐,在查找MB786 Test
sourse--EvalBoard--STM3220G-Master.eww,选择Ram_RevB下载注意:把SW1 SW2开关拨到11与01位置测试两次。
7.看(图4)红色箭头处文件选择为Fiash_RevB,选择文件为MB786_Master下载,下载完成后(图4)红色箭头处双击屏幕有显示(上海等字)把SW1 SW2开关拨到00位置。
图4
修订号修改日期
四步骤4:功能测试; 注意各项测试检查提示短路帽配置
1.先检查短路帽、电池、摄像头是否有装。
2.插上5V电源屏幕自动测试,根据屏幕提示按B2 B3 B4键屏幕显示四种颜色,看LD1 LD2 LD3 LD4是否有亮有亮按B4.灯颜色要检查
3.屏幕显示Joystick UP按U32键测上下左右中.
4.根据显示Touch red Square测触摸左右、左下、右下显示正确.
5,Ir DA测试红外把JP22 2-3位置,要与副板红外对齐,按B4测试OK
6.测试CAN1串口JP3&JP10 2-3位置,要与副板连接按B4 LD1 LD2 LD3 LD4闪一下,其
中要拔次JP10短路帽,再按B4显示OKLD4 LD3亮,屏幕指示JP3&JP10 1-2位置按B4
7.MotorCadapter测试CN5 插上CN5短线按B4 (注意插内存测不过)。
8.测USART 3(CN16) JP22 1-2位置按B4
9.测Insert SmartCard(CN20)看JP21是否有插短路帽按B4
10.测12S Speaker风鸣器 JP16 2-3位置 JP21拔掉,按B4看是否有声音
11.测CN11耳机 JP21拔掉按B4有声音,根据显示按B4,再按B4右左响一声按B4
12.测SD卡(CN6)上SD卡 JP16 1-2位置 JP22 OPEN拔掉按B4
13.测ADC_RV1左右旋转
14.测ADC_MIC吹一下麦克风
15.测Bat+ =>电池 JP19-3脚短路CN1-26脚按B4 LD1 LD2 LD3 LD4亮
16.测MEMS根据显示箭头方向侧立两次按B4
17.测Camera摄像头(CN15)看是否有装摄像头,B4两次进入摄像、按B4图像分成两
张,再按B4图像分成四张,按B4(注意看摄像是否有水波纹-B3初始化、清晰等)
修订号修改日期
18.测MII CLK网口(CN7)JP6 2-3\ JP5 1-2\ JP8拔掉(注意插上短网线绿灯亮按B4
南绿灯闪两下),按B4 JP5 2-3位置(网口灯闪),按B4 JP6 1-2位置 JP8插上按 B4闪两下
19.测USB(CN8)插上USB治具按B4 LD6亮,屏幕显示LD5 Red用治具短路一下LD5亮,
按B4
20.测USB(CN9)插上USB治具线按B4 LD7亮,屏幕显示LD8 Red (可用做好的治具LD8
正极与地短路一下 LD8亮)按B4测试完成
五步骤5:下载DEMO文件版本STM3220G-Eval_Demo_V1.0.2.Hex
1.DEMO还要通电测试检查时钟,USB,摄像头。