MB2.0S设定说明
HGST Ultrastar SN100 Series PCIe SSDs 数据手册说明书
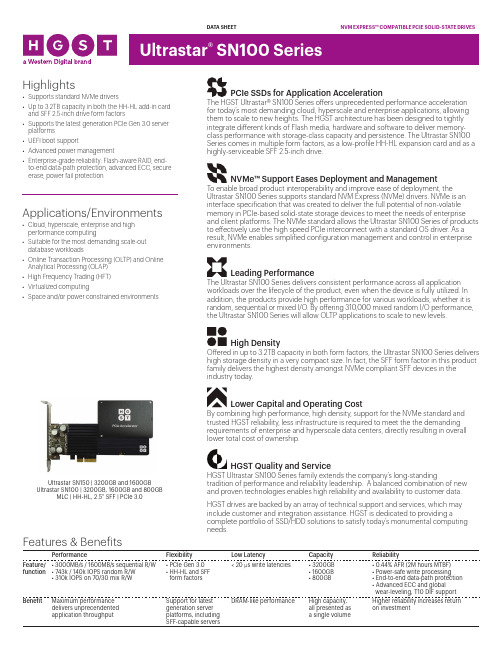
PCIe SSDs for Application AccelerationThe HGST Ultrastar® SN100 Series offers unprecedented performance accelerationfor today’s most demanding cloud, hyperscale and enterprise applications, allowingthem to scale to new heights. The HGST architecture has been designed to tightlyintegrate different kinds of Flash media, hardware and software to deliver memory-class performance with storage-class capacity and persistence. The Ultrastar SN100Series comes in multiple form factors, as a low-profile HH-HL expansion card and as ahighly-serviceable SFF 2.5-inch drive.NVMe™ Support Eases Deployment and ManagementTo enable broad product interoperability and improve ease of deployment, theUltrastar SN100 Series supports standard NVM Express (NVMe) drivers. NVMe is aninterface specification that was created to deliver the full potential of non-volatilememory in PCIe-based solid-state storage devices to meet the needs of enterpriseand client platforms. The NVMe standard allows the Ultrastar SN100 Series of productsto effectively use the high speed PCIe interconnect with a standard OS driver. As aresult, NVMe enables simplified configuration management and control in enterpriseenvironments.Leading PerformanceThe Ultrastar SN100 Series delivers consistent performance across all applicationworkloads over the lifecycle of the product, even when the device is fully utilized. Inaddition, the products provide high performance for various workloads, whether it israndom, sequential or mixed I/O. By offering 310,000 mixed random I/O performance,the Ultrastar SN100 Series will allow OLTP applications to scale to new levels.High DensityOffered in up to 3.2TB capacity in both form factors, the Ultrastar SN100 Series delivershigh storage density in a very compact size. In fact, the SFF form factor in this productfamily delivers the highest density amongst NVMe compliant SFF devices in theindustry today.Lower Capital and Operating CostBy combining high performance, high density, support for the NVMe standard andtrusted HGST reliability, less infrastructure is required to meet the the demandingrequirements of enterprise and hyperscale data centers, directly resulting in overalllower total cost of ownership.HGST Quality and ServiceHGST Ultrastar SN100 Series family extends the company’s long-standingtradition of performance and reliability leadership. A balanced combination of newand proven technologies enables high reliability and availability to customer data.HGST drives are backed by an array of technical support and services, which mayinclude customer and integration assistance. HGST is dedicated to providing acomplete portfolio of SSD/HDD solutions to satisfy today’s monumental computingneeds.Highlights• Supports standard NVMe drivers• Up to 3.2TB capacity in both the HH-HL add-in cardand SFF 2.5-inch drive form factors• Supports the latest generation PCIe Gen 3.0 serverplatforms• UEFI boot support• Advanced power management• Enterprise-grade reliability: Flash-aware RAID, end-to-end data-path protection, advanced ECC, secureerase, power fail protectionApplications/Environments• Cloud, hyperscale, enterprise and highperformance computing• Suitable for the most demanding scale-outdatabase workloads• Online Transaction Processing (OLTP) and OnlineAnalytical Processing (OLAP)• High Frequency Trading (HFT)• Virtualized computing• Space and/or power constrained environmentsUltrastar SN150 | 3200GB and 1600GBUltrastar SN100 | 3200GB, 1600GB and 800GBMLC | HH-HL, 2.5” SFF | PCIe 3.0Features & BenefitsPerformance Flexibility Low Latency Capacity ReliabilityFeature/function• 3000MB/s / 1600MB/s sequential R/W• 743k / 140k IOPS random R/W• 310k IOPS on 70/30 mix R/W• PCIe Gen 3.0• H H-HL and SFFform factors< 20 μs write latencies• 3200GB• 1600GB• 800GB• 0.44% AFR (2M hours MTBF)• Power-safe write processing• End-to-end data-path protection• Advanced ECC and globalwear-leveling, T10 DIF support Benefit Maximum performancedelivers unprecendentedapplication throughputSupport for latestgeneration serverplatforms, includingSFF-capable serversDRAM-like performance High capacity,all presented asa single volumeHigher reliability increases returnon investmentSpecificationsULTRASTAR SN150ULTRASTAR SN100Model/Part #HUSPR3232AHP301 / 0T00833 HUSPR3216AHP301 / 0T00831HUSPR3232ADP301 / 0T00839 HUSPR3216ADP301 / 0T00837HUSPR3280ADP301 / 0T00835ConfigurationDefault capacities (GB 1)3200 / 16003200 / 1600800Capacity range 2 (min-max GB)2240-3820 / 1120-19102240-3820 / 1120-1910560-955Interface PCIe 3.0 x4PCIe 3.0 x4 (8639)←Form factors HH-HL add-in cardSFF 2.5-inch drive ←Performance 3Read throughput (max MB/s, sequential 128k)3000←2600Write throughput (max MB/s, sequential 128k)1600←1400Read IOPS (max IOPS, random 4k)743,000←634,000Write IOPS (max IOPS, random 4k)140,000 ←80,000Mixed IOPS (70/30 R/W, random 4k)310,000←190,000Read IOPS (max IOPS, random 8k)385,000←330,000Write IOPS (max IOPS, random 8k)75,000←42,000Latency 512B (μs)20←←ReliabilityMTBF 4 (M hours) 2.0←←Annual failure rate 4 (AFR)0.44%←←Endurance 3 DW/D ←←Warranty 5 Years←←PhysicalDimensions, without bracket (mm)167.65 x 68.9 x 14.49100.45 x 69.85 x 15←Weight, without bracket (g) 232 / 231177 / 174166EnvironmentalPower consumption (active/idle)25 Watts / 8 Watts ←←Operating temperature 0° to 55°C 0° to 70°C ←Non-operating temperature -40° to 70°C ←←Airflow (LFM) 300←←Thermal throttling SupportedTemperature monitoring In-band and out-band using SMBus PowerSafe® technology Data protection during power lossPower throttling SupportedPower rails 3.3V aux, 12V supply rail JEDEC compliance 3-month retention at 40°C at EOLOperating Systems Linux RHEL 6/7, SLES 12, CentOS 6/7, Open SUSE 12Windows Microsoft Server 2008 R2, Windows 2012, Windows 2012 ServerSoftwareHGST Device Manager (HDM)HDM 3.2 (CLI)NVMe standard 1.1aManufacturing Standards Penang, MalaysiaISO 9001:2008 certified, ISO 14001:2004 certifiedDS26-EN-US-0316-04One gigabyte (GB) is equal to one billionbytes, one terabyte (TB) is equal to 1,000GB (one trillion bytes), and onepetabyte (PB) is equal to 1,000TB (one qua-drillion bytes) when referring to solid-state drive or hard drive capacity. Accessible capacity will vary from the stated capacity due to formatting and partitioning of the drive, the computer’s operating system, and other factors.Performance and endurance will vary with changes in usable capacity. Consult product manual for further details.All performance measurements are in full sustained mode.MTBF and AFR targets are based on a sample population and are estimated by statistical measurements and acceleration algorithms under median operating condi-tions. MTBF and AFR ratings do not predict an individual drive’s reliability and do not constitute a warranty.How to Read theUltrastar Model NumberHUSPR3238AHP301 = 3200GB, HH-HL, PCIe Gen 3.0H =HGST U =Ultrastar S =Standard PR =PCIe read intense 32=Max nominal capacity(3200GB)32=Actual capacity this model(32 = 3200GB, 16 = 1600GB, 80 = 800GB)A =Generation code H =HH-HL form factor(vs. D for SFF form factor)P3=Interface, PCIe Gen 3.00=Reserved 1=NVMe compatible© 2016 Western Digital Corporation or its affiliates. Produced 3/16. Revised 7/16.Western Digital, the HGST logo, PowerSafe and Ultrastar are registered trademarks or trademarks of Western Digital Corporation or its affiliates in the U.S. and/or other countries. All other marks that may be mentioned herein are the property of their respective owners. References in this publication to HGST-brand products, programs, or services do not imply that they will be made available in all countries. Product specifications provided are sample specifications and do not constitute a warranty. Actual specifications for unique part numbers may vary. Please visit our website, , for additional information on product specifications. Pictures shown may vary from actual products.Information & Technical Support /support Partners First Program************************ /partners。
mb嫣红强袭电子说明书

mb嫣红强袭电子说明书MG嫣红系列(MASTER GRADE)比例:统一的1/100价格:2500YEN-10000YEN间,价格跨度大,整体偏贵特点:目前为止,基本可以再现完整内构,模型本身可动范围也令人满意,最近几作五指可动化实现,模型外型比例协调,美感与质感并存,符合对模型要求较高朋友收藏。
详细介绍:MG:MASTER GRADE 常见比例为1/100(圣战士,机动警察为1/35,但不属于高达),组合难度中等至中等偏上,制作难度中等,大部分适合素组,价格比较贵(2000-10000日元),分色中等至好,活动性中等至较好,外型一般不错。
一般有部分内构,部分可变形MS无内构,有些有全内构。
例如铁球是2000日元的,机体内构不错。
附送支架和整备员,超值。
而从SEED的强袭开始也正式带动了个别MG模型附带支架的习惯,且越做越精细。
MG以往只是出品UC系列的模型,后来也新加入了G系列的4款即神,闪光,MASTER和Spiegel,由于SEED系大红大紫,其产品也加入了MG和PG的行列,MG有强袭,嫣红强袭,和自由高达。
MG 里有5个版本:第1种是普通的MG版盒面上只有MG的标识第2种是Ver. 1.5,有RX-78-2等。
第3种是Ver.Ka,它是由日本著名的机械设定师katoki重新设计而出的模型,并且加入了其主观的设计理念(他设计的机体包括V、G、W 等)有RX-78-2、WING ZERO CUSTOM(OVA前期设定版)、Ball等。
第4种MG是最新的Ver Project Pegasus,是注重活动性的MG,也采取了新的MG版运用胯部支撑可动和全新手掌和正式的腰部双关节可动的新技术。
而一年战争版的RX-78-2,也可做其代表。
第5种就是随着Z高达剧场版上映所推出的MG版Ver2.0 ,代表作有Z和MK II等。
这两款是重新设定的模型,采用了一年战争的新技术,同时也效仿了PG版的模型设计概念,在尽量多的内构中最大可能的突出其强大的可动性。
市场常见连接器类型说明

1-1: SD Card 系列:
1.SD Card系列分类:
• SD • MiniSD/MiniSD Adapter • MicroSD/MicroSD Adapter • SDIO (Import Output)
2.SD CARD系列常见国际品牌
Sandisk--美国 Panasonic/松下--日本 TOSHIBA/东芝--日本 Kingston/金士頓--美国 Transcend/创见--台湾 KingMax--台湾 Lexar/雷克沙—美国
类型
外形尺寸(L*W*T)mm
标准卡
25*15*0.8
MICRO SIM 卡
NANO SIM卡
15*12*0.8 12.3*8.8*0.7
1-8:PCMCIA Card系列內容
PCMCIA Card(Personal Computer Memory Card International Association )是一个成立于1989年的国际性组织,是一个有300多个 成员公司的国际标准组织和贸易联合会,其成员有Intel、AMD、IBM、 Compaq和TI等国际知名公司。这个国际性组织主要是建立一个省电、小 体积的整合性电子卡片的标准,提高移动计算机的互换性 。
两款厚度均为5.0mm
TypeII
TypeI
二:卡座结构及如何选型介绍
各类型卡都需要与其相对应卡座衔接接入软件系统才能发挥其作用,常 见的卡座类结构可简单分为两种:PUSH 结构与NO PUSH结构,下面对取 两款产品分别对这两种结构做简单结构分解介绍: MICRO SD PUSH PUSH卡座分解图示:
1-9:Express Card系列內容
ExpressCard 技术是由PCMCIA协会于2003年春季公布的一种新的技术标 准。该标准由众多PCMCIA会员公司联合开发而成,包括软件巨商微软, PC制造商戴尔、惠普以及IBM;芯片制造商英特尔、SMSC、高通和TI; 模块制造商日立、Lexar Madia以及SCM等;硬件制造商Delphi、FCI、 Foxconn、ITT、JAE以及Tyco等公司,其根据外形尺寸可分为两种:
华为AR160系列企业路由器数据手册说明书

DatasheetProduct OverviewThe AR160 series are fixed interface routers that provide a comprehensive platform for a variety of network topologies, including IMS, NGN, WAN and PSTN. The AR160s also employ embedded hardware encryption for security.The AR160 series are mature, stable and quiet routers that offer high performance functionality for small networks, enabling small businesses to greatly increase productivity at a lower cost.AR160s are easy to deploy, configure and customize, greatly reducing cost of deployment and maintenance, while offering maximum value to customers. These models allow network administrators to expand their networks easily and quickly, saving time and costs. The routers support firewalls, call processing, and application program functionalities.The AR160 series include the following models:●AR161, AR161G-L, AR161W, AR169, AR169G-L, AR169WThe specifications for these models are shown in the following table.AR161AR161G-LAR161WAR169AR169G-LAR169WProduct Features and BenefitsSmall Size and High Performance●More applications: Huawei series routers use the dual-core processor that isolates the control plane from the forwarding plane and processes more enterprise applications. Huawei series routers improve user experience for multimedia service when streams overlap.●Higher performance: The AR160s can process various enterprise applications, and its service processing capability is four times that in the industry.●Greater potential: Huawei series routers provide the capability to migrate services to the 3G and LTE networks.Low Investment with High Returns●Easy to construct: The AR160s supports plug-and-play, intelligent configuration, and deployment using the USB flash drive. It can function immediately after being installed. Users do not need to configure an IP address manually. The PPP and VPN indicators show the status of corresponding services. The AR160s helps to quickly construct an enterprise IT network.●Simplified solution: Huawei provides an all-around solution that integrates the routing, switching, voice, security, and wireless services. Customers can customize solutions as required.●Easy to expand: Huawei series routers have four/eight FE/GE ports, can access more employee for small enterprises. The two uplink WAN ports implement load balancing and link protection, maximizing the return on investments.Small footprint on a Comprehensive Platform●Maturity and Stableness: The AR160s uses the Huawei VRP operating system and VSP voice platform. In addition, theAR160s uses modularized hardware design, which brings good user experience.●Low-noise office: Huawei series routers have no fan, which brings low noise and good user experience.●Secure environment: The lightning failure rate of AR160s is only 3% of industry average. The AR160s can be applied in the harsh environment.Sample DeploymentsWAN AccessExample deployment in branch networks for WAN access. In this example, the AR160s function as the egress routers on enterprise branch networks and provide multiple access methods, including Ethernet, xDSL, 3G, LTE and WLAN.VPN Deployment for Secure Enterprise CommunicationsVPNs Connecting Branches and Partners to HeadquartersThis illustration shows how to deploy AR160s using VPNs to connect branches and partners to headquarters.AR160s provide various VPN tunnel protocols to ensure secure communications between:●Enterprise branches and other branch offices●Enterprise branches and headquarters●Partners and enterprise resourcesAR160s support the following VPN tunnel protocols:●GRE VPN●IPSEC VPN●DSVPN●L2TP VPNAR160s support fast tunnel set-up and authentication.Wireless Access and Management in Branch3G/LTE and Wi-Fi Wireless Access applicationThe AR160s routers complied with 3G and LTE standards including HSPA+ and FDD LTE, meeting the wireless communication requirements between branches and the headquarters. In addition, the 3G or LTE data link can be used as a backup for wired link to protect the xDSL, FE/GE, and ISDN uplinks. The backup link improves network stability and reduces network construction costs.Some models of AR160s routers are dual SIM devices, providing dual SIM standby. The customers can switch the SIM card manually according to 3G/LTE network standards. In addition, the device can switch to the backup SIM card when signal is weak to avoid link interruptionThe AR160s routers integrated WLAN wireless access capabilities, support 802.11a/b/g/n standard communication, Built-in AC function make the deployment and management more conveniently. Its wireless features can meet users’ demand for wireless access, and help enterprises to build a branch network flexibly.Wireless AC Management applicationThe AR160s routers integrated AC (Access Controller, a wireless controller) functionality, which can manage the wireless AP (Access Point, Access Point) in wireless LAN. AR supported rich certification and flexible user access control, which can provide security access guarantee for Wi-Fi users. The rich wireless capabilities integrated in one device, this can realize centralized management of wired and wireless network, meet the customers’ requirements of building different scale enterprises networks. Copper and Fiber integration Access SolutionHuawei new generation AR160 routers integrated 4 GE LAN and 1 GE WAN ports, some models support VDSL2 access, which can provide 100M access bandwidth (800 meters). This new box device can bring a high bandwidth experience to the enterprise and carrier customers.In the future, if the customers have optical access requirements, they don't need to replace the devices. As the GE WAN port supports Combo switch. The one box solution can meet the customers’ requirements perfectly, thereby prote ct their investments. Technical SpecificationsAR160s Technical SpecificationsHow to Configure the Modular AR160 RoutersThe AR160 series routers require 2 types of configuration modules:●Basic software configuration●Software license configurationThe basic software configuration modules provide functions such as routing, switching, and security. The software license configuration modules provide additional functions such as AC.Ordering InformationThe AR160 series routers are configured by selecting and installing the appropriate configuration module. The configuration module ordering information and descriptions are shown in the following tables.Table 1: Chassis OptionsCopyright © Huawei Technologies Co., Ltd. 2019. All rights reserved.No part of this document may be reproduced or transmitted in any form or by any means without prior written consent of Huawei Technologies Co., Ltd. Trademarks and Permissionsand other Huawei trademarks are trademarks of Huawei Technologies Co., Ltd.All other trademarks and trade names mentioned in this document are the property of their respective holders.NoticeThe purchased products, services and features are stipulated by the contract made between Huawei and the customer. All or part of the products, services and features described in this document may not be within the purchase scope or the usage scope. Unless otherwise specified in the contract, all statements, information, and recommendations in this document are provided "AS IS" without warranties, guarantees or representations of any kind, either express or implied.The information in this document is subject to change without notice. Every effort has been made in the preparation of this document to ensure accuracy of the contents, but all statements, information, and recommendations in this document do not constitute a warranty of any kind, express or implied.Huawei Technologies Co., Ltd. Address: Huawei Industrial Base Bantian, Longgang Shenzhen 518129 People's Republic of China Website: 。
华硕笔记本BIOS设置详解

华硕笔记本B IOS设置详解在DIY世界中混着,在DIY硬件论坛跑着,对于一个热衷于DIY的我们来说,最大的乐趣就是去折腾,去发觉计算机的潜能!对老玩家来说DIY可谓是很简单,Bios就是小菜一叠,可对于DIY 界小白来说,已提到Bio s,就会感觉是个很深奥的问题!甚至一些老玩家,提到Bios,照样还是有一副无辜的样子!Bios涉及了很多计算机内部硬件和性能差数设置,对于一般不懂电脑的人来说有一定的危险性,加之一般Bi os里面都是英文,这个对于英语好的人来说没有问题,但是这毕竟是中国,还有很多人对英语并不是很懂,所以很多人不敢轻易涉足!为了把大家的这些疑惑解决,我利用空闲时间把Bio s的设置用图文解释给大家看看,希望能给一部分人一些帮助!这次,和大家介绍一下如何设置华硕主板bios,我找了两种B ios的计算机分别是:华硕的AMI BIOS和升技的AWA RD BIOS,这也是目前两种主流的B ios,及算是不同品牌的主板,他们的Bio s也是与这两种Bio s的功能和设置大同小异,但是一般不同的主板及算是同一品牌的不同型号的主板,他们的Bio s又还是有区别的,所以一般不同型号主板的Bios不能通用!先以华硕的A MI Bios为例,介绍一下AM I Bios的设置:开启计算机或重新启动计算机后,在屏幕显示如下时,按下“Del”键就可以进入Bios的设置界面要注意的是,如果按得太晚,计算机将会启动系统,这时只有重新启动计算机了。
大家可在开机后立刻按住Delet e键直到进入Bios。
有些品牌机是按F1进入Bios设置的,这里请大家注意!进入后,你可以用方向键移动光标选择Bio s设置界面上的选项,然后按Ent er进入子菜单,用ESC键来返回主单,用PAGEUP和PAG E DOWN键或上下(↑↓)方向键来选择具体选项回车键确认选择,F10键保留并退出Bi os设置。
最新 AMI Bios 设置全程图解
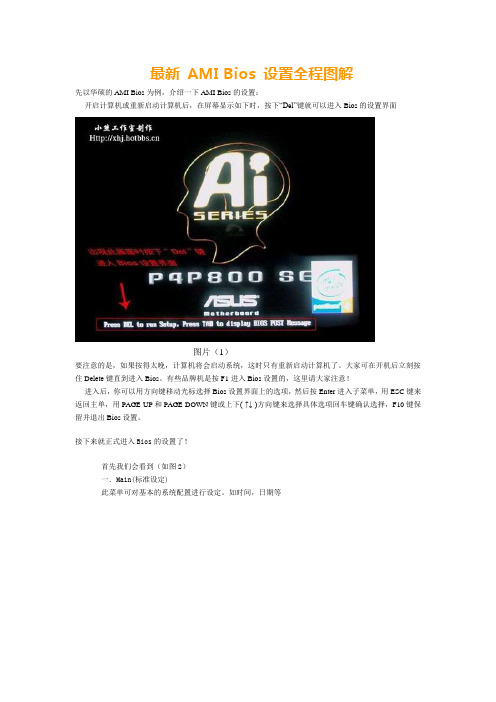
最新 AMI Bios 设置全程图解先以华硕的AMI Bios为例,介绍一下AMI Bios的设置:开启计算机或重新启动计算机后,在屏幕显示如下时,按下“Del”键就可以进入Bios的设置界面图片(1)要注意的是,如果按得太晚,计算机将会启动系统,这时只有重新启动计算机了。
大家可在开机后立刻按住Delete键直到进入Bios。
有些品牌机是按F1进入Bios设置的,这里请大家注意!进入后,你可以用方向键移动光标选择Bios设置界面上的选项,然后按Enter进入子菜单,用ESC键来返回主单,用PAGE UP和PAGE DOWN键或上下( ↑↓ )方向键来选择具体选项回车键确认选择,F10键保留并退出Bios设置。
接下来就正式进入Bios的设置了!首先我们会看到(如图2)一.Main(标准设定)此菜单可对基本的系统配置进行设定。
如时间,日期等图片(2)其中Primary/Secondary IDE Master/Slave 是从主IDE装置。
如果你的主板支持SATA接口就会有Third/Fourth IDE Mastert或者更多,他们分别管理例电脑里面各个IDE驱动装置的,如硬盘,光驱等等!因为各个主板的设置不同,所以在此就不详细解说这里的设置了,但是这些一般不用用户自己去设置,一般用默认的就可以,如果有特殊要求,建议用户自己对照说明书的说明进行设置,或者在论坛里单独提问!System Information这是显示系统基本硬件信息的,没有什么好讲(如图3)图片(3)基本设置了解后就进入高级设置了!二.Advanced(进阶设置)如图4:图片(4)这里就是Bios的核心设置了,新手一定要小心的设置,因为其直接关系系统的稳定和硬件的安全,千万不可以盲目乱设!1.大家先看到的是“JumperFree Configuration”(不同品牌的主板有可能不同,也可能没有)再这里可以设置CPU的一些参数,对于喜欢超频的朋友来说这里就是主攻地!(如图)大家可以看到有一个“AI Overclock Tumer”的选项,其中有一些选项,如上图,其中又以“Manual”为关键,选择后会看到如下图:对于CPU超频爱好者这些东西应该了如指掌,CPU的外频设置(CPU External Frequency)是超频的关键之一,CPU的主频(即我们平时所说的P4 3.0G等等之内的频率)是由外频和倍频相乘所得的值,比如一颗3.0G的CPU在外频为200的时候他的倍频就是15,(200MHz*15=3000MHz)。
Sony Professional Disc 专业光盘系统 XDCAM 说明书

Sony Professional Disc ™专业光盘系统XDCAM ™– 改变工作流程的关键为了满足标准清晰度视频制作的需要,Sony 于2004年推出了新一代视频记录产品基于光盘的XDCAM 系列光学记录系统。
它采用专业光盘作为介质,使用了卓越的蓝紫激光技术。
XDCAM 基于光盘的记录方式提供了诸多优点,如随机存取,不覆盖现有脚本,以及网络功能等。
专业光盘本身就是一种高质量、可信赖、低成本、可再次使用的理想介质,非常适合进行日常操作。
这种介质克服了原有不同格式资源的限制,具有很高的灵活性。
XDCAM 设备可对多种格式和数据进行记录,并可将MPEG IMX™和DVCAM™视频文件、元数据和低分辨率数据脚本记录到一张光盘之上。
自从用于标清节目制作的XDCAM 系列诞生的那天起,它就被各个领域的用户高度认可和采用,全世界范围内的广播公司、制作部门、专业运动队伍和企业都对它的强大功能赞赏有加。
Sony 在对现有产品的功能不断进行增强的同时,还始终致力于开发新型产品,以满足用户多方面的需要。
最新的XDCAM 系统增加了各种新的强大功能,如片断操作、新的高分辨率片断浏览软件,用于Apple Final Cut Pro 非线性编辑系统的插件等等。
而且,XDCAM 系列产品还新推出了可选购的PDBZ-E1500软件,可为PDW-1500录像机提供插入/组合编辑功能。
加上这些新增产品,Sony XDCAM 系列已经拥有了以下产品系列:一款2/3英寸型CCD MPEG IMX/DVCAM 可切换摄录一体机,三种可搭配使用的录像机,一种驱动器和两种光盘库系统。
它们满足了您对操作性和预算考虑的各种需要。
Sony XDCAM 系列是一种基于光盘的非线性记录系统,具有独一无二的卓越性能— 它能为您的今天和将来提供完美的标清视频制作解决方案。
便携式浏览机PDW-V1便携式录像机PDW-R1小型录像机PDW-1500XDCAM光盘系列产品2■ 录像机驱动器PDW-D13■ CART ( 光盘库系统)光盘库系统PDJ-C1080光盘库系统PDJ-A640■ 摄录一体机摄录一体机(MPEG IMX/DVCAM)PDW-539P*镜头,无线话筒接收器及电池为选购件。
LaCie Desktop Hard Disk USB 2.0 硬盘驱动器说明书

小巧易用此高效简洁的 USB 桌面硬盘驱动器对每个人都非常小巧而易于使用。
作为市场上最小的桌面硬盘驱动器之一,它占用空间小且重量轻。
该驱动器的安装毫不费力:即插即用,从包装盒中取出之后花几秒钟即可使用。
随附用于 PC 和 Mac™ 的 LaCie“一键式”备份软件仅需单击一下即可迅速保存文件。
通用的高速 USB 2.0此通用硬盘驱动器具有高速 USB 2.0 接口,可与您的 PC 或 Mac 高度融合。
甚至可用它在带有 USB 的台式计算机和便携式计算机之间可靠地传输数据。
高速 USB 2.0 的优点包括:通用的兼容性、跨平台的便捷性、可热插拔的连接,以及高速的传输率。
此驱动器在出厂时已预格式化,可跨 Windows™ 和 Mac OS 平台使用。
精巧的设计和功能LaCie Desktop Hard Disk 将独特成熟的风格融入您的桌面中,使其具有朴素淡雅的外观。
其时尚、全黑色的机身上有一个坚固的金属顶盖,更有利于散热,底部还有通风孔利于自然的空气流动。
其精妙的工程设计接近无声、无风扇运行。
简易的存储工具人性化而又物美价廉的 LaCie Desktop Hard Disk 可作为便携式计算机或工作站的极佳存储工具。
使用该存储工具可以定期备份整个系统,或者当计算机硬盘驱动器已满时升级存储容量。
同时易于下载数码照片或保存海量的 MP3 音乐文件。
• 轻松备份文件、音乐、照片和视频• 易于每个人进行安装和使用• 静音、无风扇运行• 节省空间、小巧、可堆叠的金属设计LaCie Desktop Hard Disk 高速 USB 2.0简洁高效的USB 硬盘驱动器*1GB = 1,000,000,000 字节。
总的可用容量视操作环境而定(通常会降低 5–10%)。
**计算基于以下假定:一小时的 DV 视频为 13GB,每首歌曲为 3.6MB,每张 JPEG 照片为 0.9MB。
© 2008, LaCie 版权所有。
最新整理amd bios的设置图解教程

a m db i o s的设置图解教程a m db i o s设置图解教程?这个你会了吗?如果不会的话,那就由小编给你们分享一下吧!一.M a i n(标准设定)此菜单可对基本的系统配置进行设定。
如时间,日期等。
其中P r i m a r y/S e c o n d a r y I D E M a s t e r/S l a v e是从主I D E 装置。
S y s t e m I n f o r m a t i o n基本设置了解后就进入高级设置了!二.A d v a n c e d(进阶设置)这里就是B i o s的核心设置了,新手一定要小心的设置,因为其直接关系系统的稳定和硬件的安全,千万不可以盲目乱设!1.大家先看到的是J u m p e r F r e e C o n f i g u r a t i o n(不同品牌的主板有可能不同,也可能没有)再这里可以设置C P U的一些参数,对于喜欢超频的朋友来说这里就是主攻地!(如图)大家可以看到有一个A I O v e r c l o c k T u m e r的选项,其中有一些选项,如上图,其中又以M a n u a l为关键,选择后会看到如下图:对于C P U超频爱好者这些东西应该了如指掌,C P U的外频设置(C P U E x t e r n a l F r e q u e n c y)是超频的关键之一,C P U的主频(即我们平时所说的P4 3.0G等等之内的频率)是由外频和倍频相乘所得的值,比如一颗 3.0G的C P U在外频为200的时候他的倍频就是15,(200M H z*15=3000M H z)。
外频一般可以设定的范围为100M H z到400M H z,但是能真正上300的C P U都不多,所以不要盲目的设置高外频,一般设定的范围约为100-250左右,用户在设定中要有耐心的一点点加高,最好是以1M H z为步进,一点点加,以防一次性加到过高而导致系统无法正常使用甚至C P U损坏!内存频率设定(D R A M F r e q u e n c y)使用此项设定所安装内存的时钟,设定选项为: 200M H z, 266M H z,333M H z, 400M H z,A u t o。
联想 笔记本电脑 说明书

第一章系统简介本手册提供了您所使用的笔记本电脑的硬件和软件信息。
如果您最近才对笔记本电脑产生兴趣或仅仅是一位初学者的话, 您应 该阅读全文。
如果在您第一次阅读后有不懂的地方,请不必担心,将这 本手册放在计算机旁,边用边学。
无论您的电脑操作水平如何,请注意被标记的警告和安全信息,同时 请注意前言中的安全信息。
操作系统(如 WindowsXP 等)和应用软件(如文字处理、数据库软 件等)应有自己的使用手册。
如果你在使用这些程序时遇到问题,您应 该查阅它们各自的使用手册。
本机器上预装的操作系统或任何应用软件 的功能与本机器本身的功能是可分的,不能将任何预装软件的功能解释 为机器本身的功能。
1.1 系统软硬件兼容性说明本笔记本电脑推荐使用 WindowsXP 操作系统。
并不排除您可以在本笔记本电脑上安装其他操作系统,但因为未经 过严格测试,联想不能保证其它非预装的或本说明书未表明支持的操作 系统在本机上使用的稳定性、可靠性和安全性,以及该其他操作系统不 会对本机器原有性能、稳定性、可靠性和安全性产生影响,联想也不能 保证提供其它操作系统下的驱动程序。
11.2 产品硬件配置您的笔记本电脑系统配置如下(具体配置以装箱单为准): 1.CPU n Intel Mobile Pentium M 处理器nu FCPGA 封装2.Chipsetn北桥(North Bridge) 855GM : n南桥(South Bridge):ICH4-M3.内存 n256MB/512MB DDR SO-DIMM 内存 n最高 1GB(512MB×2) 4.硬盘n 2.5 英寸笔记本电脑专用硬盘5.声音系统 n符合 AC97 标准 n内置 2 个扬声器,1 个麦克风 6.内置结构 n光驱:DVD-ROM 或者 DVD-COMBO 7.显示系统 n共享显示内存: 8MB/16MB/32MB(可调整) n支持:TFT LCD 12.1” 最高分辨率 1024×768x32bit 8. 83 键 Windows 键盘 9.扩展接口 n 2 个 Type II 型 PCMCIA 插槽2n Modem 接口(RJ-11) n LAN 接口(RJ-45) n 直流电源接口 n 1 个视频输出接口(TV-out) n 1 个外接显示器(CRT)接口 n 1 个 Line-out(耳机)/S-PDIF 接口 n 1 个 Microphone-in(麦克风)接口 n 3 个 USB(2.0)接口 n 2 个 IEEE 1394 接口笔记本电脑重量尺寸:n重量:2.1Kgn尺寸:283*238*29-34.3 MM 注意:重量根据不同的配置可能有细微差别。
华硕主板Bios详细图解
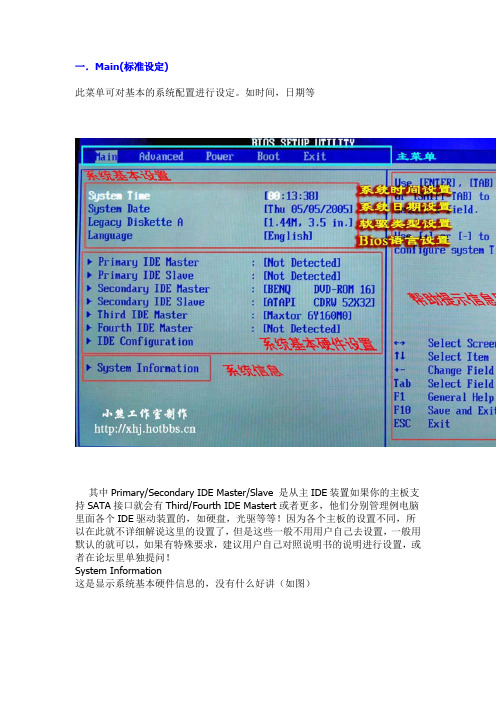
一.Main(标准设定)此菜单可对基本的系统配置进行设定。
如时间,日期等其中Primary/Secondary IDE Master/Slave 是从主IDE装置如果你的主板支持SATA接口就会有Third/Fourth IDE Mastert或者更多,他们分别管理例电脑里面各个IDE驱动装置的,如硬盘,光驱等等!因为各个主板的设置不同,所以在此就不详细解说这里的设置了,但是这些一般不用用户自己去设置,一般用默认的就可以,如果有特殊要求,建议用户自己对照说明书的说明进行设置,或者在论坛里单独提问!System Information这是显示系统基本硬件信息的,没有什么好讲(如图)基本设置了解后就进入高级设置了!二.Advanced(进阶设置)如图:这里就是Bios的核心设置了,新手一定要小心的设置,因为其直接关系系统的稳定和硬件的安全,千万不可以盲目乱设!1.大家先看到的是“JumperFree Configuration”(不同品牌的主板有可能不同,也可能没有)再这里可以设置CPU的一些参数,对于喜欢超频的朋友来说这里就是主攻地!(如图)大家可以看到有一个“AI Overclock Tumer”的选项,其中有一些选项,如上图,其中又以“Manual”为关键,选择后会看到如下图:对于CPU超频爱好者这些东西应该了如指掌,CPU的外频设置(CPU External Frequency)是超频的关键之一,CPU的主频(即我们平时所说的P4 3.0G等等之内的频率)是由外频和倍频相乘所得的值,比如一颗3.0G的CPU在外频为200的时候他的倍频就是15,(200MHz*15=3000MHz)。
外频一般可以设定的范围为100MHz到400MHz,但是能真正上300的CPU都不多,所以不要盲目的设置高外频,一般设定的范围约为100-250左右,用户在设定中要有耐心的一点点加高,最好是以1MHz为步进,一点点加,以防一次性加到过高而导致系统无法正常使用甚至CPU损坏!内存频率设定(DRAM Frequency)使用此项设定所安装内存的时钟,设定选项为:200MHz, 266MHz,333MHz, 400MHz, Auto。
最新最全BIOS设置图解教程

AMI BIOS设置图解教程对于一个热衷于电脑的用户来说,最大的乐趣就是发觉计算机的潜能,了解计算机的一些技术,计算机的Bios设置对于很多初用电脑人的来说很是深奥,甚至一些计算机的老用户还不了解Bios,因为计算机Bios涉及了很多计算机内部硬件和性能才参数设置,对于一般不懂电脑的人来说有一定的危险性,加之一般Bios里面都是英文,这个对于英语好的人来说没有问题,但是这毕竟是中国,还有很多人对英语并不是很懂,所以很多人不敢轻易涉足!为了把大家的这些疑惑解决,我利用空闲时间把Bios的设置用图文解释给大家看看,希望能给一部分人一些帮助!但是因为个人知识有限,所以可能其中有一些遗漏或者不正确的解释,请大家一起来探讨指正!谢谢各位的支持!我找了两种Bios的计算机分别是:华硕的AMI BIOS和升技的AW ARD BIOS,这也是目前两种主流的Bios,及算是不同品牌的主板,他们的Bios也是与这两种Bios的功能和设置大同小异,但是一般不同的主板及算是同一品牌的不同型号的主板,他们的Bios又还是有区别的,所以一般不同型号主板的Bios不能通用!先以华硕的AMI Bios为例,介绍一下AMI Bios的设置:开启计算机或重新启动计算机后,在屏幕显示如下时,按下“Del”键就可以进入Bios的设置界面图1 要注意的是,如果按得太晚,计算机将会启动系统,这时只有重新启动计算机了。
大家可在开机后立刻按住Delete键直到进入Bios。
有些品牌机是按F1进入Bios设置的,这里请大家注意!进入后,你可以用方向键移动光标选择Bios设置界面上的选项,然后按Enter进入子菜单,用ESC键来返回主单,用PAGE UP和PAGE DOWN键或上下( ↑↓ )方向键来选择具体选项回车键确认选择,F10键保留并退出Bios设置。
接下来就正式进入Bios的设置了!首先我们会看到(如图2)一.Main(标准设定)此菜单可对基本的系统配置进行设定。
User's Manual USB 2.0 Ethernet Adapter说明书
Disclaimer
Information in this document is subject to change without notice. The manufacturer does not make any representations or warranties (implied or otherwise) regarding the accuracy and completeness of this document and shall in no event be liable for any loss of profit or any commercial damage, including but not limited to special, incidental, consequential, or other damage. All trademarks, trade names and copyrights are properties of their respective owners.
微星主板说明书

ii
安全指导
1. 务必请仔细通读本安全指导。 2. 务必请妥善保管本手册,以备将来参考。 3. 请保持本设备的干燥。 4. 在使用前,宜将本设备置于稳固的平面上。 5. 机箱的开口缝槽是用于通风,避免机箱内的部件过热。请勿将此类开口掩盖或堵
塞。 6. 在将本设备与电源连接前,请确认电源电压值,将电压调整为110/220V。 7. 请将电源线置于不会被践踏到的地方,并且不要在电源线上堆置任何物件。 8. 插拔任何扩展卡或模块前,请都将电源线拔下。 9. 请留意手册上提到的所有注意和警告事项。 10. 不得将任何液体倒入机箱开口的缝槽中,否则会产生严重损坏或电路瘫痪。 11. 如果发生以下情况,请找专业人员处理:
iii
FCC-B 无线频率干扰声明
本设备经测试符合FCC part 15 对于B 级数字设备的限制。此 条款限制了在居住环境下使用 本设备而引起的有害干扰,并提 供了有效的保护。本设备在使用时会产生无线频率辐射,如果没有按照本手册的规定安 装使用, 可能会对无线通信设备产生干扰。然而,相关的干扰在特殊的设备下还是有可 能产生的。本设备是否对广播或电视的接收产生干扰将决定着它是否被打开或关闭,用 户可以使用以下列表中的一种或多种方法来减少干扰。
† 重新调整或重新部署接收天线。 † 增加本设备与接收设备之间的距离。 † 连接设备到电路出口( 非接收器所连接的接口) 。 † 咨询经销商或富有经验的无线电工程师。 注意事项 1 对本设备的任何变动或修改, 若未经责任保证方的及时认可, 都可能使用户无法使用此 设备。 注意事项 2 请屏蔽接口电缆和交流电源线对该设备的干扰, 否则须在辐射限制标准范围内, 才可使 用。 VOIR LA NOTICE D’INSTALLATION AVANT DE RACCORDER AU RESEAU.
XDS510-USB2.0焊接调试说明

1、TI D SP US B2.0仿真器制作目前,TI公司DSP芯片的应用越来越广泛,DSP的仿真器是每一个DSP开发者必备的工具之一。
早期的DS P并口仿真器由于传输速度慢,很难适应开发者的需求,而最近TI公司推出的PCI560仿真器,由于价格高,而且使用PCI接口,使得连接十分不方便。
为此,本文介绍一种基USB2.0接口的DSP仿真器(TDS510/X DS510),其理论上数据传输速度可以达到448Mb/s,而且USB接口可以带电插拨,使用方便。
该D SP仿真器以美国Cy press公司的US B2.0控制器CY7C68013为核心,实现对DS P片内数据的读写和传输等功能。
DSP开发者可以自行按照本文的方法研制仿真器,真正学会制作仿真器的过程,从而避免购买高价的DSP仿真器。
2 系统硬件结构整个系统以US B2.0控制器CY7C68013和JTA G扫描芯片ACT8990为核心,还包括E2PROM、电压转换芯片、总线驱动以及电压比较器。
2.1 US B2.0控制器CY7C68013CY7C68013是美国Cyp ress公司推出的U SB2.0芯片,是一个全面集成的解决方案。
CY7C68013主要结构如下:1个增强的8051微处理器、1个智能串行接口引擎(SIE)、1个U SB收发器、16 K B片上RA M(其中包括4 KB FIFO)存储器和1个通用可编程接口G PIF(G enera l Pro gramm ableInter face)。
这种独创性结构可使数据传输率达到448 Mb/s,即USB2.0允许的最大带宽。
金士顿A400固态硬盘使用指南说明书

/flashguideKingston’s A400 solid-state drive dramatically improves the responsiveness of your existing system with incredible boot, loading and transfer times compared to mechanical hard drives. Powered by a latest-gen controller for read and write speeds of up to 500M B/s and 450MB/s 1, this SSD is 10x faster than a traditional hard drive 1 for higher performance, ultra-responsive multi-tasking and an overall faster system.Also more reliable and durable than a hard drive, A400 is built with Flash memory. There are no moving parts, making it less likely to fail than a mechanical hard drive. It is also cooler and quieter, and its shock and vibration resistance makes it ideal for notebooks and other mobile computing devices.A400 is available in multiple drive form factors and capacities from 120GB–960GB 2 to give you all the space you need for applications, videos, photos and other important documents. You can also replace your hard drive or a smaller SSD with a drive big enough to hold all your files.This SSD is designed for use in desktop and notebook computer workloads and is not intended for server environments.Incredible speeds plus rock-solid reliabilityFeatures/specs on reverse >>A400 SSD> Fast start-up, loading and file transfers > More reliable and durable than a hard drive> Multiple capacities with space forapplications or a hard drive replacementA400 SSDSPECIFICATIONS>Form factor 2.5” & M.2 2280>Interface SATA Rev. 3.0 (6Gb/s) – with backwards compatibility to SATA Rev. 2.0 (3Gb/s)>Capacities 2 120GB, 240GB, 480GB, 960GB >Baseline performance 1 Data transfer (ATTO)120GB — up to 500MB/s read and 320MB/s write 240GB — up to 500MB/s read and 350MB/s write 480GB — up to 500MB/s read and 450MB/s write 960GB — up to 500MB/s read and 450MB/s write>Power consumption 0.195W idle / 0.279W avg / 0.642W (MAX) read / 1.535W (MAX) write>Storage temperature -40°C~85°C >Operating temperature 0°C~70°C >Dimensions 100.0mm x 69.9mm x 7.0mm (2.5”)80mm x 22mm x 1.35mm (M.2)>Weight 39g (120GB – 2.5”) 41g (240-480GB – 2.5”) 41.9g (960GB – 2.5”) 6.7g (256GB – M.2) 5.5g (480GB – M.2)>Vibration operating 2.17G peak (7-800Hz)>Vibration non-operating 20G peak (10-2,000Hz) >Life expectancy 1 million hours MTBF>Warranty/support 3 limited 3-year warranty with free technical support>Total Bytes Written (TBW)4 120GB — 40TB 240GB — 80TB 480GB — 160TB 960GB — 300TB>10x faster than a hard drive 1 — With incredible read/write speeds, the A400 SSD will not only increase performance but can also be used to breathe new life into older systems. >R ugge d — A400 is shock and vibration resistant for rugged reliability when used in notebooks and other mobile computing devices.>Multiple capacities — A400 is available in capacities of up to 960GB 2 to suit anyone’s needs.>Ideal for desktops and notebooks — A400 comes in 2.5” 7mm and M.2 form factors to fit in a wide array of systems. It is ideal for thin and light notebooks with limited space.FEATURES/BENEFITS1. Based on “out-of-box performance” using a SATA Rev. 3.0 motherboard. Speed may vary due to host hardware, software and usage.2. Some of the listed capacity on a Flash storage device is used for formatting and other functions and is thus not available for data storage. As such, the actual available capacity for data storage is less than what is listed on the products. For more information, go to Kingston’s Flash Memory Guide at /flashguide.3. Limited warranty based on 3 years or “Percentage Used”, which can be found using the Kingston SSD Manager (/SSDManager). For NVMe SSDs, a new unused product will show a Percentage Used value of 0, whereas a product that reaches its warranty limit will show a Percentage Used value of greater than or equal to one hundred (100). See /wa for details.4.Total Bytes Written (TBW) is derived from the JEDEC Client Workload (JESD219A).KINGSTON PART NUMBERS2.5” (Standalone)SA400S37/120G SA400S37/240G SA400S37/480G SA400S37/960GM.2 2280SA400M8/240G SA400M8/480GTHIS DOCUMENT SUBJECT TO CHANGE WITHOUT NOTICE.©2022 Kingston Technology Europe Co LLP and Kingston Digital Europe Co LLP , Kingston Court, Brooklands Close, Sunbury-on-Thames, Middlesex, TW16 7EP , England. Tel: +44 (0) 1932 738888 Fax: +44 (0) 1932 785469.All rights reserved. All trademarks and registered trademarks are the property of their respective owners. MKD-393.5 EN。
ASUS P8H61-M2 TPM SI R2.0 产品手册说明书

d r a o b r eClick an item to installIf Autorun is NOT enabled in your computer, browse the contents of the Support DVD tolocate the file ASSETUP.EXE from the BIN folder. Double-click the ASSETUP.EXE to runthe DVD.ASUS P8H61-M2/TPM/SI R2.0ExitASUS EZ Flash 2 Utility v01.04Flash InfoMODEL: P8H61-M2/TPM/SI R2.0 VER: 0304 DATE: 04/20/2012File Path: fs0:\Drive Folder Infofs0:\ 04/20/12 09:47a 8390656 H61M2TR.CAPFile InfoMODEL: VER: DATEHelp Info[Enter] Select or Load [T ab] Switch [Up/Down/PageUp/PageDown/Home/End] Move [Esc] ExitASUS P8H61-M2 SeriesWelcome to FreeDOS ()!C:\>d:D:\>When the Make Disk menu appears, select the pressing the item number.At the FreeDOS prompt, type d: and press <Enter> to switch the disk from Drive C (optical drive) to Drive D (USB flash drive).Please select boot device:SATA: XXXXXXXXXXXXXXXX USB XXXXXXXXXXXXXXXXX UEFI: XXXXXXXXXXXXXXXXEnter Setup ↑ and ↓ to move selection ENTER to select boot device ESC to boot using defaults• The boot device options vary depending on the devices you installed to the system.• The Boot Menu(F8) button is available only when the boot device is installed to the system.Silent mode Standard mode Turbo mode Loads optimized default Selects the boot device priority Selects the boot device priority Displays the system properties of the selected mode on the right hand sideSelects the Advanced mode functionsDisplays the Advanced mode menusMenu barThe menu bar on top of the screen has the following main items:Main For changing the basic system configuration Ai TweakerFor changing the overclocking settings AdvancedFor changing the advanced system settings MonitorFor displaying the system temperature, power status, and changing the fan settings BootFor changing the system boot configuration Tool For configuring options for special functions Exit For selecting the exit options and loading default settingsNavigation keysPop-up window Submenu item Scroll bar2.3.1 System Language [English]Allows you to choose the BIOS language version from the options. Configuration options: [English] [Français] [Español] [Deutsch] [Русский]2.3.2 System Date [Day xx/xx/xxxx]Allows you to set the system date.2.3.3 System Time [xx:xx:xx]Allows you to set the system time.2.3.4 SecurityThe Security menu items allow you to change the system security settings.• If you have forgotten your BIOS password, erase the CMOS Real Time Clock (RTC)RAM to clear the BIOS password. See section 1.9 Jumpers for information on how toerase the RTC RAM.• The Administrator or User Password items on top of the screen show the default NotInstalled. After you set a password, these items show Installed.2.4.1 ASUS MultiCore Enhancement [Enabled] [Enabled] S elect this option for maximum performance under XMP/Manual/User define memory frequency mode.[Disabled] Select this option for default core ratio settings.2.4.2 Memory Frequency [Auto]Allows you to set the memory operating frequency. Configuration options: [Auto] [DDR3-800MHz] [DDR3-1066MHz] [DDR3-1333MHz] [DDR3-1600MHz] [DDR3-1866MHz] [DDR3-2133MHz] [DDR3-2400MHz]The configuration options vary with the CPU types installed on the system.Selecting a very high memory frequency may cause the system to become unstable! If thishappens, revert to the default setting.2.4.3 GPU BoostGPU Boost accelerates the integrated GPU for extreme graphics performance. Configuration options: [OK] [Cancel]。
PBI接收机及调制器操作规程

信号源系统操作规程信号源系统主要包括两种设备:PBI DVR-1000工程专用卫星数字电视接收机、PBI-4000MUV 广播级全频道捷变式邻频调制器。
PBI DVR-1000工程专用卫星数字电视接收机PBI DVR-1000工程专用卫星数字电视接收机采用最新STi-5518芯片,完全符合广电总局颁发的标准和MPEG-2&DVB-S标准,并已预存了国内大量的数字压缩的卫星电视节目,具有图文接收功能,PID手动输入功能,断电记忆功能和EPG节目指南显示功能;采用增强式OSD中英文屏幕显示菜单和QPSK解调一体调谐器,门限低;有网络和转发器自动搜索功能,可方便卫星数字电视信号的接收;且应用最新型软、硬件结合技术,保证长期稳定可靠的运行。
其功能齐全,操作方便,画面品质一流,完全满足中国CATV前端卫星数字电视接收的各项要求,是各种有线电视前端系统不可或缺的高稳定的CATV前端卫星数字电视接收机。
1、设备主要部分介绍:1.1 前面板(1)液晶显示窗口:显示卫星接收机输出频道,电源指示,信号指示;(2)频道 + 键;(3)频道 - 键;(4)音量 + 键;(5)频道 - 键;(6)“OK”键;(7)“MENU”键;(8)“EXIT”键;(9)电源开关键。
1.2后面板:(1)视频输出口;(2)音频输出口L,R;(3)LNB输入端口;(4)LNB输出端口;(5)Y, Cb,Cr输出口;(6)RS232口;(7)交流电源插座:可用于电源串接;(8)交流电源输入:连接220V/50Hz 交流电源(需良好接地);(9)保险座。
2、设备特点及技术参数2.1 特点1)完全符合DVB-S和MPEG2标准2)LED显示,前面板轻触按键操作及友好操作界面3)自动网络和转发器搜索功能并更新码流信息4)可存储2000个频道的信息5)可进行视频PID和音频PID的设置6)具有断电记忆功能7)支持OSD电视图文VBI (DVB ETS 300 706) 和字幕功能8)256彩色屏幕显示,支持英文、法文、德文、俄文、西班牙文、意大利文、中文及阿拉伯文等多种语言系统9)电子节目指南EPG功能,并支持PIG(Picturre in Graphics)画中画显示功能10)具有NTSC/PAL/AUTO制式转换功能11)通过RS-232接口由电脑或另一台DVR-1000可进行软件的升级(机对机拷贝功能)3、设备安装及操作3、1 安装3.1.1认真仔细做好F接头,不可让屏蔽层的丝网和铜芯接触,以免短路。
技嘉主板说明书

GA-G41MT-D3P GA-G41MT-S2PLGA775主板支持Intel® Core™ 系列处理器/ Intel® Pentium®系列处理器/ Intel® Celeron®系列处理器使用手册Rev. 130112MSC-41MTS2P-1301RDec. 31, 2010Motherboard GA-G41MT-D3P/GA-G41MT-S2P Dec. 31, 2010Motherboard GA-G41MT-D3P/GA-G41MT-S2P版权责任声明产品版本辨识目录GA-G41MT-D3P/GA-G41MT-S2P主板配置图 (5)第一章硬件安装 (6)1-1 安装前的注意须知 (6)1-2 产品规格 (7)1-3 安装中央处理器及散热风扇 (9)1-3-1 安装中央处理器(CPU) (9)1-4 安装内存条 (10)1-4-1 双通道内存技术 (10)1-5 安装适配卡 (10)1-6 后方设备插座介绍 (11)1-7 插座及跳线介绍 (12)第二章BIOS 程序设定 (19)2-1 开机画面 (19)2-2 BIOS设定程序主画面 (19)2-3 MB Intelligent Tweaker(M.I.T.) (频率/电压控制) (20)2-4 Standard CMOS Features (标准CMOS设定) (26)2-5 Advanced BIOS Features (高级BIOS功能设定) (27)2-6 Advanced Chipset Features (高级芯片组功能设定) (28)2-7 Integrated Peripherals (集成外设) (29)2-8 Power Management Setup (省电功能设定) (31)2-9 PnP/PCI Configurations (即插即用与PCI程序设定) (32)2-10 PC Health Status (电脑健康状态) (33)2-11 Load Fail-Safe Defaults (载入最安全预设值) (34)2-12 Load Optimized Defaults (载入最佳化预设值) (34)2-13 Set Supervisor/User Password (设定管理员/用户密码) (35)2-14 Save & Exit Setup (储存设定值并结束设定程序) (35)2-15 Exit Without Saving (结束设定程序但不储存设定值) (36)第三章驱动程序安装 (36)3-1 芯片组驱动程序 (36)管理声明 (37)- 4 -LGA775 CPU插槽LGA775 CPU凹角CPU - 9 -SATA硬盘。
易驱使用说明

目 录产品简介: ........................................... 3 产品特点: ........................................... 3 功能部件: ........................................... 3 硬件安装: ........................................... 3 软件安装: ........................................... 4 操作指南 ............................................. 4 故障排除 ............................................. 6 技术规格: ........................................... 7 产品清单: ........................................... 7 服务条款: . (7)重要声明1、 感谢您购买本公司出品的US B 系列产品,请您在使用本产品之前先耐心阅读说明书,当您开始使用本产品时,本公司认为您已经认真阅读了此说明书。
2、 请在购买产品一个月内认真填写“产品保修卡”,以便为您提供更好的服务。
本说明书所涵盖的内容均是参考此手册编写时最新的事项,当涉及到内容改变时,恕不另行通知。
如有需要,请到本公司网站下载最新的使用说明及最新的驱动程序。
111112333 3产品简介:易驱USB2IDE转接器,一物多用:适用于硬盘,CD-ROM,DVD-ROM,CD-RW,COMBO外置转接。
采用USB2.0(Universal Serial Bus)界面传输技术,支持热插拔,适用于各种带USB接口的品牌及兼容PC机、笔记本电脑等,方便追加外设,用以实现海量存储、移动办公。
- 1、下载文档前请自行甄别文档内容的完整性,平台不提供额外的编辑、内容补充、找答案等附加服务。
- 2、"仅部分预览"的文档,不可在线预览部分如存在完整性等问题,可反馈申请退款(可完整预览的文档不适用该条件!)。
- 3、如文档侵犯您的权益,请联系客服反馈,我们会尽快为您处理(人工客服工作时间:9:00-18:30)。
*GAUI原廠501伺服機設定200Hz
C 尾伺服機工作頻寬
狀態燈
尾伺服頻寬
紫色 紅色 藍色
GAUI原廠502設定為1520us
D 尾伺服機工作頻率
紫色 紅色閃爍 紅色 藍色閃爍 藍色
GAUI 502尾伺服設定為333或560
E 尾舵最大行程 向右搖動尾舵桿使尾旋翼至最大角度, 等待紅燈或藍燈亮起,搖桿回中位, 再推向左至最大角度,等待紫燈亮起, 搖桿回中, 尾舵該快速推至正確方向, 如反向了, 可在搖控反向功能內修正方向
如果不論怎麼調整都沒辦法朝正確方向,也可以從遙控器的正反向來調整
J 設定循環螺距 首先調整主旋翼與尾管成一直線,油門推至中位(0度)將Pitch尺設定在 6 度, 再用遙控器副翼搖桿推至BEASTX亮藍燈範圍再看看Aileron pitch (左右槳角度)是否6度 Aileron pitch 要從機正面看 如果是6度,就設定完成 如果不是6度,就要將波頭移至伺服臂內一個孔或用較短的伺服臂 必需要設定Aileron pitch 至6度, 及BEAST鏍距總行程時, 先將PITCH CURVES 設定成一直線(0-100或-100 +100) 視搖控內的設定 隨後用PITCH尺設定12-14度(視你的喜好而定) 把油門搖桿推至上止點, 看槳是否在12或14度 如不是可左右移動尾舵搖桿設定, 正負螺距合共24-28度 警告: 在設定這功能時,切勿調整遙控器內的PITCH CURVES當這功能設定完成CURVES作 調整後便可用遙控器內PITCH
B 十字盤操控
這個模式是相對搖桿與十字盤的操作反應, 有點像EXP/DR 用尾舵搖桿選擇燈號, 前三項預設模式, 後三項是可用遙控器或電腦調整的模式, 藍燈閃亮是通過搖控EXP 線性作調整, 藍燈恒亮是通過搖控的DR 及 ATV 調整, 就如傳統十字 盤一般調節大小動及EXP曲線, 最後一項是通過電腦調整,
按設定鈕至A 燈閃爍, 釋放設定鈕進入
A 十字盤微調 這個微調功能, 只適合場外飛行時, 遇有小量飄移, 把機子降落再進入模式細調之用, 不能在飛行中 調整進入模式搖動相對搖桿作細調. 搖動尾舵搖桿可清除設定. 十字盤回復先前位置. 再按設定按鈕 儲存及進入B 注意!!絕對不要用遙控器上的微調鈕來微調
低 中等 高 非常高 由電腦設定
按設定鈕完成退出.
首次飛行開啟發射及接收電源,待BeastX自檢完成(A~N)燈號跳動 至熄滅及十字盤上下跳動完成才算自檢歸零完成 在BeastX自檢時勿觸碰搖桿及機體,開機完成後狀態燈籃燈為鎖頭模式,紫色燈為正常模式
本BeastX 2.0快速入門是參考Ken先生的1.0中文說明及2.0英文說明書編輯 歡迎各位同好使用,並請不要用於商業用途,各設定以原文為準 如有錯誤歡迎來信指教: mumujujube@ 編輯者:棗子
操作模式 按設定按鈕三秒待A燈閃爍至恒亮,釋放按鈕進入第一個設定模式 A,設定完成按一下設定鈕進入下一個設定
A 陀螺儀擺放方向 搖動尾舵桿 設定主體 安裝模式 紅色 > 垂直 / 豎立 籃色 > 水平 / 橫放
B CCPM伺服機工作頻率 搖動尾舵桿 設定CCPM伺服機的工作頻率
紫色 紅色閃爍 紅色 藍色閃爍 藍色 不亮
伺服機頻率對照表
MB 2.0 设定说明
建議:開一個新的遙控器頻道,十字盤模式選擇傳統十字盤,確認所有伺服機微調都歸零 外觀介紹
設定鈕
十字盤感度
翻滾的起始速度
尾舵的靈敏度
各設定選項
状态灯 十字盤感度旋鈕: 如果起飛時機體會追蹤或者是飛起來不穩定,就調整十字盤感度的旋鈕 翻滾起始速度的旋鈕: 功能就類似遙控器的D/R,調整做動作的速度 尾舵靈敏度: 尾舵如果自旋停止時會反彈,就調整尾舵靈敏度
L 設定十字盤最大行程
這個設定主要看aileron, elevator and pitch 同時在最大行程下十字盤有沒有 干涉撞牆現象,如出現行程過大或不足, 可移動尾舵搖桿設定
M 設定十字盤修正方向
設定機體傾斜時,十字盤修正的方向是否正確 十字盤修正方向應該要跟傾斜方向相反
狀態燈 不亮 紫色 紅 藍
H 十字盤模式
設定十字盤的類型,GAUI X5設定為120度
I CCPM伺服機正反向 設定十字盤伺服機的正反向 推動油門搖桿,如果十字盤是水平的上升或下降,就代表伺服機的方向都正確 如果有一顆伺服機會朝反方向跑,就推動尾舵搖桿來變更正反向的狀態
狀態燈 不亮 紫色 紅色 藍色
升降伺服 副翼伺服 螺距伺服 正向 反向 反向 正向 正向 反向 *出廠預設 正向 反向 正向 正向 正向 正向
狀態燈 不亮 紫色 紅色 藍色
功能 十字盤伺服機已經在中位
升降伺服機微調 副翼伺服機微調 PITCH伺服機微調
先把伺服臂90度放進伺服機或最相近的,( 因不是所有伺服機及臂能90度裝進的, 總有差誤) 隨後可用尾舵搖桿選擇單個伺服機, 作中位調整, 看上行燈號表示要設定的伺服機, 當設定的伺服機燈號亮着, 移動相對的搖桿便可調整中位, 再搖尾舵桿一次設定下一個伺服機
接線
一般接收機
连接接收
连接伺服
orange 尾舵机 Spektrum® 衛星接收
brown 感度
red 螺距
ELE/DI1 AIL/CH5 CH1/CH2 CH3/CH4 升降 副翼 升降/副翼螺距/尾舵
ELE/DI1 AIL/CH5 CH1 CH2 卫星天线 油门 升降舵 副翼
CH3 螺距
CH4 尾舵机
F 尾舵正反向 這設定是尾舵鏍修正方向, 把機子轉向任一方, 看尾舵修正方向正確與否, 機頭轉左方向 尾舵該向右方修正(如同打右舵),如不正確, 可搖尾舵搖桿調正
狀態燈 紅色 藍色
尾舵方向 正向 反向
G 十字盤伺服機中立點(十字盤0度)
設定模式前,請將遙控器各 servo 的微調及sub trim設定"0"油門搖桿推至中位(0度位置)
狀態燈 紫色 紅色閃爍 紅色 藍色閃爍 藍色 不亮
操控模式 一般 運動 專業
遙控器EXP 遙控器EXP/DR
由電腦設定
C 十字盤感度調整 D 尾舵感度調整
這二項是內置十字盤鏍距及尾舵感度調節 當高速飛行時發生機體忽上忽下及尾巴擺動, 可視情況調整,
狀態燈 紫色 紅色閃爍 紅色 藍色閃爍 藍色 不亮
感度 非常低
升降 反向 反向 正向 正向
副翼 反向 正向 反向 正向
*出廠預設
N 設定自旋十字盤補正方向 當進入這設定模式時, 十字盤會向前或後傾斜,用手找住旋翼頭, 將機體懸空向右方轉動機體, 十字盤該向右方修正 如反向可搖尾舵搖桿修正
狀態燈 修正方向 紅色 正向 藍色 反向
再按設定按鈕儲存 完成設定退出
參數設定 說明書第四十五頁
