oracle 11g 安装手册
Oracle Database Mobile Server 11g 用户手册说明书
ORACLE DATABASE MOBILE SERVER ® 11g Oracle Database Mobile Server 11g is the best way to securely connect embedded devices and mobile applications to Oracle Database. Any organization with a mobile workforce or network of remote devices can benefit from using Oracle Database Mobile Server to safely and reliably link them into their existing enterprise infrastructure. Oracle Database Mobile Server is designed to work with Berkeley DB, Oracle’s high performance mobile data store. It is also compatible with SQLite, the popular open source project. Oracle Database Mobile Server Overview Oracle Database Mobile Server 11g is a reliable, secure way to link mobile applications and embedded devices into existing enterprise infrastructure. It is well suited for mission critical applications or any application where high performance and reliability are required. It extends the application grid to mobile devices, allowing access to enterprise data and applications in the absence of a network connection. When a network connection is available, Oracle Database Mobile Server uses data synchronization to allow reliable and secure data exchange with a backend Oracle Database. The three main components of Oracle Database Mobile Server are: 1) Mobile Client, resides on mobile platform to facilitate sync and remote management 2) The Sync Server itself, coupled with the Mobile Manager console, provide scalable, secure management of data, applications and devices. 3) Mobile Development Kit (MDK), a suite of tools for packaging, publishing and testing applications. Multi-Platform Mobile Client Oracle Database Mobile Server supports many different client platforms, including Java, Android, Blackberry, Windows Desktop & Mobile, and Linux. The Mobile Client provides support for either a SQLite database or Oracle Berkeley DB. • Berkeley DB is a widely deployed, mature embedded database library that provides enterprise class features, including high throughput, low-latency reads, non-blocking writes, data scalability and in-memory caching in a small memory footprint. Berkeley DB offers a SQL API that is SQLite compatible. Berkeley DB offers features that allow it to scale well beyond the limitations of the SQLite native library, while retaining the ease-of-use of the SQLite API. • SQLite is a very popular open source embedded database library and is widely used in smart phones, including Android and Blackberry devices. It is a small footprint, transactional database library that is self-administering, requiring no external DBA. The Mobile Client supports both databases with a rich set of data synchronization features. Data synchronization can be enabled in a variety of ways – automatic background sync, manual sync using a GUI, command line app, or even from another application using API calls.A device agent on the Mobile client allows administrators to remotely manage the device by sending commands or querying the system. Application life-cycle management can be achieved by enabling remote application updates.Enterprise Ready Mobile ServerAt the core of the Oracle Database Mobile Server product is the server itself, which can be deployed on commodity server hardware running industry standard operating systems including Windows, Linux, Solaris, HP-UX and IBM AIX. The Mobile Server provides a reliable, bi-directional synchronization system and a powerful administration interface.Robust and Scalable Synchronization SystemBased on the publish/subscribe or “pub-sub” model, the Oracle Database Mobile Server synchronization system allows efficient asynchronous and synchronous incremental data synchronization between thousands of mobile users and the Oracle Database.Oracle Database Mobile Server features a robust and resilient synchronization process. In the event of a network failure, the client will resume the function from the last acknowledged checkpoint rather than restart the transmission. The result is that a successful synchronization can be achieved even over unreliable network connections.Oracle Database Mobile Server is capable of analyzing information contained in the mobile application to automatically create the application's server-side synchronization logic. It provides a flexible architecture that enables customization of the synchronization process at multiple levels. Callback support enables interleaving various application-specific tasks during the various synchronization phases. Developers can choose to optimize only the resource intensive Compose phase of synchronization by implementing java classes that leverage their insights into the data model. Alternatively, developers can provide full control of the synchronization system by independently managing the data queues that contain the uploaded data and the client updates to be downloaded.Conflicts can occur when the same data has been modified by the server and the client, or by multiple clients. Oracle Database Mobile Server automatically detects such conflicts and resolves them based on a highly customizable rule set.Comprehensive Management and AdministrationOracle Database Mobile Server employs a secure, centralized repository to support a unified interface for distributing and managing software and data on remote systems. Mobile Manager, a web-based administration interface for Mobile Server, enables 100% server-side management of all mobile applications, devices, users and mobile servers. The administrator can create users and groups, assign application access privileges, send device commands and retrieve device diagnostic information from a single interface. Integration with enterprise Oracle OID and LDAP directories further simplifies user management. In addition, the administrator can manage the synchronization process by setting its frequency, resolving errors, or analyzing and tuning its performance from the same interface. A scripting language is available that can be used to batch administration functions minimize administrator overhead.Rapid Application Development SupportThe Mobile Development Kit (MDK) is included with Oracle Database Mobile Server. It consists of a set of tools, APIs, tutorials and code samples that accelerate the development of mobile applications.The main component of the MDK is the Mobile Database Workbench (MDW), a visual development tool for designing synchronized databases. Wizards in the MDW accelerate creation of synchronized databases by allowing developers to quickly define and customize snapshots of enterprise data models for incorporation into these databases. The Packaging Wizard enables bundling all application components (executables, libraries, images, help files etc.) into a JAR file for simple upload to the Mobile Server from where it can be deployed to mobile, embedded or lightweight business environments easily.Developers can use Oracle JDeveloper with ADF Mobile to visually develop applications that enable access to critical business data. Oracle Database Mobile Server includes support for deploying and managing applications created using JDeveloper and ADF Mobile.Oracle Database Mobile Server also supports familiar data access interfaces and open standards such as ODBC, JDBC, and . Tutorials and samples included in the documentation and MDK install highlight how to leverage specific features or develop applications on a particular platform.Table 1 Supported client platformsHigh Performance and ScalabilityOracle Database Mobile Server delivers impressive out-of-the-box performance, enabling users to access information quickly and efficiently. Support for multiprocessor systems and dynamic cache sizing ensure top performance for larger databases and greater numbers of connected users. Oracle Database Mobile Server provides tools to tune the performance of data synchronization.Oracle Database Mobile Server integrates with Oracle WebLogic Server to enable scaling of Mobile Server deployments by taking advantage of the load balancing features.On the mobile device side, Berkeley DB’s small footprint, extreme scalability, and fine-grain locking make it suitable for almost any application. It supports a high degree of concurrency, including support for concurrent Vacuum and Backup commands.Unparalleled Device and Application SecurityOracle Database Mobile Server provides standard device commands as well as the infrastructure to implement customized commands to support enterprise business processes and security best practices. For example, you can issue commands to synchronize the database, perform diagnostics, or change application settings. In the event of a device loss, theft, or other security concern, you can delete applications and databases, uninstall the client or reset the password. SSL based encryption protects data integrity while data is in transit between the device and the enterprise database.JavaN/A Yes N/A AndroidN/A Yes N/A BlackberryN/A Yes N/A Windows Desktopand MobileYes Yes Yes Linux Yes Yes N/ATable 2 Key Oracle Database Mobile Server featuresConclusionOrganizations of all types can leverage Oracle Database Mobile Server 11g to increase employee productivity, reduce operation costs, and improve customer satisfaction. Oracle Database Mobile Server has delivered demonstrable impact in a wide variety of roles, including sales force automation, data collection, customer relationship management (CRM), and field service applications. It has an established presence in a range of industries including financial services, healthcare, transportation, logistics, government, retail, military, and law enforcement. It is also commonly used as a building block for custom solutions by ISVs and System Integrators (SIs).Contact UsFor more information about Oracle Database Mobile Server, please visit or call +1.800.ORACLE1 to speak to an Oracle representative.Oracle is committed to developing practices and products that help protect the environmentCopyright © 2011, Oracle and/or its affiliates. All rights reserved.This document is provided for information purposes only and the contents hereof are subject to change without notice. This document is not warranted to be error-free, nor subject to any other warranties or conditions, whether expressed orally or implied in law, including implied warranties and conditions of merchantability or fitness for a particular purpose. We specifically disclaim any liability with respect to this document and no contractual obligations are formed either directly or indirectly by this document. This document may not be reproduced or transmitted in any form or by any means, electronic or mechanical, for any purpose, without our prior written permission.Oracle is a registered trademark of Oracle Corporation and/or its affiliates. Other names may be trademarks of their respective owners.• Footprint is 1 MB• Very broad platform support• High performance• Non-blocking writes• In-memory caching• Concurrent access bymultiple threads orprocesses• Full ACID transactions• Automatic recovery• Scales to TB of data ina single table• JDBC, ODBC, APIs• SQL API compatiblewith SQLite, SQL-92• 128-bit AES encryption • Fine-grain locking• Zero administration • Flexible & reliable bi- directional synchronization • Asynchronous architecture for high scalability • Multi-threaded architecture • Custom synchronization invocation • Automatic (background) Synchronization • Support for schema evolution • SSL encryption & data compression • Network failure recovery • Built-in and custom conflict detection / resolution • Ability to synchronize data and applications• EM compliant UI • Single Sign-On capability using Oracle Identity Management • Scripting language for batch administration • Extension APIs • User management • Application provisioning and deployment • Device management including remote diagnostics • Unified interface to monitor synchronization and resolve errors。
centos下Oracle11G图文安装教程

centos下Oracle11G 图文安装教程这篇文章主要为大家详细介绍了centos 下Oracle11G 图文安装教程,具有一定的参考价值,感兴趣的小伙伴们可以参考一下本文实例为大家分享了Android 九宫格图片展示的具体代码,供大家参考,具体内容如下第一步:软件安装:本菜是在VMware 虚拟机上安装的centOS6.5,开辟的虚拟硬盘空间一定要大于30G(本菜一开始只开辟了20g ,结果最后提示空间不够,惨痛的经历,所以第二遍直接开辟了50G 硬盘空间),建议在40G~50G ,内存最低要1G!!!至于VMware 虚拟机和centOS 的安装不是本文重点,更不是难点,大家可以参考其他内容进行安装,在此不再赘述!软件准备:oracle 的下载,分为32位和64位,安装过程都是一样的。
如果你的机器是32位的,就下载32位的Oracle 软件,若是64位的就下载64位的。
下面的安装过程是完全一样的,本菜一开始在这个环节还犹豫了一些时间,汗~因为我是32位的操作系统,所以我下载的是linux_11gR2_database_1of2和linux_11gR2_database_2of2两个压缩文件。
若是64位的请下载:linux.x64_11gR2_database_1of2和linux.x64_11gR2_database_2of2(注意都是下载两个文件,缺一不可)。
如图:第二步:第二步:修改主机名以root 权限登录虚拟机,打开终端输入命令行,将主机名改为oracledb :第三步:第三步:修改网络连接方式这一步是必须要做的!因为在安装centOS (网络连接选的是桥接,不要选择NAT ,否则外网无法访问你的虚拟机)的时候我们都是动态获取IP ,但是在安装Oracle 的时候是需要更改的,我们必须要使用静态IP ,可以这样理解,装上Ora cle 数据库,你的虚拟机就是提供数据访问的服务器了,IP 就像你的身份证,如果你的每次都变换身份,谁能找得到你!知道了为什么,那么就要就行修改配置了:1.修改网卡配置:在终端输入命令行:ifconfig 可以查看网卡信息,其中inetaddr 是IP 地址的意思。
Linux系统(X64)安装Oracle11g完整安装图文教程另附基本操作

Linux系统(X64)安装Oracle11g完整安装图⽂教程另附基本操作⼀、修改操作系统核⼼参数在Root⽤户下执⾏以下步骤:1)修改⽤户的SHELL的限制,修改/etc/security/limits.conf⽂件输⼊命令:vi /etc/security/limits.conf,按i键进⼊编辑模式,将下列内容加⼊该⽂件。
oracle soft nproc 2047oracle hard nproc 16384oracle soft nofile 1024oracle hard nofile 65536编辑完成后按Esc键,输⼊“:wq”存盘退出2)修改/etc/pam.d/login ⽂件,输⼊命令:vi /etc/pam.d/login,按i键进⼊编辑模式,将下列内容加⼊该⽂件。
session required /lib/security/pam_limits.sosession required pam_limits.so编辑完成后按Esc键,输⼊“:wq”存盘退出3)修改linux内核,修改/etc/sysctl.conf⽂件,输⼊命令: vi /etc/sysctl.conf ,按i键进⼊编辑模式,将下列内容加⼊该⽂件fs.file-max = 6815744fs.aio-max-nr = 1048576kernel.shmall = 2097152kernel.shmmax = 2147483648kernel.shmmni = 4096kernel.sem = 250 32000 100 128net.ipv4.ip_local_port_range = 9000 65500net.core.rmem_default = 4194304net.core.rmem_max = 4194304net.core.wmem_default = 262144net.core.wmem_max = 1048576编辑完成后按Esc键,输⼊“:wq”存盘退出4)要使 /etc/sysctl.conf 更改⽴即⽣效,执⾏以下命令。
CentOS6.5下Oracle11G完整安装步骤

CentOS6.5下Oracle11g安装完整步骤一、硬件要求本部分内容命令,均以root用户执行。
1、内存建议内存应大于2G以上,1G可以运行,但比较吃力。
内存查看命令:[root@tsp-rls-dbserver /]# cat /proc/meminfo或[root@tsp-rls-dbserver /]# free -mtotal used free shared buffers cachedMem: 32062 1301 30760 0 40 552-/+ buffers/cache: 708 31354Swap: 16095 0 160952、交换分区交换分区大小,通常设为内存的1.5倍以上,也可以根据实际情况进行调整。
交换分区查看命令:[root@tsp-rls-dbserver /]# grep SwapTotal /proc/meminfoSwapTotal: 67682296 kB3、硬盘空间建议数据使用独立的挂载分区,本文中采用/data作为数据分区。
要求/tmp目录空间不小于400M。
磁盘空间查看命令:[root@tsp-rls-dbserver /]# df -hFilesystem Size Used Avail Use% Mounted on/dev/mapper/vg_tsprlsdbserver-lv_root 50G 4.3G 43G 10% /tmpfs 16G 348K 16G 1% /dev/shm/dev/sda1 485M 39M 421M 9% /boot/dev/mapper/vg_tsprlsdbserver-lv_home 210G 190M 199G 1% /home/dev/sdb1 1.1T 4.5G 1.1T 1% /data目录空间大小查看命令:[root@tsp-rls-dbserver tmp]# du -ch /tmp二、软件要求1、安装依赖包建议安装系统时,选择开发库。
Windows安装oracle11g教程完整版

oracle11g安装教程完整版
64位WIN7+oracle11g+plsql安装
1、下载Oracle 11g R2 for Windows的版本
下载地址:https:///technetwork/database/enterprise-edition/downloads/index.html
其中包括两个压缩包:win64_11gR2_database_1of2.zip,win64_11gR2_database_2of2.zip 2、将两个压缩包解压到同一个目录下,即“database”,然后单击解压目录下的“setup.exe”文件:
3、在出现的“配置安全更新”窗口中,取消“我希望通过My Oracle Support接受安全更新”,
单击“下一步”:
出现下面的界面,点击“是”
4、在“安装选项”窗口中,选择“创建和配置数据库”,单击“下一步”:
5、在“系统类”窗口中,选择“桌面类”,单击“下一步”:
6、在“典型安装”窗口中,选择Oracle的基目录,选择“企业版”和“默认值”并输入统一的密码为:Oracle11g,单击“下一步”:
7、在“先决条件检查”窗口中,单击“下一步”:
8、在“概要”窗口中,单击“完成”,即可进行安装:
9、出现的安装过程如下:
数据库创建完成后,会出现如下“Database Configuration Assistant”界面:。
Oracle 11g详细安装步骤

【知识点1】操作系统准备工作(六步)一、OS版本限制oracle 8ioracle 9i rhel 4.xoracle 10G R2 rhel 4.xoracle 11G R2 rhel 5.xoracle 12c【注1】其中,10g以及之前的版本已经不支持了。
【注2】oracle 版本出现的时期对应的 rhel版本要注意,如:oracle 10G R2版本,官方是不支持装在rhel 5上的。
1【问题1】8i 9i 后面跟字母i什么意思?1998年9月,ORACLE公司正式发布ORACLE 8i。
“i”代表Internet,这一版本中添加了大量为支持Internet而设计的特性。
【问题2】10g 11g 后面的g是什么意思,12 c 中的c是什么意思?2003年9月8日,旧金山举办的ORACLE World大会上,Ellison宣布下一代数据库产品为“ORACLE 10g”。
ORACLE应用服务器10g(ORACLE Application Server 10g)也将作为甲骨文公司下一代应用基础架构软件集成套件。
“g”代表“grid ,网格”。
这一版的最大的特性就是加入了网格计算的功能。
c 代表cloud二、磁盘空间限制1、oracle是数据库的一款产品软件,然后在这款产品之上,可以建库。
2、两个安装目录/软件安装目录 /u01/oracle/数据库目录2这2个目录安装初期需要大约3.5G,以后再学习备份恢复的课程,又会拷贝出来一份,所以一般留出至少10G 的空间,我们可以设置60G3、/tmp安装时会用到临时目录/tmp,产生临时文件,至少400M的空间4、swap 交换分区 real_memory*2 测试环境可以不满足生产环境尽量满足2g 4g4g 8g# free 查看Swap分区 # cat /proc/meminfo三、软件包依赖oracle软件是用C语言和JAVA写的,源代码安装需要做编译,所以需要编译器,而且需要动态链接库,所以装OS时选择“开发库”、“开发工具”和“老软件支持”# yum grouplist --- 查看包组Development LibrariesDevelopment Tools3Legacy Soft Support ------ legacy除此之外,官方列出了很多软件包rpm -q binutils compat-libstdc++ elfutils-libelf elfutils-libelf-devel elfutils-libelf-devel-static gcc gcc-c++ glibc glibc-common glibc-devel glibc-headers ksh libaio libiao-devel libgomp libstdc++ libstdc++-devel make sysstat unixoDBC unixoDBC-devel | grep not四、主机名和解析地址1、不要使用DHCP分配的IP,要使用静态IP2、解析# vim /etc/hosts【语法格式】IP 主机全名192.168.1.88 rh6oracle五、用户和资源限制(PAM)4# id oracle 查看是否有oracle这个用户【解释】建立一个账户 oracle ,因为公司不可能把root的权限给你,权限太大,你的职责是管理数据库,所以,专门给DBA建立一个账号叫oracle的账户使用1、建议指定GID和UID方式(尤其集群环境)# groupadd -g 54321 oinstall2\# groupadd -g 54322 dba# useradd -u 54321 -g oinstall -G dba oracle# echo oracle | passwd --stdin oracle2、/etc/security/limits.conf 里的内容,针对单个用户的限制oracle soft nproc 2047 ---软限进程数(nproc:number of process):此时会有警告,告诉你进程有点多了,但是还可以继续运行更多的进程oracle hard nproc 16384 --- 最多可以运行16384个进程oracle soft nofile 1024 --- 软限文件数1024个oracle hard nofile 65536 --- 硬限文件数65536个5【注】要保证session required pam_limits.so 这个模块要加载,红帽默认是加载的。
oracle 11g 安装图文手册

方法/步骤1. 1大家可以根据自己的操作系统是多少位(32位或64位)的,到官网下载相应的安装程序,如下图所示。
有一点需要注意,Oracle的安装程序分成2个文件,下载后将2个文件解压到同一目录即可。
2. 2下载完成后,将2个压缩文件一起选中,鼠标右键—>解压文件,如下图所示。
两个压缩文件解压到同一目录下。
需要注意的是,路径名称中最好不要出现中文、空格等不规则字符。
(由于小编是在本地解压后再拷贝到服务器上,所以本地路径无所谓,只要服务器上的路径负荷这个规则就行。
)3. 3打开相应的解压路径,找到安装文件“setup.exe”,双击进行安装,如下图所示:4. 4配置安全更新。
电子邮件可写可不写,取消下面的“我希望通过My Oracle Support接受安全更新(W)”,如下图所示,单击下一步。
5. 5安装选项。
直接选择默认的“创建和配置数据库”,如下图所示,单击下一步。
6. 6系统类。
由于咱们安装的是服务器,所以选择“服务器类”,如下图所示,单击下一步。
7.7网格安装选项。
选择“单实例数据库安装”,如下图所示,单击下一步。
8.8安装类型。
选择“高级安装”,如下图所示,单击下一步。
9.9产品语言。
直接默认即可(简体中文、英语),如下图所示,单击下一步。
10.10数据库版本。
选择“企业版”,如下图所示,单击下一步。
11.11安装位置。
填入安装路径(只需要填“Oracle基目录”即可,“软件位置”会自动生成),如下图所示,单击下一步。
12.12配置类型。
选择“一般用途/事务处理”,如下图所示,单击下一步。
13.13数据库标识符。
填入全局数据库名和SID,如下图所示,单击下一步。
14. 配置选项。
切换到“字符集”选项卡,选择“使用Unicode(AL32UTF8)”,如下图所示,单击下一步。
【主要查看本服务器字符集类型后选择恰当字符集】15. 管理选项。
直接单击下一步,如下图所示。
16. 数据库存储。
在linux64上安装oracle11g_完整版本
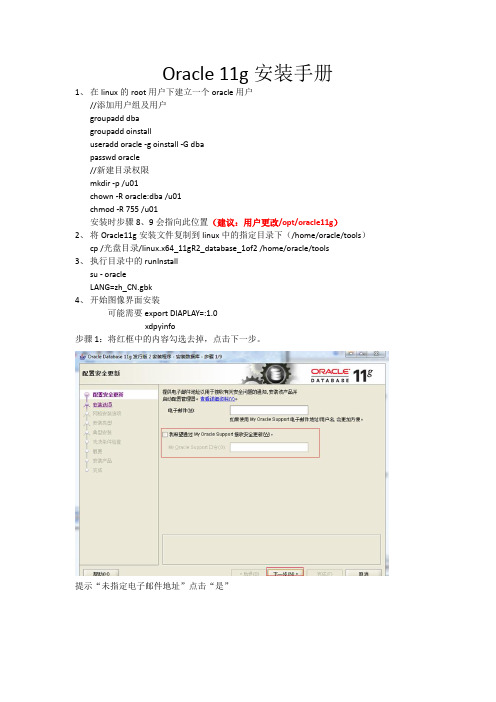
Oracle 11g安装手册1、在linux的root用户下建立一个oracle用户//添加用户组及用户groupadd dbagroupadd oinstalluseradd oracle -g oinstall -G dbapasswd oracle//新建目录权限mkdir -p /u01chown -R oracle:dba /u01chmod -R 755 /u01安装时步骤8、9会指向此位置(建议:用户更改/opt/oracle11g)2、将Oracle11g安装文件复制到linux中的指定目录下(/home/oracle/tools)cp /光盘目录/linux.x64_11gR2_database_1of2 /home/oracle/tools3、执行目录中的runInstallsu - oracleLANG=zh_CN.gbk4、开始图像界面安装可能需要export DIAPLAY=:1.0xdpyinfo步骤1:将红框中的内容勾选去掉,点击下一步。
提示“未指定电子邮件地址”点击“是”步骤2:点选“创建和配置数据库”此选项也为默认选项,点击下一步。
步骤3:点击选中“服务器类”,点击“下一步”步骤4:点击选中“单实例数据库安装”,点击下一步。
步骤5:点击选中“高级安装”,点击“下一步”步骤6:选择需要的语言,点击“下一步”,此处客户确认是否需要增加其他语言步骤7:点击选中“企业版(4.29GB)”,点击“下一步”点击上图的“选择选项”,勾选需要的组件,此处全部勾选。
步骤8:此处为默认路径,u01的建立参考第1点orcale用户的建立,点击“下一步”步骤9:此处默认即可,点击“下一步”步骤10:点击选中“一般用途/事务处理”,点击“下一步”步骤11:此处默认,点击“下一步”vpmsdbs步骤12:此处可以设置内存、字符集、安全性、示例方案(可根据用户环境调整),点击“下一步”,内存分配建议至少50%步骤13:此处默认,点击“下一步”步骤14:此处默认处理,点击“下一步”步骤15:点击选中“不启用自动备份”,点击“下一步”步骤16:各帐号口令设定,此处统一使用相同口令,客户现场请在同客户确认口令设定规则步骤17:点击“下一步”步骤18:点击“修补并在此检查”,会产生修补文件,按照提示内容执行即可A、切换到root用户,此处为测试环境执行内容如上述步骤执行完成后依旧存在失败内容,请到linux光盘中寻找对应的rpm文件,复制到linux某一目录中,按下图命令执行步骤19:修补完成后,出现如下信息,点击“完成”步骤20:执行安装过程复制文件,创建实例过程完成后信息,点击“确定”完成后,如出现以下内容,请按照操作步骤,执行完成后,完成安装过程配置监听器1、执行su - oraclesh /u01/app/oracle/product/11.2.0/dbhome_1/bin/netca2、点击选中“监听程序配置”,点击“下一步”3、点击选中“添加”,点击“下一步”4、设定监听程序名,点击“下一步”5、选定协议所有协议,点击“下一步”6、设定标准端口号,点击“下一步”7、设定标准TCP/IP SSL端口号,点击“下一步”8、设置IPC键值,点击“下一步”9、提示是否配置另一个监听程序,点“是”,再点击“下一步”配置数据库1、执行sh /u01/app/oracle/product/11.2.0/dbhome_1/bin/dbca2、点击“下一步”3、点选“创建数据库”,点击“下一步”4、点选“一般用途或事物处理”,点击“下一步”5、设定数据库名及SID,点击“下一步”6、配置管理选项,此处暂时用7、设定口令,点击“下一步”8、网络配置,点击“下一步”9、数据库文件所在位置,点击“下一步”,按照实际的文件规划位置10、恢复配置,点击“下一步”11、数据库内容,点击“下一步”12、初始化参数,点击“下一步”13、数据库存储,点击“下一步”14、创建选项,点击“完成”15、概要显示,点击“确定”16、创建进行17、创建完成,点击“退出”环境变量设置及启动1、设置环境变量在服务器上配置环境变量,编辑vi /etc/profile,在末尾加入以下配置export ORACLE_HOME=/u01/app/oracle/product/11.2.0/dbhome_1export PATH=.:$ORACLE_HOME/bin:$PATHexport ORACLE_SID=VPMSDBS (数据库SID)保存并退出vi /etc/oratab最后的N 改成Y(否则dbstart和dbshut命令无效)lsnrctl start (启动oracle监听)提示:The listener supports no servicesThe command completed successfully这样启动后远程连接会造成oracle ORA-12514:TNS:listener does not currently know of service requested in connect descriptor-----方案一-------------------------在listener.ora里面添加了一行SID_LIST_LISTENER =(SID_LIST =(SID_DESC =(GLOBAL_DBNAME = VENDB)(ORACLE_HOME = /opt/oracle11g/app/oracle/product/11.2.0/dbhome_1)(SID_NAME = VENDB)))-----方案二-------------------------linux上面:[oracle@localhost ~]$ netmgr在下图的Listeners->Database Services中配置要监听的SID及ORACLE_HOME,退出保存。
安装Oracle11g
安装Oracle11g
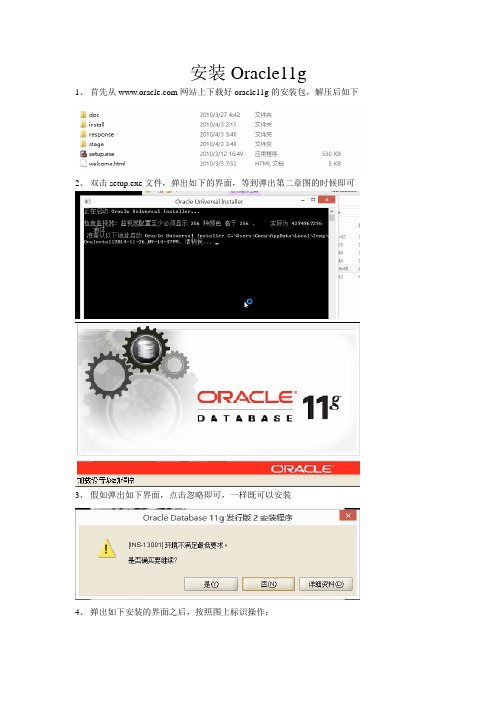
1、首先从网站上下载好oracle11g的安装包,解压后如下
2、双击setup.exe文件,弹出如下的界面,等到弹出第二章图的时候即可
3、假如弹出如下界面,点击忽略即可,一样既可以安装
4、弹出如下安装的界面之后,按照图上标识操作;
弹出如下窗口之后,点击是
5、选择创建和配置数据库,点击下一步;
6、选择单实例数据库安装,点击下一步;
6、选择高级安装,点击下一步;
7、一般有默认的中文,点击下一步;
8、选择企业版,下一步;
9、修改路径后,点击下一步;
10、选择一般用途,点击下一步;
11、设置数据库名称,点击下一步;
12、此选项卡默认
13、单击字符集选项卡,选择UTF-8的编码;
14、选择实例方案选项卡,选择好创建具有实例方案的数据库,点击下一步;
15、此步骤默认,直接下一步;
16、此步骤,默认下一步;
17、此步骤,默认下一步;
18、选择使用相同口令,下一步;
19、弹出以下弹框,选择是;
20、选择完成,开始安装;
21、然后,在安装完成后,假如你需要修改刚刚你填写的口令的话,选择口令管理,将以下
五个用户修改下密码,并解锁;超级管理账户:sys
密码:change_on_install;
普通管理账户:system
密码:manager;
经典账户:scott
密码:tiger;
大数据账户:sh
密码:sh
以上为学习所用的用户和密码;OK 到此安装完成了;。
图解Oracle 11g客户端安装

6.安装Oracle 11g客户端双击之后出现如下界面:选择“管理员”选项之后默认安装Configuration assistant(配置助手)安装之后:6.1 Oracle的连接和使用将文件tnsnames.ora复制到安装目录X:\app\Administrator\product\11.1.0\client_1\network\ad min和X:\app\Administrator\product\11.1.0\client_1\network\admi n\sample下注:文件tnsnames.ora的IP需要改成数据库的IPX表示安装的驱动器,Administrator或登录账户如:CAOD:\app\CAO\product\11.1.0\client_1\network\admin\samp le6.2如果没有文件,需要自己在Net Manager进行配置:进入开始→Oracle→配置和移植工具→Net Manager在左侧树形图中选择 Oracle Net配置→本地→服务命名,若没有服务,点击工具条的”+”进行添加,右侧是地址配置,“主机号”填写服务器所在的IP,退出并保存。
6.2运行toad会出现OK,之后还会有一系列的界面,默认处理然后,进入Toad,用户名:SYSTEM 密码:sys左侧是已创建的登录用户,右侧输入用户名和密码,TNS选项卡选择数据库名称,Connect Using选择连接的Oracle ,选择TNSNames Editor对服务进行配置如图:OK,Connect7Oracle 11g 服务器版进入Toad 用户名system 密码:system选项注意TNSNames Editor选oracle服务器,将Connect Using 选为服务器即可Connect,成功登录界面如果连接不上,替换一下D:\app\CAO\product\11.1.0\db_1\NETWORK\ADMIN下的listener文件。
Oracle 11g完全手册

一.Window下关闭Oracle 11g正常在Windows下安全关闭Oracle数据库系统的步骤如下:1.从命令行下找到oracle的BIN目录,然后输入isqlplusctl stop命令停止isqlplus进程。
2.同样在BIN目录下,emctl stop dbconsole停止企业管理器的控制台进程。
3.同样在BIN目录下,lsnrctl stop停止监听进程。
4.在命令行下输入sqlplus /nolog , 然后conn / as sysdba连接到数据库shutdown immediate;====================================================================== select username,password from dba_users; --查看用户信息select username,account_status from dba_users; --查看用户是否解锁alter user scott account unlock; --解锁scott用户alter user scott account lock;--锁scott用户alter user scott identified by tiger; --为scott用户修改密码为tiger创建用户以及给表赋予权限:创建用户create user user_name identified by password;grant dba to user_name;查询表的权限grant select on gecs_law to user_name;select file_name from dba_data_files; --查看数据文件路径select name from v$controlfile; --查看控制文件路径select member from v$logfile; --查看日志文件路径====================================================================== Oracle关于shutdown、startup几个参数:shutdown有四个参数:normal、transactional、immediate、abort。
Oracle11g的安装图文教程(个人安装总结)
在网上下载的oracle 11g一般都有两个文件,安装前步骤必须先提前解压第一个文件,然后在解压第二个文件,如果只解压第一个文件,就开始安装,在安装的过程会出现很多错误,第二个文件解压的过程中,如果出现相同文件,提示要覆盖,就覆盖了。
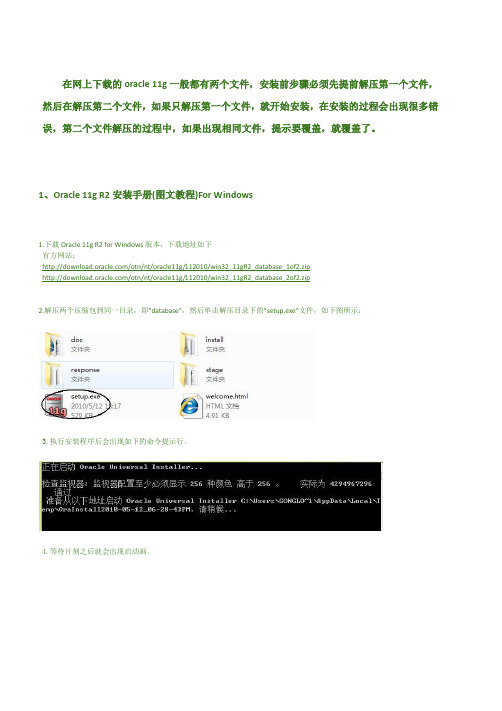
1、Oracle 11g R2安装手册(图文教程)For Windows1.下载Oracle 11g R2 for Windows版本,下载地址如下官方网站:/otn/nt/oracle11g/112010/win32_11gR2_database_1of2.zip/otn/nt/oracle11g/112010/win32_11gR2_database_2of2.zip2.解压两个压缩包到同一目录,即"database",然后单击解压目录下的"setup.exe"文件,如下图所示:3.执行安装程序后会出现如下的命令提示行。
4.等待片刻之后就会出现启动画。
5.稍微等待一会,就会出现如下图所示的安装画面,取消下图所示的选中,然后单击"下一步"继续,同时在出现的信息提示框单击"是"继续。
6.之后就会出现安装选项对话框,默认点击"下一步"继续7.之后会出现安装类型对话框,点击"下一步"继续,如果奔出你是安装在Windows Server上的话就选择服务器类。
8.然后就是安装配置,在这要注意的是:管理口令的格式要至少包含一个大写字母,一个小写字母和一个数字,否则会提示警告,正确输入后点击"下一步"继续。
9. 之后会出现"先决条件检查"对话框,选中"全部忽略"并单击"下一步"以继续。
10.之后点击"完成"就开始安装了11.安装画面如下图所示:12.当上述进度到达100%时会出现线面的对话框,请耐心等待它完成。
Oracle11g数据库安装方法与步骤图文教程
衷心感谢各位同学的支持! 谢谢!
实验步骤9
选择JDK8的安装路径,找到 Java.exe即可。
安装路径在前面JDK8安装时提及。
选择完毕后,点击Ok即可启动该 SQL工具。
实验步骤10
10.进入SQL Developer 主界面,创建连接。
实验步骤10
填写相关信息进行连 接,并测试是否成功。
请注意:
第一次使用scott用户 登录,可能会提示密
实验步骤4
到此JDK8安装完成!
实验步骤5
5.前往官方网站下载Oracle11g安装包。
实验步骤5
找到图中链接,点击进入下载页。
实验步骤5
点击“同意条款”按钮,再往下找到下载链接。
实验步骤5
实验步骤6
6.同时选中下载的2个安装包(32 位的2个或者64位的2个)进行 同时解压到同一文件夹位置内。 解压完毕后运行安装包里面的安 装程序即可,进入安装界面。
是作为练习的最佳选择。要学 会运用这个帮手。
1. 在自己电脑上安装Oracle 11g,放便以后的练 习和作业。并对本实验内容进行复习和巩固。 2. 将课本中“认证目标1.03”中的内容进行上机 实验。 3. 将本实验相关内容,即自己安装Oracle 11g的 实验过程(适当截图)放入上机实验报告册 中。
配置方法:
右键该项,选择“属性”,将“目标”项的后面内容改 成(红色部分):sqldeveloper\bin\sqldeveloperW.exe
实验步骤9
9. 点击并第一次使用“SQL Developer”工具时, 会弹出如图提示,需要进行相关配置。
配置方法:
点击“Browse”按钮,选择JDK8的安装路径,找到 Java.exe即可。安装路径在前面JDK8安装时提及。
Oracle11g 安装手册
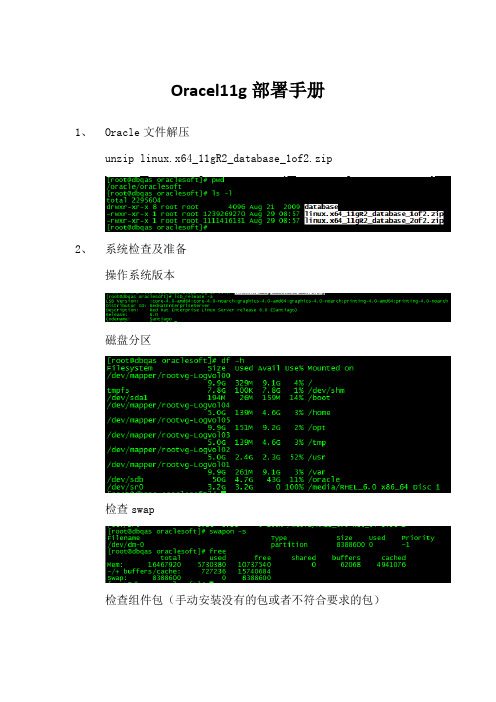
Oracel11g部署手册1、Oracle文件解压unzip linux.x64_11gR2_database_1of2.zip2、系统检查及准备操作系统版本磁盘分区检查swap检查组件包(手动安装没有的包或者不符合要求的包)配置安装(按格式修改)安装组件配置内核参数 vi /etc/sysctl.conf(删除原所有参数,新增自定义参数)内存参数立即生效(也可重启生效)安全参数配置Vi /etc/security/limits.conf(增加4参数)Vi /etc/pam.d/login(增加1参数)Vi /etc/profile检查profile文件语法问题3、安装Oracle创建用户和组拷贝隐藏文件(ls –al)修改oracle用户组和权限修改oracle密码(初设ccre1234)验证oracle账号属性切换oracle用户,编辑环境变量“.bash_profile”设置VNC密码设置VNC服务自动启动启用图形化界面语言乱码显示问题(临时注释 /oracle/.bash_profile对应的语言参数)执行安装安装前检查,发现一些32位的包未安装,需要逐一安装安装方式:A:yum install +补丁包名(可解决补丁包直接的依赖性安装)B:rpm –ivh +补丁包名忽略生产机Oracle配置(选择只安装数据库软件)1、创建数据库(用oracle用户执行命令:dbca)部署oracle监听(使用oracle用户执行命令:netca)4、Oracle安装后检查及配置登陆检查监听检查检查文件配置数据库自动启动vi /etc/oratab 将N修改为Y修改服务文件(手动添加文件,755读写属性)vi /etc/init.d/oracle使用oracle脚本执行数据库启动、关闭、监听状态添加脚本为系统服务打开Oracle系统自动服务开启Oracle归档模式检查archive状态关闭数据库加载数据库,修改数据库归档模式,打开数据库。
SUSE+Linux10+安装Oracle11G

SU SE LINUX 10.1安装Oracle 11 g手册■登录到系统的root在X—term执行:xhost + 主机IP地址/主机名系统要求:内存:推荐1G 当然也可以小,但最小也大于256 查看物理内存命令:grep MemTotal /proc/meminfoSwap分区:设为内存的2倍查看交换空间grep SwapTotal /proc/meminfo/tmp磁盘空间:400MB以上df -k /tmp 查看/tmp文件大小磁盘空间:软件3.5G 数据1.2G所需软件:SuSE Linux10 for x86Oracle安装包准备安装步骤:1、安装SuSE 安装SuSE一定确保安装“C/C Compiler and Tools”软件包。
# gcc –version 查看是否安装该软件包uname –adf –kfree注意:防火墙不要启动还要设置一个静态IP地址。
2、检查并安装ORCALE所需软件包检查ORACLE11g所需的软件包binutils-2.16.91.0.5 compat-libstdc++-5.0.7 glibc-2.4-31.2glibc-devel-2.4-31.2 gcc-4.1.0ksh-93r-12.9libaio-0.3.104libaio-devel-0.3.104 libelf-0.8.5libgcc-4.1.0libstdc++-4.1.0libstdc++-devel-4.1.0 make-3.80sysstat-6.0.2unixODBC-2.2.11unixODBC-devel-2.2.11输入命令:rmp –qa | grep 软件名的名字查看是否存在安装oracle安装所需软件包经检查没有的软件包,则需到以下网端下载:/在终端输入命令:rpm –ivh 需安装的软件包例如:rpm –ivh unixODBC-devel-2.2.11当然也可以从LINUX图形界面启动,在MENU中启动system ->configuraion->yast然后选择softeware->software managerment后,输入相应的软件包。
Oracle11g安装说明

1Oracle11G安装配置说明1.1环境需求1.1.1硬件环境a)内存>1G, 命令:prtconf|moreb)Paging space物理内存在2-16GB之间,交换空间与物理内存大小相同物理内存大于16GB交换,交换空间设为物理内存的0.75倍命令:lsps –ac)检查是否是64位命令:/usr/bin/getconf HARDWARE_BITMODEBootinfo -kd)磁盘空间temp 空间>=1GBoracle 软件安装目录>=8GBe)操作系统runlevel为2命令:who –r1.1.2软件环境a)操作系统版本AIX 6,64bit及以上版本1.2安装Oracle 11g1.2.1安装前检查1.2.2安装Oracle 11g For AIX1.点击安装文件出现如下图所示界面。
2.直接点击下一步选择跳过软件更新选项点击下一步3.选择仅安装数据库软件选项,点击下一步如下图所示:4.选择单实例数据库安装选项,点击下一步。
如下图所示:5.出现请选择运行产品时所使用的语言,选择简体中文和英文。
如下图所示:6.点击下一步出现如下图所示的界面7.选择安装数据的版本,在此选择企业版点击下一步出现如下图所示的界面8.选择产品安装文件的目录,在此我们选择/u01/app/oralnventory,选择oralnventory组名为oinstall。
点击下一步如下图所示:9.选择数据库管理员(OSDBA)组为dba,数据库操作者组为dba,点击下一步如下图所示:10.正在检查执行的先决条件,检查完成后出现如下所示的操作界面,如下图所示11.点击下一步,显示了数据库Oracle11g的安装概要。
如下图所示:12.点击安装按钮正式开始安装Oracle11g数据库,如下图所示:13.出现如下窗口14.点击确定按钮出现下面如图所示的界面15.在欢迎使用配置Oracle数据库界面,点击下一步出现如下图所示的界面16.选择创建数据库选择,点击下一步,如下图所示17.选择一般用途或数据处理选项,点击下一步18.选择配置Enterprise Manager 选项和配置Database Control以进行本地管理,点击下一步,如下图所示:19.选择监听程序配置选项,点击下一步20.选择添加选项,点击下一步,如下图所示:21.输入监听程序的名称为LISTENER,点击下一步如下图所示:22.选择要用的协议TCP,点击下一步如下图所示:23.选择使用的标准端口号1521选项,点击下一步,如下图所示:24.在是否配置另一个监听程序,选择否选项,点击下一步,如下图所示:25.输入管理员口令,点击下一步。
Oracle11g安装文档

CentOs6.5下Oracle11g安装文档一:系统环境设置:1、系统环境配置说明:由于oracle11g对系统环境要求比较高,所以在安装之前需要对系统环境进行配置:包括检查安装oracle11g所依赖的文件包是否已经安装、修改系统内核参数、对用户设置shell 限制、修改/etc/hosts文件等。
利用root权限检查系统是否包含安装oracle11g所需要的依赖包, 安装过程中有的包会提示已经是最新版本了,安装的时候要根据提示注意一下。
yum install binutils-2.*yum install compat-libstdc++-33*yum install elfutils-libelf-0.*yum install elfutils-libelf-devel-*yum install gcc-4.*yum install gcc-c++-4.*yum install glibc-2.*yum install glibc-common-2.*yum install glibc-devel-2.*yum install glibc-headers-2.*yum install ksh-2*yum install libaio-0.*yum install libaio-devel-0.*yum install libgcc-4.*yum install libstdc++-4.*yum install libstdc++-devel-4.*yum install make-3.*yum install unixODBC-2.*yum install unixODBC-devel-2.*yum install pdksh*利用上述命令下载需要的依赖包。
为了使得系统环境适合安装oracle11g,修改系统内核参数文件[root@oracle ~]#vim /etc/sysctl.conf按字母i按键,进行修改文件,在打开文件末尾增加下列语句kernel.shmmni = 4096kernel.sem = 250 32000 100 128fs.file-max = 6815744net.ipv4.ip_local_port_range = 9000 65500net.core.rmem_default = 4194304net.core.wmem_default = 262144net.core.rmem_max = 4194304net.core.wmem_max = 1048576fs.aio-max-nr = 1048576按esc按键,输入:wq,保存修改。
Oracle_Access_Manager_11g安装手册

南京千度软件科技有限公司Oracle Access Manager 11g安装基于Oracle Linux 5-64bitstream2011-5-24说明 (3)安装介质 (3)安装指南 (3)安装Oracle数据库 (3)安装前提 (3)安装步骤 (5)安装JDK (17)安装前提 (17)安装步骤 (17)安装Weblogic (18)安装前提 (18)安装步骤 (18)使用RCU创建OID schema (22)安装前提 (22)配置步骤 (22)安装Oracle Internet Directory (29)安装前提 (29)安装步骤 (29)安装Oracle Internet Directory更新 (36)安装前提 (36)安装步骤 (36)Oracle Internet Directory配置 (41)安装前提 (41)配置步骤 (41)使用RCU创建OAM Schema (52)安装前提 (52)配置步骤 (52)安装Oracle Access Manager (59)安装前提 (59)安装步骤 (59)Oracle Access Manager配置 (62)安装前提 (62)安装步骤 (62)启动和管理服务 (69)启动和管理Oracle Database (69)启动Oracle Internet Directory (69)管理Oracle Internet Directory (70)启动Oracle Access Manager (72)管理Oracle Access Manager (73)说明本文主要是针对在Oracle Enterprise Linux 5 64位操作系统上安装和配置Oracle Access Manager 11.1.1.3.0过程的描述和指导,在实际安装过程中需结合实际情况做相应的调整。
本文不包含创建相应用户(oracle)和用户组(oinstall/dba)以及设置相应的文件或目录权限的。
- 1、下载文档前请自行甄别文档内容的完整性,平台不提供额外的编辑、内容补充、找答案等附加服务。
- 2、"仅部分预览"的文档,不可在线预览部分如存在完整性等问题,可反馈申请退款(可完整预览的文档不适用该条件!)。
- 3、如文档侵犯您的权益,请联系客服反馈,我们会尽快为您处理(人工客服工作时间:9:00-18:30)。
1.下载Oracle 11g R2 for Windows版本,下载地址如下
官方网站:
/otn/nt/oracle11g/112010/win32_11gR2_database_1of2.zip
/otn/nt/oracle11g/112010/win32_11gR2_database_2of2.zip
2.解压两个压缩包到同一目录,即"database",然后单击解压目录下的"setup.exe"文件,如下图所
示:
3.执行安装程序后会出现如下的命令提示行。
4.等待片刻之后就会出现启动画。
5.稍微等待一会,就会出现如下图所示的安装画面,取消下图所示的选中,然后单击"下一步"继续,
同时在出现的信息提示框单击"是"继续。
6.之后就会出现安装选项对话框,默认点击"下一步"继续
7.之后会出现安装类型对话框,点击"下一步"继续,如果是安装在Windows Server上的话就选择
服务器类。
开发的话一般选择桌面类。
8.然后就是安装配置,在这要注意的是:管理口令的格式要至少包含一个大写字母,一个小写字母
和一个数字,否则会提示警告,正确输入后点击"下一步"继续。
9.之后会出现"先决条件检查"对话框,选中"全部忽略"并单击"下一步"以继续。
10.之后点击"完成"就开始安装了。
11.安装画面如下图所示:
12.当上述进度到达100%时会出现线面的对话框,请耐心等待它完成。
13.然后再弹出的确认对话框点击"确定"这时会回到主界面然后再单击"关闭"完成安装。
14.至此,Oracle11g R2已经安装完成,你可以在开始菜单->Oracle - OraDb11g_home1->Database
Control - orcl中打开访问网址。
15.登陆:在连接身份里选择"SYSDBA",再用户名处输入"sys",密码为你最初设定的密码,点击"
登陆"你就可以访问数据库了。
