模拟屏说明书
TN2002模拟屏技术说明书

连接,SW1 与 SW2 为拨号开关,可设置波特率、盒号、自检方式等。
在使用 TN-2002YXDB 型遥信驱动盒之前,须正确设置拨号开关位置:
I. 波特率,由 SW1 决定。
SW1 DIP3 SW1 DIP2
SW1 DIP1
波特率(b/s)
OFF
OFF
OFF
9600
四、屏面结构形式
屏面模块为活动型镶嵌式模块,颜色为国际流行灰。线条均采用圆弧凹型模压,凹部分 不超过 1mm,母线宽度 7mm,支线宽度 3.5mm。单个模块的平面公差值不大于 0.1mm,相邻缝 隙 不 大 于 0.100mm 的任意范围内应不大于 2mm。
OFF
ON
OFF
4800
OFF
OFF
ON
2400
OFF
ON
ON
1200
II. 盒号设置,由 SW2 及 SW1 的 DIP8 决定。盒号从 8 号开始设置,0 ̄7 保留。
SW1
SW2
盒
DIP8 DIP1 DIP2 DIP3 DIP4 DIP5 DIP6 DIP7 DIP8 号
9600 bit/s 任选,通讯规约见 TN-2002 模拟屏通讯规约。 2.遥测显示器显示的数据内容、小数位位置、表现形式(闪烁,正常)等可由系统命令码
控制;遥测显示器可定义符号位正、负、左、右、上、下等方式,并根据实时遥测值的极性 变化而改变;遥测显示器可通过选择开关进行显示器地址设置。
3.遥测显示器具有自检,显示自己地址的功能以方便用户的维护调试。 4. 红、绿、橙 3 色遥测显示器具有更强的数据表现能力。 5.遥信灯光有红、绿、橙、灭四种显示颜色,控制遥信灯光的命令码非常丰富,以满足不 同的应用场合。 I. 12 种慢闪命令,慢闪的表现形式为:a 颜色显示时间长, b 颜色显示时间短,a、b 颜
触摸屏HMI操作说明书

昆明烟厂太阳能预热洗涤热水系统操作员站HMI操作简易说明书(2011-8)操作员站 (1)HMI操作简易说明书 (1)HMI系统概述 (3)软件系统架构 (3)窗口操作介绍 (3)登录窗口 (3)功能操作栏 (3)常规主画面 (4)用户注销 (4)确认退出对话框 (5)报警浏览窗口 (5)报警历史程序窗口 (6)模拟量趋势 (7)操作记录查询画面 (8)标准模块窗口 (8)工程参数设定画面 (8)电机操作画面 (10)HMI系统概述软件系统架构昆明烟厂太阳能预热洗涤热水系统采用1个Pannelview触摸屏做操作员站和工程师站,HMI系统采用FTView上位机软件,通过RS232链接Controllogix,采用RSLinx Enterprise OPC连接方式获取PLC中的数据。
窗口操作介绍登录窗口图2 登录窗口当操作员站触摸屏启动后,会自动加载HMI程序,程序启动后,会提示输入操作员用户名和密码,只有有权限登录的人员才能登录本系统。
功能操作栏图3 功能操作栏所有主画面的底部均为此操作栏,用于一些功能画面的导航。
点击左边4个按钮将弹出菜单窗口栏,用于直接导航切换到相应到画面。
点击历史趋势将切换到历史趋势窗口,点击状态图将切换到当前工艺主画面。
点击操作参数按钮,将显示可以操作的水泵、电磁阀启停、开闭。
点击工程参数按钮将切换到工程参数设定画面。
常规主画面图4 常规主画面本画面为系统中较常规的画面,集中了绝大部分画面元素。
大部分画面元素是根据PID 画面所制,每个监控点都有一个KKS编码与之对应,点击画面上的不同监控点,会弹出相应的操作小窗口用于操作。
如果本画面中有相应的顺控子组操作,则会放置相应的顺控操作按钮。
用户注销图5 确认注销对话框当点击任意一个主画面上的用户注销按钮时,将注销当前登录用户,为只能查看状态,不能做任何操作的权限画面。
当用户重新登录,才能根据分配的用户权限操作或设定工程参数。
权限分配是按照操作员组来划分的,系统中预留5个组,分别是管理员组,操作员组1,操作员组2,操作员组3,默认组,所有的用户分属于不同的组。
HMIGTO6310高级触摸屏面板说明书

i s c l a im e r : T h i s d o c u m e n t a t i o n i s n o t i n t e n d e d a s a s u b s t i t u t e f o r a n d i s n o t t o b e u s e d f o r d e t e r m i n i n g s u i t a b i l i t y o r r e l i a b i l i t y o f t h e s e p r o d u c t s f o r s p e c i f i c u s e r a p p l i c a t i o n sMainRange of productMagelis GTO Product or component typeAdvanced touchscreen panel Display colour65536 colours Display size12.1 inch SupplyExternal source Battery type Lithium battery for internal RAM, autonomy: 100 days, charging time = 5 d, battery life = 10 yr ComplementaryTerminal typeTouchscreen display Display typeBacklit colour TFT LCD Display resolution800 x 600 pixels SVGA Touch sensitive zone1024 x 1024Touch panelResistive film, 1000000 cycles Backlight lifespan50000 hours (white) at 25 °C Brightness16 levels - control by touch panel 16 levels - control by software Character font Taiwanese (traditional Chinese)KoreanChinese (simplified Chinese)ASCII (European characters)Japanese (ANK, Kanji)[Us] rated supply voltage 24 V DCSupply voltage limits 19.2...28.8 VInrush current <= 30 APower consumption in W <= 17 W<= 12 W (when power is not supplied to external devices)<= 7 W (when backlight is OFF)<= 8 W (when backlight is dimmed)Local signalling Status LED (orange) flashing software starting upStatus LED (green) steady offlineSDHC card <= 32 GBDownloadable protocols Modbus Plus Schneider Electric ModiconFIPWAY Schneider Electric ModiconModbus TCP Schneider Electric ModiconModbus Schneider Electric ModiconThird party protocols Mitsubishi MelsecThird party protocols Omron SysmacThird party protocols Rockwell Automation Allen-BradleyThird party protocols Siemens SimaticUni-TE Schneider Electric ModiconIntegrated connection type COM1 serial link SUB-D 9, interface: RS232C, transmission rate: 2400...115200 bpsCOM2 serial link RJ45, interface: RS485, transmission rate: 2400...115200 bpsCOM2 serial link RJ45, interface: RS485, transmission rate: 187.5 kbps compatible with SiemensMPIUSB 2.0 port USB type AUSB 2.0 port mini B USBEthernet RJ45, interface: 10BASE-T/100BASE-TXEthernet RJ45, interface: IEEE 802.3Product mounting Flush mountingFixing mode By 4 screw clampsFront material PPTEnclosure material PPTType of cooling Natural convectionWidth315 mmHeight241 mmDepth56 mmProduct weight 2.5 kgEnvironmentStandards IEC 61000-6-2UL 508EN 61131-2Product certifications C-TickCEcULusKCCAmbient air temperature for operation0...55 °CAmbient air temperature for storage-20...60 °CRelative humidity10...90 % without condensationOperating altitude< 2000 mIP degree of protection IP20 rear panel conforming to IEC 60529IP65 front panel conforming to IEC 60529NEMA degree of protection NEMA 4X front panel (indoor use)Shock resistance147 m/s² 3 chocks in each direction X, Y and Z conforming to EN/IEC 61131-2Vibration resistance 3.5 mm (f = 5...9 Hz) conforming to EN/IEC 61131-2 X, Y, Z directions for 10 cycles (approx. 100min)1 gn (f = 9...150 Hz) conforming to EN/IEC 61131-2 X, Y, Z directions for 10 cycles (approx. 100 min) Resistance to electrostatic discharge 6 kV contact discharge conforming to IEC 61000-4-2 level 3Product environmental Product end of life instructionsAvailableEnd of life manualContractual warranty Warranty period 18 monthsExternal Dimensions1Front2Right Side3Top1Left Side 2Front3Right Side 4Top5Bottom1Left Side 2Rear3Right Side 4Top5BottomPanel Cut DimensionsInstallation Fastener DimensionsMounting AngleWhen installing the panel in a slanted position with an incline more than 30°, the ambient temperature must not exceed 40 °C (104 °F). You may need to use forced air cooling (fan,A/C) to ensure the ambient operating temperature is 40°C or less (104 °F or less).Clearance。
Skyfold 触摸屏用户手册说明书

The following procedures apply to normal operating situations. For additional information on the Skyfold system, please refer to your owner’s manual. Warning• T wo operators, one per touch screen on both sides of the wall, are required for the duration of the wall operation. Ensure that both operators of the Skyfold wall havea clear and unobstructed view of the wall. The Skyfold wall must be monitored from both sides of the wall for the extent of the wall’s ascent or descent, as this can prevent injury and/or damage to the Skyfold wall.• D o not place objects between the panels, underneath the Skyfold wall, or in the near vicinity of the Skyfold wall, as this can cause damage to the Skyfold wall when itis in motion.• D o not operate your Skyfold wall with persons or objects in the path or immediate vicinity of the Skyfold wall, and ensure that the area around both sides of the Skyfold wall is clear from obstructions.• I n case of a malfunction, do not operate the Skyfold wall or attempt to repair it. Call your local authorized Skyfold dealer for service.• D o not operate your Skyfold wall if it is making any abnormal noises or if the Skyfold wall does not appear to be working properly. Contact your local authorized Skyfold dealer immediately.• D o not operate your Skyfold wall if panels are missing as this can damagethe system.• H eat generated by lights inside of the ceiling pocket can damage the panels. Therefore, you must turn on lights that are located in the Skyfold ceiling pocket only when the wall is completely down. Never turn on the lights located in the Skyfold ceiling pocket when the wall is partially or fully retracted into the pocket.• I n cases where an obstruction has caused the Skyfold wall to halt its descent, it will raise automatically (auto-reverse) for 3 seconds to clear the obstruction. You must then remove the obstruction prior to resuming the wall’s descent.Touch the screen to activate thekeypad and display the SKYFOLDsplash screen. Touch the screenagain to proceed to the “PasswordEntry” page or wait 3 seconds.An alpha numeric keypad will nowbe displayed. Enter the default userpassword “4753”. Press “√” once thepassword has been entered. Pleasenote, an additional password can beadded in the settings menu (see step 5).The “Agreement” screen is nowdisplayed on both touch screens.Please read the message and followthe instructions. Once ready, press“Agree” on both touch screens.23Figure 1, Splash ScreenFigure 2, Password Entry ScreenFigure 3, Safety WarningYou can now operate your Skyfold wall. The operator who entered the password will have the “Wall Operation” screen displayed (Figure 4).The “Enable Button” screen will bedisplayed for the second operator(Figure 5).The UP or DOWN arrow and the “EnableButton” must both be pressed and heldfor wall operation. Release pressurefrom the touch screen when the desiredposition has been reached or after thewall is stopped automatically by itsupper or lower limit controls.The operator who entered the passwordalso has access to the “User SettingsMenu” button, which can be foundon the bottom right-hand side ofthe screen.5Figure 4, Wall Operation Screenfor First OperatorFigure 5, Enable Button Screenfor Second OperatorFigure 6, Settings Button LocationIn this menu, the user will be ableto modify the keypad’s password and language.Press the “Language” button to reveal several language options and select your preferred language. Press “Exit” once finished. You only have to adjust the language on one touch screen; the other touch screen will change its language automatically.Press “Change Password” to set a custom user password (must be4 digits). Simply enter 4 digits and press “Save”. A pop-up box will indicate that you’ve changed the user password. If an error is made while creating a new password, press “X” to delete the entry. If at any point you want to leave the “Change Password” screen, press the “Exit” button. The new password will automatically be updated on both touch screens.78Figure 7, User MenuFigure 8, Language Selection ScreenFigure 9, Change Password ScreenIn cases where LED lights are installedin the Skyfold panels, the touch screens can also be used to control this lighting.The LED control button can be accessed on the “Password Entry” screen (Figure10) or on the “Wall Operation” screen (Figures 11 and 12) by pressing the light bulb graphic on the right-hand side of the screen.Press the light bulb button and a dimming control will appear. The dimmer can be adjusted by sliding the blue rectangle along the horizontal bar with your finger.10Figure 10, Password Entry ScreenFigure 11, Wall Operation Screen for First OperatorFigure 12, Wall Operation Screen for Second OperatorFigure 13, LED Dimmer ControlIf a system fault is detected, an error message will appear at the bottom of the screen. Subject to the message, proceed with the appropriate course of action. Contact your local authorized Skyfold dealer for assistance if required.Figure 14, Error Code Display。
Pro-face PFXGP4501TADW 10.4英寸触摸屏操作器界面数据手册说明书
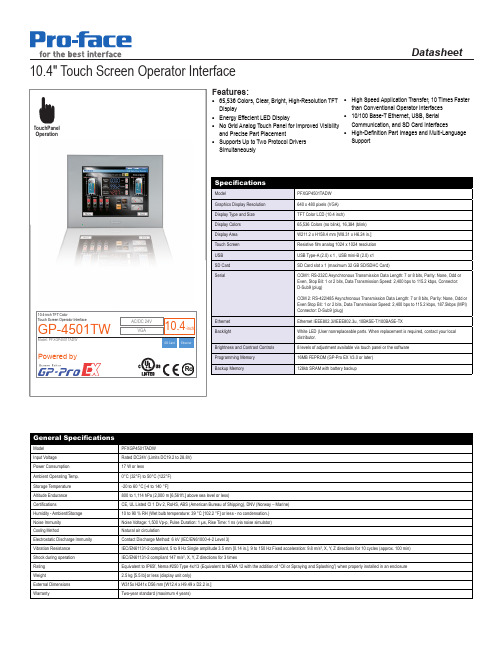
©2012 Pro-face. All rights reserved. Specifications may change without notice.
10.4" Touch Screen Operator Interface
Datasheet
TouchPanel Operation
Features:
• 65,536 Colors, Clear, Bright, High-Resolution TFT • High Speed Application Transfer, 10 Times Faster
Datasheet
Ordering Information
Part Number
Description
PFXGP4501TADW
GP-4501TW: 10.4" TFT Color Touchscreen (Analog), VGA, 2x Serial, Ethernet, 2x USB, SD, 24VDC, UL/CE
COM 2: RS-422/485 Asynchronous Transmission Data Length: 7 or 8 bits, Parity: None, Odd or Even Stop Bit: 1 or 2 bits, Data Transmission Speed: 2,400 bps to 115.2 kbps, 187.5kbps (MPI) Connector: D-Sub9 (plug)
Connectivity
(WKHUQHW0XOWL/LQNIXQFWLRQ
0DVWHU
7KH(WKHUQHW0XOWL/LQNIXQFWLRQ DOORZV\RXWRHDVLO\DGGD*3DV DVXEGLVSOD\WRWKHIDFLOLW\ ZLWKRXWFKDQJLQJDQ\VHWWLQJVRI WKHFRQWUROGHYLFH
VTRON大屏幕操作手册

VTRON操作维护手册大屏幕系统操作维护手册一┅┅┅┅┅┅┅┅┅┅┅┅┅┅┅┅┅┅┅┅┅┅┅┅┅┅┅┅开机二┅┅┅┅┅┅┅┅┅┅┅┅┅┅┅┅┅┅┅┅┅┅大屏幕管理软件操作三┅┅┅┅┅┅┅┅┅┅┅┅┅┅┅┅┅┅┅┅┅┅┅┅┅┅┅┅┅关机四┅┅┅┅┅┅┅┅┅┅┅┅┅┅┅┅┅┅┅┅┅┅┅┅┅┅故障及排除五┅┅┅┅┅┅┅┅┅┅┅┅┅┅┅┅┅┅┅┅┅┅┅┅┅┅日常维护请操作人员务必按照操作手册进行操作一、开机打开投影墙系统设备的所有电源开关→开D igicom图形处理器→在大屏幕控制机上用VWAS软件打开所有投影机。
(开机后等待4分钟左右投影墙会一起点亮)警告!!!在日常使用投影系统时,必须严格遵守系统使用注意事项,严禁在使用系统时突然断电,这样会引起系统的硬件和软件故障,严重的会损害系统设备!二、大屏幕管理软件操作1.软件的登陆步骤1.双击控制PC桌面的图标,就会弹出下图所示登录界面,在控制主机输入:“127.0.0.1”在用户名输入:“admin”;在密码输入: 111111 (6个1)按“确定”即可进入管理软件菜单。
如下图步骤2.右键点击模拟墙打开全部机芯即可开启投影机:接着调度(操作)员把临时PC接上会议室的网口,使用IE登录网址http://192.168.0.1:8080/VWAS5.5方式访问机房的大屏控制PC登录控制软件(确保控制电脑正常启动)。
2.信号的调用:当调用信号时,先要确定信号不能处于屏幕保护状态或在锁定状态,否则信号显示会出现不正常。
1.模式的调用如图所示,点击菜单中列表的“”就会弹出列表选中需要在大屏投影墙上显示的模式,双击鼠标“执行”,即可将对应的信号调用到大屏投影墙上显示。
2.视频信号源和RGB信号源的调用如图所示,点击菜单中列表的“”就会弹出列表把需要显示的视频信号用鼠标点击信号源按住Ctrl键在模拟屏上任意开处理器窗口输出,窗口大小和位置都可以用鼠标任意操作,可支持四路处理器VIDEO信号。
2201L 触摸显示器使用手册说明书
使用者手册2201L 觸摸顯示器版權所有© 2011 T yco Electronics。
保留所有權利。
未經 Tyco Electronics 的書面許可,不得以任何形式或方法(包括但不限於電子、磁性、光學、化學方法或手册等)複製、傳輸或改編本出版物的任何部分,不得將其儲存到擷取系統,不得將其翻譯成任何語言或電腦語言。
免責告示本文件中的訊息有可能在未通知的情况下進行變更。
Tyco Electronics 對本出版物的內容不提供任何形式的陳述或擔保,並且特別宣告拒絕對有特定目的適銷性或適用性提供任何默示擔保。
Tyco Electronics 保留對本出版物進行修訂並對其內容不斷進行變更,而不將這樣的修訂和變更通知任何人的權利。
商標告示Elo TouchSystems、IntelliTouch、iTouch、Tyco Electronics 和 TE(標誌)是 Tyco Electronics 集團公司及其許可方的商標。
Windows 為 Microsoft 集團公司的商標。
本文件中出現的其他產品名稱可能是其各自公司的商標或注册商標。
Tyco Electronics 對除自有商標以外的其他商標不享有任何權益。
目錄第 1 章 – 簡介 (4)第 2 章 – 安裝 (5)第 3 章 – 安裝 (9)第 4 章 – 操作 (10)第 5 章 – 技術支援 (14)第 6 章 – 安全與維護 (15)第 7 章 – 法規訊息 (16)第 8 章 – 擔保訊息 (19)第 1 章 – 簡介產品說明新的觸摸顯示器集 Elo TouchSystems 的可靠效能和觸摸技術與顯示屏設計領域的最新進展於一身。
這種功能組合可在使用者與觸摸顯示屏之間提供自然的訊息流動。
此觸摸顯示器帶有一個 24 位彩色有源矩陣薄膜晶體管 LCD 面板,提供了優异的顯示效能。
其全 HD 解析度 1920x1080 適合顯示圖形和影像。
大屏幕操作手册

第一章.硬件设备简介1.1光源1.2接口接口输入端口的定义:输出通道0口可输出输入通道0或输入通道1信号,输出通道1口只能输出输入通道1信号.零通道输入端口的定义:1.3投影单元结构投影单元光学成像结构如下图2.1:反射镜成像幕投影机投影机 等效位置调整架调节螺母调整架调节螺母1) 投影机的光程决定图像的大小。
2) 投影机的投射角决定图像的方正形状。
3) 反射镜会影响上述因素。
第二章.控制软件的登陆步骤1.双击控制PC桌面的VWASExplorer图标,就会弹出下(图1)所示登录界面,(图1)在用户名输入:“ADMIN”;在密码输入:“111111”按“确定”即可进入管理软件菜单。
如下图(图2)(图2)步骤2.右击右面:(图4)步骤3.然后点击“打开所有机芯”即可点亮大屏幕【大约2分钟才亮起来】。
第三章.屏幕管理软件操作3.1 信号的调用:添加信号源点击信号源图标在信号源栏点击右键,选择菜单“添加信号源”,弹出如下图所示的信号源属性对话框。
在“名称”栏填入信号源的名字,在“输出”栏选择信号类型,信号的类型主要有:DRGB、ARGB、HDTV、SVIDEO、VIDEO、VLINK、音频、USER_CUSTOM、网络摄像头和DVS。
在“制式”栏选择信号的制式。
注意:某些类型的信号源可能没有制式,如DRGB。
若该信号源为可控制设备(如摄像头),选中复选框“可被外部程序控制”后,该信号源将可以被信号源控制程序控制。
用户还可以根据需要把一个或多个信号源放在一个“组”中。
“组”是指多个具有某种相同属性的信号源归类或集合。
通过使用组对不同类型的信号源进行分门别类地管理,可以让用户对信号源的操作和管理更加方便和快捷。
要添加组,可以在信号源栏上点击鼠标右键,在弹出的菜单中选择“添加组”,弹出组属性对话框。
3.2“模式”的使用:添加模式在“模式”栏点击右键,在弹出的左键菜单中选择“添加”项,将弹出如下图所示的模式属性对话框:首先填写的是该模式的名称,用于唯一识别该模式。
1537L 触摸显示器 使用者手册说明书
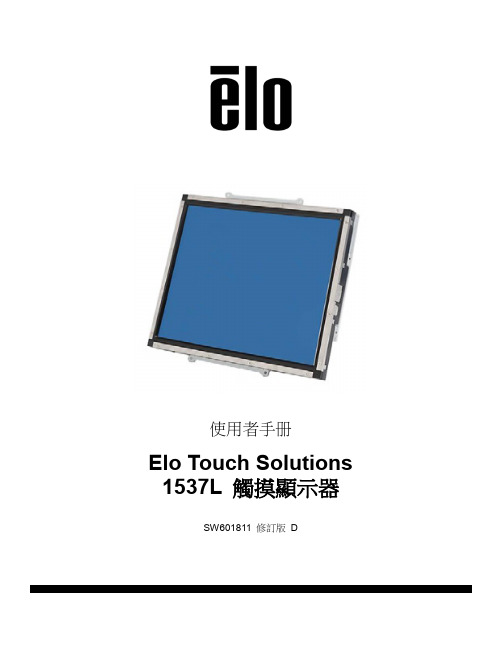
使用者手册Elo Touch Solutions 1537L 觸摸顯示器SW601811 修訂版D版權所有© 2017 Elo Touch Solutions, Inc. 保留所有權利。
未經Elo Touch Solutions Inc. 的書面許可,不得以任何形式或方法(包括但不限於電子、磁性、光學、化學方法或手册等)複製、傳輸或改編本出版物的任何部分,不得將其儲存到擷取系統,不得將其翻譯成任何語言或電腦語言。
免責聲明本文件中的訊息有可能在未通知的情况下進行變更。
Elo Touch Solutions, Inc. 及其附屬公司(共同稱為「Elo」)對本出版物的內容不提供任何形式的陳述或擔保,並且特別聲明拒絕對有特定目的適銷性或適用性提供任何默示擔保。
Elo 保留對本出版物進行修訂並對其內容不斷進行變更,而不將這樣的修訂和變更通知任何人的權利。
商標確認AccuTouch、CarrollTouch、Elo、Elo(標誌)、Elo Touch、Elo Touch Solutions、Elo TouchSystems、IntelliTouch、iTouch、SecureTouch、TouchTools 和VuPoint 為Elo 及其附屬公司的商標。
Windows 為Microsoft Corporation 的商標。
目錄第 1 章:介紹 (4)第 2 章:安裝 (5)第 3 章:操作 (12)第 4 章:技術支援 (20)第 5 章:安全與維護 (22)第 6 章:法規訊息 (24)第7 章:擔保訊息 (29)第 1 章:介紹產品說明此款新型觸摸顯示器集觸摸技術的可靠效能和(LCD) 顯示器設計的最新進展於一身。
這種效能組合可在使用者與觸摸顯示幕之間提供自然的資訊流動。
該LED 顯示器帶有一個15 英吋彩色有源矩陣薄膜電晶體(TFT),提供了優異的顯示效能。
其最大解析度為XGA 1024 x 768,適合顯示圖形和影像。
触摸屏中文说明书(只供参考-可编辑)
触摸屏中⽂说明书(只供参考-可编辑)前⾔为了您能尽快轻松⾃如地操作本机,在您开始使⽤本机之前,请仔细阅读我们随机提供的说明书,以便您能正确使⽤本机。
本⼿册中的信息资料如有变更,恕不另⾏通知,且不承担此⼿册产⽣的错误或者疏漏引起的任何事件。
⼀、主要功能·2.8⼨全触摸屏,320X240点阵全彩⾼速TFT显⽰屏全屏触摸·⽀持MP3、WMA、WA V⾳乐格式·⽀持MPEG-4(AVI)视频格式·⽀持JPEG格式图⽚浏览·内置麦克风,超长时间录⾳·节能设置,亮度可⾃由调节,⾃动关机·多种⾳效、循环可供选择·⽀持多国⽂字·USB2.0⾼速传输·⽀持电⼦书阅读·⽀持游戏功能,·移动硬盘功能·⽀持固件升级⽀持SD扩展,可⽀持到2GB SD卡⼆、外型及按键说明:1、本说明书中要求短按的时候您要在播放器上停留1S-2S,2、长按锁键可锁定机器的触摸屏,以防⽌误动作。
如需要解锁,请再长按锁键。
3、本机触摸屏可⽤⼿触摸,也可以⽤本机后壳上触摸笔孔中所带触摸笔进⾏操作。
三、主界⾯在主界⾯中,短按⼀下该菜单确认该功能,长按进⼊四、⾳乐播放在主菜单选择“⾳乐播放”选项,再长按进⼊⾳乐播放模式,进⼊以下界⾯:键选择上下曲,按调节⾳量。
2.按进⼊放⾳设置菜单。
其中设置⽅法和系统设置菜单中的⼀样,后来详述。
其中⾳效设置可设置成以下⼏种设置:,可选择正常(NOR)/3D/摇滚(ROCK)/流⾏(POP)/古典(CLASS)/重低⾳(BASS)/爵⼠(JAZZ)/⽤户⾃定(USER)8种⾳效模式。
3.按进⾏A-B复读短按⼀下,在播放状态下设置复读起始点,显⽰状态“A-”;再次短按,设置复读结束点,显⽰状态“A-B”,开始循环复读;短按“,,退出复读模式;在暂停状态下“A-B复读”功能⽆效。
当在“A-”、或“A-B”状态下,长按“”键进⾏快进或快退将取消“A-B复读”功能。
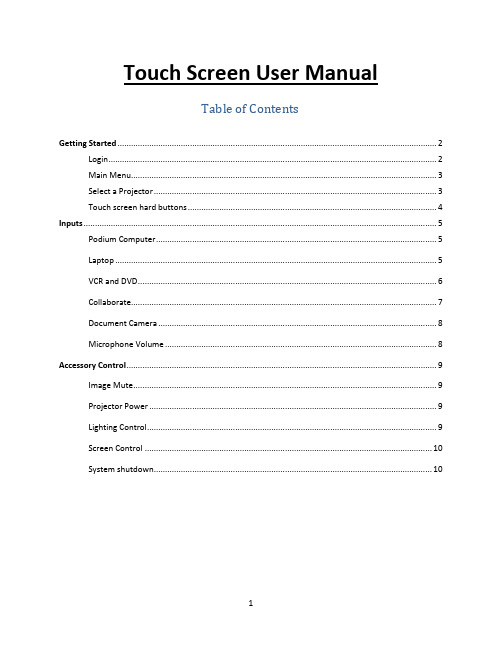
1 触摸屏用户手册目录说明书
Touch Screen User ManualTable of ContentsGetting Started (2)Login (2)Main Menu (3)Select a Projector (3)Touch screen hard buttons (4)Inputs (5)Podium Computer (5)Laptop (5)VCR and DVD (6)Collaborate (7)Document Camera (8)Microphone Volume (8)Accessory Control (9)Image Mute (9)Projector Power (9)Lighting Control (9)Screen Control (10)System shutdown (10)Login:If you see a black screen, simply touch the touch screen to begin. Once the touch screen is ‘awake’ the following image will appear. Touch anywhere on the screen to begin.The next screen will prompt you to enter the podium login code.Once the code is entered, the podium door will unlock, the projector(s) will turn on and the screen(s) will come down automatically in rooms with powered screens.The touch screen will now be displaying the Main Menu:FIGURE 1.In order to select a device, simply push the button and you will be prompted to select the projector(s) to display the input.Selecting a projector(s):In a single projector room you will be brought to the following screen to select the projector to display the image.FIGURE 2.In a room with dual projectors there will be an option to send to either “Projector A”, “Projector B”, or “ALL” (image will be displayed on both projectors).Figure 3.Push the button for the desired projector(s) to display the selected input. The touch screen will return to the main menu after the projector(s) have been selected.Touch screen hard buttons:InputsPodium Computer:Select the PC option from the main menu (Fig 1.). You will then be prompted to select a projector(s) as shown in Fig 2, or Fig 3. The PC should be the default input when logging in to the system.Laptop:When selecting the laptop option from the main menu (Fig 1.) you now have the option to connect your laptop using the traditional VGA cable or by connecting your laptop via HDMI. Once you have selected Laptop from the main menu (Fig 1.) you will see the screen shown in Fig 4. You will need to select the appropriate connection type in order for your image to display from the projector. Once you select either VGA or HDMI refer to Fig. 2, or Fig. 3, to send the image to the projector.Figure 4.NOTE: When using the HDMI connection, you will not need to use the extra audio cable as both audio AND video are sent down the HDMI cable. When using the VGA connection, you will be required to connect the second cable for audio.VCR and DVDThe VCR and DVD controls are made available to you when you select the appropriate source from the Main Menu (Fig 1.). The preview will be displayed on the privacy monitor to allow for queuing of the video, but will not be sent to the projector until the appropriate output is selected. Once the media has been queued to the proper spot, select the appropriate projector(s). Once the source (VCR or DVD) has been assigned to a projector(s), the touchscreen will default back to the Main Menu screen (Fig. 1) and the privacy monitor will return to the PC. To access the controls again, you need to press the appropriate source (VCR or DVD).Note: You will need to assign the projector from the VCR/DVD controls screen as you are not taken to a separate screen to do so as above.VCR (FIGURE 5):DVD (FIGURE 6):CollaborateThe new wireless collaboration feature can be activated by selecting “Collaborate” from the Main Menu (Fig. 1). After selecting collaborate the Solstice home screen (Fig. 7) will display on the privacy monitor and the touch screen will show the projector assignment screen (Fig. 2). Before selecting the projector the user should then connect their device through the app, or web browser, using the device name, or address, shown on the privacy monitor. Once connected, the user will need to log in as the host using the password: York5065. The host can now control which students can connect and what is displayed. Once the Projector(s) has been selected the touch screen will return to the main menu, the privacy monitor will return to the PC and the input will be sent to the projector. Students will now be able to connect on the guest account (no password required) using the app, or a web browser.Figure 7.NOTE: The app is available for iOS, Mac OS, Windows, and Android. Once installed, the user will be able to join the session by typing in the room number listed under the “By app” section of the Mersive screen. Using this feature allows the user to wireless project PowerPoint presentations, desktops, videos, etc. from their own device which allows freedom and mobility to the user. The user can also join the session using a web browser.Document Camera:Select the Document camera option from the main menu (Fig 1.). You will then be prompted to select a projector(s) as shown in Fig 2, or Fig 3.Microphone VolumeMicrophone volume can be adjusted by selecting the microphone icon from the Main Menu (Fig.1). The user will see the following screen where the wireless (Lapel) microphone and the podium wired microphone (if applicable) volumes can be individually increased, decreased, or muted. The main system volume can be adjusted by using the up and down arrows located on the right hand side of the touch screen.Accessory ControlImage MuteMuting the image will blank the projector output while leaving the projector on. This can be accomplished by selecting the “Image Mute” button from the Main Menu (Fig. 1), the user can then select the output to mute (Fig. 2, or Fig 3).NOTE: In a single projector room, the only op tion will be to mute “Projector A”, however in a dual projector room there will be an option to mute either “Projector A”, “Projector B”, or “ALL” (image will be muted on both projectors).Projector PowerYou will also have the ability to turn projectors off completely from the Main Menu (Fig. 1) by selecting “Projector Power”. You will be prompted for the projector you wish to turn On or Off (Fig 2, or Fig 3). The above note also applies to turning projectors off.Lighting ControlIn rooms where lighting control is available, the “Lighting” button will be selectable from the Main Menu screen (Fig. 1). Lighting can be zone controlled (25%, 50%, 75%) or be completely turned on (100%) using the “ON” button or completely turned off (0%) using the “OFF” button.Some rooms are equipped with Chalk and/or Stage lights. These lights function independently of the main lights and can only be turned fully on or fully off.Screen ControlIn rooms that have a power screen(s), these can be controlled by selecting the “Screen Control” button. The text on the button indicates the direction to move the screen. (i.e. in this example the screen is currently down, when the button is pressed the text will change to “Screen DOWN” and the screen will start to go up)System ShutdownTo shut down the system at the end of class, press the “Power Button”located on the top right hand corner of the touch screen. This will bring up the below display on the touchscreen:From this screen, you are able to confirm that you want to shut down by hitting “System Off” or, if you have hit the button by accident, “Cancel” or “Go Back” to return to the Main Menu of the touch screen.。
蓝模多媒体显示器使用操作手册

10 / 20
南京蓝摩科技有限公司
多媒体显示器操作手册
附一 多媒体系统保护使用
说明
1. 对 C 区做系统保护(使能 EWF 功能 ewfmgr c:-enable 5 秒后正 常重启计算机):保护后的系统无法保存新写入的数据
2. 对 C 区 不 做 系 统 保 护 ( 禁 用 EWF 功 能 ewfmgr c : -commitanddisable 5 秒后正常重启计算机):不做系统保护时, 新写入的数据才能保存
步骤 2:拿好剥线完成后的双绞线电缆。
步骤 3:接下来就要进行拨线的操作。将裸露的双绞线中的橙色对线拨向自 己的前方,棕色对线拨向自己的方向,绿色对线剥向左方,蓝色对线剥向右 方。 上:橙和白橙 左:绿和白绿 下:棕和白棕 右:蓝和白蓝 (如图 8)。
图8
步骤 4:将绿色对线与蓝色对线放在中间位置,而橙色对线与棕色对线保持不动, 即放在靠外的位置,(如图 9)。
南京蓝摩科技有限公司
电梯信号示意表
多媒体显示器操作手册
DB9 PORT
虚拟现实展示系统用户手册说明书

MANUALCONTENTSVIRTUAL DISPLAY INSTALLATION4 SCENE SETUP11 PLAYING A VIDEO ON DISPLAY15 SETTING MY PROFILE18 SAVE AND LOAD21 EXPORTING A SCENE YOU MADE23 HOW TO MAKE OWN SPACE281. SELECTING THE VR MODEClick the VR button2. SELECTING A SCENE YOU WANTClick the scene you want3. SELECTING AND INSTALL A DISPLAY ON WALLDrag and drop4. DISPLAY ROTATIONRight click!5. REMOVE A DISPLAYRight click!6. GROUPING DISPLAYS ⅠDrag & Drop* The screen automatically sticks to the next screenRight click!1237. GROUPING DISPLAYS ⅡGroup displaysRemove the grouped display group1. LIGHTING CONTROL* You can control the amount of light by clicking on the light intensity control bar and dragging it to the top or bottom2. CHARACTER PLACEMENNTⅠ12Choose a male or femaleSet character’s height3. CHARACTER PLACEMENNT Ⅱ34. CHARACTER CONTROLRight click!DeleteRotationHeightRight click!YOUR OWN PICTUREYOUR OWN VIDEOYOUTUBE12345 1. PLAYING A VIDEO2. SCREEN SPLIT Ⅰ3. SCREEN SPLITⅡPIP 1PIP 2PIP 3PIP 4PBP 1PBP 2Click the config button1. CLICK THE CONFIG BUTTON2. SETTING MY PROFILEKey-in (Name, Phone, E-mail)1234Left click!* If not selected, the business card is not visible on the scene3. MY PROFILE ON SCENE1. FILE SAVEKey-in1232. FILE LOAD123* If you have saved a file, you can view it in the file list1. CREATING CAMERA PATH POINTERMOUSELEFT CLICK Click the export video button2. SETTING CAMERA PATH POINTER[POINTER ROTATION][MOVE POINTER][REMOVE POINTER]DRAG & DROPRIGHT CLICKLEFT CLICK12DRAG & DROP3. PREVIEW THE VIDEO ⅠClick the play button4. PREVIEW THE VIDEO Ⅱ* If the SPACE BAR is pressed, the moving pictures will be stopped.* If the ESC is pressed, the moving pictures will be turned off.5. EXPORTING A SCENEClick the export button1. SELECTING CUSTOM MODE2. CREATING SPACEKey-in12Click & Drag Set the ceiling heightCreating the space3. DELETING SPACEClick & Drag4. SETTING CAMERA START POINTERCAMERA START POINTERMINI MANUAL* When you're done setting, press the next button5. SETTING MATERIAL12SELECT THE SPACE (Floor, Wall, Ceiling)SELECT THE MATERIAL6. SETTING OBJECT12SELECT THE OBJECT TYPE (Furniture, Deco, Structure)Drag and dropClick & Drag(Rotation)7. SAVE ⅠClick the save button Enter your name and save it12Key-in7. SAVE Ⅱ3Click the home button8. EDIT A SAVED FILECONTENTSHOW TO MAKE A SCREEN AREA39 WALL SETTING GUIDE47 HOW TO PLAY A VIDEO ON SCREEN531. SELECTING THE AR MODEClick the AR button①Click the gallery button12②Select the background picture file☞You should prepare a picture before running the program.2. SELECTING A PHOTO3③Select the space type3. SELECTECTING THE TYPE OF SPACE4④Set the ceiling height5⑤Click the confirm button4④Key-in (only number)4. SETTING THE CEILLING HEIGHT6⑥Set the wall style (3D Space)7⑦Click the confirm button5. SETTING THE STYLE OF WALL (3D SPACE)889⑧Select Type ⑨Select model6. SELECTING MODEL⑩Position the screen10Drag and drop7. POSITIONING THE SCREEN TO WALL8. PLAYING A VIDEO ON DISPLAY• WALL SETTING GUIDE• EXAMPLE OF 1 WALL• EXAMPLE OF 2 WALLS (INDOOR)• EXAMPLE OF 2 WALLS (OUTDOOR)。
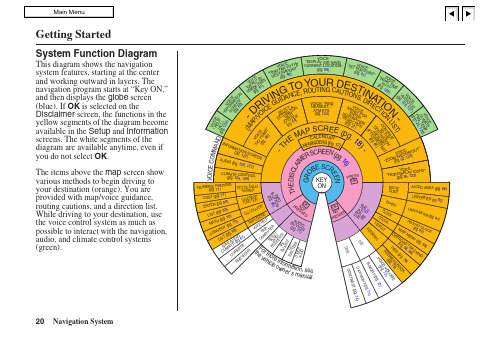
2020年模拟器导航系统用户指南说明书
20Navigation SystemGetting StartedSystem Function DiagramThis diagram shows the navigation system features, starting at the center and working outward in layers. The navigation program starts at “Key ON,” and then displays the globe screen (blue). If OK is selected on theDisclaimer screen, the functions in the yellow segments of the diagram become available in the Setup and Information screens. The white segments of the diagram are available anytime, even if you do not select OK .The items above the map screen show various methods to begin driving to your destination (orange). You are provided with map/voice guidance, routing cautions, and a direction list. While driving to your destination, use the voice control system as much as possible to interact with the navigation, audio, and climate control systems (green).Navigation System 21When you press the MENU button, the display changes to:Address (see page 22)This selection requires you to enter the city (and possibly the state), and the address that you want to go to.Intersection (see page 26)This selection allows you to enter the names of two intersecting streets in a city. This is useful if you know the general location of your destination, but not the exact address.Places (see page 31)The system has been programmed with the locations of many businesses, parks, hospitals, etc. This selection lets you search these by category, name, phone number, or Zagat 2006 (for restaurant).Map Input (see page 36)This selection allows you to point to a destination on the map using the joystick. This allows you to enter a destination or address that may not be listed in the database.Previous Destinations (see page 39)When you enter a destination with any of the available selections (except Address Book and Go Home ), the last 50 destinations are saved by the system. Use this selection to choose a destination again.NOTE:If Previous Destinations is darker in color, there are no Previous Destinations entered.Today’s Destinations (see page 40)You can enter and sort up to five destinations and store them in theToday’s destinations list. You can then use the Today’s Destinations selection.NOTE:If Today’s Destinations is darker in color, there are no Today’s Destinations entered.Address Book (see page 41)This selection allows you to select a stored address. The system can store up to a combined total of 200 User 1 and User 2 addresses.Go Home (see page 42)This selection allows you to select your home or a common place as a destination.NOTE:If you have no home address entered,the system prompts you for one.Entering a Destination。
模拟屏技术规范

- .1.总则1.1本技术规规定了模拟屏系统的功能设计、结构、性能、系统配置、安装和试验等方面的技术要求。
本次安装两面模拟屏,一面安装于热电站集控室,一面安装于升压站控制室。
1.2本规书提出的是最低限度的技术要求,并未对一切技术细节做出规定,也未充分引述有关标准和规的条文,招标方也并不试图规定本系统所需所有设备的要求。
投标方应提供符合GB和IEC等最新版本的标准和本规书要求的所有整套的优质产品。
1.3本规书中未提及的容均应满足或优于本规书所列的国家标准。
电力行业标准和有关国际标准。
规书所使用的标准如与投标方所执行的标准不一致时,按该类最高标准执行或按双方商定的标准执行。
1.4若投标方所提供的投标文件前后有不一致的地方,应以更有利于设备安装运行.保证工程质量为原则,由招标方确定。
1.5 以本技术规书为蓝本,经招标澄清后修订的技术协议作为正式合同的附件,与合同正文具有同等的法律效力。
1.6投标方中标后,投标文件经技术澄清,承诺容和技术协议具有同等约束力,与订货合同正文具有同等效力。
1.7在合同签订后,招标方有权因规、标准、规程发生变化而提出一些补充要求,在设备投料生产前,投标方应在设计上给以修改。
1.8本规书未尽事宜,由招、投标双方在合同技术谈判时协商确定。
2、标准及环境因素2.1执行标准●DL411-91 《镶嵌式电力调度模拟屏通用技术条件》●DL/T631-1997 《模拟屏驱动器通用技术条件》●DL400-91 《继电保护和安全自动装置技术规程》●NDGJ18-89 《火力发电厂、变电所二次接线技术规定》●IEC144 《低压开关和控制设备的外壳防护等级》●其它有关现行国家标准和规、行业标准、IEC标准●执行企标Q/UT 9-2010的规程规2.2使用环境条件●环境温度:户设备–20℃~60℃,户外设备–40℃~60℃●相对湿度:日平均≤65%,月平均≤60%●抗震能力:地面水平加速度0.3g,地面垂直加速度0.15g●操作回路电压:≤500V●抗冲击强度:≥6g●模拟屏工作电压:220V+10%交流或直流3、系统功能1)实时显示电网工况模拟屏控制主机与监控系统通讯接收实时数据。
HMI操作面板使用说明
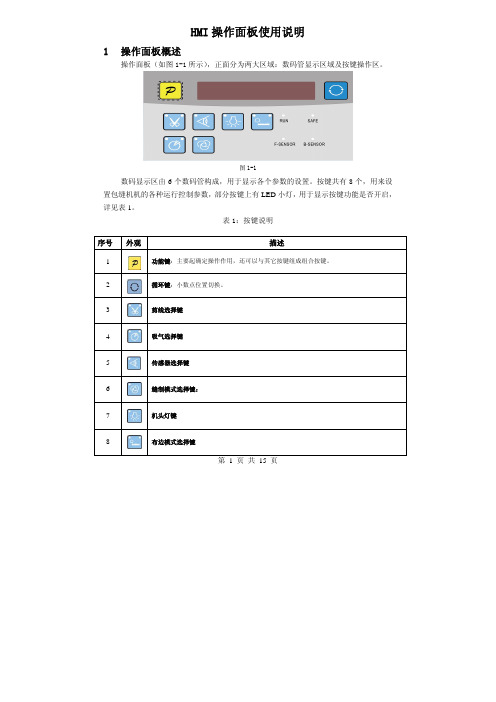
第 1 页 共 15 页HMI 操作面板使用说明1 操作面板概述操作面板(如图1-1所示),正面分为两大区域:数码管显示区域及按键操作区。
图1-1数码显示区由6个数码管构成,用于显示各个参数的设置。
按键共有8个,用来设置包缝机机的各种运行控制参数,部分按键上有LED 小灯,用于显示按键功能是否开启,详见表1。
表1:按键说明序号 外观描述1功能键:主要起确定操作作用,还可以与其它按键组成组合按键。
2 循环键:小数点位置切换。
3剪线选择键4吸气选择键5传感器选择键6缝制模式选择键:7机头灯键8布边模式选择键2用户模式定义2.1操作员模式此模式为操作面板的默认模式,操作面板上电后自动进入此模式。
进入此模式,6个数码管上的小数点位会两个相连的数码管小数点移动显示(屏幕显示),表示HMI处于空闲状态。
在执行任何操作的时候,如果长时间不按按键的话,HMI会自动切换到空闲状态,前一执行的操作将不会被执行!2.1.1全自动/半自动/全手工模式设置:全自动模式:按5键,再按下6键,两个无先后顺序。
5键灯亮,6键灯亮。
半自动模式:5键灯亮,6键灯灭。
全手工模式:5键灯灭,6键灯灭。
2.1.2剪线模式设置:。
当3按键上面两个LED灯都不点亮的时候,表示没有剪线;当3按键左上方LED灯点亮,右上方不亮的时候,表示前剪线;当3按键左上方LED灯不亮,右上方点亮的时候,表示后剪线;当3按键左上方、右上方LED灯都点亮的时候,表示前后均剪线。
2.1.3吸气模式设置:。
当4按键上面两个LED灯都不点亮的时候,表示没有吸气;当4按键左上方LED灯点亮,右上方不亮的时候,表示前吸气;当4按键左上方LED灯不亮,右上方点亮的时候,表示后吸气;第 2 页共 15 页当4按键左上方、右上方LED灯都点亮的时候,表示前后均吸气。
2.1.4机头灯设置:当按下7后,键角LED灯会亮,机头灯点亮。
再按一下键左上角LED灯会熄灭,机头灯灭。
2.1.5布边模式设置:当8按键上面两个LED灯都不点亮的时候,表示没有拖布;当8按键左上方LED灯点亮,右上方不亮的时候,表示前拖布;当8按键左上方LED灯不亮,右上方点亮的时候,表示后拖布;当8按键左上方、右上方LED灯都点亮的时候,表示前后均拖布。
Pro-face操作使用说明书
Pro-Face触摸屏操作说明一.触摸屏程序的传送:1.工程的传送1).传送的设置从工程管理器或画面编辑器里,选择“传送”命令,出现“Transfer Settings”对话框.[Send Information]Upload Information 是否传送“上载信息”到GP. 没有“上载信息”将不允许GP→计算机的传送.GP System Screen 是否传送“GP系统设置”.建议[Gp Setup]做好设置,进行系统参数传送.Filing Data(CF Data) CF的配方数据传送.[Send To]&[Communications Port]选择通过串行口或者Ethernet传送、以及相应的传送参数(计算机上使用的COM口及速度等).[Transfer Method]Send All Screens 传送所有画面.Automatically Send Changed Screens 传送上次传送以来修改过的画面.(推荐)Send User Selected Sreens 传送选择的画面.[Setup]Automatic Setup 自动.如果没有系统则自动传送.(推荐)Force System Setup 强制.建议系统软件升级时执行.Do not Perform Setup 不执行.Simulation 用计算机模拟PLC的功能.如果需要使用模拟功能,必须选择此项并进行传送.如果要恢复正常与PLC的通讯,必须去掉此项再次进行传送.Setup CFG file GP OFFLINE菜单的语言.2).Password 口令保护传送时可以设置一个传送保护口令,同时限制画面数据的下载和上载.2. 从计算机传送画面到GP 简称“下载”.传送之前,会有编译检查过程.如果检查有错误,将不能下载.3. 从GP传送画面到计算机. 简称“上载”.如果GP里没有“上载信息”,将不允许GP→计算机的传送.有“上载信息”时,还可能进行传送口令保护.4. 模拟1)模拟步骤模拟功能可以在没有PLC的情况下,用计算机模拟PLC与GP 进行通讯,以便调试画面程序.过程: 如果需要使用模拟功能,必须选择simulation并进行传送.从工程管理器菜单或者工具栏按钮启动“simulate”.这时将自动进行simulation的检查.如果没有传送simulation选项,不能进入下一步.在simulation窗口里,通过“start”“stop”按钮或菜单命令,可以方便地开始、停止模拟功能.如果要恢复正常与PLC的通讯,必须去掉simulation并再次进行传送.2)模拟窗口的画面说明可以模拟画面号、模拟切换画面、选择数据输入/显示格式、开始/结束模拟、退出模拟、以及模拟各种内容,显示当前画面中Tag、部件的信息和状态,显示或改变系统数据区.二.画面说明:1.触摸屏一带电即进入“初始画面”,显示华能自控集团信息和电站名称,系统时间等内容。
电气模拟屏

闸为绿色) 5、采用进口阻燃、耐老化、高强度的ABS工程塑料模压注塑成活面镶嵌式,具有组合方便、变形量小、光洁度高、阻燃性强等特点。
6、按电力系统符号标准,电脑雕刻图形,注塑成各种凹型线槽内填入无反光油漆,线条整洁,盘面上可操作元件均安装在易于操作的适宜高度。
7、屏上设备表示开关、刀闸、网门、接地线等符号及双重编号齐全、标准,与甲方提供的系统接线图完全一致。
8、屏上的图形按电力系统符号标准,线条及符号颜色按照JB611-84中规定的电压等级标准执行。
9、供方负责运输至现场并负责安装。
。
- 1、下载文档前请自行甄别文档内容的完整性,平台不提供额外的编辑、内容补充、找答案等附加服务。
- 2、"仅部分预览"的文档,不可在线预览部分如存在完整性等问题,可反馈申请退款(可完整预览的文档不适用该条件!)。
- 3、如文档侵犯您的权益,请联系客服反馈,我们会尽快为您处理(人工客服工作时间:9:00-18:30)。
目录第一章系统概述 (2)1.1系统原理及配置 (2)1.1.1系统原理 (2)1.1.2系统配置 (3)1.2系统功能 (3)第二章装置操作与使用 (4)2.1操作箱 (4)2.1.1操作箱介绍 (4)2.2模拟屏常规操作流程 (7)2.3结合CAOS300-C微机型防止电气误操作装置的操作 (11)2.4结合GCDS地线综合管理系统的操作 (11)2.5安全运行屏遥控器的使用 (12)第一章系统概述CAOS3000-M微机型防止电气误操作装置主要用于变电站防止电气误操作,该装置于1997年通过了原国家电力公司的鉴定,拥有多项专利技术。
综合性能指标达到国内先进水平。
十几年来在广大用户的关心和支持下,产品技术不断创新,功能日益完善,其中关键部件电脑钥匙和机械编码锁已有几代产品更新,拥有十几种型号可供选用。
产品通过了ISO9000质量体系认证,获得了国家科技部、国家税务总局、国家经贸委等五部委颁发的国家重点新产品证书,产品软件已获得辽宁省优秀软件证书。
目前该产品已形成四大系列十几种型号,应用于全国各省市供电公司和工矿企事业单位,深得广大用户的信赖和肯定。
1.1系统原理及配置1.1.1系统原理CAOS3000-M微机型防止电气误操作装置以模拟屏防误主机为核心设备,预先编写了各电厂、变电所的所有设备点的操作规则数据库及各个设备点的ID号数据库,并将其固化在存储器中,现场每个锁具ID号与录入的设备ID号一一对应,具有唯一性。
当运行人员启动系统,在模拟屏上模拟操作时,模拟屏防误主机根据已有的规则数据库对每项操作进行智能判断,若操作正确,则允许进行下一步操作;若操作错误,则显示错误操作项的设备名称及编号并通过语音提示错误操作类型,提示操作人员进行更正。
模拟操作结束后,通过通讯设备将正确的操作内容输入到电脑钥匙中,操作人员使用电脑钥匙到现场进行实地解锁及倒闸操作。
操作时,电脑钥匙自动显示当前倒闸操作项目,运行人员将电脑钥匙插入相应的编码锁内,通过其编码头检测操作对象是否正确。
若正确,电脑钥匙用语音发出允许操作命令,同时打开其闭锁回路或机构,这时就可以进行倒闸操作。
若走错间隔或误操作,电脑钥匙自动显示锁号错误,并通过语音提示操作错误,达到强制闭锁的目的,操作人员在得到可靠安全保障的同时又接受良好的培训。
操作结束后,操作人员通过模拟屏的通讯设备将电脑钥匙倒闸操作信息回传给模拟屏防误主机。
对于和综自系统联机的闭锁系统,不但实现无人值守变电站的五防要求,而且可以实现综自系统后台机远方操作功能。
1.1.2系统配置基本配置:触摸式模拟屏、模拟屏防误主机、VFD显示器、操作箱、分接头显示器、充电/通讯座、安全运行屏、潮流表显示器、通讯管理机、电脑钥匙、各类锁具及相关结构件。
可选配置:数码接地系统、GCDS地线综合管理系统、CAOS3000-C微机型防止电气误操作装置。
实现功能:➢该配置方式将各电厂、变电所的所有设备点的操作规则数据库固化在防误主机的永久记忆不丢失的存储器中,使模拟屏防误主机独立完成五防闭锁的数据处理及逻辑判断功能。
以汉字显示及智能化语音提示操作,具有操作统筹管理功能,并具有与综自系统联机的扩充功能,便于远方操作方式的实现。
➢可配合GCDS地线综合管理系统使用,更加有效地避免了容易出现的拆挂接地线等设备时出现的误操作,保护人身和设备安全。
➢CAOS3000-C是辅助的监控设备,同时实现打印操作票及其它管理功能。
CAOS3000-M若出现问题,它也可以独立完成防误闭锁功能。
1.2系统功能CAOS3000-M最为常用的功能分别为:模拟预演、自学通讯、系统查询、系统传输、操作追忆、检修操作六大功能块。
➢模拟预演按照操作票在CAOS3000-M上模拟操作。
➢自学通讯将已固化在防误主机内部的某电厂、变电所的操作规则数据库复制一份传输给电脑钥匙,以保证电脑钥匙和防误主机信息共享。
➢系统查询通过该功能可以查询到模拟屏任意设备点的内部序列号,根据此序列号可以进行五防锁码片的编制。
➢系统传输将已经编辑好的数据库,通过系统传输功能将其固化在防误主机中。
➢操作追忆主要用于对以往的操作过程进行浏览,现在此功能已在电脑钥匙中实现。
➢检修操作需要进行检修模拟预演操作时进入此菜单。
第二章装置操作与使用2.1操作箱2.1.1操作箱介绍操作箱有两个操作界面,分别是主操作界面和辅操作界面。
一、主操作界面主操作界面上有四个按键,分别是预演键、对位/浏览键、传输键、清除键,下面分别介绍。
1、预演进入模拟预演时按此键。
2、对位/浏览此键为对位和浏览复合键。
➢对位在显示主菜单界面下,按此键进入对位操作状态。
此时,按需要改变状态的设备点,当所有需要改变状态的设备点全部更改完毕后,再按此键,即将更改后所有设备点的状态记忆保存。
注:(i)、主菜单即显示屏上显示“模拟预演自学通讯系统查询”界面。
(ii)、对位最终目的是要将模拟屏所有的设备点状态必须和相对应的现场实际设备点的状态保持一致,这一点必须明确。
➢浏览对操作组中的操作项进行动态滚动显示注:1、在模拟预演操作过程中,按此键时,依次滚动显示该操作组中已操作完毕的操作项,当操作项全部显示一次完毕后,返回到下一项准备预演操作的状态。
3、传输模拟预演结束后,将预演正确的一次操作项通过红外或有线方式传送给电脑钥匙时,需按此键。
注:1、在模拟预演过程中如果没有实际的预演任何操作项按此键则返回到主菜单。
4、清除清除已模拟操作结束的某操作组中的所有操作项,此键只在“传输”功能和“等待回传”功能菜单中有效,其它状态按此键无效。
注:1、在模拟预演结束并按“传输”键后,按此键,则将该组所有的操作项清除,此时,如果是分组操作则返回到显示“共有××组等待回传”状态,否则返回主菜单状态。
2、在模拟预演操作完毕并已传入电脑钥匙后,显示“共有××组等待回传”时,按此键,则显示“准备清除第××组”,此时通过按辅操作界面中的“选择”键,选择要清除的操作组后,按“确认”键,则将要清除的操作组中的操作项清除,此时,如果是分组操作并还有其它操作组未被清除则返回到显示“共有××组等待回传”状态,否则返回主菜单状态。
二、辅操作界面将主操作界面上方专用锁打开后,拉出主操作界面,便看到内部还有一个特殊的操作界面称为“辅操作界面”。
辅操作界面共有8个按键,分别是检修键、远方/就地键、修改键、非五防键、红外/有线键、选择键、确认键、PC-104测试键,下面分别介绍。
1、 检修 进行检修预演操作时,按下此按钮,并进入检修操作子菜单中。
2、远方/就地 为远方操作方式(遥控方式)和就地操作方式的切换复合键。
当前项用综自系统操作时,此按键应处于远方状态,其它操作(用电脑钥匙和模拟屏操作)时此按键应处于就地状态。
3、修改此按键用于操作方式的更改,即远方方式和就地方式转换注:使用修改操作功能应该具有一定权限,应由专人负责,切记不能随意使用。
4、非五防此按键为备用键。
5、红外/有线此按键为备用键。
6、选择➢ 选择某菜单项时,需按此键。
➢ 选择某清除操作组时,需按此键。
➢ 选择某浏览操作组时,需按此键。
7、 确认➢ 选中某菜单项,需按此键。
➢ 选中清除某操作组,需按此键。
➢ 选中浏览某操作组,需按此键。
8、 PC-104测试模拟屏防误主机与通讯管理机口测试时需要按下此按键。
模拟预演通讯系统防误主机对闭锁规则进行智能判断常规操作流程就地操作(电脑钥匙)综自系统(遥控操作)各种锁具2.2模拟屏常规操作流程2.2.1 对位对位的目的在于需要检测模拟屏设备点的状态,使之和现场实际设备点的状态保持一致。
正确的操作步骤为在显示主菜单的情况下,按一次主操作面板上的“对位/浏览”键,VFD显示屏显示“自检对位”,即可进行模拟屏设备点的状态更改,如需更改的设备点的状态已更改完毕后,再按一次主操作面板上的对位/浏览”即可。
注:1、正常情况自检对位步骤可以省略。
2、当模拟屏设备点的状态与现场设备点的状态不一致时,需要通过“对位”强制性的将模拟屏设备点的状态和现场设备点的状态保持一致。
造成两者不一致的情况分为两类:(i)、在本次操作之前的操作不是完整性的操作。
(ii)、在本次操作开始前,即在显示主菜单下,误动模拟屏上的某一个或多个设备点的状态。
3、正常操作顺序为:模拟预演、操作传输、回传操作完毕后的设备点的状态。
2.2.2 模拟预演按一次主操作面板上的“预演”键后,操作人员按照事先准备好的倒闸操作票在模拟屏上进行模拟预演,模拟屏防误主机根据内部固化的逻辑条件对每步操作进行判断:注:1、当模拟操作正确时,系统发出正确音——“嘟”,允许继续模拟,同时将该步操作记忆。
(i)、显示“第××项√×××××”×××××为具体的操作语句。
(ii)、当分开某设备点时,触摸灯显示为绿色;当合上某设备点时,触摸灯显示为红色。
2、当模拟操作错误时,模拟屏防误主机对此进行判断,用语音警告操作错误原因。
显示“第××项√×××××”×××××为具体的操作语句。
(一次最多模拟预演255项)将错误操作项纠正后方可继续进行模拟操作。
3、所需要模拟预演的操作项预演结束后,按一次主操作面板上的“传输”键,即完成模拟预演操作,并进行操作传输步骤。
2.2.3 操作传输操作传输目的在于将已模拟预演完毕的操作项传输给电脑钥匙,准备到现场进行实际解锁。
注:1、在操作传输过程中,如果循环不停的滚动显示所有模拟预演的操作项,说明电脑钥匙未接收到操作信息。
造成其原因大致有两种:(i)、检查此时电脑钥匙是否打开,并处于“接收信息”状态。
(ii)、检查此时电脑钥匙是否和通讯座衔接良好。
2、当电脑钥匙接收完毕后,应显示“第××组等待回传”。
3、在操作传输过程中,如果想取消本次模拟预演,按一次主操作面板上的清除键,即可完成并返回到主菜单状态。
切记这只针对单组操作而言。
2.2.4 分组操作分组操作使微机防误由单组的控制操作方式变为分组操作方式操作方法:1、在显示“第××组等待回传”时,再按一次“预演”键,系统将又一次进入模拟预演状态,操作人员依照新的任务进行模拟预演、操作传输。
2、独立回传信息,每把电脑钥匙只能回传其本身操作内容。
3、分组操作中的所有操作组都回传完毕后系统才转入备用状态,即显示主菜单状态,否则一直处于“第××组等待回传”状态。
