DATABACKUP_MANUAL
xtrabackup 用法

xtrabackup 用法Xtrabackup是一个用于MySQL数据库的开源备份工具,它由Percona开发并维护。
它支持在线备份和恢复MySQL服务器,可以备份InnoDB、MyISAM和其他存储引擎。
Xtrabackup的用法如下:1.安装Xtrabackup:首先需要在服务器上安装Xtrabackup软件,可以通过包管理工具如apt或yum进行安装。
2.备份数据库:使用Xtrabackup可以进行物理备份和逻辑备份。
物理备份是一种快速且高效的备份方式,它直接备份数据库文件,而不需要执行SQL语句。
逻辑备份则是通过执行SQL语句将数据导出到文件中。
使用物理备份进行全量备份:使用xtrabackup命令进行全量备份,例如:xtrabackup --backup --target-dir=/path/to/backup。
使用物理备份进行增量备份:可以通过指定--incremental参数执行增量备份,例如:xtrabackup --backup --target-dir=/path/to/backup --incremental-basedir=/path/to/full/backup。
3.恢复数据库:使用Xtrabackup还原数据库非常简单。
首先需要创建一个空目录作为恢复目录,然后执行xtrabackup --copy-back命令将备份文件复制到恢复目录中,并设置正确的权限。
最后,启动MySQL服务器即可进行恢复。
示例命令如下:- mkdir /path/to/restore- xtrabackup --copy-back --target-dir=/path/to/backup --datadir=/path/to/restore- chown -R mysql:mysql /path/to/restore- systemctl start mysql4.其他功能:Xtrabackup还提供了其他一些有用的功能,例如增量备份、压缩备份、复制备份等。
运维手册_数据库_DataGuard日常运维手册

文档标识文件状态:[] 草稿[√] 正式发布[ ] 正在修改Oracle RAC+DataGuard运维手册版本:1.0.0编制周光晖2015年01月20审核批准年月日生效日期:年月日修订历史记录日期版本修订说明作者目录第一章引言 (3)**. 编写目的 (3)**. 定义、首字母缩写词和缩略语 (4)第二章......................................................................................................... D ATA G UARD状态查询4**. 检查主备库的D ATA G UARD状态信息 (4)**. 检查进程 (4)**. 检查归档状态 (4)**. 检查最后应用的日志S EQUENCE (5)**. 查看是否使用实时应用 (5)**. 检查GAP (5)**. 检查保护模式 (5)**. 相关视图 (6)第三章................................................................................................................... SWITCHOVER 6**. 确认主库状态是否支持切换操作 (6)**. 执行主库转换 (7)**. 关闭并MOUNT新备库 (7)**. 确认老备库状态 (7)**. 切换目标备库为主库 (7)**. 打开新主库 (8)**. 启动新备库的日志应用 (8)**. 开启新备库的ADG (8)第一章引言1.1. 编写目的本文档描述了Oracle 11gR2 RAC+ADG操作手册。
包含RAC DOWN机测试,日常查询状态,启停RAC等指令同时包含oracle 11g R2 ACTIVE DATAGUARD 的日常维护指令。
1.2. 定义、首字母缩写词和缩略语第二章DataGuard状态查询2.1. 检查主备库的DataGuard状态信息SQL> Alter session set nls_date_format ='‘YYYY-MM-DD HH24:MISS';SQL> SELECT MESSAGE FROM V$DATAGUARD_STATUS;使用V$DATAGUARD_STATUS结合alert日志信息,判断DataGuard使用过程中的错误信息,查看当前日志应用的状态。
DATAGUARD配置参数详细解释

DATAGUARD配置参数详细解释DB_NAME只需注意DataGuard的主备各节点instance使用相同的db_name即可。
推荐与service_name一致。
DB_UNIQUE_NAMEPrimary与Standby端数据库的唯一名字,设定后不可再更改。
注意:如果主备db_unique_name不一样,需要与LOG_ARCHIVE_CONFIG配合使用db_unique_name并未规定需要与数据库service_name一致,可以自定义任意名称。
LOG_ARCHIVE_CONFIG列出主备库上的DB_UNIQUE_NAME 参数。
默认情况下,定义该参数能确保主备库数据库能够互相识别对方Primary与Standby端的db_unique_name不一致时如在主备库db_unique_name不一致的情况下未配置LOG_ARCHIVE_CONFIG则会出现如下报错ORA-16057: DGID from server not in Data Guard configuration原因:主库没有设置参数log_archive_config解决方法*.log_archive_config='dg_config=( Primary, Standby)'alter system set log_archive_config='dg_config=( Primary, Standby)' scope=both; Primary与Standby端的db_unique_name一致时LOG_ARCHIVE_DEST_1本地归档路径。
Primary与Standby需要定义各自的online redo log的归档地址,以系统实际的存放路径为准。
格式如下:Primary Site:*.LOG_ARCHIVE_DEST_1='LOCATION=/arch/ VALID_FOR=(ALL_LOGFILES,ALL_ROLES) 'Standby Site:*.LOG_ARCHIVE_DEST_1='LOCATION=/stdby/ VALID_FOR=(ALL_LOGFILES,ALL_ROLES) '注意:在LOG_ARCHIVE_DEST_n设置DB_UNIQUE_NAME表示该参数在DB_UNIQUE_NAME指定的数据库上生效,设置为本地的db_unique_name。
红牛V5精简列表

50-nubia_photoeditor.apk可删除 图片编辑
51-nubia_PhotoFlow.apk可删除 照片流
52-nubia_poster.apk可删除 个性海报
53-nubia_RecognitionQRService.apkQR识别服务(我也不知这是啥)
61-PhaseBeam.apk可删除 镭光动态壁纸
62-PhotoTable.apk不可删 照片屏幕保护编辑器
63-PicoTts.apk可删除 文本转语音组件
64-PrintSpooler.apk可删打印处理服务
65-Protips.apk可删除(建议保留)主屏幕提示
66-Provision.apk不可删 按键定义储存调用 删了以后双wipe就杯具
39-nubia_Calendar_v1.0.apk可删除 日历
40-nubia_ClockWidget.apk可删除 时钟部件
41-nubia_DeskClock_v2.3.5.apk可删除 时钟
42-nubia_DLNA.apk可删除 互动分享
43-nubia_Light_v1.1.3.apk可删除 手电筒
34-MagicSmokeWallpapers.apk可删除 魔幻烟雾动态壁纸
35-NetworkSetting.apk不可删 网络设置
36-NoiseField.apk可删除 泡泡动态壁纸
37-nubia_account.apk努比亚帐户
38-nubia_Calculator_v1.2.1.apk可删除 计算器
71-Stk.apk可删 电话卡工具
数据库常用的备份和恢复方法

数据库常用的备份和恢复方法1. 定期全量备份:定期对数据库进行完整备份,可保证数据库的完整性和可恢复性。
2. 差异备份:在全量备份的基础上,只备份发生变化的数据部分,可以节省存储空间和备份时间。
3. 事务日志备份:备份数据库的事务日志,可以实现逐渐备份,精准的还原到某一时间点。
4. 复制备份:将数据库复制到其他设备或位置,以防主要数据库损坏或丢失。
5. 增量备份:只备份自上次备份以来发生的数据变化,可大幅减少备份时间和存储成本。
6. 数据库快照:生成数据库的快照,记录数据库在某个时间点的状态,用于快速恢复到该状态。
7. 物理备份:备份数据库的物理文件,包括数据文件、日志文件等,可快速恢复数据库的完整性。
8. 逻辑备份:备份数据库的逻辑结构,包括表、索引、视图等,方便跨平台导入导出。
9. 热备份:在数据库运行时进行备份,不停止数据库服务,可实现24/7的备份操作。
10. 冷备份:在数据库停止时备份,可以获得更稳定可靠的备份结果。
11. 数据库镜像:实时将数据库复制到另一个实例,确保备份数据的实时性和高可用性。
12. 数据库导出:将数据库中的数据导出为文本文件,以便迁移或重建数据库。
13. 数据库导入:从导出的文本文件中导入数据到数据库,用于恢复或迁移数据。
14. 增量同步备份:将增量数据同步到备份设备,以实现实时备份和恢复。
15. 压缩备份:对备份文件进行压缩,减小存储空间占用和备份速度。
16. 分布式备份:将备份数据分布保存在多个位置,提高数据的安全性和可靠性。
17. 数据库迁移:将数据库从一个平台迁移到另一个平台,需要备份和恢复数据。
18. 数据库克隆:创建数据库的副本,用于测试、开发或灾难恢复。
19. 自动备份计划:设定定时任务,自动执行备份操作,提高备份的可靠性和定期性。
20. 增量还原:在全量备份的基础上,只还原最近的增量备份,减少数据恢复的时间成本。
21. 数据库快速还原:通过快照或镜像技术,实现数据库的快速、即时恢复。
努比亚z7max安卓5.1.1UI3.8v3.74最新精简列表

努⽐亚z7max安卓5.1.1UI3.8v3.74最新精简列表为了保证官⽅的稳定性,我只是简单精简了⾃⼰⽤不到的。
另外利⽤DK的⽅式为rom添加了root。
简单分享下,给需要的机油。
先说精简吧:1、打开刷机zip包,删除recovery⽂件夹和recovery.img。
然后打开system,删除recovery-from-boot.p⽂件,system/etc下的recovery-resource.dat还有system\bin下的install-recovery.sh。
2、打开刷机包META-INF\com\google\android下的updater-script⽂件,删除以下⼏⾏:set_metadata("/system/bin/install-recovery.sh", "uid", 0, "gid", 0, "mode", 0750, "capabilities", 0x0, "selabel", "ubject_r:install_recovery_exec:s0");set_metadata("/system/recovery-from-boot.p", "uid", 0, "gid", 0, "mode", 0644, "capabilities", 0x0);ui_print("start update recovery2");package_extract_file("recovery.img","/dev/block/platform/msm_sdcc.1/by-name/recovery2");3、打开system/app删除以下⽂件(下⾯是我删除的⽂件,根据⾃⼰情况,其它的也可以删除,详见另外的帖⼦)1、将最新的root卡刷包改名为supersu.zip,在META-INF⽂件夹下创建supersu⽂件夹,把supersu.zip放在META-INF\supersu下。
cdh运维手册

cdh运维手册摘要:一、前言二、CDH概述1.CDH的定义2.CDH的组成3.CDH的功能三、CDH的安装与配置1.安装环境准备2.安装过程详解3.配置CDH四、CDH的运维管理1.监控CDH2.维护CDH3.备份与恢复CDH五、CDH的常见问题及解决方法六、CDH的安全策略七、CDH的优化与调优八、总结与展望正文:一、前言随着大数据时代的到来,数据处理和存储的需求日益增长。
Cloudera Data Platform(CDH)是一个开源的、完整的、高度可扩展的大数据平台,为企业提供了数据采集、存储、处理、分析和应用等功能。
为了帮助用户更好地使用CDH,本文将详细介绍CDH的运维管理方法。
二、CDH概述1.CDH的定义Cloudera Data Platform(CDH)是Cloudera公司推出的一款大数据平台,它包含了Hadoop、Hive、HBase、Spark等众多大数据组件,为用户提供了一整套大数据解决方案。
2.CDH的组成CDH主要由以下几个组件构成:(1)Hadoop:分布式存储和计算框架(2)Hive:数据仓库工具(3)HBase:分布式NoSQL数据库(4)Spark:大规模数据处理框架(5)其他组件:如Impala、Presto、Sentry等3.CDH的功能CDH提供了数据存储、数据处理、数据分析和数据应用等功能,适用于企业级大数据应用场景。
三、CDH的安装与配置1.安装环境准备(1)硬件环境:CPU、内存、磁盘空间等(2)软件环境:操作系统、Java等2.安装过程详解(1)下载CDH安装包(2)解压安装包(3)配置CDH(4)启动CDH服务(5)验证CDH安装成功3.配置CDH(1)配置Hadoop(2)配置Hive(3)配置HBase(4)配置其他组件四、CDH的运维管理1.监控CDH(1)性能监控(2)状态监控(3)日志监控2.维护CDH(1)升级CDH组件(2)优化CDH配置(3)处理故障3.备份与恢复CDH(1)备份策略(2)备份工具(3)恢复过程五、CDH的常见问题及解决方法1.Hadoop组件问题2.Hive组件问题3.HBase组件问题4.Spark组件问题六、CDH的安全策略1.访问控制2.数据加密3.审计与日志4.安全组件七、CDH的优化与调优1.Hadoop性能优化2.Hive性能优化3.HBase性能优化4.Spark性能优化八、总结与展望本文详细介绍了CDH的运维管理方法,包括安装与配置、监控与维护、备份与恢复、安全策略以及优化与调优等内容,希望对CDH用户有所帮助。
DATAGUARD配置参数详细解释
DATAGUARD配置参数详细解释
一、数据库参数
1.特定于数据库的参数
db_unique_name
功能:定义数据库唯一名称。
含义:该参数定义数据库唯一名称,该参数不应更改,否则可能会导
致一系列问题。
该参数必须在创建数据库时设置,并且不能更改。
2.remote_login_passwordfile
功能:指定远程用户的登录认证文件。
含义:此参数指定远程用户的登录认证文件,在数据库定义期间,远
程用户可以使用该文件登录数据库。
可以使用此参数将一些远程用户的标识指定为NONE,以确保只有本
地用户可以连接,而不允许远程用户连接。
3.log_archive_dest_state_2
功能:指定第二个归档日志目的地状态。
含义:此参数指定第二个归档日志目的地状态,如果设置为enable,则表示活动日志会被归档到该备用目的地,如果设置为disable,则表示
活动日志不会被归档到该备用目的地。
4.fal_server
功能:指定应用程序服务器名称。
含义:此参数指定应用程序服务器名称,例如,Fal_server等。
这些服务器用于远程归档日志,应用服务器可以是一台服务器,也可以是一组服务器。
5.log_archive_dest
功能:指定将归档日志文件发送到哪里。
含义:此参数指定将归档日志文件发送到哪里,可以是一个本地文件路径,也可以是一个远程服务器的文件路径。
update -DG物理备库创建手册
DATAGUARD物理备库的创建一、dataguard介绍Dataguard是ORACLE 推出的一种高可用性(HIGH AVAILABLE)的数据库方案,RAC的技术是为了保护实例,rman的技术是为了保护数据,而DATAGUARD则是把实例和数据一起保护了。
在8i之前称之为standby database,从9i开始,正式更名为Dataguard,它是在主节点与备用节点间通过日志同步来保证数据的同步,可以实现快速切换与灾难性恢复。
Dataguard只是在软件上对数据库进行设置,并不需要额外购买任何组件,它能在对主数据库影响很小的情况下,实现备数据库的同步,而主备机的数据差异只在在线日志部分(如果是在实时应用模式则理论上主备库的数据应该是一样的)。
所以如果在主库出现故障的情况下会丢失这部分未归档的数据。
当然这是最坏的一种情况。
主库已经安装好数据库软件和一个运行正常的数据库实例,备库只安装数据库软件,先不创建数据库和实例。
二、dataguard环境要求2.1数据库版本必须为企业版,版本最好在9i以上,主备库数据库的版本必须一致。
2.2主备数据库所在操作系统版本以及位数要求一样。
2.3主备库硬件配置可以不一样,看具体应用。
2.4主数据库和备数据库都可以是单实例的,也可以是RAC。
2.5同一个dataguard环境中数据库名必须一样。
主备库的目录结构要求一样(逻辑备库可以不一样)。
三、对主库的修改3.1修改归档方式要使用dataguard做数据库容灾,主库必须处于归档模式下。
如果已经是归档模式则跳过此步。
修改归档模式步骤SQL> archive log list;Database log mode No Archive ModeAutomatic archival DisabledArchive destination /opt/archOldest online log sequence 1Current log sequence 3可见当前数据库处于非归档模式.--关闭数据库SQL> shutdown immediate;启动数据库到mount阶段SQL> startup mount;修改数据库为归档模式SQL> alter database archivelog;Database altered.打开数据库SQL> alter database open;查看当前数据库模式SQL> archive log list;Database log mode Archive ModeAutomatic archival EnabledArchive destination /oracle/product/10.2/dbs/archive(alter system set db_recovery_file_dest='';)Alter system set log_archvie_dest_1=’location=$PATH$’;Oldest online log sequence 1Next log sequence to archive 3Current log sequence 3可见数据库已经处于归档模式。
percona xtrabackup 命令参数

Percona XtraBackup 是一个用于 MySQL 数据库备份的开源工具,它允许用户在运行时备份数据库,而无需停止数据库实例。
它通过实现增量备份和并行恢复来提高备份和恢复的性能。
Percona XtraBackup 有许多命令参数,用户可以根据自己的需求来使用这些参数,以实现更灵活和定制化的备份和恢复操作。
本文将介绍 Percona XtraBackup 命令参数的使用方法和各个参数的作用,帮助用户更好地使用 Percona XtraBackup 进行数据库备份和恢复。
一、--backup 参数1. 作用使用 --backup 参数可以执行完整备份操作,备份的数据将被写入到指定的备份目录中。
这个参数可以用于创建数据库的初始备份,也可以用于每日的完整备份操作。
2. 使用方法```bashxtrabackup --backup --target-dir=/path/to/backup/```二、--prepare 参数1. 作用使用 --prepare 参数可以执行备份数据的准备工作,将备份的数据准备成可以立即恢复的状态。
这个参数通常与--backup 参数结合使用,用于在执行完整备份后准备数据。
2. 使用方法```bashxtrabackup --prepare --target-dir=/path/to/backup/```三、--apply-log-only 参数1. 作用使用 --apply-log-only 参数可以执行仅应用事务日志文件的操作,而不进行备份或准备数据的操作。
这个参数通常用于执行增量备份的准备工作。
2. 使用方法```bashxtrabackup --apply-log-only --target-dir=/path/to/backup/```四、--incremental 参数1. 作用使用 --incremental 参数可以执行增量备份操作,备份的数据将基于之前的完整备份或增量备份进行增量备份。
2024年度Netbackup中文操作手册

数据迁移与备份策略调整
根据业务需求和数据增长情 况,定期评估和调整备份策 略。
使用Netbackup提供的数据 迁移工具,确保数据迁移的 完整性和一致性。
2024/2/2
在进行数据迁移时,确保目 标存储介质具有足够的容量 和性能。
在数据迁移完成后,验证备 份数据的可恢复性,以确保 业务连续性。
恢复失败问题
恢复失败可能是由于恢复对象损坏、存储设备故障、恢复策略配置错误等原因引起的。解 决方法包括检查恢复对象的状态、检查存储设备的状态和容量使用情况、检查恢复策略的 配置等。
系统性能问题
系统性能问题可能是由于硬件资源不足、软件配置不当等原因引起的。解决方法包括升级 硬件设备、优化软件配置等。同时,还可以定期进行系统维护和清理操作,确保系统的稳 定性和高效性。
访问控制
Netbackup还提供访问控制功能 ,管理员可以设置访问策略,限 制未经授权的访问和数据泄露风 险。
2024/2/2
25
审计日志与合规性要求
01 02
审计日志
Netbackup提供详细的审计日志功能,记录用户的所有操作和行为, 包括登录、备份、恢复、配置更改等,以便管理员进行安全审计和追溯 。
权限验证
Netbackup采用身份验证和授权机制,确保只有经过授权 的用户才能访问系统,并对用户的操作进行实时监控和记 录。
24
数据加密与传输安全
数据加密
Netbackup支持对备份数据进行 加密存储,确保数据在传输和存 储过程中的安全性。
传输安全
Netbackup采用安全的传输协议 ,如SSL/TLS,确保备份数据在传 输过程中的完整性和机密性。
易用性
Netbackup界面友好,操作简单,方便用户 快速上手。
IBM Data Protector 内部数据库备份指南说明书

Internal database backup after the upgradeOld backups of the internal database created with dbtool.pl are not usable with Data Protector.You must configure a new backup specification to back up the internal database and configuration.See the online Help index:“IDB,configuring backups”.Apart from using a tape device,the IDB backup in Data Protector differs from Application Recovery Manager in the following details:•the Data Protector services are not stopped during the backup as with dbtool.pl•the VSS database is not backed upUpgrade of backup specificationsBackup specification in Application Recovery Manager do not contain tape devices.After theupgrade to Data Protector,the backup specifications can be used only for ZDB to disk.To use tape functionality(ZDB to disk+tape,ZDB to tape),you must reconfigure the backup specifications,specifying the tape device.Changes in omnib usageIf no options are specified,Data Protector defaults to ZDB to disk+tape.Application RecoveryManager backup sessions started from the CLI using the omnib command will therefore fail dueto missing tape devices.To keep your existing backup specifications without reconfiguring themfor ZDB to disk+tape,use the-disk_only option to run ZDB to disk.Upgrading from Solaris8to Solaris9If you have Data Protector6.20Disk Agent(DA)installed on Solaris8,and you want to upgrade the operating system to Solaris9,consider the impact of this upgrade on Data Protector.It isrecommended to replace the generic Solaris DA installed on the system with the Solaris9DA toensure proper operation of Data Protector and enable advanced backup options for Solaris9,such as backup of extended attributes.Perform the upgrade in the following sequence:1.Upgrade the operating system from Solaris8to Solaris9.For more information,see Solarisdocumentation.2.Remotely install the Disk Agent on the upgraded system using an Installation Server.This willreplace the generic Solaris Disk Agent with Solaris9Disk Agent.See“Remote installation”(page74)or the ob2install man page.Migrating from HP-UX11.x(PA-RISC)to HP-UX11.23/11.31(IA-64) This section describes the procedure for migrating your existing Cell Manager from a PA-RISCarchitecture based HP-UX11.x system to an HP-UX11.23/11.31system for the Intel Itanium2(IA-64)architecture.LimitationsFor details on supported operating system versions,platforms,processor architectures and DataProtector components as well as required patches,general limitations,and installation requirements, see the HP Data Protector Product Announcements,Software Notes,and References.•The migration is supported only from the Data Protector6.20Cell Manager on a PA-RISC based HP-UX11.x system.•For the supported combinations of MoM configurations,see“MoM specifics”(page177).Upgrading from Solaris8to Solaris9175Prerequisite•Before the migration,the Data Protector Cell Manager on a PA-RISC architecture based HP-UX11.x system must be upgraded to Data Protector6.20.LicensesThe new Cell Manager(IA-64system)will have a different IP address as the old Cell Manager,therefore you should apply for the licenses migration prior to the migration.For a limited amountof time,licenses on both system will be operational.If licenses are based on an IP range and the new Cell Manager’s IP address is within this range,no license reconfiguration is necessary.See“License migration to Data Protector6.20”(page205)for details.Migration procedurePerform the migration procedure as follows:1.Install a Data Protector client on the IA-64system and import it to the old Cell Manager’s cell.If you are planning to configure Data Protector in a cluster,install the client on the primarynode.See“Installing HP-UX clients”(page51).2.Run the following command on the old Cell Manager to add the hostname of the IA-64systemto the list of trusted hosts on secured clients:omnimigrate.pl -prepare_clients New_CM_Name,where the New_CM_Name is theclient name of the IA-64system from the previous step.For more information about trusted hosts and securing Data Protector clients,see“Securingclients”(page135)and“Host trusts”(page143).3.Back up the IDB.Make sure that the used media can later be accessed on the new CellManager system.See the online Help index:“IDB backup”.4.Restore the IDB to a temporary location on the IA-64system.See the online Help index:“IDBrestore”.5.Uninstall the Data Protector client from the IA-64system.See“Uninstalling a Data Protectorclient”(page146).6.Install Data Protector Cell Manager on the IA-64system.If you are planning to configure DataProtector in a cluster,install the Cell Manager on the primary node as a standalone CellManager(not cluster aware).See“Installing the Data Protector Cell Manager(CM)andInstallation Server(s)(IS)”(page26).7.If you changed the default Data Protector Inet port on the old Cell Manager,set the same Inetport also on the new Cell Manager.See“Changing the default Data Protector Inet port”(page230).8.Move the restored IDB(residing in a temporary location on the new Cell Manager),andconfiguration data to the same location on the new Cell Manager as it was on the old CellManager.See the online Help index:“IDB restore”.If the old Cell Manager was cluster-aware,comment out the SHARED_DISK_ROOT andCS_SERVICE_HOSTNAME variables in the /etc/opt/omni/server/sg/sg.conf file.This is necessary even if the new Cell Manager will be cluster-aware.9.To migrate the IDB and clients to the new Cell Manager,and to reconfigure the Cell Manager’ssettings,perform the following steps on the new Cell Manager:•If you want to configure a standalone IA-64Cell Manager,run the omnimigrate.pl -configure command.See the omnimigrate.pl man page.•If you want to configure a cluster-aware IA-64Cell Manager:176Upgrading to Data Protector6.20a.Run the omnimigrate -configure_idb command to configure the IDB from theold Cell Manager for use on the new Cell Manager.See the omnimigrate.plman page.b.Run the omnimigrate -configure_cm command to reconfigure the configurationdata transferred from the old Cell Manager for use on the new Cell Manager.Seethe omnimigrate.pl man page.c.Export the old virtual server from the cell by running the omnicc -export_hostOld_CM_Name.d.Configure the primary and secondary Cell Manager.See the online Help index:“MC/ServiceGuard integration configuring”.e.Run the omnimigrate -configure_clients command to migrate the clientsfrom the old Cell Manager to the new Cell Manager.Note that the old Cell Managerwill keep the clients in the configuration files although it will not be their Cell Manageranymore.NOTE:If the/etc/opt/omni/server directory is located on the shared clustervolume,the configuration changes made by the omnimigrate.pl script will affect allnodes in the cluster.NOTE:The old Cell Manager will automatically become a client in the new cell.You canuninstall the Cell Manager component from the old Cell Manager,because it is not necessaryanymore.See“Changing Data Protector software components”(page154).10.Configure the licenses on the new Cell Manager.See“Data Protector6.20product structureand licenses”(page203).11.Additional steps are required if the following is true:•Your cell is a part of the MoM environment.See“MoM specifics”(page177).•Your cell works across a firewall.Reconfigure all firewall related settings on the new Cell Manager.See the online Help index:“firewall environments”.•You want to have an Installation Server on your new Cell Manager.See“Installation Server specifics”(page178).MoM specificsIf the new Cell Manager will be configured in the MoM,additional steps are required after thebasic migration procedure has been completed.The required steps depend on the configurationof the MoM for the old and new Cell Managers in your environment.The supported combinations are:•The old Cell Manager was a MoM client;the new Cell Manager will be a MoM client of the same MoM Manager.Perform the following steps:1.On the MoM Manager,export the old Cell Manager from the MoM Manager cell andimport the new Cell Manager.See the online Help index:“client systems exporting”.2.Add the MoM administrator to the users list on the new Cell Manager.See the onlineHelp index:“MoM administrator,adding”.•The old Cell Manager was a MoM Manager;the new Cell Manager will be a MoM Manager.If the old MoM Manager was the only client in the MoM,no action is necessary.Otherwise,perform the following steps:1.On the old MoM Manager(the old Cell Manager),export all MoM clients.2.On the new MoM Manager(the new Cell Manager),import all MoM clients.3.Add the MoM administrator to the users list on all MoM clients.Migrating from HP-UX11.x(PA-RISC)to HP-UX11.23/11.31(IA-64)177。
xtrabackup 参数
xtrabackup 参数Xtrabackup 是 Percona 提供的 MySQL 数据库备份工具。
它是一个高性能、低开销的备份工具,并支持局部增量备份。
Xtrabackup 采用一种叫做“流式备份”的方式来备份 MySQL 数据库。
这种方式可以直接备份 InnoDB 存储引擎中的数据文件,而不用停止MySQL 服务来备份数据。
在备份数据时,Xtrabackup 还可以完成一些附加操作,比如自动渐进式备份、对备份数据进行压缩等。
下面,我们来介绍一下 Xtrabackup 的常用参数和使用方法。
备份参数--backup:备份操作的参数。
使用该参数可以备份 MySQL 数据库中的所有数据和日志文件。
--target-dir:备份的目标路径,即备份文件的存放路径。
该参数必须指定。
--incremental:指定增量备份。
增量备份方式可以在原有基础上只备份新增数据,极大地节约备份时间和存储空间。
--incremental-basedir:指定增量备份的基准路径。
该参数必须和 --incremental 参数一起使用,以确定增量备份的起点。
--compress:对备份数据进行压缩。
使用该参数可以减少备份文件的存储空间。
--stream:将备份数据以流的形式输出。
可以将备份数据在网络中传输,也可以通过管道传输数据。
--parallel:指定备份数据时使用的线程数。
该参数可以提高备份速度,但会增加系统负担。
--compact:使用紧凑模式备份。
该模式会将备份文件进行紧凑编码,节约备份空间。
--warm-up-threshold:指定在备份之前需要走过的热身时间。
热身时间用于让数据库缓存数据,提高备份效率。
还有其他一些备份参数,比如 --no-timestamp、--history、--slave-info 等。
这些参数可以帮助你更好地备份 MySQL 数据库,并可以满足不同的备份需求。
还原参数--prepare:准备备份文件进行还原。
数据库备份恢复和容灾方案实现教程

数据库备份恢复和容灾方案实现教程第一章:数据库备份数据库备份是保证数据安全性和可靠性的重要手段。
在数据库备份过程中,有多种备份策略可供选择,如完全备份、增量备份和差异备份。
1.1 完全备份完全备份是指将整个数据库的所有数据和索引都备份到一个单独的文件中。
完全备份的优点是恢复速度快,缺点是占用的存储空间大。
1.2 增量备份增量备份是指只备份自上次完全备份或增量备份以来发生过更改的数据和索引。
增量备份的优点是占用的存储空间较小,缺点是恢复速度较慢。
1.3 差异备份差异备份是指只备份自上次完全备份以来发生过更改的数据和索引。
差异备份相比增量备份的优点是恢复速度较快,缺点是占用的存储空间较大。
1.4 定期备份计划为了避免数据损失,需要制定定期备份计划。
一般情况下,完全备份应该每周进行一次,增量备份或差异备份可根据实际情况每天或每隔几天进行一次。
第二章:数据库恢复数据库恢复是指在数据库发生故障或数据损坏时,将备份的数据还原到数据库中,保证数据的完整性和一致性。
2.1 数据库故障类型数据库故障可分为物理故障和逻辑故障两种类型。
物理故障包括硬件故障和操作系统故障,逻辑故障包括人为错误和软件错误。
2.2 数据库恢复策略数据库恢复策略包括事务日志恢复和点恢复两种方式。
2.3 事务日志恢复事务日志恢复是通过重放事务日志中的操作记录来还原数据库。
该方法可以保证数据库的一致性和完整性,但恢复耗时较长。
2.4 点恢复点恢复是指将数据库还原到指定时间点的状态。
该方法适用于单个或少量数据的恢复,恢复速度较快。
第三章:数据库容灾方案数据库容灾是指在数据库发生故障时,通过备份拷贝和灾难恢复计划,尽快将系统恢复到正常运行状态。
3.1 数据库冷备份数据库冷备份是在关闭数据库的情况下进行的备份操作。
该方法适用于对系统影响比较大或数据量较大的情况。
3.2 数据库热备份数据库热备份是在数据库运行的情况下进行的备份操作。
该方法适用于对系统影响较小的情况。
tidb 数据备份机制
tidb 数据备份机制TiDB是一款分布式数据库系统,具备高可用性和可扩展性的特点。
在TiDB中,数据备份是一项重要的机制,用于保障数据的安全性和可恢复性。
本文将详细介绍TiDB的数据备份机制。
一、数据备份的意义数据备份是指将数据库中的数据复制到其他存储介质中,以便在数据丢失或损坏时能够进行恢复。
数据备份是数据库系统中至关重要的一环,它可以确保数据的安全性,并为用户提供快速和可靠的数据恢复功能。
二、TiDB的备份策略TiDB采用了一种灵活且高效的备份策略。
在TiDB中,数据备份可以分为全量备份和增量备份两种类型。
1. 全量备份全量备份是指将整个数据库的所有数据都进行备份。
在TiDB中,全量备份可以通过使用TiDB自带的工具进行,也可以使用第三方工具进行备份。
全量备份的优点是备份过程简单,恢复速度快,但也存在备份数据量大、备份时间长的缺点。
2. 增量备份增量备份是指备份数据库中发生变化的部分数据。
在TiDB中,增量备份可以通过记录数据变更日志实现。
增量备份的优点是备份数据量小,备份时间短,但恢复过程相对复杂,需要先恢复全量备份,再应用增量备份。
三、TiDB的备份工具TiDB提供了多种备份工具,方便用户进行数据备份和恢复操作。
1. Backup & RestoreBackup & Restore是TiDB官方提供的备份工具,支持全量备份和增量备份。
它使用TiDB的快照功能进行数据备份,可以在备份过程中不影响数据库的正常运行。
同时,Backup & Restore还支持备份数据的加密和压缩,提高备份的安全性和效率。
2. Mydumper & LoaderMydumper & Loader是一套第三方工具,也是备份和恢复TiDB数据的常用工具。
Mydumper用于全量备份数据,可以快速导出数据到本地文件。
Loader则用于将备份的数据导入到另一个TiDB集群中。
Mydumper & Loader的优点是备份速度快,且可以灵活地选择备份的表和数据。
datalogs 翻译
datalogs 翻译Datalogs(数据日志)是指记录数据的日志文件,通常用于记录系统或应用程序的运行状态、错误信息、用户操作等。
Datalogs是一种重要的工具,可以帮助开发人员诊断和修复软件问题,提高系统的可靠性和稳定性。
以下是一些关于Datalogs的常见用法和中英文对照例句:1. 记录系统运行状态:- 中文:通过Datalogs可以记录系统的运行状态。
- 英文:The system's running status can be recorded through Datalogs.2. 记录错误信息:- 中文:当系统发生错误时,Datalogs可以记录错误信息。
- 英文:When an error occurs in the system, Datalogs can record the error information.3. 跟踪用户操作:- 中文:Datalogs可以用于跟踪和记录用户的操作行为。
- 英文:Datalogs can be used to track and record user's operational behaviors.4. 分析和诊断问题:- 中文:通过分析Datalogs可以诊断和解决系统的问题。
- 英文:Analyzing Datalogs can help diagnose and resolve system problems.5. 监控系统性能:- 中文:Datalogs可以用于监控系统的性能情况。
- 英文:Datalogs can be used to monitor the performance of the system.6. 收集统计数据:- 中文:Datalogs可以用于收集和分析统计数据。
- 英文:Datalogs can be used to collect and analyze statistical data.7. 追溯数据变更:- 中文:通过Datalogs可以追溯数据的变更记录。
xtrabackup相关参数

xtrabackup相关参数xtrabackup相关参数详解2.3.1 innobackupex的相关参数介绍由于innobackupex把功能都集成到xtrabackup中,但是很多习惯还是使⽤innobackupex,因为现在还有很多⽼版本的,只能⽤innobackupex备份myisam。
innobackupex --help:1)备份相关的参数innobackupex [--compress] [--compress-threads=NUMBER-OF-THREADS] [--compress-chunk-size=CHUNK-SIZE][--encrypt=ENCRYPTION-ALGORITHM] [--encrypt-threads=NUMBER-OF-THREADS] [--encrypt-chunk-size=CHUNK-SIZE][--encrypt-key=LITERAL-ENCRYPTION-KEY] | [--encryption-key-file=MY.KEY][--include=REGEXP] [--user=NAME][--password=WORD] [--port=PORT] [--socket=SOCKET][--no-timestamp] [--ibbackup=IBBACKUP-BINARY][--slave-info] [--galera-info] [--stream=tar|xbstream][--defaults-file=F] [--defaults-group=GROUP-NAME][--databases=LIST] [--no-lock][--tmpdir=DIRECTORY] [--tables-file=FILE][--history=NAME][--incremental] [--incremental-basedir][--incremental-dir] [--incremental-force-scan] [--incremental-lsn][--incremental-history-name=NAME] [--incremental-history-uuid=UUID][--close-files] [--compact]BACKUP-ROOT-DIR--compress:该选项表⽰压缩innodb数据⽂件的备份。
CNC机器人系统启动系统B-62755EN 01用户指南说明书
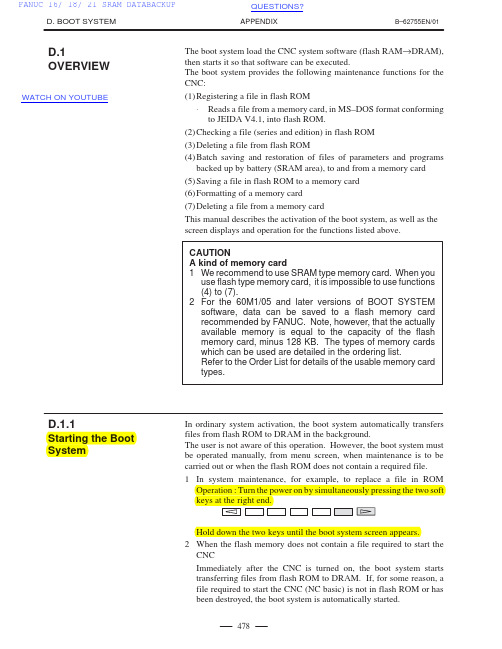
(4) Batch saving and restoration of files of parameters and programs backed up by battery (SRAM area), to and from a memory card
CAUTION A kind of memory card 1 We recommend to use SRAM type memory card. When you
use flash type memory card, it is impossible to use functions (4) to (7). 2 For the 60M1/05 and later versions of BOOT SYSTEM software, data can be saved to a flash memory card recommended by FANUC. Note, however, that the actually available memory is equal to the capacity of the flash memory card, minus 128 KB. The types of memory cards which can be used are detailed in the ordering list. Refer to the Order List for details of the usable memory card types.
card. (6) : Function for making a backup copy of the data in SRAM. (7) : Function for deleting a file from a memory card. (8) : Function for formatting a memory card. (9) : Function for terminating the boot system and starting the CNC. (10) : Condensed guidance or error message
- 1、下载文档前请自行甄别文档内容的完整性,平台不提供额外的编辑、内容补充、找答案等附加服务。
- 2、"仅部分预览"的文档,不可在线预览部分如存在完整性等问题,可反馈申请退款(可完整预览的文档不适用该条件!)。
- 3、如文档侵犯您的权益,请联系客服反馈,我们会尽快为您处理(人工客服工作时间:9:00-18:30)。
HOW TO BACKUP RESISTIVITY(SEMILAB) SETTING DATA
Execute Explore.
HOW TO BACKUP RESISTIVITY(SEMILAB) SETTING DATA
You can find DB cap file. (just one setting data file)
HOW TO RESTORE SYSTEM SETTING DATA
Double click. (MMI program execute)
HOW TO BACKUP TTV SETTING DATA
Press “Exit” button. (TTV program exit)
HOW TO BACKUP TTV SETTING DATA
Execute Explore.
HOW TO BACKUP TTV SETTING DATA
You can find DB folder (All setting data exist in DB folder.)
Copy to other storage. (D:\backup or USB memory)
ቤተ መጻሕፍቲ ባይዱ
Copy to other storage. (USB memory)
HOW TO RESTORE RESISTIVITY(SEMILAB) SETTING DATA
Press “Exit” button. (Semilab program exit)
HOW TO RESTORE RESISTIVITY(SEMILAB) SETTING DATA
Execute Explore.
HOW TO BACKUP SYSTEM SETTING DATA
You can find DB folder (All setting data exist in DB folder.)
Copy to other storage. (D:\backup or USB memory)
HOW TO RESTORE TTV SETTING DATA
Double click. (TTV program execute)
HOW TO BACKUP RESISTIVITY(SEMILAB) SETTING DATA
Press “Exit” button. (Semilab program exit)
Overwrite this file
CURRENT USE FILE
BACKUP FILE
HOW TO RESTORE RESISTIVITY(SEMILAB) SETTING DATA
Double click. (Semilab program execute)
HOW TO RESTORE SYSTEM SETTING DATA
Press “Exit” button. (MMI program exit)
HOW TO RESTORE SYSTEM SETTING DATA
CURRENT USE DATA
Overwrite all files
BACKUP DATA
HOW TO RESTORE TTV SETTING DATA
Press “Exit” button. (TTV program exit)
HOW TO RESTORE TTV SETTING DATA
Overwrite all files.
CURRENT USE DATA
BACKUP DATA
기술 표준을 선도 하는 최고의 가치 기업
SETTING DATA BACKUP MANUAL
K.S.H. 2011.07.05
HOW TO BACKUP SYSTEM SETTING DATA
Press “Exit” button. (MMI program exit)
HOW TO BACKUP SYSTEM SETTING DATA
