超长待机终端说明书
超长待机-LG20使用说明书12.1
LG20使用手册一. 前言1. 产品简介超长待机产品是一款长待机、超低功耗、定时向平台上传基站位置、接受平台最新指令、能设置开启车辆追踪等功能性产品。
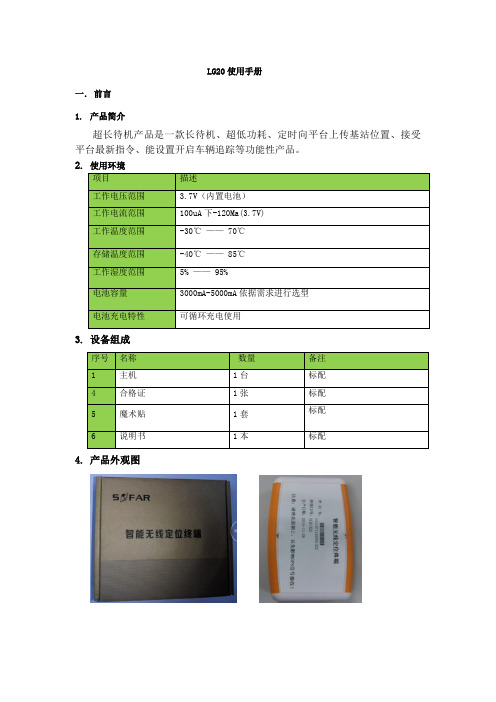
2. 使用环境3. 设备组成4. 产品外观图二.安装说明1.首次安装:LG20首次安装时,先插入SIM卡,再安装上电池;LG20插上电池即开始工作,设备插上电池上电后设备指示灯闪3次,进入连续追踪模式工作,此时若GPS定位,则指示灯常亮,GPS未定位则指示灯常灭,设备工作5分钟之后自动切换到预寻车模式。
在终端全速工作的5分钟时间之内,此时可发短信设置参数,默认不需要再次配置参数即可上线,出厂已设置好默认参数,需要跟监控人员确认是否终端已上线且GPS已定位,GPS定位后会自动校正时间,监控人员确认时间正常,GPS定位并且正常后,安装人员则认为安装完成,若过了5分钟设备还没有上线并定位,设备已进入待机状态,那么需要安装人员需要再次将设备断电再上电,直到监控人员确认设备上线并正常工作了则表明设备安装完成。
2.设备位置放置要求:设备安放时,需水平放置,且标贴面在上;可通过安装盒内的魔术贴贴在终端底面,在车上找合适的位置放置;3.指示灯状态:LG20插上电池即开始工作,上电后指示灯闪动3次,则表明终端正式开始工作4.维护策略:LG20设备电池工作电压低于3.5V时会进行低电压报警,此时应该更换新设备电池或对设备进行充电;电量低时直接更换设备电,通过匹配的线插接电源接口,用5V/1A 的电流对设备进行充电,也可以通过车充转换输出5V/1A对设备进行充电。
三.功能说明1.1终端默认配置LG20默认参数IP:125.91.8.198,端口:12002,APN:CMNET,连接方式:TCP,本机号由程序自动获取SIM卡ICCID号计算而成,终端ID由序列号自动计算而成。
1.2平台工作模式设定LG20工作模式分为3种,包括待机模式、预寻车模式、连续追踪模式,工作模式由平台下发设定,终端默认为预寻车模式。
hnd09e3y说明书
hnd09e3y说明书
【产品简介】
hnd09e3y 是一款集功能一、功能二、功能三于一体的电子产品。
产品名称简洁明了,易于记忆,为用户提供了高效便捷的使用体验。
【产品操作】
使用hnd09e3y 时,用户需按照操作步骤一、操作步骤二、操作步骤三进行。
具体操作步骤请参考说明书中的详细说明。
【产品维护】
在维护hnd09e3y 时,用户需注意维护注意事项。
维护时,请按照维护步骤一、维护步骤二进行。
维护过程中,请确保安全,避免发生意外。
【产品安全】
使用hnd09e3y 时,请遵守使用安全提示,注意安全事项。
如遇紧急情况,请参照紧急处理方法进行处理。
【产品规格】
hnd09e3y 的产品尺寸为长x 宽x 高,产品重量为xx 克。
产品参数包括功能一、功能二、功能三的性能指标。
具体参数请参阅说明书。
【产品附件】
hnd09e3y 附带了附件名称一、附件名称二、附件名称三。
附件在使用过程中起到辅助作用,请妥善保管。
【售后服务】
我们承诺为用户提供优质的售后服务。
售后服务政策包括保修期限、退换
货规定等。
如有售后需求,请按照售后服务流程进行操作,或直接联系我们。
ZLT X11 使用说明书

ZLT X11使用说明书V1.1感谢您选择本公司的5G无线数据终端产品,为使您更好的使用终端,请详细阅读本说明书,阅读后请保留备用。
本公司保留修改本说明书技术参数及规格的权利,对本说明书的印刷错误及与最新资料不符之处我们会及时改进。
所有改动不会事先通知,本公司保留最终解释权利。
ZLT X11是一款高性能5G室外数据终端,支持NR(SA&NSA)、TDD-LTE、FDD-LTE,将蜂窝网络数据转换为有线网口数据,支持1个2500Mbps LAN 口。
适用于需要快速部署通信网络的家用或商用场景。
一、产品主要技术指标●工作温度:-40℃--+55℃(低于-20度时,性能可能受限)●相对湿度:5%--95%●电源:POE供电,48V/0.32A。
●尺寸:132mm*132mm*176mm●重量:约600g●上下行速率:5G:DL2Gbps;UL1Gbps(理论值,实际速率以运营商配置为准)二、安装说明1)取出5G室外无线数据终端,将支架和5G室外无线数据终端安装在一起,并把支架和5G室外无线数据终端一体,固定在需要安装的位置,如楼顶,窗户,电线杆上面。
2)按终端上标注的方向将SIM卡安装到卡槽中,并把卡槽盖和卡槽盖的防水垫,用螺丝锁好在SIM卡外。
3)根据实际情况,选择长度合适的RJ45网线,注意使用标准的8芯网线,CAT5E网线或者CAT6网线。
在网线上,套上防水保护套,并将网线插入RJ45网口中。
4)有两种方式给5G室外无线数据终端供电,一种是配合我司的室内机,由室内机的WAN口供电,这种方式只需要将连接室外机的网线连接到室内机的WAN口,然后给室内机上电,室外机就可以开始启动并工作。
另一种方式是购置我司标配的POE电源,将连接室外机的网线连接到POE电源的POW端口,然后将POE电源插入220V的电源插座上,就可以给室外机供电。
注意:1.请勿带电安装USIM卡。
2.拿取USIM卡时,请勿接触金属接触面,以免静电损坏卡片。
H600 700 800 900系列高清终端用户手册
目录
1 系统基本信息 .....................................................................................................................................................1 1.1 1.2 1.2.1 1.2.2 1.2.3 1.3 1.4 1.5 1.6 1.7 1.7.1 1.7.2 1.7.3 1.7.4 1.8 2 遥控器 ............................................................................................................................................................... 1 设置遥控器模式 ................................................................................................................................................ 2 终端模式 ................................................................................................................................................... 2 摄像机模式 ............................................................................................................................................... 2 摄像机反向控制终端模式 ....................................................................................................................... 3 主菜单界面........................................................................................................................................................ 3 切换主菜单/视频界面 ...................................................................................................................................... 5 选择主菜单界面风格 ........................................................................................................................................ 5 屏幕提示图标.................................................................................................................................................... 6 字符输入方法.................................................................................................................................................... 7 特殊符号 ................................................................................................................................................... 7 数字 ........................................................................................................................................................... 7 英文字母 ................................................................................................................................................... 7 中文 ........................................................................................................................................................... 7 语言选择............................................................................................................................................................ 8
海能达PDT终端简易使用说明-20150831第二次修改版

1.联网状态下发起呼叫时,先短按次PTT键,等屏幕 出现“呼叫建立”后,按住PTT键进行通话。应答呼叫 时,直接按住PTT键进行通话。通话完成后,发起呼叫 方按下屏幕下方红色按键(挂机键),结束通话。 注意:双方通话结束后7秒钟无人讲话,电台自动挂断 。每次呼叫限制为3分钟,3分钟时系统自动挂断通话 ,如需呼叫可再次发起呼叫。
2.脱网模式下,发起呼叫、应答呼叫时直接按住P TT键进行通话。
注意:本产品具有超时禁发功能
此功能可防止用户过久地占用信道。如果连续发射时间超过一定的时间,本产品则会停止发射并且响警告音。若要停止警 告音,请松开【PTT】键。如需再次发射,请间隔一段时间后再次按住【PTT】键。
精品资料
X1p 数字手持终端使用(shǐyòng)介绍
精品资料
无线电台使用(shǐyòng)规范
使用安全注意事项 •在带有安全气囊的汽车上,不要将对讲机放在气囊展开时可能涉及的范围内。 如 果对讲机处于(chǔyú)气囊展开时可能涉及的区域范围,一旦气囊迅速展开,对讲机 可能会随着极大的冲击力伤及车内的人员。 •在潜在爆炸的大气环境或场合下,除非对讲机是通过特殊认证的防爆型对讲机,否 则必须关闭对讲机。在潜在爆炸大气环境中,电火花会导致爆炸或火灾。 •不要在潜在爆炸的大气环境下更换电池或对电池充电。安装和拆卸电池时可能会引 起接触电火花并导致爆炸。 •在靠近爆破区和雷管所在区域前,须先关闭对讲机,以免引起可能的爆炸。
•经过长期使用后,如果对讲机的按键、控制旋钮、显示屏和机壳变脏,可 用沾有中性洗涤剂的无纺布对其进行清洁,切勿用诸如去污剂、酒精、喷 雾剂或石油制剂等强腐蚀性化学药剂。清洁之后,务必保证对讲机彻底干 燥,否则请勿使用。
RFR900智能终端用户手册说明书
RFR900Smart Terminal Arrayusermanual BLUEBIRD version 1.0About this manualRFR900 provides high quality features for a smart terminal using Bl uebird’s creative ideas and technological expertise. This user manual is designed to help users use the device effectively.•Please read this manual carefully before using the device for safe and proper use.•This device may only be used in countries where it is sold.•The components and colors of this device in this manual may differ from the actual product.•Features and specifications are subject to change without prior notice.•Content may vary by device’s software version or by service provider or carrier.•Application and features may vary by country or region.•Certain features of this device may have performance issues due to user environment, programs in use, or peripheral device usage. Bluebird is not liable for any issue caused by applications or accessories from any provider other than Bluebird.•Modifying the device’s operating system or installing software from unknown sources may cause device malfunction or data loss. Improper or unauthorized use of the device is a violation of Bluebird license agreement and void your one-year limited warranty. CopyrightCopyright © 1995-2016 Bluebird Inc. All rights reserved.Bluebird Inc. is the designer and manufacturer of Pidion handheld mobiles.This manual and the programs in this device are protected under international copyright laws, and may not be copied, distributed, translated, or removed by any means.About this manual 12 About this manualTrademarksBLUEBIRD is an emerging global brand, striving to lead the market in performance and mobility. Their products represent reliability, innovation, and innovative technology.BLUEBIRD is a registered trademark from the global brand of Bluebird Inc. and is copyright protected.• Pidion and stylized Pidion Logo are registered trademarks and symbols of Bluebird Inc. • Qualcomm® IZat™ is a registered tr ademark of Qualcomm Atheros, Inc. • Adobe® is a registered trademark of Adobe Systems Inc. • Bluetooth® is a registered trademark of Bluetooth SIG, Inc. • Wi-Fi® is a registered trademark of the Wi-Fi Alliance.• All other trademarks and copyright are the property of their respective owners.User’s guidanceOverview 3OverviewPackage ComponentsThe package includes:RFR900 deviceBatteryMicro USB cableOptional accessories: Protection film, adapter plug (220 V), Power adapter for direct charging, 1-slot cradle, 1-slot cradle power adapter, 4-slot cradle, 4-slot cradle power adapter, vehicle charger, user manualTo purchase optional accessories, contact your sales representative.You can download your user manual from . However, the paper version may be available for some regions.4 OverviewYour DeviceFrontBackOverview 5BatteryRFR900 uses a 3,500 mAh Lithium-ion rechargeable battery. Install the provided battery before starting to charge the device.Installing the Battery1 Turn the battery lock counterclockwise to unlock the battery cover.2 Use the notch and lift the battery cover. Remove the cover completely.When removing the battery cover, be careful not to damage your fingernail. Do not try to pull the battery cover excessively. It may damage the cover.3 Insert the battery. Make sure the gold contacts are aligned.4 Replace the cover. Insert the bottom of the cover first and then press around theedge of the cover until it clicks into place.5 Turn the battery lock clockwise to lock the battery cover.Removing the Battery1 Remove the battery cover as described in Installing the Battery on page 11.2 Use the notches at the top of the battery to pull out.Before removing the battery, turn off the power. If not, it may damage the device.CAUTIONCAUTION6 OverviewCharging the BatteryCharge the device first when using the device for the first time or have not used it for a long time. The device can be charged with a charger or a cradle. You can also charge the battery by connecting it to your computer with the provided micro USB cable.When the battery is low, the device will emit a sound and display a low power message. When it is charging, the charging lamp will show red light. When the battery is fully charged, it will turn to green light.The charging status will also show on the lock screen.To charge with the chargerPlug the micro 5-pin end of the charger into the multipurpose jack of the device. Connect the USB cable of the charger with power adapter. Plug the charger into a power outlet.When the battery is extremely low on power, the device may not turn on. Charge the device enough and try to turn it on again. You can use the device while charging. But it may take longer time to charge the device fully.Connect the charger properly; it may damage the device.The device may heat up. If it gets hotter than usual, stop charging.Do not remove the battery before disconnecting the charger. It may damage the device.To charge with thecradlePlace the device on the cradle as illustrated below. Connect the power adapter with the cradle, and plug it into a power outlet.You can also take out the battery from the device and charge it separately on a cradle.CAUTIONDevice SpecificationsDevice Specifications 7TroubleshootingThe battery does not charge properly.•Ensure that your device and the charging cable is connected and the LED lamp isworking properly.•If the battery does not charge completely, it may be dead or defective. Replace a battery with new one. (The warranty period for battery replacement is six months.)The battery life got shorter.When you use network data or peripheral device such as wireless LAN or Bluetooth that require more power, your device may use more battery than usual. If it happens for an extended period of time, your battery may be dead. Then replace it with a new battery.I dropped the device in the water.Turn off the device and take out the battery. Place the device and battery in a dry place. Let them dry completely for a considerable period of time, and turn it back on. If it does not turn back on, contact our service center.My device gets too hot to touch.It is normal to get warm if receiving poor signal, performing intense workload, or battery is charging. It should not last if you stop using the device for a certain amount of time. If the problem continues, contact the manufacturer for persistent or extreme heat. It may result in a burst battery or fire.How do I get the repair service?You can contact your local sales representative or can send the device via a delivery service to the headquarter in Korea. When sending the package, make sure you pay for the shipping fee in advance. When the repair is finished, headquarter will cover the shipping cost.8TroubleshootingSafety and HandlingWARNINGPlease read this safety and handling information carefully. Failure to follow the information provided may result in fire, electric shock, or other property damage or bodily injuriesGeneral precautionsThese simple guidelines will help you for operating your device properly, maintaining it safe, and experience satisfactory services.Device•To not scratch the device’s touchscreen. Use you r finger or only compatible pen. Never use an actual pen, or any other sharp object on the touchscreen.•Do not press power button on the device if the device is wet or do not touch adapter or power cord with wet hands. There is risk of electric shock.•Do not use your device at an explosive danger zone.•Although this device is very sturdy, do not drop, hit, bend, or sit on it on purpose. It can be broken.•Do not remodel, take apart, or repair the device. Contact to your customer service center. If not the case, you will not be able to get your free repair service.•Do not attempt to modify your hardware or software. It may cause device malfunction and void your warranty.•You may not be able to use this wireless device in the basement or certain places in buildings where the signal is weak, or on open fields or in skyscraper or tall buildings where there is no signal.•Backup the data and information from your device. Your data such as ringtones, text or voice message, characters may be erased during the repair or upgrade.•Do not paint your device. It can damage your screen or your device’s exterior. Also, the paint can peel off and it triggers allergies. If there is allergic reaction, please seek medical attention.•In case your device is wet, do not put your device in heaters, microwaves, etc. to dry. There is a risk of explosion or it can be the cause of malfunction.•Keep the device away from children.•Avoid using or storing this device in too high or too low temperature. This device is designed to work in temperature between 0°C and 50°C (32°F and 122°F), and humidity between 5% and 95%.•Do not expose your device to direct sunlight such as on the dashboard of a car for extended periods of time.•Avoid wet, dusty, or damp place for storing your device.•Do not keep the device close to the vents of air conditioning. Corrosion within the device may occur due to dew condensation from dramatic changes in temperature.Safety and Handling 9Battery and charging•Improper battery use may cause fire, explosion, or other hazard.•If the battery is taken apart by impact, applied heat, submersion, or hole-drilling, there is a risk of a dangerous explosion. Keep away from children and animals.•Do not make any improper contact on battery contact pin with necklaces, coins or any electric conductors. Do not give any impact with sharp objects. There is a risk of explosion.•Use only the approved battery and charger. Using incompatible battery or charger may cause device malfunction, or other damages such as fire.•When you are not using the device for a long period, take out the battery and keep the device and the battery in a dry, cool place. Also, charge the battery once a year. If you keep it without charging for a long time, it may cause device malfunction.Distraction•Using your device may distract you and cause serious injuries and damages. For example, avoid talking on the phone or texting while driving or riding a bicycle. It is strictly prohibited by laws in some jurisdictions. If you are in an unavoidable situation, stop your vehicle or use hand-free kit.Frequency interference•This wireless device may cause radio frequency interference, so do not use the device or turn on Airplane mode when prohibited.•The device emits electromagnetic fields. It may interfere with your medical devices.•Do not place credit cards, phone cards, bankbook, and tickets next to the device. The magnetic forces of the device can damage the information of listed item.FCC compliance informationThis device complies with Part 15 of the FCC`s Rules. Operation is subject to the following two Conditions:1 This device may not cause harmful interference, and2 This device must accept ant interference received, including interference thatmay cause undesirable operation.This device complies with part 15 of the FCC Rules. Operation is subject to the condition that this device does not cause harmful interference.End users cannot modify this transmitter device. Any Unauthorized modification could void the user’s authority to operate this device.10Safety and HandlingThis device was tested for typical body-worn operations with the back of the handset kept 0.39 inches (1cm) between the user’s body and the back of the handset.To comply with FCC RF exposure requirements, the handset must be kept 0.39 inches (1cm) from the body without any reference to a particular side or edge.Any beltclips, holsters, and similar accessories containing metallic components may not be used.Body-worn accessories that cannot maintain 0.39 inches (1cm) separation distance between the user's body and the handset, and have not been tested for typical body-worn operations may not comply with FCC RF exposure limits and should be avoided. Part 15.105 (B)This equipment has been tested and found to comply with the limits for a Class B digital device, pursuant to part 15 of the FCC Rules. These limits are designed to provide reasonable protection against harmful interference in a residential installation. This equipment generates, uses and can radiate radio frequency energy and, if not installed and used in accordance with the instructions, may cause harmful interference to radio communications, However, there is no guarantee that interference will not occur in a particular installation. If this equipment does cause harmful interference to radio or television reception, which can be determined by turning the equipment off and on, the user is encouraged to try to correct the interference by one or more of the following measures:•Reorient or relocate the receiving antenna.•Increase the separation between the equipment and receiver.•Connect the equipment into an outlet on a circuit different from that to which the receiver is connected.•Consult the dealer or an experienced radio/TV technician for help.Modifications not expressly approved by the manufacturer could void the us er’s authority to operated the equipment under FCC rules.Safety and Handling 1112 Safety and HandlingIEC 60417-6044Do not listen to sound at high volume for long periods. It may cause hearingdamage. Also, only use compatible receiver, headphones, or earpieceswith your device.CEHereby, Bluebird Inc. declares that this RFR900 is in compliance with the essential requirements and other relevant provisions of directive 1999/5/EC.To comply with CE RF exposure requirements, the handset must be kept 0.59 inches (1.5cm) from the body without any reference to a particular side or edge.Any beltclips, holsters, and similar accessories containing metallic components may not be used.Body-worn accessories that cannot maintain 0.59 inches (1.5cm) separation distance between the user's body and the handset, and have not been tested for typical body-worn operations may not comply with CE RF exposure limits and should be avoided. European Union (EU) Waste of Electrical andElectronic Equipment (WEEE) d irectiveAccording to the European Union’s WEEE directive, this symbol meansthat products sold into EU countries must dispose electrical device and/or its battery separately from household waste. Disposing of the deviceseparately will help conserve resources and energy and contribute to humanhealth and environment protection.Customers or end-users in EU countries should contact their localequipment supplier representative or service centre for information aboutthe waste collection system in their country.Warranty and SupportWarranty certificateThank you for purchasing a product from Bluebird Inc.•If a circumstance arises where you lose a receipt or the certificate of guarantee, then the term of guarantee will be calculated 3 months (certified by the number of the manufacture, a certificate of inspection) after the date of manufacture.•In case of accessories such as batteries, only those that match the sales list managed by the service center will be eligible for customer service.•A repair or an exchange of batteries that does not match the sales list of the service center due to the carelessness of the customer will be fully charged.Warranty information•Bluebird Inc. (hereinafter referred to as Bluebird) provides the warranty service for its products in compliance with the regulations on compensation for damage of customer.•Upon receiving a notification on a defect of its product within the range of warranty during the warranty period, Bluebird will repair or replace the defective product according to its warranty policy.•If the defective product within the range of warranty is not repairable or replaceable, Bluebird shall refund the purchasing price within a designated period from the date of receiving a notice of defect.•Bluebird assumes no responsibility for repairing, replacement or refund until it receives the defective product from the customer. The replacement shall be equivalent to a new product in the aspect of performance.•Warranty of Bluebird is valid in the countries where the Bluebird products are distributed by Bluebird. (Contract for additional warranty service like field service)•Bluebird products may contain the recycled products, components or materials equivalent to new products in the aspect of performance.•This warranty is applied to software products only when the programming commands are not executed. Bluebird does not guarantee interruption- free or error-free performance.Warranty and Support 1314 Warranty and SupportCustomer supportBefore asking for after-sales service, please back up the data from the terminal. We do not back up data from the products received in the Customer Care Center. Therefore, we assume no responsibility for loss/deletion of data.Customers service centerSSang-young IT Twin tower, B703531, Dunchon-daero, Jungwon-guSeongnam-si, Gyeonggi-doSouth Korea 462-727• Fax: +82-2-548-0870• Email:*********************.kr• Hours: 9:30 a.m. - 6:30 p.m. (GMT Time: +9 Hours)The center is closed on Saturdays, Sundays, and Korean national holidaysRegistering for After-Sales Service• We receive the products for after-sales service through mail, delivery service and hand carry only in principle.• If you bought the product from any party other than the authorized dealer, you need to register the product before asking for after-sales service.• Please enclose an evidence of purchasing or the receipt to the product for after-sales service.• Please enclose the name, telephone number, address and symptom for prompt service. • You can ask for after-sales service through the dealer or the Customer Care Center in the head office.• Do not intentionally damage the label on the product.• Damaged label may result in a disadvantage to the customer.• When you return the product to Bluebird for service, please put the product in a protective box.• Warranty will not be provided for any damage occurring during delivery. We recommend you to use the box and protective cover supplied with the product.• Make sure to deliver the product in a safe way. Bluebird assumes no responsibility for loss of the product during delivery.Charged services• If it is not a default, it will be charged when requesting for after-sales service. - Service request due to inappropriate use of the customer- Loss of a PIN numberIMPORTANTWarranty and Support 15- Use of programs that might effect the program (over-clock, forceful changes in the input of the system, personal developments)• Default due to a mistake on the part of the customer- Default due to inappropriate or careless use of the product (dropping, submersion under water, shock, damage, unreasonable operations, etc)- Default due to a repair or unauthorized technician- Default caused intentionally or by carelessness of the customer- Default due to the use of fraudulent parts or components• Other cases- Default due to nature (fire, damage due to sea wind, flood damage, etc.)- Expendable parts have exhausted there life (batteries, antenna, or other component parts).• Regulations of treatment after charged serviceIf the same default occurs on the part that had been repaired within a 2 months( 60 days) period, it will be provided with free of charge repair service.There will be no returning of good repayment upon the following situation:• Removal of the sealing of the product if it had been sealed.• If the product has been damaged due to careless use by the customer or due to a natural disaster (floods, rain, fire, etc.).• Loss of product or other components (CD, diskette, manual, connecting cables, etc). • Damage to the product after 10 days of purchase, the product will either be exchanged or provided with after-sales service (note, returning of goods or repayment is not allowed).User ManualBLUEBIRD Copyright (C) 2016 Bluebird Inc. All rights reserved www.mypid i 。
立林v38智能终端机说明书
立林v38智能终端机说明书
立林V38智能终端机是一款集多种功能于一体的智能设备。
它不
仅可以让你轻松浏览互联网,还可以帮助你进行各种办公工作,更可
支持各种娱乐功能,一机在手,应有尽有。
立林V38智能终端机的外观设计精致,采用了时尚的金属边框和
弧形边角,手感舒适,美观大方。
其屏幕是一块10英寸的高清IPS显
示屏,色彩鲜艳、细节清晰,给用户带来更加真实的视听体验。
作为一款智能终端机,立林V38的操作系统采用了Android 8.0
系统,兼容性强,能够承载各种应用软件。
其搭载的4核心处理器和
2GB的运行内存,使得其运行速度快、反应敏捷,同时支持32GB的存
储容量,可以轻松满足用户的一些常规的办公和娱乐需求。
值得一提的是,立林V38智能终端机的电池容量较大,为4800mAh,续航时间长。
同时,其支持WiFi和蓝牙连接,可以实现无线联网,轻
松分享资料或音乐等。
除了这些基本功能外,立林V38智能终端机还具有多种高级功能。
例如,它可以支持后置500万像素和前置200万像素的摄像头,用户
可以轻松地进行视频通话,或是记录生活点滴。
此外,此款智能设备
还支持OTG传输、闪存热插拔等功能,实用性强。
总之,立林V38智能终端机是一款功能丰富、设计精美、性价比
较高的智能设备。
它可以满足用户的多种需求,不论是工作、学习、
娱乐等方面都有着不错的表现。
如果你正在寻找一台智能终端机,不妨来尝试一下立林V38,相信它会给你带来惊喜。
LXE MX7 手持式无线终端 说明书

全範圍掃描能力,可 從4英吋至40英呎 的距離內捕捉條碼信息多個一觸式功能鍵,經設置 後,用戶輕輕一按便可啟動 預定的應用功能超光顯示屏,提供 清晰畫面,即使在 倉庫昏暗的角落也 能閱讀資料輕巧便攜、堅固耐用背光按鍵, 可選55獨立數字 字母鍵 或32大數字鍵ToughTalk 語音技術,支持 語音控制的物流操作易握、可移除式的手柄配合用戶手形 設計,使用二隻手指便能觸發掃描器 ,適合長時間掃描動作802.11 a/b/g 無線組件及可選藍牙 提供實時通訊成功掃描條碼震動裝置, 用戶即使在最嘈雜的環境下 亦可確認數據已完成採集可選用保護套, 提高跌地保護指標堅固可靠手持移動終端堅固可靠手持移動終端的代名詞的代名詞的代名詞物流中心的優化產品在倉庫和分銷中心等地方,MX7是進行各種各樣數據採集應用的理想工具,設計上力求使用舒適,輕巧堅固的鎂金屬機身適用於大量掃描操作,其全距離的掃描能力,令使用者可以從近到4英吋,遠到40英呎的距離內掃描條形碼,大大提高了工作效率。
在嘈雜的環境下使用時,可啟動內置震動器,當成功掃描條形碼時能觸動震動器,提醒用戶。
MX7集智能化、運算速度快、彈性於一身,最新Windows® CE 5.0操作系統,配合英特爾® XScale® PXA255處理器,MX7隨時可以投入工作。
結合802.11 a/b/g 無線組件,你已為今日和未來需要實時資料採集的商機做好了準備。
處理器和記憶體 英特爾® XScale PXA255 400MHz 128MB SD 記億體 128MB, 512MB 或 1GB SD 快閃記億體 系統 Windows® CE 5.0 專業版 可選軟件 RF Term® 終端模擬(VT220、TN3270、TN5250) Applock® 可把設備鎖在特定的用戶應用程式 Java Virtual Machine 亞洲字體 Wavelink Avalanche 及 LXE eXpress Config 軟件開發 可從/developer下載 免費SDK 每個API 都提供程式編寫範例 完整的程式應用例子 提供程式開發時經常觸及的問題答案 FAQ 鍵盤 55獨立數字字母鍵 或32大數字鍵 背光按鍵 5個指定功能鍵讓用戶自己定義 防腐塗層 顯示 3.5”(8.8cm) 240×320像素1/4VGA TFT彩色LCD 超亮LED 背光 280 NIT 亮度 耐用觸摸屏及點擊筆 電源供應和管理 2200mAhr,7.2V 可充式鋰離子電池包 後備電池 電池低電量警告 先進及可調的供電管理 介面 藍牙 USB 用戶端 RS232接口 在機充電接口 紅外線IrDA 端口 耳機接口,可用作聲控操作 音量可調的揚聲器 掃描及供電狀態顯示燈 無線組件支援 2.4GHz 802.11b/g 無線卡 2.4/5GHz 802.11a/b/g 無線卡 優化內置雙天線或天線外接頭 思科CCXv4認證 WPA,WPA2 安全制式 可選的藍牙2.0 + EDR w/class 2外觀 尺寸 22.3cm x 8.6cm x 5cm 重量 595克,包括無線組件/電池/掃描器應用環境 操作溫度 -10℃ 到 45℃ 儲存溫度 -20℃ 到70℃ 濕度: 5到95%不凝聚水珠(於40℃) 跌地指標:可承受多次從1.5米高跌落混凝土 地面 ,如外加橡膠保護,高度可達1.8米 防水防塵等級:IEC60529,符合IP65 震動測試:MIL STD 810F認證 幅射 (EMI) FCC Part 15 Subpart B,類 A EN 55022類 A,(CISPR 22) 防干擾 (EMC) EN 55024:1998 安全性 UL 60950, CSA; C22.2 No. 60950; EN 60950, IEC 60950 雷射安全性 CDRH:21 CFR 1040.10; EN 60825-1 及 IEC 60825-1 無線組件認證 FCC Part 15C; Industry Canada RSS 210, 102 EN 300 328 RoHS-compliant 條碼 標準距離掃描器 全範圍掃描器(4英吋至40英呎) ID 及2D Imager 成功掃描震動器 掃描狀態顯示燈 支援所有條碼 選件 尼龍手帶/肩帶/背包4+1電池充電/分析器 橡膠保護套 車載支架 360度可調RAM 支架USB 線(客戶端,ActiveSync 及充電) RS232線(客戶端,ActiveSync 及充電) AC-DC 變壓器,供在機充電使用 觸摸屏保護膜 點擊筆 耳機轉換線 RS232 D9轉換線 配合手形橡膠手柄,二隻手指能觸發掃描器代理商: 資訊坊科技有限公司 香港九龍長沙灣道 883號億利工業 中心8樓802室 電話:(852) 2749 1011 傳真:(852) 8148 3532 網址:/lxe 奔奮科技 (深圳) 有限公司 深圳市福田區彩田南路中深花園B 座 2806室電話:(755) 8358 0500 傳真:(755) 8358 0501網址:LXE 無線解決方案‧ 信心及質量保證以上所有指標如有任何修改,不會另外通知© 2008資訊坊科技有限公司‧版權所有[2008 DEC]。
海卓S05L车载终端设备 使用说明书

S05L车载终端设备产品使用说明书目录第一章产品组成 (4)一、产品概况 (4)二、产品实物示意图 (4)三、产品配置清单 (4)第二章整机参数及功能操作说明 (5)一、产品整机参数表 (5)二、产品整机功能表 (5)三、产品安装操作流程 (6)第三章常见问题分析与售后服务 (8)一、常见问题分析 (8)二、注意事项 (9)三、售后服务 (9)第一章产品组成一、产品概况产品名称:超长待机车载定位终端产品型号:S05L产品规格:L79mm*W44mm*H30mm 二、产品实物示意图三、产品配置清单产品标配清单序号名称数量单位备注1 S05L主机1台2 说明书、保修卡、合格证1本三合一3 包装盒1套4 S13充电线A5 配置线 1 条5 魔术贴 1 条注明:以上为整套产品的标准配置清单,以上范围之外的配件均需额外支付费用第二章整机参数及功能操作说明一、产品整机参数表序号项目规格参数备注1工作电压DC 3.0V2工作电流90~**********约小于 3.5uA3待机电流4规格尺寸L79mm*W44mm*H30mm5定位方式GPS 定位+WIFI 定位+基站定位6定位误差GPS 定位误差<10m(此数据供参考,定位误差与车辆所在区域地形及时间等因素有关联)基站定位误差根据所在区间基站密度此数据为公司实验室实测7通信网络GPRS8通讯方式UDP10工作温度范围-25℃ ~ +75℃11贮存温度范围-40℃ ~ +85℃三、产品整机功能表功能明细功能说明闹钟模式每天最多可设置4 组唤醒时间,在设定的时间自动唤醒,发送位置数据后休眠。
定时模式定时回传,则按照设置的时间回传位置数据。
星期模式可设置一个时间点并选择一周的一天或者几天发送位置数据后休眠。
基站+GPS 定位+WIFI定位当WIFI 不能定位的情况下自动启用GPS 定位,在追车模式下开启GPS 模块进行定位,如果GPS 不能定位则启用基站定位。
超长待机无线终端使用说明书v11
超长待机使用说明书F200C目录一:产品概述 (3)二:技术指标 (3)三: 使用说明 (4)四:安装调试流程 (6)五:监控效果图 (7)六:注意事项 (8)七:售后服务 (9)一:产品概述F200C是一款特别为固定资产追踪应用设计的定位器,产品兼顾传统GPS设备的基本功能,产品更小、更精细。
产品支持基站与GPS双重定位,定位模式自动切换,能保障有效、准确的检测到资产的异常移动。
产品特点:待机时间长,待机功耗低;内置GPS模块并支持基站定位,快速稳定,精度较高;内置GSM天线;体积小、无线连接、适于隐蔽安装;采用我司的无线通讯协议,轻松快捷的集成到您现有的监控系统;独立开模、方形无菱设计、美观大方。
支持三种工作模式:24小时发一次数据;1小时发一次数据;特殊情况30s发一次数据。
工作原理:车载移动资产管理系统通过硬件设备和软件实现了对车载资产的自动记录、提醒、监管等功能。
应用领域:物流|零售|制造|服装|医疗|交通|食品|动物|图书|煤矿|资产|票证|汽车|支付|防伪|航空|军事|其它二:技术指标(二)产品图片通信模块参数频段:850/900/1800/1900 ; 灵敏度:<-106dBm 发射功率:850/900Class4(2W) 与1800/1900Class1(1W) C/A 编码:1.023 MHz chip rate 20通道查看跟踪 精确度:小于10米 冷启动:42s average 暖启动:38s average定位特性 支持GPS 及基站定位,默认定位数据1天一条电流参数电池容量3200mAH 休眠电流 30uA @ 3V(DC) 工作电流:50mA @ 3V(DC)续航能力1095天(每天传一次)三: 使用说明(一)使用开通企业车务通的SIM卡。
(二)主机IP设置切换1、先把SIM安装到SIM卡座里2、把电池插到电池座上,注意电池座方向,如图所示3、开启电源开关,注意,左边是开,右边是关闭电源,如图所示为开启电源安装时用户将一张有效的SIM卡插入主机底部SIM卡卡槽后,(由于主机默认为24小时一条数据)修改设备参数最好在室内进行,通开启电源开关来,唤醒设备,发送AS1234STATE#短信查询机器的参数状态;发送*2012*UDP113.106.90.39;7001;26000001#短信设置机器的IP、ID和连接方式;发送AS1234TIME:90,1440,#短信设置机器定时回传间隔状态;本产品也可以通过专用的配置工具及远程软件设置和调试。
CRT99 终端说明书

CRT99终端用户使用手册目录第一章欢迎使用 (3)1.1产品介绍 (3)1.2安全注意事项 (3)1.2.1存放注意事项 (3)1.2.2 使用电池注意事项 (3)1.2.3 使用整机注意事项 (3)1.2.4使用充电器注意事项 (4)1.2.5 维修注意事项 (4)1.2.6 网络服务 (4)1.3 GPS常识 (4)1.3.1 GPS定义 (4)1.3.2 关于信号 (4)1.3.3 关于搜星 (4)1.4保养和维护 (4)第二章概述 (6)2.1 外观 (6)2.2 功能介绍 (6)2.3 硬件介绍 (7)2.4外观介绍 (7)2.5 主要功能总结与解释 (7)第三章产品配件 (9)3.1 座充充电器 (9)3.2 车充充电器 (9)3.3 配套耳机 (9)第四章产品定义 (10)4.1 指示灯定义 (10)4.2 按键定义 (10)第五章使用前 (12)5.1充电 (12)5.2 购买SIM卡 (12)5.3 插入SIM卡 (12)第六章具体使用方法 (13)6.1按键和插口介绍 (13)6.2具体操作方法 (13)6.2.1 开机 (13)6.2.2 关机 (13)6.2.3 通话 (14)6.2.4 紧急报警 (14)第一章欢迎使用1.1产品介绍欢迎使用CRT99 GPS定位跟踪设备。
它体积小巧,便于携带和安装,同时拥有GPS/GPRS 功能,具有 GSM/SMS/GPRS的通讯功能、信号接收速度快、可用手机传简讯或计算机软件来作为追踪方式、支持定时连续跟踪功能、SOS报警功能、远程监听功能和通话功能和里程查询功能等。
此产品可用于车辆租赁及物流业务管理/户外机械设备等定位追踪。
1.2安全注意事项为了确保您的安全,请仔细阅读以下安全注意事项:1.2.1存放注意事项请避免将本产品置放在烈日直射下或灰尘较多位置,避免与其它电子产品堆积置放,以免造成损坏。
尽量远离产生强烈电磁辐射或强烈磁场的设备。
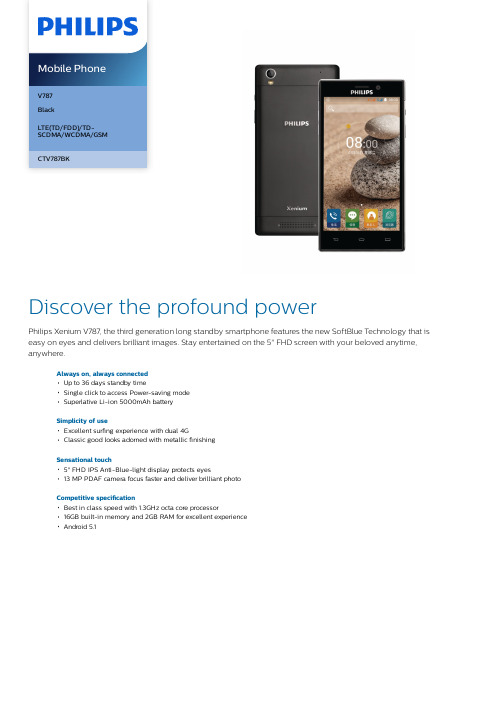
Philips Xenium V787 三代长续航智能手机用户手册说明书
V787BlackLTE(TD/FDD)/TD-SCDMA/WCDMA/GSMCTV787BKDiscover the profound powerPhilips Xenium V787, the third generation long standby smartphone features the new SoftBlue Technology that is easy on eyes and delivers brilliant images. Stay entertained on the 5" FHD screen with your beloved anytime, anywhere.Always on, always connectedUp to 36 days standby timeSingle click to access Power-saving modeSuperlative Li-ion 5000mAh batterySimplicity of useExcellent surfing experience with dual 4GClassic good looks adorned with metallic finishingSensational touch5" FHD IPS Anti-Blue-light display protects eyes13 MP PDAF camera focus faster and deliver brilliant photoCompetitive specificationBest in class speed with 1.3GHz octa core processor16GB built-in memory and 2GB RAM for excellent experienceAndroid 5.1HighlightsUp to 36 days standby timeThe phone can be on and in standby mode continuously for up to 36 days on a single charge.Power-saving switchThis Power-saving switch may well be the most convenient feature on your Philips mobile phone. By clicking the button located on the side panel, you can enable this function to help preserve your phone battery. It will shut down the WiFi, GPS and Bluetooth functions,while dimming the screen displaysimultaneously. Besides avoiding the multiple clicks needed to do likewise on other phones,this clever yet convenient button is definitely a lifesaver for heavy phone users.Li-ion 5000mAh batteryYour Philips mobile phone comes packed with a standout 5000mAh Li-ion battery forseamless and long lasting connections on the go. With such exceptional battery performance,you can banish nagging worries about missing important calls from both your professional and personal contacts. And when both work and family matters have been tackled to yoursatisfaction, you can hone in on transcendentgaming and surfing experiences on a single charge, thanks to the phone's best-in-class power technology.Dual 4G (FDD-LTE and TD-LTE)Your Philips mobile phone incorporates dual-mode 4G radio, which allows you to use mobile internet on a blazing speeds both in FDD-LTE and TD-LTE networks. Now you can enjoy wider LTE coverage with just one phone.Metallic finishingStep out in confidence and panache with your stylish Philips mobile phone in hand. Itsclassic good looks are adorned with a subtle metallic sheen. Together with a beautifully streamlined silhouette, the phone exudes the utmost professional look and feel, whether you are closing deals in the boardroom or on the golf course.5" FHD IPS Anti-Bluelight dispYour Philips mobile phone comes endowed with an awesome 5 inch fully high definition display that brings you truly vibrant colors and razor-sharp detail. The IPS technology ensures great viewing from any angle, while the vibrant colors and vivid images render a full-bodied viewing experience. Meanwhile, anti-blue-light technology is adopted to protect your eyes by reducing the harmful blue light waves without affecting the color or image of the display.13 MP PDAF camera with flashNever miss another picture perfect momentagain with your Philips mobile phone. Whether you are shooting in low light or macro conditions, your phone's 13 megapixel PDAF camera with flash will capture every precious detail. Comparing with traditional autofocus,built-in with phase detection sensor, PDAF can be faster and more accurate focus onphotographing goals to get brilliant photo,especially in the dark scenario.1.3GHz octa core processorBalze ahead of others with the almighty 1.3GHz octa core processor on your Philips mobile phone. This phenomenal powerhousezips along with your demanding needs without a cinch like no other processor before it- be it watching videos, downloading web pages or engaging in immersive gaming- and with exceptional picture quality to boot. Withlightning speeds like this, what`s not to like?16GB ROM, 2GB RAMYour Philips mobile phone comes with a 16GB built-in memory, so you can pack more into your life on the go. With such generous storage available for your ever expanding needs, there is more room for your favorite apps, photos and important documents. The 2GB ROM can let you enjoy excellent performance duringplaying games and watching movies in spare time.Android 5.1Empowered by Android, your Philips mobile now comes with a fully customizable mobile platform that is open to a wide range of smart applications and functions. Find your pocket PC, games console and telephone all rolled conveniently into one.SpecificationsNetwork Features4G TD-LTE: 1900(B39), 2300(B40), 2600(B38), 2600(B41)3G: WCDMAGSM band: 900, 1800, 1900, 850 MHz EDGE DimensionsHandset dimensions: 143*71.6*9.8mmHandset weight: 164gHandset color: BlackPicture/DisplayDiagonal screen size (inch): 5 inchStorage MediaBuilt-in memory (RAM): 2GBMaximum memory card capacity: 128 GBBuilt-in memory (ROM): 16GBAccessoriesStandard Package Includes: Battery, Charger,USB data cable, QSG(Quick start guide)Batteries: 5000mAh* MicroSD memory card is not included.* All visuals provided are for reference purposes only.Actual product features such as phone colors andscreenshots may vary from those pictured.* Specifications indicated are based on an initial fullbattery charge tested in a laboratory with Bluetoothand WiFi switched off. Actual performance will dependon network service provider and usage.* Specifications indicated are subject to change withoutprior notice.© 2021 Koninklijke Philips N.V.All Rights reserved.Specifications are subject to change without notice. Trademarks are the property of Koninklijke Philips N.V. or their respective owners.Issue date 2021‑12‑22 Version: 5.0.112 NC: 8670 001 31741 EAN: 69 31555 21321 5。
Wireless Terminal 设备说明书
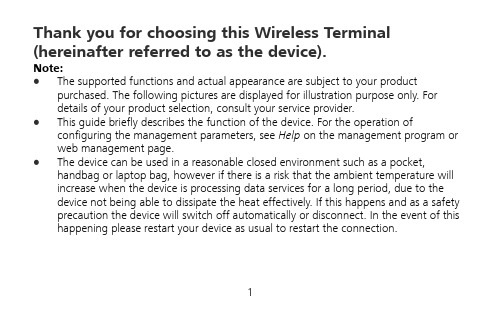
Thank you for choosing this Wireless Terminal (hereinafter referred to as the device).Note:z The supported functions and actual appearance are subject to your product purchased. The following pictures are displayed for illustration purpose only. Fordetails of your product selection, consult your service provider.z This guide briefly describes the function of the device. For the operation of configuring the management parameters, see Help on the management program or web management page.z The device can be used in a reasonable closed environment such as a pocket, handbag or laptop bag, however if there is a risk that the ambient temperature will increase when the device is processing data services for a long period, due to the device not being able to dissipate the heat effectively. If this happens and as a safety precaution the device will switch off automatically or disconnect. In the event of this happening please restart your device as usual to restart the connection.1Get to Know Your Device1. USB connector2. Micro SD card slot3. Battery_button4. Power On/Off5. WiFi/WPS button6. Dialing button7. Signal indicator8. Roam indicator9. WiFi/WPS indicator10. Mode indicator11. Battery indicatorz WiFi: Wireless Fidelityz WPS: WiFi Protected Setupz Steady on and in red: The USIM/SIM card does not exist or the PIN code is not verified or the signal is inexistent.z Steady on and in yellow: The signal strength is weak.z Steady on and in green: The signal strength is strong.z Off: The device is not in the roaming state.z Steady on and in red: The device is in the roaming state.z Off: The WiFi and WPS are disabled.z Steady on and in blue: The WiFi is enabled.z Fast Blinking in blue: The WPS is enabled.z Off: The network service is inexistent.z Fast blinking in green: dialing up.z Blinking in green: 2G network registered.z Steady on and in green: 2G data service connected.z Blinking in blue: 3G network registered.z Steady on and in blue: 3G data service connected.z Fast blinking in red: The battery power level is very low and must be charged immediately; otherwise the device will be powered off.z Steady on and in red: The battery power level is weak.z Steady on and in green: The battery power level is enough.z Blinking: The battery is being charged. If the indicator is in red, thebattery level is too low to power on the device. When the indicatorturns green, you can power on the device.2 Prepare the DeviceInstall the USIM/SIM Card and BatteryPosition the card at the card slot entrance, making sure it is facing the same way as show in the diagram, with the notched corner at the top left. Then slide in.Power on the DevicePress and hold until the indicators become lightened; the device is powered on.Note: Press and hold until the indicators areoff; the device is powered off.WiFiStep1. Establish the WiFi Connection (Take PCfor Example)1. Select Start > Control Panel > NetworkConnection.Note: To set up a WiFi connection, the PCmust be configured with the wirelessnetwork adapter. If the wireless networkconnection is displayed, the wireless networkadapter is available. Otherwise, you shouldcheck your wireless network adapter.2. Click View available Wireless Networks to display the wireless network connection list.SSID is the same as that of the device, andthen click .Note:z If the encryption parameter is set for thedevice, the Wireless Network Connectiondialog box is displayed and requiresz The SSID and key label is attached onthe device.Wait for a while. The wireless connection icon displays in the status area in the lower right corner of the screen. Then, your PC can automatically connect to the device.Step2. Access the InternetBy default, the device automatically dials up to access the Internet. You can directly use the Internet service.If the Internet service does not respond, you can access the Internet using the dialingbutton manually.Press and hold until is blinking, theconnection is set up successfully. Then you can use theInternet service.Note: Press and hold until is off, the connection is tore down.4How to Install the Management ProgramThe procedure for installing themanagement program depends on theoperating system installed on your PC. Thefollowing section takes Windows XP as anexample.1. Power on the device.2. Connect the device and PC with the compatible data cable.3. The OS (Operating System) automatically detects and recognizes new hardware andstarts the installation wizard.Note: If the auto-run program does not respond, find the installing file in the driver path. Then double-click the installing file to run the program.4. Follow the prompts of the installation wizard.5. After the program is installed, the shortcut icon of the program is displayed on thedesktop.6. After the device is installed, the program is launched automatically. Then every timethe device is connected to the PC with the compatible data cable, the program is launched automatically.Note: You can also double-click the shortcut icon on the desktop to launch the program. 5How to Access the Web Management Page1. Start the Internet browser and enter http://192.168.1.1 in the address bar.2. Enter the password, and then click Login.z Admin: This user type is authorized to view and change configurations. The default password is admin.Note: If the page is unavailable while the device is being connected with PC through the compatible data cable, launch the management program and then access the web page.6 Everyday UseCharging the BatteryNote: If you have not used the battery for a long time,please recharge it first.Method 1: Using the chargerCaution:z Use the compatible charger delivered only by the manufacturer with this device model.Using charger of other device model, other manufacturers or vendors may invalidate any approval or warranty applicable to the device, result in the non-operation of the device, and cause danger.z Charger is an optional accessory. If the charger is not provided in the package, you can contact your service provider to buy one yourself.Method 2: Connecting to a PC for charging1. Power off the device.2. Connect the device and PC with the compatible data cable.Note: To ensure that the battery has sufficient power to provide the data service longer, it is recommended that you do not power on the device until the charging is finished.If the device is powered on, the management program is launched automatically and the data service is started. Now, the charging is stopped.Saving Power modeIf the device has not been carried out any operations for 15 seconds, the indicators are off. If the device has not been accessed for 10 minutes by default, the device changes to the deep sleep state. In this state, you can press any key to activate the device. Now the indicators become lightened.When the device is in the deep sleep state, the WiFi isautomatically disabled.Enabling/Disabling the WiFiz Press and hold until is steady on and in blue, the WiFi is enabled.z Press and hold until is off, the WiFi is disabled.Mode of Accessing the InternetAfter you establish the WiFi Connection successfully, you can access the Internet using the following modes.Mode OperationsManual 1. Access the Internet using the dialing button manually. For details,see the chapter of “Step2. Access the Internet”.Note:You can also launch the management program or web page toconnect to or disconnect from the network following the prompts.2. Wait for a while. If you are notified that the connection issuccessful, you can use the Internet service.On Demand After the device is powered on, it can automatically connect to theInternet when data transmission is required. If data transmission is notperformed over a period of time, the device automatically tears downthe Internet connection.Auto After the device is powered on, it can automatically connect to theInternet no matter whether data transmission is required.Note:z The dialing button dose not work in the Auto or On Demand mode.z You can launch the web management page to select the mode of accessing the Internet.Establishing the WPS ConnectionIf the WiFi Clients connected with the device support the WPS, the device can automatically generate a network key without manually entering. The operation steps of WPS-PBC (Push button configuration) are as follows.1. Power on the device.2. Start the Clients connected with the device.3. Enable the WPS of the device.Note: After the WiFi is enabled, press and hold . When becomes off first and then fast blinking in blue, the WPS of the device is enabled.4. Enable the WPS of the Clients.Note: For the WiFi operations of the Clients see the Clients’ user guide.The procedure for establishing a WiFi connection depends on the operating system installed on your WiFi Clients. The aforesaid section takes a WiFi PC as an example. For other Clients, you need to configure them asrequired.Micro SD card1. Remove the rubber cap from the Micro SDcard slot. Then insert the Micro SD card intothe slot.2. After inserting the Micro SD card completely, replace the rubber cap.Note:z Micro SD card is an optional accessory. If the Micro SD card is not provided in the package, you can buy one yourself.z To remove the Micro SD card, open the rubber cap and press the Micro SD card gently.Now the Micro SD card will pop up automatically. Then take it out.z Do not remove the card when it is being used. Removing the card during an operation may damage the card as well as the device, and data stored on the card may becorrupted.Restoring the Factory DefaultsIf you need to reconstruct the network or you forget the changes of some parameters, you can choose to restore factory defaults and reconfigure the device.Press and hold and at the same time until all the indicators are off, you restore the factory defaults successfully.Note: After this operation, all personal configuration settings are deleted and allweb-based management settings and parameters will be restored to their default values. Friendly TipsIf you cannot ensure that the device is normal, you can try these following ways to solve: z See Help on the management program or web page.z Restart the device.z Restore the factory defaults.z Contact your service provider.Version: V100R001_03 Part Number: 31010AMM。
韩国Samsung电子CPX系列电子终端设备说明书
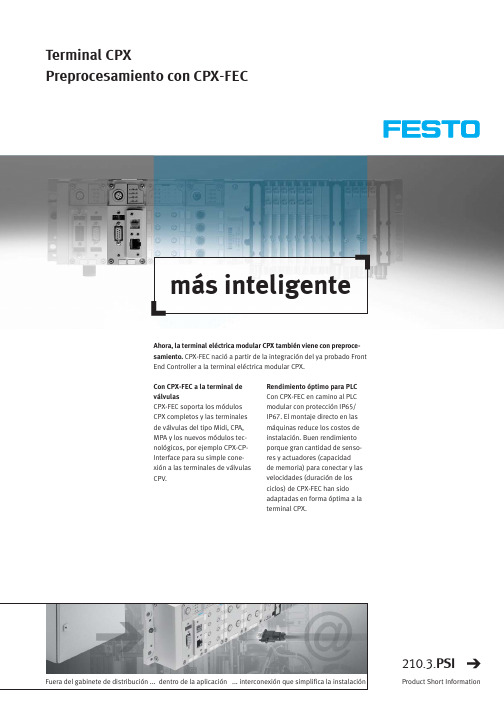
Terminal CPXPreprocesamiento con CPX-FECmás inteligenteRendimiento óptimo para PLC Con CPX-FEC en camino al PLC modular con protección IP65/IP67. El montaje directo en las máquinas reduce los costos de instalación. Buen rendimiento porque gran cantidad de senso-res y actuadores (capacidad de memoria) para conectar y las velocidades (duración de los ciclos) de CPX-FEC han sido adaptadas en forma óptima a la terminal CPX.Con CPX-FEC a la terminal de válvulasCPX-FEC soporta los módulos CPX completos y las terminales de válvulas del tipo Midi, CPA,MPA y los nuevos módulos tec-nológicos, por ejemplo CPX-CP-Interface para su simple cone-xión a las terminales de válvulas CPV.Ahora, la terminal eléctrica modular CPX también viene con preproce-samiento.CPX-FEC nació a partir de la integración del ya probado FrontEnd Controller a la terminal eléctrica modular CPX.Fuera del gabinete de distribución ... dentro de la aplicación ... interconexión que simplifica la instalación210.3.PSIProduct Short InformationFesto AG &Co. KGRuiter Strasse 8273734 EsslingenInternet Tel. ++49 (0)711 347-0 Fax ++49 (0)711 347-2144E-mail service_international@011204R e s e r v a d o e l d e r e c h o d e m o d i f i c a c i ónTerminal CPX con control integrado –CPX-FECCon CPX-FEC en combinación con la plataforma Terminal CPX es posible implementar lossiguientes conceptos básicos de control:•Uso aislado como Front End Controller o terminal de válvu-las programable para el monta-je directo en máquina.•Bus de campo Remote-Control-ler (combinación con el nodo de bus de campo para Interbus,Profibus-DP , CANopen, Device-Net o CC-Link) como unidad de preprocesamiento para subsis-temas descentralizados e inde-pendientes.•Remote Controller Ethernet Arquitectura de controlDenominación CPX-FEC-1-IEClase de protección IP65/IP67Elemento de indicación 4 x LED (expecíficas para CPX) 4 x LED para FEC y Ethernet Elementos de control Interruptor DIL para tipos de modos operativosInterruptor giratorio para RUN/STOP y selección de programaInterface/conexiónInterface serial (Sub-D, RS232) para la conexión de PC, para programación y unidades de indicación y control, por ejemplo FED Front End Display Ethernet 10/100 BaseT (RJ45) para conectar a la redInterface de servicio (M12) para conexión a Handheld CPX-MMI Capacidad de memoria Aprox. 250 kByte programa de usuario FST Aprox. 550 kByte para aplicaciones web Duración del ciclo1 ...2 ms para 1k instrucciónSoftware de programación Lista de indicaciones FST 4 y esquema eléctricoEthernetWeb-Server (Homepage), SMTP (Email), TFTP (File-Transfer) Modbus/TCP (transferencia de datos de E/S en entorno de automatización Schneider)EasyIP (transferencia de datos de E/S en entorno Festo)Ampliación del sistema Periferia CPX completaEl uso de CPX-FEC es ventajoso en las siguientes aplicaciones: •puestos de trabajo manuales independientes,•subsistemas encadenados,independientes,•automatización con tecnología IT.En principio, la terminal CPX-FEC puede utilizarse en todo el mer-cado de la automatización, la pro-ducción y, en parte, en la industria de procesos (en la cual hay deman-da de soluciones de preproce-samiento, especialmente encad enadas con Modbus/TCP).。
(整理)PIMU 配电终端产品说明书.
PIMU2000配电终端产品说明书V2.0浙江智拓智能技术有限公司2012-02目录1.概述 (3)1.1.概述 (3)1.2.硬件结构 (3)2.模件功能介绍 (5)2.1.模件类型和装置配置图 (5)2.2.CPU模件 (5)2.3.DSP模件 (7)2.4.显示模件 (9)2.5.电源模件 (10)2.6.母线模件 (10)2.7.模拟量输入接口模件1(YC板) (11)2.8.模拟量输入接口模件2(YC板) (11)2.9.信号量输入接口模件(YX板) (11)2.10.开关量输出接口模件(YK板) (12)2.11.CPU模件 (12)2.12.DSP模件 (14)1.3.显示模件:M404-LCD (15)2.13.电源模件:M400-PWR (16)2.14.模拟量输入接口模件(YC板) (17)2.15.信号量输入接口模件(YX板) (19)2.16.开关量输出接口模件(YK板):M400-DO (20)1.概述1.1. 概述PIMU2000配电终端采用模块化设计,能够完成对配电开关的信息采集和控制;完成配电线路的遥测采集;实现配网线路故障检测;通过远程通信通道,如光纤、电缆、载波、GPRS/CDMA等,将信息传送至配电自动化系统子站或主站,同时接收来自子站或主站的控制命令,对配电开关进行遥控操作,从而实现对配电网的实时监控、故障识别故障隔离、网络重构等,减少配电网地停电时间,提高配网的供电可靠性。
1.2. 硬件结构(1) PIMU2000配电终端一般配置测控单元:交采、开入、开出、通讯、显示、存储等功能。
机柜:各地区要求不同机柜结构也不同。
电池充放电管理模块:各地区要求不同,型号也不同。
备用电池:各地区要求不同,型号也不同。
远程通讯单元:一般由用户根据情况配置,要求提供电源、通讯及安装位置,GPRS方式时由厂家配备。
双路电源切换器:两路主电源输入,切换输出一路至电池充放电管理模块,同时产生24V直流电源至远程通讯装置其它辅助元件,如端子、空气开关、压板、连接电缆等(2) PIMU2000配电终端测控单元一般配置电源模件:产生终端其它功能模件需要的DC3.3V、DC5V、DC12V、-DC12V、DC24V电源;同时集成了24路YX输入。
五年超长待机GPS定位器
声明本手册可能包含技术上不准确的地方或印刷错误。
本手册的内容将做不定期的更新,恕不另行通知;更新的内容将会在本手册的新版本中加入。
本公司随时会改进或更新手册中描述的产品或程序。
若存在手册中对产品的描述与实物不符,一律以实物为准。
本公司拥有本手册的最终解释权。
目录第一章MT06 图片 (6)第二章MT06 特色 (7)第三章MT06 参数 (8)第四章MT06 功能 (9)第五章MT06 安装 (10)第一章MT06 概述1.1 MT06 简述MT06为特种定位产品,产品无任何外部连接,因此,可以安装在任何的移动目标物体上,外观小巧,分普通结构和带强磁结构两种,强磁结构带脱落报警装置。
内置超级锂电池,可一次性持续工作三年以上。
工作温度更是可以达到-25℃~65℃。
电池自放电25℃下存放1年,小于1%。
支持GPS定位、AGPS定位、基站定位等。
产品通讯支持:GSM和GPRS方式。
产品适用于各移动目标领域。
1.2 MT06 外观第二章MT06 特色(超长三年待机)1无任何连接线,安装方便。
2、内置大容量一次性超级锂电池,具备超低自放率及极宽的温度适应性。
普通锂电池一般只能在0℃~50℃下工作。
3、超长工作时间,在24小时传输一条数据的设置下,理论工作时间可达到1000 天以上。
无需频繁更换电池。
4 、超低功耗,产品休眠状态下的工作电流可以降低到0.03mA 以下,确保产品可以长时间工作。
5、同类性能规格的产品,体积最小,便于隐藏安装;6、内置强磁的版本(MT06C),产品底部内置5个钕铁硼超强永磁铁,可以使产品牢牢吸附于金属表面,安装更便捷隐秘。
7、内置强磁的版本(MT06C),具备拆机报警功能。
8、多种定位模式:GPS、AGPS 、基站定位。
第四章MT06 功能4.1 【基本功能】4.1.1定位监控终端出厂默认,每隔24小时上传一条位置信息;位置信息包含:定位状态、经纬度、GSM信号强度、GPS卫星数、电池电压等信息。
终端产品说明书(综合)
终端产品说明书(综合)●实现一台主计算机让32个用户独立、同时操作和使用●节省80%的软、硬件费用●安装简单、一按既用、免升级、易维护●全功能、高安全、便于管理●无噪音、保护环境、节省98%的电力费用、减少占用空间总目录一、PCLink S400产品说明…………………………………………………………二、PCLink V500\510产品说明……………………………………………………PCLink S400 产品说明目录1.PCLINK S400应用范围 (2)2. PCLINK S400概述及功能 (2)3. PCLINK S400解决方案所需设备 (3)4. PCLINK S400网络拓扑图 (3)5. PCLINK S400产品优势 (4)6. PCLINK S400安装流程及部分设置 (5)7. PCLINK S400打印及USB存储设备解决方案 (9)8. PCLINK S400售后服务政策 (26)一、PCLink S400应用范围家庭,大、中、小型商业公司或企业部门或内部生产线,驻外机构,出国留学机构,培训机构,房地产中介公司,小型服务窗口,政府机关,学校等用户。
二、PCLink S400概述及功能◎概述S400终端机是基于Windows 2000/XP/2003下的Windows终端设备。
德国原装进口,它是市场上第一台不含CPU及硬盘的Windows多用户终端设备,可以最大的发挥Windows计算机的潜能。
它设计小巧精致,无需升级,安装简便,易于操作,无须主机,一按即用。
利用S400终端机解决方案,您可以让多位用户(最大32个用户)独立、同时运用一台主计算机的软、硬件资源和所有外部设备资源,即实现一台电脑主机,拖(变/转)多个S400终端机办公终端。
◎功能每个S400终端机都可以同时、独立的进行网上冲浪、网络游戏及ASP、Instant Messenger(即时通信)、Private E-Mail(私人电子邮件)等互联网应用,还可以用于Office套装软件、半多媒体等任何Windows应用软件,而无需要复杂又昂贵的标准计算机。
PCS-222C-I_X_说明书_国内中文_国内标准版_X_R1.00_(ZL_ZNKZ0200.1108)
PCS-222C-I 智能终端
前言.................................................................................................................................................... i 目录.................................................................................................................................................. iii 第 1 章 概述...................................................................................................................................... 1
技术支持,请联系: 电话:025-52107703、8008289967、4008289967 传真:025-52100770 或登陆网站:/ser_sup
我们定期仔细检查本文档中的内容,在后续版本中会有必要的修正。 资料相关,请联系:
但不可避免会有一些错误之处,欢迎提出改进的意见。
Copyright © 2011 NR 南京南瑞继保电气有限公司版权所有
我们对本文档及其中的内容具有全部的知识产权。除非特别授权,禁 止复制或向第三方分发。凡侵犯本公司版权等知识产权的,本公司必 依法追究其法律责任。
购买产品,请联系: 电话:025-87178911,传真: 025-52100511、025-52100512 电子信箱:market@
I-240W-Q_I-240E-Q用户手册

3.1 产品简介 .................................................................................... 3 3.2 产品特点 .................................................................................... 3 3.3 产品外观 .................................................................................... 4 3.4 指示灯说明 ................................................................................ 4 3.5 接口说明 .................................................................................... 6 3.6 缺省设置 .................................................................................... 7
GPON 终端用户手册
5.7 操作,管理和维护功能........................................................... 17
6 设备应用模式 .................................................................................. 19
- 1、下载文档前请自行甄别文档内容的完整性,平台不提供额外的编辑、内容补充、找答案等附加服务。
- 2、"仅部分预览"的文档,不可在线预览部分如存在完整性等问题,可反馈申请退款(可完整预览的文档不适用该条件!)。
- 3、如文档侵犯您的权益,请联系客服反馈,我们会尽快为您处理(人工客服工作时间:9:00-18:30)。
欢迎使用W50车载智能无线终端!
W50车载智能无线终端是基本GSM/GPRS/CDMA方式的GPS移动通信终端。
为了您更好地使用车载智能无线终端,使用前请务必阅读本使用手册
特别提醒:
●为了保证您能更好地享受本公司的服务,请务必保护好
产品外部的编号标签。
●只有按照规定的程序操作,才能最大限度地发挥产品功
能,保证您的车辆高效安全运行。
●本产品依托GSM/GPRS/CDMA移动通信网络运行,在其网络
覆盖范围内方能保证产品有效服务。
●本终端适可以采用SMS方式和GPRS方式传输数据。
W50产品实物图
82.3(L)*57.3(W)*21.3(H)mm
一、技术指标
名称参数
工作电压DC:5V~6V
工作电流60~80mA@3V
带机电流小于3uA
定位方式GPS定位/基站定位模式
定位误差<10m(GPS定位)/<200m(基站定位)
通信网络GPRS
通讯方式TCP
尺寸82.3(L)*57.3(W)*21.3(H)mm
工作温度-20℃~+70℃
工作湿度5%~95%
存储温度-40℃~+85℃
工作时间高能量锂锰电池(1500mah),上报1次/天/3
年
三、功能说明
功能明细功能说明
定时位置回传上报间隔小于等于1分钟,则设备处于连续工作状态。
间隔时间可在10分钟至24小时内以10分钟为单位设
定。
发。
送信息可达1000多条
间隔时间可在1天至15天,以1天为单位可选。
支持基站/GPS定位可选基站定位优先,GPS定位优先或者自动模式(终端
在2分钟内无法使用GPS定位则自动采用基站定位。
终
端缺省为自动模式。
电量显示电量百分比显示,电压值显示,已发送信息条数显示。
免接接安装不需要外接任何线路,带强磁
数据发送说明:
1.终端安装好电池后,GPS模块开始收搜信号,在GPS定位后GSM
模块开始工作,上线后发送1条位置数据后,立刻进入休眠。
等待设定的时间间隔到,再启动终端定位,上报数据。
2.如3分钟内无定位(GPS或基站),则GPS模块立刻进入休眠,
并在1小时后再尝试开电,定位并上报信息,如果正常定位,上
报则回复1的工作模式。
3.如果2分钟内无法注册通讯网络,或者确认处于通讯盲区,则会
自动进入休眠,等待1小时候再次开电尝试定位,并上报数据。
如果正常,则回复1的工作模式。
四、产品安装流程
1、设备安装
(1)检查设备
查看设备外观是否良好,相关配件是否齐全。
(2)安装SIM卡
打开设备将SIM卡放入卡座。
请避免用力过度损坏卡座,且不要在设备通电的状态进行插拔SIM卡的操作,请确保SIM卡具备上网功能。
(3)选择终端安装位置要求
A.防水:应选择不易进水的位置确保持终端的干燥,要注意远离空调出风口以防在温差变化时,有冷凝水积聚在终端内部严重影响产品的使用寿命。
B.防震:终端不能悬空安装在长期振动较大位置。
C.防干扰:终端应远离车内影音和对讲等电子设备,防止辐射干扰。
D.设备中间凸出那面至少保持50公分距离内没有大面积金属屏蔽层。
五、维护常识
1、当环境温度超过终端正常工作温度范围时,建议断电。
2、当车辆处于地下停车场、隧道或车库时,将会影响定位信号。
并可能出现通讯网络信号盲区导致设备无法监控;当车辆驶出以上区域后,设备将自动恢复正常工作。
3、遇到异常情况,请不要自行修理。
因连接非原装附件或拔掉各部件之间的连接造成的损坏,厂商不承担责任。
