SATO CG408TT条码打印机彩页
KODAK VERISET T400 T800 板式打印机说明说明书

KODAKStable plate making, day after dayExceptional quality and valueThe KODAK VERISET T400/T800 Platesetter delivers the stability and reliability of Kodak’s thermal CTP technology at exceptional value, An open CTP system, the VERISET Platesetter is compatible with a wide range of thermal plates. This robust external-drum thermal CTP device has been specifically designed for the demanding needs of general commercial and publication printers. With a small footprint that minimizes space requirements, the VERISET Platesetter offers reliable plate making of up to 22 8-page plates per hour.Superior imaging technologyVERISET Platesetters feature Kodak’s TH5 thermal head, which delivers higher quality than the Gaussian technology used in other vendors’ CTP devices. The TH5 head images a more precise, accurate dot, leading to higher tonal stability and exposure uniformity. With no moving parts, the TH5 thermal head also delivers outstanding robustness and is simple to service and maintain.Maximum plate compatibilityNew Lens Contamination Avoidance (LCA) technology enables compatibility with low to medium debris-generating plates, so printers can reduce plate costs without needing to add a debris removal system. The LCA keeps debris from the imaging laser through an active air curtain and a removable window that is easily cleaned by the operator.App for remote monitoringThe optional KODAK Mobile CTP Control App lets you monitor your VERISET T400/T800 Platesetter remotely with your Android or IOS device. Know instantly if one of your CTP devices needs attention, even if you are out of the room or off site, so you can get back to making plates quickly.Reduce your environmental footprintThe VERISET Platesetter has a cooling system that reduces power consumption to only 380 watts while imaging, a savings of up to 95% compared to some competitor CTP devices. Also, because the unique LCA technology protects the lens of the imaging laser from debris, there’s no need to add a debris removal system, which consumes additional power.Autoloader (optional): Automated plate loading and unloading of up to 40 plates without slip sheets (0.3 mm); optional automatic plate rotation.Auto Unload (optional): Semi-automatic plateloading and automatic unloading to plate processoror stacker; optional automatic plate rotation.Standard: Semi-automaticplate loading and unloading.Semi-Automatic (SA) Auto Unload (AU)AutoloaderEastman Kodak Company 343 State Street Rochester, NY 14650 USA +1-866-563-2533 in North America. Produced using Kodak Technology. ©Kodak, 2020. Kodak, Prinergy, Staccato, Veriset and the Kodak Logo are trademarks of Kodak. Subject to technical change without notice./GO/CTPKODAK VERISETT400/T800 PLATESETTERThe platesetter is a Class 1 Laser Product and fully complies with EN60825-1 and US Federal Regulations 21 CFR 1040.10 - CDRH.1. Kodak does not recommend use of untrimmed plates with KODAK Platesetters due to inaccurate and faulty edge detection caused by inaccurate plate edge coating.2. Imaging speed and throughput is dependent on media sensitivity. All values are for media sensitivity of 120mJ/cm23. Tested with KODAK Workflow Solutions. For additional information about the test conditions, please consult your Kodak representative.4. Standard plate gauge is 0.15 to 0.3 mm (0.006 to 0.012 in). For plate gauges 0.15 to 0.2 mm (0.006 to 0.08 in) there may be some differences in min and max. plate sizes. For more information, please consult your Kodak representative.5. 7 Dual Plate Loading supported for plate sizes up to 450 mm along the drum.6. Minimum plate size around drum is 383 mm with the plate rotation option, and minimum plate size for manual bypass is 305 x 215 mm.。
CZ408TT产品资料介绍
货架标签 折扣处理标 签
游乐场 展会 影剧院等入 场券
7
医疗行业 应用
① 医生开设处方 薬剤部 ② 药剂师根据处方调配药物 ③ 扫描处方笺上的患者ID 条码,打印出带有患者ID条 码的标签,贴在输液袋等的 上面,送至病房。
医師 患者ID 输液袋 打印患者标签
住院
患者用腕带
④ 护士对照确认
打印腕带的条码打印机
24
CZ4
抗菌 打印头自检 最大速度 YES YES 152mm / 秒(6’) NO NO
Argox-2140
102mm / 秒(4’)
内存 外部接口
重量 碳带最长 中文字体
Flash: 8MB Flash:4MB SDRAM: 8MB SDRAM: 8MB USB2.0+IEEE128 RS-232, 4, IEEE1284,USB USB2.0+RS-232C , USB2.0+LAN 1.9kg 2.1Kg
8
物流行业 应用
•通过印有条形码的标签,可以将货物信息化,实现货物在物 流配送中的追溯管理,达到信息准确化,提高工作效率!
9
领 零售行业 应用 应用
• 适合打印货架标签、价格标签标签,方便物品销售及 管理。
10
票 务
・游乐场、展会,影剧院等入场券,每秒6英寸高速打 印,更加提高工作效率,帮助管理。
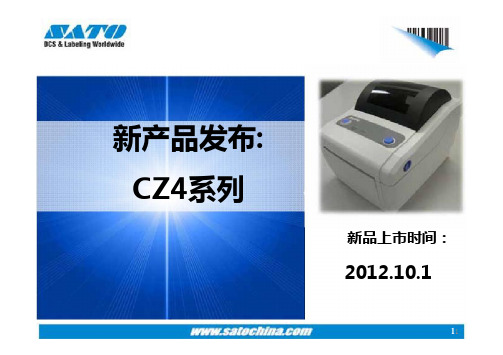
新产品发布: CZ4系列
新品上市时间:
2012.10.1
11
目录
• 产品特性
• 行业应用
• Why CZ4?
• 竞争对手分析
2
产品特性
3
CZ4系列 基本参数
/C • Z412 • 型号:CZ408• 热转印 • 打印方式:热敏/• /203• dpi• ,4ips• /305• dpi• • 打印速度:6ips• X• P400mm • 打印范围:W104mm• • 内存: 8MB• Flash/• 8MB• SDRAM 字符集:最新简体中文GB18030 +• RS232,• USB• • +• LAN,• USB• +• IEEE1284 • 外部接口: USB• • 外形尺寸/重量:(W179mmXD238mmXH173mm)/1.9Kg • 选配件:切刀,剥离器,键盘,时钟日历
TSC TTP-247条码打印机
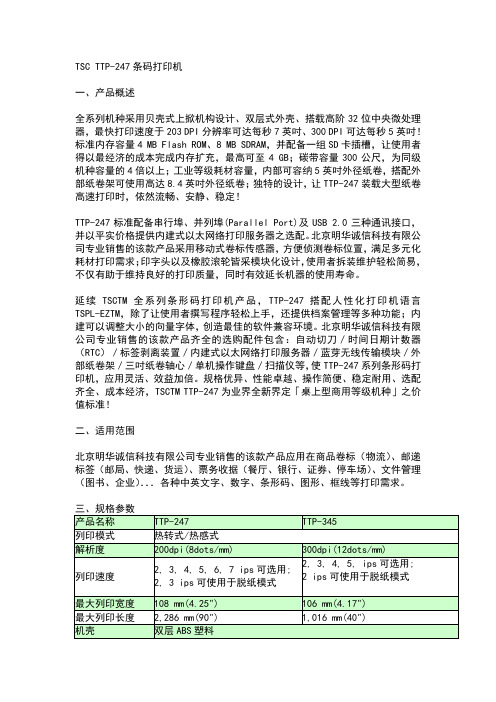
TSC TTP-247条码打印机一、产品概述全系列机种采用贝壳式上掀机构设计、双层式外壳、搭载高阶32位中央微处理器,最快打印速度于203 DPI分辨率可达每秒7英吋、300 DPI可达每秒5英吋!标准内存容量4 MB Flash ROM、8 MB SDRAM,并配备一组SD卡插槽,让使用者得以最经济的成本完成内存扩充,最高可至4 GB;碳带容量300公尺,为同级机种容量的4倍以上;工业等级耗材容量,内部可容纳5英吋外径纸卷,搭配外部纸卷架可使用高达8.4英吋外径纸卷;独特的设计,让TTP-247装载大型纸卷高速打印时,依然流畅、安静、稳定!TTP-247标准配备串行埠、并列埠(Parallel Port)及USB 2.0三种通讯接口,并以平实价格提供内建式以太网络打印服务器之选配。
北京明华诚信科技有限公司专业销售的该款产品采用移动式卷标传感器,方便侦测卷标位置,满足多元化耗材打印需求;印字头以及橡胶滚轮皆采模块化设计,使用者拆装维护轻松简易,不仅有助于维持良好的打印质量,同时有效延长机器的使用寿命。
延续TSCTM全系列条形码打印机产品,TTP-247搭配人性化打印机语言TSPL-EZTM,除了让使用者撰写程序轻松上手,还提供档案管理等多种功能;内建可以调整大小的向量字体,创造最佳的软件兼容环境。
北京明华诚信科技有限公司专业销售的该款产品齐全的选购配件包含:自动切刀/时间日期计数器(RTC)/标签剥离装置/内建式以太网络打印服务器/蓝芽无线传输模块/外部纸卷架/三吋纸卷轴心/单机操作键盘/扫描仪等,使TTP-247系列条形码打印机,应用灵活、效益加倍。
规格优异、性能卓越、操作简便、稳定耐用、选配齐全、成本经济,TSCTM TTP-247为业界全新界定「桌上型商用等级机种」之价值标准!二、适用范围北京明华诚信科技有限公司专业销售的该款产品应用在商品卷标(物流)、邮递标签(邮局、快递、货运)、票务收据(餐厅、银行、证券、停车场)、文件管理(图书、企业)...各种中英文字、数字、条形码、图形、框线等打印需求。
T4 系列使用手册说明书
I T4 系列使用手册
Ver:1.0
5.2.4 测试打印...........................................................................................44 5.2.5 内存...................................................................................................44 5.2.6 表格...................................................................................................44 5.2.7 警告讯息...........................................................................................45 5.2.8 打印机状态.......................................................................................46 6. 故障排除 ................................................................................................................47 6.1 液晶屏幕错误讯息......................................................................................47 7. 規格 ........................................................................................................................48 7.1 T4+系列規格................................................................................................48 7.2 通用序列总线(USB)接脚图.......................................................................50 7.3 串行端口脚位图..........................................................................................51 7.4 以太网络脚位图..........................................................................................51
T10标签打印机用户手册说明书

用户手册声明:l 有关本使用手册的内容,我司将保留因设备升级而变化的权利。
l 我司将不对您未按使用手册要求操作而引起的任何后果负责。
l 本使用手册所引用的其他公司标记或商标均为其他公司所有。
l如您想了解有关本设备或我司的相关信息可访问 。
公众号APP下载包装清单一各机型配置,以上述“包装清单”为准。
开箱时请您确认箱内的以上物品是否完好,如有物品损坏或缺失,请您联系销售商为您解决。
本产品不标配电源适配器插头,用户使用标准充电插头即可。
标签机1台电源线1根(合格证/保修卡)1张备注:机器使用介绍电源按键/打印按键/双击退纸按键绿色指示灯指示灯状态提示音说明绿色长亮无打印中绿色快速闪烁3次提示音两声蓝牙连接成功/蓝牙断开绿色长亮每3S提示一声电量不足时绿色1S亮,1S灭异常提示音两次出纸错误、耗材用完等红色常亮电源接入提示一声电源接入/充电中红色/绿色亮点击一次提示一声仅按键的提示音红色电量指示灯使用说明:1、关机状态下,长按电源/打印按键2秒,指示灯绿色闪烁一次后常亮绿色,标签机进入开机工作状态。
2、待机状态下,单击电源按键可实现重复上一次打印功能,双击电源按键可实现退纸功能。
3、待机状态下,连续点击电源按键3次,标签机打印APP连接二维码一张(仅限安卓系统在不开启定位情况下可扫描快速连接蓝牙)。
4、长按电源按键2秒,指示灯绿色闪烁一次后熄灭,标签机进入关机状态。
APP连接演示iPhone 版Android 版1、扫码下载APP2、 确认手机蓝牙功能处于开启状态3、打开APP,点击 右上角“未连接”手机未开启定位时,连续点击电源/打印按键3次,机器自动打印二维码 标签,用APP扫码与机器连接蓝牙。
Android 版下载时建议从下载商城或浏览器直接扫描二维码或搜索“硕方打印”。
4、 找到对应设备型号 点击连接注:设备与标签纸向下滑动开启耗材仓耗材仓开启示意正确装入标签纸关闭耗材仓1、标签纸有档纸一侧在下方;2、耗材需拉至机器外部,漏出2-3mm。
印刷配套设备

中国标签行业采购大全China Label Industry Purchasing Collection辽宁正宏豹驰数码科技有限公司.Digit@nPantheran "B 350涂布机Panthera ®TB 350是辽宁正宏豹驰数码科技有限公 司专门为配套彩色喷墨印刷机开发的材料预涂设备。
该 设备性价比高,涂布质量稳定,速度快,是配套彩色喷 墨印刷的最佳选择。
YTP -480R 4C +1全伺服不停机收放卷医药专用标签印刷机YTP -480R 4C +1全伺服不停机收放卷医药专用标 签印刷机专用于输液袋、血袋等特殊医药专用标签印 刷,集全伺服控制、不停机收放料、双收双放、修边分 条除尘等工艺于一体,可根据客户产品需求进行定制。
东莞市源铁印刷机械有限公司SWP -460-4C +1-CNC 全伺服多色多功能丝网印刷机SWP -460-4C +卜CNC 全伺服多色多功能丝网印 刷机专用于铝塑、全塑软管片材、电子保护膜、高端酒 标、高端烟包、手机电池阻燃材料等各种特殊工艺、特 殊材料标签印刷。
印刷配套设备^北京欣健隆科技有限公司洚崦集因欣健隆H L JP -850H 型高速卷对卷喷墨印刷走纸机欣健隆HLJP -850H 型髙速卷对卷喷墨印刷走纸机 具有稳定、高速、操作简便等诸多特点,带有放卷及复 卷磁粉制动装置,采用全伺服方式张力控制,配有液压 方式纸卷起落机构和高精度纠偏装置,整机采用高强度 铸铁机架。
最大材料宽度为850mm ,最大收放卷直径 为1524mm ,适用于100~350g /m 2的纸张,最高机械速 度为250m /min 。
44标签技术2019.6印刷设备及器材丨产品盘点M膏郎蝴青岛华勋光电科技有限公司…•…华勋智能UV-LED固化系统华勋智能UV-LED固化系统可用于市面上的大多数UV-LED油墨固化,固化效果良好。
其紫外光集中在395nm~405nm较狭窄的范围内,与传统的U V固化光源相比,最多可以降低70%的能耗。
4T200 4T300 系列 桌上型 热感式/热转式 条形码打印机 使用手册说明书
4T200 / 4T300 系列桌上型热感式/热转式条形码打印机使用手册©2016 鼎翰科技股份有限公司本手册和手册中所述的条形码打印机软件和韧体版权均归鼎翰科技股份有限公司所有。
本手册提供购买设备的操作者参考和使用,未经明确的书面许可,不得为了其他目的使用、复制。
所有其他品牌名称、产品名称或商标,利属于其他个别拥有者。
因持续产品的改进,故手册中所述的机种规格、配件、零件、设计及程序内容以实机为主,如有变更,恕不另行通知。
zenpert先擘尽力确保手册内容正确无误,但错误在所难免。
zenpert先擘保留更正任何这类错误的权利,并声明不对因此所造成的后果负责。
EN 55032, Class AEN 55024EN 60950-1This is a class A product. In a domestic environment this product may cause radio interference in which case the user may be required to take adequate measures.FCC part 15B, Class AICES-003, Class AThis equipment has been tested and found to comply with the limits for a Class A digital device, pursuant to Part 15 of the FCC Rules. These limits are designed to provide reasonable protection against harmful interference when the equipment is operated in a commercial environment.This equipment generates, uses, and can radiate radio frequency energy and, if not installed and used in accordance with the manufacturer’s instruction manual, may cause harmful interference with radio communications. Operation of this equipment in a residential area is likely to cause harmful interference, in which case you will be required to correct the interference at your own expense.This Class A digital apparatus complies with Canadian ICES-003.Cet appareil numérique de la classe A est conform à la norme NMB-003 du Canada.This device complies with Part 15 of the FCC Rules. Operation is subject to the following two conditions: (1) This device may cause harmful interference, and (2) this device must accept any interference received, including interference that may cause undesired operation.AS/NZS CISPR 32, Class AGB 4943.1GB 9254, Class AGB 17625.1此为在这种情况下,可能需要用户对干扰采取切实可行的措施。
东芝Toshiba B-SX4T系列条码打印机说明书
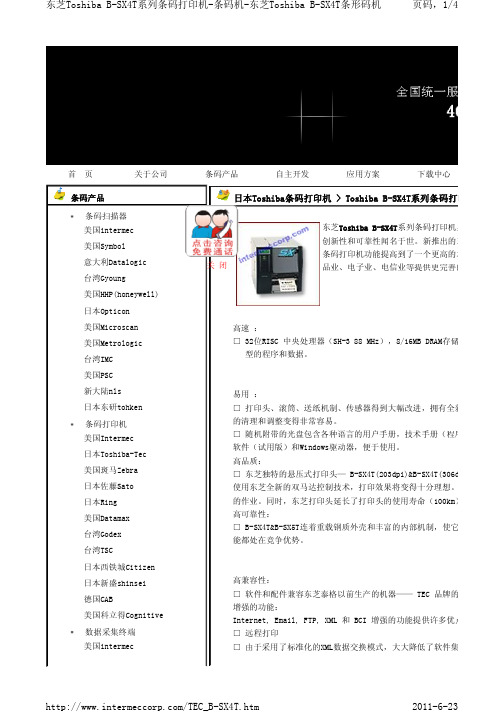
首 页 关于公司 条码产品 自主开发 应用方案 下载中心条码产品 条码扫描器美国intermec 美国Symbol 意大利Datalogic 台湾Gyoung美国HHP(honeywell) 日本Opticon 美国Microscan 美国Metrologic 台湾IMC 美国PSC 新大陆nls 日本东研tohken 条码打印机 美国Intermec 日本Toshiba-Tec 美国斑马Zebra 日本佐藤Sato 日本Ring 美国Datamax台湾Godex台湾TSC日本西铁城Citizen日本新盛shinsei 德国CAB美国科立得Cognitive 数据采集终端 美国intermec日本Toshiba条码打印机 > Toshiba B-SX4T系列条码打印机高速 :□ 32位RISC 中央处理器(SH-3 88 MHz),8/16MB DRAM存储 型的程序和数据。
易用 :□ 打印头、滚筒、送纸机制、传感器得到大幅改进,拥有全新的的清理和调整变得非常容易。
□ 随机附带的光盘包含各种语言的用户手册,技术手册(程序软件(试用版)和Windows驱动器,便于使用。
高品质:□ 东芝独特的悬压式打印头— B-SX4T(203dpi)&B-SX4T(306dpi 使用东芝全新的双马达控制技术,打印效果将变得十分理想。
的作业。
同时,东芝打印头延长了打印头的使用寿命(100km) 高可靠性:□ B-SX4T&B-SX5T连着重载钢质外壳和丰富的内部机制,使它能都处在竞争优势。
高兼容性: □ 软件和配件兼容东芝泰格以前生产的机器—— TEC 品牌的 增强的功能:Internet, Email, FTP, XML 和 BCI 增强的功能提供许多优点□ 远程打印□ 由于采用了标准化的XML数据交换模式,大大降低了软件集成东芝Toshiba B-SX4T 系列条码打印机具有创新性和可靠性闻名于世。
SATO打印机参数和图片1

SATO CL408E 坚固耐用条码打印机SATO 佐藤出品的 CL408E 系列条码打印机中央处理器采用高速32-bit RISC 133MHz 的CPU,配合记忆体大幅度扩充到18MB 及使用IEEE1284资料传输界面,使得列印性能方面达到惊人的速度,使您在列印各式标签、服饰吊牌、洗涤布标、或特殊用途贴纸等工商业运用都能获得最到的效益性,延续了日式设计优良的传统,操作更加简易,在材质上采用一贯的不锈钢外壳和金属内部结构,达到最坚固耐用的程度,也使故障率降到最低,是您自动化上的最佳伴侣。
SATO CL408E 条码打印机详细参数产品品牌: SATO 工业型产品类型: CL408E打印分辨率: 203dpi(8个点/mm) 打印速度: 172mm/秒打印宽度: 104毫米(4英寸)打印长度: 1249MM打印方式: 热转印/热敏方式测纸方式: 反射式/穿透式感测器: 居左,可移动安装标准: FCC Class A, U/L, CSA, CE, TUV, EMC驱动程序: 基于Windows3.X 95/98/NT/2000的打印驱动程序编程语言: SPL标签宽度: 10mm-115mm标签最大直径: 152mm纸轴直径: 75.4mm标签间隙: 2mm-4mm标签厚度: 0.1-0.3mm 标签最大长度: 150m碳带最大长度/卷 :450m 碳带宽度: 40mm-110mm碳带卷轴内径: ID 2〃 core (25 mm) with notch碳带卷轴最大直径:75mm 处理器 : 32 位 RISC 微处理器 133MHz内存:4MB DRAM 16MB Flash ROM接口:标准并口, RS-232串口 使用环境:操作环境:41-104°F(5-40°C)15-85%RH, 无结露状态--------储放环境:0-104°F(-20-40°C)最高90%RH,无结露状态--------耐静电:8kV 印材规范:宽度最小2.2cm ,最宽13.1cm,高度最小0.6cm ,最长35.6cm,间距标签,背黑线,或无记号连续纸 图形支持:SATO Hex / Binary,PCX bitmap 电源:220-240VAC ,50Hz 高*宽*深:长43cm*宽27.1cmx 高32.1cm 重量/结构:13Kg 可选配件: 系列专用切刀, 卷标卷纸器卷标剥离器, PCMCIA 记忆卡扩充模块, Serial/USB/Ethernet 10-100BaseT/Coax/Twinax 接口适合使用场所: 制造业、汽车业、化学工业、制药工业、纺织工业、电子工业、电信业、食品部门、零售分发业、运输业和物流、医疗业、公用事业、政府机构。
POSTEK TX 系列标签打印机 说明书

声明此为A级产品,在生活环境中,该产品可能会造成无线电干扰。
在这种情况下,可能需要用户对其干扰采取切实可行的措施。
商标ARM是Advanced RISC Machines Ltd.的注册商标。
Centronics是Centronics Data Computer Corporation的注册商标。
Microsoft, Windows是Microsoft Corporation的注册商标。
POSTEK是深圳市博思得科技发展有限公司的注册商标。
PS/2是International Business Machines Corporation的注册商标。
版权版权所有2008深圳市博思得科技发展有限公司保留一切版权。
TX系列标签打印机用户手册。
二○○八年九月第一版。
免除责任声明本手册在其出版时,确切地阐述了POSTEK TX系列标签打印机的规格和使用说明。
但是其后生产的打印机的规格以及配置可能会在没有任何通告的情况下改变。
该产品的制造商和经销商对于由本手册和打印机之间存在的差异甚至错误所造成的直接或间接的损失不承担任何责任。
尽管本手册对可能发生的问题进行了尽可能详尽的描述,但是不保证实际使用该打印机的过程中仍有未预见的情况发生。
对于使用该打印机中发生的诸如打印机不工作、打印的内容缺损或不清晰等问题,该产品的制造商和经销商只负责排除该打印机的故障(依照保修卡上的保修条款),而对于其它任何直接或间接的损失包括商业利益损失、业务中断损失、商业信息丢失或其它财务损失等不承担责任。
重要安全事项在没有该产品制造商授权人员指导下,严禁私自拆装这台打印机,否则可能会发生触电、打印机的传动机构伤人或损坏机器零部件的事故。
严禁使用损坏的或破旧的电源线,否则可能会造成触电或引发火灾。
严禁过度弯曲、用力拉扯电源线。
不要在电源线上放置重物。
当拔出电源插头时,要抓住插头部分,不能拉扯电源线部分,否则可能会损伤电源线并引发火灾或触电。
打码机培训资料

SATO打码机培训资料一、产品简介SATO CL408E工业级条码打码机配备了32位133MHZ的微处理器,全部金属结构配置,并配有液晶显示屏,可调整大部分的打卬参数。
两种打印方式,打印速度可达每秒六英寸,打卬范围为104mm X 1249mm,是一款性能卓越的打印机。
二、安装附件打开包装箱,取出配件,装上前面板及并行接口卡,按图示装好标签纸和碳带(内碳和外碳安装不同);关掉计算机的电源,将并口线连在计算机的并口上,将另一端连接在SATO打码机的接口卡上;连接SATO打码机的电源线,就可打开开关,准备打印了。
三、安装驱动程序如同所有的打印机一样,SATO打码机也须安装相应有驱动程序,可用WINDOWS中的添加打码机,浏览等操作寻找对应的目录安装,也可如下操作:将随机所带光盘放入光驱中,稍等片刻,屏幕上将出现如下画面:XAVU CT4XX / Enhanced Series Printer Manual You need to install Acrobat Roader to read t!Hs manual• install Printer DriverDriver DocumentationYou to install Acrobat Reader to read this document► Programming ManualA USB Preparationwnh purchase of USB accesscrlesA LAN Address Setupw.tn purchase ot LAK acoesscricslr>of oil A 按 INSTALL PRINTER DRIVER 选项中的 ENHANCEDSENIES,将出现一系列的安装画面,按NEXT 按扭,选择SATO CT408e,继续按NEXT 键,按提示选择并口一,将该打卬机设置 为默认打印即可。
安装好驱动后,在WINDOWS 中选择SATO 打码机,点右 键按属性,先设置纸张大小,再将纸张旋转180度。
DPtech Scanner1000 系列产品彩页

Scanner1000系列具备如下特点:⏹ 闭环管理流程,提供全方位漏洞管理⏹ 全面精确的Web 安全分析,确保应用层漏洞防护⏹ 自动补丁管理,及时解决潜在风险⏹ 漏洞库自动更新,持续安全防护 信息技术飞速发展,网络应用日益复杂和多元化,利用漏洞攻击的网络安全事件日趋严重,权威机构统计95%以上的攻击事件都利用了未及时修补的漏洞,让用户蒙受巨大的社会、经济损失,漏洞俨然已经成为危害互联网安全的罪魁祸首之一。
因受应用层技术复杂、更新快等因素限制,传统产品主要针对操作系统漏洞进行扫描,针对应用级漏洞,如Web 应用、SSL 加密等漏洞管理效果不佳,并且在漏洞管理上过于单一,不具备漏洞预先通告、定期评估、漏洞自动修补等重要功能,无法从根本上避免攻击产生。
因此,只有从技术本源入手,采用完整、有效和持续的漏洞扫描管理系统才能有效地避免攻击威胁。
DPtech Scanner1000漏洞扫描系统可提供漏洞通告、关联检测、自动修复、资产风险管理、漏洞审计多维度闭环管理功能,通过高性能的多核硬件平台,可实现对网络中各种资产进行全方位、高效的漏洞管理。
DPtech Scanner1000漏洞扫描系统采用“智能关联扫描引擎”技术,通过多种扫描方法关联校验的方式对漏洞进行扫描,且对漏洞特征库进行持续不断的升级,从而确保漏洞判断准确无误。
支持对终端、服务器、路由/交换设备、操作系统(Windows/Linux/Unix )、应用服务等进行漏洞管理,具有覆盖2-7层漏洞检测和自动修补等技术,尤其针对Web 应用系统进行代码级检测,消除XSS 跨站脚本、SQL 注入、网页挂马等漏洞威胁,且支持对SSL 加密应用的漏洞管理。
DPtech Scanner1000 系列产品是目前业界性能最高、漏洞检测最全面、功能最丰富的漏洞扫描系统,能够满足各种应用环境的部署与管理需求,目前已成为漏洞管理的首选产品。
产品概述 产品系列DPtech Scanner1000漏洞扫描系统【 】 产品彩页 DPtech Scanner1000 Scanner1000-MSScanner1000-GS[键入文字]产品规格 产品型号 Scanner1000-MS Scanner1000-GS 可扫描网络资产 终端设备、服务器、路由/交换设备、操作系统(Windows/Linux/Unix )、应用服务、数据库 Web 漏洞扫描Web 服务器检测、插件检测、配置检测、注入攻击漏洞检测、注射攻击漏洞检测、远程文件检索漏洞检测、文件上传检测、FORM 弱口令检测、数据窃取检测、GOOGLE-HACK 检测、中间人攻击检测、Web 2.0 AJAX 注入检测、Cookies 注入检测、弱口令扫描 设备漏洞扫描 SMTP/POP3、FTP 、SNMP 、端口扫描、弱口令扫描 网页木马检测支持各种类型木马检测、木马分析、木马溯源 扫描方式 定时扫描、手动扫描 扫描对象 支持多个域名/IP 设置扫描对象、支持多个扫描对象扫描、支持SSL 扫描 网络爬虫扫描深度可设、预定义用户登录参数、提供交互式用户登录参数设置、支持并发扫描 漏洞修复 补丁管理、与微软WSUS 联动系统管理 ICP 备案提醒 被扫描的网站ICP 备案是否到期,以及到期提醒支持HTTPS 支持HTTPS 网站的漏洞扫描多服务器支持支持多服务器、多端口扫描 报表分析 扫描结果对比、漏洞报告、统计分析、报表导出。
立象科技桌上型条码打印机系列使用手册 CP-2140EX CP-3140EX GT-820

CP-EX / GT桌上型条码打印机系列使用手册CP-2140EX /CP-3140EX / GT-820 / GT-880https:///cn/本手册为简易手册,完整版请上官网下载版号:1. 7目录1.简介 (1)专属声明 (1)产品改良 (1)FCC相容声明 (1)赔偿声明 (1)2.开始使用 (2)打开打印机包装 (2)包装内容物 (3)前视图 (4)后视图 (4)内部检视 I (5)内部检视 II (6)连接电源 (7)装入纸张 (8)准备纸张 (8)装入纸卷 (8)纸张感测器设定 (13)由软件/驱动程序设定并排标签 (13)装入碳带 (14)准备碳带 (14)装入碳带卷 (15)3.打印机操作 (20)打印纸校正及设定 (20)开始进行纸张校准及设定的步骤 (20)打印自检页范例 (21)将打印机重设为原厂默认值 (22)打印机控制按键和指示灯 (23)恢复程序 (28)4.通讯 (29)接口和需求 (29)USB 接口需求 (29)打印机通讯 (29)5.维护打印机 (36)打印头维护指南 (36)清洁周期 (36)清洁材料 (36)清洁方向 (37)6.产品规格 (38)一般规格 (38)字型、条码和图形规格 (40)打印机程序语言:PPLA (40)打印机程序语言:PPLB (41)打印机程序语言:PPLZ (42)7.附录 (43)接口规格 (43)USB界面 (43)串口接头 (44)连接主机 (45)8.尺寸图 (47)1. 简介专属声明本手册包含立象科技股份有限公司拥有之专属信息。
这些信息仅供负责操作及维护手册中所述之设备的相关人士参考及使用。
未经过立象科技股份有限公司书面同意,不论任何情况下均不得对此类专属信息进行使用、再制,或泄露给任何第三方。
产品改良持续改良产品是立象科技股份有限公司奉行的原则之一。
所有的规格及符号得随时变更,恕不事先通知。
FCC相容声明本设备经过测试并判定符合FCC条例第15篇对A级数位设备之限制。
SATO TH2 零售标签打印机用户指南说明书
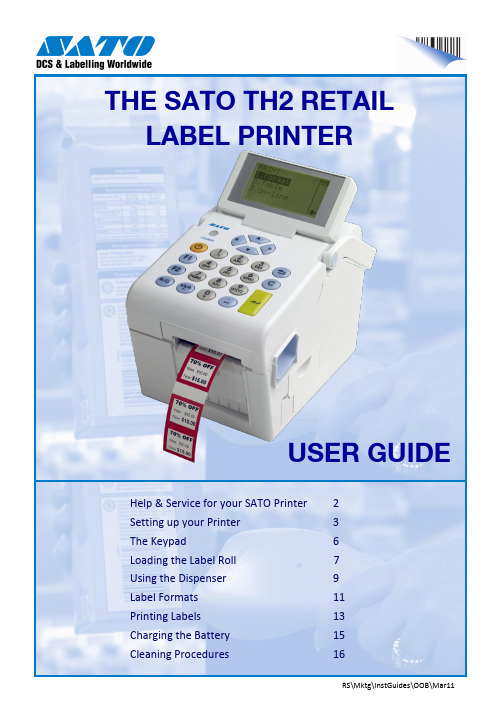
RS\Mktg\InstGuides\OOB\Mar11Help & Service for your SATO Printer 2 Setting up your Printer 3 The Keypad6 Loading the Label Roll7 Using the Dispenser 9 Label Formats 11 Printing Labels13 Charging the Battery 15 Cleaning Procedures16THE SATO TH2 RETAILLABEL PRINTERUSER GUIDEAbout your SATO Retail PrinterYour SATO TH2 printer will immediately provide professional labels with the simplest of operation.Being designed using the most up-to-date technology, the printer is fully future-proofed and can be programmed to take care of any labelling require-ments that your business may need.Assistance for your SATO PrinterYou should find that your SATO printer is straightforward to operate. However, if you should experience any difficulty, please contact our Helpdesk for assistance:e-mail:**********************Setting up your SATO Printer (1)Inside the box:- TH2 Retail Label Printer- Quick Guide- Mains AC Adaptor- Mains Cablefrom PowerScannerPower connectorConnector coverDispenserSensorPrint headPrint head coverMedia compartmentLabel roll guidesPlaten RollerDispenser plateDispenser frameCover Open PartsSetting up your SATO Printer (2)Mains Power CableAC AdaptorPower ConnectionFlat of the plug to top!AC AdaptorDC input connectorPower Power On: Power Off:Menu/Page Up Menu:Up 1 level:Select Dispense ModeIn Print Mode:Feed Mode:1 2MediaGuides SELECT THE TYPE OF LABEL THAT YOU WISH TO PRINT AND INSTALL INTO THE PRINTERPowerFeed4. Position the edges of the labels under the Label Guides and pull the end of the roll out of the front of the printer.6. Press the Power key for 1 second if the Press <Enter> then the <Feed> key to feed and align the first label.Using the Label DispenserThis feature will print and dispense a single label. As soon as the label is removed the printer will issue the next label. This procedure will set up the printer for dispenser use.Label GuidesDispenser CoverYou are now ready to print your labels.Dispenser CoverTo return to Normal label mode1. SWITCH TO THE NORMAL MODE: and press <Enter>. and Press <Enter> to - The printer is now set to output labels on ENSURE THAT THE LABELS ARE LOADED ASThere are 13 common label formats provided with your TH2 printer. Select the function and label required from the table below.LabelPrinter For-mat No.Label Re-order Code7Price, Description1. Ensure that the printer is switched ON. Select the required label format number by scrolling the list or by entering the Format Printing labels is done by selection of the required label format and following the on-screen prompts. Label Format 9, text, price and barcode is used in this example.2. Input the first line of text as requested. This may be a code or a description etc. The maximum num- IndicatesSelection: 3. Enter the article price using the <FULL STOP>6. The printer will returns to screen 1 of the selected format. If you wish to select a new that for safety reasons, there is no serrated edge to tear your labels.Tear off the labels using a downwards and PAGE UP keyOptional Battery Installation & ChargingPut the terminal end of the battery into the compartment first.Push the battery inwards until it is locked in place by the Blue Locking Tab. Close the battery cover.Removing the Battery Fitting the Battery Charging the BatteryConnect the AC Power Adaptor to the printer and to the mains power supply. The charge LED will illuminate toindicate charging and go out when the battery is fully charged.AN EXHAUSTED BATTERY WILL NEED ABOUT 6 HOURS TO ACHIEVE FULL CHARGE.The battery can now be removed.Lower the Battery Compartment Cover on the right-hand side of the printer.Slide the Blue Locking Tab to release the battery.Cleaning ProceduresUsing a new cleaning wipe, carefully clean the surface of the print head removing any adhesive or label debris. The product code for SATO cleaning wipes is Y701901037863 Clean the Label Sensor cover using a wipe.412 Switch off the printer.Press the Cover Open Latch (1). Lift up the cover fully (2).1 Ensure that the cover is in the “up” position.Remove the label roll.2 Regular cleaning will ensure that your SATO printer always produces highquality labels. Please follow the procedure below each month.Continued on next pageCleaning Procedures continuedClean the length of the rubber PlatenRoller. Rotate the roller to clean the whole surface.5 Install the label roll and position the sides of the labels under the Label Guides. Close the Top Cover and the printer is ready for use .6 Assistance for your SATO PrinterCall: 01255 252828ore-mail:**********************For effective cleaning use SATO Cleaning wipes,Product Code Y70190103786。
爱普生彩色标签打印机TM-C3520产品彩页

283mm打印模式进纸设计打印速度打印分辨率打印接口切刀类型颜色一维码二维码规格尺寸可打印尺寸纸张厚度额定电压耗电量温度湿度按需全彩色喷墨(微压电打印技术MicroPiezo)卷纸 / 折叠纸Max. 85 mm /sec.(速度模式,360 x 360 dpi 分辨率下,打印104mm宽度标签)360 x 360 dpi / 720 x 360 dpi高速 USB2.0 / 以太网口100BASE-TX /10BASE-T普通纸/模切标签(普通介质 / 喷墨介质 / 合成介质): 1,500,000 cuts 连续标签(普通介质 / 喷墨介质): 750,000 cuts颜料墨水C,M,Y,K四色分离墨水Barcode : UPC-A,UPC-E,JAN13(EAN ),JAN8(EAN ),Code39,ITF,Codabar,Code93,Code128,GS1-128,GS1 DataBar Omnidirectional,GS1 DataBar Truncated,GS1 DataBar Limited,GS1 DataBar ExpandedTwo-dimensional symbols : PDF417,QR Code,Maxi Code,GS1 DataBar Stacked,GS1 DataBar Stacked Omnidirectional,GS1 DataBar Expanded Stacked,DataMatrix,Aztec Code普通纸,喷墨纸,合成纸,光泽纸卷纸: 30-108 mm 模切标签纸: 30-112 mm 折叠纸: 50-108 mm模切折叠标签纸: 50-112 mm模切标签纸: 25.4-108 mm 模切折叠标签纸: 46-108 mm 卷纸: 0.084-0.124 mm 模切标签纸: 0.129-0.195 mm 折叠纸: 0.124-0.128 mm模切折叠标签纸: 0.161-0.164 mmAC110 - 240V(AC adaptor)工作状态 30W 待机状态 2.5W15 - 35C 20 - 80%RH新一代全彩色标签打印机高质量、个性化的全彩色标签打印机按需输出的卓越体现设计精巧时尚,节省更多空间适用多种标签打印介质,为标签输出提供更多打印方案独特的分体墨盒设计,超大限度的减少标签输出成本标配自动切刀,大大提高标签输出效率新一代全彩色标签打印机图片仅供参考,外观以实物为准。
Argox OS-314TT 条码打印机 说明书

上海仙丰条码网(/)提供条码条形码条码打印机条形码打印机标签打印机数据采集器碳带标签盘点机条码扫描器条形码扫描器条码软件条形码软件标签打印软件标签设计软Argox OS-314TT 条码打印机
Argox OS-314TT 条码打印机除具备OS-214TT 条码打印机之优点,更提供
300dpi 完美的打印解析度,图象输出如同激光打印般精密清晰,为四寸微型
标签条码条码打印机之翘楚。
•2MB 缓冲储存动态内存,可容载超大容量之图象、条码及文字。
•条码打印机外接选配纸卷架,可负载200mm 外径大卷标签纸,以支援多量打印之需求。
•内置选配自动标签纸玻璃功能,最适合小尺寸标签的操作使用。
•条码打印机全机黑色塑料,兼具现代感及精致产业的外观,极适合商业空间的摆放。
上海仙丰条码网提供各种型号立象打印机,多款立象条码机,立象OS314TT 条码机说明,立象OS-314打印机驱动,立象OS-314TT 标签机软件,立象OS-314TT 标签打印机原厂配件.本条码打印机适用于:零售、邮政、医疗管理、服装鞋、珠宝、五金、票务。
产品规格:
上海仙丰条码网(/)提供条码条形码条码打印机条形码打印机标签打印机数据采集器碳带标签盘点机条码扫描器条形码扫描器条码软件条形码软件标签打印软件标签设计软。
SATO RFID 配置指南说明书

First edition: Jun 2015©2015 SATO CORPORATIONHF RFID Configuration GuideThank you for choosing a SATO RFID Printer. This guide will help configure the printer to encode your inlays.Refer to the CL4NX Operator Manual for more information.You can access the CL4NX Operator Manual from the website for your region linked from .1 Examine labels.Refer to the CL4NX HF Inlay Configuration Guide for what measurements you should take and what they mean, as well as a list of inlays and their required configurations.2 Set up printer.A)Menu Settings:Adjust the Antenna position according to required levels on attached list.1. Turn on Power2. Printer Comes Online3. Switch to Offline( buttonon the Operator Panel)4. Enter Menu5. Select “Interface”( (Right Arrow) button on theto confirm)6. Select “RFID”Four Easy Steps of RFID Configuration1Examine Labels to determine printer settings.2Set up printer.A) Menu SettingsB) Physical Antenna Position3Set Labels and Carbo n Ribbon.4Confirm operation by printing/encoding alabel.•Explanation of RFID menu items* BOLD items are default settings.Tag OffsetDistance to print on label BEFORE pausing to encode RFID. “0 - 240” (mm in unit) This setting will be used when labels aren’t compatible with the CL4NX’s antenna positions. For more information about com-patible antenna positions, refer to the attached CL4NX HF Inlay Place-ment and Configuration Table.Reader Model Display model of installed RFID reader module.Reader Version Display firmware version of installed RFID reader module.ViewWhen selected printer will attempt to read the tag currently set in the printer.Select the memory bank from which to read information. “USER”, “UID”Retry ModeDetermine whether to retry encoding of failed data after error recovery. “Retry ”, “Release”The Release option deletes the current print job, allowing the printer to move on to the next print job. When Retry is selected, the printer will continue to attempt encoding the same data.Retries Number of failed encoding attempts before error warning/print pause. “0 - 1 - 9”Mark Bad TagsMark bad tags with slash marks. “Enable ”, “Disable”Non-RFID WarningAllows interruption of printing when the items received do not contain an RFID issue command,, if you have enabled the "Non-RFID Warn-ing" settings in a printer that outputs RFID labels to be attached.Log RFID Data Record encoded tag information. “Disable ”, “Enable”Output Error Mode Allows the user to set the signal type for RFID errors. “Pulse”, “Level ”Pulse LengthAllows the user to select the length of an RFID error pulse.This menu is displayed when the Output Error Mode is set in Pulse . “100ms ”, “200ms”, “300ms”, “400ms”, “500ms”CountersLife timeLife time counter displays the number of encoding successes, failures, and total attempts. (Count Success, Count Failure, Count Total)UserUser counter displays the number of encoding successes, failures, and total attempts. (Count Success, Count Failure, Count Total)The counter can be reset using the right soft button (CLEAR ) when the counter is 1 or higher.B)Physical Antenna PositionAdjust the physical position of the antenna according to the settings required for the specific label and inlay used.3 Set Labels and Carbon Ribbon.Refer to the sticker on the printer’s top cover, the help videos in the printer menu, and the Operator Manual for more information.4 Confirm operation by printing/encoding a label.Be sure to read the data and check that it is correctly encoded.RFID Printing TipsA) Recommended no-print zoneAvoid printing barcodes or characters directly on top of an RFID chip. The uneven surface will negatively affect print quality.B) Printing of RFID tag errorsThe printer can be set to print an RFID tag error when there is a problem with the recorded data, for example in a write to a defective tag, in order to prevent accidental distribution of a defective label. Depending on the error and the print command paper size setting, a diagonal line or a cross will be printed, together with a description of the error.•List of errors printedMessageCause and CountermeasureTAG NOT FOUNDCauseTag cannot be found, or reading failed.CountermeasureConfirm inlay operation and check printer / antenna configuration.WRITE TAG ERRORCauseWriting failed.CountermeasureConfirm inlay operation and check printer / antenna configuration.PROTECT TAG ERRORCause 1An attempt was made to write to a tag with the write lock set.Cause 2An attempt was made to write to a non-writable address.CountermeasureUse a label with the lock not set.VERIFY TAG ERR.CauseThe written value and the read value are not identical.CountermeasureConfirm inlay operation and check the printer/antenna configuration.LOCKING ERRORCause 1Lock processing failed because the label has been locked.Cause 2Lock processing failed because the antenna output is weak.CountermeasureCheck if the label was locked and if the inlay antenna placement is correct.WRONG TID ERRORCauseA tag type other than that specified in command data was detected.CountermeasureEnsure that command tag type matches actual label/tag.MULTI TAGS ERRORCauseMultiple tags captured simultaneously.CountermeasureConfirm inlay operation and check printer / antenna configuration.Extensive contact information for worldwide SATO operations can be found on the Internet at 。
WS4 TT系列打印机服务手册说明书

WS4 TT Series PrintersService ManualWS408TT / WS412TT© 2021 SATO Corporation. All rights reserved.Contents1Introduction (1)1.1About This Manual (1)1.2Warnings and Cautions (1)2Maintenance (2)2.1Print Head Maintenance (2)3Spare Parts List (3)4Spare Parts Removal and Assembly (11)4.1Top Cover (11)4.2Roller Platen and Front Cover. (13)4.3Main Board and Bottom Cover (14)4.4Mid Cover (16)4.5Motor (17)4.6Sensors (19)4.7TPH (20)5Troubleshooting (21)5.1Printer Status Indication (21)5.2Printer Connector Pin Assignment (22)1 Introduction1.1 About This ManualThis service manual gives the information necessary for you to adjust and repair the WS4 TTprinter. This service manual is written only for SATO authorized service personnel. The information in this manual is confidential to general users.This service manual is used as an extension of the operator manual. For basic specification, Installation, operation and configurations of the printer, refer to the operator manual of the WS4 TT printer.1.2 Warnings and CautionsBefore doing maintenance, please notice the followings:●Put the device in a safe place.●Please keep the device in a clean and dry the area.WARNINGWhen replace or install any parts, please check following:●Turn off power.●Disconnect the power cord of the AC Adapter.●Disconnect the USB cable.CAUTION (Static Discharge)●The printer electronics are sensitive to static discharge.●Wear an anti-static wristband and attach it to the printer chassis.CAUTION (Replace Parts)●Please do not wear jewelry.●Please do not get wet on hands and parts.2 Maintenance2.1 Print Head MaintenanceIt is essential to keep print head clean if you want the best printing quality. We strongly recommend that you clean the print head when loading a new media roll. If the printer is operated in critical environment or the print quality declines, you need to clean the print head more frequently.Keep in mind these things before you clean TPH:Keep the water away in case of corrosion on heating elements.If you just finish printing, wait until the print head cools down.Do not touch the print head with bare hands or hard objects.Cleaning steps:1.Moisten a soft cloth or a cotton swab with ethyl alcohol.2.Gently wipe the print head in one direction. That is, wipe it only from left to right or vice versa. Do notwipe back-and-forth, in case dust or dirt attaches to the print head again.3 Spare Parts ListPictureASSY-MAIN-PCBA-WS4-LAN-RTC ASSY-MAIN-PCBA-WS4-STD-RTC4 Spare Parts Removal and Assembly 4.1 Top CoverA-1 Take off the top cover and push the right latchupward.Then we can see the TPH and the Roller PlatenA-24.2 Roller Platen and Front Cover.B-1 orange. Then we can take off the front cover.B-24.3 Main Board and Bottom CoverC-1weandprinter.Disconnect all cables from MB then lift up andseparate the whole printer module. (Figure C-2)Using screwdriver to loosen 4 screws which areandC-2C-34.4 Mid CoverD-1 Secondly, from broadside to pull the mid coverAlways turn off printer power before removal.D-24.5 MotorSeparate the whole printer module with main Then we can take the motor out as shown inWhen disconnect the power cord, please waitconnectors E-1 E-2E-34.6 SensorsF-1 After taking out the whole printer module andcan see the Reflective Sensor which is markedF-24.7 TPHG-1Always turn off printer power before removal.G-25 Troubleshooting5.1 Printer Status IndicationStatus lights can help you check printer’s condition. The following tables show the blinking speed of status lights and the conditions they indicate.** Fast 0.5 Second* Slow 2 Seconds* LED2 + *LED1 Slow LED2 & LED1 Blinking Interval at same time* LED2 + LED1 * Slow LED2 & LED1 Blinking Interval at different timing Green Green The printer is ready to print. V Green ** Green The printer is transmitting data.* Green * Green In pause. V* Green Green * The printer is writing data to the flash or USB memory. The USB memory is being initialized.Green Orange Head high temperature. V Green ** Orange The print module is opened when the printer is turned on.Orange Orange Paper jam. V**Orange ** Orange The media is out when the print data is sent to the printer.Paper end.V**Orange Orange ** Ribbon end or ribbon error. (for thermal transfer models) V Red Orange The printhead is broken. V Red *Orange Communication error (RS-232C). V Red **Orange Cutter error (with optional cutter).V Red Red Cover (Thermal Head) open error during printing.VRed * Red An EEPROM for backup cannot be read or written properly.A command has been fetched from an odd address.Word data has been accessed from a place other than the boundary of the word data.Long word data has been accessed from a place other than the boundary of the long word data.Red ** Red Command error. V* Red Red * Flash ROM on the CPU board error or USB memory error. V An erase error has occurred when formatting the USB memory.Unable to save files due to insufficient USB memory.5.2 Printer Connector Pin AssignmentUSB1 VBUS +5V2 D- Differential data signaling pair -3 D+ Differential data signaling pair +4 Ground GroundEthernet123456781 Transmit+2 Transmit-3 Receive+4 Reserved5 Reserved6 Receive-7 Reserved8 ReservedRS232CHost (DB9)Printer (DB9) Signal Description Pin Pin Description Signal CD Carrier Detect 11 Provide 5V Power+5VRxD Receive 22 Receive RxD TxD Transmit3 3 Transmit TxD DTR Data Terminal Ready4 4 No Connection NC GND Ground5 5 Ground GND DSR Data Set Ready6 6 Pull High Hi RTS Request to Send7 7 Request to Send RTS CTS Clear to Send8 8 Clear to Send CTS CI 99Pull HighHi1 +5V Provide 5V Power2 RxD Receive3 TxD Transmit4 NC No Connection5 GND Ground6 Hi Pull High7 RTS NC Request to Send 8 CTS Clear to Send 9HiPull High。
苏州优信网络 SATO CL408e 412e 中文说明书

SATO CL408e/412e 中文使用手册对资料如有任何疑问请与我们联系给予批评指正公司地址邮政编码公司电话公司传真公司网站苏州市三香路136号 215004 0512-******** 0512-******** 苏州优信网络科技有限公司-专业条码系统集成,条码打印软件开发,欢迎联系!CL408e/412 e快速指南控件和指示器操作员面板指示灯状态STATUS离线OFF LINE时显示为无亮打印机连线ON LINE时显示为绿色出故障时显示为红色LCD显示屏通电时亮起调整前面板后部的控件打印PRINT调整打印暗度偏移量OFFSET调整分配/切割/撕裂位置的后退/前进送纸的数值字符间距PITCH在+/-3.75mm范围内调整标签的起点位置该参数对标签停止位置打印位置和分配/切割位置会有所影响DSW2/DSW3设置打印机配置按键Line行将打印机在连线和离线模式之间进行切换打印过程中将使打印机暂停打印某项作业Feed送纸处于离线状态时将送出一张空白标签处于连线状态时将再次打印一张最近已打印的标签显示器面板2行*16字符LCD 用于设置运行参数和显示故障的情况DSW2/DSW3用于配置打印机操作的挑线设定电源打开或者关闭打印机后面板连接AC输入 115V/220V 50/60HZ连接器使用提供电缆AC保险丝输入电源保护类型3A/250V插件接口插件接口卡订购时指定的规格EXT 外部信号连接器Amp 57-60140CL408e/412 e快速指南初始安装连接打印机1将打印机置于适当位置如果使用1EEE 1284并行接口请与主机保持在6英尺距离之内如果使用高速RS232接口请保持在35英尺之内对于其他类型的插件接口卡请参阅操作员和技术参考手册请确保打印机上方和右侧留有足够空间以使标签存取机门能够自由旋转开启2将提供的AC电源线手稿打印机后部并连接到合适的115/240V AC插座3开启打印头并使用顶盖内的碳带导轨指示图以加载碳带确保将碳带轴正确置于碳带锭上并将空纸管置于碳带倒带锭上将碳带的亲置端放到碳带倒带锭上以便按逆时针方向旋转时挑起碳带4将标签卷放到标签锭上并将绿色的标签轴挡板推到标签锭上直到将标签卷全部推入打印机内部此时标签应从标签卷底部滑出标签正面应正对标签卷5按照顶盖内的标签线路图的批示输送标签此时标签应从塑料导轨底部通过穿过标签传感器附件进入打印头底部并从打印机前端输出将标签缘导轨正对打印机内部安装直至与标签外缘刚好接触6关闭打印头栓然后关闭侧部存取机门7使用前面板挑设定选择适当的标签感应方式在顶盖内已提供了挑线设定功能图出厂时已将打印机设置为标签间隙检测DSW2DSW3都位于OFF[关闭]位置请注意DSW开关向下即为OFF关闭反之即为ON打开8将前面板电源开头置于1位置以接通电源9此时Power电源和On-Line连线灯应亮起同时在LCD上应出现ONLINE 连线字样10按下LINE行一次此时On-Line连线灯应熄灭同时在LCD上应出现OFFLINE离线字样11在OFFLINE状态下按上FEED送纸一次此时打印机应送出一个标签并暂停12如果打印机送出20英寸的空白标签并暂停而LCD屏幕上同时显示SENSOR ERROR传感器故障请检查并确定标签碳带正确安装13将POWER电源开关切换到0位置以关闭AC电源打印测试标签当标签和碳带在打印机上正确安装后即可使用前面板控件打印测试标签1按下FEED送纸按键打开打印机电源2此时打印机将发出一声嘟响并在LCD屏幕顶部分别显示TEST PRINT MODE测试打印模式和Configuration”配置信息按下FEED送纸按键接受该测试签类型3此时屏幕将出现TEST PRINT SIZE测试打印尺寸如果您装入了尺寸至少为4英寸宽的标签请使用默认的10cn选项如果您的标签小于4英寸宽请按下LINE 行按键将光标切换到等于或者小于打印机所装的标签选项一旦选择了正确标签尺寸请按下FEED送纸按键即可开始测试标签打印操作4打印机将继续打印测试标签直至再次按下FEED送纸按键将打印机置于PAUSE 暂停模式再次按下FEED送纸按键将继续进行测试标签打印5要停止印测试标签请按下FEED送纸按键暂停打印机活动然后关闭电源再次打开电源将使打印机处于常规的On-Line(连线)模式处于该位置时打印机正在等待打印数据配置打印机CL408e/412 e打印机前面板和接口的DSW开头的出厂配置为Off关或向下位置DSW-1则位于串行RS232插件接口卡这将打印机配置为进行以下操作热转打印如果安装了高速RS232串行接口那么该接口的设置为9600BPS无厅偶校验8个数据位1个停止位和就绪/繁忙数据流控制对于并行或USB接口不需接口设置标签感应设置为检测标签间距持续标签打印不同的DSW开关组合可配置不同的功能在前盖内的图表已列出了每个DSW开头的功能有关更多细节请参阅打印机附带的操作员和技术参考手册中的第2章或参考以下说明当通过DSW开关进行更改配置时在新设置生效前必须关闭及打开打印机电源DIP开关设置一般条码机设置好之后是很少要更改的但如果标签类型改变了会需要更改设置标签有连续和非连续即有标签纸黑标纸和间隔纸之分相应的打印机的标签传感器类型也有两种GAP和MARK使用黑标纸时须把传感器类型改为MARK DSW2-2拨为ON使用连续的无标记纸时(洗水布)可以将DSW3-3拨为ON,SATO 408E/412E DIP Switch PanelsDSW1串行口设置(在机器里主板上用串口时可调)Data Bit Selection (DSW1-1)设定串口传送的数据的数据位是七位还是八位DSW1-1 SETTINGOff 8 data bits 八位On 7 data bits 七位Parity Selection (DSW1-2, DSW1-3). 设定串口传送数据时进行什么样的校验DSW1-2 DSW1-3 SETTINGOff Off No Parity 不校验Off On Even 偶校验On Off Odd 奇校验On On Not Used 不使用S top Bit Selection (DSW1-4). 设定串口的停止位DSW1-4 SETTINGOff 1 Stop Bit 一位停止位On 2 Stop Bits 二位停止位Baud Rate Selection (DSW1-5, DSW1-6). 设定串口RS232 的波特率DSW1-5 DSW1-6 SETTINGOff Off 9600Off On 19200On Off 38400On On 57600Protocol Selection (DSW1-7, DSW1-8).(* Will select protocol for M-8400 if DSW2-8 is ON) 握手方式DSW1-7 DSW1-8 SETTINGOff Off Rdy/BsyOff On Xon/XoffOn Off Bi-Com 3On On Bi-Com 4*Printer Set Up DSW2是打印设置Print Mode Selection (DSW2-1).选择通过热敏纸打印的直接热敏打印方式还是通过碳带打印的热转印打印方式DSW2-1 SETTINGOff Therm Xfr热转On Direct Therm直接热敏Sensor Type Selection (DSW2-2). 选择间隙传感器还是标记传感器DSW2-2 SETTINGOff Gap 间隙On Eye-Mark 标记Head Check Selection (DSW2-3). 打印头是否检测DSW2-3 SETTINGOff Disabled 关闭On Enabled 开Hex Dump Selection (DSW2-4). HEX下载模式DSW2-4 SETTINGOff Disabled 关On Enabled 开Receive Buffer Selection(DSW2-5). 接收缓冲DSW2-5 SETTINGOff Single Job 单任务On Multi Job 多任务Firmware Download (DSW2-6). 下载firmware模式DSW2-6 SETTINGOff Disabled 关On Enabled 开Protocol Code Selection (DSW2-7). 打印机命令模式DSW2-7 SETTINGOff Standard 标准On Non-Std 非标准Backfeed Sequence (DSW3-1). 后退功能如果为ON那么打印时会先有一个后退的动作即标签会退到标签顶部零位置打印DSW3-1 DSW3-2 SETTING 工作方式Off Off Continuous 连续纸Off On Tear-Off 撕纸On Off Cutter 切刀On On Dispenser 剥离器Label Sensor Selection (DSW3-3). 打开或关闭标签传感器打开时候传感器会通过打印测试自动识别标签如果关闭那么打印位置就须通过软件设置DSW3-3 SETTINGOff Sensor Used 使用On Not Used 不使用Back-Feed Selection (DSW3-4). When Back-Feed is enabled, the printer willposition the last printed label for dispensing and retract it before printing the nextlabel. The amount of backfeed offset is adjustable .退纸功能DSW3-4 SETTINGOff Enabled 开On Disabled 关闭EXT Print Start Signal Selection (DSW3-5).DSW3-5 SETTING 外部信号端是否打开EXT口Off DisabledOn EnabledDSW 2 与DSW 3默认设置DSW 2-5为ON 其他全为OFF连接计算机CL408e/412 e 打印机有一个插件接口模块该模块插入后面板接口插座中要完成整个安装进程您 需使用适当的接口电缆将打印机连接到主机计算机的输出端口该电缆可从当地分销商或SATO 供销商处购买如果需要获得有关接口尖类型连接器类型或电缆引线的更多细节请参阅操作员手册中的第5节最常用的接口模块是IEEE 1284并行端口和高速串行端口其他可用端口模块为USB 10/100BaseT 以太网和Twinax/Coax.并行接口如果使用IEEE1284并行接口模块则必须使用IEEEE1284兼容接口电缆以使用打印机的全部功能此外必须将计算机并行LPT 端口设置为ECP 类型IEEE1284接口连接器是一种AMP57-40360孔36针Centronics 类型并行端口连接器是一种AMP57针数 描述-40360孔36针Centronics 类型 1 选通信号 2-9 数据位0-7 10 确认 11 繁忙 12 无纸 13 选择 14 自动送纸 16 逻辑地线 17 底板地线 18 +5VDC31 初始化 32 故障 19-30信号地线36选择输入并配置开头设置持接口无需DSW串行接口针数 描述 1 帧地线 2 传送数据 3 接收数据4 请求发送5 可发送6 数据组就绪7 信号地线 20数据终端就绪高速R 接器即是DB-25F S232串行接口连要正确连接到PC 串行端口需使用一个DB-25P/9P DB-25F 的空调调制解调器电缆用于RS232数据格式的DSW 1配置设置必须与主机系到统的设置匹配如果不匹配当发送数据时打印机会发出警示音并在显示器上显示FRAMING ERROR 成帧误差信息如果DSW1-6所选的波特率与主机不匹配则打印机将忽略任何发送数据用户可以在打印机或主机上更改串行波特率和字格式设置以纠此类情况正但是首要条件是它们必须匹配CL408e/412 e 软件和驱动程序每台打印机附带的光盘中都附有一个Label WizardsE 的Label Wizard SELabel WizardsE 设计和打印软件用于Windows3.1/95/98/2K 的评估版本它可用于所有的SATO 打印机SE 版本是全功能标签设计软件包但是每次仅限打印一张标签用户可随时将其升级到完整的Lab izard 版本el W 通过您 的SAT 分销商购买升级软件包O 以拥有各种复杂的标签生产功能任何在SE 版本中创建的标签设计都可用于升级包abel WizardsE 软件是一种高性能工具可用于各种标签设计并且能完美体现SATO 打印机的各项功能在您的PC 上加载Label WizardsE 软件时请确保也加载了打印所需的SATO Generic 打印机驱动程序它与以下所说的Windows 驱动程序不同L光盘中提供了一个完整的Label Wizard 文档集Windows 驱动程序EE 1284光盘中也提供用于IE 高速串行接口USB 和10/100BaseT 接口的Windows 驱动程序使用该驱动程序您 可以从任何Windows 应用程序打印各类标签有关加载驱动程序的说明可从Windows3.1Wi dows/95/98/2K 和WindowsNT 操作系统所附带的驱动程序渔船中获得n请注意Windows3.1NT4和较早版本的Windows95不支持USB 通信安装驱动程序后,您可以将数据发送到CL408e/412e 打印机上,其方法与发送到系统中的其他印机一样,即只需在Windows 应用程序的”打印”对话框中指定CL408e/412e 即可.用户可使打用”高级”对话框来管理打印机配置.要打印条形码”对话框定义一个条形码.光盘中提供了有关描述如何加载配置和使用Windows 驱动程序的文档Windows 驱动程序非常适用于打印那此数量有限的标签或简单的打印机作业但是数据传效率可能很低输例如如果用户选择了一种打印机已有的字体则打印机会迅速反应但是如果指定了一种Windows True-Type 字体即是以图形格式将该字体传送到打印机此时除非使用IEEE 1284接口的高速性能 否则将减慢打印机的反应速度通常最好使用支持所用SATO 打印机所有功能的标签设计程序这样就能够提高运行效率并保证最佳反应时间 如果打印机无法打印该如何处理源)灯是否亮着打印机不能连线Power(电请检查电源线和AC 保险丝出现故障请确保打印机头栓关闭好打印流导致出现此类故障机发出警示音并拒绝打印通常是因为错误的数据浓度将打印机置于十六进制转储模式并传入数据流找出错误的指令用法有关正确指令的解释请参阅操作员和技术参考手册后发送数据打印不机打印查看接口电缆确保是否连接到正确的PC 端口确保打印机已安装正确的插件接口模块如果使用串行接口请确保主机与打印机的波特率匹配将打印机置于十六进制转储模式并重新发送数据流此时以十六进制格式的接收数据字符列表将会打印出来有关如何将打印机置于十六进制转储模式的住处请参阅操作员和技术参考手册第35页第2节十六进制转储诊断标签如果无法按十六进制转储模式打印数据则表示打印机没有收到任何数据确保您的计算机程序将数据发送到正确的打印机 在Windows 的打印机对话框中可将多个打印机分配给同一个端口确保打印设置窗口中所列的打印机为CL408e/412 e 注Label Wizard 所用的正确打印机驱动程序应为SATO Generic打印机送出了一个标签但是没有打印任何内容标签的宽度是否足够第一个打印点位置在打印头的外缘并且将窄标签调整到打印机部内您可能需要配置打印机的偏移量值以纠正图像在标签中的位置有关如何进行此项操作的说明请参阅操作员和技术手册的第2节如果在热感模式下进行打印请确保使用热感纸如果在热转模式下进行打印请查扑克并确保带有墨水的碳带暗面与介质接触打印现部分打印内容缺失品质存在缺陷如果打印时出请检查打印头以确保打印头清洁并且无损坏如有其他杂质果请用棉签清洁打印头同时使用SATO 清洁套件中滚简清洁器清洗热敏打印头如果打印颜色过深 以及条形码中的条纹模糊并且重叠请降低热量设置通过高速前面板上的PRINT打印分压计可对打印机进行微调如果打印颜色过浅请确认打印速度使用LCD 面板或软件命令米尝试您的碳带/标签组合是否匹配对于树脂碳带来说品质差的标签纸的表面很粗糙所以不易着色蜡质碳带与某些合成标签材料合用时其着色效果也不理想关于条码打印机或者条码打印软件开发及使用方面有任何疑问都可以访问知名的条码论坛:易码中国条码论坛:/ barcode_clubL CD 显示SENSOR ERROR 传感器故障法质配检查并确保所选的感应方与加载的介匹CL408e/412 e 打印机的出厂设置是检标签间距测DSW-2=OFF[关闭]每个标签之间必须至少保持1/8英寸的间距如果使用可视标记标签底部的黑线那么DSW-2必须处于On 打开位置以扃动反射传感器如果使用连续性介质而不进行任何类型的标记那么传感器必须于OFF 关闭DSW3-3=On[开]位置否则打印机将送入大约20英寸长的纸并显示SENSOR ERROR传感器故障信息如果标签间距或者标记条没有沿升至标签宽度那么您可能需要调整标签感应器附件有关调整标签感应器附件的细节请参阅操作员和技术参考手册中的第2了确保所有标签都穿过标签传感器而不是从其上面通过LCD 显示SENSOR ERROR 成帧故障当使用行接口时串打印机主机之间通与的信格式必须同步CL408e/412 e 的RS232行接口的出厂设置为9600bps 串无奇偶校验8个数据位1个停止N 81并使用就绪/繁交忙数据流控制信号换DSW 1-8=OFF[关闭]如果计算机以其他格式发送数据打印机就无法正确解释为数据LCD 屏幕将出现SENSOR ERROR 成帧故障信息打印机正在接收数据并且似乎在打印但是输出的标签仍为空白查看碳带以确保碳带的墨面暗面与标签接触其他厂商可能使用不同的方式缠绕碳带如果他们根据图示加载了碳带那么可能将碳带的墨水面朝上如果出现此类情况在重新碳加载碳带前应及时清除打印头上的素LCD 显示PAPER END ERROR纸张不故足障标签是否完全推入打印机内部并已为标签边缘导轨所固定没有纸张抟感器位于标通道内部边缘的附近签如果没有与打印个质接触那么即会出现纸张不足故障请检查并确保标签上槽口或孔洞不会导致没有纸张开关显示错误指示LCD 显示RIBBON EN D ERROR 碳带终止故障如果碳带锭不旋转那么将现出碳带终止故障请确保碳带机芯尺寸不会过大且能够在锭上自由旋转并 如果暗度设置过高那么有时候会使碳带与标就签粘贴在一起这样就导致碳带移动终止此时即出现碳带终止信号张您现在是否在热感纸上进行打印但尚未将打机的热感打印配置设为DSW2-1=On[打开印]在热感模式下由于碳带用于热不感打印因此碳带运动传感器处于禁用状态CL408e/412 e 规格以下是CL408e/412 e 规格的缩略表详细资料请参考机型 CL408e/412e打印方法 热转或热感分辨率 203/305dpi 或 8dpmm/12dpmm最大介质宽度 5.0英寸或 128毫米最大打印宽度 4.1英寸或 104毫米最大打印长度 49.2/32.8英寸 1249/833毫米最快打印速度 6ips 150毫米/秒实际尺寸 10.7英寸(宽)*16.9英寸(深)*12.6英寸 (高)1毫米(高)或者271毫米(宽)*430毫米(深)*32重量 28.7镑或 19千克最大介质滚轴OD 8.6英寸或 218毫米 标签感应 可视标记间隙槽口或无需感应最小表格长度 0.24英寸或 6毫米文字字体 15碳带 1475英尺或 450米图形 PCX BMP 和SATO 十六进制/二进制条形码 19个包括4个2维码旋转 文字和条形码可旋转4个90O 增量电源 110/220V AC+/-10%50/60H Z +/-1%环境 动作时 41 O -104 O F 5 O -40 O C存储时 0 -104 O O F -20 O -40 O C相对湿度 25-85%无冷凝介质和供应 CL408e/412 e 打印机的出厂设置为与高品质TechnoTherm 热转介质和碳带配合使用打印机本身附带最佳品质的SATO 标准蜡质和Premnier II 蜡质/树脂碳带样本选件 CL408e/412 e 打印机使用插件接口模块插件接口模块可用接口模块是IEEE 1284双向并行接口通用串行总线高速RS232USB标签剥CL408e/412 e 标签分配选件是一种内置机制10/100BaseT 以太网Twinax/Coax离器 使用该机制能够在需要模式下打印标签当安装该机制时打印机就会每次分配一个标签并剥离标签的数层标签切CL408e/412 e 切割器选件是一种内置机制割器 当从打印机输出标签或卡片时该设备即对其进行切割PCMC 存扩展选件可为连接器和接口提供一个PCMCIA 内存卡IA 内存扩展内它可接受内存容量高达和高达16MB 的Flash ROM 内存卡4MB 的SRAM 内存卡内置式通过添加一个升级的闪存模块即可扩展打印机内部存储容量内存扩展进行此项操作后即存容量可增加4MB 的闪日历选项 日历选项允许在当地打印机上维护并调用日期和时间用于标签打印 日历选项支持标准和儒略日历记载模式标签倒带器 标签倒带器是一种外置机制允许标签在打印过程中倒回滚轴上滚轴最大容量为10英寸清洗套清洗套件包括一个清洁片件 打印头清洗液棉签和清洁巾这些物品全部用于确保2 e 提供高品质打印CL408e/41安全注意事项警告电击事故和静电 1严禁在潮湿环境下使用打印机以防造成人员损伤 2堆积在人体表面或其他表面上的放射静电能可能损害打印机的打印头或电子组件严禁触摸打印头或电子组件注意 打印机的设置和操作常通在安装或个性打印机设置时须首先关掉电源后然连接电缆 执行清洁或维护操作 移动打印机合B 类数字设备的限制 本设备已经检测并符同时符合FCC 规则中第15节的要求这些限制设计用于提供合理的保护对防在居民区安装时出现有寄存害干扰本设会产生备使用和发射无线频率能量如果违反说明安装使用则可能导致对无线通信产生有害干扰但是不保证在特定安装中不会发干扰现象生如果本设备对无线或者电视接收造成干扰可通过关闭和打开设备米确定本则我们建议用户通过如下措施排除干扰改装或重新安置接收天线增加设备与接收器之间的距离将设备连接到电路的电源插座该电路不应与接收器相连请咨询分销商或有经验的无线电/电视技术员获得帮助公司保留所有权利本文档中的资料仅作为常规信息提供如有更改恕不另行通知。
