HDMI-KVM矩阵切换器EK-100H
VS222HD4K 2x2 HDMI 矩阵开关-4K 快速切换和自动感知产品说明书

2x2 HDMI Matrix Switch - 4K with Fast Switching and Auto-SensingProduct ID: VS222HD4KSave time and hassle by automatically switching between your HDMI audio/video sources. This 2x2 HDMI® matrix switcher provides the ultimate viewing experience, with support for Ultra HD 4K. It lets you connect two HDMI sources to two HDMI displays, with exceptional 4K resolution, while switching seamlessly between your video sources.Impressive image quality with 4K supportThe matrix switch supports Ultra HD 4K picture quality on two monitors while switching between content from HDMI source devices - including Blu-ray™ players or DVD players, computer systems, video game consoles, digital cable or satellite boxes, and A/V receivers.4K support ensures a higher level of image clarity and visibility, delivering four times the resolution of 1080p - 8.29 million pixels versus 2.07 million pixels. It provides a more engaging visual experience for audiences in a wide range of venues including conference centers, boardrooms, educational facilities, and commercial settings. With its exceptional image quality, 4K resolution is also ideal for bringing your digital signage to life.Fast and versatile switching optionsEnjoy hassle-free operation with four different switching modes:•Matrix switching: lets you route either HDMI source (Input 1 or Input 2) to either monitor (Output 1 and/or Output 2) - and independently switch two displays between two video sources.•Fast auto-switching: ensures minimal time for switching between HDMI sources. The switch provides effortless operation with advanced auto-sensing - it detects the latest connected HDMI source andautomatically switches both outputs to that device. It also ensures no downtime in a digital signageapplication if a source signal is accidentally powered off or fails.•Priority switching: identifies the first port to have first priority for HDMI sources, which will be output on both displays.•Manual switching: enables you to manually select your HDMI source with front-panel buttons that are easy to use.An IR remote control is included in the box, enabling you to select your desired input source remotely. The RS-232 serial control interface ensures easy remote operation with serial control enabled devices.Hassle-free setup with plug-and-play installationThe matrix switch is easy to install. EDID emulation saves you time during setup by ensuring all of your display settings, such as native resolution and refresh rate, are communicated between your display and video source devices. The built-in EDID copy feature maximizes compatibility with your 4K display, to ensure a convenient plug-and-play installation and the sharpest image quality.The VS222HD4K is TAA compliant and backed by a 2-year warranty with free lifetime technical support.Certifications, Reports and Compatibility Applications•Run Ultra HD 4K multimedia presentations on two monitors inconference rooms, commercial settings or at trade shows•Switch between different video sources on your digital signage displays in hospitals, shopping centers, or schools•Connect and switch between two video sources and two displays on a test bench, for troubleshooting computers•Automatically switch between your Blu-ray player, set-top box, or gaming console in a home theatre environmentFeatures•Impressive image quality with support for Ultra HD 4K•Easy operation with automatic, priority and manual switching between HDMI sources•Access two HDMI source devices on two independent HDMI displays,with 2 x 2 matrix switching•IR remote control included•RS-232 serial control interface•EDID copy support ensures accurate display output•Backward compatible with high-definition 1080p•Mounting hardware includedWarranty 2 YearsHardware Audio YesAV Input HDMIAV Output HDMIIndustry Standards HDMI 1.4Ports2Performance Audio Specifications7.1 Surround soundMax Distance10 m / 33 ftMaximum Cable Length393.7 in [10000 mm]Maximum Digital Resolutions4K @ 30 HzSupported Resolutions3840x2160 (4K)2560x16001920x12001920x1080 (1080p)1280x720 (720p)Wide Screen Supported YesConnector(s)Connector A 2 - HDMI (19 pin) FemaleConnector B 2 - HDMI (19 pin) Female1 - RJ-11 FemaleIndicators LED Indicators 2 - Active port LED1 - Power LEDPower Input Voltage100 - 240 ACOutput Current 1.5Output Voltage12 DCPower Consumption (In Watts)18Power Source AC Adapter Included Environmental Humidity0% ~ 80%Operating Temperature0°C to 50°C (32°F to 122°F)Storage Temperature-20°C to 70°C (-4°F to 158°F)Color BlackPhysicalCharacteristicsProduct Height0.8 in [2 cm]Product Length 6.1 in [15.6 cm]Product Width 2.6 in [65 mm]Weight of Product10.4 oz [296 g]Package Height 2.6 in [65 mm]PackagingInformationPackage Length 6.1 in [15.6 cm]Package Width9.3 in [23.5 cm]Shipping (Package) Weight29.7 oz [841 g]What's in the Box Included in Package 1 - 2x2 HDMI matrix switch1 - remote control1 - universal power adapter (NA/EU/UK/AU)1 - RJ11 cable (1200mm)1 - RJ11 to DB-9 serial adapter1 - mounting kit1 - quick start guideProduct appearance and specifications are subject to change without notice.。
迈拓维矩8口USB自动KVM切换器使用说明书
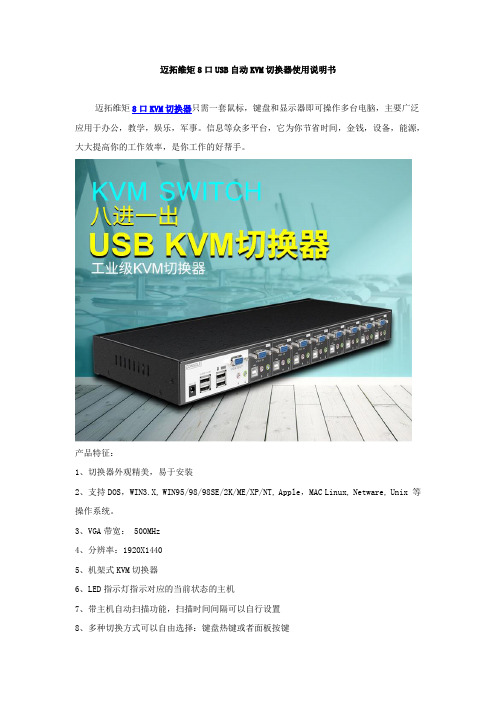
迈拓维矩8口USB自动KVM切换器使用说明书迈拓维矩8口KVM切换器只需一套鼠标,键盘和显示器即可操作多台电脑,主要广泛应用于办公,教学,娱乐,军事。
信息等众多平台,它为你节省时间,金钱,设备,能源,大大提高你的工作效率,是你工作的好帮手。
产品特征:1、切换器外观精美,易于安装2、支持DOS,WIN3.X, WIN95/98/98SE/2K/ME/XP/NT, Apple,MAC Linux, Netware, Unix 等操作系统。
3、VGA带宽: 500MHz4、分辨率:1920X14405、机架式KVM切换器6、LED指示灯指示对应的当前状态的主机7、带主机自动扫描功能,扫描时间间隔可以自行设置8、多种切换方式可以自由选择:键盘热键或者面板按键切换方法:A、前面板上的按键主机1-8:直接按按键①-----⑧B、键盘上的热键:“SCROLL LOCK”,“SCROLL LOCK”,“1,2,3,4,5,6,7,8……”,例如:切换到第5台主机:“SCROLL”,“SCROLL”,“5”,“Enter”切换到第8台主机:“SCROLL LOCK”,“SCROLL LOCK”,“8”切换时,如果要切换到的目标主机端口,正好是当前操作的主机端口,那么切换不执行!例如:当前正在操作第五台主机,按下前面板上的数字⑤,或者按下键盘上的热键:“SCROLL LOCK”,“SCROLL LOCK”,“5”,那么切换动作都不会执行。
LED指示当前主机状态:LED上的三位数字中,最右边表示输出,此处恒为“1”,左边两位指示当前主机,例如:“03”表示当前是操作第三台主机,使用步骤:1)用配线将主机逐个和KVM切换器连接好配线中USB头,VGA头的一端连接主机配线中单个的VGA头连接到KVM的主机端口2)将鼠标,键盘,显示器,和KVM切换器的控制端连接好3)按顺序给各台主机上电,在一台主机完全启动后(鼠标键盘可以正常操作了之后),再接着启动另一台主机,直到所有的主机完全启动启动扫描方式:2)键盘热键:“SCROLL LOCK”,“SCROLL LOCK”,“空格键”,扫描顺序是从当前状态的主机开始,回到当前状态的主机结束,例如:当前是第5台主机,开始扫描时,到第6台主机,结束后回到第5台主机。
HDMI矩阵说明书
HDMI矩阵操作手册安全操作指南为确保设备可靠使用及人员的安全,在安装,使用和维修时,请遵守以下事项:1.系统接地。
系统必须有完善的接地,否则,不仅造成讯号干扰,不稳定或机械损坏,而且还可能因漏电引起人身事故;请使用标准的三线电源插座,其地线接地电阻应小于1Ω。
2.禁止改变原设计。
禁止对本产品的机械和电器设计更改或增添任何部件。
否则。
本公司对由此所带来的后果不负责任。
3.请勿使用两芯插头,确保设备的输入电源为220V50Hz的交流电。
4.机器内有220V高压部件,请勿打开机壳,以免触电。
5.不要将机器置于过冷或过热的地方。
6.设备电源在工作时会发热,因此要确保工作环境的良好通风。
以免温度过高而损坏机器。
7.阴雨潮湿天气或长时间不用时,应关闭设备电源总闸。
一、产品简介…………………………………………..……………….1.关于HDMI系列矩阵切换器………..…….2.HDMI矩阵连接示意图………………二、矩阵系统的安装………..…………………….1、矩阵与控制电脑的连接……………………………….……….三、前面板功能键…………………………..………………..……….1、切换指令……………………………………..…………….2、UP、Down状态查询指令……………………..………….3、SAVE存储指令…………………………………………….4、RECALL调用指令…………………………………...…….5、CANCEL键…………………………………………..…….四、矩阵控制软件…………………….……….….五、R S232通讯协议…………………………………………………产品简介:1.1关于HDMI系列矩阵切换器HDMI数字视频矩阵切换器是为了将计算机数字视频信号进行重新分配和组合的矩阵交换设备,该设备可将多路HDMI数字视频输入信号切换到多路输出通道的任意通道上去。
可广泛用于所有需要进行HDMI信号分配和组合的场合,应用领域涉及军工、多媒体教学、电视电话会议、金融、科研、气象等领域。
KVM在数据中心内的发展、应用与方案配置
多个IP KVM会话可以连接到同一台服务器,此时它们共享一个数字通道, 并且有且只有一个IP KVM会话获得操作权,即只有它窗口内的鼠标与键 盘操作有效
Company Confidential
关于KVM技术的小结
K/V/M是指服务器主机上的三种信号源接口,也指对 应于这三种信号源的外设
– K(键盘)V(VGA)M(鼠标)
KVM技术是指对K/V/M这三种信号进行传输时所使 用的各种技术,通常分为切换与延长,其作用在于 使得K/V/M外设与服务器上的K/V/M信号源接口之间 不再受限于1:1的对应关系,也可以突破极有限的 传输距离限制
远程系统部署与安装、零故障运行是我们对于服务 器运维方式的梦想与追求,但不是现实
我们依然需要站在服务器跟前,安装、调试、配置、 诊断、恢复等等,这个时候我们需要K、V、M
Company Confidential
如果每台服务器都配了一套K、V、M
机架空间是有限且昂贵的资源 机架背后的线缆也将是杂乱无章 在一堆显示器间摸爬滚打也不是件易事
Company Confidential
KVM切换器优化了机房内的服务器部署与操作
机架空间被节省以放置更多的服务器和关键IT设备 机架后的K/V/M线缆也更易整理 在一套K/V/M外设上完成多台服务器的维护操作
Company Confidential
将服务器操作从主机房延伸至维护操作室
操作环境更为人性化 操作过程更易管理 主机房安全更易保障
KVM切换器发展史

KVM切换器发展史KVM历史模拟式KVM早期的KVM 切换器基本都是模拟式的KVM切换器,就目前而言,这类产品仍然在市场中占有很大份额。
迈拓维矩模拟KVM切换器是一种即插即用的设备,如果使用者与服务器相距不远,且集中于同一地点管理,则模拟式KVM是最佳选择。
一般而言,模拟KVM 切换器具备2个以上的输入接口,可连接到所有的服务器或相关外围,并且具有1个或多个输出接口可以连接到不同的主控台上。
机房常见的模拟KVM设备就是8进1出KVM切换器(MT-801UK-L),在机柜内只需要配置1台CRT/LCD显示器和1套键盘、鼠标就可以操作8台服务器,相当于IP网络中集线器一样的作用。
在KVM终端,操作人员需要手动切换到相应的服务器上去,这样避免了每一台服务器配置一套显示器和键盘、鼠标。
传统的KVM主机切换设备,可以将KVM维护终端拉出机房。
但因其信号并不经由网络传送,目前业界能提供的最远距离也只有300 m,故无法实现真正意义上的远端维护。
远程控制软件是传统的KVM 到数字式KVM中间的过渡产品,它可以通过IP网络远程控制和操作服务器。
但是维护人员很快发现,通过软件来控制无法实现真正意义上的代替现场维护。
服务器故障多出于硬件故障或者是操作系统尚未启动或启动过程不能完成(如刷新BIOS、安装操作系统、开机动作、进入Windows的安全模式)。
由于系统还不能提供相应的服务,远程操作根本无法完成。
另外不同的操作系统(Windows、Linux、Unix、FreeBSD)需要用到不同的远程控制软件,无法统一管理众多不同类型的服务器。
“统一的管理界面、简单的菜单原则、有规则的服务器命名的远程维护”才是维护和管理人员真正索求的目标。
数字式KVM鉴于模拟式KVM 和远程控制软件的不足,数字式KVM应运而生。
数字式KVM切换器有以下的特点:1、统一的管理数字式KVM与其他大多数服务器集中控制解决方案的不同点在于,它具有整合式远程访问功能,在世界上任何地方、任何时间均可以通过网络浏览器对您的服务器进行BIOS等级访问。
AC-MX44-UHD AVProConnect 4x4 HDMI 矩阵切换器说明书

A V P r o C o n n e c t3518 N C a s c o A v e n u e ~ S i o u x F a l l s , S D 571041-877-886-5112 ~ 605-274-6055s u p p o r t @a v p r o c o n n e c t.c o mAC-MX44-UHD4x4 HDMI Matrix w/ Audio De-Embedding 4K 60Hz, HDMI 2.0 and HDCP 2.2 CompatibleThe AC-MX44-UHD is a true 4x4HDMI matrix switch. Supporting HDMI 2.0, HDCP 2.2, up to 4K video resolution, and up to 10.2 GBPS bandwidth. This switch allows any source (Blu-ray, UHD Blu-ray, satellite receiver, game consoles, PCs, etc...) to be shown on any of the connected displays.This matrix equalizes and amplifies the output to ensure the HDMI signal can be transmitted through long HDMI cables without loss of quality. You can extend your distance further with the AC-EX70-UHD HDMI Extender. Full EDID management allows maximum flexibility with todays wide mixture of sources and displays.This is an ideal solution for digital entertainment centers, HDTV retail, show sites, data centers, schools, conference and training centers and more!Features:•HDMI 2.0 (10.2 GBPS)•HDCP 2.2 compliant•De-embed 2CH audio on each output •Independent source/display switching •Up to 4K Resolution (4K60 4:2:0)•HDR Supported•IR & RS-232 Control Easy to use:•Install in seconds •Feature rich•Powerful EDID management •Front Panel Control•IR Remote•IR & RS-232 Control•LAN ControlDevice Overview:Figure 1 ~ AC-MX44-UHD Panel ControlsNOTE: There is an application diagram on page 11 of this manual.In The Box:•AC-MX44-UHD Matrix Switch •IR Remote Control •IR Extension Cable•12V/3A Locking Power Supply •Instruction ManualQuick Installation:1.Connect the HDMI input sources (Blu-ray, Set Top Box, etc...) to the AC-MX44-UHD2.Connect the HDMI output devices (AVR, Display, Distribution Amplifier, Extender) to the AC-MX44-UHD3.Power on the sources4.Connect the power supply into the AC-MX44-UHD5.Turn on output devices/displays6.You may now use the front panel controls, supplied IR remote or free PC software to control the switch.* For advanced programming please see the RS-232 commands on page 7Front Panel Control:The AC-MX-44-UHD front panel controls allow for the selection of the inputs to the various outputs. First press a button on the OUTPUT row to choose the output port, then press a button on the INPUT row to select the input signal for the selected output. (Output, then Input)Select Output First --><-- Then Select Your InputIR Remote Control:The HDMI routing of the matrix can also be controlledby using the IR remote supplied with the product.The left arrow button decrements to the next lowerinput port, and the right arrow increments to thenext input port.The IR remote controller for the AC-MXDH-44 alsoallows direct selection of the inputs for each output.Figure 2 ~ AC-MX44-UHD IR RemoteAdditionally, the supplied IR Extension Cable can provide a different receiver position. Just plug into the IR Extension Socket on the back of the matrix and place the receiver in a more convenient location.Figure 3 ~ AC-MX44-UHD IR Controls Figure 4 ~ IR Extension CableBonus Feature!Pressing and holding the any OUTPUT button will automatically read, store and apply the EDID from the display device to the current INPUT assigned. It will be stored in USER EDID 1.EDID Management:This matrix has 12 factory defined EDID settings. It also has 3 user defined EDID memories. The user EDID memories are independent to each input and can be set differently. The user defined EDID can be uploaded using the free PC Control software or RS-232. In addition, you can choose to read the EDID from the desired output and that read EDID will automatically store and overwrite the EDID in "USER EDID 1". We recommend uploading custom EDID settings to memory 2 or 3.By default the matrix is set to a 1080P EDID, this is to maximize plug and play capability. When using 4K sources, you will want to define a 4K EDID on that input (or read from the display).To Change the EDID setting:1.Press and hold the INPUT you want to change for 3 seconds2.Now "click" desired INPUT to toggle through the available EDID options3.Once you are on the EDID you want to select, press and hold for 3 seconds again. This will set the EDID for the desired input. Please see the example below for detailed instructions.These are the pre-defined EDID settings that you can toggle through:1 - 1080P 2CH (PCM)2 - 1080P 6CH (5.1 Channel)3 - 1080P 8CH (7.1 Channel)4 - 1080p 3D 2CH (PCM)5 - 1080P 3D 6CH (5.1 Channel)6 - 1080P 3D 8CH (7.1 Channel)7 - 4K30Hz 3D 2CH (PCM)8 - 4K30Hz 3D 6CH (5.1 Channel)9 - 4K30Hz 3D 8CH (7.1 Channel)10 - 4K60Hz (Y420) 3D 2CH (PCM)11 - 4K60Hz (Y420) 3D 6CH (5.1 Channel)12 - 4K60Hz (Y420) 3D 8CH (7.1 Channel)U SER EDID 1 USER EDID 2 USER EDID 3EDID from output 1 EDID from output 2 EDID from output 3 EDID from output 4EDID Management Cont:The first 12 EDID settings cannot be altered. The three USER EDID settings are programmed using RS-232 or the free PC Software. However, you can read an EDID from any output and it will automatically store in USER EDID 1. Remember, each IN P UT has an independent EDID setting and you may need to program each one.To read and set an EDID to a specified input the steps are the same as on PAGE 5. The only difference is that when you see a screen similar to FIGURE 5, you press and hold the INPUT button again for 3 seconds and this AUTOMATICALLY reads, stores and sets the EDID for that INPUT.Figure 5 ~ Read EDID ScreenDisplay IP Data:Press and hold INPUT 3 and INPUT 4 at the same time for three seconds to display the current IP settings. This screen will change every 3 seconds showing additional settings (host, net mask, router IP). NOTE: This screen always starts with the current IP address of the matrix:In order to prevent potential IP problems, most IP settings have to be managed in the Free PC Software or using RS-232 commands.NOTE: The default IP address is 192.168.001.239 (As pictured above)You can enable/disable DHCP mode directly from the front panel. When DHCP is enabled it will automatically gather an IP address from the network and it will be discoverable on said network. You can now view the assigned IP address by following the steps above. To toggle DHCP, press and hold INPUT 1 and INPUT 3 at the same time for three seconds. You will see this:Cascade Mode:When Cascade Mode is turned on, the signal is passed from the switch without reading EDID or HotPlug. Many issues can be resolved in the field with this mode, including:•Invalid/incorrect EDID coming from display (It happens more than you think)•When you want to manage EDID in a device further down the chain (AVR or Distribution Amp)•When running one or more outputs into additional peripherals before the displayWe recommend you ONLY use cascade mode if you have exhausted all other troubleshootingoptions. To toggle Cascade Mode press and hold INPUT 1 and INPUT 2 at the same time for three seconds. When Cascade Mode is enabled you will see this:AC-MX44-UHD and AC-MX88-UHDThe same commands can be sent to the matrix using Ethernet as IP commandsdiagram at the end of the manual.NOTE: HDR (High Dynamic Range) is supported on these matrix switchers. you mus read EDID from and HDR capable display and store it to to the input where the HDR source resides.Specifications:After Sale Service:AVProConnect.Application Diagram:RS-232 Wiring Diagram:Audio Wiring Diagram:Using the Free PC Software: General Matrix ControlUsing the Free PC Software: EDID ManagementUsing the Free PC Software: IP SettingsAVP roC o nn e ct 3518 N Casco A v e nu e ~ S ioux Fa l l s , S D 57104 1-877-886-5112 ~ 605-274-6055su p por t @a v p r o c o n n ec t.c o mThank you for choosing AVProConnect!Please contact us with any questions, we are happily at your service!。
HDMI接口KVM切换器用户手册
■ Please do not dismantle the equipment, avoid damaging the internal electrical component.
HDMI Type A x1 (female)
Switch way
Key switch, remote control switch
Automatic scanning interval
Default 5 seconds (time 5~999 seconds adjustable)
Resolution
safety of the user, please observe the following matters during the process of installation, use and maintenance.
■ Please do not use this product in the following places: the place of dust, soot and electric conductivity dust, corrosive gas, combustible gas; the place exposed to high temperature, condensation,wind and rain; the occasion of vibration and impact. Electric shock, fire, wrong operation can lead to damage and deterioration to the product, either;
HDMI KVM扩展器组合包EXP-EX-80-KVM快速入门指南说明书
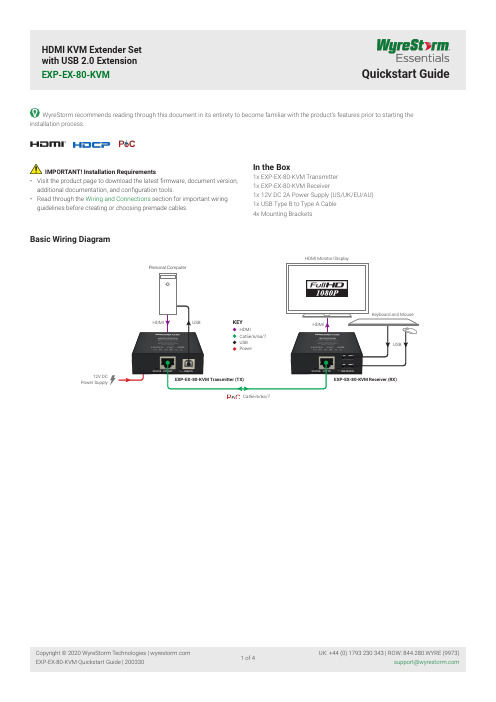
HDMI KVM Extender Set with USB 2.0 Extension EXP-EX-80-KVMQuickstart Guideinstallation process.Basic Wiring DiagramIMPORTANT! Installation Requirements• Visit the product page to download the latest firmware, document version, additional documentation, and configuration tools.• Read through the Wiring and Connections section for important wiring guidelines before creating or choosing premade cables.In the Box1x EXP-EX-80-KVM Transmitter 1x EXP-EX-80-KVM Receiver1x 12V DC 2A Power Supply (US/UK/EU/AU) 1x USB Type B to Type A Cable 4x Mounting BracketsHDMI12V DCPower SupplyCat5e/6/6a/7Transmitter (Front/Rear)Receiver (Front/Rear)HDMI In 19-pin type A HDMI femaleSupports HDMI and DVI/D with adapter Power LEDSolid: The unit is powered On Off:The unit is powered OffPower In 5.5mm Screw Down Barrel JackConnect to the included 12V DC 2A power supply to the transmitter. A power supply is not required on the other end as it will bepowered using PoC.Status LED Flashing: The receiver is operating normally.Off:The receiver is Not operating normally.UTP Out8-pin RJ-45 femaleConnect the transmitters UTP OUT to receiversUTP IN.USB LEDSolid: USB linkedFlashing: USB data transmitting Off:No USB device connected USB (PC) HostUSB Type B femaleConnection of USB Host deviceHDMI Out 19-pin type A HDMI femaleSupports HDMI and DVI/D with adapter Power LEDSolid: The unit is powered On Off:The unit is powered OffPower In5.5mm Screw Down Barrel JackConnect to the included 12V DC 2A power supply to the transmitter. A power supply is not required on the other end as it will bepowered using PoC.Status LEDFlashing: The receiver is operating normally.Off:The receiver is Not operating normally.UTP In8-pin RJ-45 femaleConnect the transmitters UTP OUT to receiversUTP IN.USB LEDSolid: USB linkedFlashing: USB data transmitting Off:No USB device connected USB Device2x USB Type A femaleConnection of USB devices such as keyboards and mice.Wiring and ConnectionsWyreStorm recommends that all wiring for the installation is run and terminated prior to making connections to the switcher. Read through this section in it’sentirety before running or terminating the wires to ensure proper operation and to avoid damaging equipment.IMPORTANT! Wiring Guidelines• The use of patch panels, wall plates, cable extenders, kinks in cables, and electrical or environmental interference will have an adverse effect on signal transmission which may limit performance. Steps should be taken to minimize or remove these factors completely during installation for best results.• WyreStorm recommends the use of shielded category cable to minimize signal noise and interference.• WyreStorm recommends using pre-terminated HDMI cables due to the complexity of these connector types. Using pre-terminated cables will ensure that these connections are accurate and will not interfere with the performance of the product..TroubleshootingNo or Poor Quality Picture (snow or noisy image)• Verify that power is being supplied to the transmitter and receiving device • Verify that all HDMI and UTP connections are not loose and are functioning properly• Verify that the UTP cable is properly terminated following EIA568B standard • Verify that the output resolution of the source and display is supported by this extenderFailed USB Connection or Slow Transmission rate• Ensure the category cable length is within the range of requirement, USB HIDdevice is within 80m/260ft, USB storage device is within 60m/200ft.Troubleshooting Tips:• WyreStorm recommends using a cable tester or connecting the cable to other devices to verify functionality.SpecificationsInputs 1x HDMI In: 19-pin type A 1x USB Type B1x UTP In: 8-pin RJ-45 Female 2x USB Type AOutputs1x UTP Out: 8-pin RJ-45 Female 1x HDMI Out: 19-pin type A Output Video Encoding UTP Encoding Data Rate 6.75GbpsEnd to End Latency (Max)10μs (micro seconds)Note: WyreStorm recommends the use of shielded category cable to minimize signal noise and interferenceSupported Standards DCI | RGB UTP HDMI 1.3b | HDCP 1.4 | EDID | 2-way PoC Storage Temperature -20 to +70°C (-4 to + 158 °F), 10% to 90%, non-condensing Height 23mm/0.9in Width 75mm/2.95276in Depth 98.2mm/3.87in Warranty InformationWyreStorm Technologies LLC warrants that its products to be free from defects in material and workmanship under normal use for a period of two (2) years from the date of purchase. Refer to the Product Warranty page on for more details on our limitedproduct warranty.Note: WyreStorm reserves the right to change product specification, appearance or dimensions of this product at any time without prior notice.。
海洋矩阵OMX-07HMHM0004 HDMI 4x1 切换器说明书

OMX-07HMHM0004HDMI 4x1 Switcher 8K@60Hz 4:4:4 HDRHDCP2.3Description:The Ocean Matrix OMX-07HMHM0004 is an HDMI 4x1 switcher that lets you share four HDMI-enabled video sources with a single display or projector. The switcher features four independent inputs that each support 8K resolutions and 7.1 surround sound audio. The switcher is backward compatible with Ultra HD 4K and HD 1080p, so users can be assured that their digital signage will look great in all situations.Features:Supports Resolutions up to 8K@60Hz 4:4:4, 4K@120Hz, and 1080p@240Hz1200MHz/12Gbps per Channel Bandwidth (48Gbps All Channels)Supports 12bit per Channel (36bit All Channels) Deep ColorHDCP 2.3, HDCP2.2 and HDCP1.4 CompliantSupport High Dynamic Range (HDR) Video Pass-through, such asHDR10/HDR10+/Dolby vision etc.VRR (Variable Refresh Rate), ALLM (Auto Low-latency Mode), and QFT (Quick Frame Transport) FunctionalityBuilt-in Equalizer, Retiming, and DriverAutomatic, Manual, and Remote Control Switching SupportedSupports Uncompressed Audio; LPCMSupports Compressed Audio: DTS, Dolby Digital (DTS-HD Master Audio™ andDolby TrueHD)Specifications:Input Ports: HDMI x 4Output Ports: HDMI x 1Vertical Frequency Range: 50/60/100/120/240HzVideo Amplifier Bandwidth: 12Gbps/1200MHz per Channel (48Gbps All Channels) Interlaced (50 & 60Hz): 480i,576i,1080iProgressive (50 & 60Hz): 480p,576p,720p,1080p,4K@24/30Hz,4K@50/60/120Hz, 8K@24/30/50/60HzOperating Temperature: 32°F – 158°F (0°C-70°C)Storage Humidity: 5% to 90% TH Non-condensationPower Consumption (Max): 5WSwitcher Unit & Power Supply Certifications: FCC, CE, RoHSDimensions (LxWxH): 5.35 x 2.41 x 0.56in (136.3 x 61.5 x 14.5mm)Operation Controls and Functions:245789Power LED IndicatorInput Ports 1-4 LED Indicators - Blue LED indicates an active signal path while noLED indicates no input signalAuto Mode LED Indicator - LED on indicates the unit is in automatic switchingmode while off indicates it's in manual switching modeIR Mode LED Indicator - LED on indicates the unit is in the normal IR receivermode while off indicates it's not in IR function modeIR Signal Receiver PortSwitch - Press to change the input channel, automatic / manual switching mode,and IR receiver modeDC/5V - DC 5V input via micro-USBHDMI Output Port1.2.3.4.5.6.7.8.316Item Includes:Remote Control:Power Button1-4 - Press the number to select the input source accordinglyIR - Press to turn on/off the IR receiver functionUSB Power Cable1. a.b.c.2.Connection DiagramThe unit should be serviced by qualified service personnel if: (a) The DC power supply cord or AC adaptor has been damaged (b) Objects or liquids have gotten into the unit (c) The unit has been exposed to rain (d) The unit does not operate normally or exhibits a marked change in performance; The unit has been dropped or the cabinet is damaged. (2) Servicing Personnel: Do not attempt to service the unit beyond that described in these operating instructions. Refer all other servicing to authorized servicing personnel. (3) Replacement parts: When parts need replacing ensure the servicer uses parts specified by the manufacturer. Unauthorized substitutes may result in fire, electric shock, or other hazards. (4) Safety check: After repairs or service, ask the servicer to perform safety checks to confirm that the unit is in proper working condition.Damage requiring service:PRODUCT SERVICEAlways follow basic safety precautions to reduce the risk of fire, electrical shock and injury to persons.To prevent fire or shock hazard, do not expose the unit to rain, moisture or install this product near water.Never spill liquid of any kind on or into this product.Never push an object of any kind into this product through any openings or empty slots in the unit, as you may damage parts inside the unit.Do not attach the power supply cabling to building surfaces.Use only the supplied power supply unit (PSU). Do not use the PSU if it is damaged.Do not allow anything to rest on the power cabling or allow any weight to be placed upon it or any person walk on it.To protect the unit from overheating, do not block any vents or openings in the unit housing that provide ventilation and allow for sufficient space for air to circulate around the unitPlease read all instructions before attempting to unpack, install or operate this equipment and before connecting the power supply.Please keep the following in mind as you unpack and install the unit:SAFETY PRECAUTIONSWARRANTY1 Year。
Krell HDMI 切换器用户指南说明书

Krell HDMI Switcher Owner’s ReferenceKrell HDMI Switcher Owner’s ReferenceTable of ContentsGetting Started ______________________________________________________________________________ (3) Connections _________________________________________________________________________________ (4) Operation ____________________________________________________________________________________ (5) Specifications _______________________________________________________________________________ (6) Warranty _____________________________________________________________________________________(7) Service ______________________________________________________________________________________ (9) Krell Contact Information ____________________________________________________________________ (9)Getting StartedThank you for your purchase of a Krell HDMI 4K HDR Switcher.The switcher extends the capabilities of our Foundation and Foundation 4K surround processors by offering additional HDMI inputs that meet the HDMI 2.0b HDR specifications.Unpacking / Placement / AC Power GuidelinesPacking List:1 – HDMI Switcher1 - AC power adapter2 – 3ft. HDMI cables1 – 1ft. USB cable1 – USB to RS-232 adapter1 - Warranty Registration cardPlace the HDMI switcher on a firm, level surface, away from excessive heat, humidity, or moisture. It may be placed on top of the Foundation as long as there is adequate ventilation.W ARNING: Do not place the component where it could be exposed to dirt or excessive moisture. Do not place flammable material on top of or beneath the unit.The power adapter is designed to work all over the world at voltages from 100-240VAC.Note:Save all packing materials; if you need to ship the HDMI switcher in the future, repack the unit in its original packaging to prevent shipping damage.Recommended Cleaning Instructions for Krell ProductsClean your Krell product gently, using a high quality lint-free cloth that has not been treated with chemicals of any kind. Please note the following: Do not use cleaning agents of any kind, such as water, alcohol, or other common cleaning products.Thank you.ConnectionsThe following diagram shows a typical connection of the HDMI switcher to a Foundation or Foundation 4K.OperationIn order to use the HDMI switcher with the Foundation or Foundation 4K you will need to update the software in your unit to the following versions (or higher). If your unit is connected to the Internet, you can go to the Software Update page in the front panel menu and get the latest software. Otherwise contact Krell for instructions on how you can update the software by other means.Foundation: V1.33Foundation 4K: V1.48Go to the External HDMI Switch page in the front panel menu of the Foundation or Foundation 4K and set the Enable option. This will map HDMI inputs 2-4 on the Foundation or Foundation 4K to inputs 2-4 on the HDMI switcher. If you have a source assigned to HDMI input 1, you will need to connect it to inputs 2-4 on the HDMI switcher and then change the HDMI input in the source setup menu accordingly. Put the Foundation or Foundation 4K into stand-by and then turn it back on. You don’t need to do anything else at this point. All of your source settings will remain as they are and source selection from the remote control or home control system will continue to operate as normal.RS-232 ControlThe HDMI switcher may be operated by a computer or home control system through the RS-232 port.Port settings: 57600 baud rate, no parity, 8 data bits, 1 stop bitInput select command: swc n <CR><LF>n = 1-4 for HDMI inputs 1-4<CR> carriage return<LF> line feedInput status command: swc ? <CR><LF>returns Select Rx Port = nSpecificationsHDM I: HDMI v2.0b with HDCP v1.4/2.2Bandwidth: 18GbpsVideo: 4K/60Hz, RGB 4:4:4/YUV 4:4:4/YUV 4:2:0, 12-bits, HDR10, HDR10+, Dolby Vision Audio:LPCM, Dolby Digital, Dolby TrueHD, Dolby Atmos, DTS, DTS-HD, DTS-XPower Supply: 24VDC, 0.5APower Consumption: <12WDimensions: 8.9in (22.6cm) W x 1.2in (3.0cm) H x 4.25in (10.8cm) DShipping Weight: 3lbs (1.4kg)WarrantyThis Krell product has a limited warranty of three years for parts and labor on circuitry from the date of purchase extended to five years with submission of the Warranty Registration Card either online at our website, or by mail within 60 days of purchase.Should this product fail to perform at any time during the warranty, Krell will replace it at no cost to the owner, except as set forth in this warranty. The warranty does not apply to damage caused by acts of nature.The warranty on this page shall be in lieu of any other warranty, expressed or implied, including, but not limited to, any implied warranty of merchantability or fitness for a particular purpose. There are no warranties which exceed beyond those described in this document. If this product does not perform as warranted herein, the owner’s sole remedy shall be repair. In no event will Krell be liable for incidental or consequential damages arising from purchase, use, or inability to use this product, even if Krell has been advised of the possibility of such damages.Proof of purchase in the form of a bill of sale or receipted invoice substantiating that the unit is within the warranty period must be presented to obtain warranty service. The warranty begins on the date of retail purchase, as noted on the bill of sale or receipted invoice from an authorized Krell dealer or distributor.The warranty for Krell products is valid only in the country to which they were originally shipped, through the authorized Krell distributor for that country, and at the factory. There may be restrictions on or changes to Krell’s warranty because of regulations within a specific country. Please check with your distributor for a complete understanding of the warranty in your country.If a unit is serviced by a distributor who did not import the unit, there may be a charge for service, even if the product is within the warranty period.Freight to the factory is your responsibility. Return freight within the United States (U.S.A.) is included in the warranty. If you have purchased your Krell product outside the U.S.A. and wish to have it serviced at the factory, all freight and associated charges to the factory are your responsibility. Krell will pay return freight to the U.S.A.-based freight forwarder of your choice. Freight and other charges to ship the unit from the freight forwarder to you are also your responsibility.Krell is not responsible for any damage incurred in transit. Krell will file claims for damages as necessary for units damaged in transit to the factory. You are responsible for filing claims for shipping damages during the return shipment.Krell does not supply replacement parts and/or products to the owner of the unit. Replacement parts and/or products will be furnished only to the distributor performing service on this unit on an exchange basis only; any parts and/or products returned to Krell for exchange become the property of Krell.No expressed or implied warranty is made for any Krell product damaged by accident, abuse, misuse,natural or personal disaster, or unauthorized modification.Any unauthorized voltage conversion, disassembly, component replacement, perforation of chassis, updates, or modifications performed to the unit will void the warranty.The operating voltage of this unit is determined by the factory and can only be changed by an authorized Krell distributor or at the factory. The voltage for this product in the U.S.A. cannot be changed until six months from the original purchase date.In the event that Krell receives a product for warranty service that has been modified in any way without Krell authorization, all warranties on that product will be void. The product will be returned to original factory layout specifications at the customer’s expense before it is repaired. All repairs required after the product has been returned to original factory specifications will be charged to the customer, at current parts and labor rates.All operational features, functions, and specifications and policies are subject to change.ServiceReturn Authorization ProcedureIf you believe there is a problem with your component, please contact your dealer, distributor, or the Krell factory to discuss the problem before you return the component for repair. To expedite service, you may wish to complete the Service Request Form in the Support section of our website at: .To return a product to Krell, please follow this procedure so that we may serve you better:1.Obtain a Return Authorization Number (R/A number) and shipping address from the KrellService Department.2.Insure and accept all liability for loss or damage to the product during shipment to the Krellfactory and ensure all freight (shipping) charges are prepaid.3.The product may also be hand delivered if arrangements with the Service Department havebeen made in advance. Proof of purchase will be required for warranty validation at the time of hand delivery.NOTE: Use the original packaging to ensure the safe transit of the product to the factory, dealer, or distributor. Krell may, at its discretion, return a product in new packaging and bill the owner for such packaging if the product received by Krell was boxed in nonstandard packaging or if the original packaging was so damaged that it was unusable. If Krell determines that new packaging is required, the owner will be notified before the product is returned.To purchase additional packaging, please contact your authorized Krell dealer, distributor, or the Krell Service Department for assistance.To Contact the Krell Service Department:Telephone: 203-298-4020 Monday-Friday, 8:30am to 5:00pm ESTFax: 203-799-9796E-Mail:*********************https://。
kvm切换器方案
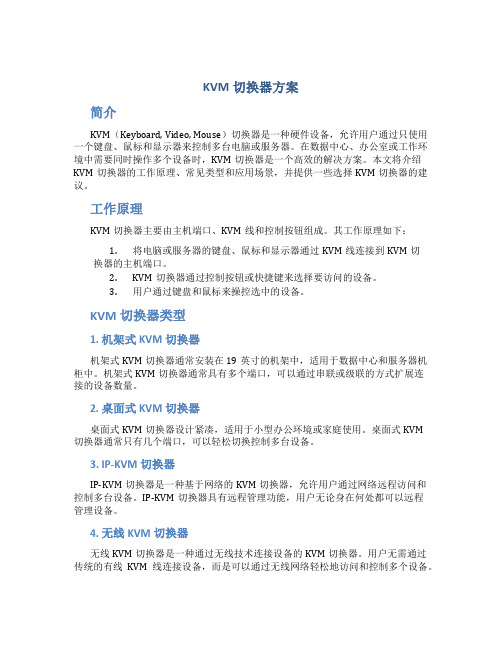
KVM切换器方案简介KVM(Keyboard, Video, Mouse)切换器是一种硬件设备,允许用户通过只使用一个键盘、鼠标和显示器来控制多台电脑或服务器。
在数据中心、办公室或工作环境中需要同时操作多个设备时,KVM切换器是一个高效的解决方案。
本文将介绍KVM切换器的工作原理、常见类型和应用场景,并提供一些选择KVM切换器的建议。
工作原理KVM切换器主要由主机端口、KVM线和控制按钮组成。
其工作原理如下:1.将电脑或服务器的键盘、鼠标和显示器通过KVM线连接到KVM切换器的主机端口。
2.KVM切换器通过控制按钮或快捷键来选择要访问的设备。
3.用户通过键盘和鼠标来操控选中的设备。
KVM切换器类型1. 机架式KVM切换器机架式KVM切换器通常安装在19英寸的机架中,适用于数据中心和服务器机柜中。
机架式KVM切换器通常具有多个端口,可以通过串联或级联的方式扩展连接的设备数量。
2. 桌面式KVM切换器桌面式KVM切换器设计紧凑,适用于小型办公环境或家庭使用。
桌面式KVM切换器通常只有几个端口,可以轻松切换控制多台设备。
3. IP-KVM切换器IP-KVM切换器是一种基于网络的KVM切换器,允许用户通过网络远程访问和控制多台设备。
IP-KVM切换器具有远程管理功能,用户无论身在何处都可以远程管理设备。
4. 无线KVM切换器无线KVM切换器是一种通过无线技术连接设备的KVM切换器。
用户无需通过传统的有线KVM线连接设备,而是可以通过无线网络轻松地访问和控制多个设备。
应用场景KVM切换器可以在以下场景中发挥重要作用:1. 数据中心在大型数据中心中,管理员通常需要管理和维护多台服务器。
KVM切换器可以帮助管理员轻松切换和管理不同的服务器,提高工作效率。
2.办公室在办公环境中,人们通常使用台式电脑和笔记本电脑来完成工作。
使用KVM切换器,用户可以通过共享一个键盘和显示器来轻松切换不同的设备,提高办公效率。
3.软件开发和测试在软件开发和测试过程中,开发人员和测试人员通常需要同时运行多台计算机。
网络中控HDMI矩阵与应用解决方案

网络中控HDMI矩阵与应用解决方案网络中控HDMI矩阵是一种通过网络连接的设备,可以将多个HDMI输入信号传输到多个HDMI输出设备上。
它可以帮助用户更灵活地控制和管理多个HDMI信号源和显示设备,提供更高的便利性和可扩展性。
在下面的文章中,我将介绍网络中控HDMI矩阵的原理和应用解决方案。
首先,让我们了解一下网络中控HDMI矩阵的工作原理。
网络中控HDMI矩阵由两个主要部分组成:中控主机和HDMI矩阵切换器。
中控主机通过网络连接到计算机或移动设备,并通过一个控制界面来控制HDMI矩阵切换器。
HDMI矩阵切换器有多个HDMI输入和输出端口,可以将输入信号广播到输出设备上。
中控主机可以通过网络与矩阵切换器进行通信,控制输入信号的切换和输出设备的管理。
1.会议室:在大型会议室中,可能需要连接多个信号源,如计算机、投影仪和视频会议设备。
通过网络中控HDMI矩阵,可以轻松地切换输入信号源,实现无缝切换和管理多个显示屏。
2.教育场所:在教育场所,教师需要连接多个输入设备,如电脑、摄像头和DVD播放器,并将其传输到学生们的显示设备上。
网络中控HDMI 矩阵可以帮助教师轻松地控制和切换输入源,并将内容传输给学生们的设备。
3.家庭影院:在家庭影院系统中,用户可能需要连接多个输入设备,如电视、游戏机和音响系统,并将其传输到不同的显示设备上。
通过网络中控HDMI矩阵,用户可以方便地切换输入源,实现多个设备的灵活管理和控制。
4.商务展示:在商务展示中,用户可能需要将不同的媒体内容传输到多个大屏幕上。
网络中控HDMI矩阵可以帮助用户方便地切换和管理输入源,实现更专业和高效的展示效果。
5.视频监控:在视频监控系统中,用户可能需要连接多个摄像头,并将视频内容传输到监视设备上。
通过网络中控HDMI矩阵,用户可以方便地切换和管理多个摄像头,实现更全面和灵活的监控。
除了以上应用解决方案,网络中控HDMI矩阵也可以在其他场景中发挥重要作用。
yeren矩阵8进8出切换器使用说明

yeren矩阵8进8出切换器使用说明摘要:一、yeren 矩阵8 进8 出切换器介绍1.产品概述2.主要功能3.适用场景二、使用说明1.连接设备2.接通电源3.系统配置4.切换器操作5.注意事项三、常见问题及解决方法1.无法正常工作2.切换不顺畅3.系统崩溃正文:yeren 矩阵8 进8 出切换器是一款高性能的多媒体切换器,具有8 个输入端口和8 个输出端口,可实现多路信号源之间的自由切换。
适用于家庭、办公室、会议室、学校等场所,方便用户快速切换信号源,提高工作效率。
一、yeren 矩阵8 进8 出切换器介绍1.产品概述yeren 矩阵8 进8 出切换器采用高性能硬件架构,支持多种信号格式,包括HDMI、VGA、AV 等。
具有8 个输入端口和8 个输出端口,支持热插拔,即插即用。
设备外观简约时尚,体积小巧,便于携带和安装。
2.主要功能(1)多路信号源切换:支持8 路信号源之间的自由切换,无需重新配置系统。
(2)信号放大:信号源经过切换器后,信号质量不受损,画面清晰稳定。
(3)兼容性强:支持多种信号格式,适用于不同类型的设备连接。
3.适用场景(1)家庭:连接电视、电脑、游戏机等多路设备,实现一键切换。
(2)办公室:连接打印机、电脑、投影仪等设备,方便员工进行演示和报告。
(3)会议室:连接笔记本、投影仪、音响等设备,提高会议效率。
(4)学校:连接多媒体教学设备,实现多路信号源之间的自由切换。
二、使用说明1.连接设备将信号源设备(如电视、电脑、游戏机等)通过相应的线缆连接到切换器的输入端口。
确保线缆插头插入紧密,避免松动影响信号传输。
2.接通电源将切换器接入电源,打开设备电源开关。
注意:请确保电源电压与设备额定电压相符,避免因电压不稳导致的设备损坏。
3.系统配置(1)通过遥控器或面板按键进行系统配置,包括语言、信号源命名等。
(2)根据实际需求,设置合适的信号源顺序,以便于快速切换。
4.切换器操作(1)使用遥控器或面板按键,选择需要切换的信号源。
迈拓维矩4K超高清4进4出HDMI矩阵切换器

迈拓维矩4K超高清4进4 出HDMI矩阵切换器在大屏显示行业,人们对分辨率的追求就像对显示尺寸极限的追求一样,从未停止过。
近年来,随着显示技术的不断进步,4K技术开始在大屏显示领域里全面开花。
而作为与大屏显示市场息息相关的视频信号处理市场,也面临着更高的要求。
于是,身处在这股潮流下的包括矩阵切换器、远距传输、拼接控制等在内的信号处理产品,都开始加速跑步进入“4K”时代。
在这种环境下,作为规模化高端KVM切换器制造商的迈拓维矩于近日推出了一款全新的4K超高清 4进4出 HDMI 矩阵切换器。
迈拓维矩4K超高清 4进4 出HDMI 矩阵切换器(型号:MT-HD414)的推出,无论是从设计技术还是最终给用户所带来的视讯效果来看,都在引领着高清时代新的革命。
MT-HD414最亮眼的特点在于支持4K超高清分辨率(4Kx2K@30Hz),能够为用户提供更高质的影像画面效果,给用户带来更加完美的视讯体验。
除此之外,迈拓维矩4K超高清4进4出HDMI 高清矩阵切换器,支持将4 路HDMI 输入信号任意换出4 路HDMI 信号输出,支持红外遥控控制,RS232控制,局域网控制等多种控制方法,方便切换选择输入及输出信号源,可以轻松将4个HDMI信号源的内容切换到显示器或电视机。
凭借强大的性能,该产品能广泛适用于安防系统展销处、数字监控中心, 教育系统,展览演播系统,指挥系统中心等场所。
迈拓维矩4进4出4K超高清矩阵切换器具有以下产品特征:1.任意切换4路HDMI源信号并分配至4路HDMI显示设备上;2.支持超高清分辨率4Kx2K@30HZ,可向下兼容1080P、1080I,720P等;3.数据传输速率10.2Gbps;4.支持红外遥控控制;5.支持RS232串口控制;6.支持按键控制选择输入/输出通道;7.支持局域网内控制;8.纯硬件设计,即插即用;9.支持3D;10.支持4:2:2的色彩空间;。
《KVM切换器介绍》课件

通过支持远程访问协议, 用户可以在远程位置访问 和控制计算机。
KVM切换器的作用
1 简化操作
通过使用KVM切换器,用户可以在一个控制台上管理多台计算机,减少了切换设备的需 求。
2 提高效率
用户可以快速切换和操作多个计算机,从而提高工作效率。
3 节省空间
不再需要为每台计算机配备独立的键盘、鼠标和显示器,节省了大量的办公空间。
1
无线切换器
2
通过无线连接,方便灵活的操作多台计
算机,适用于移动办公或会议环境。
3
有线切换器
使用有线连接,适用于需求较低的个人 或小型办公室环境。
IP切换器
支持远程访问和管理,适用于需要远程 操作计算机的企业和机构。
KVM切换器的应用场景
1 数据中心
KVM切换器使管理员能够集中管理和控制数 据中心中的多台服务器。
《KVM切换器介绍》PPT 课件
KVM切换器是一种用于管理多台计算机的设备,可以实现在一台键盘、鼠标 和显示器上控制多台主机的操作。
KVM切换器的定义
1 基本功能
KVM切换器是一种硬件设 备,允许用户通过共享键 盘、鼠标和显示器来操作 多台计算机。
2 通用性
3 远程管理
它可以连接各种类型的计 算机,包括桌面、服务器、 工作站等。
KVM切换器的工作原理
连接
KVM切换器通过使用一组连接线将计算机和控制 台连接起来。
信号传输
切换器将键盘、鼠标和显示器的信号从当前选定 的计算机传输到控制台。
切换
用户可以通过按动切换按钮或使用快捷键来切换 当前操作的计算机。
数据安全
切换器通常支持加密和安全认证功能,以确保数 据传输的安全性。
专业级高清矩阵切换器- 用户手册说明书

Professional Matrix Switch用户手册HDMI系列高清矩阵DVI系列高清矩阵HVD系列高清混插矩阵在使用本系统前,请详细阅读本说明书!安全操作指南为确保设备可靠使用及人员的安全,在安装、使用和维护时,请遵守以下事项:系统接地系统必须有完善的接地。
否则,不仅造成信号干扰、不稳定或机械损坏,而且还可能因漏电引起人身事故。
HDMI、DVI、HVD切换矩阵的最终接地点应连接至真地,其接地电阻应小于1Ω。
禁止改变原设计禁止对本产品的机械和电器设计更改或增添任何部件。
否则,生产厂家对由此所带来的危害性结果不负责任。
请勿使用二芯插头,确保设备的输入电源为110V60Hz的交流电。
机器内有交流高压部件,请勿擅自打开机壳,以免发生触电危险。
不要将系统设备置于过冷或过热的地方。
设备电源在工作时会发热,因此要保持工作环境的良好通风,以免温度过高而损坏机器。
阴雨潮湿天气或长时间不使用时,应关闭设备电源总闸。
在下列操作之前一定要将设备的交流电源线从交流供电电源插座拔下:A.取下或重装设备的任何部件。
B.断开或重接设备的任何电器插头或其它连接。
非专业人士未经许可,请不要试图拆开设备机箱,不要私自维修,以免发生意外事故或加重设备的损坏程度。
不要将任何化学品或液体洒在设备上或其附近。
目录一、HDMI/DVI/HVD高清矩阵系统说明 (3)1.1关于矩阵切换器 (3)1.2矩阵系统的分类 (3)二、矩阵系统包装说明 (4)三、矩阵主机安装 (4)四、前后面板示意图 (4)HDMI0808后接口图 (5)HDMI1616后接口图 (5)DVI0808后接口图 (5)DVI1616后接口图 (5)五、矩阵与外围设备的连接 (6)5.1输入、输出接口说明 (6)5.2RS-232通讯端口及连接方法 (6)5.2.1矩阵与网络接口的连接 (6)5.2.2矩阵与控制电脑的连接 (6)5.3高清矩阵切换器的连接方法 (7)5.4插卡式高清矩阵结构说明 (7)六、控制面板使用说明 (8)6.1前面板按键功能说明 (8)6.2操作示例 (9)七、遥控器使用说明 (10)8.1.软件安装说明: (10)8.4软件功能说明 (11)8.5主操作界面功能说明: (11)8.6更多巡航设置: (12)九、通讯协议与控制指令代码 (12)9.1RS232通讯协议 (12)十、矩阵系统技术参数 (14)10.1技术参数: (14)10.2产品系列规格重量 (15)十一、常见故障及维护 (16)本手册说明 (16)一、HDMI/DVI/HVD高清矩阵系统说明1.1关于矩阵切换器HDMI/DVI高清系列矩阵切换器,是一款高性能的专业矩阵切换设备,可用于切换高清音视频信号。
KVM切换器使用方法
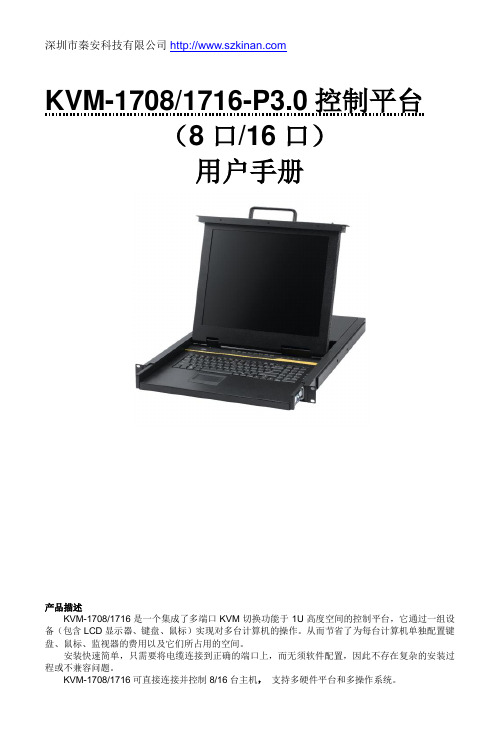
深圳市秦安科技有限公司KVM-1708/1716-P3.0控制平台(8口/16口)用户手册产品描述KVM-1708/1716是一个集成了多端口KVM切换功能于1U高度空间的控制平台,它通过一组设备(包含LCD显示器、键盘、鼠标)实现对多台计算机的操作。
从而节省了为每台计算机单独配置键盘、鼠标、监视器的费用以及它们所占用的空间。
安装快速简单,只需要将电缆连接到正确的端口上,而无须软件配置,因此不存在复杂的安装过程或不兼容问题。
产品特性●17” LCD TFT 液晶显示屏,高亮度,高清晰,高分辨率显示●1U 高度,适应于19”标准机柜安装,金属结构●超薄键盘99键,带数字小键盘,标准PS/2接口●采用触摸板鼠标,高分辨率,高灵敏度。
2个功能按键和滚轮功能(触摸板右边横条区域为滚轮功能区),符合PS/2 标准接口切换器功能●可直接连接8/16台电脑并实现切换操作●警音提示切换完成●无需安装附加软件,通过OSD菜单或热键操作,非常容易地在多台电脑间切换●切换电脑时,会自动记录并存储键盘、鼠标原有的工作状态●在自动扫描(auto-scan)模式下鼠标可正常使用●DDC模拟功能- 每台服务器的视讯设定会自动调整至屏幕显示的最佳状态●只用鼠标即可完成主机间的切换操作●具有热插拔功能(直接增加或移除主机而无需关闭KVM电源)外观图1-1.1整体外观尺寸图前视图(见图1-1.2)图1-1.2 KVM-1708前视图1.液晶显示屏2.后挂耳导槽3.LCD OSD控制键4.键盘5.前挂耳6.触摸鼠标7.拉手8.锁扣9.显示面板后视图(见图1-1.3)图1-1.3 KVM-1708后视图1 PC连接端口: 8个端口(集成VGA/键盘/鼠标信号输入端)2 电源输入插座(AC 或DC)3 电源开关4 接地螺钉5 Console : 外接显示器使用6 Update前视图(见图1-1.4)图1-1.4 KVM-1716 前视图1.液晶显示屏2.后挂耳导槽3.LCD OSD控制键4.键盘5.前挂耳6.触摸鼠标7.拉手8.锁扣9.显示面板后视图(见图1-1.5)图1-1.5 KVM-1716 后视图1 PC连接端口: 16个端口(集成VGA/键盘/鼠标信号输入端)2 电源输入插座(AC or DC)3 电源开关4 接地螺钉5 Console : 外接显示器使用6 Update机架安装KVM-1708/1716控制平台符合标准19”机柜的安装要求,由前向后安装,后挂耳插入导槽内,安装好后,锁紧前后挂耳螺丝。
HDMI矩阵切换器的特点和产品应用
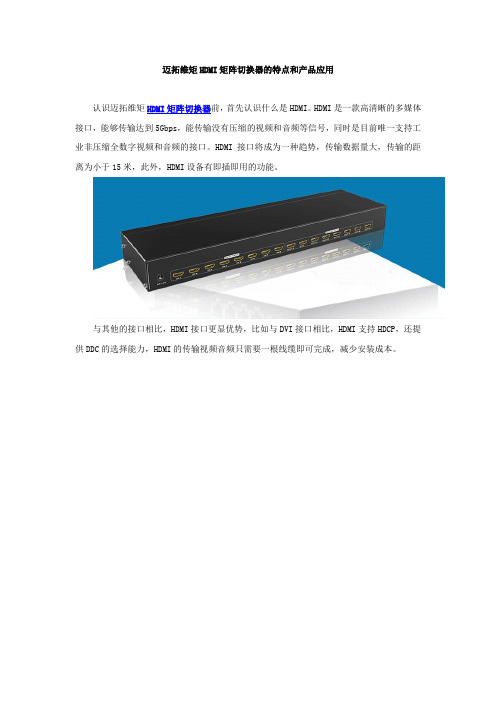
迈拓维矩HDMI矩阵切换器的特点和产品应用
认识迈拓维矩HDMI矩阵切换器前,首先认识什么是HDMI。
HDMI是一款高清晰的多媒体接口,能够传输达到5Gbps,能传输没有压缩的视频和音频等信号,同时是目前唯一支持工业非压缩全数字视频和音频的接口。
HDMI接口将成为一种趋势,传输数据量大,传输的距离为小于15米,此外,HDMI设备有即插即用的功能。
与其他的接口相比,HDMI接口更显优势,比如与DVI接口相比,HDMI支持HDCP,还提供DDC的选择能力,HDMI的传输视频音频只需要一根线缆即可完成,减少安装成本。
HDMI接口将随着时间的推移不断的普及应用,特别是对于普通家庭来说,HDMI产品的运用越来越多,包括HDMI延长器、HDMI分配放大器、HDMI矩阵切换器等,这些产品不但可以运用于企事业单位,还能使用于家庭。
迈拓维矩HDMI的矩阵切换器采用高速处理器芯片,能够有效的确保信号切换迅速,切换流畅,不失真,不会出现延时,卡顿,无法切换等情况,还具有断电记忆保护。
集中多路高清音视频信号并进行音视频同步切换传输,使用遥控器能给多个空间里的高清系统提供最方便的控制方式,随着高清电视的不断普及,HDMI设备将越来越受到人们的喜欢。
矩阵切换控制系统(大屏液晶显示)概要

矩阵切换/控制系统(大屏液晶显示)主机带前面板键盘主机带前面板键盘★菜单编程★16路输出年、月、日、时、字符叠加,带国标二级字库★多种报警处理方式★系统分区控制★带32个防区报警输入口,一个输出口,可配扩展箱、报警跟随器★可配8-64个解码器,控制8-64个云台或高速智能球★系统之间可通过IP/RS232实现联网功能,包括网络编程、网络控制、具备网络对时功能★可选配视霸网络版多媒体控制管理/集成系统软件★可选配WS8188宏功能键盘,实现宏指令操作备注:★WS70系列型号中“V”表示主机带前面板键盘★WS70系列型号中“VA”表示主机带音视频,前面板键盘★WS70系列型号中“VL”表示主机视频输入带环接前面板键盘★WS70系列型号中“R”表示主机不带前面板键盘★可选配以太网控制功能,实现远程网络控制功能★具有网络故障检测和工作状态监控功能。
★可选配内置WEB视频服务器,实现远程网络视频浏览和控制功能★机箱:乳白色★机箱尺寸:89(高)×432(宽)×322(深)加耳环后尺寸:89(高)×482(宽)×322(深)mm★前面板键盘大屏液晶显示备注:WS70系列后缀加“N”字母,有多级控制功能价格:①8×2、16×5、16×8、32×5、32×8在原价上加收100%②其余型号规格在原价上加收30%WS70系列后缀加“NE”字母,系统升级为以太网联网控制功能,单价在原基础上增加2500。
WS70系列后缀加“NEV1”字母,系统升级为以太网远程视频浏览(1路)和网络控制功能,单价在原的基础上,增加8600。
WS70系列后缀加“NEV4”字母,系统升级为以太网远程视频浏览(4路)和网络控制功能,单价在原的基础上,增加16800。
单价(RMB)说明5,3008路视频输入、2路视频输出32路报警输入1路报警输出带前面板键盘6,8008路视频输入、5路视频输出32路报警输入1路报警输出带前面板键盘8,60016路视频输入、5路视频输出32路报警输入1路报警输出带前面板键盘12,60016路视频输入、8路视频输出32路报警输入1路报警输出带前面板键盘10,90032路视频输入、5路视频输出32路报警输入1路报警输出带前面板键盘14,60032路视频输入、8路视频输出32路报警输入1路报警输出带前面板键盘28,50032路视频输入、16路视频输出32路报警输入1路报警输出带前面板键盘28,80048路视频输入、5路视频输出32路报警输入1路报警输出带前面板键盘33,50048路视频输入、8路视频输出32路报警输入1路报警输出带前面板键盘48,50048路视频输入、16路视频输出32路报警输入1路报警输出带前面板键盘37,50064路视频输入、5路视频输出32路报警输入1路报警输出带前面板键盘44,68064路视频输入、8路视频输出32路报警输入1路报警输出带前面板键盘55,50064路视频输入、16路视频输出32路报警输入1路报警输出带前面板键盘6,8008路音视频输入、2路音视频输出32路报警输入1路报警输出带前面板键盘8,0008路音视频输入、5路音视频输出32路报警输入1路报警输出带前面板键盘10,50016路音视频输入、5路音视频输出32路报警输入1路报警输出带前面板键盘13,90016路音视频输入、8路音视频输出32路报警输入1路报警输出带前面板键盘14,40032路音视频输入、5路音视频输出32路报警输入1路报警输出带前面板键盘18,30032路音视频输入、8路音视频输出32路报警输入1路报警输出带前面板键盘7,6008路视频输入(带环接)2路视频输出32路报警输入1路报警输出带前面板键盘9,6008路视频输入(带环接)5路视频输出32路报警输入1路报警输出带前面板键盘11,90016路视频输入(带环接)5路视频输出32路报警输入1路报警输带前面板键出盘13,70016路视频输入(带环接)8路视频输出32路报警输入1路报警输出带前面板键盘14,90032路视频输入(带环接)5路视频输出32路报警输入1路报警输出带前面板键盘15,70032路视频输入(带环接)8路视频输出32路报警输入1路报警输出带前面板键盘4,5008路视频输入、2路视频输出32路报警输入1路报警输出不带前面板键盘6,6708路视频输入、5路视频输出32路报警输入1路报警输出不带前面板键盘7,50016路视频输入、5路视频输出32路报警输入1路报警输出不带前面板键盘9,20016路视频输入、8路视频输出32路报警输入1路报警输出不带前面板键盘9,90032路视频输入、5路视频输出32路报警输入1路报警输出不带前面板键盘12,90032路视频输入、8路视频输出32路报警输入1路报警输出不带前面板键盘25,60032路视频输入、16路视频输出32路报警输入1路报警输出不带前面板键盘25,80048路视频输入、5路视频输出32路报警输入1路报警输出不带前面板键盘30,60048路视频输入、8路视频输出32路报警输入1路报警输出不带前面板键盘43,80048路视频输入、16路视频输出32路报警输入1路报警输出不带前面板键盘35,80064路视频输入、5路视频输出32路报警输入1路报警输出不带前面板键盘41,60064路视频输入、8路视频输出32路报警输入1路报警输出不带前面板键盘51,80064路视频输入、16路视频输出32路报警输入1路报警输出不带前面板键盘三.WS67系列音频矩阵箱WS67系列音频矩阵箱★通过外扩展接口与WS60、WS70系列主机连接★与主机视频同步切换★机箱:乳白色★机箱尺寸:89(高)×432(宽)×322(深)mm★加耳环后尺寸:89(高)×482(宽)×322(深)mm产品型号单价(RMB)说明WS67-8×2A2,9808路音频输入、2路音频输出WS67-8×5A3,1808路音频输入、5路音频输出WS67-16×5A3,30016路音频输入、5路音频输出WS67-16×8A4,58016路音频输入、8路音频输出WS67-32×5A3,90032路音频输入、5路音频输出WS67-32×8A4,95032路音频输入、8路音频输出WS67-32×16A8,90032路音频输入、16路音频输出WS67-48×8A7,50048路音频输入、8路音频输出WS67-48×16A9,85048路音频输入、16路音频输出WS67-64×8A8,90064路音频输入、8路音频输出WS67-64×16A10,90064路音频输入、16路音频输出WS70-32×5V10,90032路视频输入、5路视频输出32路报警输入1路报警输出带前面板键盘WS70-32×8V14,60032路视频输入、8路视频输出32路报警输入1路报警输出带前面板键盘WS70-32×16V28,50032路视频输入、16路视频输出32路报警输入1路报警输出带前面板键盘WS70-48×5V28,80048路视频输入、5路视频输出32路报警输入1路报警输出带前面板键盘WS70-48×8V33,50048路视频输入、8路视频输出32路报警输入1路报警输出带前面板键盘WS70-48×16V48,50048路视频输入、16路视频输出32路报警输入1路报警输出带前面板键盘WS70-64×5V37,50064路视频输入、5路视频输出32路报警输入1路报警输出带前面板键盘WS70-64×8V44,68064路视频输入、8路视频输出32路报警输入1路报警输出带前面板键盘WS70-64×16V55,50064路视频输入、16路视频输出32路报警输入1路报警输出带前面板键盘WS70-8×2V A6,8008路音视频输入、2路音视频输出32路报警输入1路报警输出带前面板键盘WS70-8×5V A8,0008路音视频输入、5路音视频输出32路报警输入1路报警输出带前面板键盘WS70-16×5V A10,50016路音视频输入、5路音视频输出32路报警输入1路报警输出带前面板键盘WS70-16×8V A13,90016路音视频输入、8路音视频输出32路报警输入1路报警输出带前面板键盘WS70-32×5V A14,40032路音视频输入、5路音视频输出32路报警输入1路报警输出带前面板键盘WS70-32×8V A18,30032路音视频输入、8路音视频输出32路报警输入1路报警输出带前面板键盘WS70-8×2VL7,6008路视频输入(带环接)2路视频输出32路报警输入1路报警输出带前面板键盘WS70-8×5VL9,6008路视频输入(带环接)5路视频输出32路报警输入1路报警输出带前面板键盘WS70-16×5VL11,90016路视频输入(带环接)5路视频输出32路报警输入1路报警输出带前面板键盘WS70-16×8VL13,70016路视频输入(带环接)8路视频输出32路报警输入1路报警输出带前面板键盘WS70-32×5VL14,90032路视频输入(带环接)5路视频输出32路报警输入1路报警输出带前面板键盘WS70-32×8VL15,70032路视频输入(带环接)8路视频输出32路报警输入1路报警输出带前面板键盘WS70-8×2R4,5008路视频输入、2路视频输出32路报警输入1路报警输出不带前面板键盘WS70-8×5R6,6708路视频输入、5路视频输出32路报警输入1路报警输出不带前面板键盘WS70-16×5R7,50016路视频输入、5路视频输出32路报警输入1路报警输出不带前面板键盘WS70-16×8R9,20016路视频输入、8路视频输出32路报警输入1路报警输出不带前面板键盘WS70-32×5R9,90032路视频输入、5路视频输出32路报警输入1路报警输出不带前面板键盘WS70-32×8R12,90032路视频输入、8路视频输出32路报警输入1路报警输出不带前面板键盘WS70-32×16R25,60032路视频输入、16路视频输出32路报警输入1路报警输出不带前面板键盘WS70-48×5R25,80048路视频输入、5路视频输出32路报警输入1路报警输出不带前面板键盘WS70-48×8R30,60048路视频输入、8路视频输出32路报警输入1路报警输出不带前面板键盘WS70-48×16R43,80048路视频输入、16路视频输出32路报警输入1路报警输出不带前面板键盘WS70-64×5R35,80064路视频输入、5路视频输出32路报警输入1路报警输出不带前面板键盘WS70-64×8R41,60064路视频输入、8路视频输出32路报警输入1路报警输出不带前面板键盘WS70-64×16R51,80064路视频输入、16路视频输出32路报警输入1路报警输出不带前面板键盘WS8102系列主、分控操作键盘(配接WS60、WS70、WS80 WS90系统)产品型号单价说明WS8102-13,380分控操作键盘(控制恒速云台、镜头、智能球),用恒速摇杆控制。
- 1、下载文档前请自行甄别文档内容的完整性,平台不提供额外的编辑、内容补充、找答案等附加服务。
- 2、"仅部分预览"的文档,不可在线预览部分如存在完整性等问题,可反馈申请退款(可完整预览的文档不适用该条件!)。
- 3、如文档侵犯您的权益,请联系客服反馈,我们会尽快为您处理(人工客服工作时间:9:00-18:30)。
矩阵HDMI切换器EK-100H产品介绍
HDMI矩阵KVM切换器EK-100H,顾名思义是将一路或多路HDMI视频信号分别传输给一个或者多个HDMI显示设备,如两台电脑主机要共用一个显示器,矩阵切换器可以将两台电脑主机上的内容任意切换到同一个或多个显示器上。
小编在此一一与各位看官分享这套新颖的HDMI产品。
产品介绍
EK-100H传输的是数字信号,由发送端(EK-100HT)和接收端(EK-100HR)组成,发送端负责完成信号获取和压缩的作用,接收端负责完成信号的解码和端口输出,直连最远的传输距离为100米,中间通过Cat5/5e/6网线进行连接。
如果经过网络交换机将EK-100HT与EK-100HR连接起来,传输距离可达200米。
发送端最高支持16台电脑。
在EK-100HR端屏幕输出分辨率可达1080P高画质,并相容HDCP与3D电视。
可适用于影音长距离矩阵传输、长距离矩阵管控、实时高解析画质播放、影音监控与需要隔绝外接干扰之影音播放。
产品外观
产品连接示意图
EK-100HT与EK-100HR的外观尺寸一模一样,仅有160mm*140mm*30mm,非常小巧美观,便于布置在任何角落。
而且它在信息发布上有着广泛的应用,相对于传统的信息发布有着无法比拟的优势。
可以实现全部的高清显示终端的信息内容同步,用于高清实时的直播而且避免的传统信息发布繁琐的设置。
可以迅速更换大大减小了设备的安装和维护的成本。
产品应用范围
HDMI矩阵切换器主要应用于广播电视工程、多功能会议系统、多媒体会议厅、大屏幕显示工程、电视教学、指挥控制中心等要求极高清晰度的场合。
具体应用领域有:学校教学、医院研讨、政府办公、企业会议、监控指挥等。
产品认证
本产品生产流程严格遵循ISO质量标准,均通过FCC,CE,RHOS等质量管理认证和出口认证,产品出厂前均经过严格的检测。
宜坤网络介绍
深圳市宜坤网络科技有限公司(宜坤网络)—EAKUN(宜坤)品牌的所有者,是设立于深圳市南山区南山科技园的新兴高科技公司,专业从事计算机、网络设备、智能家居、人体穿戴设备的研发、生产、及销售。
公司以互联网电子商务为载体,采用O2O电商模式,汇集顶尖研发、生产、销售人才,致力于打造中国最好的计算机及网络信息产品垂直电商平台。
