惠普推出HP Latex 500和HP Latex 1500系列打印机
HP Latex 700 和 800 系列打印机用户指南说明书
HP Latex 700 印表機系列H P Latex 800 印表機系列使用者指南摘要如何使用您的產品。
關於本版本第 3 版,2022 年 5 月©Copyright 2020–2022 HP Development Company, L.P.法律聲明本文件包含的資訊如有變更,恕不另行通知。
HP 產品與服務的保固範圍,僅限於產品與服務隨附的保固聲明中所提供的保固項目。
本文件的任何部分都不可構成任何額外的保固。
對於本文所含的技術或編輯錯誤或疏漏,HP 概不負責。
商標Microsoft® 與 Windows® 為 MicrosoftCorporation 在美國的註冊商標。
目錄1 簡介 (1)歡迎使用您的印表機 (1)印表機附件 (2)說明文件 (2)安全預防措施 (3)主要印表機元件 (9)控制面板 (19)HP PrintOS (27)嵌入式 Web 伺服器 (27)連接方式與軟體指示 (29)Advanced network configuration (進階的網路組態設定) (31)開啟與關閉印表機 (38)重新啟動印表機 (39)如何列印 (概述) (39)2 實用連結 (40)需要協助時 (40)3 處理紙材 (42)概觀 (42)如何儲存和處理紙材 (51)將捲筒紙裝入印表機 (51)有孔的紙材 (57)墨水收集器 (58)裝入附件 (67)輔助手動裝紙 (74)邊緣支架 (76)設定和使用紙材進紙附件 (81)從印表機中取出捲筒紙 (82)如何抬起壓輪 (84)捲紙軸 (85)清潔捲筒 (90)檢視有關紙材的資訊 (91)iii裁切紙材 (93)在織品上列印 (93)4 紙材設定 (97)紙材預設檔 (97)組態中心 (97)線上搜尋 (98)HP Media Locator (99)一般預設檔 (99)仿製紙材預設檔 (100)修改紙材預設檔 (100)新增紙材預設檔 (101)在列印時變更設定 (104)溫度設定檔 (105)選擇成像次數 (105)將您的紙材預設檔儲存在雲端 (110)刪除紙材預設檔 (111)列印秘訣與技巧 (111)色彩校準 (111)最佳化色彩校準的建議 (113)色彩校準程序 (113)不同 700 和 800 系列印表機之間的色彩一致性 (114)ICC 設定檔 (114)完全校準 (115)5 工作佇列管理 (117)控制面板中的工作佇列 (117)6 擷取印表機用量資訊 (122)取得印表機的統計資訊 (122)從 PrintOS PrintBeat 檢查用量 (122)檢查工作的使用情形統計資料 (122)檢查成本分配 (123)7 疑難排解紙材問題 (124)無法成功裝入紙材 (124)紙材位置不正確 (124)iv紙材收縮或伸展 (127)紙材發生拱屈變形 (128)自動裁紙器無法使用 (129)捲紙軸卡紙 (129)8 解決列印品質問題 (130)一般列印建議 (130)最佳化列印品質 (131)改善列印品質 (132)最常見的列印品質問題 (137)9 處理墨水系統 (148)700 系列供墨系統 (148)800 系列供墨系統 (155)校正印字頭 (161)更換噴頭 (164)如何儲存和運送噴頭 (169)更換維護油墨匣 (169)使用白色墨水列印 (僅限 700W 和 800W 機型) (173)10 疑難排解墨水系統問題 (183)無法插入墨水匣 (700 系列) (183)無法插入墨水匣 (800 系列) (183)安裝不褪色墨水匣 (183)控制面板建議重裝或更換印字頭 (185)無法插入噴頭 (185)無法插入維護油墨匣 (185)11 印表機維護 (187)一般清潔指示 (187)建議使用但不提供的維護工具 (187)清潔噴頭 (188)清潔印字頭的電氣連接 (188)清潔並潤滑噴頭托架桿 (193)清潔編碼器條帶 (PMK13) (195)清潔壓板和進紙感應器視窗 (PMK19) (196)更換潤滑毛氈 (PMK18) (199)v檢查和清潔噴頭插槽中的塑膠針 (204)更換噴頭插槽中的塑膠針 (206)更換墨水混合容器 (PMK15) (207)清潔印表機的外部 (207)清潔固化乾燥模組 (PMK14) (208)服務維護 (208)12 客戶自行維修零件 (210)安裝墨水收集器 (210)紙材裝入隔條 (210)更換線條感應器 (211)更換潤滑毛氈 (214)列印壓板 (221)更換真空壓力橡膠 (223)更換墨水收集器感應器 (227)更換提升機件手柄 (232)更換轉向器風扇裝置 (233)更換裁紙器 (236)更換光學感應器 (238)更換托架護蓋 (241)裝回噴頭護蓋 (244)13 韌體更新 (246)使用 USB 快閃磁碟進行韌體更新 (246)使用嵌入式 Web 伺服器進行韌體更新 (246)自動韌體更新 (247)14 移動或存放印表機 (248)移動印表機 (248)準備供墨匣 (僅限 800 系列) (248)存放印表機 (251)儲存不符合環境規定 (251)15 耗材與附件 (252)訂購墨水耗材 (252)棄置指示 (253)16 疑難排解其他問題 (255)印表機無法取得 IP 位址 (255)vi印表機無法列印 (256)程式回應變慢,或在產生列印工作時停滯 (256)印表機似乎變慢 (256)電腦與印表機之間的通訊失敗 (257)無法連線至例如韌體更新、線上搜尋、或協助客戶參與計劃等服務 (257)系統錯誤代碼 (258)17 印表機規格 (261)功能規格 (261)實體規格 (262)記憶體規格 (263)電源規格 (263)生態規格 (264)環境規格 (264)聲音規格 (264)附錄 A 常見列印問題摘要 (266)索引 (268)vii1簡介本產品的簡介。
HP Latex 500 系列打印机:如何创建自定义配置说明书
Latex Knowledge CenterLatex Knowledge Center, August 2017 1How to easily create your own profiles for HP Latex 500 seriesThis document provides information about how to generate a media preset using only the printer and the internal spectrophotometer and how to reuse media presets from other HP Latex printers – HP Latex 100, 300, 3000 and 1500 series. Add a new substrateIf you cannot find a ready-made preset for your substrate, and prefer not to use a generic preset or edit an existing preset, you can make your own preset from scratch.The Add New Substrate wizard guides you to work out the best settings for your substrate. It first requests someinformation about the substrate and your intended use of it, then prints some test prints and asks you to evaluate them. From this information, it creates the new preset. 1. Ensure that the printer is in the Ready state . 2. Stop the job queue .3. Load your new substrate , selecting the most similar substrate when asked to do so; or select None of these.4. When the substrate has been loaded, go to the Substrate Library on the front panel.5. Choose the substrate category in the left column of the Substrate Library screen (PVC BANNER in this example).Related Links: /go/latex/Printers related to this article HP Latex 500 Printers Series6. Click + New substrate category at the top of the right column (+ New PVC BANNER in this example).7. Your new preset will be based on a generic preset .NOTE: If there are multiple generic presets in that category, the front panel asks you to choose one of them.8. Follow the front panel guides through the subsequent steps to create your new preset.9.The following screen is displayed. Press the Blue Print test button to produce the ink drying and color saturation testprint; then continue adjusting the settings and printing again until you are satisfied with the result.NOTE: You can omit this step if you alreadyknow the settings that you want to use.10.If you cannot reach a satisfactory result, you may want to press Advanced settings and try adjusting those settings,which are intended for people who understand their implications.NOTE:To go back to the previous screen,press .•Straightness optimization: Allows you to compensate for barrel-shaped substrate deformation. The value represents the distance that the center of the substrate has moved with respect to the left and right edges.•Latex optimizer level: If you have ink bleed or coalescence, you can increase the optimizer level until you see a significant impact on gloss or color saturation.•Print test: You can press this button to print the advanced optimizer test and select the best optimizer level for your substrate.•Vacuum printing: Sets the vacuum value in the print zone to hold the substrate flat. Increase if the substrate suffers from crashes or smears, decrease if you see banding or graininess.•Advance factor: Use only when printing without the substrate-advance sensor, to increase or decrease the substrate advance in each carriage pass.•Inter-pass delay offset: The time delay between passes to allow for smoother drying. Increase the delay if you have seen banding on your prints.•Input tension: Substrate rewinder tension, increase in case of wrinkled substrate in the print zone.•OMAS enabled: Automatic substrate-advance tracking and correction. Disable only if advised to do so on the front panel at loading time.•Colors: Print four (CMYK) or six (CMYKcm) colors.•Leading edge release: Enable this setting to advance the leading edge of the paper, if a specific substrate is likely to crash under the curing module.11.When you have finished, press Continue to perform color calibration.12.Enter your substrate name and click Set color reference.13.After the automatic color calibration process has completed, we recommend using the generic ICC profile;alternatively, you can choose to create a new profile or to copy a profile already assigned to a different print mode for this substrate (if there are any such profiles).NOTE:The Create ICC profile button is disableduntil color calibration is complete.Color emulation of other printers modelsYou can set up an HP Latex 500 series printer to emulate the colors printed by another printer that belongs to a different family, such as the HP Latex 36x/37x, 1500, or 3000 Series Printer.The emulation process is done by importing a source (any other HP Latex series) substrate preset into the destination (HP Latex 500 series) printer that was created, color-calibrated, and, CC-profiled in the source printer. The original or source substrate preset contains a number of paper modes and a color-calibration reference.A new substrate preset is then added to the destination substrate library that keeps the same name as the source substrate preset, suffixed by Emulated. This destination preset contains the paper modes that are the closest equivalent to the source ones in terms of ink density and number of passes. Color emulation between source and destination, for the given substrate material, can then be achieved by performing color calibration and profiling of the destination substrate preset.If the source substrate preset has not been color-calibrated, it can still be imported into the destination printer. A translated set of paper modes will still be created, but color emulation of the source printer cannot be optimized. RecommendationsColor emulation between printers of different models is based on the same principle as color consistency between printers of the same model. That is, exporting a source color-calibrated substrate preset, then importing that preset, and color-calibrating it in a destination printer. When the printer model is the same, most print settings and color resources are implicitly matched. Those include printing engine and mechanical settings, paper mode and associated ICC profiles. However, when emulating the colors of a different printer model, you are advised to follow these recommendations: •Use the same substrate type in both source and destination printer (this is also recommended between printers of the same model).•Choose a paper mode in the destination substrate preset that is as close as possible to the active paper mode in the source substrate preset.•Use the same workflow in your RIP software for printing to the source and destination printers.TIP:The best color emulation can be achieved by setting the rendering intent to ‘relative colorimetric’ in the RIP for printing both source and destination printers.•Choose ICC profiles in the source and destination paper modes that are both made with the same type of spectrophotometer and profiling software. For example, use either ICC profiles made with external software using‘Brand A’ spectrophotometer in both cases, or ICC profiles made with the HP Embedded Spectrophotometer andinternal ICC profiler in both cases.Emulating an HP Latex 36X/37X/15XX/3XXX printerTo set up a new substrate preset in an HP Latex 560/570 printer that provides color emulation of a source substrate preset in a HP Latex 36X/37X/15XX/3XXX printer: Emulating an HP Latex 36X/37XEmulating an HP Latex 15XX/3XXX printer1.Using the source HP, select the desired substrate preset . Refer to the printer’s own documentation whenever necessary.2. Perform color calibration .3. Create an ICC profile for each paper mode to be emulated, using the HP Embedded Spectrophotometer.Use the Internal Print Server to export the calibrated substrate preset.Use the Embedded Web Server to export the calibrated and profiled substrate preset4. Using the destination HP Latex 560/570 printer, import the new substrate preset .5. After a successful import, a confirmation popup window appears in the front panel. Press OK to continue .6. Go to the substrate library, and select the just-created emulation substrate preset by pressing the Select button.7. Press the Modify button to see the color emulation status of the preset. The initial color emulation status is Not ready.8. Press Calibrate color button to start color calibration. After a successful color calibration, the color emulation status changes to Ready, and the color calibration status changes to OK. 9.Press Create ICC profile for every paper mode that you want to use for color emulation.Do not press Create ICC profile . ICC color profile must be created externally. 1, 210. Press Done to finish the process.TIP: To emulate the same source printer on several HP Latex 560/570 destination printers, you can export the newly created preset from the HP Latex 560/570, and then import it into other HP Latex 560/570 printers.Learn more at:/communities/lkc1 ICC profiles that are needed for printing, in both the source and the destination printers, must be created externally usingthe same external spectrophotometer and external profiling software. Most RIP applications support stand-alone spectrophotometers for creating ICC profiles.2 This process, based on an external spectrophotometer, can also be used for color matching the HP Latex 36x/37x printer and the HP Latex 560/570.。
HP Latex 1500和HP Latex 3x00系列的媒体类型和规格说明书

Media types: Translucent•Backlit PVC banners•Translucent PVC banners intended•for retro-illumination.•Backlit paperTear-resistant, translucent paperintended for retro-illumination.Maximum media roll dimensions that can be used:HP Latex 1500Width: 3.2 m (126 in)Weight: 160 kg (350 lbs)Diameter: 30 cm (12 in)HP Latex 3x00 SeriesWidth: 3.2 m (126 in)Weight: 300 kg (660 lbs)Diameter: 40 cm (15.75 in)Please be aware that Dual roll configuration is not supportedwhen printing with the Double-sided Day and Night kit.For more information about the media profiles available, visitthe Media Locator Solution. It is continuously updated with newmedia profiles.You can find more information in the:Latex 1500 Manual and Latex 3x00 series Manuals.The kit is in fact a service-installed upgrade of the machine.The upgrade consists of a set of LED lights on the printerplaten and a light sensor on the carriage – these are used totrack and align the image on each side. The kit also includesoutput zone lighting (like the 3000 series)—frontlit andbacklit—so that registration can be checked by the operator. Double-sided Day Night KitHP Latex 1500 and 3x00 Printer SeriesTECHNICAL DOCUMENT for getting the best results with the Double-sided Day Night KitWhat is the Double-sided Day Night Kit?From city-light posters to store signs, there is a wide rangeof outdoor applications that can be placed in lightboxes.This way, they can be effective regardless of the time of theday.During the day, thanks to the sunlight, we are able to seethem properly as frontlit posters. When night falls, theartificial light sources behind the posters are switched on,allowing them to capture our attention. This is a fantasticway of maximizing the impact of an advertising campaignor making a store more visible.By printing on both sides of the media, the colors will lookperfect under any light. If the light source comes from thefront, the light will reflect on the media and the viewer willonly see the ink placed on the front side. If the light sourcecomes from the back, the viewer will observe the ink placedon both sides; the extra layer adding greater saturation.The printer will automatically detect exactly where to printon side B, thanks to a specific sensor, and will compensatefor deviations, skew or even bowing, resulting in amazingaccuracy with less than 2mm of error at any point,regardless of the length or width of the job. Forget aboutmanually adjusting side B…let the machine print it by itselfwithout the operator even being there.Real-time corrections:X-Y position Skew BowingThe HP Latex Day Night Kit is available as an optionalaccessory for the HP Latex 1500 Printer and the HP Latex3000 Printer series.· Sensor reads registrationmarks· Each time the printerfinds a mark, it makescalculations· Printer makesadjustments in real timeDouble-sided Day Night vs. Backlit applications Backlit plots are designed for applications that are retro-illuminated all the time. They are printed only on one side. The ink density and the number of passes needed to obtain bright colors typically start from 10 passes and 150% ink density. If retro illumination disappears, the image will become dark. Double-sided Day Night plots, however, are designed for applications that are sometimes retro-illuminated and sometimes with front illumination. They are printed on two sides. The HP Latex printer reads printed fiducials on the front side to compensate for the real time image printed on the back side in order to ensure proper registration from side to side. The ink density needed to obtain bright colors is divided onto the two media sides. This way, when plots are front-illuminated, the image will be seen with natural colors and when plots are back-illuminated, the image will continue to be seen with natural and bright colors. Recommended print modes It is recommended to use Generic PVC and Paper media profiles available on the printer. If for any reason you would like to create your own profile, you could always clone a generic one and use it as a starting point. To select a generic Double-sided Day Night substrate when loading a roll: in the IPS, click the Substrate Type drop-down list and select the substrate to load. Suitable generic substrates are: - Front Side or Side A: Generic Side A Translucent PVC Banner Generic Side A Translucent Paper- Back Side or Side B: Generic Side B Translucent PVC Banner Generic Side B Translucent Paper Some possible configurations that you could use are:There are more available print modes to be configured in case you need them. You can find all the information in the HP Latex 1500 User Guide and HP Latex 3x00 series User Guide . There is a complete chapter in the User Guide with Recommended print modes for each substrate type .HP Latex 1500HP Latex 3x00 SeriesCategory: PVC banner Front SideGeneric Side A – Translucent PVC banner Back Side Generic Side B – Translucent PVC banner6 passes, 120% ink density 4 passes, 100% ink density4 passes, 100% ink density3 passes, 80% ink densityCategory: Paper Front Side Generic Side A – Translucent Paper Back Side Generic Side B – Translucent Paper 6 passes, 120% ink density 4 passes, 100% ink density 4 passes, 100% ink density 3 passes, 80% ink density Category: PVC banner Front Side Generic Side A – Translucent PVC banner Back SideGeneric Side B –Translucent PVC banner 8 passes, 100% ink density 6 passes, 80% ink density6 passes, 90% ink density4 passes, 60% ink densityCategory: Paper Front Side Generic Side A – Translucent Paper Back Side Generic Side B – Translucent Paper 6 passes, 90% ink density 4 passes, 60% ink densityUse examplesFront Side image:Back Side image: NODay and Night (same image on both sides) Front Side image:Back Side image:Day and Night (different images on each side) Front Side image:Back Side image:You could see overlap front side and back side images and have different effect pending on front or back illumination.Backlight ONDay Day Backlight OFFNight Backlight ONBacklight ONBacklight ONBacklightOFFNight Backlight OFFBacklight ONIn this document is basic information that you could use if you are interested in using the Double-sided Day and Night Kit. In case you would like to start printing, you can find another document here where it is explained step by step how to print your first plot using the Double-sided Day and Night Kit.。
HP PageWide Pro MFP 577dw系列用户指南说明书
用户指南版权与许可©2016 版权所有HP Development Company, L.P.保留所有权利。
除非版权法允许,否则在未经HP 预先书面许可的情况下,严禁转载、改编或翻译本手册的内容。
本文档包含的信息如有更改,恕不另行通知。
HP 产品与服务的全部保修条款在此类产品和服务附带的保修声明中均已列明。
此处内容不代表任何额外保修。
HP 对此处任何技术性或编辑性的错误或遗漏概不负责。
Edition 2016 年2 月1 日商标声明Adobe®、Acrobat®和PostScript®是 Adobe Systems Incorporated 的商标。
Intel® Core™ 是Intel Corporation 在美国和其它国家/地区的商标。
Java™ 是Sun Microsystems, Inc. 在美国的商标。
Microsoft®、Windows®、Windows® XP 和Windows Vista® 是Microsoft Corporation 在美国的注册商标。
UNIX®是The Open Group 的注册商标。
能源之星和能源之星标记是美国环保署拥有的注册商标。
目录1产品基本信息 (1)产品功能 (2)环境功能 (2)辅助功能 (3)产品视图 (4)左前视图 (4)右前视图 (5)后视图 (5)墨盒门视图 (6)开机/关机 (7)打开产品电源 (7)管理电源 (7)关闭产品电源 (8)使用控制面板 (9)控制面板按钮 (9)控制面板主屏幕 (10)控制面板仪表板 (10)控制面板的应用程序文件夹 (11)控制面板快捷方式 (11)帮助功能 (12)打印机信息 (12)帮助动画 (13)安静模式 (14)从控制面板打开或关闭安静模式 (14)从EWS 打开或关闭安静模式 (14)2连接产品 (15)将产品接入计算机或网络 (16)使用USB 电缆连接产品 (16)将产品连接到网络 (16)支持的网络协议 (16)ZHCN iii使用有线网络连接产品 (17)使用无线网络(仅限无线型号)连接产品 (17)使用WiFi 设置向导将产品连接到无线网络 (18)使用WPS 将产品连接至无线网络 (18)手动将产品连接至无线网络 (19)使用Wi-Fi Direct 将计算机或设备连接至产品 (20)打开Wi-Fi Direct (20)从具有无线功能的移动设备打印 (20)从具有无线功能的计算机进行打印(Windows) (20)从具有无线功能的计算机进行打印(OS X) (20)为已接入网络的无线产品安装HP 打印机软件 (23)打开打印机软件(Windows) (24)管理网络设置 (25)查看或更改网络设置 (25)设置或更改产品密码 (25)在控制面板中手动配置TCP/IP 参数 (25)链路速度和双工设置 (26)3打印机管理和服务 (27)HP 嵌入式Web 服务器(EWS) (28)关于EWS (28)关于cookie (28)启动EWS (29)功能 (29)主页选项卡 (29)“扫描”选项卡 (30)“传真”选项卡 (31)“Web 服务”选项卡 (31)“网络”选项卡 (31)“工具”选项卡 (31)“设置”选项卡 (32)Web 服务 (33)何为Web 服务? (33)HP ePrint (33)打印应用程序 (33)设置Web 服务 (33)使用Web 服务 (34)HP ePrint (34)打印应用程序 (35)删除Web 服务 (35)iv ZHCNHP Web Jetadmin 软件 (37)产品安全功能 (38)安全声明 (38)防火墙 (38)安全性设置 (39)固件更新 (39)打印机软件(Windows) 中的HP Printer Assistant (40)打开HP Printer Assistant (40)功能 (40)Connected 选项卡。
HP DesignJet Z6 系列打印机和 HP DesignJet Z9+ 系列打印机用户指南说
用户指南版本 3©Copyright 2019 HP Development Company, L.P.法律通告本文档中包含的信息如有更改,恕不另行通知。
HP 产品和服务的唯一保证在该产品或服务附带的明示保修声明中列出。
本文中的任何内容都不应被引申为补充保证。
HP 对本文档中出现的技术错误、编辑错误或疏漏之处概不负责。
支持 IPv6商标Adobe®、Acrobat®、Adobe Photoshop®和 Adobe® PostScript® 3™ 是 AdobeSystems Incorporated 的商标。
ENERGY STAR 和 ENERGY STAR 标志是美国的注册商标。
Microsoft® 和 Windows® 是Microsoft Corporation 在美国的注册商标。
PANTONE® 是 Pantone, Inc. 的标准颜色检查商标。
目录1 简介 (1)欢迎使用您的打印机 (2)安全防范措施 (2)主要组件 (6)打开和关闭打印机 (10)前面板 (11)HP Utility (14)HP 打印预览 (14)内嵌式网站服务器 (15)示范打印件 (15)配置打印机 (16)移动打印 (23)辅助功能 (23)其他信息资源 (23)2 纸张操作 (25)一般建议 (26)将纸卷装到卷轴上 (26)将纸卷装入打印机 (29)取出卷筒 (31)装入单张纸 (31)取出单张纸 (34)敏感纸张模式(仅限 Z6dr 和 Z9+dr) (34)查看有关纸张的信息 (35)纸张预设 (35)打印纸张信息 (37)移动纸张 (37)进纸并裁切纸张 (38)保持纸张 (38)更改晾干时间 (38)打开和关闭自动水平裁纸器 (39)打开和关闭自动垂直修剪器(仅限 Z6dr 和 Z9+dr) (39)使用收纸器 (39)ZHCN iii3 使用两个卷筒(仅限 Z6dr/Z9+dr) (47)多卷筒打印机的优点 (48)打印机如何向纸卷分配作业 (48)4 网络 (50)简介 (51)控制网络协议 (51)前面板上的菜单项 (51)链路配置方法 (54)故障排除 (54)5 打印 (58)简介 (59)从 U 盘打印 (59)使用打印机驱动程序从计算机进行打印 (60)高级打印设置 (60)6 移动打印 (73)移动打印 (74)从操作系统中打印 (74)通过电子邮件打印 (HP ePrint) (75)从 HP Smart 应用程序中进行打印和共享 (75)移动规格 (75)7 作业队列管理 (76)前面板中的作业队列 (77)内嵌式网站服务器或 HP DesignJet Utility 中的作业队列 (82)8 颜色管理 (85)简介 (86)如何再现色彩 (86)颜色管理流程简介 (86)颜色校准 (86)颜色配置 (88)打印机驱动程序中的颜色管理 (90)在前面板中执行颜色管理 (95)9 实际打印示例 (96)根据正确的大小调整比例打印草稿以便修订 (97)从 Adobe Acrobat Reader 或 Adobe Acrobat Pro 中打印 PDF 多页作业 (97)用正确的颜色打印文档 (99)iv ZHCN打印项目 (105)打印演示文稿 (108)在 Microsoft Office中执行打印操作与大小调整操作 (111)使用垂直修剪器打印无边界作业 (113)10 检索打印机用量信息 (116)获取打印机统计信息 (116)检查用量统计信息 (116)检查作业的用量统计信息 (119)检查成本分配 (120)11 处理墨盒和打印头 (121)关于墨盒 (122)检查墨盒状态 (122)卸下墨盒 (122)插入墨盒 (123)关于打印头 (125)检查打印头状态 (125)卸下打印头 (125)插入打印头 (128)安全模式 (131)12 维护打印机 (132)检查打印机状态 (133)清洁打印机表面 (133)维护墨盒 (133)移动或存放打印机 (133)更新固件 (134)更新软件 (135)打印机维护套件 (135)安全文件擦除 (136)磁盘清理 (136)13 附件 (137)如何订购耗材和附件 (138)附件简介 (142)处置说明 (144)14 纸张问题的故障排除 (145)无法成功装入纸张 (146)纸张类型不在驱动程序、HP Utility 或前面板中 (147)ZHCN v打印机在错误的纸张类型上打印 (149)自动裁切不可用 (149)暂停以等待纸张 (149)卷筒纸张不进纸 (150)纸张卡塞 (150)出纸盘中留有纸带,因而发生卡纸 (153)出纸区域和裁纸器轨道区域留有纸带,因而发生卡纸(仅限 Z6dr 和 Z9+dr) (153)打印机在有纸时显示缺纸 (153)打印件未准确落入纸筐 (153)打印完毕后纸张留在打印机中 (153)打印完毕后裁剪纸张 (153)水平裁纸器裁切不正常 (154)垂直修剪器裁切不正常(仅限 Z6dr 和 Z9+dr) (154)垂直修剪器裁切不准确(仅限 Z6dr 和 Z9+dr) (155)垂直修剪器:打印机报告模块缺失(仅限 Z6dr 和 Z9+dr) (156)垂直修剪器在废纸上留下痕迹 (157)卷轴上的卷筒松弛 (157)重新校准进纸 (157)15 打印质量问题的故障排除 (160)一般建议 (161)水平线条(条纹)横贯图像 (161)条纹表现为不整齐的水印 (162)整幅图像模糊或呈颗粒状 (162)纸张不平 (162)打印件出现磨损或刮花 (163)纸张上出现墨渍 (163)接触打印件时黑色墨水脱落 (164)对象的边缘呈阶梯状或不清晰 (164)对象的边缘比预期亮度暗 (165)裁切纸打印件底端出现水平线条 (165)不同颜色的垂直线条 (165)打印件上出现白点 (165)颜色不准确 (166)我的打印件缺乏光泽均匀性(仅限 Z9+) (167)图像不完整(底部被裁剪) (167)图像被截切 (167)打印的图像丢失某些对象 (168)线条过粗、过细或丢失 (168)线条呈阶梯状或参差不齐 (169)打印的线条为双线或颜色错误 (169)线条不连续 (170)vi ZHCN图像诊断打印件 (171)如果仍然存在问题 (173)16 墨盒和打印头问题的故障排除 (174)无法插入墨盒 (175)墨盒状态信息 (175)打印机未检测到光亮剂墨盒(仅限 Z9+) (175)无法插入打印头 (175)前面板建议重新安装或更换打印头 (175)清洁打印头 (176)清洁打印头墨滴检测器 (177)对齐打印头 (179)打印头状态消息 (181)17 打印机一般问题的故障排除 (182)打印机不打印 (183)前面板无法初始化 (183)打印机速度非常慢 (183)计算机和打印机之间的通信失败 (184)无法访问内嵌式 Web 服务器 (184)无法连接到 Internet (184)Web 服务问题 (185)自动文件系统检查 (185)警报 (185)18 前面板错误消息 (186)系统错误日志 (186)19HP 客户服务 (187)简介 (188)HP 专业服务 (188)客户自行维修 (189)与 HP 支持部门联系 (189)20 打印机规格 (190)功能规格 (191)物理规格 (192)内存规格 (192)电源规格 (192)ZHCN vii噪音规格 (193)术语表 (194)索引 (197)viii ZHCN1简介●欢迎使用您的打印机●安全防范措施●主要组件●打开和关闭打印机●前面板●HP Utility●HP 打印预览●内嵌式网站服务器●示范打印件●配置打印机●移动打印●辅助功能●其他信息资源ZHCN1欢迎使用您的打印机您的打印机是一种彩色喷墨打印机,适合在最大宽度为 610 毫米或 1118 毫米的纸张上打印高质量的图像。
HP Latex 1500 超宽厚实打印机说明书

DatasheetHP Latex 1500 PrinterProduce superwide 126-in (3.2-m) applications with speed, quality, and controlFast, productive superwide applicationsPrint SAV at 480 ft² (45 m²)/hr indoor quality , PVC banner at 800 ft² (74 m²)/hr outdoor quality.Deliver vivid textiles quickly—up to 260 ft² (24m²)/hr ; optional ink collector kit for porous textiles.Automatically print double-sided backlitapplications with the optional double-sided day night kit.Cut risk, eliminate delays—prints are dry and scratch resistant immediately after printing.Quality results—with every printGet the color and quality you expect with innovative HP technology including OMAS,embedded spectrophotometer.Match tile edges confidently—advanced features enable HP printheads to deliver color consistency <=2 dE2000Maintain quality print after print—with 1200 dpi HP Thermal Inkjet printheads and auto nozzle replacement.Get quality results over the life of the printer with timely, routine HP Print Care preventive maintenance.Cut costs, keep controlHelp reduce your running costs with cost-effective 5-liter HP ink cartridges.Do quick visual checks—the accessible print zone features LED lighting.At-a-glance monitoring on a busy production floor with internal print server alerts and status beacon signals.More unattended printing—a robust roll-to-roll design drives up to 1600 ft² (150 m²) PVC banner production.For more information, please visit /go/latex1500Join the community, find tools, and talk to experts. Visit the HP Latex Knowledge Center at https:///The HP Latex 1500 Ink Collector Kit is an optional accessory for printing on porous textiles and mesh banner. To be available after the introduction of the HP Latex 1500 Printer. Printing double-sided backlit applications requires the optional HP Latex 1500 Double-sided Day Night Kit. Front-to-back image registration accuracy of 2 mm or better when using certified PVC banner and paper media, see /go/mediasolutionslocator Scratch resistance is comparable to hard-solvent inks on self-adhesive vinyl and PVC banner. Scratch-resistance comparison based on testing third-generation HP Latex Inks and representative hard-solvent inks. Estimates by HP Image Permanence Lab on a range of media. At 6-pass, 6-color , 100%. 480 ft² (45 m²)/hr requires the optional HP Latex 1500 Dual Roll Kit. At 3-pass, 6-color , 90%. At 12-pass, 6-color , 170%. The color variation inside a printed job has been measured to be within this limit: maximum color difference (95% of colors) <= 2 dE2000. Reflective measurements on a 943 color target under CIE standard illuminant D50, andaccording to the standard CIEDE2000 as per CIE Draft Standard DS 014-6/E:2012. 5% of colors may experience variations above 2 dE2000. Backlit substrates measured in transmission mode may yield different results.45612371234567Datasheet | HP Latex 1500 PrinterTechnical specificationsPrintPrinting modes170 ft²/hr (16 m²/hr)- High Saturation Backlits (18-pass 6-color 260%)260 ft²/hr (24 m²/hr)- Textiles and Canvas (12-pass 6-color 170%)480 ft²/hr (45 m²/hr)- Indoor High Quality (6-pass 6-color 100% / 6-pass 6-color 120%)610 ft²/hr (57 m²/hr)- Outdoor Plus (4-pass 6-color 100%)800 ft²/hr (74 m²/hr)- Outdoor (3-pass 6-color 90%)Print resolution Up to 1200 x 1200 dpiInk types Water-based HP Latex InksInk cartridges7 (black, cyan, light cyan, light magenta, magenta, yellow, HP Latex Optimizer)Cartridge size 5 LPrintheads 4 (cyan/black, magenta/yellow, light cyan/light magenta, HP Latex Optimizer)Long-term print-to-printrepeatabilityMaximum color difference (95% of colors) ≤ 2 dE2000MediaHandling Roll-to-roll, double-sided blockout, dual-roll (optional), roll-to-freefall (optional), double-sided backlit(optional), ink collector (optional)Media types Banners, self-adhesive vinyls, films, papers, wallcoverings, canvas, synthetics, fabrics, mesh, textilesRoll size Up to 126 in (3.2 m) single roll; Up to 2 x 63 in (2 x 1.6 m) optional dual rollRoll weight Up to 350 lb (160 kg) single roll; Up to 2 x 155 lb (2 x 70 kg) with optional dual roll kitRoll diameter11.8 in (30 cm)Thickness Up to 0.015 in (0.4 mm) default; up to 0.08 in (2.0 mm) with custom carriage height setting Applications Vehicle graphics; Banners; Displays; Indoor posters; POP/POS; Exhibition and event graphics; Exterior signage;Light boxes - film; TextileConnectivityInterfaces Gigabit Ethernet (1000Base-T)Dimensions (w x d x h)Printer228 x 54 x 66 in (574 x 138 x 167 cm)Shipping 231 x 71 x 75 in (586 x 181 x 191 cm)WeightPrinter2690 lb (1220 kg)Shipping 4410 lb (2000 kg)What's in the box HP Latex 1500 Printer, HP 881 Latex Printheads, HP 871 Latex Printhead Cleaning Kit, 126-in spindles (x2), HP Internal Print Server, documentation software, user manual, media edge holders (x4), Original HP samplemedia, cleaning supplies, pneumatic gunEnvironmental rangesOperating temperature59 to 86ºF (15 to 30ºC)Operating humidity20 to 70% RH (non-condensing)AcousticsSound pressure<70 dB(A) (operating), <57 dB(A) (idle)Sound power8.7 B(A) (operating), 7.3 B(A) (idle)PowerConsumption8 kW (typical) - high-quality indoor mode (6-pass), 10 kW (typical) - outdoor mode (3-pass) CertificationSafety IEC 60950-1+A1+A2 compliant; United States and Canada (CSA listed)Electromagnetic Compliant with Class A requirements, including: USA (FCC rules), Canada (ICES)Environmental WEEE; REACHWarranty One-year limited hardware warranty Ordering informationProductK4T88A HP Latex 1500 PrinterAccessoriesCZ059A HP Series 1000/3000 126-in Carbon Fiber SpindleD9Z41B HP Large Format Onyx Thrive RIP SoftwareG1K80A HP Latex 126-in Dual Roll SpindleL5E74C HP Large Format Caldera Grand RIP SoftwareM2J33A HP Latex In-line SlittersP4P91A HP Latex 1500 Double-sided Day Night KitP4P92A HP Latex 1500 Ink Collector KitT0F91A HP Latex 1500 Dual Roll KitT0F92A HP Latex 1500 Ink Collector Foams KitT4E58B HP Latex Media Saver KitOriginal HP printing suppliesCR327A HP 881 Yellow/Magenta Latex PrintheadCR328A HP 881 Cyan/Black Latex PrintheadCR329A HP 881 Light Magenta/Light Cyan Latex PrintheadCR330A HP 881 Latex Optimizer PrintheadCR331A HP 881 5-liter Cyan Latex Ink CartridgeCR332A HP 881 5-liter Magenta Latex Ink CartridgeCR333A HP 881 5-liter Yellow Latex Ink CartridgeCR334A HP 881 5-liter Black Latex Ink CartridgeCR335A HP 881 5-liter Light Cyan Latex Ink CartridgeCR336A HP 881 5-liter Light Magenta Latex Ink CartridgeCR337A HP 881 5-liter Latex Optimizer CartridgeG0Y99A HP 871 Latex Printhead Cleaning KitOriginal HP large format printing materialsHP Permanent Gloss Adhesive Vinyl (REACH certified)HP Backlit Polyester FilmHP PVC-free Durable Smooth Wall Paper (REACH, FSC®, UL GREENGUARD GOLD certified) HP Premium Poster Paper (FSC® certified)For the entire HP Large Format Printing Materials portfolio, please see . Service and SupportHA151AC HP Full Coverage Maintenance Support ContractHK965AC HP Shared Maintenance Hardware Support ContractHK707AC HP Parts and Remote Hardware Support ContractW0R39A / K4T88-67259 HP Latex 1500 Printer Maintenance KitK4T88-67260 HP Latex 1500 Service Maintenance KitV8L81A / K4T88-67256 HP Latex 1500 Basic Uptime KitECO highlightsBetter for printing companies/operators—no special ventilation or HAPsBetter for the end-customer, more differentiation—odorless prints reach more indoor spacesBetter for the environment—HP designs end-to-end sustainability into large-formatprintingHP Latex Inks are UL GREENGUARD GOLD CertifiedPlease recycle printing hardware and eligible printing supplies. Find out how at our website: /ecosolutionsSpecial ventilation equipment (air filtration) is not required to meet U.S. OSHA requirements. Special ventilation equipment installation is at the discretion of the customer—see the Site Preparation Guide for details. Customers should consult state and local requirements and regulations. HP Latex Inks were tested for Hazardous Air Pollutants, as defined in the Clean Air Act, per U.S. Environmental Protection Agency Method 311 (testing conducted in 2013) and none were detected.There is a broad set of media with very different odor profiles. Some of the media can affect the odor performance of the final print.UL GREENGUARD GOLD Certification to UL 2818 demonstrates that products are certified to UL's GREENGUARD standards for low chemical emissions into indoor air during product usage. For more information, visit /gg or .Reflective measurements on a 943 color target under CIE standard illuminant D50, and according to the standard CIEDE2000 as per CIE Draft Standard DS 014-6/E:2012. Backlit substrates measured in transmission mode may yield different results.Performance may vary depending on media—for more information, see/go/mediasolutionslocator. For best results, use textiles that do not stretch. The optional ink collector is required for porous textiles.This product does not contain substances listed as SVHC (155) per Annex XIV of the EU REACH directive published as of June 16, 2014 in concentrations exceeding 0.1%. To determine the status of SVHC in HP products, see the HP REACH Declaration published at HP Printing Products and Consumable Supplies.HP Large Format Media take-back program availability varies. Some recyclable HP papers can be recycled through commonly available recycling programs. Recycling programs may not exist in your area. See /hp/ecosolutions for details.BMG trademark license code FSC®-C115319, see . HP trademark license code FSC®-C017543, see . Not all FSC®-certified products are available in all regions.UL GREENGUARD GOLD Certification to UL 2818 demonstrates that products are certified toUL's GREENGUARD standards for low chemical emissions into indoor air during product usage.For more information, visit /gg or .us-en April 2020123435645123123123456。
HP Latex 1500 打印机用户指南说明书

User guide4.For full control of your preset, clone a generic preset (or the preset obtained from the Add New Substratewizard) and adjust the settings manually. See Edit a substrate preset on page 70. This is recommendedfor advanced users only.5.Tiling optimization for a new substrate. To optimize tiling performance, create a new substrate via the IPS,Substrate > Optimize for tiling.Optimize for tilingOptimize for tiling improves color consistency, specifically for tiling applications within a printer, within a singlejob, and within the same substrate roll, it also:●Creates a new media structure, based on existing ones, with tiling specific optimizations.●Reduces color variations during long printing to maximum color difference (95% of color) <=1 dE 2000 inTiling mode.●Has a workflow to create media optimized for tiling based on customer media.●An automated introduction of preparation plot and color bars to plot stream to stabilize system during longruns.It is/does not:● A printer to printer color consistency solution.●Does not modify existing print modes or media.It only supports the following print modes:●8p 70% - 120%●10p 70% - 130%●14p 70% - 140%1.Select Substrate > Optimize for tiling, then select the required substrate from the list.NOTE:Only substrates that can be optimized for tiling appear in the list. Supported types are: front-litsubstrate, vinyl, wallpaper and PVC banner. Substrates that have been converted as optimized for tiling willnot appear.ENWW Optimize for tiling65NOTE: A Tiling suffix is added to the name of the substrate, you edit the name, but you cannot erase thesuffix.2. A warning about the solution space change in the new substrate appears, click OK.3. A window appears to recommend the CLC to select before the first time the substrate is used.4.System Preheat is automatically checked for the selected tiling substrate, it is greyed out in the window,and cannot be unchecked. Only the recommended solution space, (number of passes and ink levels)appears in the tiling window.NOTE:If the paper mode from the original substrate is not within the recommended solution space, it isdeleted from the list. If the existing paper modes have been deleted during creation, a recommendedpaper mode is automatically added.5.During creation, the CLC color reference is reset and the status appears as Color reference not set in theIPS.NOTE:After creation, a CLC is required to create the reference for future color calibration. A warningwindow appears straight after substrate creation. You can create an ICC profile from the RIP and managethe substrate as normal from this point on.66Chapter 5 Handle the substrate ENWW6. A beginning of job preparation plot (A) and sideway color bars (B) are automatically added.NOTE:When tiling optimized substrate is loaded, the specific workflow changes and beginning of jobpreparation plot and sideway color bars are automatically introduced. Workflow for non-optimizedsubstrates is not affected.7.Substrate can be exported from one printer to another.IMPORTANT:Tiling substrates can only be imported with the latest firmware. See Update the firmwareon page 23.ENWW Optimize for tiling67。
HP Latex 1500 打印机介绍文件说明书

1E n g l i s h What is it?The HP Latex 1500 Printer allows you to print signs and graphics on a wide range of flexible materials up to 3.20 m (126 in) wide. The printer uses water-based HP Latex Inks to provide high quality, durable output. This introductory document includes legal notices and safety instructions, describes the printer software, and lists error messages that you may encounter.The following documents are available for your printer, and can be downloaded from/go/latex1500/manualsSite preparation guide, site preparation checklist, installation guide, introductory information (this document), user’s guide, legal information, limited warranty.Legal notices© Copyright 2016 HP Development Company, L.P.The information contained herein is subject to change without notice. The only warranties for HP products and services are set forth in the express warranty statement accompanying such products and services. Nothing herein should be construed as constituting an additional warranty. HP shall not be liable for technical or editorial errors or omissions contained herein.You can find the expressly provided HP Limited Warranty and Legal Information applicable to your product in the start menu on your PC and/or in the CD/DVD provided in the box. For some countries/regions a printed HP Limited Warranty is provided in the box. In countries/regions where the warranty is not provided in printed format, you may request a printed copy from: /go/ orderdocumentsSafety precautionsBefore using your printer, read the following safetyprecautions and operating instructions to make sure youuse the equipment safely. You are expected to have the appropriate technical training and experience necessary to be aware of hazards to which you may be exposed in performing a task, and to take appropriate measures to minimize the risks to yourself and to others. Operations must be supervised at all times.General safety guidelinesWARNING: The information provided by the printer status beacon is only for information purposes and is not related to any safety provision or safety states. Warning labels on the printer must be always considered when operating the printer and prevail against any of the status indicated by the printer status beacon.Turn off the printer, using the Branch Circuit Breakers located in the building’s Power Distribution Unit (PDU), and call your service representative in any of the following cases:• The power cord is damaged.• The drying or curing enclosures are damaged.• The printer has been damaged by an impact.• Liquid has entered the printer.• There is smoke or an unusual smell coming from the printer.•The printer’s built-in Residual Current Circuit Breaker (Ground Fault Circuit Interrupter) has been repeatedly tripped.• Fuses have blown.• The printer is not operating normally.•There is any mechanical or enclosure damage.HP Latex 1500 PrinterIntroductory InformationTurn off the printer using the Branch Circuit Breakers in either of the following cases:• During a thunderstorm• During a power failureTake special care with zones marked with warning labels.Electrical shock hazardWarning: The internal circuits, the drying and curing modules operate at hazardous voltages capable of causing death or serious personal injury.Turn off the printer using the Branch Circuit Breakers located in the building’s Power Distribution Unit (PDU) before servicing the printer. The printer must be connected to earth at mains outlets only.To avoid the risk of electric shock:• Do not attempt to dismantle the drying and curing modules, or the e-cabinet except during hardware maintenance tasks. In that case, follow the instructions strictly.• Do not remove or open any other closed system covers or plugs.• Do not insert objects through slots in the printer.• Test the functionality of the Residual Circuit Breaker (RCCB) every year (refer to the procedure below).Note: A blown fuse may indicate malfunctioning electrical circuits within the system. Call your service representative, and do not attempt to replace the fuse yourself.Checking the functionality of the Residual Circuit Breakers (RCCBs)Following standard Residual Current Circuit Breaker (RCCB) recommendations, it is recommended that the RCCBs are tested on a yearly basis. The procedure is as follows:1. Turn off the built-in computer using the Internal Print Server’s Shutdown button (or, in Print Care, select Printer tools> Power options > Shutdown). Do not turn off the printer from the mains switch or the circuit breakers.Caution: The shutdown process takes some time to complete. Wait until the green Power Enabled light is off before proceeding.2. Once the computer is off, test that the RCCB works correctly by pressing the test button.• If the RCCB does not trip when the test button is pressed, this indicates that it has failed. The RCCB must be replaced for safety reasons; call your service representative to remove and replace the RCCB.• If the RCCB trips, this indicates that it is working correctly; reset the RCCB to its normal on state.Fire hazardThe drying and curing subsystems of the printer operate at high temperatures. Call your service representative if the printer’s built-in Residual Current Circuit Breaker (Ground Fault Circuit Interrupter) is repeatedly tripped. To avoid the risk of fire, take the following precautions:• Use the power supply voltage specified on the nameplate.• Connect the power cords to dedicated lines, each protected by a branch circuit breaker according to the information detailed in the Site Preparations documentation.• Do not insert objects through slots in the printer.• Take care not to spill liquid on the printer. After cleaning, make sure all components are dry before using the printer again.• Do not use aerosol products that contain flammable gases inside or around the printer. Do not operate the printer in an explosive atmosphere.• Do not block or cover the openings of the printer.• Do not attempt to modify the drying or curing module, or the e-cabinet.• Ensure that the operating temperature of the substrate recommended by the manufacturer is not exceeded. Ifthis information is not available, ask the manufacturer. Do not load substrates that cannot be used at an operating temperature above 125°C (257°F).• Do not load substrates with auto-ignition temperatures below 250°C (482°F). See note below. No ignition sources are close to the substrate.Note: Test method based on EN ISO 6942:2002; Evaluation of materials and material assemblies when exposed to a source of radiant heat, method B. The test conditions, to determine the temperature when the substrate starts ignition (either flame or glow) were: Heat flux density: 30 kW/m2, Copper calorimeter, K type thermocouple.• Proper maintenance and genuine HP consumables are required to ensure that the printer operates safely as designed.The use of non-HP consumables (foams, filters, printhead cleaner roll, and inks) may present a risk of fire.2• The LED’s array supports, beam and enclosures can reach high temperatures. To avoid the risk of fire, take the following precautions:-Take special care with zones marked with warning labels.-Do not place objects covering LED’s arrays supports, beam and enclosures.-Take care not to spill liquid on the accessory. After cleaning, make sure all components are dry before using the printer.-Do not attempt to modify LED’s array supports, beam and enclosures;Heat HazardThe drying and curing subsystems of the printer operate at high temperatures and can cause burns if touched. LED’sarray (oprional) supports , beam and enclosures can reach high temperatures. To avoid the risk of burns, take the following precautions:• Do not touch the internal enclosures of the printer’s drying and curing modules and vapor removal thermal blankets.• Take special care when accessing the substrate path.• Take special care with zones marked with warning labels.• Do not place objects covering LED’s arrays supports, beam and enclosures.• Do not attempt to modify LED’s array supports, beam and enclosures;• Remember to let the printer cool down before performing some maintenance operations.Mechanical hazardThe printer has moving parts that could cause injury. To avoid personal injury, take the following precautions when working close to the printer and in-line slitters:• Keep your clothing and all parts of your body away from the printer’s moving parts.• Avoid wearing necklaces, bracelets and other hanging objects.• If your hair is long, try to secure it so that it will not fall into the printer.• Take care that sleeves or gloves do not get caught in the printer’s moving parts.• Avoid standing close to the fans, which could cause injury and could also affect print quality (by obstructing the air flow).• Do not touch gears or moving rolls during printing.• Do not operate the printer with covers bypassed.• Do not touch in-line slitters during printing.• Handle in-line slitters with care and store them safely into their box when not used with the printer.• Risk of cutting your fingers! Uninstall the In-line slitters when manipulating the curing module or accessing the substrate path.• Take care when using the air gun. When used for cleaning purposes, make sure to use it according to the local regulations since additional safety provisions may apply.Light radiation hazardUV radiation can be emitted from the LED’s array in compliance with the requirements of the exempt group of IEC 62471:2006 Photobiological safety of lamps and lamp systems. However, you are recommended not to look directly for a long time at the output LEDs lights while they are on.Sound pressure levelThe sound pressure level could exceed 70 dBA in some print modes. Hearing protection may be required.Chemical hazardSafety data sheets identify ink ingredient and ventilation requirements to ensure any airborne exposure is adequately controlled.Current printer ink systems material safety data sheets are available at: /go/msds.Air conditioning and ventilation should meet with local environmental and health and safety (EHS) guidelines and regulations. To see more detailed information, please refer to the “Ventilation and air conditioning” section included in the site preparation guide, available at: /go/latex1500/manuals.Heavy substrate hazardSpecial care must be taken to avoid personal injury when handling heavy substrates.• Handling heavy substrate rolls always requires two people. Care must be taken to avoid back strain and/or injury.• Always use a forklift, pallet truck, or other handling equipment to lift substrates. The printer has been designed to be compatible with many of these devices.• Always wear personal protective equipment including boots and gloves.3Ink handling and condensatesHP recommends that you wear gloves when handling ink system components and condensates.Ventilation and air conditioningAs with all equipment installations, to maintain ambient comfort levels, air conditioning and ventilation in the work area should take into account that the printer produces heat.Air conditioning and ventilation should meet local environmental, health, and safety (EHS) guidelines and regulations. For a more prescriptive approach to adequate ventilation, refer to the ANSI/ASHRAE (American Society of Heating, Refrigerating and Air-Conditioning Engineers) 62.1-2013 Ventilation for Acceptable Indoor Air Quality. An example minimum exhaust rate of 2.5 L/s.m² (0.5 cfm/ft²) of fresh air for “copy, printing rooms” is specified.Note: The ventilation and air conditioning units should not blow air directly onto the printer.Note: Maintaining positive air pressure in the print production room will help prevent dust from entering the room.Printer softwareThe HP Internal Print Server is provided with your printer and is already installed in the printer’s built-in computer. It displays printer alerts and a summary of printer status, manages print jobs, and must be used to interact with the printer in various ways.The HP Print Care program is provided with your printer and is already installed in the printer’s built-in computer. It displays printer status and history in detail, and helps you to maintain the printer and solve any problems that may arise.A Raster Image Processor (RIP) should be run on a separate computer; it cannot be installed on the printer’s built-in computer. It is not provided with the printer and should be obtained separately.Printer messagesOccasionally you may see messages such as the following in the Internal Print Server window. There are two types:text messages, which are more informative, and messages containing numerical codes, which mean that the printer has detected a problem or malfunction. When one of these messages appears, please follow any instructions provided by the printer, and consult the table below. If you feel in doubt about the correct response, or if you have followed the recommendation but the problem persists, call your service representative.Message or code Recommendation[Color] cartridge has expired Replace the cartridge.[Color] cartridge is altered Replace the cartridge.[Color] cartridge is low on ink Be ready to replace the cartridge soon.[Color] cartridge is missing Install the correct cartridge.[Color] cartridge is non-HP ink You are recommended to install an HP cartridge for best performance. [Color] cartridge is out of ink Replace the cartridge.[Color] printhead is missing Install the correct printhead.{Color} printhead out of warranty The printhead’s warranty has ended, because of the length of time it has beenin operation, because of the volume of ink used, or because non-HP ink hasbeen used in the system. See the limited warranty document.An error has occurred in printhead detection Remove the printhead, clean any ink from the electrical connectors on the printhead (do not try to clean the nozzles), and reinsert the printhead.Checking file system After a dirty power off, the printer performs a file system check, which will takesome minutes.Checking printer The printer is completing checks and cool-down cycle after finishing a job.Clean drop detector spittoon Clean the ink deposits.45E n g l i s hMessage or code RecommendationCleaner roll jamGo to the Internal Print Server and select the Ink System menu, thenCheck cleaner roll . Pull out the printhead cleaning roll assembly, raise the pinchwheels, wind the roll forward manually, then lower the pinchwheels and push the assembly back into the printer.Color calibration cancelled because of scanning errors The color calibration chart could not be scanned successfully with the current substrate.ConnectingThe Internal Print Server is connecting to the printer.Connecting printer, please wait The Internal Print Server is starting the printer.DisconnectedThe printer is shut down or not detected.FW upgrade post actions The firmware update is being performed.Ink dryingThe printer is drying the last passes of a job after printing it.Ink system not ready to print Please wait a while. If the printer does not recover, restart it.Job canceled due to lack of data received from the IPSIf the problem persists, check the configuration of the Internal Print Server computer.Line sensor calib. error: substrate too small Load a larger substrate.Low cleaner roll Be ready to replace the printhead cleaning roll soon.Lower leverLower the substrate pressure handles.Maintenance #N advised. Please contact HP You are advised to contact your service representative.No substrate loaded Load substrate.Please close safety sensor An open safety circuit has been detected, and should be closed in order to continue working.Please press rearm button Press the blue, blinking button to finish the printer’s start-up procedure.Please release emergency stop An emergency button has been pressed, and must be released to continue working.Preparing to printThe printer is performing checks and warm-up prior to printing.Printer cannot carry on printingCheck that the three-phase power supply is working and that the ambient temperature is within the normal range. This problem can also be caused by holes in the substrate, by reflective or transparent substrates, or by a dirty or faulty temperature sensor.Printer cannot cool downIf the ambient temperature is within the normal range, this problem may be caused by removing the substrate too quickly after printing. Try leaving the substrate in the printer until temperatures settle down after printing.Printer cannot warm upCheck that the three-phase power supply is working. This problem can also be caused by holes in the substrate, by reflective or transparent substrates, or by a dirty or faulty temperature sensor.Printheads not alignedAlign the printheads.Printhead replacement incomplete The printhead replacement process was unsuccessful.Printing The printer is printing.ReadyThe printer is ready to receive and print a job.Remove {color} printheadRemove the printhead.Message or code RecommendationReplace {color} cartridge Replace the cartridge.Replace {color} printhead Replace the printhead.Replace aerosol filter Replace both aerosol filters.Reseat {color} cartridge Reseat the cartridge.Reseat {color} printhead Reseat the printhead.Select substrate name in the IPS Select the name of the loaded substrate in the Internal Print Server.Starting The printer is being detected while starting up.Substrate jam: remove substrate Remove all substrate from the printer (see the user’s guide).See the user’s guide.Substrate may be detached from therear spindle or slippage detected.Substrate will be unloaded.System error The printer has a system error. In the alert window, you should see thenumerical code of the system error.Very low cleaner roll Be ready to replace the printhead cleaning roll very soon.10.04.XX:YY Problem with e-cabinet fuses. You may need to run a subsystem diagnostic toconfirm that fuse replacement is required.10.06.09:40The emergency stops and/or safety relay have been activated. Check that theemergency stops are not activated. If the problem persists, run a diagnostic toidentify the issue.51.01.00:92The main window is open. Close the window to continue printing. If the problempersists, run a diagnostic to identify the issue.51.02.00:92The front cover is open. Close the front cover to continue printing. If theproblem persists, run a diagnostic to identify the issue.51.03.00:92The loading table is not closed. Close the loading table to continue printing. Ifthe problem persists, run a diagnostic to identify the issue.51.04.00:92The emergency stops and/or safety relay have been activated. Check that theemergency stops are not activated. If the problem persists, run a diagnostic toidentify the issue.86.01.00:01Carriage movement failure. Ensure that maintenance routines are up to date,then perform Reinitialize Carriage from the Internal Print Server. Also performthe carriage-rail cleaning process.The above table includes the most significant numerical codes. If you receive an error code that is not in the table, follow the instructions in the message.HP Latex 1500 Printer (Under RMN: BCLAA-1606)SpecificationPower10kWFrequency 50 / 60 Hz3∅~AC Voltage 200 - 240 / 380 - 415 VCurrent Max48 A / 30 A6。
惠普 LaserJet Pro MFP M25-M27 用户指南说明书
HP Latex 打印机产品介绍说明书
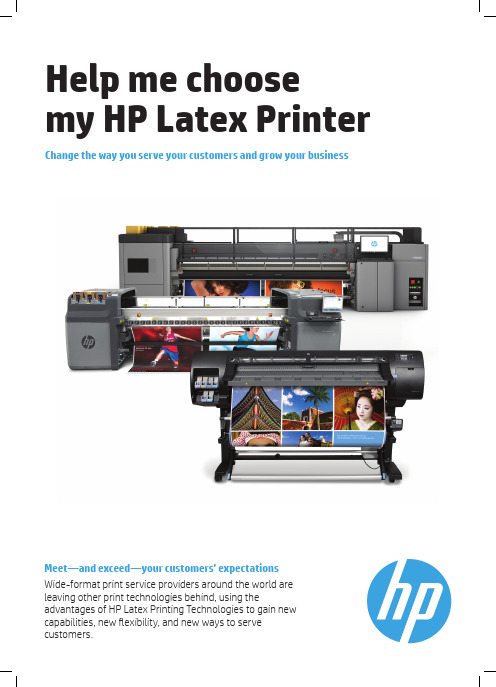
Meet—and exceed—your customers’ expectations Wide-format print service providers around the world are leaving other print technologies behind, using the advantages of HP Latex Printing Technologies to gain new capabilities, new fl exibility, and new ways to serve customers.3Performance may vary depending on media—for more information, see /go/mediasolutionslocator or consult your media supplier for compatibility details. For best results, use textiles that do not stretch. Performance varies by printer. For HP Latex 800 series printers and the HP Latex 3000 Printer , the optional ink collector is required for porous textiles (included with the HP Latex 850 Printer). For HP Latex 200 series printers, print on media that does not let the ink trespass onto the printer.HP image permanence estimates by HP Image Permanence Lab. Outdoor display permanence tested according to SAE J2527 on a range of media, including HP media; in a vertical display orientation in simulated nominal outdoor display conditions for select high and low climates, including exposure to direct sunlight and water; performance may vary as environmental conditions change. Laminated display permanence using HP Clear Gloss Cast Overlaminate, GBC clear gloss 1.7 mil hot laminate, or Neschen Solvoprint Performance Clear 80 laminate. Results may vary based on specific media Requires an HP WallArt account, Internet connection, and connected Internet-capable device. One year free trial license. Cancel at any time. After the free trial, a full HP WallArt license may be purchased. Point of purchase posters Reduce costs without compromising quality • Great results on all types of paper, including low-cost uncoated papers and traditional offset papers Wallcoverings and canvas Discover a new market opportunity • Odorless prints 12 meet high environmental standards—ideal for hotels, restaurants, schools • Trial the easy-to-use HP WallArt solution, visit /go/wallart 13Light boxes Deliver high-value backlit applications • Produce high-resolution prints up to 1200 dpi • Vibrant, saturated colors • Choose from a range of backlit printing materials: paper, film, polypropylene, and textiles 10Temporary textiles 10Complement your business with new applications• Print on a wide variety of textiles, including uncoated and natural textiles • An easy-to-use solution compared to dye-sublimation techniquesOutdoor and event bannersProduce images worthy of building the best brands• Achieve high-quality results on self-adhesive vinyls and banners• Offer outdoor display permanence upto three years unlaminated, five yearslaminated 11Easy, convenient printing Easy, productive printing;width makes it ideal for widebanners and textiles14Mid-volume roll-to-rollprinterFully featured HP LatexMid-volume roll- to-rollprinterIndustrial productivityand operationalefficiency• Double-sided printing capability15• Take-up reel • Double-sided printingcapability15• Roll-to-roll• Double-sided printing16• Roll-to-roll• Roll-to-free fall• Dual roll• Roll-to-roll• Roll-to-free fallHP Latex 260 Printer HP Latex 280 Printer HP Latex 820 Printer HP Latex 850 Printer HP Latex 3000 Printer。
HP OfficeJet Pro 7740 宽幅多功能一体机系列用户指南说明书

目录
1 如何操作? ................................................................................................................................................... 1
HP OfficeJet Pro 7740 Wide Format All-inOne series
用户指南
版权信息 © 2020 HP Development Company, L.P.
HP 公司通告
本文档包含的信息如有更改,恕不另行 通知。
保留所有权利。 除非版权法允许,否则 在未经 HP 预先书面许可的情况下,严 禁转载、改编或翻译本手册的内容。
2 使用入门 ...................................................................................................................................................... 2 辅助功能 ................................................................................................................................................................ 2 HP EcoSolutions(HP 与环境) ..................................................
HP Latex 700 打印机系列 HP Latex 800 打印机系列 用户向导说明书
HP Latex 700 打印机系列HP Latex 800 打印机系列用户向导摘要如何使用您的产品。
关于本版本2022 年 5 月,第 3 版©Copyright 2020–2022 HP Development Company, L.P.法律通告本文档中包含的信息如有更改,恕不另行通知。
有关 HP 产品和服务的全部保修和保证条款,均已在相关产品和服务所附带的保修声明中进行了明确的规定。
本文中的任何内容都不应被引申为补充保证。
HP 对本文档中出现的技术错误、编辑错误或疏漏之处概不负责。
商标Microsoft® 和 Windows® 是 MicrosoftCorporation 在美国的注册商标。
目录1 简介 (1)欢迎使用您的打印机 (1)打印机附件 (2)文档 (2)安全注意事项 (3)打印机主要组件 (8)控制面板 (19)HP PrintOS (27)内嵌式 Web 服务器 (27)连接方式和软件说明 (29)高级网络配置 (31)打开和关闭打印机 (37)重新启动打印机 (38)如何打印(概述) (38)2 有用的链接 (39)当您需要帮助时 (39)3 处理基材 (41)概述 (41)如何存放和搬动基材 (50)将纸卷装入打印机 (50)多孔基材 (56)墨水收集器 (57)装入附件 (66)辅助手动装纸 (73)边缘固定夹 (75)设置和使用基材送入附件 (80)从打印机中取出卷筒 (81)如何抬起压纸轮 (83)卷纸收纸器 (83)擦拭器辊 (89)查看有关基材的信息 (90)iii剪切基材 (92)在织物上打印 (92)4 基材设置 (96)基材预设 (96)Configuration Center (96)联机搜索 (97)HP Media Locator (98)通用预设 (98)克隆基材预设 (99)修改基材预设 (99)添加新的基材预设 (100)在打印时更改设置 (103)温度配置文件 (104)选择遍数 (104)将基材预设保存在云中 (109)删除基材预设 (110)打印速度、提示和技巧 (110)颜色校准 (110)关于获得最佳颜色校准效果的建议 (112)颜色校准过程 (112)不同的 700 和 800 系列打印机之间的颜色一致性 (113)ICC 配置文件 (113)完全校准 (114)5 作业队列管理 (116)控制面板中的作业队列 (116)6 检索打印机用量信息 (121)获取打印机统计信息 (121)从 PrintOS PrintBeat 中检查用量 (121)检查作业的用量统计信息 (121)检查成本分配 (122)7 基材问题的故障排除 (123)无法成功装入基材 (123)基材位置不正确 (123)iv基材收缩或膨胀 (126)基材产生弓形变形 (127)自动裁纸器不起作用 (128)收纸器基材卡塞 (128)8 打印质量问题的故障排除 (129)一般打印建议 (129)优化打印质量 (130)改进打印质量 (131)最常见的打印质量问题 (136)9 处理墨水系统 (146)700 系列墨水系统 (146)800 系列墨水系统 (153)对齐打印头 (159)更换打印头 (161)如何存放和运输打印头 (167)更换维护墨盒 (167)用白色墨水进行打印(仅限 700W 和 800W 型号) (171)10 墨水系统问题的故障排除 (181)无法插入墨盒(700 系列) (181)无法插入墨盒(800 系列) (181)安装未摇动的墨盒 (181)控制面板建议重新安装或更换打印头 (183)无法插入打印头 (183)无法插入维护墨盒 (183)11 打印机维护 (185)一般清洁说明 (185)建议使用但未提供的维护工具 (185)清洁打印头 (186)清洁打印头上的电路连接线 (186)清洁和润滑打印头滑动架杆 (191)清洁编码器条 (PMK13) (193)清洁打印平台和基材前移传感器窗口 (PMK19) (194)更换润滑毡 (PMK18) (197)v检查和清洁打印头插槽中的塑料针 (202)更换打印头插槽中的塑料针 (204)更换墨水混合容器 (PMK15) (205)清洁打印机外部 (205)清洁固化模块 (PMK14) (206)服务维护 (206)12 客户自行维修部件 (208)安装墨水收集器 (208)基材装入隔片 (208)更换线传感器 (209)更换润滑毡 (212)打印平台 (219)更换真空橡胶圈 (221)更换墨水收集器传感器 (225)更换升降机件手柄 (230)更换导向器风扇装置 (231)更换裁纸器 (234)更换光学传感器 (236)更换滑动架盖 (239)更换打印头护盖 (242)13 固件更新 (244)使用 USB 闪存驱动器的固件更新 (244)使用嵌入式 Web 服务器的固件更新 (244)自动固件更新 (245)14 移动或存放打印机 (246)移动打印机 (246)准备供墨盘(仅限 800 系列) (246)存放打印机 (249)在环境规格之外贮存 (249)15 耗材和附件 (250)订购墨盒 (250)处置说明 (251)16 其他问题的故障排除 (253)打印机无法获取 IP 地址 (253)vi打印机不打印 (253)在生成打印作业时,程序运行速度降低或停止 (254)打印机速度非常慢 (254)计算机和打印机之间的通信失败 (255)无法连接到服务(如固件更新、在线搜索或客户参与计划) (255)系统错误代码 (256)17 打印机规格 (259)功能规格 (259)物理规格 (260)内存规格 (261)电源规格 (261)生态规范 (262)环境规格 (262)噪音规格 (262)附录 A 常见打印问题汇总 (264)索引 (266)vii1简介产品的简介。
HPLatex1500打印机HPLatex3000打印机系列Double-sidedDay
HP Latex 3000 打印机系列Double-sided Day Night 套件用户指南©Copyright 2016 HP Development Company, L.P.版本 1法律通告本文档中包含的信息如有更改,恕不另行通知。
有关 HP 产品和服务的全部保修和保证条款,均已在相关产品和服务所附带的保修声明中进行了明确的规定。
本文中的任何内容都不应被引伸为补充保证。
HP 对本文档中出现的技术错误、编辑错误或疏漏之处概不负责。
安全说明在开始使用打印机之前,先阅读并理解下面的操作和安全说明。
目录1HP Latex Double-sided Day Night 套件 (1)套件组件 (1)简介 (2)双面后打光打印说明 (3)准备图像内容以进行双面后打光打印 (4)LED 打样指示灯 (13)2 硬件维护 (14)更换 Double-sided Day Night 套件压板纸张保护器 (14)更换 Double-sided Day Night 套件纸张边缘固定夹 (15)清洁 Double-sided Day Night 套件指示灯 (16)3Print Care 诊断 (18)操作员诊断 (18)4 系统错误和警报 (19)ZHCN iiiiv ZHCN1HP Latex Double-sided Day Night 套件通过使用 HP Latex Double-sided Day and Night 套件,您可以轻松打印适合户外广告的半透明纸张双面打印件,可以在任何光线条件(白天前打光或夜晚后打光)下获得较好的色彩效果。
注:该视频适用于 HP Latex 1500 和 HP Latex 3000 打印机系列。
套件组件1.压板纸张保护器(2 个)2.张紧杆(6 个)3.Double-sided Day Night 套件纸张边缘固定夹(2 个)和 10 个额外的条带4.仅适用于 3000 系列:普通纸张边缘固定夹(4 个)和 20 个额外的条带ZHCN套件组件1切记:在 3000 系列打印机中安装 Double-sided Day Night 套件后,您应该卸下原来的边缘固定夹并使用套件附带的边缘固定夹。
HP LaserJet M3027 M3035多功能一体机 说明书
HP LaserJet M3027/M3035 多功能一体机用户指南版权与许可© 2006 Copyright Hewlett-Packard Development Company, L.P.未经事先书面许可,严禁进行任何形式的复制、改编或翻译,除非版权法另有规定。
此处包含的信息如有更改,恕不另行通知。
HP 产品及服务的保修仅以随该产品及服务提供的书面保修声明为准。
本文所述任何内容不应被视为附加保修。
对任何技术或编辑错误或者本文所述内容的遗漏,HP 不承担任何责任。
部件号: CB414-90934Edition 1, 10/2006商标声明Adobe®、Acrobat®和 PostScript®是 Adobe Systems Incorporated 的商标。
Linux 是 Linus Torvalds 在美国的注册商标。
Microsoft®、Windows®和 Windows NT®均为 Microsoft Corporation 在美国的注册商标。
UNIX®是 The Open Group 的注册商标。
ENERGY STAR®和 ENERGY STAR 徽标®均为美国环保署在美国的注册标志。
目录1 设备基本信息设备比较 (2)功能比较 (3)打印机视图 (4)设备部件 (4)接口端口 (5)设备软件 (6)支持的操作系统 (6)支持的打印机驱动程序 (6)选择正确的打印机驱动程序 (6)通用打印机驱动程序 (7)驱动程序自动配置 (7)立即更新 (7)HP 驱动程序预配置 (7)打印设置优先级 (7)打开打印机驱动程序 (8)用于 Macintosh 计算机的软件 (8)从 Macintosh 操作系统中删除软件 (9)实用程序 (9)HP Web Jetadmin (9)内嵌式 Web 服务器 (9)HP Easy Printer Care 软件 (9)支持的操作系统 (9)支持的浏览器 (10)其它组件和实用程序 (10)2 控制面板使用控制面板 (12)控制面板布局 (12)主页屏幕 (12)触摸屏上的按钮 (13)控制面板帮助系统 (14)使用管理菜单 (15)导航管理菜单 (15)信息菜单 (15)默认作业选项菜单 (16)默认原件选项 (16)默认复印选项 (17)默认传真选项 (17)ZHCN iii默认电子邮件选项 (18)默认发送到文件夹选项 (19)默认打印选项 (19)时间/计划菜单 (20)管理菜单 (21)初始设置菜单 (22)联网和 I/O (22)传真设置 (28)电子邮件设置 (29)发送设置菜单 (29)设备动作菜单 (30)打印质量菜单 (33)故障排除菜单 (35)重置菜单 (36)服务菜单 (36)3 输入/输出 (I/O) 配置USB 配置 (38)网络配置 (39)配置 TCP/IPv4 参数 (39)设置 IP 地址 (39)设置子网掩码 (40)设置默认网关 (40)配置 TCP/IPv6 参数 (41)禁用网络协议(可选) (41)禁用 IPX/SPX (41)禁用 AppleTalk (41)禁用 DLC/LLC (42)HP Jetdirect EIO 打印服务器 (42)4 介质和纸盘一般介质准则 (44)避免使用的纸张 (44)可损坏设备的纸张 (44)一般介质规格 (45)介质注意事项 (46)信封 (46)双侧接缝的信封 (46)带粘性封条或封盖的信封 (47)信封边距 (47)信封存放 (47)标签 (47)标签结构 (48)投影胶片 (48)卡片纸和重磅介质 (48)卡片纸结构 (48)卡片纸准则 (48)信头纸和预印表格 (49)选择正确的热凝器模式 (49)iv ZHCN选择打印介质 (51)支持的介质尺寸 (51)支持的介质类型 (52)打印和纸张存放环境 (53)装入介质 (54)将介质放在扫描仪玻璃板上 (54)装入自动文档进纸器 (ADF) (54)装入纸盘 1(多用途纸盘) (55)自定义纸盘 1 操作 (56)装入纸盘 2 和可选纸盘 3 (57)装入特殊介质 (58)控制打印作业 (60)选择出纸槽 (61)打印到顶部出纸槽 (61)打印到后出纸槽 (62)5 设备功能使用便捷订书机 (64)装订介质 (64)装入订书钉 (65)使用作业存储功能 (67)访问作业存储功能 (67)使用审阅待打印功能 (67)创建审阅待打印作业 (67)打印审阅待打印作业的剩余份数 (68)删除审阅待打印作业 (68)使用专用作业功能 (68)创建专用作业 (68)打印专用作业 (68)删除专用作业 (69)使用快速复印功能 (69)创建快速复印作业 (69)打印更多份快速复印作业 (69)删除快速复印作业 (70)使用存储的作业功能 (70)创建存储的复印作业 (70)创建存储的打印作业 (70)打印存储的作业 (71)删除存储的作业 (71)6 打印使用 Windows 打印机驱动程序中的功能 (74)创建和使用快速设置 (74)使用水印 (75)调整文档大小 (75)从打印机驱动程序设置自定义纸张尺寸 (75)使用不同纸张和打印封面 (76)打印空白的第一页 (76)在一张纸上打印多个页面 (76)ZHCN v在纸张两面打印 (77)使用自动双面打印 (77)手动双面打印 (78)双面打印的布局选项 (78)使用维修选项卡 (79)使用 Macintosh 打印机驱动程序中的功能 (80)创建和使用预置 (80)打印封面 (80)在一张纸上打印多个页面 (80)在纸张两面打印 (81)取消打印作业 (83)从控制面板停止当前打印作业 (83)使用软件程序停止当前打印作业 (83)7 复印使用复印屏幕 (86)设置默认复印选项 (87)基本复印说明 (88)从扫描仪玻璃板复印 (88)从文档进纸器复印 (88)调整复印设置 (89)复印双面文档 (90)手动复印双面文档 (90)自动复印双面文档(只限双面打印机型) (90)复印包含多种尺寸的原文档 (92)更改复印自动分页设置 (93)复印照片和书籍 (94)使用“作业构建”功能组合复印作业 (95)取消复印作业 (96)8 扫描和发送电子邮件配置电子邮件设置 (98)支持的协议 (98)配置电子邮件服务器设置 (98)查找网关 (99)从设备控制面板查找 SMTP 网关 (99)从电子邮件程序查找 SMTP 网关 (99)使用“发送电子邮件”屏幕 (100)执行基本电子邮件功能 (101)装入文档 (101)发送文档 (101)发送文档 (101)使用自动填写功能 (101)使用通讯簿 (102)创建收件人列表 (102)使用本地通讯簿 (102)将电子邮件地址添加到本地通讯簿 (102)从本地通讯簿删除电子邮件地址 (103)更改当前作业的电子邮件设置 (104)vi ZHCN9 传真模拟传真 (108)将传真附件连接到电话线 (108)配置和使用传真功能 (108)数字传真 (109)10 管理和维护设备使用信息页 (112)配置电子邮件警报 (114)使用 HP Easy Printer Care 软件 (115)打开 HP Easy Printer Care 软件 (115)HP Easy Printer Care 软件各部分 (115)使用内嵌式 Web 服务器 (117)通过网络连接打开内嵌式 Web 服务器 (117)内嵌式 Web 服务器各部分 (117)使用 HP Web Jetadmin 软件 (119)使用适用于 Macintosh 的 HP Printer Utility (120)打开 HP Printer Utility (120)HP Printer Utility 功能 (120)管理耗材 (122)耗材寿命 (122)打印碳粉盒大致更换时间间隔 (122)管理打印碳粉盒 (122)打印碳粉盒存放 (122)使用原装 HP 打印碳粉盒 (122)HP 对非 HP 打印碳粉盒的策略 (122)打印碳粉盒鉴别 (123)HP 打假热线和网站 (123)更换耗材和部件 (124)耗材更换准则 (124)更换打印碳粉盒 (124)清洁设备 (127)清洁外部 (127)清洁扫描仪玻璃板 (127)清洁扫描仪盖板衬底 (128)清洁 ADF (128)清洁送纸道 (130)校准扫描仪 (131)11 故障排除故障排除检查表 (134)影响性能的因素 (134)问题解决流程图 (135)解决一般设备问题 (138)控制面板消息类型 (141)控制面板消息 (142)ZHCN vii卡塞恢复 (151)清除卡纸 (152)从 ADF 清除卡纸 (152)从进纸盘区域清除卡纸 (154)从打印碳粉盒区域清除卡纸 (155)从出纸槽区域清除卡纸 (156)从双面打印器清除卡纸 (157)解决重复卡纸 (158)清除订书机卡塞 (160)解决打印质量问题 (163)与介质有关的打印质量问题 (163)与环境有关的打印质量问题 (163)与卡纸有关的打印质量问题 (163)图像缺陷示例 (163)打印颜色浅(部分页面) (165)打印浓度淡(整个页面) (165)斑点 (165)丢字 (166)线条 (166)灰色背景 (166)碳粉污迹 (167)松散的碳粉 (167)重复缺陷 (168)重复图像 (168)变形字符 (168)页面倾斜 (169)卷曲或呈波形 (169)皱纹或折痕 (170)白色垂直线 (170)胎迹 (170)黑底上的白色斑点 (171)分散的线条 (171)模糊打印 (172)随机图像重复 (172)解决网络打印问题 (173)解决复印问题 (174)防止出现复印问题 (174)图像问题 (174)介质处理问题 (175)执行问题 (177)解决传真问题 (178)解决发送问题 (178)解决接收问题 (179)解决电子邮件问题 (180)验证 SMTP 网关地址 (180)验证 LDAP 网关地址 (180)解决常见的 Windows 问题 (181)解决常见的 Macintosh 问题 (182)viii ZHCN解决 Linux 问题 (184)解决 PostScript 问题 (185)一般问题 (185)附录 A 耗材和附件订购部件、附件和耗材 (188)直接从 HP 订购 (188)通过服务或支持提供商订购 (188)通过嵌入式 Web 服务器直接订购(适用于连接到网络上的打印机) (188)通过 HP Easy Printer Care 软件直接订购 (188)产品号 (189)纸张处理附件 (189)打印碳粉盒 (189)内存 (189)电缆和接口 (189)订书机附件 (190)打印介质 (190)附录 B 服务与支持Hewlett-Packard 有限保修声明 (193)客户自助维修保修服务 (194)打印碳粉盒有限保修声明 (195)HP 客户服务 (196)联机服务 (196)电话支持 (196)软件实用程序、驱动程序和电子信息 (196)直接订购 HP 附件或耗材 (196)HP 服务信息 (196)HP 服务协议 (196)HP Easy Printer Care 软件 (196)有关 Macintosh 计算机的 HP 支持及信息 (197)HP 维护协议 (198)现场服务协议 (198)次日现场服务 (198)每周(批量)现场服务 (198)重新包装设备 (198)延长保修期 (198)附录 C 规格物理规格 (200)电气规格 (201)声音排放 (202)操作环境 (203)附录 D 规范信息FCC 规则 (206)环境产品管理计划 (207)保护环境 (207)ZHCN ix产生臭氧 (207)能耗 (207)碳粉消耗 (207)纸张使用 (207)塑料 (207)HP LaserJet 打印耗材 (207)HP 打印耗材的退回和回收利用计划信息 (208)纸张 (208)材料限制 (208)欧盟用户丢弃私人废弃设备的规定 (209)材料安全数据表 (MSDS) (209)更多信息 (209)电信服务声明 (210)一致性声明 (211)安全声明 (212)激光安全 (212)加拿大 DOC 规则 (212)VCCI 声明(日本) (212)电源线声明(日本) (212)EMI 声明(韩国) (212)EMI 声明(台湾) (212)芬兰激光声明 (213)附录 E 处理内存和打印服务器卡概述 (216)安装内存 (217)安装设备内存 (217)检查 DIMM 安装 (221)保存资源(永久资源) (222)为 Windows 启用内存 (223)使用 HP Jetdirect 打印服务器卡 (224)安装 HP Jetdirect 打印服务器卡 (224)取出 HP Jetdirect 打印服务器卡 (225)词汇 (227)索引 (229)x ZHCN1设备基本信息本章包含有关设备功能的基本信息:●设备比较●功能比较●打印机视图●设备软件ZHCN1HP LaserJet M3027HP LaserJet M3027x HP LaserJet M3035HP LaserJet M3035xs●在 letter 尺寸介质上打印时,速度可达每分钟 27 页(ppm);在 A4 尺寸介质上打印时,速度可达 25 ppm●总计 256 兆字节 (MB) 随机存储内存 (RAM),最大可升级至 512 MB●内部 40 千兆字节 (GB) 或更大硬盘●100 页多用途纸盘(纸盘 1)、500 页进纸盘(纸盘 2)、50 页自动文档进纸器 (ADF) 和 250 页出纸槽●高速通用串行总线 (USB) 2.0 端口和增强的输入/输出(EIO) 插槽●HP Jetdirect 嵌入式打印服务器,用于连接至以太网 10/100Base-T 网络●一个开放式双列直插式内存模块 (DIMM) 插槽HP LaserJet M3027,外加:●自动双面打印附件●33.6 kpbs 模拟传真●在 letter 尺寸介质上打印时,速度可达 35 ppm;在A4 尺寸介质上打印时,速度可达 33 ppm●总计 256 MB RAM,最大可升级至 512 MB●内部 40 GB 或更大硬盘●100 页纸盘 1、500 页纸盘 2、50 页 ADF 和 250 页出纸槽●高速 USB 2.0 端口和 EIO 插槽●HP Jetdirect 嵌入式打印服务器,用于连接至以太网 10/100Base-T 网络●一个开式 DIMM 插槽●自动双面打印附件HP LaserJet M3035,外加:●33.6 kpbs 模拟传真●20 页便捷订书机●500 页进纸盘(纸盘 3)2第 1 章设备基本信息ZHCN功能说明性能●400 MHz 处理器用户界面●控制面板帮助●Windows® 和 Macintosh 打印机驱动程序●内嵌式 Web 服务器,可用于获得支持和订购耗材(只适用于联网型号的管理工具)●HP Easy Printer Care 软件(一种基于 Web 的状态和故障排除工具)打印机驱动程序●HP PCL 5●HP PCL 6●HP postscript level 3 仿真分辨率●FastRes 1200 - 可提供 1200 点/英寸 (dpi) 的打印分辨率,可快速、高质量地打印商业文本和图形●ProRes 1200 - 可提供 1200 dpi 的打印分辨率,可打印出最佳质量的艺术线条和图形图像存储功能●内部 40 GB 或更大硬盘驱动器●字体、表格和其它宏●作业保留字体●93 种内置字体,供 PCL 使用●软件解决方案提供 80 种 TrueType 格式的与打印机匹配的屏幕字体●可添加其它字体。
HP Latex环保创新技术开启大幅面印刷新机遇
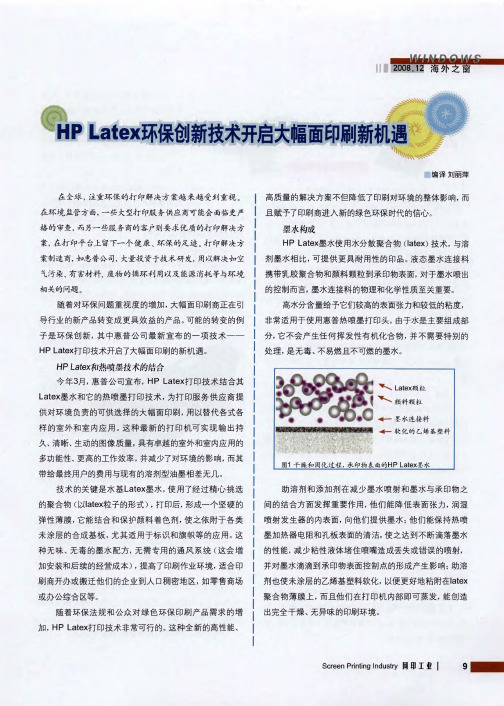
, , ,
刷 商开 办或搬 迁 他 们 的 企 业 到 人
或 办 公 综合 区 等
。
口 稠 密地 区
,
如 零 售 商场
te
x
聚 合 物 薄 膜 上 而 且 他 们 在 打 印机 内部 即 可 蒸 发 能 创 造 出完全 干 燥 无 异 味 的印刷 环 境
。
x
)
技 术 与溶
,
案制 造 商 如 惠 普公 司 大量 投 资 于技 术 研 发 用 以 解 决 如 空
,
剂 墨 水 相 比 可 提 供 更 具 耐 用 性 的印 品 液 态 墨 水 连 接料
携 带 乳 胶 聚 合 物 和 颜 料 颗 粒 到 承 印物表 面 对 于 墨 水 喷 出
,
气污 染 有 害 材 料 废 物 的 循 环 利 用 以 及 能 源 消耗 等与 环 境
-
。
此 外 惠 普 公 司 专 有 的 承 印物 表 面
,
机 内部 惠普宽幅 打 印头 的设 计 结 构 支持 墨 水
,
处 理 新 技 术产 生 了广 泛 的 色 域 使 得 在
,
滴 落尺 寸 为 1 2
,
p ic
o
l it r e
的 图 像 形 成 过 程 在 印刷 和 固 化 区
,
机 织 高 密度 聚 乙 烯 和 高 密 度 聚 乙 烯 合成 纸 上 呈 现 耐 用 性
。
久 清 晰 生 动 的 图 像 质 量 具 有卓 越 的 室 外 和 室 内应 用 的
、 、
,
多功 能 性 更 高 的工 作效 率 并 减 少了 对 环 境 的影 响 而 其
HP_激光打印机维修手册Laserjet 1018 1020 1022 系列

Laserjet 1018/1020/1022 系列
版本: V1.0 发布日期:2006-11-1
编写: 孙立新
中国惠普公司消费类外设产品维修网——维修手册 消费类激光打印机
Page 1 of 89
版本说明
z V1.0:初始版本 更新日期:2006-11-1
惠普机密,仅供内部使用 "© 2006 Hewlett-Packard Development Company, L.P. The information contained herein is subject to change without notice".
1.2 LASERJET1018/1020/1022/1022N/1022NW 具体的性能指标 ....................... 8 1.3 装箱单 ................................................................ 10
2.维修流程................................................................. 11
4.黑白激光打印机工作原理................................................... 26
4.1 清洁 .................................................................. 26 4.2 充电 .................................................................. 26 4.3 暴光 .................................................................. 27 4.4 显影 .................................................................. 28 4.5 转印 .................................................................. 29 4.6 定影 .................................................................. 29
HP Latex 110、300、500、1500和3000打印机系列的Polyester文凸打印指

HP Latex 300, 500, 1500 and 3000 Printer SeriesMay 2017Printing on polyester films with HP Latex printersPolyester films (PET films) can be used to fulfill a great variety of Sign & Display applications such as roll-ups or light boxes.This document provides tips and tricks for getting the best results when printing on PET film with your HP Latex 110, 300, 500, 1500 or 3000 printer series.Some common types of PET films are:∙Backlit PET films: translucent materials to be used with rear illumination. They provide a high quality alternative for light boxes applications. High ink amounts are used to achieve excellent color saturation.∙Frontlit PET films:commonly used in Roll-up or Pop-up displays, they represent a more rigid alternative to PVC banners, papers or textiles. Many substrates include a colored back side to block light.∙Transparent PET films: similar to other PET films but without any whitening agent, they are used in applications such as window graphics.∙Lightjet/Duratrans PET films: designed for digital chromogenic printing (non-inkjet) for fine art photographic applications. High cost due to the composition of the material (including silver salts).∙Polycarbonate films:common in fields such as construction or food industry. They can have a similar look-and-feel to PET Films and are becoming a popular alternative in large format printing.HP Media Solutions LocatorVisit the HP Media Solutions Locator (/ml/#/medialocator) to obtain ready-to-use profiles for a new substrate, or to discover new media compatible with your HP Latex printer. Learn how to make the most out of the HP Media Solutions Locator looking at the following article.You may also access and download the profiles directly from your printer (see the printer’s User guide). You may fine-tune the profile to your specific requirements and preferences, if necessary. Recommended print modesThe generic print modes, available in the printer by default, provide an optimal balance between image quality and throughput. Nonetheless, the printer provides advanced operators with the flexibility to adjust and fine-tune settings, if necessary.In this case, it is recommended to maintain the ratio between speed and ink quantity, as too fast and/or too saturated print modes can lead to lack of curing, media deformation and condensations on the printer.To select a different print mode or edit the print settings, create a new media (or clone a generic profile) and perform the desired changes on the newly created substrate.IQ and Application Tips and TricksPrint durabilityLatex inks require PET films to be coated for inkjet printing in order to adhere to the substrate’s surface. When using uncoated substrates, or with very thin coating, the prints are easily damaged by scratches. Also, there is a higher risk of ink transfer to the surfaces in contact with the print, such as the light box screen or the back-side of rolled substrates.Latex inks have very good adhesion on water-based coated substrates, and on most solvent-based coated ones. UV-coated materials, on the other side, usually have thin coatings and are less recommended for Latex inks.The durability of the print also depends highly on the resistance of the coating to external factors. Water-based coatings (and some thick solvent-based ones) are often easier to scratch than standard solvent-based coatings. Moreover, water-based coatings get damaged when in contact with water. So consider laminating these products after printing, especially when the prints will be placed outdoors.Surface drynessHP Latex inks should come out fully dry directly after printing. Nonetheless, when using excessive ink amounts with low temperatures and/or fast throughputs, saturated areas, such as dark colors in backlit prints, may show a greasy surface.Solvent-coated or UV-coated media are more likely to show areas with greasy surfaces than water-based coatings, which, provided their high liquid absorption capacity, do not show this effect.Placing a tissue paper between samples avoids this effect from appearing while protects the prints from potential damages during handling. It is also recommended to install the prints in the final location within 48 hours after printing.Moreover, the following recommendations should be followed if a greasy surface is observed on the prints:1.Ensure that you are operating the printer within the optimal print quality environmentalspecifications:∙Temperature: 20°C to 25°C (68°F to 77°F).∙Relative humidity: 30% to 60%.∙Temperature gradient: 10°C/h (18°F/h) or less.2.Increase the number of passes: a high number of passes is strongly recommended for most backlitPET prints (e.g. 18 passes in the HP Latex 3000 series).3.Increase the drying power and curing temperature.4.Reduce the ink density: no more than the maximum ink for the generic print mode is recommended. You may use the Generic PET film settings (available in your HP Latex 3000 series printer) as a reference.Substrate flatnessSome PET films tend to expand under high temperatures, generating waves that may be visible to the naked eye right after printing.However, this kind of deformation is minimized when the printed images are installed vertically and viewed perpendicularly. Rear illumination and some tension (as the one the prints would experience in a light box) should make the prints look totally flat even if certain deformation might have been noticed while printing.Moreover, in order to minimize the subs trate’s deformation, please follow these recommendations:1.Ensure that you are operating the printer within the optimal print quality environmentalspecifications:∙Temperature: 20°C to 25°C (68°F to 77°F).∙Relative humidity: 30% to 60%.∙Temperature gradient: 10°C/h (18°F/h) or less.2.Reduce the curing temperature. 85°C is the recommended value for most PET backlit films,although lower values may also be used.∙In order to ensure that the images are completely cured, you may need to decrease the ink saturation and increase the number of passes (e.g. 18 passes and 230% or less in the HPLatex 3000 series).3.Reduce the tension and vacuum values. The recommended settings in case deformation isobserved are:∙Input tension: 30 N/m.∙Output tension: 30 N/m (in the HP Latex 1500 and 3000 series).∙Vacuum: 10 mm H2O.Recommended substratesAmong the backlit PET films tested by HP, the substrates that provide the best combination of durability, lack of greasy surface and deformation are the Natura ES690 and the CMA Perfect Trans.Other substrates available proven compatible are included in the HP Media Solutions locator, together with the corresponding recommended print settings.Polycarbonate substratesPolycarbonate films such as Tekra JetView Latex White Matte/Gloss are becoming a popular alternative to PET films. These products show very good compatibility with the Latex inks, providing a very good IQ (color saturation and white point), durability, low deformation levels and no greasy surfaces.Although some gloss differences may be visible when viewing front lit images, these are not noticeable when using back lighting (e.g. in a lightbox).。
惠普推出最新latexDesignjet打印机

惠普推出最新latexDesignjet打印机
佚名
【期刊名称】《数码印刷》
【年(卷),期】2011(000)012
【摘要】为继续扩展latex打印机的使用范围,惠普近日推出新型打印机系列,包括2.64米超宽DesignjetL28500和1.54米宽L26500打印机。
以上两种打印设备同时使用惠普792latex墨水,该墨水用于惠普较大幅面LX系列,可以双面使用。
【总页数】1页(P18-18)
【正文语种】中文
【中图分类】TP334.8
【相关文献】
1.惠普推出最新宽幅打印机 [J], 惠普
2.惠普推出最新HPPage Wide XL系列大幅面打印机 [J], ;
3.惠普CP4525彩色激光打印机最新评测 [J],
4.惠普推出最新喷墨轮转印刷机及涂布解决方案,为生产型喷墨印刷创造更多商机最新解决方案帮助出版商提高单色图书喷墨印刷生产效率,增强介质通用性 [J],
5.惠普推出其速度最快的60英寸染料墨水生产型大幅面打印机全新惠普DesignjetD5800打印机更适合当前低成本打印环境 [J],
因版权原因,仅展示原文概要,查看原文内容请购买。
hp color LaserJet 1500小型彩色激光打印机
hp color LaserJet 1500小型彩色激光打印机
佚名
【期刊名称】《个人电脑》
【年(卷),期】2003(9)8
【摘要】这是一款惠普公司新发布的低价位小型彩色激光打印机,它采用基于主机的打印方式(GDI),更低的购买成本使其更适合小型工作组和个人商业用户的办公应用。
在功能方面,LaserJet 1500与2500系列基本一致.并且延续了2500简洁易用的设计,安装,设置与维护均很方便;LaserJet 1500物理打印分辨率为600dpi。
【总页数】1页(P63)
【正文语种】中文
【中图分类】TP334.84
【相关文献】
1.HP顶级A3彩色激光打印机树立高端行业应用新标准——HP Color LaserJet 6015全新上市 [J],
2.彩色时代,飞速打印HP LaserJet1500彩色激光打印机 [J], 康健;
3.精准定位:HP Color LaserJet Pro CP5225dn彩色激光打印机 [J],
4.小型彩色激光打印机 hp Color Laserjet 3500 [J], 王泉
5.文武双全 HP Color LaserJet Enterprise M553x彩色激光打印机 [J], 卢小雷因版权原因,仅展示原文概要,查看原文内容请购买。
- 1、下载文档前请自行甄别文档内容的完整性,平台不提供额外的编辑、内容补充、找答案等附加服务。
- 2、"仅部分预览"的文档,不可在线预览部分如存在完整性等问题,可反馈申请退款(可完整预览的文档不适用该条件!)。
- 3、如文档侵犯您的权益,请联系客服反馈,我们会尽快为您处理(人工客服工作时间:9:00-18:30)。
惠普推出HP Latex 500和HP Latex 1500系列打印机-
机械制造论文
惠普推出HP Latex 500和HP Latex 1500系列打印机
2016 年5 月5 日,惠普公司推出HP Latex 500 系列打印机和HP Latex 1500 打印机,以帮助中到大型标牌和展架打印服务提供商提高生产效率。
新的64 英寸HP Latex 560 和570 打印机为打印量日益增大的中到大型打印服务提供商而设计,可帮助用户管理各种打印作业,满足峰值生产量需求,并降低前期投资。
其新功能包括:
◎ 无轴装纸平台和自动倾斜调整功能,可在1 分钟或更短时间内装入纸卷,延长无人值守打印时间。
可使用55 千克的重型纸卷,配备状态显示灯标,便于远距离实时监视。
◎ 在室内模式时,打印速度高达23m2/h,可经济实惠地快速完成高质量打印作业。
◎ 在生动色彩打印模式,墨水密度提高50%,可生产高饱和度印品。
提供新的刮刀辊配件,以在打印低成本横幅和自黏式乙烯基材料时,获得高质量打印效果。
◎ 能在面对打印机的情况下完成更换介质和墨盒等所有操作,可用操作空间扩大了一倍。
◎ 方便与更大型的、具备色彩仿真功能的HP Latex打印机整合使用。
◎ 采用HP Latex Mobile 软件,客户能够远程管理打印作业,从而在更长时间内进行无人值守生产。
此次推出的126 英寸(约合3.2 米)HP Latex 1500打印机是可靠、经济实惠的超大幅面打印解决方案,打印周期更短,适用于多种室内和室外应用,
包括PVC 横幅、自粘式乙烯基材料、纺织品和双面印品。
该打印机在室外生产模式时,打印速度高达74m2/h。
在室内模式时,打印速度为45m2/h。
HP Latex 1500 打印机采用1200 dpi HP Thermal Inkjet 热感应喷墨打印头和可自动更换喷嘴,配备了光学介质推进传感器(OpticalMedia Advance Sensor,OMAS)和嵌入式分光光度计。
得益于第三代HP Latex 技术,印品打印完成后已完全干燥且具有抗刮能力,提高了生产效率。
此外,HP Latex 1500 打印机采用经济实惠的5 升墨盒,可进行时间更长的无人值守打印,其打印区域伸手可及,且配备LED 照明,易于装载,同时还具备内部打印服务器和状态灯,生产状态一目了然。
客户还可以选择双纸卷套件、在线分切机、卷到地套件、双面昼夜套件和墨水收集器套件等附件。
