juniper debug
juniper交换机命令juniper交换机配置命令整理
juniper交换机命令juniper 交换机配置命令整理导读:就爱阅读网友为您分享以下“juniper 交换机配置命令整理”的资讯,希望对您有所帮助,感谢您对 的支持!设置交换机名字set system host-name BaoGaoTing端口镜像set ethernet-switching-options analyzer debug input ingress interface ge-0/0/0.0set ethernet-switching-options analyzer debug input egress interface ge-0/0/0.0set ethernet-switching-options analyzer debug output interface ge-0/0/4.0Dual-partition的主要目的:解决异常断电设备无法启动的问题request system snapshot media internal slice alternate request system snapshot slice alternate //主备之间备份request system reboot slice alternate media internal // 指定从另外一个分区启动,下一次启动就会默认从上次启动的分区启动junos os,记忆功能QinQ 配置基本的set ethernet-switching-options dot1q-tunneling ether-type 0x8100 封装协议set vlans qinqvlan vlan-id 2821set vlans qinqvlan dot1q-tunnelingset interfaces ge-0/0/28 unit 0 family ethernet-switching vlan members 2821 上行端口set ethernet-switching-options dot1q-tunneling ether-type 0x8100set vlans cust1 vlan-id 100set vlans cust1 interface ge-0/0/1.0set vlans cust1 interface ge-0/0/2.0灵活的set ethernet-switching-options dot1q-tunneling ether-type 0x8100 ##set interfaces ge-0/0/27 unit 0 family ethernet-switching port-mode access ##下行端口set interfaces ge-0/0/27 unit 0 family ethernet-switching vlan members qinq ##用户Vlan为qinq 管理Vlan为Vlan600是透传上去的set interfaces ge-0/0/27 unit 0 family ethernet-switching vlan members vlan600 ** 注意点:一般情况下是不可以同时两个access的,--那样就做成trunk模式** 除非有一个vlan是dot1q-tunnel,而且需要tunnel vlan必须得有customer-vlan的,没有customer-vlan是无法提交成功的set vlans qinq vlan-id 4000 ##//灵活qinq,对于内层标签2-150的tag加上外层4000set vlans qinq interface ge-0/0/27.0set vlans qinq dot1q-tunneling customer-vlans 2-150接入交换机配置setinterfaces ge-0/1/1 unit 0 family ethernet-switching port-mode trunkset interfaces ge-0/1/1 unit 0 family ethernet-switching vlan members 2set interfaces ge-0/1/1 unit 0 family ethernet-switching native-vlan-id 600 **由于上联汇聚交换机的端口为Access口所以要透传的Vlan为native-Vlan##root用户名密码set system root-authentication encrypted-password "$1$z2Z28Ixe$AScMP7uMvMHY3fy8dgtm11" ##用户idset system login user juniper uid 2100 ##设置root用户为超级用户set system login user juniper class super-user##远程用户名和密码set system login user juniper authentication encrypted-password "$1$qUdu0s0Z$vGS88V0jrjhsPnQOTF9oy/" ##启用telnet set system services telnet connection-limit 10 set system services telnet rate-limit 10##端口模式为accesset interfaces ge-0/0/0 unit 0 family ethernet-switching port-mode access ##端口加入Vlan为600 set interfaces ge-0/0/0 unit 0 family ethernet-switching vlan members 600 ##端口为trunkset interfaces ge-0/1/0 unit 0 family ethernet-switching port-mode trunk ##允许通过Vlan为600 set interfaces ge-0/1/0 unit 0 family ethernet-switching vlan members 600 ##设置Vlan600的ip地址set interfaces vlan unit 600 family inet address 172.30.0.16/24 ##设置默认网关set routing-options static route 0.0.0.0/0 next-hop 172.30.0.1 ##开启Vlan的三层接口set vlans default l3-interface vlan.0 ##创建Vlan 名字为mgt id 为600 set vlans mgt vlan-id 600 ##开启Vlans mgt的三层接口set vlans mgt l3-interface vlan.600 ##开启Vlans mgt的三层接口set poe interface all X配置VLAN的L3接口地址set vlans name l3-interface vlan.xxset interface vlan xx unit xx family inet address x.x.x.x/24将某个交换端口添加到创建好的VLAN中set interface ge-0/0/x unit 0 family ethernet-switching port-mode access vlan members name 配置TRUNK端口set interface ge-0/0/23 unit 0 family ethernet-switching port-mode trunk native-vlan-id 1 vlan member xx预提交commit check清除LED灯报警clear alarm trafficclear alarm eventEX2200 ALARM告警灯亮红灯:show chassis alarmshow system alarmrequest system configuration rescue save/delete set chassis alarmmanagement-ethernet link-down ignore 管理口状态警告信息灯关闭set chassis alarm ethernet link-down ignore 交换机端口状态警告信息灯关闭igmp 开启set protocols igmp-snooping vlan alldeactivate protocols igmp-snooping开启生成树Set protocol stp恢复出厂设置load factory defaultDual-partition的主要目的:解决异常断电设备无法启动的问题request system snapshot media internal slice alternate //主备之间备份request system reboot slice alternate media internal // 指定从另外一个分区启动,下一次启动就会默认从上次启动的分区启动junos os,记忆功能dhcp 配置set system services dhcp pool 100.1.1.0/24 address-range low 100.1.1.10set system services dhcp pool 100.1.1.0/24 address-range high 100.1.1.200set system services dhcp pool 100.1.1.0/24 default-lease-time 7200set system services dhcp pool 100.1.1.0/24 router 100.1.1.254将端口设置为三层模式。
Juniper防火墙命令行查错工具(snoop)

Juniper防火墙命令行查错工具(snoop)ns208->snoopStart Snoop,type ESC or‘snoop off’to stop,continue?[y]/n y3.发送测试数据包或让小部分流量穿越防火墙4.停止snoopns208->snoop off5.检查防火墙对所转发的符合过滤条件的数据包的分析结果(非采用上面的filter,而是采用另外的filter):ns208->get db stream1.The packet comes into the Netscreen from the Trusted side client.55864.0:0(i):005004bb815f->0010db00ab30/080010.0.0.36->10.10.10.14/1,tlen=60vhl=45,id=31489,frag=0000,ttl=322.The packet then leaves the Netscreen,on it’s way to the destination host.55864.0:1(o):0010db00ab31->00104bf3d073/080010.10.10.10->10.10.10.14/1,tlen=60vhl=45,id=31489,frag=0000,ttl=313.The packet then returns to the Netscreen from the host.55864.0:1(i):00104bf3d073->0010db00ab31/080010.10.10.14->10.10.10.10/1,tlen=60vhl=45,id=12289,frag=0000,ttl=1284.Finally,the packet is returned to the client on the trusted side.55864.0:0(o):0010db00ab30->005004bb815f/080010.10.10.14->10.0.0.36/1,tlen=60vhl=45,id=12289,frag=0000,ttl=1276.清除防火墙缓存的debug结果:ns208->clear db7.清除防火墙的snoop过滤设置ns208->snoop filter deleteAll filters removed本文章由江苏祥和消防科技有限公司(hhtp:///)负责人整理与大家分享!。
Juniper路由器安全配置方案

Juniper路由器安全配置方案一.路由器网络服务安全配置:默认情况下,系统启动了许多无用服务,这些服务在占用系统资源的同时也造成一定的安全隐患,应该在尽可能的情况下停止或限制这些服务1. SNMP服务使用如下命令来停止SNMP服务:set system processes snmp disable使用如下命令来设置SNMP通讯字符串:set snmp community mysnmp authorization read-only使用如下命令来在接口上设备SNMP通讯字符串:set snmp interface fxp0 community mysnmp使用如下命令来在接口上禁止SNMP服务trap:set interfaces fxp0 unit 0 traps disable使用如下命令来限制SNMP的访问客户端:set snmp community mysnmp clients 192.168.0.0/24set snmp community mysnmp clients 0.0.0.0/0 restrict上述命令只允许192.168.0.0/24网段访问路由器的SNMP服务<2.停止接口广播转发:广播转发容易造成smurf攻击,因此应该使用如下命令停止:set system no-redirects接口级别停止广播转发使用如下命令:set interfaces fxp0 unit 0 family inet no-redirects3.停止dhcp-relay服务,dhcp-relay服务用于在不同网段使用同一个dhcp服务器,如果没有使用,则应该使用如下命令停止:set system dhcp-relay disable4.禁止IGMP服务,IGMP服务如果在没有使用的情况下应该使用如下命令禁止:set protocols igmp interface all disable5.禁止PIM服务,PIM服务如果在没有使用的情况下应该使用如下命令禁止:set protocols pim disable6.禁止SAP服务,SAP服务如果在没有使用的情况下应该使用如下命令禁止:set protocols sap disable</P>7.禁止IP Source Routing源路由set chassis no-source-route二.路由器登录控制:1.设置系统登录Banner:set system login message "Warning: if you NOT authorized to access this system,disconnect NOW!"2.设置登录超时时间:默认情况下,系统登录没有登录超时时间限制,应该将登录超时时间设置为15分钟:set cli idle-timeout 153.建议采取用户权限分级管理策略set system login class tier1 idle-timeout 15set system login class tier1 permissions [ configure interface network routing snmp system trace view firewall ]set system login class tier2 idle-timeout 15set system login class tier2 permissions all</P>set system login user admin full-name Administratorset system login user admin uid 2000set system login user admin class tier2set system login user admin authentication encrypted-password "<ASSWORD>"</P>set system login user tier1 uid 2001set system login user tier1 class tier1set system login user tier2 uid 2002set system login user tier2 class tier2</P>4. 限制系统ssh、telnet服务连接数量:以下配置将ssh, telnet连接最大数量限制为10个,并且每分钟最多有5个可以连接:set system services ssh connection-limit 10 rate-limit 5set system services telnet connection-limit 10 rate-limit 5以下特性JUNOS5.0以上支持:set system services root-login deny(禁止root远程登陆)set system services protocol-version v2(使用sshv2)三.配置系统日志服务:1.设置系统kernel级警告发到console上set system syslog console kernel warning2.配置登录系统日志到单独的auth.log文件中set system syslog file auth.log authorization info3.配置系统配置更改日志到单独的change.log文件中set system syslog file change.log change-log info4.配置系统所有日志到日志服务器set system syslog host x.x.x.x. any info四.路由策略安全1.配置以下保留地址的黑洞路由set routing-options options no-resolveset routing-options options syslog level debugset routing-options static route 0.0.0.0/8 discardset routing-options static route 10.0.0.0/8 discardset routing-options static route 20.20.20.0/24 discardset routing-options static route 127.0.0.0/8 discardset routing-options static route 169.254.0.0/16 discardset routing-options static route 172.16.0.0/12 discardset routing-options static route 192.0.2.0/24 discardset routing-options static route 192.168.0.0/16 discardset routing-options static route 204.152.64.0/23 discardset routing-options static route 224.0.0.0/4 discard2.设置strict模式的unicast RPFset interfaces so-0/0/0 unit 0 family inetrpf-check <fail-filter filter-name3.设置相应prefix-list,禁止保留地址访问set policy-options prefix-list reserved 0.0.0.0/8set policy-options prefix-list reserved 10.0.0.0/8set policy-options prefix-list reserved 20.20.20.0/24set policy-options prefix-list reserved 127.0.0.0/8set policy-options prefix-list reserved 169.254.0.0/16set policy-options prefix-list reserved 172.16.0.0/12set policy-options prefix-list reserved 192.0.2.0/24set policy-options prefix-list reserved 204.152.64.0/23set policy-options prefix-list reserved 224.0.0.0/4set firewall filter inbound-filter term 1 from prefix-list reservedset firewall filter inbound-filter term 1 then count spoof-inbound-reservedset firewall filter inbound-filter term 1 then discardset interfaces ge-0/0/0 unit 0 family inet filter input inbound-filter五. Firewall-Policy设置Firewall-Policy可以限制进入及流量主机数据包的来源、目标地址、协议、端口号、流量等,应用Firewall-Policy可以实现类似于防火墙的性能,但一般不建议在骨干路由器上使用,以下是Firewall-Policy的使用方法:1.创建Firewall-Policy:set firewall filter local-sec term sec-in1 from destination-port telnetset firewall filter local-sec term sec-in1 from destination-address 172.16.0.1/32set firewall filter local-sec term sec-in1 from source-address 192.168.0.0/24set firewall filter local-sec term sec-in1 then acceptset firewall filter local-sec term sec-in2 from destination-port telnetset firewall filter local-sec term sec-in2 from destination-address 172.16.0.1/32set firewall filter local-sec term sec-in2 then discardset firewall filter local-sec term sec-in3 fromset firewall filter local-sec term sec-in1 then accept2.应用到路由器的端口上:set interfaces fxp0 unit 0 family inet filter input local-sec以上例子不允许除192.168.0.0/24网段外所有地址telnet访问172.16.0.1,但允许其它任何包通过。
Juniper路由器配置命令介绍
Juniper路由器配置命令介绍Juniper路由器配置命令介绍⒈系统配置命令⑴ `set system hostname`:设置设备的主机名。
⑵ `set system domn-name`:设置设备的域名。
⑶ `set system login user`:设置设备的登录用户信息。
⒉接口配置命令⑴ `set interfaces interface-name unit logical-unit-number family inet address ip-address/subnet-mask`:配置接口的IP地址和子网掩码。
⑵ `set interfaces interface-name unit logical-unit-number family inet6 address ipv6-address/prefix-length`:配置接口的IPv6地址和前缀长度。
⑶ `set interfaces interface-name unit logical-unit-number vlan-id vlan-tagged`:配置接口的VLAN标签。
⒊路由配置命令⑴ `set routing-options static route destination next-hop`:配置静态路由。
⑵ `set protocols ospf area area-id`:配置OSPF路由协议。
⒋安全配置命令⑴ `set security zones security-zone zone-nameinterfaces interface-name`:将接口分配给安全区域。
⑵ `set security policies from-zone source-zone to-zone destination-zone policy policy-name then permit`:配置安全策略以允许数据流动。
⒌ VPN配置命令⑴ `set security ike proposal proposal-name authentication-method pre-shared-keys`:配置IKE提议的预共享密钥认证方法。
Juniper路由器配置命令介绍

Juniper路由器配置命令介绍Juniper路由器配置命令介绍目录1、简介2、配置基础命令2.1 进入操作模式2.2 配置系统参数2.3 设置管理接口2.4 配置路由表3、高级配置命令3.1 OSPF配置3.2 BGP配置3.3 VRF配置3.4 MPLS配置4、安全配置命令4.1 配置防火墙4.2 配置安全策略4.3 配置VPN4.4 配置ACL5、故障排查命令5.1 显示命令5.2 路由故障排查5.3 硬件故障排查5.4 访问控制故障排查6、性能优化命令6.1 接口配置6.2 QoS配置6.3 缓存配置6.4 动态路由配置1、简介Juniper路由器是一种支持多种网络协议的高性能路由器。
本文档介绍了Juniper路由器的配置命令,并根据功能分类进行了细化。
2、配置基础命令2.1 进入操作模式- login:登录路由器- cli:进入命令行操作模式- configure:进入配置操作模式2.2 配置系统参数- set system hostname <hostname>:设置路由器主机名- set system domn-name <domn-name>:设置路由器域名- set system time-zone <time-zone>:设置时区- set system name-server <ip-address>:设置DNS服务器2.3 设置管理接口- set interfaces <interface> unit <unit> family inet address <ip-address/mask>:配置管理接口的IP地质- set interfaces <interface> unit <unit> family inet address dhcp:使用DHCP分配管理接口的IP地质2.4 配置路由表- set routing-options static route <destination> next-hop <next-hop>:配置静态路由- set routing-options router-id <id>:配置路由器ID- set protocols ospf area <area> interface <interface>:配置接口与OSPF区域的关联3、高级配置命令3.1 OSPF配置- set protocols ospf area <area> interface <interface>:配置接口与OSPF区域的关联- show ospf neighbor:显示OSPF邻居信息- show ospf route:显示OSPF路由表3.2 BGP配置- set protocols bgp group <group-name> neighbor<neighbor-address>:配置BGP邻居- set protocols bgp group <group-name> family <family>:配置BGP邻居的地质族- show bgp neighbor:显示BGP邻居信息- show bgp summary:显示BGP邻居摘要信息3.3 VRF配置- set routing-instances <instance-name> interface<interface>:配置接口与VRF的关联- set routing-instances <instance-name> routing-options static route <destination> next-hop <next-hop>:配置静态路由3.4 MPLS配置- set protocols mpls interface <interface>:启用接口的MPLS功能- set protocols mpls label-switched-path <LSP-name> to <destination-address> : 配置LSP的路径4、安全配置命令4.1 配置防火墙- set security policies from-zone <from-zone> to-zone <to-zone> policy <policy-name> match <match-conditions> then permit/deny:配置安全策略4.2 配置安全策略- set security zones security-zone <zone-name> address-book address <address-name> <ip-address>:配置地质对象- set security zones security-zone <zone-name> host-inbound-traffic system-services <services>:配置允许进入防火墙的服务4.3 配置VPN- set security ike proposal <proposal-name> authentication-method <method>:配置IKE提议- set security ike gateway <gateway-name> ike-policy <policy-name>:配置IKE网关- set security ipsec vpn <vpn-name> bind-interface<interface>:绑定VPN到接口4.4 配置ACL- set firewall family inet filter <filter-name> term <term-name> from protocol <protocol>:配置ACL规则- set firewall family inet filter <filter-name> term <term-name> then accept/discard:配置ACL规则动作5、故障排查命令5.1 显示命令- show interfaces <interface> detl:显示接口详细信息- show route <destination> : 显示路由信息- show chassis hardware:显示硬件信息5.2 路由故障排查- show bgp summary:显示BGP邻居摘要信息- show ospf neighbor:显示OSPF邻居信息- show route protocol <protocol>:显示指定协议的路由5.3 硬件故障排查- show chassis hardware:显示硬件信息- show log messages:显示系统日志消息- request support information:收集支持信息文件5.4 访问控制故障排查- show security policies from-zone <from-zone> to-zone <to-zone> policy <policy-name>:显示安全策略信息- show security zones interfaces:显示接口与安全域的关联信息6、性能优化命令6.1 接口配置- set interfaces <interface> mtu <mtu-size>:设置接口MTU大小- set interfaces <interface> description <description>:设置接口描述6.2 QoS配置- set class-of-service interfaces <interface> unit<unit> scheduler-map <map-name>:为接口配置调度器映射- set class-of-service scheduler-maps <map-name> forwarding-class <forwarding-class> scheduler <scheduler-name>:配置调度器映射6.3 缓存配置- set forwarding-options cache hit-cache-size <size>:设置缓存大小- set forwarding-options cache timeout <timeout-value>:设置缓存超时时间6.4 动态路由配置- set protocols ospf area <area> interface <interface> passive:将接口设置为OSPF被动接口- set routing-instances <instance-name> interface <interface> passive:将接口设置为VRF被动接口附件:无法律名词及注释:无。
juniper抓包

一、Screen OS抓包debug:跟踪防火墙对数据包的处理过程1. Set ffilter src-ip x.x.x.x dst-ip x.x.x.x dst-port xx设置过滤列表,定义捕获包的范围2、clear dbuf清除防火墙内存中缓存的分析包3、debug flow basic开启debug数据流跟踪功能4、发送测试数据包或让小部分流量穿越防火墙5、undebug all关闭所有debug功能6、get dbuf stream检查防火墙对符合过滤条件数据包的分析结果7、unset ffilter清除防火墙debug过滤列表8、clear dbuf清除防火墙缓存的debug信息9、get debug查看当前debug设置Snoop:捕获进出防火墙的数据包,与Sniffer嗅包软件功能类似1. Snoop filter ip src-ip x.x.x.x dst-ip x.x.x.x dst-port xx 设置过滤列表,定义捕获包的范围2、clear dbuf清除防火墙内存中缓存的分析包3、snoop开启snoop功能捕获数据包4、发送测试数据包或让小部分流量穿越防火墙5、snoop off停止snoop6、get db stream检查防火墙对符合过滤条件数据包的分析结果7、snoop filter delete清除防火墙snoop过滤列表8、clear dbuf清除防火墙缓存的debug信息9、snoop info查看snoop设置二、SRX 抓包debug:跟踪防火墙对数据包的处理过程SRX对应ScreenOS debug flow basic跟踪报文处理路径的命令:set security flow traceoptions flag basic-datapath 开启SRX基本报文处理Debugset security flow traceoptions file filename.log 将输出信息记录到指定文件中set security flow traceoptions file filename.log size <file-size> 设置该文件大小,缺省128kset security flow traceoptions packet-filter filter1 destination-prefix 5.5.5.2 设置报文跟踪过滤器run file show filename.log 查看该Log输出信息捕获进出防火墙的数据包开启抓包功能参数设置edit forwarding-optionsset packet-capture maximum-capture-size 500 //Specify in bytes the maximum size of each packet to capture in each file—for example, 500. The range is between 68 and 1500, and the default is 68 bytes.set packet-capture file filename pcap-file //Specify the target filename for the packet capture file—for example, pcap-file. For each physical interface, the interface name is automatically suffixed to the filename—for example, pcap-file.fe-0.0.1.set packet-capture file files 100 // Specify the maximum number of files to capture—for example, 100. The range is between 2 and 10,000, and the default is 10 files. In the Files box, type 100set packet-capture file size 1024 // Specify the maximum size of each file in bytes—forexample, 1024. The range is between 1,024 and 104,857,600, and the default is 512,000 bytes. In the Size box, type 1024.set packet-capture file world-readable // Specify if all users have permission to read the packet capture files.Configuring Packet Capture on an Interfaceedit interfaces fe-0/0/1set unit 0 family inet sampling input outputConfiguring a Firewall Filter for Packet Captureedit firewallset firewall filter dest-all term dest-term from destination-address 192.168.1.1/32set firewall filter dest-all term dest-term then sample acceptset interfaces fe-0/0/1 unit 0 family inet filter output dest-allDisabling Packet Captureedit forwarding-optionsset packet-capture disable。
JUNIPER路由器中常用命令总结
JUNIPER路由器中常⽤命令总结前些⽇⼦认真看了⼀下Juniper路由器的⼀些命令。
在这⾥总结⼀下。
⽅便以后使⽤Juniper路由器的命令主要分为两个部分,⼀个是operational,主要是复杂查看⽬前⽹络的配置情况(只能查看,不能修改。
感觉权限⽐较低);另⼀个是configuration,主要⽤来查看和修改配置(感觉权限⾼⼀些)。
刚进⼊到Juniper路由器时,默认进⼊的是operation,输⼊edit命令之后,就进⼊到了[edit]⽬录下,也就是进⼊了configuration。
基础配置命令(如未说明则在[edit]⽬录下)1、配置主机名字:set system host-name router12、配置域名: set system domain-name 3、配置fxp0接⼝(以太⽹中通过这个接⼝进⾏路由器的配置)。
Set interfaces fxp0 unit 0 family inet address 192.168.15.1/2 44、配置备份路由器:set system backup-router 192.168.15.25、配置DNS服务器:set system name-server 192.168.15.36、配置root⽤户的密码:set system root-authentication plain-text-password(密码中不可以全是⼤写、全是⼩写、全是数字)7、设置ntp服务器: set system ntp server 192.168.2.28、提交修改:commit9、查看提交是否合法: commit check10、在当天特定时间进⾏提交 commit at 22:4511、在特定⽇期的特定时间提交: commit at “2005-02-26 10:45”12、取消commit的操作 clear system commit13、为了避免提交带来意外的损害采⽤:commit confirmed,会在10分钟以后⾃动回滚14、与14相同,但在⼀分钟以后⾃动回滚:commit confirmed 115、提交信息,并同步到备份路由器上: commit synchronize配置服务:1、设置ssh服务:set system services ssh2、配置ftp服务: set system services ftp3、删除ftp服务: delete system services ftp权限设置:1、设置root⽤户ssh登录的密码:set system root-authentication ssh password2、禁⽌root⽤户使⽤ssh登录:[edit system ] set services ssh root-login deny3、设置密码要求:[edit system login] set password maximun-length 20 set password minimum-length 8 set password mi nimum-changes 24、设置密码加密算法:set system login password formate md55、查看⾃⼰的权限,以及可以设置的权限: show cli authorization进⼊与退出命令:1、Edit2、修改root的配置:configure3、避免多⼈修改导致设置丢失采⽤ configure exclusive4、查看⽬前修改区域有谁在线:[edit]status(只能看见⽐你先登录的⼈,后⾯登录的信息看不见)5、强制要求别⼈下线:request system logout user mike6、进⼊到根⽬录 top7、退出configuration 模块:quit8、退出configuration模块:exit configuration-mode9、提交并退出:commit and-quit10、退出当前⽬录:exit11、进⼊到某⽬录 edit ⽬录名字查看命令:1、查看当前⽬录地下的设置 [edit]show2、查看你设置的命令 show | display set3、查看你新增的命令 show | compare(+表⽰你增加的命令,-表⽰你删除的命令。
juniper防火墙常用维护指南
juniper防火墙常用维护指南Netscreen 防火墙日常维护指南一、综述. 3二、Netscreen防火墙日常维护. 3常规维护:. 3应急处理. 7总结改进. 8故障处理工具. 9三、Netscreen 冗余协议(NSRP). 10NSRP部署建议. 10NSRP常用维护命令. 11四、策略配置与优化(Policy). 12五、攻击防御(Screen). 13五、特殊应用处理. 15长连接应用处理. 15不规范TCP应用处理. 16VOIP应用处理. 16附录:JUNIPER防火墙Case信息表. 17一、综述防火墙作为企业核心网络中的关键设备,需要为所有进出网络的信息流提供安全保护,对于企业关键的实时业务系统,要求网络能够提供7*24小时的不间断保护,保持防火墙系统可靠运行及在故障情况下快速诊断恢复成为维护人员的工作重点。
NetScreen防火墙提供了丰富的冗余保护机制和故障诊断、排查方法,通过日常管理维护可以使防火墙运行在可靠状态,在故障情况下通过有效故障排除路径能够在最短时间内恢复网络运行。
本文对Netscreen防火墙日常维护进行较系统的总结,为防火墙维护人员提供设备运维指导。
二、Netscreen防火墙日常维护围绕防火墙可靠运行和出现故障时能够快速恢复为目标,Netscreen防火墙维护主要思路为:通过积极主动的日常维护将故障隐患消除在萌芽状态;故障发生时,使用恰当的诊断机制和有效的故障排查方法及时恢复网络运行;故障处理后及时进行总结与改进避免故障再次发生。
常规维护:在防火墙的日常维护中,通过对防火墙进行健康检查,能够实时了解Netscreen防火墙运行状况,检测相关告警信息,提前发现并消除网络异常和潜在故障隐患,以确保设备始终处于正常工作状态。
1、日常维护过程中,需要重点检查以下几个关键信息:Session:如已使用的Session数达到或接近系统最大值,将导致新Session不能及时建立连接,此时已经建立Session的通讯虽不会造成影响;但仅当现有session连接拆除后,释放出来的Session资源才可供新建连接使用。
juniper交换机基本操作手册

j u n i p e r交换机基本操作手册work Information Technology Company.2020YEARjuniper交换机操作手册信息中心网络产品开发部一、Juniper管理界面说明: (5)二、典型配置 (5)2.1系统配置模式典型配置 (5)2.1.1 configure (5)2.1.2 Monitor (5)2.1.3 Ping (6)2.1.4 telnet (6)2.1.5 Traceroute (6)2.1.6 Restart (6)2.1.7 Request (6)2.1.7.1 系统重启 (6)2.1.7.2 保存救援配置 (6)2.1.7.3 系统软件升级: (6)2.1.8 Show (7)2.1.8.1查看系统硬件信息: (7)2.1.8.1.1查看系统硬件警告: (7)2.1.8.1.2查看系统硬件环境信息 (7)2.1.8.1.3查看板卡cpu和内存情况 (8)2.1.8.1.4查看交换机硬件的注册及型号 (8)2.1.8.1.5查看插槽具体信息 (8)2.1.8.1.6查看路由引擎的CPU/内存/启动时间等信息: (8)2.1.8.2查看当前系统配置 (9)2.1.8.3 查看poe口的供电情况: (10)2.1.8.4 查看系统信息: (10)2.1.8.4.1查看系统备份配置 (11)2.1.8.4.2 查看系统保存操作的基本信息 (11)2.1.8.4.3 查看系统当前时间及启动时间 (11)2.1.8.4.4查看系统传输层连接情况 (11)2.1.8.4.5查看系统进程占用资源情况 (12)2.1.8.4.6查看系统各类软件版本情况 (12)2.2管理配置模式典型配置 (13)2.2.1配置模式介绍 (13)2.2.1.1使用set命令 (13)2.2.1.2使用edit命令 (14)2.2.2 相关注意事项 (14)2.2.3配置二层端口 (15)2.2.4 配置三层端口 (15)2.2.5配置基本接口参数: (16)2.2.6 vlan的相关配置 (16)2.2.6.1配置vlan (16)2.2.6.2 将vlan部署到接口上 (16)2.2.6.3配置三层vlan端口 (17)2.2.6.4将三层vlan接口与vlan匹配 (17)2.2.7三层协议配置 (17)2.2.7.1静态路由相关配置 (17)2.2.7.2 OSPF协议相关配置 (18)2.2.7.2.1 区域配置 (18)2.2.7.2.2 配置末节及nssa区域 (18)2.2.7.2.3 ospf类型配置 (18)2.2.7.2.4 ospf邻居参数配置 (18)2.2.8 链路聚合配置 (18)2.2.8.1 配置链路聚合参数 (19)2.2.8.2 配置接口进入链路聚合接口 (19)2.2.8.3 配置聚合接口参数 (19)2.2.9 日常保障配置 (20)2.2.9.1 密码恢复 (20)2.2.9.2 恢复出厂设置 (20)一、Juniper管理界面说明:Juniper交换机一共有两种管理界面:传统CLI界面与J-web界面。
juniper交换机的告警信息清除
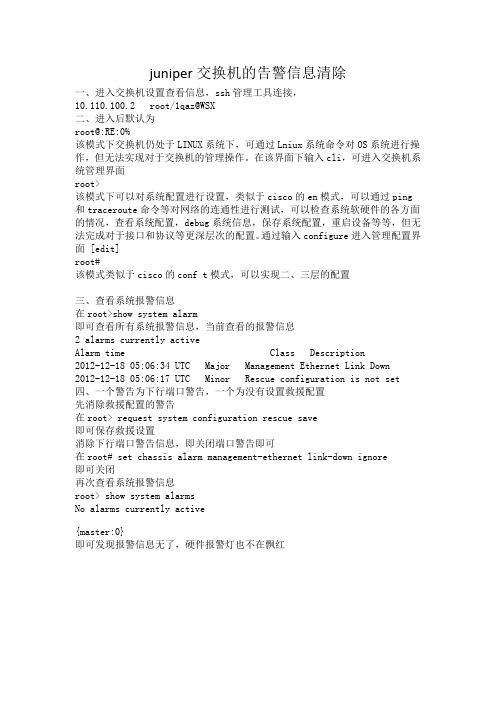
juniper交换机的告警信息清除一、进入交换机设置查看信息,ssh管理工具连接,10.110.100.2 root/1qaz@WSX二、进入后默认为root@:RE:0%该模式下交换机仍处于LINUX系统下,可通过Lniux系统命令对OS系统进行操作,但无法实现对于交换机的管理操作。
在该界面下输入cli,可进入交换机系统管理界面root>该模式下可以对系统配置进行设置,类似于cisco的en模式,可以通过ping 和traceroute命令等对网络的连通性进行测试,可以检查系统软硬件的各方面的情况,查看系统配置,debug系统信息,保存系统配置,重启设备等等,但无法完成对于接口和协议等更深层次的配置。
通过输入configure进入管理配置界面 [edit]root#该模式类似于cisco的conf t模式,可以实现二、三层的配置三、查看系统报警信息在root>show system alarm即可查看所有系统报警信息,当前查看的报警信息2 alarms currently activeAlarm time Class Description2012-12-18 05:06:34 UTC Major Management Ethernet Link Down2012-12-18 05:06:17 UTC Minor Rescue configuration is not set 四、一个警告为下行端口警告,一个为没有设置救援配置先消除救援配置的警告在root> request system configuration rescue save即可保存救援设置消除下行端口警告信息,即关闭端口警告即可在root# set chassis alarm management-ethernet link-down ignore即可关闭再次查看系统报警信息root> show system alarmsNo alarms currently active{master:0}即可发现报警信息无了,硬件报警灯也不在飘红。
juniper 交换机配置命令整理

QinQ 配置
基本的
set ethernet-switching-options dot1q-tunneling ether-type 0x8100 封装协议
set vlans qinqvlan vlan-id 2821
set vlans qinqvlan dot1q-tunneling
##端口为trunk
set interfaces ge-0/1/0 unit 0 family ethernet-switching port-mode trunk
##允许通过Vlan为600
set interfaces ge-0/1/1 unit 0 family ethernet-switching native-vlan-id 600 **由于上联汇聚交换机的端口为Access口所以要透传的Vlan为native-Vlan
##root用户名密码
set system root-authentication encrypted-password "$1$z2Z28Ixe$AScMP7uMvMHY3fy8dgtm11"
##端口模式为acces
set interfaces ge-0/0/0 unit 0 family ethernet-switching port-mode access
##端口加入Vlan为600
set interfaces ge-0/0/0 unit 0 family ethernet-switching vlan members 600
set ethernet-switching-options analyzer debug output interface ge-0/0/4.0
juniper_debug调试步骤
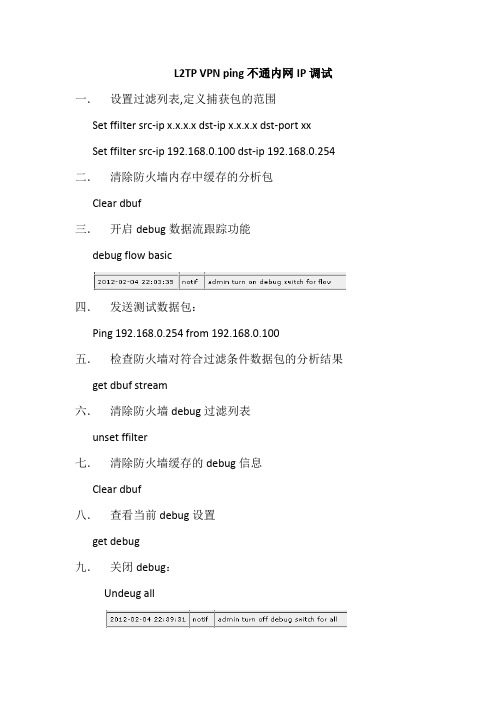
L2TP VPN ping不通内网IP调试一.设置过滤列表,定义捕获包的范围Set ffilter src-ip x.x.x.x dst-ip x.x.x.x dst-port xxSet ffilter src-ip 192.168.0.100 dst-ip 192.168.0.254 二.清除防火墙内存中缓存的分析包Clear dbuf三.开启debug数据流跟踪功能debug flow basic四.发送测试数据包:Ping 192.168.0.254 from 192.168.0.100五.检查防火墙对符合过滤条件数据包的分析结果get dbuf stream六.清除防火墙debug过滤列表unset ffilter七.清除防火墙缓存的debug信息Clear dbuf八.查看当前debug设置get debug九.关闭debug:Undeug all备注:不是所有的juniper ctl 命令都可以用tab健补全,无法补全的命令,不代表此命令不存在,有些命令必须手动输全,如debug命令Ping不通时的debug数据包****** packet decapsulated, type=l2tp, len=60******ipid = 63557(f845), @2d483138ethernet0/1:192.168.0.100/9729->192.168.0.254/1280,1(8/0)<Root>no session foundflow_first_sanity_check: in <ethernet0/1>, out <N/A>flow_first_routing: in <ethernet0/1>, out <N/A>search route to (ethernet0/1, 192.168.0.100->192.168.0.254) in vr trust-vr for vsd-0/flag-0/ifp-null[ Dest] 1.route 192.168.0.254->192.168.0.254, to ethernet0/0routed (x_dst_ip 192.168.0.254) from ethernet0/1 (ethernet0/1 in 0) to ethernet0/0policy search from zone 1-> zone 2policy_flow_search policy search nat_crt from zone 1-> zone 2RPC Mapping Table search returned 0 matched service(s) for (vsys Root, ip 192.168.0.254, port 8795, proto 1)policy_flow_search in tunnel pak_ptr policy: id: 17, from zone 1 -> 2VPN policy= 17: szone 1 dzone 2 pid 17 ports 5b220008 iphdr 2d483138Permitted by policy 17No src xlate choose interface ethernet0/0 as outgoing phy ifno loop on ifp ethernet0/0.session application type 0, name None, nas_id 0, timeout 60secservice lookup identified service 0.flow_first_final_check: in <ethernet0/1>, out <ethernet0/0>existing vector list 5-7e5618c.Session (id:127592) created for first pak 5flow_first_install_session======>route to 192.168.0.254arp entry found for 192.168.0.254ifp2 ethernet0/0, out_ifp ethernet0/0, flag 00800800, tunnel ffffffff, rc 1outgoing wing prepared, readyflow got session.flow session id 127592flow_main_body_vector in ifp ethernet0/1 out ifp ethernet0/0flow vector index 0x5, vector addr 0x17a77f0, orig vector 0x17a77f0post addr xlation: 192.168.0.100->192.168.0.254.no more encapping neededpacket send out to c4cad95ae6fd through ethernet0/0****** packet decapsulated, type=l2tp, len=60******Ping 通后的debug数据包:****** packet decapsulated, type=l2tp, len=60******ipid = 36081(8cf1), @2d723138ethernet0/1:192.168.0.101/38144->192.168.0.254/1280,1(8/0)<Root>no session foundflow_first_sanity_check: in <ethernet0/1>, out <N/A>flow_first_routing: in <ethernet0/1>, out <N/A>search route to (ethernet0/1, 192.168.0.101->192.168.0.254) in vr trust-vr for vsd-0/flag-0/ifp-null[ Dest] 1.route 192.168.0.254->192.168.0.254, to ethernet0/0routed (x_dst_ip 192.168.0.254) from ethernet0/1 (ethernet0/1 in 0) to ethernet0/0policy search from zone 1-> zone 2policy_flow_search policy search nat_crt from zone 1-> zone 2RPC Mapping Table search returned 0 matched service(s) for (vsys Root, ip 192.168.0.254, port 45915, proto 1)policy_flow_search in tunnel pak_ptr policy: id: 17, from zone 1 -> 2VPN policy= 17: szone 1 dzone 2 pid 17 ports 5bb30008 iphdr 2d723138Permitted by policy 17dip id = 2, 192.168.0.101/38144->192.168.0.1/21379choose interface ethernet0/0 as outgoing phy ifno loop on ifp ethernet0/0.session application type 0, name None, nas_id 0, timeout 60secservice lookup identified service 0.flow_first_final_check: in <ethernet0/1>, out <ethernet0/0>existing vector list 5-7e5618c.Session (id:127434) created for first pak 5flow_first_install_session======>route to 192.168.0.254arp entry found for 192.168.0.254ifp2 ethernet0/0, out_ifp ethernet0/0, flag 10800800, tunnel ffffffff, rc 1outgoing wing prepared, readyflow got session.flow session id 127434flow_main_body_vector in ifp ethernet0/1 out ifp ethernet0/0flow vector index 0x5, vector addr 0x17a77f0, orig vector 0x17a77f0post addr xlation: 192.168.0.1->192.168.0.254.no more encapping neededpacket send out to c4cad95ae6fd through ethernet0/0****** packet decapsulated, type=l2tp, len=60******。
Juniper路由器配置命令介绍

Juniper路由器配置命令介绍本文档是关于Juniper路由器配置命令的介绍,旨在帮助用户快速了解和使用Juniper路由器的各种命令。
以下是文档的详细内容。
第一章:登录和基本配置1.登录Juniper路由器- 进入路由器的命令行界面- 输入用户名和密码进行登录2.基本配置命令- 配置路由器的主机名- 配置管理接口的IP地质- 设置路由器的时钟- 保存配置更改第二章:接口配置1.配置物理接口- 激活和禁用接口- 配置接口IP地质- 配置接口子网掩码- 配置接口速率和双工模式- 配置接口上的ACL(访问控制列表)2.配置逻辑接口- 配置VLAN接口- 配置子接口- 配置隧道接口第三章:路由配置1.配置静态路由- 添加静态路由- 删除静态路由- 配置默认路由- 查看路由表2.配置动态路由- 配置OSPF(开放最短路径优先)协议 - 配置BGP(边界网关协议)协议- 配置RIP(路由信息协议)协议第四章:安全配置1.配置防火墙规则- 添加入站规则- 添加出站规则- 配置地质转换(NAT)2.配置VPN- 配置IPSec VPN- 配置SSL VPN第五章:监控和故障排除1.监控命令- 查看接口状态- 查看路由器 CPU 和内存使用情况 - 查看硬盘使用情况2.故障排除命令- 执行连通性测试- 查看日志信息- 跟踪路由本文档涉及附件:附件1:Juniper路由器配置示例文件(示例配置文件,供参考使用)本文所涉及的法律名词及注释:1.ACL(访问控制列表):用于控制网络流量的一种机制,可以限制特定源IP地质或目的IP地质的访问权限。
2.OSPF(开放最短路径优先):一种用于动态路由选择的内部网关协议,使用最短路径优先算法确定最佳路由。
3.BGP(边界网关协议):一种用于在互联网自治系统之间交换路由信息的外部网关协议。
4.RIP(路由信息协议):一种用于在小型网络中交换路由信息的距离矢量路由协议。
[转载]Juniper?SSG
![[转载]Juniper?SSG](https://img.taocdn.com/s3/m/3946385400f69e3143323968011ca300a6c3f636.png)
[转载]Juniper SSGJuniper SSG-5-SH 新手配置手册(2)SSG5三十天就上手-Day 15 SSG5 Event Log通过SSG5 的Event Log可以让你知道你的SSG5发生了什么事情。
比如SSG5本身产的讯息或是alarms等等。
在SSG5将Event Log分为下列Level:[Alert]: 这个信息是需要马上被注意的,如防火墙遭到攻击。
[Critical]: 这个信息是有可能会影响运作或是功能,如HA (High Availability)状态改变。
[Error]: 这个信息是SSG5发生错误且可能造成运作上或是功能上的错误,如连上SSH Servers.[Warning]: 这个信息是SSG5发生了会影响功能方面的事件,如认证失败。
[Notification]: 这是发生一般正常的事件,给予管理这常态的通知,如管理人员变更网络参数设定,是否需开通上网功能。
[Debugging]: 这是提供详细的信息让你用来做debug用途。
你可以登入 SSG5 的web管理页面,并在 "Reports" => "System Log" => "Event" 查看SSG5的 Event Log。
SSG5三十天就上手-Day 16 SSG5 Sending Email Alerts 身为一位网络工程师人员,每天看Log可以说是天命。
但是天天进系统看Log实在会累死人,尤其是当你可以能会用十几台SSG5的时候。
这个时候当然是要叫SSG5 每天自动把alarm 用e-mail 寄给你!设定的方法如下:登入SSG5 的web管理页面,并进入"Configuration" => "Report Settings" => "Email" ,在右边的页面,你就可以设定下列信息:1.SMTP Server Name2.E-mail Address 13.E-mail Address 2请在 SMTP Server Name设定你的mail server,假设我的mail server为192.168.171.25,那就将192.168.171.25输入到SMTP Server Name的字段。
Juniper防火墙基本命令

Juniper防火墙基本命令Getinteth某/某查看指定接口配置信息Getmip查看映射ip关系Getroute查看路由表Getpolicyid某查看指定策略Getnrp查看nrp信息,后可接参数查看具体vd组、端口监控设置等Getpercpude查看cpu利用率信息Getpereionde查看每秒新建会话信息Geteion查看当前会话信息,后可匹配源地址、源端口、目的地址、目的端口、协议等选项Geteioninfo查看当前会话数量Getytem查看系统信息,包括当前o版本,接口信息,设备运行时间等Getchai查看设备及板卡序列号,查看设备运行温度Getcountertat查看所有接口计数信息Getcountertateth某/某查看指定接口计数信息Getcounterflowzonetrut/untrut查看指定区域数据流信息Getcountercreenzoneuntrut/trut查看指定区域攻击防护统计信息Gettech-upport查看设备状态命令集,一般在出现故障时,收集该信息寻求JTAC支持常用设置命令Setinteth某/某zonetrut/untrut/dmz/ha配置指定接口进入指定区域(trut/untrut/dmz/ha等)Setinteth某/某ip某.某.某.某/某某配置指定接口ip地址Setinteth某/某manage配置指定接口管理选项,打开所有管理选项Setinteth某/某manageweb/telnet/l/h配置指定接口指定管理选项Setinteth某/某phyfull100mb配置指定接口速率及双工方式Setinteth 某/某phylink-down配置指定接口hutdownSetnrpvdid0monitorinterfaceeth某/某配置ha监控端口,如此端口断开,则设备发生主/备切换E某ecnrpvd0modebackup手工进行设备主/备切换,在当前的主设备上执行etroute0.0.0.0/0interfaceethernet1/3gateway222.92.116.33配置路由,需同时指定下一跳接口及ip地址所有et命令,都可以通过unet命令来取消,相当于cico中的no所有命令都可以通过“TAB”键进行命令补全,通过“”来查看后续支持的命令防火墙基本配置createaccount[admin|uer](创建账户)回车输入密码:再次输入密码:configureaccountadmin(配置账户)回车输入密码:再次输入密码:2.port配置configportautooff{peed[10|100|1000]}duple某[half|full]autooff配置端口的限速和工作模式(全和半)3.Vlan配置无论是核心还是接入层,都要先创建三个Vlan,并且将所有归于DefaultVlan的端口删除:configvlandefaultdelportall清除默认VLAN 里面所有端口createvlanServercreatevlanUer创建vlanerveruer和mangercreatevlanManger定义802.1q标记configvlanServertag10configvlanUertag20configvlanMangertag30设定Vlan网关地址:configvlanServeripa192.168.41.1/24configvlanUeripa192.168.40.1/ 24configvlanMangeripa192.168.某.某/24Enableipforwarding启用ip路由转发,即vlan间路由Trunk配置configvlanServeraddport1-3tconfigvlanUeraddport1-3tconfigvlanmangeraddport1-3t4.VRRP配置enablevrrp开启虚拟路由冗余协议configurevrrpaddvlanUerVlan在VLAN里面添加vrrpconfigurevrrpvlanUerVlanaddmatervrid10192.168.6.254configure vrrpvlanUerVlanauthenticationimple-paworde某tremeconfigurevrrpvlanUerVlanvrid10priority200configurevrrpvlanUerVlanvrid10advertiement-interval15configurevrrpvlanUerVlanvrid10preempt5.端口镜像配置首先将端口从VLAN中删除enablemirroringtoport3#选择3作为镜像口configmirroringaddport1#把端口1的流量发送到3configmirroringaddport1vlandefault#把1和vlandefault的流量都发送到36.port-channel配置enableharinggrouping{port-baed|addre-baed|round-robin}howportharing//查看配置7.tp配置enabletpd//启动生成树createtpdtp-name//创建一个生成树configuretpdaddvlan{port[dot1d|emitp|pvt-plu]} configuretpdtpd1priority16384configurevlanmarketingaddport2-3tpdtpd1emitp8.DHCP中继配置enablebootprelayconfigbootprelayadd9.NAT配置Enablenat#启用natStaticNATRuleE某ampleconfignataddout_vlan_1mapource192.168.1.12/32to216.52.8.32/3 2DynamicNATRuleE某ampleconfignataddout_vlan_1mapource192.168.1.0/24to216.52.8.1-216.52.8.31PortmapNATRuleE某ampleconfignataddout_vlan_2mapource192.168.2.0/25to216.52.8.32/28 bothportmapPortmapMin-Ma某E某ampleconfignataddout_vlan_2mapource192.168.2.128/25to216.52.8.64/ 28tcpportmap1024-819210.OSPF配置enableopf启用OSPF进程createopfarea创建OSPF区域configureopfrouterid[automatic|]配置Routeridconfigureopfaddvlan[|all]area{paive}把某个vlan加到某个Area 中去,相当于Cico中的network的作用configureopfareaaddrange[advertie|noadvertie]{type-3|type-7}把某个网段加到某个Area中去,相当于Cico中的network的作用configureopfvlanneighboraddOSPF中路由重发布配置enableopfe某portdirect[cot[ae-type-1|ae-type-2]{tag}|]enableopfe某porttatic[cot[ae-type-1|ae-type-2]{tag}|]enableopforiginate-default{alway}cot[ae-type-1|ae-type-2]{tag}enableopforiginate-router-id11.SNMP配置enablenmpacce启用SNMP访问enablenmptrap启用SNMP限制createacce-profiletype[ipaddre|vlan]confignmpacce-profilereadonly[|none]配置nmp的只读访问列表,none是去除confignmpacce-profilereadwrite[|none]这是控制读写控制confignmpaddtrapreceiver{port}diableip-optionlooe-ource-route禁止散发源路由diableip-optiontrict-ource-route禁止静态源路由diableip-optionrecord-route禁用路由记录。
Juniper设备常规操作与维护
J u n i p e r设备常规操作与维护1.设备操作1.1.单机设备关机因为主控板上有大容量硬盘,为防止强行断电关机造成硬件故障,要求设备关机必须按照下面的步骤进行操作:1.管理终端连接console口。
2.使用具有足够权限的用户名和密码登陆CLI命令行界面。
3.在提示符下输入下面的命令:> request system halt…The operating system has halted.Please press any key to reboot(除非需要重启设备,此时不要敲任何键,否则设备将进行重启)4.等待console输出上面提示信息后,确认操作系统已停止运行,关闭机箱背后电源模块电源。
1.2.单机设备重启重启必须按照下面的步骤进行操作:1.管理终端连接console口。
2.使用具有足够权限的用户名和密码登陆CLI命令行界面。
3.在提示符下输入下面的命令:> request system reboot4.等待console设备的输出,操作系统已经重新启动。
1.3.单机操作系统升级操作系统软件升级必须按照下面的步骤进行操作:1.管理终端连接console口,便于升级过程中查看设备重启和软件加载状态。
2.升级前,执行下面的命令备份旧的软件及设定:> request system snapshot3.加载新的OS软件:>输入用户名密码后,通过get命令下载os,ftp> lsftp> binftp> get filename.tgzOS的默认下载目录为登录用户的主目录/var/home/username4.升级新下载的OS>request system software add no-validate no-copy filename.tgz reboot5.软件加载成功后,设备将自动重启,重启完成后检查系统当前软件版本号:> show system software也可以在防火墙上开启FTP service,通过客户端用put方式将OS软件上传至防火墙。
Juniper虚拟防火墙测试情况

Juniper vGW虚拟防火墙推出了很长时间,一直也没有进行研究和测试,今天在官网中发现这个产品可以在线测试,所以就过来看看,废话不多说下面正式开始,1.首先先在官网中找到测试的链接,填一张简单的表,进入测试界面登录界面使用Juniper一贯的简介大方,帐号密码也不用输入直接点击进入打开后的主界面也是一贯的友好,中间是内容栏,上面是状态栏,左边是配置导航栏。
点击Please See Status Screen这个黄叹号可以通过里面所包含的信息看出防火墙所在的位置和大概情况,从上面的导航栏可以详细的看见HOME界面上各个详细的信息,当然点击HOME主界面上的各个标图也可以。
下面需要正式配置了,和物理防火墙不同的地方他首先需要进行关于VMware一些方面的配置,如果对VMware ESX比较了解,在这里的配置会很容易理解:2 点击顶端状态导航栏的最后一项进入基本配置界面分三大栏目:vGW的基本配置,其中包括许可证的输入界面,vCenter信息输入界面,虚拟防火墙功能的安装界面,还有像管理员、HA等基本配置安全的基本设置,其中包括IDS基本配置,协议和协议组的定义,还有网络和zones的定义。
最后一栏是对虚拟防火墙设备的一些设置:如设备的更新、时间、网络的基本配置。
在这里完成了基本配置后就可以对vGW进行正式的配置了,他的配置信息全在左侧的配置导航栏配合状态导航栏的防火墙和IDS等栏目可以对vGW进行配置具体情况查看,到这我才发现Juniper给我使用的登录帐号只能看不能动,这让我很郁闷,所以下面就截图让大家看看他具体能实现的那些东东:总共分为四大块,下面具体的看看每一块里面都包含什么东西。
策略组这一栏目包含了对ESX下所安装的各种虚拟机进行了定义并对各个类别进行策略的划分。
检测组对虚拟机和实际应用情况进行检测和设置这一栏对ESX下的固定系统进行检测和实际情况查看最后一栏是对安全策略外的虚拟机进行显示好了,这就是Juniper vGW大概测试情况,Juniper这个只能看不能动的账户实在让人很不爽,但总的来说,这款软设备还是很让人欣慰的,解决了VMware所谓的云(我从来不认为这种方式组建的云有多大优势,充其量可以说是一种廉价的云)面临的安全问题。
- 1、下载文档前请自行甄别文档内容的完整性,平台不提供额外的编辑、内容补充、找答案等附加服务。
- 2、"仅部分预览"的文档,不可在线预览部分如存在完整性等问题,可反馈申请退款(可完整预览的文档不适用该条件!)。
- 3、如文档侵犯您的权益,请联系客服反馈,我们会尽快为您处理(人工客服工作时间:9:00-18:30)。
• Since console output is not viewable from a telnet or secure shell connection, the debug buffer can also be used for viewing snoop output from an telnet or secure shell connection
10
Snoop Filter Details
• To view the configured snoop filter options and to see what options are available for setting:
– snoop info Snoop: Off, Interface: All, direction: incoming EtherType 0000, SrcIp 0.0.0.0, DstIp 0.0.0.0, Proto 0 SrcPort 0, DstPort 0 Ip(either src or dst) 0.0.0.0, Port(either src or dst) 0
– get dbuf info
• To show the total, allocated, and left (available) memory
– get mem
• To allocate system memory for the debug buffer
– set dbuf size <size>
• [ESC] only disables snoop or debug on the management processor • [ESC] does not disable snoop or debug on the session processors
NS Implementation and Configuration Rev00a
Debug Buffer “dbuf”
Understanding & Using The Debug Buffer
B R O A D B A N D
I N T E R N E T
S E C U R I T Y
S O L U T I O N S
Snoop & Debug Output
• Sending snoop & debug output to the debug buffer (recommended)
• The method of debug output
– sending debug output to a console the most CPU intensive – sending debug output to a debug buffer is much less CPU intensive
• snoop off
– To disable debug on all processor cards
• undebug all • debug <debug-option> 0 *(Where Applicable)
– Do not use [esc] to disable debug or snoop on the NS1000!!!
NS Implementation and Configuration Rev00a
NetScreen Technologies
8
Snoop Status
• To view whether or not snoop is running:
– snoop info
Snoop: On, Interface: All, direction: incoming EtherType 0000, SrcIp 0.0.0.0, DstIp 0.0.0.0, Proto 0 SrcPort 0, DstPort 0 Ip(either src or dst) 0.0.0.0, Port(either src or dst) 0
– CLI settings
• set console dbuf • get console
– shows the debug is set to buffer
NS Implementation and Configuration Rev00a
NetScreen Technologies
2
Snoop & Debug Output
NS Implementation and Configuration Rev00a
NetScreen Technologies
11
Snoop Filter Details
• To set up the snoop options that allow filtering of frames that sent to the debug buffer or the console
– shows that snoop & debug output will be sent to console
NS Implementation and Configuration Rev00a
NetScreen Technologies
3
Debug Buffer (DBUF)
• To show the dbuf size in bytes
NS Implementation and Configuration Rev00a
NetScreen Technologies
4
Debug Buffer (DBUF)
• To view the contents of the debug buffer (dbuf)
– get dbuf stream
– It is recommended that snoop output be directed to the debug buffer instead of the console
NS Implementation and Configuration Rev00a
NetScreen Technologies
– snoop ? <return> direction ethernet info interface ip off snoop direction snoop specified ethernet show snoop information snoop which interface snoop ip packet turn off snoop
• The amount of traffic being sent through the NetScreen
– increases in traffic flow decrease the performance, for more data must be sent to the console or debug buffer
NS Implementation and Configuration Rev00a
NetScreen Technologies
9
Snoop
• The snoop command gives a user the ability to view packet information from layer-2 up to layer-4 as it comes into and out of the NetScreen • Snoop output behaves the same way as debug output and the same principles apply as to how to handle snoop output
• If traffic flow is high, you may lose access to the console screen to perform any CLI commands including the disabling of debug
– CLI settings
• unset console dbuf • get console
– clear dbuf
NS Implementation and Configuration Rev00a
NetScreen Technologies
5
NS1000 Warning
• NS1000 – Disabling snoop and debug
– To disable snoop on processor cards
• Snoop is a powerful troubleshooting tool, but it must be used with caution
– Causes a slow down in performance while debug is running – The performance drop depends on a few factors:
NetScreen Technologies
6
ScreenOS Snoop
Understanding & Using ScreenOS Snoop
B R O A D B A N D
I N T E R N E T
S E C U R I T Y
S O L U T I O N S
Snoop Warning!!!
• dbuf size should not be modified without checking to make sure there is an ample amount of memory available on the NetScreen to allocate for added debug buffer space • If the dbuf is capturing enough of the snoop or debug output for troubleshooting a problem, then the dbuf size does not need to be modified • If the debug output being stored is larger than the size of the dbuf • The snoop and debug output is stored first in first out (FIFO) • Newer entries are stored and older ones are overwritten