GnuAutotools
GNU Automake
GNU AutomakeFor version 1.3, 3 April 1998David MacKenzie and Tom Tromey目录∙介绍∙通用性概念o通用操作o深度o严格性o统一命名机制o派生变量是如何命名的∙一些实例软件包o一个简单的例子,从起点到终点o一个经典的程序o创建etags和ctags∙创建`Makefile.in'∙扫描`configure.in'o配置需求o Automake能够识别的其它事情o自动生成的aclocal.m4o由Automake支持的Autoconf宏o编写你自己的aclocal宏∙顶层`Makefile.am'∙创建程序和库o创建一个程序o创建一个库o对LIBOBJS和ALLOCA的特别处理o创建一个共享库o创建一个程序时使用的变量o对Yacc和Lex的支持o C++和其它语言o自动de-ANSI-ficationo自动的依赖性(dependency)跟踪∙其它派生对象o可执行的脚本o头文件o与体系结构无关(Architecture-independent)的数据文件o已创建的源代码∙其它GNU工具o Emacs Lispo Gettexto Guileo Libtoolo Java∙创建文档o Texinfoo Man手册∙安装了些什么∙清除了些什么∙需要发布哪些文件∙对测试套件(test suites)的支持∙改变Automake的行为∙其它规则o与etags之间的界面o处理新的文件扩展名∙条件(Conditionals)∙--gnu and --gnits的效果∙--cygnus的效果∙什么时候Automake不够用∙发布`Makefile.in'∙未来的某些想法∙索引@dircategory GNU admin @direntry * automake: (automake). Making Makefile.in's@dircategory Individual utilities @direntry * aclocal:(automake)Invoking aclocal. Generating aclocal.m4Copyright (C) 1995, 96 Free Software Foundation, Inc.这是GNU Automake文档的第一版,并且是针对GNU Automake 1.3的。
永远的Autotools——GNUBuildSystem简介(一)
理解两类配置文件
Makefile.am --(automake)--> Makefile.in Makefile.in ---(./configure)--> Makefile 所以编写 Makefile.am 相当于编写每个子
语法类似 Makefile
目录下的 Makefile 骨架供 make 工具使用
cc -c example.c example.o cc example.o -o example_program
引子:开发一个C语言的项目
问题出现在项目规模增大的情况下:
项目中有数十个甚至上百个.h头文件,.c
源文件,该如何方便地编译整个项目?要 敲的命令太多了。
写 Shell 脚本批处理 使用 Make 工具
configure.scan,这通常是使用 Autotools 万里 长征的第一步 编辑 configure.scan 得到能用的 configure.ac
请看示例
编写两类配置文件:configure.ac
注意事项: AM_INIT_AUTOMAKE([]) 宏内使用 foreign 参 数可避免 GNU 的严格文件要求
最简易使用方法:配置文件
用户需要编写两类文件:
configure.ac(主要被 autoconf 使用) Makefile.am(主要被 automake 使用)
configure.ac 置于项目根目录 Makefile.am 必须有一个放在项目根目录,
可以在所有有必要的子目录下单独编写放 置 (类似.gitignore文件?)
理解两类配置文件
对两个文件的处理工作互有交叉;需要综
合考虑两者才能生成恰当的中间文件与目 标文件 大难题,是该工具最令人诟病的一点
fonttools使用
fonttools使用FontTools是一个用Python编写的开源库,用于处理字体文件。
通过FontTools,用户可以读取、写入和修改字体文件,以及进行各种字体相关操作。
本文将一步一步回答与FontTools使用有关的问题,并介绍其主要功能和用法。
一、什么是FontTools?FontTools是一个强大的字体处理工具,它允许用户对字体文件进行低级别的操作和修改。
它支持TrueType和OpenType字体格式,并提供了丰富的功能和工具,使用户能够轻松地处理字体文件中的各种数据和元数据。
二、FontTools的主要功能有哪些?1.读取字体文件:FontTools可以解析字体文件,读取其中的字形、轮廓、度量信息、字体名等数据。
用户可以使用FontTools获取字体文件中的各种信息,以供其他用途之用。
2.修改字体文件:FontTools提供了一系列操作方法,允许用户对字体文件进行各种修改。
用户可以调整字形的位置、大小和形状,修改字体的度量信息,添加或删除字形,甚至创建全新的字体文件。
3.生成字体文件:FontTools还支持通过代码生成字体文件。
用户可以使用Python编写脚本,利用FontTools的API来创建和构建字体文件,从而将自定义的字形转换为可用的字体。
4.转换字体格式:FontTools可以将不同格式的字体文件进行相互转换。
用户可以将TrueType字体转换为OpenType格式,或者将字体文件转换为其他常见的字体格式,如WOFF、EOT等。
5.验证字体文件:FontTools提供了一些工具,用于验证字体文件的完整性和正确性。
用户可以使用这些工具来检查字体文件中的错误、损坏或不一致之处,并排除这些问题。
6.字体分析与优化:FontTools还提供了一些工具和方法,用于分析字体文件中的各种数据,如字形轮廓、度量信息等。
用户可以使用这些工具来优化字体文件,使其更加精确和高效。
三、如何安装FontTools?安装FontTools非常简单,只需使用Python的包管理工具pip执行以下命令即可:pip install fonttools四、如何使用FontTools?1.导入FontTools库:首先,用户需要在Python脚本中导入FontTools库,使用以下语句:from fontTools.ttLib import TTFont2.读取字体文件:接下来,用户可以使用TTFont方法读取字体文件,并获取字体文件中的各种信息,如字形、度量信息等。
autoreconf 源码编译

autoreconf 源码编译1. 什么是 autoreconf?autoreconf 是一个用于自动化生成 GNU Autotools 构建系统所需文件的工具。
GNU Autotools 是一套用于自动化构建和配置软件的工具集,包括 Autoconf、Automake 和 Libtool。
使用 autoreconf 可以简化软件的构建过程,减少手动配置的工作量。
2. autoreconf 的作用在编译源码之前,通常需要先进行一系列的配置操作,例如生成 Makefile、检查编译环境等。
而 autoreconf 的作用就是根据项目中的 configure.ac 文件自动生成这些配置文件和脚本,从而简化了整个配置过程。
具体来说,autoreconf 会读取 configure.ac 文件,并根据其中的宏定义和规则生成以下文件:•configure:一个脚本文件,用于检查系统环境和生成 Makefile。
•aclocal.m4:包含所有宏定义的文件。
•Makefile.in:包含 Makefile 的模板。
•config.h.in:包含预处理器常量和宏定义的模板。
•stamp-h.in:在第一次运行 configure 时创建,用于标记是否需要重新生成 config.h。
通过自动生成这些文件,autoreconf 大大简化了软件构建过程中繁琐的手动配置步骤。
3. autoreconf 的使用方法要使用 autoreconf,首先需要确保系统中已经安装了 GNU Autotools 工具集。
在大多数 Linux 发行版中,可以通过包管理器直接安装这些工具。
安装完成后,进入源码目录,在命令行中运行以下命令:autoreconf -i其中,-i参数表示自动运行autoheader、aclocal、automake和autoconf这些工具。
运行 autoreconf 之后,会在当前目录生成 configure 脚本和其他相关文件。
GNU C编译器 中文手册
GCC 中文手册GCCSection: GNU Tools (1)Updated: 2003/12/05Index Return to Main ContentsNAMEgcc,g++-GNU工程的C和C++编译器(egcs-1.1.2)总览(SYNOPSIS)gcc[option|filename ]...g++[option|filename ]...警告(WARNING)本手册页内容摘自GNU C编译器的完整文档,仅限于解释选项的含义.除非有人自愿维护,否则本手册页不再更新.如果发现手册页和软件之间有所矛盾,请查对Info文件, Info文件是权威文档.如果我们发觉本手册页的内容由于过时而导致明显的混乱和抱怨时,我们就停止发布它.不可能有其他选择,象更新Info文件同时更新man手册,因为其他维护GNU CC的工作没有留给我们时间做这个. GNU 工程认为man手册是过时产物,应该把时间用到别的地方.如果需要完整和最新的文档,请查阅Info文件`gcc’或Using and Porting GNU CC (for version 2.0) (使用和移植GNU CC 2.0) 手册.二者均来自Texinfo原文件 gcc.texinfo.描述(DESCRIPTION)C和C++编译器是集成的.他们都要用四个步骤中的一个或多个处理输入文件: 预处理(preprocessing),编译(compilation),汇编(assembly)和连接(linking).源文件后缀名标识源文件的语言,但是对编译器来说,后缀名控制着缺省设定:gcc认为预处理后的文件(.i)是C文件,并且设定C形式的连接.g++认为预处理后的文件(.i)是C++文件,并且设定C++形式的连接.源文件后缀名指出语言种类以及后期的操作:.c C源程序;预处理,编译,汇编.C C++源程序;预处理,编译,汇编.cc C++源程序;预处理,编译,汇编.cxx C++源程序;预处理,编译,汇编.m Objective-C源程序;预处理,编译,汇编.i 预处理后的C文件;编译,汇编.ii 预处理后的C++文件;编译,汇编.s 汇编语言源程序;汇编.S 汇编语言源程序;预处理,汇编.h 预处理器文件;通常不出现在命令行上其他后缀名的文件被传递给连接器(linker).通常包括:.o 目标文件(Object file).a 归档库文件(Archive file)除非使用了-c, -S,或-E选项(或者编译错误阻止了完整的过程),否则连接总是最后的步骤.在连接阶段中,所有对应于源程序的.o文件, -l库文件,无法识别的文件名(包括指定的 .o目标文件和.a库文件)按命令行中的顺序传递给连接器.选项(OPTIONS)选项必须分立给出: `-dr’完全不同于`-d -r ’.大多数`-f’和`-W’选项有两个相反的格式: -fname和 -fno-name (或-Wname和-Wno-name).这里只列举不是默认选项的格式.下面是所有选项的摘要,按类型分组,解释放在后面的章节中.总体选项(Overall Option)-c -S -E -o file -pipe -v -x language语言选项(Language Option)-ansi -fall-virtual -fcond-mismatch -fdollars-in-identifiers -fenum-int-equiv -fexternal-templates -fno-asm -fno-builtin -fhosted -fno-hosted -ffreestanding -fno-freestanding -fno-strict-prototype -fsigned-bitfields -fsigned-char -fthis-is-variable -funsigned-bitfields -funsigned-char -fwritable-strings -traditional -traditional-cpp -trigraphs警告选项(Warning Option)-fsyntax-only -pedantic -pedantic-errors -w -W -Wall -Waggregate-return -Wcast-align -Wcast-qual -Wchar-subscript -Wcomment -Wconversion -Wenum-clash -Werror -Wformat -Wid-clash-len -Wimplicit -Wimplicit-int -Wimplicit-function-declaration -Winline -Wlong-long -Wmain -Wmissing-prototypes -Wmissing-declarations -Wnested-externs -Wno-import -Wparentheses -Wpointer-arith -Wredundant-decls -Wreturn-type -Wshadow -Wstrict-prototypes -Wswitch -Wtemplate-debugging -Wtraditional -Wtrigraphs -Wuninitialized -Wunused -Wwrite-strings调试选项(Debugging Option)-a -dletters -fpretend-float -g -glevel -gcoff -gxcoff -gxcoff+ -gdwarf -gdwarf+ -gstabs -gstabs+ -ggdb -p -pg -save-temps -print-file-name=library -print-libgcc-file-name -print-prog-name=program优化选项(Optimization Option)-fcaller-saves -fcse-follow-jumps -fcse-skip-blocks -fdelayed-branch -felide-constructors -fexpensive-optimizations -ffast-math -ffloat-store -fforce-addr -fforce-mem -finline-functions -fkeep-inline-functions -fmemoize-lookups -fno-default-inline -fno-defer-pop -fno-function-cse -fno-inline -fno-peephole -fomit-frame-pointer -frerun-cse-after-loop -fschedule-insns -fschedule-insns2 -fstrength-reduce -fthread-jumps -funroll-all-loops -funroll-loops -O -O2 -O3预处理器选项(Preprocessor Option)-Aassertion -C -dD -dM -dN -Dmacro[=defn] -E -H -idirafter dir -include file -imacros file -iprefix file -iwithprefix dir -M -MD -MM -MMD -nostdinc -P -Umacro -undef汇编器选项(Assembler Option)-Wa,option连接器选项(Linker Option)-llibrary -nostartfiles -nostdlib -static -shared -symbolic -Xlinker option -Wl,option -u symbol目录选项(Directory Option)-Bprefix -Idir -I- -Ldir目标机选项(Target Option)-b machine -V version配置相关选项(Configuration Dependent Option)M680x0 选项-m68000 -m68020 -m68020-40 -m68030 -m68040 -m68881 -mbitfield -mc68000 -mc68020 -mfpa -mnobitfield -mrtd -mshort -msoft-floatVAX选项-mg -mgnu -munixSPARC选项-mepilogue -mfpu -mhard-float -mno-fpu -mno-epilogue -msoft-float -msparclite -mv8 -msupersparc -mcypressConvex选项-margcount -mc1 -mc2 -mnoargcountAMD29K选项-m29000 -m29050 -mbw -mdw -mkernel-registers -mlarge -mnbw -mnodw -msmall -mstack-check -muser-registersM88K选项-m88000 -m88100 -m88110 -mbig-pic -mcheck-zero-division -mhandle-large-shift -midentify-revision -mno-check-zero-division -mno-ocs-debug-info -mno-ocs-frame-position -mno-optimize-arg-area -mno-serialize-volatile -mno-underscores -mocs-debug-info -mocs-frame-position -moptimize-arg-area -mserialize-volatile -mshort-data-num -msvr3 -msvr4 -mtrap-large-shift -muse-div-instruction -mversion-03.00 -mwarn-passed-structsRS6000选项-mfp-in-toc -mno-fop-in-tocRT选项-mcall-lib-mul -mfp-arg-in-fpregs -mfp-arg-in-gregs -mfull-fp-blocks -mhc-struct-return -min-line-mul -mminimum-fp-blocks -mnohc-struct-returnMIPS选项-mcpu=cpu type -mips2 -mips3 -mint64 -mlong64 -mmips-as -mgas -mrnames -mno-rnames -mgpopt -mno-gpopt -mstats -mno-stats -mmemcpy -mno-memcpy -mno-mips-tfile -mmips-tfile -msoft-float -mhard-float -mabicalls -mno-abicalls -mhalf-pic -mno-half-pic -G num -nocppi386选项-m486 -mno-486 -msoft-float -mno-fp-ret-in-387HPPA选项-mpa-risc-1-0 -mpa-risc-1-1 -mkernel -mshared-libs -mno-shared-libs -mlong-calls -mdisable-fpregs -mdisable-indexing -mtrailing-coloni960选项-mcpu-type -mnumerics -msoft-float -mleaf-procedures -mno-leaf-procedures -mtail-call -mno-tail-call -mcomplex-addr -mno-complex-addr -mcode-align -mno-code-align -mic-compat -mic2.0-compat -mic3.0-compat -masm-compat -mintel-asm -mstrict-align -mno-strict-align -mold-align -mno-old-align DEC Alpha选项-mfp-regs -mno-fp-regs -mno-soft-float -msoft-floatSystem V选项-G -Qy -Qn -YP,paths -Ym,dir代码生成选项(Code Generation Option)-fcall-saved-reg -fcall-used-reg -ffixed-reg -finhibit-size-directive -fnonnull-objects -fno-common -fno-ident -fno-gnu-linker -fpcc-struct-return -fpic -fPIC -freg-struct-return -fshared-data -fshort-enums -fshort-double -fvolatile -fvolatile-global -fverbose-asm总体选项(Overall Option)-x language明确指出后面输入文件的语言为language (而不是从文件名后缀得到的默认选择).这个选项应用于后面所有的输入文件,直到遇着下一个`-x’选项. language的可选值有`c’, `objective-c’, `c-header’, `c++’, `cpp-output’, `assembler’,和`assembler-with-cpp’.-x none关闭任何对语种的明确说明,因此依据文件名后缀处理后面的文件(就象是从未使用过`-x’选项).如果只操作四个阶段(预处理,编译,汇编,连接)中的一部分,可以使用`-x’选项(或文件名后缀)告诉 gcc从哪里开始,用`-c’, `-S’,或`-E’选项告诉gcc到哪里结束.注意,某些选项组合(例如, `-x cpp-output -E’)使gcc不作任何事情.-c编译或汇编源文件,但是不作连接.编译器输出对应于源文件的目标文件.缺省情况下, GCC通过用`.o’替换源文件名后缀`.c’, `.i’, `.s’,等等,产生目标文件名.可以使用-o选项选择其他名字.GCC忽略-c选项后面任何无法识别的输入文件(他们不需要编译或汇编).-S编译后即停止,不进行汇编.对于每个输入的非汇编语言文件,输出文件是汇编语言文件.缺省情况下, GCC通过用`.o’替换源文件名后缀`.c’, `.i’,等等,产生目标文件名.可以使用-o选项选择其他名字.GCC忽略任何不需要编译的输入文件.-E预处理后即停止,不进行编译.预处理后的代码送往标准输出.GCC忽略任何不需要预处理的输入文件.-o file指定输出文件为file.该选项不在乎GCC产生什么输出,无论是可执行文件,目标文件,汇编文件还是预处理后的C代码.由于只能指定一个输出文件,因此编译多个输入文件时,使用`-o’选项没有意义,除非输出一个可执行文件.如果没有使用`-o’选项,默认的输出结果是:可执行文件为`a.out’, `source.suffix ’的目标文件是`source.o’,汇编文件是 `source.s’,而预处理后的C源代码送往标准输出.-v(在标准错误)显示执行编译阶段的命令.同时显示编译器驱动程序,预处理器,编译器的版本号.-pipe在编译过程的不同阶段间使用管道而非临时文件进行通信.这个选项在某些系统上无法工作,因为那些系统的汇编器不能从管道读取数据. GNU的汇编器没有这个问题.语言选项(LANGUAGE OPTIONS)下列选项控制编译器能够接受的C "方言":-ansi支持符合ANSI标准的C程序.这样就会关闭GNU C中某些不兼容ANSI C的特性,例如asm, inline和 typeof关键字,以及诸如unix和vax这些表明当前系统类型的预定义宏.同时开启不受欢迎和极少使用的ANSI trigraph特性,以及禁止`$’成为标识符的一部分.尽管使用了`-ansi’选项,下面这些可选的关键字, __asm__, __extension__, __inline__和__typeof__仍然有效.你当然不会把他们用在ANSI C程序中,但可以把他们放在头文件里,因为编译包含这些头文件的程序时,可能会指定 `-ansi’选项.另外一些预定义宏,如__unix__和__vax__,无论有没有使用 `-ansi’选项,始终有效.使用`-ansi’选项不会自动拒绝编译非ANSI程序,除非增加`-pedantic’选项作为 `-ansi’选项的补充.使用`-ansi’选项的时候,预处理器会预定义一个__STRICT_ANSI__宏.有些头文件关注此宏,以避免声明某些函数,或者避免定义某些宏,这些函数和宏不被ANSI标准调用;这样就不会干扰在其他地方使用这些名字的程序了.-fno-asm不把asm, inline或typeof当作关键字,因此这些词可以用做标识符.用 __asm__, __inline__和__typeof__能够替代他们. `-ansi’ 隐含声明了`-fno-asm’.-fno-builtin不接受不是两个下划线开头的内建函数(built-in function).目前受影响的函数有_exit, abort, abs, alloca, cos, exit, fabs, labs, memcmp, memcpy, sin, sqrt, strcmp, strcpy,和strlen. `-ansi’选项能够阻止alloca和_exit成为内建函数.-fhosted按宿主环境编译;他隐含声明了`-fbuiltin’选项,而且警告不正确的main函数声明.-ffreestanding按独立环境编译;他隐含声明了`-fno-builtin’选项,而且对main函数没有特别要求.(译注:宿主环境(hosted environment)下所有的标准库可用, main函数返回一个int值,典型例子是除了内核以外几乎所有的程序.对应的独立环境(freestanding environment)不存在标准库,程序入口也不一定是 main,最明显的例子就是操作系统内核.详情参考gcc网站最近的资料)-fno-strict-prototype对于没有参数的函数声明,例如`int foo ();’,按C风格处理---即不说明参数个数或类型. (仅针对C++).正常情况下,这样的函数foo在C++中意味着参数为空.-trigraphs支持ANSI C trigraphs. `-ansi’选项隐含声明了`-trigraphs’.-traditional试图支持传统C编译器的某些方面.详见GNU C手册,我们已经把细节清单从这里删除,这样当内容过时后,人们也不会埋怨我们.除了一件事:对于C++程序(不是C), `-traditional’选项带来一个附加效应,允许对 this赋值.他和`-fthis-is-variable’选项的效果一样.-traditional-cpp试图支持传统C预处理器的某些方面.特别是上面提到有关预处理器的内容,但是不包括 `-traditional’选项的其他效应.-fdollars-in-identifiers允许在标识符(identifier)中使用`$’字符(仅针对C++).你可以指定 `-fno-dollars-in-identifiers’选项显明禁止使用`$’符. (GNU C++在某些目标系统缺省允许`$’符,但不是所有系统.)-fenum-int-equiv允许int类型到枚举类型(enumeration)的隐式转换(仅限于C++).正常情况下GNU C++允许从 enum到int的转换,反之则不行.-fexternal-templates为模板声明(template declaration)产生较小的代码(仅限于C++),方法是对于每个模板函数 (template function),只在定义他们的地方生成一个副本.想要成功使用这个选项,你必须在所有使用模板的文件中,标记`#pragma implementation’ (定义)或`#pragma interface’ (声明).当程序用`-fexternal-templates’编译时,模板实例(template instantiation) 全部是外部类型.你必须让需要的实例在实现文件中出现.可以通过typedef实现这一点,他引用所需的每个实例.相对应的,如果编译时使用缺省选项`-fno-external-templates’,所有模板实例明确的设为内置.-fall-virtual所有可能的成员函数默认为虚函数.所有的成员函数(除了构造子函数和new或delete 成员操作符)视为所在类的虚函数.这不表明每次调用成员函数都将通过内部虚函数表.有些情况下,编译器能够判断出可以直接调用某个虚函数;这时就直接调用.-fcond-mismatch允许条件表达式的第二和第三个参数的类型不匹配.这种表达式的值是void.-fthis-is-variable允许对this赋值(仅对C++).合并用户自定义的自由存储管理机制到C++后,使可赋值的 `this’显得不合时宜.因此,默认情况下,类成员函数内部对this赋值是无效操作.然而为了向后兼容,你可以通过`-fthis-is-variable’选项使这种操作有效.-funsigned-char把char定义为无符号类型,如同unsigned char.各种机器都有自己缺省的char类型.既可能是unsigned char也可能是signed char .理想情况下,当依赖于数据的符号性时,一个可移植程序总是应该使用signed char或unsigned char.但是许多程序已经写成只用简单的char,并且期待这是有符号数(或者无符号数,具体情况取决于编写程序的目标机器).这个选项,和它的反义选项,使那样的程序工作在对应的默认值上.char的类型始终应该明确定义为signed char或unsigned char,即使它表现的和其中之一完全一样.-fsigned-char把char定义为有符号类型,如同signed char.这个选项等同于`-fno-unsigned-char’,他是the negative form of `-funsigned-char’的相反选项.同样, `-fno-signed-char’等价于 `-funsigned-char’.-fsigned-bitfields-funsigned-bitfields-fno-signed-bitfields-fno-unsigned-bitfields如果没有明确声明`signed’或`unsigned’修饰符,这些选项用来定义有符号位域 (bitfield)或无符号位域.缺省情况下,位域是有符号的,因为他们继承的基本整数类型,如int,是有符号数.然而,如果指定了`-traditional’选项,位域永远是无符号数.-fwritable-strings把字符串常量存储到可写数据段,而且不做特别对待.这是为了兼容一些老程序,他们假设字符串常量是可写的. `-traditional’选项也有相同效果.篡改字符串常量是一个非常糟糕的想法; ``常量’’就应该是常量.预处理器选项(Preprocessor Option)下列选项针对C预处理器,预处理器用在正式编译以前,对C 源文件进行某种处理.如果指定了`-E’选项, GCC只进行预处理工作.下面的某些选项必须和`-E’选项一起才有意义,因为他们的输出结果不能用于编译.-include file在处理常规输入文件之前,首先处理文件file,其结果是,文件file的内容先得到编译. 命令行上任何`-D’和`-U’选项永远在`-include file’之前处理, 无论他们在命令行上的顺序如何.然而`-include’和`-imacros’选项按书写顺序处理.-imacros file在处理常规输入文件之前,首先处理文件file,但是忽略输出结果.由于丢弃了文件file的输出内容, `-imacros file’选项的唯一效果就是使文件file中的宏定义生效, 可以用于其他输入文件.在处理`-imacrosfile’选项之前,预处理器首先处理`-D’ 和`-U’选项,并不在乎他们在命令行上的顺序.然而`-include’和 `-imacros’选项按书写顺序处理.-idirafter dir把目录dir添加到第二包含路径中.如果某个头文件在主包含路径(用`-I’添加的路径)中没有找到,预处理器就搜索第二包含路径.-iprefix prefix指定prefix作为后续`-iwithprefix’选项的前缀.-iwithprefix dir把目录添加到第二包含路径中.目录名由prefix和dir合并而成,这里 prefix被先前的`-iprefix’选项指定. -nostdinc不要在标准系统目录中寻找头文件.只搜索`-I’选项指定的目录(以及当前目录,如果合适).结合使用`-nostdinc’和`-I-’选项,你可以把包含文件搜索限制在显式指定的目录.-nostdinc++不要在C++专用标准目录中寻找头文件,但是仍然搜索其他标准目录. (当建立`libg++’时使用这个选项.) -undef不要预定义任何非标准宏. (包括系统结构标志).-E仅运行C预处理器.预处理所有指定的C源文件,结果送往标准输出或指定的输出文件.-C告诉预处理器不要丢弃注释.配合`-E’选项使用.-P告诉预处理器不要产生`#line’命令.配合`-E’选项使用.-M [ -MG ]告诉预处理器输出一个适合make的规则,用于描述各目标文件的依赖关系.对于每个源文件,预处理器输出一个make规则,该规则的目标项(target)是源文件对应的目标文件名,依赖项(dependency)是源文件中 `#include引用的所有文件.生成的规则可以是单行,但如果太长,就用`\’-换行符续成多行.规则显示在标准输出,不产生预处理过的C程序.`-M’隐含了`-E’选项.`-MG’要求把缺失的头文件按存在对待,并且假定他们和源程序文件在同一目录下.必须和 `-M’选项一起用.-MM [ -MG ]和`-M’选项类似,但是输出结果仅涉及用户头文件,象这样`#include file"’.忽略系统头文件如`#include <file>’.-MD和`-M’选项类似,但是把依赖信息输出在文件中,文件名通过把输出文件名末尾的`.o’替换为 `.d’产生.同时继续指定的编译工作---`-MD’不象`-M’那样阻止正常的编译任务.Mach的实用工具`md’能够合并`.d’文件,产生适用于`make’命令的单一的依赖文件.-MMD和`-MD’选项类似,但是输出结果仅涉及用户头文件,忽略系统头文件.-H除了其他普通的操作, GCC显示引用过的头文件名.-Aquestion(answer)如果预处理器做条件测试,如`#if #question(answer)’,该选项可以断言(Assert) question的答案是answer. -A-’关闭一般用于描述目标机的标准断言.-Dmacro定义宏macro,宏的内容定义为字符串`1’.-Dmacro=defn定义宏macro的内容为defn.命令行上所有的`-D’选项在 `-U’选项之前处理.-Umacro取消宏macro. `-U’选项在所有的`-D’选项之后处理,但是优先于任何 `-include’或`-imacros’选项.-dM告诉预处理器输出有效的宏定义列表(预处理结束时仍然有效的宏定义).该选项需结合`-E’选项使用.-dD告诉预处理器把所有的宏定义传递到输出端,按照出现的顺序显示.-dN和`-dD’选项类似,但是忽略宏的参量或内容.只在输出端显示`#define name.汇编器选项(ASSEMBLER OPTION)-Wa,option把选项option传递给汇编器.如果option含有逗号,就在逗号处分割成多个选项.连接器选项(LINKER OPTION)下面的选项用于编译器连接目标文件,输出可执行文件的时候.如果编译器不进行连接,他们就毫无意义.object-file-name如果某些文件没有特别明确的后缀a special recognized suffix, GCC就认为他们是目标文件或库文件. (根据文件内容,连接器能够区分目标文件和库文件).如果GCC执行连接操作,这些目标文件将成为连接器的输入文件.-llibrary连接名为library的库文件.连接器在标准搜索目录中寻找这个库文件,库文件的真正名字是`liblibrary.a’.连接器会当做文件名得到准确说明一样引用这个文件.搜索目录除了一些系统标准目录外,还包括用户以`-L’选项指定的路径.一般说来用这个方法找到的文件是库文件---即由目标文件组成的归档文件(archive file).连接器处理归档文件的方法是:扫描归档文件,寻找某些成员,这些成员的符号目前已被引用,不过还没有被定义.但是,如果连接器找到普通的目标文件,而不是库文件,就把这个目标文件按平常方式连接进来.指定`-l’选项和指定文件名的唯一区别是, `-l选项用`lib’和`.a’把library包裹起来,而且搜索一些目录.-lobjc这个-l选项的特殊形式用于连接Objective C程序.-nostartfiles不连接系统标准启动文件,而标准库文件仍然正常使用.-nostdlib不连接系统标准启动文件和标准库文件.只把指定的文件传递给连接器.-static在支持动态连接(dynamic linking)的系统上,阻止连接共享库.该选项在其他系统上无效.-shared生成一个共享目标文件,他可以和其他目标文件连接产生可执行文件.只有部分系统支持该选项.-symbolic建立共享目标文件的时候,把引用绑定到全局符号上.对所有无法解析的引用作出警告(除非用连接编辑选项 `-Xlinker -z -Xlinker defs’取代).只有部分系统支持该选项.-Xlinker option把选项option传递给连接器.可以用他传递系统特定的连接选项, GNU CC无法识别这些选项.如果需要传递携带参数的选项,你必须使用两次`-Xlinker’,一次传递选项,另一次传递他的参数. 例如,如果传递`-assert definitions’,你必须写成`-Xlinker -assert -Xlinker definitions’,而不能写成`-Xlinker "-assert definitions"’,因为这样会把整个字符串当做一个参数传递,显然这不是连接器期待的.-Wl,option把选项option传递给连接器.如果option中含有逗号,就在逗号处分割成多个选项.-u symbol使连接器认为取消了symbol的符号定义,从而连接库模块以取得定义.你可以使用多个 `-u’选项,各自跟上不同的符号,使得连接器调入附加的库模块.目录选项(DIRECTORY OPTION)下列选项指定搜索路径,用于查找头文件,库文件,或编译器的某些成员:-Idir在头文件的搜索路径列表中添加dir 目录.-I-任何在`-I-’前面用`-I’选项指定的搜索路径只适用于`#include "file"’这种情况;他们不能用来搜索`#include <file>’包含的头文件.如果用`-I’选项指定的搜索路径位于`-I-’选项后面,就可以在这些路径中搜索所有的 `#include’指令. (一般说来-I选项就是这么用的.)还有, `-I-’选项能够阻止当前目录(存放当前输入文件的地方)成为搜索`#include "file"’的第一选择.没有办法克服`-I-’选项的这个效应.你可以指定 `-I.’搜索那个目录,它在调用编译器时是当前目录.这和预处理器的默认行为不完全一样,但是结果通常令人满意.`-I-’不影响使用系统标准目录,因此, `-I-’和`-nostdinc’是不同的选项.-Ldir在`-l’选项的搜索路径列表中添加dir目录.-Bprefix这个选项指出在何处寻找可执行文件,库文件,以及编译器自己的数据文件.编译器驱动程序需要执行某些下面的子程序: `cpp’, `cc1’ (或C++的 `cc1plus’), `as’和`ld’.他把prefix当作欲执行的程序的前缀,既可以包括也可以不包括`machine/version/’.对于要运行的子程序,编译器驱动程序首先试着加上`-B’前缀(如果存在).如果没有找到文件,或没有指定 `-B’选项,编译器接着会试验两个标准前缀`/usr/lib/gcc/’和 `/usr/local/lib/gcc-lib/’.如果仍然没能够找到所需文件,编译器就在`PATH’环境变量指定的路径中寻找没加任何前缀的文件名.如果有需要,运行时(run-time)支持文件`libgcc.a’也在`-B’前缀的搜索范围之内. 如果这里没有找到,就在上面提到的两个标准前缀中寻找,仅此而已.如果上述方法没有找到这个文件,就不连接他了.多数情况的多数机器上, `libgcc.a’并非必不可少.你可以通过环境变量GCC_EXEC_PREFIX获得近似的效果;如果定义了这个变量,其值就和上面说的一样用做前缀.如果同时指定了`-B’选项和GCC_EXEC_PREFIX变量,编译器首先使用 `-B’选项,然后才尝试环境变量值.警告选项(WARNING OPTION)警告是针对程序结构的诊断信息,程序不一定有错误,而是存在风险,或者可能存在错误.下列选项控制GNU CC产生的警告的数量和类型:-fsyntax-only检查程序中的语法错误,但是不产生输出信息.-w禁止所有警告信息.-Wno-import禁止所有关于#import的警告信息.-pedantic打开完全服从ANSI C标准所需的全部警告诊断;拒绝接受采用了被禁止的语法扩展的程序.无论有没有这个选项,符合ANSI C标准的程序应该能够被正确编译(虽然极少数程序需要`-ansi’ 选项).然而,如果没有这个选项,某些GNU扩展和传统C特性也得到支持.使用这个选项可以拒绝这些程序.没有理由使用这个选项,他存在只是为了满足一些书呆子(pedant).对于替选关键字(他们以`__’开始和结束) `-pedantic’不会产生警告信息. Pedantic 也不警告跟在__extension__后面的表达式.不过只应该在系统头文件中使用这种转义措施,应用程序最好避免.-pedantic-errors该选项和`-pedantic’类似,但是显示错误而不是警告.-W对下列事件显示额外的警告信息:*非易变自动变量(nonvolatile automatic variable)可能在调用longjmp时发生改变. 这些警告仅在优化编译时发生.编译器只知道对setjmp的调用,他不可能知道会在哪里调用longjmp,事实上一个信号处理例程可以在程序的任何地点调用他.其结果是,即使程序没有问题,你也可能会得到警告,因为无法在可能出现问题的地方调用longjmp.*既可以返回值,也可以不返回值的函数. (缺少结尾的函数体被看作不返回函数值)例如,下面的函数将导致这种警告:foo (a){if (a > 0)return a;}由于GNU CC不知道某些函数永不返回(含有abort和longjmp),因此有可能出现虚假警告.*表达式语句或逗号表达式的左侧没有产生作用(side effect).如果要防止这种警告,应该把未使用的表达式强制转换为void类型.例如,这样的表达式`x[i,j]’会导致警告,而`x[(void)i,j]’就不会.*无符号数用`>’或`<=’和零做比较.-Wimplicit-int警告没有指定类型的声明.-Wimplicit-function-declaration警告在声明之前就使用的函数.-Wimplicit同-Wimplicit-int和-Wimplicit-function-declaration.-Wmain如果把main函数声明或定义成奇怪的类型,编译器就发出警告.典型情况下,这个函数用于外部连接, 返回int数值,不需要参数,或指定两个参数.-Wreturn-type如果函数定义了返回类型,而默认类型是int型,编译器就发出警告.同时警告那些不带返回值的 return语句,如果他们所属的函数并非void类型.-Wunused如果某个局部变量除了声明就没再使用,或者声明了静态函数但是没有定义,或者某条语句的运算结果显然没有使用, 编译器就发出警告.-Wswitch如果某条switch语句的参数属于枚举类型,但是没有对应的case语句使用枚举元素,编译器就发出警告. ( default语句的出现能够防止这个警告.)超出枚举范围的case语句同样会导致这个警告.-Wcomment如果注释起始序列`/*’出现在注释中,编译器就发出警告.。
使用 GNU autotools 改造一个软件项目

使用 GNU autotools 改造一个软件项目本文不是一篇规范的教程,而是用一个软件项目作为例子,演示使用 GNU autotools 进行软件管理的思路和过程。
目录• GNU 的软件风格• 准备 autotools• 改造文件布局• autoscan• configure.ac 的基本结构• Makefile 文件的产生• 编写 Makefile.am• 软件根目录 Makefile.am• src/Makefile.am• data/Makefile.am• docs/Makefile.am• fonts/Makefile.am• images/Makefile.am• music/Makefile.am• sound/Makefile.am• 运行 autotools• SDL 库的侦测• 软件使用的数据文件• configure 选项• autotools 脚本• 使用 configure 产生的 Makefile• 最终的 configure.ac 文件GNU 的软件风格一个标准的 GNU 软件,编译安装都是使用下面三个步骤:$ ./configure$ make$ make installconfigure 脚本运行时可以侦测系统的环境,确定软件安装目录,然后生成 Makefile 文件。
make 调用系统中的编译器进行编译和连接。
make install 将软件安装到设定的目录。
用户执行 configure 时可以通过它的命令行参数指定自己所需的编译选项,比如安装目录通过 --prefix=PREFIX 设置,如果不指定,缺省情况下 PREFIX 是 /usr/local。
默认安装时,执行文件安装到 /usr/ local/bin 目录,库安装到 /usr/local/lib 目录,数据文件安装到 /usr/local/share 目录。
由于 GNU 的软件风格方便易用,通用性好,可移植性高,现在大多数 Unix/Linux 系统上的自由软件都采用这种方式分发软件。
autotools用法简介

GNU AUTOTOOLS 简介1.介绍大部分时候,你从网上下载了一个开放源代码的软件,在解压后,你一般会敲入以下三个命令来编译和安装你的程序:1)./configure2)make3)make install其中,configure脚本分析你的系统以找到合适的工具和库,make是真正用来编译构建软件的工具,make install来安装软件。
在开放源代码世界,configure脚本获得了广泛的使用,它使从源代码安装软件变得非常容易,本文主要就是介绍如何使用GNU autotools,以便使你能够以上面这种方式来编译和安装你的程序。
2.什么是GNU autotoolsGNU autotools主要包括下面三个工具:Autoconf –这个工具用来生成configure脚本。
就像前面提到的,这个脚本主要用来分析你的系统以找到合适的工具和库。
譬如:你的系统的C编译器是―cc‖还是―gcc‖?Automake –这个工具用来生成Makefiles。
它需要使用到Autoconf提供的信息。
譬如,如果Autoconf检测到你的系统使用―gcc‖,那Makefile就使用gcc作为C编译器。
反之,如果找到―cc‖,那就使用―cc‖。
Libtools –这个工具创建共享库。
它是平台无关的。
3.为―Hello,world‖添加Autoconf1) 创建一个―Hello,world!‖写一个简单的―Hello,world!‖程序hello.c:#include <stdio.h>int main(void){printf ("Hello World.\n");}写一个简单的MakefileMakefileEXEC:=helloall: $(EXEC).PHONY:cleanclean:rm -f hello *.o2) 添加Autoconf现在,我们将添加autoconf到这个程序。
大作业GNU-autoconfig(ppt文档)
AC_MSG_RESULT (result-description)
– Notify the user of the results of a check.
Makefile.am for programs:
– xxx_LDADD = $(top_srcdir)/src/libs/ – or: – xxx_LDADD = $(top_srcdir)/src/libs/libmy.a
If external libraries is needed, for example, libpthread, add:
Inventec Confidentiake
automake is a tool for automatically generating
`Makefile.in' files compliant with the GNU Coding Standards.
automake calls libtoolize to generate some extra files if the macro 'AC_PROG_LIBTOOL' is used in 'configure.in'. If it is not present, automake installs 'config.guess' and 'config.sub' by itself.
Inventec Confidential
Page 4
Contents
A simple start Deeper and deeper Generated File Dependencies
autotools

生成src目录下的main可执行文件
在src目录下执行Autoscan Mv configure.scan configure.in编辑 Aclocal,(libtoolize –f –c动态库),autoconf,automake -add missing, ./configure,make 执行./main打印结果: hello world plus result is 2010 动态库需安装,加载其路径有两种方式 1.export LD_LIBRARY_PATH=(path) 2.修改etc/ld.so.conf文件,加入搜索路径(自己存放库的 路径),修改后用ldconfig命令载入修改(需root权限)
修改configure.in
修改动作: 1.修改AC_INIT里面的参数: AC_INIT(main,1.0, pgpxc@) 2.添加宏AM_INIT_AUTOMAKE(main,1.0), 它是automake 所必备的宏,也同前面一样,PACKAGE是所要产生软件 套件的名称,VERSION是版本编号. 3.在AC_OUTPUT后添加输出文件Makefile
Automake,autoconf
实例分析
第一步: ---------假如我们有一个目录test, 里面有main.c 第二步: ---------运行 autoscan , 自动创建两个文件: autoscan.log configure.scan 第三步: ---------修改configure.scan的文件名为configure.in 查看configure.in的内容:
生成Makefile过程图解
主要步骤
开发者要书写的文件主要是configure.in和 和 Makefile.am 运行autoscan检测源文件生成configure.scan并修改 成configure.in 编辑configure.in configure.in 由aclocal命令生成aclocal.m4 运行autoconf生成configure脚本 运行autoheader生成config.h.in文件 创建并编辑Makefile.am 运行automake生成makefile.in 运行configure脚本生成Makefile
gnu c的发展历史

gnu c的发展历史GNU C的发展历史可以追溯到上世纪80年代初,当时Richard Stallman和他的团队开始着手开发一个自由的C编译器,这个编译器后来成为了GNU C编译器(GCC)的雏形。
在早期的发展阶段,GCC的目标是提供一个可以生成高质量的机器代码的C编译器。
随着时间的推移,GCC逐渐发展成为一个强大而灵活的工具,支持多种不同的目标体系结构和编程语言。
GCC不仅可以编译C语言程序,还支持C++、Fortran、Objective-C等其他编程语言。
随着GCC在业界的影响力逐渐增大,越来越多的开发者开始参与到GCC的开发和维护中来。
他们为GCC添加了许多新的功能和优化,使得GCC在编译器领域中占据了重要的地位。
在GCC的发展过程中,还产生了一些衍生项目,如GDB调试器和Binutils工具集。
这些工具的出现进一步拓宽了GCC的应用范围,使得它成为了一个完整的开发工具链。
除了GCC之外,GNU项目还开发了许多其他与C语言相关的工具和库。
例如,GNU C库(glibc)提供了一套标准的C库函数,方便开发者进行系统级编程。
还有GNU Autotools工具集,可以自动化生成跨平台的构建脚本。
近年来,GCC的发展重点逐渐转移到了优化编译器的研究和开发上。
GCC引入了许多新的优化技术,如基于图形的优化和自动向量化等,以提高编译器生成的代码的性能。
总的来说,GNU C编译器的发展经历了多年的努力和持续的改进。
它不仅成为了开源社区中最受欢迎的C编译器,还为许多其他开源项目提供了强大的支持。
GNU C的发展历史充分展示了开源社区的力量和创新精神,为软件开发领域带来了巨大的影响。
autotools
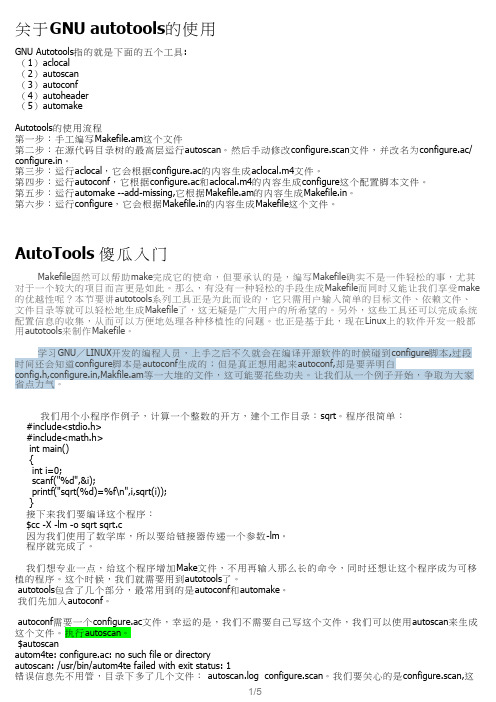
关于GNU autotools的使用GNU Autotools指的就是下面的五个工具:(1)aclocal(2)autoscan(3)autoconf(4)autoheader(5)automakeAutotools的使用流程第一步:手工编写Makefile.am这个文件第二步:在源代码目录树的最高层运行autoscan。
然后手动修改configure.scan文件,并改名为configure.ac/ configure.in。
第三步:运行aclocal,它会根据configure.ac的内容生成aclocal.m4文件。
第四步:运行autoconf,它根据configure.ac和aclocal.m4的内容生成configure这个配置脚本文件。
第五步:运行automake --add-missing,它根据Makefile.am的内容生成Makefile.in。
第六步:运行configure,它会根据Makefile.in的内容生成Makefile这个文件。
AutoTools 傻瓜入门Makefile固然可以帮助make完成它的使命,但要承认的是,编写Makefile确实不是一件轻松的事,尤其对于一个较大的项目而言更是如此。
那么,有没有一种轻松的手段生成Makefile而同时又能让我们享受make 的优越性呢?本节要讲autotools系列工具正是为此而设的,它只需用户输入简单的目标文件、依赖文件、文件目录等就可以轻松地生成Makefile了,这无疑是广大用户的所希望的。
另外,这些工具还可以完成系统配置信息的收集,从而可以方便地处理各种移植性的问题。
也正是基于此,现在Linux上的软件开发一般都用autotools来制作Makefile。
学习GNU/LINUX开发的编程人员,上手之后不久就会在编译开源软件的时候碰到configure脚本,过段时间还会知道configure脚本是autoconf生成的;但是真正想用起来autoconf,却是要弄明白config.h,configure.in,Makfile.am等一大堆的文件,这可能要花些功夫。
03_嵌入式Linux系统项目工程管理

Autotools必要工具
• autoconf: 生成可以自动地配置软件源码包,用以适应多种 UNIX类系统的shell脚本工具,最后生成可执行程序configure • automake:从Makefile.am文件自动生成Makefile.in的工具, configure程序使用Makefile.in生成Makefile • libtool:方便生成各种程序库的工具
Makefile的优势
动推导,判断源码依赖关系的功能
2、Makefile有可以使用隐含规则来简化makefile的编写
3、当然,Makefile使得大工程编译维护变得更快!
Makefile基本结构
makefile 中一般包含如下内容: – 需要由make工具创建的项目,通常是目标文件和可执行文件 – 通常使用“目标(target)”一词来表示要创建的项目 – 要创建的目标依赖于哪些文件 – 创建每个目标时需要运行的命令,每个命令之前必须有tab打头 – 通常都包含一些固定的伪目标: 如all、install、clean用作缺省编译,安装和清除文件 – #打头表示注释行
SUBDIRS=src inc #指定需要处理的子目录,如果要处理多个子目录,以空格隔开.这里只 有src inc
Autotools项目配置过程
ROOTDIR=$(shell /bin/pwd) #利用pwd取得当前路径 export INCLUDES=-I$(ROOTDIR)/inc #指定头文件所在路径,并导出供子目录Makefile.am使 bin_PROGRAMS=target #指定要产生的执行文件名 target_SOURCES=main.c 指定产生执行文件需要的源文件,如果有多个,以空格隔开 target_LDADD=$(ROOTDIR)/src/libname.a(利用src创建静态库) 或者 LIBS+=... 增加链接库
autotools入门

# -*- Autoconf -*# Process this file with autoconf to produce a configure script. > AC_PREREQ (version),要求autoconf的版本 AC_PREREQ(2.59) > AC_INIT (package, version, [bug-report], [tarname], [url]) AC_INIT(jobqueue, 1.0, zhiyong1@) > AC_CONFIG_AUX_DIR (dir),指定辅助文件的目录 > ls config > config.guess config.sub depcomp install-sh missing > 这些文件是autoconf生成的,要随源码发布 AC_CONFIG_AUX_DIR(config) > AC_CONFIG_HEADERS (header) > 生成的配置头文件的名称 AC_CONFIG_HEADER([config.h]) > AC_CONFIG_SRCDIR (unique-file-in-source-dir) > ./configure --srcdir=DIR 指定源码目录,configure 查找 unique-file-in-source-dir, 确定指定了正确的源码目录 AC_CONFIG_SRCDIR([jobqueue.cpp])
检查c编译器acprogcxx检查c编译器acprogcc检查链接器acprogld检查ranlib程序acprogranlib检查install程序acproginstallaccheckliblibraryfunctionactioniffoundactionifnotfoundotherlibraries指定libcurl中的一个函数curleasyinit检查是否有libcurl库如果没有指定actioniffound且找到了libcurl库则默认添加lcurl到libs如果没有指定actionifnotfound且没有找到libcurl库则默认不退出configure如果需要改变默认行为用下面检查mysqlclient的方法checksforlibraries
autotools使用
autotools 使⽤关于Autotools 的使⽤我们前⾯的章节中已经讲到了Makefile 的使⽤()。
我们知道在下⾯如果编译⼀个⽐较⼤型的项⽬,我们可以通过Makefile 的⽅式来完成。
但是,我们⼜蛋疼了,Makefile 拥有复杂的语法结构,甚⾄让⼈难以领会,当我们项⽬⾮常⼤的时候,维护Makefile 会成为⼀件⾮常头疼的事情。
于是我们就有了autotools ⼯具,专门⽤来⽣成Makefile ,这个⼯具让我们很⼤程度的降低了开发的难度。
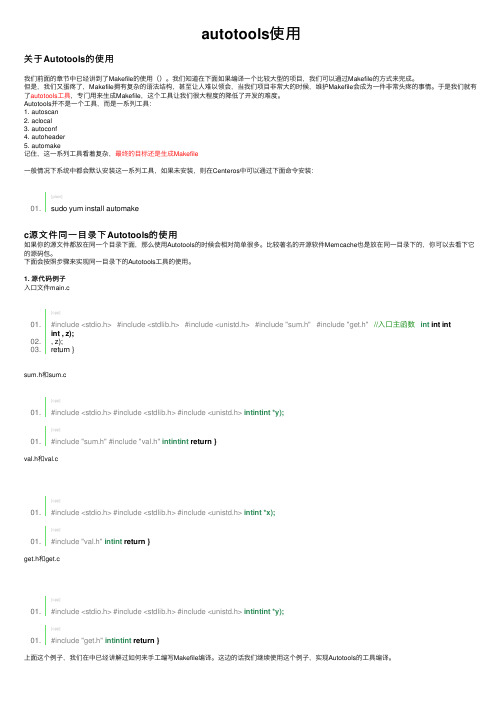
Autotools 并不是⼀个⼯具,⽽是⼀系列⼯具:1. autoscan2. aclocal3. autoconf4. autoheader5. automake记住,这⼀系列⼯具看着复杂,最终的⽬标还是⽣成Makefile⼀般情况下系统中都会默认安装这⼀系列⼯具,如果未安装,则在Centeros 中可以通过下⾯命令安装:c 源⽂件同⼀⽬录下Autotools 的使⽤如果你的源⽂件都放在同⼀个⽬录下⾯,那么使⽤Autotools 的时候会相对简单很多。
⽐较著名的开源软件Memcache 也是放在同⼀⽬录下的,你可以去看下它的源码包。
下⾯会按照步骤来实现同⼀⽬录下的Autotools ⼯具的使⽤。
1. 源代码例⼦⼊⼝⽂件main.csum.h 和sum.cval.h 和val.cget.h 和get.c上⾯这个例⼦,我们在中已经讲解过如何来⼿⼯编写Makefile 编译。
这边的话我们继续使⽤这个例⼦,实现Autotools 的⼯具编译。
[plain]01. sudo yum install automake[cpp]01.#include <stdio.h> #include <stdlib.h> #include <unistd.h> #include "sum.h" #include "get.h" //⼊⼝主函数 int int int int , z); 02. , z); 03. return }[cpp]01. #include <stdio.h> #include <stdlib.h> #include <unistd.h> intintint *y);[cpp]01. #include "sum.h" #include "val.h" intintint return }[cpp]01. #include <stdio.h> #include <stdlib.h> #include <unistd.h> intint *x);[cpp]01. #include "val.h" intint return }[cpp]01. #include <stdio.h> #include <stdlib.h> #include <unistd.h> intintint *y);[cpp]01. #include "get.h" intintint return }2. Autoscan 命令第⼀步,我们需要在我们的项⽬⽬录下执⾏autoscan 命令。
GNU Automake

GNU AutomakeFor version1.7.2,5December2002 David MacKenzie and Tom TromeyCopyright c 1995,1996,2000,2001,2002Free Software Foundation,Inc.This is thefirst edition of the GNU Automake documentation,and is consistent with GNU Automake1.7.2.Published by the Free Software Foundation59Temple Place-Suite330,Boston,MA02111-1307USAPermission is granted to make and distribute verbatim copies of this manual provided the copyright notice and this permission notice are preserved on all copies.Permission is granted to copy and distribute modified versions of this manual under the con-ditions for verbatim copying,provided that the entire resulting derived work is distributed under the terms of a permission notice identical to this one.Permission is granted to copy and distribute translations of this manual into another lan-guage,under the above conditions for modified versions,except that this permission notice may be stated in a translation approved by the Free Software Foundation.1IntroductionAutomake is a tool for automatically generating‘Makefile.in’s fromfiles called ‘Makefile.am’.Each‘Makefile.am’is basically a series of make variable definitions1,with rules being thrown in occasionally.The generated‘Makefile.in’s are compliant with the GNU Makefile standards.The GNU Makefile Standards Document(see section“Makefile Conventions”in The GNU Coding Standards)is long,complicated,and subject to change.The goal of Automake is to remove the burden of Makefile maintenance from the back of the individual GNU maintainer(and put it on the back of the Automake maintainer).The typical Automake inputfile is simply a series of variable definitions.Each suchfile is processed to create a‘Makefile.in’.There should generally be one‘Makefile.am’per directory of a project.Automake does constrain a project in certain ways;for instance it assumes that the project uses Autoconf(see section“Introduction”in The Autoconf Manual),and enforces certain restrictions on the‘configure.in’contents2.Automake requires perl in order to generate the‘Makefile.in’s.However,the distri-butions created by Automake are fully GNU standards-compliant,and do not require perl in order to be built.Mail suggestions and bug reports for Automake to bug-automake@.2General ideasThe following sections cover a few basic ideas that will help you understand how Au-tomake works.2.1General OperationAutomake works by reading a‘Makefile.am’and generating a‘Makefile.in’.Certain variables and targets defined in the‘Makefile.am’instruct Automake to generate more specialized code;for instance,a‘bin_PROGRAMS’variable definition will cause targets for compiling and linking programs to be generated.The variable definitions and targets in the‘Makefile.am’are copied verbatim into the generatedfile.This allows you to add arbitrary code into the generated‘Makefile.in’. For instance the Automake distribution includes a non-standard cvs-dist target,which the Automake maintainer uses to make distributions from his source control system.Note that most GNU make extensions are not recognized by ing such extensions in a‘Makefile.am’will lead to errors or confusing behavior.A special exception is that the GNU make append operator,‘+=’,is supported.This operator appends its right hand argument to the variable specified on the left.Automake 1These variables are also called make macros in Make terminology,however in this manual we reserve the term macro for Autoconf’s macros.2Autoconf2.50promotes‘configure.ac’over‘configure.in’.The rest of this documentation will refer to‘configure.in’as this use is not yet spread,but Automake supports‘configure.ac’too.will translate the operator into an ordinary‘=’operator;‘+=’will thus work with any make program.Automake tries to keep comments grouped with any adjoining targets or variable defi-nitions.A target defined in‘Makefile.am’generally overrides any such target of a similar name that would be automatically generated by automake.Although this is a supported feature, it is generally best to avoid making use of it,as sometimes the generated rules are very particular.Similarly,a variable defined in‘Makefile.am’or AC_SUBST’ed from‘configure.in’will override any definition of the variable that automake would ordinarily create.This feature is more often useful than the ability to override a target definition.Be warned that many of the variables generated by automake are considered to be for internal use only,and their names might change in future releases.When examining a variable definition,Automake will recursively examine variables refer-enced in the definition.For example,if Automake is looking at the content of foo_SOURCES in this snippetxs=a.c b.cfoo_SOURCES=c.c$(xs)it would use thefiles‘a.c’,‘b.c’,and‘c.c’as the contents of foo_SOURCES.Automake also allows a form of comment which is not copied into the output;all lines beginning with‘##’(leading spaces allowed)are completely ignored by Automake.It is customary to make thefirst line of‘Makefile.am’read:##Process this file with automake to produce Makefile.in2.2StrictnessWhile Automake is intended to be used by maintainers of GNU packages,it does make some effort to accommodate those who wish to use it,but do not want to use all the GNU conventions.To this end,Automake supports three levels of strictness—the strictness indicating how stringently Automake should check standards conformance.The valid strictness levels are:‘foreign’Automake will check for only those things which are absolutely required for proper operations.For instance,whereas GNU standards dictate the existenceof a‘NEWS’file,it will not be required in this mode.The name comes from thefact that Automake is intended to be used for GNU programs;these relaxedrules are not the standard mode of operation.‘gnu’Automake will check—as much as possible—for compliance to the GNU stan-dards for packages.This is the default.‘gnits’Automake will check for compliance to the as-yet-unwritten Gnits standards.These are based on the GNU standards,but are even more detailed.Unlessyou are a Gnits standards contributor,it is recommended that you avoid thisoption until such time as the Gnits standard is actually published(which maynever happen).For more information on the precise implications of the strictness level,see Chapter21 [Gnits],page62.Automake also has a special“cygnus”mode which is similar to strictness but handled differently.This mode is useful for packages which are put into a“Cygnus”style tree(e.g., the GCC tree).For more information on this mode,see Chapter22[Cygnus],page63.2.3The Uniform Naming SchemeAutomake variables generally follow a uniform naming scheme that makes it easy to decide how programs(and other derived objects)are built,and how they are installed. This scheme also supports configure time determination of what should be built.At make time,certain variables are used to determine which objects are to be built.The variable names are made of several pieces which are concatenated together.The piece which tells automake what is being built is commonly called the primary. For instance,the primary PROGRAMS holds a list of programs which are to be compiled and linked.A different set of names is used to decide where the built objects should be installed. These names are prefixes to the primary which indicate which standard directory should be used as the installation directory.The standard directory names are given in the GNU standards(see section“Directory Variables”in The GNU Coding Standards).Automake extends this list with pkglibdir,pkgincludedir,and pkgdatadir;these are the same as the non-‘pkg’versions,but with‘@PACKAGE@’appended.For instance,pkglibdir is defined as$(libdir)/@PACKAGE@.For each primary,there is one additional variable named by prepending‘EXTRA_’to the primary name.This variable is used to list objects which may or may not be built,depending on what configure decides.This variable is required because Automake must statically know the entire list of objects that may be built in order to generate a‘Makefile.in’that will work in all cases.For instance,cpio decides at configure time which programs are built.Some of the programs are installed in bindir,and some are installed in sbindir:EXTRA_PROGRAMS=mt rmtbin_PROGRAMS=cpio paxsbin_PROGRAMS=@MORE_PROGRAMS@Defining a primary without a prefix as a variable,e.g.,PROGRAMS,is an error.Note that the common‘dir’suffix is left offwhen constructing the variable names;thus one writes‘bin_PROGRAMS’and not‘bindir_PROGRAMS’.Not every sort of object can be installed in every directory.Automake willflag those attempts itfinds in error.Automake will also diagnose obvious misspellings in directory names.Sometimes the standard directories—even as augmented by Automake—are not enough. In particular it is sometimes useful,for clarity,to install objects in a subdirectory of somepredefined directory.To this end,Automake allows you to extend the list of possible installation directories.A given prefix(e.g.‘zar’)is valid if a variable of the same name with‘dir’appended is defined(e.g.zardir).For instance,until HTML support is part of Automake,you could use this to install raw HTML documentation:htmldir=$(prefix)/htmlhtml_DATA=automake.htmlThe special prefix‘noinst’indicates that the objects in question should be built but not installed at all.This is usually used for objects required to build the rest of your package, for instance static libraries(see Section9.2[A Library],page27),or helper scripts.The special prefix‘check’indicates that the objects in question should not be built until the make check command is run.Those objects are not installed either.The current primary names are‘PROGRAMS’,‘LIBRARIES’,‘LISP’,‘PYTHON’,‘JAVA’,‘SCRIPTS’,‘DATA’,‘HEADERS’,‘MANS’,and‘TEXINFOS’.Some primaries also allow additional prefixes which control other aspects of automake’s behavior.The currently defined prefixes are‘dist_’,‘nodist_’,and‘nobase_’.These prefixes are explained later(see Section9.4[Program and Library Variables],page28).2.4How derived variables are namedSometimes a Makefile variable name is derived from some text the maintainer sup-plies.For instance,a program name listed in‘_PROGRAMS’is rewritten into the name of a ‘_SOURCES’variable.In cases like this,Automake canonicalizes the text,so that program names and the like do not have to follow Makefile variable naming rules.All characters in the name except for letters,numbers,the strudel(@),and the underscore are turned into underscores when making variable references.For example,if your program is named sniff-glue,the derived variable name would be sniff_glue_SOURCES,not sniff-glue_SOURCES.Similarly the sources for a library named libmumble++.a should be listed in the libmumble___a_SOURCES variable.The strudel is an addition,to make the use of Autoconf substitutions in variable names less obfuscating.2.5Variables reserved for the userSome Makefile variables are reserved by the GNU Coding Standards for the use of the “user”–the person building the package.For instance,CFLAGS is one such variable.Sometimes package developers are tempted to set user variables such as CFLAGS because it appears to make their job easier–they don’t have to introduce a second variable into every target.However,the package itself should never set a user variable,particularly not to include switches which are required for proper compilation of the package.Since these variables are documented as being for the package builder,that person rightfully expects to be able to override any of these variables at build time.To get around this problem,automake introduces an automake-specific shadow variable for each userflag variable.(Shadow variables are not introduced for variables like CC,where they would make no sense.)The shadow variable is named by prepending‘AM_’to the user variable’s name.For instance,the shadow variable for YFLAGS is AM_YFLAGS.2.6Programs automake might requireAutomake sometimes requires helper programs so that the generated‘Makefile’can do its work properly.There are a fairly large number of them,and we list them here.ansi2knr.cansi2knr.1These twofiles are used by the automatic de-ANSI-fication support(see Sec-tion9.13[ANSI],page39).compile This is a wrapper for compilers which don’t accept both‘-c’and‘-o’at the same time.It is only used when absolutely required.Such compilers are rare. config.guessconfig.subThese programs compute the canonical triplets for the given build,host,or target architecture.These programs are updated regularly tosupport new architectures andfix probes broken by changes in new kernelversions.You are encouraged to fetch the latest versions of thesefiles fromftp:///gnu/config/before making a release.depcomp This program understands how to run a compiler so that it will generate not only the desired output but also dependency information which is then used bythe automatic dependency tracking feature.elisp-compThis program is used to byte-compile Emacs Lisp code.install-shThis is a replacement for the install program which works on platforms whereinstall is unavailable or unusable.mdate-sh This script is used to generate a‘version.texi’file.It examines afile and prints some date information about it.missing This wraps a number of programs which are typically only required by main-tainers.If the program in question doesn’t exist,missing prints an informativewarning and attempts tofix things so that the build can continue. mkinstalldirsThis works around the fact that mkdir-p is not portable.py-compileThis is used to byte-compile Python scripts.texinfo.texNot a program,thisfile is required for make dvi,make ps and make pdf to workwhen Texinfo sources are in the package.ylwrap This program wraps lex and yacc and ensures that,for instance,multiple yacc instances can be invoked in a single directory in parallel.3Some example packages3.1A simple example,start tofinishLet’s suppose you justfinished writing zardoz,a program to make your headfloat from vortex to vortex.You’ve been using Autoconf to provide a portability framework,but your ‘Makefile.in’s have been ad-hoc.You want to make them bulletproof,so you turn to Automake.Thefirst step is to update your‘configure.in’to include the commands that automake needs.The way to do this is to add an AM_INIT_AUTOMAKE call just after AC_INIT: AC_INIT(zardoz,1.0)AM_INIT_AUTOMAKE...Since your program doesn’t have any complicating factors(e.g.,it doesn’t use gettext, it doesn’t want to build a shared library),you’re done with this part.That was easy!Now you must regenerate‘configure’.But to do that,you’ll need to tell autoconf how tofind the new macro you’ve used.The easiest way to do this is to use the aclocal program to generate your‘aclocal.m4’for you.But wait...maybe you already have an ‘aclocal.m4’,because you had to write some hairy macros for your program.The aclocal program lets you put your own macros into‘acinclude.m4’,so simply rename and then run:mv aclocal.m4acinclude.m4aclocalautoconfNow it is time to write your‘Makefile.am’for zardoz.Since zardoz is a user program, you want to install it where the rest of the user programs go:bindir.Additionally,zardoz has some Texinfo documentation.Your‘configure.in’script uses AC_REPLACE_FUNCS,so you need to link against‘@LIBOBJS@’.So here’s what you’d write:bin_PROGRAMS=zardozzardoz_SOURCES=main.c head.c float.c vortex9.c gun.czardoz_LDADD=@LIBOBJS@info_TEXINFOS=zardoz.texiNow you can run automake--add-missing to generate your‘Makefile.in’and grab any auxiliaryfiles you might need,and you’re done!3.2A classic programGNU hello is renowned for its classic simplicity and versatility.This section shows how Automake could be used with the GNU Hello package.The examples below are from thelatest beta version of GNU Hello,but with all of the maintainer-only code stripped out,as well as all copyright comments.Of course,GNU Hello is somewhat more featureful than your traditional two-liner.GNU Hello is internationalized,does option processing,and has a manual and a test suite.Here is the‘configure.in’from GNU Hello:dnl Process this file with autoconf to produce a configure script.AC_INIT(src/hello.c)AM_INIT_AUTOMAKE(hello,1.3.11)AM_CONFIG_HEADER(config.h)dnl Set of available languages.ALL_LINGUAS="de fr es ko nl no pl pt sl sv"dnl Checks for programs.AC_PROG_CCAC_ISC_POSIXdnl Checks for libraries.dnl Checks for header files.AC_STDC_HEADERSAC_HAVE_HEADERS(string.h fcntl.h sys/file.h sys/param.h)dnl Checks for library functions.AC_FUNC_ALLOCAdnl Check for st_blksize in struct statAC_ST_BLKSIZEdnl internationalization macrosAM_GNU_GETTEXTAC_OUTPUT([Makefile doc/Makefile intl/Makefile po/Makefile.in\src/Makefile tests/Makefile tests/hello],[chmod+x tests/hello])The‘AM_’macros are provided by Automake(or the Gettext library);the rest are stan-dard Autoconf macros.The top-level‘Makefile.am’:EXTRA_DIST=BUGS ChangeLog.OSUBDIRS=doc intl po src testsAs you can see,all the work here is really done in subdirectories.The‘po’and‘intl’directories are automatically generated using gettextize;they will not be discussed here.In‘doc/Makefile.am’we see:info_TEXINFOS=hello.texihello_TEXINFOS=gpl.texiThis is sufficient to build,install,and distribute the GNU Hello manual.Here is‘tests/Makefile.am’:TESTS=helloEXTRA_DIST=hello.in testdataThe script‘hello’is generated by configure,and is the only test case.make check will run this test.Last we have‘src/Makefile.am’,where all the real work is done:bin_PROGRAMS=hellohello_SOURCES=hello.c version.c getopt.c getopt1.c getopt.h system.h hello_LDADD=@INTLLIBS@@ALLOCA@localedir=$(datadir)/localeINCLUDES=-I../intl-DLOCALEDIR=\"$(localedir)\"3.3Building true and falseHere is another,trickier example.It shows how to generate two programs(true and false)from the same sourcefile(‘true.c’).The difficult part is that each compilation of ‘true.c’requires different cppflags.bin_PROGRAMS=true falsefalse_SOURCES=false_LDADD=false.otrue.o:true.c$(COMPILE)-DEXIT_CODE=0-c true.cfalse.o:true.c$(COMPILE)-DEXIT_CODE=1-o false.o-c true.cNote that there is no true_SOURCES definition.Automake will implicitly assume that there is a sourcefile named‘true.c’,and define rules to compile‘true.o’and link‘true’. The true.o:true.c rule supplied by the above‘Makefile.am’,will override the Automake generated rule to build‘true.o’.false_SOURCES is defined to be empty—that way no implicit value is substituted.Be-cause we have not listed the source of‘false’,we have to tell Automake how to link the program.This is the purpose of the false_LDADD line.A false_DEPENDENCIES variable, holding the dependencies of the‘false’target will be automatically generated by Automake from the content of false_LDADD.The above rules won’t work if your compiler doesn’t accept both‘-c’and‘-o’.The simplestfix for this is to introduce a bogus dependency(to avoid problems with a parallel make):true.o:true.c false.o$(COMPILE)-DEXIT_CODE=0-c true.cfalse.o:true.c$(COMPILE)-DEXIT_CODE=1-c true.c&&mv true.o false.oAlso,these explicit rules do not work if the de-ANSI-fication feature is used(see Sec-tion9.13[ANSI],page39).Supporting de-ANSI-fication requires a little more work: true._o:true._c false.o$(COMPILE)-DEXIT_CODE=0-c true.cfalse._o:true._c$(COMPILE)-DEXIT_CODE=1-c true.c&&mv true._o false.o As it turns out,there is also a much easier way to do this same task.Some of the above techniques are useful enough that we’ve kept the example in the manual.However if you were to build true and false in real life,you would probably use per-program compilation flags,like so:bin_PROGRAMS=false truefalse_SOURCES=true.cfalse_CPPFLAGS=-DEXIT_CODE=1true_SOURCES=true.ctrue_CPPFLAGS=-DEXIT_CODE=0In this case Automake will cause‘true.c’to be compiled twice,with differentflags. De-ANSI-fication will work automatically.In this instance,the names of the objectfiles would be chosen by automake;they would be‘false-true.o’and‘true-true.o’.(The name of the objectfiles rarely matters.)4Creating a‘Makefile.in’To create all the‘Makefile.in’s for a package,run the automake program in the top level directory,with no arguments.automake will automaticallyfind each appropriate ‘Makefile.am’(by scanning‘configure.in’;see Chapter5[configure],page12)and gen-erate the corresponding‘Makefile.in’.Note that automake has a rather simplistic view of what constitutes a package;it assumes that a package has only one‘configure.in’,at the top.If your package has multiple‘configure.in’s,then you must run automake in each di-rectory holding a‘configure.in’.(Alternatively,you may rely on Autoconf’s autoreconf, which is able to recurse your package tree and run automake where appropriate.) You can optionally give automake an argument;‘.am’is appended to the argument and the result is used as the name of the inputfile.This feature is generally only used to au-tomatically rebuild an out-of-date‘Makefile.in’.Note that automake must always be run from the topmost directory of a project,even if being used to regenerate the‘Makefile.in’in some subdirectory.This is necessary because automake must scan‘configure.in’,and because automake uses the knowledge that a‘Makefile.in’is in a subdirectory to change its behavior in some cases.Automake will run autoconf to scan‘configure.in’and its dependencies (‘aclocal.m4’),therefore autoconf must be in your PATH.If there is an AUTOCONF variable in your environment it will be used instead of autoconf,this allows you to select a particular version of Autoconf.By the way,don’t misunderstand this paragraph:Automake runs autoconf to scan your‘configure.in’,this won’t build‘configure’and you still have to run autoconf yourself for this purpose.automake accepts the following options:‘-a’‘--add-missing’Automake requires certain commonfiles to exist in certain situations;for in-stance‘config.guess’is required if‘configure.in’runs AC_CANONICAL_HOST.Automake is distributed with several of thesefiles(see Section2.6[AuxiliaryPrograms],page5);this option will cause the missing ones to be automaticallyadded to the package,whenever possible.In general if Automake tells you afile is missing,try using this option.By default Automake tries to make asymbolic link pointing to its own copy of the missingfile;this can be changedwith--copy.‘--libdir=dir’Look for Automake datafiles in directory dir instead of in the installationdirectory.This is typically used for debugging.‘-c’‘--copy’When used with--add-missing,causes installedfiles to be copied.The default is to make a symbolic link.‘--cygnus’Causes the generated‘Makefile.in’s to follow Cygnus rules,instead of GNUor Gnits rules.For more information,see Chapter22[Cygnus],page63.‘-f’‘--force-missing’When used with--add-missing,causes standardfiles to be reinstalled even ifthey already exist in the source tree.This involves removing thefile from thesource tree before creating the new symlink(or,with--copy,copying the newfile).‘--foreign’Set the global strictness to‘foreign’.For more information,see Section2.2[Strictness],page2.‘--gnits’Set the global strictness to‘gnits’.For more information,see Chapter21 [Gnits],page62.‘--gnu’Set the global strictness to‘gnu’.For more information,see Chapter21[Gnits], page62.This is the default strictness.‘--help’Print a summary of the command line options and exit.‘-i’‘--ignore-deps’This disables the dependency tracking feature in generated‘Makefile’s;seeSection9.14[Dependencies],page40.‘--include-deps’This enables the dependency tracking feature.This feature is enabled by de-fault.This option is provided for historical reasons only and probably shouldnot be used.‘--no-force’Ordinarily automake creates all‘Makefile.in’s mentioned in‘configure.in’.This option causes it to only update those‘Makefile.in’s which are out of datewith respect to one of their dependents.‘-o dir’‘--output-dir=dir’Put the generated‘Makefile.in’in the directory dir.Ordinarily each‘Makefile.in’is created in the directory of the corresponding‘Makefile.am’.This option is deprecated and will be removed in a future release.‘-v’‘--verbose’Cause Automake to print information about whichfiles are being read or cre-ated.‘--version’Print the version number of Automake and exit.‘-W CATEGORY’‘--warnings=category’Output warnings falling in category.category can be one of:‘gnu’warnings related to the GNU Coding Standards(see section“Top”in The GNU Coding Standards).‘obsolete’obsolete features or constructions‘portability’portability issues(e.g.,use of Make features which are known notportable)‘syntax’weird syntax,unused variables,typos‘unsupported’unsupported or incomplete features‘all’all the warnings‘none’turn offall the warnings‘error’treat warnings as errorsA category can be turned offby prefixing its name with‘no-’.For instance‘-Wno-syntax’will hide the warnings about unused variables.The categories output by default are‘syntax’and‘unsupported’.Additionally,‘gnu’is enabled in‘--gnu’and‘--gnits’strictness.‘portability’warnings are currently disabled by default,but they will beenabled in‘--gnu’and‘--gnits’strictness in a future release.The environment variable‘WARNINGS’can contain a comma separated list ofcategories to enable.It will be taken into account before the command-lineswitches,this way‘-Wnone’will also ignore any warning category enabled by‘WARNINGS’.This variable is also used by other tools like autoconf;unknowncategories are ignored for this reason.5Scanning‘configure.in’Automake scans the package’s‘configure.in’to determine certain information about the package.Some autoconf macros are required and some variables must be defined in ‘configure.in’.Automake will also use information from‘configure.in’to further tailor its output.Automake also supplies some Autoconf macros to make the maintenance easier.These macros can automatically be put into your‘aclocal.m4’using the aclocal program. 5.1Configuration requirementsThe one real requirement of Automake is that your‘configure.in’call AM_INIT_ AUTOMAKE.This macro does several things which are required for proper Automake op-eration(see Section5.6[Macros],page17).Here are the other macros which Automake requires but which are not run by AM_INIT_ AUTOMAKE:AC_CONFIG_FILESAC_OUTPUTAutomake uses these to determine whichfiles to create(see section“CreatingOutput Files”in The Autoconf Manual).A listedfile is considered to be anAutomake generated‘Makefile’if there exists afile with the same name and the‘.am’extension appended.Typically,AC_CONFIG_FILES([foo/Makefile])willcause Automake to generate‘foo/Makefile.in’if‘foo/Makefile.am’exists.Other listedfiles are treated differently.Currently the only difference is thatan Automake‘Makefile’is removed by make distclean,while otherfiles areremoved by make clean.5.2Other things Automake recognizesEvery time Automake is run it calls Autoconf to trace‘configure.in’.This way it can recognize the use of certain macros and tailor the generated‘Makefile.in’appropriately. Currently recognized macros and their effects are:AC_CONFIG_HEADERSAutomake will generate rules to rebuild these headers.Older versions ofAutomake required the use of AM_CONFIG_HEADER(see Section5.6[Macros],page17);this is no longer the case today.。
Check—强大的c语言单元测试框架Autotools的机理和解决过程
Check—强大的c语言单元测试框架Autotools的机理和解决过程Check —强大的c语言单元测试框架C 语言的单元测试框架,上WikiPedia可以查到很多。
经过一番比较之后,选定check作为c 语言的单元测试框架。
Check 最主要的优点是对于每一个测试用例的运行都fork 一个子进程,这么做的原因是因为 C 语言的独特性:其它语言如Java,Python,Ruby等,单元测试出错最多不过是抛出异常? C 语言如果指针操作错误,乱指一气,可是会coredump 的。
测试框架因此直接退出,用户是看不到任何返回的,只有郁闷的coredumpCheck 的单元测试运行在fork 的子进程中,可以避免测试框架由于coredump 而崩溃,优点显而易见但是在Debian 上安装check,示例代码竟然没有办法编译通过,陷入忙等待,显然是陷入了一个死循环。
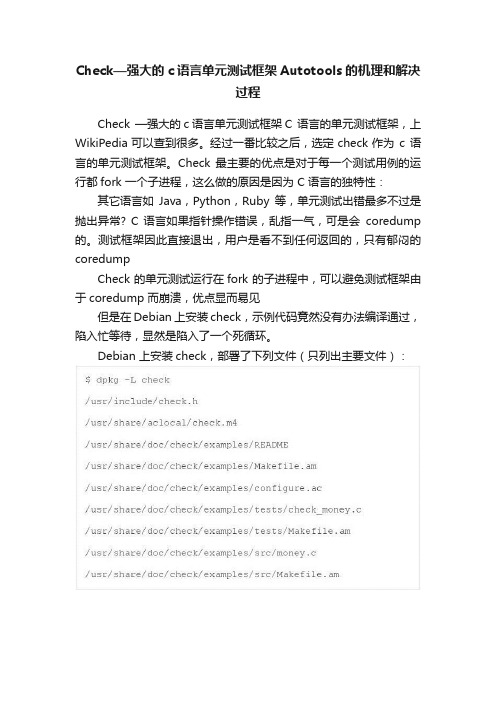
Debian 上安装check,部署了下列文件(只列出主要文件):将示例拷贝到工作目录,运行,陷入可怕的死循环!CPU 占用100%:我们在运行autoreconf 时间使用了-v 参数,看到发生死循环是在运行aclocal 命令时。
怎么办呢?着急的用户,看这里将configure.ac 中的如下内容修改为:之后再参照README 中的说明执行就可以了:Autotools 的机理和解决过程为什么出错以及为什么这么做就OK 了呢?如果要说清楚,要了解autoconf, automake, aclocal 等,即autotools 的机理。
可以参考王胜的这个博文:《autotools系列工具—-自动生成Makefile》见附件下面是解决过程,其中饶了不少弯路在遇到这个问题时,首先想到的是生成新的configure.ac 文件,取代示例中的configure.ac 文件再执行aclocal ,不再死锁,但是也没有任何新文件生成比较新旧的configure.ac ,发现当注释掉AM_PATH_CHECK() 之后,便不再死锁AM_PATH_CHECK 是什么呢?我们从check 软件包的部署文件中,我们看到这个文件:/usr/share/aclocal/check.m4我们打开这个文件(/usr/share/aclocal/check.m4),看到其中只包含了一个宏AM_PATH_CHECK 的宏定义。
GNU开发工具链介绍

xlanchen@2007.5.22
Embedded Operating Systems
8
GNU Tools—gcc
gcc是一个强大的工具集合,它包含了预处理 器、编译器、汇编器、链接器等组件。它会在 需要的时候调用其他组件。 输入文件的类型和传递给gcc的参数决定了gcc 调用具体的哪些组件。 对于开发者,它提供的足够多的参数,可以让 开发者全面控制代码的生成,这对嵌入式系统 级的软件开发非常重要
Embedded Operating Systems
39
35
使用ar建立库文件(1)
源程序add.c和minus.c
xlanchen@2007.5.22
Embedded Operating Systems
36
使用ar建立库文件(2)
编译成目标文件 建立库文件 Ar的rv参数的说明: r:将多个文件组成一个文件 v:输出信息
将库文件拷贝到/usr/lib目录下
Embedded Operating Systems
18
3、编译成目标代码
汇编代码目标代码
gcc –x assembler –c gcctest.s
直接编译成目标代码
gcc –c gcctest.c
使用汇编器生成目标代码
as –o gcctest.o gcctest.s
xlanchen@2007.5.22
xlanchen@2007.5.22
Embedded Operating Systems
37
库文件使用举例 在代码中使用Add和Minus函数
xlanchen@2007.5.22
Embedded Operating Systems
linux下更新GTK+到3.x

linux下更新GTK+到3.x以Centos 6.0(内核2.6.32)1、所需要的库及一些必要的环境C 编译器(sudo yum install gcc)C++编译器g++(sudo yum install gcc-c++)X 窗口系统库(sudo yum install libXext)pkg-config 工具(网站)GNU make 工具(网站)JPEG、PNG 以及TIFF 图形库(sudo yum install libjpeg-devellibtiff-devellibpng-devel)FreeType(网站)fontconfig 库(网站)XInput库(sudo yum install libXi-devel)如果没有装这个会在编译GTK+时失败。
提示找不到xinput.hGNU libiconv 库(当系统上没有iconv() 函数的时候需要)(网站)GNU gettext 软件包(当系统上没有gettext() 函数的时候需要)(网站)GLib 库ATK 库Cairo 库Pango 库Gdk-pixbuf库GTK+ 库2、具体说明GTK+和最后6库关系密切,更新也较快,通常一个GTK+ 的版本会依赖于这些库的一些特定的版本。
也就是说,GTK+ 的安装实际上主要是GLib、Atk、Cairo、Gdk-pixbuf、Pango 和Gtk+ 这六个库的安装。
另外pkg-config的变动较大,新版本的GTK+ 的安装需要新版pkg-config的支持,否则可能会使安装过程失败。
因此,要在安装GTK+ 之前检查pkg-config的版本号。
如果版本过低,一定要对它进行版本更新。
至于GTK+ 安装时对pkg-config的最低版本要求,可以在GTK+ 下载目录的dependencies 目录中找到对应的pkg-config软件包,从软件包上提供的版本信息中获得确认。
3、安装准备检查软件是否存在获得软件的版本号,从中可以了解软件的新旧程度,是决定软件是否需要更新的依据软件包大致可分为两种类型:程序和库。
- 1、下载文档前请自行甄别文档内容的完整性,平台不提供额外的编辑、内容补充、找答案等附加服务。
- 2、"仅部分预览"的文档,不可在线预览部分如存在完整性等问题,可反馈申请退款(可完整预览的文档不适用该条件!)。
- 3、如文档侵犯您的权益,请联系客服反馈,我们会尽快为您处理(人工客服工作时间:9:00-18:30)。
GNU AutoTools In a Nutshell
Makefile’s way to develop
➢ 三元组(Target, Dependency, Command) ➢ Target : Dep1 Dep2
<TAB>Cmd1 <TAB>Cmd2 [Blank Line]
GNU AutoTools In a Nutshell
小结
➢ Autoconf:根据用户提供的configure.in文件,生成一个名 为configure的脚本。该脚本可以搜集有关移植性的平台相 关信息,这些信息被用来生成Makefiles,配置头文件和其 它平台相关的文件。
➢ Automake:根据用户提供的一个高层次的生成规则 Makefile.am,生成Makefile文件的模板Makefile.in。 Automake生成的Makefiles符合GNU的Makefile标准,用户 无需再手工编写Makefile文件。
➢ 各种工具分别开发,但是协同工作的很好。 比如autoconf, automake, libtool等等。
➢ 但是,连开发者自己也承认,这套工具虽 然好用,但是学习曲线很陡峭。
➢ 困难在于:一套新的思路和习惯,一套自 定义的宏和规则,使用者的交流☺
GNU AutoTools In a Nutshell
GNU AutoTools In a Nutshell
Hello World! 演示
——如何杀鸡用牛刀
GNU AutoTools In a Nutshell
来龙去脉
autoscan
edit
aclocal
configure.scan
configure.in
aclocal.m4
automake
Makefile.am
GNU AutoTools In a Nutshell
Makefile.am(5)
➢ 尽量用相对路径引用源程序的位置,以下 两个变量是预定义好的:
$(top_srcdir)无论在哪个目录层次,该变量定 义了包含src目录的目录位置,用于引用源程序;
$(top_builddir)定义了生成目标文件上最上层目 录,用于引用.o等编译出来的目标文件。
➢ configure脚本完成autoconf与automake的初始化 工作,为不同的平台定义相应的宏,检测并指定 适当的程序名、库名、结构和常量名等等,指定 要为哪些目录输出Makefile文件。总之,为编译 程序ell
configure.in(2)
GNU AutoTools In a Nutshell
Makefile.am(1)
➢ 一种比Makefile更高层次的规则。只指定要生成 什么目标,它由什么源文件生成,要安装到什么 目录。
➢ Just simple and stupid! ☺ ➢ 可执行文件: bin_PROGRAMS = foo foo_SOURCES = foo1.c foo1.h foo2.c foo_LDADD = foo3.o -lm foo4.a foo_LDFLAGS = -L<lib_path> foo_DEPENDENCIES =
是怎么生成的?
cd foo-1.0 ./configure make
问题2:configure脚本怎么知
(su) make in道s该ta如l何l 生成Makefile
幕后英雄—— GNU Auto Tools: autoconf, automake, libtool, autoscan,
可以通过./configure --prefix=<new_prefix>的方 法覆盖。 其它的预定义目录如:bindir = $(prefix)/bin, libdir = $(prefix)/lib, datadir = $(prefix)/share, sysconfdir = $(prefix)/etc, … ➢ 想定义一个新的安装路径?比如config, 可定义 confdir = $(prefix)/config, 然后conf_DATA = file1 file2,则file1, file2会作为数据文件安装到 $(prefix)/config目录下。
GNU AutoTools In a Nutshell
Makefile.am(2)
➢ 对静态库: lib_LIBRARIES = libfoo.a foo_a_SOURCES = foo_a_LDADD = foo_a_LIBADD = foo_a_LDFLAGS = 只在make时做静态连接用,不安装的库: noinst_LIBRARIES = libfoo.a …… ➢ 对头文件:include_HEADERS = foo.h ➢ 对数据文件:data_DATA = data1 data2
➢ .la库只能连入.lo(使用libtool生成的目标文件) libshell_la_LDADD = xmalloc.lo @LTLIBOBJS@
➢ 传入库的版本号: libshell_la_LDFLAGS = -version-info 1:0:1
➢ 与其它目标文件连接时用LDFLAGS指定连接的方式(默认 是动态方式):-static, --all-static指定静态连接。
打入.tar.gz包,其它文件若要进入.tar.gz包可以用这种办法,比如配
。 置文件, 数据文件等等 SUBDIRS = dir1 dir2 在处理本目录之前要递归处理哪些子目录
GNU AutoTools In a Nutshell
Makefile.am(4)
➢ 标准安装路径 $(prefix) = /usr/local 是所有安装目录的默认前缀,
Makefile.in
autoconf configure
Makefile
GNU AutoTools In a Nutshell
configure.in(1)
➢ 是configure脚本的输入文件,为了解决在不同 unix变种之间移植程序的问题:库名可能不同, 应用程序名可能不同,结构和常量的定义可能不 同……
If configure or make did it, make distclean undoes it.
If make did it, make clean undoes it. If make install did it, make uninstall undoes it. If you did it, make maintainer-clean undoes it.
➢ Libtool:使得生成内存位置无关的代码且让共享库在不同 平台间移成为可能。它可以不依赖autoconf和automake单 独运行,另一方面,automake和libtool可以无缝地集成使 用。
GNU AutoTools In a Nutshell
References
➢ ToolsManual: /~lf/tutorial
……
GNU AutoTools In a Nutshell
configure’s Gifts
➢ configure脚本生成的Makefile中已经带了很 多常用的目标如:check, all, install, uninstall, clean, dist, distcheck, distclean, tags, maintainerclean.
configure.in(3)
5. 检查某些头文件是否存在。 6. 检查Typedefs and structures。 7. 检查Functions。 8. 指定在哪些目录输出Makefile。 Seems troublesome, mmm? Don’t worry,
autoscan will do most of the work for you.
GNU AutoTools In a Nutshell
使用libtool
➢ 在configure.in文件中加上AC_PROG_LIBTOOL宏,如果 原来有AC_PROG_RANLIB宏,删去它。
➢ 在Makefile.am文件中: lib_LTLIBRARIES = libshell_la_SOURCES = object.c subr.c symbol.c 与原来的写法非常相似!
configure.in的八股文 1. 基本初始化部分:包括AC_INIT (必须第
一个出现), AM_INIT_AUTOMAKE(程序包 名,版本号), AC_CONFIG_HEADER 2. 可选宏:如AC_ARG_ENABLE 3. 检测某些程序的存在性 4. 检查程序用到的库
GNU AutoTools In a Nutshell
Hello World – Step by Step
➢ 1. hello.c #include <stdio.h> int main() { printf(“Hello World!\n”); return 0; } ➢ 2. Makefile.am bin_PROGRAMS = hello hello_SOURCES = hello.c ➢ 3. configure.in AC_INIT(hello.c) AM_INIT_AUTOMAKE(hello, 0.1) AC_PROG_CC AC_OUTPUT(Makefile) ➢ 4. aclocal ➢ 5. autoconf ➢ 6. automake --add-missing --foreign ➢ 7. ./configure ➢ 8. make (make install 安装,make dist 产生安装包)
➢ .s1 .s2 :
<TAB>Cmd1
➢ $(var), $<, $@ ➢ ……
