LabVIEW Basic I-中文版 (9)
LabVIEW开发环境及程序设计基础LabVIEW基础入门课件

基本单元 - VI前面板 – 仪器的交互程序框图 – 仪器的功能工具栏
LabVIEW程序设计基础
基本数据类型1
数值型整型有些数据类型的本质也是整形,如枚举型浮点型可以更改数据表达方式决定其占用的存储字节数及数值表达方式
强制数据类型转换
通常,函数返回占用字节数较多的数据类型为提高程序执行效率, 尽量避免自动强制转换
强制转换点
基本数据类型2
布尔型注意: 前面板对应的布尔控件有六种机械动作可选可通过范例区别六种机械动作的不同
基本数据类型3
字符串前面板控件可现实不同的显示方式Normal, ‘\’ Codes, Password 以及 Hex字符串操作函数选板
基本数据类型4
枚举型本质上也可以认为是整型,不过取值范围有限常与条件结构共同使用
理解数据流
哪个节点先执行?A) 加法B) 减法C) 随机数D) 除法E) 正弦
理解数据流 (没有固定答案)
哪个节点先执行?A) 加法 – 可能 B) 减法 – 不可能C) 随机数 – 可能D) 除法 – 可能E) 正弦 – 不可能
一个简单的VI:采集、分析、表达
LabVIEW中的“采集”Express VI
LabVIEW作为编程语言的优势
LabVIEW``Real-Time
LabVIEW Desktop
LabVIEWFPGA
LabVIEWMPU/MCU
支持连接各种硬件,而且支持发布到多种Target
基于数据流的自然思维方式,但同时也支持调用文本语言的代码
一个简单而典型的LabVIEW应用
采集
分析
表达
LabVIEW的出现推动了测试技术的发展
从手工测试迈向自动化测试使仪器和PC得以有效连接有效降低了仪器控制的复杂程度从此以后,软件在测控系统中发挥的作用越来越大
LabVIEW中文教材

计算机虚拟仪器图形编程LabVIEW实验教材北京中科泛华测控技术有限公司目录第一课LABVIEW概述 (4)第一节虚拟仪器(VI)的概念 (4)第二节L AB VIEW的操作模板 (6)工具模板(Tools Palette) (6)控制模板(Controls Palette) (8)功能模板(Functions Palette) (9)第三节创建一个VI程序 (11)1. 前面板 (11)框图程序 (12)从框图程序窗口创建前面板对象 (14)4. 数据流编程 (14)第四节程序调试技术 (15)1. 找出语法错误 (15)2. 设置执行程序高亮 (15)3. 断点与单步执行 (16)4. 探针 (16)第五节练习1-1 (16)第六节把一个VI程序作为子VI程序调用 (20)第七节练习1-2 (21)第八节练习1-3 (24)第九节练习1-4 (26)第十节练习1-5 (29)第二课数据采集 (33)第一节概述 (33)第二节数据采集VI程序的调用方法 (36)第三节模拟输入与输出 (37)练习2-1 (38)第四节波形的采集与产生 (41)练习2-2 (42)第五节扫描多个模拟输入通道 (43)练习2-3 (44)第六节连续数据采集 (45)练习2-4 (46)第三课仪器控制 (48)第一节概述 (48)第二节串行通讯 (48)第三节IEEE488(GPIB)概述 (50)练习3-1 (52)第四节VISA编程 (53)练习3-2 (55)第五节用L AB VIEW编写仪器驱动程序 (58)第六节验证仪器驱动软件 (58)练习3-3 (60)第四课分析软件 (63)第一节概述 (63)第二节、高级分析功能程序 (63)第三节信号产生 (64)练习4-1 (65)第四节信号处理 (66)练习4-2 (67)第五节数字滤波器 (68)练习4-3 (69)第六节曲线拟合 (71)练习4-4 (72)练习4-5 (74)第五课实用工具软件包 (77)第一节概述 (77)第二节常用软件工具箱 (77)第三节分析工具软件 (80)第一课LabVIEW概述第一节虚拟仪器(VI)的概念使用LabVIEW开发平台编制的程序称为虚拟仪器程序,简称为VI。
LabVIEW教程PPT课件

ln(x)
说明 绝对值 反余弦,x弧度 反双曲余弦,x弧度 反正弦 反双曲正弦 反正切函数 反双曲正切 返回大于1的最小整数 余弦积分,x为非负实数 余弦函数 双曲余弦 余切函数 余割函数 指数函数
exp(x)-1 返回小于x的最大整数 返回距x最近的整数 返回0-x间最近的整数
自然对数函数
这对于实现有多个变量的公式来说很有用。否 则需要使用复杂的框图模型。
通过在框中直接键人公式代码来代替创建框图 部分。
2021/3/9
17
公式节点的输入、输出变量
❖ 从公式节点边框上弹出快捷菜单,从中选择Add Input 或 Add Output。
❖ Change to Output可将输入改变为输出,Change to Input可将输出改变为输入。
2021/3/9
23
局部变量的创建和使用方法
❖ 局部变量的创建既可以通过图示右键弹出菜 单获得,也可以在功能模板上选择 Function/Structures/Local Variable将其拖到 框图上,得到一个代“?”的图标,再将其 与框图中已有的变量建立关联。
2021/3/9
24
4.8 局部变量和全局变量
1. 掌握循环结构的自动索引功能和函数 的多态性操作方法。
2021/3/9
32
5.1 LabVIEW的数据类型
整形数 浮点数 逻辑量 字符串 文件路径
2021/3/9
兰色 橙色 绿色 粉色 青色
33
5.2 数值类型
❖ 最基本的数据类型是数值类型,这是一种标量值, 通常包括一个整型值或实型数值(浮点)。
2021/3/9
9
建立循环结Leabharlann 演示2021/3/910
LabVIEW Basic I-中文版 (8)

感謝你購買 LabVIEW Basics I: Introduction 課程。
當你完成這本手冊中的練習之後,你就可以開始發展應用程式。
這本課程手冊以及隨附的軟體是供三天的LabVIEW Basics I: Introduction 實習課程使用。
如果您在購買本課程後的九十天內完成註冊,可以抵扣相關課程的註冊費用。
請前往 /training ,了解線上課程日程表,syllabi,訓練中心,以及課程註冊的資訊。
ጯϠ͘ΊLabVIEW Basics I: Introduction 課程是一系列課程的一部份,設計目標是為了建立你使用LabVIEW的熟練度,並協助你預備考試,以期成為NI Certified LabVIEW Developer以及NI Certified LabVIEWArchitect。
下圖說明LabVIEW訓練課程中的各項科目。
請光臨/training,取得關於NI Certification的資訊。
ጯϠ͘Ί˘ăᙯٺώ͘Ί這本課程教導你如何使用LabVIEW來發展測試及計量、資料擷取、儀器控制、資料記錄、數據分析,以及報表製作的應用程式。
這本課程手冊假設你已經熟悉Windows、Mac OS或UNIX的操作,而且你擁有使用流程圖或方塊圖撰寫運算法的經驗。
課程內容分成不同的課,每一課介紹一項主題或一組主題。
每一課包括下列內容:.簡介,說明課程目標及你將學習的功能.介紹課程中的主題.一些加強了解主題的練習。
有一些課程中包括選擇性及挑戰性練習,或是一些額外的練習,若是時間許可,可以完成這些作業。
.摘要,列舉該課所教導的重要概念及技巧。
本手冊中的數項練習使用以下的National Instruments硬體產品之一:.插入模組型態的多功能資料擷取(data acquisition, DAQ) 設備,連接至含有溫度感測器、函數產生器及LED的DAQ SignalAccessory.GPIB界面,連接至NI Instrument Simulator如果你沒有這些硬體,你仍然可以完成大部份的練習。
LabVIEW Basic I-中文版 (6)

本課說明如何使用陣列,將同一種類型的資料編成群組。
ଋጯົĈA.關於陣列B.如何使用自動索引(auto-indexing),以迴圈建立陣列C.如何使用Array函數D.關於多型(polymorphism)第4課ੱЕ˘ăੱЕ)Bssbz*陣列將同一種類型的資料元件組成群組。
陣列包括元件及維度(dimension)。
元件指構成陣列的資料。
維度指陣列的長、高或深度。
陣列可以擁有一個或多個維度,最多可達231個-在記憶體許可的情況下,每個維度中只有一個元件。
你可以建立數值、布林、路徑、字串、波形,以及叢集資料類型的陣列。
當你使用大量類似的資料時,以及在進行重複的運算時,就可以考慮使用陣列。
陣列很適於儲存你從波形取得的資料,或是在陣列中產生的資料(迴圈每次執行,都會產生陣列的一個元件)。
你不能建立由陣列構成的陣列。
但是你可以建立由叢集構成的陣列,每個叢集中包括一個或多個陣列。
請參閱第五課「叢集」,取得更多關於叢集的資料。
陣列元件依次序排列。
陣列使用索引,讓你得以迅速存取任何一個特定的元件。
索引從零開始,也就是說它位於0至n – 1的範圍內,n是陣列中元件的數目。
舉例來說,如果你建立一個太陽系中行星的陣列,因為有九個行星,n = 9,因此索引範圍為0至8。
地球是第三個行星,因此它的索引值是2。
ޙϲੱЕଠטጡ̈́ϯጡ要建立如以下範例中的陣列控制器或指示器,請在Controls»AllControls»Array & Cluster面板中選擇一個陣列,將它置於人機介面上,並將控制器或指示器拖拉至陣列邊框中。
如果你試圖將不能使用的控制器或指示器拖拉至陣列邊框中(例如XY圖表),將無法把控制器或指示器置入陣列邊框中。
1索引顯示2元件顯示你必須在陣列邊框中加入物件,才能在程式區中使用陣列,否則陣列接頭呈黑色,並且內有一個空的括號。
第4課ੱЕ˟ჯੱЕ)Uxp.Ejnfotjpobm!Bssbz*二維陣列將元件儲存在格柵(grid)裡。
Labview图形化编程语言中英文对照外文翻译文献

Labview图形化编程语⾔中英⽂对照外⽂翻译⽂献中英⽂资料外⽂翻译National Instruments LabVIEW: A Programming Environment for Laboratory Automation and Measurement .National Instruments LabVIEW is a graphical programming language that has its roots in automation control and data acquisition. Its graphical representation, similar to a process flow diagram, was created to provide an intuitive programming environment for scientists and engineers. The language has matured over the last 20 years to become a general purpose programming environment. LabVIEW has several key features which make it a good choice in an automation environment. These include simple network communication, turnkey implementation of common communication protocols (RS232, GPIB, etc.), powerful toolsets for process control and data fitting, fast and easy user interface construction, and an efficient code execution environment. We discuss the merits of the language and provide an example application suite written in-house which is used in integrating and controlling automation platforms.Keywords: NI LabVIEW; graphical programming; system integration; instrument control; component based architecture; robotics; automation; static scheduling; dynamic scheduling; databaseIntroductionCytokinetics is a biopharmaceutical company focused on the discovery of small molecule therapeutics that target the cytoskeleton. Since inception we have developed a robust technology infrastructure to support our drug discovery efforts. The infrastructure provides capacity to screen millions of compounds per year in tests ranging from multiprotein biochemical assays that mimic biological function to automated image-based cellular assays with phenotypic readouts. The requirements for processing these numbers and diversity of assays have mandated deployment of multiple integrated automation systems. For example, we have several platforms for biochemical screening, systems for live cell processing, automated microscopy systems, and an automated compound storage and retrieval system. Each in-house integrated system is designed around a robotic arm and contains an optimal set of plate-processing peripherals (such as pipetting devices, plate readers, and carousels) depending on its intended range of use. To create the most flexible, high performance, and cost-effective systems, we have taken the approach of building our own systems in-house. This has given us the ability to integrate the most appropriate hardware and software solutions regardless of whether they are purchased from a vendor or engineered de novo, and hence we can rapidly modify systems as assay requirements change.To maximize platform consistency and modularity, each of our 10 automated platforms is controlled by a common, distributed application suite that we developed using National Instruments (NI) LabVIEW. This application suite described in detail below, enables our end users to create and manage their own process models (assayscripts) in a common modeling environment, to use these process models on any automation system with the required devices, and allows easy and rapid device reconfiguration. The platform is supported by a central Oracle database and can run either statically or dynamically scheduled processes.NI LabVIEW BackgroundLabVIEW, which stands for Laboratory Virtual Instrumentation Engineering Workbench is a graphical programming language first released in 1986 by National Instruments (Austin, TX). LabVIEW implements a dataflow paradigm in which the code is not written, but rather drawn or represented graphically similar to a flowchart diagram Program execution follows connector wires linking processing nodes together. Each function or routine is stored as a virtual instrument (VI) having three main components: the front panel which is essentially a form containing inputs and controls and can be displayed at run time, a block diagram where the code is edited and represented graphically, and a connector pane which serves as an interface to the VI when it is imbedded as a sub-VI.The top panel (A) shows the front panel of the VI. Input data are passed through “Controls” which are shown to the left. Included here are number inputs, a file path box, and a general error propagation cluster. When the VI runs, the “Indicator”outputs on the right of the panel are populated with output data. In this example, data include numbers (both as scalar and array), a graph, and the output of the error cluster. In the bottom panel (B) the block diagram for the VI is shown. The outer case structure executes in the “No Error” case (VIs can make internal errors o r if called as a sub-VI the caller may propagate an error through the connector pane).Unlike most programming languages, LabVIEW compiles code as it is created thereby providing immediate syntactic and semantic feedback and reducing the time required for development and testing.2Writing code is as simple as dragging and droppingfunctions or VIs from a functions palette onto the block diagram within process structures (such as For Loops, or Case Structures) and wiring terminals (passing input values, or references). Unit testing is simplified because each function is separately encapsulated; input values can be set directly on the front panel without having to test the containing module or create a separate test harness. The functions that generate data take care of managing the storage for the data.NI LabVIEW supports multithreaded application design and executes code in an inherently parallel rather than sequential manner; as soon as a function or sub-VI receives all of its required inputs, it can begin execution. In Figure 1b, all the sub-VIs receive the array input simultaneously as soon as the For Loop is complete, and thus they execute in parallel. This is unique from a typical text-based environment where the control flows line by line within a function. When sequential execution is required, control flow can be enforced by use of structures such as Sequences, Events, or by chaining sub-VIs where output data from one VI is passed to the input of the next VI.Similar to most programming languages, LabVIEW supports all common data types such as integers, floats, strings, and clusters (structures) and can readily interface with external libraries, ActiveX components, and .NET framework. As shown in Figure 1b, each data type is graphically represented by wires of different colors and thickness. LabVIEW also supports common configuration management applications such as Visual SourceSafe making multideveloper projects reasonable to manage.Applications may be compiled as executables or as Dynamic Link Libraries (DLLs) that execute using a run-time engine similar to the Java Runtime Environment. The development environment provides a variety of debugging tools such as break-points, trace (trace), and single-step. Applications can be developed using a variety of design patterns such as Client-Server, Consumer-Producer, andState-Machine. There are also UML (Unified Modeling Language) modeling tools that allow automated generation of code from UML diagrams and state diagrams.Over the years, LabVIEW has matured into a general purpose programming language with a wider user base.NI LabVIEW as a Platform for Automation and InstrumentationOur experience creating benchtop instrumentation and integrated automation systems has validated our choice of LabVIEW as an appropriate tool. LabVIEW enables rapid development of functionally rich applications appropriate for both benchtop applications and larger integrated systems. On many occasions we have found that project requirements are initially ill defined or change as new measurements or new assays are developed.. There are several key features of the language that make it particularly useful in an automation environment for creating applications to control and integrate instrumentation, manage process flow, and enable data acquisition.Turnkey Measurement and Control FunctionLabVIEW was originally developed for scientists and engineers .The language includes a rich set of process control and data analysis functions as well as COM, .NET, and shared DLL support. Out of the box, it provides turnkey solutions to a variety of communication protocols including RS232, GPIB, and TCP/IP. Control structures such as timed While Loops allow synchronized and timed data acquisition from a variety of hardware interfaces such as PCI, USB, and PXI. DataSocket and VI ServerDeployment of an integrated system with multiple control computers requires the automation control application to communicate remotely with instrument drivers existing on remote computers. LabVIEW supports a distributed architecture by virtue of enabling seamless network communication through technologies such as VI Server and DSTP (data sockets transfer protocol). DSTP is an application layer protocol similar to http based on Transmission Control Protocol/Internet Protocol (TCP/IP). Data sockets allow easy transfer of data between remote computers with basic read and write functions. Through VI server technology, function calls can be made to VIs residing on remote computers as though they are residing on the local computer. Both Datasockets and VI server can be configured to control accesses privileges.Simple User Interface (UI) ImplementationIn addition to common interface controls such as text boxes, menu rings, and check-boxes, LabVIEW provides a rich set of UI controls (switches, LEDs, gauges, array controls, etc.) that are pertinent to laboratory equipment. These have their origins in LabVIEWs laboratory roots and help in development of interfaces which give scientists a clear understanding of a system's state. LabVIEW supports UI concepts including subpanels (similar to the Multiple Document Interface), splitter bars, and XControls (analogous to OCX controls).Multithreaded Programming EnvironmentThe inherent parallel environment of LabVIEW is extremely useful in the control of laboratory equipment. Functions can have multiple continuous While Loops where one loop is acquiring data rapidly and the other loop processes the data at a much slower rate. Implementing such a paradigm in other languages requires triggering an independent function thread for each process and developing logic to manage synchronization. Through timed While Loops, multiple independent While Loops can be easily synchronized to process at a desired period and phase relative to one another. LabVIEW allows invoking multiple instances of the same function witheach maintaining its own data space. For instance, we could drag many instances of the Mean sub-VI onto the block diagramin Figure 1b and they would all run in parallel, independent of one another. To synchronize or enforce control flow within the dataflow environment, LabVIEW also provides functions such as queues, semaphores, and notification functions.NI LabVIEW Application Example: The Open System Control Architecture (OSCAR)OSCAR is a LabVIEW-based (v7.1) automation integration framework and task execution engine designed and implemented at Cytokinetics to support application development for systems requiring robotic task management. OSCAR is organized around a centralized Oracle database which stores all instrumentation configuration information used to logically group devices together to create integrated systems (Fig. 2). The database also maintains Process Model information from which tasks and parameters required to run a particular process on a system can be generated and stored to the database. When a job is started, task order and parameter data are polled by the Execution Engine which marshals tasks to each device and updates task status in the database in real time. Maintaining and persisting task information for each system has two clear benefits. It allows easy job recovery in the event of a system error, and it also provides a process audit trail that can be useful for quality management and for troubleshooting process errors or problems.Each OSCAR component is distributed across the company intranet and communicates with a central database. Collections of physical devices controlled through OSCAR Instrument packages (OIP) make up systems. Users interact with systems through one of the several applications built on OSCAR. Each application calls the RTM which marshals tasks from the database to each OIP. OSCAR has sets of tools for managing system configurations, creating Process Models, monitoring running processes, recovering error-state systems, and managing plate inventory in storage devices.OSCAR uses a loosely coupled distributed component architecture, enabled in large part by LabVIEWs DSTP and remote VI technologies that allow system control to be extended beyond the confines of the traditional central control CPU model. Any networked computer or device can be integrated and controlled in an OSCAR system regardless of its physical location. This removes the proximity constraints of traditional integrated systems and allows for the utilization of remote data crunchers, devices, or even systems. The messaging paradigm used shares many similarities with current Service Oriented Architectures or Enterprise Service Bus implementations without a lot of required programming overhead or middleware; a centralized server is not required to direct the XML packets across the network. An additional benefit to this loosely coupled architecture is the flexibility in front-end application design. OSCAR encapsulates and manages all functionality related to task execution and device control, which frees the developer to focus on the unique requirements of a given application. For example, an application being created for the purpose of compound storage and retrieval can be limited in scope to requirements such as inventory management and LIMS integration rather than device control, resource allocation, and task synchronization.The OSCAR integration framework consists of multiple components that enable device and system configuration, process modeling, process execution, and process monitoring. Below are descriptions of key components of the framework. Integration PlatformThe Oscar Instrument Package (OIP) is the low level control component responsible for communicating with individual devices. It can support any number of devices on a system (including multiple independent instances of the same type of device) and communicates to the Runtime Manager (RTM) via serialized XMLstrings over DSTP. This allows the device controller and RTM components to exist on separate networked computers if necessary. Additionally, the OIP controller communicates with a device instance via LabVIEW remote VI calls which provide a lower level of distribution and allow the device drivers to exist on a separate networked computer from the controller. At Cytokinetics, we currently support approximately 100 device instances of 30 device types which are distributed across 10 integrated systems.System ManagementAn OSCAR system is a named collection of device instances which is logically represented in the database. The interface for each device (commands and parameters) is stored in the database along with the configuration settings for each device instance (i.e., COM port, capacity). The System Manager component provides the functionality to easily manipulate this information (given appropriate permissions). When a physical device is moved from one system to another, or a processing bottleneck alleviated by addition of another similar device, system configuration information is changed without affecting the processes that may be run on the system.Process ModelingA process model is the logical progression of a sequence of tasks. For example, a biochemical assay might include the following steps (1) remove plate from incubator, (2) move plate to pipettor, (3) add reagent, (4) move plate to fluorescent reader, (5) read plate, and (6) move plate to waste. The Process Modeler component allows the end user to choose functions associated with devices and organize them into a sequence of logical tasks. The resulting process model is then scheduled via a static schedule optimization algorithm or saved for dynamic execution (Fig. 3). Aprocess model is not associated with a physical system, but rather a required collection of devices. This has two importantbenefits: (1) the scientist is free to experiment with virtual system configurations to optimize the design of a future system or the reconfiguration of an existing system, and (2) any existing process model can be executed on any system equipped with the appropriate resources.The top panel (A) shows the Process Schedule Modeler, an application that graphically displays statically scheduled processes. Each horizontal band represents a task group which is the collection of required tasks used by a process; tasks are color coded by device. The bottom panel (B) shows the UI from the Automated Imaging System application. The tree structure depicts the job hierarchy for an imaging run. Jobs (here AIS_Retrieval and AIS_Imaging) are composed of task groups. As the systems runs, the tasks in the task group are executed and their status is updated in the database.Process ExecutionProcess execution occurs by invoking the OSCAR RTM. The RTM is capable of running multiple differing processes on a system at the same time allowing multiple job types to be run in parallel. The RTM has an application programming interface (API) which allows external applications to invoke its functionality and consists of two main components, the Task Generator Module (TGM) and the Execution Engine. External applications invoke an instance of a Process Model through the TGM at which point a set of tasks and task parameters are populated in the OSCAR database. The Execution Engine continually monitors the database for valid tasks and if a valid task is found it is sent to the appropriate device via the OIP. The OSCAR system supports running these jobs in either a static or dynamic mode. For processes which must meet strict time constraints (often due to assay requirements), or require the availability of a given resource, a static schedule is calculated and stored for reuse.The system is capable of optimizing the schedule based on actual task operation times (stored in the database).Other types of unconstrained processes benefit more from a dynamic mode of operation where events trigger the progress of task execution as resources become available in real-time. When operating dynamically, intelligent queuing of tasks among multiple jobs allows optimal use of resources minimizing execution time while allowing for robust error handling.Process MonitoringAll systems and jobs can be monitored remotely by a distributed application known as the Process Monitor. This application allows multiple users to monitor active jobs across all systems for status and faults and provides email notification for fault situations.ConclusionCytokinetics has built and maintains an automation software infrastructure using NI LabVIEW. The language has proven to be a powerful tool to create both rapid prototype applications as well as an entire framework for system integration and process execution. LabVIEW's roots in measurement instrumentation and seamless network communication protocols have allowed systems to be deployed containing multiple control computers linked only via the network. The language continues to evolve and improve as a general purpose programming language and develop a broad user base.。
LabVIEW入门指南从零开始学习LabVIEW编程

LabVIEW入门指南从零开始学习LabVIEW编程LabVIEW是一种面向虚拟仪器的图形化编程语言,广泛应用于科学研究、工程控制和教育领域。
本篇文章将带你从零开始学习LabVIEW编程,通过逐步引导,让你快速掌握这一强大工具的基本知识和应用技巧。
一、LabVIEW简介LabVIEW,全称Laboratory Virtual Instrument Engineering Workbench,是一种由美国国家仪器公司(National Instruments)开发的可视化编程环境。
它不同于传统的文本编程语言,而是通过图形化的方式,将各种功能模块拖拽式地连接起来,构建出一个数据流图(Dataflow Diagram)。
这种直观的编程方式使得LabVIEW非常适合于快速原型开发和实验室测量等应用。
二、LabVIEW的安装和配置1. 下载和安装LabVIEW:首先,你需要访问National Instruments官方网站,选择合适的版本并下载LabVIEW。
安装过程相对简单,按照向导的提示依次操作即可完成。
2. 配置设备和驱动程序:在使用LabVIEW之前,确保你的计算机连接了相应的设备,并且安装了正确的驱动程序。
你可以通过National Instruments官网获取最新的驱动程序,并按照说明进行配置。
三、LabVIEW界面和基本元素1. 控件面板(Front Panel):控件面板是LabVIEW的用户界面,你可以在这里添加各种控件元素,如按钮、滑动条、图表等。
通过鼠标拖拽的方式,你可以调整控件的位置和大小,并为其设置相应的属性和事件。
2. 结构面板(Block Diagram):结构面板是LabVIEW的编程界面,你可以在这里构建数据流图。
不同的模块使用线条连接起来,完成数据的输入、处理和输出等功能。
常用的结构包括循环结构、条件结构和函数结构等。
四、LabVIEW基本编程概念1. 节点(Node):节点是LabVIEW中的一个基本单元,代表一个操作或函数。
LabVIEW 基础课程

LabVIEW 基础课程LabVIEW是一个由美国国家仪器公司(National Instruments, 简称NI)开发的一种图形化的编程语言,适用于各种科学仪器、自动化控制系统、工业控制器、机器人、计算机视觉以及其他数种领域。
对于初学者而言,LabVIEW具有易学易用,能够快速搭建编程框架、自定义仪器和控制板的优势。
在本文中,我们将详细介绍LabVIEW的基础知识,为初学者提供参考和帮助。
I. LabVIEW的基本概念1. 程序设计的开发环境首先,让我们了解LabVIEW程序设计的开发环境。
当你打开LabVIEW时,你会看到一个像赛车赛道的界面,四张白纸条形图表(称为面板)以及一个工具栏和一些弹出式面板。
这是LabVIEW编辑器的默认显示界面。
2. Front Panel与Block Diagram在LabVIEW中,有两种主要的视图:Front Panel和Block Diagram(内部实现图)。
Front Panel是你设计和用户交互的部分,它代表了你设计的用户界面,可以不依赖于内部的实现。
Block Diagram代表程序的实际实现。
你需要在Block Diagram 中实现代码来操作Front Panel中的元件,实现前端与后端的交互。
3. 仪器控件Front Panel中的控制元件通常被称为仪器控件。
这些控件包括LED指示灯、滑动条、开关、按钮、数字显示器、图形控件等。
这些元件非常有用,可以使你的程序具有更直观的交互界面。
4. 节点在Block Diagram中,你可以看到调用或创建代码的节点。
节点是指图形化的可执行代码块,而代码则表示为一系列节点连接一起构成的类似于电路图的图形化代码。
5. 数据流LabVIEW采用数据流编程风格。
这意味着,你的程序中的数据是从节点流向节点的,而不是通过函数调用。
你可以使用数据来控制程序的执行顺序,将代码块放在不同的位置,实现了代码并行执行的效果。
LabVIEW Basic I-中文版 (2)

字串是指一連串可顯示或不可顯示的ASCII字元。
字串提供獨立於平台之外的格式,供資料和資訊使用。
檔案I/O作業則將資料傳入及傳出檔案。
ଋጯົĈA.如何建立字串控制器及指示器B.如何使用字串函數C.關於檔案I/O作業D.如何使用高階檔案I/O VIE.如何使用低階檔案I/O VI及函數F.如果將文字檔案格式化以應用於試算表中第8課фҚ̈́ᑫ९J0P˘ăфҚ字串是指一連串可顯示或不可顯示的ASCII 字元。
字串提供獨立於平台之外的格式,供資料和資訊使用。
字串較常見的應用方式包括下列各項:•建立簡單的文字訊息。
•將數值資料以字元字串的方式傳送給儀器,然後將該字串轉換為數值。
•將數字資料存入磁碟。
要將數值存入ASCII 檔案,你必須先將數值轉換為字串,再將數值寫入磁碟檔案中。
•以對話方塊指示或提示使用者。
在人機介面上,字串以表格、文字輸入方塊及標生的樣式呈現。
ޙϲфҚଠטጡ̈́ϯጡ使用字串控制器及指示器(位於Controls»Text Controls 以及Controls»Text Indicators 面板)來模擬文字輸入方格及標籤。
使用Operating 工具或Labeling 工具來輸入或編輯字串控制器中的文字。
使用Positioning 工具來改變人機介面的字串物件的大小。
要使字串物件佔用的空間達到最小,請在該物件上按滑鼠右鍵, 並從捷徑選單中選擇Visible Items»Scrollbar 選項。
在人機介面的字串控制器或指示器上按滑鼠右鍵,並從顯示類型中選擇(如下表所示)。
表格中亦提供各種顯示類型的範例訊息。
ܑॾ)Ubcmf*使用表格控制器(位於Controls»All Controls»List & Table 面板)或Express Table VI (位於Controls»Text Indicators 面板),在人機介面顯示類型說明訊息NormalDisplay使用控制器的字型,顯示可列印字元。
LabVIEW入门教程

2023-10-26
目录
• labview简介 • labview基础知识 • labview编程入门 • labview应用实例 • labview进阶技巧 • labview社区和资源
01
labview简介
labview是什么?
• LabVIEW(Laboratory Virtual Instrument Engineering Workbench)是一种图形化编程语言和开发环 境,由美国国家仪器(National Instruments,简称NI)公司开发。它被广泛用于数据采集、仪器控制、 实验室自动化和数据分析等领域。
2. 学习并应用设计模 式、面向对象编程等 先进理念,提高程序 的可维护性和可扩展 性。
3. 积极参与社区交流 和学习,分享经验和 解决方案,获取更多 的技能提升和成长机 会。
06
labview社区和资源
labview社区介绍
LabVIEW社区是全球最大的虚拟仪器 社区,为工程师和科学家提供了一个 交流和分享的平台。
丰富的仪器控制功能:LabVIEW提供了丰富的仪器控制 功能,可以轻松地与各种仪器进行通信和控制,包括数 据采集卡、仪器控制器、嵌入式系统等。
跨平台支持:LabVIEW支持多种操作系统和平台,包 括Windows、Linux和Mac OS等,使得它可以在不同 的系统和平台上运行。
图形化编程语言:LabVIEW使用图形化编程语言(G语 言),通过拖拽和连接图标来编写程序,使得编程更加 直观和易于理解。
要点三
LabVIEW实现
在LabVIEW中可以通过调用数字滤波 器函数块来实现数字滤波器的设计。 用户只需要输入需要处理的信号、选 择滤波器类型和设置滤波器参数, LabVIEW就可以自动完成对信号的滤 波处理。
LabVIEW Basic I-中文版 (11)

本課說明如何在LabVIEW中使用插入式資料擷取(DAQ)設備。
請參閱LabVIEW Measurements Manual,以取得更多關於在LabVIEW中取得資料的資訊。
ଋጯົĈA.關於插入式DAQ設備B.關於LabVIEW中的資料擷取C.如何進行類比輸入D.如何儲存取得的資料及平均值,並將取得之資料記錄至磁碟中E.如何進行類比輸出F.關於計數器(counter)G.關於數位I/O第9課ྤफ़ᕜפ̈́گݭ˘ăໄ៍̈́ၗLabVIEW中內附一組VI,讓你設定DAQ設備、從它們取得資料,以及將資料送給它們。
通常一部設備可以執行多種功能,諸如類比轉數位(A/D)、數位轉類比(D/A)、數位I/O,以及計數器/計時器操作。
每部設備支援不同的DAQ及信號產生速度。
同時,每一部DAQ設備都針對特定的硬體平台及作業系統設計。
請參閱/daq的內容,以取得更多關於DAQ設備的資訊。
EBRր̮І在以電腦為基礎的測量系統開始測量實質的信號(例如溫度)之前,必須先由感測器或轉換器將實質信號轉變為電子信號(例如電壓或電流)。
你可能以為插入式DAQ設備就是整個測量系統,但它實際上只是系統的一項元件。
你不一定都能直接將信號連接至插入式DAQ設備。
在這種情況下,你必須使用信號調節附件(signalconditioning accessories)來調整信號,插入式DAQ設備才能將它們轉變為數位資訊。
軟體控制DAQ系統的方式是取得原始資料,分析並呈現結果。
考慮DAQ系統的以下幾種選擇:•插入式DAQ設備位於電腦內。
你可以將該設備插入桌上型電腦的PCI插槽或膝上型電腦的PCMCIA插槽,供可攜式DAQ測量系統使用。
•DAQ設備在外部,透過現有的連接埠連接至電腦,例如串列埠或乙太網路埠,也就是說你可以迅速簡單地將測量點置於感測器附近。
電腦透過DAQ設備接受原始資料。
你撰寫的應用程式以你能夠了解的格式來呈現在操作這些原始資料。
軟體也控制DAQ系統,命令它何時及從何通道取得資料。
labview教程

labview教程LabVIEW是一款强大的图形化编程软件,用于实时数据采集、仪器控制、测量设备、数据处理和分析等应用。
本教程将带你快速入门LabVIEW,介绍一些基本操作和常用功能。
1. 下载和安装LabVIEW软件- 前往官方网站下载最新版本的LabVIEW软件,并按照提示进行安装。
2. 打开LabVIEW并创建一个新的VI(Virtual Instrument)- 打开LabVIEW软件后,点击菜单栏上的"File",选择"New VI"。
- 这将在编辑器中创建一个新的虚拟仪器。
3. LabVIEW界面介绍- LabVIEW的界面主要由菜单栏、工具栏、面板和编辑区组成。
- 菜单栏提供各种功能和选项,例如文件操作、编辑、调试和运行。
- 工具栏包含了常用的操作工具,例如选择、连线和调节大小等。
- 面板是VI的前端界面,用于显示和操作数据。
- 编辑区是VI的主要工作区域,用于构建程序逻辑和连接各种功能模块。
4. 基本操作和函数- 拖拽控件和函数:在工具栏中选择需要的控件或函数,拖拽到面板或编辑区中。
- 连线功能模块:使用鼠标从一个输出端口拖拽线条到另一个输入端口,将功能模块串联起来。
- 配置控件和函数:右键点击控件或函数,选择"Properties"或"Configure"进行参数设置。
- 调试和运行程序:点击编辑器中的运行按钮,或按下快捷键Ctrl+R,运行程序并查看结果。
5. 数据采集和显示- 使用数据采集模块:LabVIEW提供了丰富的数据采集函数和工具,用于连接和读取各种传感器、仪器和设备。
- 配置数据显示:选择适当的图表或指示器,配置其参数和样式,将采集的数据显示在界面上。
6. 仪器控制和操作- 使用仪器控制模块:LabVIEW支持与各种仪器进行通信和控制,例如示波器、多用途数据采集卡等。
- 配置仪器控制:选择合适的仪器控制函数,配置通信接口和命令参数,实现对仪器的操作和控制。
LabVIEW Basic I-中文版 (5)

ኝෞณ課程 _________________________________________________________________________________________地點 _________________________________________________________________________________________教師_____________________________________________日期 ____________________________________ጯࣶྤफ़ĞΞ̙ğ姓名 _________________________________________________________________________________________公司 _____________________________________________電話 ____________________________________ିर請評量教師的表現,圈選適當的項目。
不滿意 不佳 尚可 好很好教師說明課程概念的能力□□□□□教師對於課程主題的了解程度□□□□□教師的表達技巧□□□□□教師對於課程需求的敏感度□□□□□教師的課程預備□□□□□ኝ訓練中心的品質□□□□□訓練設備的品質□□□□□硬體設定正確嗎?□是□否課程長度□太長□剛好□太短課程中說明之主題的詳盡度□太多□剛好□不夠課程材料很清楚,容易明白。
□是□否□有時候是課程涵蓋的主題和宣傳內容相符嗎?□是□否我擁有參加這個課程所需要的技術或知識。
□是□否若否,你可以如何做更好的預備? __________ _____________________________________________________________________________________________課程有何優點? _______________________________________________________________________________ _____________________________________________________________________________________________你希望課程增加什麼主題?_____________________________________________________________________ _____________________________________________________________________________________________課程有那些部份必須加以濃縮或刪除? ___________________________________________________________ _____________________________________________________________________________________________課程需增加什麼內容,使它變得更好? ___________________________________________________________ _____________________________________________________________________________________________你參加這個課程有何收穫? _____________________________________________________________________ _____________________________________________________________________________________________貴公司是否有其他人有受訓的需要?請列出。
LabVIEW Basic I-中文版 (10)

本課介紹在VI中進行決策的方法,包括Select函數、Case結構,以及公式節點(Formula Node)。
同時也說明公式節點的公式能力。
ଋጯົĈA.使用Select函數進行決策B.如何使用Case結構C.如何使用公式節點(Formula Node)第7課дWJ̚ઇՙඉ˘ăֹϡTfmfduבᇴซҖՙඉ到目前為止,本課程中描述的每一個VI都根據資料流動的方向來決定執行順序。
有些時候必須在程式中進行決定。
舉例來說,如果a發生,則執行b;否則若c發生,則執行d。
在文字式程式中,這種要求可以使用if-else敘述、case敘述、switch敘述等等來完成。
LabVIEW中包括許多不同的方法可以進行決策,其中最簡單的是Select函數。
TfmfduבᇴSelect函數(位於Functions»Express Comparison 面板)根據一個布林輸入埠的值,在兩個值之間擇一。
如果布林輸入埠s的值為真,此函數傳回連接至t輸入埠的值。
如果布林輸入埠的值為偽,此函數傳回連接至f輸入埠的值。
你在習作2-2的Thermometer VI中使用Select函數來判斷要輸出華氏溫度或是攝氐溫度,如下圖的程式區所示。
如果要進行的決策複雜度超過Select函數的能力,就可能需要使用Case結構。
第7課дWJ̚ઇՙඉ˟ăDbtfඕၹCase結構(如左圖所示)擁有兩個或更多的子程序。
一次只看得見一個子程序,而且結構也只會執行一個子程序,由輸入值來決定執行那一個子程序。
Case結構類似文字式程式設計語言中的case敘述或if...then...else敘述。
位於Case結構頂端的條件選擇辨識元(case selector identifier,如左圖所示)中,其中央為條件選擇辨識元,兩側各有一個加值及減值按鈕。
使用加值及減值按鈕來切換可選擇的條件。
將一個輸入值(或選擇器)連接至選擇器接頭(如左圖所示),以決定執行那一個條件。
LabVIEW Basic I-中文版 (1)

本課說明如何在波形圖表(waveform chart)、波形圖(waveformgraph)、XY圖(XY graph),以及強度圖(intensity plot)中顯示資料。
ଋጯົĈA.如何使用波形圖表來顯示資料B.如何使用波形圖及XY圖來顯示資料C.關於強度圖(intensity plot)(選擇性內容)第6課ᘱᄦྤफ़˘ăگԛဦܑ波形圖表是一種數值指示器,顯示一個或多個曲線圖。
波形圖表位於Controls»Graph Indicators 面板中。
波形圖表可以顯示一個或多個曲線圖。
下圖顯示多曲線圖波形圖表的元件。
圖中顯示兩道曲線:Raw Data 及Running Avg 。
圖表使用三種不同的模式來捲動資料,如以下的人機介面所示。
在圖表上按滑鼠右鍵,並從捷徑選單中選擇Advanced»Update Mode 。
選擇Strip Chart 、Scope Chart 或Sweep Chart 。
預設模式為Strip Chart 。
帶狀圖表(strip chart )從左向右捲動圖表以持續顯示執行資料。
範圍圖表(scope chart )顯示一項資料(例如脈衝或波形)從圖表左側向右捲動半個畫面。
掃瞄圖表(sweep chart )的運作類似範圍圖表,但是它將較舊的資料顯示在右側,較新的資料顯示在左側,二者以一道垂直線分隔。
範圍圖表和掃瞄圖表都有類似示波器的回溯顯示(retracing display )。
由於回溯曲線消耗的資源較少,因此範圍圖表和掃瞄圖表顯示曲線的速度高於帶狀圖表。
1標籤2Y 軸3X 軸4軸圖例5Graph 面板6曲線圖例第6課ᘱᄦྤफ़ాତဦܑ你可以將數量輸出埠直接接線至波形圖表。
在下圖中,接頭的端點與輸入埠的資料類型相符。
波形圖表可以顯示多個曲線。
使用位於Cluster面板中的Bundle函數,將數個曲線結合起來。
在以下的程式區中,Bundle函數將三個VI的輸出埠結合起來,繪製出波形圖表。
LabVIEW Basic I-中文版 (3)

本課說明你可以如何使用LabVIEW來控制外接之GPIB及序列埠儀器,並由它們擷取資料。
使用儀器驅動程式及Instrument I/O Assistant來執行儀器的I/O。
ଋጯົĈA.關於儀器控制B.關於GPIB通訊及組態設定C.如何使用Instrument I/O AssistantD.關於VISAE.關於LabVIEW 儀器驅動程式F.如何使用儀器驅動程式 VI群G.關於序列埠通訊H.關於波型傳送(選擇性內容)第10課ᆇጡଠט˘ăᆇጡଠטໄ如果你選擇業界標準的控制技術,就不會受到你所控制之儀器類型的限制。
你可以使用許多不同類型的儀器,包括序列埠、GPIB、VXI、PXI、電腦儀器、乙太網路、SCSI、CAMAC,以及平行埠儀器。
本課介紹兩種最常見的儀器通訊方法,即GPIB及序列埠通訊。
以PC控制儀器時,你必須考慮以下的問題:•儀器上的接頭類型•需要纜線-虛擬數據機,針腳數,公頭/母頭•需要的電力特性-信號強度,接地,纜線長度的限制•使用的通訊協定-ASCII指令,二進位指令,資料格式•可用之軟體驅動程式第10課ᆇጡଠט˟ăHQJC఼ੈ̈́ၗనؠANSI/IEEE Standard 488.1-1987(亦稱為通用介面匯流排GeneralPurpose Interface Bus, GPIB)描述一種標準介面,供不同廠商的儀器和控制器(例如掃瞄器和影像記錄器)通訊之用。
其中包括電力、機械及功能的規格。
GPIB為數位八位元平行通訊介面,資料傳輸速率為1 Mbyte/s以上,使用三條纜線交換控制信號。
匯流排支援一個系統控制器(System Controller,通常是電腦),以及最多14部額外的儀器。
ANSI/IEEE Standard 488.2-1992擴充IEEE 488.1的規格,定義一個匯流排通訊協定(資料碼及格式的共同組合)以及一組通用的設備指令。
GPIB儀器為測試及製造工程師提供了最大範圍的選擇,他們可以選擇通用用途的廠商及儀器,也可以選擇專業的垂直市場測試應用。
labview 中文

所有的LabVIEW程序都被称为虚拟仪器(VI),因为程序的外观和操作方式都与诸如示波器、万用表等实际仪器类似。
LabVIEW包括齐全的用于数据采集、分析、显示、存储数据、调试代码的工具。
在LabVIEW中,您可以利用控制件和显示件建立用户界面,即前面板。
控制件包括旋钮、按钮等输入控件,显示件包括图表、LED等显示器件。
在完成用户界面的创建后,您可以通过VI和结构添加代码来控制前面板上的对象。
这些程序代码就构成了程序框图。
利用LabVIEW,您可以和诸如数据采集设备、图像设备、运动控制设备等硬件进行通信,也可以和GPIB、PXI、VXI、RS-232、RS-485仪器通信。
创建一个虚拟仪器程序(VI),在下面的练习中,您将创建一个VI,能够产生一个信号并把它在图表上显示出来。
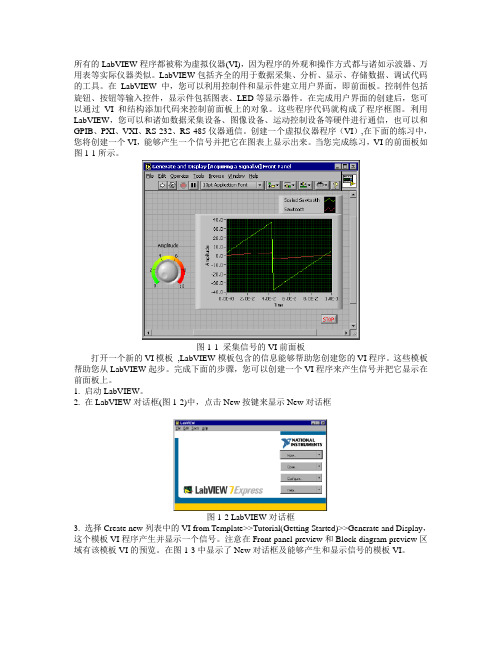
当您完成练习,VI的前面板如图1-1所示。
图1-1 采集信号的VI前面板打开一个新的VI模板,LabVIEW模板包含的信息能够帮助您创建您的VI程序。
这些模板帮助您从LabVIEW起步。
完成下面的步骤,您可以创建一个VI程序来产生信号并把它显示在前面板上。
1. 启动LabVIEW。
2. 在LabVIEW对话框(图1-2)中,点击New按键来显示New对话框图1-2 LabVIEW对话框3. 选择Create new列表中的VI from Template>>Tutorial(Getting Started)>>Generate and Display,这个模板VI程序产生并显示一个信号。
注意在Front panel preview和Block diagram preview区域有该模板VI的预览。
在图1-3中显示了New对话框及能够产生和显示信号的模板VI。
图1-3 New对话框4. 单击OK键打开该模板,也可以双击在Create new列表中的该模板VI的名字来打开该模板。
5. 察看VI程序的前面板。
labview中文

虚拟仪器(LabVIEW)虚拟仪器是一种高效用于构建数据采集与监测系统图形化编程语言。
使用虚拟仪器,您快速创建用户界面,让您交互控制您的软件系统。
要指定您系统的功能,您只需装配块关系图—一种自然的设计表示科学家和工程师。
测量硬件紧密集成方便了数据采集、分析与演示文稿解决方案的快速发展。
虚拟仪器包含强大的内置度量分析和一个图形的编辑器实现最佳性能。
虚拟仪器是使用于Windows 2000/NT/Me/9x、Mac OS、Linux、Sun Solaris 和HP-UX,有三种不同的开发系统选项。
更快地发展虚拟仪器通过加快发展了对传统的编程提升了4至10倍!使用模块化和层次结构的虚拟仪器,可以原型,设计,并且在一个短时间内修改系统。
您也可以重用虚拟仪器代码轻松快速地在其他应用程序中应用。
更好的投资使用虚拟仪器系统,每个用户有权访问单一的商业文书的成本低于一个完整的检测实验室。
此外,用户还可配置的虚拟仪器系统足够的灵活性,从而更好地长期投资的技术变化与适应。
优化性能虚拟仪器的所有应用程序执行以获得最佳性能的编译速度。
用虚拟仪器专业开发系统或应用程序生成器,可为您的代码的安全通讯生成独立可执行文件或dll。
您甚至可以创建共享的库或从其他编程语言中调用虚拟仪器代码的dll。
开放的开发环境用虚拟仪器在开放开发环境,您可以连接到通过ActiveX、Web、dll、共享的库、SQL(数据库)、DataSocket、TCP/IP和许多其他协议的其他应用程序。
虚拟仪器用于快速创建网络的测量和Web发布和远程数据共享最新的科技集成的自动化系统。
虚拟仪器也可以用于插件数据采集、信号调理、GPIB、VXI、PXI、基于计算机的仪器、串行协议、图像采集和运动控制的驱动程序。
除了在虚拟仪器的开发系统国家仪器还提供多种附加模块和扩展功能的虚拟仪器的工具集。
这使您可以快速构建可定制、鲁棒的测量和自动化系统。
虚拟仪器数据记录和监督控制模块高通道数的分布式应用程序日志记录的虚拟仪器数据和监督控制模块,提供了一个完整的解决方案。
