DX8808L+说明书
LT-880_24路_DMX512解码器试用说明书

输入电压
DC12V~DC24V
最大负载电流
3A/路×24
输出最大功率
860W/1720W(12V/24V )
输出灰度级
256 级
输入信号
DMX512/1990
输出负载 适用环境温度
24 路 恒压 PWM -30℃-70℃
产品尺寸
L260×W120×H40mm
包装尺寸
L290×W130×H46mm
重量(毛重)
DMX ADDR NUMBER
049 050 051 052 053 054 055 056 057 058 059 060 061 062 063 064 065 066 067 068 069 070 071 072
LT- 880 DMX512 恒压解码器-使用说明书
第 8 页 共 14 页
Appendix: DMX Address Setting Table
,安全指示,
为了保证产品的完好状态和使用安全,请遵守此说明书上的指示和提醒。
注意! 谨慎操作!请详细阅读安全注意事项: 1、 安装时尽量避免在雷区、强磁场和高压的区域。 2、 确保接线正确牢固,以免短路损坏部件和触发火灾事故。 3、 请将控制器安装在通风良好的地方,以保证环境温度适宜。 4、 请检查控制器输入供电电源是否符合产品要求,电源输出电压是否和
DMX ADDR NUMBER
025 026 027 028 029 030 031 032 033 034 035 036 037 038 039 040 041 042 043 044 045 046 047 048
DIP SWITCH 123456789 100011000 010011000 110011000 001011000 101011000 011011000 111011000 000111000 100111000 010111000 110111000 001111000 101111000 011111000 111111000 000000100 100000100 010000100 110000100 001000100 101000100 011000100 111000100 000100100
得力 DL-888TW 标签打印机 说明书
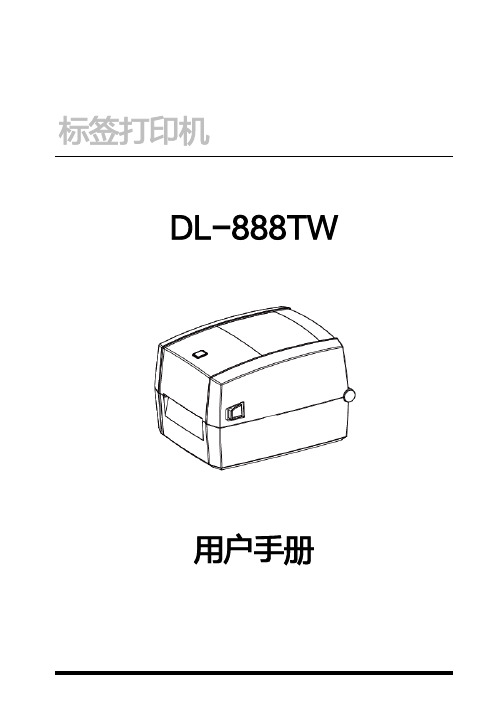
标签打印机DL-888TW用户手册目录安全须知 (1)第1章产品简介 (4)1.1 开箱清单 (4)1.2 外观及组件 (5)1.3 产品尺寸 (6)第2章产品规格 (7)第3章安装和使用 (9)3.1 安装介质 (9)3.1.1 安装纸卷 (9)3.1.2 安装折叠纸 (11)3.1.3安装外置纸卷支架 (12)3.1.4安装碳带 (13)3.2 电源连接 (15)3.3 接口连接 (16)3.4 标签侦测 (16)3.5 操作面板 (17)3.6 基本功能使用 (18)3.6.1 开机/关机 (18)3.6.2 走纸 (18)3.6.3 打印测试 (18)3.6.4 标签学习 (19)第4章接口 (20)第5章清洁打印机 (21)5.1 清洁打印头 (21)5.2 清洁传感器、胶辊和纸张路径 (21)附录1:电子信息产品污染控制的说明 (22)安全须知在操作使用打印机之前,请仔细阅读下面的注意事项,以免发生人身伤害或设备损坏。
1.安全警告标志警告必须遵守,以免伤害人体,损坏设备。
注意给出了打印机操作的重要信息及提示。
2.安全注意事项警告:违反以下事项可能会导致严重的伤亡事故。
1)不要同时将几个插头插入一个多孔电源插座中。
•这会导致过热和火灾。
•如果插头潮湿或者肮脏,请在使用前烘干或者擦拭干净。
•如果插头与电源插座不配套,请不要插上电源。
•只能使用标准化的多孔电源插座。
2)您只能使用本包装中供应的适配器。
•使用其它适配器十分危险。
3)不要通过拉扯连接线的方式拔插头。
•这可能损坏连接线,造成火灾或者打印机故障。
4)不要在手潮湿的时候,插或者拔电源插头。
•这可能导致触电。
5)不要用力弯曲连接线,或者将其置于重物之下。
•连接线损坏后,可能造成火灾。
注意:违反以下事项可能造成轻伤或损坏设备。
1)如果发现打印机不明原因地冒烟、发出气味或者噪音,请拔下插头,再采取急救措施。
•关闭打印机,拔下设备的插头。
•在烟消失后,电话联系经销商进行维修。
朗驰 LC8808R 8 路 D1 网络视频解码器 说明书

LC8808R网 络 视 频 解 码 器使 用 手 册(V1.0)目 录1引言 (3)1.1编写目的 (3)1.2使用范围 (3)2产品介绍 (3)2.1产品简介 (3)2.2功能简介 (3)2.3产品技术规格 (4)3设备说明 (6)3.1运行环境 (6)3.2后面板说明 (6)4产品使用 (6)4.1装箱清单 (6)4.2产品安装注意事项 (7)4.3连接示意图 (8)4.4设置解码器 (8)4.4.1搜索设备 (8)4.4.2添加解码器 (10)4.4.3解码器通道设置 (14)4.4.4高级参数配置 (15)4.4.5报警参数设置 (17)4.4.6添加编码器 (18)4.4.7分配解码通道 (20)4.4.8音频、对讲 (21)4.4.9轮询设置 (21)4.4.10云台控制 (23)4.4.11单画面放大 (24)4.5升级解码器固件 (24)4.6虚拟键盘的使用 (25)4.6.1 主菜单说明 (25)4.6.2 连接菜单 (26)4.6.3 断开连接菜单 (28)4.6.4 循环连接菜单 (28)4.6.5 循环设置菜单 (29)4.6.6 添加循环服务器菜单界面 (30)4.6.7 播放、停止音频 (31)4.6.8 启动、停止对讲 (32)4.6.9 显示模式菜单 (32)4.6.10 系统设置菜单界面 (33)4.6.11 网络设置菜单界面 (34)4.6.12 系统参数菜单界面 (35)4.6.13 高清输出菜单(此产品不支持) (36)4.6.14 音频参数菜单 (37)4.6.15 云台控制菜单界面 (37)4.6.16 报警状态菜单界面 (39)4.6.17 报警设置菜单界面 (40)4.6.18 地址薄菜单(此功能未实现) (42)4.6.19 版本信息菜单 (42)5 常见问题解答 (43)附录 A 球型摄像机键盘的使用 (44)附录 B 遥控器的使用 (45)1引言1.1编写目的本手册为商务人员及最终用户了解产品性能、设计方案、合理使用产品而编制。
FLUKE8808A说明书
?2007 年 7 月? 2007 Fluke Corporation,保留所有权利。
所有的产品名称均为相应所有人的商标。
.8808A 数字万用表 用户手册Байду номын сангаас
LIMITED WARRANTY AND LIMITATION OF LIABILITYEach Fluke product is warranted to be free from defects in material and workmanship under normal use and service. The warranty period is one year and begins on the date of shipment. Parts, product repairs, and services are warranted for 90 days. This warranty extends only to the original buyer or end-user customer of a Fluke authorized reseller, and does not apply to fuses, disposable batteries, or to any product which, in Fluke's opinion, has been misused, altered, neglected, contaminated, or damaged by accident or abnormal conditions of operation or handling. Fluke warrants that software will operate substantially in accordance with its functional specifications for 90 days and that it has been properly recorded on non-defective media. Fluke does not warrant that software will be error free or operate without interruption.Fluke authorized resellers shall extend this warranty on new and unused products to end-user customers only but have no authority to extend a greater or different warranty on behalf of Fluke. Warranty support is available only if product is purchased through a Fluke authorized sales outlet or Buyer has paid the applicable international price. Fluke reserves the right to invoice Buyer for importation costs of repair/replacement parts when product purchased in one country is submitted for repair in another country.Fluke's warranty obligation is limited, at Fluke's option, to refund of the purchase price, free of charge repair, or replacement of a defective product which is returned to a Fluke authorized service center within the warranty period.To obtain warranty service, contact your nearest Fluke authorized service center to obtain return authorization information, then send the product to that service center, with a description of the difficulty, postage and insurance prepaid (FOB Destination). Fluke assumes no risk for damage in transit. Following warranty repair, the product will be returned to Buyer, transportation prepaid (FOB Destination). If Fluke determines that failure was caused by neglect, misuse, contamination, alteration, accident, or abnormal condition of operation or handling, including overvoltage failures caused by use outside the product’s specified rating, or normal wear and tear of mechanical components, Fluke will provide an estimate of repair costs and obtain authorization before commencing the work. Following repair, the product will be returned to the Buyer transportation prepaid and the Buyer will be billed for the repair and return transportation charges (FOB Shipping Point).THIS WARRANTY IS BUYER'S SOLE AND EXCLUSIVE REMEDY AND IS IN LIEU OF ALL OTHER WARRANTIES, EXPRESS OR IMPLIED, INCLUDING BUT NOT LIMITED TO ANY IMPLIED WARRANTY OF MERCHANTABILITY OR FITNESS FOR A PARTICULAR PURPOSE. FLUKE SHALL NOT BE LIABLE FOR ANY SPECIAL, INDIRECT, INCIDENTAL, OR CONSEQUENTIAL DAMAGES OR LOSSES, INCLUDING LOSS OF DATA, ARISING FROM ANY CAUSE OR THEORY.Since some countries or states do not allow limitation of the term of an implied warranty, or exclusion or limitation of incidental or consequential damages, the limitations and exclusions of this warranty may not apply to every buyer. If any provision of this Warranty is held invalid or unenforceable by a court or other decision-maker of competent jurisdiction, such holding will not affect the validity or enforceability of any other provision.Fluke Corporation P.O. Box 9090 Everett, WA 98206-9090 U.S.A.Fluke Europe B.V. P.O. Box 1186 5602 BD Eindhoven The Netherlands11/99To register your product online, visit
8808智能监控并车系统说明书

8800远程智能监控系统简介8808智能监控并机系统说明书前言柴油发电机组的控制屏用于实现对机组的启动、运行、停机、紧急停机等操作,部分型号的控制屏还具备实现通讯及进行远程监控的功能,这就为用户将柴油发电机组顺利纳入集中监控网络提供了可能。
同时,它们还具有当机组发生故障时,可根据其严重程度和性质自动对机组实施停机保护或发出报警信号等功能,同时指示出故障种类,为柴油发电机组的可靠运行、方便操作和故障查找等提供了保障和参考。
所有类型的启动控制系统屏均选用进口或合资企业生产的优质元器件,可确保机组安全稳定运行。
所有类型的启动控制系统屏均可按加装预热装置控制单元。
不同型号的启动控制屏分别可以完成不同的功能,用户可根据不同的使用要求予以选择。
我司的控制屏分为手动和自动两大类,8100手动控制屏是我司的标准配置,自动控制屏有8200,8800和8808型自动控制屏。
8200控制屏具备基本的自动控制功能;8800控制屏属于远程智能监控屏,大屏幕多行全中文液晶显示界面,具备遥控、遥信、遥测的功能,随机免费提供全中文上位机监控软件及MODBUS通讯协议;8808控制屏属于智能监控并车屏,该屏在8800控制屏的基础上加上并车的控制功能。
以下就客户购买的具体型号的控制屏进行具体的说明。
8808智能监控并车系统一、概述:COOLTECH 8808智能监控并车系统,结构简单紧凑,功能十分强大,除具有基本的发电机组三遥功能外,还具有控制最多32台机组全自动并车,机组与市电电网并联,自动按比例实现有功和无功负载的无差分配;提供标准的计算机通讯接口,用户可以用PC机直接就近连接或通过公用电话网远程拔号上网监控多台机组并车系统。
发电机组控制保护功能1.手动和自动控制单台机组的启停及输出空气开关;2.LCD宽屏液晶参数显示:油压、水温、电池电压、运行时间等油机参数,三相相电压、线电压、线电流、频率、功率因数、有功功率、无功功率、电度等电参数,并联汇流母线电压、母线与发电机电压、频率、相位差等同步参数;3.发电机组低油压、高水温、超速、超频、速度信号丢失、起动失败、过流、电压过高或过低、逆功率保护停机;4.发电机组充电失败、水温高、油压低、电池电压低、传感器故障报警;5.类似黑匣子的历史事件记录;6.参数设置授权控制;7.方便功能扩展。
8809 8808 系列温控器 说明书
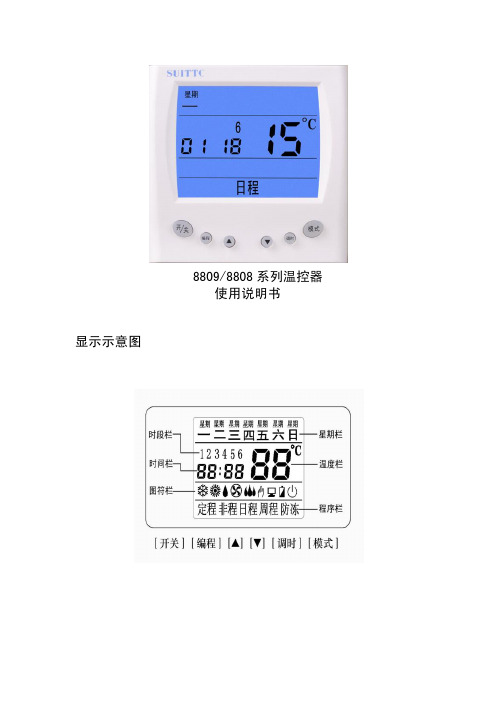
8809/8808系列温控器使用说明书显示示意图尊敬的客户,首先感谢您选用本公司生产的8809型和8808型系列电采暖温控器,安装和使用前希望您仔细阅读本说明,这将有助于您充分了解本产品的功能,从而保证您的正确安装和使用.①本产品电子集成度较高,请不要在过分潮湿的环境下使用.②由于本产品采用上下散热孔,因此请在装饰墙面时对上部散热孔采取一定的保护措施,以防止进水后电子器件短路,造成机器损坏.③请不要在高于50℃的环境下使用,否则,对机器的使用寿命将会产生很大的影响.如安装过热保护传感器,请将其穿入穿线管中,放置于需要测温的地方切勿将其线及探头直接接触水泥沙浆。
功能及特点大屏幕液晶显示,用户操作界面友好。
五种工作模式:定程、非程、日程、周程、防冻周编程(每日六时段),为用户节约能源。
预置固定时段程序,方便用户使用。
内置防冻功能,使用安全。
温度上限锁定:可调(标准:6-99℃)宽范围温度设定,适应不同应用环境。
室内温度测量蓝色背光(备选项)时钟功能键盘锁定功能过热温度保护(8809S;8809SD;8808S;8808SD)远距离测温(8809W;8809WD;8808W;8808WD)技术指标温度设定范围:5~99℃温控精度:±1℃防冻温度:8℃(可定制)过热保护温度:40 ℃(可定制)温控容差:±1℃(可定制)输出方式:继电器本机功耗:<1W电源电压:220V±10% 50HZ额定负载:3000W最大电流:16A(8809) 10A(8808)屏幕尺寸:60*48mm外形尺寸:86*86*21mm/86*86*34mm安装孔距:60mm1、温度控制当被测温度高于设定温度时,加热设备停止加热;当被测温度低于设定温度时,加热设备开始加热。
2、五种工作模式定程:程序栏显示[定程],温控器按下表出厂预置的时段和温度运行。
非程:程序栏显示[非程],仅允许对温度进行设定。
富士诺彩色扫描声纳CSH-5L CSH-8L操作手册说明书

操作手册彩色扫描声纳CSH-5LCSH-8L型号www.furuno.co.jpPub. No. O ZS-13190-C1 DATE OF ISSUE: Nov. 2010iii目录前言............................................................................................................................v i 系统配置....................................................................................................................v ii 1.操作概述.............................................................................................................1-11.1控制单元......................................................................................................................1-11.2遥控器(选用件)........................................................................................................1-21.3基本操作步骤...............................................................................................................1-31.3.1开启电源............................................................................................................1-31.3.2降下传感器........................................................................................................1-31.3.3发射...................................................................................................................1-41.3.4调整控制单元的背光..........................................................................................1-51.3.5选择显示模式.....................................................................................................1-61.3.6选择显示量程.....................................................................................................1-81.3.7调整增益............................................................................................................1-91.3.8收回传感器和关闭电源......................................................................................1-91.4设置倾斜角................................................................................................................1-101.4.1开启/关闭自动倾斜...........................................................................................1-101.4.2海底和倾斜角...................................................................................................1-121.4.3如何分辨鱼群回波和海底回波..........................................................................1-121.4.4注意事项..........................................................................................................1-131.4.5海面鱼群的倾斜角............................................................................................1-131.4.6适当的倾斜角...................................................................................................1-141.5确定目标的距离和方位...............................................................................................1-141.6“声纳”菜单概述......................................................................................................1-151.6.1操作步骤..........................................................................................................1-151.6.2“声纳”菜单说明............................................................................................1-162.微调声纳画面......................................................................................................2-12.1消除多余回波...............................................................................................................2-12.2清晰显示海面鱼群........................................................................................................2-22.3抑制海底曳尾...............................................................................................................2-22.3.1AGC..................................................................................................................2-22.3.2脉冲长度............................................................................................................2-32.3.3第二AGC.........................................................................................................2-32.4抑制浅水渔场中的海底和海面反射...............................................................................2-42.5抑制声纳干扰和噪讯....................................................................................................2-52.5.1确定噪讯源........................................................................................................2-52.5.2使用干扰抑制功能抑制噪讯...............................................................................2-52.5.3使用噪讯限制功能抑制噪讯...............................................................................2-52.5.4通过TX 周期抑制干扰.....................................................................................2-62.6选择波束宽..................................................................................................................2-72.6.1水平波束宽........................................................................................................2-72.6.2垂直波束宽........................................................................................................2-72.7探测微弱回波...............................................................................................................2-72.8回波平均......................................................................................................................2-7iii3.高级声纳操作......................................................................................................3-13.1跟踪鱼群(目标锁定).................................................................................................3-13.2通过听觉探测鱼群........................................................................................................3-33.3鱼群警报.......................................................................................................................3-43.4测量鱼群速度................................................................................................................3-53.4.1输入鱼群标记.....................................................................................................3-53.4.2删除单个鱼群标记..............................................................................................3-63.5重新定位鱼群以便观察.................................................................................................3-63.6事件标记和本船位置标记..............................................................................................3-73.6.1事件标记.............................................................................................................3-73.6.2输入本船位置标记..............................................................................................3-83.6.3删除事件标记.....................................................................................................3-83.7集体删除标记................................................................................................................3-93.8功能键(F1-F4)...........................................................................................................3-103.8.1操作功能键.......................................................................................................3-103.8.2根据渔场或目标鱼群编程.................................................................................3-103.8.3编程特定功能...................................................................................................3-113.8.4确认功能键程序................................................................................................3-123.9抑制颠簸摇晃造成的影响(减摇装置)......................................................................3-134.回声测深仪模式..................................................................................................4-14.1选择量程.......................................................................................................................4-14.2调节增益.......................................................................................................................4-24.3画面递进速度................................................................................................................4-34.4测量深度.......................................................................................................................4-34.5抑制干扰.......................................................................................................................4-44.6抑制低电平噪讯............................................................................................................4-44.7消除微弱回波................................................................................................................4-54.8“测深仪”菜单上的其它项目......................................................................................4-65.标记和数据.........................................................................................................5-15.1正常显示上的标记和数据..............................................................................................5-15.2回声测深仪和音频显示上的标记和数据........................................................................5-56.屏幕说明.............................................................................................................6-16.1海底回波.......................................................................................................................6-16.2鱼群..............................................................................................................................6-26.3海面反射.......................................................................................................................6-36.4尾迹..............................................................................................................................6-36.5旁波瓣导致的假回波.....................................................................................................6-46.6噪讯和干扰...................................................................................................................6-47.“标记”和“系统”菜单....................................................................................7-17.1“标记”菜单................................................................................................................7-17.2“系统”菜单................................................................................................................7-3 iv8.维护与故障排除..................................................................................................8-18.1一般维护......................................................................................................................8-18.2清洁设备......................................................................................................................8-18.3船体单元维护...............................................................................................................8-28.3.1润滑点,锌板.....................................................................................................8-28.3.2手动升起传感器.................................................................................................8-38.4更换保险丝..................................................................................................................8-48.5更换风扇......................................................................................................................8-48.6故障排除......................................................................................................................8-58.7错误消息......................................................................................................................8-68.8诊断测试......................................................................................................................8-78.8.1选择诊断测试.....................................................................................................8-78.8.2诊断测试说明.....................................................................................................8-8规格......................................................................................................................SP-1 菜单树..................................................................................................................AP-1索引........................................................................................................................IN-1v前言尊敬的 CSH-5L/CSH-8L 用户:承蒙惠购 FURUNO CSH-5L/CSH-8L 彩色扫描声纳。
HTD8808 中文说明书
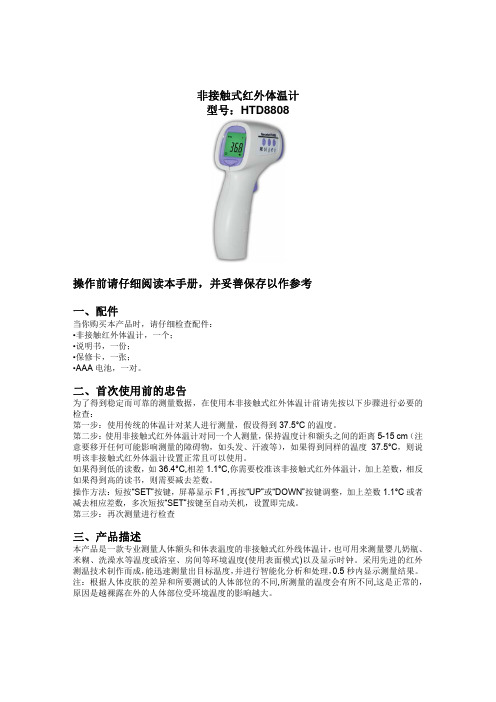
非接触式红外体温计型号:HTD8808操作前请仔细阅读本手册,并妥善保存以作参考一、配件当你购买本产品时,请仔细检查配件:•非接触红外体温计,一个;•说明书,一份;•保修卡,一张;•AAA电池,一对。
二、首次使用前的忠告为了得到稳定而可靠的测量数据,在使用本非接触式红外体温计前请先按以下步骤进行必要的检查:第一步:使用传统的体温计对某人进行测量,假设得到37.5°C的温度。
第二步:使用非接触式红外体温计对同一个人测量,保持温度计和额头之间的距离5-15 cm(注意要移开任何可能影响测量的障碍物,如头发、汗液等),如果得到同样的温度37.5°C,则说明该非接触式红外体温计设置正常且可以使用。
如果得到低的读数,如36.4°C,相差1.1°C,你需要校准该非接触式红外体温计,加上差数,相反如果得到高的读书,则需要减去差数。
操作方法:短按“SET”按键,屏幕显示F1 ,再按“UP”或“DOWN”按键调整,加上差数1.1°C或者减去相应差数,多次短按“SET”按键至自动关机,设置即完成。
第三步:再次测量进行检查三、产品描述本产品是一款专业测量人体额头和体表温度的非接触式红外线体温计,也可用来测量婴儿奶瓶、米糊、洗澡水等温度或浴室、房间等环境温度(使用表面模式)以及显示时钟。
采用先进的红外测温技术制作而成,能迅速测量出目标温度,并进行智能化分析和处理,0.5秒内显示测量结果。
注:根据人体皮肤的差异和所要测试的人体部位的不同,所测量的温度会有所不同,这是正常的,原因是越裸露在外的人体部位受环境温度的影响越大。
四、安全手册•请在使用前仔细阅读本说明书。
•请不要把该产品靠近带电的物体,以免电击。
•请不要在相对湿度大于85 %的环境下使用该产品。
•请不要将本产品太靠近电磁范围(如无线电,手机等)。
•请不要将本产品在太阳下暴晒或靠近火炉,更不能接触到水。
•请不要撞击或掉落本产品,若有损坏请不要使用。
DX8808M-2称重控制器说明书
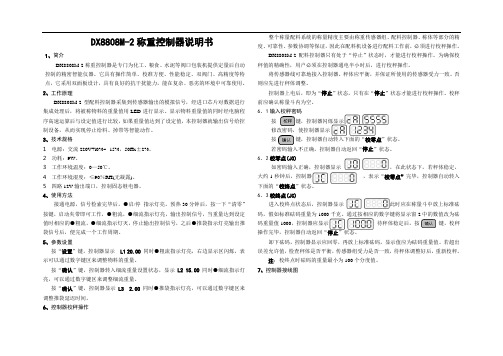
DX8808M-2称重控制器说明书1、简介DX8808M-2称重控制器是专门为化工、粮食、水泥等阀口包装机提供定量后自动控制的精密智能仪器。
它具有操作简单、校准方便、性能稳定、双阀门、高精度等特点,它采用双面板设计,具有良好的抗干扰能力,能在复杂、恶劣的环境中可靠使用。
2、工作原理DX8808M-2型配料控制器采集到传感器输出的模拟信号,经进口芯片对数据进行集成处理后,将被称物料的重量值用LED进行显示。
显示物料重量值的同时经电脑程序高速运算后与设定值进行比较,如果重量值达到了设定值,本控制器就输出信号给控制设备,从而实现停止给料、掉带等智能动作。
3、技术规格1电源:交流220V+l0%~ -15%,50Hz±2%。
2 功耗:9W。
3工作环境温度:0—50℃。
4 工作环境湿度:≤90%RH(无凝露)。
5四路12V输出端口,控制固态继电器。
4、使用方法接通电源,信号检索完毕后,●启/停指示灯亮。
预热30分钟后,按一下“清零”按键,启动夹带即可工作,●粗流,●细流指示灯亮,输出控制信号,当重量达到设定值时相应的●粗流,●细流指示灯灭,停止输出控制信号,之后●推袋指示灯亮输出推袋信号后,便完成一个工作周期。
5、参数设置按“设置”键,控制器显示L1 20.00 同时●粗流指示灯亮,右边显示区闪烁,表示可以通过数字键区来调整物料的重量。
按“确认”键,控制器转入细流重量设置状态,显示L2 15.00 同时●细流指示灯亮,可以通过数字键区来调整细流重量。
按“确认”键,控制器显示L3 2.00 同时●推袋指示灯亮,可以通过数字键区来调整推袋延迟时间。
6、控制器校秤操作整个称量配料系统的称量精度主要由称重传感器组、配料控制器、称体等部分的精度、可靠性、参数协调等保证,因此在配料机设备进行配料工作前,必须进行校秤操作。
DX8808M-2配料控制器只有处于“停止”状态时,才能进行校秤操作。
为确保校秤值的精确性,用户必须在控制器通电半小时后,进行校秤操作。
JBYD 8808A说明书
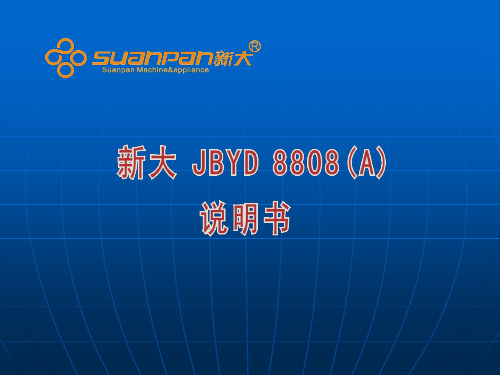
点按两下“模式键” ,再按一下 “模式键”,退出预置功能。
点按本键开关冠字号码显示功能;显示■。显示屏和详情里不记录当前清 点纸币的冠字号码
进入菜单
灵敏度调节: H001 000
参数设定:待机状态下,同时按住“功能键”和“OCR”5秒,进入灵敏度调 节。遮挡进钞光耦,保存设置并退出。
步骤一:按菜单键进入子菜单
进钞光耦
3、接钞对管异常:开机前清理接钞管积灰,清除接钞对管之间的异物, 注意接钞对管不要正对光源,再重新开机,看是否有故障。如无法排除, 请联系服务商。
4、上/下图像管异常:开机前清理上下图像管积灰,清除图像管之间的 异物,扣上旋转组件。如无法排除,请联系服务商。
5、进钞不畅:先松开钞板固定螺丝,调节钞板“调节螺钉”,再锁 紧钞板固定螺丝。
1、打印冠字号
将专用打印机连接到点验钞机上,按打印键即 可将清点过的钞票冠字号直接打印出来。
2、本机调阅
第一步:点按详情图标。
第二步:按显示屏下方的上一页, 下一页按键,查阅记录。
第三步:按“返回”键,退出。 Nhomakorabea本机采用“以真防假”的主动鉴伪模式,具备: ⑴红外图像分析鉴别 ⑶多光谱图像分析鉴别 ⑸荧光特征分析鉴别 ⑺安全性特征磁性分析鉴别 ⑼红外光学特征分析鉴别 ⑾胶带检测等功能 ⑵白光图像分析鉴别 ⑷冠字号码识外 ⑹磁性图像特征分析鉴别 ⑻磁性特征分析鉴别 ⑽紫外光学特征分析鉴别
变色油墨变造币
变造币+透明胶
二分之一变造币
机制币,SA版
机制币,金属线真
四分之一变造币
四分之一变造币有磁性
四分之一不到变造币
贴美纹胶变造币
正十字变造币
一、JBYD 8808(A)简介 二、JBYD 8808(A)使用说明 三、JBYD 8808(A)的日常保养及维护 四、JBYD 8808(A)简介 五、JBYD 8808(A)冠字号码功能 六、JBYD 8808(A)鉴伪能力
霹雳 1800 Flex 产品说明书

User ManualT ABLE OF C ONTENTS1. Before You Begin (3)What Is Included (3)Unpacking Instructions (3)Claims (3)Text Conventions (3)Symbols (3)Disclaimer (3)Product at a Glance (4)Safety Notes (4)2. Introduction (5)Overview (5)Dimensions (6)3. Setup (7)AC Power (7)Resetting the Breaker (7)Mounting (8)Orientation (8)Rigging (8)4. Operation (9)Remote or Manual Operation (9)Timer Remote Controller (FC-T) (9)Fluid Tank Indicator LED (9)Auto Cut-Off Feature (10)DMX Operation (10)Setting the Starting Address (10)DMX Channel Values (10)DMX Quick Reference Chart (11)5. Technical Information (12)Fogger Maintenance (12)Storage (12)6. General Troubleshooting (13)7. Technical Specifications (14)Returns (15)Contact Us (16)Page 2 of 16 Hurricane™ 1800 Flex User Manual Rev. 8Hurricane TM 1800 Flex User Manual Rev. 8Page 3 of 161. B EFORE Y OU B EGINWhat Is Included ·Hurricane™ 1800 Flex·FC-T Wired Timer Controller ·Hanging Bracket with Mounting Hardware· Power Cord · Warranty Card· Quick Reference GuideUnpacking InstructionsCarefully unpack the product immediately and check the container to make sure all the partsare in the package and are in good condition.ClaimsIf the box or the contents (the product and included accessories) appear damaged fromshipping, or show signs of mishandling, notify the carrier immediately, not Chauvet. Failure to report damage to the carrier immediately may invalidate your claim. In addition, keep the box and contents for inspection.For other issues, such as missing components or parts, damage not related to shipping, or concealed damage, file a claim with Chauvet within 7 days of delivery.TextConventionsConvention Meaning1—512 A range of values 50/60 A set of values Settings A menu optionMenu > SettingsA sequence of menu options <Enter>A buttonSymbolsSymbolMeaningCritical installation, configuration, or operation information. Not following these instructions may make the product not work, cause damage to the product, or cause harm to the operator.Important installation or configuration information. The product may not function correctly if this information is not used.Useful information.DisclaimerThe information and specifications contained in this User Manual are subject to changewithout notice. Chauvet assumes no responsibility or liability for any errors or omissions, and reserves the right to revise or recreate this manual at any time. Download the latest versionfrom .© Copyright 2015 Chauvet. All rights reserved.Electronically published by Chauvet in the United States of America.Author Date Editor DateR. Isenstadt4/15/2015D. Couppe5/12/2015Page 4 of 16 Hurricane™ 1800 Flex User Manual Rev. 8Safety Notes These notes include important information about the mounting, usage, and maintenance ofthis product; read before using the product.·Always connect the product to a grounded circuit to avoid the risk of electrocution.·Always disconnect the product from the power source before cleaning or resetting the breaker.· Make sure the power cord is not crimped or damaged.· Never disconnect the product from power by pulling or tugging on the cord. · If mounting the product overhead, always secure to a fastening device using a safety cable.· Make sure there are no flammable materials close to the product when operating. · Do not touch the product’s housing when operating because it may be very hot. ·Do not mount the product on a flammable surface (linoleum, carpet, wood, paper, carton, plastic, etc.).· The product’s nozzle is very hot during operation and it remains hot for a long time after operation has stopped.· The fog exits the nozzle at a very high temperature. Keep a minimum distance of 6.5 ft (2 m) from the nozzle to the nearest object. · Do not use the product as a space heater.· Do not drink or come in contact with the fog fluid. If you do, call your local emergency service (911 in the US) for help.·Do not add perfume, alcohol, gasoline, or any other flammables to the fog fluid.· Always make sure that the voltage of the outlet to which you are connecting the product is within the range stated on the decal or rear panel of the product.· The product is for indoor use only! (IP20) To prevent risk of fire or shock, do not expose the product to rain or moisture.· Always install the product in a location with adequate ventilation, at least 20 in (50 cm) from adjacent surfaces.· Be sure that no ventilation slots on the product’s housing are blocked. · Never connect the product to a dimmer.·Never carry the product from the power cord or any moving part. Always use the hanging/mounting bracket.· The maximum ambient temperature (Ta) is 104 °F (40 °C). Do not operate the product at higher temperatures.· In the event of a serious operating problem, stop using the product immediately. · Never try to repair the product. Repairs carried out by unskilled people can lead to damage or malfunction. Contact the nearest authorized technical assistance center. · This product is not intended for permanent installation. · Use only CHAUVET® water-based fog fluid.· Drain the tank before transporting or storing the product.·To eliminate unnecessary wear and improve its lifespan, during periods of non-use completely disconnect the product from power via breaker or by unplugging it.Keep this User Manual for future use. If you sell the product to another user, be sure to give this document to the next owner.FCQ (Fog Cleaner Quart) was specifically developed by Chauvet to clean your Hurricane™ 1800 Flex. Make sure you use FCQ regularly, no longer than 90 days between cleanings, to increase the life of your fogger.Hurricane TM 1800 Flex User Manual Rev. 8Page 5 of 162. I NTRODUCTIONOverviewBack Panel ViewRemote ControlPower CablePower SwitchIn/OutFog Fluid Front ViewAdjustment Knobs x4Mounting BracketDimensionsPage 6 of 16 Hurricane™ 1800 Flex User Manual Rev. 83.S ETUPAC Power This Hurricane TM 1800 Flex has a fixed voltage power supply and it can work with an inputvoltage of either 120 VAC, 60 Hz or 230 VAC, 50 Hz, depending on the specific model.To determine the product’s power requirements (circuit breaker, power outlet, and wiring),use the current value listed on the label affixed to the product’s back panel, or refer to theproduct’s specifications chart. The listed current rating indicates the product’s averagecurrent draw under normal conditions.·Always connect the product to a protected circuit (circuit breaker or fuse). Makesure the product has an appropriate electrical ground to avoid the risk ofelectrocution or fire.·To eliminate unnecessary wear and improve its lifespan, during periods of non-use completely disconnect the product from power via breaker or by unpluggingit.Never connect the product to a rheostat (variable resistor) or dimmer circuit, even ifthe rheostat or dimmer channel serves only as a 0 to 100% switch.Resetting theBreaker 1. Disconnect the product from power.2. Allow to cool for 5-15 minutes.3. Using your hand, press on the button for the breaker, until it remains in place. ·Disconnect the product from power before resetting the breaker.·The breaker will not reset until it has been allowed to cool.Hurricane TM 1800 Flex User Manual Rev. 8 Page 7 of 16Hanging ClampN OTE!C LAMP AND SAFETY CABLE SOLDSEPARATELY.Mounting Before mounting the product, read and follow the safety recommendations indicated in theSafety Notes.Orientation This product may be mounted in a 90° degree angle (horizontal), provided there isadequate room for ventilation. The tank of the product should not move from thisposition. However, the front portion of the fog machine can tilt up and down in thedesired direction. This is secured by using the bracket adjustment knobs.Rigging ·Before deciding on a location, always make sure there is easy access to the product formaintenance and fluid replenishment.·Make sure that the structure or surface onto which you are mounting the product cansupport the product’s weight (see the Technical Specifications).·When mounting the product overhead, always use a safety cable. Mount the productsecurely to a rigging point, such as an elevated platform or a truss.·When rigging the product onto a truss, you should use a mounting clamp of appropriateweight capacity. The bracket has 13-mm holes, which are appropriate for this purpose.·The rubber feet also serve as floor supports and allow for surface mounting. Whenmounting the product on the floor, make sure that the product and cables are away frompeople and vehicles.While operating the Hurricane™ 1800 Flex, make sure there is adequate fog fluid in themachine to prevent pump and heater damage. When fluid runs low, the auto cut-off featurewill activate. Simply add more fog fluid to continue using the Hurricane™ 1800 Flex.downSafety CablePage 8 of 16 Hurricane™ 1800 Flex User Manual Rev. 8Hurricane TM 1800 Flex User Manual Rev. 8Page 9 of 164. O PERATIONRemote or Manual Operation The Hurricane™ 1800 Flex can be operated manually, or with the included timer remotecontroller (FC-T). The Manual button is located on the rear of the unit. See the productOverview .Two other optional remote controls are also available: a manual wired remote (FC-M) and awireless remote (FC-W). Details on the optional controllers are available at /.Timer Remote Controller (FC-T) The FC-T wired timer controller allows you to automatically trigger fog output by setting intervaland duration times. LED indicator lights display the machine and controller’s current state.Rotary knobs set interval and duration times, while manual and continuous buttons allowoverriding control.1. Plug in the fog machine to power and turn the power switch to the product on.2. Plug in the timer controller to the Manual Controller socket on the back of the fog machine.3. Press the <TIMER ON/OFF> latching button on the timer controller. The Timer LED Indicatorabove the button will light up. The <TIMER ON/OFF> latching button will remain on until it is pressed again. 4. Set the INTERVAL and DURATION adjustment knobs to the desired positions.· INTERVAL knob sets the amount of time in between bursts of fog· DURATION knob sets the length of time that the fog machine will run during the burst5.Press the <CONTINUOUS> latching button and the fog machine outputs fog until the button is pressed again. The Manual/Power LED Indicator above the button will light up during continuous operation.Note: The duration of continuous fog output is based on the capability of the fog machine.6.Press the <MANUAL> button to momentarily output fog. The fog machine will output fog for as long as you hold down the button. During manual operation the Manual Momentary LED Indicator above the button will light up.Note: The duration of manual fog output is based on the capability of the fog machine.Fluid Tank Indicator LED The indicator LED inside of the Hurricane™ 1800 Flex shows the status of the fogger bycausing the fluid tank to glow as follows:· Red - The product is heating up, or will heat up once the trigger is released.· Blue - Optimum temperature has been reached. Ready to produce fog. ·Flashing (any color) - Fluid level is low.DurationAdjustment Interval Adjustment Timer LED IndicatorManual Momentary LEDManual/PowerLEDManual Control Momentary Button ContinuousLatching ButtonTimer On/Off Latching ButtonAuto Cut-OffFeature This product has an auto cut-off safety feature to keep the machine from becoming damaged. This is referring to the operation of the pump. When the fluid tank is empty, the pump will still operate for a short period of time, until all of the fluid has been removed from the system. Then, it will sense that there is no fluid, and will automatically stop the fog output. An indication that this has occurred is when the LED’s that are lighting the fluid tank are flashing.·This feature takes approximately 30 seconds to 1 minute to engage once the fluid has emptied from the tank.·In order for the fog machine to automatically reset, the trigger must be released either from the wired remote, wireless remote, the manual fog button on the unit, or via a DMX controller. If the DMX controller is used, the DMX channel must bebrought to a value of 000 (0%) in order to allow the fog machine to reset itself. ·Once the tank has been refilled with fog fluid, you may resume using the fog machine. The auto cut-off will automatically reset.DMX Operation Connecting a DMX controller to the Hurricane™ 1800 Flex automatically sets the product to DMX mode. There are both 3-pin and 5-pin inputs and outputs on the rear panel. For more information on DMX, download the DMX Primer from Chauvet.Setting theStartingAddress The starting address on the Hurricane™ 1800 Flex is set by using the DIP switch on the rear panel, with a binary version of the address desired. If unfamiliar with binary numbering systems, see the DMX Quick Reference Chart, or follow the instructions below to determine how to set the address:1. Determine the largest value switch that is less than the start address. Turn thisswitch on.2. Subtract the value of the switch you just turned on from the starting addressnumber.3. Determine the largest value switch that is less than the remainder from the previoussubtraction. Turn this switch on.4. Subtract the value of the switch you just turned on from the remainder of theprevious subtraction.5. Repeat steps three and four until you have a remainder of zero.E XAMPLE S TARTING A DDRESSAddress 10Switch # 4 = 8Switch # 2 = 2Total = 10Resolving addressusing simple math.Address 233233 – (128) = 105, Turn ON Dip # 8105 – (64) = 41, Turn ON Dip # 741 – (32) = 9, Turn ON Dip # 69 – (8) = 1, Turn ON Dip # 41 – (1) = 0, Turn ON Dip # 1DIP SWITCH(DMX V ALUE)123456 7 8 9 1248 16 32 64 128 256DMX ChannelValuesChannel Function Value Percent/Setting 1 Fog Output000ó005 No function006ó255 Fog output On/OffPage 10 of 16 Hurricane™ 1800 Flex User Manual Rev. 8DMX Quick Reference ChartDMX Address Quick Reference ChartDIP Switch PositionDMX DIP#9 0 0 0 0 0 0 0 0 1 1 1 1 1 1 1 1 SWITCH SET0=OFF #8 0 0 0 0 1 1 1 1 0 0 0 0 1 1 1 11=ON #7 0 0 1 1 0 0 1 1 0 0 1 1 0 0 1 1 X=OFF or ON #6 0 1 0 1 0 1 0 1 0 1 0 1 0 1 0 1 #1 #2 #3 #4 #50 0 0 0 0 32 64 96 128 160 192 224 256 288 320 352 384 416 448 4801 0 0 0 0 1 33 65 97 129 161 193 225 257 289 321 353 385 417 449 4810 1 0 0 0 2 34 66 98 130 162 194 226 258 290 322 354 386 418 450 4821 1 0 0 0 3 35 67 99 131 163 195 227 259 291 323 355 387 419 451 4830 0 1 0 0 4 36 68 100 132 164 196 228 260 292 324 356 388 420 452 4841 0 1 0 0 5 37 69 101 133 165 197 229 261 293 325 357 389 421 453 4850 1 1 0 0 6 38 70 102 134 166 198 230 262 294 326 358 390 422 454 4861 1 1 0 0 7 39 71 103 135 167 199 231 263 295 327 359 391 423 455 4870 0 0 1 0 8 40 72 104 136 168 200 232 264 296 328 360 392 424 456 4881 0 0 1 0 9 41 73 105 137 169 201 233 265 297 329 361 393 425 457 4890 1 0 1 0 10 42 74 106 138 170 202 234 266 298 330 362 394 426 458 4901 1 0 1 0 11 43 75 107 139 171 203 235 267 299 331 363 395 427 459 4910 0 1 1 0 12 44 76 108 140 172 204 236 268 300 332 364 396 428 460 4921 0 1 1 0 13 45 77 109 141 173 205 237 269 301 333 365 397 429 461 4930 1 1 1 0 14 46 78 110 142 174 206 238 270 302 334 366 398 430 462 4941 1 1 1 0 15 47 79 111 143 175 207 239 271 303 335 367 399 431 463 4950 0 0 0 1 16 48 80 112 144 176 208 240 272 304 336 368 400 432 464 4961 0 0 0 1 17 49 81 113 145 177 209 241 273 305 337 369 401 433 465 4970 1 0 0 1 18 50 82 114 146 178 210 242 274 306 338 370 402 434 466 4981 1 0 0 1 19 51 83 115 147 179 211 243 275 307 339 371 403 435 467 4990 0 1 0 1 20 52 84 116 148 180 212 244 276 308 340 372 404 436 468 5001 0 1 0 1 21 53 85 117 149 181 213 245 277 309 341 373 405 437 469 5010 1 1 0 1 22 54 86 118 150 182 214 246 278 310 342 374 406 438 470 5021 1 1 0 1 23 55 87 119 151 183 215 247 279 311 343 375 407 439 471 5030 0 0 1 1 24 56 88 120 152 184 216 248 280 312 344 376 408 440 472 5041 0 0 1 1 25 57 89 121 153 185 217 249 281 313 345 377 409 441 473 5050 1 0 1 1 26 58 90 122 154 186 218 250 282 314 346 378 410 442 474 5061 1 0 1 1 27 59 91 123 155 187 219 251 283 315 347 379 411 443 475 5070 0 1 1 1 28 60 92 124 156 188 220 252 284 316 348 380 412 444 476 5081 0 1 1 1 29 61 93 125 157 189 221 253 285 317 349 381 413 445 477 5090 1 1 1 1 30 62 94 126 158 190 222 254 286 318 350 382 414 446 478 5101 1 1 1 1 31 63 95 127 159 191 223 255 287 319 351 383 415 447 479 511DIP Switch Position DMX Address5. T ECHNICAL I NFORMATIONFogger Maintenance Do not allow the fogger to become clogged. After every 40 hours of continuous operation,use CHAUVET® Fog Cleaner Quart (FCQ) through the system to prevent the accumulationof particulate matter in the heating element.The recommended cleaning procedure is as follows. 1. Unplug the product from power.2. Empty all fog fluid from the machine.3. Add cleaning solution to the tank.4. Connect the product to power and allow it to warm up.5. Run the unit in a well-ventilated area until the tank is almost empty. Do not allowthe pump to run dry.6. Refill with fogger fluid to continue using the fogger. Run the machine briefly to clear anyremaining cleaning solution from the pump and heater.Do Not operate the machine without fluid at any time.Fog Cleaner Quart (FCQ) was specifically developed by Chauvet to clean your Hurricane™ 1800 Flex. Make sure you use FCQ regularly, no longer than 90 days between cleanings, to increase the life of your product.StorageBefore storing the fogger, run FCQ through the system as described in the cleaningprocedure above; however, only follow steps 1 through 5. Do not refill the tank with fog fluid if storing the fogger. Cleaning the system prior to storage will help prevent any particles from condensing inside the pump or heater while not in use .Test-run your Hurricane™ 1800 Flex on a monthly basis to achieve the best performance.If you still experience problems after trying the solutions presented here, contact Chauvet Technical Support.7.T ECHNICAL S PECIFICATIONSDimensions andWeight22.2 in (563 mm) 13.4 in (340 mm) 15 in (380 mm) 27.6 lb (12.5 kg)Note: Dimensions in inches rounded to the nearest decimal digit.PowerModel-specific 120 VAC, 60 Hz or230 VAC, 50 HzFixedConsumption 1,364 W 1,300 WOperating current 11.9 A 5.7 ABreaker size 15 A 15Power input connector Hard-wired Hard-wiredPower Cord plug Edison (US) Local plugOperation5 min 1.3 gal (5 l) 150 ml/minFog Output25,000 cfmThermal104 °F (40 °C) ConvectionOrderingHurricane 1800 Flex (120 V)Hurricane TM 1800 Flex (230 V)05070320 781462206727R ETURNSIn case you need to get support or return a product:· If you are located in the U.S., contact Chauvet World Headquarters. · If you are located in the UK or Ireland, contact Chauvet Europe Ltd. · If you are located in Mexico, contact Chauvet Mexico.· If you are located in Benelux, contact Chauvet Europe BVBA.· If you are located in any other country, DO NOT contact Chauvet. Instead, contact yourlocal distributor. See for distributors outside the U.S., UK, Ireland, Mexico, or Benelux.If you are located outside the U.S., UK, Ireland, Mexico, or Benelux, contact yourdistributor of record and follow their instructions on how to return Chauvet products to them. Visit our website for contact details.Call the corresponding Chauvet Technical Support office and request a Return Merchandise Authorization (RMA) number before shipping the product. Be prepared to provide the model number, serial number, and a brief description of the cause for the return.Send the merchandise prepaid, in its original box, and with its original packing and accessories. Chauvet will not issue call tags.Clearly label the package with the RMA number. Chauvet will refuse any product returned without an RMA number.Write the RMA number on a properly affixed label. DO NOT write the RMA number directly on the box.Before sending the product, clearly write the following information on a piece of paper and place it inside the box: · Your name · Your address· Your phone number · RMA number·A brief description of the problemBe sure to pack the product properly. Any shipping damage resulting from inadequate packaging will be your responsibility. FedEx packing or double-boxing are recommended.Chauvet reserves the right to use its own discretion to repair or replace returned product(s).C ONTACT U S WORLD HEADQUARTERS - ChauvetGeneral InformationAddress: 5200 NW 108th AvenueSunrise, FL 33351Voice: (954) 577-4455Fax: (954) 929-5560Toll free: (800) 762-1084Technical SupportVoice: (954) 577-4455 (Press 4)Fax: (954) 756-8015Email: ************************ World Wide WebUNITED KINGDOM AND IRELAND - Chauvet Europe Ltd.General InformationAddress: Unit 1CBrookhill Road Industrial EstatePinxton, Nottingham, UKNG16 6NTVoice: +44 (0)1773 511115Fax: +44 (0)1773 511110Technical SupportEmail: ************************** World Wide WebMEXICO - Chauvet MexicoGeneral InformationAddress: Av. Santa Ana 30Parque Industrial LermaLerma, Mexico C.P. 52000 Voice: +52 (728) 285-5000 Technical SupportEmail: ********************.mx World Wide Web .mxCHAUVET EUROPE - Chauvet Europe BVBAGeneral Information Address:Stokstraat 189770 KruishoutemBelgiumVoice: +32 9 388 93 97 Technical SupportEmail: ************************* World Wide Web www.chauvetlighting.euOutside the U.S., United Kingdom, Ireland, Mexico, or Benelux contact your dealer. Follow their instructions to request support or to return a product. Visit our website for contact details.。
DX80存储安装配置指导书
2.1 存储上架......................................................................................................................................................2-1 2.2 存储挡板的安装和拆卸 ..............................................................................................................................2-4
4 连接主机和存储...........................................................................................................................4-1
4.1 DAS 组网连接..............................................................................................................................................4-1 4.2 SAN 组网连接..............................................................................................................................................4-2
富士施乐1080使用说明书

在运行Microsoft Windows 2000/XP的计算机上的打印驱动程序中创建自定义纸张尺寸1. 对于Windows 2000操作系统,单击[开始],将鼠标指向[设置],然后选择[打印机]。
对于Windows XP/Server 2003操作系统,单击[开始],然后单击[打印机和传真]。
将显示"打印机"或"打印机和传真"窗口。
2. 右键单击打印机图标,然后选择[属性]。
将显示"属性"窗口。
3. 单击[配置]标签。
4. 单击[自定义纸张尺寸]按钮。
将显示"自定义纸张尺寸"窗口。
5. 单击[自定义1]。
6. 将设定调整到所需的尺寸。
7. 在指定的字段中输入自定义尺寸纸张的名称,然后单击[确定]。
修改规格设定注意:如果启用了单一帐户模式或多帐户模式,则应首先登录机器。
有关更多详情,请参见下面的相关项目。
1. 按住控制面板上的[认证(规格设定/登记)]键4秒钟。
字母"P"将在显示屏中闪烁。
2. 请参阅下表,使用数字键输入将要更改的规格设定的菜单编号。
编号菜单说明值1 自动清除时间当机器完成复印作业时,将在特定的时间后清除为该特定复印作业选择的功能。
选择在复印作业完成后机器清除所选复印功能所需的时间。
0:无1: 20秒2: 30秒3: 60秒*4: 90秒2 纸盘的优先顺序选择纸盘优先顺序。
注意:如果机器没有安装选装的纸盘2,则无法选择纸盘1:纸盘1* 2:纸盘23:旁路纸盘3 原稿画质选择默认原稿画质。
1:文字* 3:照片2:文字/照片4 复印浓度选择默认浓度级别。
0:淡1:略淡2:普通*3:略浓4:浓5 倍率选择选择默认缩放倍率。
注意:可选值的变更取决于所选的测量单位:公制单位/英寸(菜单编号:15)。
公制单位0:100%* 1:50% 2:70% 3:141% 4:200%英寸0:100%* 1:50%2:78% 3:129% 4:200%6 自动纸盘选择当纸盘在复印作业期间用完纸张时,机器将自动选择放有相同尺寸和方向的纸张的另一个纸盘。
夏普KI-DX70、KI-DX85使用说明
夏普KI-DX70、KI-DX80使用说明书本空气净化器有4个过滤网,分别为HEPA除尘过滤网、脱臭过滤网、加湿过滤网、抗菌过滤网。
风路又分前端风路和后端风路2种,为保证高浓度负离子发生装置的有效工作,每运行17500小时需要更换一次负离子发生装置。
如果不更换,前端风路将在运行至19000小时后自动关闭。
Q:看不见有蒸汽出来,是否有效加湿?是否过度加湿?A:本净化器采用气化方式加湿,没有蒸汽出现。
并且会更具周围环境自动调整加湿量,不会出现过度加湿的情况。
Q:使用加湿功能下,水槽里的水位没有明显变化?A:电脑自动控制加湿,在湿度事宜的情况下,自动停止加湿。
Q:加湿中为何周围湿度未发生变化?A:有可能水槽里没有水、或者加湿滤网里附着过量垃圾。
请确认滤网及水槽水量。
Q:出风口有点冷?A:本净化器为了保证高浓度负离子的有效释放,出风口的前后会感到寒冷,属正常情况。
Q:只能使用自来水?A:自来水一般会有细菌抑制处理,所以推荐使用自来水。
如果用井水、净水器过滤的水、矿水的话,容易产生细菌。
Q:出风口有异味怎么办?A:经常抽烟或者吃烧烤、或者长时间未清洗水槽的话,会有异味产生。
遇此情况,请将本机清洗一遍。
Q:出风口的风量越来越弱怎么办?A:遇此情况,请将本机清洗一遍。
Q:高浓度负离子发生装置一定要定期更换么?A:是的,2年更换一次为好。
Q:出风口有[滋滋]的声响怎么办?A:属于正常情况,负离子发射器工作时会发出声响。
Q:突然间机器说起话来?A:机器在使用中,的确会说话,不懂不影响使用,如果觉得吵,可以反复按此按钮,将声音去除关于安置:为了得到最有效的除尘效果,请将机器背面放置于离墙壁30cm意外的位置。
1.室温最好控制在0-35度。
2.选择不被太阳直接照射的位置。
3.远离空调出风口。
4.远离电视机、调频收音机,调频时钟。
关于使用面表:1.按此键,机器会说日文,说的大多是一般提示之类的话语,只能说日文,不懂不影响操作,因为这些提示在面板上都会有显示。
DX 1280 冰箱使用说明书

REFRIGERATIONDX 1280 Refrigerator REFRIGERATIONInstallation and Operating manualDear customer:Thank you for buying your new fridge. T o ensure that you get the best resultsfrom your new fridge, please take time to read through these simple instruc-tions in this booklet.Please ensure that the packaging material is disposed of in accordance withthe current environmental requirements.If the fridge is visibly damaged, do not connect it to the power supply,Contact the store from where you purchased the appliance.CONTENTSWarning_____________________________________________________ P.2 Important information___________________________________________P.3 Names of the parts______________________________________________P.4 Installation____________________________________________________P.5 Positioning_________________________________________________P.5 Electrical connection_________________________________________P.5 Operation and maintenance______________________________________P.6 T emperature regulation_______________________________________P.6 Storing food and drink________________________________________P.7 Storing frozen food/freezing fresh food_________________________P.7 Important__________________________________________________P.7 ICE________________________________________________________P.7 The care required for best performance__________________________P.7 Defrosting food_____________________________________________P.7 Defrosting the appliance______________________________________P.7 Prolonged periods of disuse___________________________________P.8 Troubleshooting________________________________________________P.8 How to dispose of the packing materials____________________________P.8 Circuit diagram________________________________________________P.9 T echnical information___________________________________________P.9Always keep this instruction booklet together with the appliance for future consultation. In the event of resale of the appliance or change of ownership, ensure that the instruction booklet is supplied with the appliance so that new owner is fully aware of all instructions and warnings present in this documents.These warnings have been drawn up to ensure the safety of the user and others. Therefore read all instructions carefully prior to appliance installation and use.1. Disconnect the mains plug before carrying out any cleaning or maintenance operations(e.g. bulb replacement).2. This appliance has been designed to be used exclusively by adults. Ensure that childrendo not play near or with the appliance.3. All modifications to the electrical mains to enable appliance installation must be carriedout by a qualified technician.4. Do not use an extension cord. On completion of installation, check that the appliance isnot standing on the power cable.5. Domestic refrigerators and/or freezers are designed exclusively to store and/or freezefoodstuffs.6. During normal operation, the condenser and compressor, located at the rear of theappliance can reach high temperatures. Ensure that installation is carried out a according to the instructions contained in this booklet. Insufficient ventilation will impair operation and damage the appliance. Never cover or obstruct the ventilation slates on the appliance.7. Never allow children to play with the appliance. Children must never be allowed to siton the drawers or hang on the appliance doors.8. If the appliance is transported in a horizontal position, the oil in the compressor mayflow into the refrigerant circuit.9. Leave the appliance standing vertically for at least two hours before switching it on, toensure that oil flows back into the compressor.10. All refrigerators and freezers have surfaces that are subject to the formation of frost.11. Depending on the models, this frost can be removed automatically. (Automaticdefrosting) or manually when necessary. Never attempt to remove frost with sharp objects as this may damage the evaporator and impair efficient appliance operation. Let the frost thaw naturally; Never use hot water.12. Never put sparkling drinks or bottles of water in the low temperature compartments(freezer/cooler) as they can explode.13. We strongly advise against putting hot liquids or food in the refrigerator or filling riddedcontainers to the maximum capacity.14. Never carry out any modifications to your appliance.15. Never attempt to repair the appliance alone. Repairs carried out by unqualified personscan cause serious damage; always contact your nearest Service Center and use original spare parts only.16. The refrigerant and insulation in this appliance do not contain any gases harmful to theozone or which contribute to the greenhouse effect. However, disposal must be carried out in compliance with the relative standards regarding protection of the environment.17. Never use the base, drawers, doors etc. To stand on or as support.Caution:Please keep the products away from the fire or similar glowing substance before you dispose the refrigerator.Danger:Before you throw away your old refrigerator or freezer: take off the doors. Leave the shelves in place so that children may not easily climbinside.Do not store explosive substances such as aerosol cans with a flammable propellant in this appliance.Warning:If the supply cord is damaged, it must be replaced by the manufacturer or its service agent or a similarly qualified person inorder to avoid a hazard.Warning:This appliance can not be used in camping.Warning:This appliance can not be used in public transportations.Warning:The appliance shall be used for indoor only.Attention:This appliance is not intended for use by persons (including children) with reduced physical, sensory or mental capabilities, or lack ofexperience and knowledge, unless they have been given supervisionor instruction concerning use of the appliance by a personresponsible for their safety.Children should be supervised to ensure that they do not play with the appliance.Keep the key out of reach of children and not in the vicinity of the refrigerator.This appliance is intended to be used in household and similar applications such as• staff kitchen areas in shops, offices and other working environments;• farm houses and by clients in hotels, motels and other residential typeenvironments;• bed and breakfast type environments;• catering and similar non-retail applications.MODEL NO.: DX 12801. Freezer baffle assembly2. Freezer Shelf3. Freezer T emperature Control4. Refrigerator T emerature Control5. Refrigerator Shelves6. Crisper7. Leveling Leg8. Freezer Door Rack9. Door Pockets I Of Regrigerator10. Door Pocket III Of RegrigeratorNAMES OF PARTS1.8.9.10.7.INSTALLATIONPositioningPosition the appliance away from heat sources such as stoves, radiators, direct sunlight etc. Before connect the power supply, remove the supporting base and then screw down the front foot of appliance correctly to make it leveled correctly.This appliance is suitable in ‘ST’ climate.Hot to installInstall the refrigerator in a convenient location away form extreme heat and cold.Allow sufficient clearance between the refrigerator and side wall so the door(s) will open without obstruction. Refrigerator is not designed for recessed instSelect a space with strong level floor.Allow at least 10 cm of space between the refrigerator’s side and the wall.The appliance must be correctly connected to the power supply.Electrical connectionBefore connecting the appliance to the power supply, ensure that the voltage and frequency as indicated on the data plate correspond to those of the electrical mains.A deviation of -6% to +6% is admissible with respect to the rated voltage. For operation with other voltage supplies, an adequately powered auto=transformer is required. Always connect the appliance to an efficient earthing system.Put the appliance in upright position for at least 2 hours before switching it on.T emperature Control PanelsSetting the T emperature Control• To control the internal temperature, adjust the control dials according to the ambient temperature or purpose of use.• The first time you turn the unit on, set the temperatore control to “MAX” in refrigerator section and “MID” in freezer section.• The range of the temperature control is from position “OFF” the warmest to “MAX” the coldest in refrigerator sectionand from position “MIN” the warmest to “MAX” the coldest in the freezer section.A er 24 to 48 hours, adjust the temperature control to the setting that best suits your needs. The setting of “MID” in refrigerator section and “MID” in freezer section should be correct for home or office refrigerator use.Note: If the unit is unplugged, haslost power, or is turned off,you must wait 3 to 5 minutesbefore restarting the unit. Ifyou attempt to restart beforethis time delay, therefrigerator-freezer will notstart.MODEL N0: DX 1280Storing food and drinkFor optional use of the refrigerator compart-ment observe the following instructions:1. Never put hot liquids or food in therefrigerator;2. Cover or wrap food prior to storage3. Arrange food so that air can circulatefreely inside the compartment.Meat(all types:) Wrap in protective material and store time should be less than two days cooked food, cold meals etc. must be covered well and stored in proper position in the refrigerator.Fruit and vegetables should be cleaned and stored in the relative drawer.Bananas, potatoes, onions and garlic should not be stored in the refrigerator unless wrapped first.Storing frozen food/freezing fresh food Appliances with compartments can be used to store frozen food for a maximum time of one month.The interval between purchase and placing the food in the freezer should be as short as possible.Never exceed the storage period indicated on the food packaging.Only open the freezer door when necessary and as quick as possible.In the event of operation a er prolonged periods of disuse, switch on the appliance under no-load conditions for 2-3 hours taking care to set the thermostat knot to the highest setting, then place food in the refrigerator as required and adjust the thermostat knob to an intermediate setting.ImportantIf food stored in the compartment is defrosted, e.g. due to a power failure, it should be consumed within a short time, even if not completely thawed.IceThe appliance is supplied with an ice tray to make ice. If the ice tray freezes onto the from the compartment, never use metal and/or sharp objects to detach the tray from the compartment.The care required for best performance, such asLoadings in the refrigerating appliance should not exceed its storage volume.If the refrigerating appliance stopped for a long time(due to interruption of power supply or failure of the refrigerating system), the frozen food(fresh food) had better to be disposed of according to user’s need.It is better to arrange the food when storage, to avoid cross-contamination. Some types of fresh vegetables and fruits are sensitive to cold; therefore they are not suitable for storage in chill compartment. LampLED lamp can not be replaced by user. It must be replaced by the manufacturer, service agent or similarly qualified person. Defrosting foodFor optional cooking results with frozen food, we recommend defrosting inside the refrigerator or at ambient temperature, the latter obviously require less time.If you need to save time and cook food in the shortest time, you can cook small items directly from frozen by lengthening the cooking time slightly, or put the big size items in a microwave oven to reduce the defrosting time.Defrosting the applianceA er refrigerator operates some time, water of food or moisture in air, which enters refrigerator when opening its door, will make a layer of frost on its evaporator. Freezing efficiency may be decreased and energy consumption be increased by too thick layer of frost. So it should be defrosted a er refrigerator operates a period.The product needs not artificial defrosting because of its auto-defrosting function. Water from melting frost is drained to drip tray at lower part of its back through drainpipes and is evaporated naturally.Prolonged periods of disuseIf you do not intend to use the appliance for long periods of time. Set the thermostat knob of the “OFF” or “0” position and disconnect the power supply. Then take out the foods, defrost and clean the appliance. Leave the door slightly open.Cleaning the ApplianceDisconnect the power supply before cleaning the appliance.Do not use coarse or aggressive cleaning agents as you may damage the surface. Clean the exterior with cloth.Remove the detachable accessories in the interior of the appliance and clean with water and liquid detergent. Plastic parts cannot be washed in dishwashers.Wash the interior of the appliance with wet cloth, adding one or two spoonfuls of vinegar.A er cleaning, connect the appliance to power supply and reload it.TROUBLESHOOTINGDefective operation of the appliance is not always due to a technical fault but is offen caused by incorrect installation or use. To avoid unnecessary technical assistance and relative expenses we recommend the following procedures.1. Internal temperature is not cool enoughCheck • Make sure that the door closes properly;• Make sure that the thermostat setting is correct;• Make sure that the refrigerator is not positioned close to heat sources;• Make sure that air can circulate freely at the rear of the appliance;• Make sure that the condenser is not blocked.2. Internal temperature is too lowCheck • Make sure that the thermostat setting is correct.3. Excessive appliance noise levelCheck • Make sure that the appliance is leveled correctly.4. Appliance operation failureCheck • Make sure that the thermostat is not set to “OFF” or “0”.• Make sure that the power supply is not disconnected;• Make sure that the pulg is inserted correctly into the mains socket;• Make sure that the automatic cut-out on the mains line has not tripped or that thefuse has not roken.• Make sure that the power cable is not faulty.Note: If the power cable need to be replaced, remove the plug from the power socket and install the new cable, which must be requested from the Sevice senter and installed by a qualifiedtechnician; ensure that it is properly connected and fixed.If problems persist after the above procedures, contact your nearest Technical Assistancedepartment.HOW TO DISPOSE OF THE PACKING MATERIALThe packing material is recyclable.The following procedure is recommended:• dispose of paper, card and carton in the relative containers;• dispose of plastics in the relative containers.• If you have no cecycling bins in your area then you can put this material in the ordinary bins and/or take it to the appropriate collection centers.TECHNICAL INFORMATION AND CIRCUTIT DIAGRAM• CIRCUTIT DIAGRAMZH目錄• 結構介紹 ________________________________________ P.1• 使用注意事項 ____________________________________ P.2• 搬運與放置 ______________________________________ P.3• 雪櫃的合理使用_________________________________ P.4-5• 雪櫃保養與清潔 __________________________________ P.6• 簡單故障的分析與排除 ____________________________ P.7• 技術參數規格及電路圖 ____________________________ P.8• 使用雪櫃前請您詳細閱讀本說明書,以便正確使用 ,並請妥善保存本說明書以供日後參考。
DX8808L秤重控制器说明书

DX8808L称重显示控制器说明书潍坊市大兴水泥设备测控部1.概述1.1简介DX8808L称重显示控制器是专门为水泥、化工等行业设计的提供自动定量控制的微机。
该微机采用工业级元器件、STM工艺生产,具有体积小、功能强、可靠性高、适应能力好等优点,集称重控制于一体,具有独特的抗干扰能力,能在恶劣的环境中长期使用。
1.2主要功能◆设定量控制◆工作状态LED显示◆粗细流双控制◆灵敏度设定◆手自动去皮功能1.3工作原理称重控制器接受传感器输出的模拟信号,经内部采集信号处理后,计算并显示出称体内物料的重量值。
对称体内物料的重量值与设定值进行比较,如重量值达到设定值,控制器输出信号给执行设备(如进行掉袋、推袋等动作)。
1.4技术规格1.4.1一般规格⑴环境温度:-20℃~+60℃⑵相对温度:10~80%⑶电源电压:AC220V土10%⑷外形尺寸:76×159×1151.4.2测量部分⑴传感器电源:5V土5%DX8808L 称重显示控制器说明书设置 置零← + 确定 ⑵负载能力: 150mA ⑶信号范围: 0mV ~25mV⑷内部输出外供直流12V ,最大500mA 。
2.操作2.1显示面板2.2指示灯说明亮有夹袋信号,灭无夹袋信号 亮有粗流输出,灭无粗流输出 亮有细流输出,灭无细流输出 亮有推袋输出,灭推袋输出 2.3按键说明设置键: 【重量状态】:按此键进入“参数设置”,(例如显示P01),其他时候按此键,返回上级菜单。
置零键:【重量状态】:按此键,手动重量置零,即手动去皮。
左移键: 【数据状态】:按此键,闪烁位左移。
加法键: 【数据状态】:按此键,闪烁位加一。
确认键:【参数序号状态】:按此键,进入数据状态。
【数据状态】:按此键,保存数据。
2.4参数设置显示:P01:代表设定值(kg )P02:代表细流重量值(kg )P03:推袋时间(0~999),每个数0.5S 左右 输出“推袋信号”的时间长短 P04:代表称重零点值(kg ),即皮重P05:代表称体静测时间,每个数0.5S 左右 从夹袋到粗细流开始灌装的延迟时间P06:传感器量程(kg )P07:传感器输出灵敏度(mV ) P08:代表自动状态下是否自动去皮0--不去皮,1--自动去皮 P09:代表设定袋重提前量,默认值为0 P10:密码功能2.5操作举例包装机进行包装工作前必须进行去皮操作!!!为确保校称值的精确性,必须通电半小时后才能进行校称、去皮操作,具体步骤如下:1.校称:本微机出厂前已校好称,也可二次校称步骤如下:2.去皮:去皮操作步骤如下:2.6接线端子说明:夹袋输出推袋输出细流输出粗流输出夹袋输入运行输入外供-外供+1 2 3 4 5 6 7 8 9 10 11 12电源+信号+信号+电源-地线火线零线13 14 15 16 17 18 19 20 21 22 23 24安全使用注意事项:在控制器接入电源之前,请检查使用的电压是否在AC220V土10%范围之内及频率是否在50HZ土2%范围内。
迪士华器说明书.pdf_1701985776.2429068

of the impeller.
7. Insert the pump cover and press
down .
2
a The pump cover clicks into position.
1
8. Install the filter system.
Troubleshooting
Fault
Display for water supply lights up
the tableware. Check that the spray arms can ro-
4. Select the programme. 5. Start the programme . 6. Remove the tableware at the end of the pro-
gramme.
Programme
Intensive 70° Auto 45-65° Eco 50° Express 65° - 1h Machine Care
1) Duration [h:min] 2) Energy [kWh] 3) Water [l]
1) 2:10 - 2:15 2) 1,300 - 1,350 3) 11,0 - 13,5
50 ml
2. Close the lid of the deter-
25 ml
gent dispenser.
15 ml
a The lid clicks into position.
9001669928 (020401) SGV2ITX22G
*9001669928*
How to use your appliance
1) 1:45 - 2:45 2) 0,850 - 1,350 3) 9,5 - 15,5
D8810终端用户手册

声明欢迎利用升腾终端,请在第一次安装和利用前,认真阅读此用户手册。
Microsoft®是 Microsoft公司的注册商标。
Citrix®和ICA®是 Citrix公司的注册商标。
intel®是 Intel公司的注册商标。
本手册提及的所有其他产品注册商标名称都是归其相应公司所有。
未依照本手册进行操作所造成的损坏或问题,福建升腾资讯不承担任何责任。
由于自选耗材(非福建升腾资讯产品或认可产品)所造成的损坏或问题,须自行承担责任。
各型号终端产品可能与用户手册略有不同,福建升腾资讯将另行说明。
未经福建升腾资讯书面许可,不准以任何方式对本手册进行复制、转载或其它形式的侵权行为。
若是在终端的利用进程中有任何建议和意见,请随时拨打福建升腾资讯免费效劳热线:800-858-1515。
福建升腾资讯保留对本手册的最终说明权公司简介福建升腾资讯(简称“升腾资讯”)成立于2002年,是中国最先从事瘦客户机研发、生产和销售的企业,是国内领先的终端设备制造商。
升腾资讯专注于行业嵌入式设备的研发、制造和销售,目前产品线已覆盖了Windows终端、网络运算机(NC)、智能手持设备、自助效劳设备等嵌入式产品领域。
其中,自从1998年推出中国第一台具有自主知识产权的Windows终端——升腾2000,升腾Windows终端产品已经持续八年国内销量第一,是国内Windows终端市场当之无愧的领导厂商。
升腾资讯坚持“立足行业,面向应用”的进展战略,以行业嵌入式设备为基础,以行业应用为核心,通过技术创新、对行业客户的深切了解,为行业客户的核心业务提供“量身定做”的产品和解决方案。
目前,升腾资讯已拥有国内Windows终端厂家最丰硕的应用案例和覆盖面最广的客户群,产品普遍效劳于金融、电信、税务、电力、交通、海关、教育等行业和相关政府机构,倍受客户的认可与信任。
“创新升华价值,诚信腾飞事业”是升腾人始终不渝的理念。
V80中文使用手册
到回墨罐。墨水粘度会不断增加,机器每隔一分钟自动检测粘度,检测时电磁阀YV5
会打开,如果粘度值超过设定粘度,稀释阀 YV2会开启,稀释剂从稀释罐吸入回墨罐,
使墨水得到稀释。本机在工作过程中会自动检测喷腔压力,使喷腔压力保持稳定。
墨路各器件名称及功能见下表:
序号 代号
名称
功能
1
/
墨泵
提供墨水运行的动力
如果需要喷印汉字或是较为复杂的图案,则需要由更多的点来组成,如汉字一般需要 16 16 点阵,复杂图案可以用 24 点阵。
在本喷码机中,点阵通过打印行数来设置。设置打印单行时,打印字符为 5 7 点阵, 双行为 16 点阵,三行为 24 点阵。打印点阵越复杂,需要参予打印的墨点越多,相应的打印 速度也会降低。
尊敬的用户:您好!
LEADJET V80 系列喷码机中文操作手册
感谢您选用镭德杰 V 系列小字符喷码机,它将以优异的性能为您的产品提供高质量、
高效率之喷墨打印。 为使您的机器达到最佳使用效果,请在使用前仔细阅读本操作手册。特别提醒注意以下
事项:
1、 因墨水及稀释剂为易燃品,应确保喷码机附近无明火,并备有灭火器。 2、 机器内部有 220V、300V及 5000V高压,打开机器时请断开电源,以防
晶振
检测极 高压板 墨滴
喷腔组件 充电极 负极板 回收器
-2-
LEADJET V80 系列喷码机中文操作手册
图 1 喷墨打印原理
点阵:
喷码形成的每一个字符都是由墨点组成的,字符的复杂程度不同,组成字符所需要的点 的数量也不同。通常情况下,字母和数字横排 5 个点,坚排 7 个点就可以组成美观清楚的字 符。如下图所示。这样的字符就称为 5 7 点阵字符。实际打印中,字符与字符之间必须空 一列,两行字符之间必须空一行,所以这种字符也称为 6 8 点阵字符。
- 1、下载文档前请自行甄别文档内容的完整性,平台不提供额外的编辑、内容补充、找答案等附加服务。
- 2、"仅部分预览"的文档,不可在线预览部分如存在完整性等问题,可反馈申请退款(可完整预览的文档不适用该条件!)。
- 3、如文档侵犯您的权益,请联系客服反馈,我们会尽快为您处理(人工客服工作时间:9:00-18:30)。
DX8808L+
称重显示控制器
说
明
书
1.概述
1.1简介
DX8808L+称重显示控制器是专门为干粉砂浆、水泥、化工等行业设计的提供自动定量控制的微机。
该微机采用工业级元器件、STM工艺生产,具有体积小、功能强、可靠性高、适应能力好等优点,集称重控制于一体,具有独特的抗干扰能力,能在恶劣的环境中长期使用。
1.2主要功能
◆设定量控制
◆工作状态LED显示
◆粗细流双控制
◆手动回皮功能
◆手自动标称功能
◆漏料自动检测保护功能
◆脱袋自动检测保护功能
1.3工作原理
称重控制器接受传感器输出的模拟信号,经内部采集信号处理后,计算并显示出称体内物料的重量值。
对称体内物料的重量值与设定值进行比较,如重量值达到设定值,控制器输出信号给执行设备(如进行掉袋、推
- 1 -
袋等动作)。
1.4技术规格
1.4.1一般规格
⑴环境温度:-20℃~+60℃
⑵相对温度:10~80%
⑶电源电压:AC220V土10%
⑷外形尺寸:76×159×115
1.4.2测量部分
⑴传感器电源:8V土5%
⑵负载能力: 150mA
⑶信号范围: 0mV~25mV
⑷内部输出外供直流12V,最大500mA。
2.操作
2.1显示面板
- 2 -
- 3 -
设置 2.2指示灯说明
夹 袋○ :亮时有夹袋信号,灭无夹袋信号
粗 流○ :亮时有粗流输出,灭无粗流输出
细 流○ :亮时有细流输出,灭无细流输出
推 袋○ :亮时有推袋输出,灭无推袋输出
参 数○ :参数灯亮时,可以进行参数设置
设定值○ :设定灯亮时,可以进行袋重设定
瞬时值○ :瞬时灯亮时,显示重量瞬时值
2.3按键说明
设置键:
【参数灯亮状态】:
<1>.参数数码管(绿色)显示参数“C ”,输入
“01234” 按设置键,参数数码管(绿色)
显示参数“H ”,代表细流闸板关闭以后延
时多少秒进行推袋;再按设置键,参数数码
管(绿色)显示参数“A ”,代表粗流闸板
关闭提前量,例如:假设此值为“5”,设
定值为“50”KG ,那么粗流闸板关闭的重
量值为“45”公斤。
<2>.参数数码管(绿色)显示参数“C ”,若五
位红色数码管不为数值“01234”,按此键,
- 4 -
回皮 ← + —
标称 → 设定值指示灯亮,可以进行包装袋重进行
设定,再按此键,瞬时指示灯亮,显示当
前瞬时重量。
注:仪表包装时,“瞬时指示灯”亮时才能“启动”;否
则,仪表处于“暂停”状态。
标称键:
按此键,手动进行标称
回皮键:
按此键,手动重量置零,即手动去皮。
左移键
【数据状态】:按此键,闪烁位右移。
左移键:
【数据状态】:按此键,闪烁位左移。
加法键:
【数据状态】:按此键,闪烁位加一。
减法键:
【数据状态】:按此键,闪烁位减一。
2.4参数设置显示:
1、参数指示灯亮:
“□□□□□C”:代表需输入密码进入参数设定
“□□□□□H”:代表细流关闭后到推袋开始之间
的延时时间(S)
“□□□□□A”:代表粗流关闭时的提前量,例如
此值为“5”,设定值:“50”,那
么粗流到“45”时关闭
2、设定值指示灯亮:
“□□□□□”:代表包装袋重设定值
3、瞬时指示灯亮:
“□□□□□”:显示仪表瞬时重量,此灯亮,仪
表才能启动,否则,处于“暂停”
状态;
2.5操作举例
包装机进行包装工作前必须进行去皮操作!!!
为确保校称值的精确性,必须通电半小时后才能进行校称、去皮操作,具体步骤如下:
本微机出厂前已校好称,也可二次校称步骤如下: 清空称体上的杂物,按一下“回皮”键,仪表瞬时重量值进行“清零”,称体上放入一个20KG左右的砝码,
- 5 -
- 6 -
按“标称”键,标称灯亮,修改仪表显示数值与砝码重量一致,按三下“标称”键,标称灯灭,标称完毕。
2.6接线端子说明:
夹袋输出 推袋输出 细流输出 粗流输出 夹袋输入 外供+ 1 2 3 4 5 6
7 8 9 10 11 12 电源+ 信号+ 信号+ 电源-
地线 火线 零线 13 14 15 16 17 18 19 20 21 22 23 24
安全使用注意事项:
在控制器接入电源之前,请检查使用的电压是否在AC220V土10%范围之内及频率是否在50HZ土2%范围内。
如果您使用的电源不能满足要求,需要加交流稳压电源。
如果您设备上已安装了传感器,在设备上的电焊作业应尽量避免。
必须焊接的,焊接部位要就近搭铁,保证传感器不受任何焊接电流影响,如果传感器已接入控制器,那么您设备上机械构件部分的一切电焊作业都是绝对不允许的。
感谢您选用了我公司DX8808L+称重显示控制器,请在使用前认真阅读本说明书,并按说明书操作。
如有任何疑难问题,请与本公司联系,我们将竭诚为您服务。
***********†††***********
如产品需要维修,
请将产品、发票送到以下地址进行检修
*********************************************
- 7 -。
