jbmp用户指南
JMBIE-MP3操作说明

―――――JMBIE MP3 U盘操作说明―――――JMBIE STUDIO一、可执行程序下载首先了解下载的概念,基于AT89C51SND1C的MP3 和U盘学习板,其用户程序和MP3音乐文件都是通过USB电缆下载到学习板的。
下载用户程序时,单片机作为一个特殊的USB 设备存在,在计算机上需要专门的驱动程序,并依靠专门的下载软件完成操作;用户程序是下载到单片机内部的FLASH程序存储器里,说的更准确的话就是将程序“烧写”到单片机。
而当可用的用户U盘程序烧写到单片机后,重新启动学习板,运行用户程序的结果使得学习板可以象普通U盘那样在计算机上使用,这时学习板被计算机识别为一个USB海量存储器。
1.MCU设备驱动程序在光盘“开发软件”目录下提供了若干应用软件,其下的“FLIP-1-8-2 \ usb2.4.0驱动”子目录里包含了AT89C51SND1C单片机的设备驱动程序。
“FLIP-1-8-2”目录下的《readme.txt》文件里有说明。
用户可以拷贝该驱动到硬盘,以备后用。
参考AT89C51SND1C的相关文档可知,该芯片在出厂发行时BLJB位(BootLoader跳转位)已经被编程,这意味着芯片第1次上电时首先运行的是芯片内含的Atmel BootLoader,也就是说进入了程序下载状态(这时芯片并无用户程序可执行)。
所以正常的话,插入USB电缆后,计算机就会提示发现新硬件,需要查找安装其驱动程序;然后选取事先准备好的AT89C51SND1C芯片USB设备驱动程序即可,安装过程中分两次分别选择“usb2.4.0驱动”目录下的两个.inf文件。
安装成功后系统提示设备可用。
需要注意的是,进行驱动程序安装之前学习板不要插电池,也就是说要直接插入USB线并获得电源。
驱动安装完毕后即可用FLIP软件下载程序了。
2.用FLIP软件下载程序在光盘“开发软件”目录下的“FLIP-1-8-2”子目录下提供ATMEL公司发布的FLIP软件,用于在计算机上将用户程序文件下载到AT89C51SND1C等单片机芯片。
Jbmp学习资料
jBPM,全称是Java Business Process Management,是一种基于J2EE的轻量级工作流管理系统。
jBPM是公开源代码项目,它使用要遵循 Apache License。
jBPM在2004年10月18日,发布了3.0版本,并在同一天加入了JBoss,成为了JBoss企业中间件平台的一个组成部分,它的名称也改成JBoss jBPM。
随着jBPM加入JBoss组织,jBPM也将进入一个全新的发展时代,它的前景是十分光明的。
jBPM最大的特色就是它的商务逻辑定义没有采用目前的一些规范,如 WfMC´s XPDL, BPML, ebXML, BPEL4WS等,而是采用了它自己定义的JBoss jBPM Process definition language (jPdl)。
jPdl认为一个商务流程可以被看作是一个UML状态图。
jPdl就是详细定义了这个状态图的每个部分,如起始、结束状态,状态之间的转换等。
jBPM的另一个特色是它使用Hibernate来管理它的数据库。
Hibernate是目前Java领域最好的一种数据持久层解决方案。
通过Hibernate,jBPM将数据的管理职能分离出去,自己专注于商务逻辑的处理。
J2EE工作流管理系统jBPM详解(一)一、jBPM入门简介概述工作流业务流程管理技术是基于SOA技术实现的一个核心部分。
使用工作流能够在软件开发和业务两个层次受益:1、方便开发工作流管理系统能够简化企业级软件开发甚至维护。
◆降低开发风险 - 通过使用状态和动作这样的术语,业务分析师和开发人员使用同一种语言交谈。
这样开发人员就不必将用户需求转化成软件设计了。
◆实现的集中统一 -业务流程经常变化,使用工作流系统的最大好处是:业务流程的实现代码,不再是散落在各种各样的系统中。
◆加快应用开发 - 你的软件不用再关注流程的参与者,开发起来更快,代码更容易维护。
智能无线张拉系统使用说明书

智能无线张拉系统使用说明书目 录本说明书中的约定 0第一章概 述 (1)1.1简介 (1)1.2主要功能及特点 (1)1.3主要技术指标 (2)1.4符号与术语 (2)1.5注意事项 (3)1.6仪器的维护与保养 (3)1.7责任 (4)第二章张拉系统描述 (5)2.1系统组成 (5)2.1.1L2000预应力无线张拉仪 (5)2.1.2压力传感器 (8)2.1.3位移传感器 (8)2.1.4无线模块 (9)2.1.5油泵及千斤顶 (10)2.1.6电源线 (11)2.2仪器按键介绍 (12)2.2.1非可屏蔽按键 (13)2.2.2普通按键 (14)第三章仪器操作 (15)3.1仪器显示界面 (15)3.1.1等待张拉界面 (15)3.1.2张拉测量界面 (16)3.2按键二次确认 (17)第四章智能无线张拉软件 (18)4.1软件的安装、运行与卸载 (18)4.1.1软件的运行环境 (18)4.1.2软件的安装 (18)4.1.3驱动的安装 (21)预应力无线张拉系统使用说明书4.1.4软件的运行 (21)4.1.5软件的卸载 (22)4.1.6软件的升级 (22)4.2软件界面介绍 (22)4.2.1标题栏 (23)4.2.2菜单栏 (23)4.2.3工具栏 (23)4.2.4组切换区 (23)4.2.5张拉控制区 (24)4.2.6次切换区 (24)4.2.7波形/数据列表区 (25)4.2.8张拉状态结果/孔位示意图 (26)4.3软件菜单介绍 (26)4.3.1文件菜单 (26)4.3.2参数菜单 (32)4.3.3显示菜单 (39)4.3.4编辑菜单 (42)4.3.5视图菜单 (44)4.3.6帮助菜单 (45)4.3.7张拉控制 (45)第五章快速操作指南 (53)5.1软件控制张拉 (53)5.1.1准备工作 (53)5.1.2张拉组第一次张拉 (58)5.1.3进行下一次张拉 (59)5.1.4重测当次 (59)5.1.5打印张拉记录表 (59)附录1 仪器提示及报警信息汇总 (60)附录2 快捷键一览表 (62)附录3 本系统支持的张拉模式 (63)附录4 预应力筋平均张拉力的计算 (67)附录5 预应力筋的理论伸长值的计算 (68)本说明书中的约定A.灰色背景、带黑色方框的文字表示界面上的一个按钮,如:确定钮。
高清网络播放器使用说明书
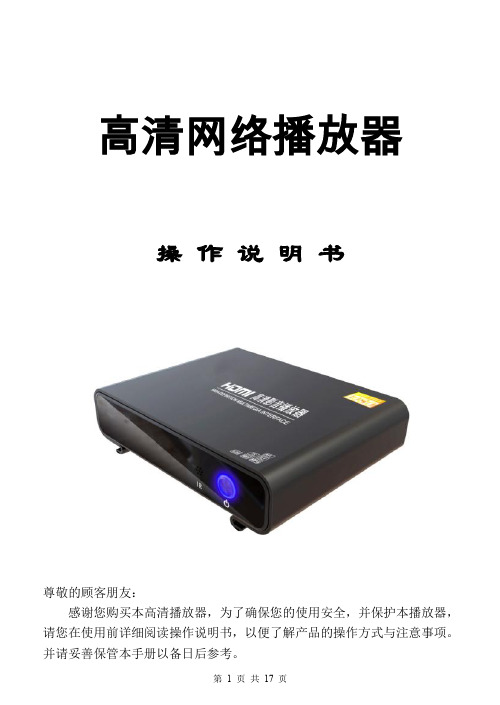
高清网络播放器操作说明书尊敬的顾客朋友:感谢您购买本高清播放器,为了确保您的使用安全,并保护本播放器,请您在使用前详细阅读操作说明书,以便了解产品的操作方式与注意事项。
并请妥善保管本手册以备日后参考。
注意事项:1.请勿将本机暴露雨中或潮湿的环境以防发生火灾或电击事故。
2.为了减少火灾,触电或产品损坏的危险,请勿让本机遭受雨淋、受潮或溅上水滴。
3.安全指南●请使用本机所配专用适配器,不得与其他设置共用适配器。
●请不要将适配器电源线及插头放在靠近热源设备的地方。
●请不要在适配器电源线及插头上放置重物。
●请不要拆修适配器及其电源线。
●为保证安全,请不要打开机壳暴露内机,如需检修,务必请专业人员。
4、维修提示●本机机构复杂,非专业人员切勿自行打开机器,以免损坏机器。
●用户请勿随意拆缷机器部件,打开机器自行修理将使保修标记失效。
●如果确实需要进行维修,请与当地保修部门联络安排维修事宜。
●如需要更换器件或配件,修理时必须选用符合制造商规定的原装器件。
机器的前后面板1、向下方向键;2、向上方向键;3、返回键;4、向左方向键;5、向右方向键;6、确认(OK)键;7、IR,红外遥控接收窗口;8、电源开关和灯镜,通电后蓝灯亮;9、DC,外接电源6V/2.5A开关电源从这里插入;10、V,CVBS视频输出接口;11、L:模拟音频左声道输出接口;12、R:模拟音频右声道输出接口;13、COAXIAL:数字同轴音频输出接口;14、HDMI:数字高清1.3输出口,HDMI线从这里插入。
15、RJ45:有线网络输入接口,RJ45网线从这里插入,网络接通后,绿灯常亮,黄灯闪烁;16、HOST 1:外接移动硬盘或U盘等设备插入口。
17、HOST 2:外接移动硬盘或U盘等设备插入口;18、SD:SD卡从这里插入。
遥控器1、<电源>:本机工作在任何时候按此键,将关闭播放器,系统进入低功耗待机模式,真正切断电源需关掉电源开关。
JBPM4.1

JBPM4.1学习尹伟为一、搭建开发环境1.首先下载eclipse最新版和jbmp4.1,分别解压缩到某目录下,以下称该目录为JBPM_HOME。
2.运行eclipse,window Preferences配置user libraries,将JBPM_HOME下的jbpm.jar添加进去,并将JBPM_HOME\src目录source attach到jbpm.jar;再将JBPM_HOME\lib目录下的所有jar文件都添加到jbpm libraries下,如下图给工程配置jbpm libraries,3. 安装流程设计器GPD 插件,Help --> Install New Software...,如下图,选择JBPM_HOME\install\src\gpd\jbpm-gpd-site.zip ,这里可能会花费一定的时间,等着吧。
完成后重起eclipse,就可以在eclipse中可视化地设计流程,如下图4.配置jbpm runtime,指定runtime location到JBPM_HOME目录如下图5.添加jPDL 4 schema,将jbpm\src下的jpdl-4.0.xsd添加到XML Catalog,如下图二、Signavio基于web的流程编辑器JBPM_HOME/install/src/signavio目录下有jbpmeditor.war,这就是signavio的web应用。
里面的web.xml 中有一项fileSystemRootDirectory的配置,指定流程文件编辑保存后的存放目录,修改后部署到tomcat中即可。
也可以通过ant任务来部署ant -Dsignavio.repo.path=d:/java/jbpm-4.1/signavio-repo install.signavio.into.tomcat其中signavio.repo.path也是指定流程文件的存放目录。
高清网络播放器使用说明书
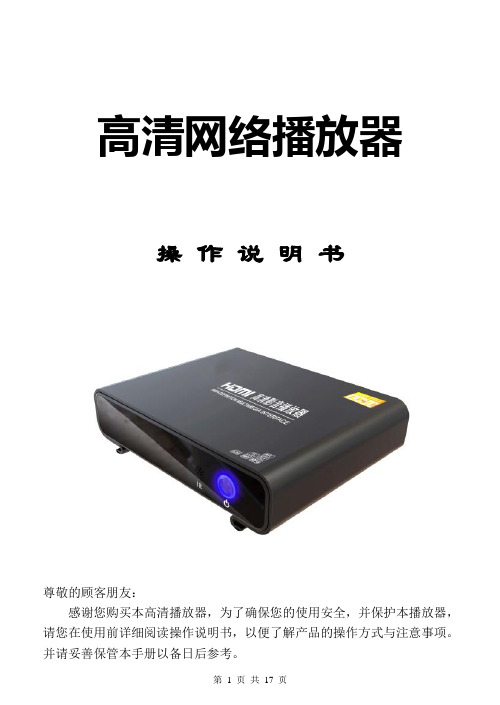
高清网络播放器操作说明书尊敬的顾客朋友:感谢您购买本高清播放器,为了确保您的使用安全,并保护本播放器,请您在使用前详细阅读操作说明书,以便了解产品的操作方式与注意事项。
并请妥善保管本手册以备日后参考。
注意事项:1.请勿将本机暴露雨中或潮湿的环境以防发生火灾或电击事故。
1.为了减少火灾,触电或产品损坏的危险,请勿让本机遭受雨淋、受潮或溅上水滴。
1.安全指南●请使用本机所配专用适配器,不得与其他设置共用适配器。
●请不要将适配器电源线及插头放在靠近热源设备的地方。
●请不要在适配器电源线及插头上放置重物。
●请不要拆修适配器及其电源线。
●为保证安全,请不要打开机壳暴露内机,如需检修,务必请专业人员。
4、维修提示●本机机构复杂,非专业人员切勿自行打开机器,以免损坏机器。
●用户请勿随意拆缷机器部件,打开机器自行修理将使保修标记失效。
●如果确实需要进行维修,请与当地保修部门联络安排维修事宜。
●如需要更换器件或配件,修理时必须选用符合制造商规定的原装器件。
机器的前后面板1、向下方向键;2、向上方向键;3、返回键;4、向左方向键;5、向右方向键;6、确认(OK)键;7、IR,红外遥控接收窗口;8、电源开关和灯镜,通电后蓝灯亮;9、DC,外接电源6V/2.5A开关电源从这里插入;10、V,CVBS视频输出接口;11、L:模拟音频左声道输出接口;12、R:模拟音频右声道输出接口;13、COAXIAL:数字同轴音频输出接口;14、HDMI:数字高清1.3输出口,HDMI线从这里插入。
15、RJ45:有线网络输入接口,RJ45网线从这里插入,网络接通后,绿灯常亮,黄灯闪烁;16、HOST 1:外接移动硬盘或U盘等设备插入口。
17、HOST 2:外接移动硬盘或U盘等设备插入口;18、SD:SD卡从这里插入。
遥控器1、<电源>:本机工作在任何时候按此键,将关闭播放器,系统进入低功耗待机模式,真正切断电源需关掉电源开关。
JProfiler使用说明

JProfiler使用说明(版本号1.0)2008年1月第 1 页共 80 页文档更改历史记录序号 主要更改内容 版本号 更改人 更改时间1 建立文档 1.0 2008-01-11 23456789第 2 页共 80 页目录1JPROFILER'S START CENTER (5)1.1O PEN SESSION (5)1.2N EW SESSION (6)1.2.1New Session (6)1.2.2New server integration (7)1.3C ONVERT SESSION (17)1.4O PEN SNAPSHOT (17)2管理SESSION (18)2.1A PPLICATION SETTINGS DIALOG (18)2.1.1session名 (18)2.1.2session类型 (18)2.2P ROFILING SETTINGS (20)2.2.1Adjusting call tree collection options (20)2.2.2JA V A 子系统 (23)3监测视图 (27)3.1内存视图 (27)3.1.1所有对象(ALL objects) (28)3.1.2记录的对象(Recorded objects) (29)3.1.3分配调用树(Allocation call tree ) (29)3.1.4分配热点视图(Allocation hot spots view) (29)第 3 页共 80 页3.1.5类跟踪(Class tracker) (30)3.2CPU视图 (30)3.2.1调用树视图(Call tree view) (30)3.2.2热点视图(Hot spot view) (33)3.2.3调用图(Call graph) (34)3.3线程视图 (40)3.3.1线程历史视图 (40)3.3.2线程监控视图 (41)3.3.3死锁检测图形 (43)3.3.4当前监控使用视图 (43)3.3.5监控使用历史视图 (44)3.3.6监控使用统计 (44)3.4VM遥感监测视图 (45)3.4.1Heap (45)3.4.2Objects (45)3.4.3Garbage collector (45)3.4.4Classes (45)3.4.5Threads (45)4IDE集成(ECLIPSE 3.X) (46)第 4 页共 80 页1JProfiler's start center使用JProfiler's start center,你可以创建新的会话,编辑已有会话或者打开已保存的会话。
博奥软件操作

博奥工程量清单计价软件操作指南目录第一章公司简介 (1)第二章软件介绍 (1)2、1软件组成与安装 (1)2、1、1系统需求 (1)2、1、2软件组成 (2)2、1、3版本说明 (2)2、1、4软件安装 (2)2、1、5软件卸载 (3)第三章软件界面介绍 (3)3、1主菜单 (3)[系统] (3)[编辑] (5)[工作] (6)[窗口] (6)[帮助] (7)3、2工具图标 (7)3、3输入模块 (8)3、4快速功能键说明 (8)第四章软件功能模块说明 (9)4、1软件操作流程 (9)4、2建立工程档案 (10)4、3分部分项工程量清单输入 (15)4、3、1功能键说明 (16)4、3、2功能按键说明 (16)4、3、3分析窗功能说明 (22)4、4输入分部分项工程量 (26)4、4、1分部名称输入 (26)4、4、2输入工程项目 (28)4、4、3输入定额子目 (28)4、4、4建立补充定额子目 (29)4、4、5工程量输入 (31)4、4、6土建混凝土拌制/搅拌机 (31)4、4、7土建超高增加费 (31)4、4、8泵送费自动计算与装饰装修的垂直运输机械费自动汇总 (32)4、4、9商品砼的换算 (32)4、4、10多专业工程合并(拿土建与装饰两专业工程举例) (32)4、5措施项目清单输入 (33)4、6其她项目清单输入 (34)4、7信息价输入 (35)4、8工程取费 (37)4、9浏览报表 (39)4、10编制说明 (40)4、11清单结算 (40)4、12打印报表设计及输出 (40)第五章管理中心--数据库维护 (45)第六章单独装修专业 (46)第七章安装专业 (47)第八章园林专业 (48)第九章问题解答及操作技巧 (49)如何导入EXCEL格式的电子招标文件? (49)定额法工程与清单法工程如何转换? (49)清单、消耗量软件可以用定额计价方式做预算不? (49)如何调整清单项目综合单价? (50)不套取定额子目能直接输入清单项目的综合单价不? (50)可否将信息价作为定额基价使用? (51)可以直接修改定额基价或材料基价不? (51)如何处理甲供材料? (51)可以统计三材(水泥、钢材、木材)用量与价格不? (51)如何换算定额材料? (51)临时输入的信息价如何保存,以备下次使用? (52)如何用原来的算式法计算工程量? (52)如何生成招标文件? (52)如何生成投标文件(如何刻光盘)? (52)如何检查综合单价就是否正确? (52)如何输入“工作内容”? (52)定额子目的取费费率可以修改不? (52)如何复制/删除选定好的项目或定额子目? (52)如何输入措施项目? (52)如何从网站下载各地材料信息价? (52)如何对清单工程进行结算? (53)如何反映软件问题? (53)如何升级/更新软件程序? (53)如何将报表生成EXCEL电子文档? (53)如何建立个性背景图? (53)如何取消同步计算功能,提高运行速度? (54)如何单独修改某条项目的费率? (54)如何自动对项目编码进行排序? (54)如何恢复被误删除的工程? (54)如何建立补充项目或定额子目? (54)如何备份材料信息价? (55)单位不显示如何处理? (55)如何强行修改报表数据? (56)如何将材料、主材、设备直接作为补充定额使用? (56)第十章技术支持 (56)第一章公司简介博奥软件()就是一家以工程软件开发为主业,兼营计算机软硬件销售、网络集成、综合布线、承接工程预结算、工程施工组织设计等业务的高科技公司,公司全体员工经过多年不懈努力,成功地开发出一系列优秀软件产品,赢得了广大用户的信赖与支持。
jbmp用户指南
使用jBPM开发基于WEB的工作流,首先需要搭建好开发环境,经过一段时间的摸索,先将环境搭建的步骤做个简要说明:1.前提:Eclipse 3.2MyEclipse 5.0GAjBPM3.1.2(jbpm-starters-kit-3.1.2)Oracle 10gStruts1.2Hibernate32.至于数据库的脚本生成就不说了,有些参考资料讲得比较清楚,也有备份。
3.安装完JBPM的相关Eclipse插件以后,就可以使用Eclipse创建(new...)一个Process Project以及相关的ProcessDefinition,但这不是我们想要的。
我们想要的从步骤4开始。
4.使用Eclipse创建一个Web Project,加入必要的框架包,如Struts,JSTL等。
5.在构建路径中配置jBPM库,这也是环境搭建的重点。
由于使用默认的Process Project 可以帮我们创建好jBPM库,但没有帮我们创建WEB环境,因此,我们首先建立WEB工程,再来搭建JBPM库。
6.在工程的“Build Path”中选择配置构建路径(Config Build Path...)。
7.在打开的窗口中选择右边的Libraries标签库,通过Add Library选项,在打开的窗口中添加一个jBPM库。
8.可以看到没有所谓的jBPM库选项,因此要自己动手,选择User Library选项,创建一个自定义的用户库,取名为jBPM Library [jBPM Runtime]。
9.添加jar文件到我们自定义的User Library中,需要添加的内容是:jbpm-starters-kit-3.1.2\jbpm.3\lib目录下的所有jar包;jbpm-starters-kit-3.1.2\jbpm.3\build目录下的所有jar包。
OK,开发环境初步搭建完成,我们同样可以在新建的工程中自由的创建Process Definition 文件。
HP Pocket PC 移动打印用户指南说明书

不作担保。责任限制。
只要当地法律允许,软件 “原样”提供,不作任何口头或书面的、明示或暗示的担保或规定。 HP 明确声明, 对适销性、满意的质量、非侵害性以及针对特定用途的适用性不作任何暗示的担保或规定。
除非当地的法律禁止,否则, HP 或其子公司、分支机构或供应商对由于使用、不能使用本软件所造成的任何 直接、特殊、偶发、继发或其他损失 (包括利润损失、数据丢失或停机成本)概不负责,无论根据担保、合 同、侵权还是其它法律原理,即使已被告知可能造成上述损失。
功能 . . . . . . . . . . . . . . . . . . . . . . . . . . . . . . . . . . . . . . . . . . . . . . . . . . . . . . . . . . . 3 获得有关 hp mobile printing 的帮助 . . . . . . . . . . . . . . . . . . . . . . . . . . . . . . . . . . . 4
从 “日程表”、“联系人”和 “任务”中打印 . . . . . . . . . . . . . . . . . . . . . . . . . . 53 选择打印选项 . . . . . . . . . . . . . . . . . . . . . . . . . . . . . . . . . . . . . . . . . . . . . . . . . . . 55 查看打印状态 . . . . . . . . . . . . . . . . . . . . . . . . . . . . . . . . . . . . . . . . . . . . . . . . . . . 55
目录
1 简介
IBM云管理系统用户指南4.20(中文简体)

IBM Cloud Manager with OpenStack--T z~q E'x> C'8OIBM Cloud Manager with OpenStack--T z~q E'x> C'8O"bZ9C>J O0d'V D z7.0,k D A Z233D:y w;P D E"#Z_f(2014j12B)©Copyright IBM Corporation2012,2014.?<IBM Cloud Manager with OpenStack--T z~q E'x>C'8O (1)B v Z] (1)u o (1)h C C'E*D~ (2)>}J' (3)\m n? (3)n?I1J q G+D E v (3)h C n?_T (3)ks n?I1J q (4)\m3q (4)i43q t T (4)?p3q (4)\m5} (5)\m5}t T (5)T5}V d!/IP X7(OpenStack) (9)\m i b z t T (10)8]i b z3q (11)\m ks (13)7z ks (13)X B a;Q\x D ks..........13\m J' (14)i4r\m J' (14)>}J' (14)4(M<k\?T (14)i4B~ (15)i4F3F E" (15)i49C i v b?3F E" (15)i4J49C i v3F E" (15)i4F4, (16)T ZC'D Q-J b M b v=8 (16)_Y:f D T> (16)#f3q l# (16)m s{"o T (17)Internet Explorer T> (17)G<'\ (19)(z&\!n (21)y w (23)L j (24)~=_T"b B n (25)©Copyright IBM Corp.2012,2014iiiiv IBM Cloud Manager with OpenStack--T z~q E'x>:C'8OIBM Cloud Manager with OpenStack--T z~q E'x>C' 8OT Z IBM®Cloud Manager with OpenStack4.2,I9C y Z Web D&C L r a I X ks?p J4#IBM Cloud Manager with OpenStack a)K U(D+2r(C F Y w,}g:v d C M!{a)i b zv p]M K!5}v6q5}v w*5}D;?V t/M#9i b zv w{V P i b z s!":v IBM Cloud Manager with OpenStack k OpenStack u o S|#w*N<,k N D:u o;#v I)z9C D Y w!v Z z D\m1d C73D==#B v Z]IBM Cloud Manager with OpenStack Z K"P f P_P B D'V M&\#T B P m G k T IBM Cloud Man-ager with OpenStack C'G+D#&\|B:v(}OpenStack<u,m S K T z/VM®i b/D'V#v T5}V d!/IP X7(OpenStack)":*q!\m1D B'V M&\D j{P m,k N D IBM Knowledge Center Z D IBM Cloud Manager with OpenStack#u oIBM Cloud Manager with OpenStack'V m`;,`M D i b/y!a973#P1,b)73+;,u oC Z`,E n#B m P h v K u o n l#":IBM Cloud Manager with OpenStack k OpenStack u o|S|#}g,$w:X M h8V Z F*5}M 3q#OpenStack GJ CZ(C F M+2F D*E=4z k F F c=(#P X OpenStack D E",k N D http:// /m1.i b/y!a9`M k IBM Cloud Manager with OpenStack H[J c D u o H Oi b/y!a9`M J c(e IBM Cloud Manager with OpenStack H[J cVMware#e i b z D6<,|,*}]T0I C44(Bi b z D;v r`v E L3q#3q©Copyright IBM Corp.2012,20141m1.i b/y!a9`M k IBM Cloud Manager with OpenStack H[J c D u o H O(x)i b/y!a9`M J c(e IBM Cloud Manager with OpenStack H[J cVMware i b z`F Z K P Y w53M&CL r D o m F c z D i b Fc z D I K P5}#5}OpenStack Flavor flavor G k T Q h C D i b z(e D s!#?v flavor<_P J4d C M s!D(;i O#Flavorg{9C T z~q E'x>,G4}K73.d D u o n l.b,9f Z X k K b D X|E n#n?T z~q E'x>Z D n?a)K\m r,T T;P C n?D I1E\i4M\m D3q M5}x P V i#ks ks G y P*s\m1H K<;s E\j I D Y w#1C'"T4P\m1Q h C**s K<D Y w 1,T z~q E'x>a"M;u K<ks#J'Z T z~q E'x>P t C G J Y w a$n J'&\#J'P|(`n"y P_"J'`n P5"J 'I1M"1#a k T J'I1y?p D5}r d U Q#":;P\m1\m1E\4(J',+G,C'I8(*J'y P_#y>?p M_6?pC'(}9C y>?p m%?p3q#n?y P_r\m1I9C y>?p r_6?p m%#{G9I d C T>Z y>?p m%P D?p h C#h C C'E*D~Z z W N G<IBM Cloud Manager with OpenStack.0,X k(}z D53\m1ks J'#"R,X k* @z D IBM Cloud Manager with OpenStack~q w D URL#}L1.+Web/@w8r IBM Cloud Manager with OpenStack~q w D URL"G<#C URL k T B>}`F,d P IBM Cloud Manager with OpenStack hostname G z D IBM Cloud Manager with OpenStack w z D{F,port number G K Z E:http(s)://IBM Cloud Manager with OpenStack hostname:port number/cloud/ web/login.html2.g{z;P J',k%w ks J'T4(C'J'ks#Z\m1K<ks.s,a*z4(;v J'#":v X k S U J'E"E\L x#v g{;*@z D IBM Cloud Manager with OpenStack~q w D URL,k k IBM Cloud Manager with OpenStack\m1*5T V/ks J'#3.(}%w R O=u y P D C'{"S B-P m P!q T>C'W!n,r*“C'E*D~”0Z#4.|B C'E*D~E",T|,g S J~X7M ks g S J~(*#a>:g{z4t C g S J~(*,G4?N|G\k1,\m1<X k X B4(z D C'J'#y P IBMCloud Manager with OpenStack E"<a*'#2IBM Cloud Manager with OpenStack--T z~q E'x>:C'8OV Z,I T9C z D C'E*D~#>}J'z I T ks f1>}z D C'J'#X Z K N q*>}C'E*D~,k T z D53\m1"M ks#}L1.+Web/@w8r IBM Cloud Manager with OpenStack~q w D URL"G<#C URL k T B>}`F,d P IBM Cloud Manager with OpenStack hostname G z D IBM Cloud Manager with OpenStack w z D{F,port number G K Z E:http(s)://IBM Cloud Manager with OpenStack hostname:port number/cloud/ web/login.html2.%w R O=u y P D C'{"S P m P!q>}R D j6#3.%w>}T7O C ks#K1+4(>}z D J'D ks#53\m1K<ks.s,+>}z D C'E*D~#a{Q>}z D C'E*D~#\m n?z I T ks C J n?3f O D n?#*C J n?,k%w C J(!n(,;s%w n?!n(T i4I C n?D P m#IBM Cloud Manager with OpenStack n?G t I i i b3q M5},b)i b3q M5}v T Z C n?D I1 E I S#IBM Cloud Manager with OpenStack f=F*“+2”n?D1!n?,y PC'<t Z C n?#1!i v B, a+Q Z IBM Cloud Manager with OpenStack b?4(D y P i b3q M5}<V d x+2n?#n?I1J q G+D E v+z w*n?I1m S1,a T z8(}v I1J q G+P D;v G+#y P_n?y P_T n?0d Z]_P\m1(^#n?y P_w*\m n?D Z],T0T C n?0d Z ]_P(^D K1#C'n?C'_P9C n?0d Z?T s D(^#}g,n?C'I+i b3q?p=n?#C'9I T i4"P I\V4d{C'4(D i b z D8]3q,b!v Z n u h C n?M G+D==#n?C 'w*&m d T:D?p#i4_n?i4_v P(i4n?0n?P|,D i b3q M5}#h C n?_TT Z z5P D n?,I T h C=Z_T M s z_T T0l?p Z C n?P D5}#IBM Cloud Manager with OpenStack--T z~q E'x>C'8O31.%w C J(!n(,;s%w n?!n(#2.Z m P%w C n?D{F T T>n?t T#3.%w`-#4.9*z*9C D n?D j b:=Z_T r s z_T#5.*z D n?h C_T,r!q9C F1!549C\m1h C D_T#B;=v24P X9C=Z_T M s z_T D|`E",k N D IBM Cloud Manager with OpenStack\m18O#ks n?I1J qI T f1ks T n?D C J(#}L1.Z n?P m P,%w*ks C J D n?D{F#2.%w ks C J(#a{a rn?4(_"M;v g S J~(*,ks z T n?D C J(#g{C n?4(_J'Q>},r n?4( _4t C g S J~(*,G4a+g S J~"M x IBM Cloud Manager with OpenStack\m1#\m3qZ3q!n(P,I4=I CZ?p D3q,i4d t T"+d x P?p#Z IBM Cloud Manager with OpenStack P,?v3q<_Pk d X*D4,#g{C4,*}#,G4I T *<?p3q#%w“"B”4%T|B4,#*i43v3q D t T,k%w C3q D{F#g{3q P m;|,z k*D3q,k7#}7h C10F"n?M e5a9}K w#i43q t TI i43q t T(}g,3q{F"h v"n|;N^D U Z"f6f>"^)"M M U>)#g{z_P n ?y P_(^,G49I T d C M^D3q{F"h v M n?#X Z K N qP X g N d C3q D|`E",k N D IBM Cloud Manager with OpenStack\m18O#%w3q{F T i4“3q t T”3f#%w`-T^D3q t T#k G!,z Z IBM Cloud Manager with OpenStack P T3q x P D^D I\;a43Z W c D i b/y!a9#?p3qI9C y>d C!n r_6d C!n4?p3q#v1\m1T z y Z73t C K_6d C!n1,E I9C b)!n#4IBM Cloud Manager with OpenStack--T z~q E'x>:C'8O1.%w*?p D3q D{F#2.Z“3q”t T3f P,%w?p#":IBM Cloud Manager with OpenStack F\m1I d C IBM Cloud Manager with OpenStack T9C'I T9C_6?p&\#g{I T,k%w|`>_6?p T T>_6?p m%#_6?p(}_6?p,\m1I d C b)!n,T c C'\;]R M V45}#1!i v B,VMware"OpenStack KVM M Hyper-V73'V]R Y w#g{\m1T%v?p&\t C`v5},G4z I(}%v?p4?p`v5}#Q?p5}+?p{F C w?;v5}D0:#B{F9a+-x C w s:,d P x G5}D w}#g{Q t C?p K<w L,G4z+S U%v K<ks#\m1I T Z4s ks1|D?p5}D}?#b?M G J&\T wv%;?p5}<U P0l#9I T h Cn g i b z(F"i b z v T/D~HH V N#P X9C_6!n D|`E",k N D IBM Cloud Manager with OpenStack\m18O#y>?pZ y>?p P,;T>n r%D d C!n,d P|({F"h v"n?"flavor(g{9COpenStack)"&m w E"M Z f#b)!n I\m1x P d C,r K z I C D!n I\k K;,#":v;P y!n?D I1E\i4r3q?p x4(D5}#v g{Q t C K<,G4Z\m1K<ks.0,?p+;a j I#v g{Q t C G J,G4z X k G47Q D J'D I1,?p E\L x#v?p D=Z1d N M s z_T h C!v Z n?P h C D_T#v Z I&?p OpenStack PowerVM®5}.s,C5}D4,S Deploying|D*Active#9a Z PowerVC O t/B N q T$n C5}#Z N q K P1,5}D i b z&Z Activating4,,"R a{ C5}D y P&\(}K`-M>})#Z j I$n.s,a4-5}&\#\m5}Z5}4(s,I9C IBM Cloud Manager with OpenStack P D5}!n(4\m5}#I y Z F"n?r y P_48(*i4D5}#g{5}P m;P|,z h*D5},k7#}7h C10F"n?M y P_}K w#":v g{t C K P X>}5}D s z_T,G41=\m1K<C'ks.s,E a5V C ks#v1>}5}1,g{C5}4I&X S IBM Cloud Manager with OpenStack T z~q E'x>>},G4 C5}Z C T z~q E'x>P D4,a|D*“4*”#\m5}t TZ“5}t T”3f O,I T i45}4,"T5}4P Y w r i4P X5}D**E"#Z IBM Cloud Manager with OpenStack P,5}_Pk d X*D4,#g{5}4,4h C*}#,k%w C5}T i4|`E",|(5w d G q I C D U>#**E"M Y w*C J“5}t T”3f,k%w5}D{F#Z“5}t T”3f P,I4P B P N q:v6q5}v|D5}D E H6v(}9C B(y Z&\?~4F5}(ev T>v~X D5}v(F A B w zv+5}F A m;n?v x(v w{5}s!v h C6q>$v#9r t/5}v]R"]#M V45}v b}x(v i4X Z K5}D]R ks(g{Q t C K<)v i4i b z t T"5}1d A G"f"m"~q w3q M U>u?v i4?p(e":v g{Q t C K<,G4d P?V Y w+*s\m1K<#v d P?V Y w;\I n?y P_44P#4F5}(eI4F V P5}(e44(`F D5}#K!n a4F flavor(g{P)r&m w}"d C5M x g d C H E "#+G,|;a4F P X5}D N N V P m~r}]#X Z K N q*4F V P5}D d C E",k%w*4F D5},;s%w|`>B(y Z#Z“?p-4F5}”3f O,I X|{B5}"|D5#":z Z IBM Cloud Manager with OpenStack P T5}D y>t T(}g,{F M h v)x P D^D;a4 3Z VMware r OpenStack P#I(}F{F t T z Y i b/\m w P y9C D5#|D5}D+V E H61p v w z X(;5}1,z I T|D*?p=X P D5}D+V E H6#*h C5}D E H6,k%w E H6,;s*C5}!q z k*D E H6#1|B5}1,a T>T B{": instance instance name has been saved.6q5}K5}D l U I CZ4(y Z C5}D Bi b3q,I Z T s T C3q x P?p#X Z K N qK N q X(Z VMware M OpenStack#*q!6q OpenStack PowerVM5}D8>E",k I/\m1#}L1.%w*6q D5},;s%w|`>6q#":v g{;P c;D I C E",G4Z6q5}.0a a>z d k E"#v Z6q OpenStack PowerVM5}.0,X k#9C5}#2.*=3q!n(T i4B3q#a{z+4=&Z“}Z6q”4,D{*“instance_name unique_identifier”D B3q,d P instance_name G z y6 q D5}D{F,unique_identifier G C B3q D(;j6#I(}%w C3q T i4j8E"4z Y6q x H#":v g{Q t C K<,G4X k H j I K<,;s E a"z6q#w{5}s!(VMware)z I^D5}y a)D}Z VMware O K P D i b z9C D J4?#y]VMware i b z D d C==,I Z i b z&Z K P4,1m S Z f M i b&m w#X Z K N qv s i b z E L I9E L O_P|`I C U d,+G";a|D V x M D~53D s!#f Z;)|n,X k Z C M Y w53K P b)|n,E\v s D~53D s!#P X Z m S f"U d.s g N|D D~53s!D |`E",k N D Y w53D5#P X&Z K P4,D i b z g N&m Z f M&m w=f D|D D|`E",k N D VMware D5M Y w53D 5#}L1.%w*w{s!D5}D{F#2.%w|`>w{s!#3.|B*V d x5}P i b z D&m w M Z f J4}#1i b z&Z Q t/4,1I w{s!D h C!v Z VMware O C i b z D d C==#P X|D i b z P D5D|`E",k N D IBM Cloud Manager with OpenStack\m18O#4.%w w{s!#":v g{Q t C K<,G4X k H j I K<,;s E\w{5}s!#v g{;P T>&m w r Z f V N,G4i b z K P1,;a'V|D b)5#*^D b)5,k X U ib z g4#w{5}s!(OpenStack)z I^D i b z9C D J4?#X Z K N qZ z L x C}L.0#95}#}L1.%w*w{s!D5}D{F#2.%w|`>w{s!...T r*“w{5}s!”3f#3.Z2~?V B,|B*V d x5}P i b z D OpenStack Flavor#":v flavor j8E"|D!v Z z!q D s!flavor#v1z|B flavor1,&m w"Z f M f"w s!V N;S\{}#+!T N N!}}]#v(J CZ PowerVM M Hyper-V),g{*|D f"w s!,G4;\|B*O s D E L s!# v(v J CZ KVM),g{!q_P O!f"w s!D flavor,G4KVM^(w{f"w s!1,a x }b;Y w#d{J4+`&Xw{s!#v(v J CZ z/VM)z;\|D V d x i b z D CPU M Z f J4#4.%w w{s!#":v g{Q t C K<,G4X k H j I K<,;s E\w{5}s!#*i$G q Q w{C5}s!,k i 4C5}D i b z flavor j6t T#v g{C5}}ZK P,G4Z w{\m L r D s!.s,OpenStack a#9C5},w{C5}s!T0 X B t/C5}(PowerVM5}}b)#v PowerVC5}'V Z n/4,B Dw{s!#Z w{s!Z d,5}#V n/4,#Z n/4,B Dw {s!Y w\5}J46'(&m w}"Z f?M&m w%*}D n s5M n!5)^F,"R;\' V D flavor a;K}#K b,}G5}D K P4v4,*}#,q r;J m x P Z n/4,B Dw{s !Y w#P X J46'D|`E",k N D n b f6#]R"]#M V45}y]i b/73;,,z I T]R"]#M V45}#*<.0T B(e h v]R"]#M V4Y w#]R f"i b z D4,,+y P Z f4k E L,"Z V4i b z.0+d#9#1i b z&Z]R4, 1,;I T d x P C J#]R Y w+M E k y8(5}X*D Z f M&m w9C J#]#+i b z D104,f"Z Z f P,"Y1h9T5}4P Y w#V4Z]R r]#.0,+y8(D5}5X=d H0D4,#1.S5}!n(P,!q*]R"]#rV4D5}D{F#2.*]R5}T0C5}P D y P i b z,k%w]R#3.*]#5},k%w]##4.*V45}T0C5}P D y P i b z,k%w V4#i45}P D i b zZ“5}t T”3f P,a T>t Z C5}D i b z0|G D104,M IP X7(g{IBM Cloud Manager with OpenStack Q*C5})#}L%w5}{F T T>“5}t T”3f#v g{P%v i b z k K5}X*,k9*“i b z t T”?V T i4Y w j8E"#v g{P`v i b z k K5}X*,k S m P!q i b z{F T i4Y w j8E"#":T Z OpenStack5},+i b z w z{t T h C*I OpenStack7(D5}{F#IBM Cloud Manager with OpenStack;*@5J D w z{#i4P X5}D]R ksX Z K N qg{Q t C K<,G4k K5}`X D Y w I\a*s\m1K<#P X5}D]R ks+T>Z“5}t T”3f P#K3f9T>K ks C'"ks4,"y ks Y w M ks D U Z#%w ks j6T i4P X C]R k s D|`j8E"#i45}1d A G M U>X Z K N q5}H?5;Z“5}t T”3f P D1d A G?V P#5}U>;Z“5}t T”3f O D?p U>u?M X F(U>u?P#a T>P X5}D y P U>D P m#T5}V d!/IP X7(OpenStack)14(OpenStack5}1,T z~q E'x>a T>C5}O D y P X*L(IP X7T0N N!/IP X7#X Z K N qI9C T z~q E'x>4Z OpenStack5}O9!/IP X7k L(IP X7X*#!/IP X7J m+Z C J C5}#Z*<.0,X k4(!/IP X#h*1,k q-OpenStack8>E"4h C x g"7I w T0!/IP X 7X#P X|`E",k N D\m IP X7#*T5}m S r}%X*D!/IP X7,k j I B P=h#1.S IBM Cloud Manager with OpenStack T z~q E'x>g f P,!q5}#2.!q5}T r*t T#3.m S r}%!/IP X7X*#a.Z IP X7m P,%w m S,T m S!/IP X74a)+2IP X7#b.*}%!/IP X7,k Z C m P!q`&D P"%w}%#":1%w}%1,C!/IP X7a S L(IP X7Q k X*#4.%w7(#>}T\m1m],9I(}OpenStack G m e r OpenStack|n P g f T OpenStack5}V d !/IP X7#P X|`E",k N D T B4S#v S OpenStack G m e T5}V d!/IP X7#v S OpenStack|n P g f\m IP X7#\m i b z t T(}S“5}”3f P!q i b z,I T i4**E""T C i b z4P Y w#S“5}t T”3f P,I4P B P Y w:v m S f"U dv h C6q>$()i b z6q Z d9C)v i4f"m E"v i4i b z t T+f"w m S=i b zI+f"w m S=i b z#*<.0r*Z>}i b z1,a+B v D f"w>},y T+d S*L]T D f"w#IBM Cloud Manager with OpenStack;'V m S V C T D f"w#":K N q v J CZ VMware#}L1.Z“5}”3f P,!q|,h*n b f"w D i b z D5}#2.g{`v i b z k C5}X*,k i R h*=S f"w D i b z D w z{#%w w z{T r*“t T”3f#3.%w`-#4.9*“f"m”?V#5.%w m S<j T+n b f"w m S=i b z#6.a)E",;s Y N%w m S#":v g{z>}5},G49a>}E L#v a+E L=S=i b z,+;a T d x P20r q=/#P X g N T B E L x P20M q=/D8>E ",k N D C M Y w53D5#7.Z"T m S n b f"w.0,H}K}L j I#":9I T S5}3f(}9C`F}L4}%f"w#]#rV4i b zz I T]#M V4}Z z/VM 6.3r|_f>O K P D i b z#z I T]#i b z,w{CPU J4,;s V 4i b z#X Z K N q*]#rV4i b z,k q-T B=h:}L1.S5}!n(P,!q|,*]#rV4D i b z D5}D{F#":g{`v i b z k5}X*,k S m P!q i b z{F T i4i b z j8E"#2.%w`-#3.*]#i b z,k%w]##4.*V4i b z,k%w V4#8]i b z3qI8]z D5}P D i b z3q#K&\+4(T s I V4D i b z3q M F d C D1>#K b,z9I T\ m b)8]3q#X Z K N qP X8]3q D j8E"g B y>:v8]3q G i b z3q M F d C D+71>#;a4P N N3q e}Y w#v^(+8]3q?p*B5}#;\+d C4V4`X*D i b z3q M F d C#v v n?y P_(r\m1)E P(V48]i b z3q M8]i b z#v g{z}Z9C OpenStack F,G4,1;J m4P;v5}8]Y w#g{m;v C'}ZK P8]"R z T,;5}t/8],G4z+S U=;v m w f Z e;ks D m s#*4P8],z X k;1H=m ;8]j I#v OpenStack PowerVM M z/VM5};'V K Y w#v g{(}9C IBM Cloud Manager with OpenStack>}5},G49a>}X*D8]#":B#f D i b z;a w*3q)d{?p Y w9C##f i b z3qI#f i b z3q T V4`X*D i b z E L M d C D~#*#f i b z3q,I4(*C w i b z3q D8 ]D~q w3q#*<.0y Z x86=(z X k X B h C$n}f,E\Z y Z x86=(O#f5}#P X X(D8>E",k N D P X I C D$n m ~D D5#X Z K N qg{\m1Q T“#f3q”ks t C K<z|\Z,G4Z4P N N Y w.0,a+ks"M x\m1K<# Z K<ks.s,a#9i b z"R#f1>#g{4t C K<z|\Z,G4a+“#f”ks"M A53T Z s(x P&m#}L1.Z5}3f O,%w|,i b z D5}#":g{P`v i b z k5}X*,k S m P%w i b z{F T i4i b z j8E"#2.%w`-#3.9*~q w3q?V#4.%w#f3q<j#g{53\m L r G PowerVM,G4X k#9i b z#5.I!:g{o=K n s Q#f3q},G453a*s z7O G q I T>}n g D Q#f3q#6.I!:%w G J m53>}n g D Q#f3q,r_,%w q"V/>}Q#f D3q4*B#f D3qZ v U d#;s,Y N%w#f3q#7.g{C i b z&Z K P4,,k%w G T#9i b z##f Y w j I.s,i b z+X B t/#8.d k Q#f D3q D{F#9I!q d k h v#9.%w#f#(f Q#f D3qz I V4Q#f D3q,|+f;10i b z D Z]#X Z K N qg{Q+V4Y w d C*9C K<z|\Z,G4a+ks a;x\m1K<#1=\m1K<C ks.s, V4Y w E a t/#g{4t C K<z|\Z,G4V4Y w a"4t/#":OpenStack PowerVM M z/VM5};'V K Y w#}L1.Z5}3f O,%w|,*V4D~q w3q D5}{F#":g{`v i b z k5}X*,k S m P!q i b z{F T i4i b z j8E"#2.%w`-#3.9*~q w3q?V#4.!q*V4D3q#5.@N%w V4M G#6.7O G q*+10i b~q w D Z]f;*Q#f D1>#Z4P#f Y w.s x P D N N|D<+*'#\m Q#f D3qI i4Q#f D3q D P m,2I>}b)3q#}L1.Z5}3f O,%w|,*\m D3q D5}{F#":g{P`v i b z k5}X*,k S m P!q i b z{F T i4i b z j8E"#2.%w`-#3.9*~q w3q?V#4.R=*&m D Q#f3q#5.*>}Q#f D3q,k!q Q#f D3q"%w>}#P G:>}5}1,9a>}y P Q#f D3q#6.7O G q*>}C Q#f D3q#":Z VMware O#95}1,IBM Cloud Manager with OpenStack a H"v C M X U Y w|n4=H X X U i b z#j I K Y w I\h*;)1d#g{C M X U Y w'\r G(Q+$1d,G4IBM Cloud Manager with OpenStack a X U i b z g4#\m ksI9C“ks”!n(4i4M7z5}ks#g{\m1t C K s z_T'V,G4\`Y w I\<h*\m 1K<E\j I#}g,1z?p3q T4(5}1,+4(5}ks"+C ks a;x\m1K<#a+5}4,h C*] R,1=\m1&m K<ks#*i4z D ks D4,,k!q C J(!n(,;s%w ks!n(#7z ksI f1S K<S P P7z ks#}L1.!q ks!n(#2.!q ks#g{z44=ks,k7#Q}7h C S<#a>:I9*“"M”?V"%w m S"M4d k P X C ks D d{"M#3.%w7z#X B a;Q\x D ksg{\m1\x z D ks,G4z I T^D ks r_a)d{"M T b v N N J b"X B a;z D ks#}L1.!q ks!n(#2.!q Q\x D ks#g{Q\x D ks;Z P m P,k7#S<P m Q h C*“Q b v D ks”#3.*Z X B a;ks.0|D N N ks N},k9*ks j8E"?V#4.**ks d k y h D=S E",k9*"M?V,"%w m S"M#5.%w X B a;#\m J'z I i4z w*y P_r I1D J'D E"#t C IBM Cloud Manager with OpenStack T z~q E'x>F Q1,h*J'#k q-X Z T z~q E'x >F Q D B P<r:v;P T z~q E'x>\m1E\4(J';+G,z I I*J'y P_#v v Z T B i v B z E\?p5}:z G J'I1R C J'D`n*},I CZ*~q w9C6Q#v;P J'y P_M T z~q E'x>\m1E\\m J'#v J'_P`n"y P_"J'`n P5"J'I1M"1#–`n G J'D u R`n#?v ks M K P?p D I>a f1d F F S`n P u%#–J'y P_G T z~q E'x>C'E*D~,:p*J'G k{=M x P'6#–J'`n P5G;v5,m>J'`n d*M`n D;v p n#g{`n5M=c,5w J'7Q#–J'I1Gt Z J'D T z~q E'x>C'#1J'Z T z~q E'x>P?p5}1,a+b)5 }G={G D J'O#–?v5}<_P;E"1#;v J'I_P s?"1,I S“J't T”0Z P i4b)"1#i4r\m J'I i4N N J'D t T,r\m z5P D J'#X Z K N q*i4J't T r\m z5P D J',k!q C J(!n("%w J'#;s,I Z J'm P!q*&m D J '#>}J';P Z T B i v B,z I T>}K':z G C J'D y P_"R C J'4k N N n/5}`X*#}L1.Z J'm P,!q*>}D J'#2.%w>}<j"7O>}#4(M<k\?TI9C“\?T”!n(44(\?T"*OpenStack F<k+C\?#\?T CZ t Ck i b z D SSH,S#*9C\?T,k Z?p1++C\?m S=5}P#;s,(C\?c CZ(}9C U K&C L r(}g,PuTTY)T,Sx P S\#*9C\?T,k%w;Z C J(!n(P D\?T!n(#":“\?T”!n(v Z\m14(OpenStack F.s E I S#*4(\?T,k j I B P=h:1.%w4(B D\?T<j#2.d k C\?T D{F#3.%w#f#4.4(B\?T.s,+v V;v0Z,T>CZ T,Sx P S\D(C\?#9I T%w B X T B X Q4(D(C\?#*<k\?T,k j I B P=h:1.%w<k+C\?<j#2.d k\?T{F M+C\?Z],r_%w/@T!q CZ<k+C\?D+C\?D~#3.%w<k#i4B~z I i4B~,g5}j I"5}'\"B(C'J'ks T0Q4(B J'#Z“B~”!n((I(}“(f”!n(9C)P,I4{y P+253B~#K S<|(z w*I1D n?P N N J4O"z D y P B~#i4F3F E"z I T i4P X F D E"#i49C i v b?3F E"z I T i4z Z T?v i b z9C D?V J4D}?,"I y]h*x P w{,T c x P G J#Z9C i v b?!n((I(}(f!n(9C)P,I4{}Z9C D J4D3F E"#b)3F E"I\ |(P X k n?X*D?v i b zr_m D&m w"Z f M f"U d D E"#i b z b?T>i b z&Z N V4,"|9C K`Y&m w1d"`Y Z f T0`Y f"U d(T GB!1F)# m b?T>m&Z N V4,"|9C K`Y f"U d(T GB!1F)#l U b?T>l U&Z N V4,"|9C K`Y f"U d(T GB!1F)#*i4V d x n?D i b z"m r l U D9C i v E",k9C J4}K w!n#z I T8(n?"C'{" e5a9r53\m L r,"%w&C}K w#;s,%w i b z D{F T i4P X C~q w D|_e D E "#i4J49C i v3F E"Z“J49C i v”0q P,z I T i4}Z9C D J4D3F E",|(e5a9`M"&m w"Z f M f" w#e5a9D=V`M:Power®M x86#&m w"Z f M f"J4CZ`v F P#Z“J49C i v”0q P, z I T(}?V`M D e5a9i4w V J4D\e9C i v#1z+s j F=<P D;8O=1,+T>$ _a>E"45w&m w"Z f M f"w P?v F9C i v D j8E"#B<T>K v V D P X J49C i v E"D$_a>#IBM Cloud Manager with OpenStack--T z~q E'x>C'8O15i4F4,Z“F4,”0q P,z I T i4N N;v F r_b)F D,S G q f Z J b#Z s_i v B,5}I\T;& Z K P4,#4,+T>“}#”r;v“m s”#g{;P&Z“}#”4,D K P F,G4IBM Cloud Manager with OpenStack&\+\^#k i$F G q f Z N N(E J b#T ZC'D Q-J b M b v=8g{z}Z9C_P C'G+D IBM Cloud Manager with OpenStack,k i4z I\v=D b)Q*J b M b v=8#_Y:f D T>Z20r}6=IBM Cloud Manager with OpenStack1,z D/@w I\;a S H0f>D m~P|B3q# k q X Z}6=r20IBM Cloud Manager with OpenStack.s e}/@w D_Y:f##f3q l#g{i b z;G I10IBM Cloud Manager with OpenStack4(D,G41z#f i b z D3q8]1a S U=;u m s{"#16IBM Cloud Manager with OpenStack--T z~q E'x>:C'8OIBM Cloud Manager with OpenStack h *i b z D j8E "E \4(3q 8]#g {"z Km s ,G 4z a S U =T B{":CYX4755E:Instance "instance name"does not have a customization and its virtual machine cannot be saved.":Instance name G |,i b z D 5}D {F #m s {"o T3)m s E "a T m ;V o T T >,x G z *IBM Cloud Manager with OpenStack C 'g f h C D o T #b )m s E "T >*z 53Oh C D o T #g {m s E ""G T >*z k *D o T ,k i $z Z IBM Cloud Manager with OpenStack C 'g f M Y w 53D h C #Internet Explorer T >Z Internet Explorer 9"10r Internet Explorer 11P 9C IBM Cloud Manager with OpenStack 1,I \a 4=<V M q =`E 9C A ;Q T /@#1z 9C Internet Explorer 9"10M Internet Explorer 11C J IBM Cloud Manager with OpenStack 1,1!i v B ,/@w I \a T “f ]T S <”==J V Web C 'g f #9C T B =h S Internet Explorer D “f ]T S <”==P ;*j <==:1.*S “f ]T S <”==P ;=j <==,k %w X 78R `D “f ]T S <”4%(Z T B <q P T L +;v T >)#2.g {“f ]T S <”4%;I {,k 4F12|#3.y ]z y 9C D Internet Explorer D f >,L x 4P B f D ;i =h :v g {}Z 9C Internet Explorer 9,k %w /@w ==:IE9>Internet Explorer 9T !q T j <==i 4#"b ,K %P D (;;v !P j G Z Internet Explorer 9.0#v g {}Z 9C Internet Explorer 10,k %w /@w ==:IE10>Internet Explorer 10T !q T j <==i 4#"b ,K %P D (;;v !P j G Z Internet Explorer 10.0#<1.“f ]T ”4%IBM Cloud Manager with OpenStack --T z ~q E 'x >C '8O 17v g {}Z 9C Internet Explorer 11,k %w D 5==T !q T j <==i 4#<2./@w ==:IE10K %18IBM Cloud Manager with OpenStack --T z ~q E 'x >:C '8Oa >:g {}Z C J IBM Cloud Manager with OpenStack D Internet Explorer T /S j <==P ;=“f ]T S <”==,ke }$_>Internet !n >_6>9C “f ]T S <”T /V 43f <V m s P D !n #G <'\g {z D C 'G <IZ a0,1'\,G 41x h C I \f Z J b #l i T B P I \D b v =8#v k 7O IBM Cloud Manager with OpenStack ~q w M M 'z 1d k 1x G q %d #}g ,Z ~q w O ,g {1x *+r j <1d +08:00,G 41d *11:27#T Z M 'z ,g {1x *+r j <1d +07:00,G 41d &*10:27#":M 'z 9C }ZK P IBM Cloud Manager with OpenStack C 'g f D 53(}g ,v K F c z )D 1d #v i $C 'G q Q x (#\m 1I S T z ~q E 'x >T C 'J 'x P x (r b x #g {C 'Q b x ,G 4C K 1^(G <#g {1!\m 1J 'Q x (,G 4C J 'a Z X B t /~q w 1b x#<3./@w ==:IE11K %IBM Cloud Manager with OpenStack --T z ~q E 'x >C '8O 1920IBM Cloud Manager with OpenStack--T z~q E'x>:C'8O(z&\!nIBM Cloud Manager with OpenStack4f0\'V D/@w D W C J T&\?~#*q!W C J T&\?~D j{P m,k C J z}Z9C D\'V/@w D“W C J T'V”3f#*q!\'V/@w D P m,k N D\ 'V D Web/@w#4f K L r;p a)N N2=4v f o#IBM Knowledge Center G P\Z%v&C L r P D IBM<u v f o D+r P k f"b,;Z T B;v URL:/support/knowledgecenter/(}D F D Qw"}K M C'e i,I|r%_'X i R M/@<u Z]#4(z T:D IBM D5k PDF d v f h&d D/O#"b:z I T Z K&R=IBM Cloud OpenStack Platform z7/O:/support/knowledgecenter/SSUTA8/welcomeZ z+E""M=IBM1,z+Z h IBM G@<({4+E"T|O*O J D==9C r V d,;a f0z D e q#©Copyright IBM Corp.2012,20142122IBM Cloud Manager with OpenStack--T z~q E'x>:C'8Oy w>E"G*Z@zz Z)&D z7M~q x`4D#>D O D d{o T f>I S IBM q!#+G,z I\h* 5P C o T D z71>r z7f>,E\T d x P C J#IBM I\Z d{z R r X x;a)>D5P V[D z7"~q r&\X T#P X z10y Z x r D z7M~q D E",k r z1XD IBM z m I/#N N T IBM z7"L r r~q D}C"G b Z w>r5>;\9C IBM D z7"L r r~q#;*;V8IBM D*6z(,N N,H&\D z7"L r r~q,<I T z f IBM z7"L r r~q#+G,@@M i$N N G IBM z7"L r r~q D Y w,IC'T P:p#IBM+>I\Q5P r}Z j k k>D5Z]P X D w n({#a)>D5";b6E Z hC'9C b)({ D N N m I#z I T C i f N=+m I i/D y:IBM Director of LicensingIBM CorporationNorth Castle DriveArmonk,NY10504-1785U.S.A.P X+V Z V{/(DBCS)E"D m I i/,k k z y Z z R r X x D IBM*6z(?E*5,r C i f= =+i/D y:Intellectual Property LicensingLegal and Intellectual Property LawIBM Japan Ltd.1623-14,Shimotsuruma,Yamato-shiKanagawa242-8502JapanT B N d T Z"z M k1X(I P;,f(D d{z R r X x y;J C:INTERNATIONAL BUSINESS MACHINES CORPORATION“4V4”a)>v f o,;=P N N V`D(^[G w>D9G5,D)#$,| (+;^Z5,D P X G V("J z M J CZ3X(C>D#$#3)z R r X x Z3);W P;J m b}w >r5,D#$#r K>u nI\;J CZ z#>E"I\|,<u=f;;<7DX=r!"m s#>E"+(Z|D;b)|D+`k>E"D B f> P#IBM I T f1T>J O P h v D z7M/r L r x P D x M/r|D,x;m P(*#>E"P T N N G IBM Web>cD}C<;G*K=c p{E a)D,;T N N==d1T G)Web>c D#$#G)Web>c P D J O;G IBM z7J O D;?V,9C G)Web>c x4D g U+I z T P P ##IBM I T4|O*J1D N N==9C r V"z y a)D N N E"x^k T z P#N N p N#>L r D;m I=g{*K b P X L r D E"T o=g B?D:(i)9d\;Z@"4(D L r M d{L r(| (>L r).d x PE";;,T0(ii)9d\;T Q-;;D E"x P`%9C,k k B P X7*5:IBM CorporationDept.LRAS/Bldg.903©Copyright IBM Corp.2012,20142311501Burnet RoadAustin,TX78758-3400U.S.A.;*q XJ1D u~M u n,|(3)i N B D;(}?D6Q,<I q C b=f D E"#>D5P h v D m I L r0d y P I C D m I J O y I IBM@]IBM M'-i"IBM z J m~m I-i" IBM z w z k m I-i r N N,H-i P D u n a)#K&|,D N N T\}]<G Z\X73P b CD#r K,Z d{Y w73P q CD}]I\a P w T D; ,#P)b?I\G Z*"6D53O x P D,r K;#$k;c I C53O x P D b?a{`,#K b,P )b?G(}F c x@F D,5J a{I\a P n l#>D5D C'&1i$d X(73D J C}]#f0G IBM z7D E"I S b)z7D)&L"d v f5w r d{I+*q CD J O P q!#IBM;P T b )z7x P b T,2^(7O d T\D+7T"f]T r N N d{X Z G IBM z7D y w#P X G IBM z7 T\D J b&1r b)z7D)&L a v#y P X Z IBM44=r r b r D y w<I f1|D r U X,x;m P(*,|G vv m>K?j M b8x Q#y P IBM D[q y G IBM10D(i c[[,I f1|D x;m P(*#-z L D[q I\;,#>E"v CZ f.D?D#Z y h v D z7O P.0,K&D E"a P|D#>E"|,Z U#5q Y w P9C D}]M(f D>}#*K!I\j{X5w b)>},>}P I\a|( v K"+>"7F M z7D{F#y P b){V<G i9D,t V5z n P5J5q s59C D{V M X7k K`F,?t I O#f(m I$:>E"|,4o T N=D y>&C L r,C T{w Z;,Y w=(O D`L<u#g{G*4U Z`4y>L r D Y w=(O D&C L r`L S Z(API)x P&C L r D*""9C"-z r V"*?D,z I T N N N= T b)y>L r x P4F"^D"V",x^k r IBM6Q#b)>}P4Z y P u~B-}+f b T#r K,IBM;\##r5>b)L r D I?T"I,$T r&\#b)5}L r“4V4”a),;=P N N V` D#$#T Z r9C y>L r y}p D N N p&,IBM E;:p#2b)y>L r D?]=4r d N N?V r N N\z z7,<X k|(g B f(y w:©IBM Corp.2014.Kz k D3)?V G y]IBM+>D y>L r\z v4D#©Copyright IBM Corp.2012, 2014.g{T m=4N=i4>E",<,M J+e<I\^(T>#L jIBM"IBM U j M ®G International Business Machines Corporation Z@z M/r d{z R r X x D L j r"a L j#g{Z b)L j M d{IBM L j n W N v V Z C E"P T L j{E(®M™)j G,G4b ){E8>Z K{""<Z d IBM y5P D U.S"a L j r(C(I L j#b)L j Z d{z R r X x2G IBM D"a L j r(C(I L j#10D IBM L j P m I S Web>c /legal/copytrade.shtml O D“f(M L j E"”?V q C#Adobe"Adobe U j"PostScript T0PostScript U j G Adobe Systems Incorporated Z@z M/r d{z R r X x D"a L j r L j#24IBM Cloud Manager with OpenStack--T z~q E'x>:C'8O。
CHUNDE UM0C913A 操作手冊说明书
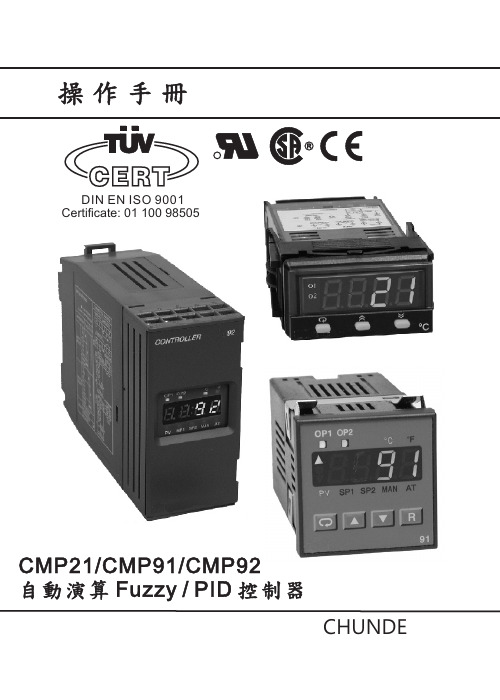
操作手冊DIN EN ISO 9001Certificate: 01 100 98505CMP21/CMP91/CMP92自動演算 Fuzzy / PID 控制器CHUNDEUM0C913A1-1 前言本操作手冊僅提供使用者如何操作本產品, 係供熟悉控制器人員參考之用, 如需更完整說明, 建議參考英文User's Manual .2第一章 簡介(1). : 參考第1-2節, 檢查所購產品是否符合使用規格.(2). : 參考第2章 配線(3). : 參考第1-6節及第3章選擇需要的功能.(4). : 參考第3-11節執行自動演算PID 值.(5). : 檢視功能是否符合預期, 是否需要調整參數值?(6). : 檢視產品是否維持正常使用?本產品之使用非持容易,各階段工作安排如下述:UM0C913A 4: 90 - 264 VAC, 50/60 HZ5: 11 - 26 VAC or VDC 9: 其他0: 1: RS-485介面( CMP21, CMP92 )2: RS-232介面( CMP21, CMP92 )9: 其他無CMP21-CMP91-CMP92-0: 紅色1: 綠色1-2 選購機型電源輸入信號輸入OP1 輸出通信功能字幕顏色1: 標準輸入熱電偶 J, K, T, E, B, R, S, N, L 白金電阻 PT100 DIN PT100 JIS 2: 0 -60 mV 3: 0 - 1 V 4: 0 - 5 V 5: 1 - 5 V 6: 4 -20 mA 7: 0 -20 mA 8: 0 -10 V 9: 其他0. 無1. 繼電器 2A/240 VAC2. 5V/30mA 脈輸出3. 隔離型4-20mA/0-20mA4. 隔離型1-5V/0-5V5. 隔離型0-10V6. SSR 輸出1A/240VAC 9.其他OP2 輸出0: 無1. A 接點 繼電器2A/240VAC2. 5V/30mA 脈衝輸出3. 隔離型4-20mA/0-20mA4. 隔離型1-5V/0-5V5. 隔離型0-10V6. SSR 輸出1A/240VAC7. 隔離型20V/25mA 感測器電源8. 隔離型12V/40mA 9. 隔離型5V/80mAA. RS-485 介面( CMP91 )B. 其他31-3 按鍵功能按此鍵可選擇參數供觀察或調整.加按此鍵增加參數值.減: 按此鍵減少參數值.及CMP92按鍵, CMP21則按雙鍵, 可達到 下列功能:(1) 顯示器回復到正常畫面.(2) 解除栓鎖形警報(限警報條件消除以後).(3) 離開手動控制模式, 自動演算, 校正模式.(4) 讓通訊錯誤訊息或自動演算錯誤訊息消失.(5) 重新啟動恆溫計時器.(6) 故障模式時換成顯示輸出百分比, 以供手動控制之用.秒會出現此時放開鍵,按選擇鍵秒會出現此時放開鍵, 秒~3UM0C913A41-5 操作參數流程圖6UM0C913A1-6 參數特性說明UM0C913A78UM0C913AUM0C913A92-1 接線圖第二章安裝CAT. I I++__COMTC+TXD RXD90-264 VAC47-63 Hz,10VAOP22A/240 VAC2A/240 VACOP11112131434576V+,mA+_TCV ,mA__TX1TX2RS-485RS-232CAT. I I2-2 控制輸出配線控制輸出信號形態可分4類, 要正確選購:(1) 繼電器,固態繼電器 可直接推動負載或電磁開關.(2) 脈衝電壓, 推動大電流固態繼電器( SSR ).(3) 電流, 可選4~20 mA 或0~20mA(4) 電壓, 有0~1V, 0~5V, 1~5V, 0~10V 4種選擇.(3), (4) 之電壓, 電流輸出可推動比例閥, 變頻器, 傳輸器,或其他直流輸入制動裝置.123456789101112131415TX1TXDTX2RXD C NORS-232COM OP2++OP1RS-485直接推動負載(要注意不能過載)CPM21CMP91CMP9210930mA / 5V 脈衝電壓內部電路56109109_三相電源電磁接觸器21_OP1OP2OP121OP2推動電磁開關推動SSR電源3421_電源OP1OP2CMP21CMP91CMP92CMP21CMP915610956109_線性電流OP1500 W 以下3421OP2500 W 以下線性電壓OP1_10 K W 以上3421_OP2_10 K W 以上CMP21CMP91CMP92CMP21CMP91CMP92212-3 警報輸出配線直接推動負載(要注意不能過載)三相電源電磁接觸器推動電磁開關21CMP91CMP9112132-4 數位通訊配線CMP21TX1TX2最多可連接247 RS-485 配線211213CMP21TX1TX2211213CMP21TX1TX2213-1 Lock 上鎖3-2 信號輸入INPT : 選擇感測器種類UNIT : 選擇單位, L C, L F 或 PU. DP : 選擇小數點.INLO : 電壓或電流輸入時低限值設定.INHI : 電壓或電流輸入時高限值設定.第三章 選擇功能要選擇功能, 按 3秒,, 即進入功能參數.選LOCK=NONE, 所有參數均無上鎖, 可任意更改. LOCK= SET , 功能參數群被上鎖.LOCK=USER, 除SP1以外之參數均被上鎖. LOCK= ALL , 所有參數被上鎖, 禁止更改.3-3 控制輸出ON-OFF 控制: 設PB=0, 選擇適當O1HY 之值P 或 PD 控制: 設TI=0, 調整PB, TD, OFSTPID 制熱 : 設 OUT1=REVR, 執行自動演算決定PB, TI, TD 之值. PID 制冷 : 設 OUT1=DIRT, 執行自動演算決定PB, TI, TD 之值.例如:感測器選4-20mA 對應0-15Kg , 需2位小數點, 則選擇INPT=4-20,UNIT=PU, DP=2-DP, INLO=0.00, INHI=15.00PID 冷熱控制: 設OUT1=REVR, OUT2=COOL, 選擇適當CPB 及DB 之值, 再執行自動演算以決定PB, TI 及TD 之值.PID 制ON-OFF 制冷: OUT1=REVR, OUT2=DEHI, 選擇適當 O2HY 之值, 再執行自動演算以決定PB, TI TD .3-4 警報有6種警報功能及4種警報模式可供選擇:警報功能(OUT2):(1) 偏差高警報( OUT2=DEHI ) : PV 值高於SV+SP2時警報發生.PV 值低於SV+SP2-O2HY 時警報解除.(2) 偏差低警報( OUT2=DELO ) : PV 值低於SV+SP2時警報發生. PV 值高於SV+SP2+O2HY 時警報解.警報模式(ALMD):(1) 正常警報(ALMD=NORM) : 按實際PV 值即時反應警報動作.(2) 栓鎖警報(ALMD=LTCH ): 一旦警報發生, 除非按復歸鍵, 否則警報 永不解除, 即使警報條件消除亦然.(3) 限制警報(ALMD=HOLD): 電源剛起動, PV 值尚未達設定值之前, 警報 不輸出, 等到PV 值達到SP1以後, 警報動作 即恢復正常警報方式.(4) 栓鎖限制警報(ALMD=LTHO): 兼具栓鎖及限制警報條件.3-5 挑選常用參數組合利用SEL1~SEL8等8個參數, 最多可挑選8個參數往前放, 置於常用參數組合中.例如: 選擇OUT2=DELO, PB=0, LOCK=NONE, SEL1=INPT,SEL2=UNIT, SEL3=PB, SEL4=TI, SEL5~SEL8=NONEPV 3-6 斜率控制設RAMP=MINR 或 HRR, 且RR 不為零, 則斜率控制啟動, 當電源剛起動,或設定點SP1變動時,設定值SV 將以固定的速率(RR)由PV 值開始向上或向下增減至SP1值為止, 因此PV 也會跟著SV 之軌跡變動.3-7 恆溫計時器(Dwell Timer)設OUT2=TIMR 時, OP2輸出成為恆溫計時器, SP2則用來設定時間. 當PV 未達設定點SP1前, OP2不動作, 等到PV 達到SP1時, SP2開始倒退計時, 一直到SP2=0 則OP2輸出動作.21(3) 偏差帶外警報( OUT2=DBHI ) : PV 值高於SV+SP2或低於SV-SP2時警報發生.反之警報解除.(4) 偏差帶內警報( OUT2=DBLO ) : PV 值低於SV+SP2且或高於SV-SP2 時警報發生.反之警報解除.(5) 高限警報( OUT2=PVHI ) : PV 值高於SP2時警報發生,低於SP2-O2HY 時警報解除.(6) 低限警報( OUT2=PVLO ) : PV 值低於SP2時警報發生,高於SP2+O2HY 時警報解除.UM0C913A P SP1SP2UM0C913A3-9 濾波器 FILT有時PV 讀值極不穩定, 可利用FILT 之功能改善. FILT 選擇越大, 則PV 值之變動性越慢.3-10 故障強迫輸出O1FT 供OP1故障時選擇強迫輸出之方式.O2FT 供OP2故障時選擇強迫輸出之方式.例如: 設O1FT=BPLS, O2FT=10.0, 則故障時 OP1將採平順轉換, 利用故障前平均值繼續控制, OP2則提供10%輸出, ( OUT2=COOL 時才有此功能).3-11 自動演算新安裝之系統為了要得到最佳之PID.要進入自動演算, C21數次直到出現, C91及C92直到AT 指示燈亮, 再按參數值設定正確, 且才可以進行.3-12 手動控制數次直到或出現, 再按秒, 即進入手動控制模式.表示OP1之輸出百分比表示OP2之輸出百分比.3-13 數位通信本產品具有數位通信功能, 利用RS-232或RS-485介面組成監控系統, 採用Modbus RTU 模式通信協定, 設COMM=RTU, 另外要設定的參數有ADDR,資料位元數DATA 要設8bit, 結束位元數STOP 要設1bit, 檢查位元PARI 與傳輸速率BAUD 要與系統設一致. 詳細使用說明可參考 " User's Manual ".除了通信埠可用來傳輸資料外, 本產品另提供程式埠( programming port )作為快速建構之用, 不需經由按鍵輸入, 建構參數即可瞬間完成.223-8 PV 修正量(SHIF)正常情況下SHIF 通常均設為零, 但有時PV 值由於感測點之不同而與實測值有所偏差, 此時可利用SHIF 之值予以修正. 例如: SHIF=0時, PV 值為100.0則SHIF 設20.0時, PV 值成為120.0, 若SHIF 設為-10.0, 則PV 值變成90.0.附錄: 錯誤訊息及排除方法23UM0C913At TEL : 07-3735373 FAX : 07-3758835ADD : 高雄縣仁武區澄合六街18號E-mail:*******************.net 川得科技股份有限公司。
jprofiler9.2入门教程
JProfiler9入门教程JProfiler简介 (2)JProfiler安装及配置 (2)window下安装及配置 (2)Linux下安装及配置 (15)JProfiler监控方式介绍 (17)1.等待模式 (17)2.非等待模式 (17)3.离线模式 (17)创建监视本地Tomcat的工程(等待模式) (18)创建监视远程Tomcat的工程(等待模式) (24)创建监视远程Tomcat的工程(非等待模式) (24)创建监视远程Java程序的工程 (25)Jprofiler分析视图简介 (26)遥测(Telemetries) (26)实时内存视图(Live memory) (27)堆遍历视图(Heap walker) (28)CPU视图(CPU views) (30)线程视图(Threads) (31)锁视图(Monitor&locks) (31)数据库快照对比(Databases) (32)Java探针(JEE&Probes) (32)Mbeans (32)案例分析 (32)内存泄漏查找 (36)线程阻塞 (43)查看占用CPU较多的方法 (44)检测sql语句的执行效率 (44)帮助手册 (45)JProfiler简介JProfiler 是一个非常优秀的的 JVM 性能分析工具,可监视本地和远程的 JVM,适用于各种操作系统。
常用的功能有:1、监视堆内存占用情况和创建对象实例的数量,找出内存泄露的根源。
2、监视占用 CPU 较多的方法3、监视线程的阻塞与死锁4、监视 GC 的耗时。
JProfiler安装及配置window下安装及配置安装:1) 从官网下载JProfiler安装包 jprofiler_windows-x64_9_2.exe2) 双击运行3) 选择“Customize installation” Next4) 选择“I accept the agreement” Next5) 点击browser选择安装目录 Next6) 选择“Window x86 32 and 64 bit” Next7) 一路默认 Next 直到出现“License information”弹框,选择 Yes 选项 Next8) 选择 Enter license key >Single or evaluation license (Name、Company随便写License key输入以下任一注册码) Next*******************#23874-hrwpdp1sh1wrn#0620*******************#36573-fdkscp15axjj6#25257*******************#5481-ucjn4a16rvd98#6038*******************#99016-hli5ay1ylizjj#27215*******************#40775-3wle0g1uin5c1#06749)IDE Integration 非必选项,根据需要选择。
玛莱特·柴犬·用户指南说明书

PARTS LIST:Front Seat Cover Set Rear Seat Cover SetREQUIRED TOOLS: No tools required.Diver Down ™Custom Neoprene Seat CoversInstallation Manual: for 1997- Current Jeep Wrangler Vehicles#14167.20XX®READ ALL SAFETY MESSAGES AND UNDERSTAND ALL INSTRUCTIONS BEFORE ATTEMPTING TO INSTALL THISPRODUCT. ALWAYS WEAR SAFETY GLASSES DURING INSTALL.A hazardous situation which, if not avoided, could result in death or serious injury. You CAN be KILLED or SERIOUSLY HUR T if you don’t follow instructions.A hazardous situation which, if not avoided, could result in minor or moderate injury. You CAN be moderately HURT and also may suffer property damage if you don’t follow instructions.Careful attention is required to this instruction or operation but does generally not relate to personal injury. Damage to your Quadratec ®product or other property may result if you don’t follow instructions.A Few Words About Product Safety:Your Diver Down™ seat covers are intended to protect your seats and enhance the comfort and style of your vehicle interior. Before installation, please take a moment to review the following safety information and installation instructions. Important safety information is generally preceded by one of three signal words indicating the relative risk of injury. The signal words mean:Seat Covers Installation:®Prepare your seat covers for installation. Make sure to unbuckle all straps and unzip all zippers on your seat covers prior to installation.For JK only:Remove front headrests by depressing the release tabs at the base of the headrest posts and lift up on headrest.Front seat covers are designed specifically for the passenger or driver sides of the vehicle and are not interchangeable.Start by slipping the seat cover over the back of your vehicle’s seat and pulling it down all the way over seatback. For JK vehicles, ensure that the holes for the headrest on the covers line-up with the holes in the seat.Tuck the connecting flap or straps of the seat cover between the seat base and seat-back. Folding the seat forward may make this process easier. Zip all zippers on the seat cover. On two-piece covers, attach the connecting flap with the hook and loop fasteners on the back of the seat cover.On two-piece seat covers install the seat bottom cover over the seat base and pass the connection flap and straps between the seatback and seat base. On one-piece covers, make sure the buckles and straps are tucked all the way through the crevice between the seatback and base.(JK ONLY) IF YOUR VEHICLE IS EQUIPPED WITH SIDE IMPACT AIRBAGS MAKE SURE THAT YOU POSITION THE AIRBAG FLAPS OVER THE AIRBAGS,ON THE OUTSIDE OF THE SEAT FACING THE DOORS. FAILURE TO DO SO COULD LESSEN THE EFFECTIVENESS OF THE AIRBAGS.Underneath the seat, connect and tighten the buckles and straps from the back of the seat cover with the buckles at the front of the seat cover.Pull the sides of the seat cover all the way down over the sides of the seat base.Attach the elastic straps with hooks to the buckled straps under the seats or to part of the underside of the seat base.For JK vehicles only:Install headrest covers and reinstall headrests.Finish installation by adjusting the seat covers around and behind all seat levers,adjusters, covers, and trim.Periodic adjustments to the seat covers may be necessary as the cover breaks in and conforms to your vehicle’s seat. Seat covers can be spot cleaned with mild soap and water and a soft bristle brush. Do not machine wash.Sunlight will naturally fade neoprene over time.Seat covers are warrantied against defects in workmanship and materials, but not for fading due to normal UV exposure. See p4 for complete warranty information.A Quadratec seat cover installation video is available @ ®USE THE STRAPS FOR FINAL ADJUSTMENT ONLY. DO NOT PULL TOO HARD OR OVER-TIGHTEN THE STRAPS. THIS COULD CAUSE DAMAGETO THE SEAT COVERS.DO NOT ATTACH STRAPS OR HOOKS TO ANY PART OF THE SEAT THAT MIGHT IMPEDE PROPER OPERATION OF THE SEAT.BEFORE DRIVING, TEST THE OPERATION OF THE SEATS. IF THE SEAT OPERATION IS IMPAIRED BY THE COVER, MAKE ADJUSTMENTS TO THE INSTALLATION OF THE SEAT COVER, AND TEST THE OPERATION OF THE SEAT AGAIN. DO NOT DRIVE THE VEHICLE UNLESS THE SEATS OPERATE PROPERLY.Care of your product:For Further Information:Seat Covers Installation: continuedQuadratec® Exclusive One Year Limited WarrantyYour Quadratec®Diver Down™ brandedaccessories are covered by the followingLimited Warranty provided exclusivelyby Quadratec, Inc., 1028 Saunders Lane,West Chester PA 19380.This Limited Warranty is the only warrantymade in connection with your purchase.Quadratec neither assumes nor authorizes anyvendor, retailer or other person or entity toassume for it any other obligation or liability inconnection with this product or Limited War-ranty. This Limited Warranty does not applyand is not cumulative to any accessory or partdistributed by Quadratec for which the Manu-facturer provides a separate written warranty.What is Covered: Subject to the terms, exclu-sions and limitations herein and with respectonly to Quadratec branded accessories first soldin the United States, Quadratec warrants to theinitial retail purchaser only that yourQuadratec accessory shall be free of defects inmaterial and workmanship: for a period of one(1) years from date of retail purchase.This Limited Warranty is not assignable andshall terminate upon sale of the vehicle uponwhich the Quadratec accessory is installed orother transfer third persons.All other warranties are hereby disclaimed, ex-cept to the extent prohibited by applicable lawin which case any implied warranty of mer-chantability or fitness for a particular purposeon this product is limited to 1 year from date ofinitial retail sale. Quadratec reserves the rightsto: (a.) require invoice or other proof youraccessory is within the terms of this LimitedWarranty as a condition of warranty serviceand, (b.) make future revisions to this productand Limited Warranty without prior notice orobligation to upgrade your product.What is Not Covered:Your Quadratec Limited Warranty does notcover products or parts Quadratec determinesto have been damaged by or subjected to:(a.) installation damage, alteration, modifica-tion, combination with other parts, failure tomaintain or improper repair or service, (b.) nor-mal wear & tear, UV fading, cosmetic damageor damage from moisture or water immersion,(c.) Acts of God, accidents, misuse, negligence,inadequate mounting or impact with vehicle(s),obstacles or other aspects of the environment,(d.) theft, vandalism or other intentionaldamage.Remedy Limited to Repair/Replacement:The exclusive remedy provided hereunder shall,upon Quadratec inspection and at Q uadratec’soption, be either repair or replacement of prod-uct or parts (new or refurbished) covered underthis Limited Warranty.Customers requestingwarranty consideration should first contactQuadratec to obtain a RGA number(610-701-3336). All labor, removal, shippingand installation costs are customer’sresponsibility.Other Limitations - Exclusion of Damages -Your Rights Under State Law:In consideration of the purchase price paid, nei-ther Quadratec nor any independent Quadratecdistributor/licensee are responsible for any timeloss, rental costs, or for any incidental, conse-quential, punitive or other damages you mayhave or incur in connection with any part orproduct purchased. Your exclusive remedyhereunder for covered parts is repair/replace-ment as described above.This Limited Warranty gives you specific rights.You may also have other rights that vary fromstate to state. For example, some states do notallow limitations of how long an implied war-ranty lasts and /or do not allow the exclusionor limitation of incidental or consequentialdamages, so the limitations and exclusionsherein may not apply to you.©Quadratec, Inc. 2016. All Rights Reserved.Part #12999.3064 A4®。
HDJD-JD04 Development Kit 操作硬件手册说明书

HDJD-JD04Development KitOperating Hardware ManualIntroductionThank you for purchasing the HDJD-JD04 Development Kit from Avago Technologies. The HDJD-JD04 Kit is a simple development board, which demonstrates the capabilities of the 20-pin ADJD-J823 color management controller device with integrated RGB photosensors as feedback device of an RGB LED-based backlighting system.The development kit can be used stand-alone with an Autoload feature enabled, or connect direct to an IBM-PC computer (using USB port).Sample programs are provided to demonstrate the unique features of the device.The HDJD-JD04 Development Kit comes with the fol-lowing:• HDJD-JD04 Development Board (Figure 1-1)• HDJD-JD04 FPC Board (Figure 1- 2)• CD-ROM, which contains:• HDJD-JD04 Development Kit Hardware User Guide • ICMv2 Operating Software Manual • Application Notes• DatasheetsIf you are missing any part of the kit, please contact your nearest Avago Technologies sales office listed in the back of this publication for help.AVAGO TECHNOLOGIES’ PRODUCTS AND SOFTWARE ARE NOT SPECIFICALLY DESIGNED, MANUFACTURED OR AUTHORIZED FOR SALE AS PARTS, COMPONENTS OR ASSEMBLIES FOR THE PLANNING, CONSTRUCTION, MAINTENANCE OR DIRECT OPERATION OF A NUCLEAR FACILITY OR FOR USE IN MEDICAL DEVICES OR APPLICATIONS. CUSTOMER IS SOLELY RESPONSIBLE, AND WAIVES ALL RIGHTS TO MAKE CLAIMS AGAINST AVAGO TECHNOLOGIES OR ITS SUPPLIERS, FOR ALL LOSS, DAMAGE, EXPENSE OR LIABILITY IN CONNECTION WITH SUCH USE.ESD WARNING: Standard CMOS handling precautions should be observed to avoid static discharge.WARNING: This product is non RoHS compliantHDJD-JD04 Development BoardThe HDJD-JD04 development board has the following hardware features:1. 20-pin QFN packaged ADJD-J823 device2. Onboard +3.3V linear regulator with internal microprocessor reset circuit for direct input from +5V USB supply or external +5V supply 3. 1K I 2C Serial EEPROM4. USB port and associated hardware for direct connection to a USB port interface5. USB Data Transfer IC6. Jumper to select either using USB +5V or external +5V7. PCB mounting socket for external +5V supply8. PWM output connector that connects to external LED driver card9.HDJD-JD04 Flex Connector that connect the HDJD-JD04 flexible circuit board10. PWM output connector that connects to external LED driver card11.External I/O connector that port various control pins of ADJD-J823 device externally8910115647Figure 1. HDJD-JD04 Development Board Hardware1HDJD-JD04 Development Kit Hardware User GuideThis guide describes the HDJD-JD04 Development Board, including hardware component layout and schematic. Detailed information on ADJD-J823 can refer to the data sheet.Chapter 1: Introduction - This chapter introduces the HDJD-JD04 Development Kit and provides a briefdescription of the hardware.Chapter 2: Hardware Description - This chapter describes in detail the hardware of the HDJD-JD04 DevelopmentBoard.Reference DocumentsReference documents listed below are included in the CD-ROM.•ADJD-J823 Technical Data Sheets Application Notes•ADJD-J823 Application Note•ICM Program User Guide•HDJD-JD04 User GuideHardware DetailThe HDJD-JD04 Development Kit hardware is extremely simple and is intended to illustrate the ease of use of the Color Management Controller with integrated RGB photosensors.Power SupplyThe development board has a linear regulator that will step-down the +5V input to provide +3.3V supply needed to power up all the components onboard. The user can either choose USB +5V or external regulated 5V can be plugged into J7.The user can choose using the following jumper settingJ8 – External +5VJ9 – USB +5VNote: The HDJD-JD04 Development Kit does not include a power supply.USB PortA USB port interface is provided for easy interfacing with an IBM-PC computer. The port is used to emulate I2C com-munication using software to perform the communication translation job. The normal USB port cable can be used to hook up the board with the computer.Serial EEPROMA M24C01 1K (128 x 8) I2C serial EEPROM, from Microchip, is included on the board to illustrate I2C bus concepts and to store ADJD-J823 configuration and calibration data.External Input-Output ConnectorMost of the ADJD-J823 pins are mappable on the external input-output connector. These pins include:•PWM output R/G/B (PWM R/G/B)•I2C SDA (SDA)•I2C SCL (SCL)Sleep trigger (SLEEP)SchematicsThe following figures show schematics for the HDJD-JD04 Development board.Figure 2a. HDJD-JD04 Development Board SchematicFor product information and a complete list of distributors, please go to our web site: Avago, Avago Technologies, and the A logo are trademarks of Avago Technologies, Limited in the United States and other countries.Data subject to change. Copyright © 2007 Avago Technologies Limited. All rights reserved. Obsoletes AV02-0061EN AV02-0500EN - July 4, 2007Figure 2b. HDJD-JD04 Development Board SchematicAVAGO TECHNOLOGIES’ PRODUCTS AND SOFTWARE ARE NOT SPECIFICALLY DESIGNED, MANUFACTURED OR AUTHORIZED FOR SALE ASPARTS, COMPONENTS OR ASSEMBLIES FOR THE PLANNING, CONSTRUCTION, MAINTENANCE OR DIRECT OPERATION OF A NUCLEAR FACILITY OR FOR USE IN MEDICAL DEVICES OR APPLICATIONS. CUSTOMER IS SOLELY RESPONSIBLE, AND WAIVES ALL RIGHTS TO MAKE CLAIMS AGAINST AVAGO TECHNOLOGIES OR ITS SUPPLIERS, FOR ALL LOSS, DAMAGE, EXPENSE OR LIABILITY IN CONNECTION WITH SUCH USE.ESD WARNING: Standard CMOS handling precautions should be observed to avoid static discharge.WARNING: This product is non RoHS compliant。
土地利用规划管理信息系统用户手册
土地利用规划管理信息系统用户手册文件编号:J/GY-01010-20 04文件版次: 1.0文档编号J/GY-01010-2004 版本号 1.0分册名称第册/共册总页数38 正文38 附录编制金娜娜审批邓福军生效日期沈阳国源科技有限公司目录目录 (2)软件简介 (5)一、辅助编制 (5)二、实施控制 (5)系统安装 (6)一、硬、软件要求 (6)二、版权声明 (6)三、软件的安装 (6)系统启动和登录 (7)一、启动 (7)二、登录 (7)性能说明 (8)一、操作简单 (8)二、先进的开发平台 (8)三、运行环境简单 (8)四、良好的可维护性 (8)五、业务描述规范、合理 (8)六、良好的可扩充性 (9)七、保护已有的计算机成果 (9)八、32位操作系统 (9)系统数据要求 (10)系统操作说明 (11)一、辅助编制 (11)(一)工具栏按钮 (11)(二)文件 (13)(三)图像 (14)(四)专题 (15)(五)查询 (16)1、图形查询 (16)2、属性查询 (16)3、空间查询 (16)(六)输出 (17)1、行政区规划图 (17)2、分幅规划图 (17)3、任意区域规划图 (17)4、规划文档 (17)5、规划附表 (18)(七)维护 (18)(八)帮助 (20)(九)录入指标 (21)(十)导入规划数据 (21)(十一)编辑规划图 (21)(十二)统计编制数据 (22)(十三)编制规划文档 (22)1、编制附表 (22)2、编制规划文档模板 (23)3、编制规划文档 (23)(十四)方案比较 (24)(十五)导出成果数据 (24)(十六)窗口 (24)二、实施控制 (24)(一)工具栏按钮 (25)(二)文件 (27)(三)图像 (28)(四)专题 (29)(五)查询 (29)1、图形查询 (29)2、属性查询 (29)3、空间查询 (30)4、历史查询 (30)5、实施项目 (30)(六)统计 (31)(七)输出 (33)1、行政区规划图 (33)2、分幅规划图 (34)3、实施规划图 (34)4、规划文档 (34)5、附表 (34)(八)窗口 (34)(九)维护 (35)(十)帮助 (37)(十一)年度计划管理 (37)(十二)预审报件管理 (38)1、工作台帐 (38)2、预审报件 (38)(十三)规划局部调整 (39)软件简介《土地利用规划信息系统》是在《县级土地利用信息系统》基础上进行的,按照国家的《县(市)级土地利用规划数据库标准》(国土资发[2002]193号,以下简称《标准》)和《县(市)级土地利用规划管理信息系统建设指南》(以下简称《指南》)的规定,针对县级土地利用规划编制和实施管理各个环节的业务需求,以实施土地利用总体规划为目标,设计的一套功能全面、性能稳定的软件。
Shimadzu GC17A GC14C 清晰度控制模块用户指南说明书
SHIMADZU GC17A/GC14CClarity Control Module ENGCode/Rev.:M046/40CDate:3/29/2018Phone:+420251013400DataApex Ltd. Fax:+420251013401Petrzilkova2583/1315800Prague5 The Czech RepublicClarity®,DataApex®and®are trademarks of DataApex Ltd.Microsoft®and Windows TM aretrademarks of Microsoft Corporation.DataApex reserves the right to make changes to manuals without prior notice.Updated manuals can be downloaded from .Author:JKShimadzu GC17A/GC14C Table of Contents Contents1Shimadzu GC17A/GC14C1 2Requirements2 3Installation Procedure33.1Shimadzu GC17A/14C setup-communication33.2Hardware-Wiring43.3Clarity Configuration54Using the control module74.1Method Setup-GC74.1.1Method Setup-GC-Oven/Zones74.1.2Method Setup-GC-Inlet1(2)94.1.3Method Setup-GC-Press/Flow1(2)104.1.4Method Setup-GC-Det1(2-X)114.1.5Method Setup-GC-Time events124.1.6Method Setup-GC-Shutdown134.1.7Method Setup-GC-Gradients144.2Device Monitor154.3Shimadzu GC-17A/14C Setup16Table of Contents Clarity Control Module To facilitate the orientation in the Shimadzu GC17A/GC14C manual and Clarity chromatography station,different fonts are used throughout the manual.Meanings of these fonts are: Instrument(blue text)marks the name of the window to which the text refers.Open File(italics)describes the commands and names of fields in Clarity,parameters that canbe entered into them or a window or dialog name(when you already are in the topic describingthe window).WORK1(capitals)indicates the name of the file and/or directory.ACTIVE(capital italics)marks the state of the station or its part.The bold text is sometimes also used for important parts of the text and the name of the Clarity station.Moreover,some sections are written in format other than normal text.These sections are formatted as follows:Note:Notifies the reader of relevant information.Caution:Warns the user of possibly dangerous or very importantinformation.▌Marks the problem statement or trouble question.Description:Presents more detailed information on the problem,describes its causes, etc.Solution:Marks the response to the question,presents a procedure how to remove it.Shimadzu GC17A/GC14C1Shimadzu GC17A/GC14C 1Shimadzu GC17A/GC14CThis manual describes the setting of the Shimadzu GC17A and GC14CGC chromatographs.The control module enables direct control of theinstrument over serial line.Fig1:Shimadzu GC17A series IIICaution:Do not confuse GC14C(model derived from GC17A)with GC14A(olderShimadzu product).Direct control means that the chromatograph can be completely controlledfrom the Clarity environment.Instrument method controlling the analysisconditions will be saved in the measured chromatograms.The GC14C model is based on the GC17A,with limited functionality(onlymanual gas flow control).The model type should be selected in the GCsetup dialog window in System configuration.In this manual,the optionsto be selected will be described for the GC17A,with marked differencesfor GC14C.Note:Analysis conditions are all the options from the Method Setup-GCdialogs.Shimadzu GC17A/GC14C2Requirements 2RequirementsClarity Installation CD ROM with GC Control module(p/n A23).Free serial port in the PC(fast-16550UART).Note:Modern computers usually have only1(if any)serial(COM)port installed.To use more devices requiring the port,the MultiCOM adapter(p/nMC01)is available.Serial cross DB9F-DB25M cable(p/n SK03).Note:Cables are not part of Clarity Control Module.It is stronglyrecommended to order required cables together with the Control Module.A/D card(e.g.INT7,NetPAD,Colibrick etc.)The chromatograph must have the RS-232Interface board installed(thismay be ordered from Shimadzu(Shimadzu P/N221-44370-91)+cable(Shimadzu P/N630-06420-06)).Alternatively the Opt-USB Adapter fromDataApex(p/n OPT01)can be used.Shimadzu GC17A/GC14C3Installation Procedure 3Installation Procedure3.1Shimadzu GC17A/14C setup-communicationThe RS232"Interface board"from Shimadzu or Opt-USB Adapter fromDataApex must be installed.The Communication setting is in Function15Most of the parameters must correspond with the setting from theShimadzu GC-17A/14C Setup dialog.Current loop protocol must be set to EXTEND.Baud rate must correspond with the setting in the Shimadzu GC-17A/14CSetup dialog.Recommended value is4800.Communication protocol must be set to OPTICAL LINK,not to RS-232C(mistake of Shimadzu).File format must be set14CH MODE.Parity must correspond with the setting in the Shimadzu GC-17A/14CSetup dialog.Note:There is a Shimadzu mistake causing that EVEN=NONE and NONE=EVEN,but we have amended it by swapping the meanings too to providecorresponding settings.3Installation Procedure Clarity Control Module 3.2Hardware-WiringStart and Ready signals are communicated with Clarity through the Serialcross DB9F-DB25M cable,so it is not necessary to connect additionalstarting cables.The signal cable has to be connected according to the following scheme:Fig2:Signal cable wiringIn a set with the Autosampler synchronization cables will be required.Note:Typical connections of a GC set with Autosampler can be found in theGetting Started manual(chapter Device Setup and Wiring).Typical serial cable wiring is described in the picture.Fig3:Serial cross cable DB9F-DB25MShimadzu GC17A/GC14C3Installation Procedure 3.3Clarity ConfigurationIn the System Configuration dialog press the Add button(①on Fig6onpg6.)to invoke the Available Control Modules dialog.Fig4:Available Control ModulesSelect the Shimadzu GC17A/14C and press the Add button.The Shimadzu GC-17A/14C Setup dialog will appear.Fig5:Shimadzu GC-17A/14C SetupFill in the COM Port,Rate,Parity and Stop bits according to the settings inthe GC(see the chapter3.1)and press the OK button.Select the corresponding GC model.Set up the configuration options to match the connected GC.3Installation Procedure Clarity Control Module Note:Other fields from this dialog are described later in the manual("ShimadzuGC-17A/14C Setup"on page 16).The Shimadzu GC-17A/14C item②will appear in the Setup ControlModules list of the System Configuration dialog.Drag the GC icon from the Setup Control Modules list on the left side tothe desired Instrument tab③on the right side④,or use the button⑤to do so.Fig6:System ConfigurationSet the Start and Ready input and output numbers for your acquisitioncard according to the wires used for synchronization.4Using the control moduleNew GC tab appears in the Method Setup dialog,enabling the setting ofthe GC control method.Caution:If the module does not get the method file,for example after theInstrument window opening or method file change,the Single Runmeasurement will run with the old method loaded to the ShimadzuGC17A/GC14C control module.4.1Method Setup-GC4.1.1Method Setup-GC-Oven/ZonesFig7:Method Setup-GC-Oven/ZonesOven ParametersSets the Max Oven Temperature,Equilibry Time and the OvenTemperature program.Oven Max.Possible values[0-470].Equilibry TimeTime that the GC needs to reach the temperature equilibrium.Gradient TableSets the Heat Rate,desired temperature(Final Temp.)and time to holdthis temperature(Hold Time).The Total Time column will be calculatedautomatically.Note:Maximum of5rows is available.Delete the value in Heat Rate column toclear the selected row.Temperature ZonesSets the temperature of the zones that have been set in the Shimadzu GC-17A/14C Setup dialog.DescriptionDescription of the method(this description is not sent to or read from GC,it serves only for the information in Clarity).4.1.2Method Setup-GC-Inlet1(2)Parameters of the Inlet may differ according to the inlet type.In somecases(when the options selected are not supported by the connectedGC),the values will not be sent to the GC and null values will be get fromthe GC.Fig8:Method Setup-GC Control-InletColumn parameters:Length,DiameterPurge parameters:Press,FlowSPL mode:is the same for both inletsPressure,Velocity,Col Flow:Caution:Only one value will be sent to GC,select which one,the other values will becalculated by the CG.When reading a method from the GC,all values willbe read.Total Flow,Split Ratio:Caution:Only one value will be sent to GC,select which one,the other values will becalculated by CG.When reading a method from GC,all values will byread.4.1.3Method Setup-GC-Press/Flow1(2)Caution:This tab is not available for the GC14C.Fig9:Method Setup-GC Control-Press/FlowP/F modeSelect whether the gradient will be set in the pressure or flow mode.Gradient tablePressure or flow program depends on the P/F mode4.1.4Method Setup-GC-Det1(2-X)These tabs define the settings of detectors defined in the Shimadzu GC-17A/14C Setup dialog.Fig10:Method Setup-GC Control-DetectorThe items of this dialog will be different for various types of detectors set inthe Shimadzu GC-17A/14C Setup dialog and in the device.Note:In some cases(options not supported by the connected GC)the valueswill not be sent to GC and null values will be get from GC.4.1.5Method Setup-GC-Time eventsFig11:Method Setup-GC Control-Time EventsA table of time events:Set time,type and value for every event.Values must correspond to the setting in the GC.Incorrect values will be ignored.Caution:Table is only sent to GC.It cannot be read from the GC to Clarity.Caution:The parameters are not checked for validity.Invalid values will be ignored.4.1.6Method Setup-GC-ShutdownFig12:Method Setup-GC Control-ShutdownThe Shutdown tab of the GC control enables to switch off the oven heaterafter the analysis is finished.Keep state-the heater remains onSet off after Analysis-the heater will be switched off after the end ofgradient program.Note:When any method is sent to GC,the heater will be always switched On.Typically,the method with shutdown On will be used as the last one in asequence.The automatic sending of the method to the instrument shouldthen be disabled.4.1.7Method Setup-GC-GradientsFig13:Method Setup-GC Control-GradientsDisplays the gradients selected by the Gradients of radiobuttons(Oventemperature,Pressure or Flow).4.2Device MonitorDevice Monitor-Shimadzu GC-17A/14C dialog displays current valuesfrom the GC and expected values(=values sent to the GC).It also allowa direct control of the GC oven heater.Note:For the GC-14C model,some of the fields in the Device Monitor windowmight be missing.Fig14:Fig15:Device Monitor-Shimadzu GC-17A/14CThe GC Heater can be set On or Off using the corresponding buttonsSystem ON and System Off in the Device Monitor window.Note:When the System Off is pressed during run,the heater will be switched Offonly after the analysis has been finished.Temperature fieldsLeft field contains the values set in the method.Right field contains realvalues read from the chromatograph.If there is a difference betweenrequired value and the real value the actual value is marked in by color.Green value means that the actual temperature is lower than the required.Red value means that the actual temperature is higher than the required.Note:The set Oven temperature is not updated during a gradient run,the initialset temperature will be displayed.Any additional informative fields displayed will depend on the current GCconfiguration.4.3Shimadzu GC-17A/14C SetupFig16:Shimadzu GC-17A/14C SetupCOMSelection of the communication port.RateThe speed of the communication port.Possible values[1200;2400;4800]ParityThe Parity of the communication port.Possible values[None,Even]Stop bitsThe Stop bits of the communication port.Possible values[1;2]ModelSelect model GC17A or GC14C.Injector and Detector TypesSets the types of Injectors and Detectors that have been installed on theGC and attach corresponding Heat zones to them.。
J-Link Lower Control Arms 安装指南说明书

JKS 1650J-Link Lower Control Arm InstallationPage 1WelcomeCONGRATULATIONS on purchasing a set of J-Link Lower Control Arms from JKS Manufacturing. We are committed to providing you with the best products available and your satisfaction is our first priority.PLEASE READ these Installation Instructions carefully, and save them for future reference, as they contain important installation and maintenance information.ImportantCOMPATIBLE WITH original 4-link suspension con-figuration and vehicle ride height up to 4.0”REFER TO FACTORY SERVICE MANUAL for informa-tion and procedures not covered in these instructions.Tools RequiredMetric/Standard Socket Wrench Set Torque Wrench Tape Measure Anti-Seize LubricationHydraulic Floor Jack & Jack Stands* Asterisk denotes tools that are not required for someapplications. Thoroughly read instructions first to determine which tools will be required for your application.517-278-1226•************************•491 W. Garfield Avenue, Coldwater, MI 49036*WJ models require JKS 6109JKS 1650J-Link Lower Control Arm Installation2 PagePre-Installation Note Use flat washer shims to fill void between bracket and bushingVOID9/16” SAE FLAT WASHERis necessary to insert spacer washers between the bracket and bushing to fill this requires one 1/4" thick Install Control Arms ONE AT A TIME for easiest align -ment of mounting hardware.InstallationRemove the nut and bolt from the chassis railbracket. Retain the original mounting hardware. Remove the original lower suspension arm fromthe vehicle.2. INSTALL CONTROL ARMSInstall the arms in the frame and axle mounts sothat the bend is down and closer to the front axle.ÂGRAND CHEROKEE WJ ONLY - Insert two(2) 1/8" shims (included in JKS6109)– one on each side of bushing – to fill the void between the frame bracket and control arm bushing. Install the original mounting bolt and fingertighten the nut. DO NOT torque mountinghardware until instructed.ÂGRAND CHEROKEE WJ ONLY - Insert two(2) 1/4" shims (included in JKS6109)– one oneach side of the control arm bushing - to fillthe void between the axle bracket and controlarm bushing.Install the original mounting bolt and finger tighten the nut. Remember to realign cam adjuster onfront axle if equipped. DO NOT torque mountinghardware until instructed.HINT: If mounting bolt is difficult to install dueto misalignment of control arm bushing withmounting bracket, either (1) adjust height ofaxle housing with hydraulic jack, (2) moveaxle housing into position with a heavy-dutyratchet strap, or (3) temporarily disconnecttrack bar until mounting holes align.3. TIGHTEN MOUNTING HARDWAREOnce all control arms have been properlyinstalled, lower the vehicle to the ground until coilsprings are supporting the full weight of vehicle.Using a torque wrench, tighten the mounting hardware to the factory torque specifications foryour vehicle.Wrangler TJ, 1997-06ÂTighten nut at FRONT axle and chassisbrackets to 130 ft-lbs.ÂTighten nut at REAR axle and chassisbrackets to 150 ft-lbs.Grand Cherokee ZJ, 1993-98ÂTighten nut at FRONT axle and chassisbrackets to 130 ft-lbs.ÂTighten nut at REAR axle and chassisbrackets to 130 ft-lbs.Grand Cherokee WJ, 1999-04ÂTighten nut at FRONT axle and chassisbrackets to 130 ft-lbs.Cherokee XJ, 1984-01ÂTighten nut at FRONT axle and chassisbrackets to 130 ft-lbs.4. POST-INSTALLATION INSTRUCTIONSIf track bar was disconnected during the install, torque axle to track bar bolt to 50 ft-lbs.Double check all hardware has been torqued.MaintenanceSUSPENSION COMPONENTS THAT HAVE RUBBER BUSHINGS must be tightened with vehicle on level ground and at normal ride height. The springs must be supporting the weight of the vehicle when the hard-ware is torqued; or else ride comfort could be affected and premature bushing wear may occur.RUBBER BUSHINGS MUST NEVER BE LUBRICATED, as doing so will impair performance and longevity.©2016 JKS ManufacturingRevision Date 04/08/2016JKS 1650J-Link Lower Control Arm Installation Page 3。
博奥软件操作

博奥工程量清单计价软件操作指南目录第一章公司简介 (1)第二章软件介绍 (2)2.1软件组成与安装 (2)2.1.1系统需求 (2)2.1.2软件组成 (2)2.1.3版本说明 (2)2.1.4软件安装 (2)2.1.5软件卸载 (4)第三章软件界面介绍 (5)3.1主菜单 (5)[系统] (5)[编辑] (8)[工作] (9)[窗口] (10)[帮助] (10)3.2工具图标 (11)3.3输入模块 (13)3.4快速功能键说明 (13)第四章软件功能模块说明 (15)4.1软件操作流程 (15)4.2建立工程档案 (16)4.3分部分项工程量清单输入 (21)4.3.1功能键说明 (22)4.3.2功能按键说明 (22)4.3.3分析窗功能说明 (28)4.4输入分部分项工程量 (33)4.4.1分部名称输入 (33)4.4.2输入工程项目 (36)4.4.3输入定额子目 (37)4.4.4建立补充定额子目 (37)4.4.5工程量输入 (39)4.4.6土建混凝土拌制/搅拌机 (39)4.4.7土建超高增加费 (39)4.4.8泵送费自动计算和装饰装修的垂直运输机械费自动汇总 (40)4.4.9商品砼的换算 (40)4.4.10多专业工程合并(拿土建和装饰两专业工程举例) (41)4.5措施项目清单输入 (41)4.6其他项目清单输入 (43)4.7信息价输入 (44)4.8工程取费 (46)4.9浏览报表 (48)4.10编制说明 (49)4.11清单结算 (50)4.12打印报表设计及输出 (50)第五章管理中心--数据库维护 (57)第六章单独装修专业 (58)第七章安装专业 (59)第八章园林专业 (60)第九章问题解答及操作技巧 (61)如何导入EXCEL格式的电子招标文件? (61)定额法工程与清单法工程如何转换? (61)清单、消耗量软件可以用定额计价方式做预算吗? (61)如何调整清单项目综合单价? (62)不套取定额子目能直接输入清单项目的综合单价吗? (62)可否将信息价作为定额基价使用? (63)可以直接修改定额基价或材料基价吗? (63)如何处理甲供材料? (63)可以统计三材(水泥、钢材、木材)用量和价格吗? (63)如何换算定额材料? (64)临时输入的信息价如何保存,以备下次使用? (64)如何用原来的算式法计算工程量? (64)如何生成招标文件? (64)如何生成投标文件(如何刻光盘)? (64)如何检查综合单价是否正确? (64)如何输入“工作容”? (64)定额子目的取费费率可以修改吗? (64)如何复制/删除选定好的项目或定额子目? (65)如何输入措施项目? (65)如何从下载各地材料信息价? (65)如何对清单工程进行结算? (65)如何反映软件问题? (66)如何升级/更新软件程序? (66)如何将报表生成EXCEL电子文档? (66)如何建立个性背景图? (66)如何取消同步计算功能,提高运行速度? (67)如何单独修改某条项目的费率? (67)如何自动对项目编码进行排序? (67)如何恢复被误删除的工程? (67)如何建立补充项目或定额子目? (67)如何备份材料信息价? (68)单位不显示如何处理? (68)如何强行修改报表数据? (69)如何将材料、主材、设备直接作为补充定额使用? (69)第十章技术支持 (70)第一章公司简介博奥软件()是一家以工程软件开发为主业,兼营计算机软硬件销售、网络集成、综合布线、承接工程预结算、工程施工组织设计等业务的高科技公司,公司全体员工经过多年不懈努力,成功地开发出一系列优秀软件产品,赢得了广大用户的信赖和支持。
J-SAP-M-960 型手动火灾报警按钮 说明书
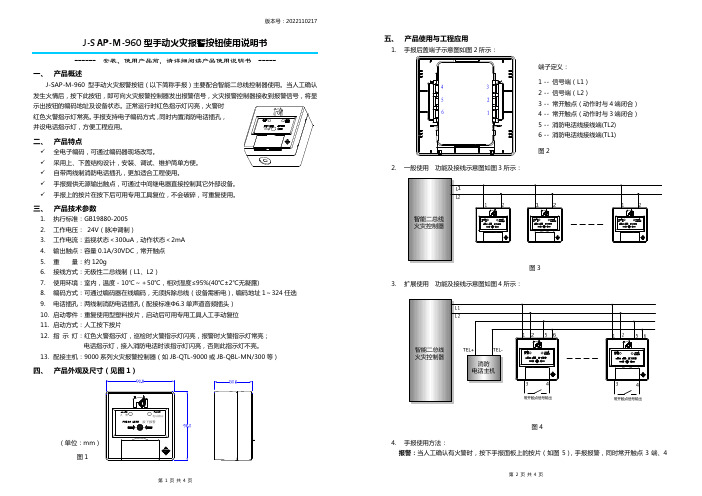
版本号:2022110217第 1 页 共 4 页 J-SAP-M-960型手动火灾报警按钮使用说明书------ 安装、使用产品前,请详细阅读产品使用说明书 -----一、 产品概述J-SAP-M-960型手动火灾报警按钮(以下简称手报)主要配合智能二总线控制器使用。
当人工确认示出按钮的编码地址及设备状态。
正常运行时红色指示灯闪亮,火警时红色火警指示灯常亮。
手报支持电子编码方式,同时内置消防电话插孔,并设电话指示灯,方便工程应用。
二、 产品特点9 全电子编码,可通过编码器现场改写。
9 采用上、下盖结构设计,安装、调试、维护简单方便。
9 自带两线制消防电话插孔,更加适合工程使用。
9 手报提供无源输出触点,可通过中间继电器直接控制其它外部设备。
9手报上的按片在按下后可用专用工具复位,不会破碎,可重复使用。
三、 产品技术参数1. 执行标准:GB19880-20052. 工作电压: 24V(脉冲调制)3. 工作电流:监视状态<300uA,动作状态<2mA4. 输出触点:容量0.1A/30VDC,常开触点5. 重 量:约120g6. 接线方式:无极性二总线制(L1、L2)7. 使用环境:室内,温度-10℃~+50℃,相对湿度≤95%(40℃±2℃无凝露)8. 编码方式:可通过编码器在线编码,无须拆除总线(设备需断电),编码地址1~324任选 9. 电话插孔:两线制消防电话插孔(配接标准Ф6.3单声道音频插头) 10. 启动零件:重复使用型塑料按片,启动后可用专用工具人工手动复位 11. 启动方式:人工按下按片12. 指 示 灯:红色火警指示灯,巡检时火警指示灯闪亮,报警时火警指示灯常亮; 电话指示灯,接入消防电话时该指示灯闪亮,否则此指示灯不亮。
13. 配接主机:9000系列火灾报警控制器(如JB-QTL-9000或JB-QBL-MN/300等)四、 产品外观及尺寸(见图1)(单位:mm)图1第 2 页 共 4 页五、 产品使用与工程应用1. 手报后盖端子示意图如图2所示:123456端子定义:1 -- 信号端(L1)2 -- 信号端(L2)3 -- 常开触点(动作时与4端闭合)4 -- 常开触点(动作时与3端闭合)5 -- 消防电话线接线端(TL2)6 -- 消防电话线接线端(TL1)图22. 一般使用 功能及接线示意图如图3所示:图3 3. 扩展使用 功能及接线示意图如图4所示:图44. 手报使用方法:报警:当人工确认有火警时,按下手报面板上的按片(如图5),手报报警,同时常开触点3端、4第 3 页 共 4 页端(如图4所示)闭合。
- 1、下载文档前请自行甄别文档内容的完整性,平台不提供额外的编辑、内容补充、找答案等附加服务。
- 2、"仅部分预览"的文档,不可在线预览部分如存在完整性等问题,可反馈申请退款(可完整预览的文档不适用该条件!)。
- 3、如文档侵犯您的权益,请联系客服反馈,我们会尽快为您处理(人工客服工作时间:9:00-18:30)。
使用jBPM开发基于WEB的工作流,首先需要搭建好开发环境,经过一段时间的摸索,先将环境搭建的步骤做个简要说明:1.前提:Eclipse 3.2MyEclipse 5.0GAjBPM3.1.2(jbpm-starters-kit-3.1.2)Oracle 10gStruts1.2Hibernate32.至于数据库的脚本生成就不说了,有些参考资料讲得比较清楚,也有备份。
3.安装完JBPM的相关Eclipse插件以后,就可以使用Eclipse创建(new...)一个Process Project以及相关的ProcessDefinition,但这不是我们想要的。
我们想要的从步骤4开始。
4.使用Eclipse创建一个Web Project,加入必要的框架包,如Struts,JSTL等。
5.在构建路径中配置jBPM库,这也是环境搭建的重点。
由于使用默认的Process Project 可以帮我们创建好jBPM库,但没有帮我们创建WEB环境,因此,我们首先建立WEB工程,再来搭建JBPM库。
6.在工程的“Build Path”中选择配置构建路径(Config Build Path...)。
7.在打开的窗口中选择右边的Libraries标签库,通过Add Library选项,在打开的窗口中添加一个jBPM库。
8.可以看到没有所谓的jBPM库选项,因此要自己动手,选择User Library选项,创建一个自定义的用户库,取名为jBPM Library [jBPM Runtime]。
9.添加jar文件到我们自定义的User Library中,需要添加的内容是:jbpm-starters-kit-3.1.2\jbpm.3\lib目录下的所有jar包;jbpm-starters-kit-3.1.2\jbpm.3\build目录下的所有jar包。
OK,开发环境初步搭建完成,我们同样可以在新建的工程中自由的创建Process Definition 文件。
jBPM用户指南-CH01[注:本系列jBPM用户指南是根据JBoss jBPM文档中的jBPM3.1.2 User Guide所做的翻译,之前有网友翻译过jBPM3.0 User Guide,jBPM3.1.2中有稍微的变动。
本系列内容最早发布在BologSpot,后来转到CSDN,现将其移到这里,方便有兴趣的朋友一起交流,文中肯定有很多言不达意的地方,如果觉得有问题,请您参照原文理解,烦请将问题跟帖指出,不胜感激!]第一章:介绍JBoss jBPM是一个灵活、可扩展的工作流管理系统。
JBoss jBPM有直观的流程设计语言,可以根据任务、异步通信的等待状态、定时器、自动操作等来图形化地表示业务流程。
为了将这些操作绑定在一起,JBoss jBPM拥有一套最强大的、可扩展的流程控制机制。
JBoss jBPM有着最小的依赖性,使用起来和使用普通的java库一样简单。
当然也可以把它通过部署到J2EE 集群应用服务器,以用在吞吐量极为关键的环境中.JBoss jBPM 可以同任何数据库配置,并且可以部署在任何应用服务器上.1.1综述核心的工作流和BPM(业务流程管理)功能被打包为一个简单的java库。
这个库包含了一个用来从jBPM数据库中存储、更新和获取流程信息的服务。
图1.1 :JBPM组件概览图1.2. The JBoss jBPM starter kit本工具包包含了绑定到一个简单下载包的所有的jBPM组件。
内容包括:jbpm-server:预先配置的jboss 应用服务器.jbpm-designer:用来图形化地创建jBPM流程的eclipse插件 .jbpm-db:jBPM 数据库兼容包(参看下面).jbpm:核心jbpm组件包括库和本手册.jbpm-bpel:JBoss jBPM BPEL 扩展的参考实现.预配置的JBoss应用服务器安装了以下的组件。
核心jBPM组件,打包为一个服务档案文件集成了jBPM表的数据库:包含jBPM表和流程的默认hypersonic数据库能由流程参与者与jBPM管理员使用的web控制台应用程序。
定时器执行的jBPM调度计划。
调度程序在新手包中被配置为一个Servlet。
这个servlet将产生一个线程来监控和执行定时器。
异步执行命理的jBPM命令执行器。
该执行器同样配置为一个Servlet。
该Servlet将产生一个线程来监视和执行命令。
一个示例流程以及部署到jBPM数据库中。
第二章入门本章将带你从第一步获取JBoss jBPM到提供立即启动运行JBoss jBPM的初始指示。
2.1.下载包概览下面列出的现在可用的不同jBPM包。
每个包包含了一个或多个可下载的文件。
这些文件都伴有一份内容说明和相关的安装指令提示(如果文件可安装的话)。
下面描述的所有下载内容均可在sourceforge jbpm下载页面找到。
2.1.1. JBPM3在下载JBoss jBPM 3。
这是包含了核心引擎和一些运行JBPM所需要的附加模块。
开发新手包:(jbpm-starters-kit-.zip): 如果你想对JBoss jBPM快速入门,这就是你所需要的文件。
它在一个单独的下载中包含了这个包的所有其他模块并加上一个图形设计器。
解开压缩包到指定的目录并阅读readme.html文件以获取更多信息和更多的安装指令。
有了哥哥新手包你就可以立即从第三章开始。
【指南】核心引擎和身份组件(jbpm-.zip):该下载包含了jBPM核心引擎和用于参与者与组管理的身份组件。
要开始使用它,解开压缩包到指定的目录,你可以发现指向用户指南的提示和在jbpm-文件夹的readme.html文件中描述的其他重要信息资源。
数据库扩展(jbpm-db-.zip):数据库扩展包包含了jBPM核心引擎和用于参与者与组管理的身份组件。
要开始使用它,解开压缩包到指定的目录,你可以发现指向用户指南的提示和在jbpm-文件夹的readme.html文件中描述的其他重要信息资源。
2.1.2. jBPM 流程设计器在下载jBPM流程设计器。
该设计器是一个Eclipse插件并允许你制作自己的流程定义并简单地进行部署。
该插件可以作为一个压缩的Eclipse feature或压缩的Eclipse update site提供下载。
内容上基本一致,唯一不同的地方是你的安装的方式。
Eclipse Update Site(jbpm-gpd-site-<version>.zip):如果你想确信设计器的安装能够顺利进行,我们推荐使用update site机制与一个新的Eclipse安装相结合。
当然,Eclipse版本要跟下载的update site文档相匹配。
要入手设计器插件,请按照文档根目录的readme.html 文件的指示以成功安装GPD(图形设计器)。
Eclipse Feature (jbpm-gpd-feature-<version>.zip): 如果你厌烦了每次去刷新Eclipse安装,那么你将应付一些可能的问题,你可以尝试feature下载包。
这种安装相当简单,只需要解压文档到你的Eclipse安装路径并覆盖可能先前存在的同名文件夹即可(确保plugins 和features文件夹在你的Eclipse安装的同一个位置结束)。
这种安装方式非常简单,但由于你已经安装了其他的features,覆盖先前存在的插件可能会让你陷入相互冲突的问题。
尽管文件有相同的名字,但还可能配到这些冲突的插件版本不同,因此存在冲突的可能性。
readme.html文件的安装指示中已经多次强调。
2.1.3. jBPM BPEL 扩展在下载JBoss jBPM BPEL扩展。
它只包含一个文件:jbpm-bpel-.zip。
要使用BPEL扩展,请参看顶层文件夹doc子目录下的用户指南。
2.2. JBoss jBPM 项目目录专业支持: JBoss 是为该项目提供专业支持、培训和资讯服务的公司。
用户指南:你正在阅读的提供进入本项目主要切入点服务的文档。
论坛:与社区联系,提问和讨论jBPM。
wiki:额外信息,大部分由社区提供。
问题跟踪:提交BUG和特性要求。
下载:sourceforge提供的jBPM下载页。
邮件列表:用于公告的邮件列表。
javadocs:部分的下载在doc/javadoc目录。
2.3. CVS 访问2.3.1. 匿名CVS 访问作为选择,根据下面的信息你可以从CVS得到JBoss jBPM。
* 连接类型: pserver* 用户: anonymous* 主机: * 端口: 2401 (which is the default)* 知识库路径: /cvsroot/jbpm* 标签: :pserver:anonymous@:/cvsroot/jbpm2.3.2. 开发人员CVS 访问为了能够进行开发者访问,你必须签署贡献者协议并且需要一个SSH KEY。
更多两者的信息可以在JBoss cvs 知识库wiki页找到。
* 连接类型: ext over ssh (extssh in eclipse)* 用户: username or jboss username* 主机: * 端口: 2401 (which is the default)* 知识库路径: /cvsroot/jbpm* 标签: :pserver:anonymous@:/cvsroot/jbpm第三章指南本指南将向你展示用JPDL构造的基本流程和管理运行时执行的API的用法。
指南的格式是解释一组的例子。
这些例子将集中讲解一个详细的主题并包含一些扩展的内容。
这些例子也可以在jBPM下载包中的src/java.examples目录找到。
最好的学习方式是创建一个工程,并在给出的例子的基础上改造,进行试验。
Eclipse用户入门:下载jbpm-3.0-[version].zip包并解压到你的系统中。
然后按照Eclipse 菜单的"File" --> "Import..." --> "Existing Project into Workspace"顺序进行操作。
点击“下一步”(Next),然后浏览jBPM根目录并点击“完成”(Finish)按钮。
现在在你的工作区就有了jbpm.3工程了。
现在你可以在src/java.examples/...目录下发现本指南的示例。
当你打开这些示例,你可以通过菜单"Run" --> "Run As..." --> "JUnit Test"来运行它们。
