DCWL-3000-APAG_APG用户手册-v1.10
3000使用说明书

开关量输出 (DO)
均经光电隔离。
8(防跳内置)或 7(防跳外置)
通信接口
2
可以是 RS-232、RS-485、光纤和网络接口。
4 主要技术指标
4.1 额定参数
交流电压额定值(Un):100V,380V 交流电流额定值(In):5A,1A 电源频率额定值: 50Hz 直流电源额定值: 220V,110V
4.1 额定参数.............................................................................................................................. 4 4.2 环境条件.............................................................................................................................. 4 4.3 功率消耗.............................................................................................................................. 5 4.4 热稳定性.............................................................................................................................. 5 4.5 测控技术指标...................................................................................................................... 5 4.6 保护技术指标...................................................................................................................... 6 4.7 触点容量.............................................................................................................................. 8 4.8 绝缘性能.............................................................................................................................. 9 4.9 抗干扰能力.......................................................................................................................... 9 5 装置原理................................................................................................................................... 10 5.1 装置的构成........................................................................................................................ 10 5.2 保护原理说明.................................................................................................................... 10 6 菜单及数据表格说明............................................................................................................... 22 6.1 实时数据表........................................................................................................................ 22 6.2 保护参数表......................................................................................................................... 23 6.3 通信数据表格.................................................................................................................... 29 6.4 系统参数表......................................................................................................................... 32 6.5 模拟量校准表..................................................................................................................... 34 7 操作方法................................................................................................................................... 35 8 装置结构及尺寸....................................................................................................................... 35 9 装置原理接线图....................................................................................................................... 36 10 箱后端子接线图..................................................................................................................... 37
能源恒科技3000W DC到AC电源用户手册说明书

AC outlets Digital display PostsON/OFF buttonRemote control connection1 SAFETY GUIDELINES3000W POWER INVERTERImportant • Before connecting or using your 3000 watt inverter, please read and understand this User’s Manual.Please keep this manual for future reference.Safety Precautions • Incorrect installation or misuse of your DC to AC inverter may result in damage or hazardous conditions to the user. Please pay special attention to the following instructions and warnings.!Shock hazard! Keep away from children!• The safety will keep each AC outlet with only max 1500W power output. Any appliance over 1500W will not be powerd by this unit, and the overloading protection will be activated.DO NOT open the case of the inverter.DO NOT insert any foreign objects into the unit outlets, vents or fan openings.DO NOT expose the unit to rain, water or any other liquid, it is not designed to be waterproof.DO NOT operate the unit near flammable fumes or gases such as the cabin of a gasoline power boat, or near propane tanks.DO NOT operate the unit in an enclosed area that contains automotive type lead-acid batteries. This type of battery emits explosive hydrogen gas which can be ignited by sparks.The unit must be operated in an area that meets the following requirements in order to operate safely and provide optimum performance:Your 3000W Power Inverter supplies 3000 watts of continuous power with 6000 watts of surge power. When you turn on an appliance or a tool that operates using a motor or tubes, itrequires an initial surge of power to start up. This surge of power is referred to as the “starting load” or “peak load”. Once started, the tool or appliance requires less power to continue to operate. This is referred to as the “continuous load” in terms of power requirements. You will need to determine how much power your tool or appliance requires to start up and its continued running power requirements.2 OPERATING INSTRUCTIONS DescriptionDon’t allow water or other liquid to drop or splash on the unit.Dry Ambient air temperature should be 0℃~40℃(the cooler the better within this range).Cool Leave at least 2in. (5cm) clearance around the unit for air flow. Ensure that the ventilation openings are not obstructed.Ventilated Do not operate the unit in the same compartment as batteries or in any compartment capable of storing flammable liquids like gasoline.Safe Do not operate the unit in an area that is prone to dirt, dust or debris. Especially important if used in a work environment.CleanThe inverter should be connected to your 12V power source with the two sets of DC cables to four posts (included). We recommend that the equipment or appliance switch be in the “OFF” position prior to plugging into the AC receptacle of the inverter.Connecting the inverter:1) Place the inverter on a flat surface, such as on the vehicle floor.2) Please make sure that the inverter is off.3) Attach the ring type connector marked with red to the positive (+) DC terminal on the power inverter, and attach the ring connector marked with black to the negative (-) DC terminal.4) Tighten the nut on each DC terminal until it is snug. DO NOT over-tighten.5) Connect the other end of the DC cables to 12V battery, red to positive and black to negative.Reverse the polarity will arouse blown fuse or damage to the inverter, which may also void the warranty.6) Repeat step (3)-(5) to connect another set of DC cables Notice: As this is a heavy duty unit, it requires two set of cable connecting to carry the electrical power.7) Press the ON button to turn inverter on.8) Plug the AC product(s) you wish to operate into the AC. outlet(s).9) Switch them on, one at a time.10) When the power inverter is not in use, disconnect the DCO-ring from the battery to prevent slight discharge of batteryCaution!Most vehicle batteries are designed to provide short period of very high current for starting the engine. They are not designed for a constant “deep discharge”. Constantly operating the unit from a vehicle battery until the low voltage shut off will affect the life of the battery. If you are operating electrical products for extended periods of time, you should consider connecting the unit to a separate deep discharge battery. !Although the inverter incorporates protection against over-voltage, it may still be damaged if the input voltage exceeds 16 volts.Cable Gauge suggection :it's highly recommend to use the included oring cables toconnection the inverter to 12V battery. if you want longer cable, please refer to below chart of copper cable gauge suggestion:LengthGuage (2sets)3FT4FT5FT6FT7FT8FT9FT10FT 6AWG 5AWG 4AWG 4AWG 3AWG 3AWG 2AWG 2AWG3 FEATURES3000W Power Inverter, a high performance solution to use household power while on the road. Connected to the 12V volt output in your vehicle, the inverter efficiently and reliably supplies 115V/60Hz AC power for a wide variety of loads, such as all kinds of jacklights, TV sets, audio/video systems and electromotion tools with total power consumption under 3000 watts. It has been tested and found to be in line with the requirement of ETL certification. With proper care and appropriate usage, it will give you years of dependable service in your car, truck, RV and boat.The unit is not designed to be waterproof. It applies to the ambient temperature for 32℉~104℉(0℃~40℃).The inverter is designed with automatic shutdown features in abnormal conditions for safe operation. Please refer to below chart for details.1072569!1. Normal working conditions:Under normal working condition, the digital display shows the input voltage ( in V) and the output power( in W or KW) intermittently.Green indicator on Yellow in dicator on Red indicator on the number displaying is the input voltage the number displaying is the output power in KW the number displaying is the output power in WDigital display explanation:2. Abnormal condition:If there is error occurred, the inverter will shut down , alarm, and digital display shows an error code (refer to page 9 "Error codes explanation and trouble shooting"One AC outlet is limited to 1500W only4 SPECIFICATIONSMax. Continuous Power……………………….....…….……..3000W Surge Capacity (Peak Power)………………………………..6000W Single Outlet Max. Continuous Output………...………....... 1500W Input Voltage Range………………………………………11-15V DC Output Voltage Range………………………………… 104-125V AC Output Frequency………….…………………………...…..60+/- 2Hz USB Output…………..……....…………………………....….5V 2.1A Wave Form……………………………….………..Modify Sine Wave。
AMC3000用户使用说明书 V1.00
1
0755-86196687
Page 3 of 10
2011-8-26 19:12:22
AMC3000 用户手册
AMC3000 运动控制卡一张; 62 针电缆一根; 62 针端子板一张; 配套光盘一张;
2.2 AMC3000 结构布局
板子长 180 毫米(mm), 宽 130 毫米(mm);
过程中可以执行暂停、恢复; l 缓冲区中的相邻运动指令支持前瞻预处理功能; l 支持软件限位功能,命令位置超限之后,控制轴停止运动; l 9 路隔离数字输入(DI); l 16 路隔离集电极开路数字输出(DO);
2 安装
2.1 检查配件
打开包装前,请先查看外包装标明的产品型号是否与订购的产品一致。打开包装后,请首先检查运 动控制器的表面是否有机械损坏,然后核对配件是否齐备。如果运动控制器表面有损坏,或产 品内容不符合,请不要使用,立即与我司联系。
提供了丰富的接口供用户使用,包括:USB HOST 接口、USB DEVICE 接口、隔离的全双工 RS485 接口、RS232 接口、10/100Mbps 自适应以太网接口。
支持点位运动、直线/圆弧/螺旋线插补、回零等功能,并且提供了 2000 级的指令缓冲区,所有 的插补指令可以放入缓冲区中执行;支持前瞻预处理功能,启动前瞻预处理功能时,可以指定相邻 运动指令的过渡误差。
2 安装................................................................................................... 1
2.1 检查配件..................................................................................................................1 2.2 AMC3000 结构布局 ................................................................................................2
DCAP系列操作维护说明

前言北京清华紫光测控生产的DCAP-3000系列综合自动化系统是通过部级鉴定,通过国家继电器质量监视检验中心检验的产品,是国家电力部检验和认证的产品,是国家经贸委城乡电网改造中第一批推荐使用的产品。
它代表清华大学在高新技术控制领域的强劲实力,以其先进的技术力量和优质的效劳态度赢得了广阔用户的一致好评,实践也证明,它是一种让广阔用户信赖的产品。
但任何产品在使用过程中是不可防止的要处理一些小故障,给用户带来一些麻烦,为了方便用户能正确、积极的操作及处理我公司产品的问题,我公司针对用户在使用DCAP-3000系列监控保护装置的过程中提出的一些问题和要求进展了罗列和整理,并将在操作和维护中有可能出现的问题进展了分析,制作了本维护手册,以便用户能够更加熟悉地使用该产品。
当然,紫光公司也不会满足现有的状态,在广阔用户的监视下,它一定会取得更加完美的成绩,开发生产出让广阔用户更加信服的产品。
该说明用于操作和维护人员在使用该产品时作为参考资料,如有模棱两可的问题,希望用户尽快和我公司联系,以便能更好的解决问题。
本说明不详之处,敬请各位指出,以便我公司补充。
谢谢!说明:该手册配合技术说明书和补充说明一起使用。
北京清华紫光测控日常维护系统在安装调试完毕后,应该定期对设备进展日常维护,维护的频度根据具体使用条件而定。
日常维护要点包括环境检查、工作状况检查和部件检查及清理等内容。
工作环境包括温度、湿度、干净度等。
温度:环境温度关系到综自系统运行的有效寿命和稳定可靠性;长时间的高温下工作可能导致系统运行的有效寿命大大降低,同时使诸如出口继电器等元器件的性能大大下降。
设备长期运行的温度一般不高于25C°,最低长期运行温度一般不低于-5 C°。
相对湿度:相对湿度影响到系统的绝缘和系统的防护性能。
湿度大直接导致绝缘电阻的降低,同时长时间的相对湿度大将导致线路和元器件受到侵蚀,甚至破坏系统的正常工作状态。
一般长期运行的相对湿度在75%左右。
3000 Series 操作手册说明书

Figure 1 Front Panels
3
3000 Series
(1) Power Switch: Power ON/OFF switch (1=ON, 0 = OFF) (2) Output ON/OFF LED: Red LED for indicating output ON or OFF (3) Output ON/OFF Switch: Output ON/OFF control switch (only available in remote models) (4) -S Remote Sensing Input Terminal: For sensing output voltage at the - load terminal (only
• Output voltage readback • Output current readback • Remote or manual-controlled ON/OFF without using the power switch • Control of output voltage and current using external voltage and resistor • Remote sensing
5. Specifications ............................................................................ 12
iii
3000 Series
1. Overview
This 3000 Series Direct Current (DC) Power Supply Operation Manual contains an introduction to the power supply, a description of its functions, the operation procedure, the scope of application and the specifications. The models are the 3203A, 3203AR, 3203D, 3203DR, 3302A, 3302AR, 3302D, 3302DR, 3303A, 3303AR, 3303D, 3303DR, 3601A, 3601AR, 3601D, 3601DR, 3306D, 3306DR, 3603D, 3603DR, 33010D and 33010DR.
全网无功优化说明书
目录1前言 (1)2安装说明 (4)2.1安装路径及说明 (4)2.2配置系统环境 (4)2.2.1设置环境变量 (4)2.2.2注册控件 (7)3系统启动与退出 (7)3.1系统启动 (7)3.2系统退出 (7)4与SCADA接口(略) (8)5运行画面与维护 (8)5.1概述 (8)5.2控制状态说明 (8)5.3运行界面 (9)5.4系统登录 (9)5.5控制参数维护 (10)5.5.1添加系统控制参数 (10)5.5.2添加厂站控制参数 (11)5.5.3添加变压器控制参数 (12)5.5.4添加电容器控制参数 (13)5.5.5修改设备控制参数 (14)5.5.6删除设备控制参数 (14)5.6设备控制参数查询 (14)5.6.1厂站控制参数 (14)5.6.2变压器控制参数 (14)5.6.3电容器控制参数 (15)5.7保护信息查询 (16)5.7.1厂站保护信息 (16)5.7.2变压器保护信息 (16)5.7.3电容器保护信息 (17)5.8控制状态修改 (17)5.8.1厂站控制状态 (17)5.8.2变压器控制状态 (17)5.8.3电容器控制状态 (18)6A VC系统 (18)6.1综述 (18)6.1.1控制目标 (19)6.1.2操作规程 (19)6.2运行界面 (19)6.3使用说明 (20)6.3.1登录 (20)6.3.2注销 (21)6.3.3关闭窗口 (21)6.3.4启动实时和关闭实时 (21)6.3.5图形 (21)6.3.6语音文件说明 (22)6.3.7其他 (22)7参数设置 (22)7.1闭锁时间设置 (22)7.2动作次数设置 (25)7.2.1进入动作次数设置功能 (25)7.2.2动作次数设置 (26)7.3设备保护参数设置 (27)7.4进入设备保护参数设置功能 (27)7.5设备保护的功能操作说明 (28)7.5.1添加 (28)7.5.2修改 (28)7.5.3删除 (29)8报表统计 (30)8.1状态查询 (30)8.2电压合格率查询 (31)8.3设备动作次数查询 (31)8.4历史命令查询 (32)8.5操作查询 (32)8.6闭锁查询 (33)8.7设备运行率查询 (33)9曲线查询 (34)9.1档位曲线 (34)9.2负荷曲线 (34)9.3力率曲线 (35)9.4电压曲线 (35)1前言本系统适用于地区级、县级电网中单电源或多电源供电的各种网络,并能可靠地与各家调度自动化厂家开发的SCADA系统接驳,与主站A VC系统接驳,实现省、地、县网电压无功联合控制。
fed3000a-g1-v调试说明书

fed3000a-g1-v调试说明书
1、调试说明书是您解决设备问题的重要工具,不要忽视它的存在。
2、仔细阅读调试说明书,按照步骤进行操作,避免出现错误。
3、如果您不确定如何使用调试说明书,请咨询专业人士或寻求在线帮助。
4、在调试过程中,保持耐心和冷静,不要急于求成。
5、定期检查设备并更新调试说明书,以确保其与最新版本的设备兼容。
6、如果您遇到了困难或疑问,请随时向我们反馈,我们会尽快为您解决问题。
7、遵循正确的安全操作规程,确保您的设备和人身安全。
8、在调试过程中,注意保护设备的外观和内部结构,避免损坏。
9、请勿将调试说明书随意丢弃或泄露给他人,以免造成不必要的损失。
10、最后,感谢您对我们产品的支持和信任,祝您生活愉快!。
文件夹保护3000用户使用手册
目录一文件夹保护3000软件介绍二文件夹保护3000安装方法三文件夹保护3000卸载方法四激活文件夹保护3000五文件夹保护3000功能和使用方法1保护文件夹A 文件夹加密码B 隐藏C伪装2解除保护3打开文件夹4保护磁盘5软件设置6密码提示和密码恢复7加密码和隐藏文件夹常规扫描和急就中心六注销文件夹保护3000一文件夹保护3000软件介绍文件夹保护3000是一款适用于windows系统的加密软件,具有文件夹加密码、文件夹隐藏、文件夹伪装、磁盘保护等功能。
二文件夹保护3000安装方法:1 在文件夹保护3000官方下载页面,下载软件安装包。
2 下载后,双击运行软件安装包(fpsetup.exe),依次点击“下一步”完成软件安装。
3 软件安装成功后,默认情况下会自动打开软件。
在以后的使用过程中,可以直接双击桌面上软件的快捷方式,或点击开始-所有程序-找到文件夹保护3000,运行软件。
三文件夹保护3000卸载方法:1 点击“开始”,选择“所有程序”。
2 在所有程序里面找到“文件夹保护3000”,点击“文件夹保护3000”文件夹,在下拉列表中选择“删除文件夹保护3000”3 在弹出的文件夹保护3000卸载向导的窗口中点击“是”,就可以成功卸载软件了。
4 也可以在控制面板的程序和功能(Win7/8/10, XP系统是“添加/删除程序”)中删除软件。
四激活文件夹保护30001、双击运行试用版的文件夹保护3000,在弹出的窗口中点击【激活正式版】按钮。
2、然后会弹出“请输入激活码”窗口,复制粘贴激活码到【激活码】后面的输入框中,点击【激活】。
3、软件激活成功后,会看到如下提示信息。
请根据提示先退出软件,然后重新运行软件,注册信息就会生效。
五文件夹保护3000功能和使用方法:1 保护文件夹:对文件夹加密码、隐藏和伪装A 文件夹加密码1)功能说明:加密码后的文件夹打开时需要输入正确密码。
2)使用方法:方法一:在需要保护的文件夹上单击鼠标右键,在弹出菜单中选择“文件夹保护”。
DCWL-3000APG无线上网密码无线桥接快速配置

神州数码DCWL-3000APG_APAG上网设置接入网线。
接入的网线的网络中有DHCP功能就可以直接上网密码设置Encryption设置为Enable Wpa2-psk设置密码点击Apply神州数码DCWL-3000APG_APAG无线桥配置环境说明:AP-1通过网线连接到有线网络,AP-2和AP-3均通过桥接方式连接到AP-1,然后接入有线网络,配置完成后笔记本-1和笔记本-2均能用无线方式接入网络。
配置步骤:AP-1上的配置1.WEB方式登录到AP上,默认用户名为admin,默认密码为空,在主页面点击Status按钮,然后点击AP Status按钮,查看无线AP上Radio G MAC Address,这个地址后面会用到。
2.2.点击右上角Home按钮返回主页面,点击Advanced Setup按钮进入高级设置界面。
3.点击WDS Settings按钮,进入桥接设置,APAG型号可以用802.11a Interface接口开启桥接功能,也能用802.11g Interface接口开启桥接功能,我们这里以802.11g Interface接口开启桥接功能为例。
在Bridge Role选项处点击Root-Bridge,Bridge Child处填入AP-2和AP-3的MAC地址(此MAC地址可按第一步的方式找到)。
4.点击Radio G菜单下的Radio Settings按钮,找到Radio Channel选项,选择一个信道,信道选择以减少干扰为准,需保证AP-1和AP-2、AP-3信道一致。
然后把AutoChannel Select选项设置为disable。
5.点击Radio G菜单下的Security按钮,把VAP0和VAP1均勾选上,VAP0用于与AP-2和AP-3桥接使用,VAP1用于笔记本连接使用。
需保证3台AP的VAP0后面的SSID值一致。
6.AP-2和AP-3上的配置AP-2和AP-3只有一个地方与AP-1配置不同,那就是第3步配置里需选择Brige选项,在Bridge Parent选项处填入AP-1的MAC地址,其余配置和AP-1一致。
3000设备入门指南说明书

[分类:受限制]Check Point版权声明©2020Check Point Software Technologies Ltd.保留所有权利。
本产品及相关文档受版权保护,并且凭限制其使用、复制、分发及反编译的许可进行分销。
未经Check Point的事先书面授权,不得对本产品或相关文档的任何部分,以任何形式或任何方式进行复制。
在本手册编制过程中已非常谨慎,但Check Point不对任何错误或疏漏承担责任。
本出版物及其中所述功能如有更改,恕不另行通知。
限制权利图注:政府的使用、复制或纰漏须符合DFARS252.227-7013和FAR52.227-19的“技术数据和计算机软件权利”一条中第(c)(1)(ii)款规定的限制。
商标:参考版权页以获取我们的商标清单。
参考第三方版权声明以获取相关版权和第三方许可的清单。
重要信息最新软件我们建议您安装最新版软件,以获得最新的完善功能、更好的稳定性、更高的安全级别,并防止发展中的新攻击入侵。
认证有关Check Point产品的第三方独立认证,请参见Check Point认证页面。
Check Point3000设备如需更多有关此版本的信息,请参见主页。
此文档的最新版本请打开网页浏览器中此文档的最新版本。
请下载此文档(PDF格式)的最新版本。
反馈Check Point一直在致力于完善其文档。
请发送您的意见给我们,以帮助我们不断改进。
修订历史目录安全和环保声明7合规信息9符合性声明9引言14欢迎14 3000设备概述14装运箱内容物15术语15将3000设备安装于机架16设备物理规格16设备通风口16配置3000设备18启动设备18可用软件映像18初始配置18创建网络对象18高级配置18连接至3000设备CLI19 3000设备硬件20前面板20后面板22在3100/3200设备中安装电源配适器固定夹22双冗余BIOS25更换和升级组件26恢复出厂默认设置27通过Gaia门户进行恢复27通过启动菜单恢复27通过Gaia Clish进行恢复28注册和支持29注册29支持29如何进阶?29安全和环保声明请在设置或使用设备前阅读以下警告。
3000整流模块说明书(和2000基本一样)
3. FLATPACK2 整流模块安装........................................................................................................................7
2. FLATPACK2 整流模块................................................................................................................................4
主要特征............................................................................................................................................................4 典型应用............................................................................................................................................................4 模块类型............................................................................................................................................................5
神州数码DCWL-3000-APAG_APG快速设置指南
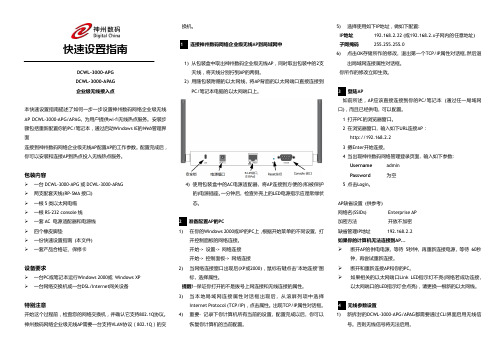
口),而且已经供电, 可以配置。
1 打开PC的浏览器窗口。
2 在浏览器窗口, 输入如下URL连接AP:
http://192.168.2.2
3 摁Enter开始连接。
4 当出现神州数码网络管理登录页面, 输入如下参数:
Username
admin
Password
为空
5 点击Login。
AP缺省设置 (供参考)
包装内容 一台 DCWL-3000-APG 或 DCWL-3000-APAG 两支配套天线(RP-SMA 接口) 一根 5 类以太网电缆 一根 RS-232 console 线 一套 AC 电源适配器和电源线 四个橡皮脚垫 一份快速设置指南 (本文件) 一套产品合格证、保修卡
标“本地连接”,选择属性。 3) 当 本地 连接 属性 对话框 出现 后 , 从 滚屏 列表 中选 择Internet
Protocol (TCP/IP),点击属性。出现TCP/IP Properties属性对话 框。 4) 输入你计算机原有标准网络配置, 取代刚才不AP连接而做的临 时配置。 5) 点击OK保存你计算机的配置, 退出第一个TCP/IP Properties属 性对话框, 然后退出本地连接属性对话框。 你的PC/笔记本现在可以正常使用网络了。
更多信息 你现在可以使用无线网络登录到AP的Web管理界面。使用该工具查看 和精细调整AP的大量设置和选项, 使你的无线热点运行更加安全、更 加有效。
更多详情请参考神州数码网络的无线用户指南或者在Web管理界面下 打开和浏览 Help 帮劣窗口, 找到相关项的帮劣说明。
6 现场安装AP
1) 从电源揑座断开AP的电源适配器。 2) 将AP移到它的永久位置(既便于供电, 又便于ISP网络连接)。
DCBI-3000用户web自服务使用手册
DCBI-3000用户web自服务使用手册Version 3.0神州数码网络(北京)有限公司版权所有2007年1月前言作为Internet上网业务的运营系统,对于宽带上网或拨号上网而言,计费管理都是至关重要的。
但由于适用于窄带接入按时长计费的单一策略对宽带网络已不太适用,所以宽带网络需要增加不同于窄带接入的多种计费手段,以最大限度的发展用户,又能够最大限度的利用已有的资源,实现收益最大化。
神州数码DCBI-3000认证计费管理系统可以针对每个宽带上网用户,提供准确、详实的计费数据;并且可以为服务商提供方便、灵活的计费策略。
DCBI-3000认证计费系统可以支持PPPOE认证、Web 方式认证、基于端口或基于MAC地址的802.1x认证方式,该系统是基于标准认证、计费协议--RADIUS协议开发的产品。
可以完成用户的身份验证、访问授权、上网控制、计费信息采集、用户管理、计费管理、费用结算以及营业点受理和客户查询服务等多种功能。
从模块上划分,可以分为认证及计费信息实时采集模块、数据库模块、管理模块、帐务模块。
从功能上划分,可以分为认证功能、计费功能、管理功能以及帐目结算功能。
同时为了方便客户的使用,提供了用户web 自服务子系统。
DCBI-3000认证计费系统可以和支持PPPOE认证、Web 方式认证的DCRS6608、DCRS6610系列路由交换机,和支持802.1x认证计费的DCS2000E、DCS3926S、DCS3950S。
DCRS5526S、DCRS5512GC等系列交换机实现对接入用户的认证、计费、授权管理功能。
有效地为各种企业用户、各高校及运营商提供一套完整的解决方案。
本使用手册版权和著作权属于神州数码网络(北京)有限公司,未经书面许可任何个人或团体组织不得将本使用手册内容的局部或全部以任何形式转载使用或出版销售。
版权所有,侵权必究!目录第1章系统简介 ________________________________________________ 5 1.1 系统结构_____________________________________________________________ 5 第2章系统Web服务器安装 _____________________________________ 6 2.1 安装包内容简介_______________________________________________________ 6 2.2 安装步骤_____________________________________________________________ 6 2.3 卸载方法_____________________________________________________________ 7 2.4 Web服务器的启停____________________________________________________ 7 2.5 连接web自服务______________________________________________________ 8 第3章系统使用 ________________________________________________ 9 3.1 用户密码修改________________________________________________________ 10 3.2 上网记录查询________________________________________________________ 12 3.3 查询费用帐单________________________________________________________ 14 3.4 帐户明细查询________________________________________________________ 16 3.5 充值卡充值__________________________________________________________ 18 3.6 用户余额查询________________________________________________________ 20 3.7 用户累积额度查询____________________________________________________ 22 3.8 用户web注册 _______________________________________________________ 24 3.9 用户信息修改________________________________________________________ 26 3.10 预付包天用户自主启停________________________________________________ 27 3.11 预付包月用户自主启停________________________________________________ 29 3.12 用户问题报修________________________________________________________ 31 3.13 问题报修结果查询____________________________________________________ 32 3.14 问题报修处理________________________________________________________ 33 3.15 用户激活____________________________________________________________ 34 3.16 修改计费类型________________________________________________________ 35 3.17 计费类型修改日志查询________________________________________________ 36 第4章客户端软件配置要求 _____________________________________ 38 4.1 操作系统____________________________________________________________ 38 4.2 浏览器配置要求______________________________________________________ 38第1章系统简介1.1 系统结构DCBI-3000用户web自服务是神州数码DCBI认证计费管理系统的一个组成部分。
Compabloc 3000维护指南说明书
Reference: 5060 en -2019.09 / e2COMPABLOC 3000 Maintenance Guide5060 en - 2019.09 / eCONTENTS GENERAL WARNING This document is an addition to the general manual ref. 2557 (recommendations), ref. 3711, ref. 3804 (Atex specificrecommendations), and manual ref. 3520 (Compabloc 3000 installation).NOTENidec Leroy-Somer gives no contractual guarantee whatsoever concerning the information published in this document and cannot be held responsible for any errors it may contain, nor for any damage resulting from ist use.CAUTIONThe specifications, instructions and descriptions are for standard operation. They do not take account of structural variants or special adaptations. Failure to comply with these recommendations may lead to premature deterioration of the gearbox and voiding of the manufacturer’s guarantee.Despite all the care taken in the manufacture and checking of this equipment, Nidec Leroy-Somer cannot guarantee that lubricant will not escape during the product’s lifetime. If slight leaks could have serious consequences for the safety of people and property, the installer and user should take all necessary precautions to avoid such consequences.1 - HOW TO ORDER .................................................................................................................................................32 - INSTRUCTIONS FOR DISMANTLING AND REBUILDING (3)2.1 - Dismantling ..................................................................................................................................................32.2 - Rebuilding ....................................................................................................................................................33 - EXPLODED VIEWS - PARTS LIST (4)3.1 - Compabloc multistage (4)3.1.1 - Compabloc multistage exploded views:.................................................................................................................43.1.2 - Cb 30xx to Cb 38xx parts list. (5)3.2 - Compabloc 1 stage (6)3.2.1 - Exploded views: Cb 30 to Cb 3531 ........................................................................................................................63.2.2 - Compabloc 1 stage parts list: Cb 3031 to Cb 3531 (6)3.3 - Input shaft AP and input shaft with AD backstop (7)3.3.1 - Exploded views AP and AP-AD ..............................................................................................................................73.3.2 - Parts list AP and AP-AD .. (7)3.4 - MU universal mounting and universal mounting with AD backstop (8)3.4.1 - MU and MU-AD exploded views ............................................................................................................................83.4.2 - MU and MU-AD universal mounting parts list .. (9)3.5 - Motor MI, IM-B5, MI-IM-B5 (10)3.5.1 - Motor exploded views ..........................................................................................................................................103.5.2 - Motor parts list .. (10)3.6 - MI integral motor with AD backstop (11)3.6.1 - Motor exploded views MI-AD for Cb 30 to 35 .......................................................................................................113.6.2 - Motor parts list MI-AD for Cb 30 to 35 ...................................................................................................................113.6.3 - Method for reversing the direction of rotation of AD* .............................................................................................113.6.4 - Motor exploded views MI-AD for Cb 36 to 38 ......................................................................................................123.6.5 - Motor parts list MI-AD for Cb 36 to 38* . (12)3HOW TO ORDERCOMPABLOC 3000 Maintenance Guide 5060 en - 2019.09 / ee n1 - HOW TO ORDERNecessary information:a) from the gearbox nameplate 1 - gearbox model and size 2 - operating position3 - fixing type (S with foot, BS, BDn or BT…)4 - exact reduction - possible options5 - serial number6 - lubricant7 - backlash: Standard (DYNABLOC).b) from the appropriate part list - part description and item number.c) Where a motor is fitted to the gearbox, from the motor nameplate(for the motor: see the corresponding manual)- motor type- No. of poles (or speed in min -1)- power in kW (or N.m).Caution: the motor requires a special shaft and flange for integral mounting (MI) with the gearbox.2 - INSTRUCTIONS FORDISMANTLING AND REBUILDING2.1 - Dismantling- Remove the geared motor from the machine.- Drain the gearbox.- Remove the motor (undo the nuts 184 on motor side).- Dismantle the gearbox.Utilisation of appropriate tools (hub-puller, bearing-puller, mallets, adjustable spanners, circlips pliers,assorted screwdrivers, taps and dies, press…) as well as applying our rigorous procedures (M32 S244 §9 for gearbox and T32 S69 §4 for Universal mounting) the intervention of an authorised Nidec Leroy-Somer Service Centre will be required to maintain the original high performance of the drive system.2.2 - Rebuilding- Proceed in the reverse order to dismantling.- Oil the lip-seals ; they must be fitted very carefully so as to avoid damage to the running seal area ; the use of protection sleeves is recommended to cover the sharp edges of shaft keyways.- Nuts must be fixed with medium strength anaerobic adhesive.- Re-fit the O-rings, checking that they are positioned correctly.- Fill with oil up to the appropriate level (see § 6).- Turn the shaft to check that the box is functioning satisfactorily before finally mounting it in position.4COMPABLOC 3000 Maintenance Guide5060 en - 2019.09 / eCOMPABLOC 3000 Maintenance Guide 5060 en - 2019.09 / e e n3.1.2 - Cb 30xx to Cb 38xx parts list5018700090090013000610077003100800062028402820001025500970052004201990103009601790254018401830007018101280254025700970181000701750096COMPABLOC 3000 Maintenance Guide5060 en - 2019.09 / e3.2 - Compabloc 1 stage3.2.1 - Exploded views: Cb 30 to Cb 3531Cb 3131 to Cb 353167COMPABLOC 3000 Maintenance Guide 5060 en - 2019.09 / ee n3.3 - Input shaft AP and input shaft with AD backstop3.3.1 - Exploded views AP and AP-AD8COMPABLOC 3000 Maintenance Guide5060 en - 2019.09 / e3.4 - MU universal mounting and universal mounting with AD backstop9COMPABLOC 3000 Maintenance Guide 5060 en - 2019.09 / eDimension A must be kept according to the table below for Cb 31 to Cb 35 ; you can measure it between the flange face of the motor and the end of the coupling. Cb 36 to Cb 38: mounting with distance piece (rep.168).2012/09 : New MU, exploded viewe n1071 bCOMPABLOC 3000 Maintenance Guide5060 en - 2019.09 / e3.5 - Motor MI, IM-B5, MI-IM-B53.5.1 - Motor exploded viewsFrame size: LS 56 to LS(ES) 31511COMPABLOC 3000 Maintenance Guide 5060 en - 2019.09 / ee n3052222233011491063041841839671327147184211502653505963.6 - MI integral motor with AD backstop3.6.1 - Motor exploded views MI-AD for Cb 30 to 35Frame size: LSES 80 to 180 M, MT3.6.3 - Method for reversing the direction of rotation of AD*- Remove the cover 13- Remove the fan 7, by unscrewing the central screw (or ring + screw and washer) if necessary - Remove the Gamma seal 96- Unscrew the 6 screws 183 from the closing cover 304, then take off the cover (the seal 106 also comes at the same time) maintaining the AD ring back on the motor shaft - Remove the circlips 149- Extract the inner AD 301 ring front (the AD moving parts shall remain in the ring back)- Clean AD 301 faces, ring back305 and cover 304- Apply sealing paste (type: OMNIFIT 100M) in the cover socket and on the ring back - If necessary, replace the grease contained by the ring seal 106 of the cover- Flip the 301 assembly by 180° and reposition the wall parts on the motor shaft without forgetting the 150 key- Ensure that the AD direction of rotation (marked with an arrow on the moving part) corresponds to the motor direction of rotation - Replace the other parts reversing the disassembly procedure. Fit a new Gamma seal.*Label indicating the motor shaft (or gearbox output shaft) direction of rotationMI-AD from 0,75 to 18,5 kW for Cb 30xx to 35xx12COMPABLOC 3000 Maintenance Guide5060 en - 2019.09 / e3.6.4 - Motor exploded views MI-AD for Cb 36 to 38Frame size: LSES 132 M, MU to 2803.6.5 - Motor parts list MI-AD for Cb 36 to 38*Rep.Description Qty Rep.DescriptionQty *Label indicating the motor shaft (or gearbox output shaft) direction of rotation。
珠海万力达WLD3000操作指南

珠海万力达电气股份有限公司WLD3000厂站监控系统用户操作手册文件版本:V2.0 2004年9月目录概述 (1)一、系统软件 (1)二、WLD3000自动化系统软件的主要模块 (1)第一部分系统启动及系统退出 (2)一、系统启动 (2)二、系统登录 (2)三、监控画面的调用及符号含义 (3)(一)调用监控画面 (3)(二)主接线图中符号表示的含义 (4)四、画面缩放 (4)(一)比例缩放 (4)(二)无级放大 (4)(三)无级缩小 (4)五、画面切换 (4)六、注销登录 (5)七、系统退出 (5)第二部分监控操作 (5)一、遥控操作 (5)(一)返校控制 (5)(二)直接控制 (6)二、告警信息确认 (6)三、历史事件查询 (7)四、查看实时数据 (8)五、实时曲线棒图的显示 (8)六、历史数据查询修改 (9)(一)历史数据查询 (9)(二)历史数据修改 (10)七、历史曲线棒图查询 (11)八、统计数据查询 (12)九、保护监控 (12)(一)申请保护定值 (12)(二)修改保护定值 (13)(三)确认修改定值 (13)(四)申请定值区号 (13)(五)修改定值区号 (13)(六)确认修改区号 (14)(七)定值打印 (14)(八)信号复归 (14)十、AGC监视画面 (14)十一、A VC监视画面 (14)十二、报表操作 (15)(一)生成报表 (15)(二)打印报表 (15)(三)打开报表 (16)十三、通道监控 (16)十四、属性点查询修改 (17)(一)遥测点属性查询修改 (17)(二)遥信点属性查询修改 (18)(三)脉冲点属性查询修改 (18)(四)计算点属性查询修改 (19)(五)模拟虚拟点属性查询修改 (19)(六)状态虚拟点属性查询修改 (19)概述WLD3000厂站监控系统完全基于Windows2000操作系统平台的开发并进行了深入的应用,采用SQL Server数据库和Office文档报表,OLE自动链接、ActiveX控件等高新技术,符合开放、分布、分散、分层的标准,实现多种控制方式,是一套结构合理、技术先进、运行可靠、使用方便、通用性强的电力自动化系统。
AG-3000 抗菌蒸汽器 用户手册 - 中文说明书
USER MANUAL- ENGLISHThank you for choosing Air Guard. Please read the following safety information carefullybefore operating the machine. This information includes important safeguards aboutinstallation, usage, and maintenance. Pay attention to all warning labels and instructionsin this manual and printed on the machine.l Keep this device dry.l Always connect to a grounded circuit to avoid risk of electrocution.l Before connecting the machine to power, always check the voltage indicate on the machine matches to your local AC voltage. Do not use the machine if AC power voltage does not match. l Disconnect the machine from AC power before servicing and when not in use.l If the supply cord is damaged, contact your local dealer for replacement.l This product is for indoor use only! Do not expose to rain or moisture. If fluid is spilled, disconnect AC power and clean with a damp cloth. If fluid is spilled onto electronic parts,immediately unplug the machine and contact your local dealer for advice.l No user serviceable and modifiable parts inside. Never try to repair this product, an unauthorized technician may lead the machine to damage or malfunction.l For adult use only. Children being supervised not to play with the machine. Never leave the machine running unattended.l The machine is not to be used by persons (including children) with reduced physical, sensory or mental capabilities, or lack of experience and knowledge.l Installed in a well ventilated area. Provide at least 50 cm space around the machine.l Never add flammable liquid of any kind to the machine.l Make sure there are no flammable materials close to the machine while operating.l Only use Air Guard Antibacterial Solution. Other solution may lead to heater clog and malfunction.l If the machine fails to work, unplug the machine and stop operation immediately. Contact your local dealer for advice.l Before transporting the machine, make sure the fluid tank is completely drained.l Air Guard Antibacterial Solution may present health risks if swallowed. Do not drink Air Guard solution. Store it securely. In case of eye contact or if solution is swallowed immediately look for medical advice.Immediately upon receiving the antibacterial vaporizer, carefully unpack the carton, check the content to ensure that all parts are present and have been received in good condition. If any parts appear damaged or mishandled from shipping, notify the shipper immediately and retain the packing material for inspection.What is included: 1 x AG-3000 Antibacterial Vaporizer2 x Power Cord (One for Fog Machine, the other for Fan)2 x Fluid Tank1 x User ManualH 719 mmW 428 mmL 728 mmProduct OverviewBreaker / Fuse XLR 3-Pin / XLR 5-Pin DMX Connector Neutrik PowerCon Power SwitchTank Capacity :5 litersLCD control panelFog Output NozzleMulti-angle Fan 9 Positions are AvailableStep 1: Place the machine on a flat surface and in a suitably large area with at least 50 cm open space at each side of the machine and 2 meters for the output direction of the machine.Step 2: Fill the fluid tank with Air Guard fluid.Step 3: Connect the machine to suitably rated power supply. To determine the power requirement for the machine refer to the label on the back of the machine.Always connect the machine to a protected circuit and ensure it is properly grounded to avoid risk of electrocution .Step 4: Turn on the machine by connecting the power cord. Heat-up takes approximatley 8 minutes. Once the machine has reached operating temperature, the LCD screen will display “Ready To Fog”. Now the machine is ready for operation.Step 5: To start making fog, press the VOLUME button on the control panel.Step 6: To turn off the machine, hold the STOP button for 3 seconds; the machine will automatically run a self-cleaning process and shut down after the self-cleaning process is done.Select High Output or Low Output ModeSet interval time at Timer mode from 1 to 300 secondsInterval can be turned OFF. When “OFF” is selected, there is no interval time. Once the duration time is up, machine stops fogging automatically.Set duration time at Timer mode from 1 to 300 secondsSet output volume at Timer modeWhen machine is in Low Output mode, the volume can be set from 1 to 100%. When machine is in High Output mode, the volume can be set from 20 to 100%Set output volume at Volume modeWhen machine is in Low Output mode, the volume can be set from 1 to 100%. When machine is in High Output mode, the volume can be set from 20 to 100%, or set at continuous outputSet fan speed from 20 to 100% or to turn off FanSet DMX address from 1 to 510Turn On/Off Air Pump SensorTurn On/Off run last setting functionTimer DurationXXX SecTimer OutputXXX %Fan SpeedXXX %DMX-512Address: XXXRun Last SettingXXAir Pump SensorXXOperation ModeXXXXVolume OutputXXX %Timer IntervalXXX SecDMX Connector Pin AssignmentThe machine provides a 3- or 5-pin XLR connector for DMX connection. The diagram below indicates pin assignment information.Pin Function1 Ground2 Data-3 Data+4 N/A5 N/ADMX OperationMaking the DMX Connection – Connect the machine to a DMX controller or to one of the machines in the DMX chain. The machine uses a 3-pin or 5-pin XLR connector for DMX connection, the connector is located on the front of the machine.Address Setup – Use control menu to set DMX address. The machine occupies 3 control channels. The starting address is defined as the first channel from which the machine will respond to the controller. Always double check to make sure there are no overlapping channles in order to control the machine correctly.DMX Channel FunctionChannel Value Function10-127 Low Output Mode 128-255 High Output Mode2 0-5 Output Off 6-255 Output 21-100%30-5 Fan speed at 20% 6-255 Fan speed 21-100%Use Air Guard FLD / FLV Antibacterial Solution for AG-3000. The machine is tested and calibrated with this fluid to achieve the best output performance. Warranty will be voided if any other type of liquid is used, improper use of liquid may lead to machine failure and malfunction. Service and Maintenance․ Do not allow the machine and fluid to become contaminated.․Regularly fill distilled water to fluid tank and run the machine to clean the system. After cleaning, refill Air Guard fluids into fluid tank and make sure machine can produce fog properly.․It is recommended to run the machine on a monthly basis in order to achieve best performance and output condition.․Excessive dust, liquid and dirt built up will degrade performance and cause overheating.Breaker ResetDisconnect AC power before resetting the breaker. Only replace fuse with same typeand rating.Step 1: Disconnect AC power. Step 2: Flip breaker to ON position. Step 3: Turn on machine for testing.Breaker 100-120V = 15A 250V220-240V = 8A 250V- Input voltage-Rated power-Warm-up time-Fluid consumption-Fluid tank capacity -Compatible fluid-Ambient temp. range -Control-DMX channels-Connection-Dimension-Weight US model: AC 100-120V, 50 / 60Hz13.5A EU model: AC 220-240V, 50 / 60Hz7A 1600W8 minutes (approx.)High Output mode: 130 ml/minLow Output mode: 25ml/min5 Liter (1.32 Gallon)Air Guard FLD Antibacterial SolutionAir Guard FLV Antibacterial Solution0 °C - 40 °C (32 °F-104 °F)DMX512, Timer, Manual3 channelsNeutrik Powercon (Power)XLR 3-pin and 5-pin (DMX)L728 W428 H719 mm(L28.66 W16.85 H28.31 inch)52.5 kg (115.74 lbs)M22 Moisture Co., Ltd.Tel : +886 3 2227470 Fax : +886 3 2227469 e-mail : ******************.twC08AG3000。
DCAP-3000 馈线监控保护装置使用说明书(V1.6)
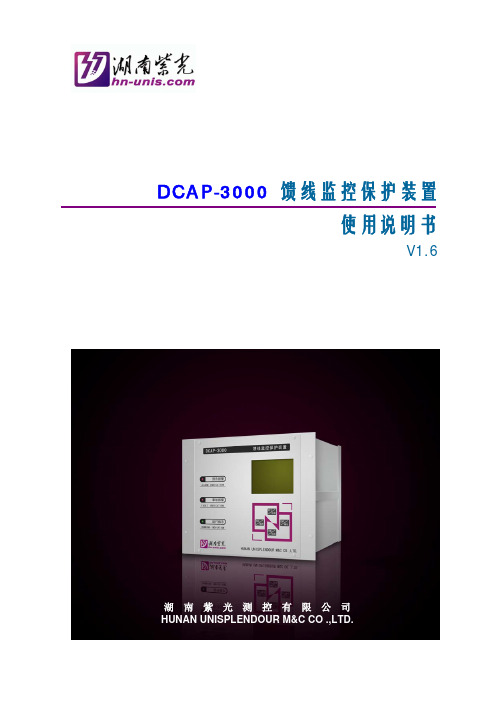
湖南紫光测控有限公司 2008-2-10
DCAP-3000 馈线监控保护装置使用说明书(V1.6)
目
录
1 装置概述 ....................................................................................................................................... 3 2 使用说明 ....................................................................................................................................... 3 2.1 交流电压输入回路 .......................................................................................................... 3 2.2 交流电流输入回路 .......................................................................................................... 3 2.3 直流电源输入回路 .......................................................................................................... 3 2.4 开关量输入回路 .......................................................................
- 1、下载文档前请自行甄别文档内容的完整性,平台不提供额外的编辑、内容补充、找答案等附加服务。
- 2、"仅部分预览"的文档,不可在线预览部分如存在完整性等问题,可反馈申请退款(可完整预览的文档不适用该条件!)。
- 3、如文档侵犯您的权益,请联系客服反馈,我们会尽快为您处理(人工客服工作时间:9:00-18:30)。
相关文档 您可以从以下途径来获得您所需要的相关的资料: 互联网: 您可以通过互联网从下面这个网址获得最新的神州数码网络(北京)有限公司文档 网址: 信息反馈 如果您是通过网络在线阅读神州数码网络产品文档,您可以通过在线发送的方式来发送 您对任何文档的任何意见。 您也可以通过E-Mail 的方式来发送您对产品文档的任何意见, 您可以将您的意见发送到: DCN_Support@ 您也可以通过邮寄的方式来反馈您对产品文档的任何意见,您可以将信寄到如下地址: 北京市海淀区上地9街9号神州数码网络(北京)有限公司
用户手册
DCWL-3000-APG DCWL-3000-APAG 企业级室内放装型无线访问节点
神州数码网络(北京)有限公司 2009 年 3 月
手册版本号:V1.10
DCWL-3000-APG/APAG 室内型企业级无线接入点 AP
前言 .............................................................................................. 4 第一章 产品介绍 ............................................................................... 6 1.1 包装清单 ............................................................................. 7
第 2 页 / 共 86 页 神州数码网络(北京)有限公司
DCWL-3000-APG/APAG 室内型企业级无线接入点 AP
6.3 无线界面 ............................................................................ 60 6.4 Status Information ................................................................ 82
第 3 页 / 共 86 页 神州数码网络(北京)有限公司
DCWL-3000-APG/APAG 室内型企业级无线接入点 AP
前言
感谢您选购神州数码网络产品,本手册(版本号:V1.10)为您提供了详细的安装指南,可 以更加方便您的安装和使用。 使用范围 本手册主要介绍了神州数码网络室内企业级无线接入点 AP 在功能上和物理上的一些特性, 提供了安装步骤、故障排除信息、技术规格,以及电缆和连接器的规格和使用准则。适用于想对 上述内容进行了解且在安装和维护网络硬件方面具有一定经验的用户。 文档结构 ―产品综述‖将介绍产品适用范围,主要特性,端口和LED。 ―安装‖将介绍无线接入点选择位臵、整机安装、电源连接、天线定位及配臵口电缆连接 的方法和步骤等。 ―故障排除‖将描述在硬件安装和使用过程中可能出现的问题及检测、解决方法。 附录 ―连接器和连接介质说明‖
第 6 页 / 共 86 页 神州数码网络(北京)有限公司
DCWL-3000-APG/APAG 室内型企业级 2.4GHz/5Ghz 无线接入点包装包括: 一台 2.4GHz/5Ghz 无线接入点 两根可拆卸天线(RP-SMA 接口) 一条 5 类网线 一根 RS-232 控制线 一根直流电源适配器和电源线 四个橡胶垫 用户手册光盘 快速安装手册 产品合格证以及保修卡
我们很感谢您所提的宝贵的意见。 获得技术帮助 神州数码对所有的产品都提供了完善的技术支持服务,您可以通过如下途径来获得您所需要 技术帮助: 神州数码的网站。在神州数码的网站中您可以获得最新的产品技术资料,常见的产品故障 的原因及问题分析,产品的应用解决方案,软件的升级等。 神州数码客户服务中心。神州数码客户服务中心可以为所有的客户提供所需要的技术帮 助:产品、技术和解决方案。对于客户遇到的产品的安装,软件的配臵问题,以及其它 的网络性能的问题,客户服务中心都将提供迅速的技术支持。 客户咨询热线:800-810-9119,400-810-9119 文档格式约定
第 5 页 / 共 86 页 神州数码网络(北京)有限公司
DCWL-3000-APG/APAG 室内型企业级无线接入点 AP
第一章 产品介绍
此系列 2.4 GHz/5 GHz 无线接入点作为 802.11a/b/g 接入点在有线局域网和安装了 802.11a, 802.11b 或 802.11g 无线网卡的固定或移动终端之间提供透明的,高速的无线数据通讯。 此用户使用手册适用于以下型号: DCWL-3000-APG: 802.11b/g 室内无线访问节点 DCWL-3000-APAG: 802.11a/b/g 室内无线访问节点 此无线解决方案提供高速、 安全的无线连接而开销要小于有线局域网 (包含长期的线路维护) 。 使用 802.11a,802.11b 和 802.11g 技术,此接入点可以轻松的代替 10M 以太网络或无缝整合到 10/100Mbps 以太局域网中。 此接入点的每个物理射频端口支持最多 4 个虚拟接入点,即 4 个在 802.11a 射频端口以及 4 个在 802.11g 射频端口。这允许一个 AP 根据不同的用户组来分离流量。每个 VAP 可以应用不同 的安全设臵,vlan 分配以及其他参数。 AP 的每个射频端口可以运行在以下四种模式中的一种: 访问接入点 — 在服务区内为无线终端提供接入服务。 中继器 — 为远端连接有线局域网的 AP 提供无线扩展。在此模式下 AP 不能通过线缆连 网桥 —提供到其他工作在―网桥‖或―根网桥‖模式的接入点的连接, 从而连接到其他有线 根网桥 — 提供到其他工作在―网桥‖模式的接入点的连接, 从而连接到其他有线局域网。
1.2 硬件描述 .............................................................................. 7 1.2.1 硬件描述....................................................................... 8 1.3 特性与优点 ......................................................................... 10 1.4 系统默认设臵 ...................................................................... 10 第二章 硬件安装 ............................................................................. 17 第三章 外接天线 ............................................................................. 19 3.1 安装规程 ............................................................................ 19 第四章 网络配臵 ............................................................................. 22 4.1 网络拓扑 ............................................................................ 22 4.1.1 Infrastructure 无线局域网 ............................................... 23 4.1.2 Infrastructure 无线局域网用于无线 PC 漫游 ......................... 23 4.1.3 Infrastructure 无线网桥.................................................. 24 4.1.4 Infrastructure 无线中继.................................................. 24 第五章 初始配臵 ............................................................................. 26 5.1 通过 CLI 进行初始配臵 ........................................................... 26 5.1.1 必须的连接 .................................................................. 26 5.1.2 初始配臵步骤 ............................................................... 26 第六章 系统配臵 ............................................................................. 29 6.1 高级设臵 ............................................................................ 29 6.2 SNMP ................................................................................. 52
第 4 页 / 共 86 页 神州数码网络(北京)有限公司
DCWL-3000-APG/APAG 室内型企业级无线接入点 AP
以下列出了本文档中使用到的标记的详细说: ―注意‖ —— 注意符号用于提醒读者注意。提醒的内容中包含一些帮助性的建议和参考。 ―警告‖ —— 警告符号表示用户应当非常小心。提醒用户不要做出某些对设备造成损害或 者丢失数据的行为。 ―危险‖ —— 危险符号意味着危险。在这种情况下可能会导致人身伤害。此符号提醒用户 在对设备使用前,应该采取一定的措施以防事故的发生。
