八重洲(YAESU)FT-600短波电台使用说明书(英文版)
八重州 FT-1807M简易操作手册

YAESU Fm Transceiver FT-1807M简易操作手册1、在主机安装完毕后,按住(PWR)键三秒开机,完成后,在显示VFO(446.000)的情况下可以进行你需要的任何一项操作。
2、设置手动自动下差:在显示VFO的模式下按住(MHZ SET)键三秒进入主菜单,旋动(DIAL)旋纽到第四项菜单(ARS),轻按(MHZ SET)键进入第四项主菜单选择开关手动自动下差(ON/OFF),设置完毕后轻按(MHZ SET)键退出菜单。
3、设置差频:在显示VFO模式下按住(MHZ SET)键三秒进入主菜单,旋动(DIAL)旋纽到第43项(RPT)菜单,轻按(MHZ SET)键进入此项菜单设置上下差频(-RPT,+RPT,OFF)4、设置差频数值:在显示VFO模式下按住(MHZ SET)键三秒进入主菜单,旋动(DIAL)旋纽到第46项(SHIFL)菜单,轻按(MHZ SET)键进入此项菜单后(7.6MHZ)设置差频值,机器默认数值为7.6MHZ,旋动(DIAL)旋纽设置你需要的差频值,设置完毕后轻按(MHZ SET)键推出主菜单。
5、设置亚音编码:在显示VFO模式下按住(MHZ SET)键三秒进入主菜单,旋动(DIAL)旋纽到第49项(SQLTYP)菜单,轻按(MHZ SET)键进入此项菜单设置你需要的编码,一般选择(TONE)编码(TONE/TSQL/DCS/RVTN/OFF) 6、设置亚音数值:在显示VFO模式下按住(MHZ SET)键三秒进入主菜单,旋动(DIAL)旋纽到第52项()菜单,轻按(MHZ SET)键进入此项菜单后(100MHZ)设置亚音,旋动(DIAL)旋纽进行设置你需要的亚音值。
7、储存频道:在显示VFO的模式下,用手咪输入你想要的频点,然后按住(MWD/MR)键,直至屏幕右下角出现数字(0),如果此数字一直在闪烁,表示此频道为空,然后旋动(DIAL)纽选择频道号码,选定后轻按(MW D/RW)键,完成频道存储。
八重洲10r使用说明
F22 PTT LOCK OFF LOCK功能启用时是否同时禁止发射
F23 PTT MODE MOMENT 发射键的操作模式MOMENT迅动 TOGGL自锁
2. VFO下长按,频率闪烁,再按一下,存入频道。
3. MR模式下长按,进入频道相关操作功能表。
4. 长按VOL/SEL进入主功能表后,用于进入子功能表,配合DIAL(频率旋钮)调整,再次按压为确认更改,有某些功能必须要用VOL/SEL功能键才能确认,如SQL。
VOL/SEL键
1. 进入音量设定
五、复位功能操作:
按住VOL/SEL键后按开机键,然后转动旋钮选择要复位的方式,选好后再按一下VOL/SEL键,这时候机器会关机并自动从新开启,复位将操作成功。
六、将机器接收进行菜单扩频:
在没有将机器接收进行菜单扩频时,面板只能显示GRP(所有频道)、LINE---IN(MP3音频输入)、WX1(气象频率)、AM、FM、U段和V段。要想接收航空、电视伴音和300兆,请进入主菜单模式到27号菜单调整选择EXPAND后确认,这时机器显示上多了3个频段。
3、面板右侧的上下键在正常使用时,用来选择每个频段的如U、V、AM、FM、WFM等。
4、面板顶部按键,左侧PTT发射键。最右侧的是开关机和锁键,长按开关机按一下锁住按键再按一下退锁。中间上下键是用来选择快速功能菜单的,F键是用来选择你所需菜单功能的。
二、时钟的启用和调整:
启用时钟请进入主菜单,到F9选择ON启用时钟确认后退出菜单。按VOL/SEL键两次显示屏出现时间,再长按VOL/SEL键进入时间相关设定菜单,这时显示为T1闪烁按向右键一次显示时间,长按向右键时数闪烁,旋转旋钮调整。按向下键分数闪烁调整好后按向右键确认,然后按VOL/SEL键退出。要回到频道模式再按一次VOL/SEL键。
ES-SUB-TRP 双重8和10英寸电源子频道说明书
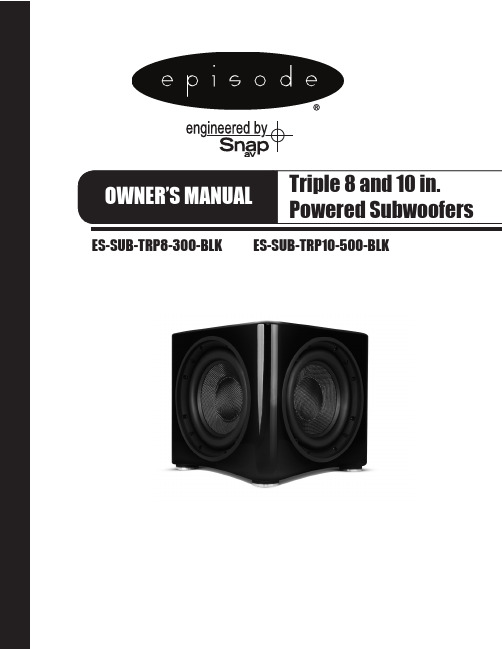
ES-SUB-TRP8-300-BLK ES-SUB-TRP10-500-BLKpg.2ES-SUB-TRP Installation and Users ManualWARNING : To reduce the risk of fire or electric shock, do not expose this apparatus in or near rain or moisture.1. Read and keep these instructions for future reference.2. Do not use this apparatus near water.3. Clean only with a dry cloth.4. Do not block any ventilation openings. Install according to manufacturer’s instructions.5. Do not install near any heat sources such as radiators, heat registers, stoves or other apparatus (including amplifiers) that produce heat.6. Do not override the safety purpose of the polarized or grounding-type plug. A polarized plug has two blades - one wider than the other. A grounding type plug has two blades and a third grounding prong. The wide blade or the third prong is provided for your safety. If the provided plug does not fit into your outlet, consult an electrician for replacement of the obsolete outlet.7. Protect the power cord from being walked on or pinched particularly at plug, convenience receptacles, and the point where it exits from the apparatus.8. Only use attachments/accessories specified by the manufacturer.9. Use only with a cart, stand, tripod, bracket or table specified by the manufacturer, or sold with the apparatus. When a cart is used, use caution when moving the cart/apparatus combination to avoid injury from tip-over.10. Unplug this apparatus during lightning storms or when unused for long periods of time.11. Refer all servicing to qualified service personnel. Servicing is required when the apparatus has been damaged in any way, such as when the power-supply cord or plug is damaged, liquid has been spilled or objects have fallen into the apparatus, the apparatus has been exposed to rain or moisture, does not operate normally, or has been dropped.12. To completely disconnect this equipment from the AC mains, disconnect the power supply cord plug from the AC receptacle13. This is CLASS II apparatus with double insulation, and no protective earth provided.14. Do not expose this equipment to dripping or splashing and ensure that no objects filled with liquids, such as vases, are placed on the equipment.15. To completely disconnect this equipment from the ac mains, disconnect the power supply cord plug from the ac receptacle.16. The main plug of the power supply cord shall remain readily operable.IMPORTANT SAFETY INSTRUCTIONSThe lightning flash with arrowhead symbol, within an equilateral triangle, is intended to alert the user to the presence of uninsulated dangerous voltage within the product’s enclosure that may be of sufficient magnitude to constitute a risk of electric shock to persons.The exclamation point within an equilateral triangle is intended to alert the user to the presence of important operating and maintenance (servicing) instructions in the literature accompanying the appliance.© 2012 EpisodeES-SUB-TRP Installation and Users Manualpg.3WELCOME TO EPISODE ®Episode ® is one of the most highly-regarded brands of speakers available today. We appreciate your business and we stand committed to providing our customers with the highest degree of quality and service in the industry. Episode ® subwoofers are a superb choice for bass reinforcement of almost every type of audio system. They have been designed with advanced technology components that accurately reproduce low frequencies in all types of music and movies. For optimum system performance, we recommend pairing them with our acclaimed Episode ® loudspeakers.FEATURES>>WORLD-CLASS BASH ® HYBRID AMPLIFIER TECHNOLOGYIncorporates the latest BASH ® amplifier technology to maximize performance while generating little heat. In standby mode, the subwoofer consumes less than 0.5 watts making it one of the “greenest” solutions available.>>HIGH-GLOSS CABINETAttractive furniture-quality cabinet provides the ultimate in rigidity and sound clarity.>>TUNED SYSTEM PERFORMANCEOffers rear-mounted, low-pass crossover adjustment and a switchable phase control (0 or 180 degrees) to ensure optimal system integration, giving a seamless blend for an unbelievable music and movie experience.>>SIGNAL-SENSING FOR AUTOMATIC POWER CONTROLThere are three power mode options with an Episode® powered subwoofer: Always On, ‘Auto Sense, and Trigger. When Trigger or ‘Auto Sense is selected, the subwoofer will automatically switch to a power-saving standby mode until an input signal is detected. Power will turn on whenever a minimal amount of signal is detected on the input jacks, and off again when no signal is present for approximately 15 minutes.>>GOLD-PLATED INPUTSFeatures stereo RCA line-level inputs for many two-channel applications. For home theater use, the right RCA unbalanced input also serves as an LFE (Low Frequency Effects) input for a direct connection from the receiver or processor. An XLR balanced input is provided for clean accurate audio from receivers or processors with balanced LFE outputs. For added versatility, there are also gold-plated, five-way binding-post inputs and outputs for speaker-level connections.pg.4ES-SUB-TRP Installation and Users ManualINSTALLATIONPLACING YOUR EPISODE ® SUBWOOFERSubwoofer placement can have an effect on the performance that you receive. All rooms are different, but the strongest output will likely occur if the subwoofer is placed in a corner of the room on the same wall as the front channel speakers. This is known as the boundary effect and will emphasize certain bass frequencies while canceling others.Some listeners will find this to be the best sounding result, while others may find it overly “boomy” or muddy. Experiment with the placement options available to you and follow the fine tuning instructions that follow in the “Installation” section of this manual. Note that due to the Triple Woofer design, it is recommended that the subwoofer is placed at a 45° angle at least 12” from the corner.For ultimate flexibility in placement, use the Episode ® Wireless Subwoofer Kit.ES-SUB-TRP Installation and Users ManualES-SUB-TRP Installation and Users ManualGETTING CONNECTEDEpisode® Powered Subwoofers are among the most flexible on the market today and can be configured for use in many different applications, as shown in the figures below.• For line level connections, use high-quality RCA cables that feature low impedance, shielding and high-quality connectors.• Use two-conductor loudspeaker wire for high level connections to the subwoofer and to any satellite loudspeakers that may be connected as well.- DO NOT connect wiring to both sets of inputs simultaneously. Example – If using loudspeaker level inputs, DO NOT connect anRCA cable to the subwoofer at the same time.LOW-LEVEL INPUTSpg.6pg.7© 2012 Episodepg.8ES-SUB-TRP Installation and Users ManualES-SUB-TRP Installation and Users ManualFINE TUNINGAfter making all the connections and calibrating the sub, set up your Episode® subwoofer using the following steps:Note: When using an AV receiver and the LFE input, set the subwoofer calibration level to the factory setting before performing the following procedure. After making the below adjustments, calibrate the system via the AV receiver’s setup procedure.1. Ensure that the subwoofer is plugged in.2. Set the following controls and switches to positions that will enable tuning for maximum performance.a. VOLUME knob set to 50%, or 12 o’clockb. CROSSOVER knob set to 120 Hz or 5 o’clockc. PHASE switch set to 0ºDuring initial setup, it may be helpful to set the TRIGGER MODE switch to the ‘ON’ position. Once calibration is complete, switch it to ‘AUTO SENSE’ to enable the automatic power-saving mode.3. Play a movie scene or music track and set the system volume to an average level. Listen to the bass level from your favoritelistening position. Adjust the VOLUME control as desired.4. If deeper bass is desired, adjust the CROSSOVER control toward the lower frequencies. Experiment with different frequencysettings until you find one that sounds best.NOTE: When using the LFE input on the Trp10, set to LFE and make any crossover adjustments in the preamplifier or receiver crossover settings.5. Continue listening to your favorite music and movie sources using the settings chosen for volume and crossover.Now, try experimenting with the PHASE switch until you find the best setting for the installation. Depending on your subwoofer’s placement, the bass may sound louder or deeper when the phase has been optimized. In some cases, adjusting phase will make no discernible difference.INSTALLING AND REMOVING THE GRILLSTo remove the grills, gently pull the tabs on the outer edge of the grill frame to separate the grill from the baffle of the subwoofer. To install the grill, start in one top corner and gently press the grill frame in around the front baffle, pushing it in at each of the remaining three recessed holes.CLEANINGUse a soft cloth or paper towel to clean the cabinet. The grill is best cleaned by brushing it off with a lint-free cloth.pg.9 © 2012 EpisodeSPECIFICATIONSTROUBLESHOOTINGEpisode ® speakers are designed to function trouble-free. Most problems that occur are due to simple issues. If you have trouble, please check the list of simple fixes below. If the problem persists, contact Episode ® Customer Service at 1.866.838.5052 NO SOUND• Verify that there is audio coming from the source selected. Select another source if necessary. • Ensure that any A/V receivers are turned on and connected properly.• Check cable connections at each subwoofer not producing sound for good contact.• Ensure the subwoofer volume is turned up to a reasonable level. The control is located on the rear panel. • During troubleshooting, it may be useful to temporarily set the MODE switch to ‘ON’ to ensure signal-sensing power mode is disabled.WARRANTY10/2-Year Limited WarrantyEpisode ® Subwoofers have a 2-Year Warranty on the amplifier and a 10-Year Warranty on the woofer and box. This warranty includes parts and labor repairs on all components found to be defective in material or workmanship under normal conditions of use. This warranty shall not apply to products which have been abused, modified or disassembled. Products to be repaired under this warranty must be returned to SnapAV or a designated service center with prior notification and an assigned return authorization number (RA).CONTACTING TECHNICAL SUPPORTPhone: (866) 838-5052Email:**********************© 2012 Episode120608-1600ES-SUB-TRP8-300ES-SUB-TRP10-500Driver (1) 8” Woven Fiberglass (2) 8” Passive Radiators (1) 10” Woven Fiberglass (2) 10” Passive Radiators Amplifier***************%THD ***************%THD Signal to Noise Ratio 90 dB A-weighted90 dB A-weightedInput Power 100-120V/220-240V, ~50/60Hz, 3.15A 100-120V/220-240V, ~50/60Hz, 5A Frequency Response 30 Hz to 200 Hz30 Hz to 180 HzDimensions (H) 11.81 in. (300 mm) x (W) 12.8 in. (325 mm) x (D)12.8 in. (325 mm)(H) 13.7 in. (347 mm) x (W) 14.9 in. (379 mm) x (D)14.75 in. (374.5 mm)Weight31.9 lbs44 lbs。
八重洲手台 FT-60R中文手册
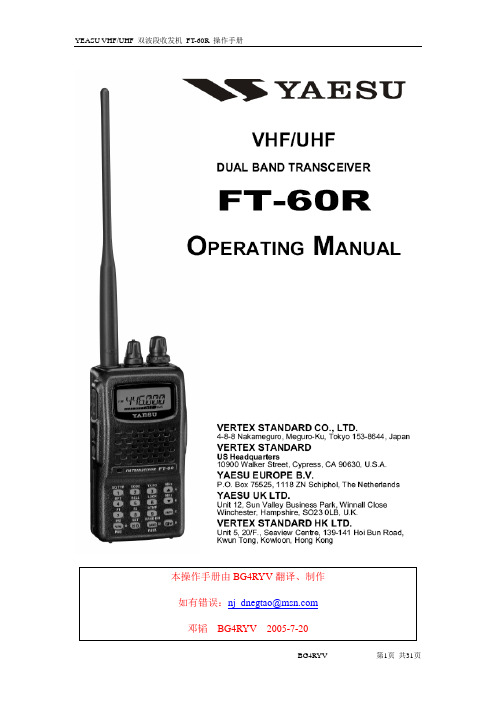
本操作手册由BG4RYV翻译、制作如有错误:******************邓韬BG4RYV 2005-7-20FT-60R是一款双段单显FM手持收发信机。
它具有很小的尺寸,你可以带着它到任何地方。
原装的FNB-83镍氢电池可以为FT-60R在144MHz和430MHz业余段提供高达5W的输出功率。
FT-60R可以在VHF和UHF电视波段、VHF AM航空波段以及较宽的商业和公众安全频率内接收信号。
FT-60R具有EAI(Emergency Automatic ID,紧急自动身份)功能。
它将自动发送你的呼号并且开启麦克风,即使你不能按下PTT。
同时,FT-60R也提供了安全密码功能,只有在输入了密码后才能开机和操作。
随机品:FNB-83:7.2V,1400mAh可充电镍氢电池NC-88B/C*:整夜式充电器(10小时)背夹天线操作手册保修卡选件:FBA-25A:6节AA干电池盒CD-29B/C*:快速充电器(1.5小时)CN-3 :BNC转SMA适配器CT-27:复制线CT-44:麦克风适配器E-DC-5B:DC线带点火器适配器E-DC-6:DC线MH-34B4B:扬声器/麦克风MH37A4B:耳机/麦克风VC-25 :声控耳麦*:B-100~120V AC,C-230~240V AC1、天线座:连接随机天线或者其他阻抗50欧姆的天线。
2、音量/电源开关:顺时针旋转开机并增加音量,逆时针旋转降低音量并关机。
3、发射/忙指示灯:打开静噪时为绿色,发射时为红色。
4、拨动轮(DIAL)[内]:20位的选转开关,用来操作频率,同时也用来作为菜单的选择和其他调整。
5、静噪[外]:调整接收时的背景噪音,顺时针旋转到背景噪音刚好消失(绿色的忙指示灯熄灭)。
7、扬声器8、麦克风9、键盘FT-60R屏幕显示说明1、PTT2、监听3、夜灯4、麦克风/扬声器5、外接DC:6~16V。
键盘操作:第一功能频率输入1 频率输入2 频率输入3 VFO下增频率或移动记忆频道到上一频道第二功能F/W+KEY 激活CTCSS或DCS 选择CTCSS或DCS码选择输出功率VFO模式下向上增加1MHz频率第三功能:按1秒天气广播频道激活ARTS 激活智能搜索开始向上扫描第一功能频率输入4 频率输入5 频率输入6 VFO下减频率或移动记忆频道到下一频道第二功能F/W+KEY 在中继操作下选择频差方向选择CTCSS/DCS鸣叫激活键盘锁定VFO模式下向下增加1MHz频率第三功能:按1秒激活紧急功能N/A 激活键盘锁定开始向下扫描第一功能频率输入7 频率输入8 频率输入19 倒频第二功能F/W+KEY 激活EPCS 选择记忆扫描跳过频道模式选择DTMF模式转换到HOME频道第三功能:按1秒N/A N/A N/A N/A第一功能VFO和记忆模式转换频率输入0激活Internet 连接VFO下转换到下一频段激活第二功能第二功能F/W+KEY 激活属性功能进入设定模式激活频道模式,在频道调出模式中转移操作到下一频率段关闭第二功能第三功能:按1秒开始向上进行可编程扫描Internet存取码选择在VFO下选择可编程扫描的频率范围激活记忆写入(记忆存储)*1:可以自定义第二功能;*2:交换第一功能和第二功能天线安装随机提供的天线在业余频段提供很好的效果,但是如果想在非业余段增强接收效果,需要另外安装与所需波段相匹配的天线。
FT C使用说明 含电路图

(5)D LOCK 操作锁定按键 按此按键会禁用调谐旋钮和话筒调谐按
当工作在记忆操作方式时,该旋钮用来 选择所需的记忆信道。
FT-80C 全模式收发信机
第一章 概 述
FT-80C 是一种小型的具有单边带(SSB)、等幅报(CW)、调幅(AM)和调频(FM,可选) 功能的收发信机,在整个高频波段内可输出峰值包络功率 100W,接收频率覆盖范围 100 kHz 30 MHz。
该机具有操作方便的特点:各种模式下不同的调谐步进、20 个记忆信道(用来存储工作 模式、单工或异频频率和扫描状态)、可选记忆频率自动扫描、接收清晰器(频率微调)、用 户可编程或采用外部计算机进行高级控制的计算机辅助系统。带宽 6KHz 的调幅中频滤波器和 500Hz 窄带等幅报中频滤波器是本机标准配置。可选的 20dB 接收衰减器和噪声抑制器使各种 接收条件下的接收效果得到优化。
频率准确度 SSB、CW、AM:±200 Hz (4057 厂说明为±100 Hz) FM:±300 Hz (4057 厂说明为±200 Hz)
天线阻抗 50 Ω 不平衡
电源电压 直流 13.5V ± 10%(负极接地)
最大电流消耗 19 A (100 W 输出时)
部分规格如有变动,恕不另行通知。
附件
(11)瞬时按键
←MODE→ 模式按键 按这个按键的任何一边,可选择工作模 式 LSB、USB、CW、AM 和 FM。这些模式依上 边的次序显示在工作频率之上。按 MODE 键的 左边,选中正在显示的模式左边的模式,按 右边,选中正在显示的模式右边的模式。
八重洲 YAESU VX-6R 简易使用说明
10、 储存频道:按“F/W”1秒以上,屏幕出现“F”闪烁,转动大旋钮至所需频道位置。按“F/W”储存退出。
11,扫描:按“BAND”键1秒以上。按发射键停止扫描。
改变发射功率:按“F/W” “电子”)
12,键盘锁:按“电子”2秒以上。
13:调整静噪:按一下FW,再按一下0,旋调频率那个钮到59,再按一下0,默认是1,我改成2了,也是旋钮来设置的,按发射键确认,静噪调整完成。
6、 设置亚音:
按一下“F/W”然后按“MODE”进入设置菜单
旋在大旋钮根据需要选择“TONE”、“TSQL”“RV TV”、“DCS”或“OFF”
按发射键保存退出]
7、 设置亚音频:
按一下“F/W”然后按“数字鍵2”进入设置菜单
旋在大旋钮根据需要选择亚音频率
按发射键保存退出
14DCS.N/R 开启/关闭转换DCS译码 T/RX N,RX R,TX R,T/RX R 原设定值T/RX N
15DT DLY 设定DTMF自动拨号延迟时间 50MS/100MS/250MS/450MS/750MS/1000MS 原设定值1000MS
16DT SPD 设定DTMF自动拨号传送速度 50MS/100MS 原设定值50MS
按发射键保存退出]
7、 设置亚音频:
按一下“F/W”然后按“数字鍵2”进入设置菜单
旋在大旋钮根据需要选择亚音频率
按发射键保存退出
8、 设置发射功率
1)、按一下“F/W”键、再接着接“电子”键。每按一次,功率从“LOW1”→“LOW2”→“LOW3”→“HIGH”循环变化。
八重洲 YAESU VX-6R 简易使用说明(一)2010-01-24 23:181、 按“V/M”键进入频率输入模式(非“MEMORY”模式)。
YAESUFTM10R说明书照译
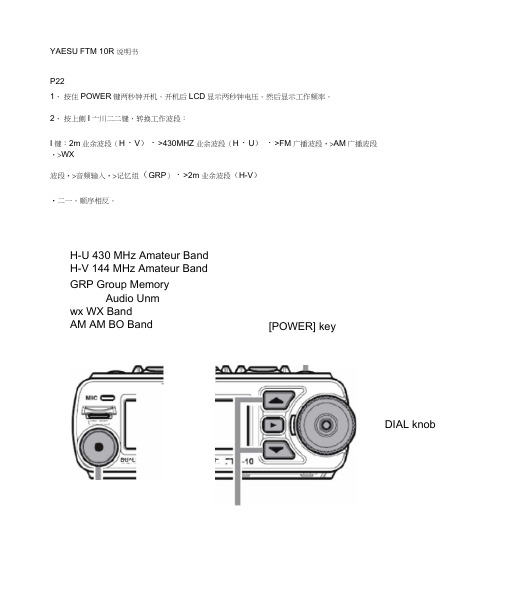
YAESU FTM 10R 说明书P221、按住POWER键两秒钟开机。
开机后LCD显示两秒钟电压。
然后显示工作频率。
2、按上侧I亠川二二键,转换工作波段:I键:2m业余波段(H・V)・>430MHZ业余波段(H・U)・>FM广播波段・>AM广播波段・>WX波段・>音频输入・>记忆组(GRP)・>2m业余波段(H-V)•二一,顺序相反。
H-U 430 MHz Amateur BandH-V 144 MHz Amateur BandGRP Group MemoryAudio Unmwx WX BandAM AM BO Band [POWER] keyDIAL knob[VOLSEL] keyP233、旋转DIAL旋钮调谐频率预编程的步骤。
顺时针旋转的转盘旋钮频率增加;逆时针旋转降低频率。
4、按住一个前面板I厶H二3键一秒后(1MHZ数字闪烁)。
然后旋转DIAL旋钮按步进1变化。
此功能MHz 能够快速调谐。
5、按--A L]键直到拨号盘左侧LED红色,液晶显示屏上显示音量,表盘旋钮是音量旋钮。
6、旋转旋钮调节听筒音量。
顺时针旋转提高音音量。
发送1、按下前面板(二、按键来切换波段操作到144 MHz或430MH乙2、调整到正确频率,按PTT (Push to Talk),对着麦克风(前面板的左上角)用正常音量和语速说话。
3、如果离开面壳风超过3英尺远,可能会发送不清晰。
PTT key込tssss _____RF HufILMF”显示功能AF DUAL AF 双守按八5键激活AF 的双守候功能,在同一时间收听 FM 广播电台同时监听接收业余频段信号。
ARTS按目键激活ARTS ARTS?这是威泰克斯独有的一项无线电通讯技术,通讯范围内出现其他配有ARTS? 技术的对讲机时,会自动提示用户对方的存在。
若离开通讯范围2分钟以上,用户的对讲机无法获得接收信号 时会发出蜂 鸣报警。
八重洲2R说明书
八重洲2R说明书本翻译说明书从第十一页开始,前一部分的关于本机器的各部件的安装和说明不在此翻译范围内。
注意事项:不许将此说明书做商业用途。
不许公开此说明书(因为一方涉及到厂商的版权问题,另一方面本人水平有限)BG7IUT 翻译2003年10月18日调频:开机,旋转DIAL键可以按事先设定好的步进来调整当前操作波段的频率,顺时针方向可以使频率向高的方向步进,逆时针方向可以使频率向低的方向步进。
按F/W键,用顶部旋纽调1MHz频。
扫描:在VFO模式下,按住BAND 键一秒并用顶部旋纽进行向上或向下扫描。
当接收到一个足够强的信号时,扫描会停止在这个频点上,扫描停止保持的时间是依照你设定的“resume”条件来确定的。
(菜单#31)。
按PTT键退出扫描。
发射:VX-2R只能在144MHz和430MHz发射,发射时,仅仅需要按住PTT键就可以了。
在发射频率范围上,可以选择两种功率。
改变发射功率时,只需按H(高)/L(低)键就可以进行转换。
在高功率发射时,液晶上显示满格发射讯号;在低功率发射时,液晶上只显示两格发射讯号。
在FNB-82Li电池(3.7V)工作下,144MHz高功率时1.5W输出,低功率时0.1W输出;430MHz高功率时1.0W 输出,低功率时0.1W输出。
在外接电源(6.0V)工作下,144MHz 高功率时3W输出,低功率时0.3W输出;430MHz高功率时2.0W 输出,低功率时0.3W输出。
锁键:为了防止意外的频率误调整,面板和DIAL旋钮可以被锁定。
激活锁定功能如下:按住H/L键一秒进入设定模式用顶部旋纽DIAL键选择菜单#25(LOCK)按H/L键进行入设定,然后用顶部旋纽DIAL键选择:KEY(锁定按键),DIAL (锁定旋纽),K+D(锁定按键和旋纽),PTT(锁定发射键),K+P (锁定按键和发射键),D+P(锁定旋纽和发射键),ALL(锁定所有键)。
完成设定后,按PTT键保存新设置并退回正常操作模式。